


TF Beechcraft Bonanza F33A Build


 11-08-2019, 08:22 AM
#403

Thread Starter
11-08-2019, 12:31 PM
#405
My Feedback: (2)
Hi Vince, what is the scale of this airplane. I was giving an aeroworks airplane a few years back and the guy who gave it to me tried to put a 28cc engine in it and would not fit. So I was giving this airplane and it had an a 8 ft wing span and it was original had a 90 in it. I gave it to a fellow modeler who is going to convert it electric.
take care
Michael Johnston
take care
Michael Johnston
11-08-2019, 03:40 PM
#407
Thread Starter
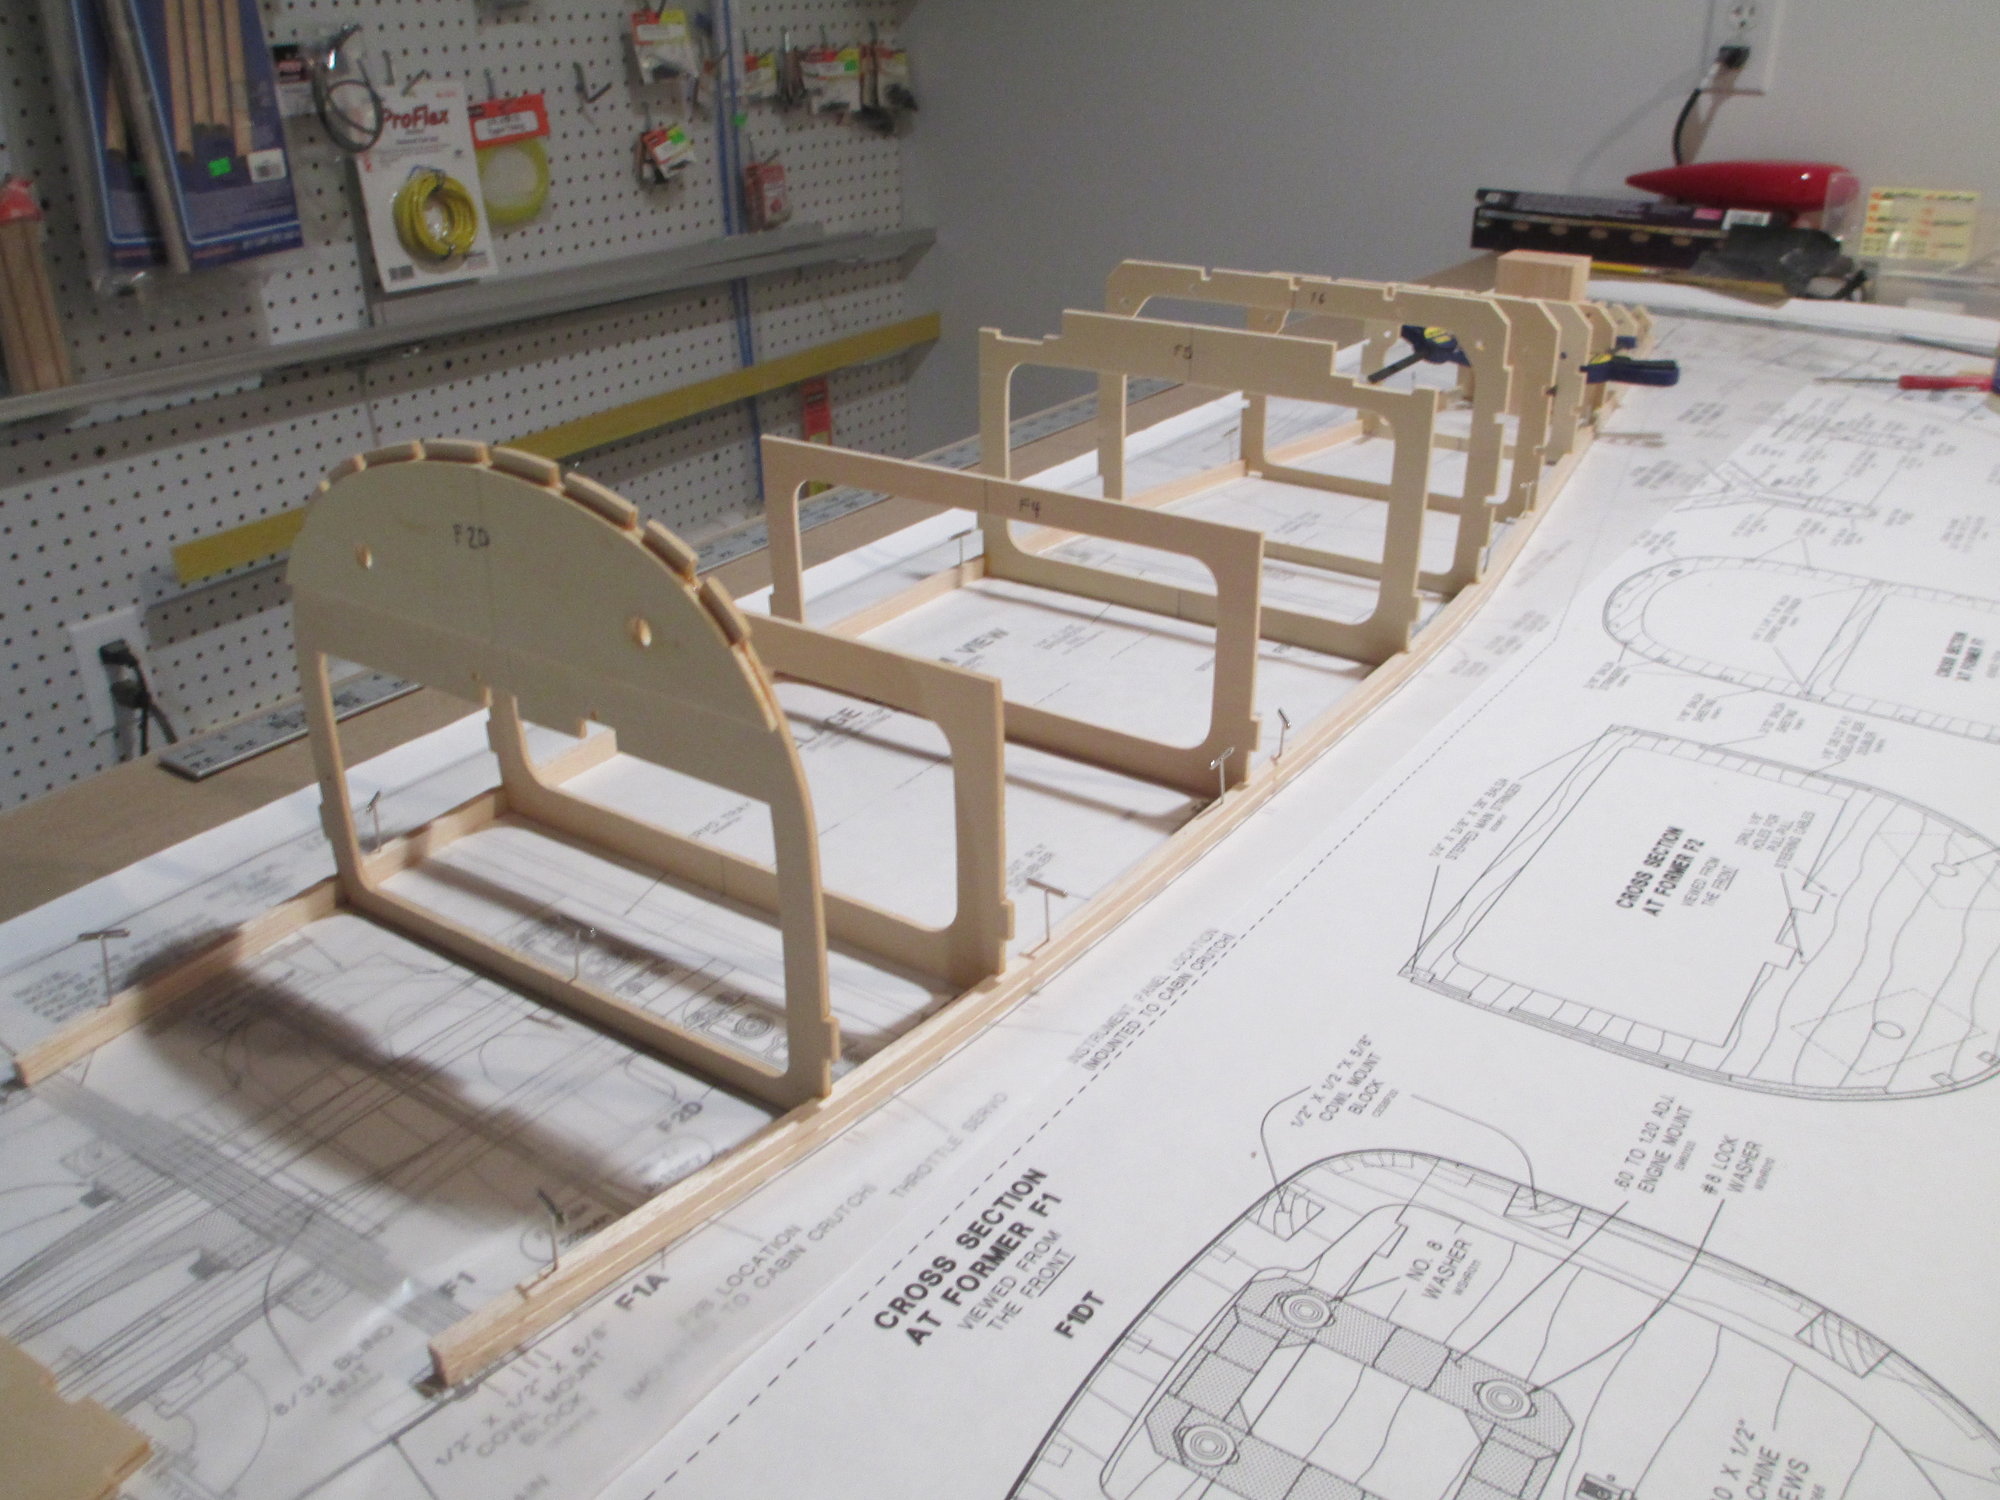
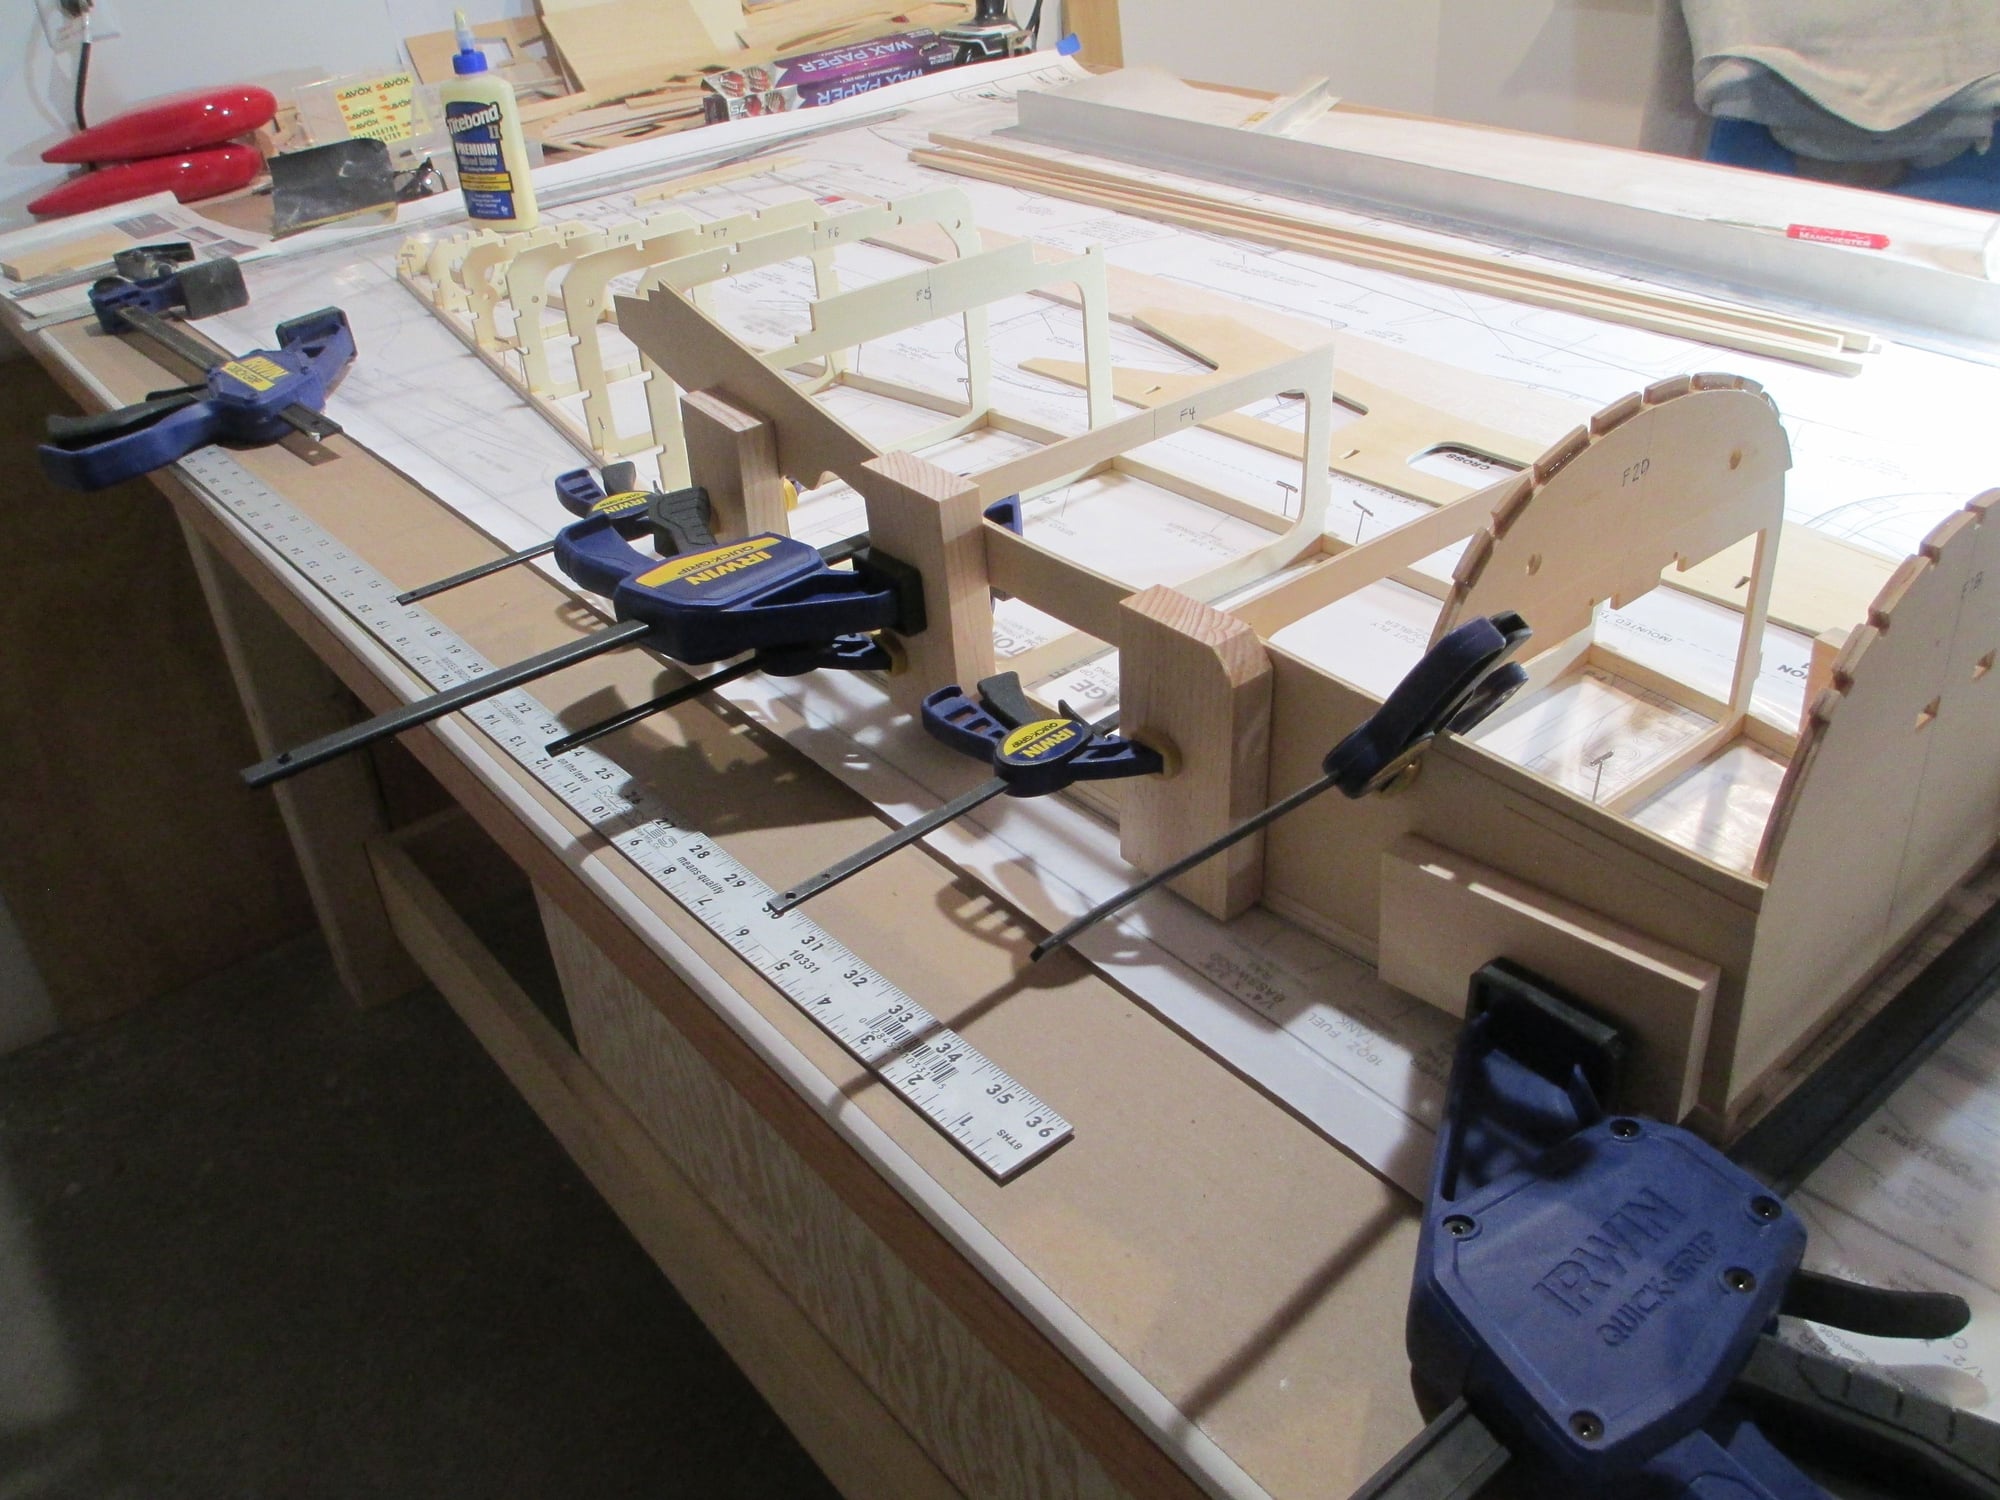
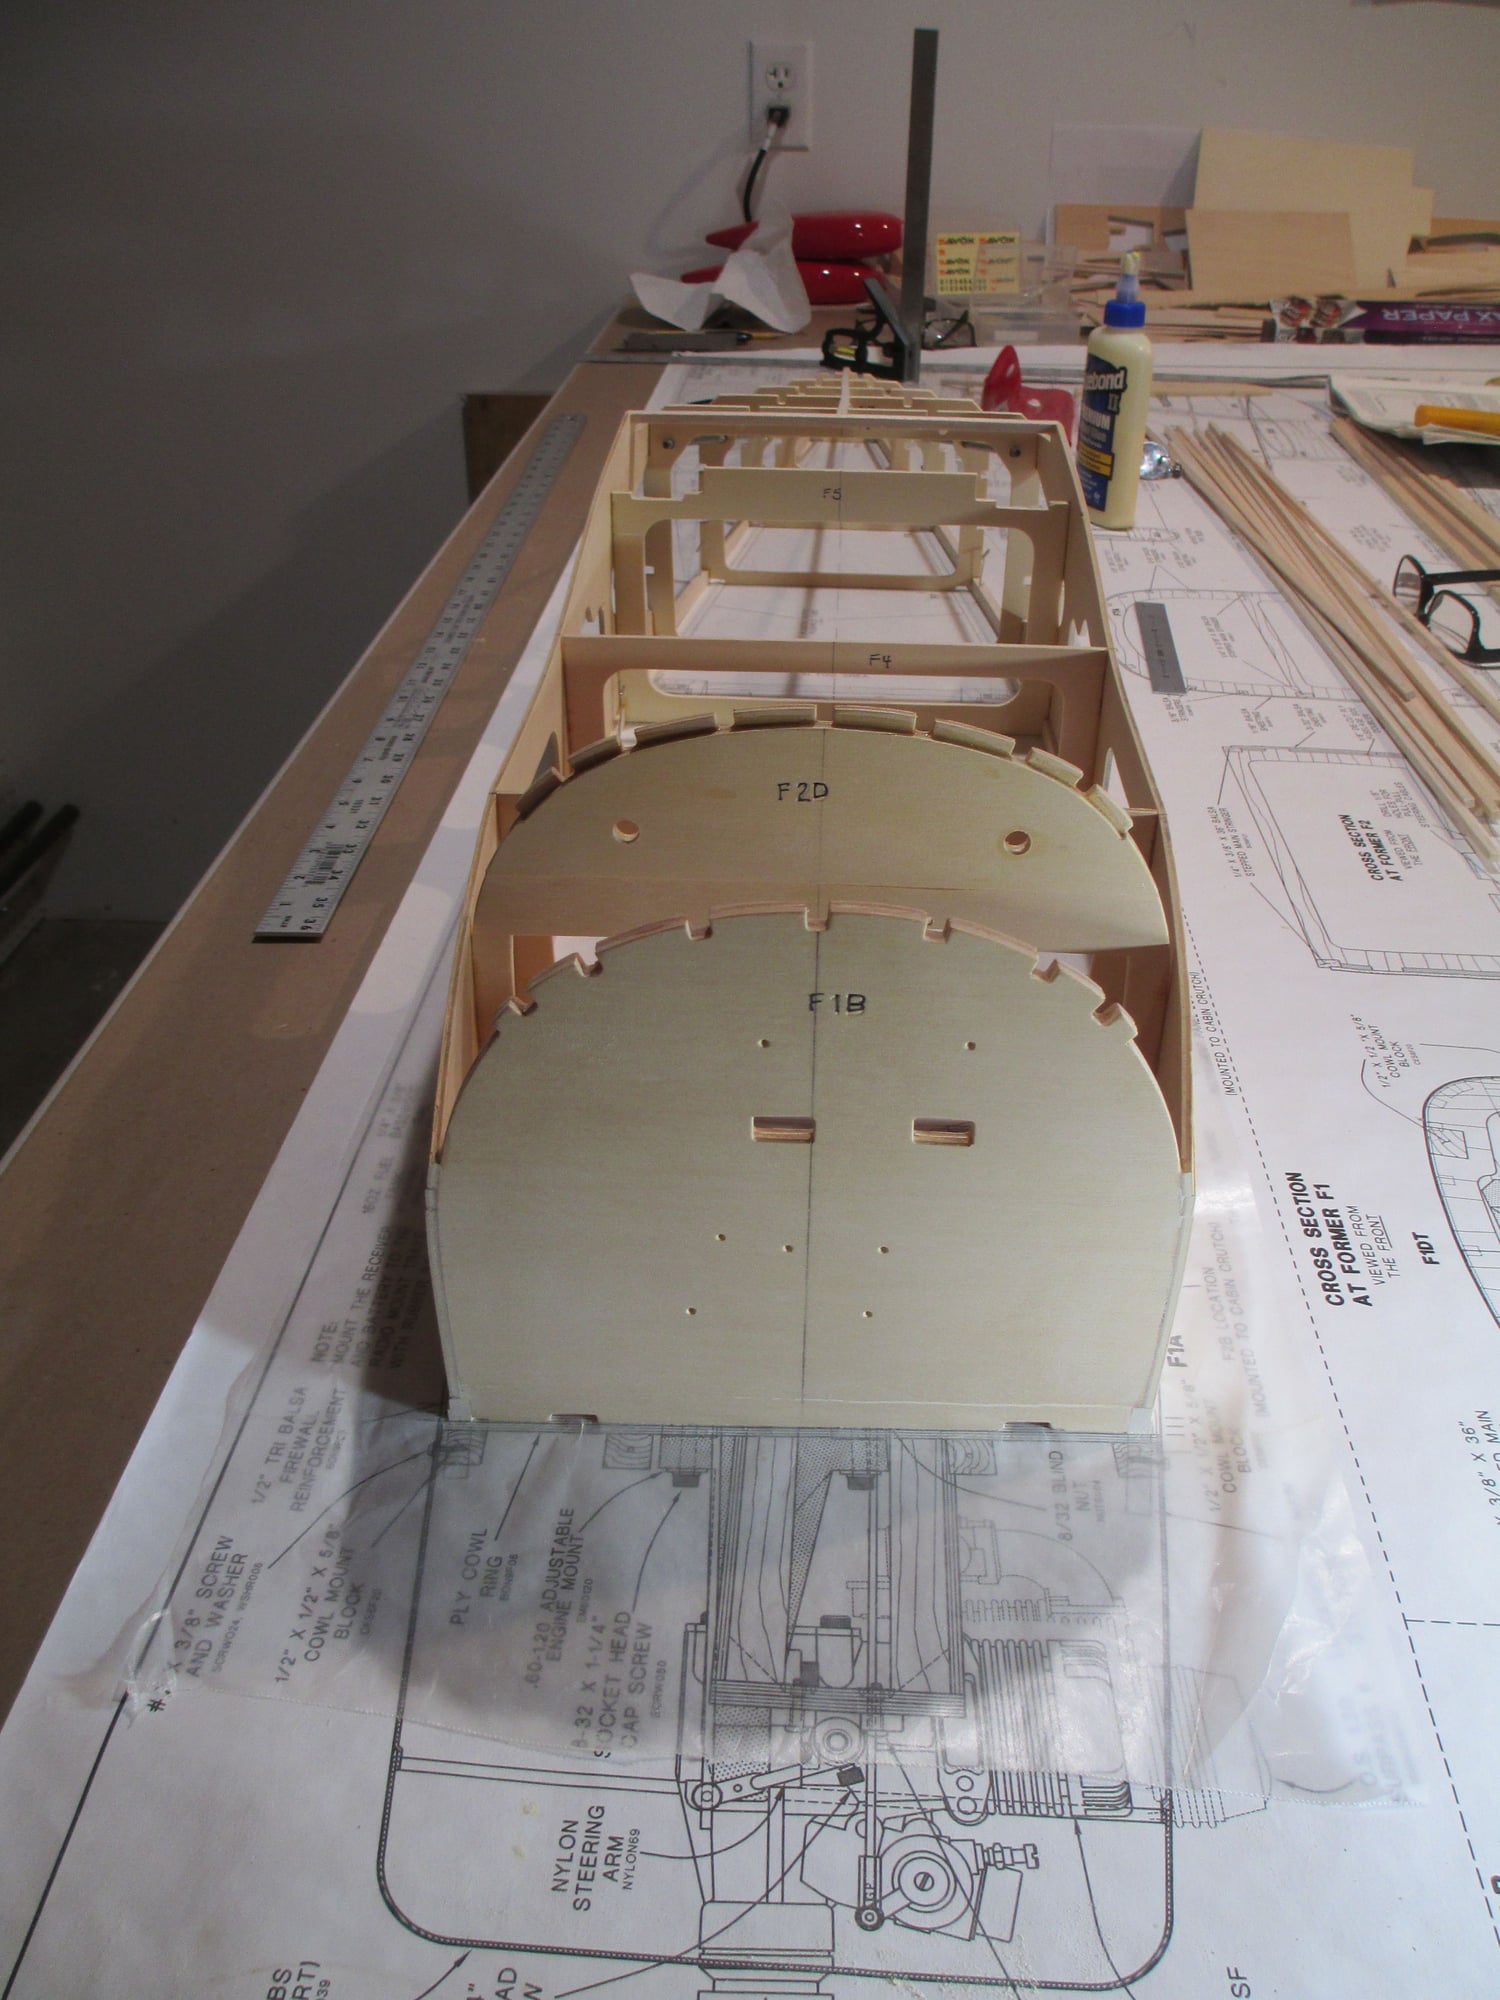
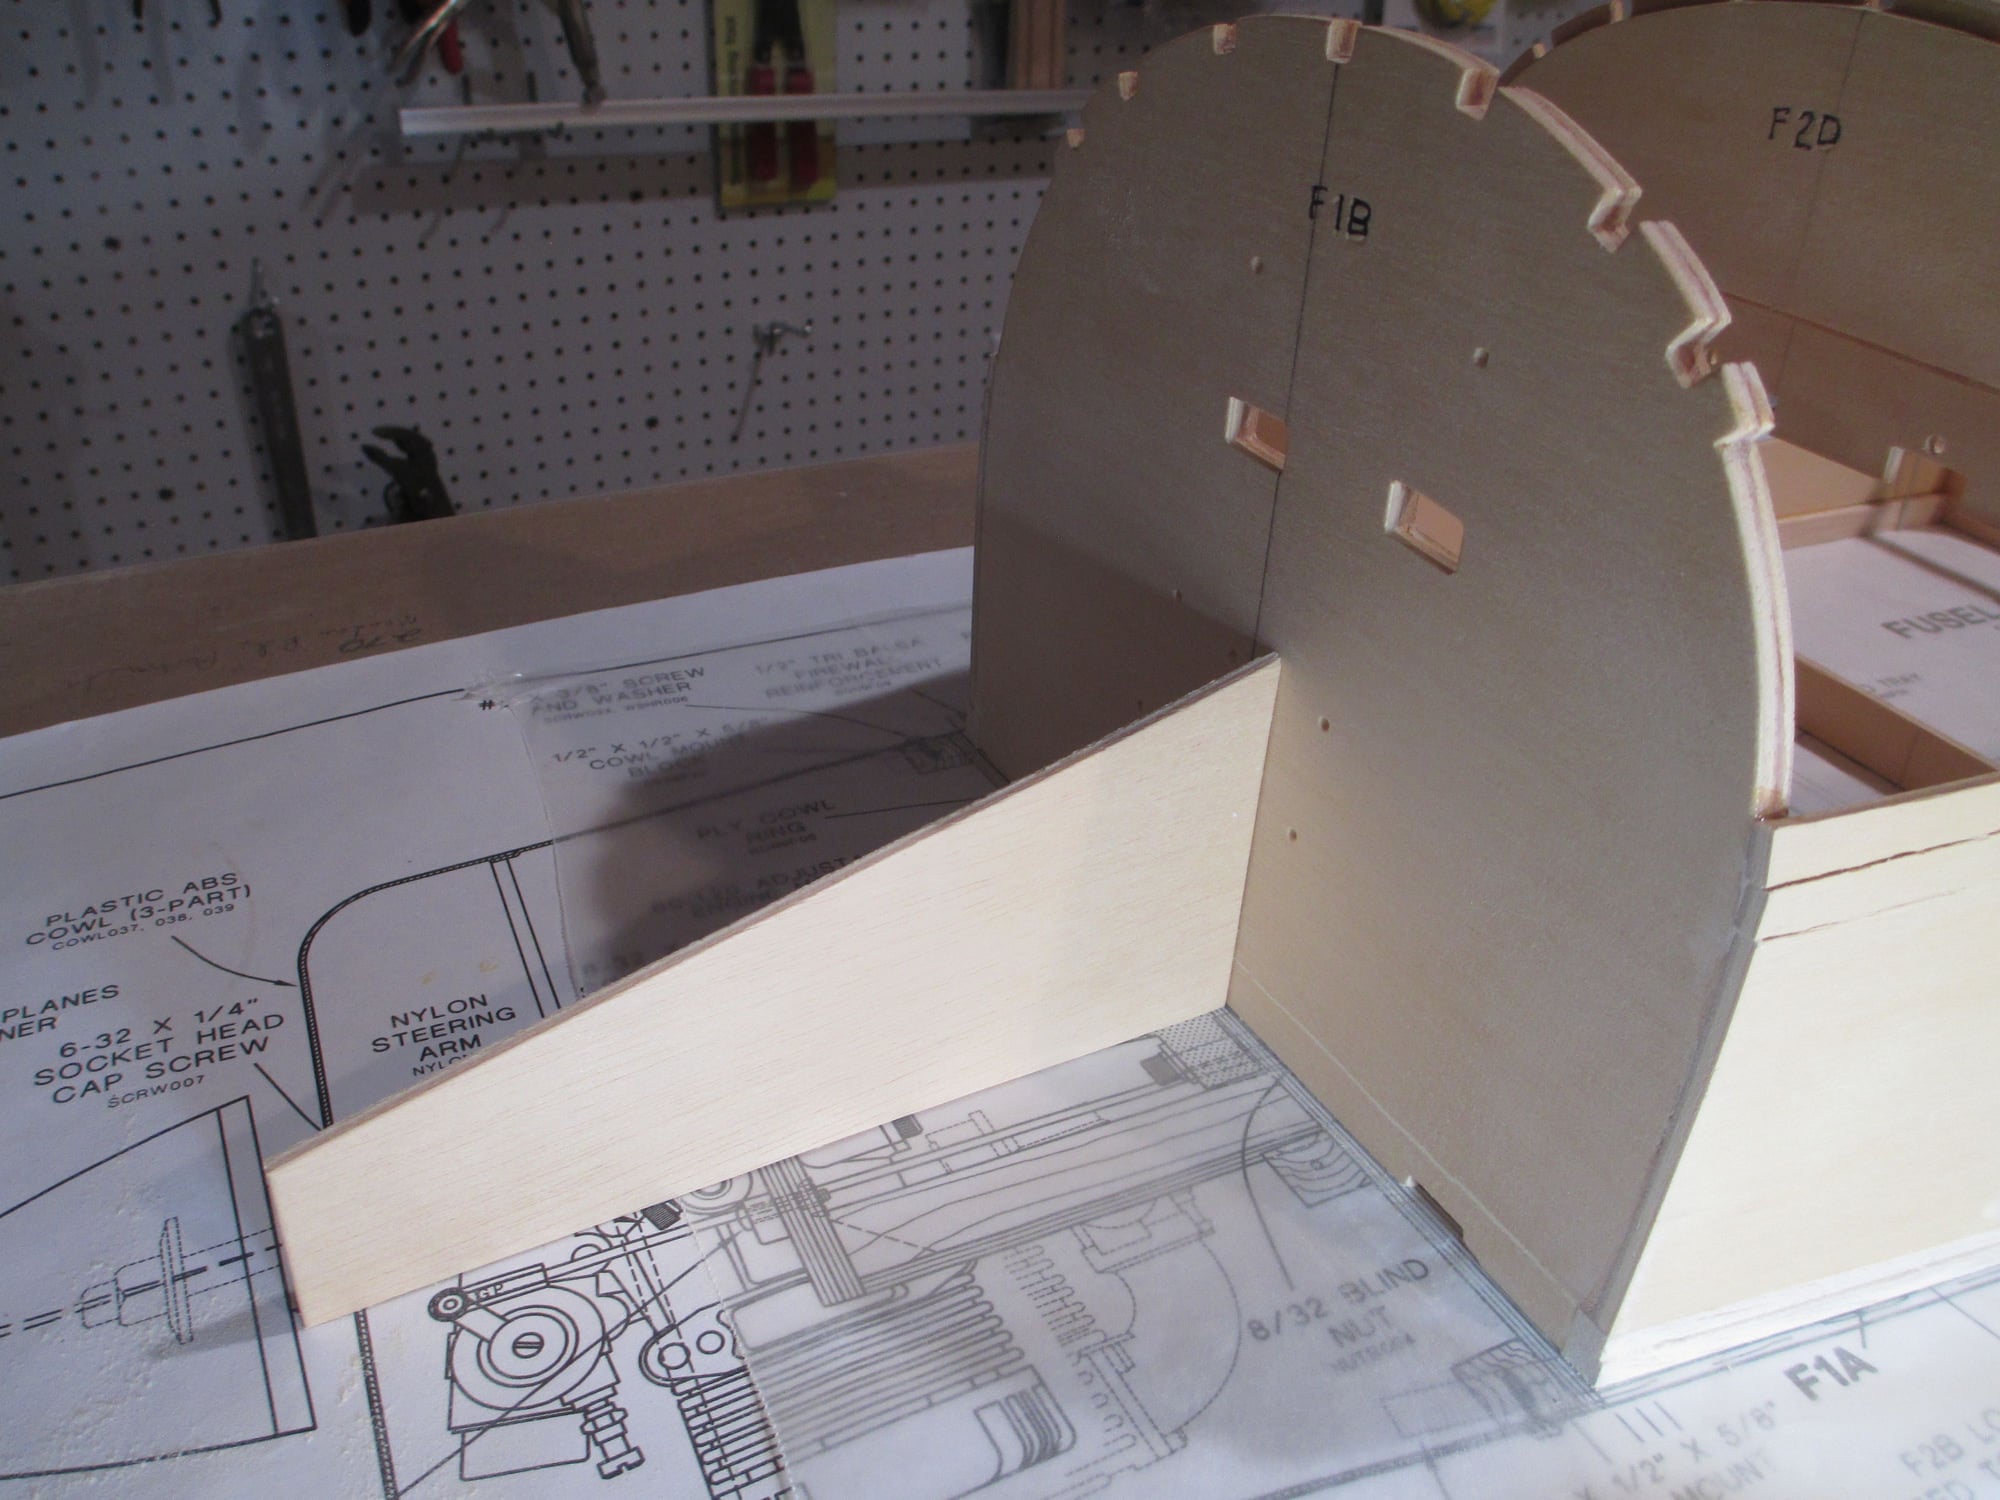
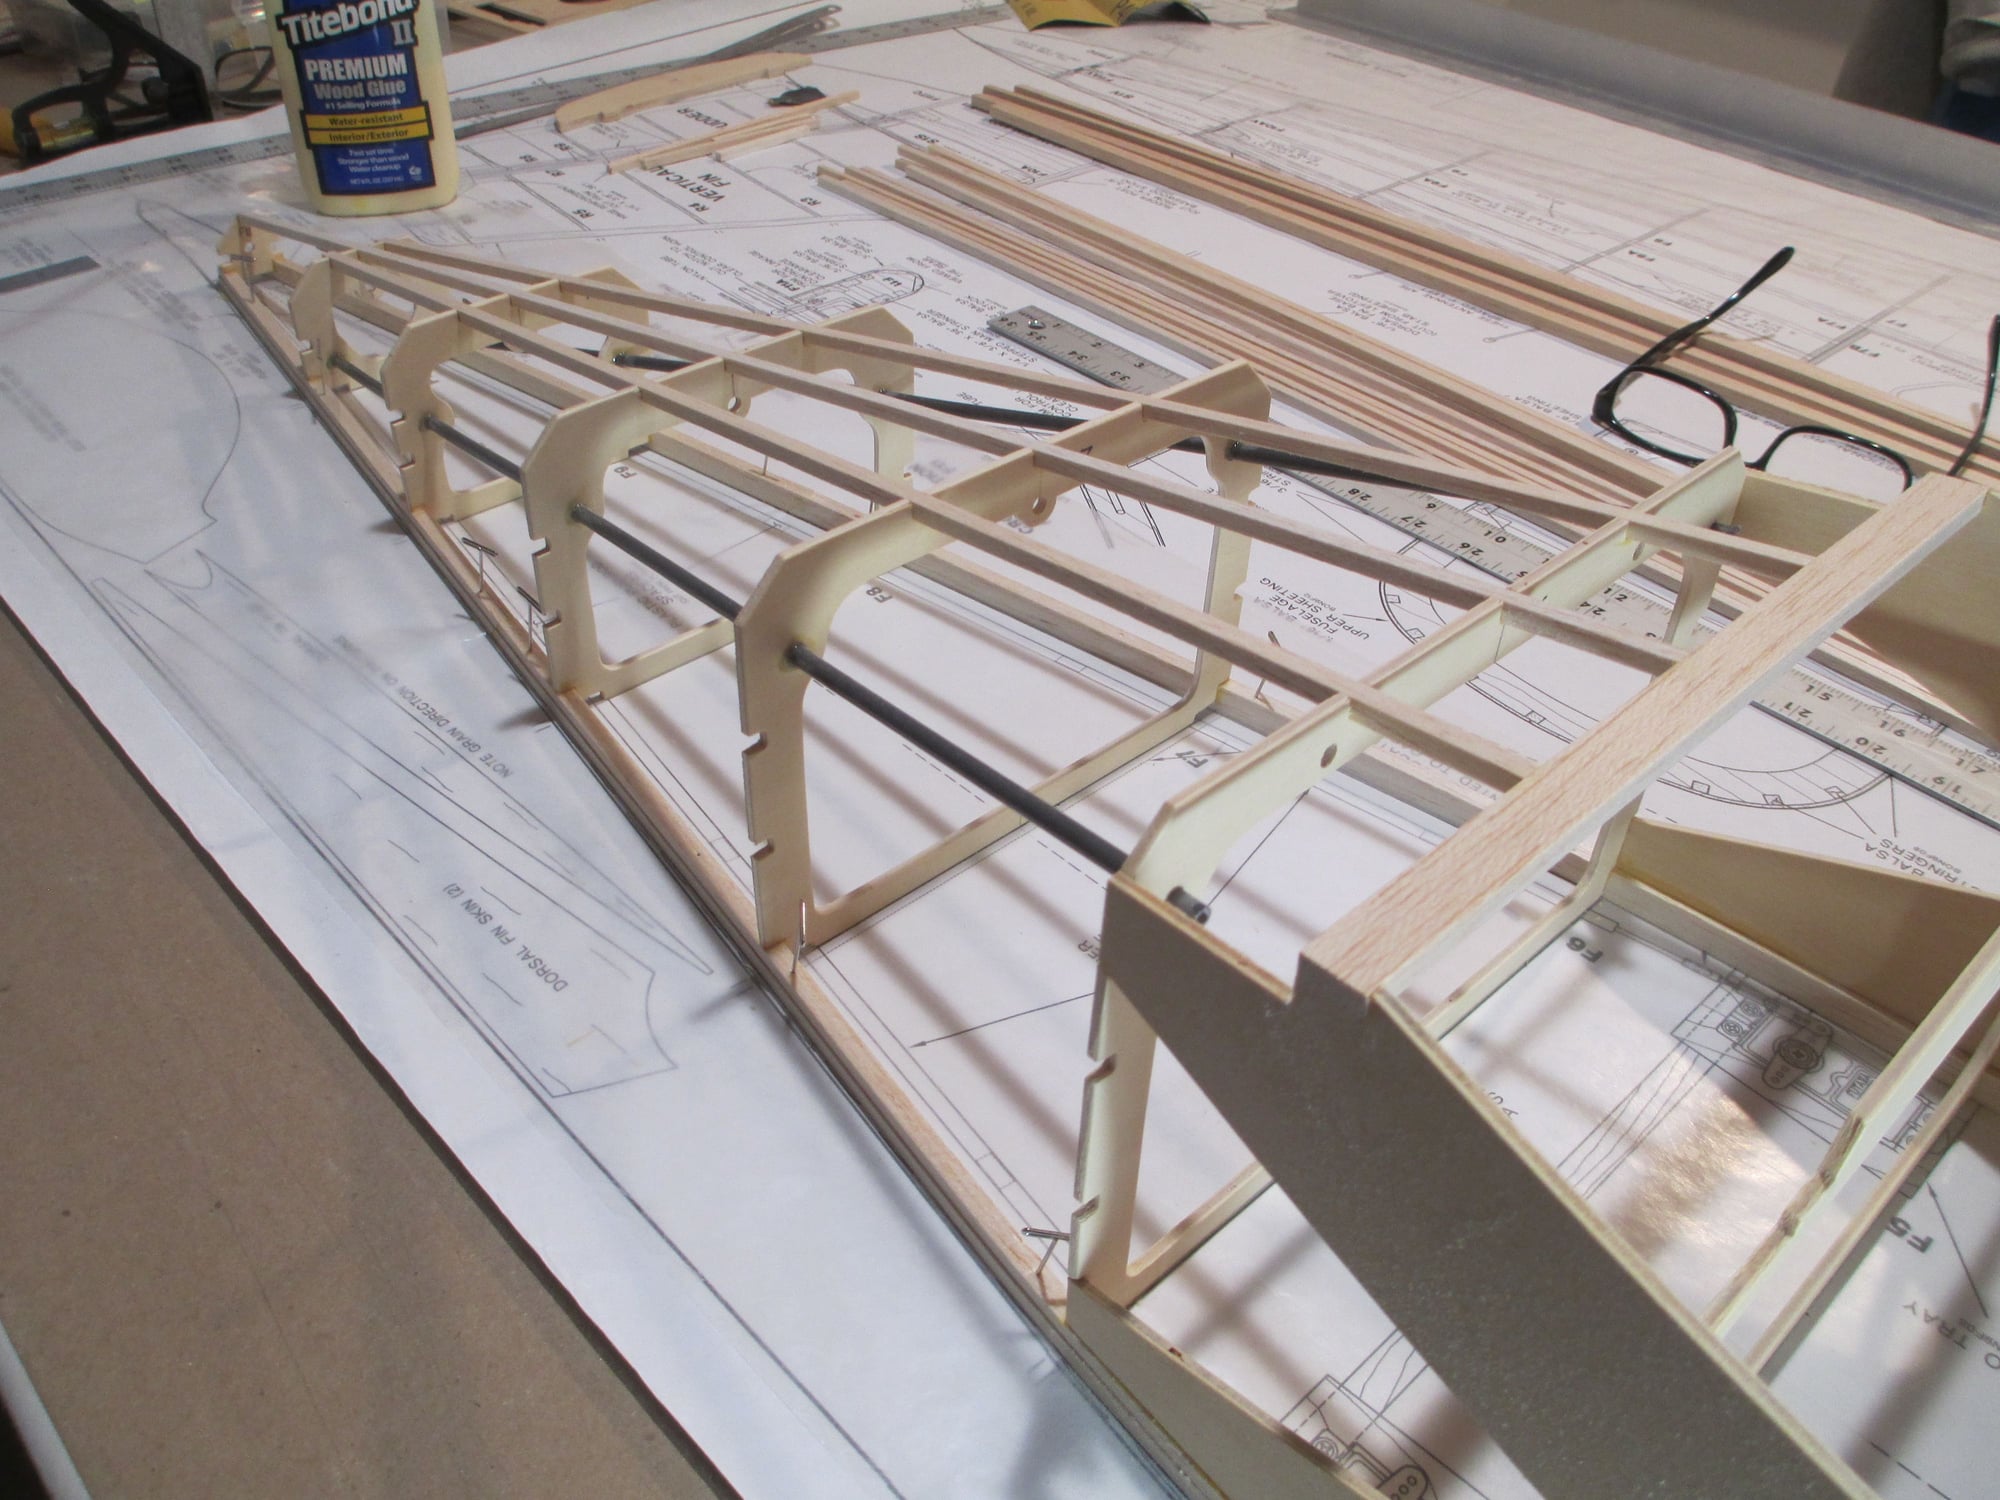
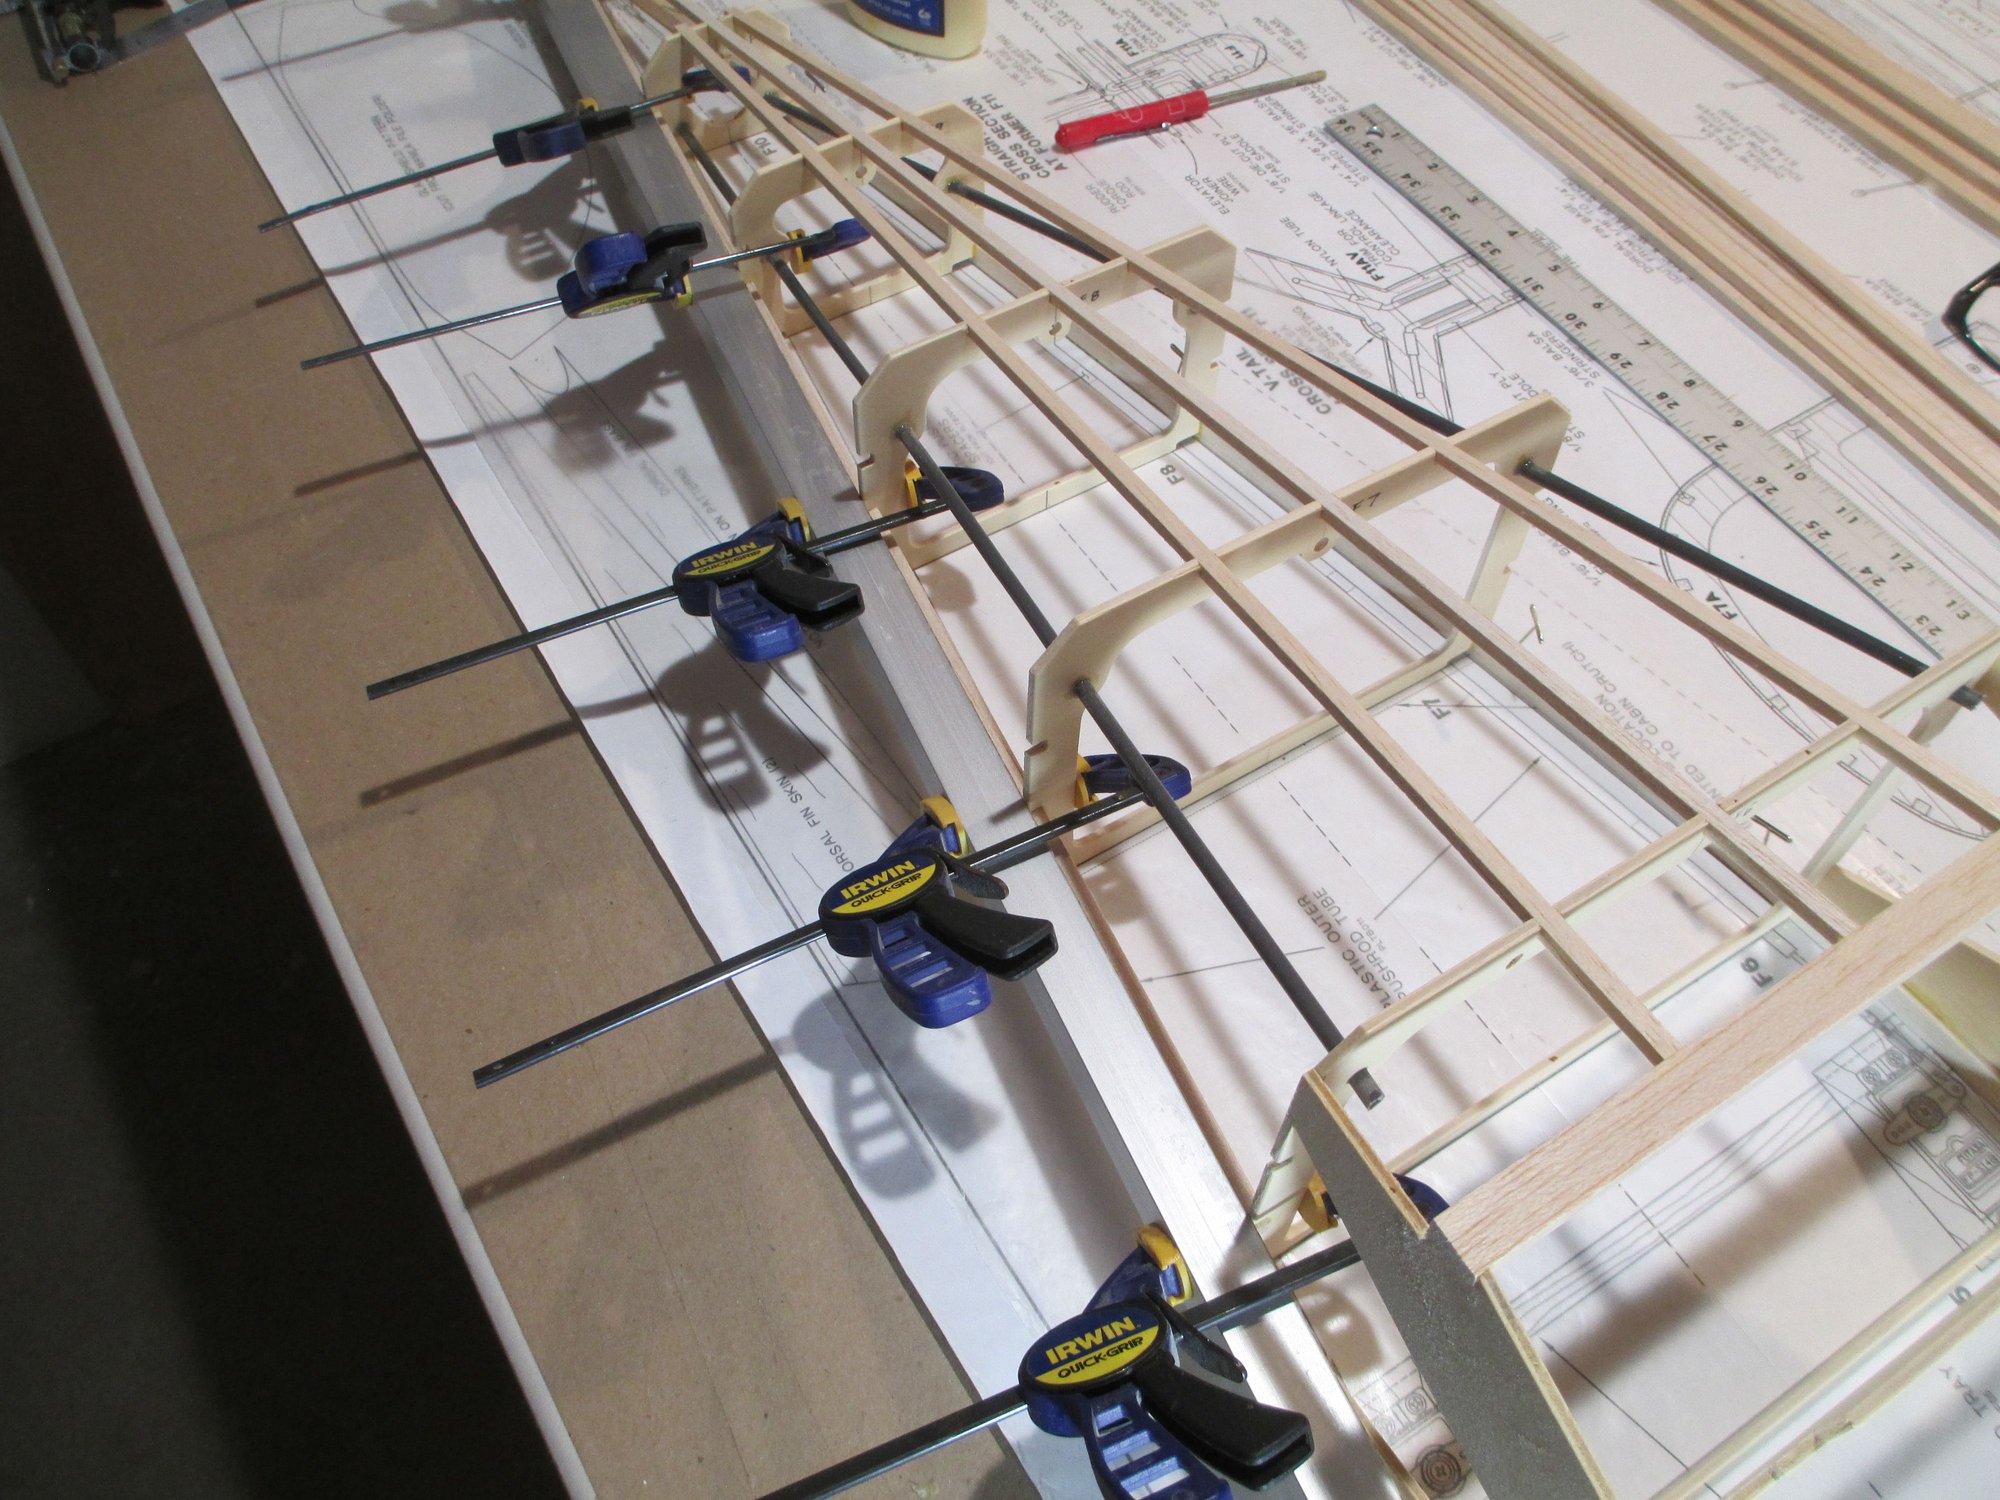
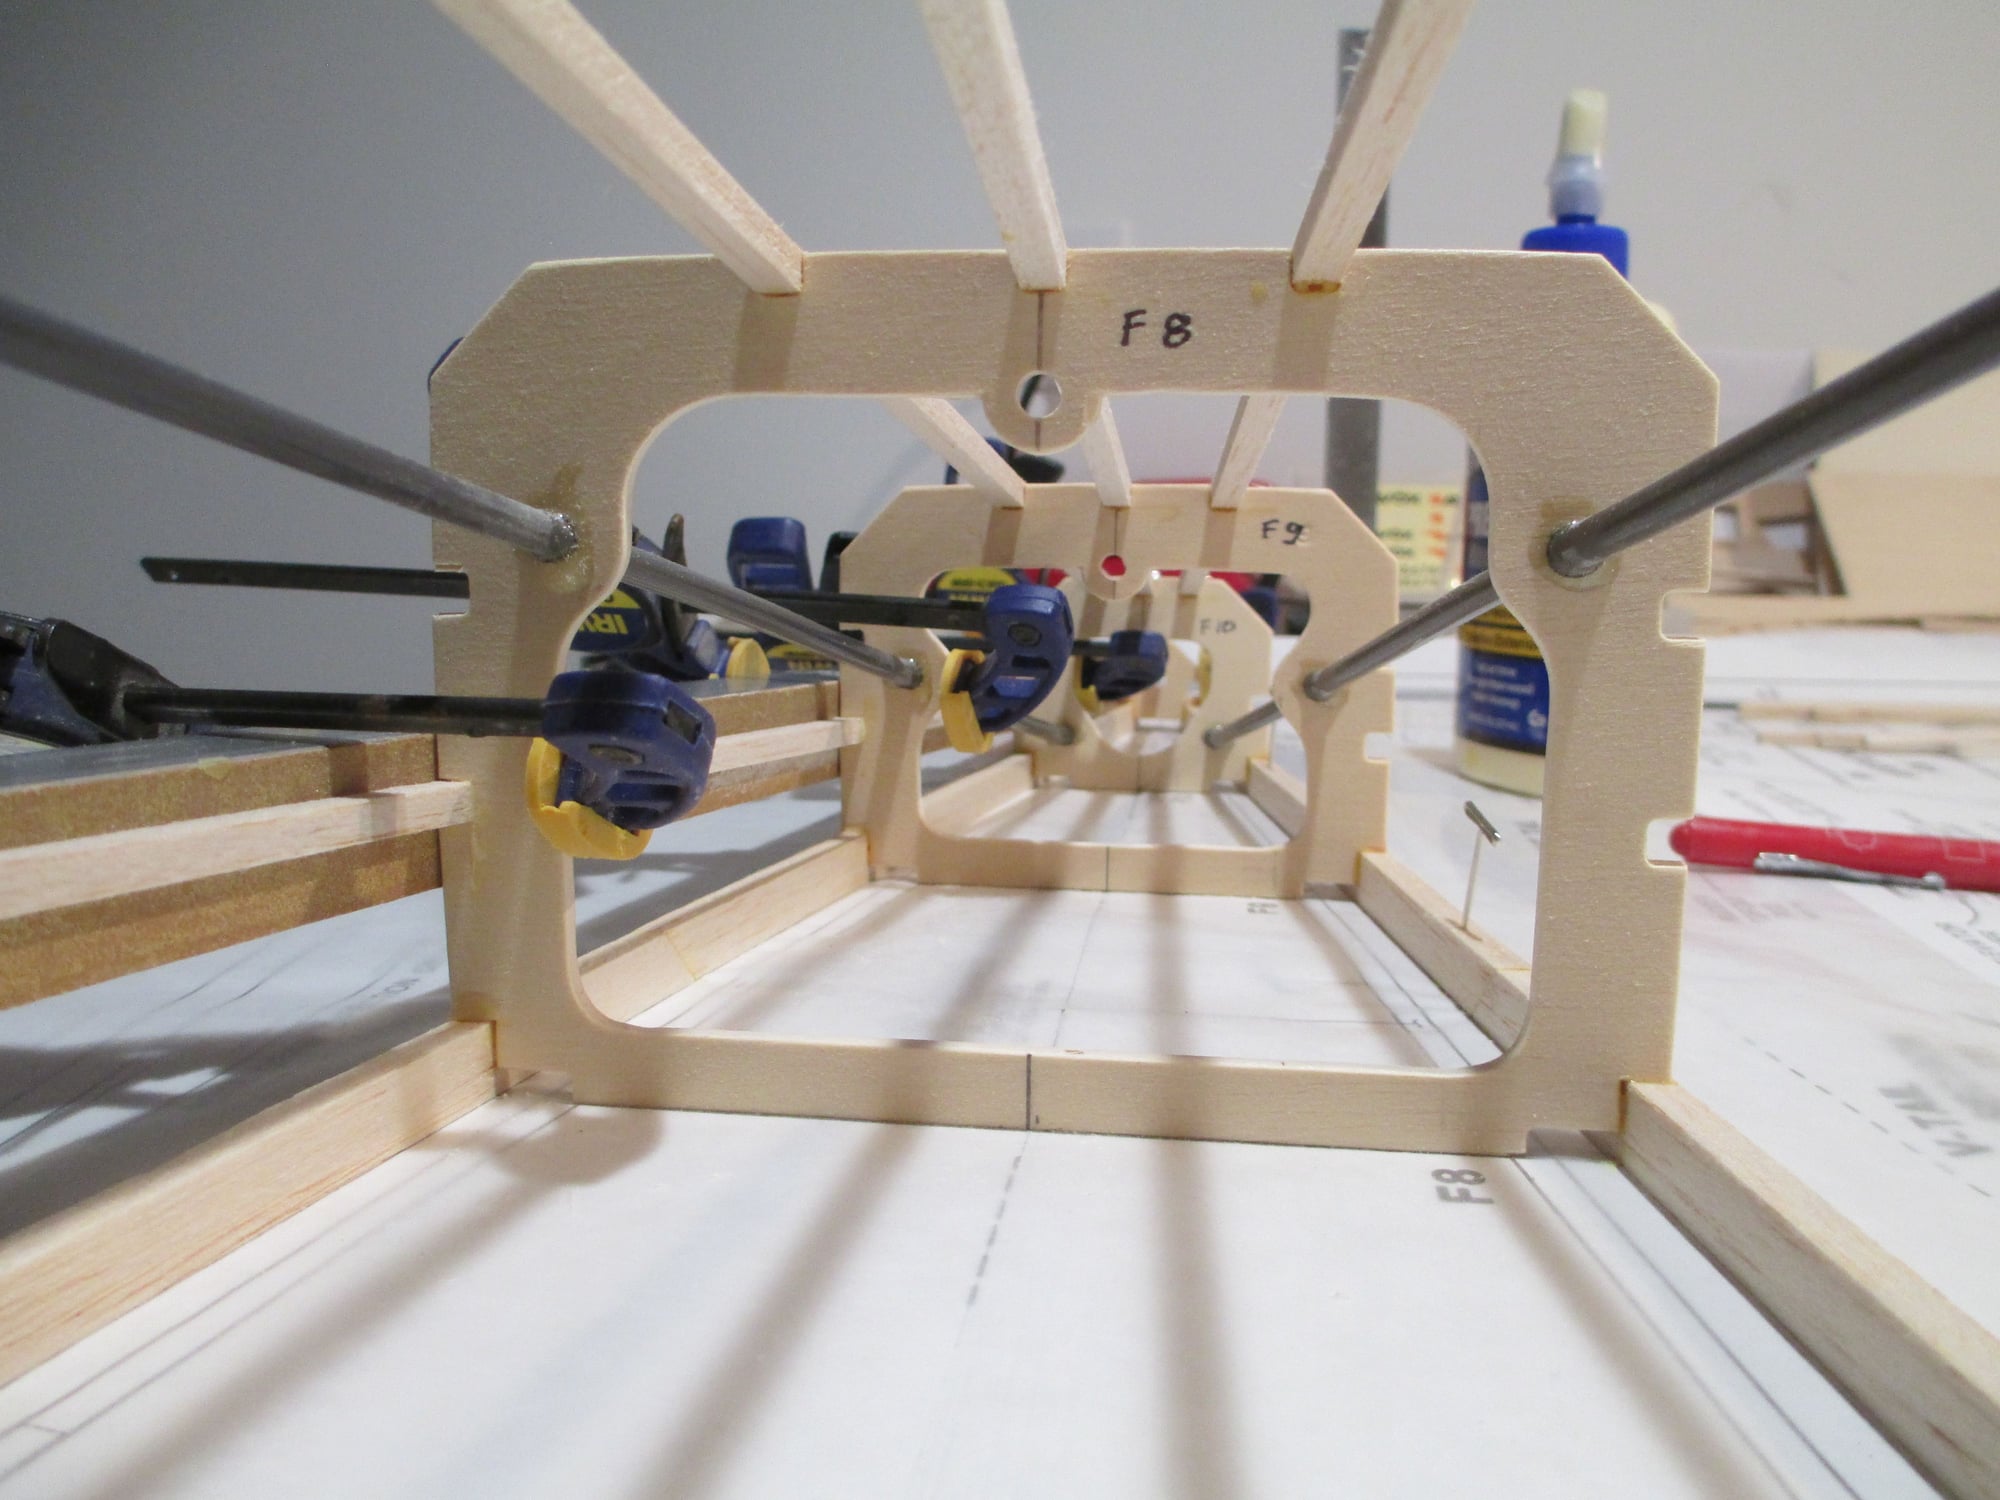
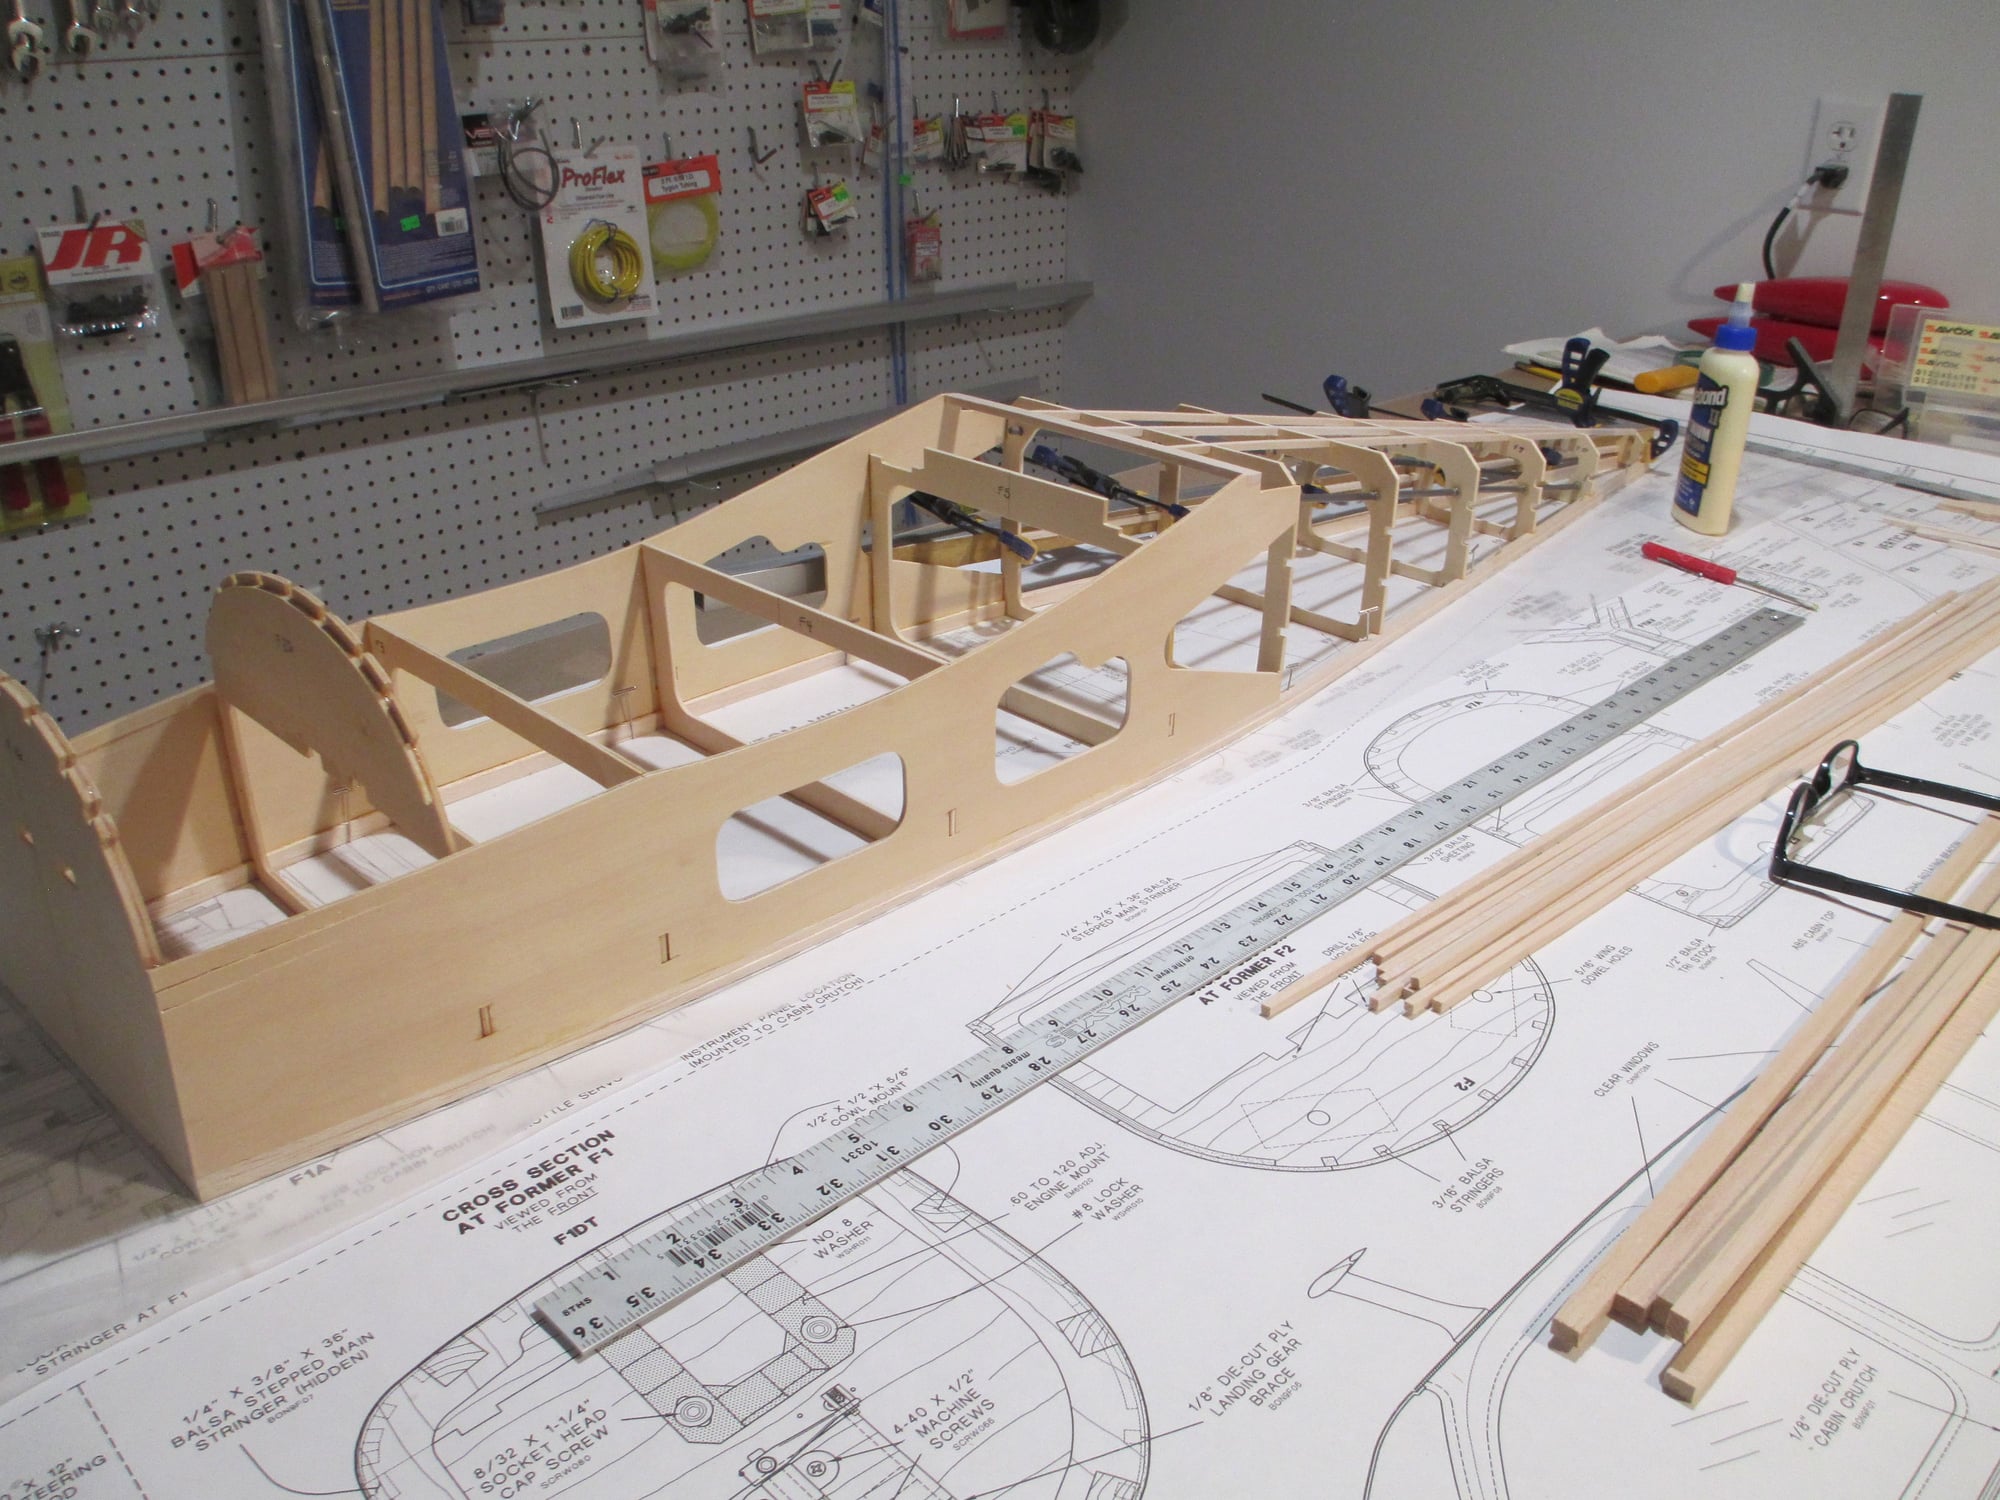
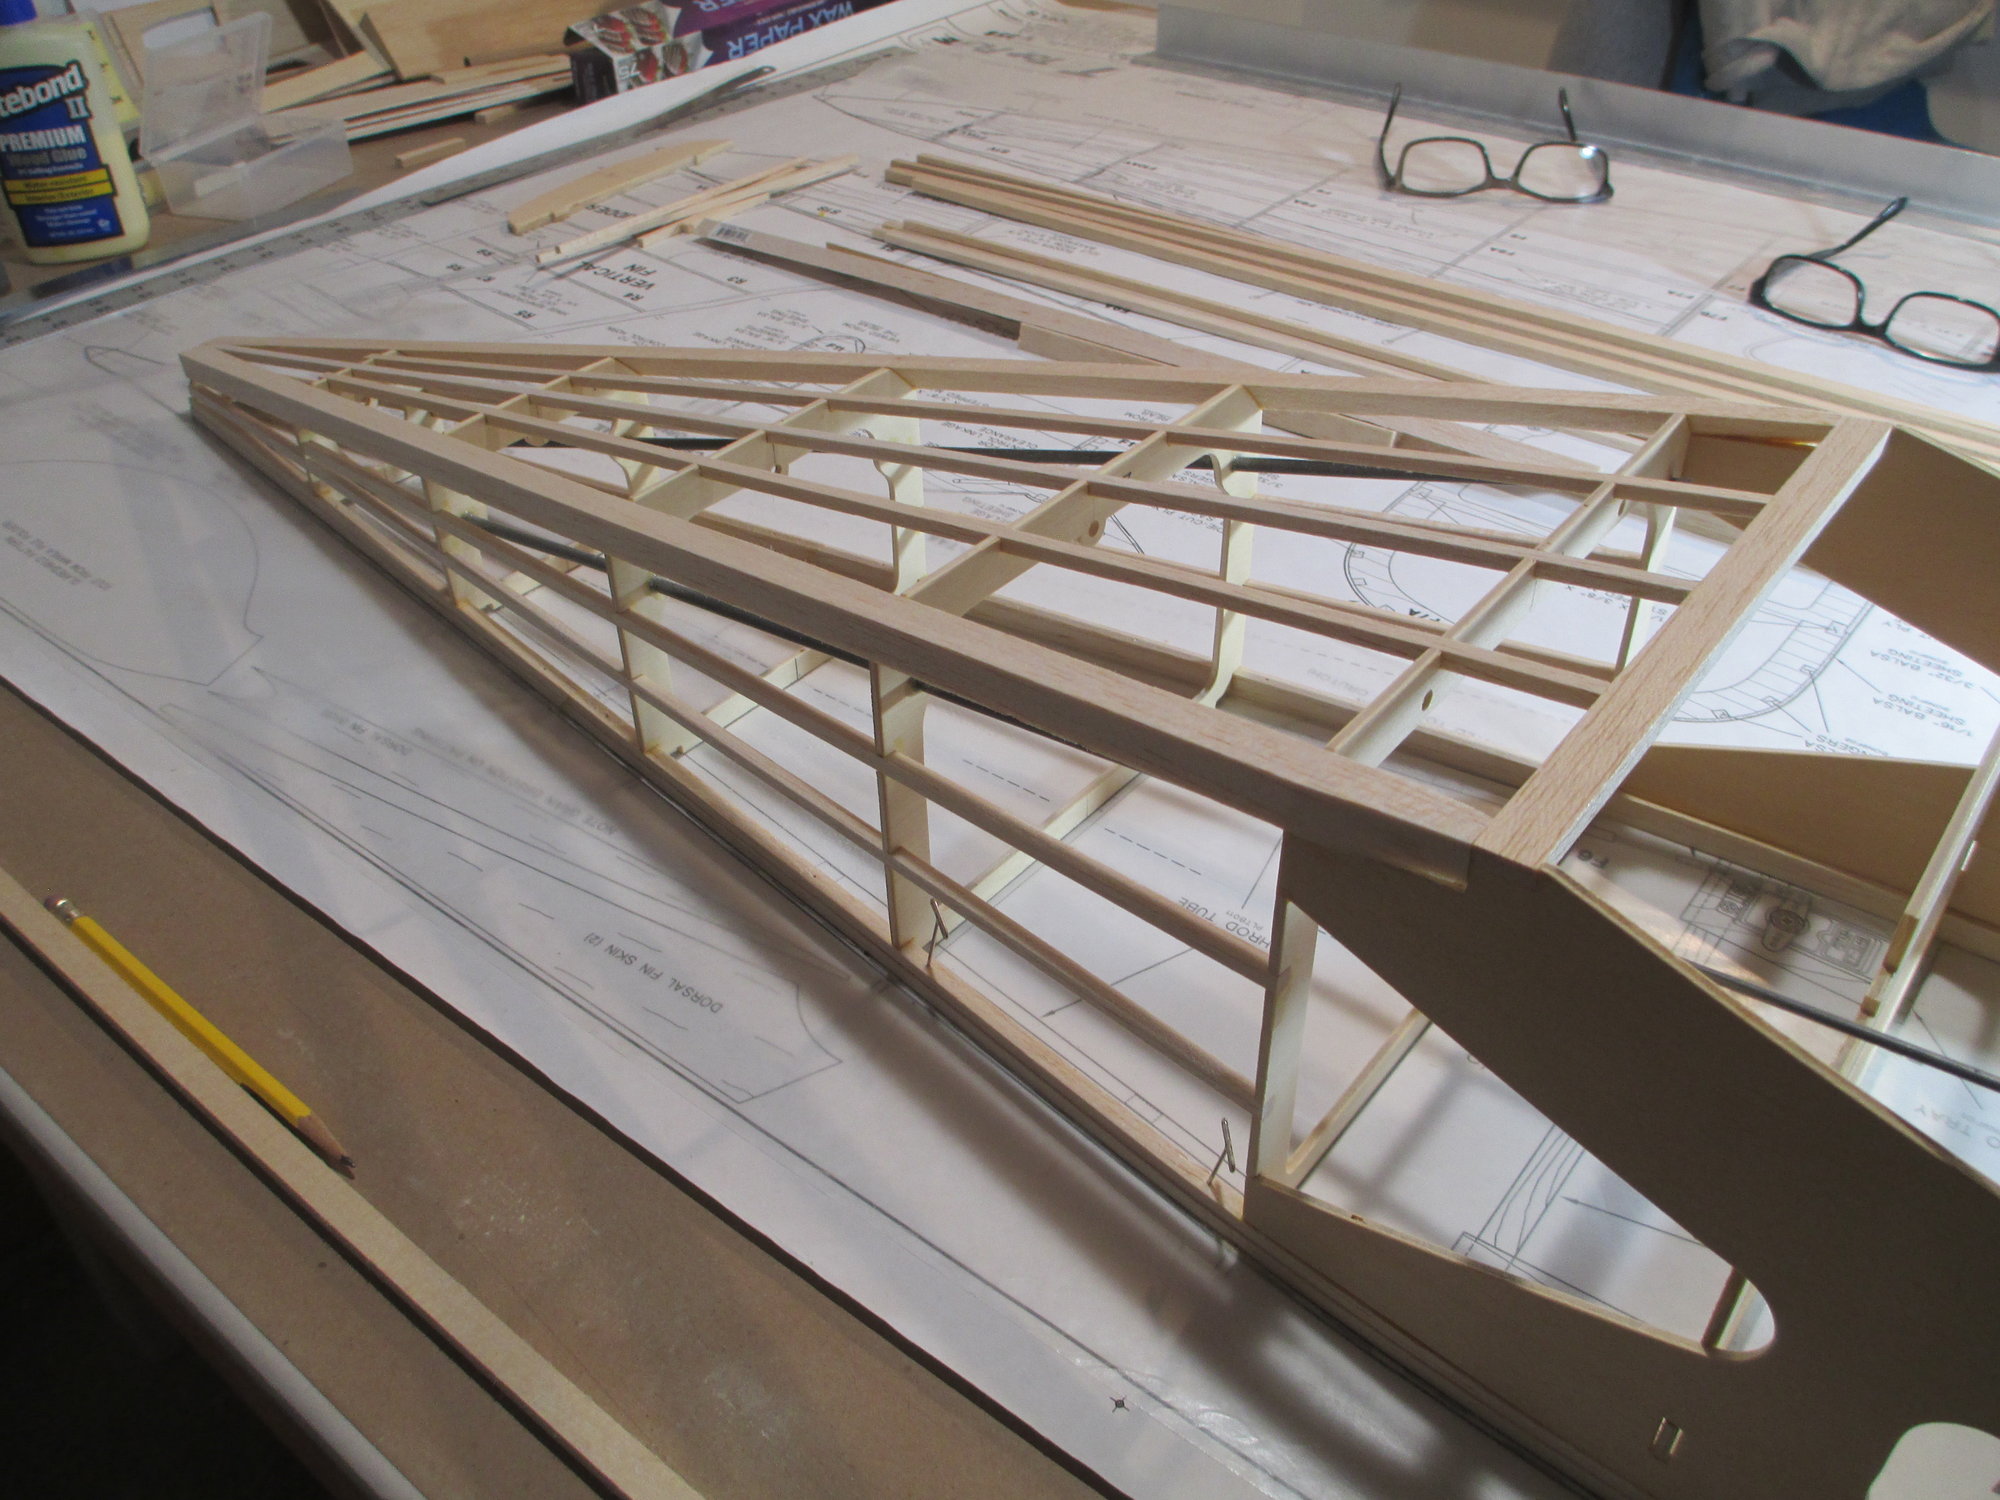
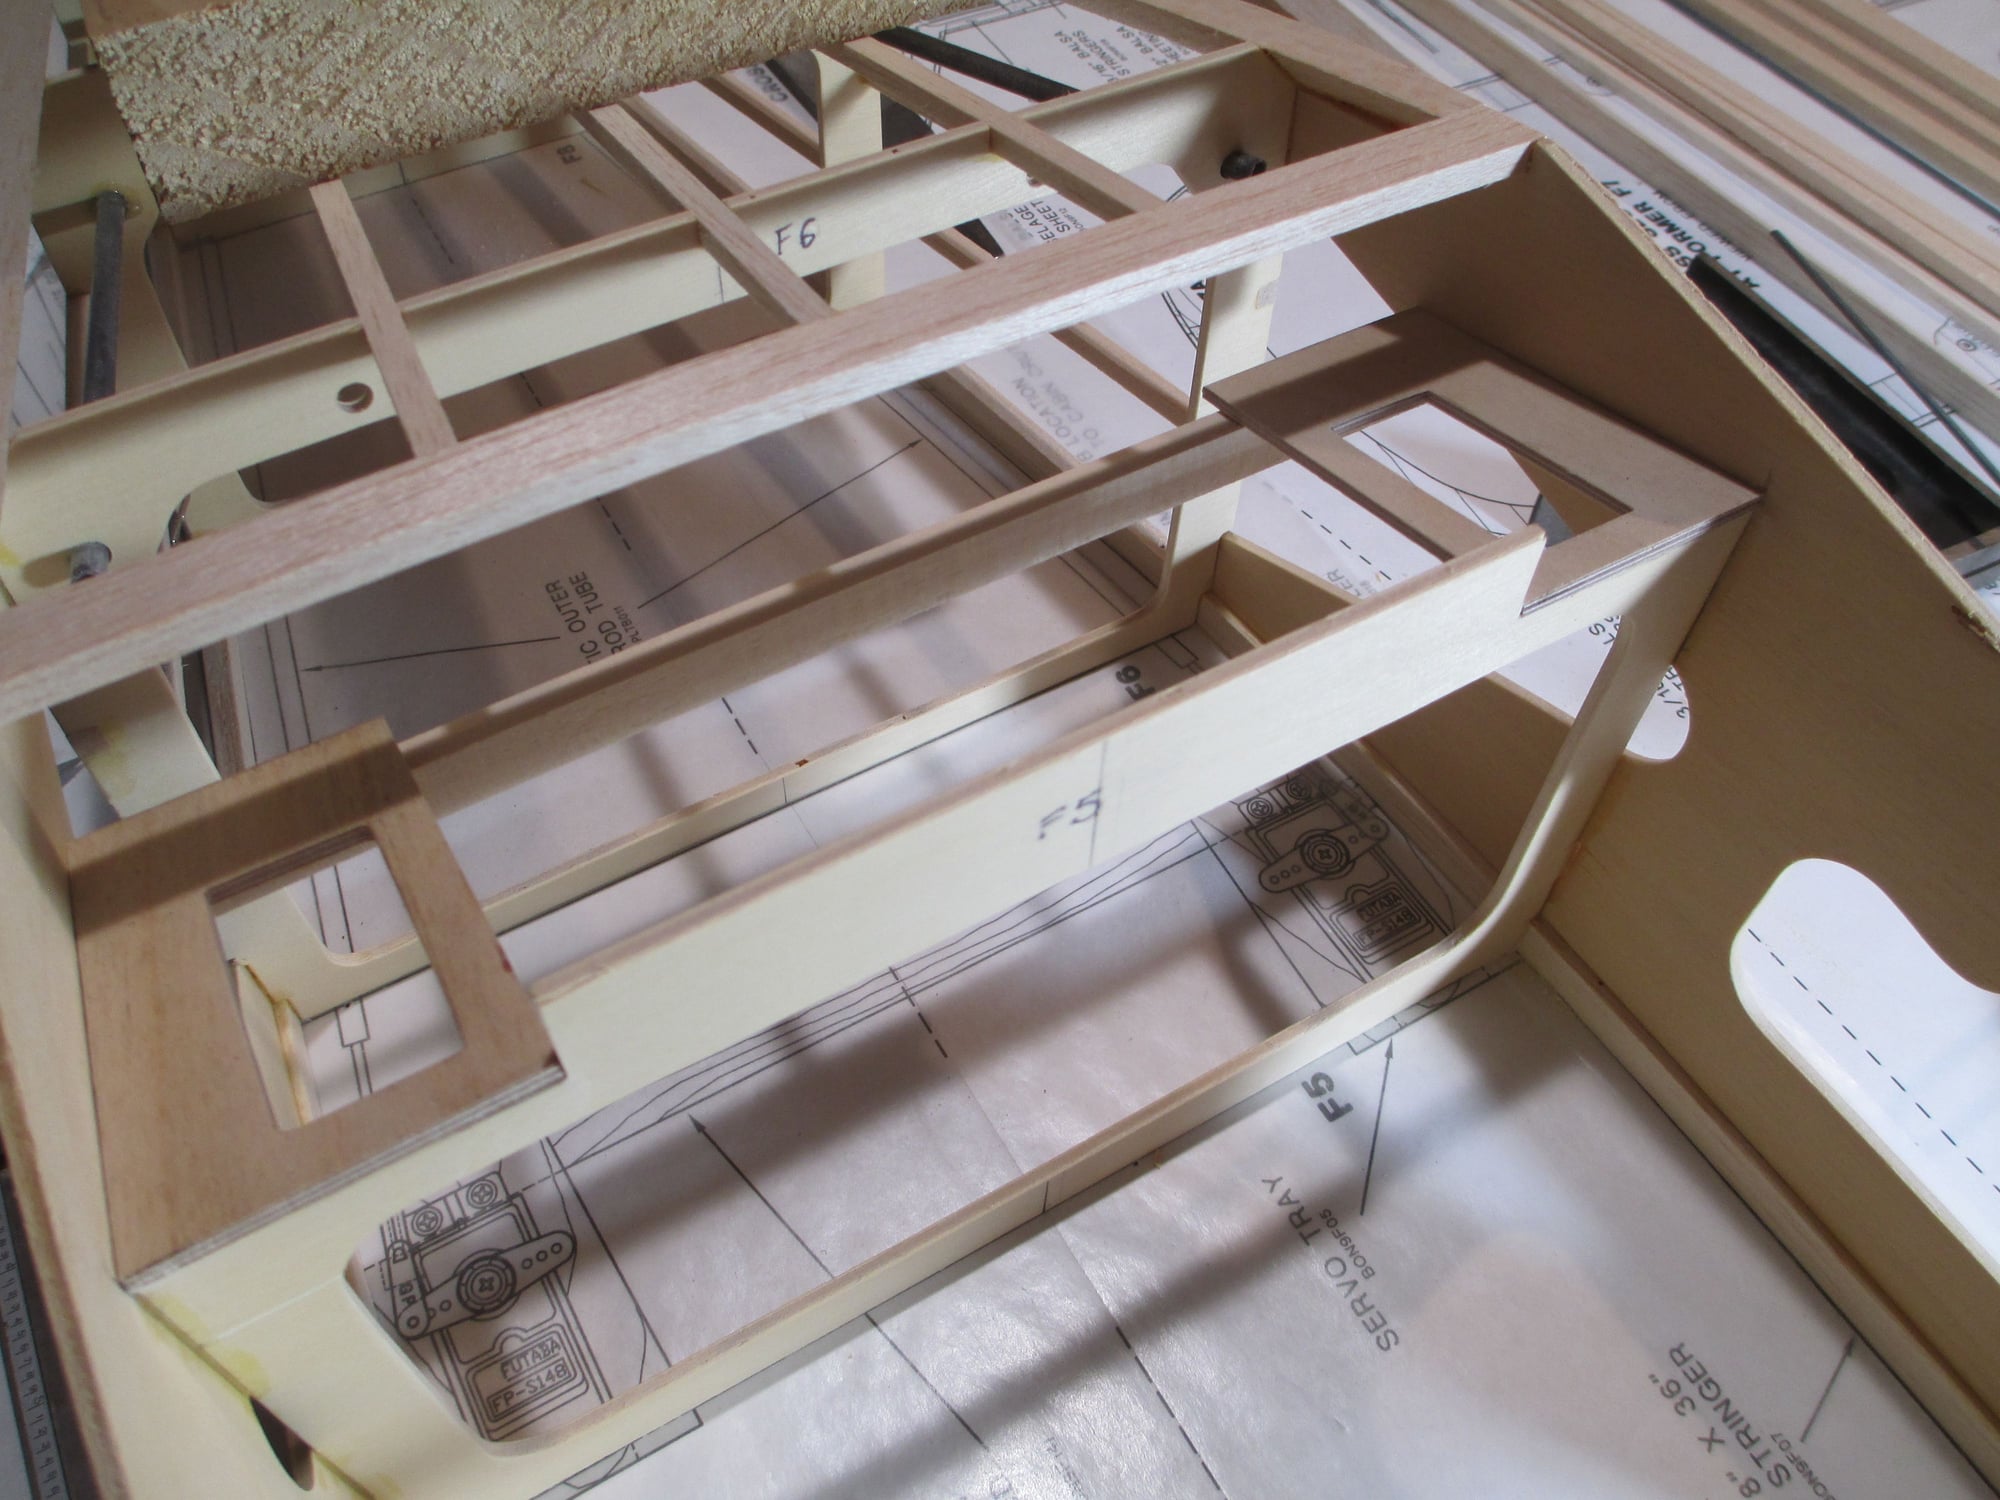
Happy with how each of the formers fit between the side stringers, I glued them all into place making sure each former was plumb.
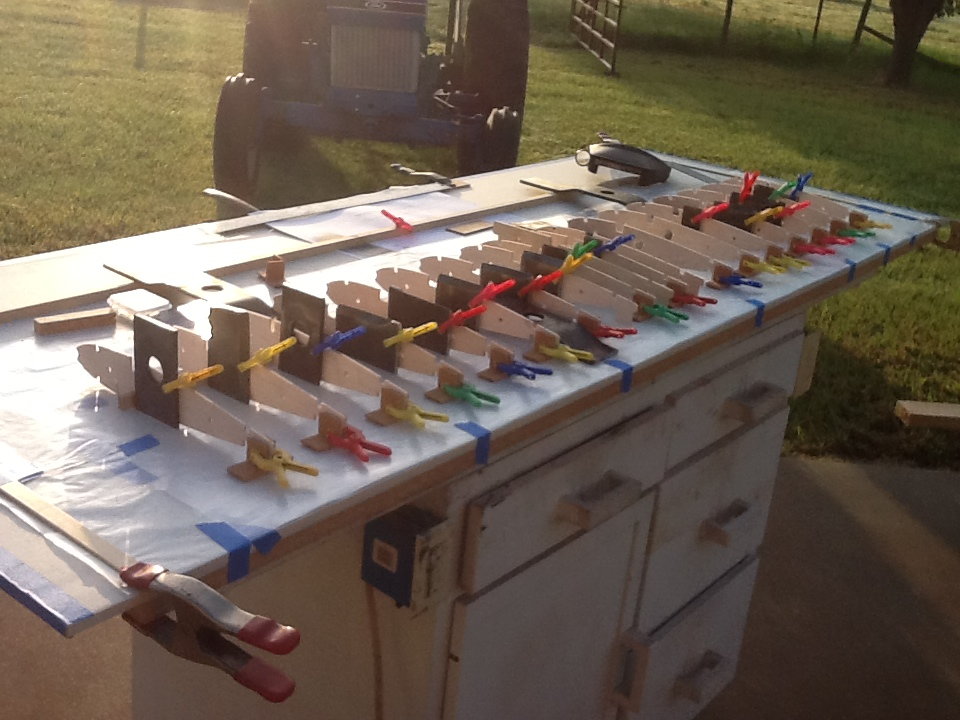
You've seen my block collection before, they come in handy in so many different ways. Here I'm using them to keep the former plumb by clamping them on each side of the former. Each block is perfectly squared,when the blocks get dinged and worn they get used as kindling in my wood stove!
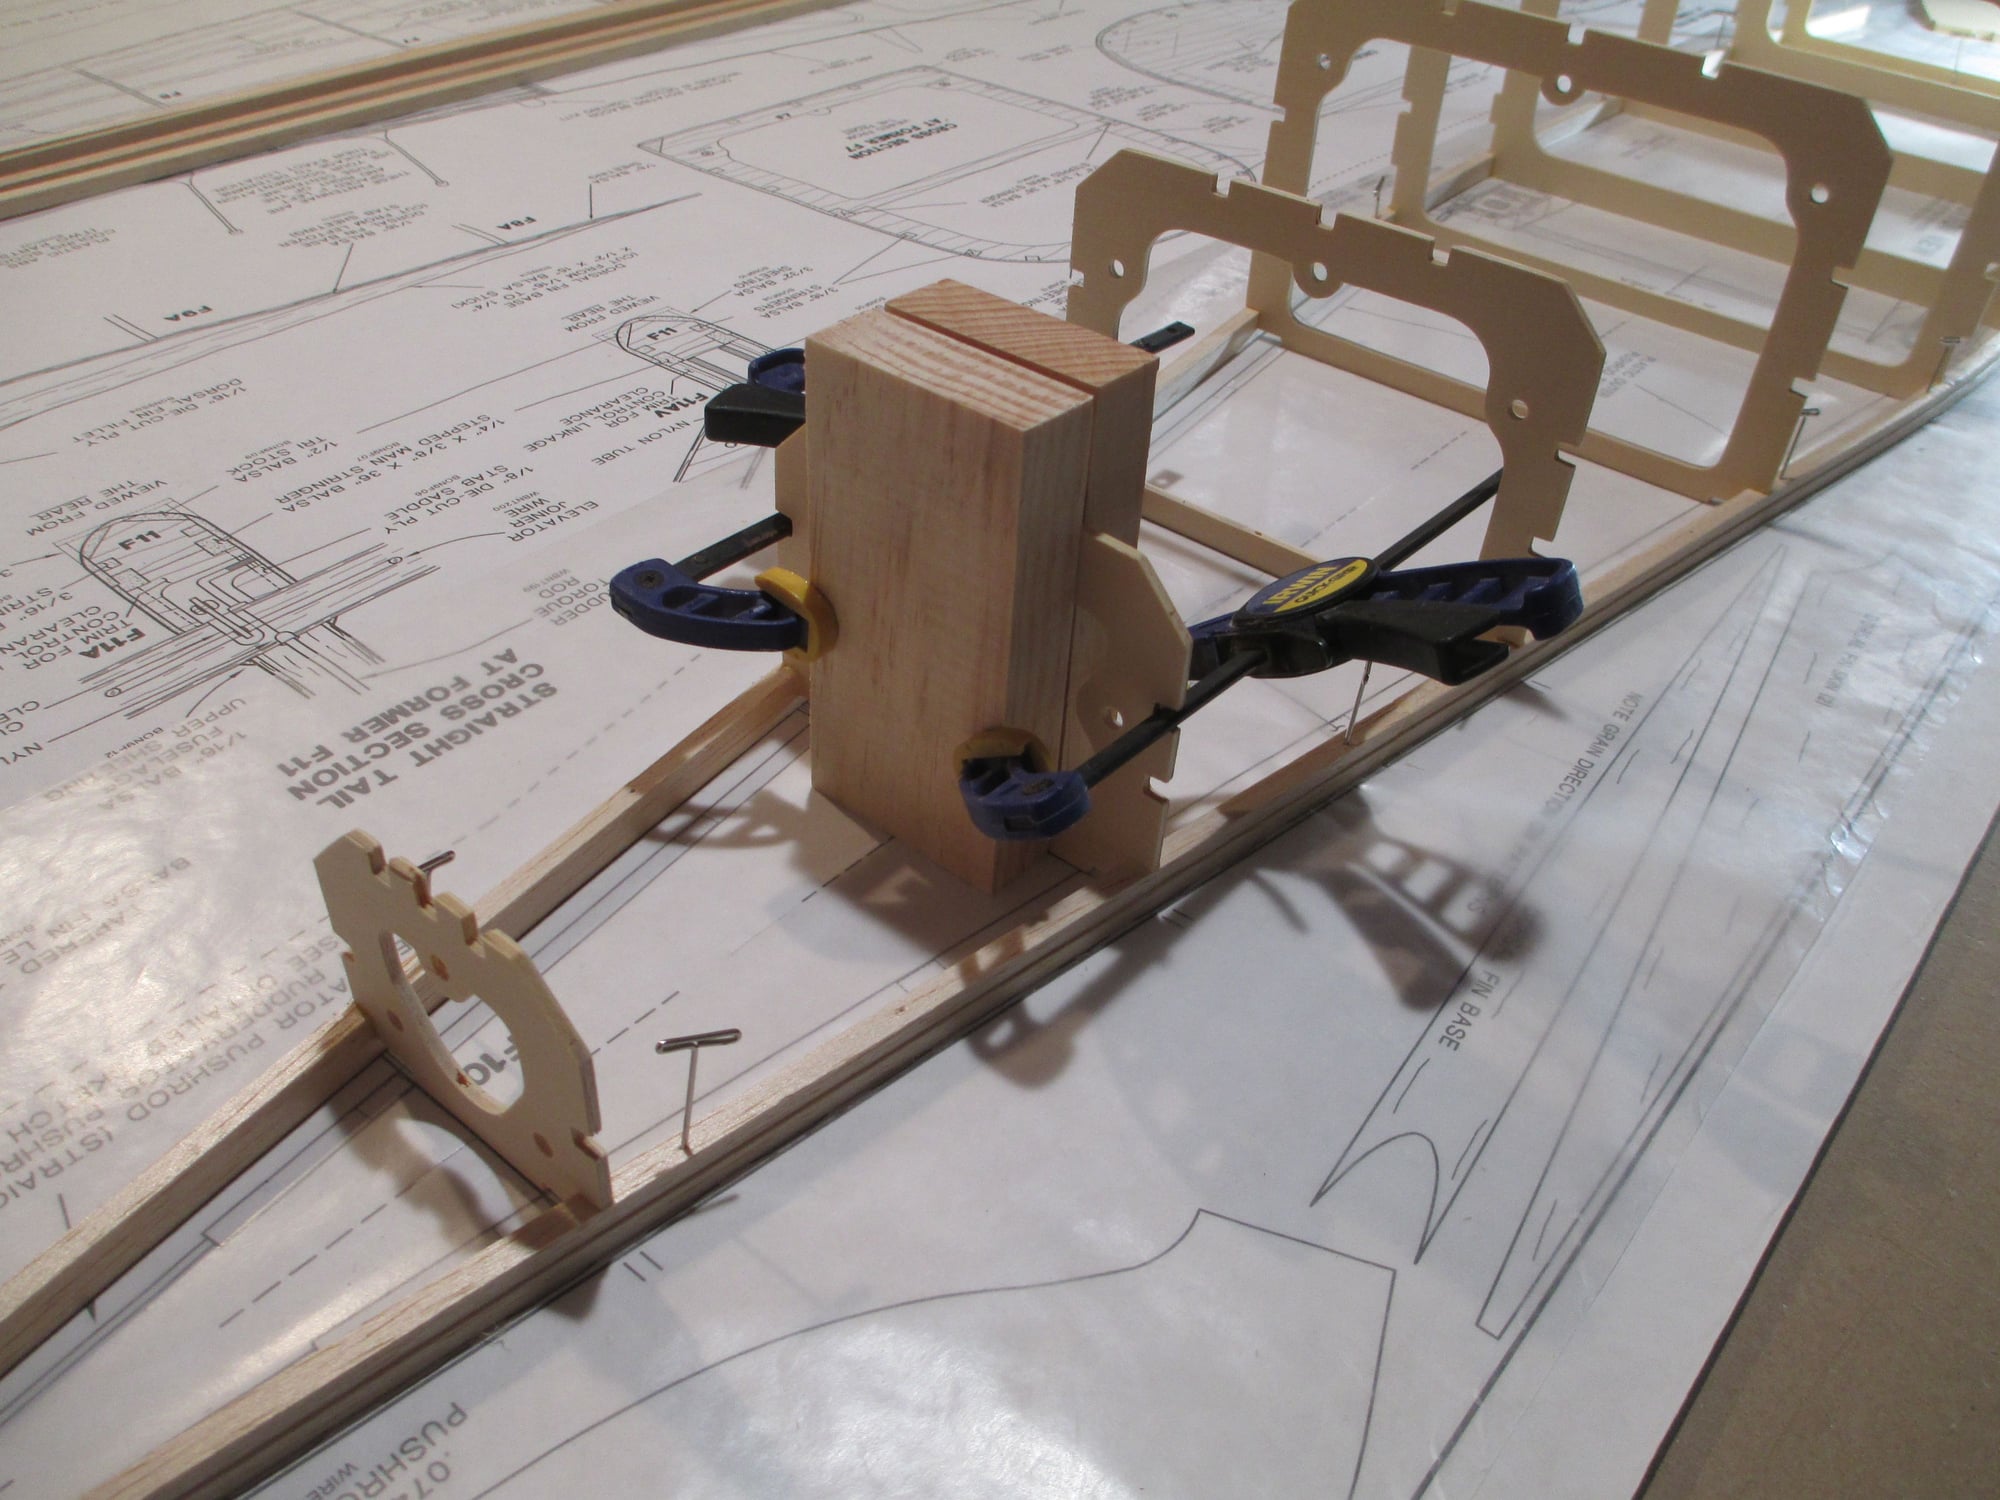
I wasn't going to glue in the firewall former at this time, but after looking at how the next few steps progress in the build I changed my mind.
The firewall is installed with 2.5 degrees of right thrust and 2.0 degrees of down thrust. The down thrust is set using this firewall gauge (supplied in the kit).
Last edited by VincentJ; 11-08-2019 at 03:43 PM.
11-08-2019, 07:03 PM
#408

Have you considered getting a few sets of these:
https://www.micromark.com/1-2-3-Blocks
Or maybe some of these:
https://www.micromark.com/SET-OF-THREE-ANGLE-PLATES
I have the angle plates and love them for building as I can use them to square up things both vertically and horizontally
https://www.micromark.com/1-2-3-Blocks
Or maybe some of these:
https://www.micromark.com/SET-OF-THREE-ANGLE-PLATES
I have the angle plates and love them for building as I can use them to square up things both vertically and horizontally
11-09-2019, 03:48 AM
#409

Vincent I�ve been following along and learning too. Nice work on this build. I, too, throw my waste wood pieces in the wood burning stove.
Hydro when I got back into RC my first build was a scratch built Ugly Stik. Talk about building blocks, I used what I had on hand. LOL.
Hydro when I got back into RC my first build was a scratch built Ugly Stik. Talk about building blocks, I used what I had on hand. LOL.
11-09-2019, 04:06 AM
#410
Thread Starter
Have you considered getting a few sets of these:
https://www.micromark.com/1-2-3-Blocks
Or maybe some of these:
https://www.micromark.com/SET-OF-THREE-ANGLE-PLATES
I have the angle plates and love them for building as I can use them to square up things both vertically and horizontally
https://www.micromark.com/1-2-3-Blocks
Or maybe some of these:
https://www.micromark.com/SET-OF-THREE-ANGLE-PLATES
I have the angle plates and love them for building as I can use them to square up things both vertically and horizontally
11-09-2019, 04:20 AM
#412
Thread Starter
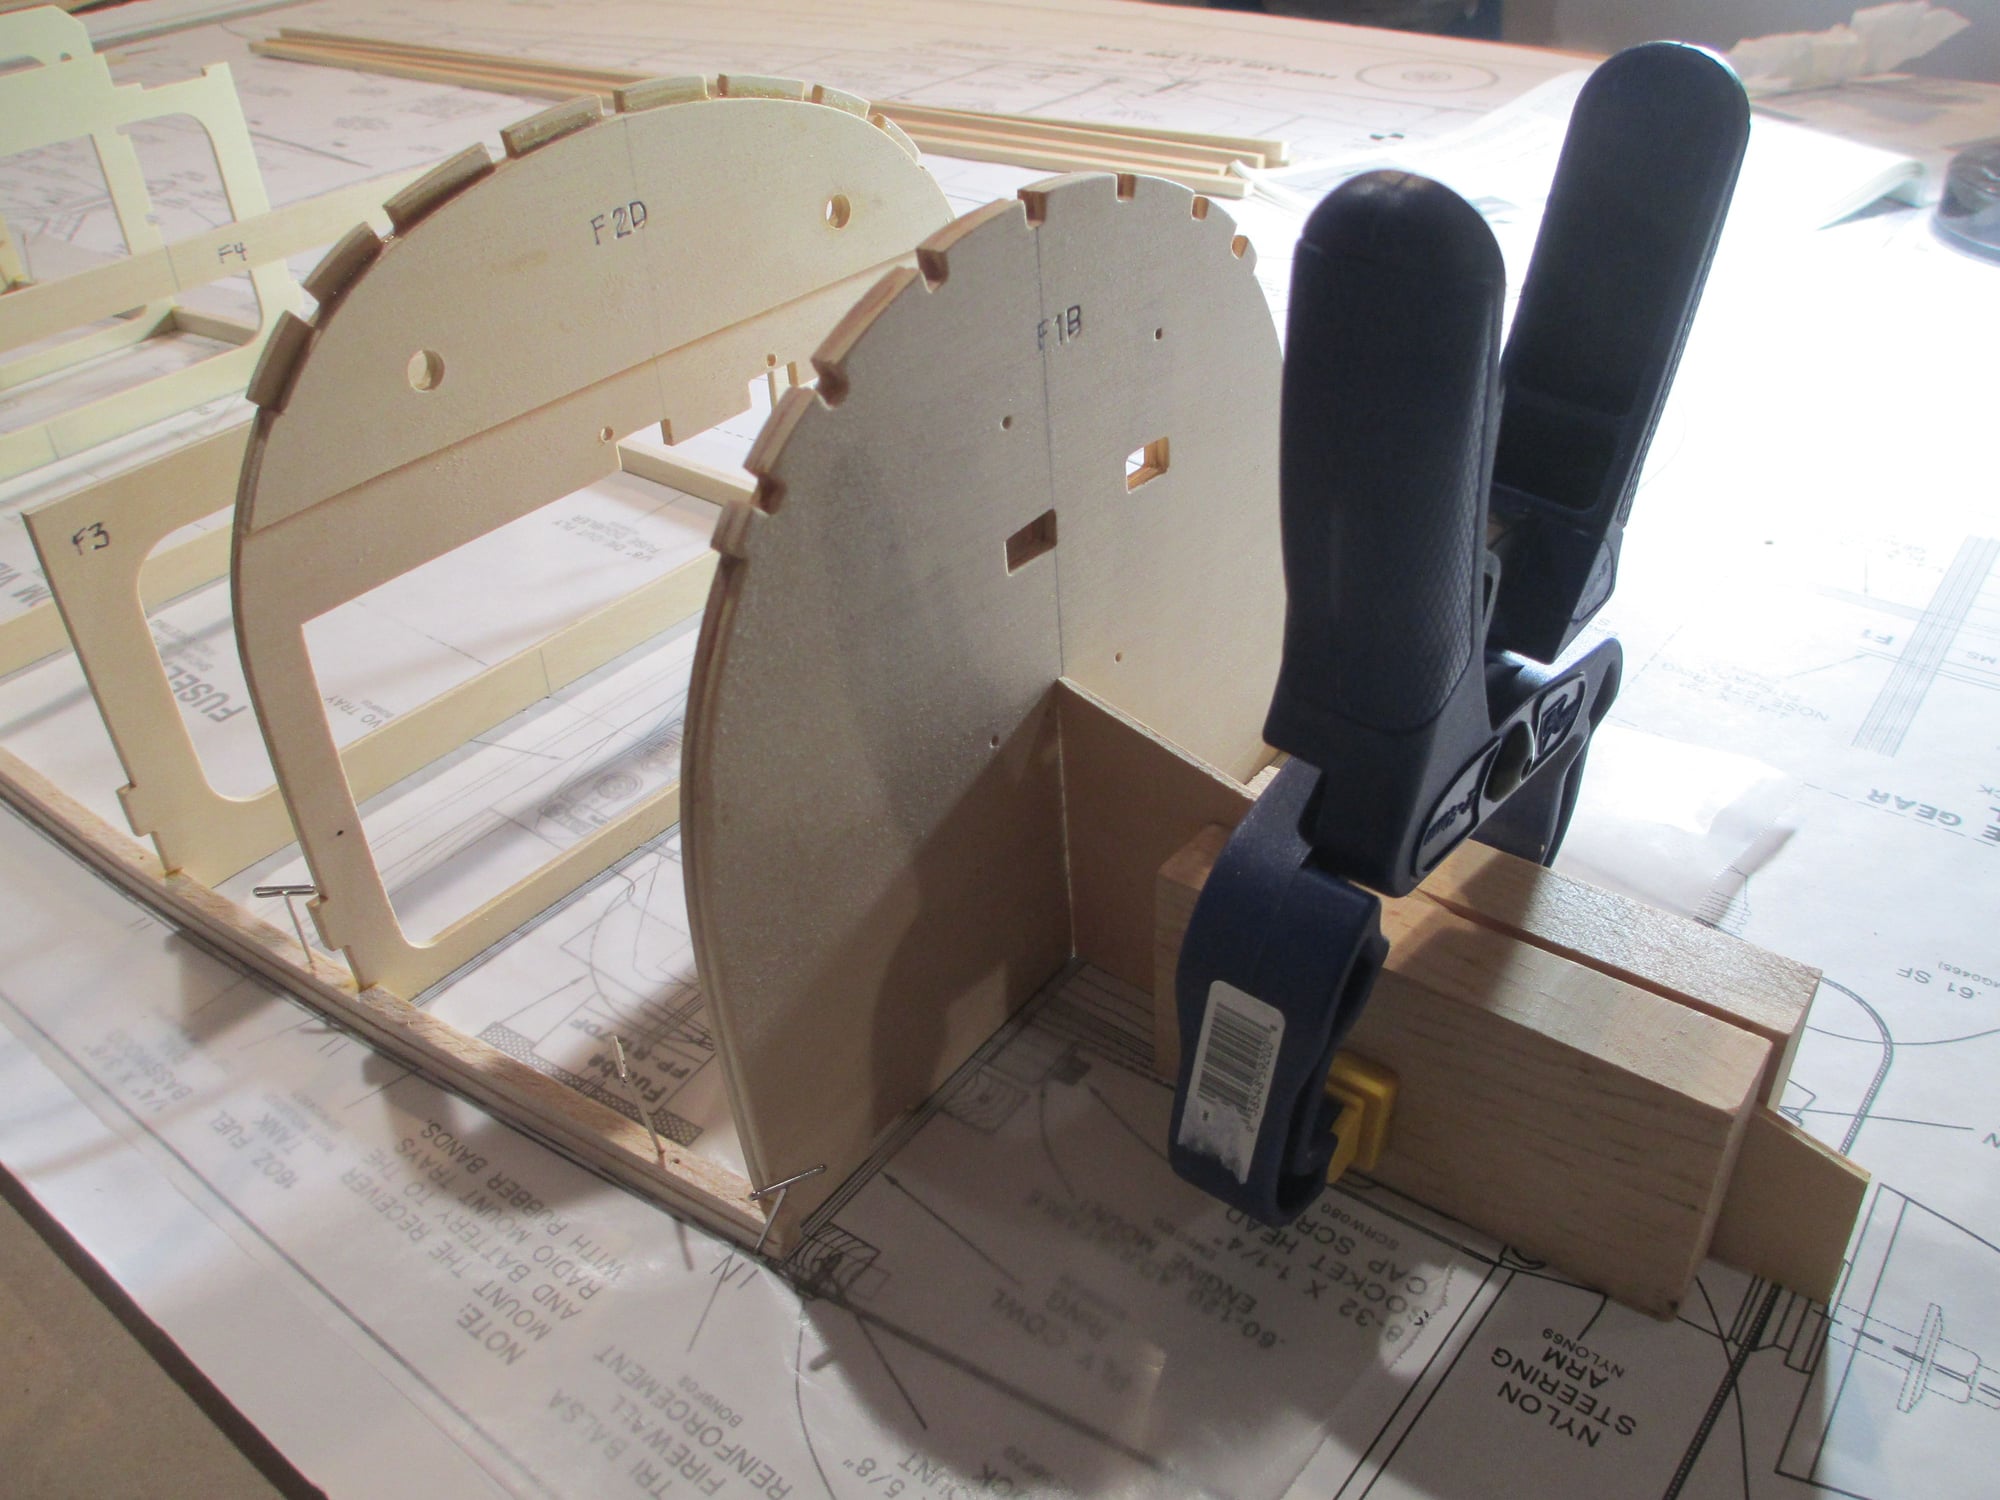
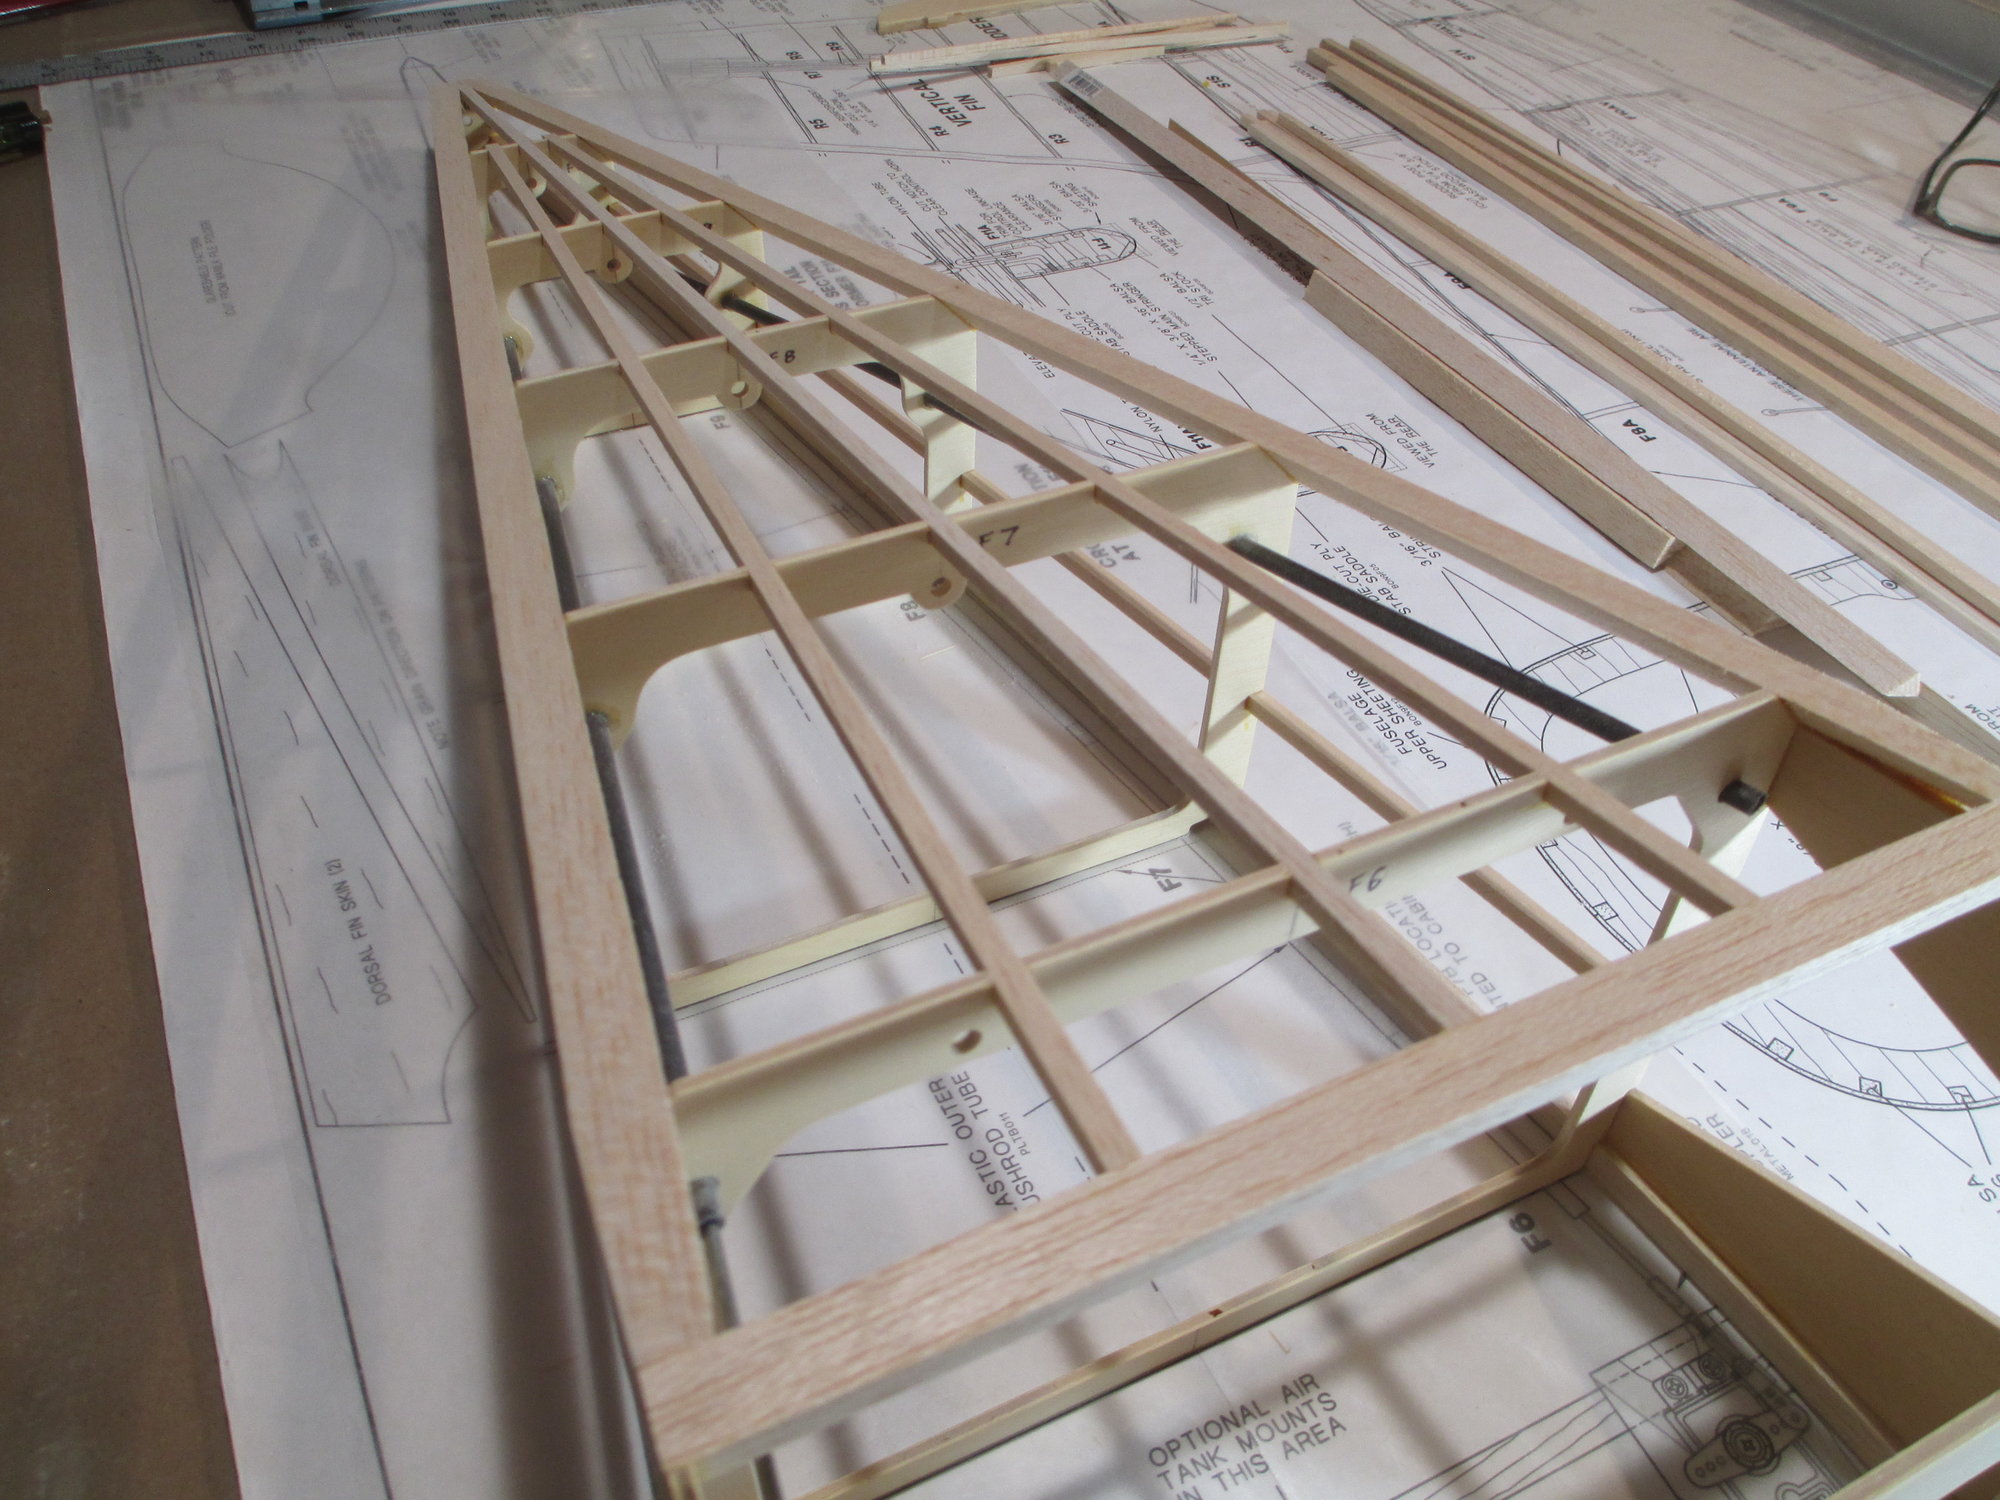
Before the plywood side doublers were installed, I took the time to sand both sides as well as true up all of the edges.
Two 1/8" plywood fuse side doublers get glued to the right and left sides of the fuselage next. I decided to glue the left side on first (remember the fuse is upside down) using my blocks and clamps. Note, in all the photos the plywood is not glued to the firewall former yet.
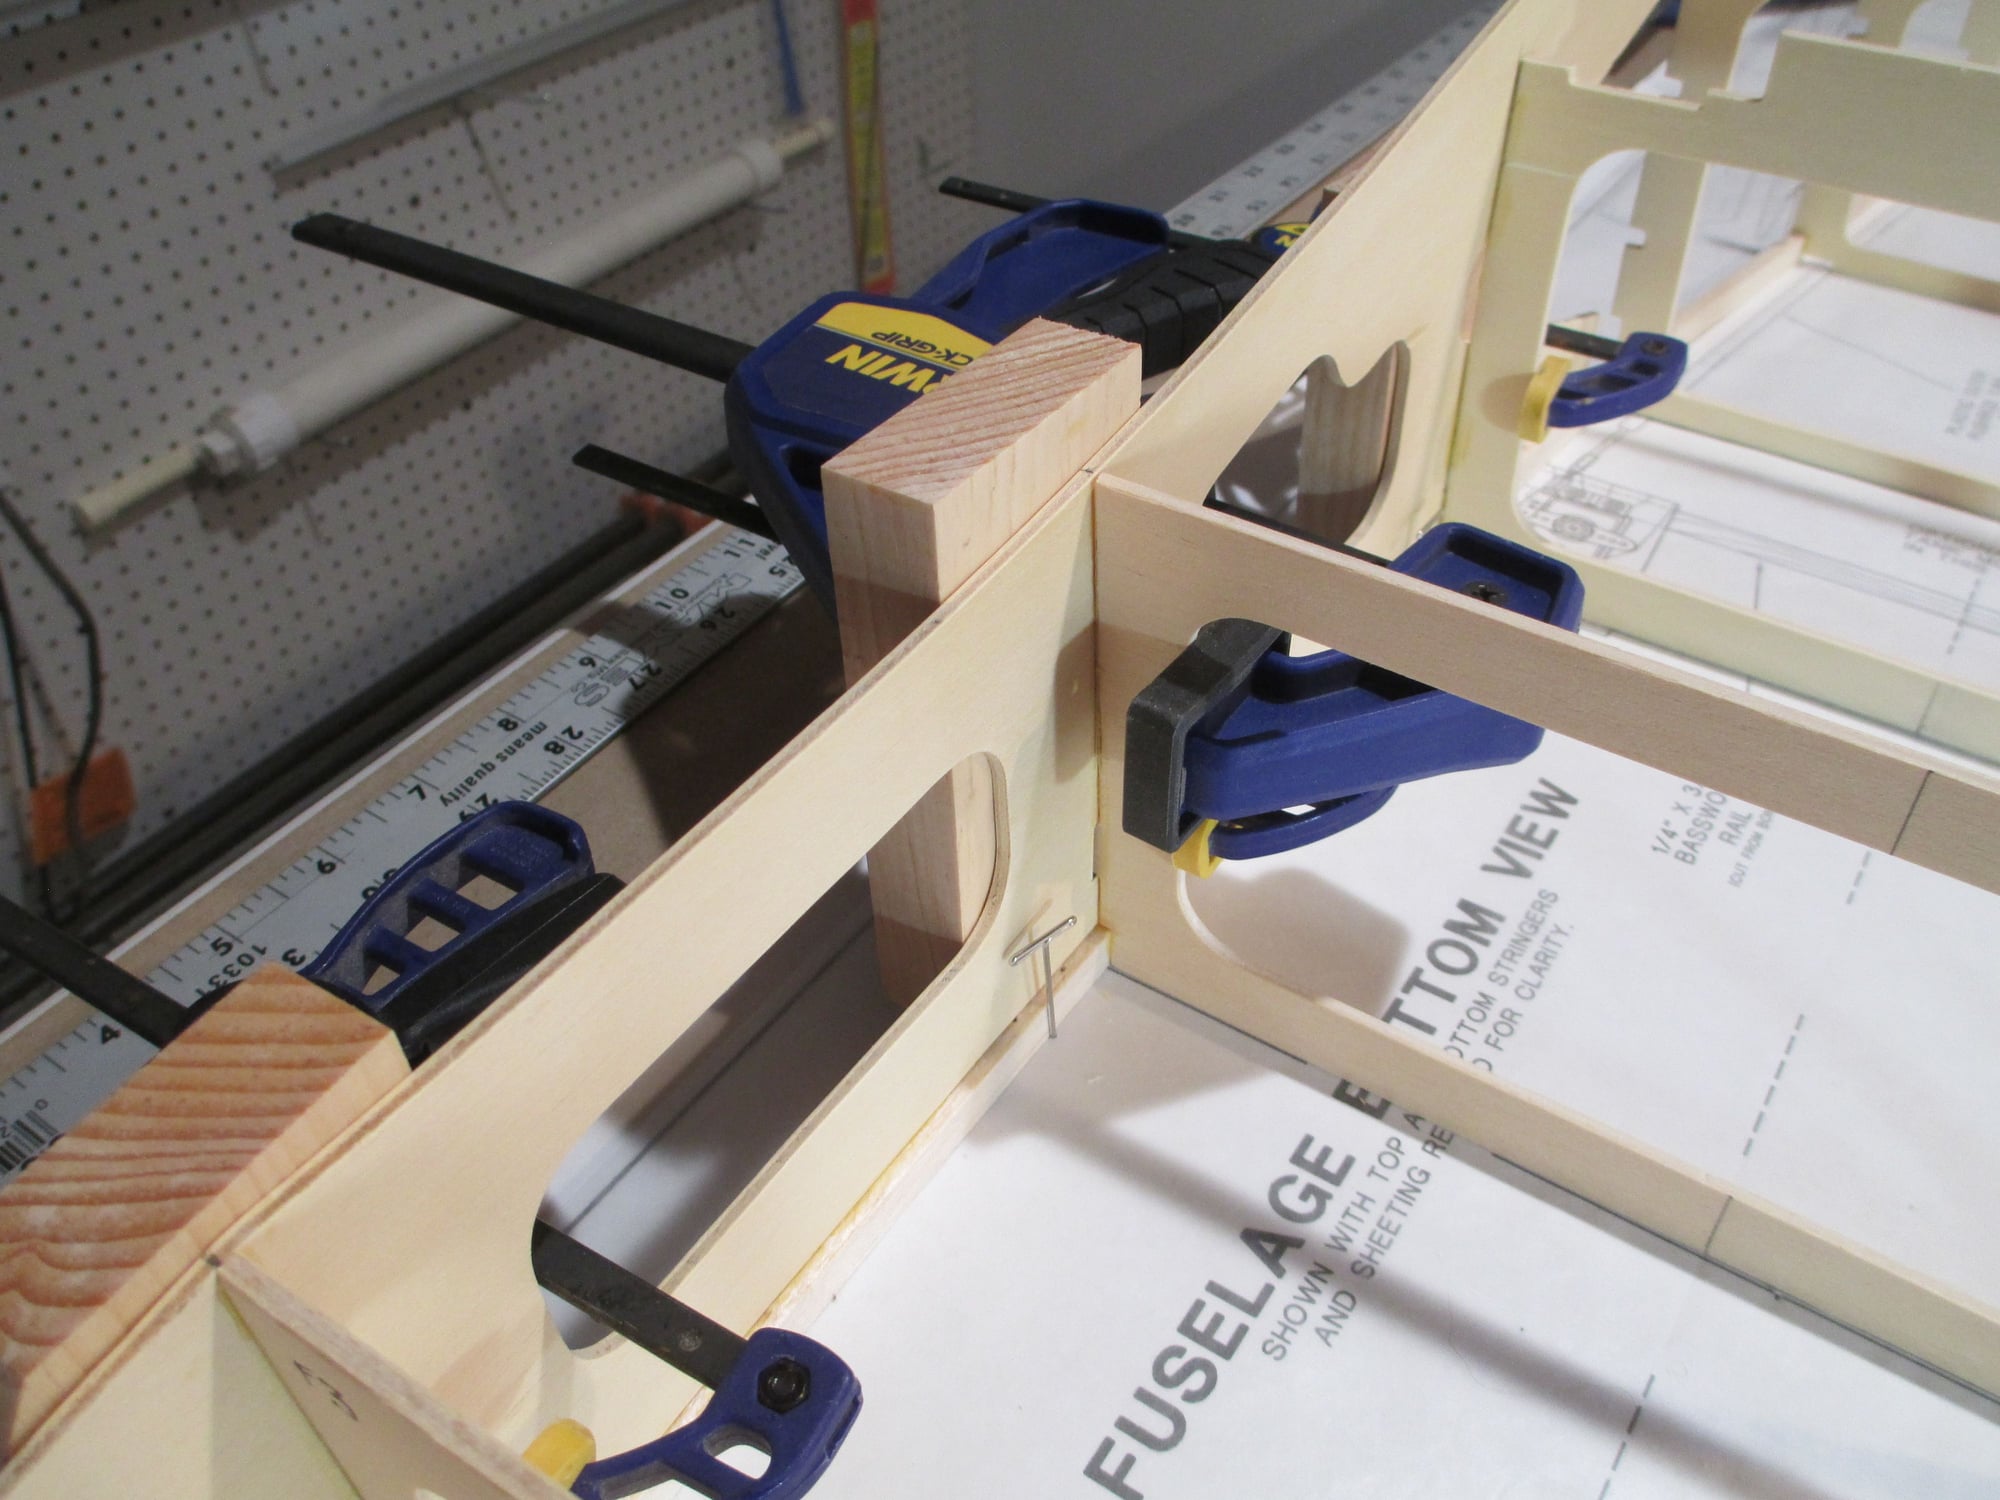
The blocks help spread the clamping load evenly.
Once the left side dried, I glued on the right side. Here I'm using my clamps across the fuselage. All you need is a small amount of clamping pressure as too much will bow the formers.
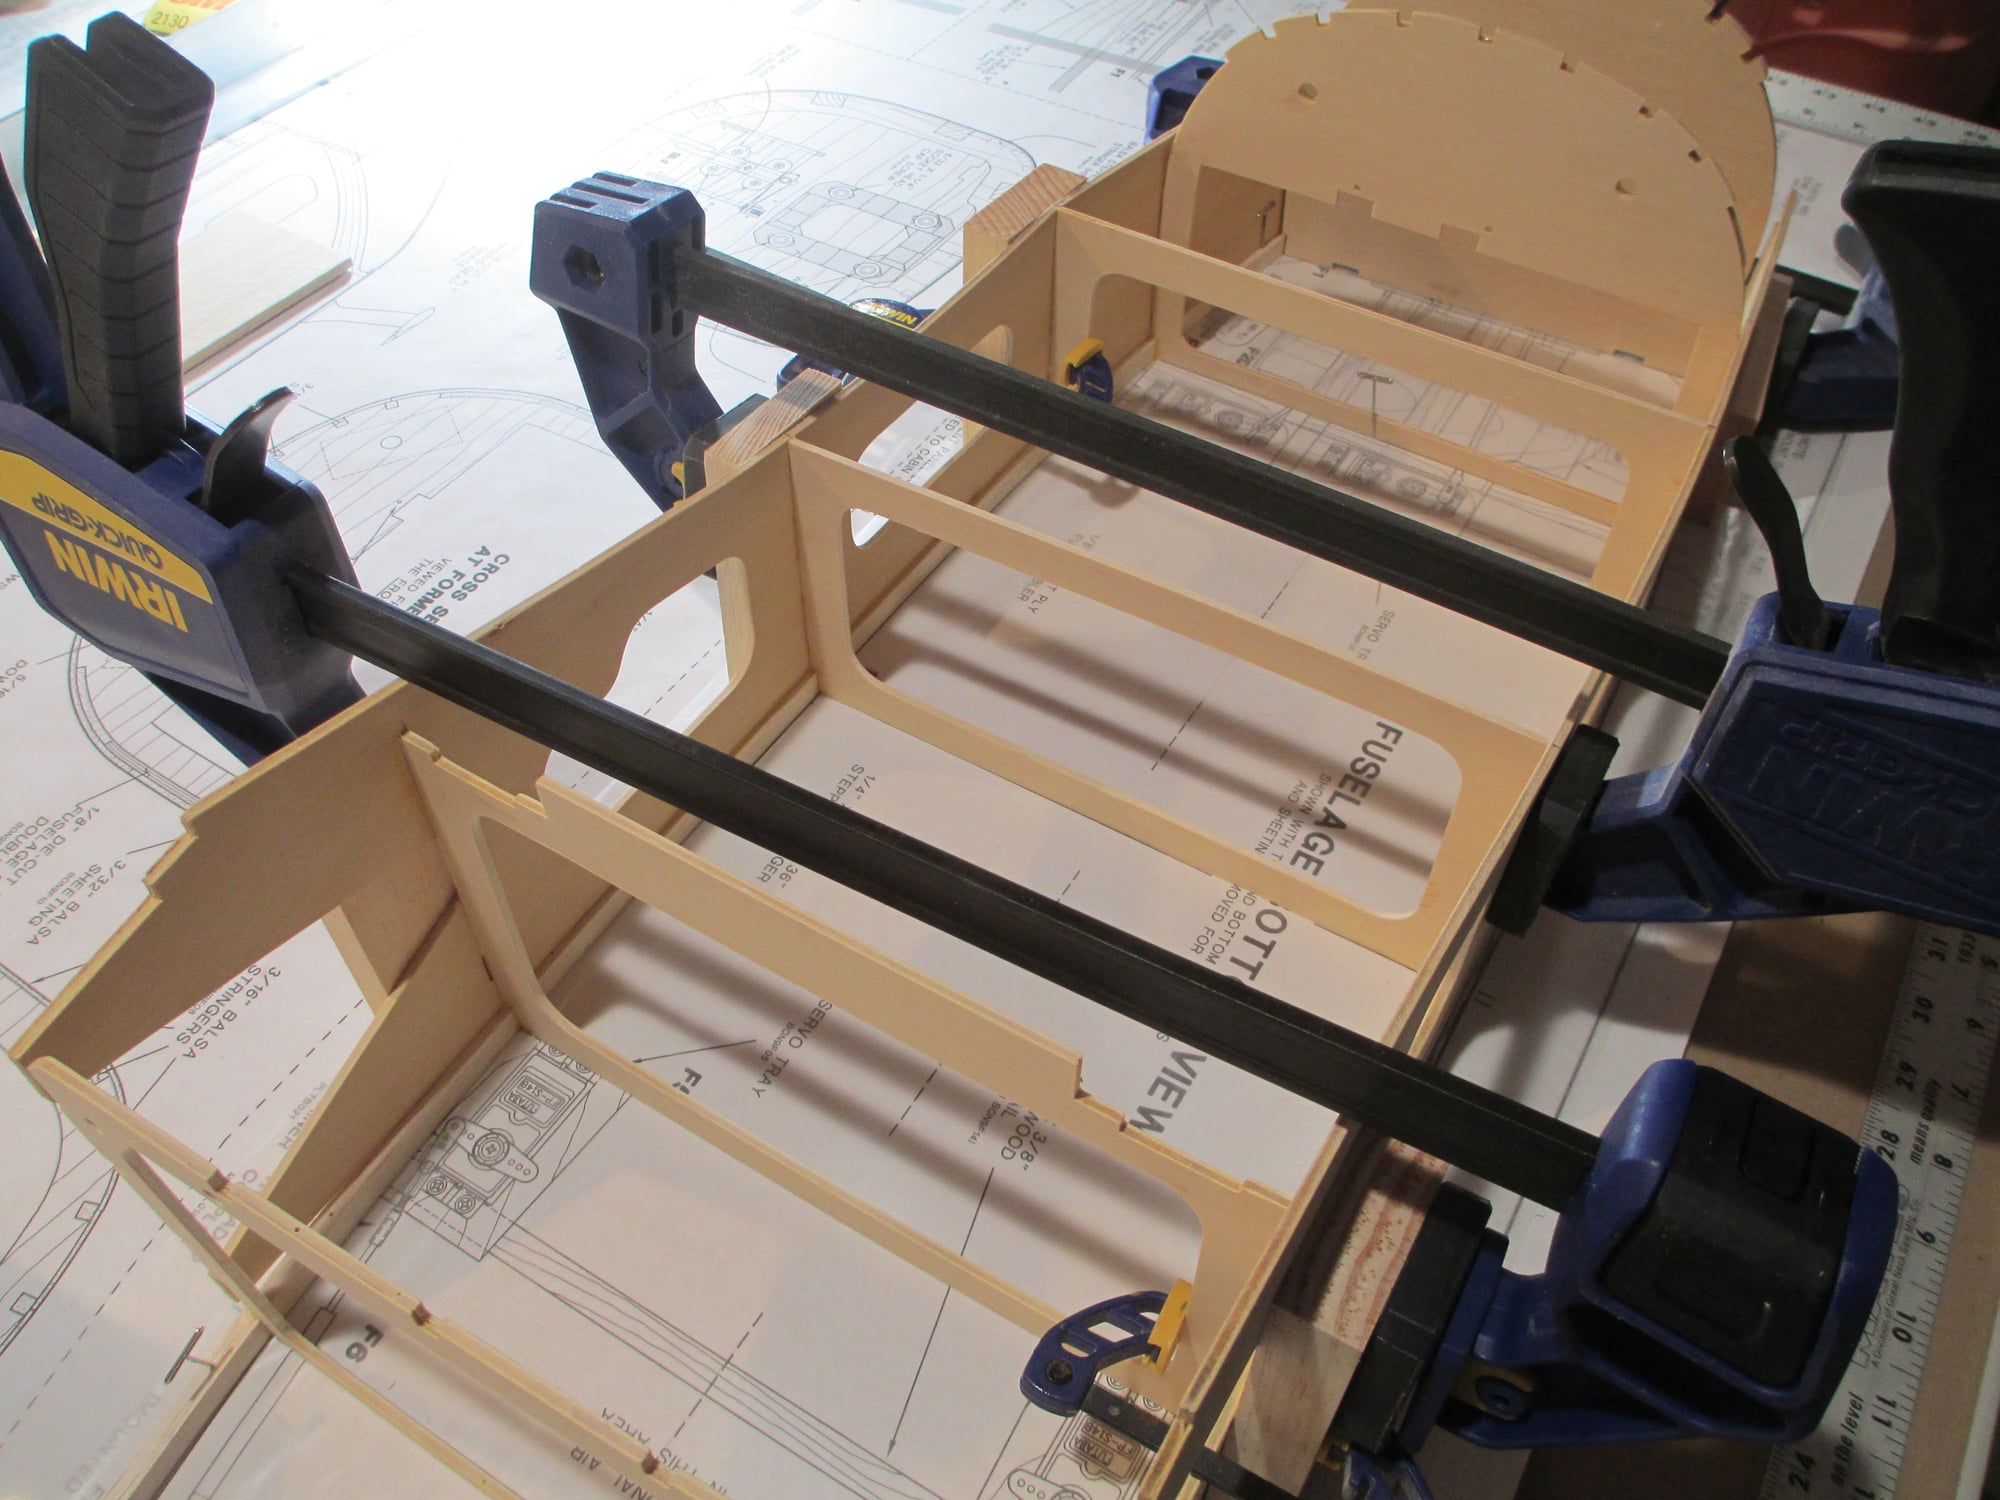
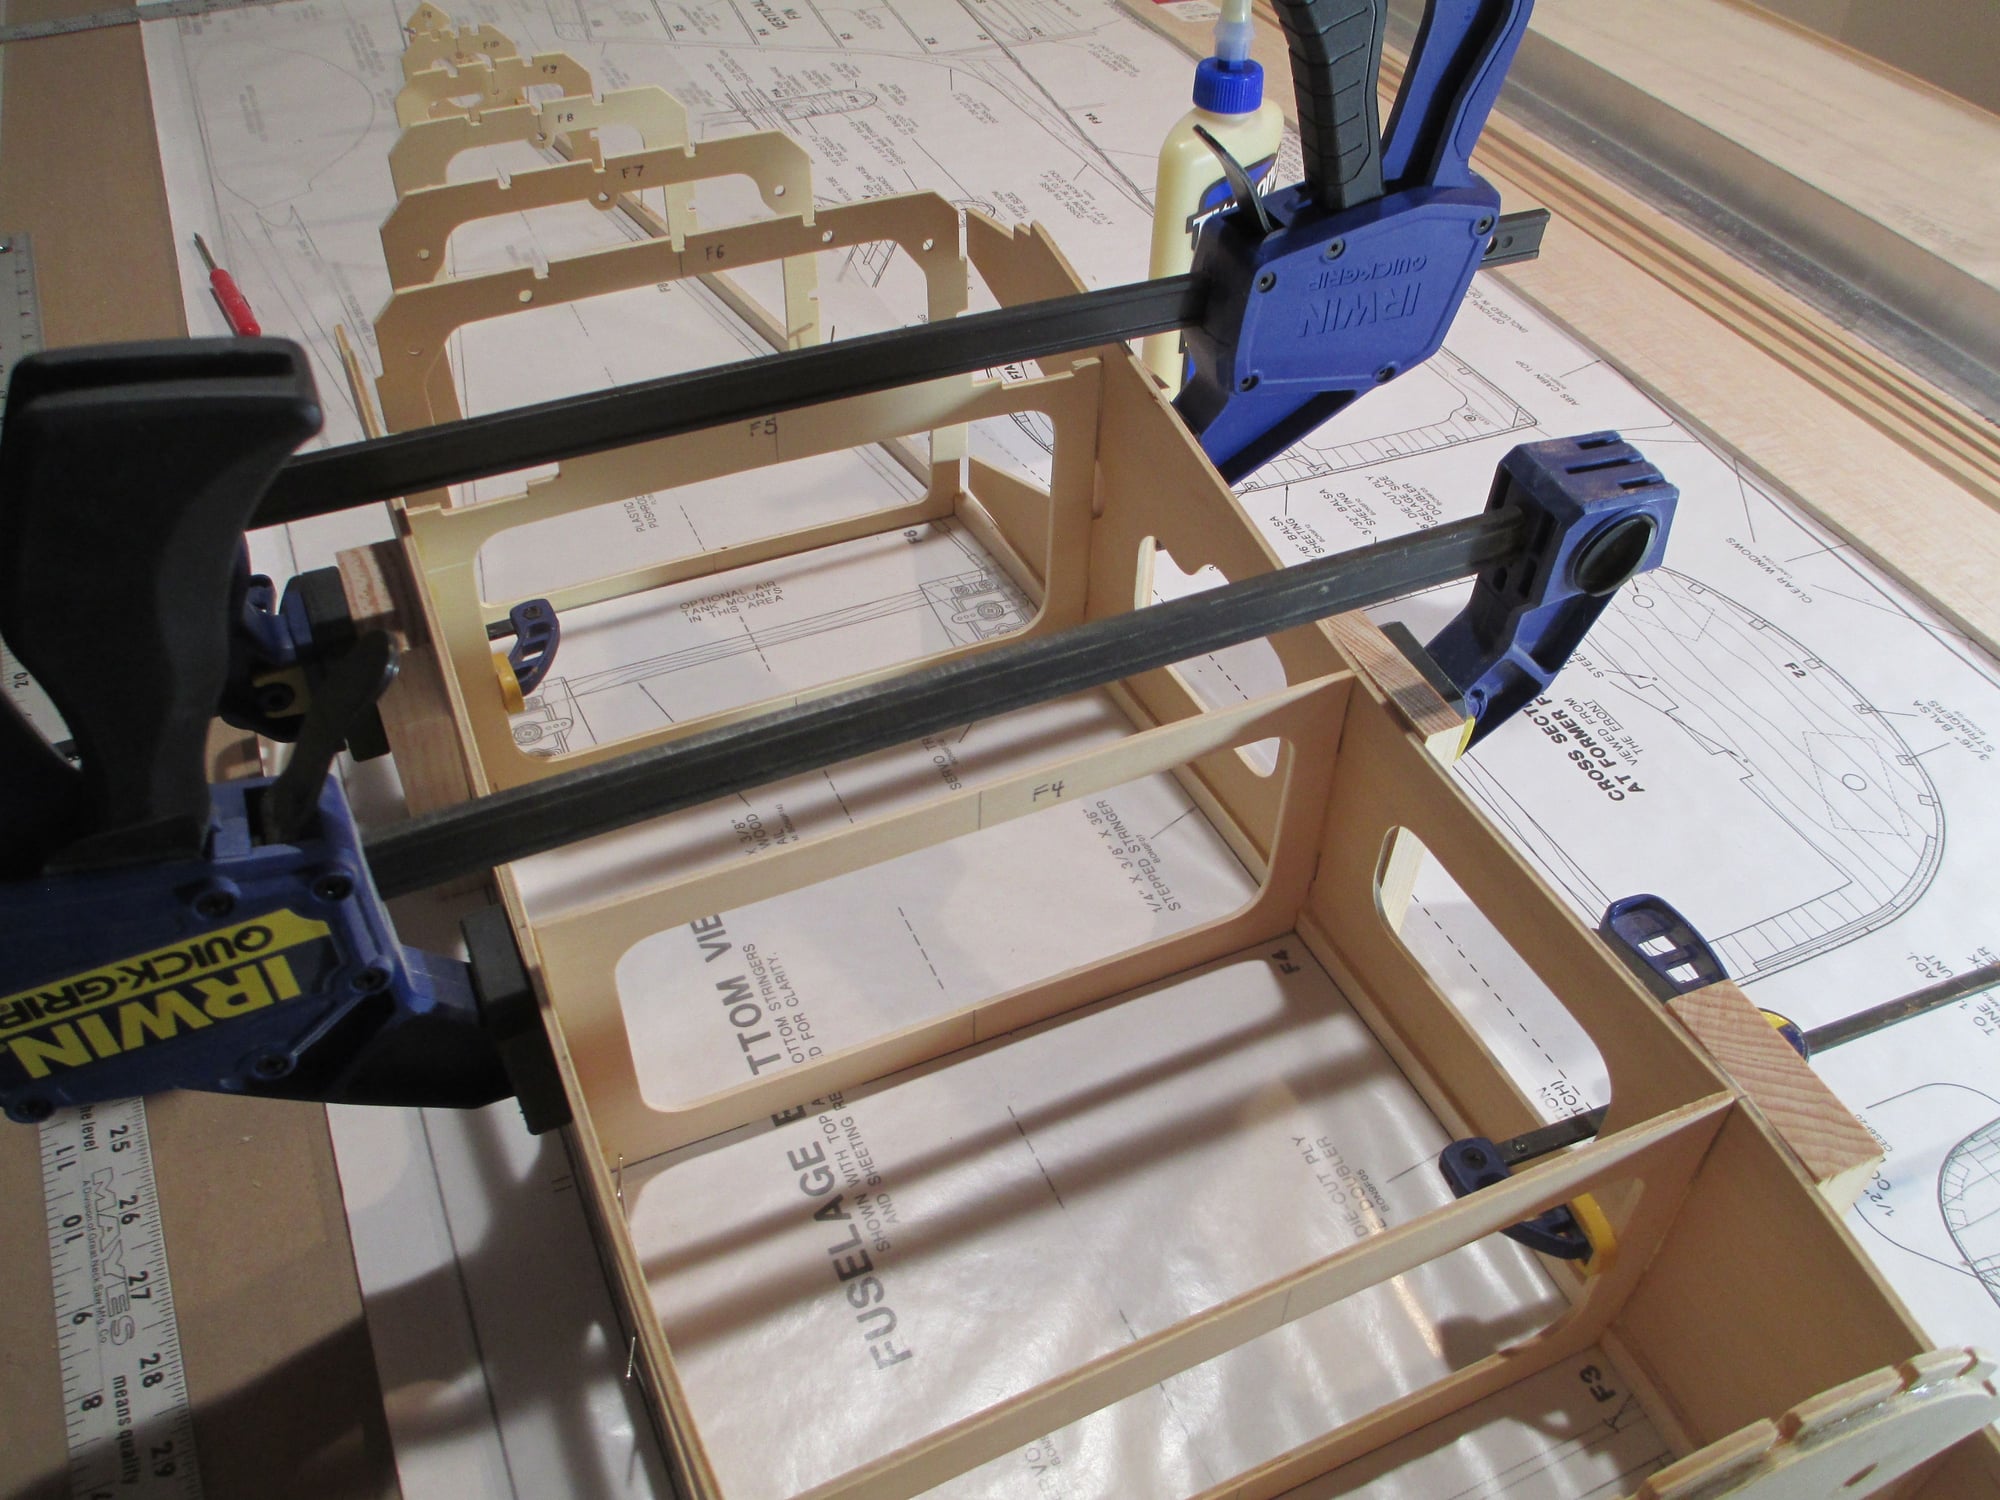
Note that the centerline of each former is directly over the plan.
Two 1/8" plywood fuse side doublers get glued to the right and left sides of the fuselage next. I decided to glue the left side on first (remember the fuse is upside down) using my blocks and clamps. Note, in all the photos the plywood is not glued to the firewall former yet.
The blocks help spread the clamping load evenly.
Once the left side dried, I glued on the right side. Here I'm using my clamps across the fuselage. All you need is a small amount of clamping pressure as too much will bow the formers.
Note that the centerline of each former is directly over the plan.
Last edited by VincentJ; 11-09-2019 at 04:23 AM.
11-09-2019, 09:31 AM
#413

It's been about 4 years since I have done a completely balsa built up airplane. I had almost forgotten how many parts are involved and all the tooling required to do it correctly. Great work as usual Vincent, but I think I'm going to stick with my composite builds LOL.
11-09-2019, 10:01 AM
#414
Thread Starter
It's been about 4 years since I have done a completely balsa built up airplane. I had almost forgotten how many parts are involved and all the tooling required to do it correctly. Great work as usual Vincent, but I think I'm going to stick with my composite builds LOL.
11-09-2019, 01:16 PM
#415
Not sure if you noticed but you can also order them individually in each size. For my boats, I've found the one and two inch work well for the areas that will be under the decks. I really like the three inch for places where straightness of frames(in this case the frame the turn fin is mounted to) is an over riding issue in construction
11-09-2019, 01:20 PM
#416
Vincent I�ve been following along and learning too. Nice work on this build. I, too, throw my waste wood pieces in the wood burning stove.
Hydro when I got back into RC my first build was a scratch built Ugly Stik. Talk about building blocks, I used what I had on hand. LOL.
Hydro when I got back into RC my first build was a scratch built Ugly Stik. Talk about building blocks, I used what I had on hand. LOL.
11-10-2019, 09:33 AM
#417
Thread Starter
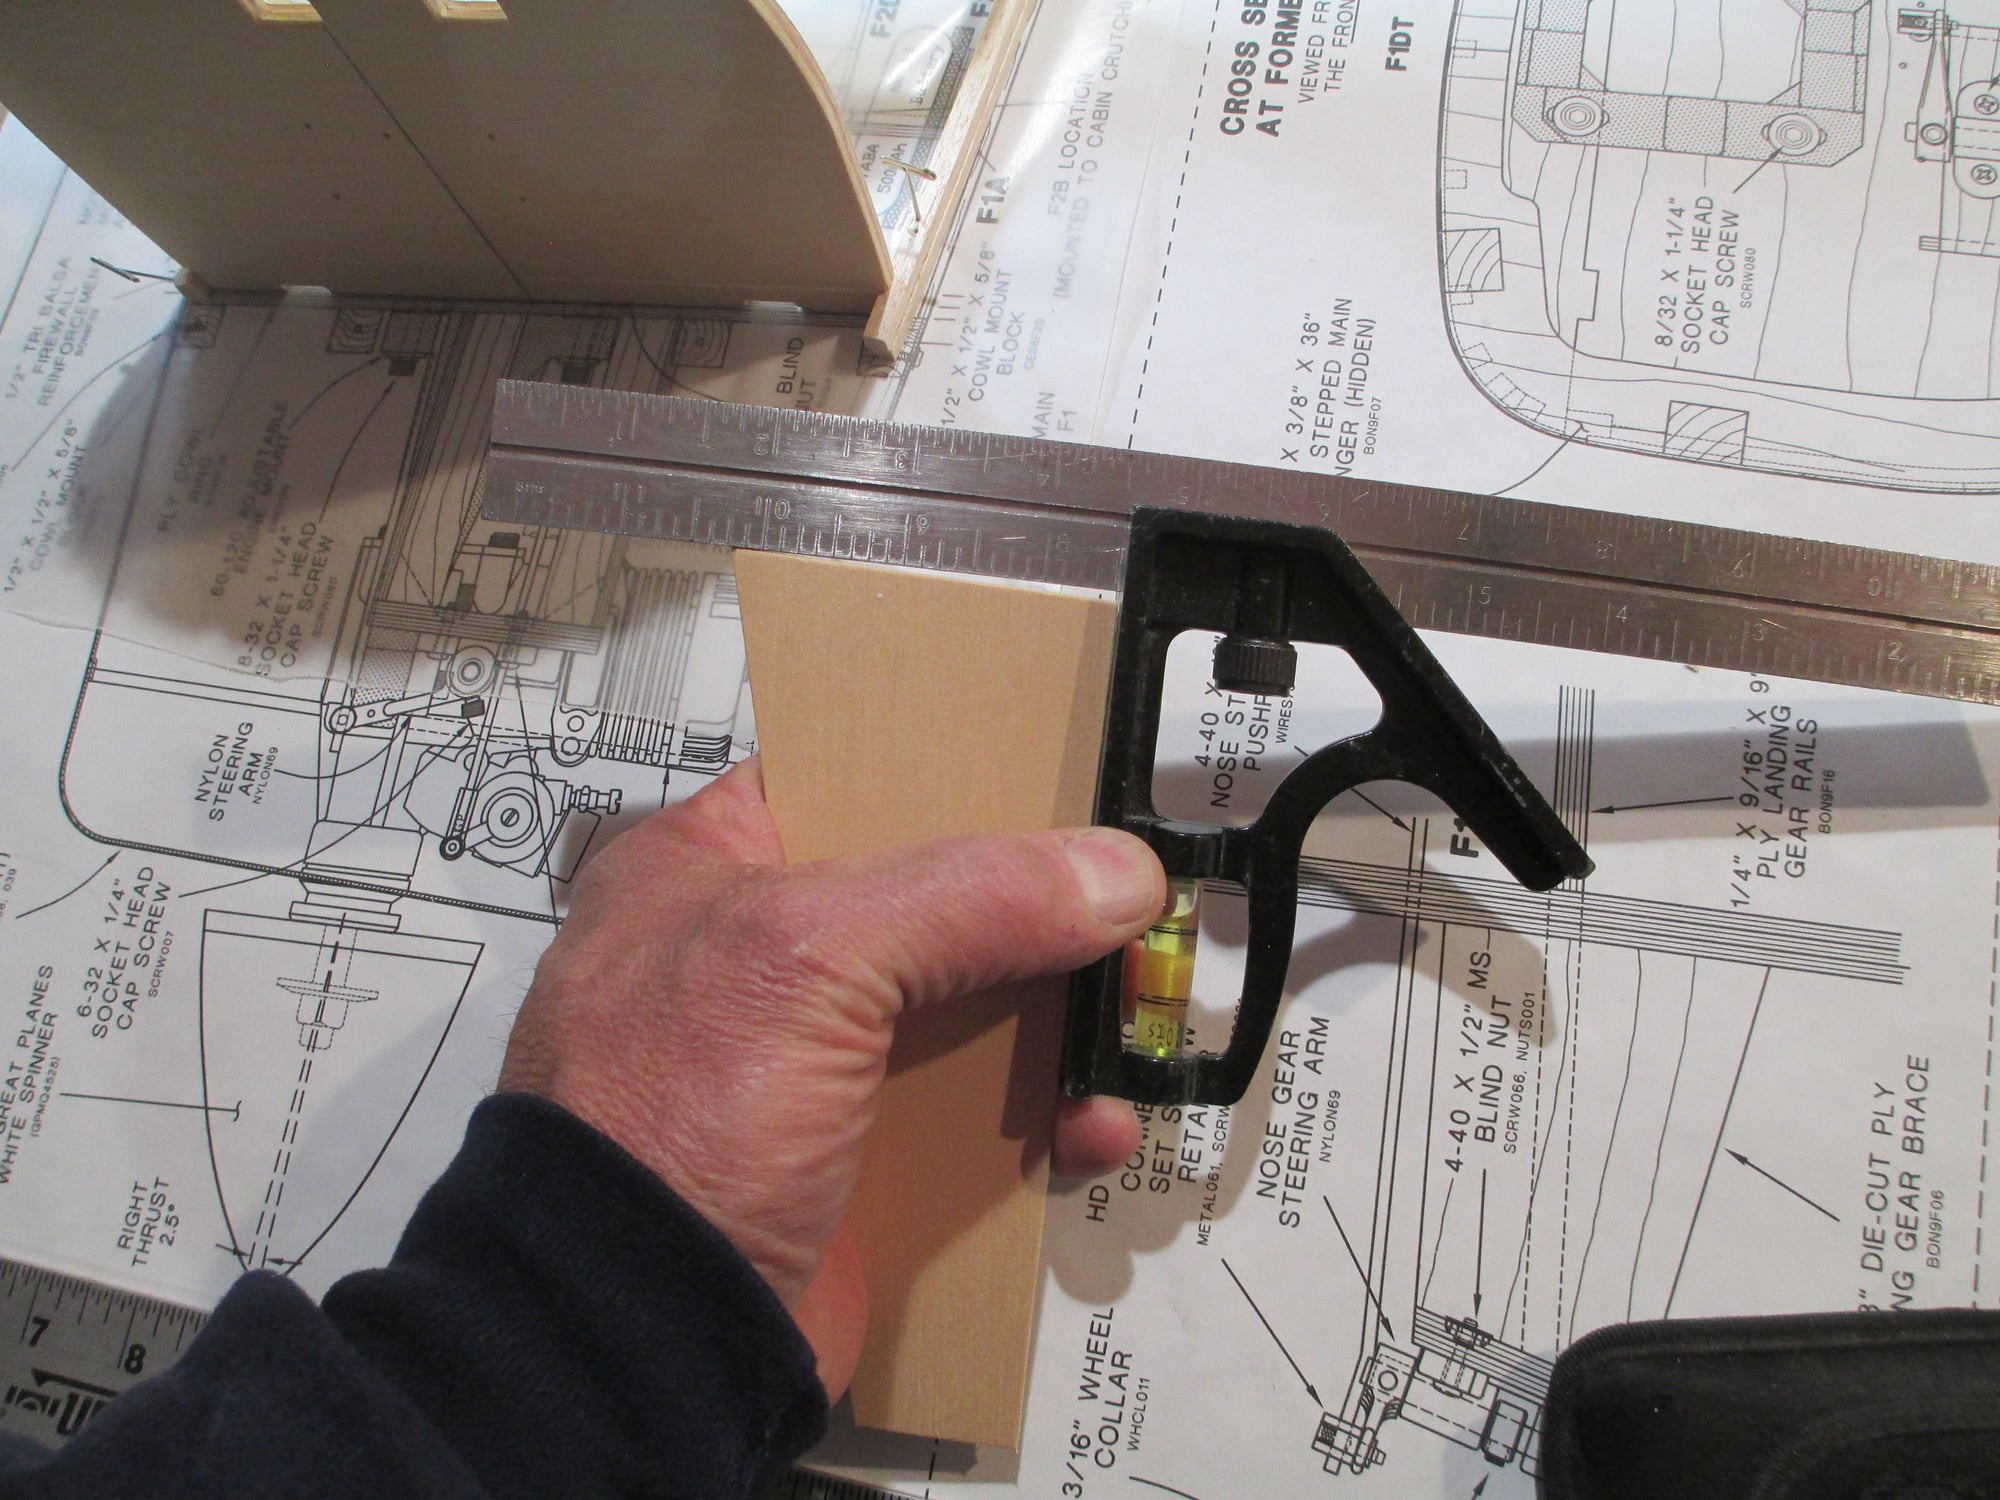
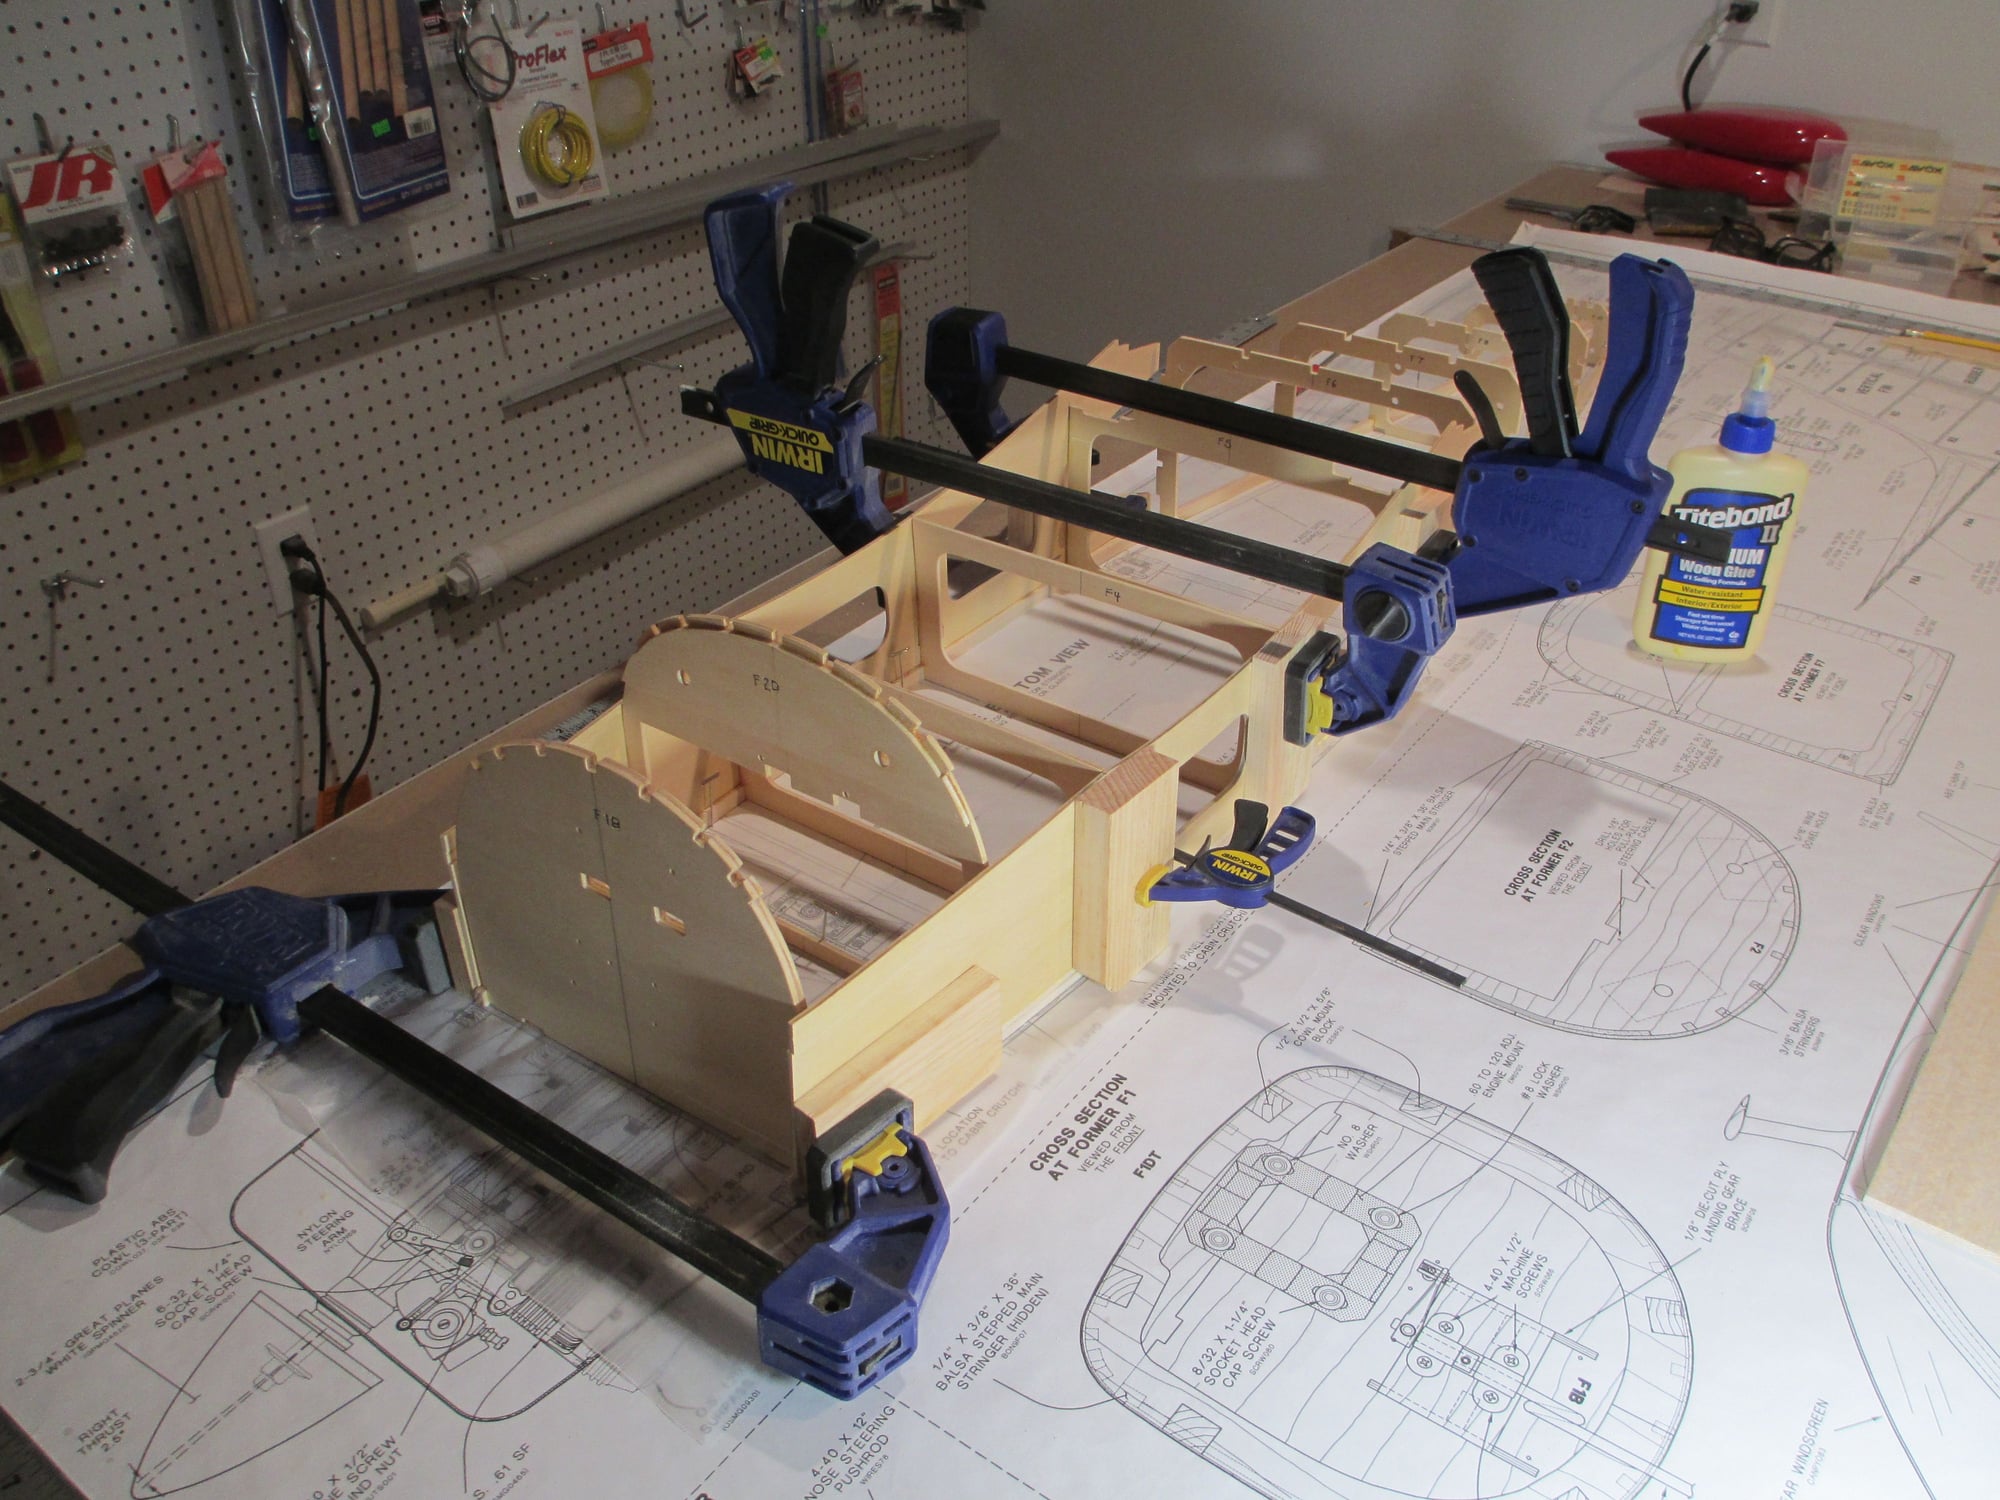
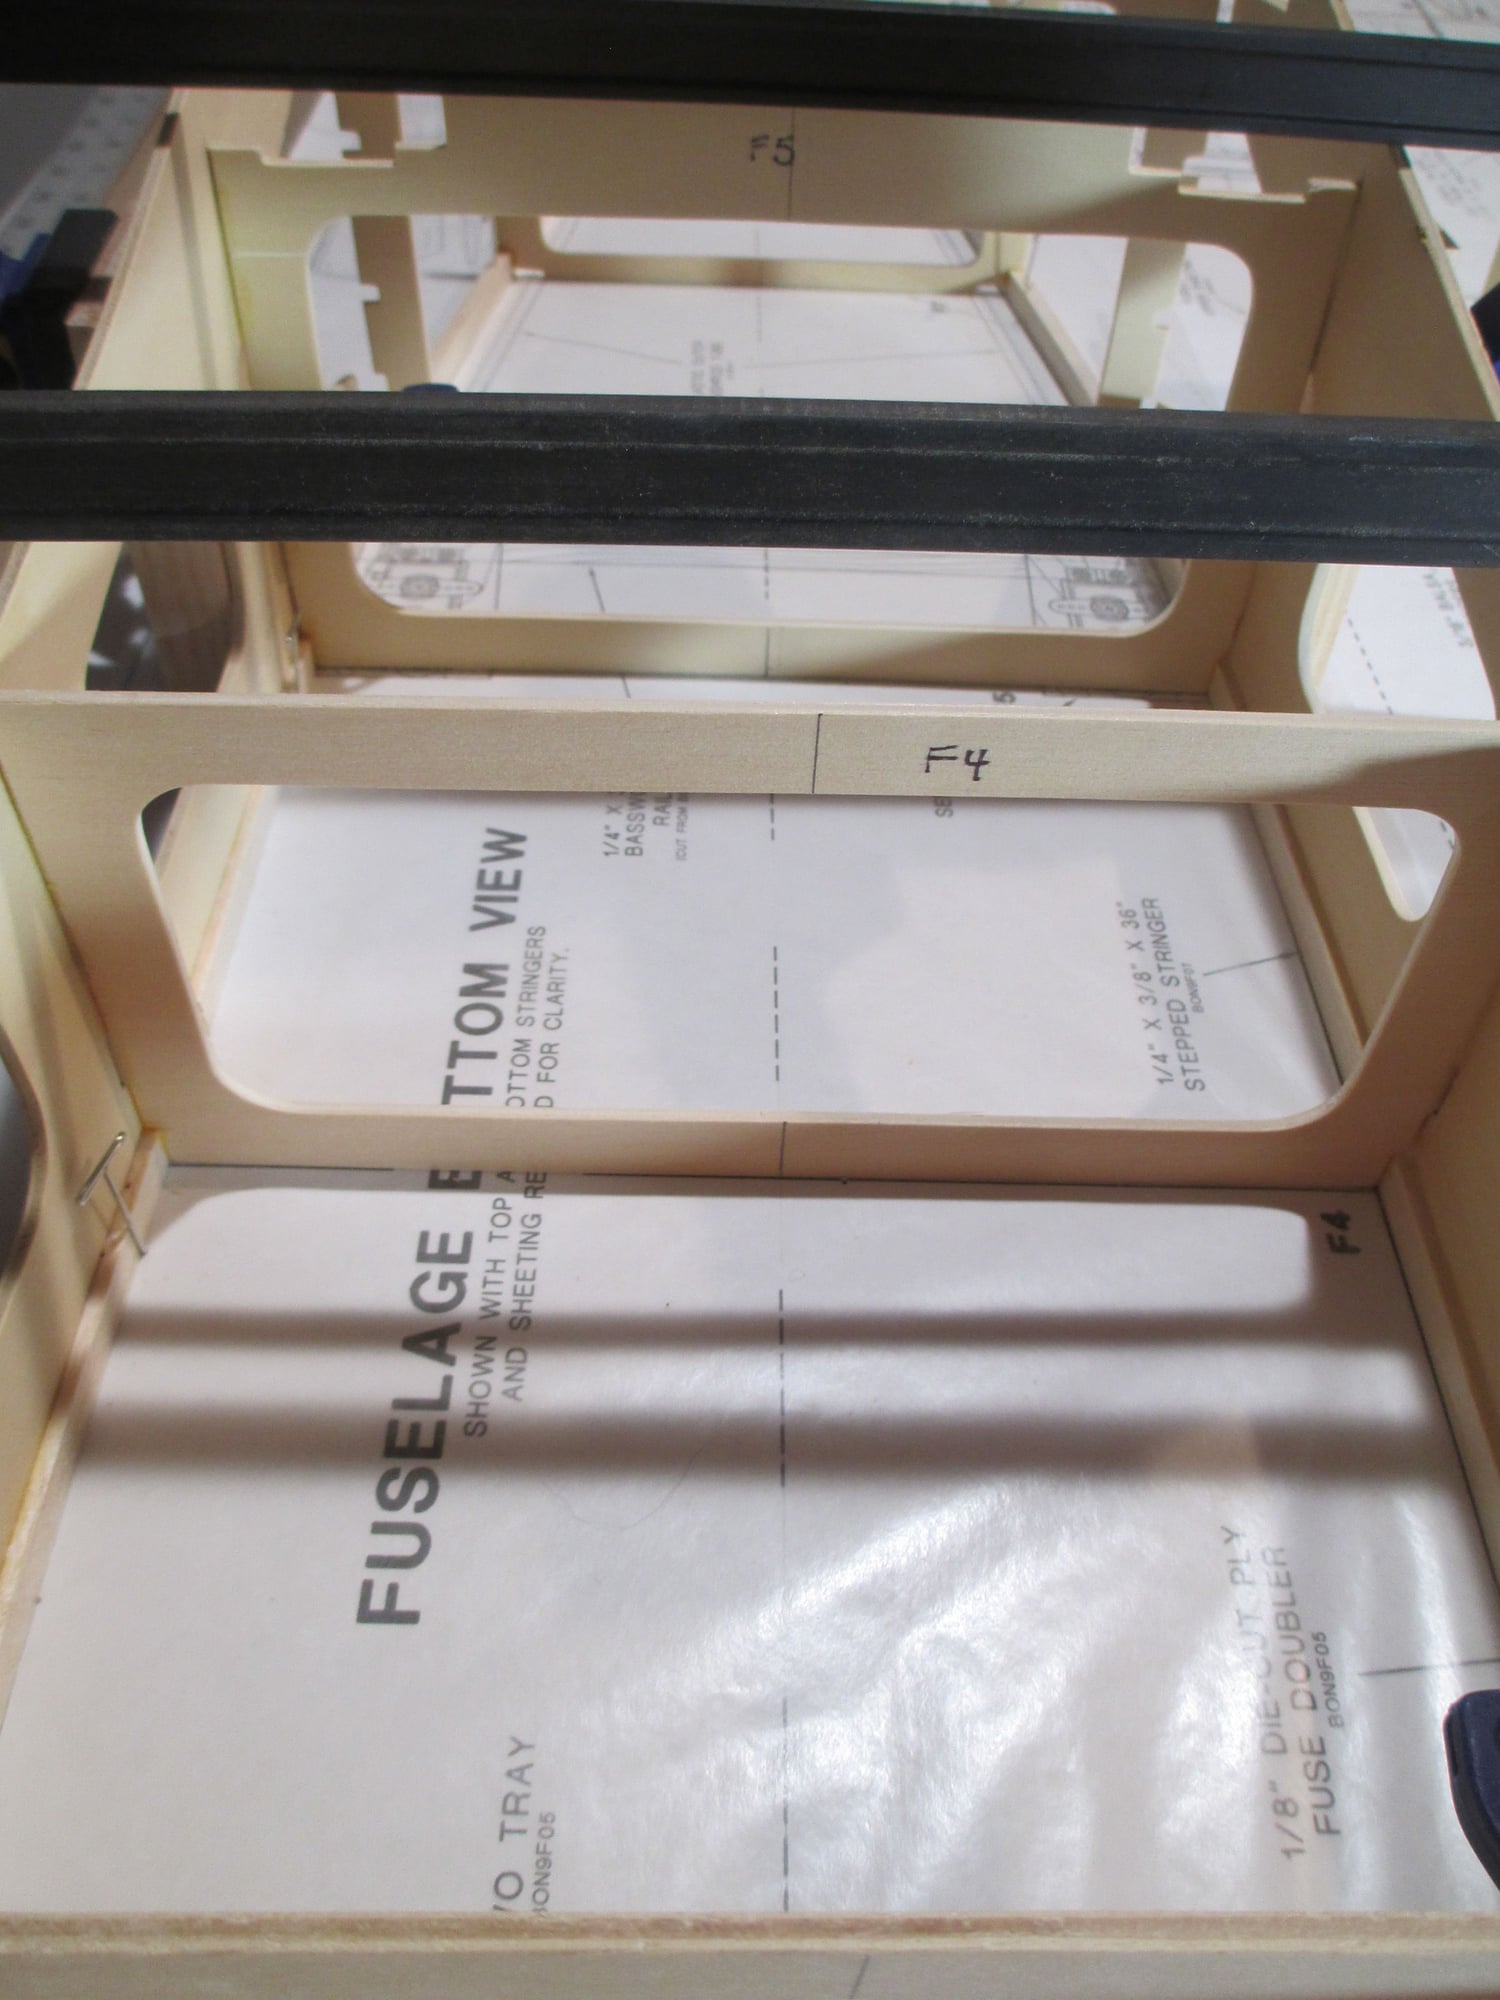
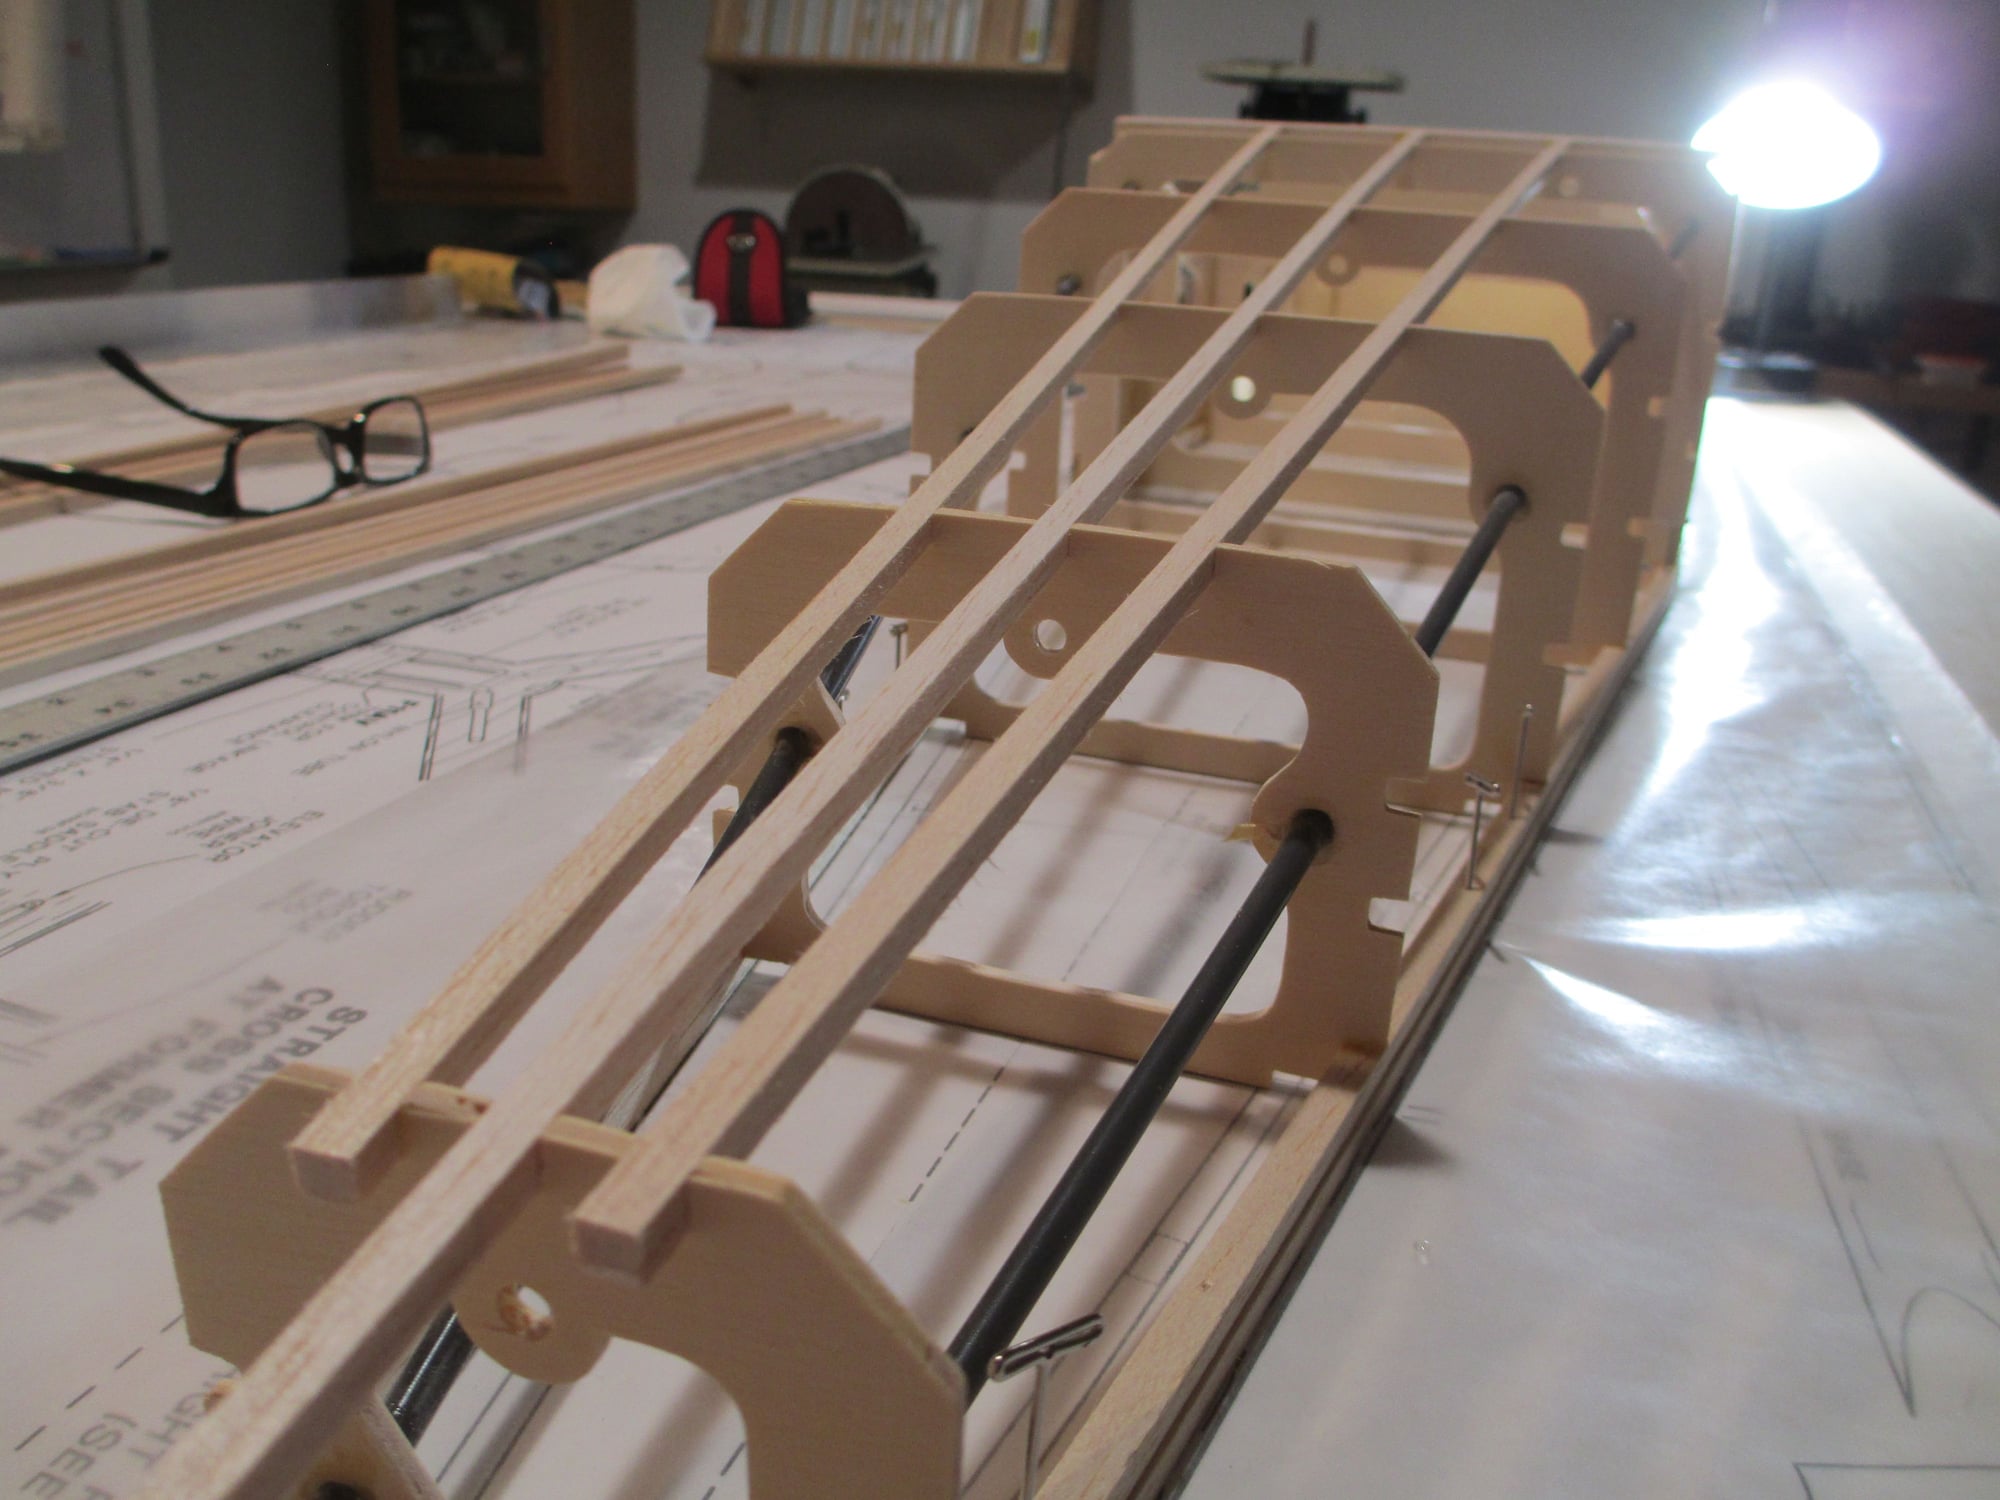
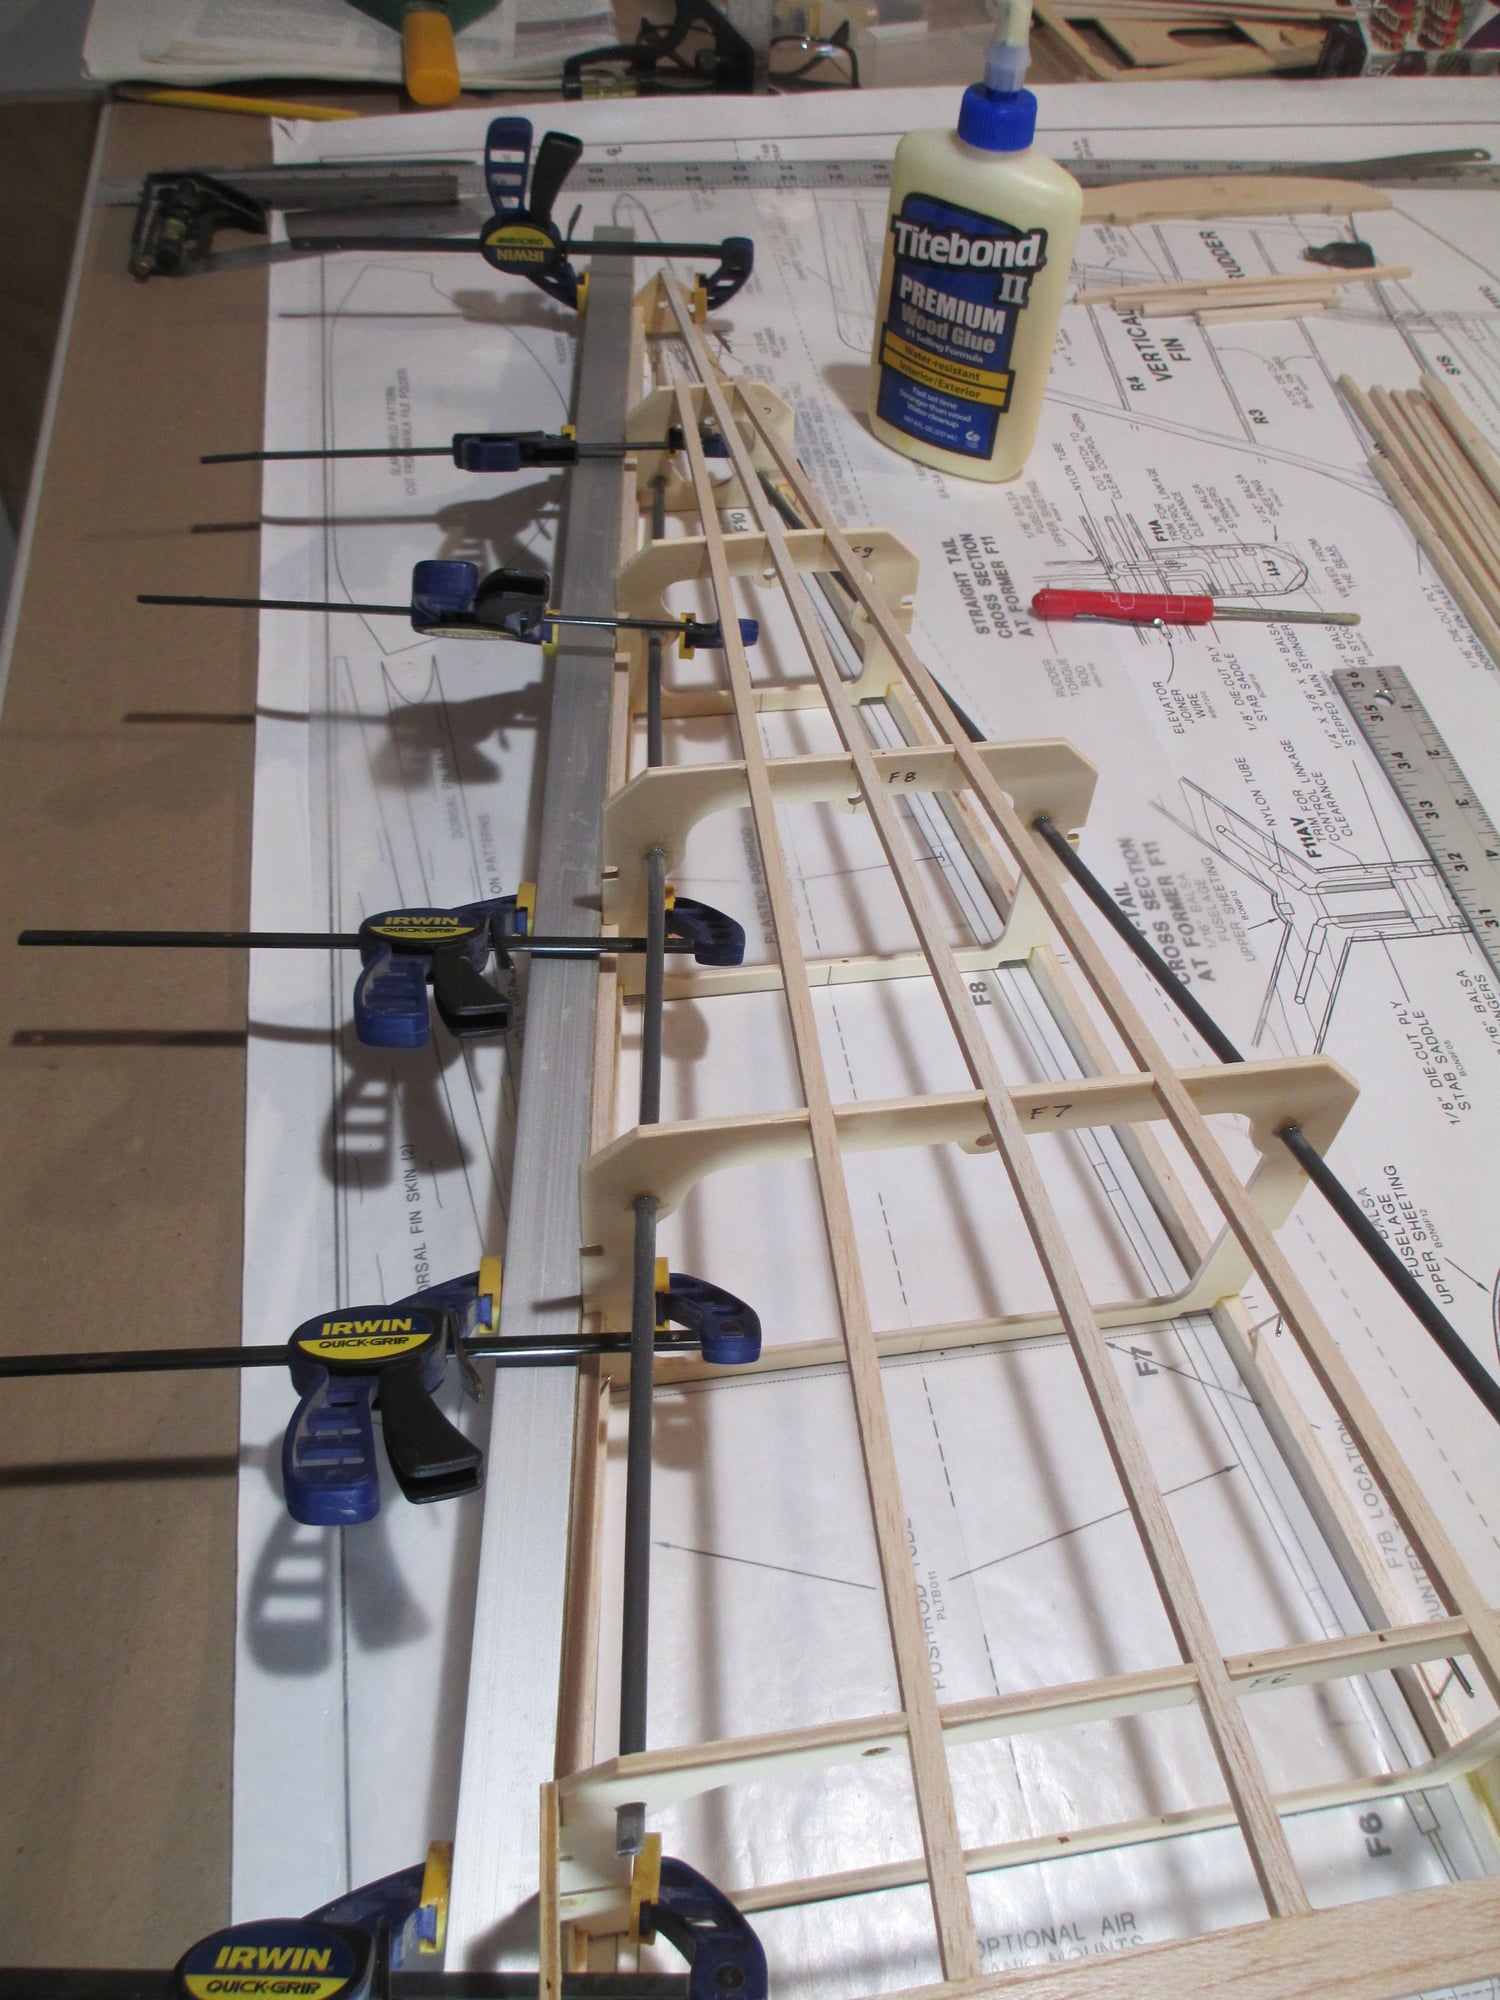
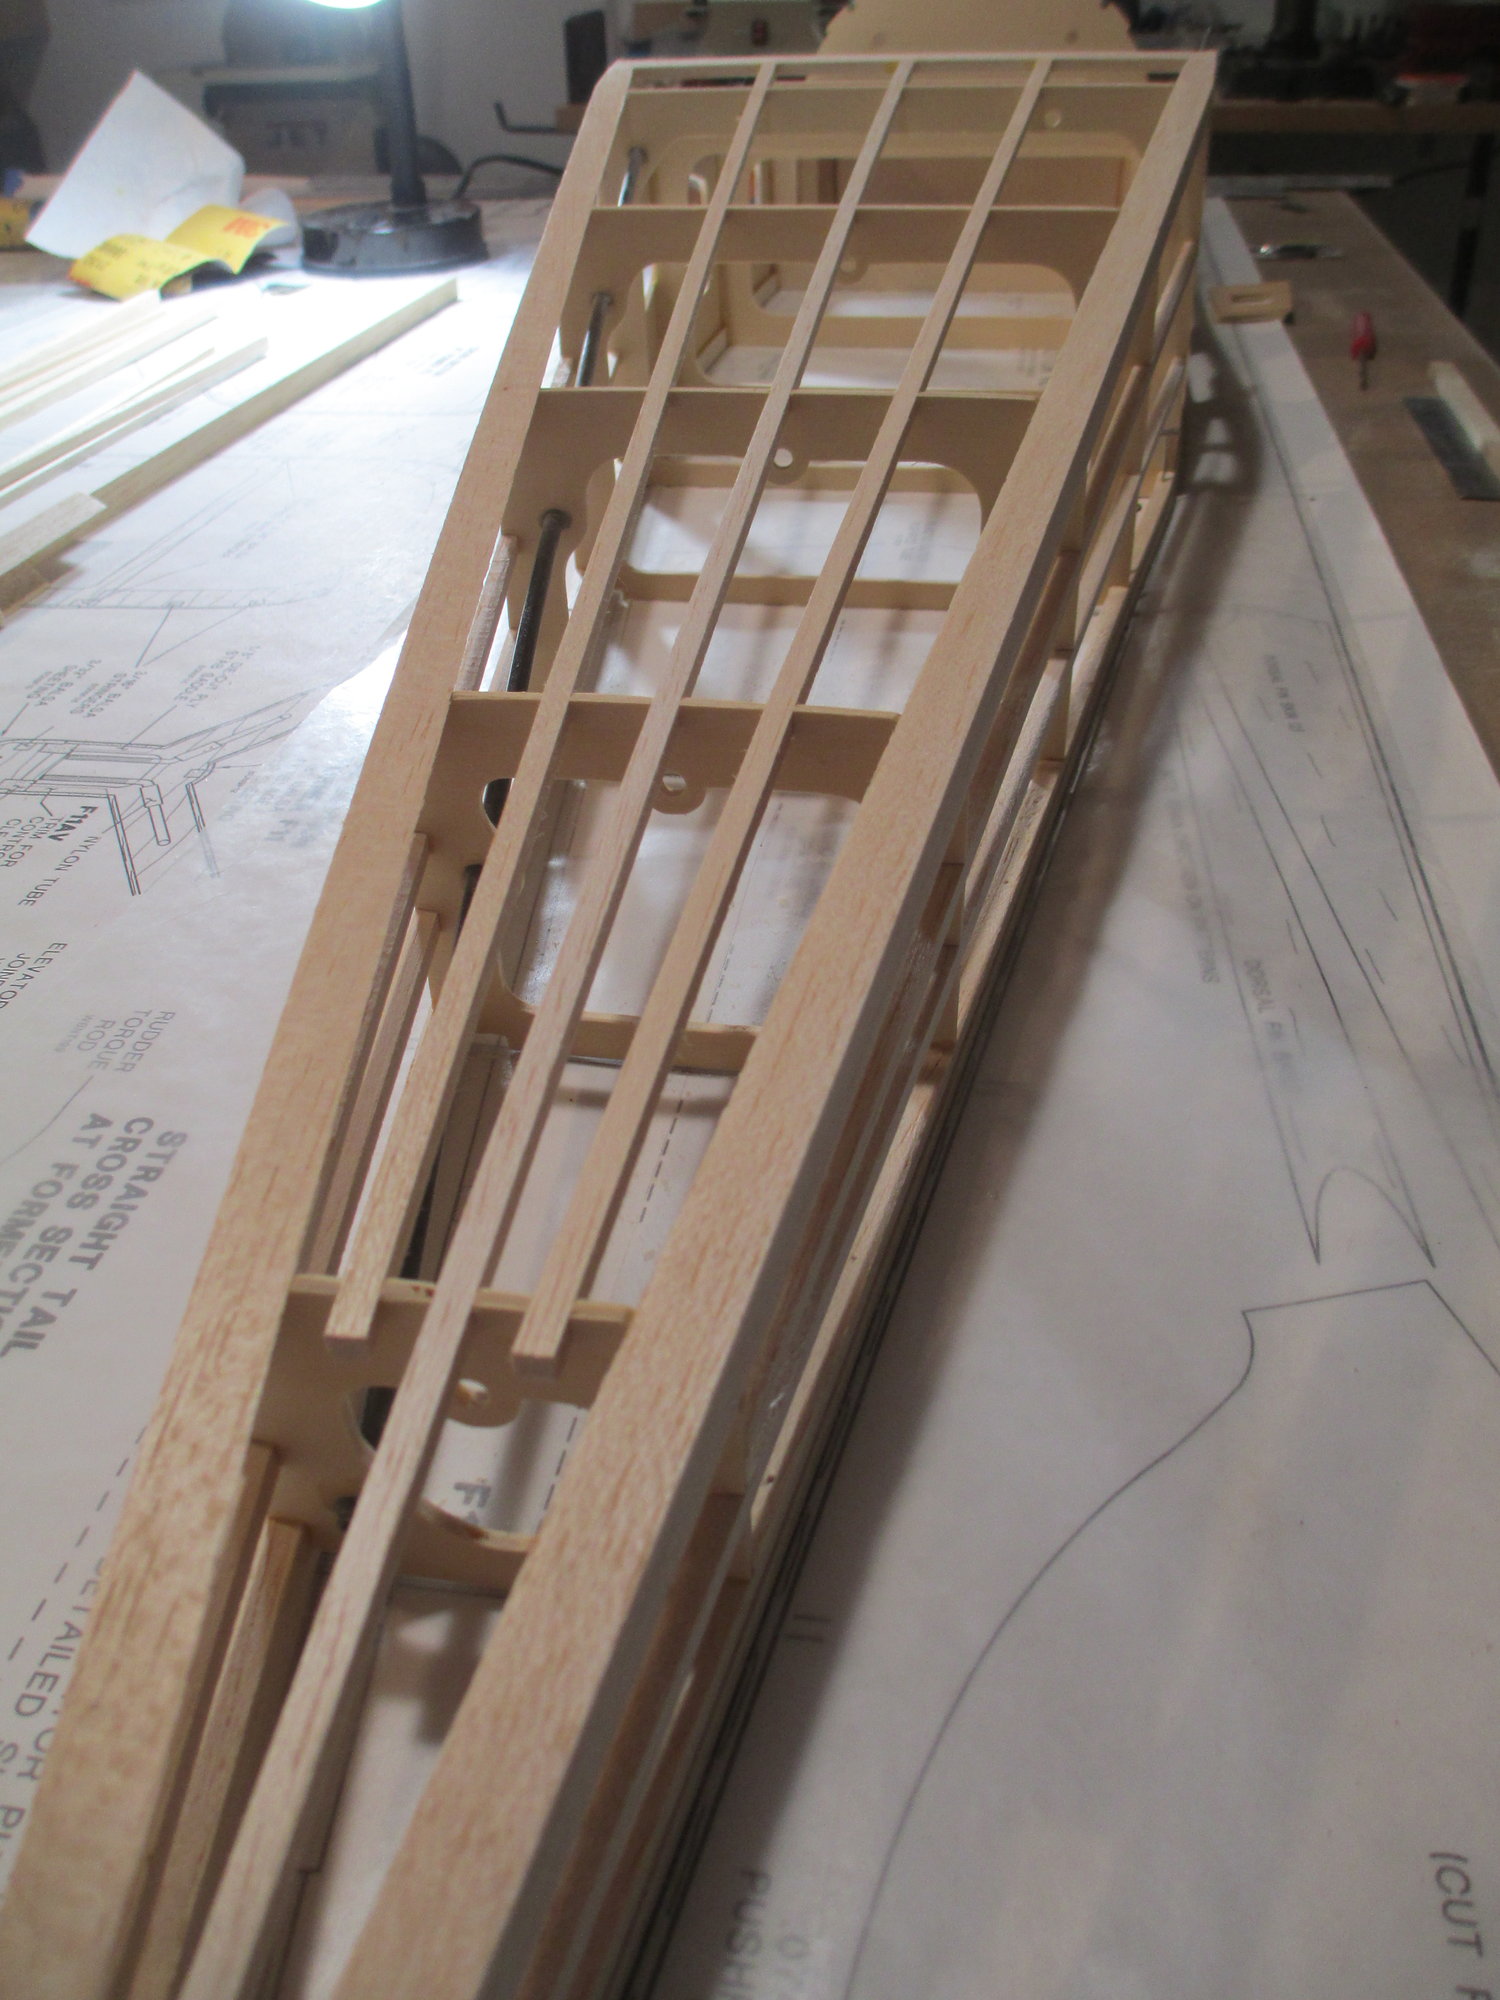
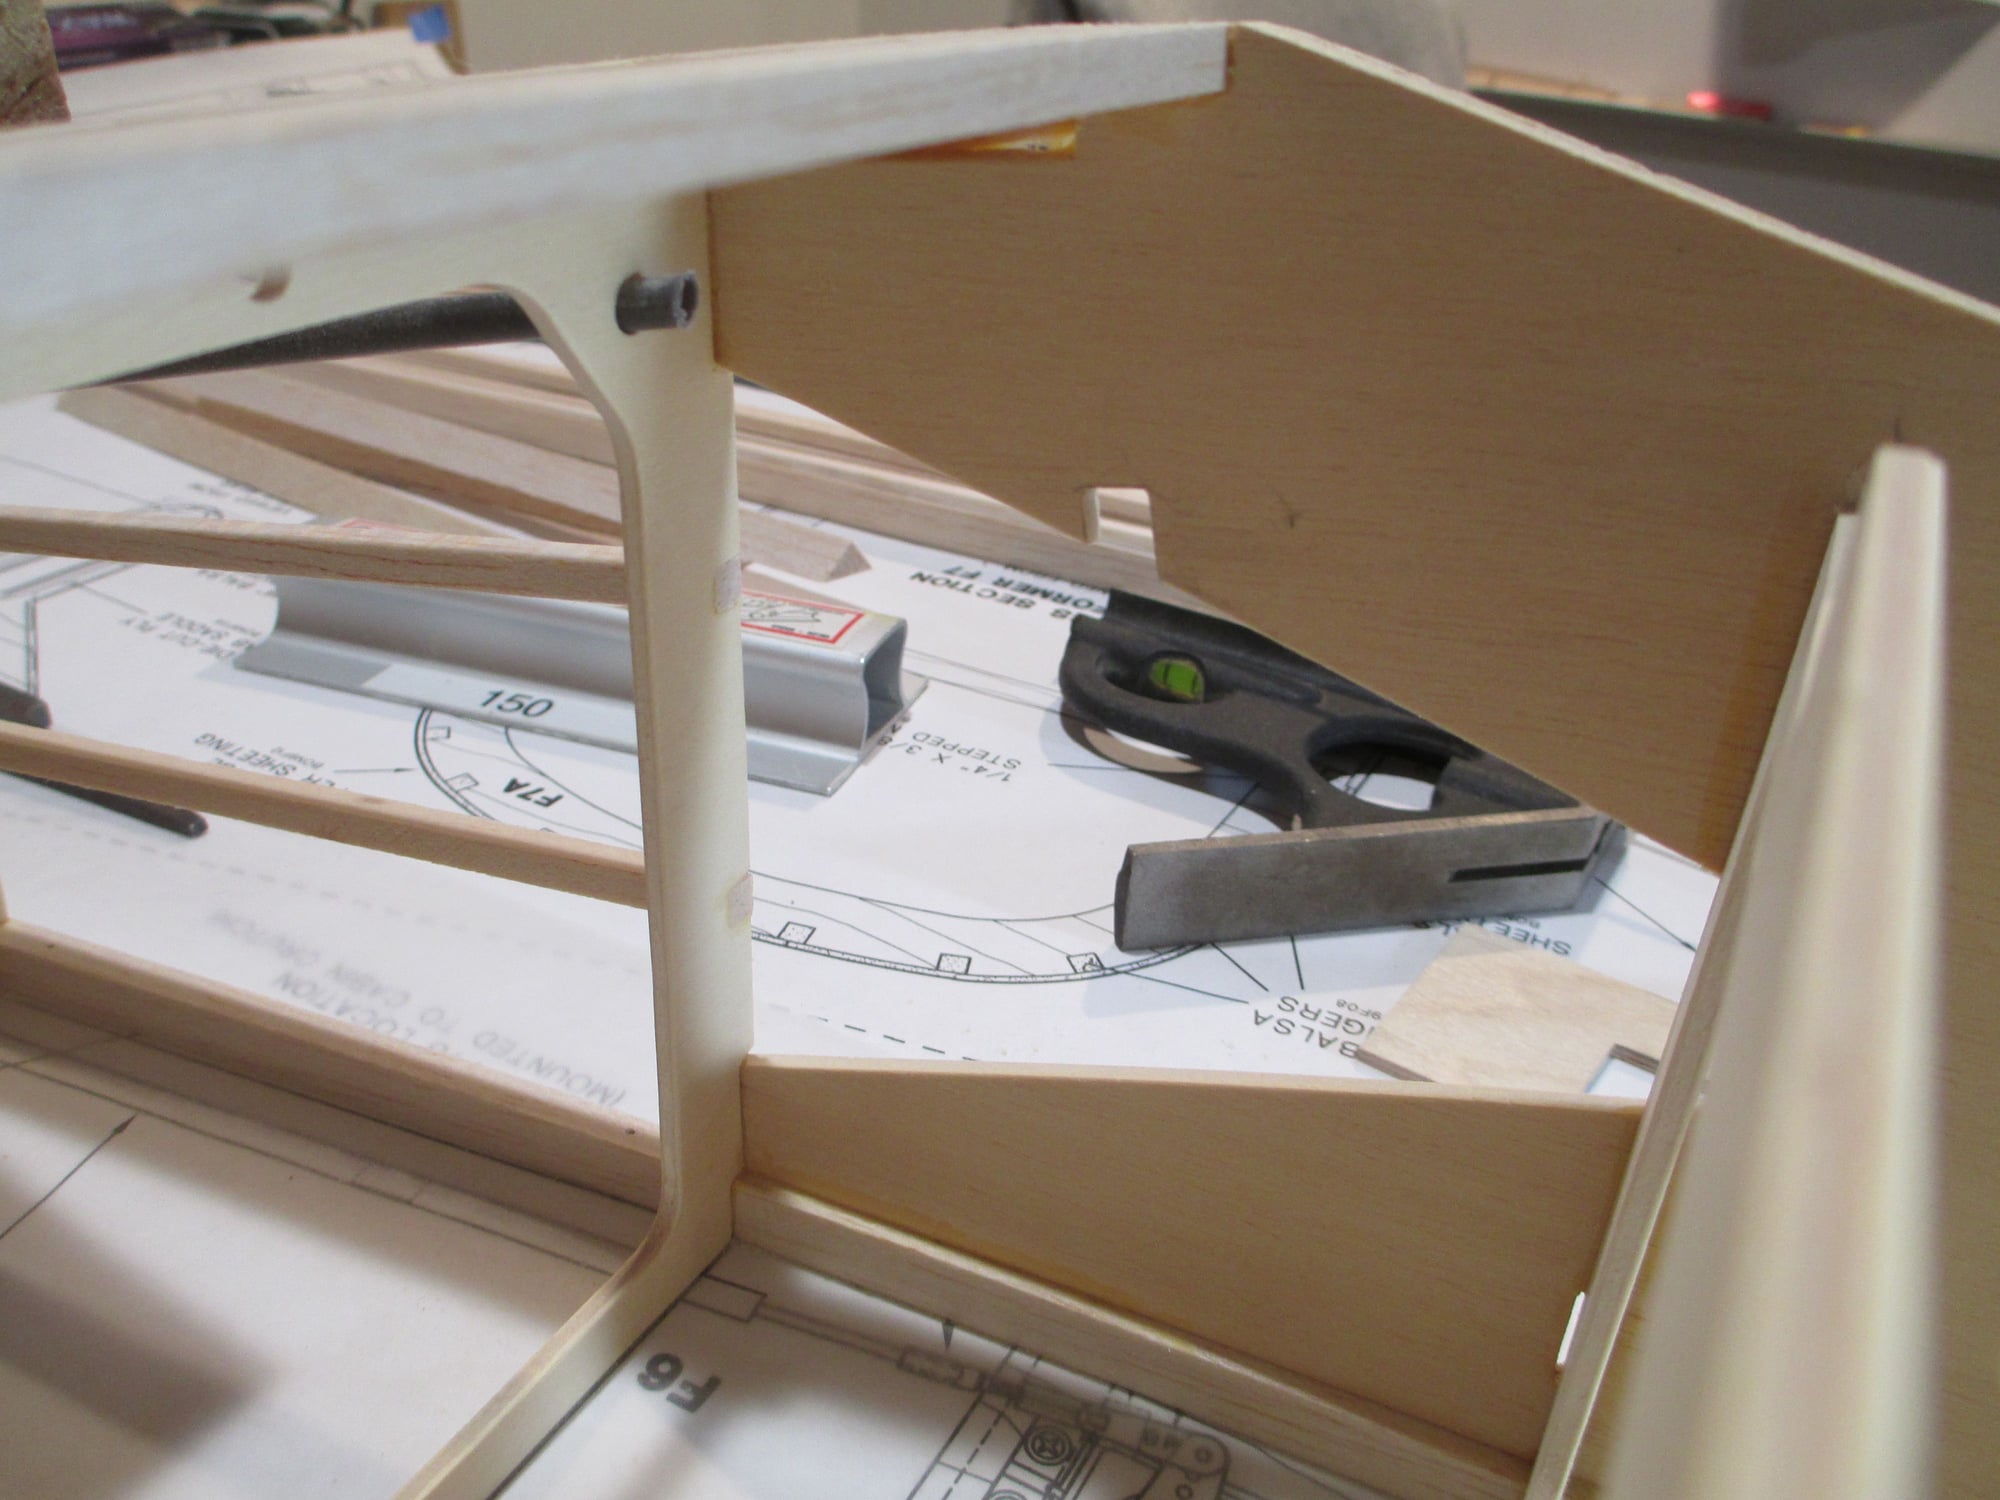
All of the formers were glued to the 1/8" plywood fuse doubler except the firewall doubler. Because of the additional stress placed on this former by the engine, 30 minute epoxy was used.
Just checking the angle with the firewall angle gauge to make sure it didn't move.
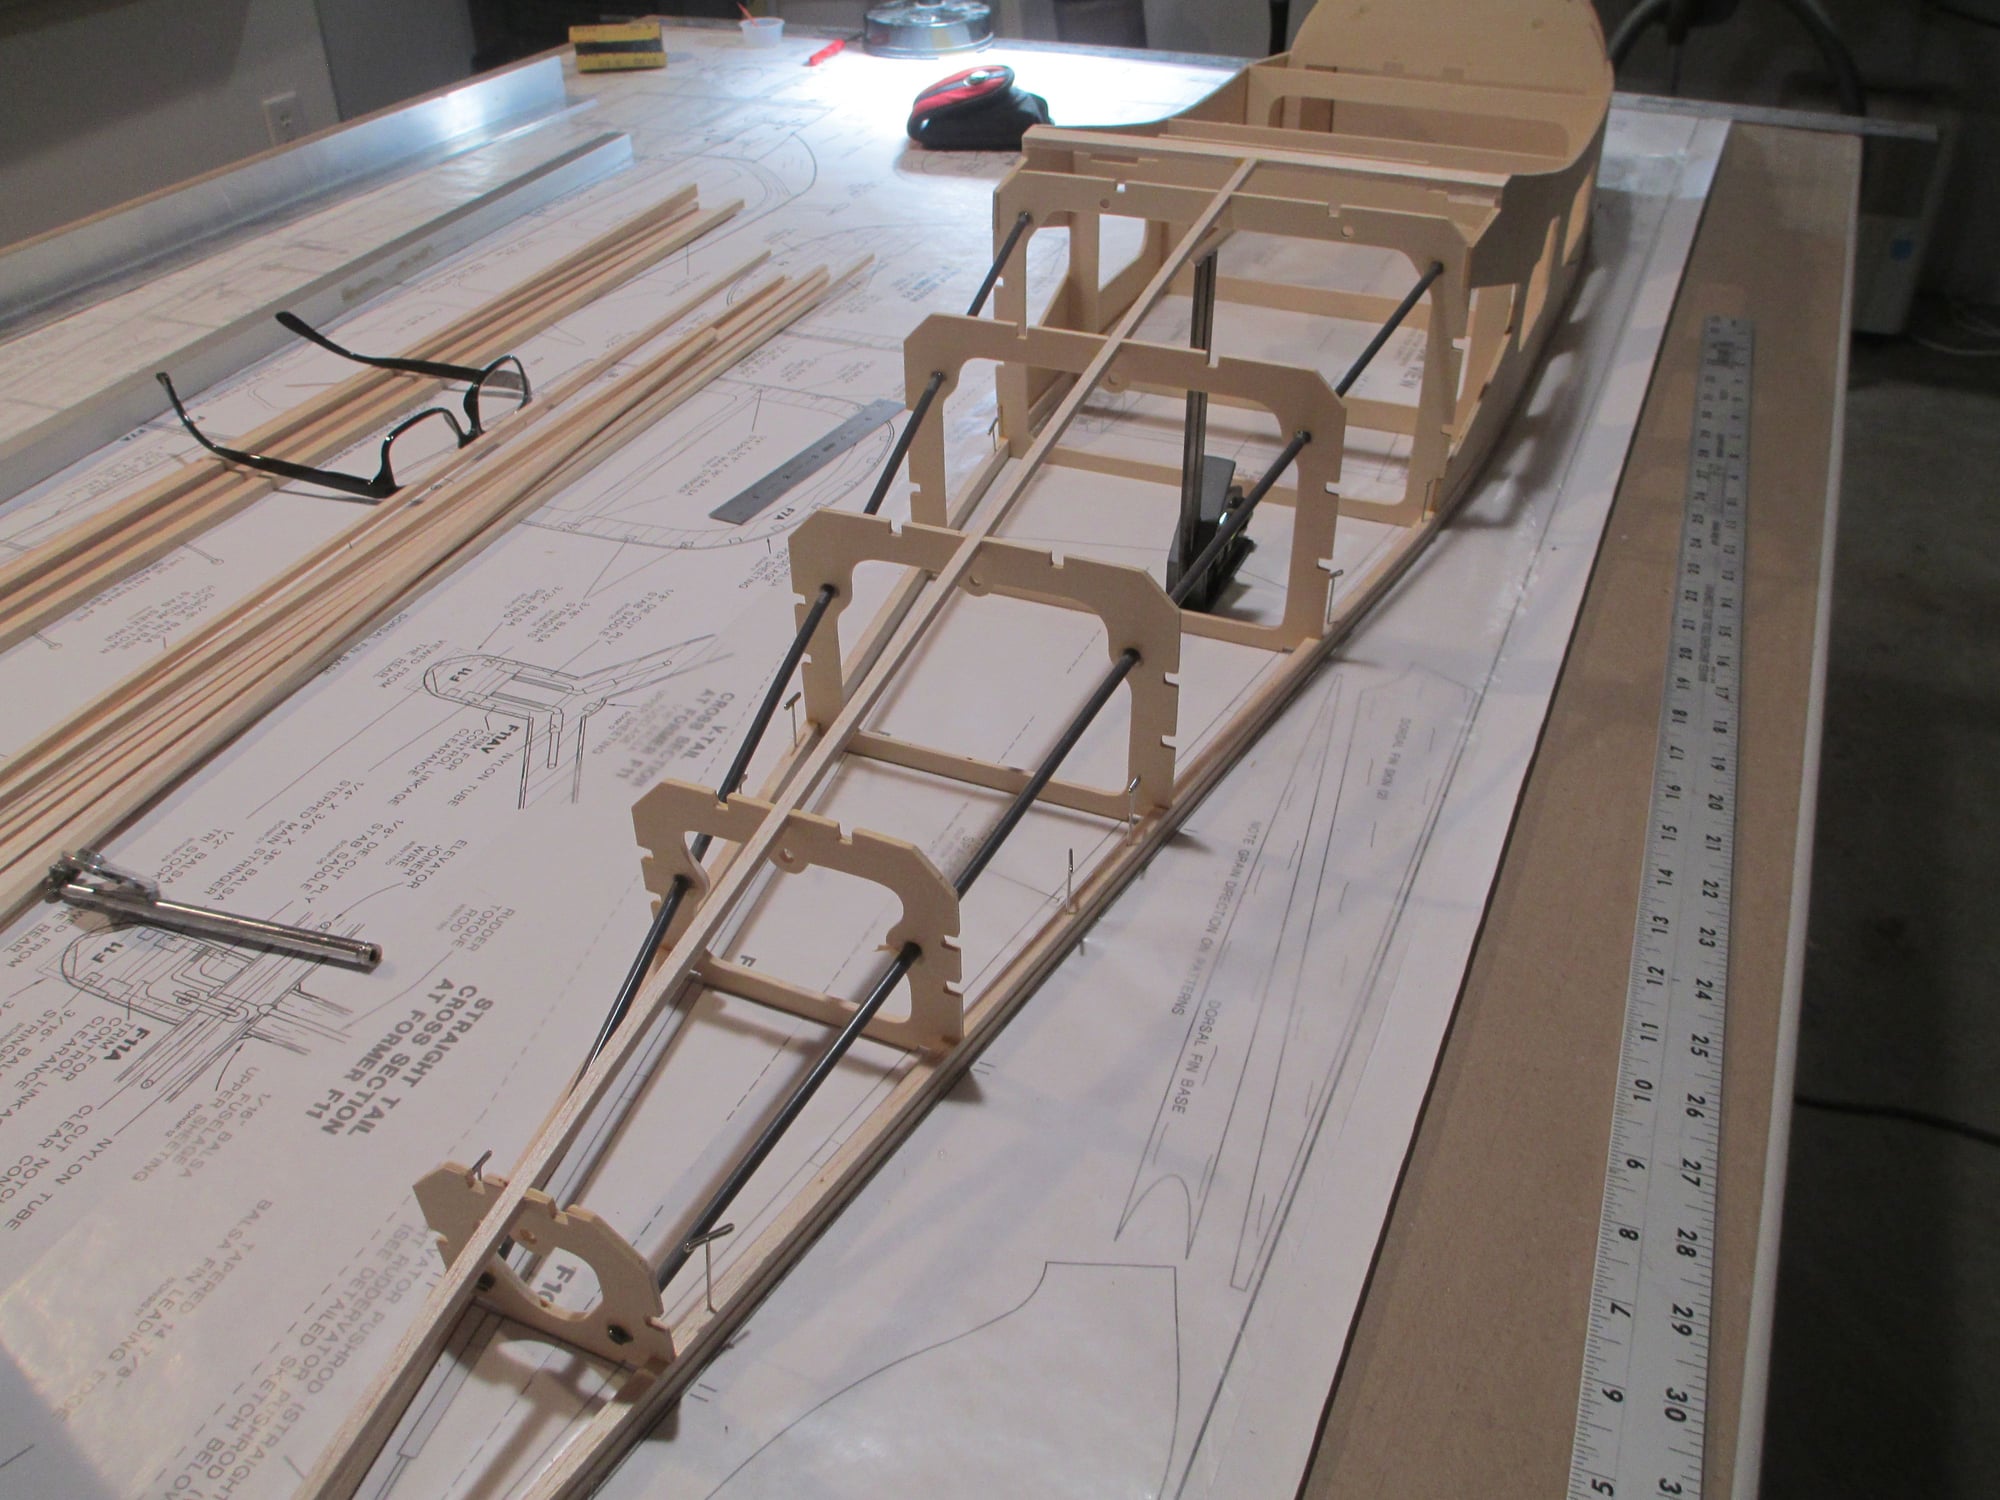
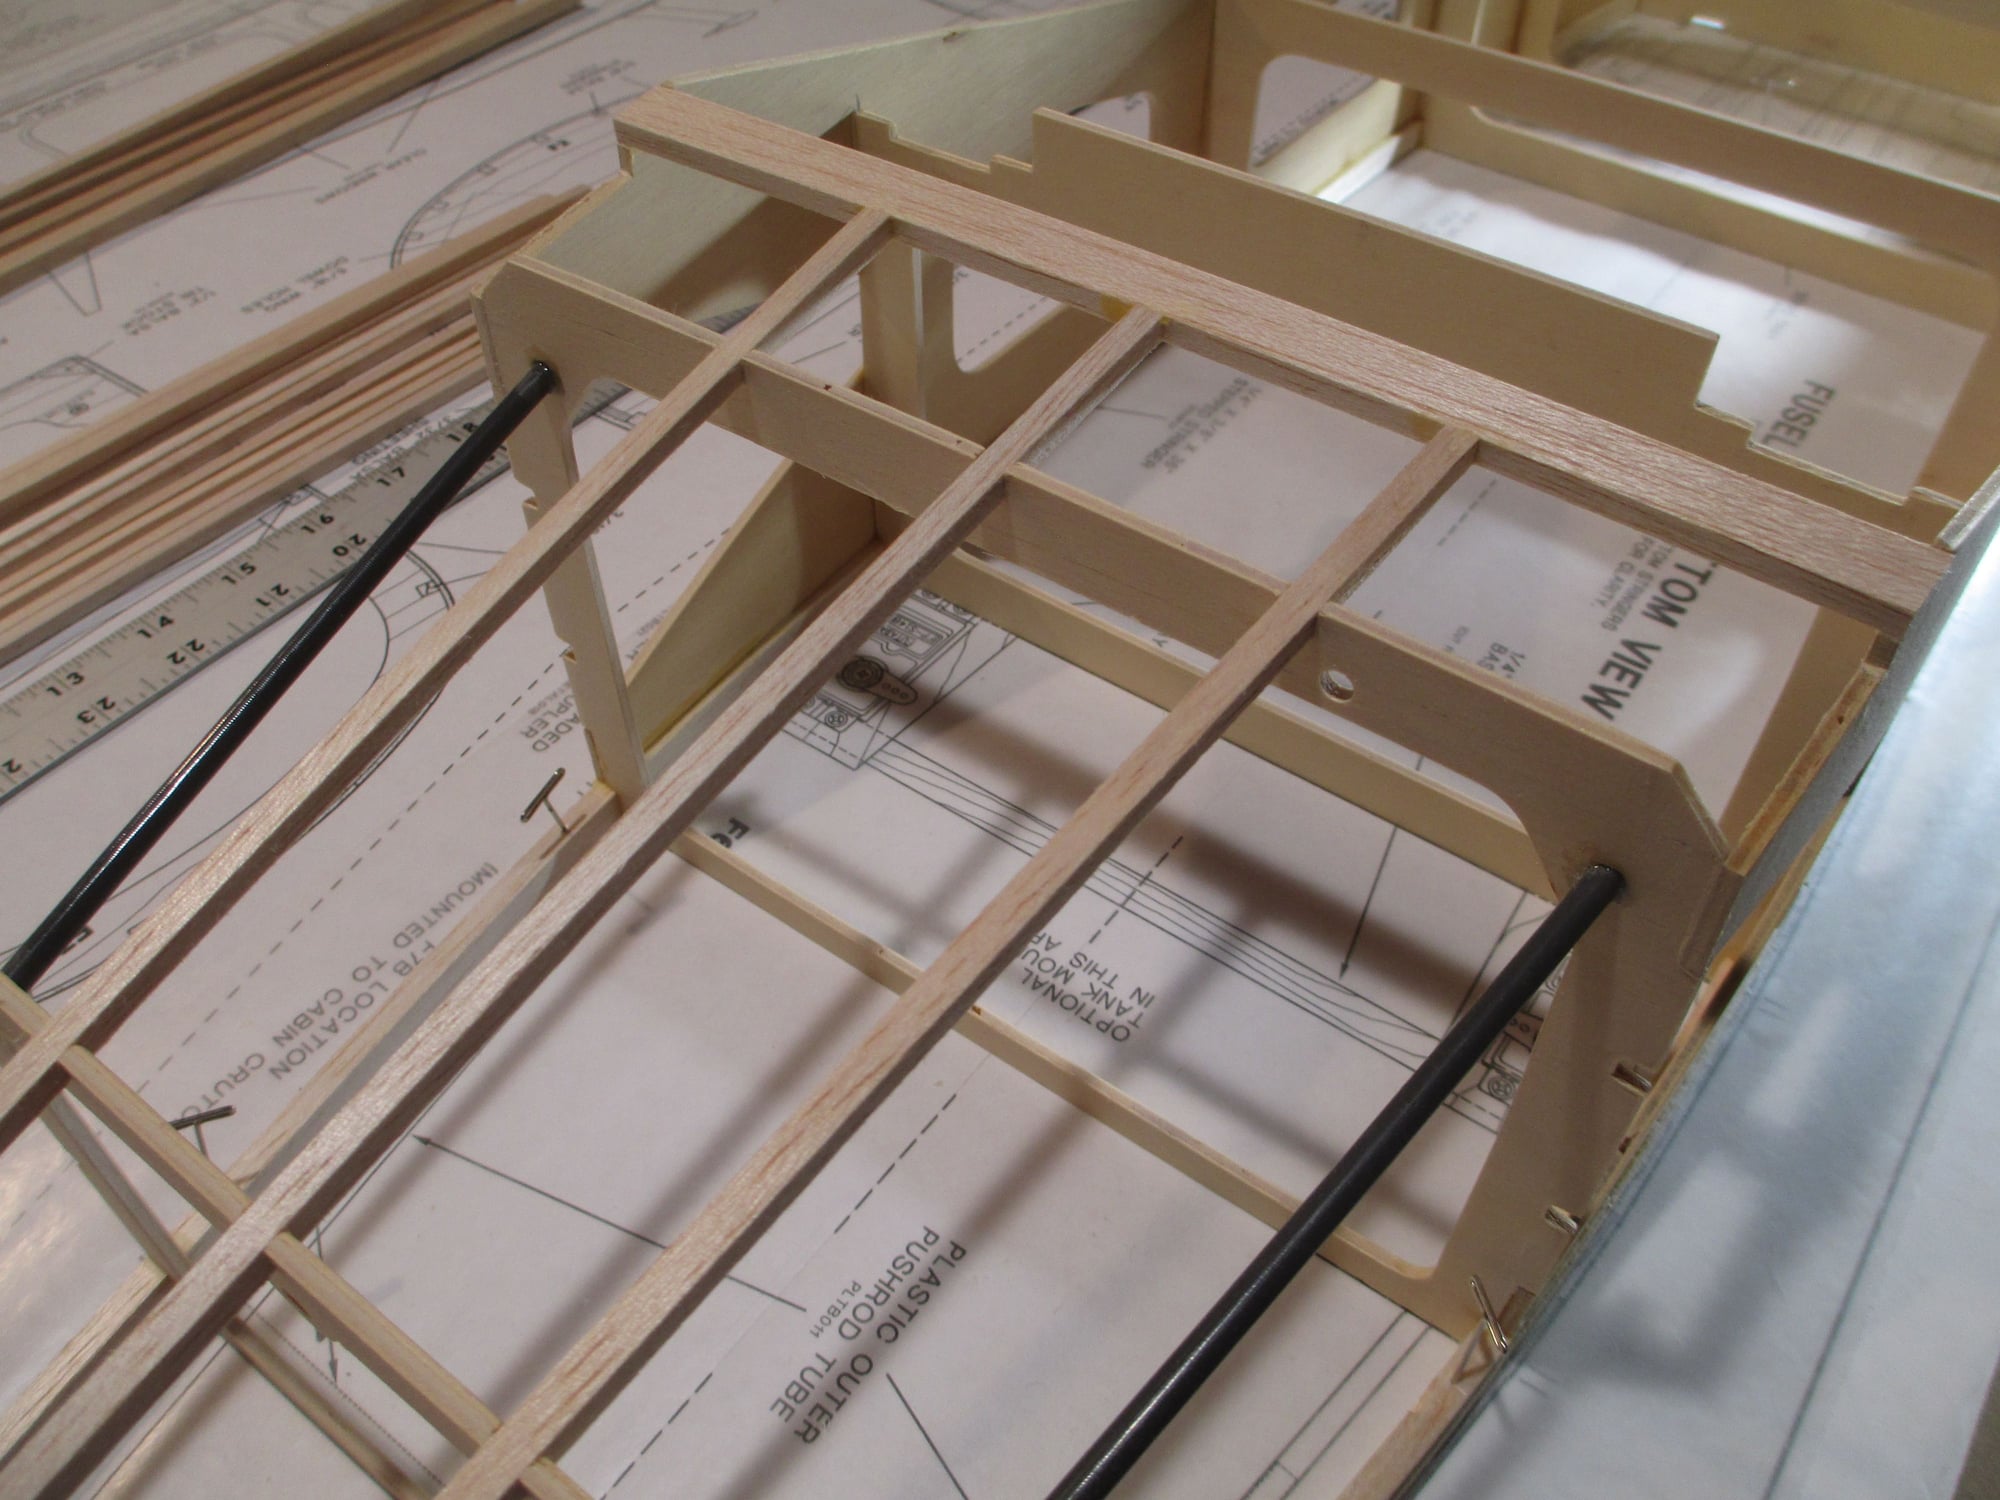
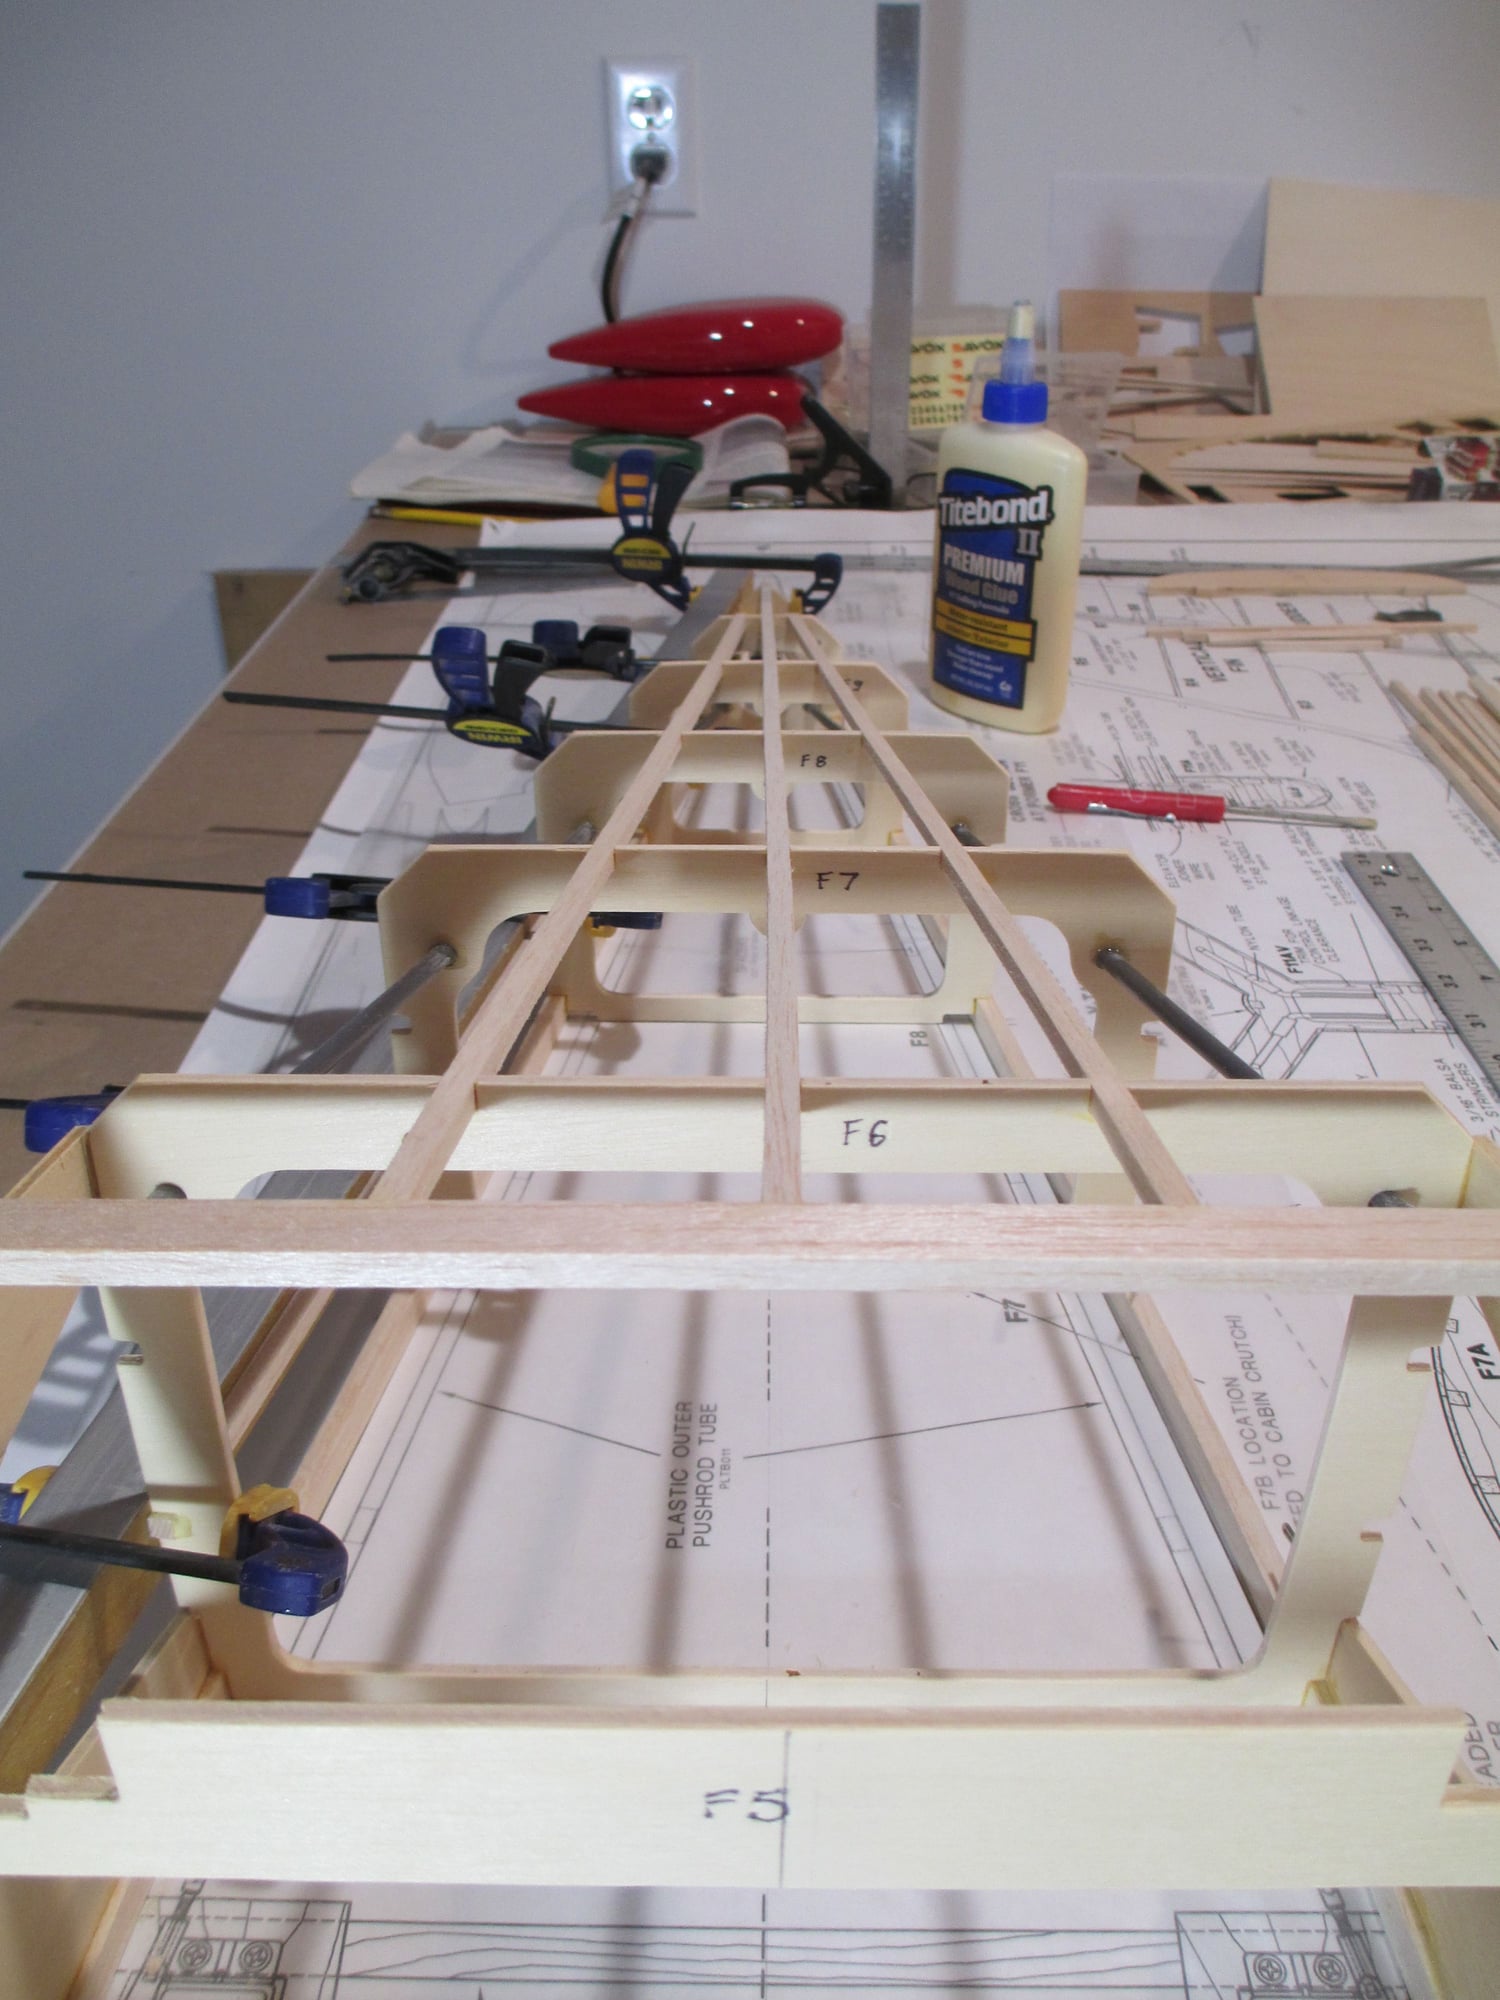
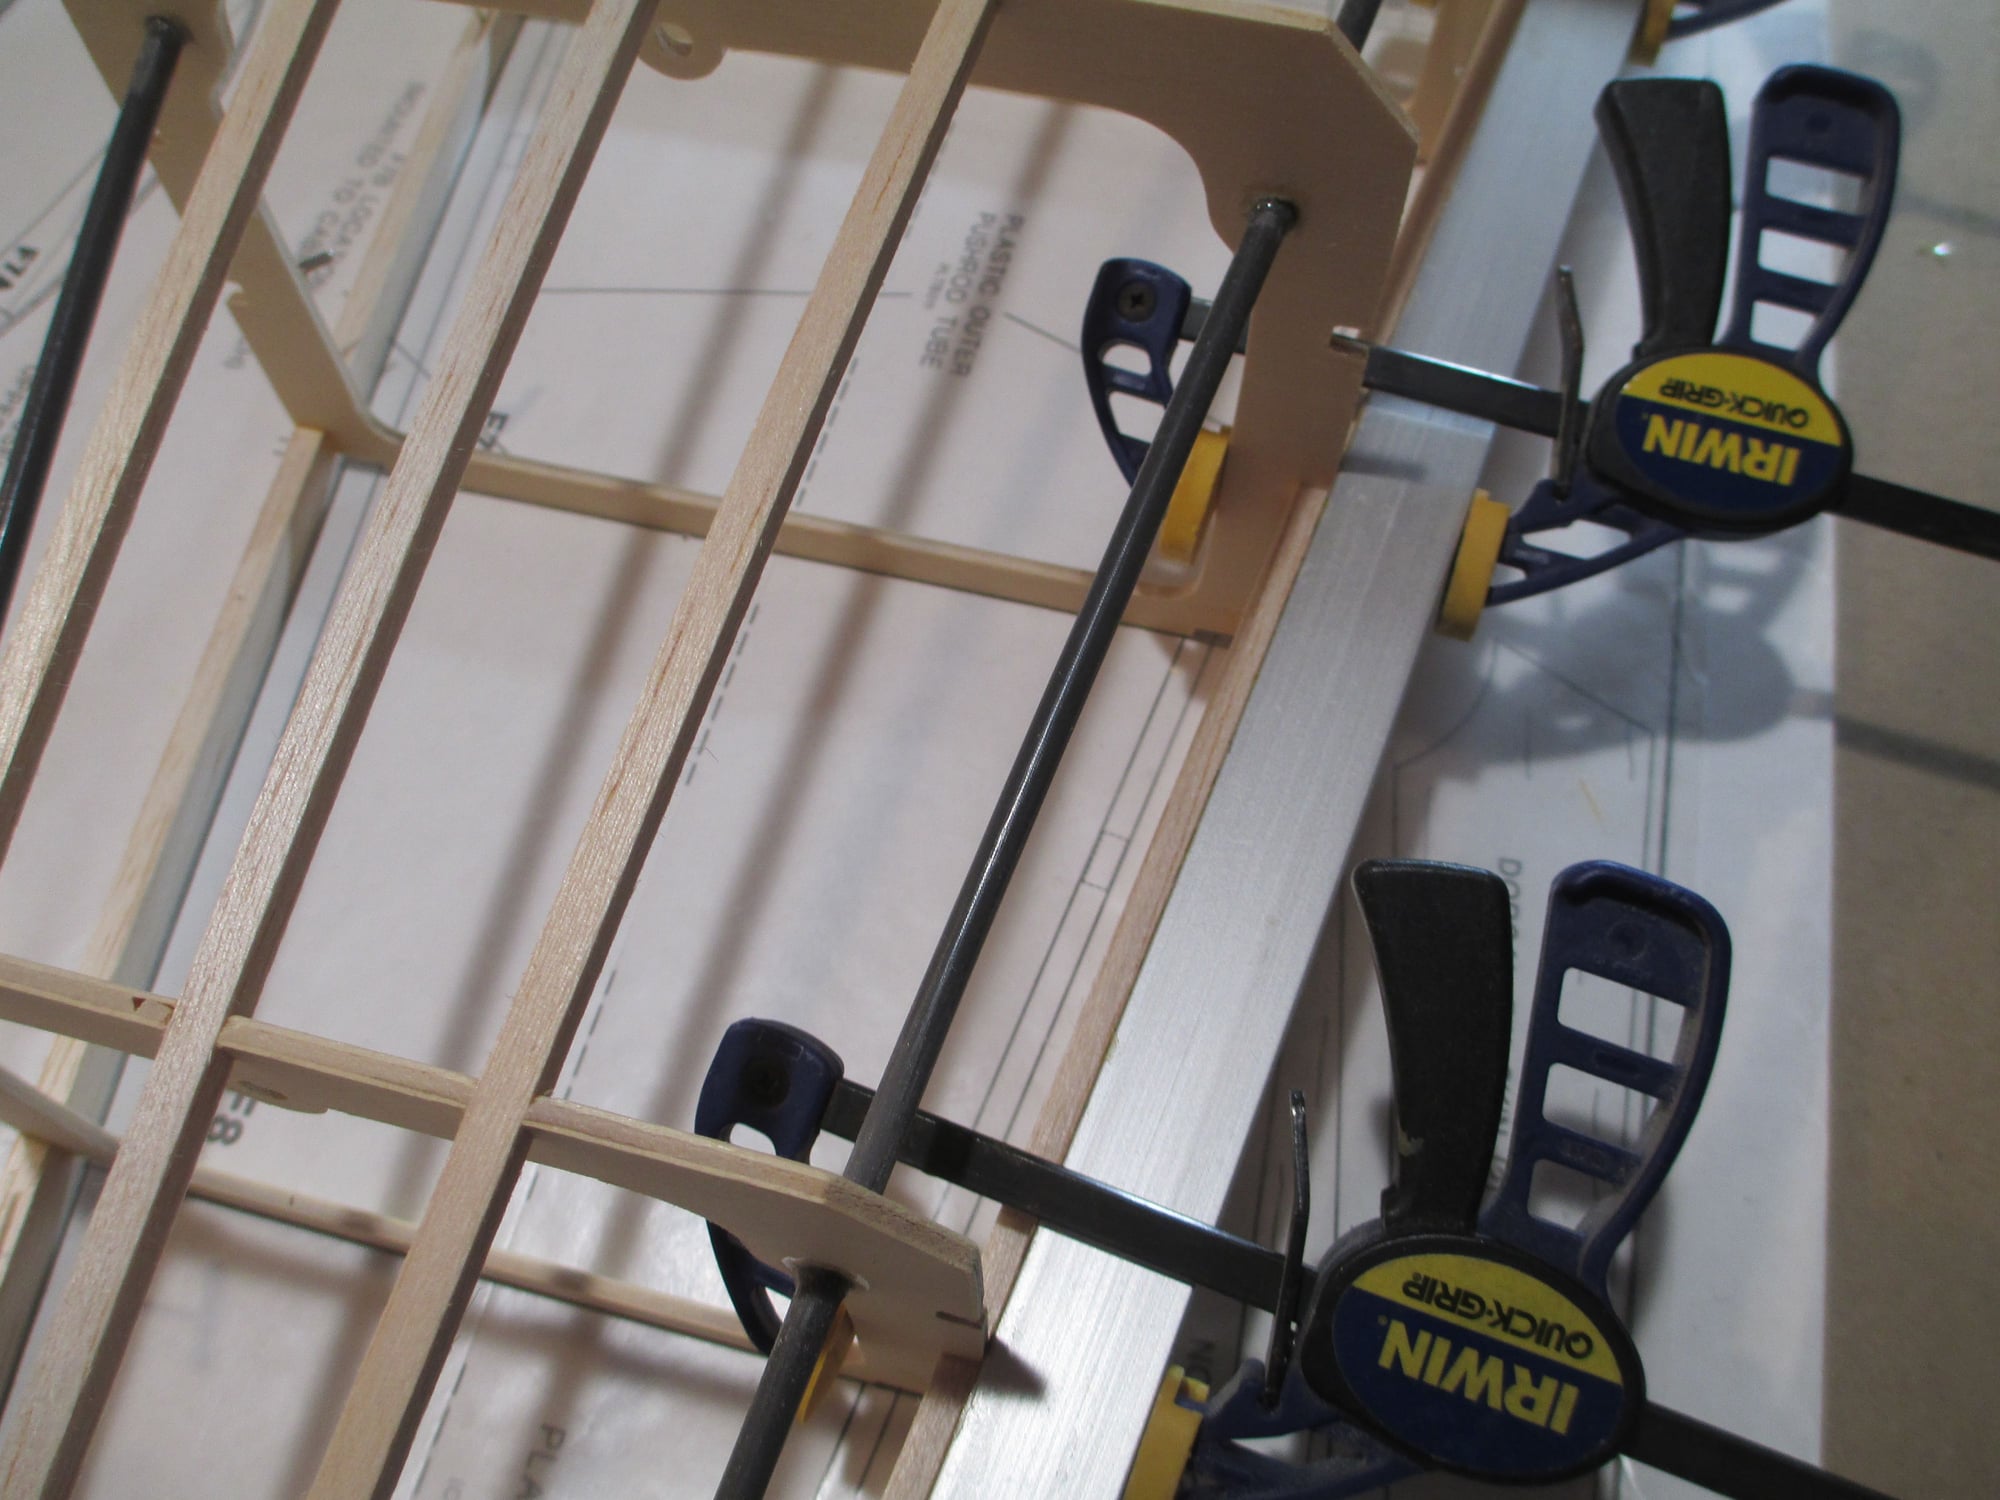
Two 24" pushrod tubes were inserted through each former and epoxied into position. To ensure that the epoxy would adhere to the tube, sandpaper was used to rough up the tube's surface at each former location.
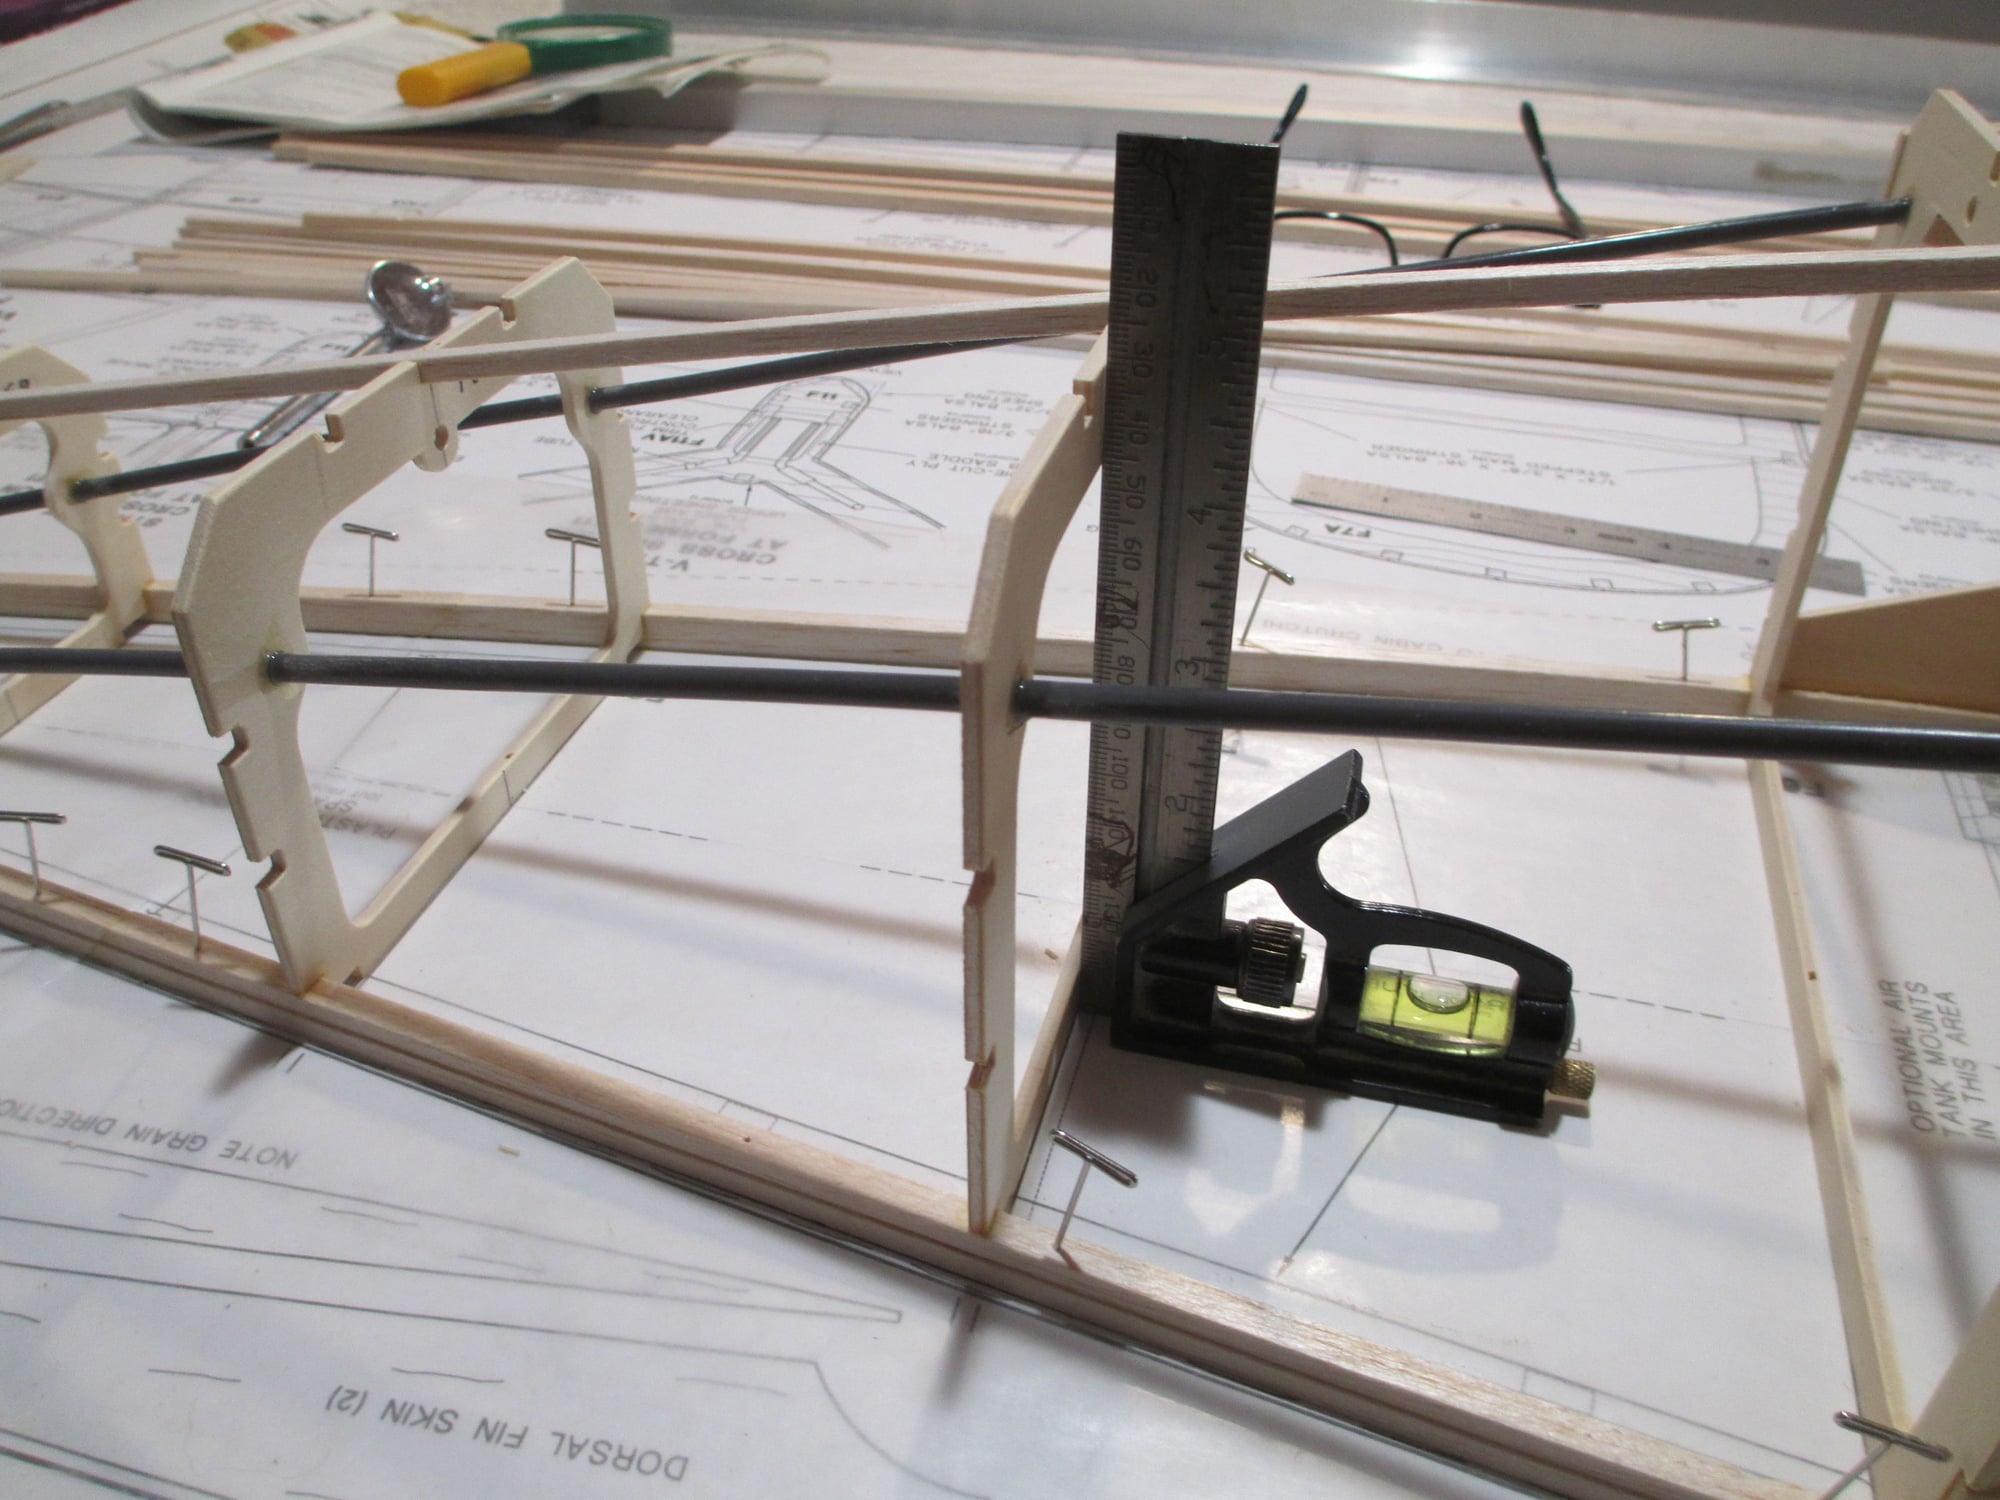
I made sure that each former was dead plumb before I spread the epoxy. Also note that the bottom center stringer was added and glued into place.
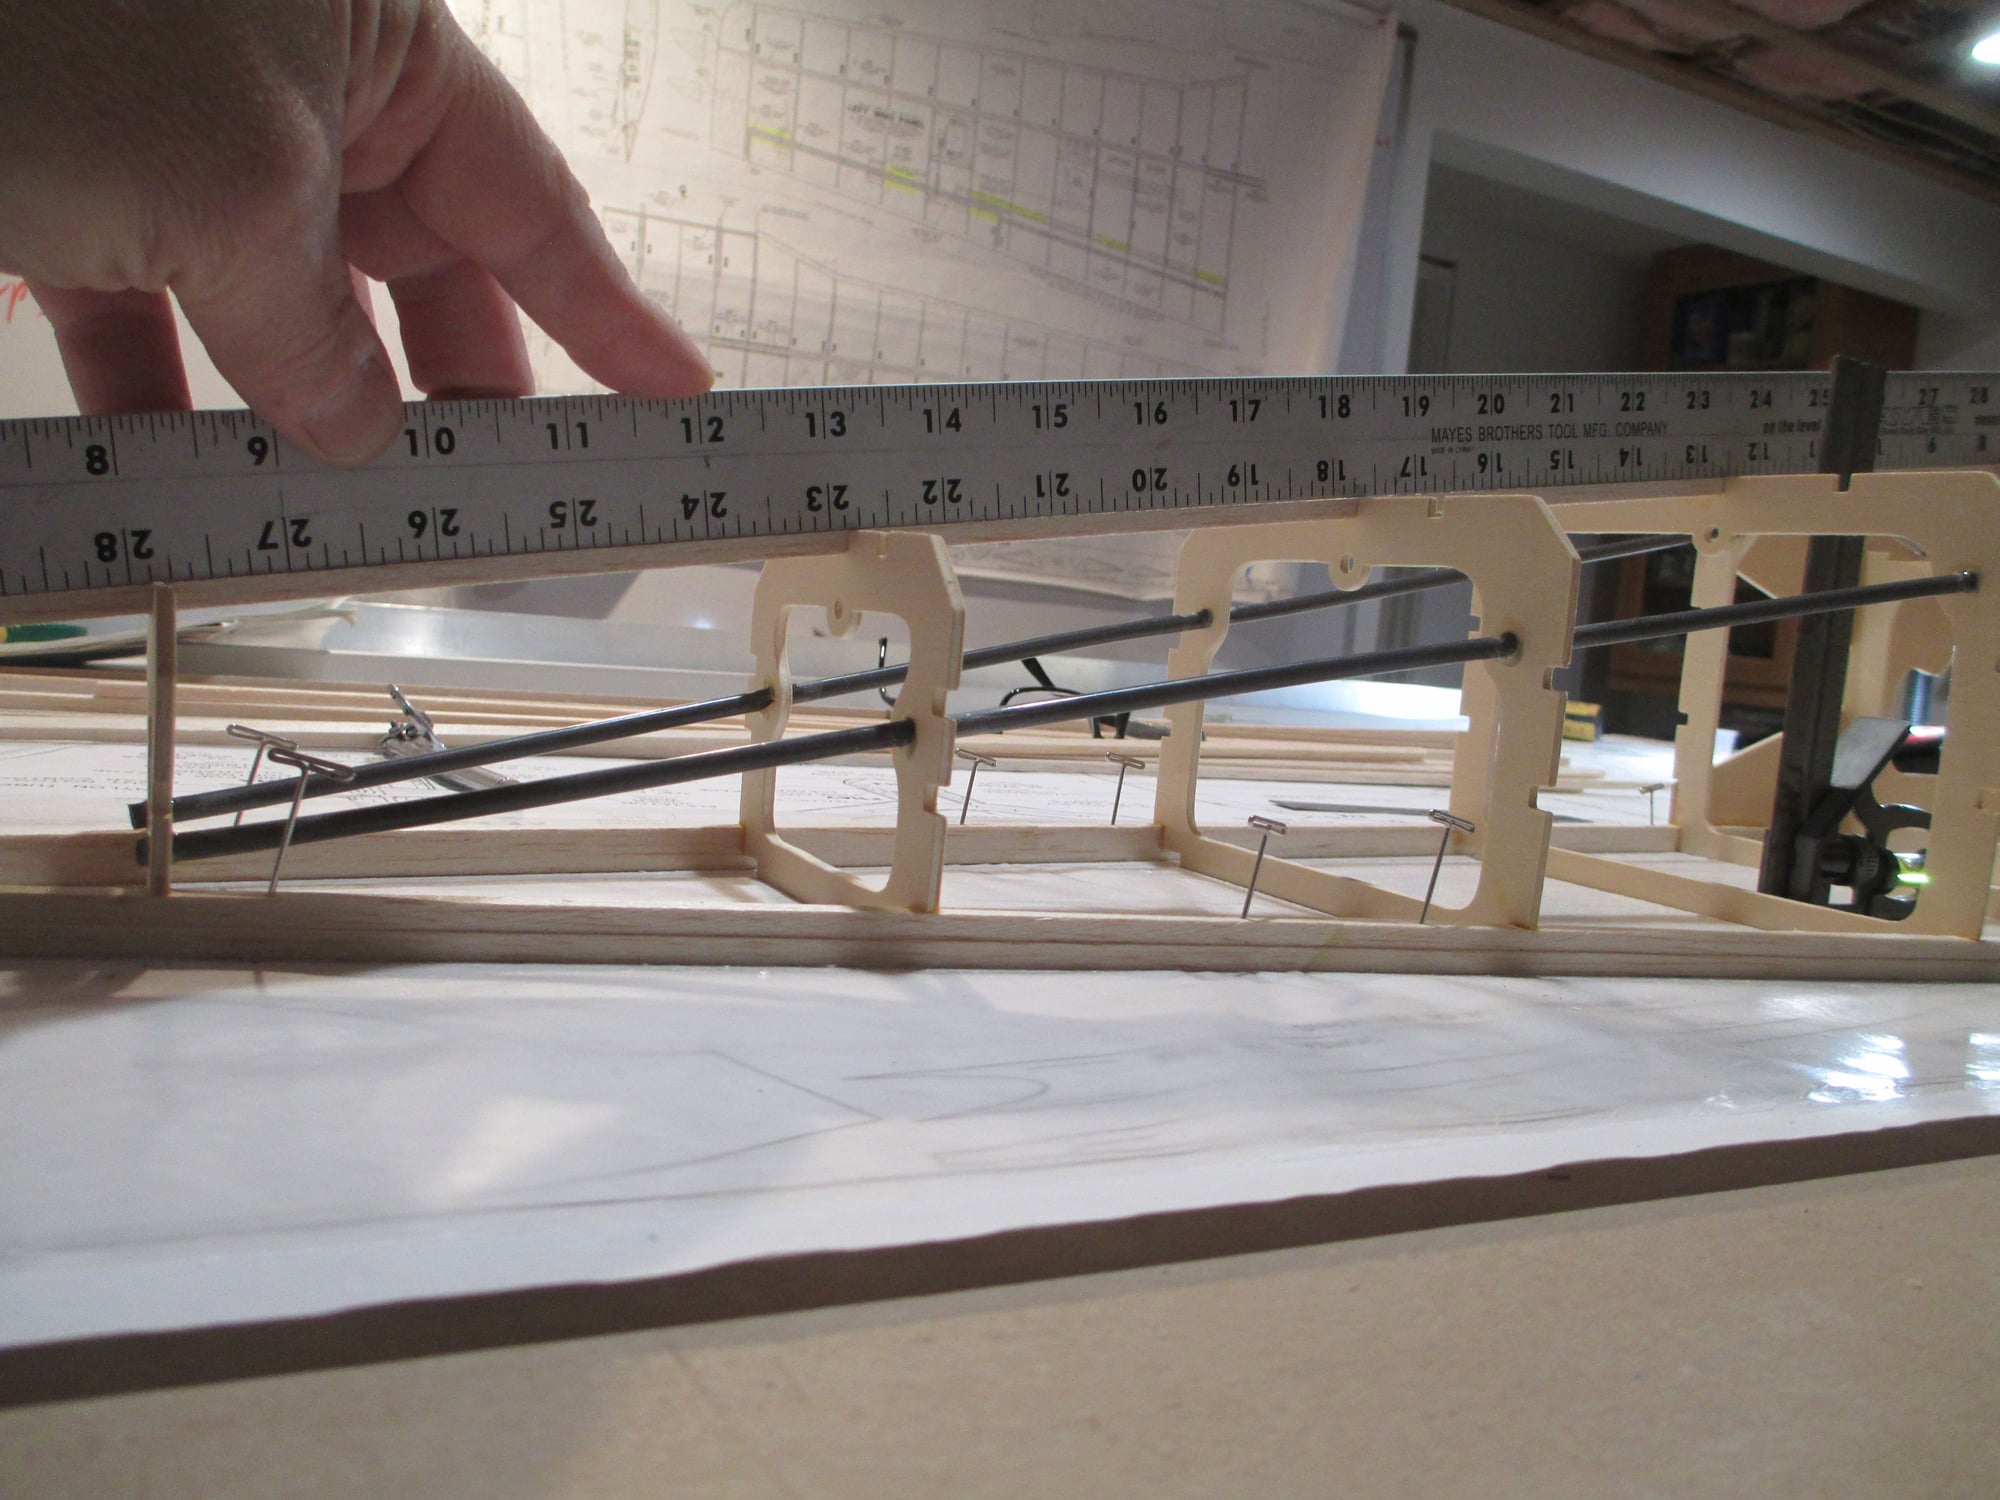
Before gluing the stringer into position, I checked to see if it had a bow in it. I did, so I took a small file and made adjusts to a few of the formers to ensure that the stringer was straight. It's the small details like this, that ensure that your fuselage will be straight and strong.
Last edited by VincentJ; 11-10-2019 at 09:37 AM.
11-10-2019, 11:32 AM
#418
Thread Starter
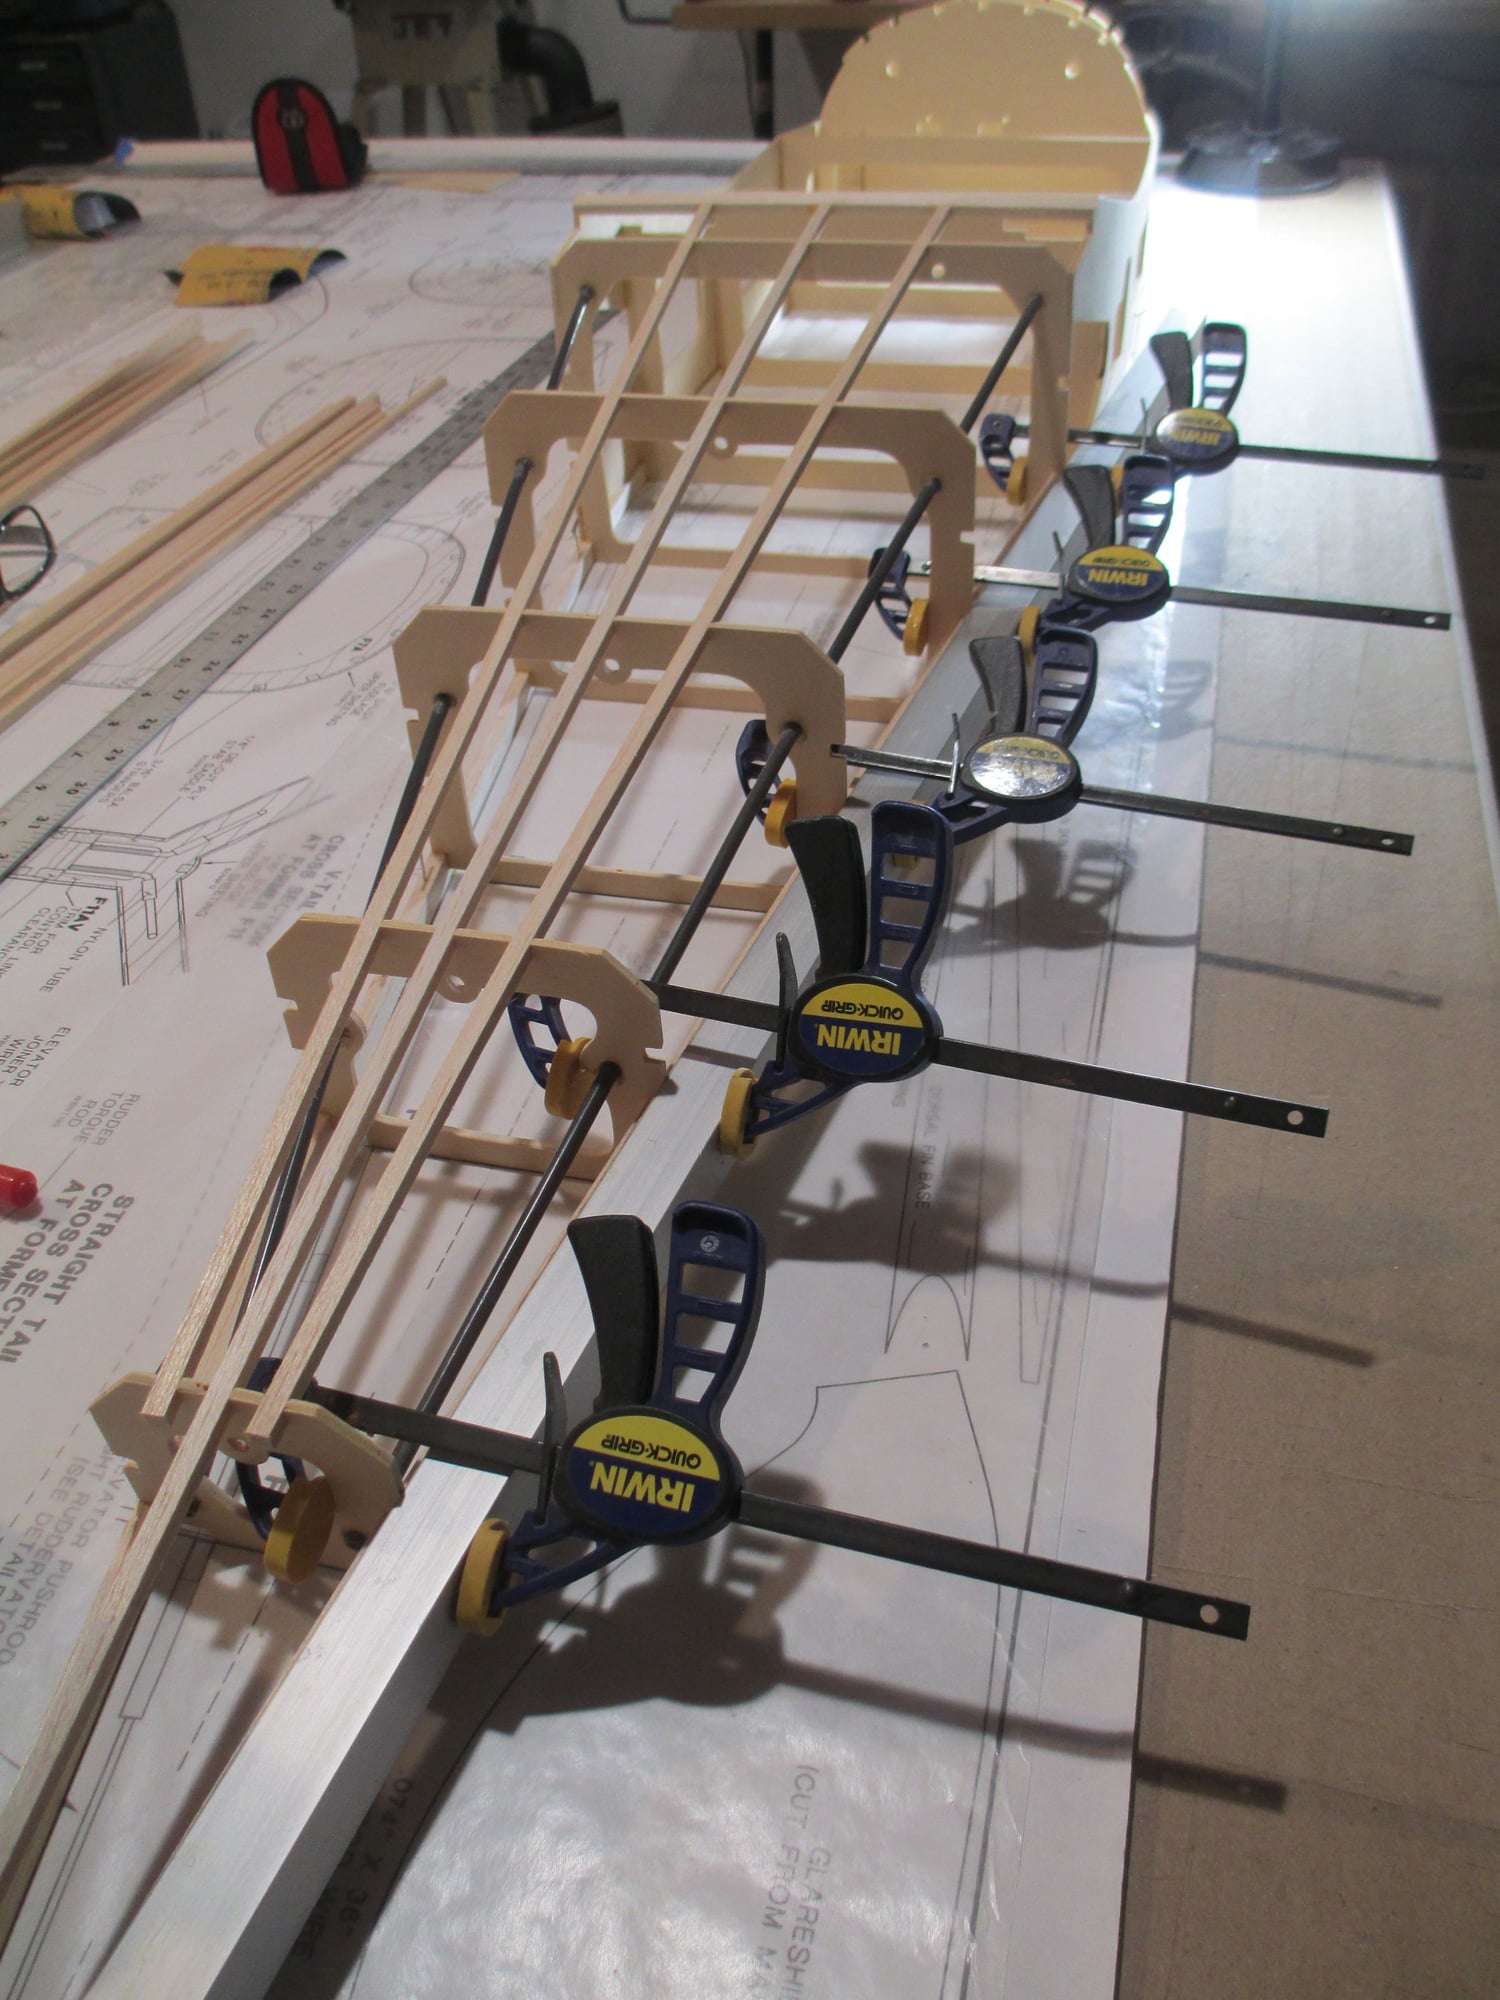
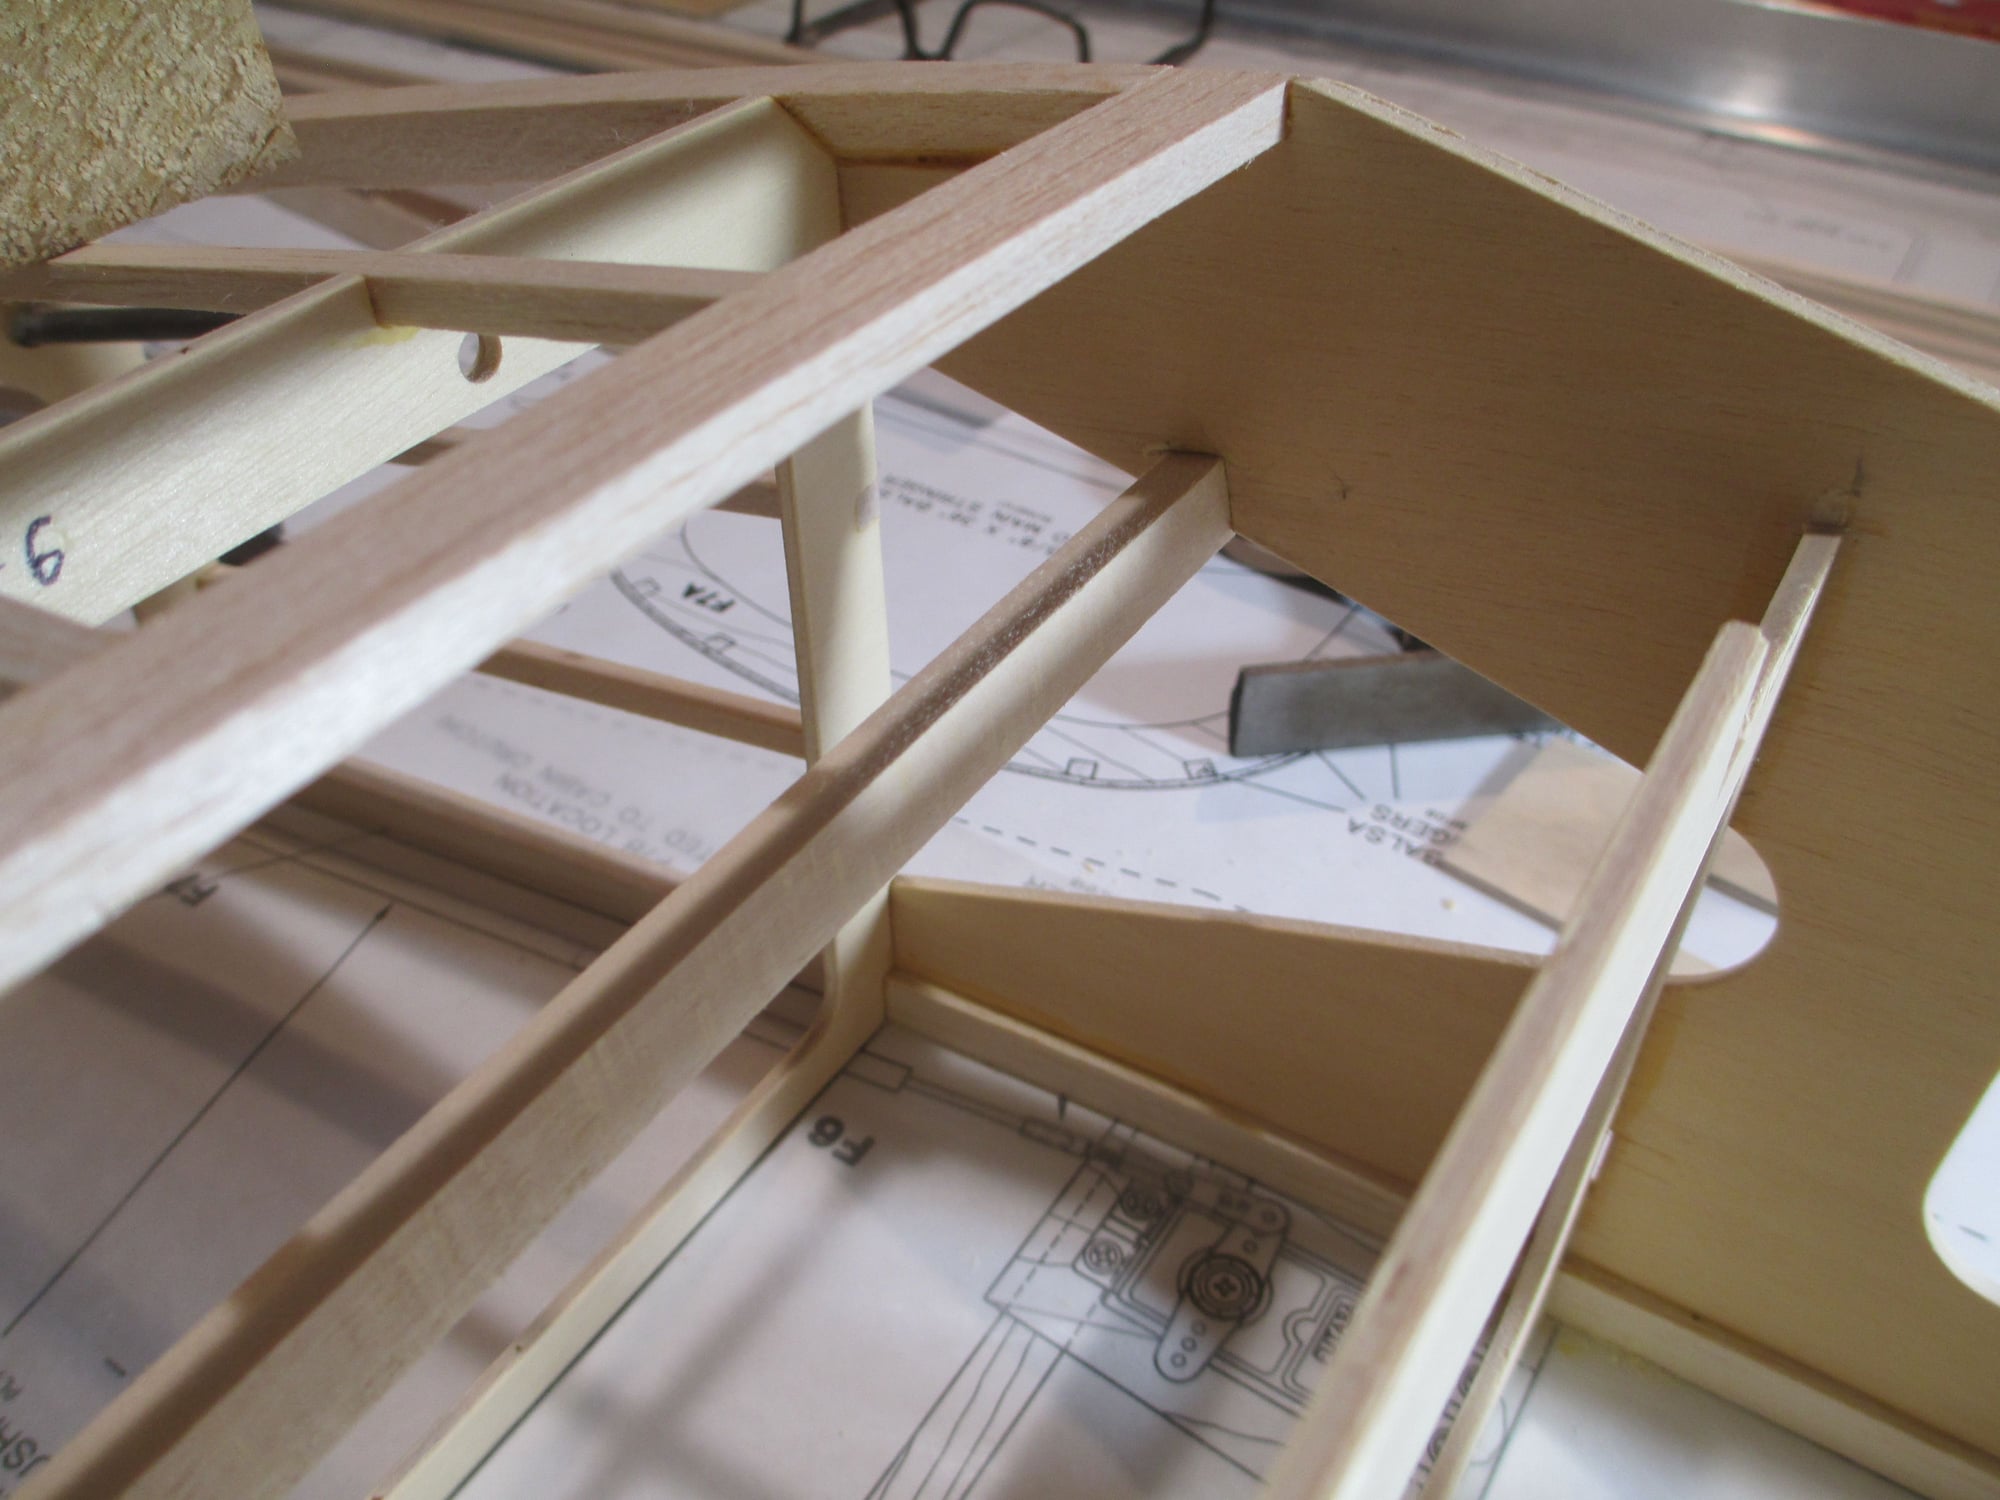
Just a few more photos showing the progress made today on the fuselage. Take note that in these (and other) photos, I use aluminum square stock that I purchased from my local hardware store to keep things straight and true. I used to have a problem with the stock slipping off the work before I got a chance to apply clamp pressure. To fix that problem, I simply placed sandpaper the full length on one side of the aluminum stock. I even do that with my steel rulers to prevent them from moving before I can mark with my pencil...
 11-11-2019, 07:12 AM
#422
Thread Starter
11-11-2019, 10:08 AM
#424
Thread Starter
 11-11-2019, 10:27 AM
#425
Thread Starter
The stock location of the elevator and rudder make it difficult to access the two aft servo screws. I decided to move both servos forward about 1/4" to make all of the screws more easily accessible. This meant that the supplied servo tray would be too short, which is OK as it was way too sloppy for me...
Not liking a few things about the rudder and elevator tray location and set-up, so I decided to make a few changes/improvements. I relocated the servo tray rail moving it back as well as notching both side fuse doublers to hold the rail.
The rail is (1/4" x 3/8" basswood) glued into position.
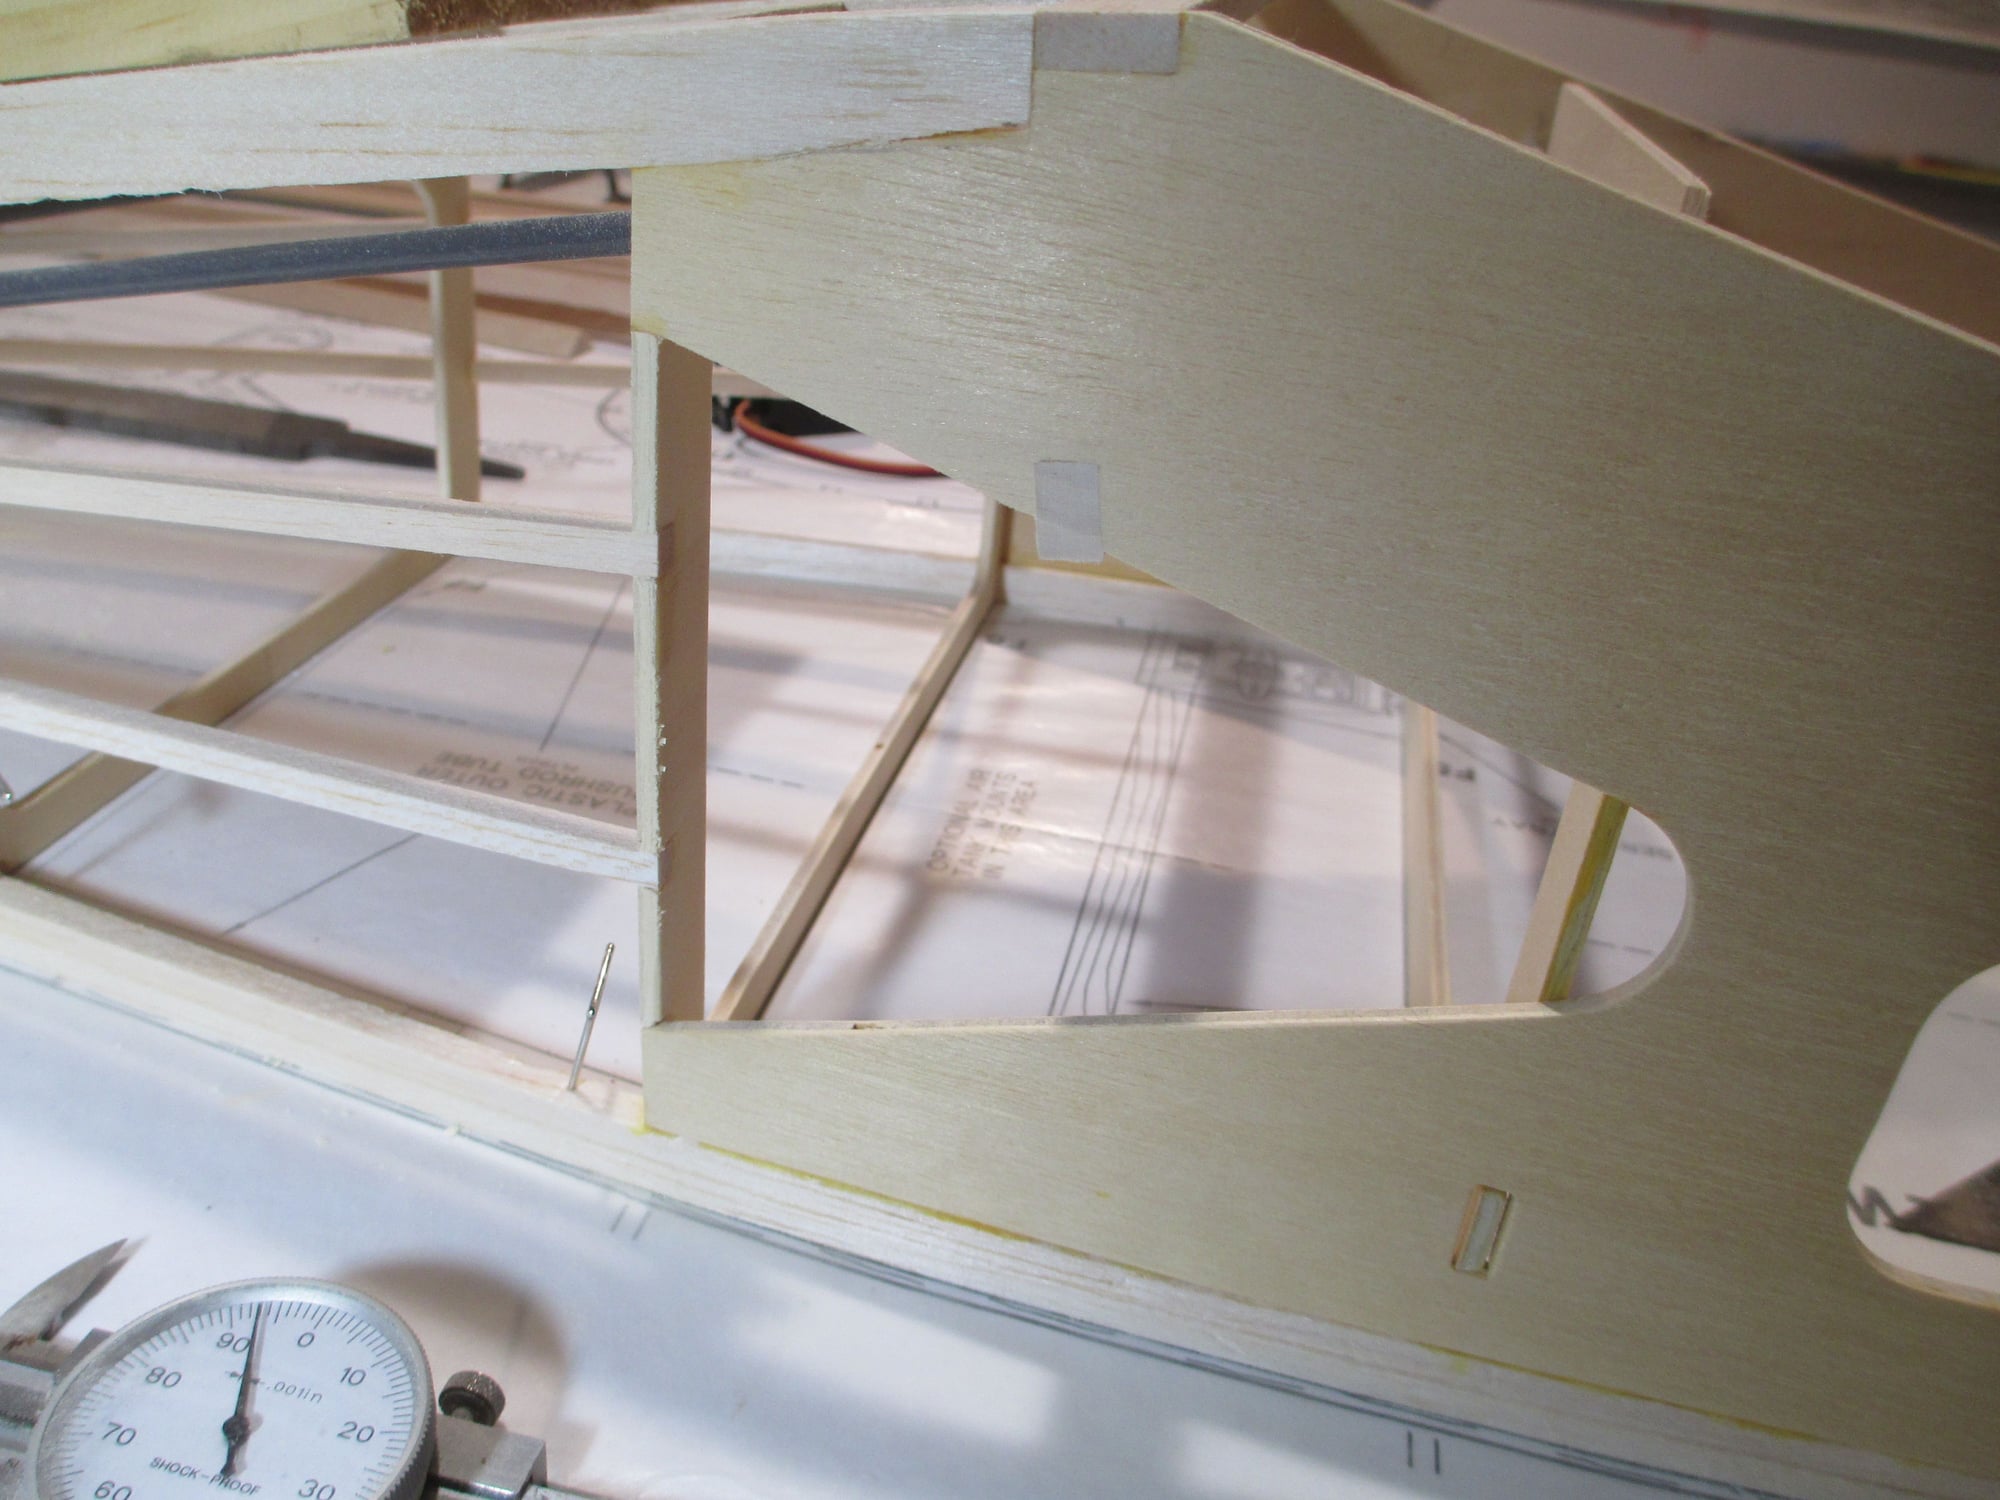
This should give a stronger joint without any weight penalty. Basically a win win situation...
I also ditched the servo trays and made two new ones. I also lowered the front of the tray about 3/16" by notching the top of the former. These will be epoxied into position, but not quite yet...
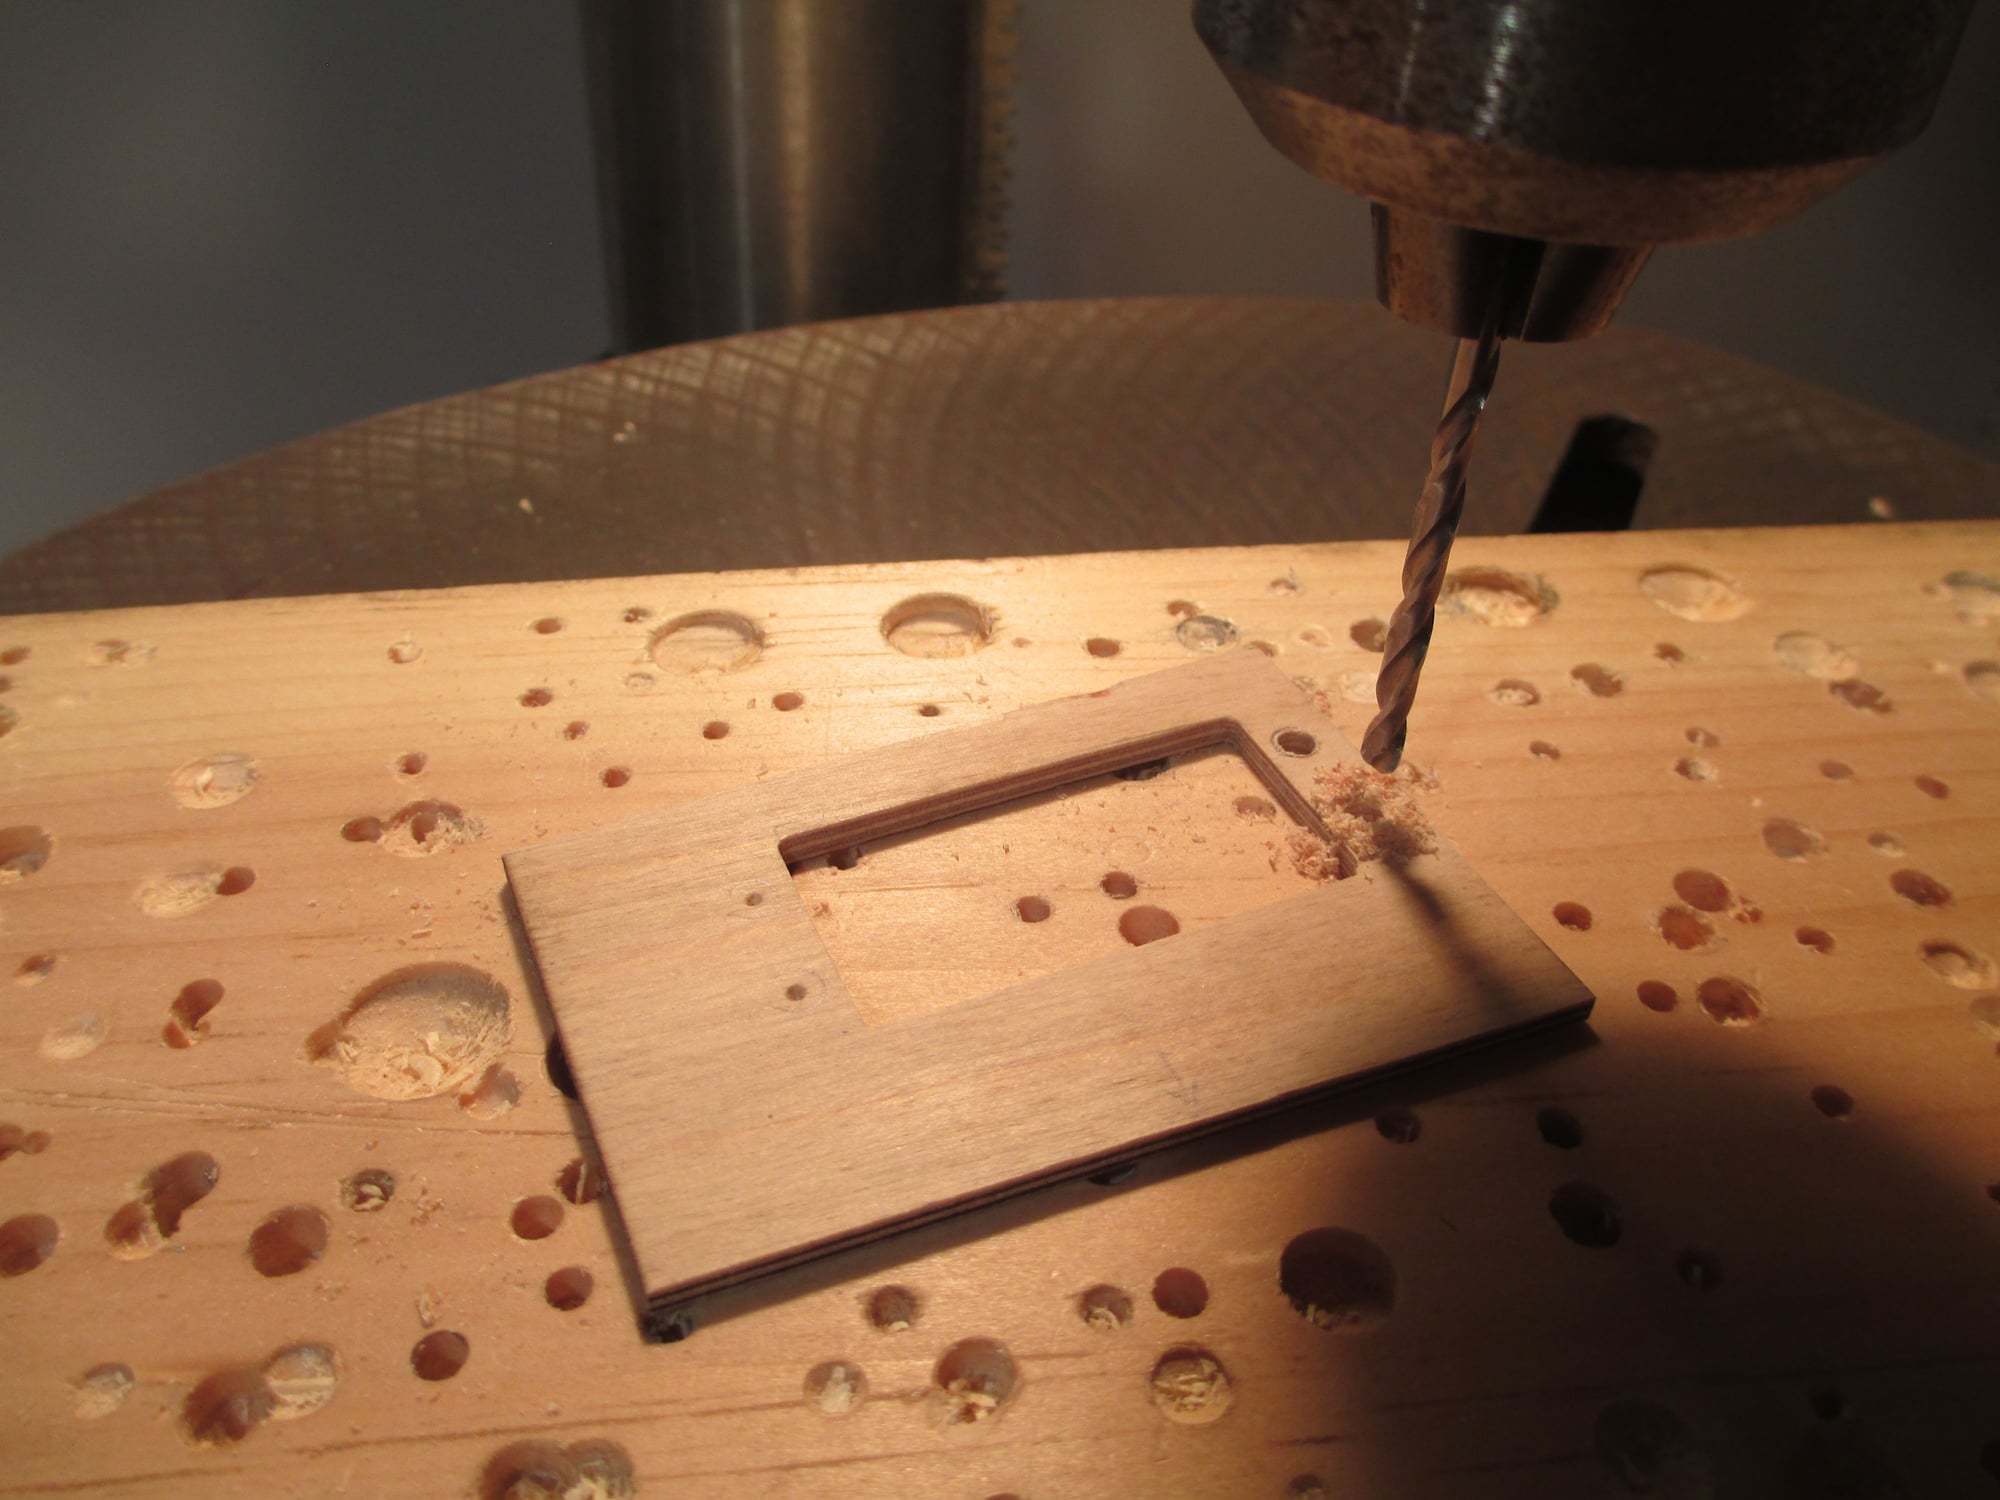
I have been holding all of my servos in place with cap head screws threaded into blind nuts for years without any failures. I'm not fond of using wood screws to hold servos in place. Here, I'm drilling holes to receive the 2-56 blind nuts.
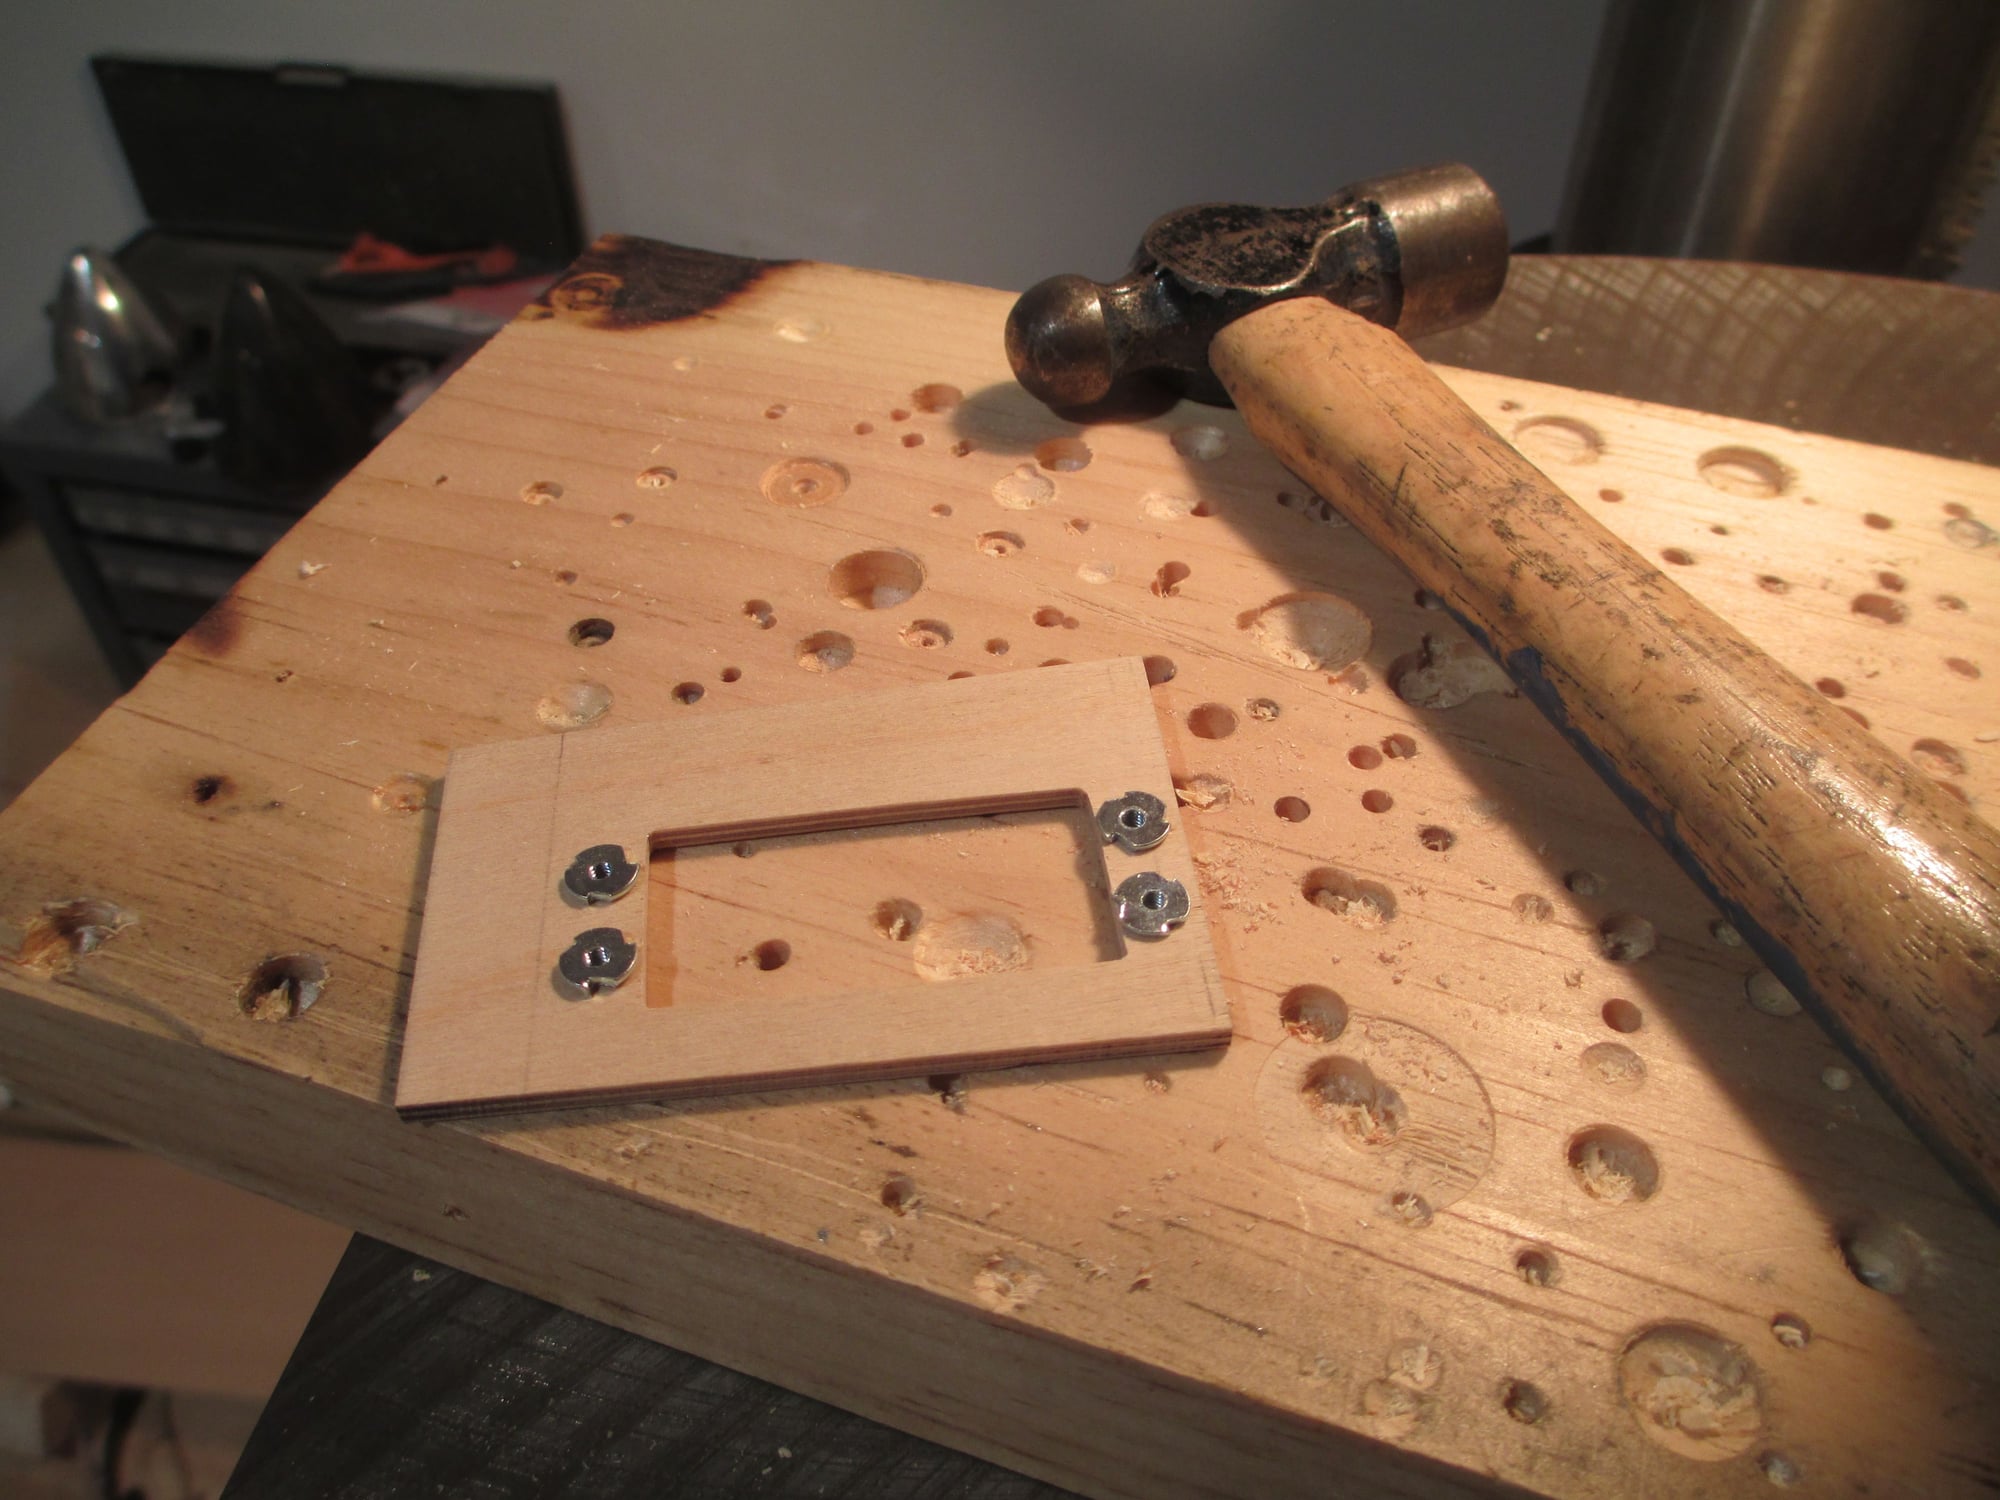
Gently tapped into position.
Note: Its always a good idea to run a tap through each blind nut before installing them, or at least run a fastener through. You don't want to find out later that the thread has a burr in it an won't accept the fastener.
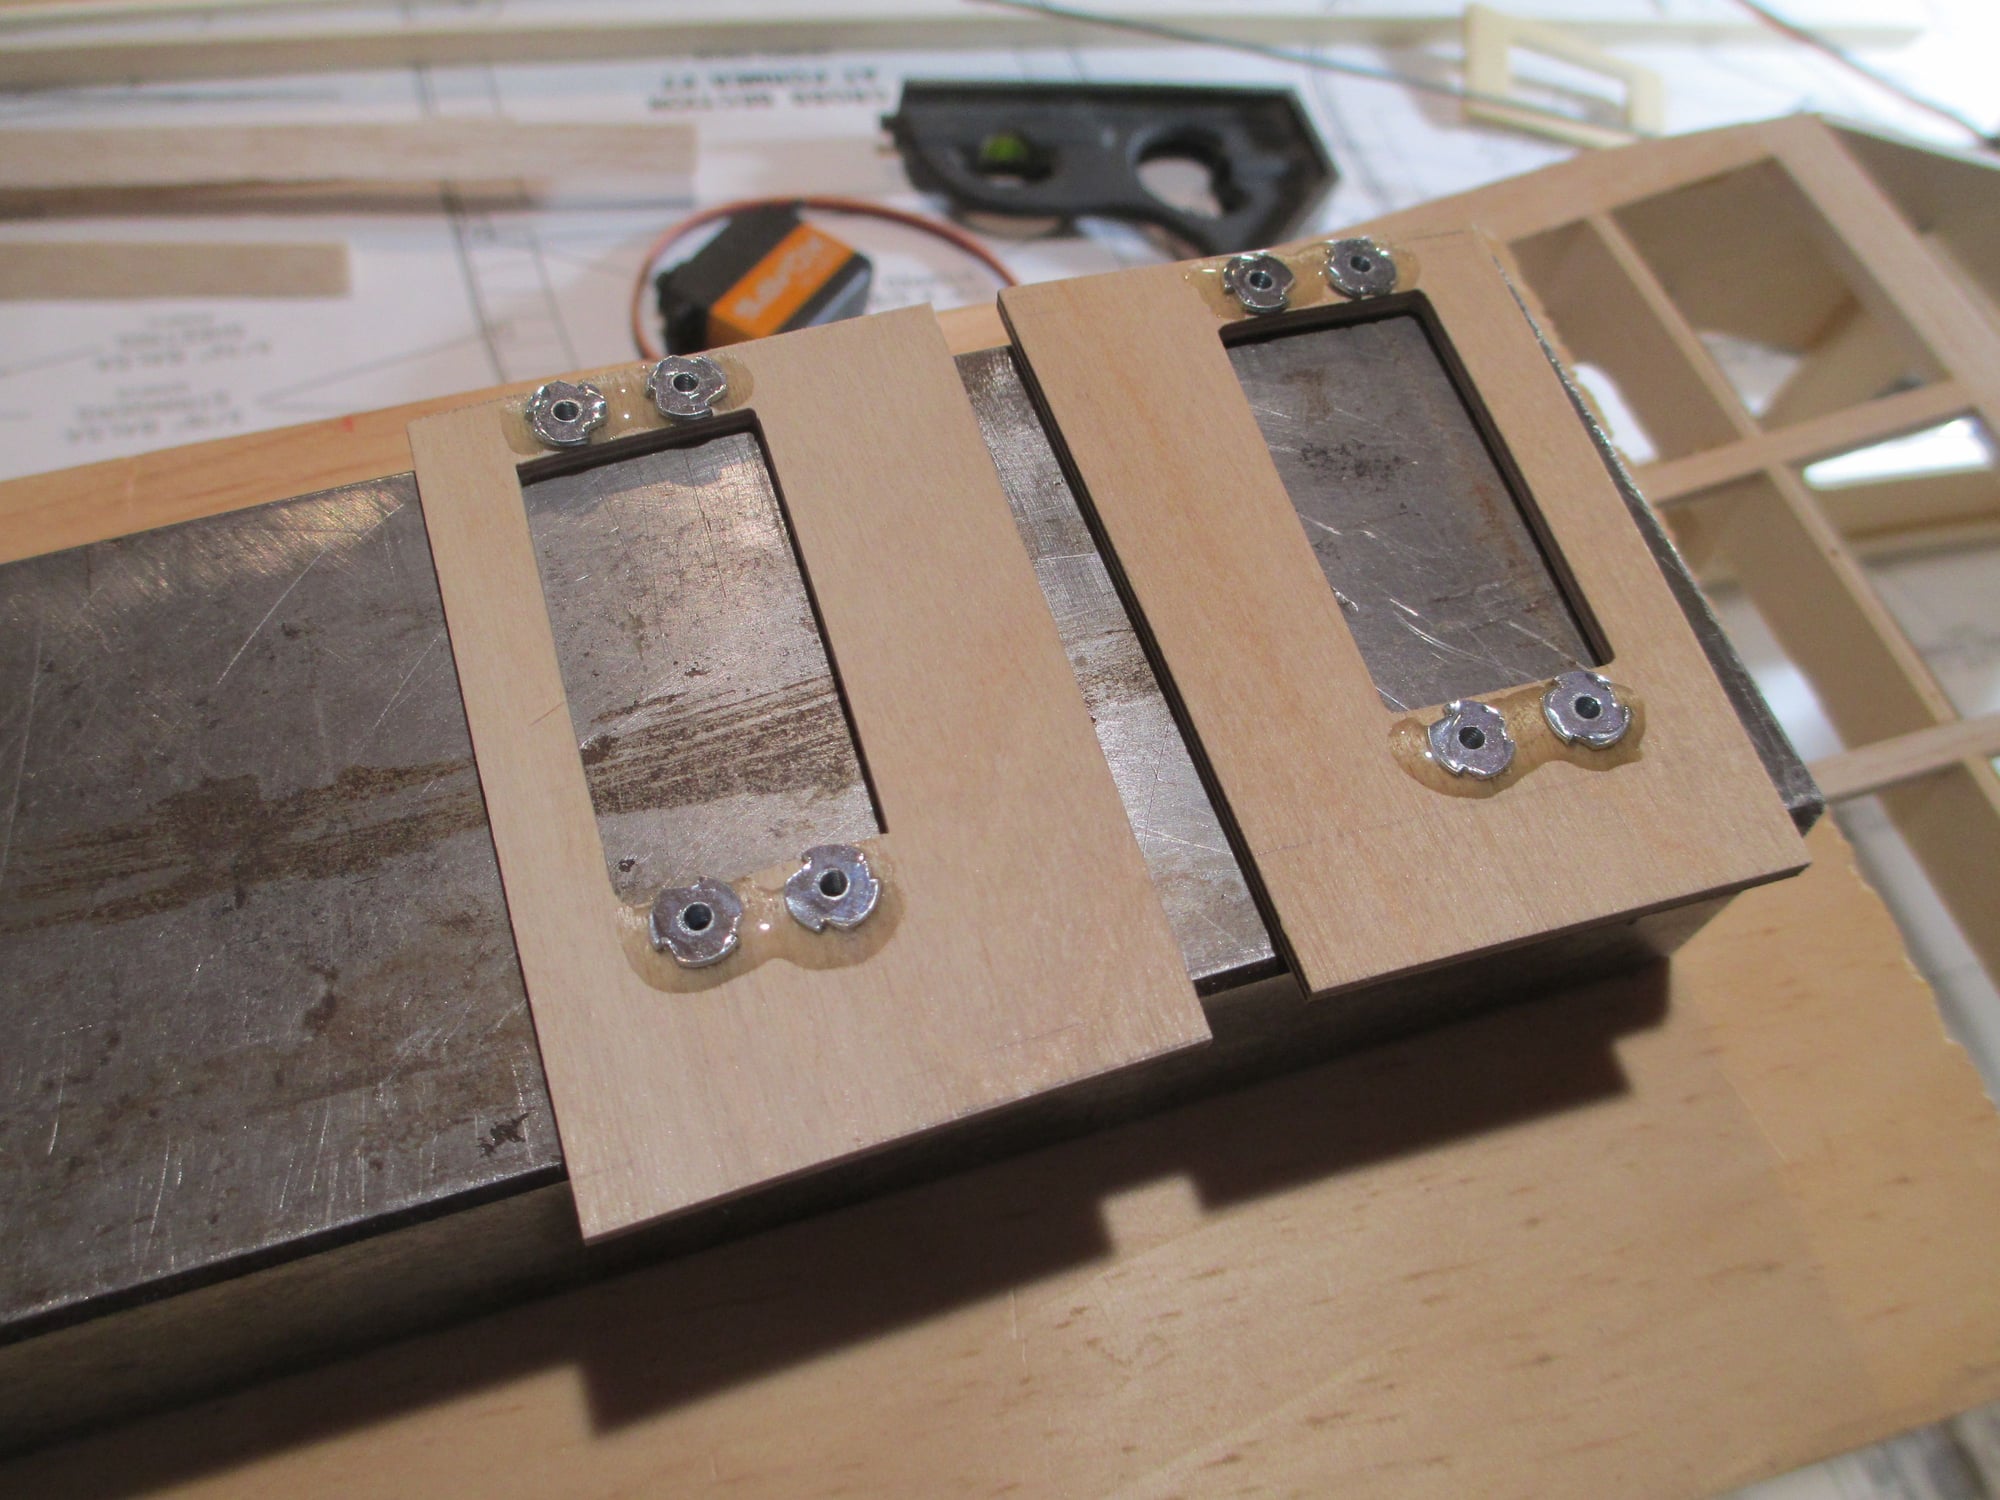
Each blind nut is epoxied in place.
Not liking a few things about the rudder and elevator tray location and set-up, so I decided to make a few changes/improvements. I relocated the servo tray rail moving it back as well as notching both side fuse doublers to hold the rail.
The rail is (1/4" x 3/8" basswood) glued into position.
This should give a stronger joint without any weight penalty. Basically a win win situation...
I also ditched the servo trays and made two new ones. I also lowered the front of the tray about 3/16" by notching the top of the former. These will be epoxied into position, but not quite yet...
I have been holding all of my servos in place with cap head screws threaded into blind nuts for years without any failures. I'm not fond of using wood screws to hold servos in place. Here, I'm drilling holes to receive the 2-56 blind nuts.
Gently tapped into position.
Note: Its always a good idea to run a tap through each blind nut before installing them, or at least run a fastener through. You don't want to find out later that the thread has a burr in it an won't accept the fastener.
Each blind nut is epoxied in place.
Last edited by VincentJ; 11-11-2019 at 10:36 AM.