


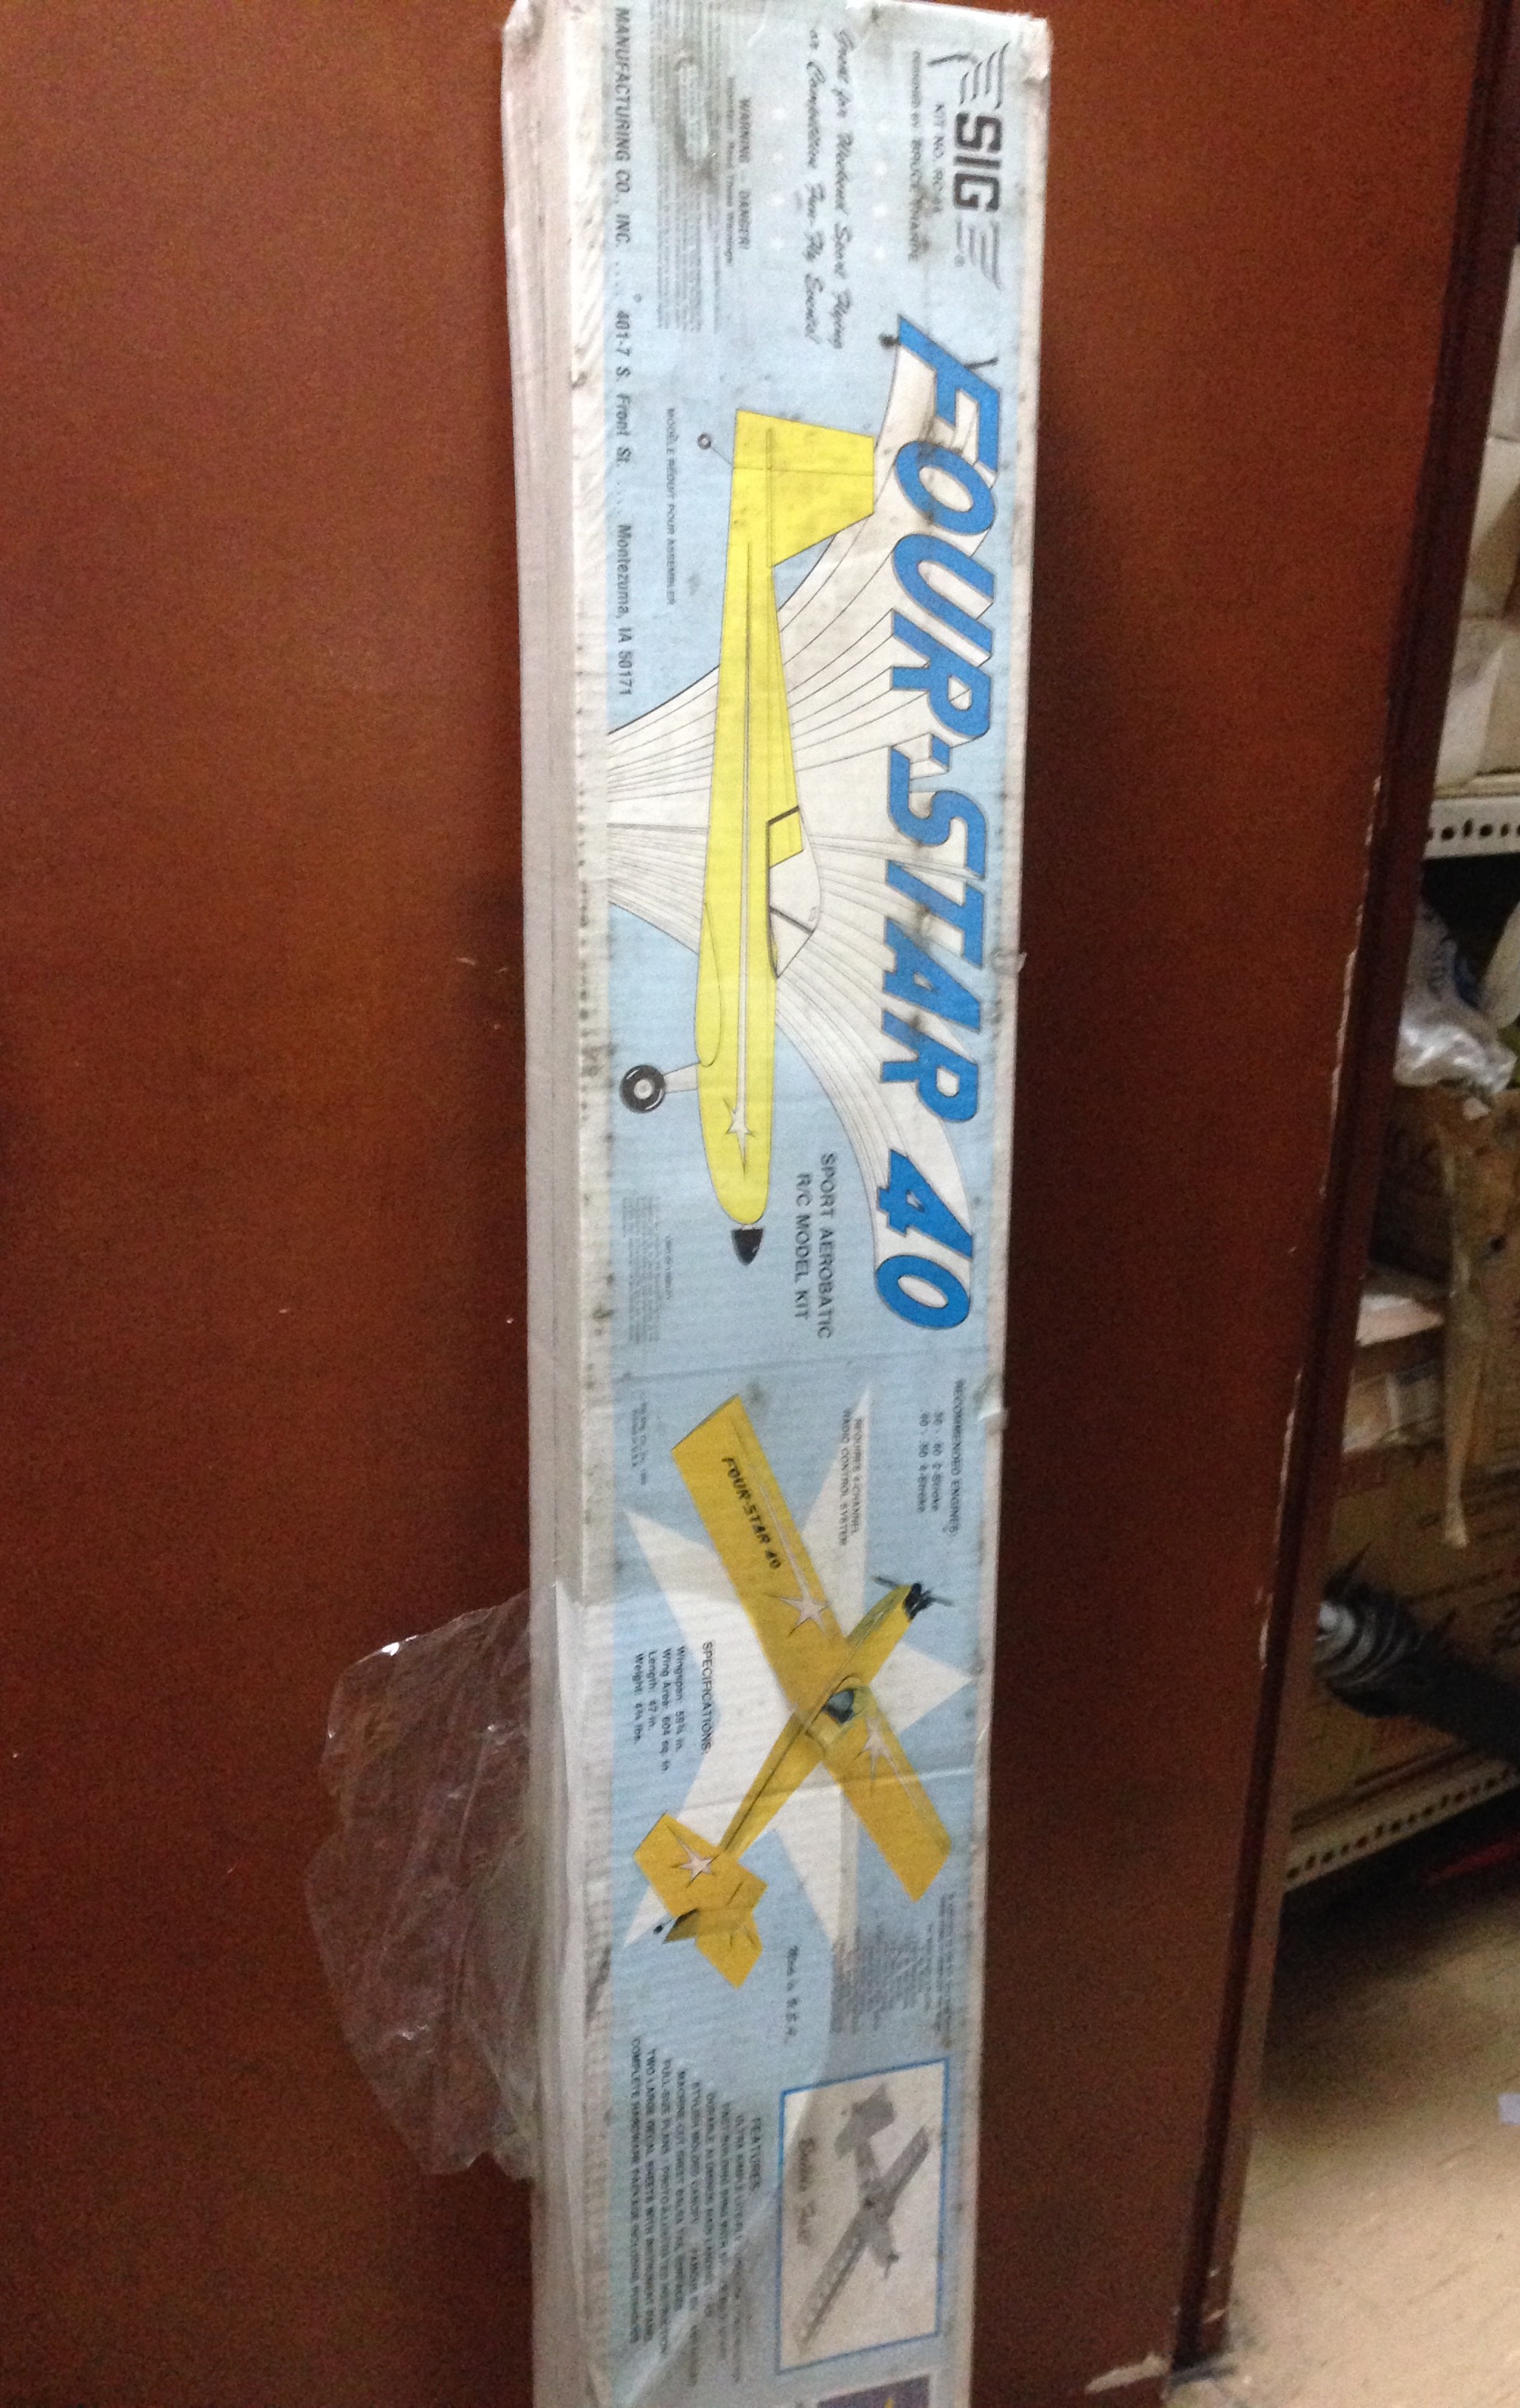
Sig Four Star .40 Build Thread!!!!!!!!
 09-13-2014 | 07:15 AM
#76
Junior Member
Joined: Sep 2014
Posts: 1
Likes: 0
Received 0 Likes
on
0 Posts
G-JIMG,
I am beginning a 4*60. Thanks for your beautiful mod details.
Could you share your ammended manual? Could you give more details on your wingtips, cockpit and dashboard? Where did you mount your switch?
Thanks!
kitsBuilder
I am beginning a 4*60. Thanks for your beautiful mod details.
Could you share your ammended manual? Could you give more details on your wingtips, cockpit and dashboard? Where did you mount your switch?
Thanks!
kitsBuilder
 09-29-2014 | 07:10 AM
#77


Joined: Nov 2012
Posts: 36
Likes: 0
Received 0 Likes
on
0 Posts
From: Lincoln, UNITED KINGDOM
Hi Kitsbuilder,
Sorry it's taken a while to respond, I've been travelling on business.
I don't think I still have a soft copy of the amended manual but I'll have a trawl through my files when I get home.
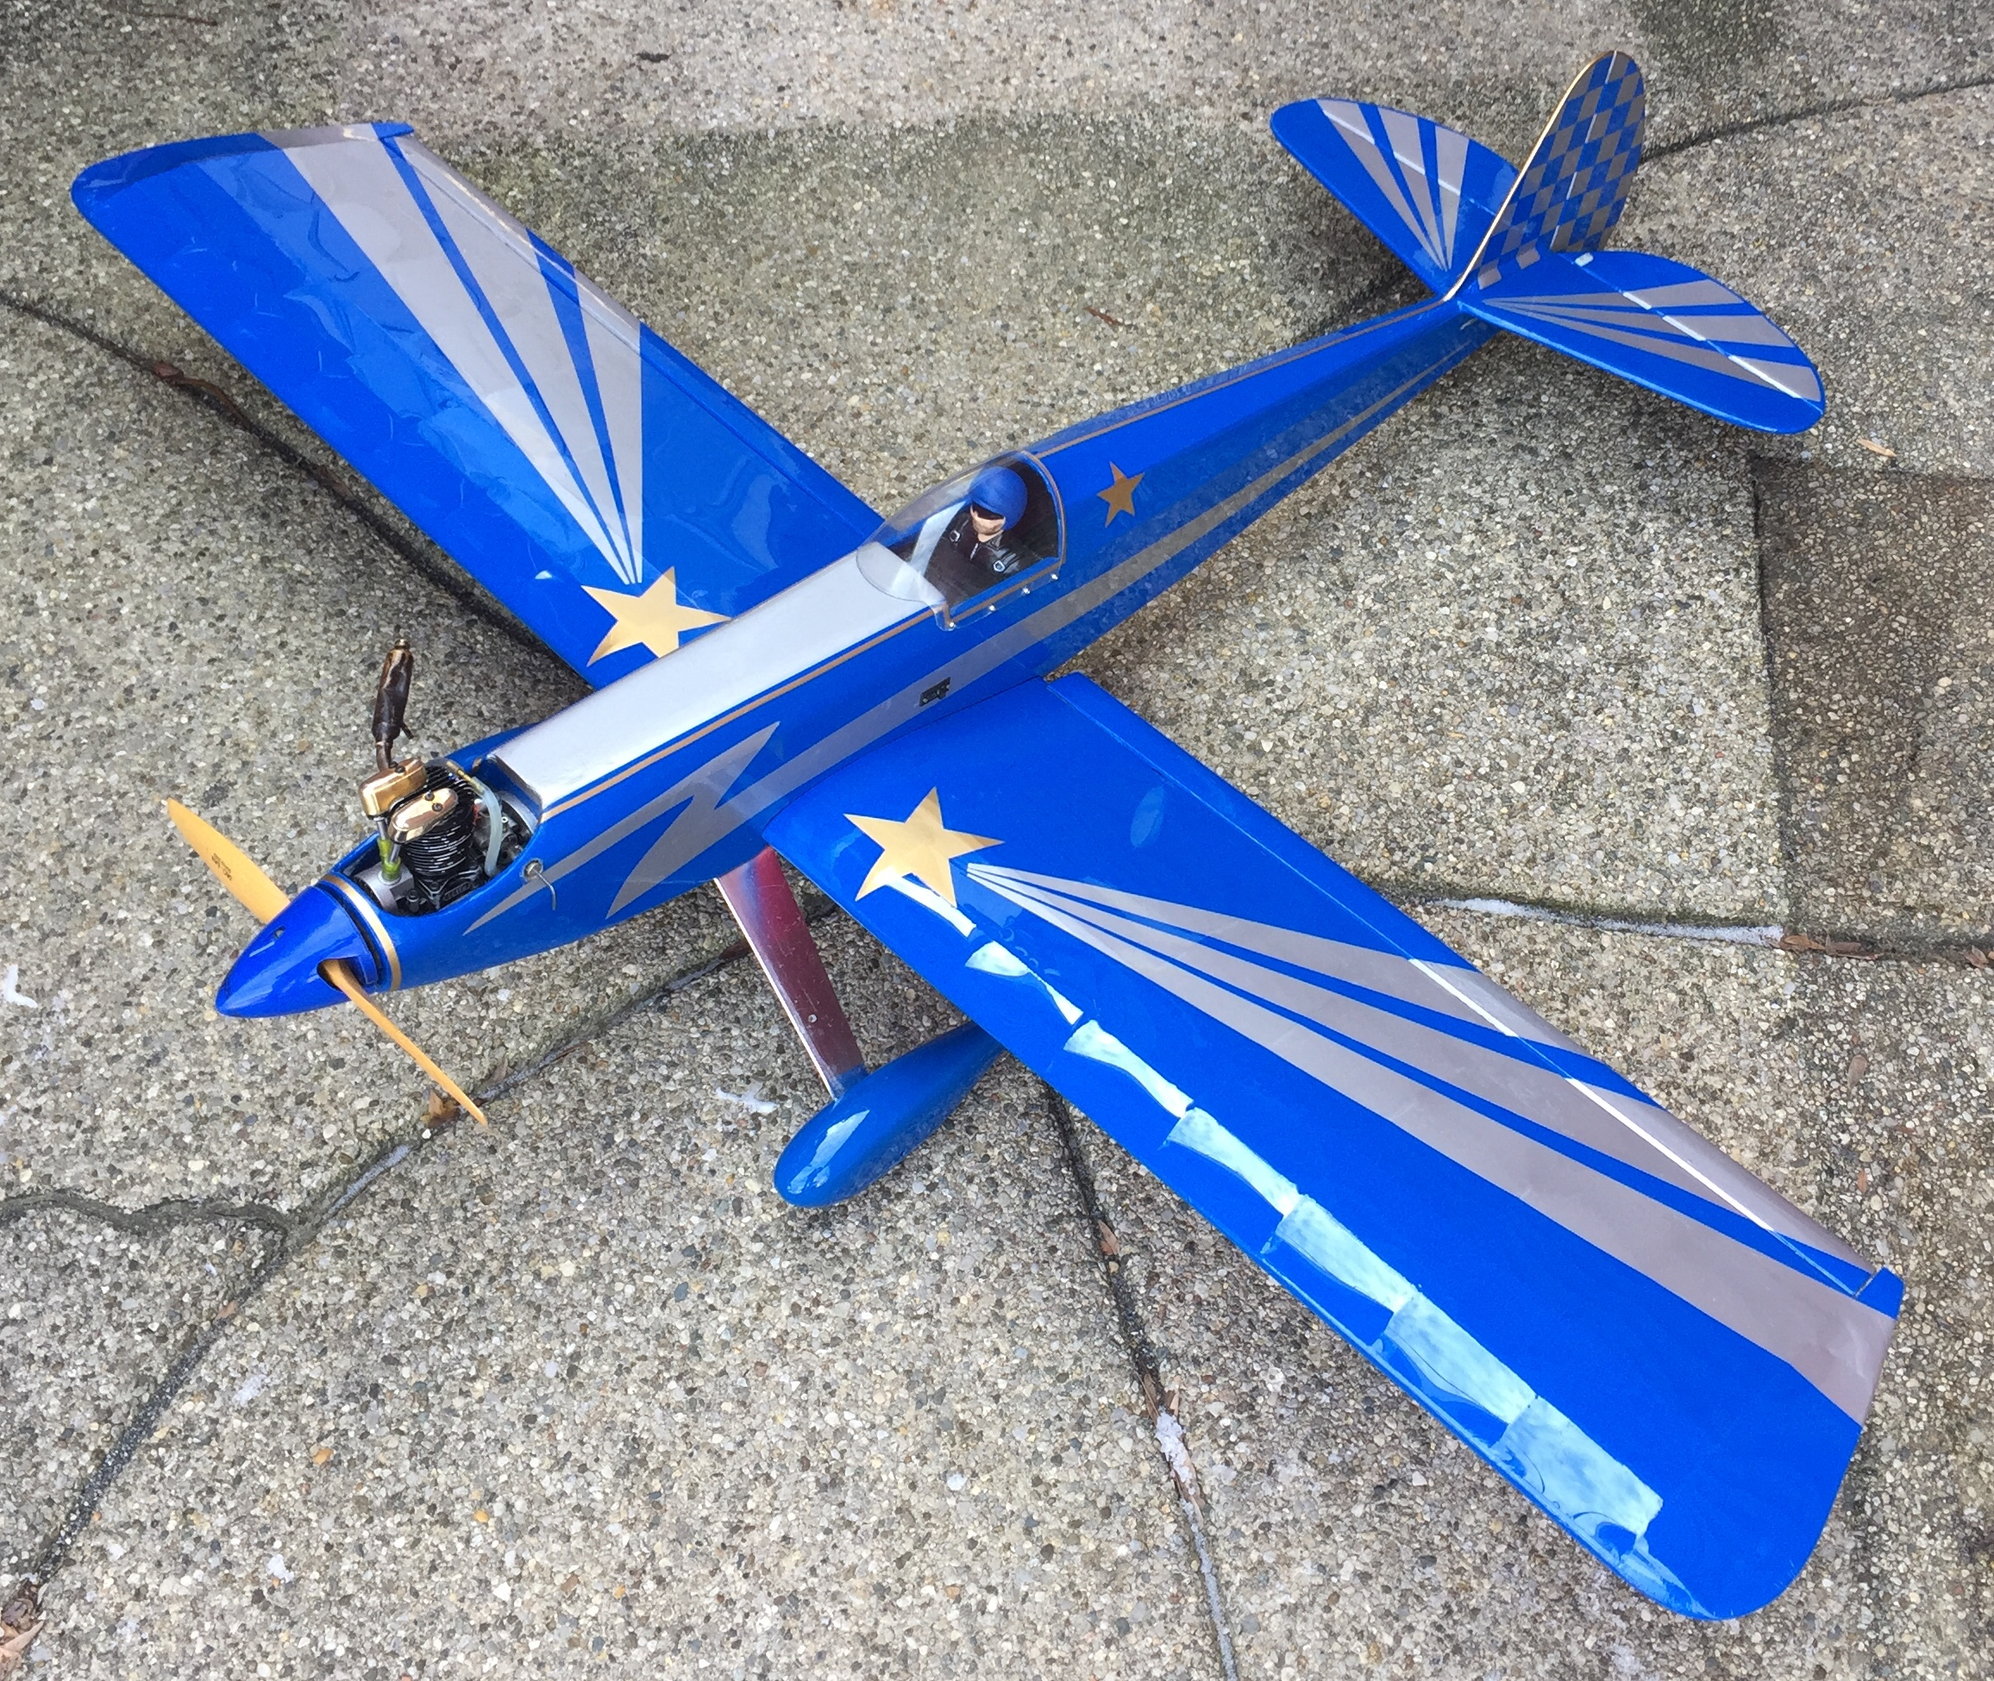
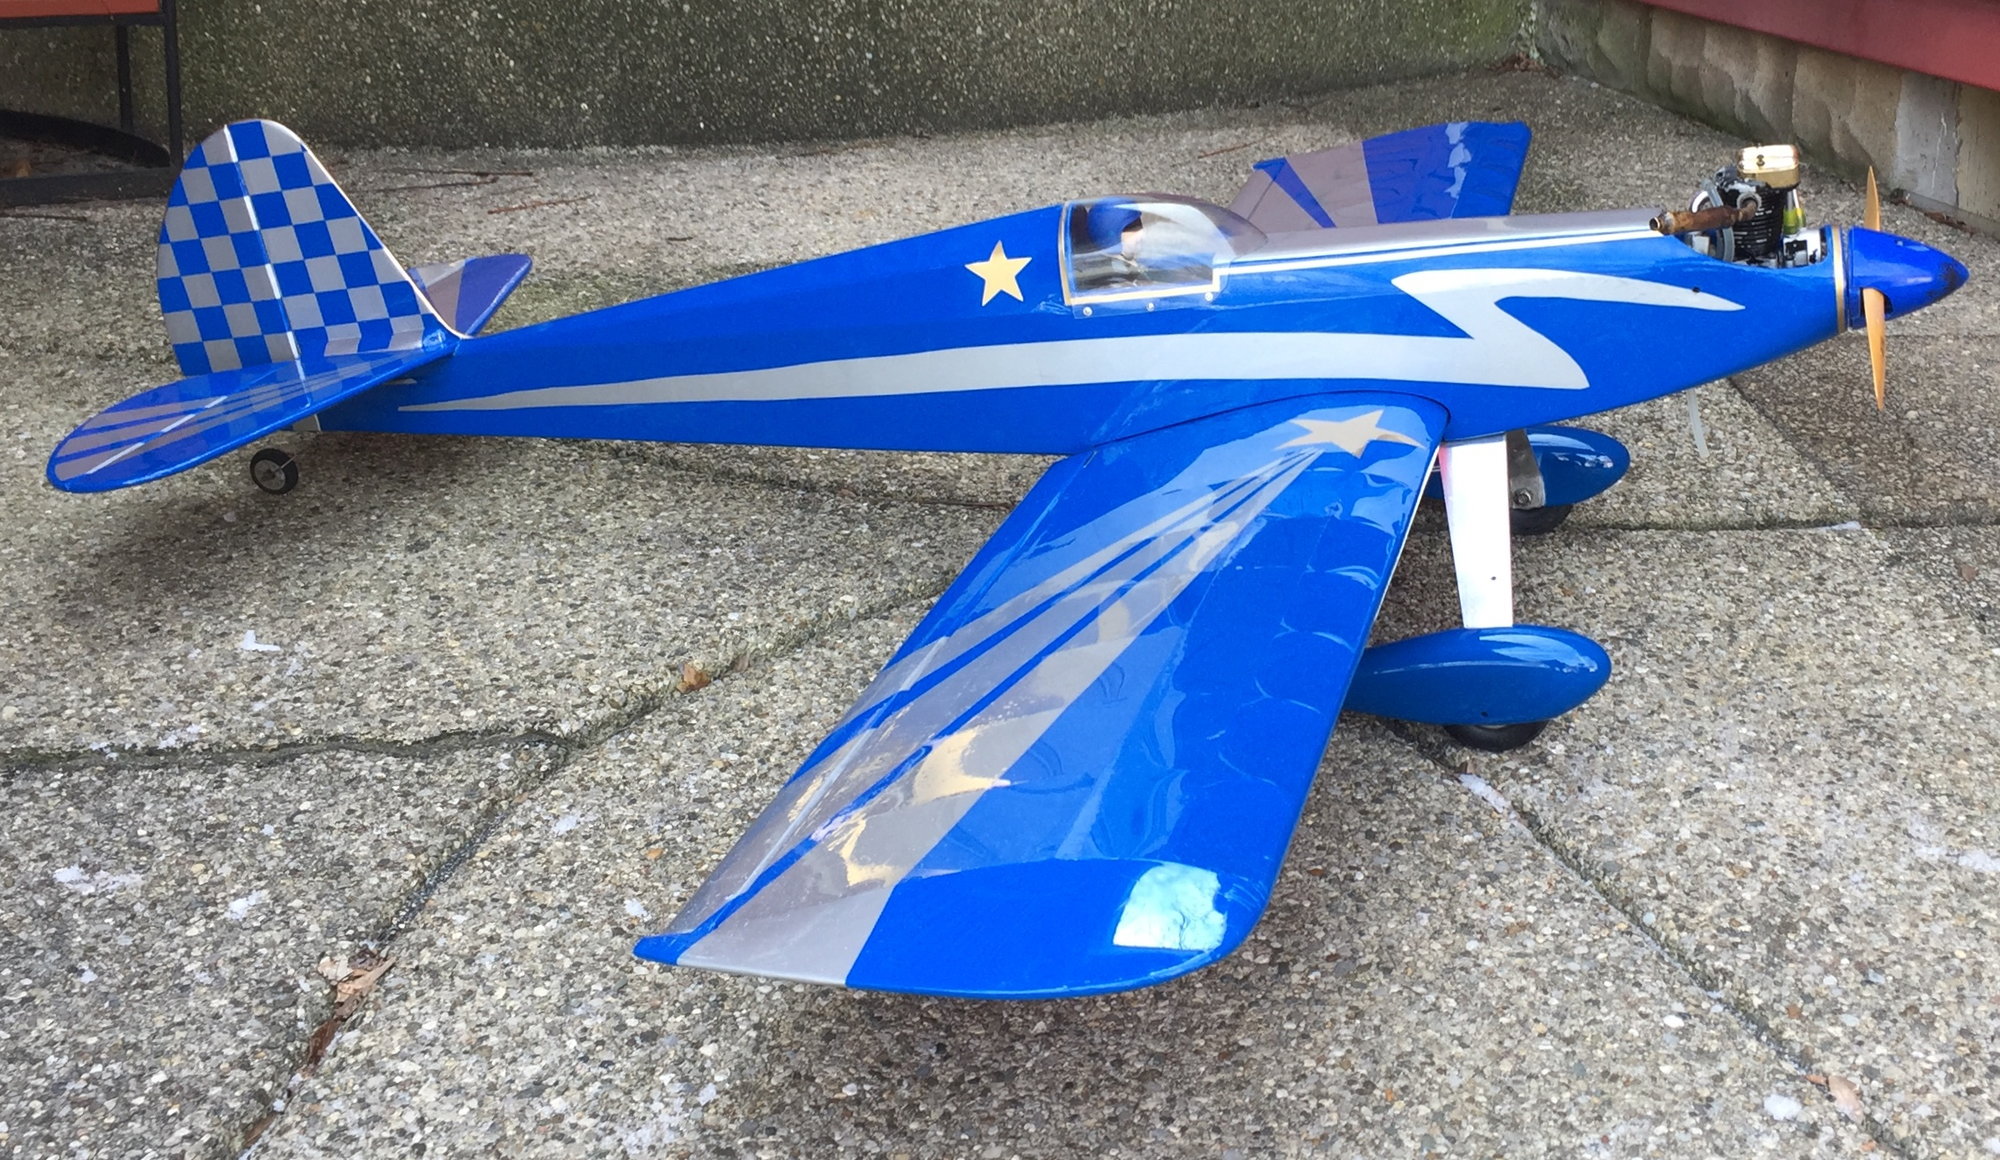
The Wings I built as per plan, just finished them one bay shorter than shown. I used one of the unused ribs as a rough template and cut the wingtip from a sufficiently large length of triangular balsa, the type used for large ailerons. I glued it to the the end of the wing with the wider part nearly flush with the wing's upper surface, then trimmed/sanded to fit. It gives a nice 'tapered down' finish to the wing. When initially cutting the balsa I left it longer at the TE than the rib template, I later sanded it to blend with the Aileron profile thereby providing protection for the Aileron tip and giving the wing a nice 'finished' look. (see original photo).
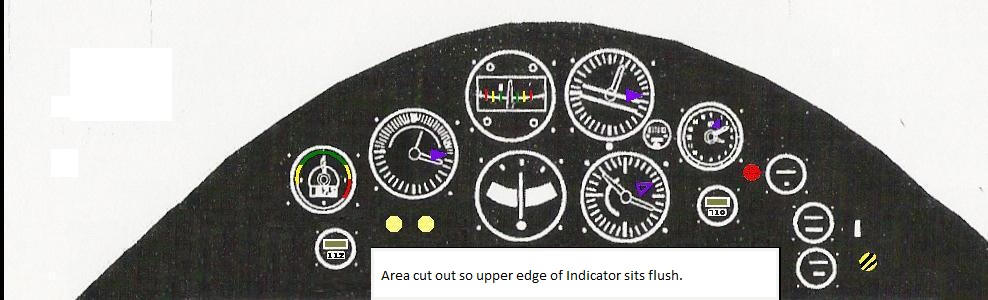
In the cockpit I extended an existing slot in the fuselage balsa to accept the battery staus indicator and glued a suitably angled block of balsa underneath. This provided enough surface to stick the indicator on (they come with self adhesive pads). I then shaped a block of balsa to blend with the forward curved raised portion of the cockpit and cut a 'slot' in the lower face of it to accept the upper edge of the Indicator where it protruded from the cockpit floor. I then shaped it to give it a sort of cowling look and used lots of balsa seal before giving it a final light sanding and spraying it.
I used the attached picture (suitably sized and printed) and cut it to fit the console face. It also shows where the slot should be to accept the upper edge of the indicator.
My Rx switch is on the left side almost in line with the LE (as per the original picture). The other black dot in the photo, slightly higher and a few inches forward of the switch, is the refuelling dot.
I'm in the process of building another 4 Star 40 but this time I'm fibre glassing and spray painting the whole thing. Need to hone the skills before I build my Corsair!
Let me know how your build goes, and feel free to ask any questions.
Sorry it's taken a while to respond, I've been travelling on business.
I don't think I still have a soft copy of the amended manual but I'll have a trawl through my files when I get home.
The Wings I built as per plan, just finished them one bay shorter than shown. I used one of the unused ribs as a rough template and cut the wingtip from a sufficiently large length of triangular balsa, the type used for large ailerons. I glued it to the the end of the wing with the wider part nearly flush with the wing's upper surface, then trimmed/sanded to fit. It gives a nice 'tapered down' finish to the wing. When initially cutting the balsa I left it longer at the TE than the rib template, I later sanded it to blend with the Aileron profile thereby providing protection for the Aileron tip and giving the wing a nice 'finished' look. (see original photo).
In the cockpit I extended an existing slot in the fuselage balsa to accept the battery staus indicator and glued a suitably angled block of balsa underneath. This provided enough surface to stick the indicator on (they come with self adhesive pads). I then shaped a block of balsa to blend with the forward curved raised portion of the cockpit and cut a 'slot' in the lower face of it to accept the upper edge of the Indicator where it protruded from the cockpit floor. I then shaped it to give it a sort of cowling look and used lots of balsa seal before giving it a final light sanding and spraying it.
I used the attached picture (suitably sized and printed) and cut it to fit the console face. It also shows where the slot should be to accept the upper edge of the indicator.
My Rx switch is on the left side almost in line with the LE (as per the original picture). The other black dot in the photo, slightly higher and a few inches forward of the switch, is the refuelling dot.
I'm in the process of building another 4 Star 40 but this time I'm fibre glassing and spray painting the whole thing. Need to hone the skills before I build my Corsair!
Let me know how your build goes, and feel free to ask any questions.
12-03-2014 | 03:36 AM
#78
Junior Member
Hi all, first post here as I recently decided to do a search about this plane and came across this thread. Recently acquired this kit and this will be my first time to assemble a kit plane, any suggestions other than the ones mentioned in this thread? Anything to look out for? I'm not new to flying, but new to building a kit. Thanks in advance 
12-03-2014 | 04:55 PM
#79
Junior Member
Joined: Sep 2008
Posts: 21
Likes: 0
Received 0 Likes
on
0 Posts
From: naperville,
IL
My only recommendation would be to review the build manual and familiarize yourself with all the steps and methods before putting glue to wood. My first kit was a four star 60 and found it 'easy' relatively speaking. The Sig manual with the four star 60 was very thorough and didn't leave much to question. That being said, take your time and enjoy the build! The end result will be something your proud of and happy to put in the air alongside the high dollar ARF's at the field on a Saturday morning!!
12-04-2014 | 09:41 PM
#80

Joined: Aug 2010
Posts: 123
Likes: 0
Received 0 Likes
on
0 Posts
From: calgary, AB, CANADA
I used to have a 4 star 40 that I powered with an OS 40 SF with a tuned pipe. Sadly the 4 star didn't survive a stall when landing but I still have the 40 SF and use it on a Goldberg Tiger. Thinking about putting the tuned pipe back on it.
12-22-2014 | 07:39 AM
#81
Joined: Nov 2012
Posts: 36
Likes: 0
Received 0 Likes
on
0 Posts
From: Lincoln, UNITED KINGDOM
Hi all, first post here as I recently decided to do a search about this plane and came across this thread. Recently acquired this kit and this will be my first time to assemble a kit plane, any suggestions other than the ones mentioned in this thread? Anything to look out for? I'm not new to flying, but new to building a kit. Thanks in advance
If you have any questions please feel free to ask.
12-22-2014 | 07:44 AM
#82
Joined: Nov 2012
Posts: 36
Likes: 0
Received 0 Likes
on
0 Posts
From: Lincoln, UNITED KINGDOM
Oh, and do not forget to laterally balance the model before you cover the wings. Mine took 1/4oz of lead in the Port wingtip, but that might have been because of the modifications I made.
02-22-2020 | 04:41 AM
#83

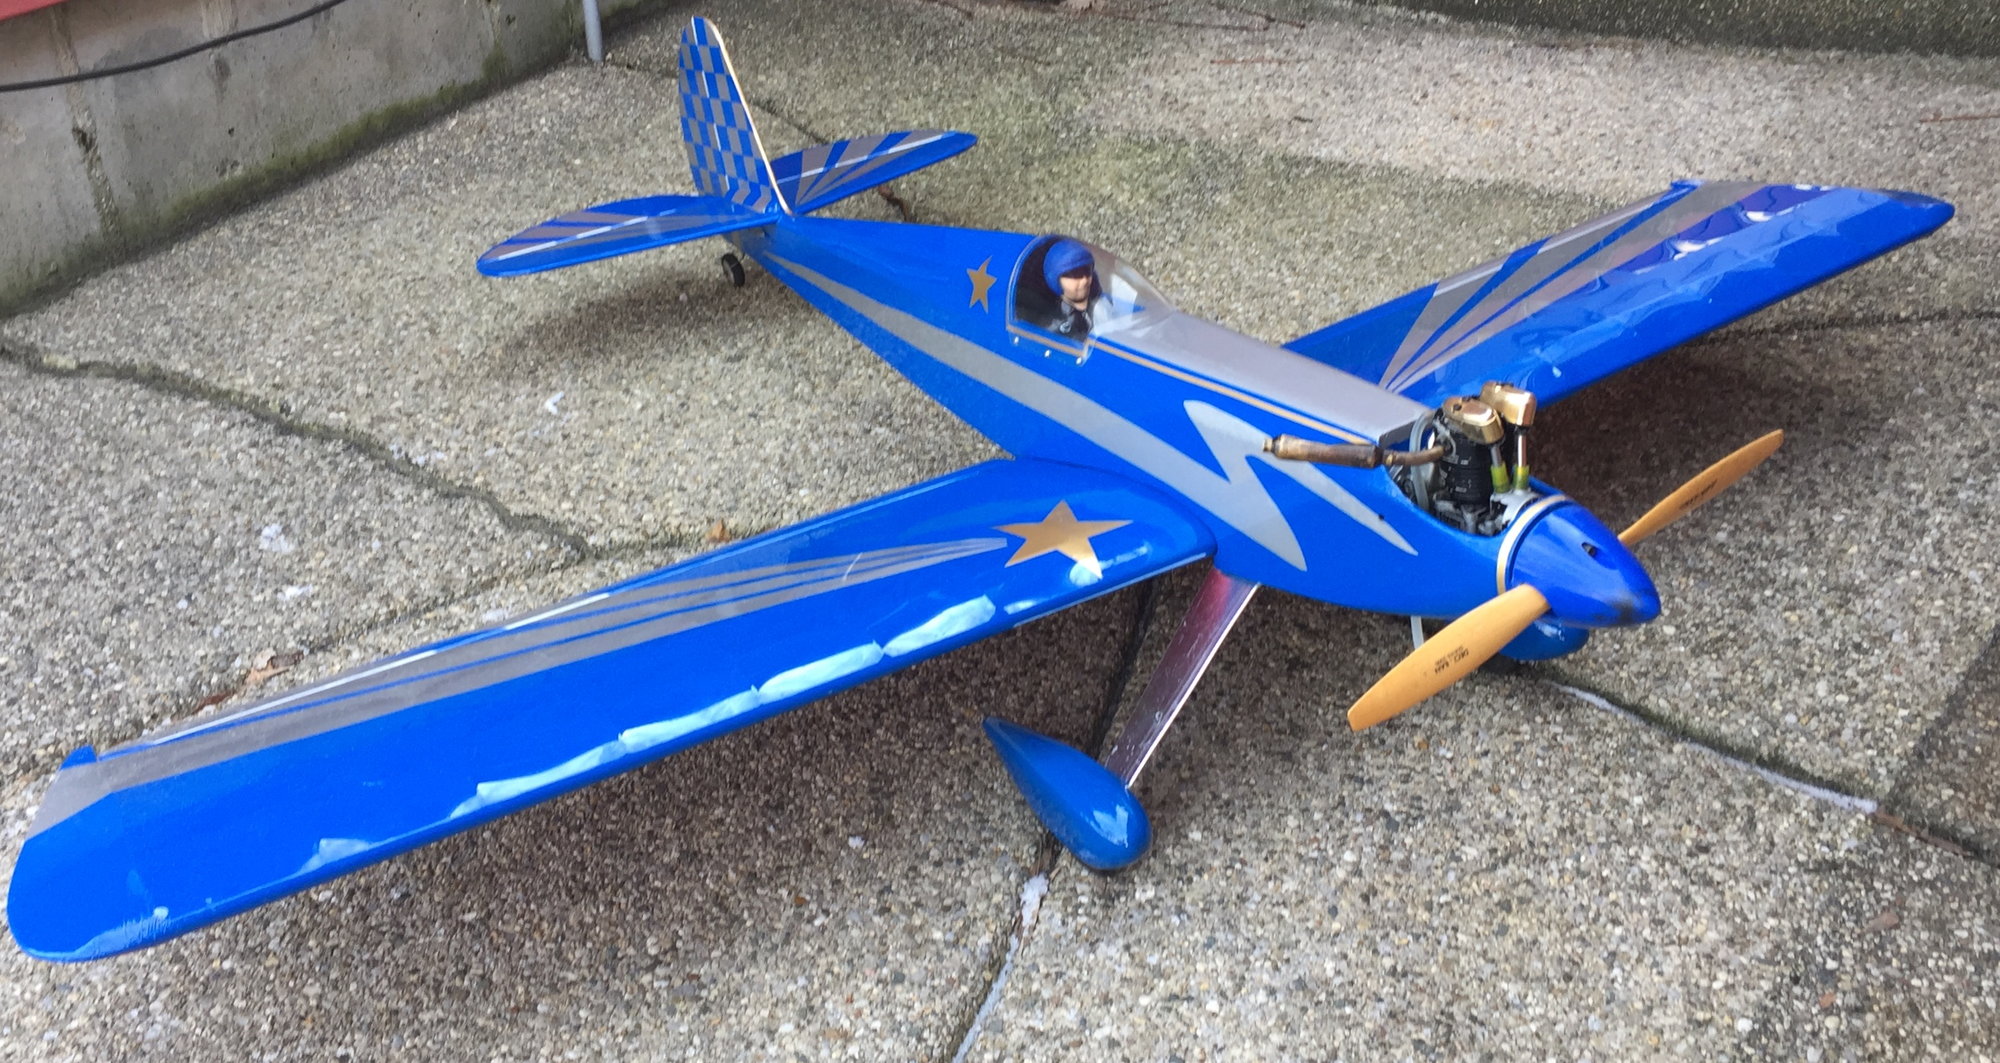
I bought this Four Star at an auction for $24.
It was in rough condition but had an engine and all servos.
I hate the looks of these planes but love how they fly so I had a plan; rebuild it so it doesn�t look like a Four Star.
I believe I have succeeded!
I did lots of work to this plane and it payed off.
It turned out so nice that I have bought a second Four Star to rebuild.
The following users liked this post:
betingu (05-06-2020)
09-04-2020 | 11:23 AM
#84
Junior Member
I know this is an old thread however i am starting a 4 star 40 soon .Do you guys feel the sheeting of the leading edge to the wing spar a good mod .I am planning on beefing up the lading gear block and the wing hold down blocks and decking in the turtle deck.
Also how important are individual ail servos compared to only one in the center of the wing.First build in almost 40 years
Thanks
Also how important are individual ail servos compared to only one in the center of the wing.First build in almost 40 years
Thanks
09-04-2020 | 05:55 PM
#85

Joined: Oct 2005
Posts: 1,181
Likes: 0
Received 0 Likes
on
0 Posts
From: Dublin,
VA
I know this is an old thread however i am starting a 4 star 40 soon .Do you guys feel the sheeting of the leading edge to the wing spar a good mod .I am planning on beefing up the lading gear block and the wing hold down blocks and decking in the turtle deck.
Also how important are individual ail servos compared to only one in the center of the wing.First build in almost 40 years
Thanks
Also how important are individual ail servos compared to only one in the center of the wing.First build in almost 40 years
Thanks
09-04-2020 | 07:17 PM
#86
My Feedback: (1)
Joined: Oct 2002
Posts: 931
Likes: 0
Received 0 Likes
on
0 Posts
From: Great Falls, MT
I know this is an old thread however i am starting a 4 star 40 soon .Do you guys feel the sheeting of the leading edge to the wing spar a good mod .I am planning on beefing up the lading gear block and the wing hold down blocks and decking in the turtle deck.
Also how important are individual ail servos compared to only one in the center of the wing.First build in almost 40 years
Thanks
Also how important are individual ail servos compared to only one in the center of the wing.First build in almost 40 years
Thanks


