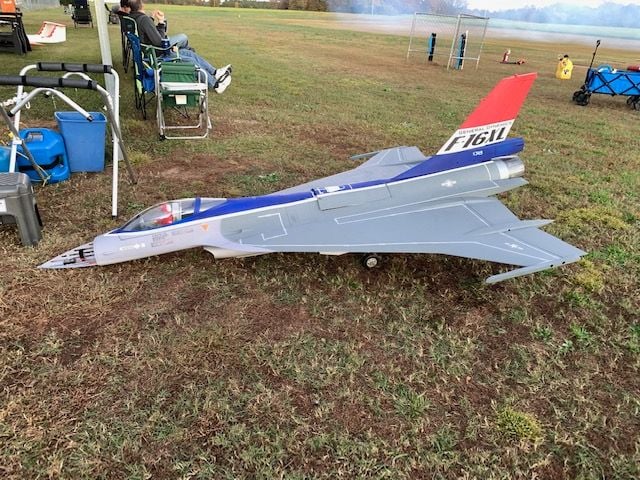
F-16XL ARF by Global Knight Models from Global Jet Club


The following 2 users liked this post by mikedenilin:
drfred58809 (11-12-2021),
yeahbaby (10-18-2021)


The following 3 users liked this post by mikedenilin:
 11-12-2021, 06:14 PM
#381

Thread Starter
My Feedback: (20)
Nose gear plate falls out again
First day at Jason Jordan Jet Jam near Greenville, SC. Perfect weather. The jet is flying great and looks great. Then after 6 sorties the nose gear plate came out again on landing. It was a near perfect approach and touch down on the mains, smooth runway, and as nose gear touched down the mount became unglued again and departed. I can't land any better than I did. No damage except the pitot tube screw broke off and one main gear door. The nose gear plate was previously repaired last May at FIF when it came out on take off. I just stuck it back in and added more epoxy as documented in this thread back in May. My conclusion is that in this v1 jet that there is not enough wood or composite structure to keep it in during normal ops especially on grass. I will have to redesign and fabricate a better way to keep the nose gear plate in the jet. When I figure out a way I will post my solution.
First day at Jason Jordan Jet Jam near Greenville, SC. Perfect weather. The jet is flying great and looks great. Then after 6 sorties the nose gear plate came out again on landing. It was a near perfect approach and touch down on the mains, smooth runway, and as nose gear touched down the mount became unglued again and departed. I can't land any better than I did. No damage except the pitot tube screw broke off and one main gear door. The nose gear plate was previously repaired last May at FIF when it came out on take off. I just stuck it back in and added more epoxy as documented in this thread back in May. My conclusion is that in this v1 jet that there is not enough wood or composite structure to keep it in during normal ops especially on grass. I will have to redesign and fabricate a better way to keep the nose gear plate in the jet. When I figure out a way I will post my solution.
11-14-2021, 07:47 PM
#382

My Feedback: (67)
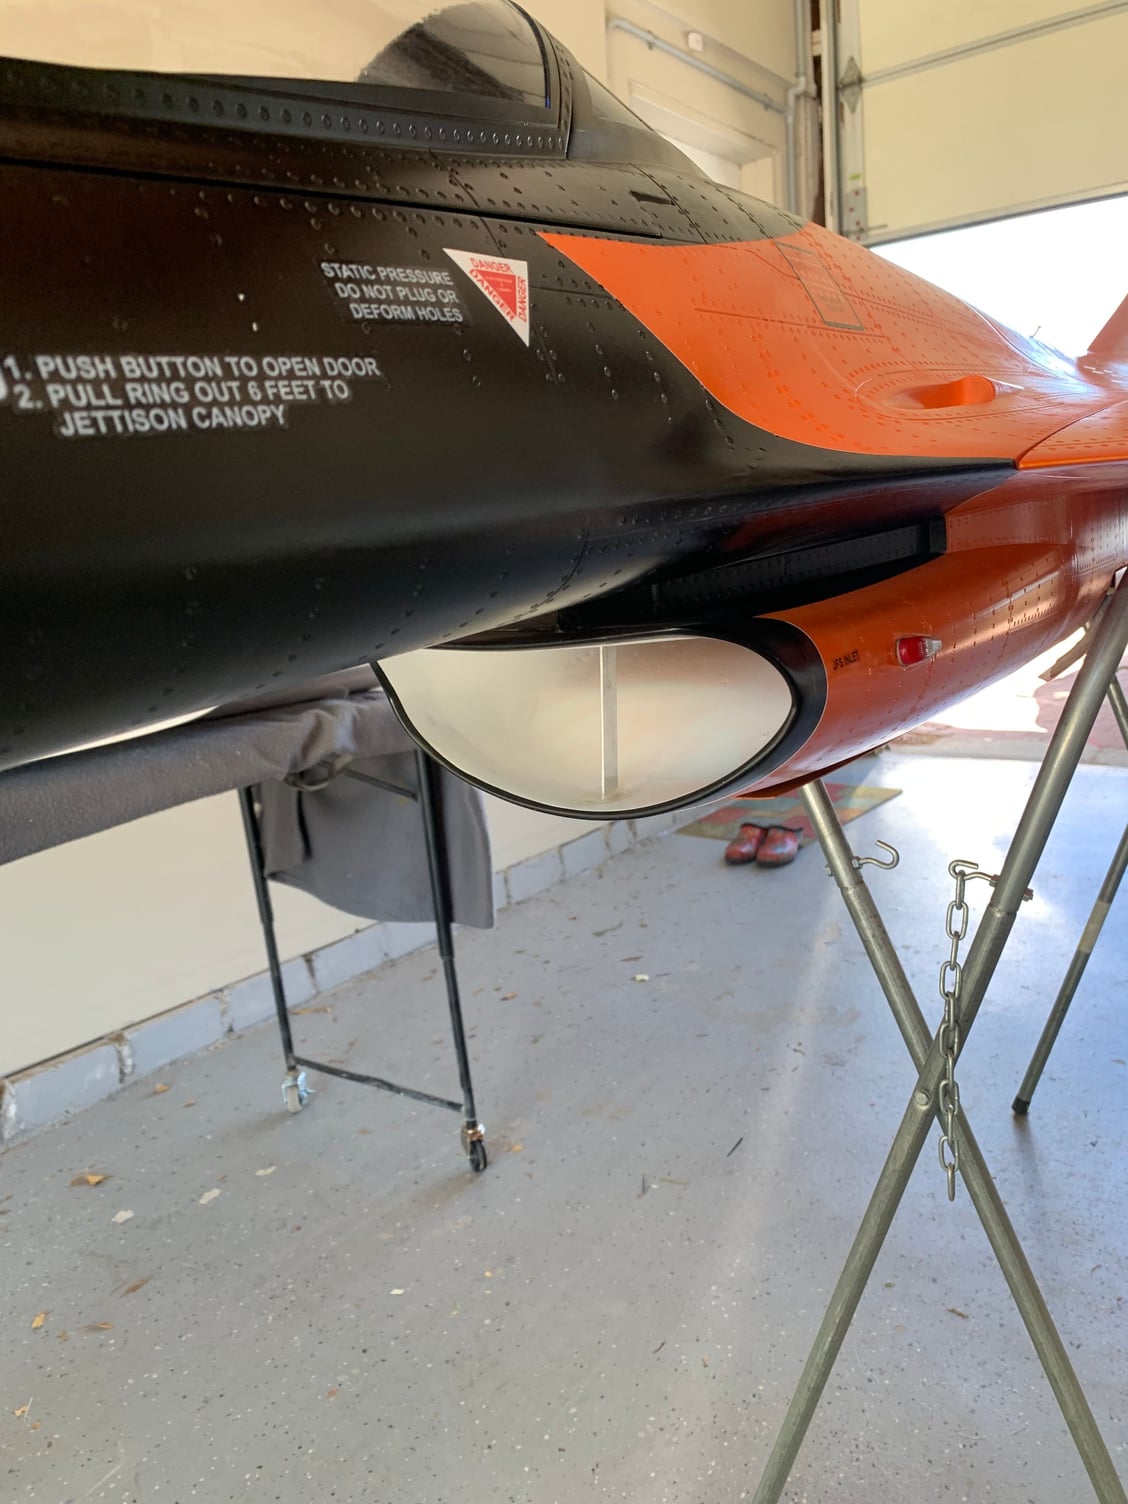
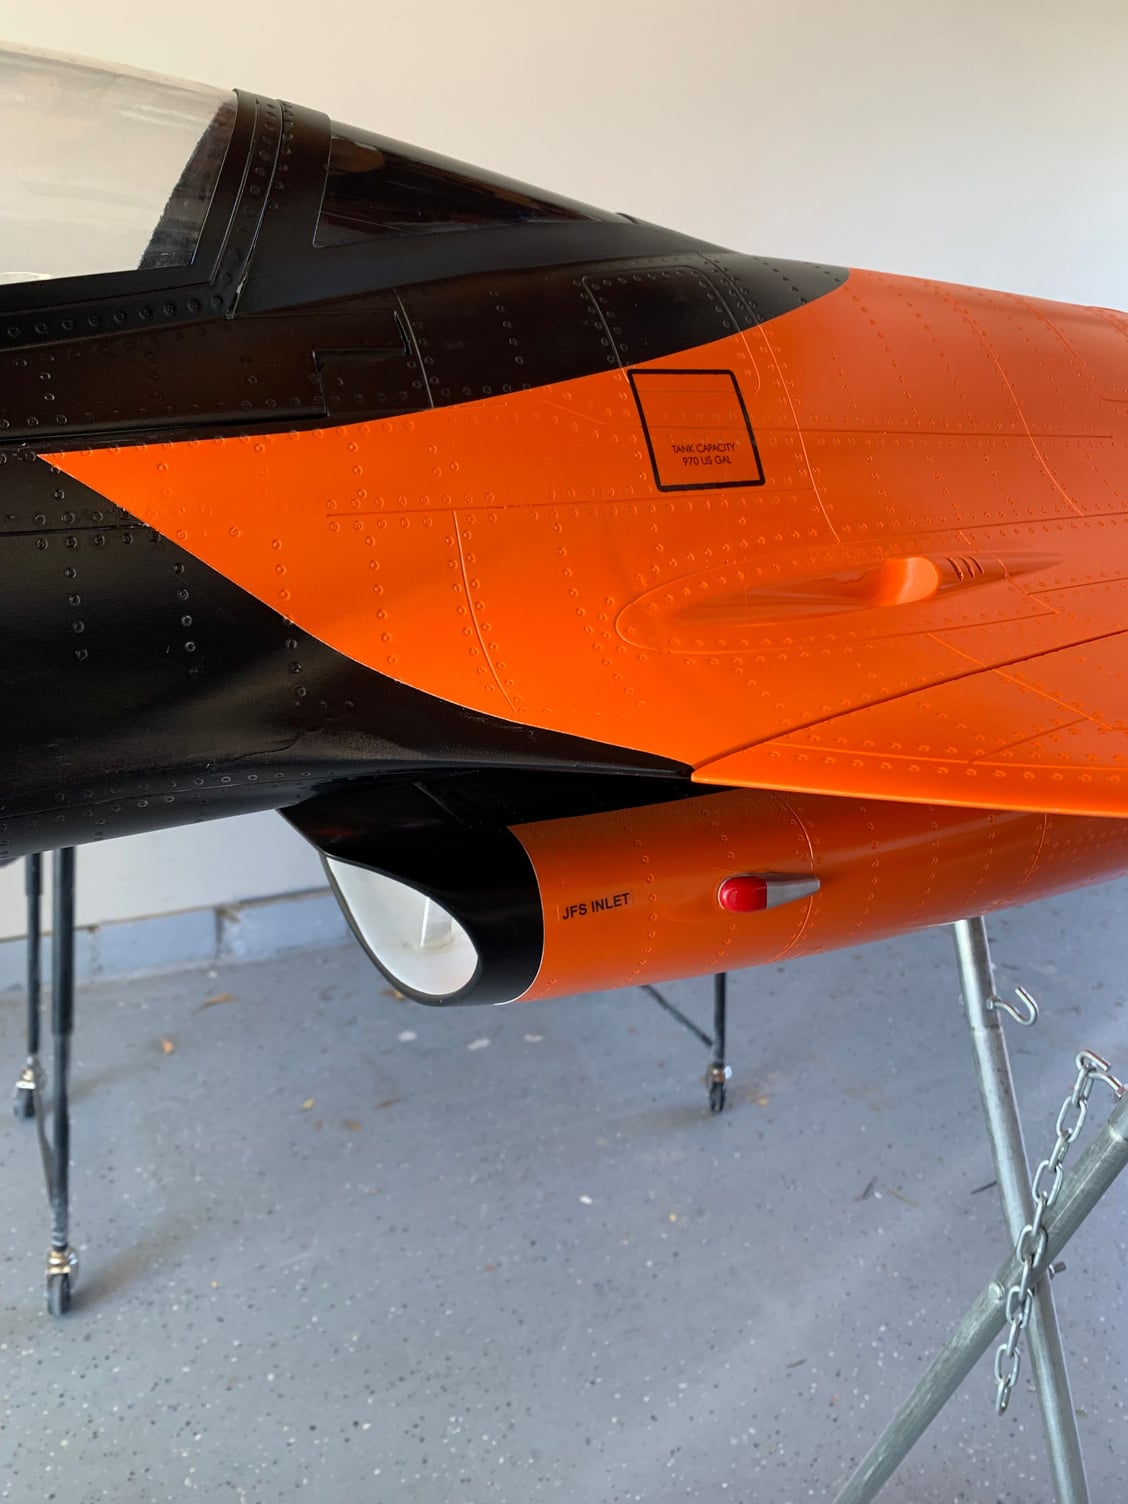
Hi Gary, I use carbon fiberglass to wrap the nose gear plate and the bulkhead so it can handle rougher surface including sand and gravels that we encountered at the Best in the West event.
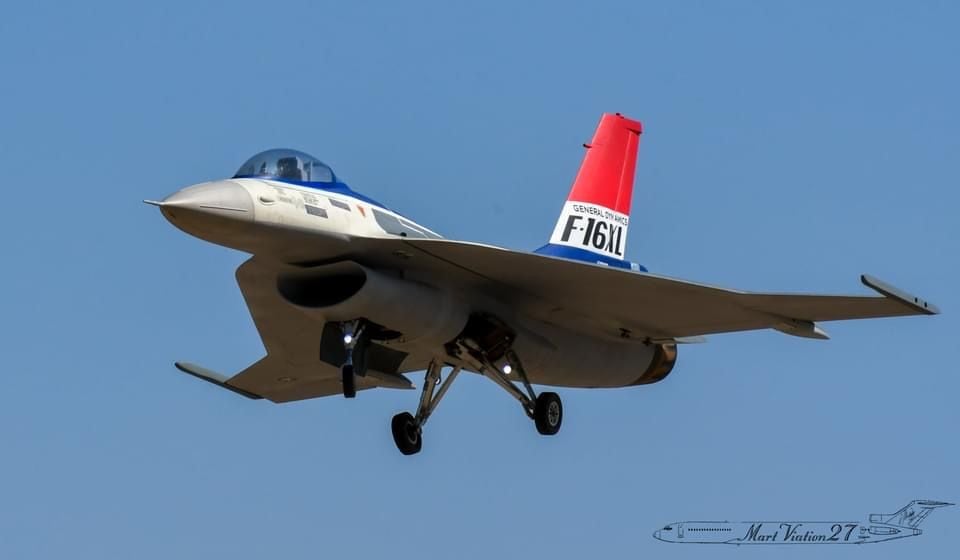
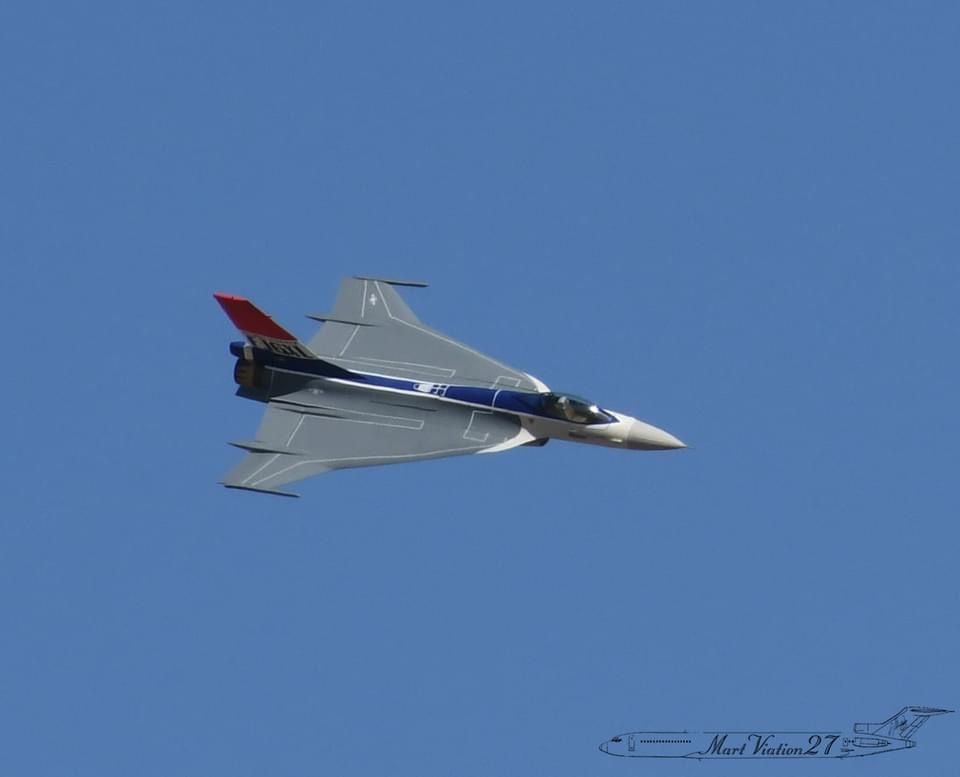
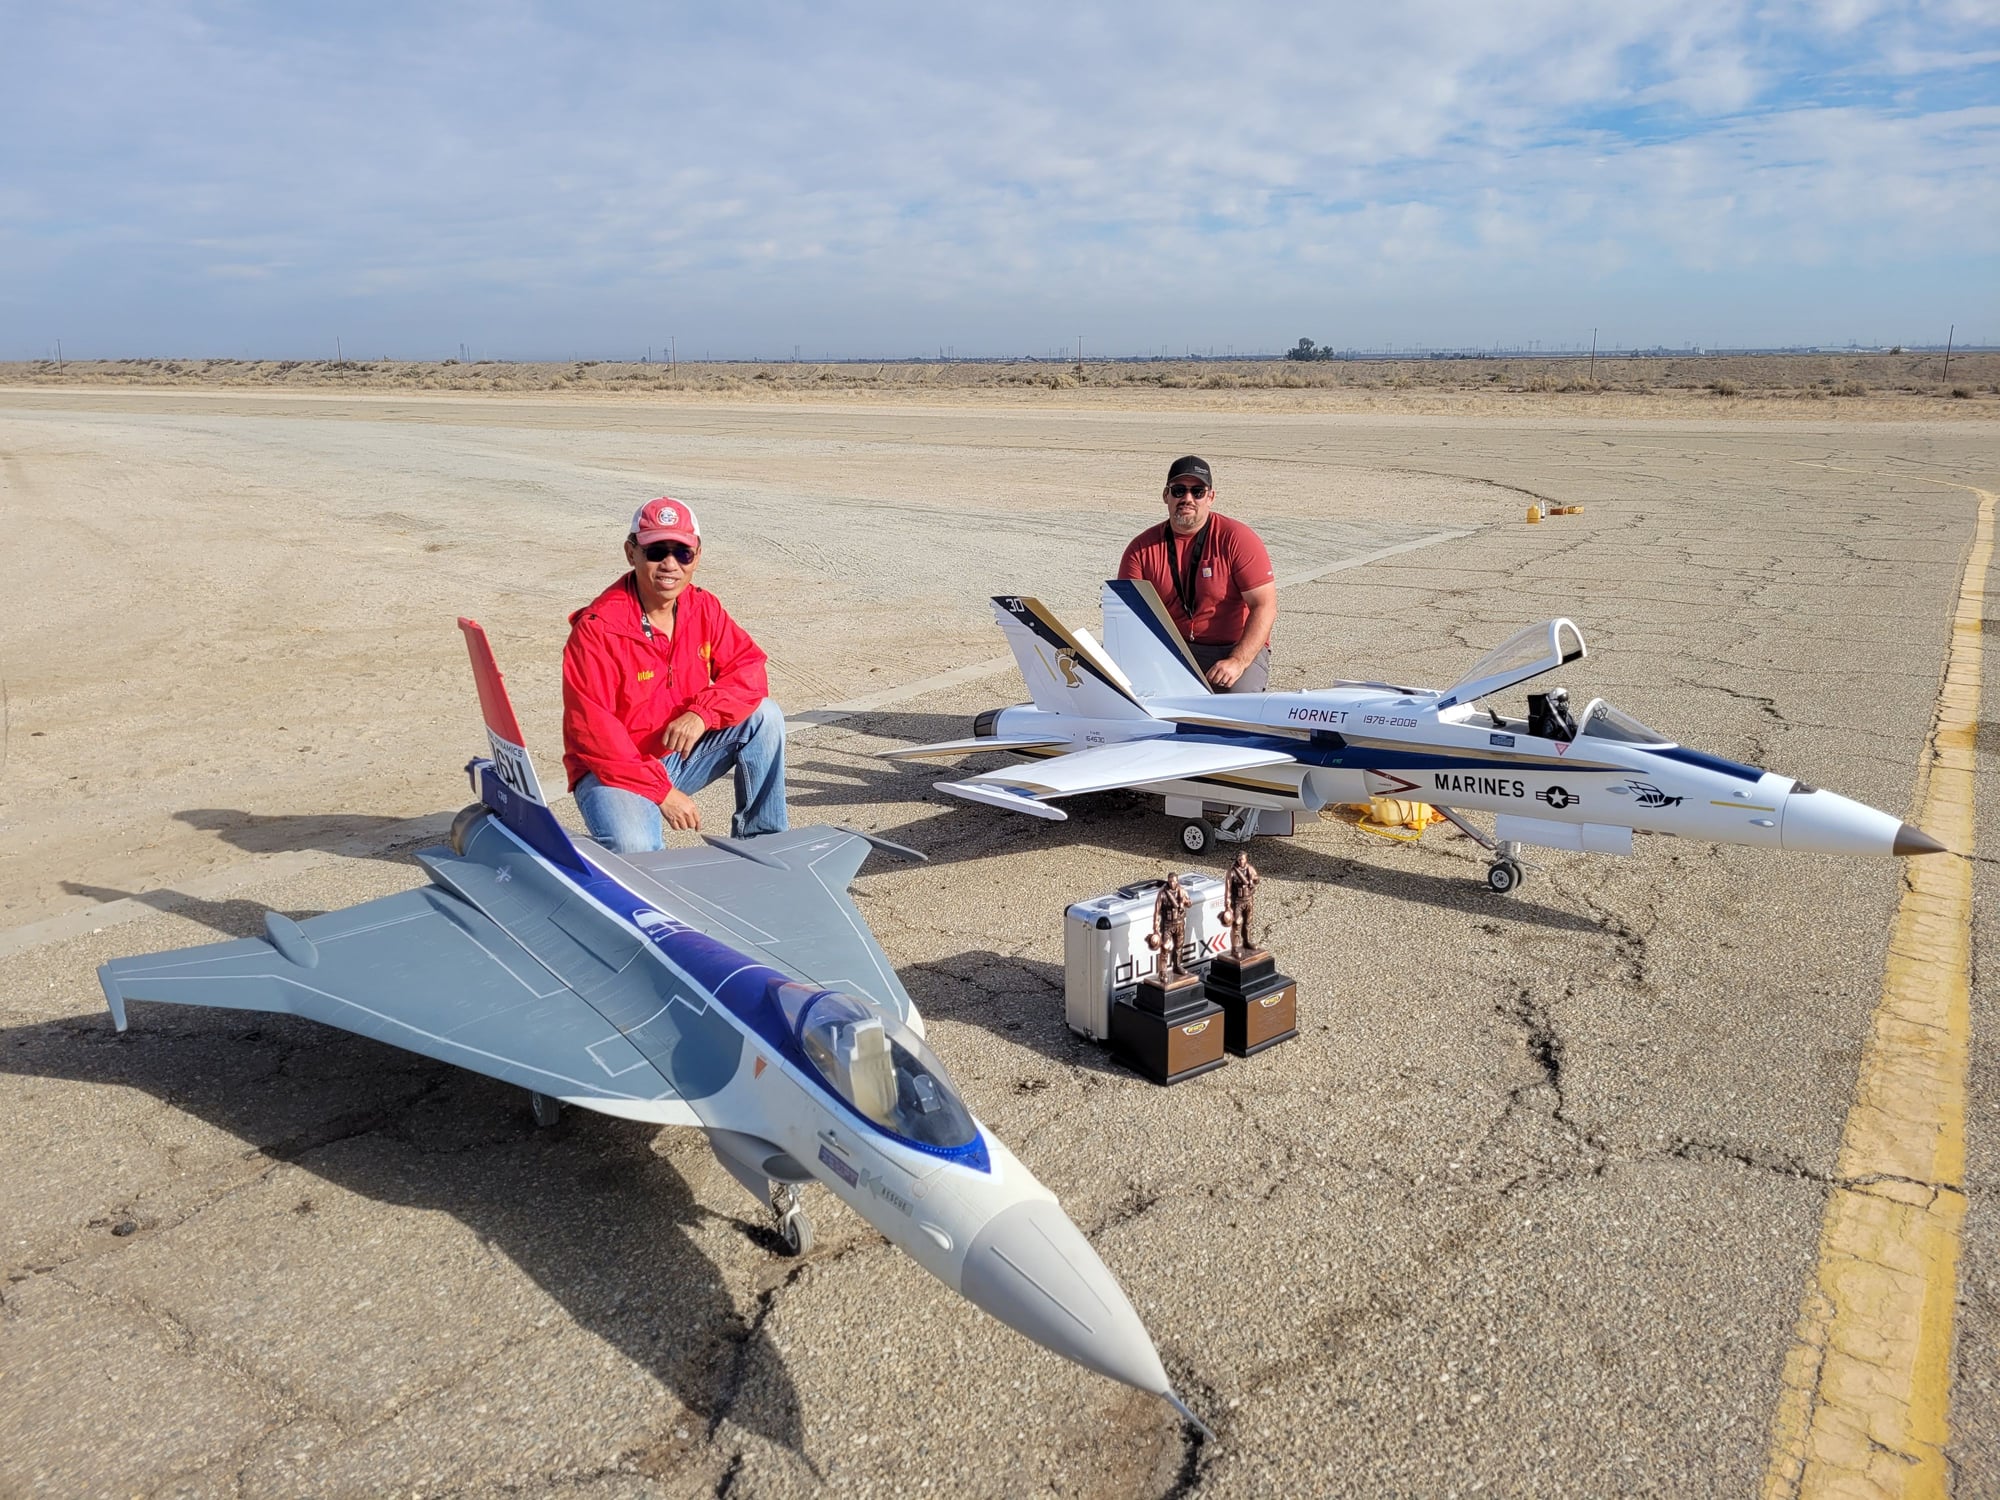
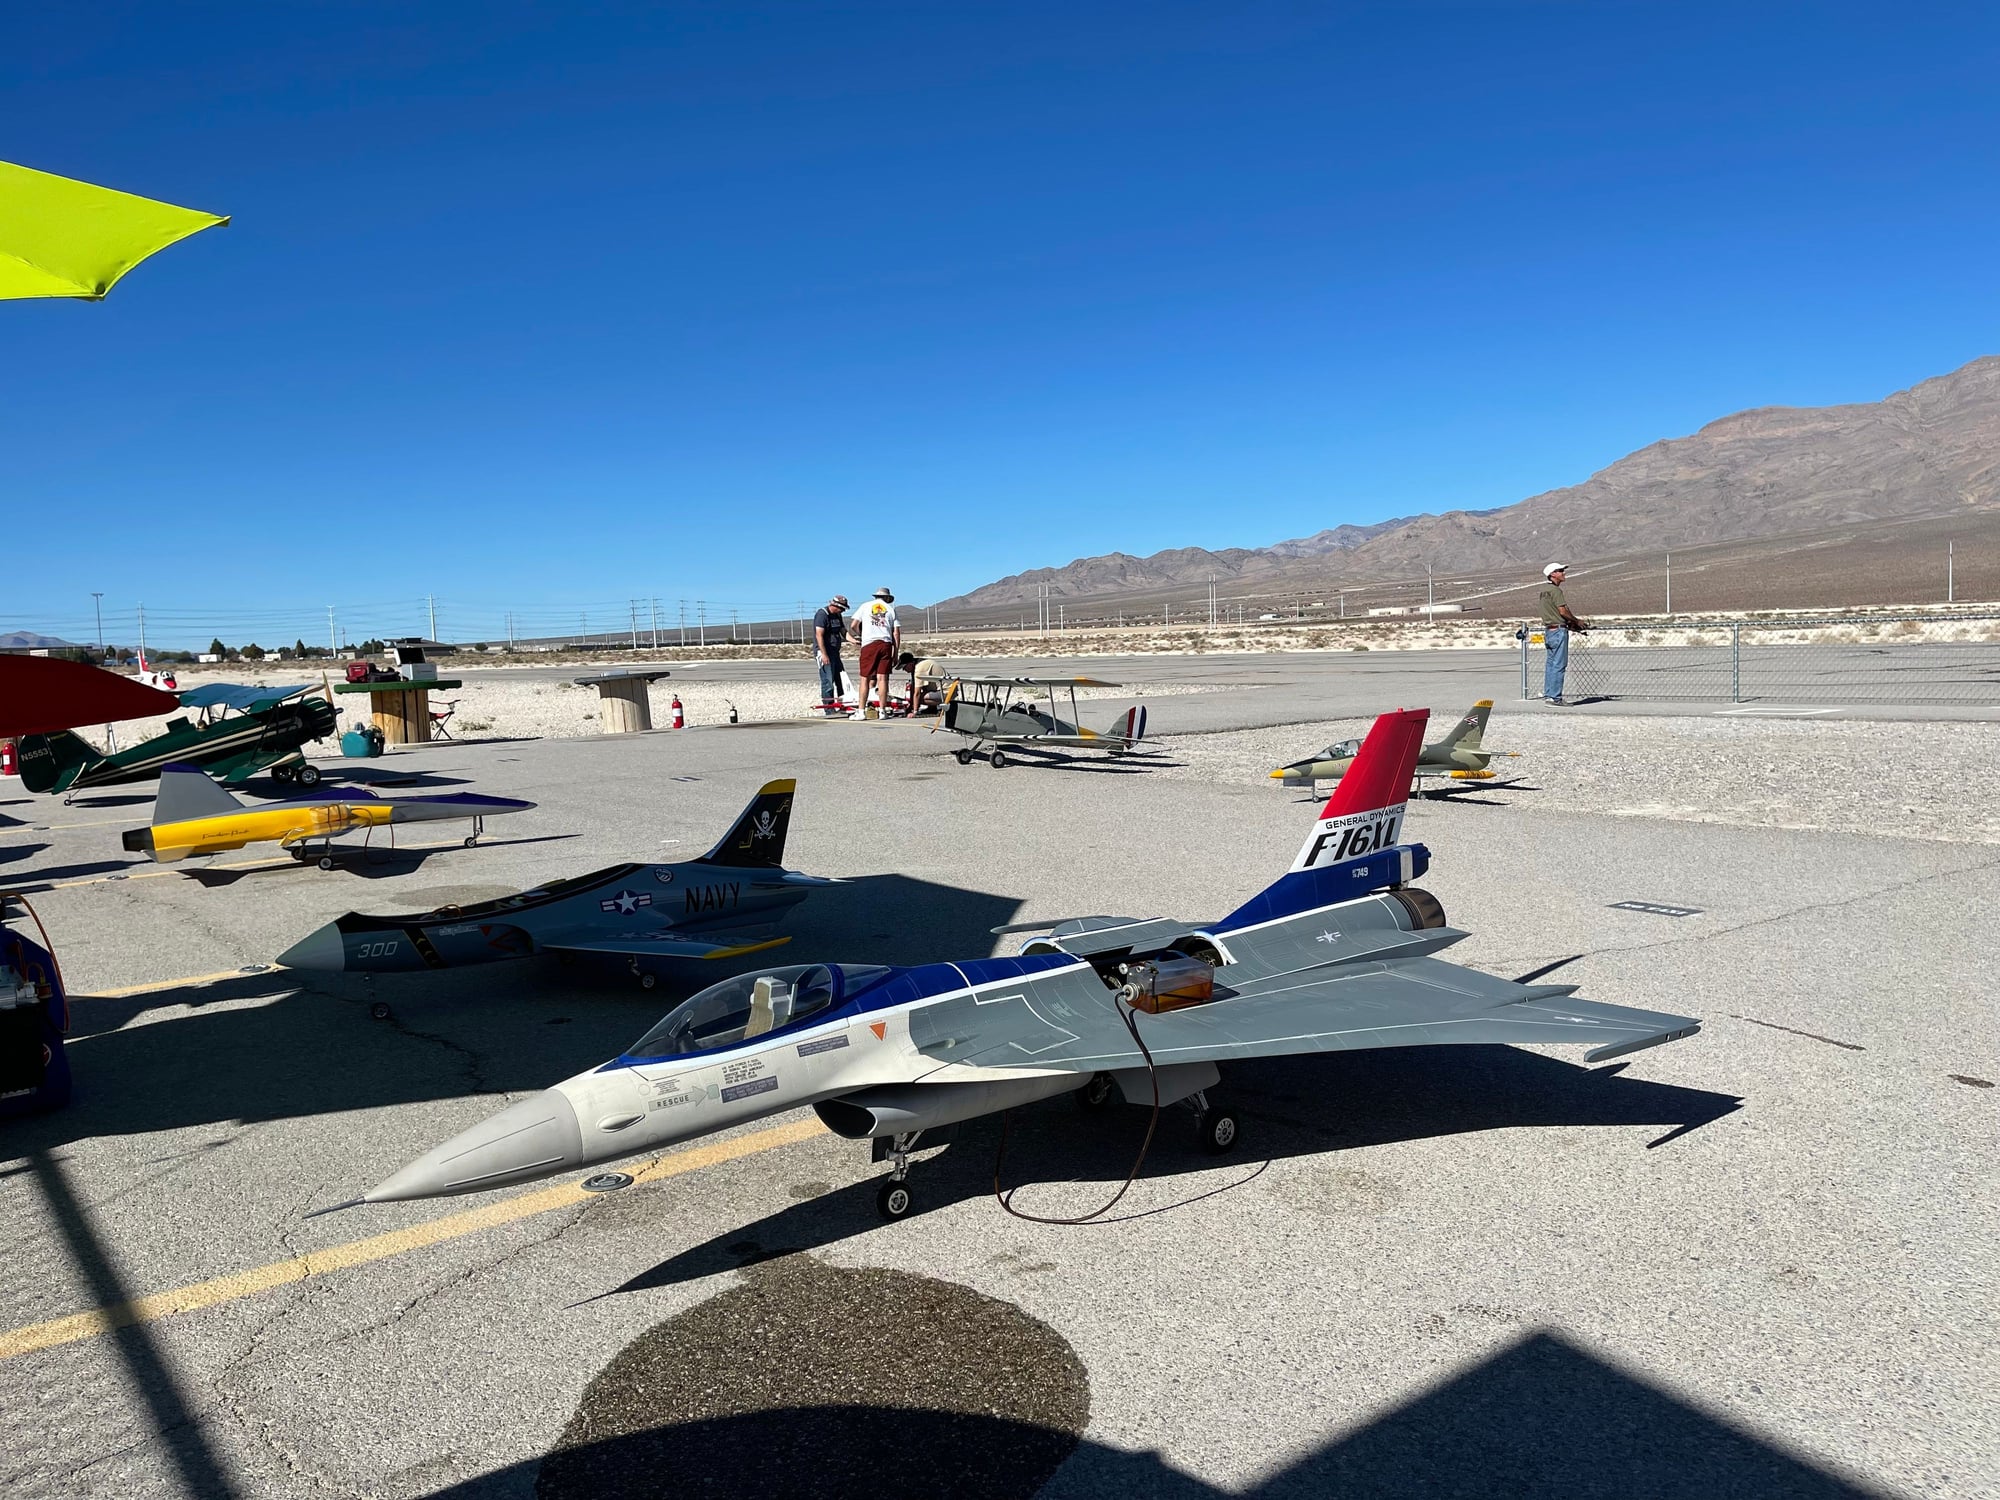
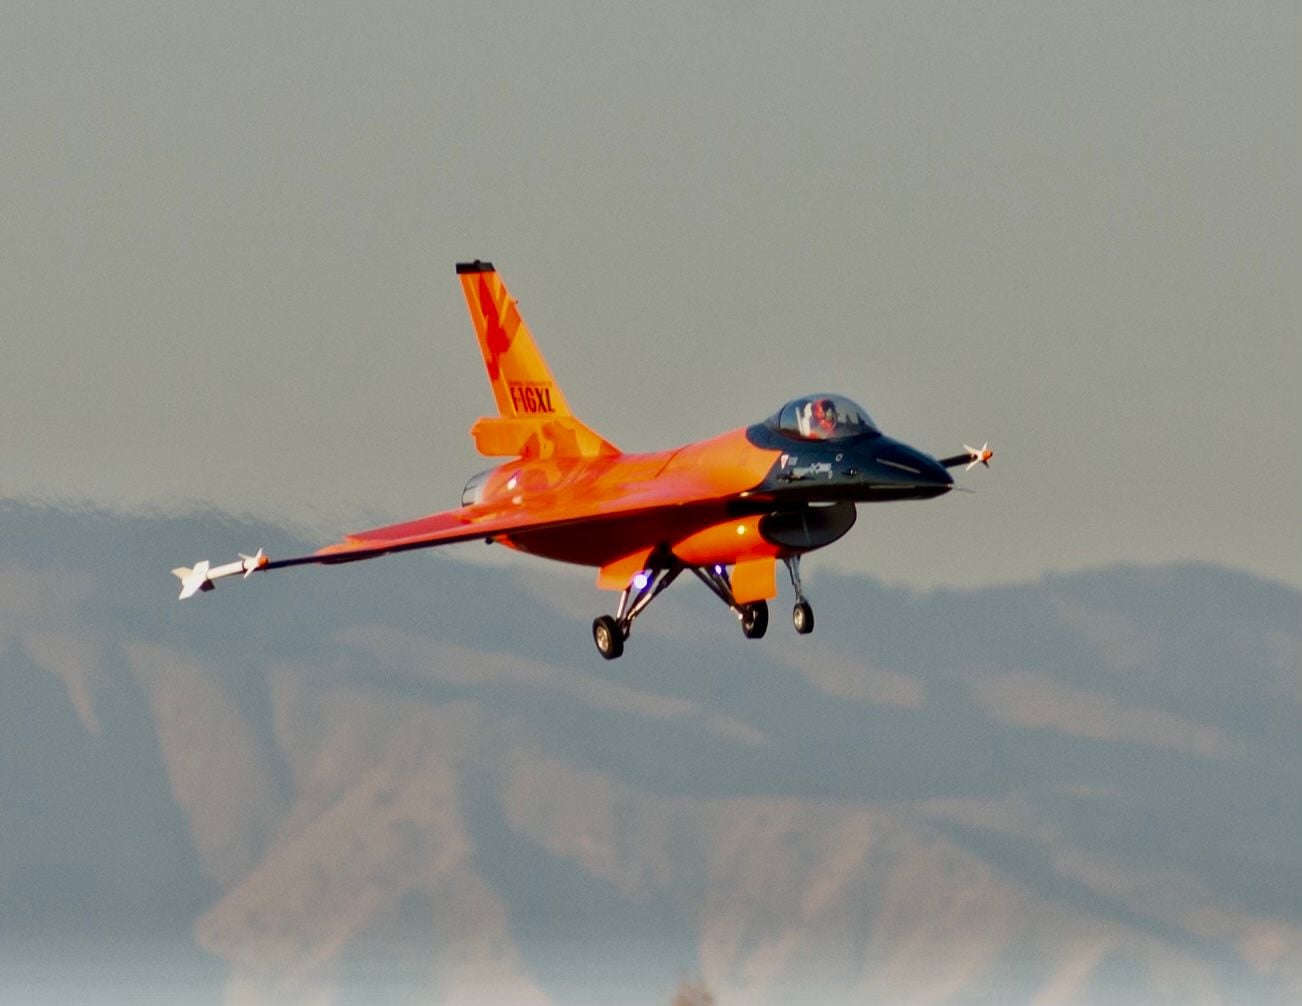
Here is the photo of it at North Las Vegas. I love all kinds of slow, high drag maneuvers it can perform. 31 Flights up to date.
Mike
Mike
Here is the photo of it at North Las Vegas. I love all kinds of slow, high drag maneuvers it can perform. 31 Flights up to date.
Mike
Mike
The following users liked this post:
mongo (11-15-2021)
11-15-2021, 05:55 PM
#383
Thread Starter
My Feedback: (20)
Hi Gary, I use carbon fiberglass to wrap the nose gear plate and the bulkhead so it can handle rougher surface including sand and gravels that we encountered at the Best in the West event. Here is the photo of it at North Las Vegas. I love all kinds of slow, high drag maneuvers it can perform. 31 Flights up to date. Mike
Yes, I really love this jet. It flies fast, slow, does bat turns, and lands very easy, plus it looks really good. I get lots of comments about it everywhere I take it.
I've been flying it since May on my nose gear plate quick field repair from FIF and it came out again. I should have done what you did and wrap it all in CF when I got back from FIF. I will do that on the next repair. I really recommend the factory lock it in on future builds.
It's still a way cool jet. Thanks for making it available.
Gary
The following users liked this post:
mongo (11-15-2021)
11-16-2021, 04:59 PM
#384
Thread Starter
My Feedback: (20)
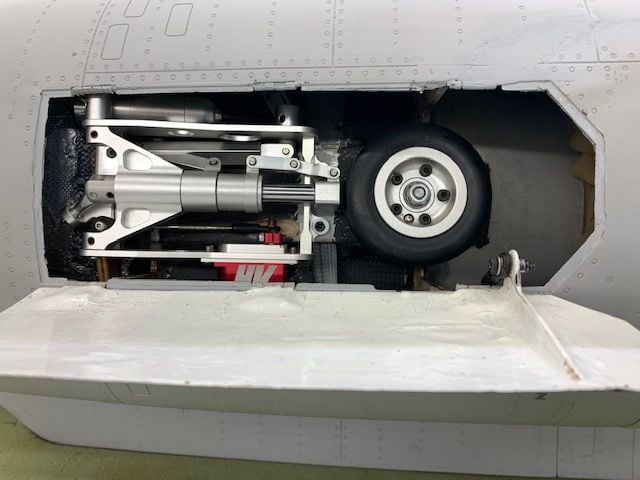
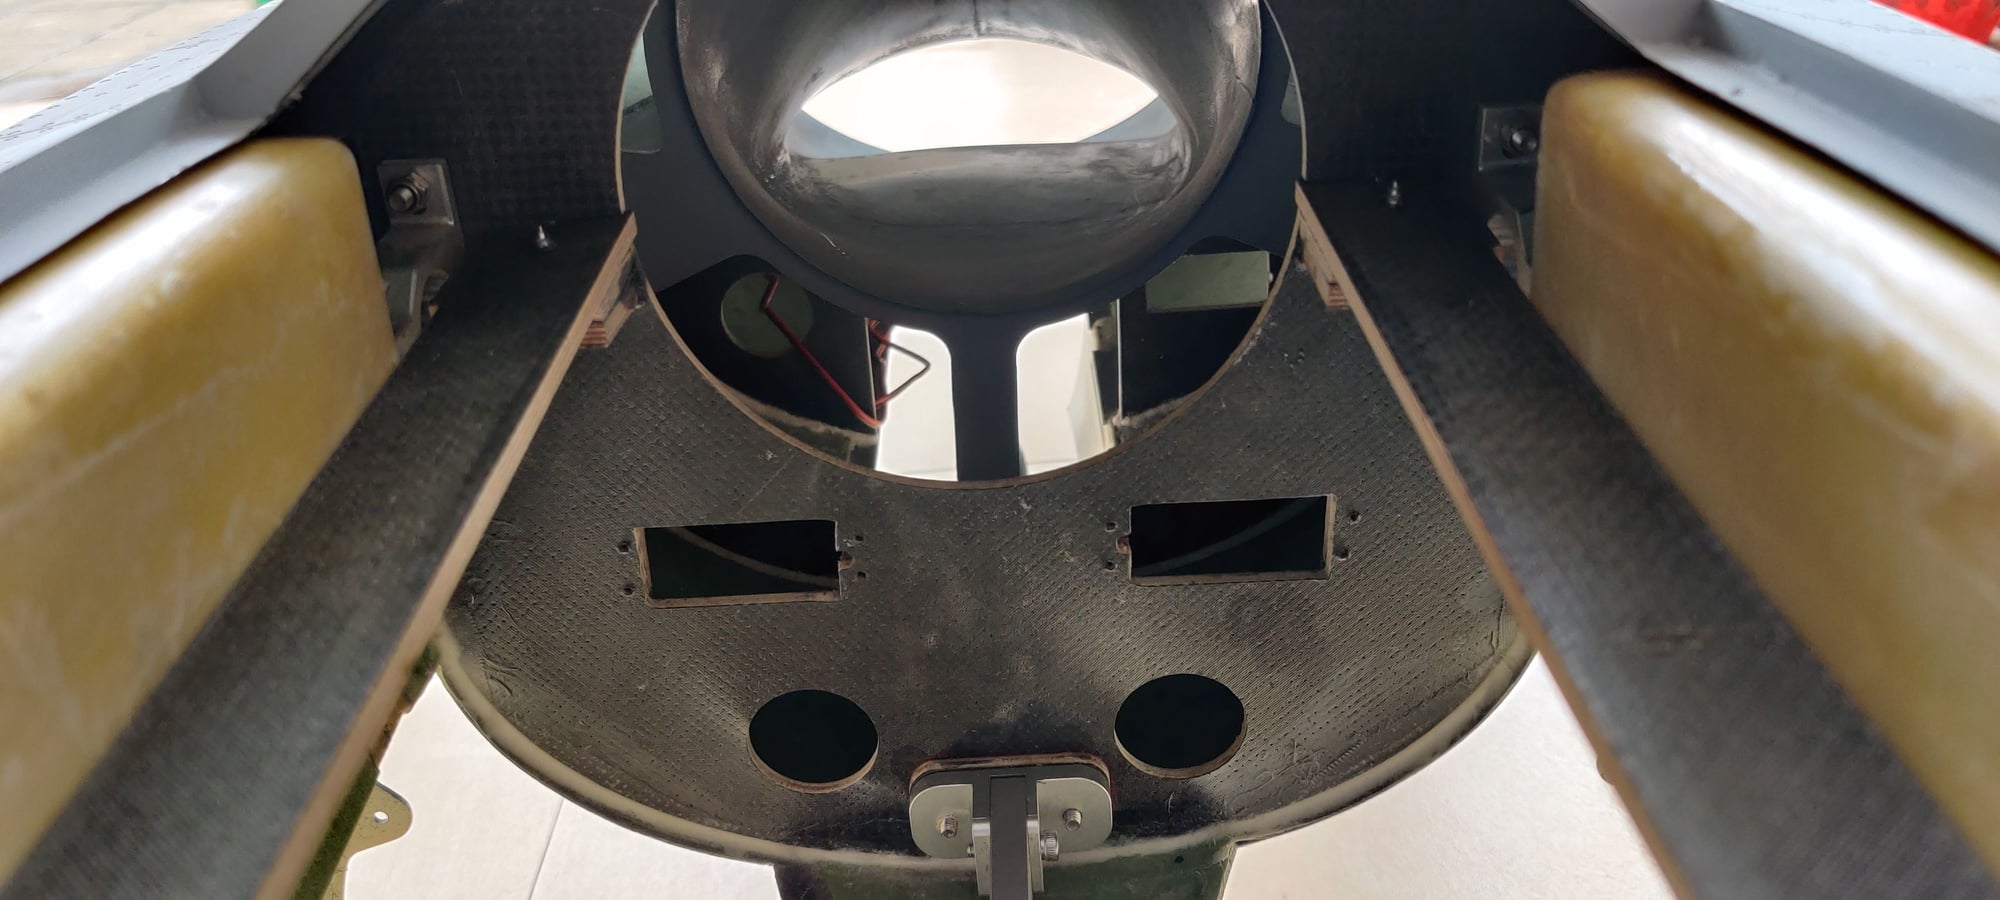
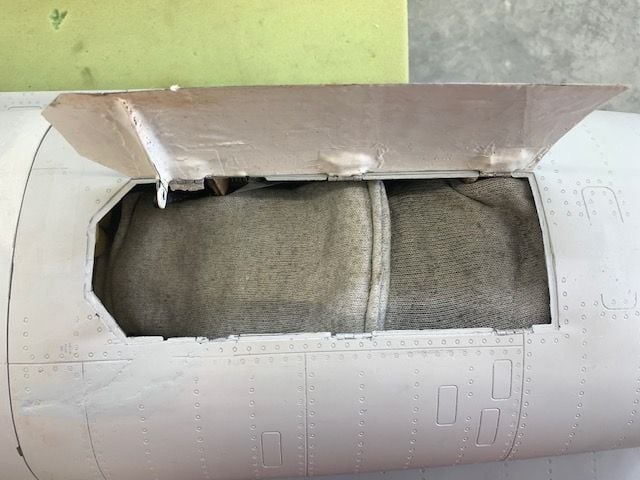
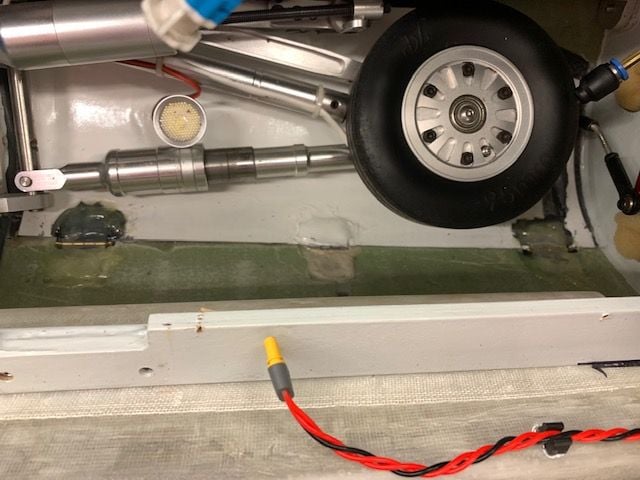
Nose gear mount damage.
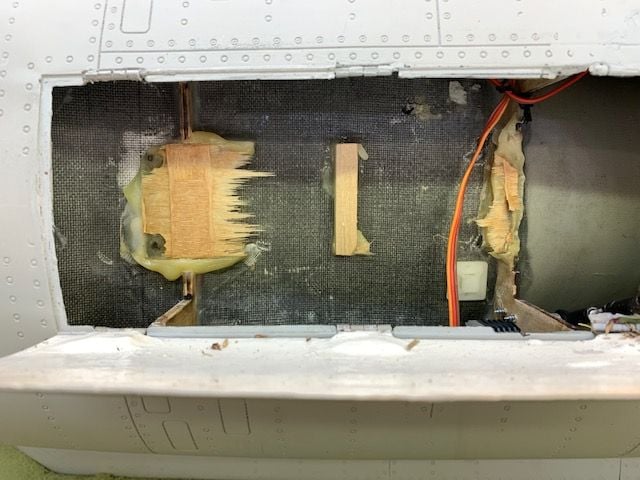
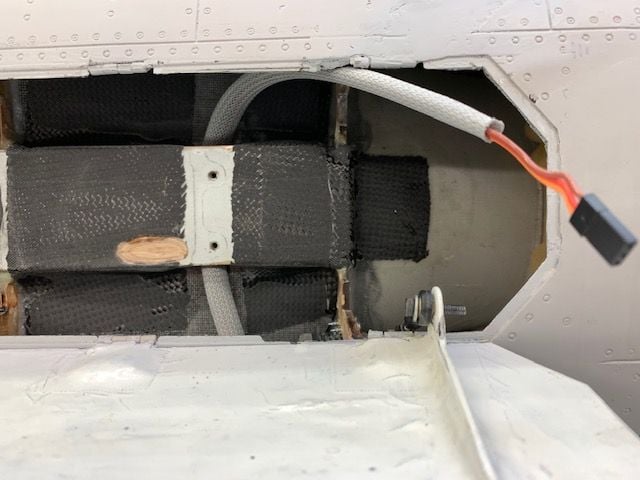
Here is the nose gear mount inside the gear well. The original mount was just glued in on the front (left) and rear of the nose gear plate. I added the middle brace after I glued it back in after the first fail at FIF in May. The brittle china poxy glue failed the first time. This pic shows the Six10 epoxy I used for the repair did not fail. It was the plywood plate that failed here. There are several gear door hinges that got broken that have to be replaced and the pitot tube bolt broke off.
This time the plywood lamination failed at the front and rear joints. My plan for repair is to epoxy the plate back in and then wrap carbon fiber cloth over the entire gear plate and bond it to the carbon fiber on the bottom of the intake tunnel. I fly mostly from grass and I'm sure its' rougher that pavement but I highly recommend if you have a V1 XL kit to fix the nose gear mount before it fails. My first failure was on pavement during the jet's 2nd takeoff. Nothing on the calendar for awhile so I will get to this after some other projects are completed.
The following users liked this post:
mongo (11-16-2021)
The following 4 users liked this post by mikedenilin:
11-26-2021, 06:36 PM
#386
Thread Starter
My Feedback: (20)
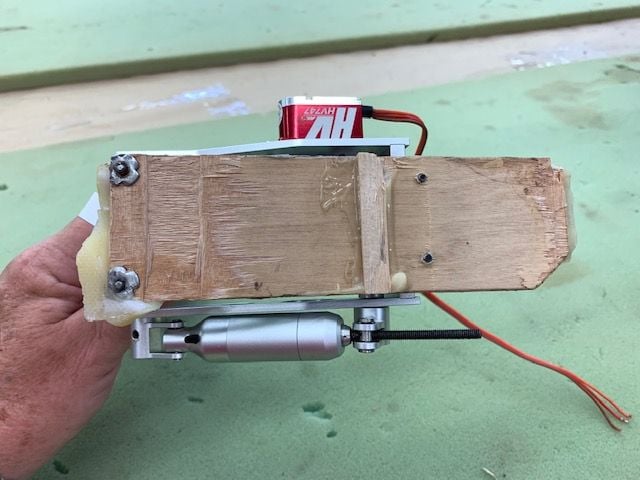
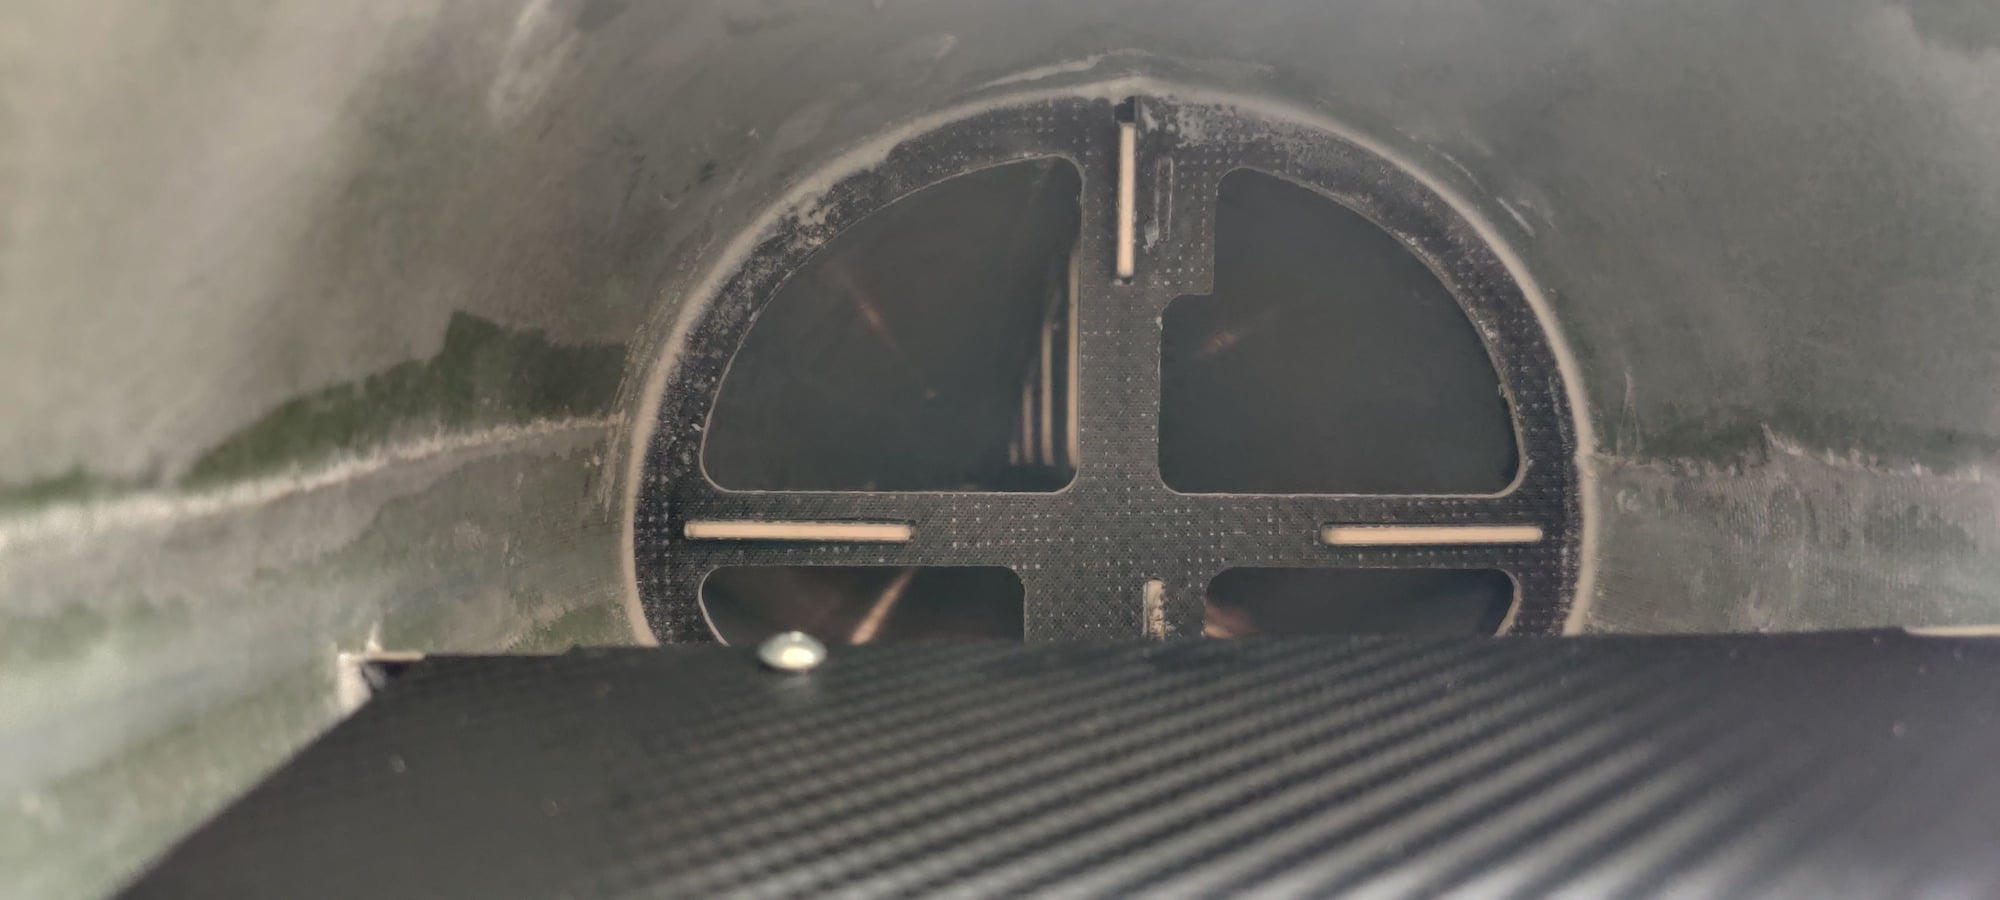
Re installing nose gear plate
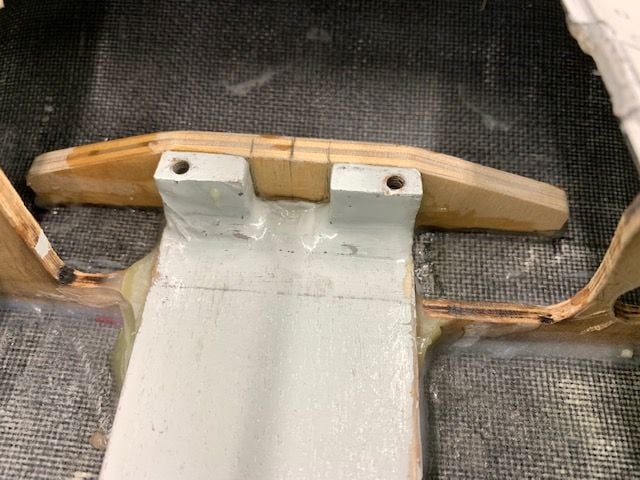
Plywood sub former epoxied to front of plate to give more area on the mounting surface
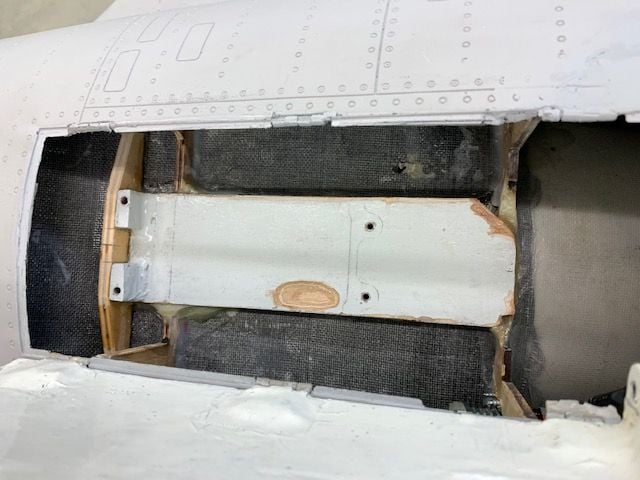
Plate glued back in ready for CF wrap
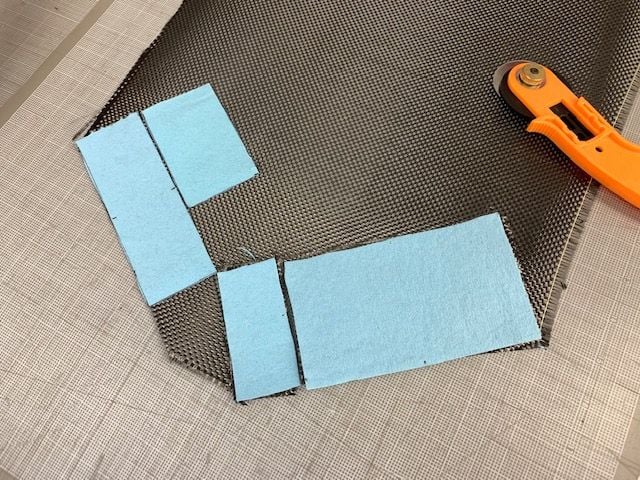
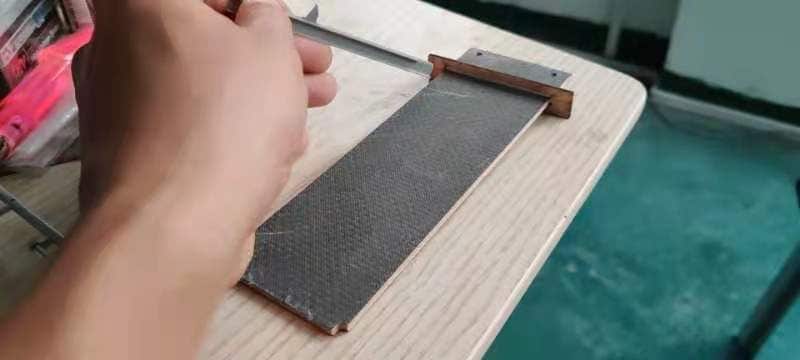
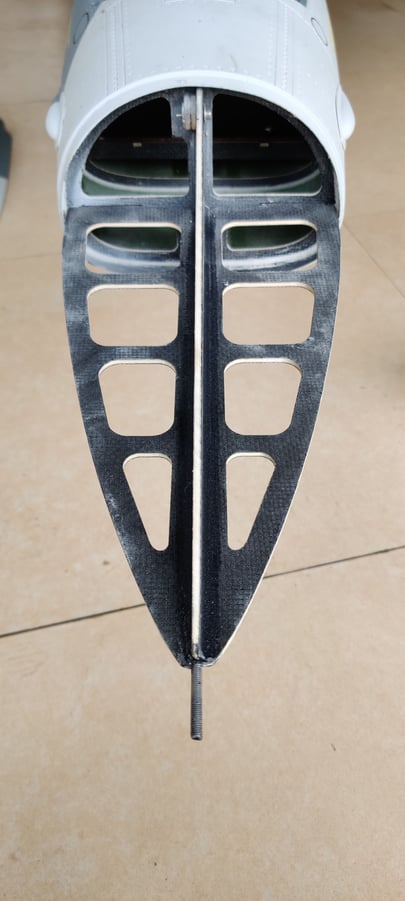
Patterns for CF cloth cuts
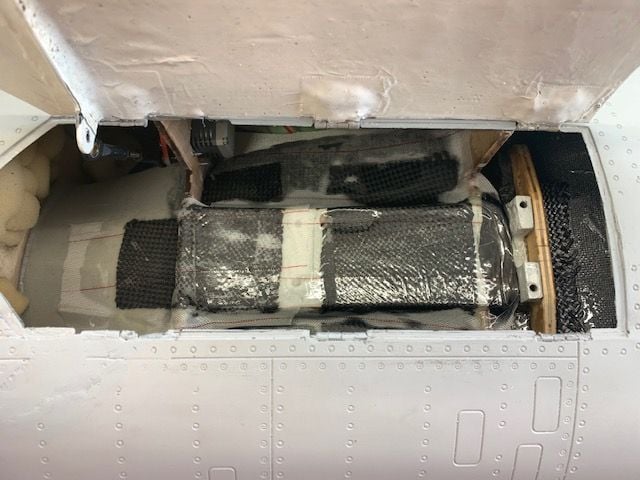
CF applied over plate and covered with peel ply cloth
Plastic over peel ply
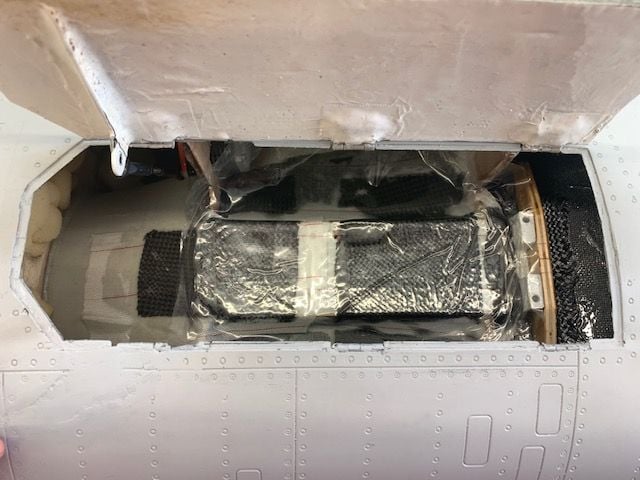
Lead shot bean bags over plastic to keep CF cloth flat on plate
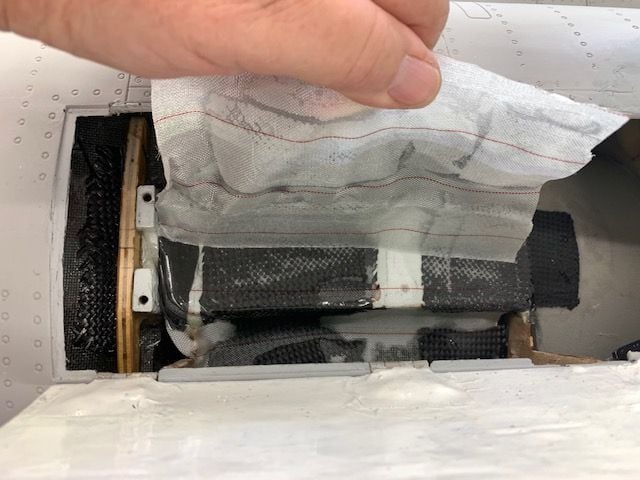
Removing peel ply
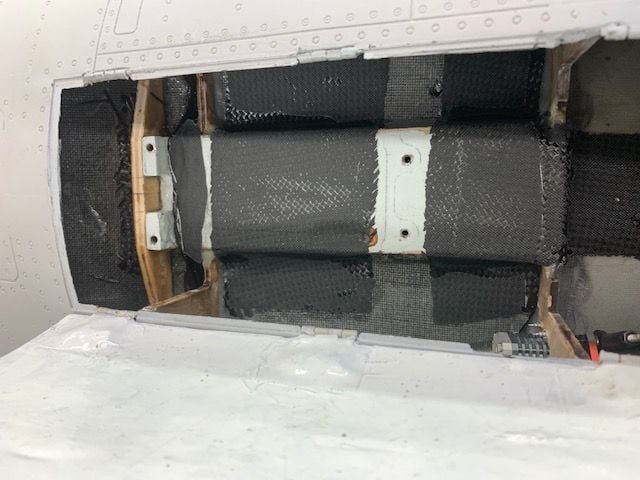
Done ready to bolt nose gear in place
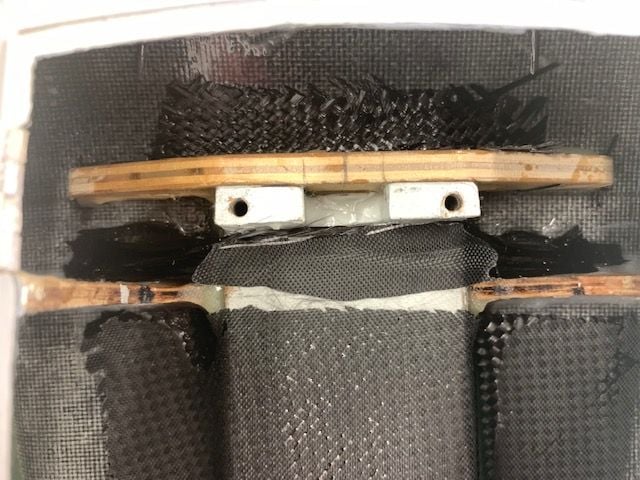
5 strips of carbon tow lapped over mounting plate in narrow gap between former and bolt holes
Two of three door hinges replaced. I hate working on door hinges.
Plywood sub former epoxied to front of plate to give more area on the mounting surface
Plate glued back in ready for CF wrap
Patterns for CF cloth cuts
CF applied over plate and covered with peel ply cloth
Plastic over peel ply
Lead shot bean bags over plastic to keep CF cloth flat on plate
Removing peel ply
Done ready to bolt nose gear in place
5 strips of carbon tow lapped over mounting plate in narrow gap between former and bolt holes
Two of three door hinges replaced. I hate working on door hinges.
11-26-2021, 06:48 PM
#387
Thread Starter
My Feedback: (20)
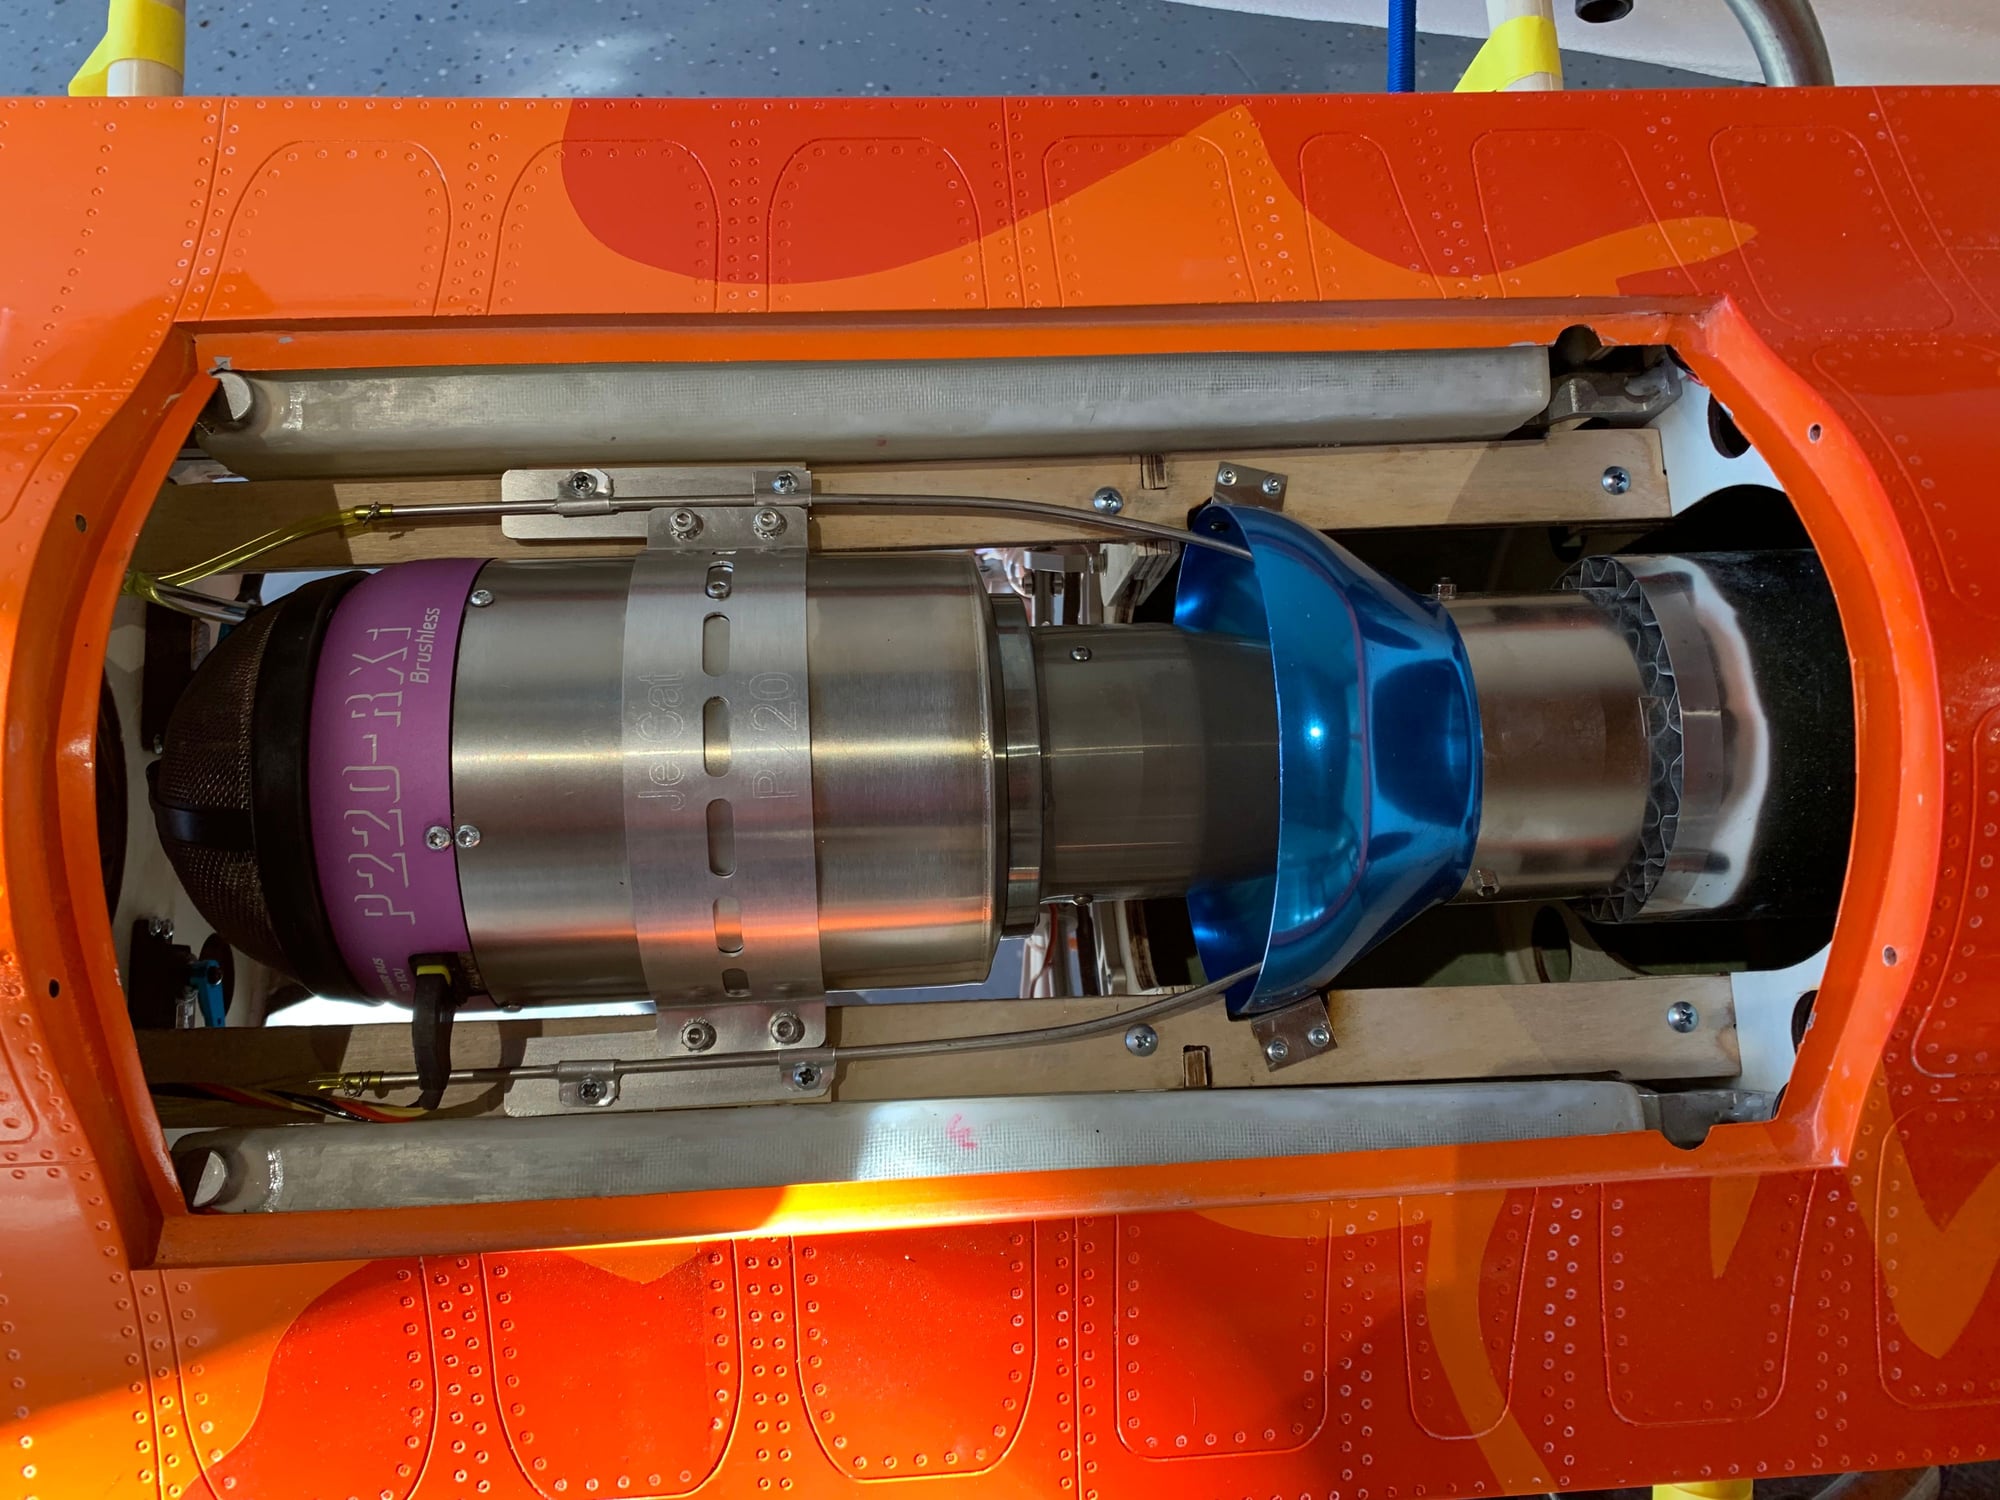
Any ideas on how to fix wires that pulled out of JP retract motor?
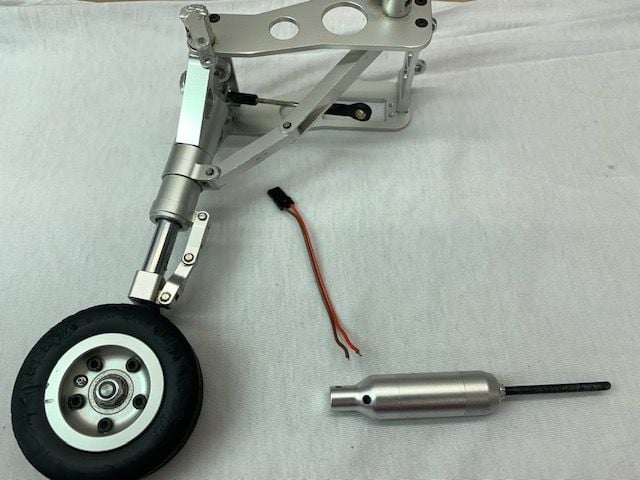
Here is the biggest problem I have. How do I get the JP motor case apart to re solder the wires back in. Anybody ever opened these motor cases before. Are the ends threaded or just a press fit?
Here is the biggest problem I have. How do I get the JP motor case apart to re solder the wires back in. Anybody ever opened these motor cases before. Are the ends threaded or just a press fit?
The following users liked this post:
mongo (11-26-2021)
 11-26-2021, 09:21 PM
#389
My Feedback: (2)
https://www.rc-castle.com/index.php?...roduct_id=8049
IF this one does not work you should able to find the correct size on the same website... I used them many times and quick shipping to the US
IF this one does not work you should able to find the correct size on the same website... I used them many times and quick shipping to the US
11-27-2021, 03:46 PM
#390
Thread Starter
My Feedback: (20)
https://www.rc-castle.com/index.php?...roduct_id=8049
IF this one does not work you should able to find the correct size on the same website... I used them many times and quick shipping to the US
IF this one does not work you should able to find the correct size on the same website... I used them many times and quick shipping to the US
11-28-2021, 04:23 PM
#391
Thread Starter
My Feedback: (20)
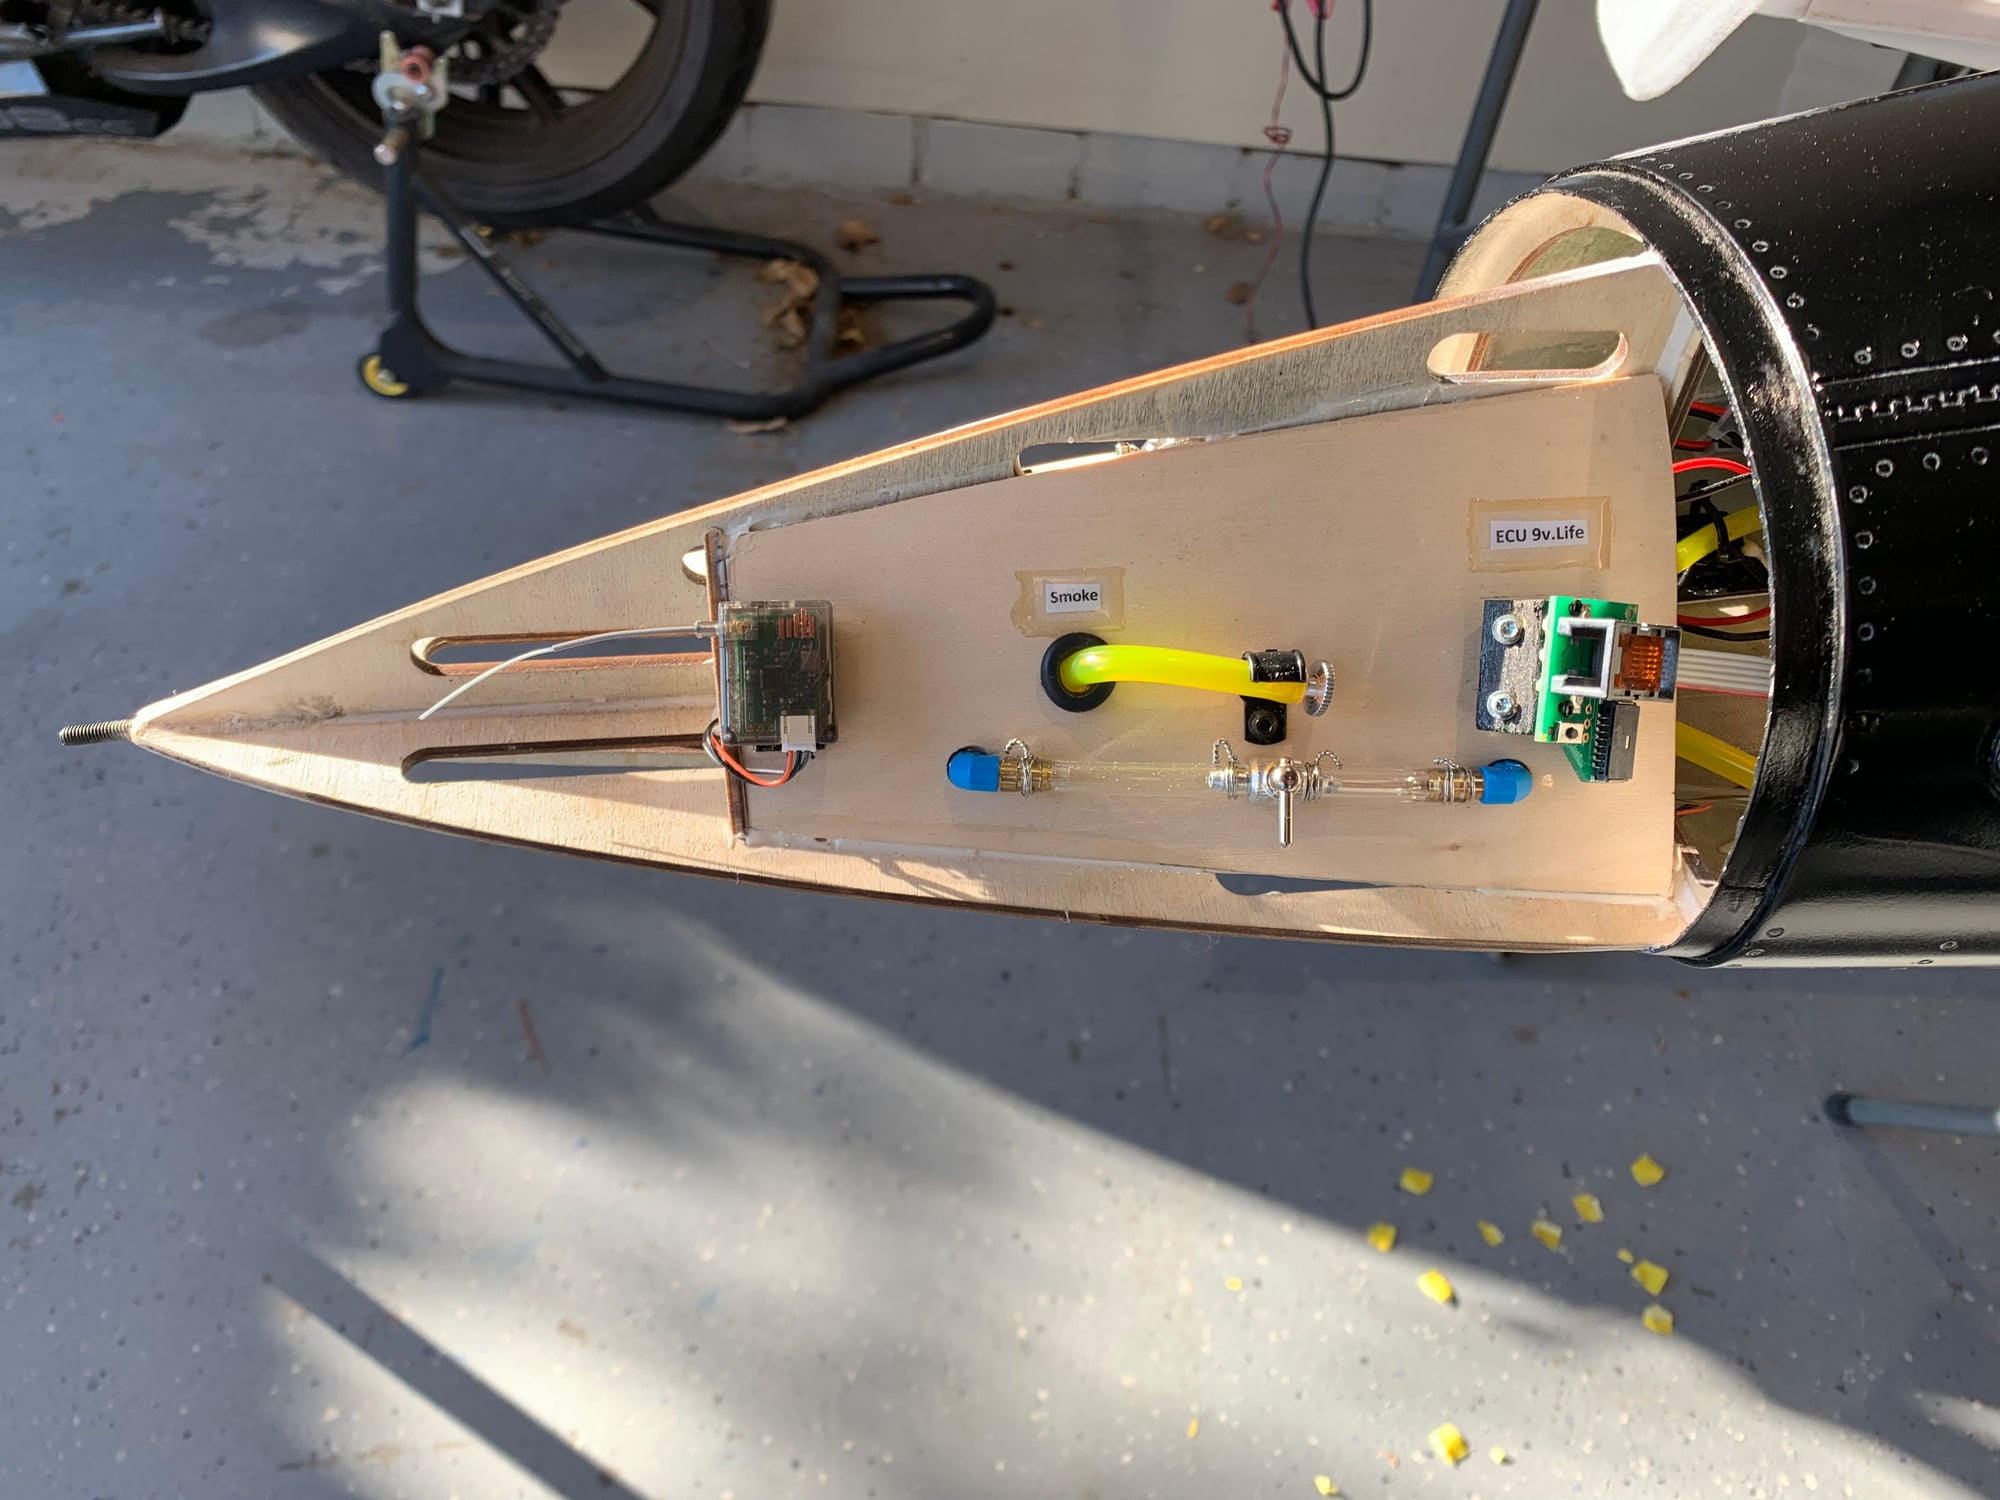
Nose gear door servo lead and pitot tube fix
I ground out the recess for the steering arm that was covered by the CF band aid. Then I installed a new plug to replace the one torn off the nose gear door servo lead. I realized as I slipped it under the nose gear mount that the CF had very sharp edges and could cut the wire insulation. So I slipped a nylon sheath over the lead and then slipped it under the mount plate. WIll have to do the same for the steering servo lead later.
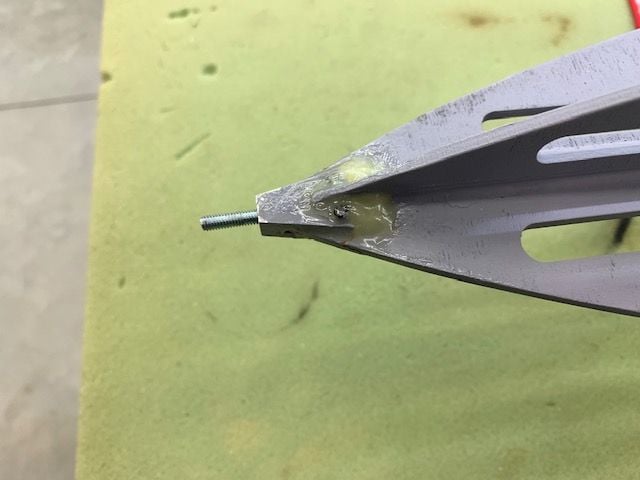
Pitot tube bolt holder got broken off and snapped the 4mm bolt. Glued back on and replaced 4mm bolt. The best thing here was we were able to recover the custom pitot tube made by my friend Tim to replace the first one that got ground flat in May. It was buried about an inch below the surface in the divot that the nose made when the nose gear fell out.
I ground out the recess for the steering arm that was covered by the CF band aid. Then I installed a new plug to replace the one torn off the nose gear door servo lead. I realized as I slipped it under the nose gear mount that the CF had very sharp edges and could cut the wire insulation. So I slipped a nylon sheath over the lead and then slipped it under the mount plate. WIll have to do the same for the steering servo lead later.
Pitot tube bolt holder got broken off and snapped the 4mm bolt. Glued back on and replaced 4mm bolt. The best thing here was we were able to recover the custom pitot tube made by my friend Tim to replace the first one that got ground flat in May. It was buried about an inch below the surface in the divot that the nose made when the nose gear fell out.
Last edited by Viper1GJ; 11-28-2021 at 05:36 PM.
The following users liked this post:
mongo (11-28-2021)
11-28-2021, 04:37 PM
#392
Thread Starter
My Feedback: (20)
Attempted JP motor repair
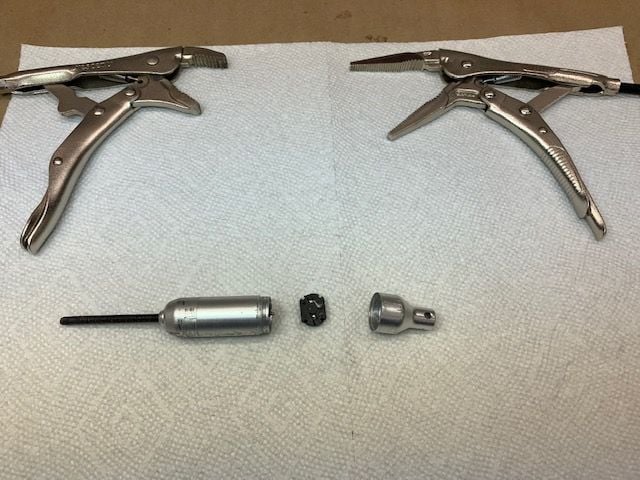
Since I had two nose gear retract motors with wires pulled out I decided to try and fix one. This one was the original motor that got all torn up when the gear plate fell out back in MAY and FIF. It got dragged down the runway on takeoff and the wires pulled out. After several tries I discovered the rear cap would unscrew. The very thin aluminum threads had thread lock on them and were very difficult to turn.
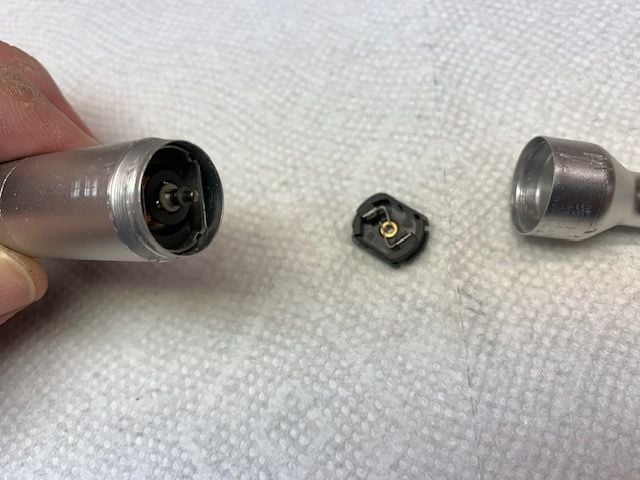
As the rear cap came off the rear bearing with brushes and solder contacts fell out also. I cleaned the tread locker off the thread as best as possible
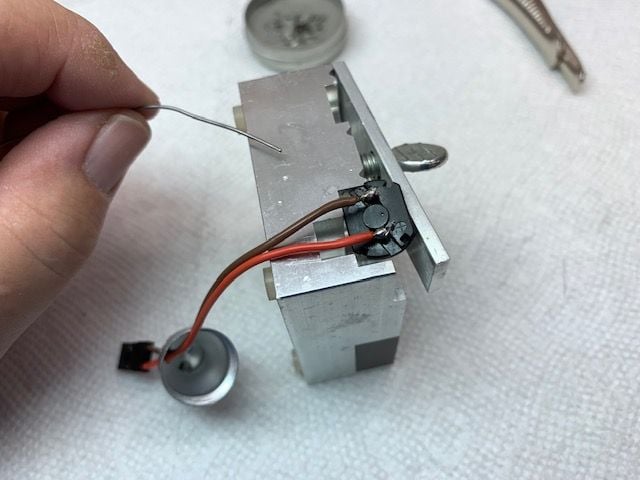
The wires were easy to solder back on. The back side of the bearing plate was marked with a + for the red wire.
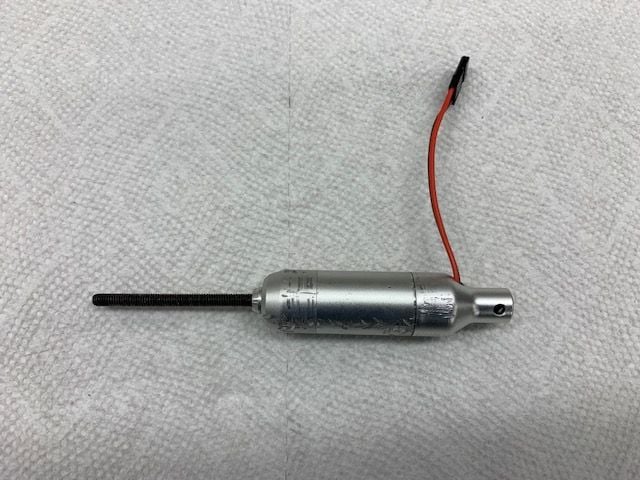
I reassembled the motor housing as best I could. I could tell the thin aluminum threads were stripping as I tried to turn the rear cap back on. I could never get it all the way closed like before. I connected it to the nose gear lead and tested. It ran one time then quit. Its probably not user fixable with any reliability. No other option but to replace. Waiting on a replacement from Mike at GJC.
Since I had two nose gear retract motors with wires pulled out I decided to try and fix one. This one was the original motor that got all torn up when the gear plate fell out back in MAY and FIF. It got dragged down the runway on takeoff and the wires pulled out. After several tries I discovered the rear cap would unscrew. The very thin aluminum threads had thread lock on them and were very difficult to turn.
As the rear cap came off the rear bearing with brushes and solder contacts fell out also. I cleaned the tread locker off the thread as best as possible
The wires were easy to solder back on. The back side of the bearing plate was marked with a + for the red wire.
I reassembled the motor housing as best I could. I could tell the thin aluminum threads were stripping as I tried to turn the rear cap back on. I could never get it all the way closed like before. I connected it to the nose gear lead and tested. It ran one time then quit. Its probably not user fixable with any reliability. No other option but to replace. Waiting on a replacement from Mike at GJC.
Last edited by Viper1GJ; 11-28-2021 at 04:39 PM.
11-29-2021, 10:10 AM
#393

Hey Gary, if you want to have a go repairing your other unit, most thread lock will release with heat.
A good heat gun applied holding the work with a thick leather gloved hand is normally enough.
Malcolm
A good heat gun applied holding the work with a thick leather gloved hand is normally enough.
Malcolm
11-29-2021, 12:55 PM
#394
I hate to ask because I felt your frustration with the project but will the 105 make an appearance again? You have so much good work into it I sincerely hope you will see it thru...I for one would love to see the end result!
The following users liked this post:
jcterrettaz (11-29-2021)
11-29-2021, 04:01 PM
#395
Thread Starter
My Feedback: (20)
Thanks,
Gary
11-29-2021, 05:46 PM
#396


The following users liked this post:
mongo (12-28-2021)
12-21-2021, 09:21 AM
#399
Member
Indeed a super cool paint scheme !