


Fire Tug - Shelley Foss Tugboat 36" Build
 04-02-2021 | 03:56 AM
#1
Thread Starter
Member
Good Day Folks,
I recently purchased a Dumas Shelley Foss Tug Boat kit direct from Dumas's website. It took about two weeks to arrive in Wisconsin from their Arizona facility. My plan is to build this as a FIRE TUG, using modern electronics(brushless, lipo, Rasp Pi, etc). I'm going to go with the Kort Nozzles for authenticity. I live on the Mississippi River, with a beach and docks as my backyard. I have a float and slip at my backdoor.
I have wanted an FPV boat for some time now. I have FPV equipment from my Park Zone Radian Sailplane project, that I plan to install on this. My end is goal is being able to drive this from my living room, while the RC boat is out on the river. I have a three story deck, where I can mount antennas from and easily see the boat out on the River. I even have a permanent Outdoor PTZ Webcam I can track it with from my deck.
Since this is going to be a FIRE TUG, I have ordered a few different 12 volt Water Pressure pumps to experiment with. A full size Shelley Foss Fire Tug pumps 1000 GPM! This model is 1/30, so 1000/30 = 33.3GPM. For a 3 foot boat, that's almost impossible to hit. I have found 1.0 GPM 80psi pumps, that use 700 DC motors. They are small enough to possibly get FOUR of them in my hull. Fire Tugs usually have 4 Water Cannons. I plan to have TWO turrets, front and rear mounted, each having TWO cannons. The dream is to able to Soak boats that get too close, or innocent bystanders at the beach. These 1.0 GPM 80psi pumps can push water almost 20 feet. Four of them will be a real treat to watch work.
My progress since Tuesday Afternoon(moody blues commence).

Freshly opened box, wood!
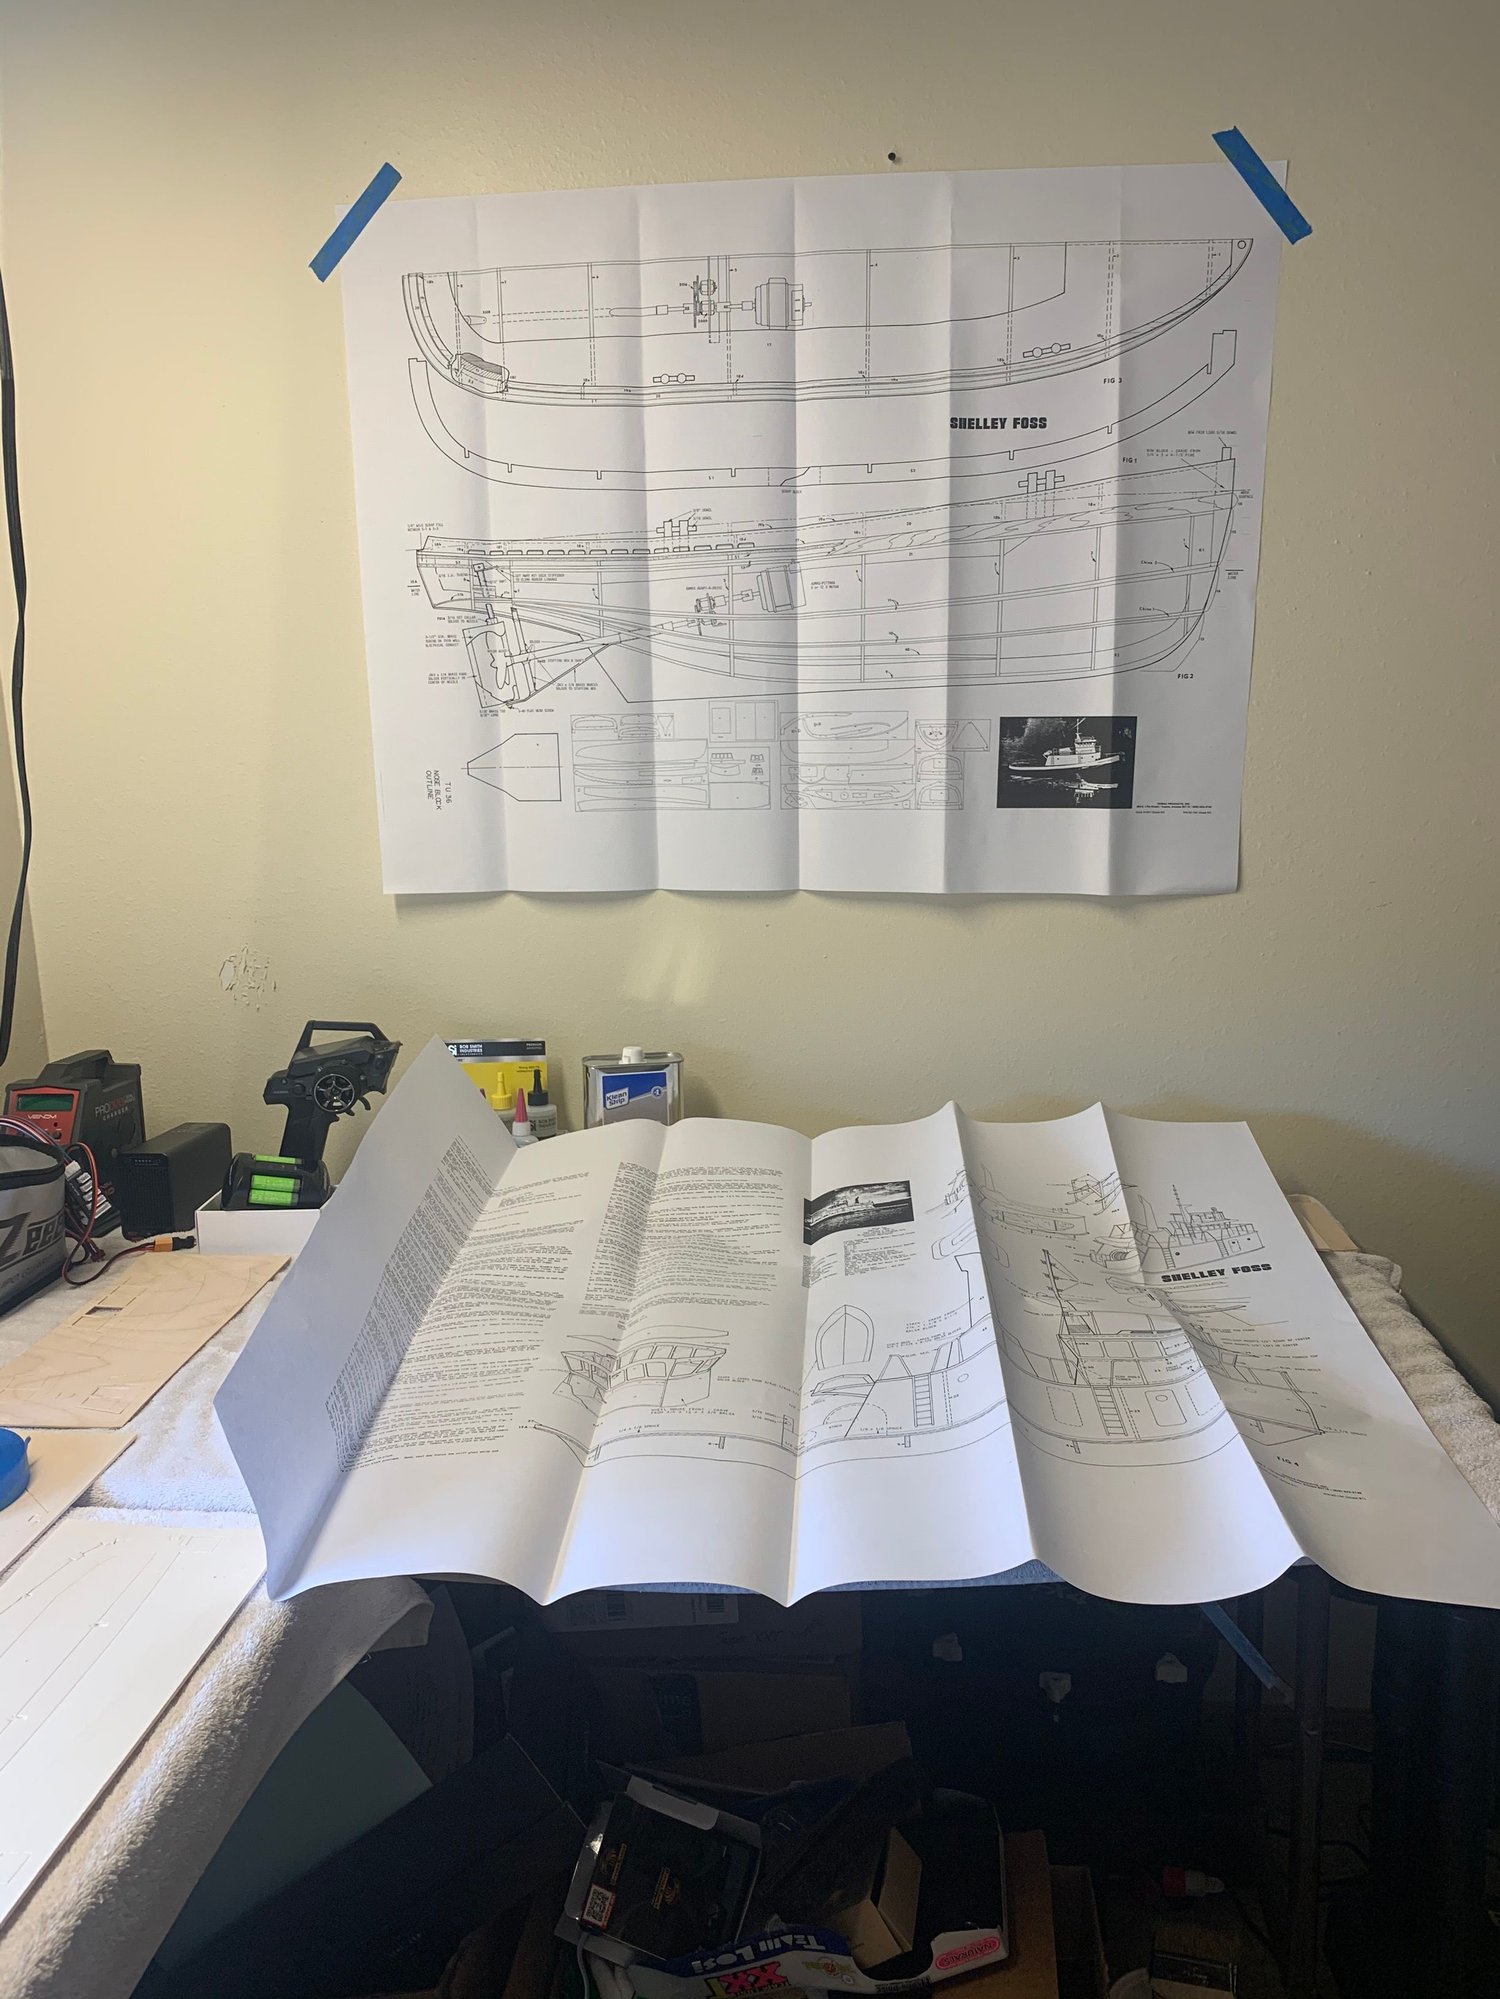
Laying out the plans
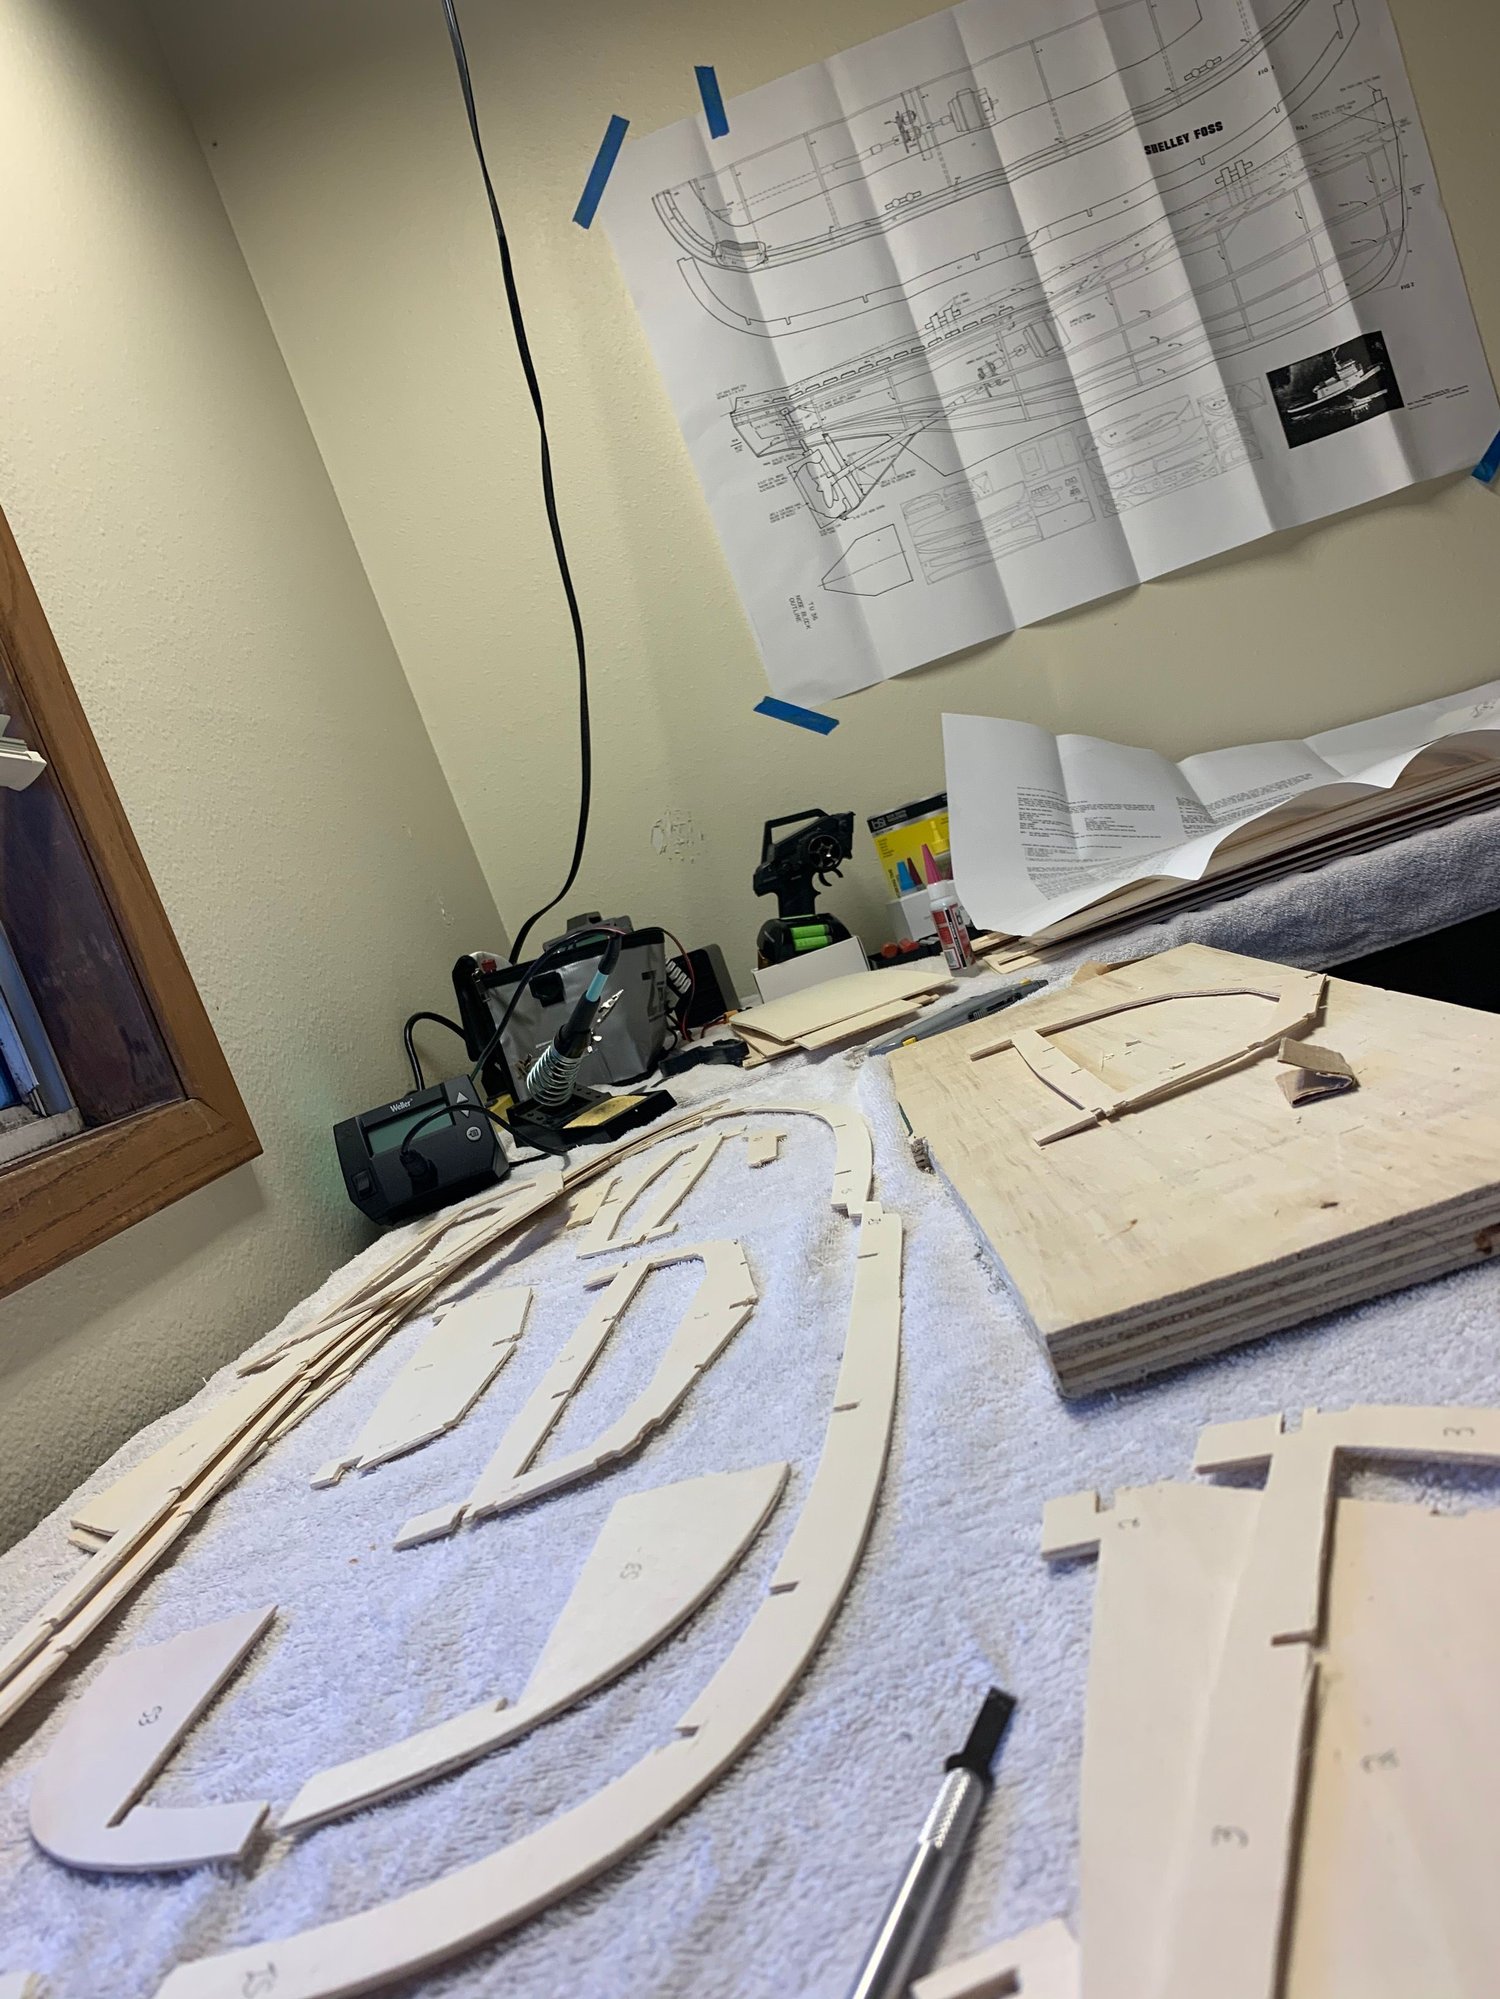
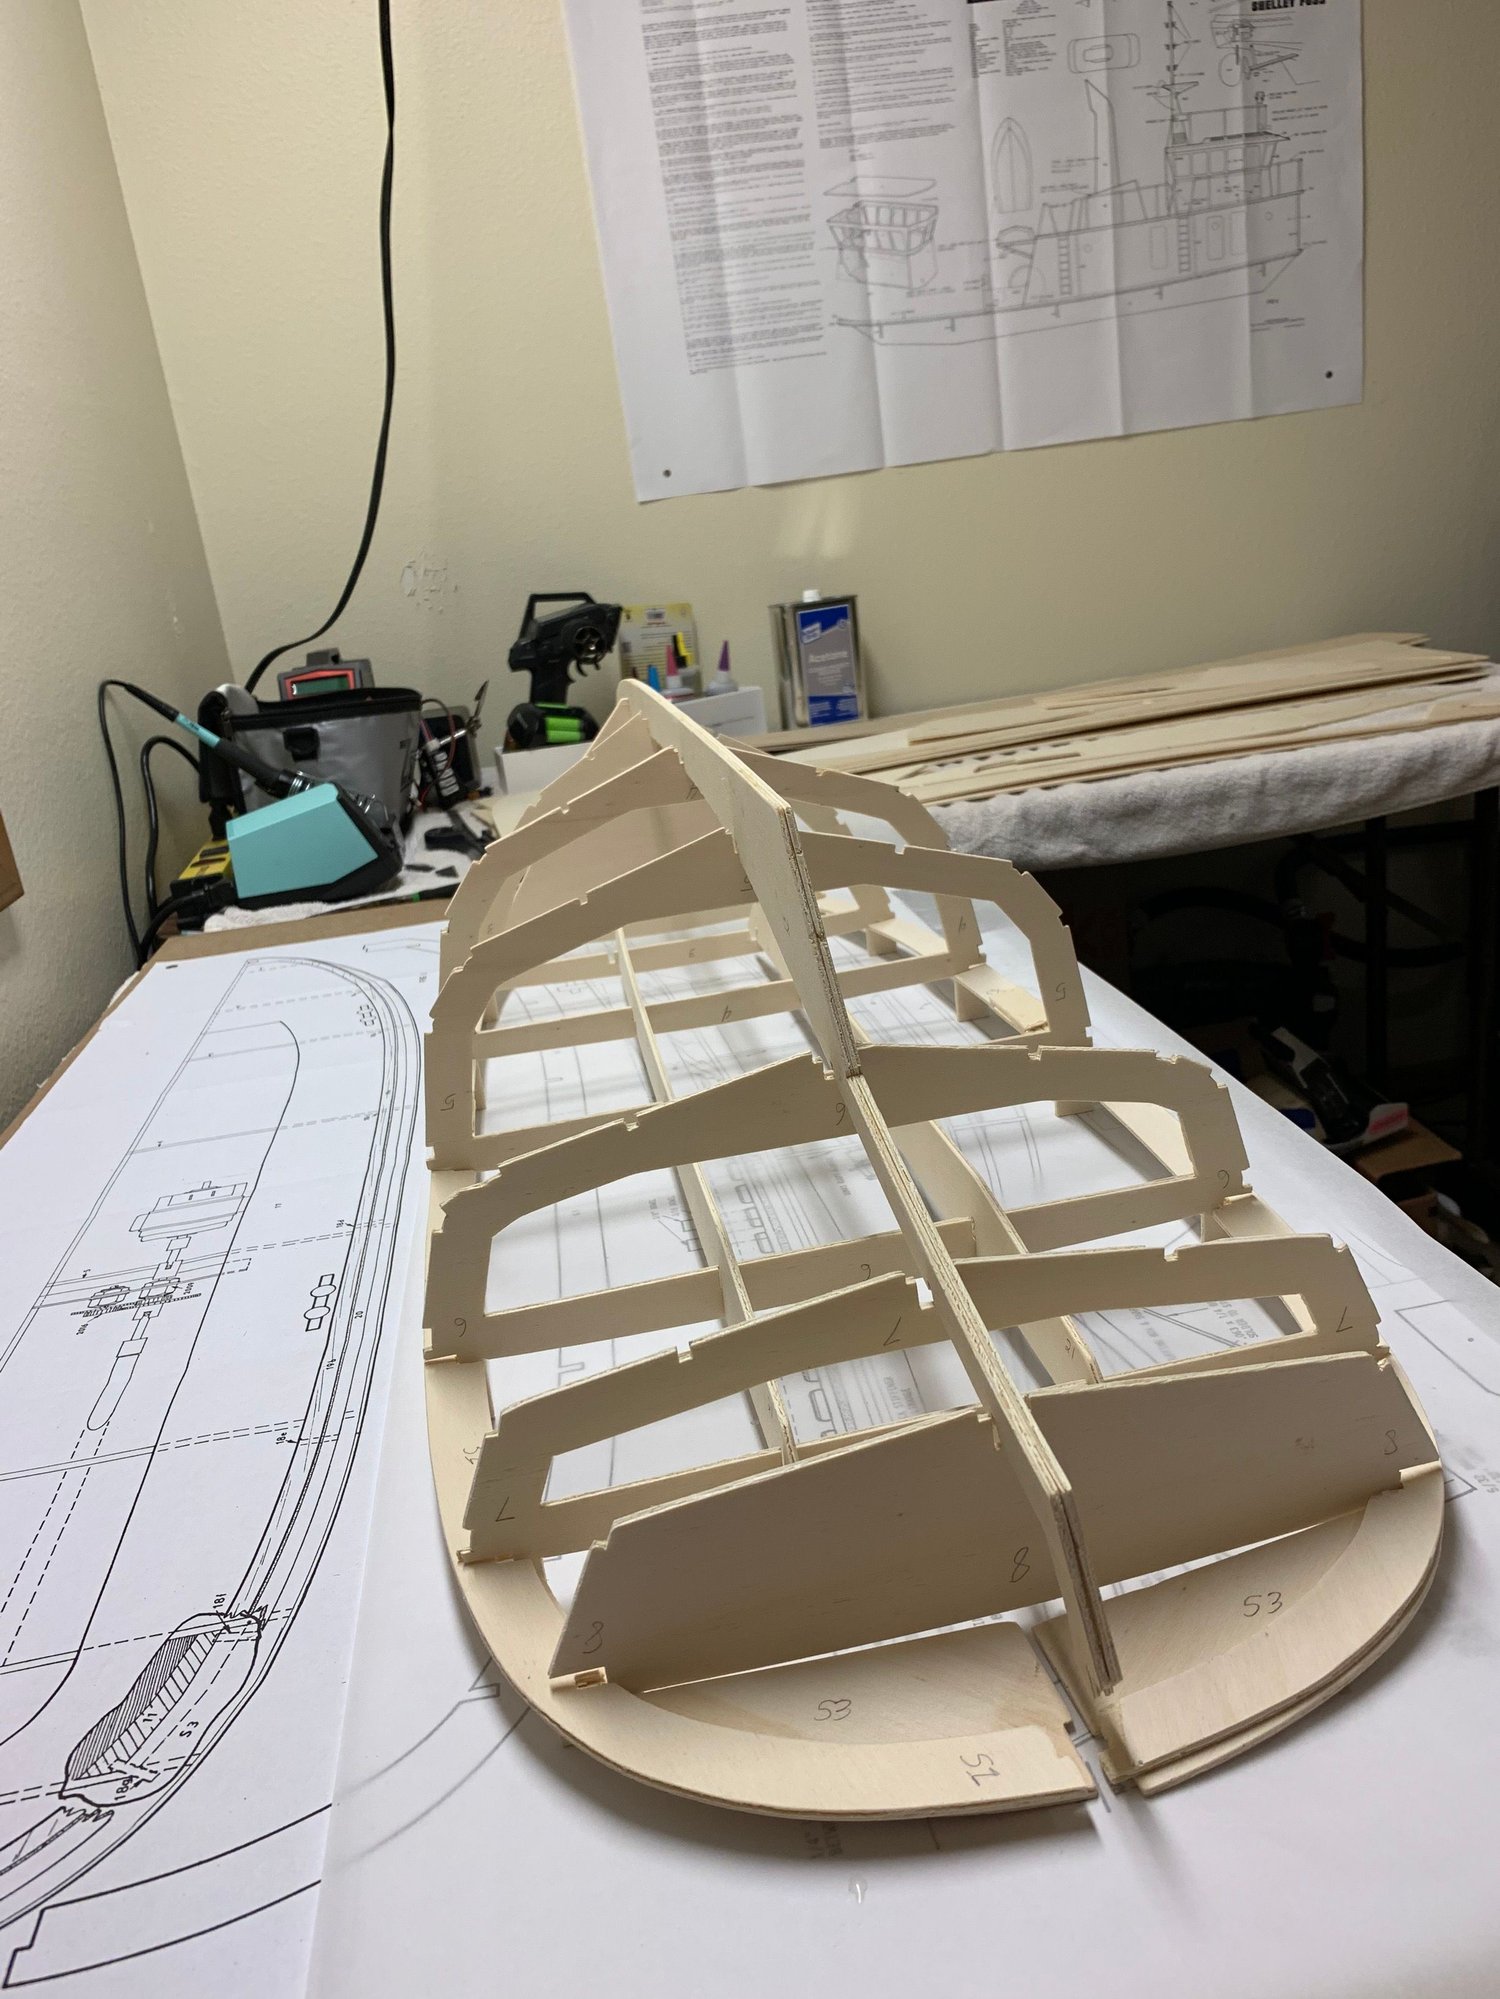
Remembering how to trim and sand die-cut wood parts. A flat style razor blade made all the difference for getting clean notches.
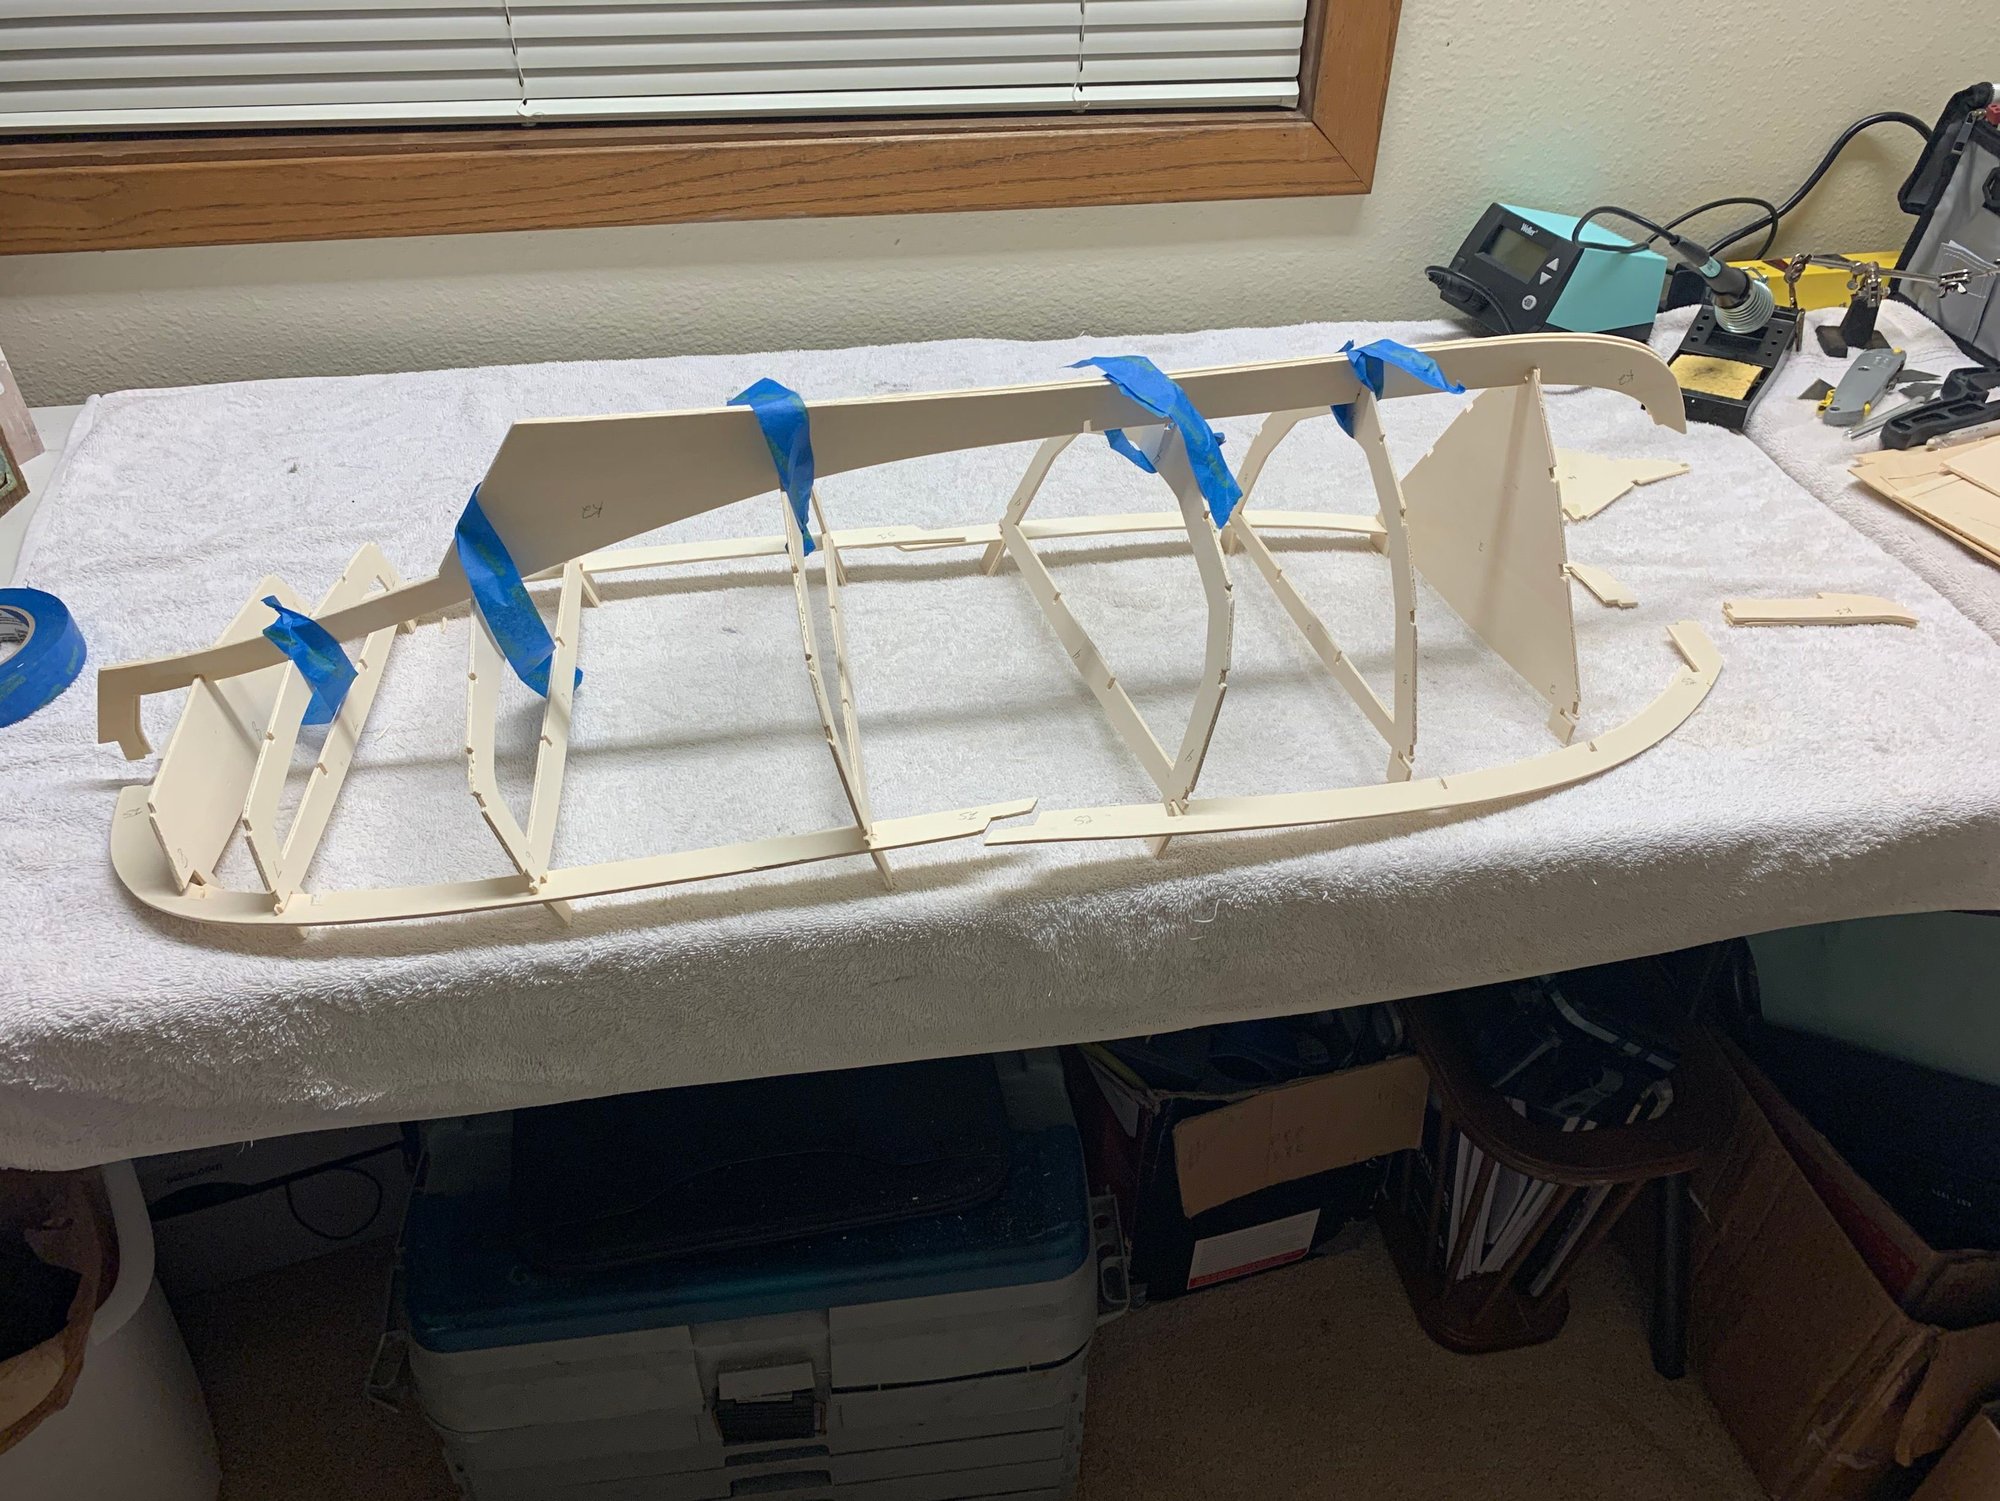
Tuesday Night test fitting parts, time for bed.
Playing with Epoxy, got the Keels stuck together and the Sheers glued. Wednesday was spent trimming, test fitting, and doing more prep.
Went to town Thursday with the CA glue on the Keel and Sheers.
Got all of the Sheers and Keels glued!

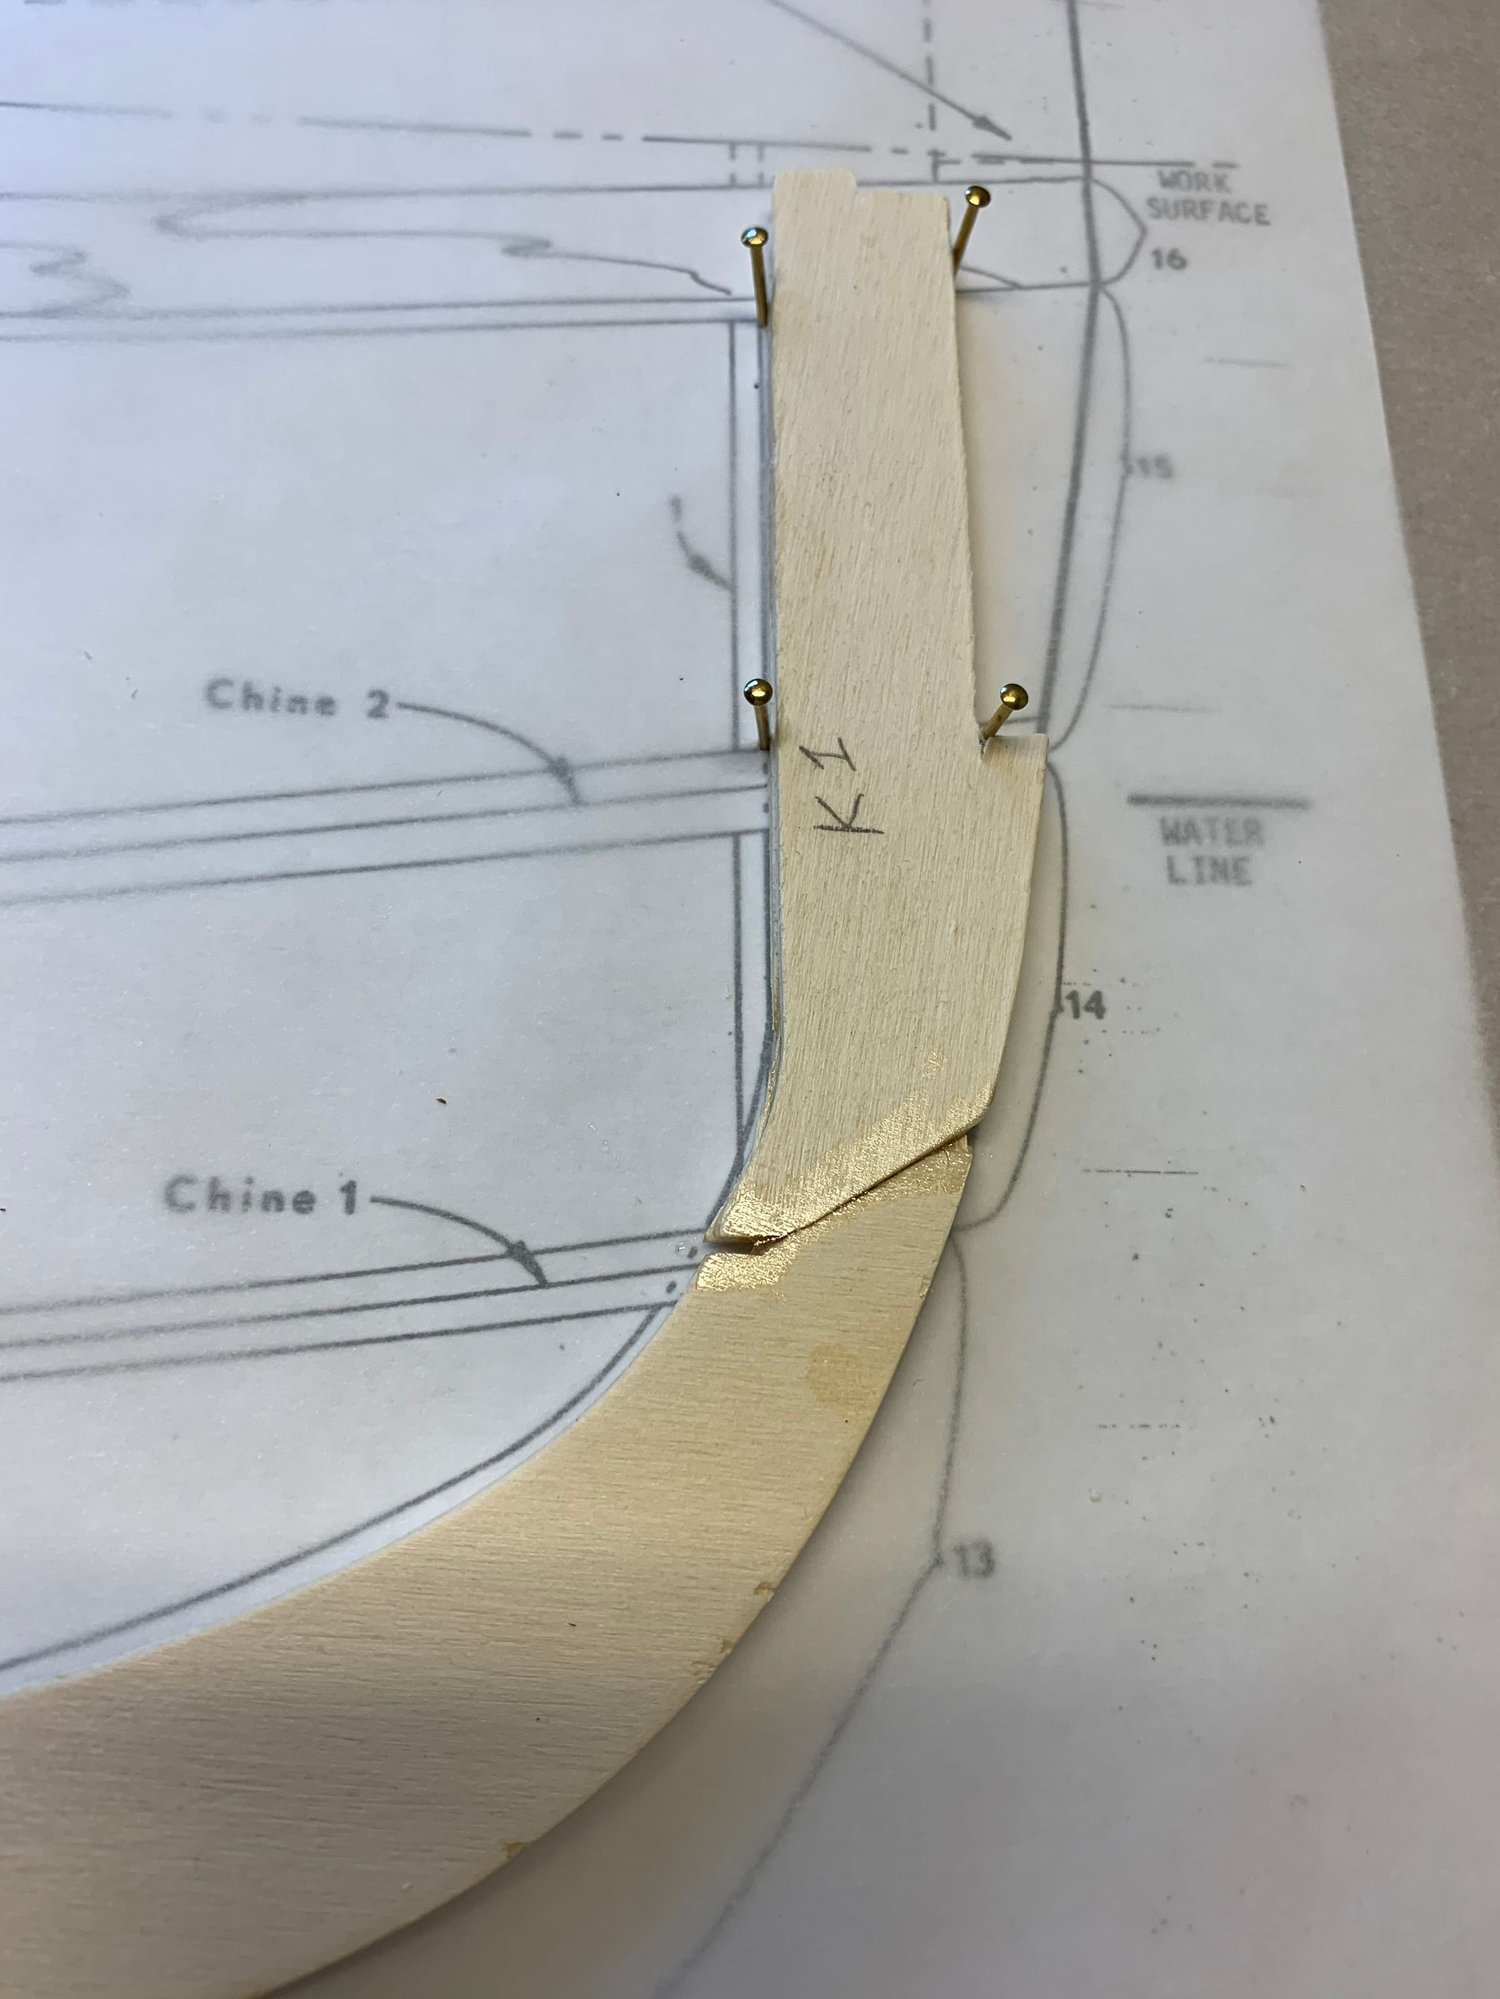
Went to the town with the Stringers, but I should have stopped at this point....I made one small mistake. Time for bed, fix it tomorrow.
I recently purchased a Dumas Shelley Foss Tug Boat kit direct from Dumas's website. It took about two weeks to arrive in Wisconsin from their Arizona facility. My plan is to build this as a FIRE TUG, using modern electronics(brushless, lipo, Rasp Pi, etc). I'm going to go with the Kort Nozzles for authenticity. I live on the Mississippi River, with a beach and docks as my backyard. I have a float and slip at my backdoor.
I have wanted an FPV boat for some time now. I have FPV equipment from my Park Zone Radian Sailplane project, that I plan to install on this. My end is goal is being able to drive this from my living room, while the RC boat is out on the river. I have a three story deck, where I can mount antennas from and easily see the boat out on the River. I even have a permanent Outdoor PTZ Webcam I can track it with from my deck.
Since this is going to be a FIRE TUG, I have ordered a few different 12 volt Water Pressure pumps to experiment with. A full size Shelley Foss Fire Tug pumps 1000 GPM! This model is 1/30, so 1000/30 = 33.3GPM. For a 3 foot boat, that's almost impossible to hit. I have found 1.0 GPM 80psi pumps, that use 700 DC motors. They are small enough to possibly get FOUR of them in my hull. Fire Tugs usually have 4 Water Cannons. I plan to have TWO turrets, front and rear mounted, each having TWO cannons. The dream is to able to Soak boats that get too close, or innocent bystanders at the beach. These 1.0 GPM 80psi pumps can push water almost 20 feet. Four of them will be a real treat to watch work.
My progress since Tuesday Afternoon(moody blues commence).
Freshly opened box, wood!
Laying out the plans
Remembering how to trim and sand die-cut wood parts. A flat style razor blade made all the difference for getting clean notches.
Tuesday Night test fitting parts, time for bed.
Playing with Epoxy, got the Keels stuck together and the Sheers glued. Wednesday was spent trimming, test fitting, and doing more prep.
Went to town Thursday with the CA glue on the Keel and Sheers.
Got all of the Sheers and Keels glued!
Went to the town with the Stringers, but I should have stopped at this point....I made one small mistake. Time for bed, fix it tomorrow.
 04-02-2021 | 06:40 PM
#2

Not sure if you said anything about where you are going to order your running gear from or not but I would recommend contacting Mack Products. They usually have all the parts and fittings you will need and it's much better quality than what Dumas has/had. In fact, they have a parts kit just for the Shelley Foss:
working pg 2 - n (mackproductsrc.com)
working pg 2 - n (mackproductsrc.com)
The following users liked this post:
Martin H (08-23-2021)
04-07-2021 | 05:16 AM
#3
Thread Starter
Member
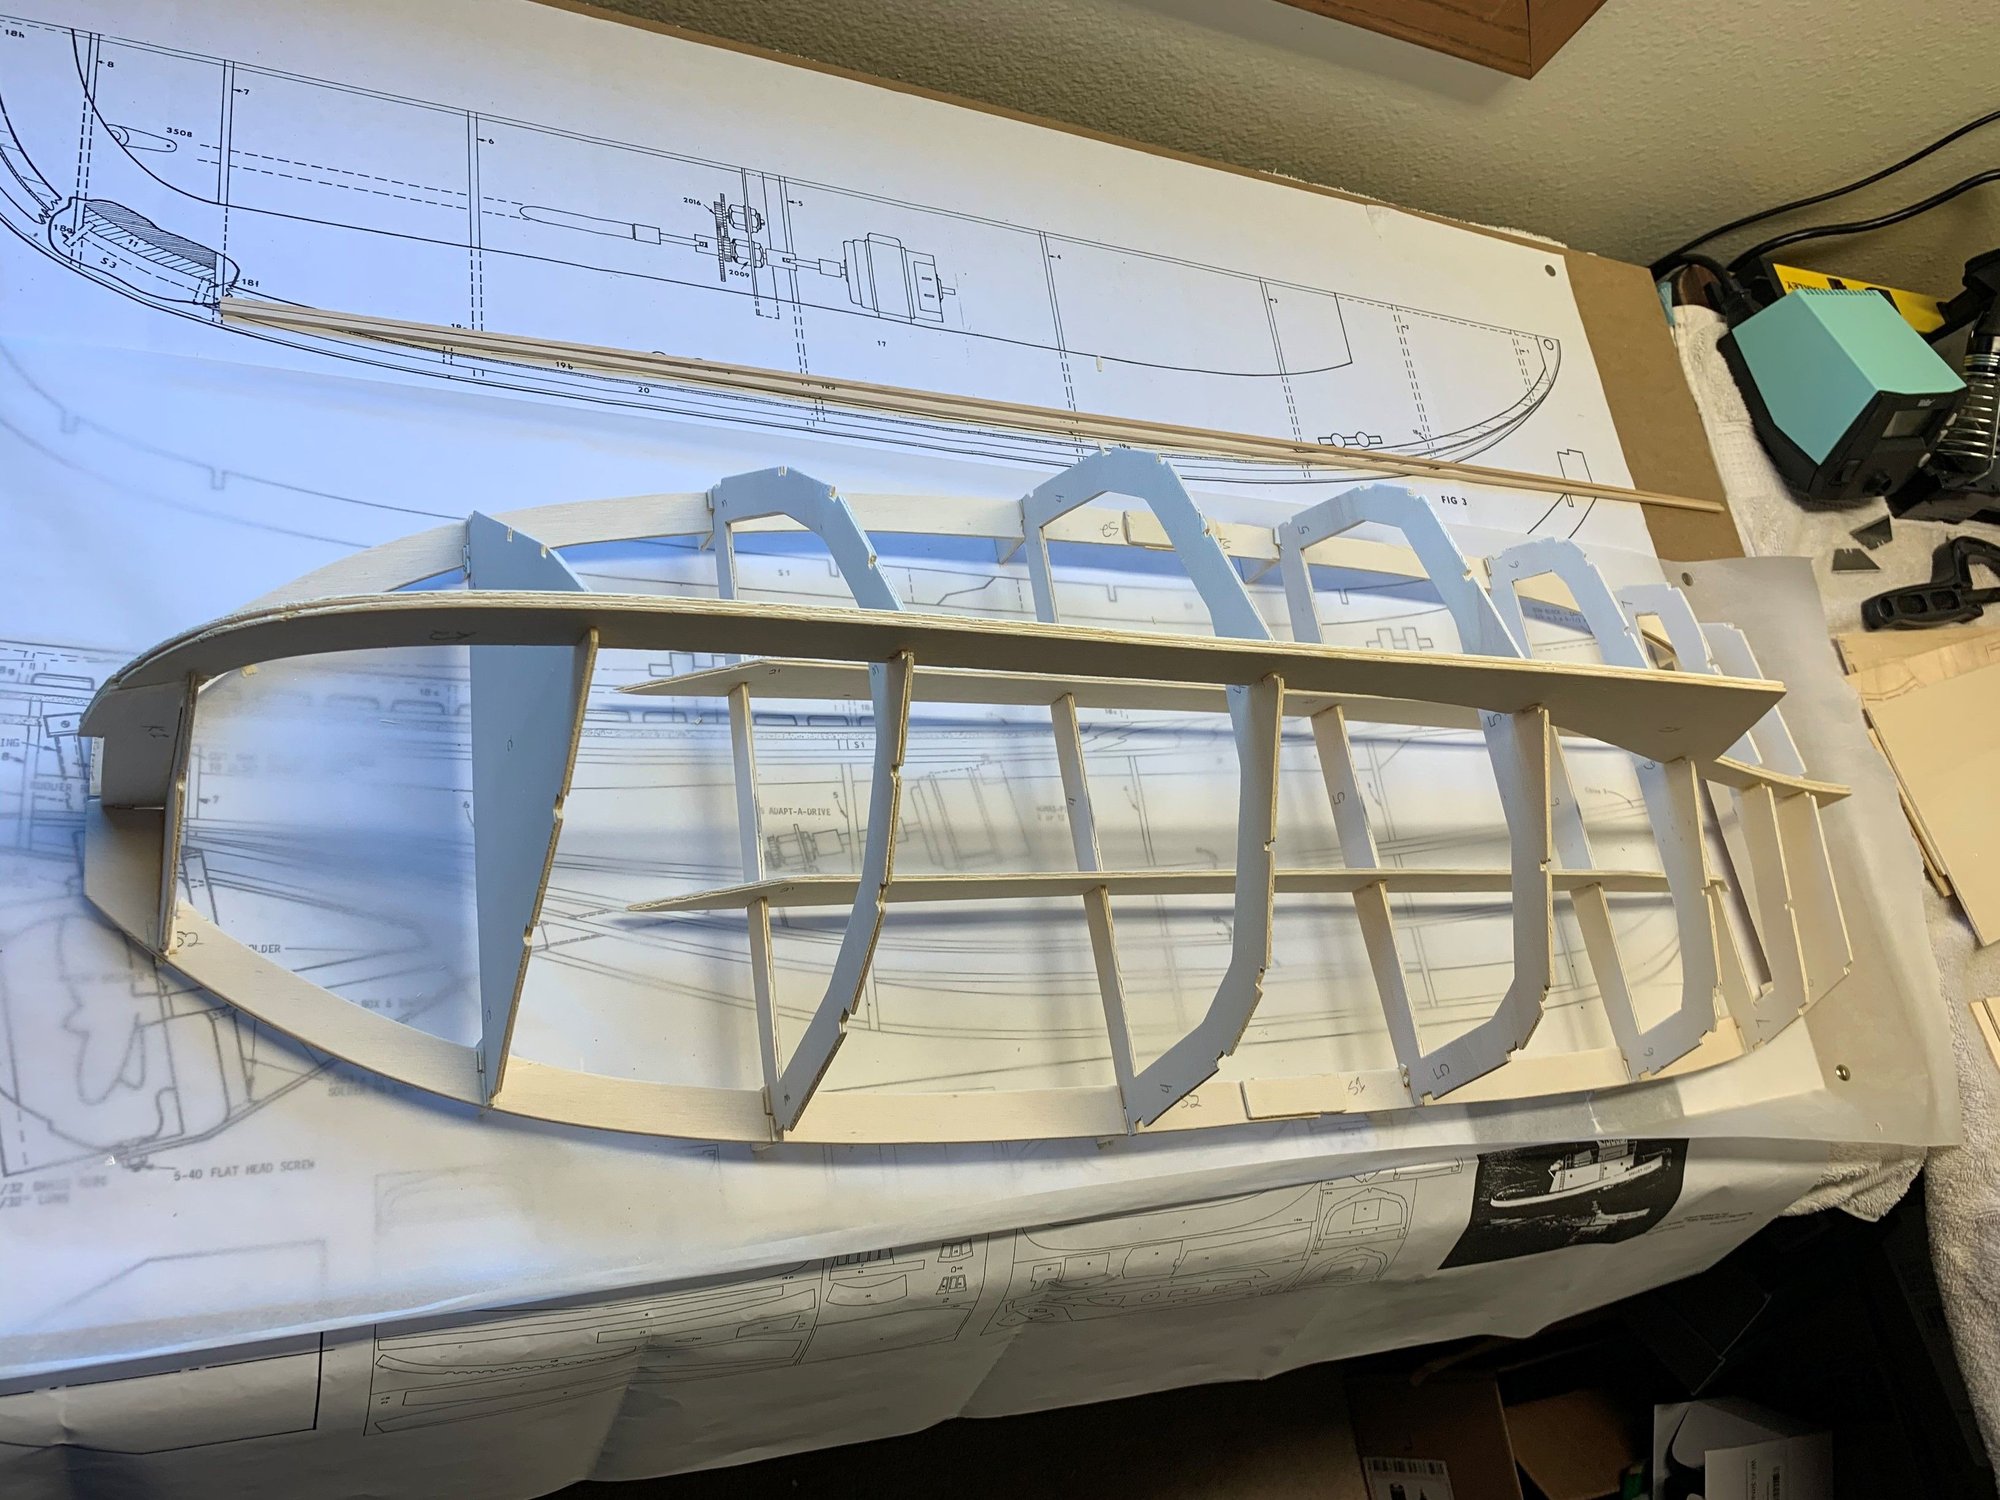
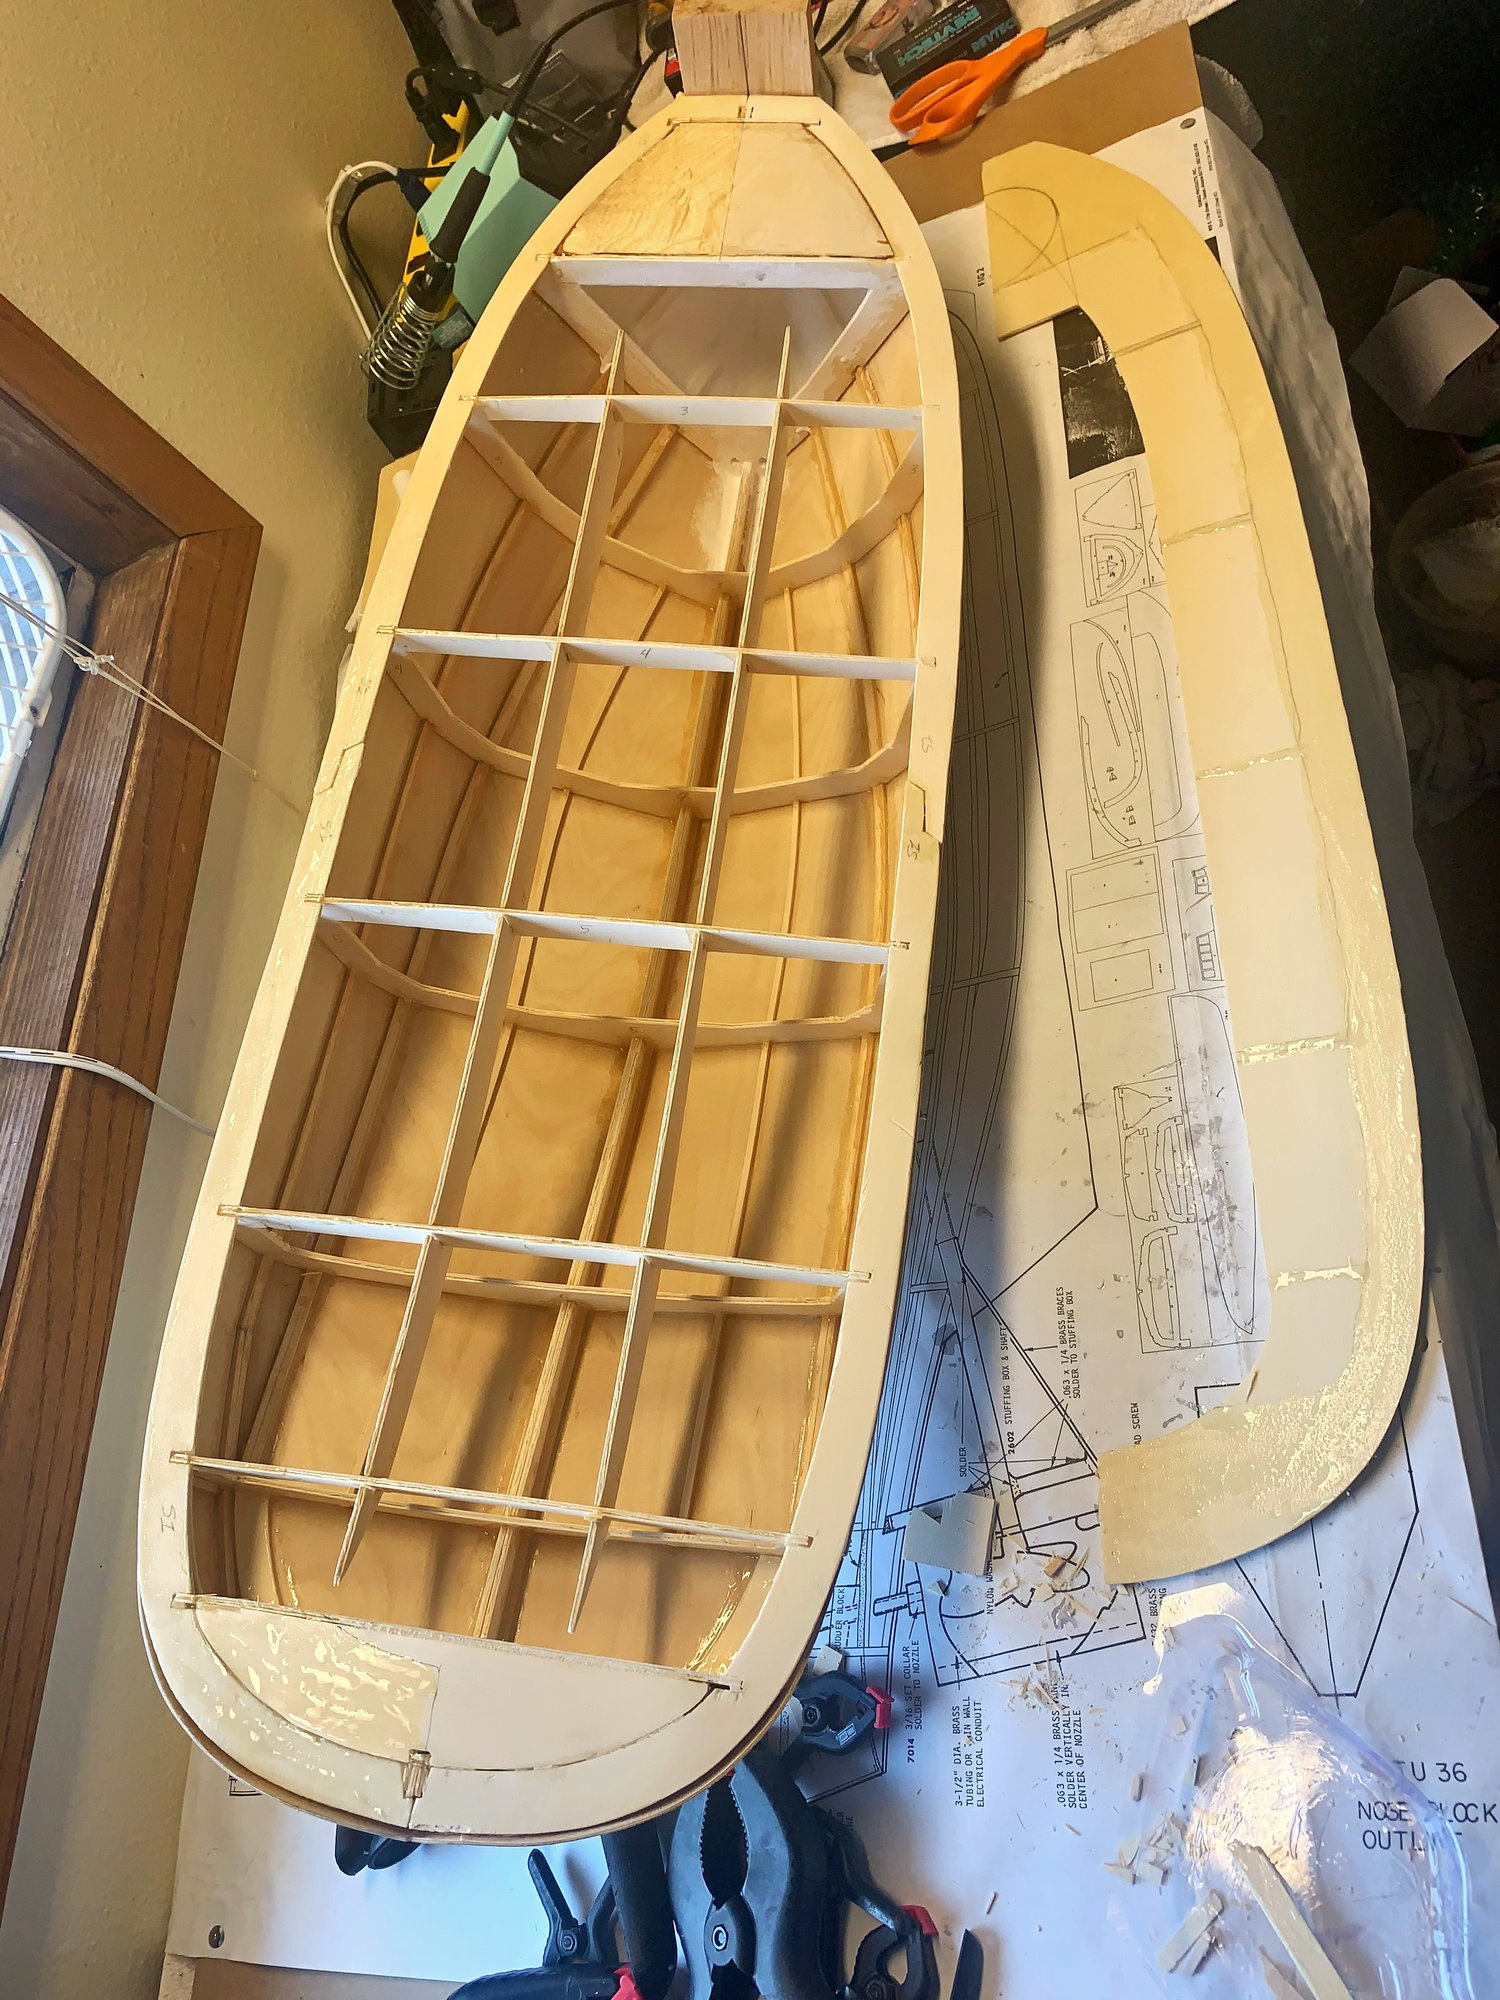
Got the last Stringer CA glued in yesterday. Going to go back and epoxy all of the joints, now that the entire hull is Built up. After that it's sanding edges for panel fitment.
Last edited by birdo; 04-07-2021 at 05:26 AM.
The following users liked this post:
Martin H (08-23-2021)
04-10-2021 | 10:39 AM
#5
Thread Starter
Member
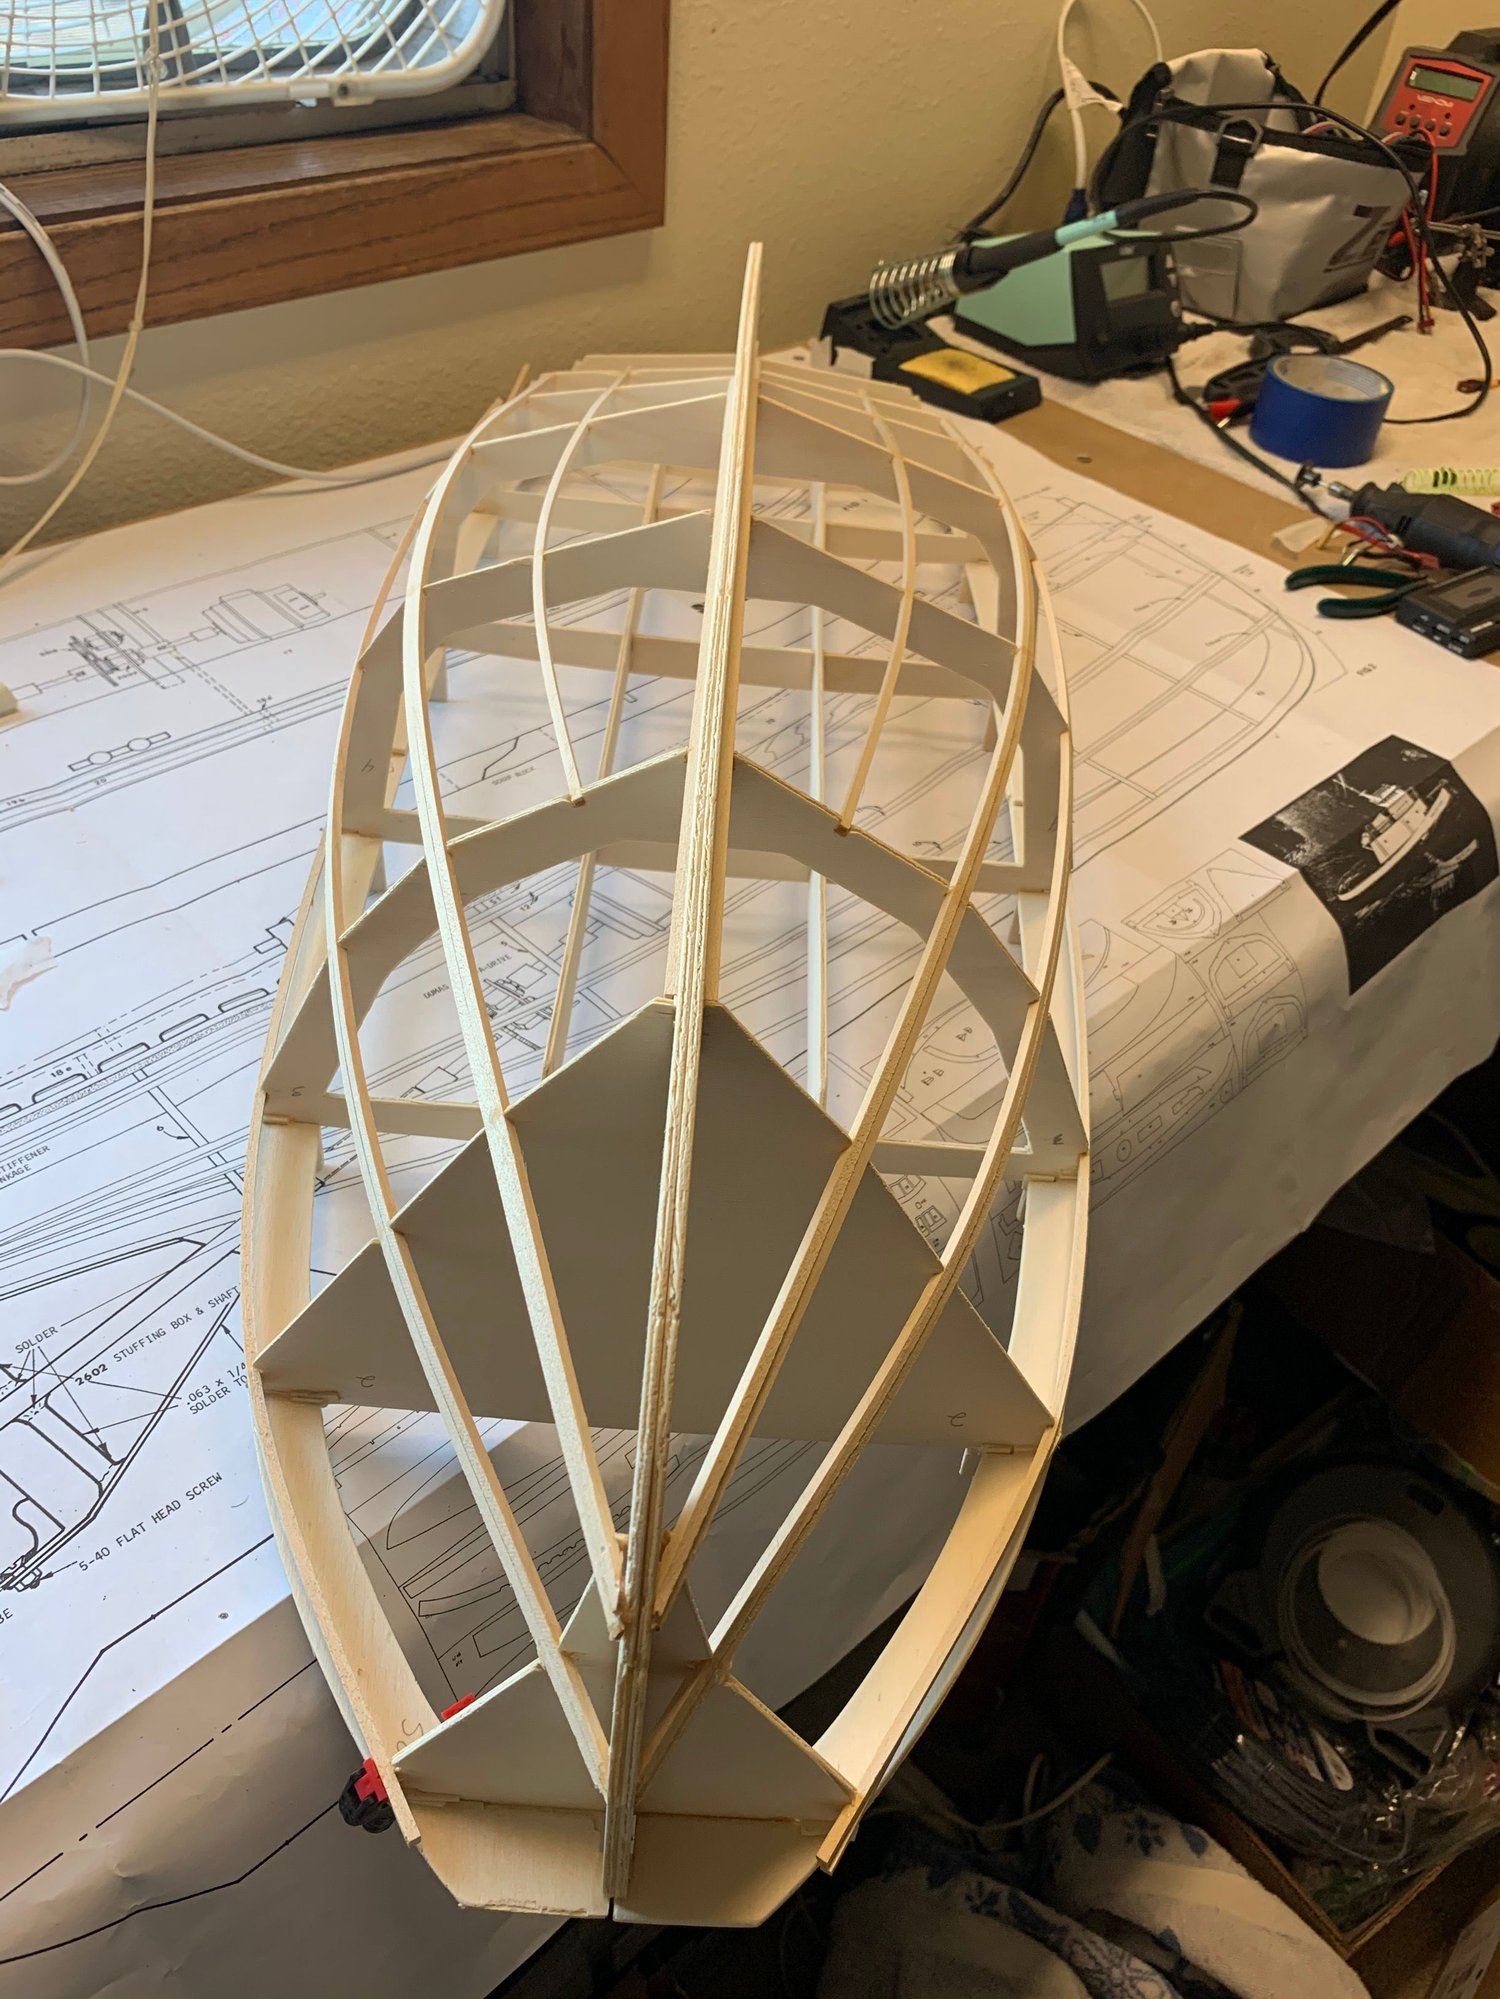
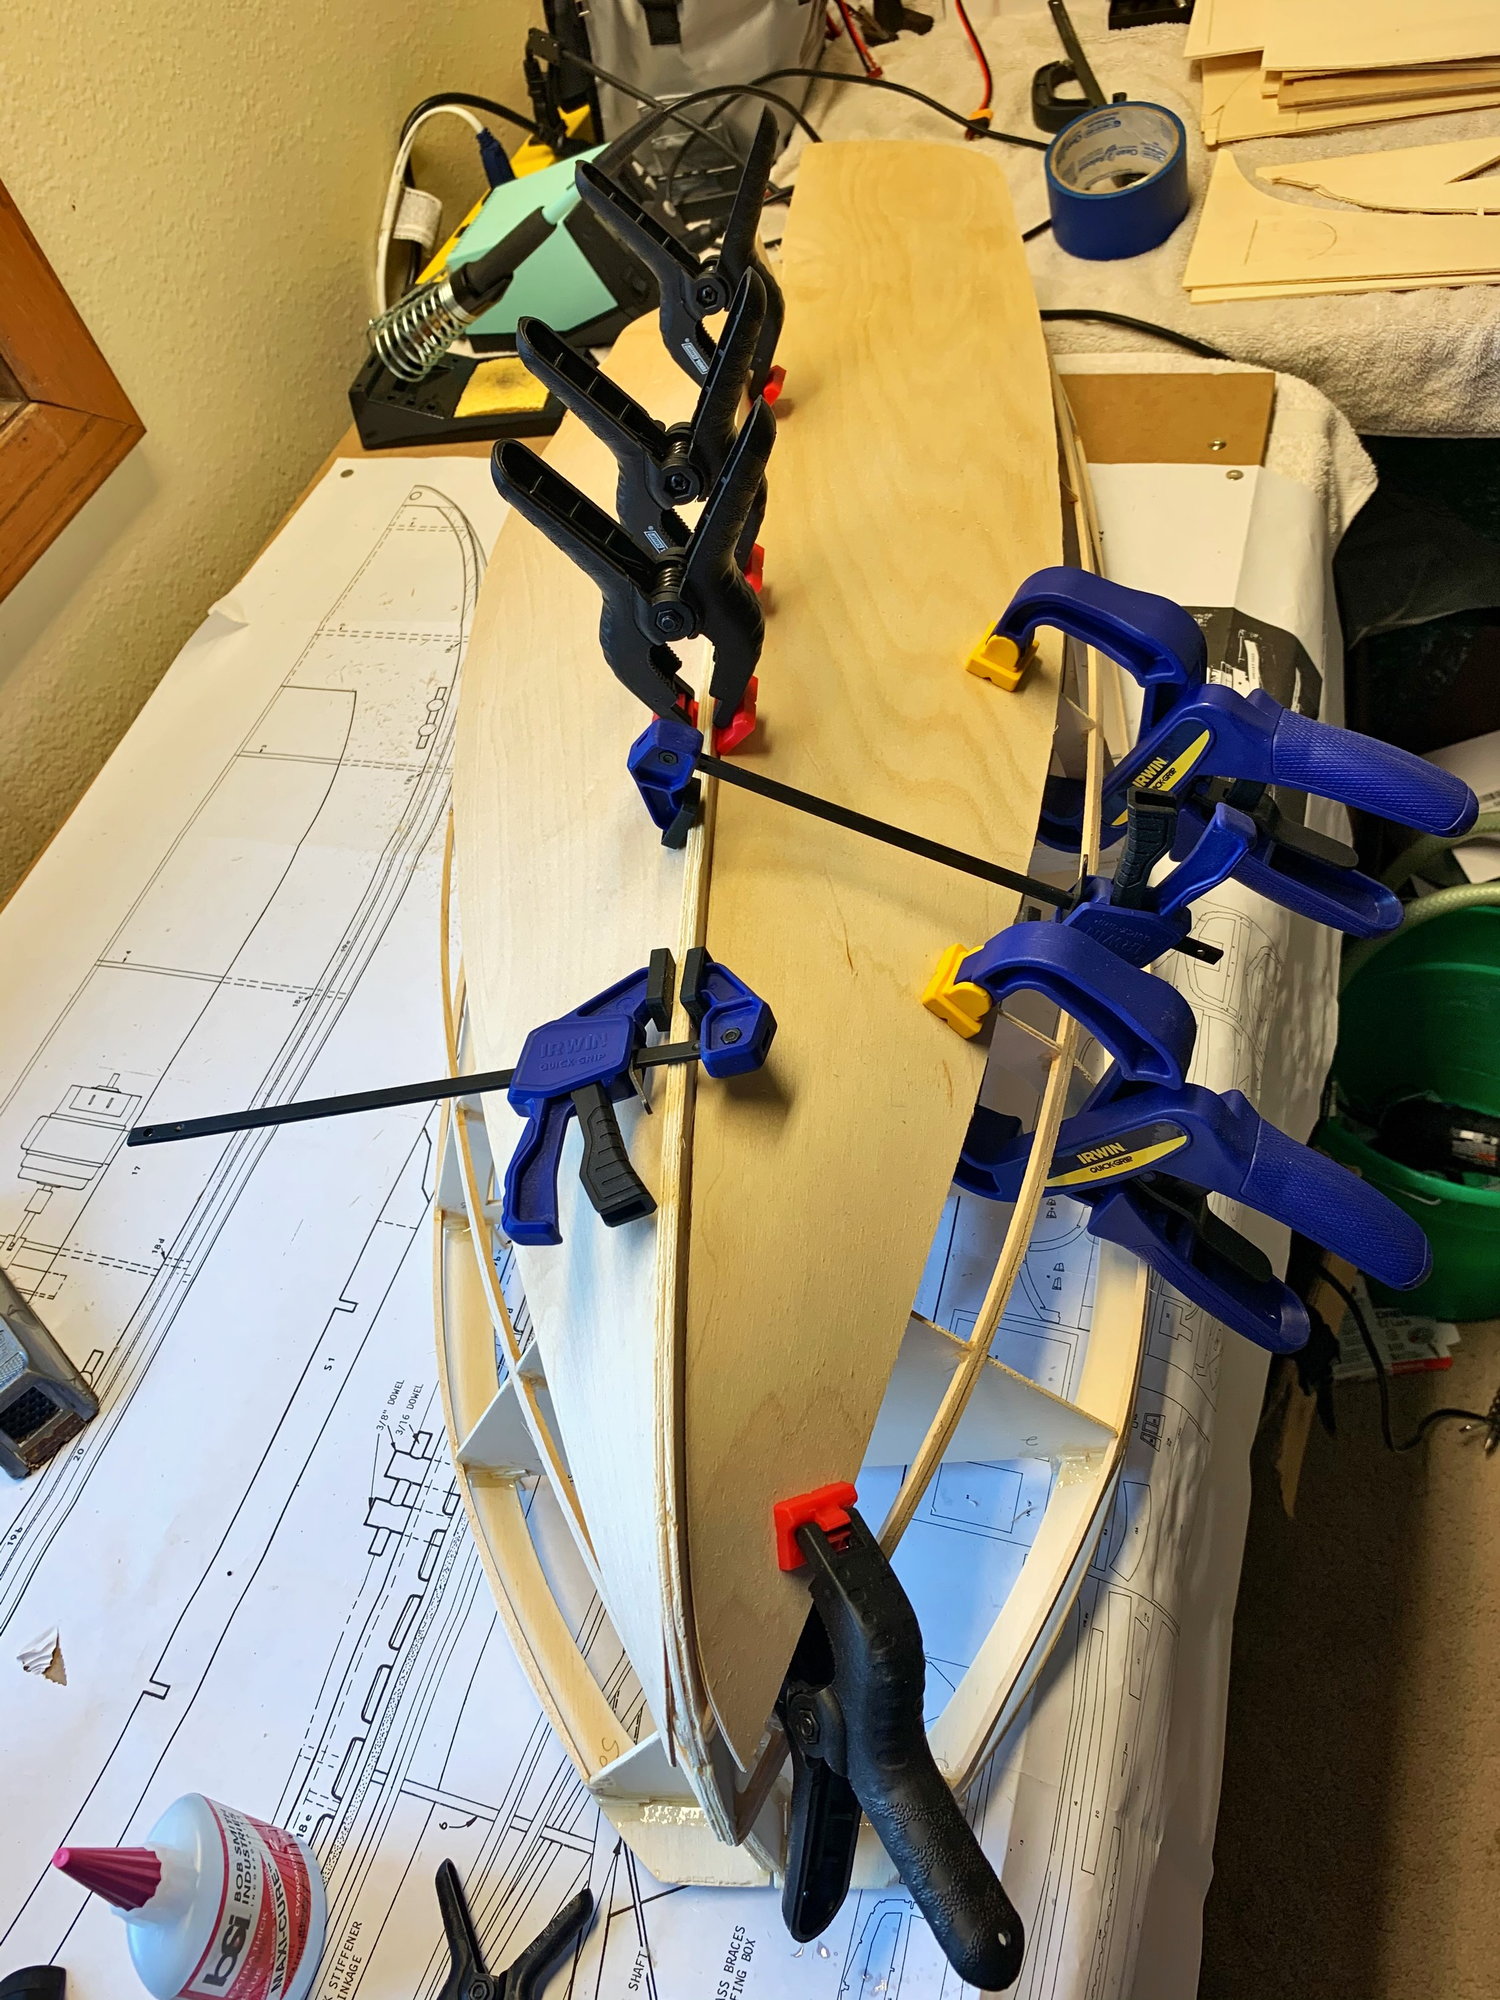
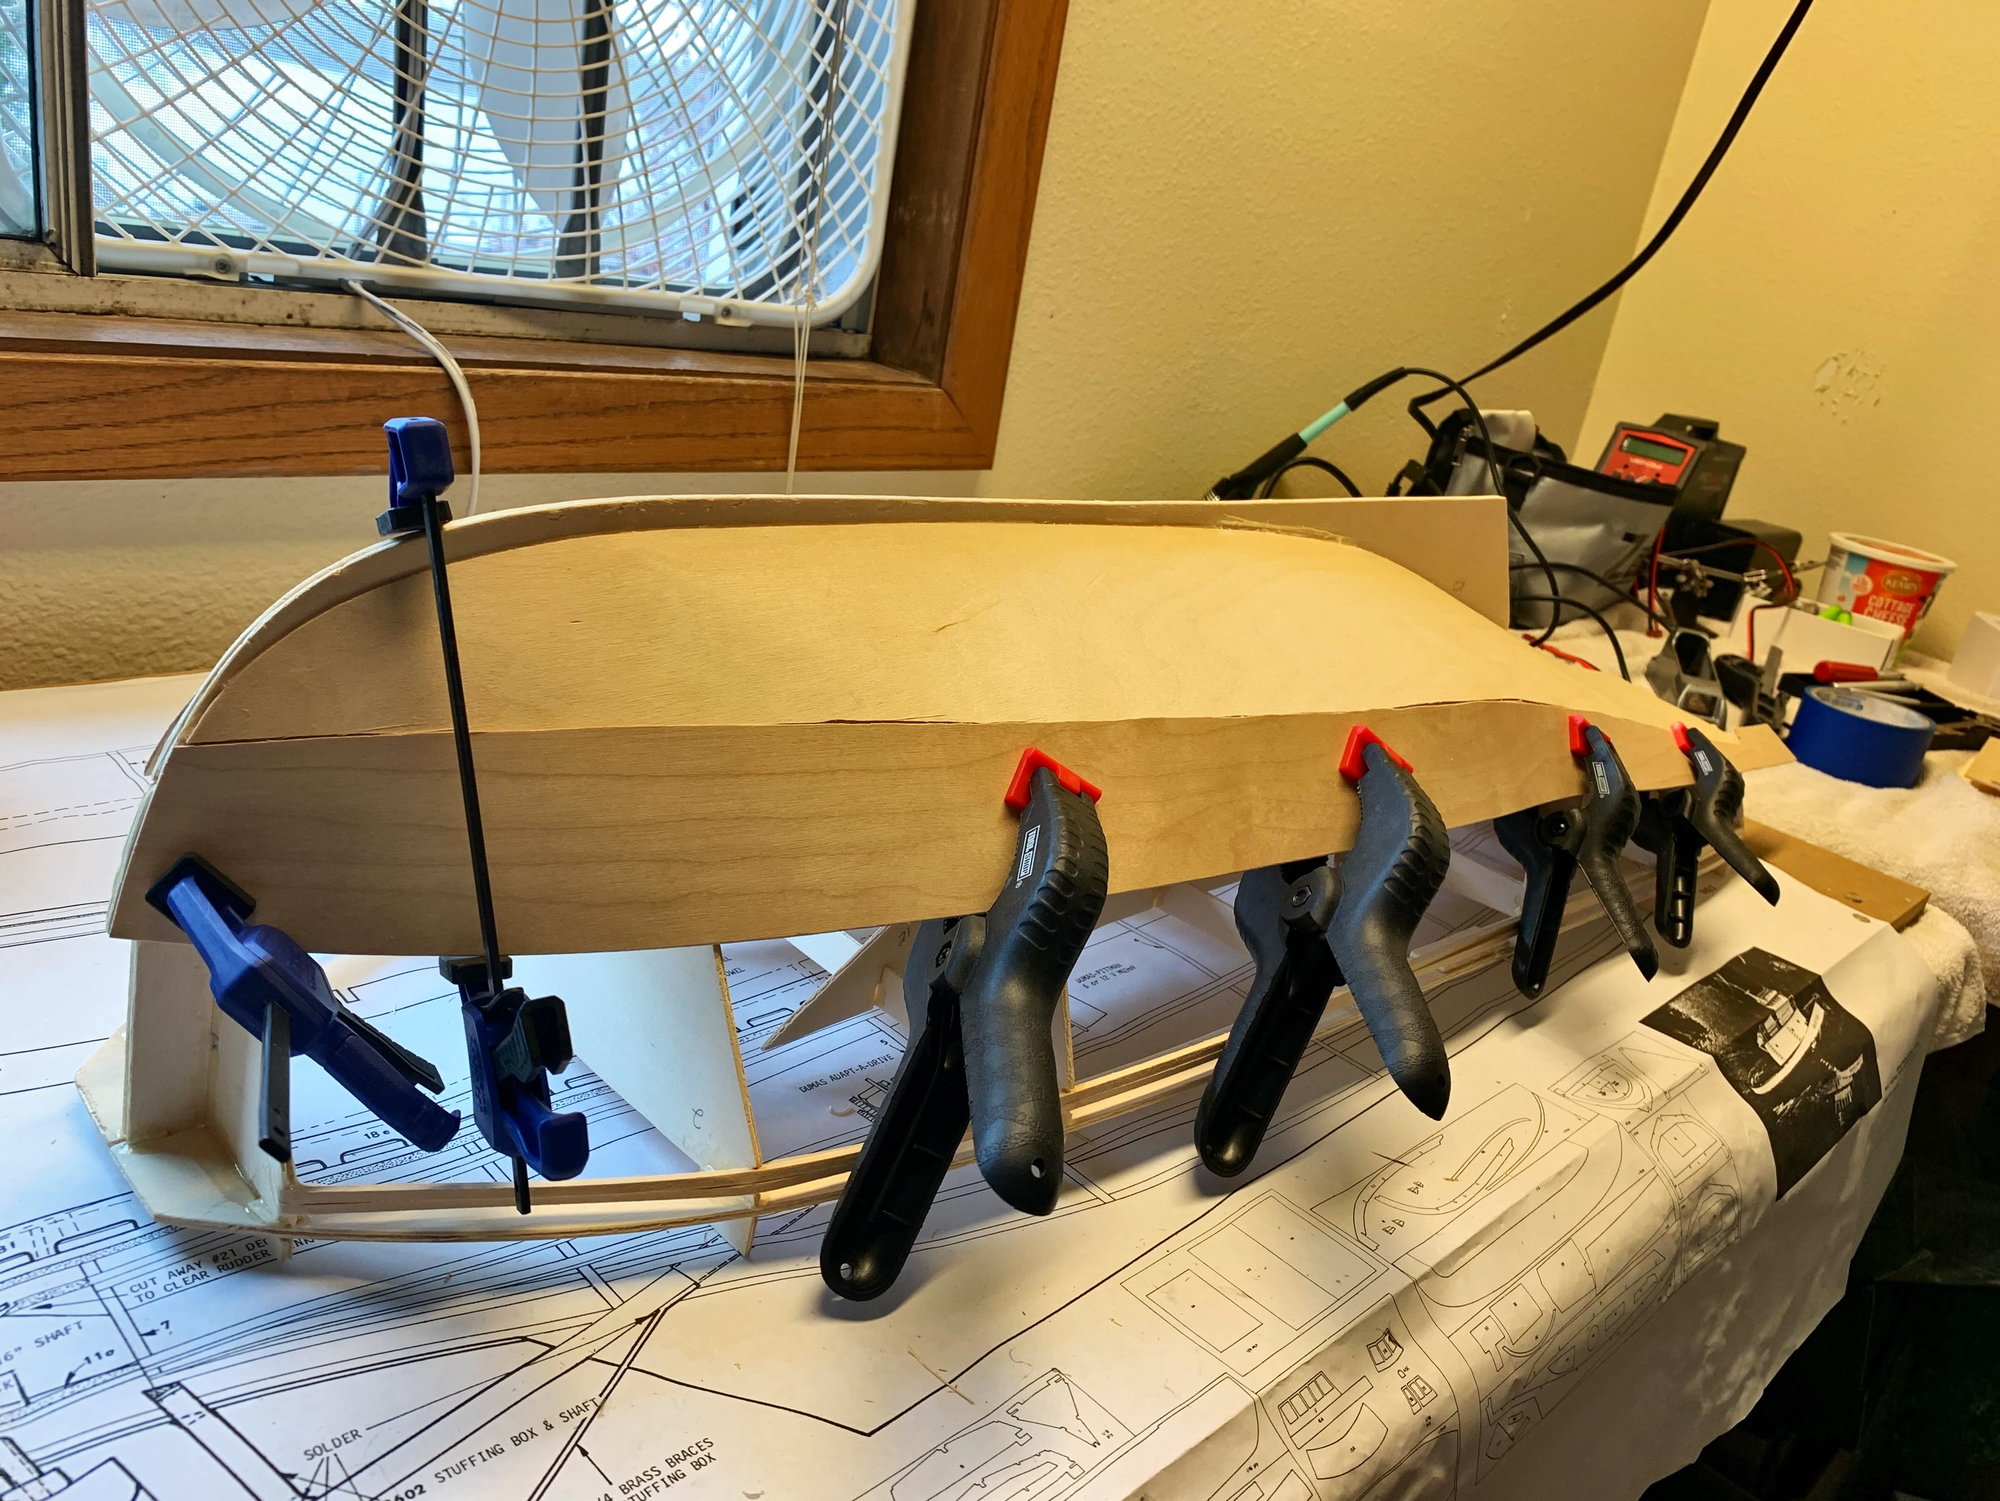
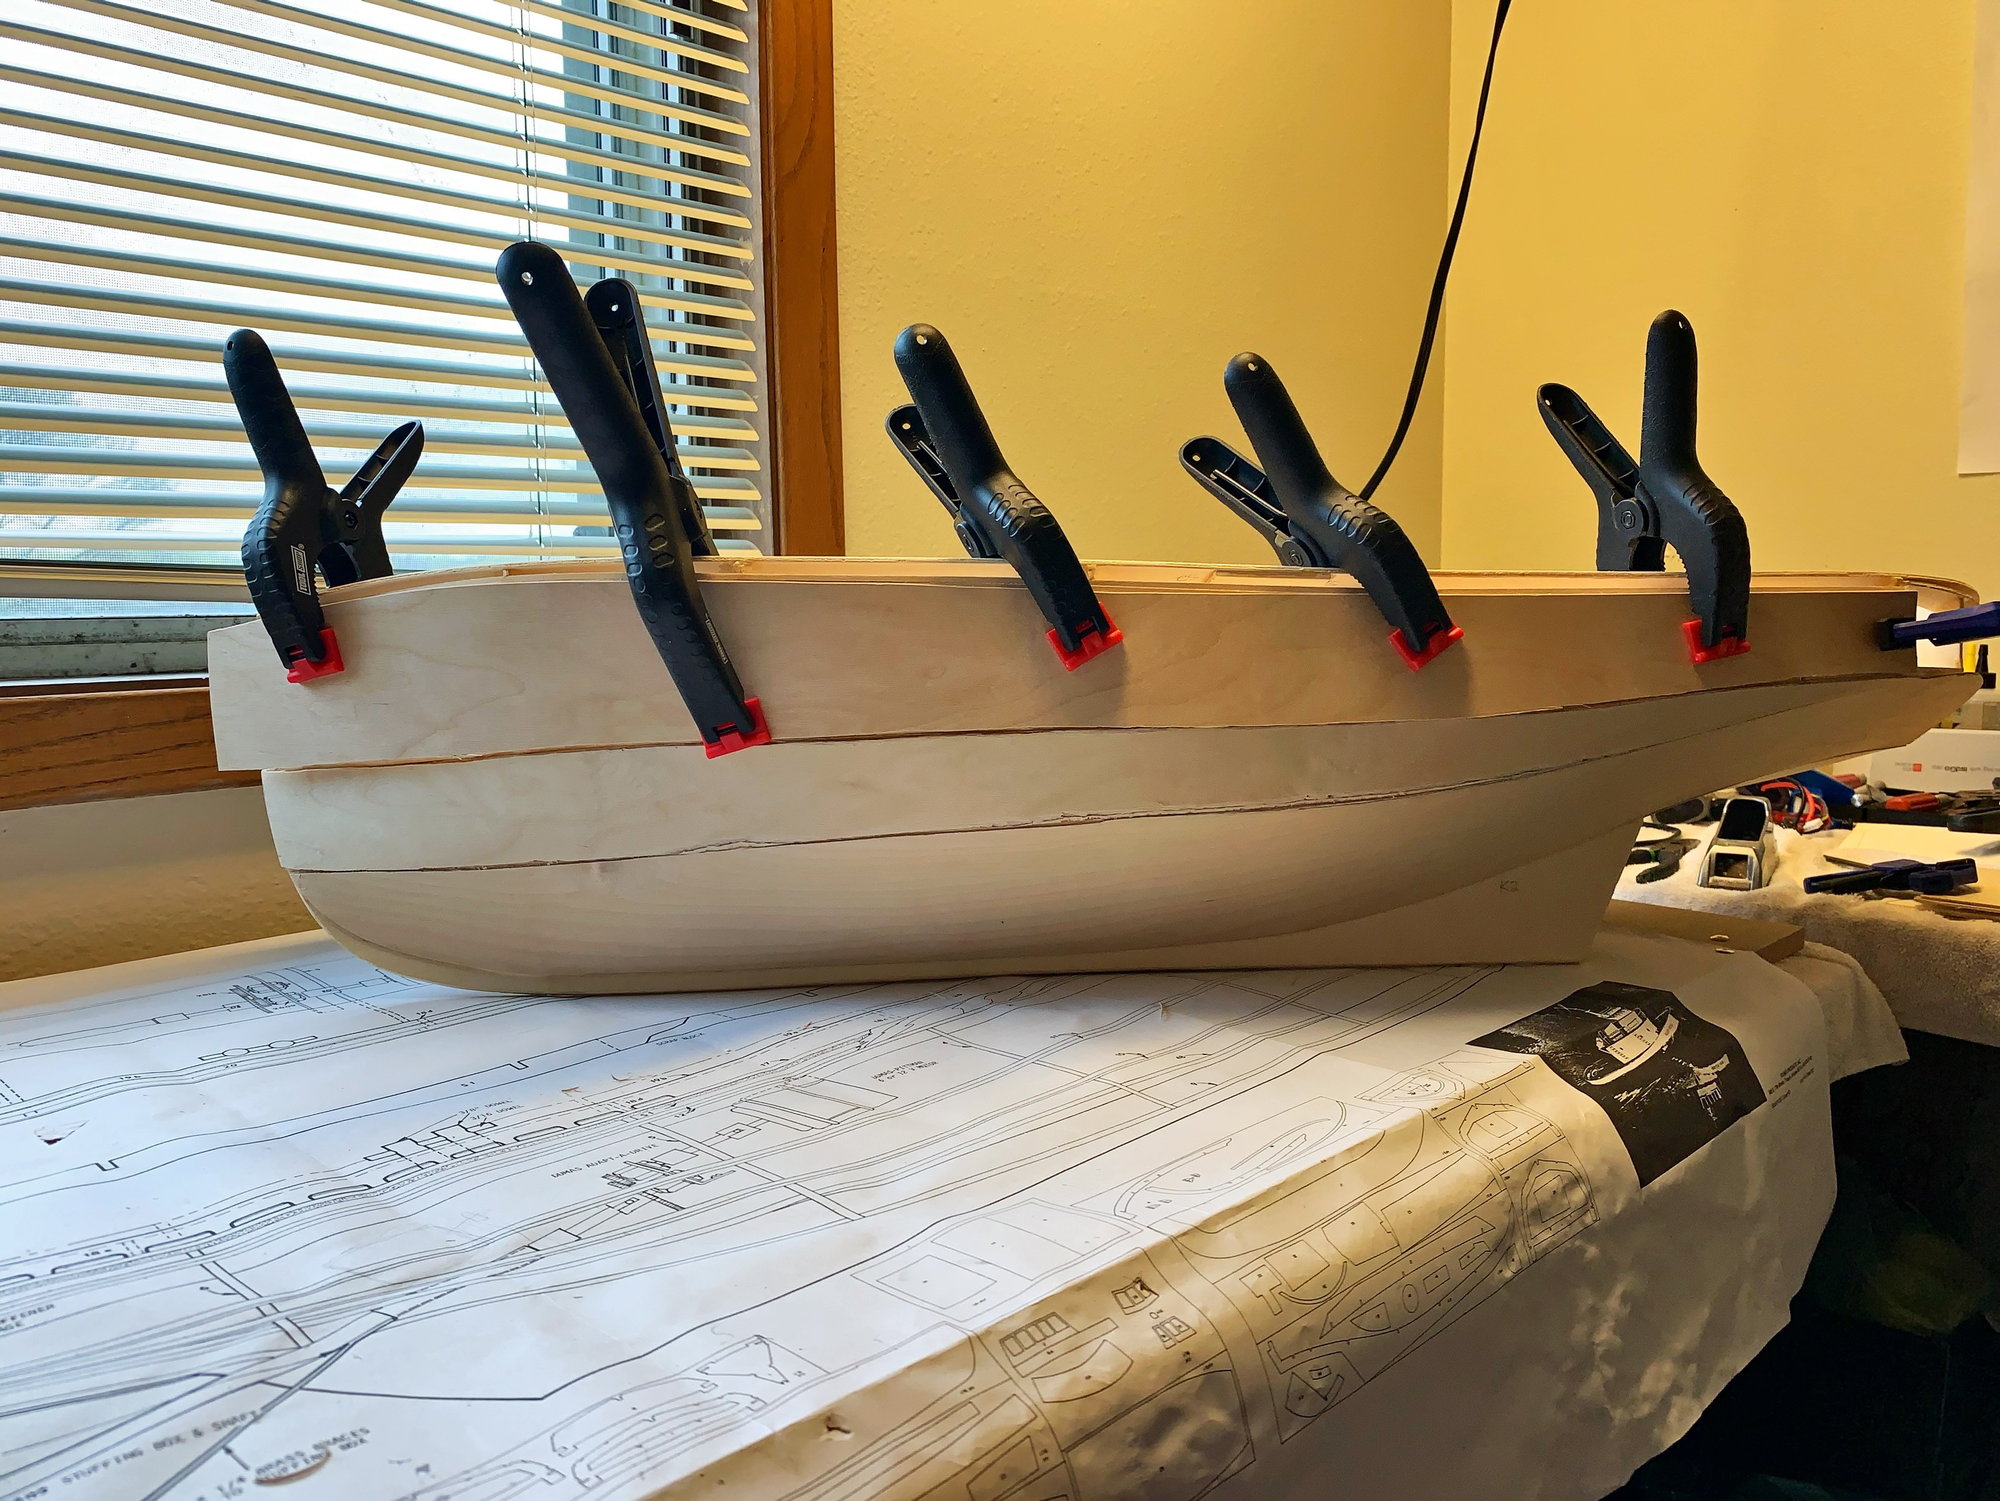
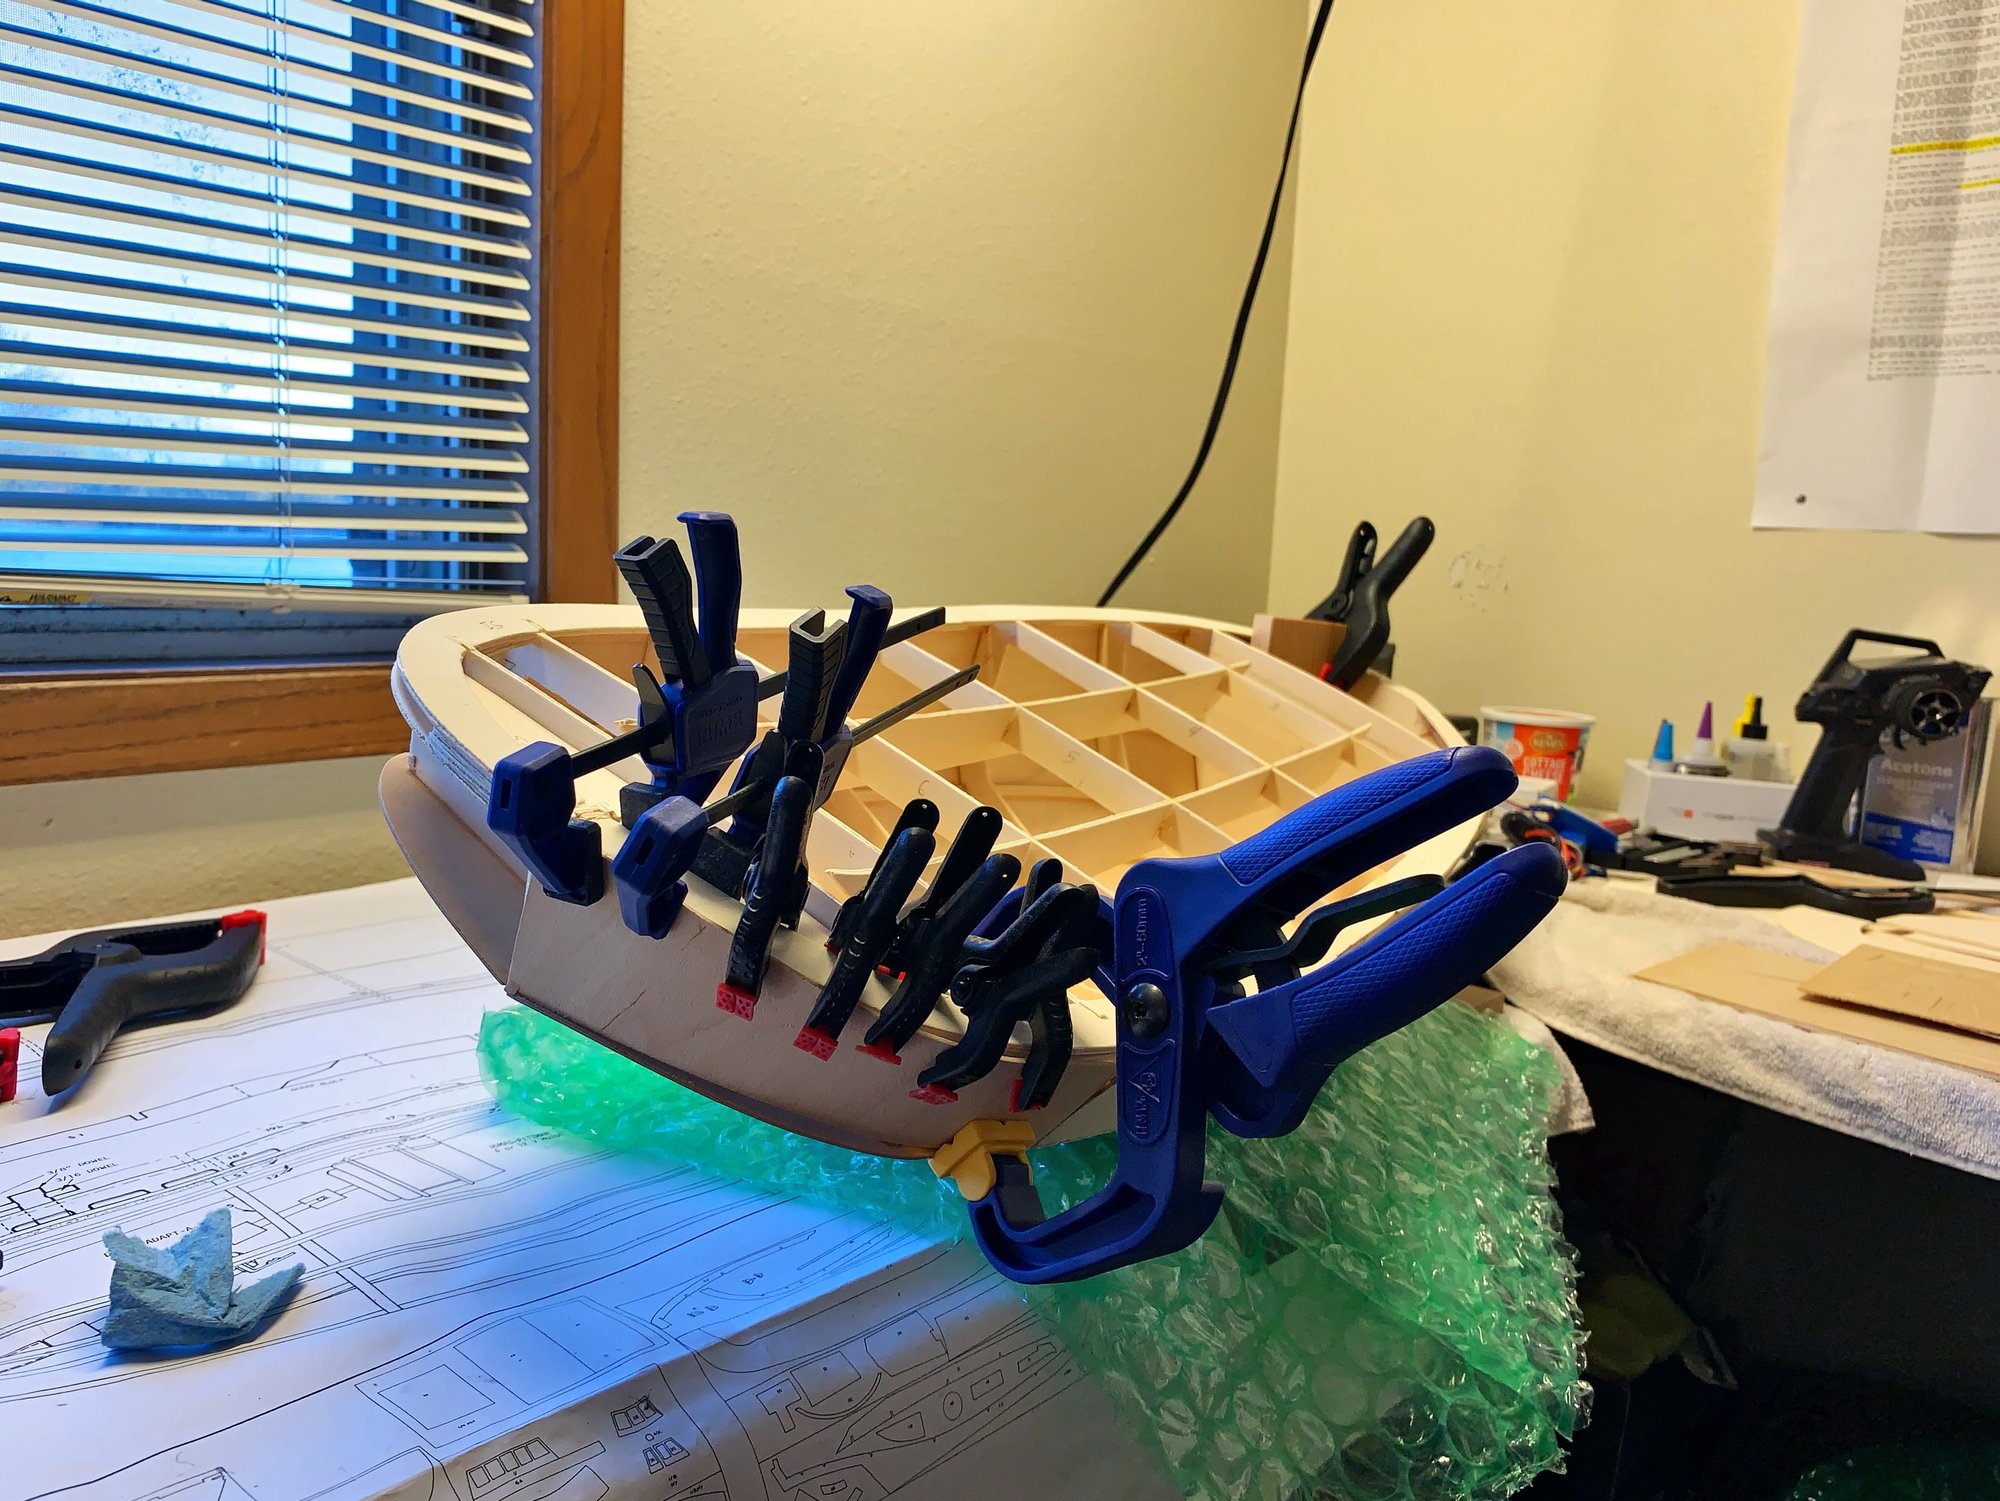
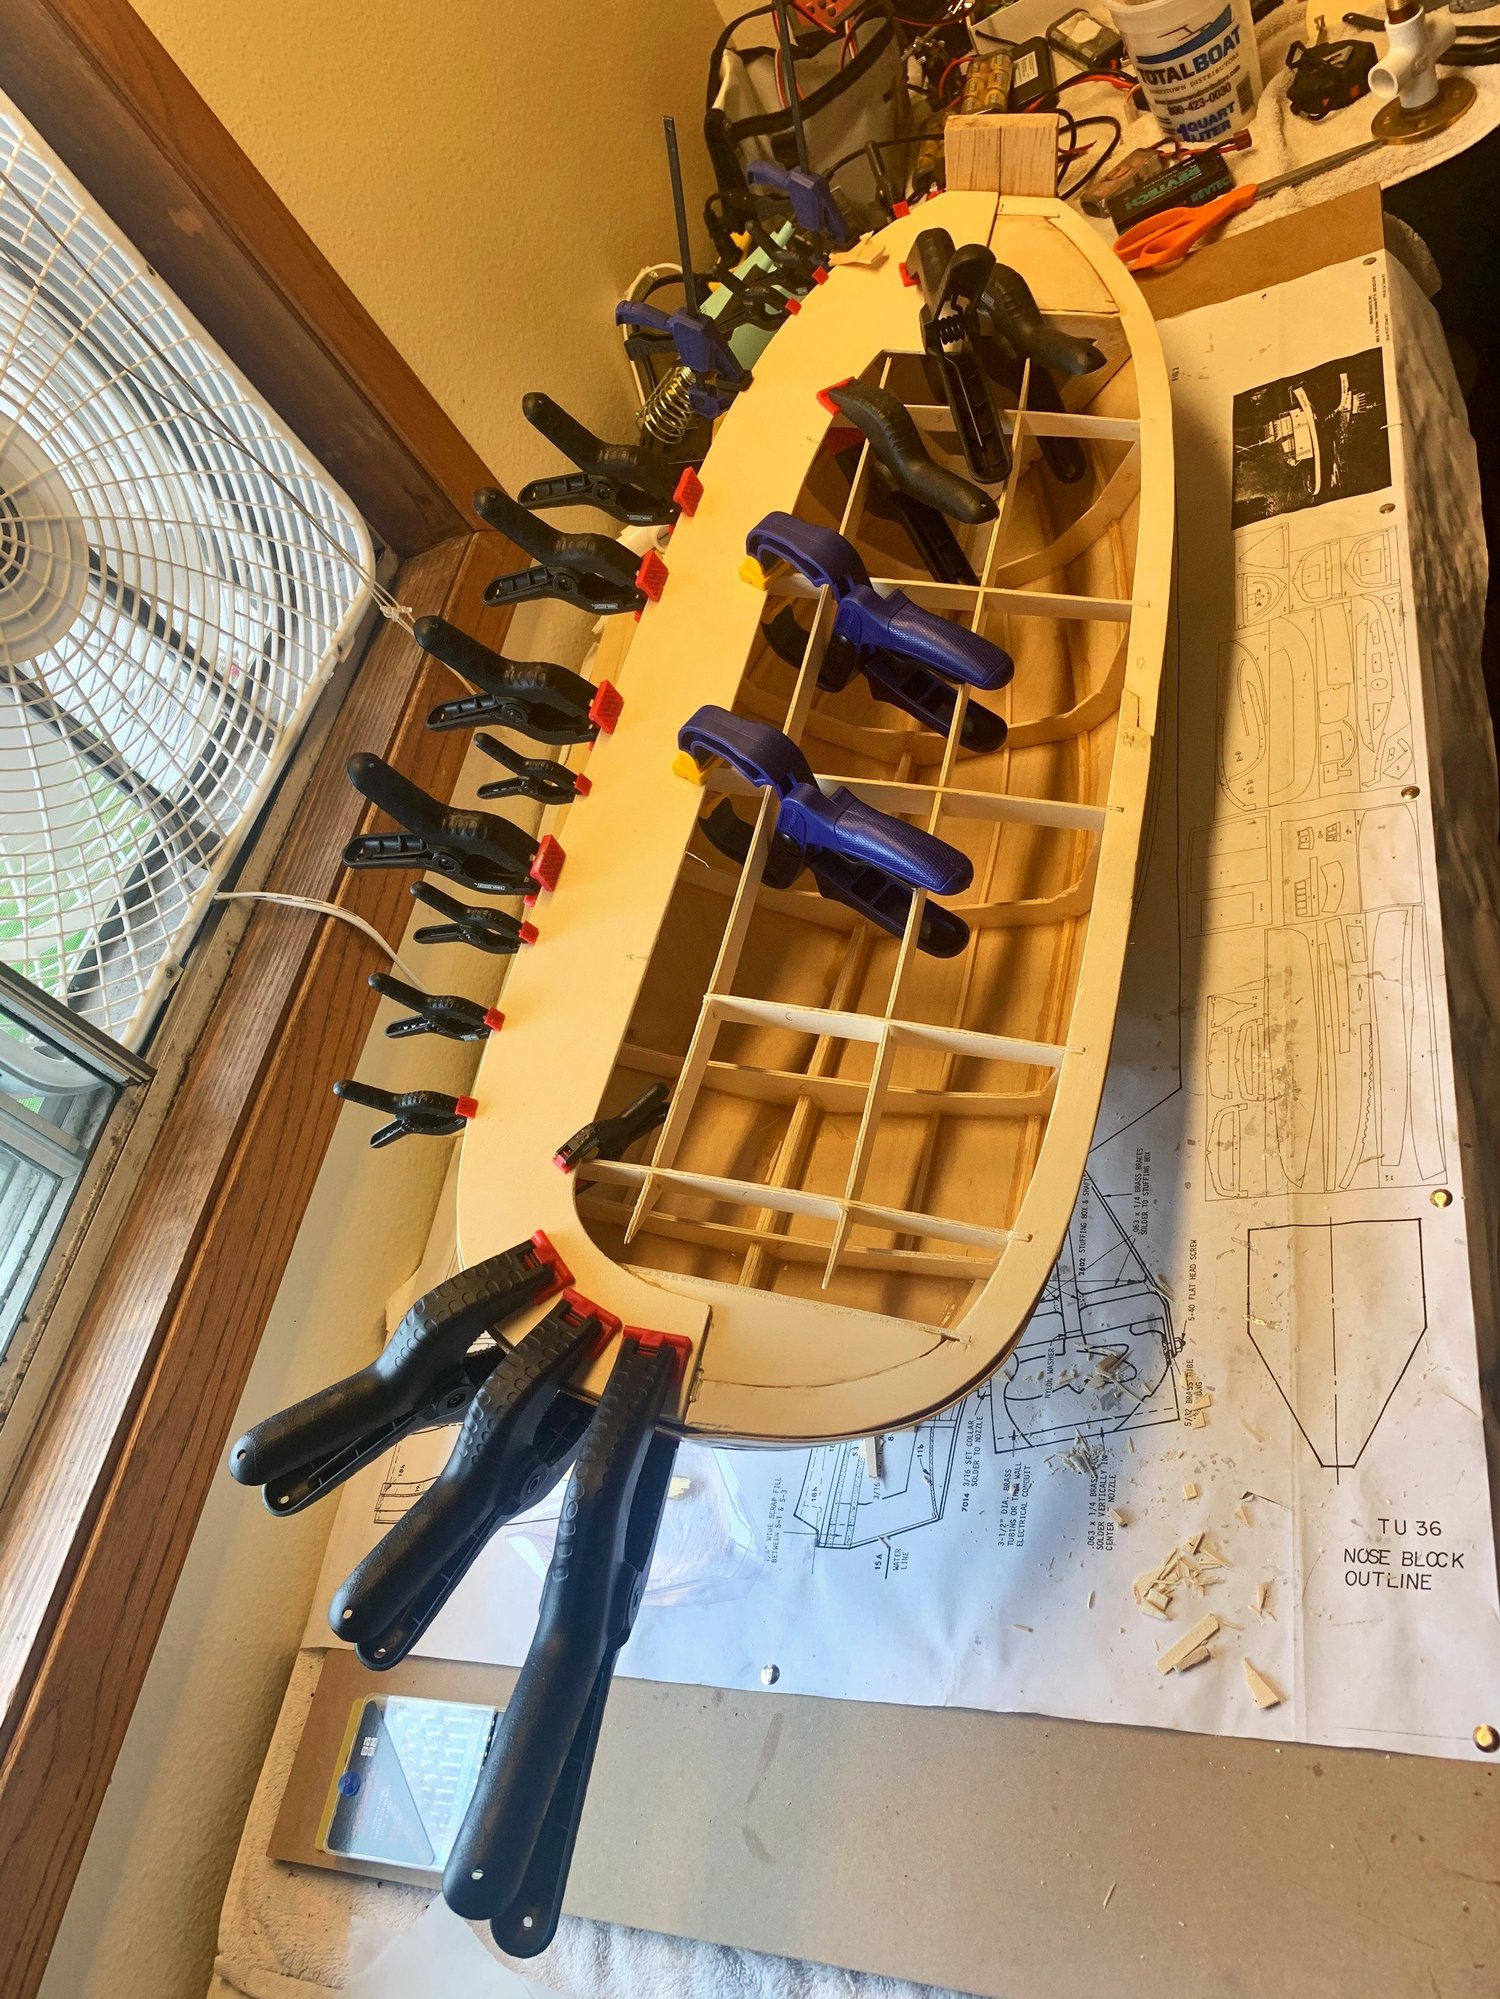
Soaked each panel in water to make it more flexible. Clamped them in place then let air dry to form. Started gluing from the keel first, making sure to get a solid edge started.
04-12-2021 | 06:04 PM
#6
Thread Starter
Member
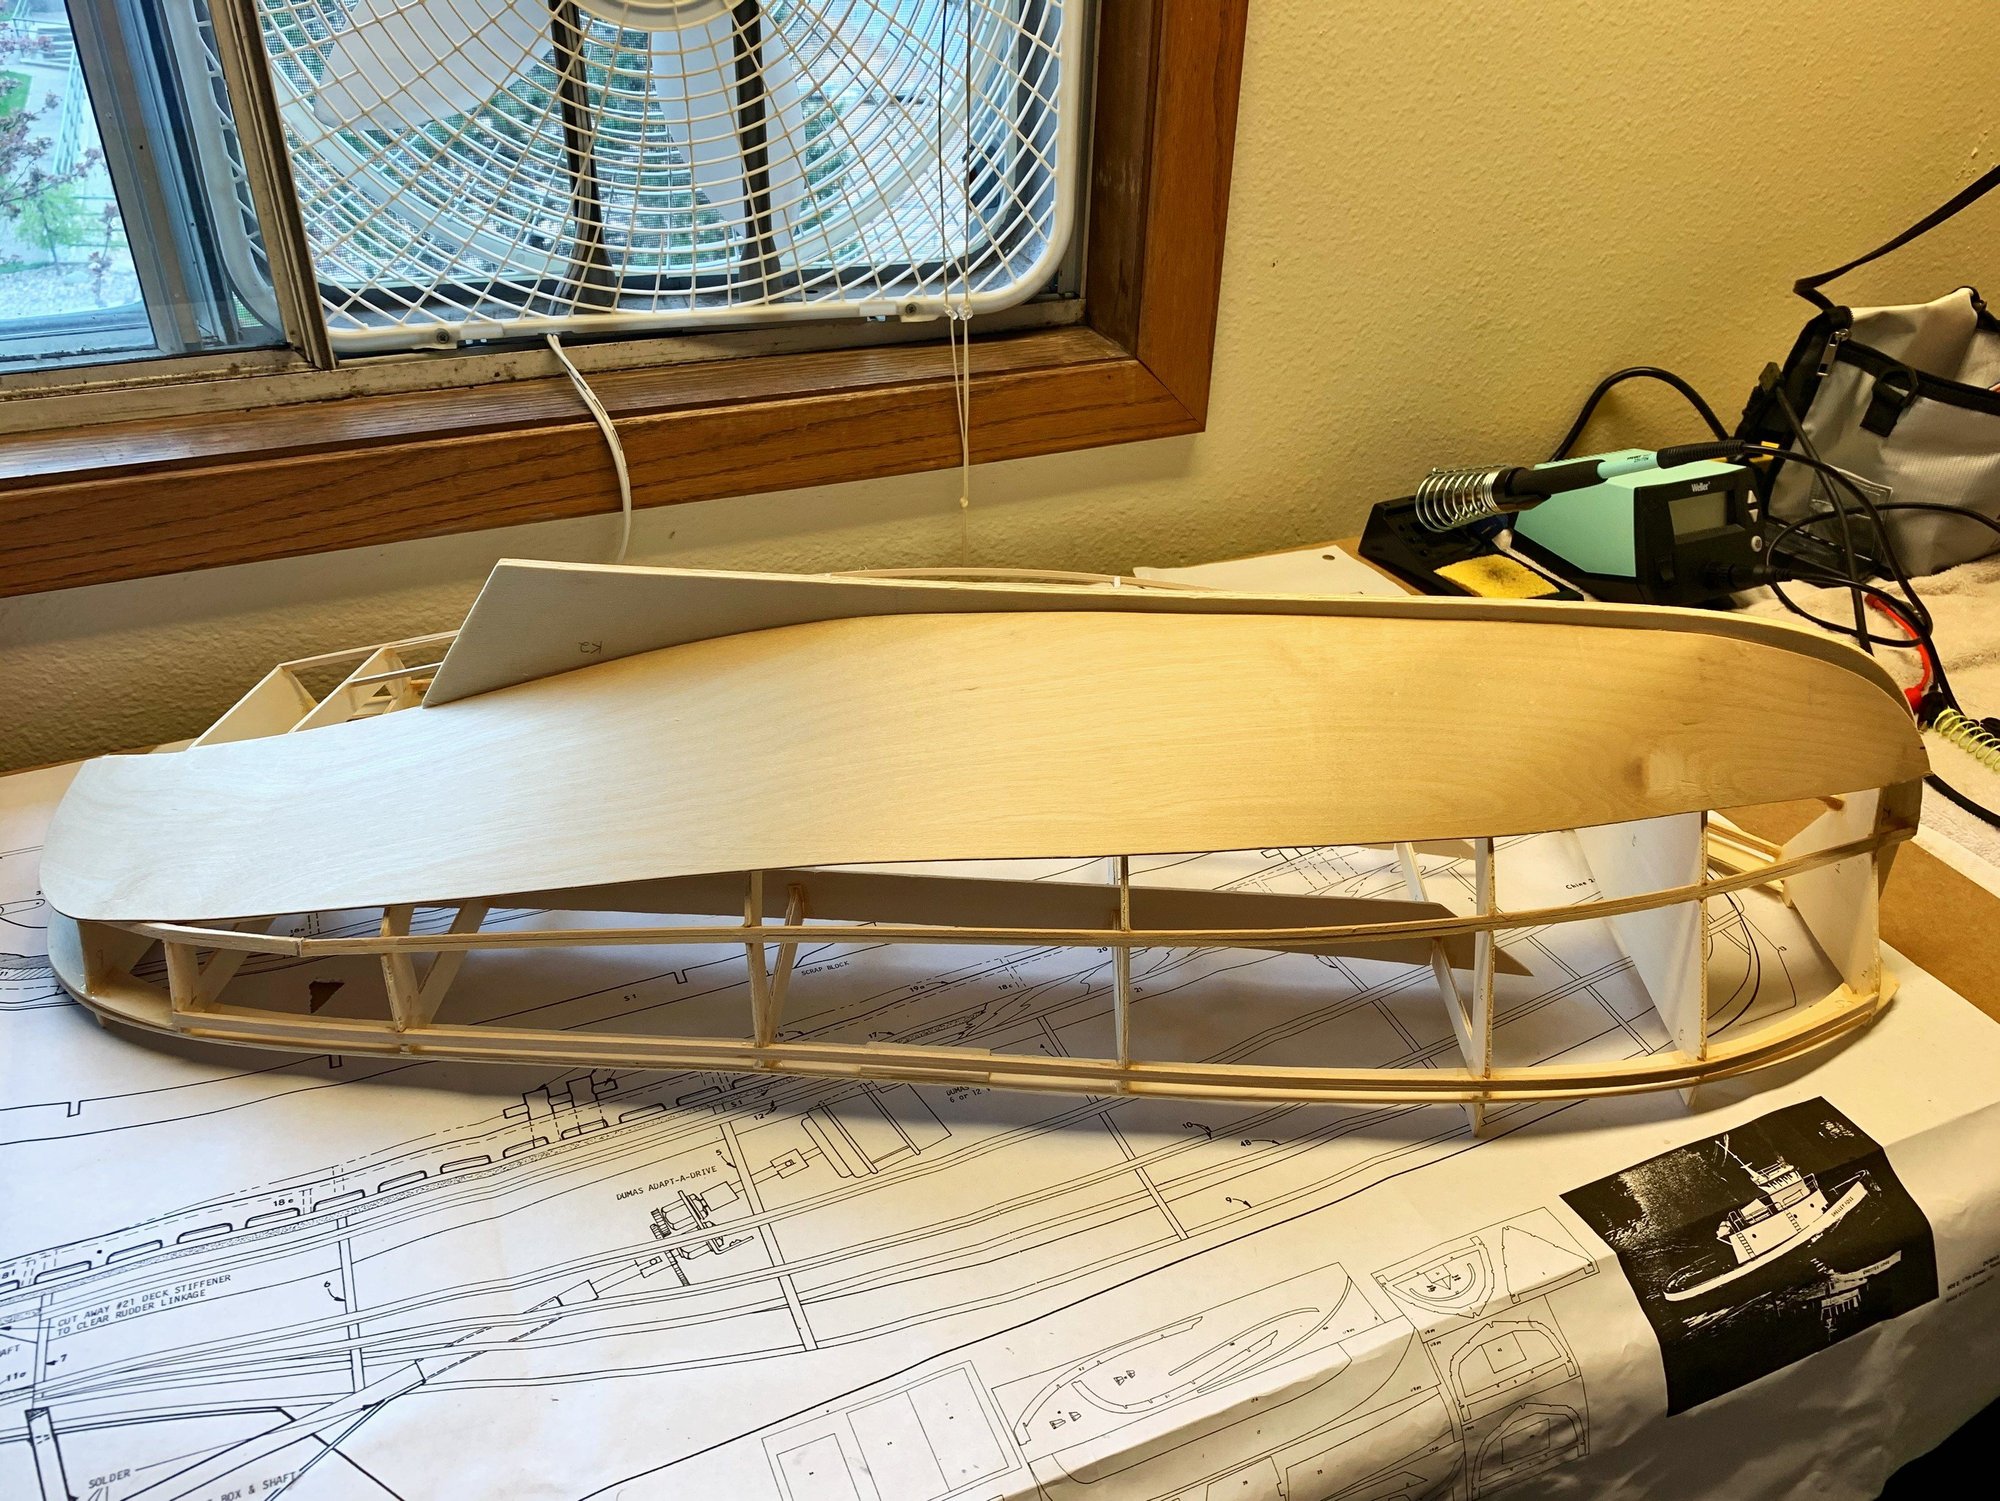
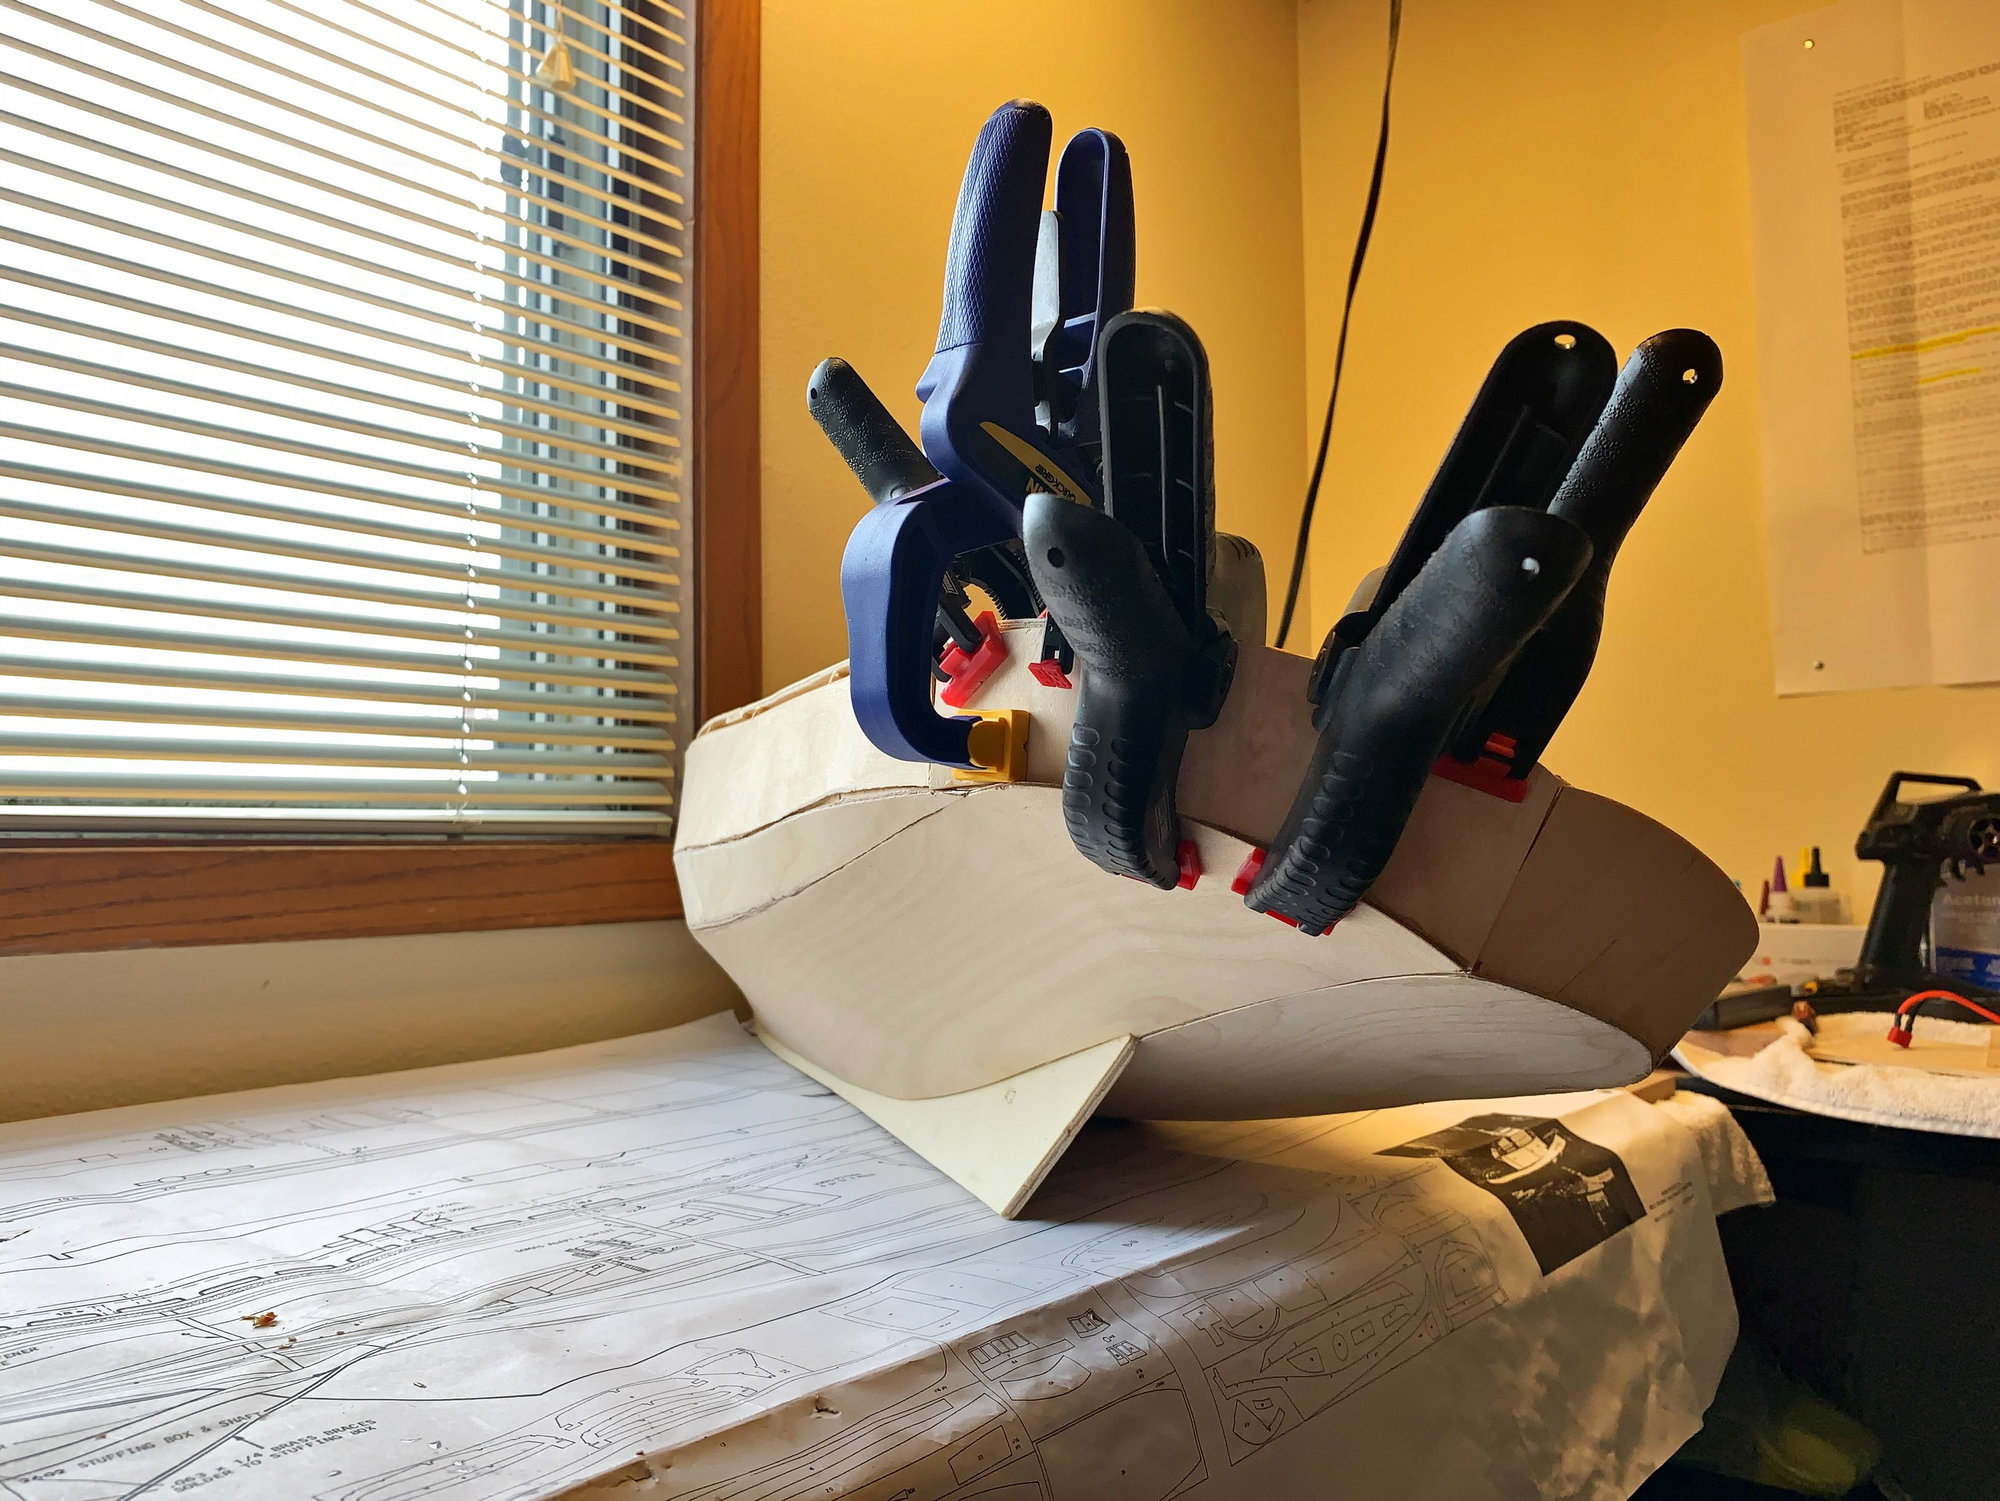
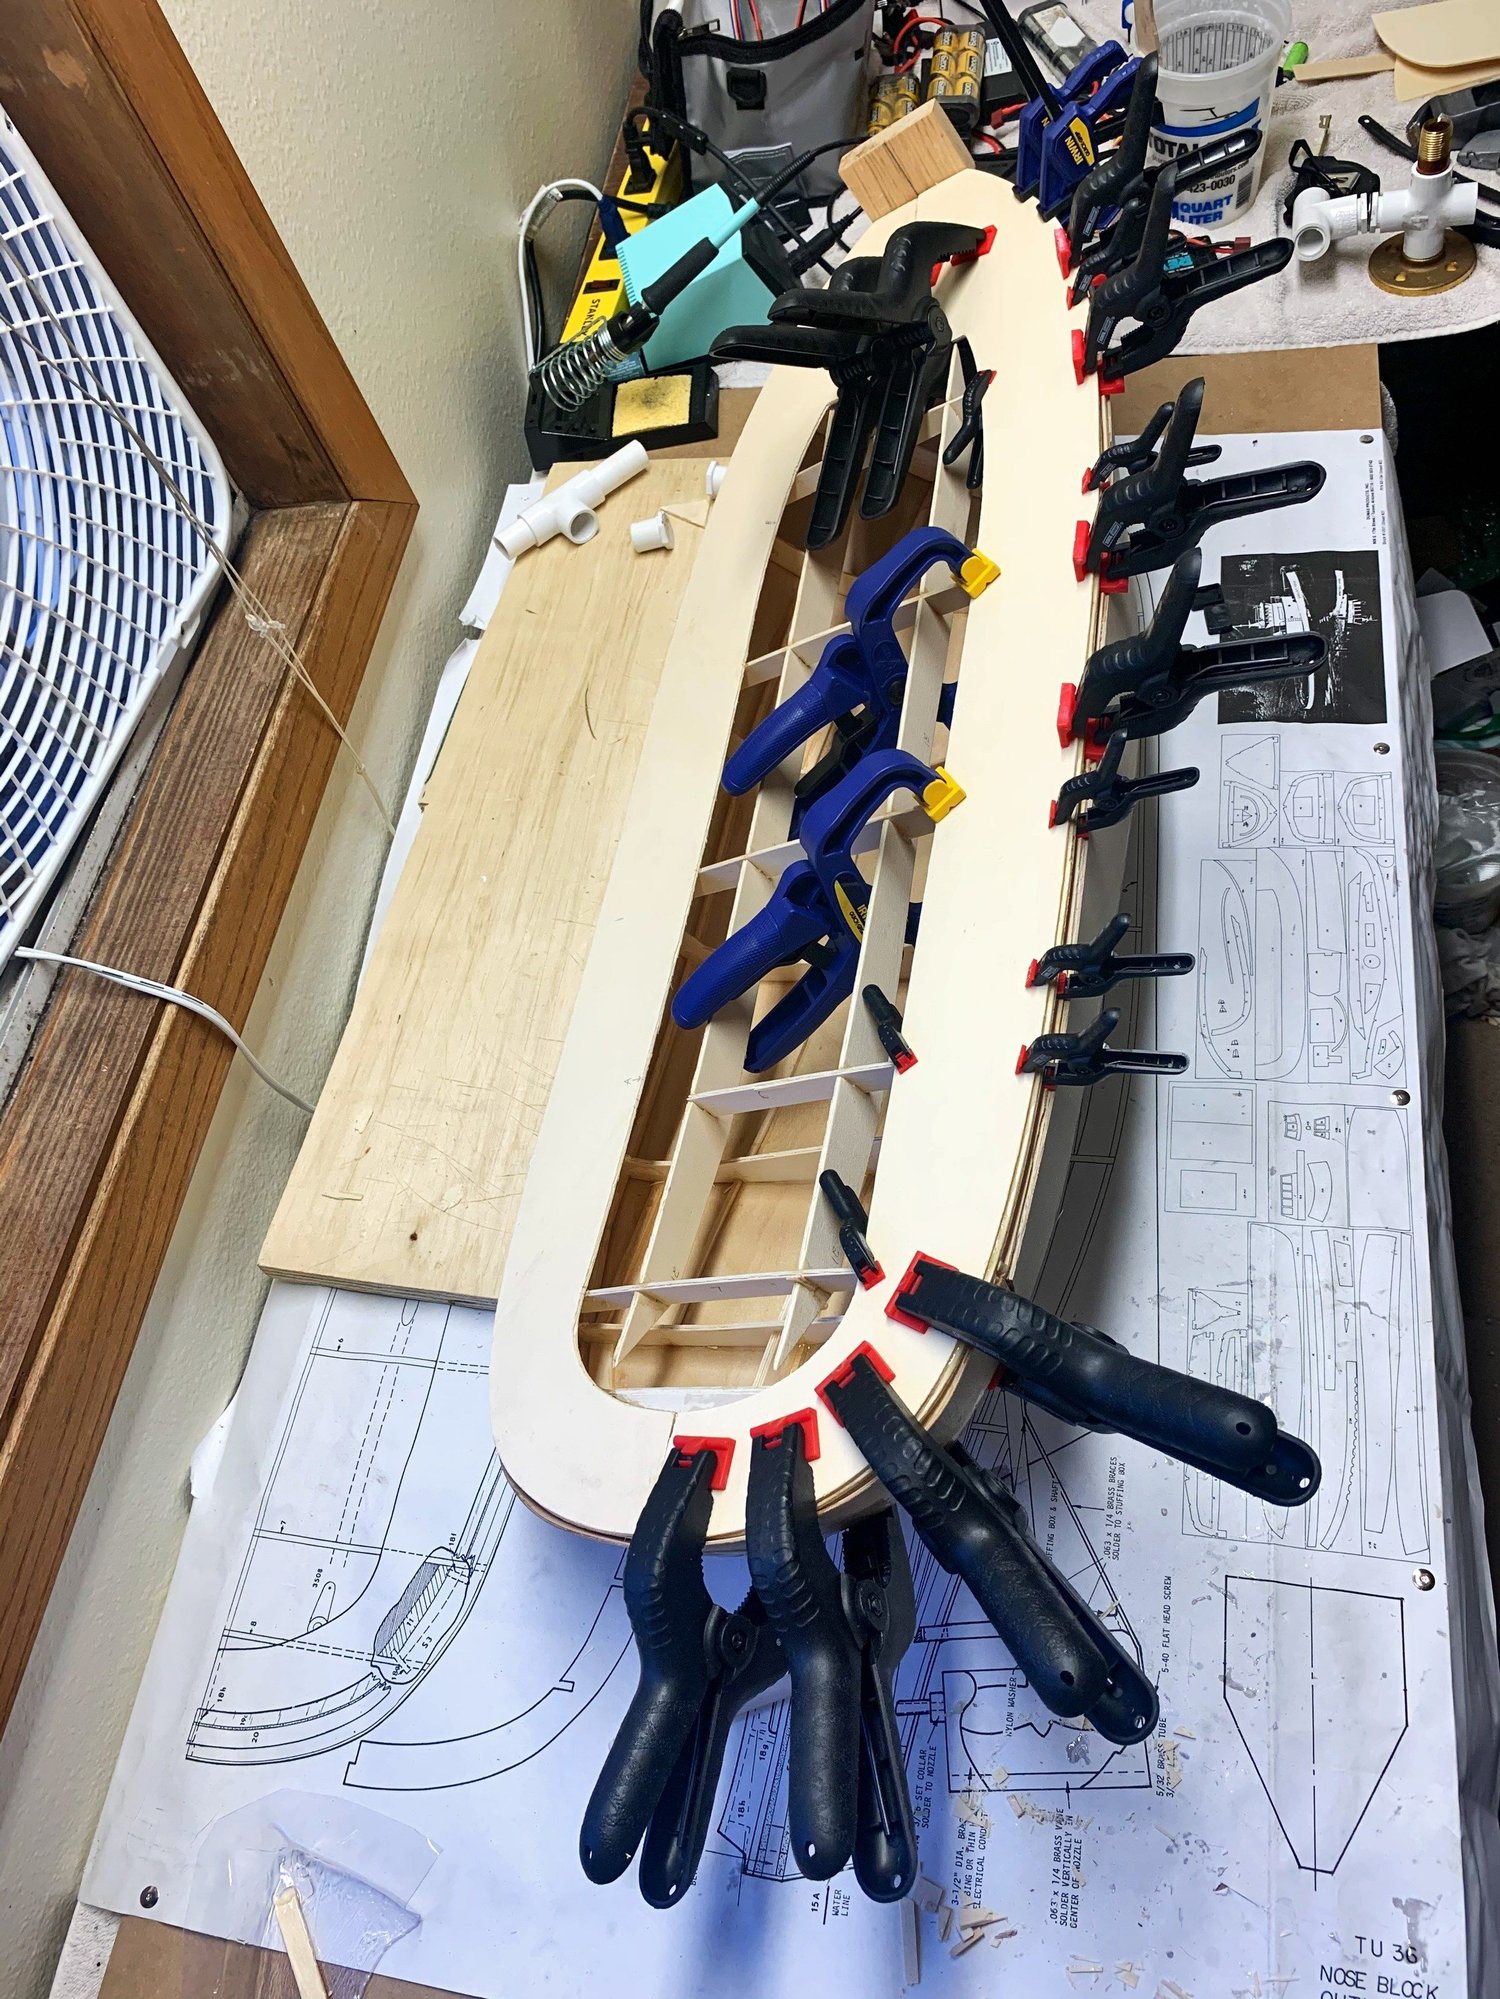
More progress. Should have the sides all done by tomorrow night.
Third Panel
Fourth Panel
Fifth Panel
John Dunsworth's Birthday was today. He was a huge proponent of getting a hobby and working at it everyday. RIP Mr. Lahey
Third Panel
Fourth Panel
Fifth Panel
John Dunsworth's Birthday was today. He was a huge proponent of getting a hobby and working at it everyday. RIP Mr. Lahey
The following users liked this post:
Martin H (08-23-2021)
04-13-2021 | 01:33 PM
#7
Thread Starter
Member
Other Progress:
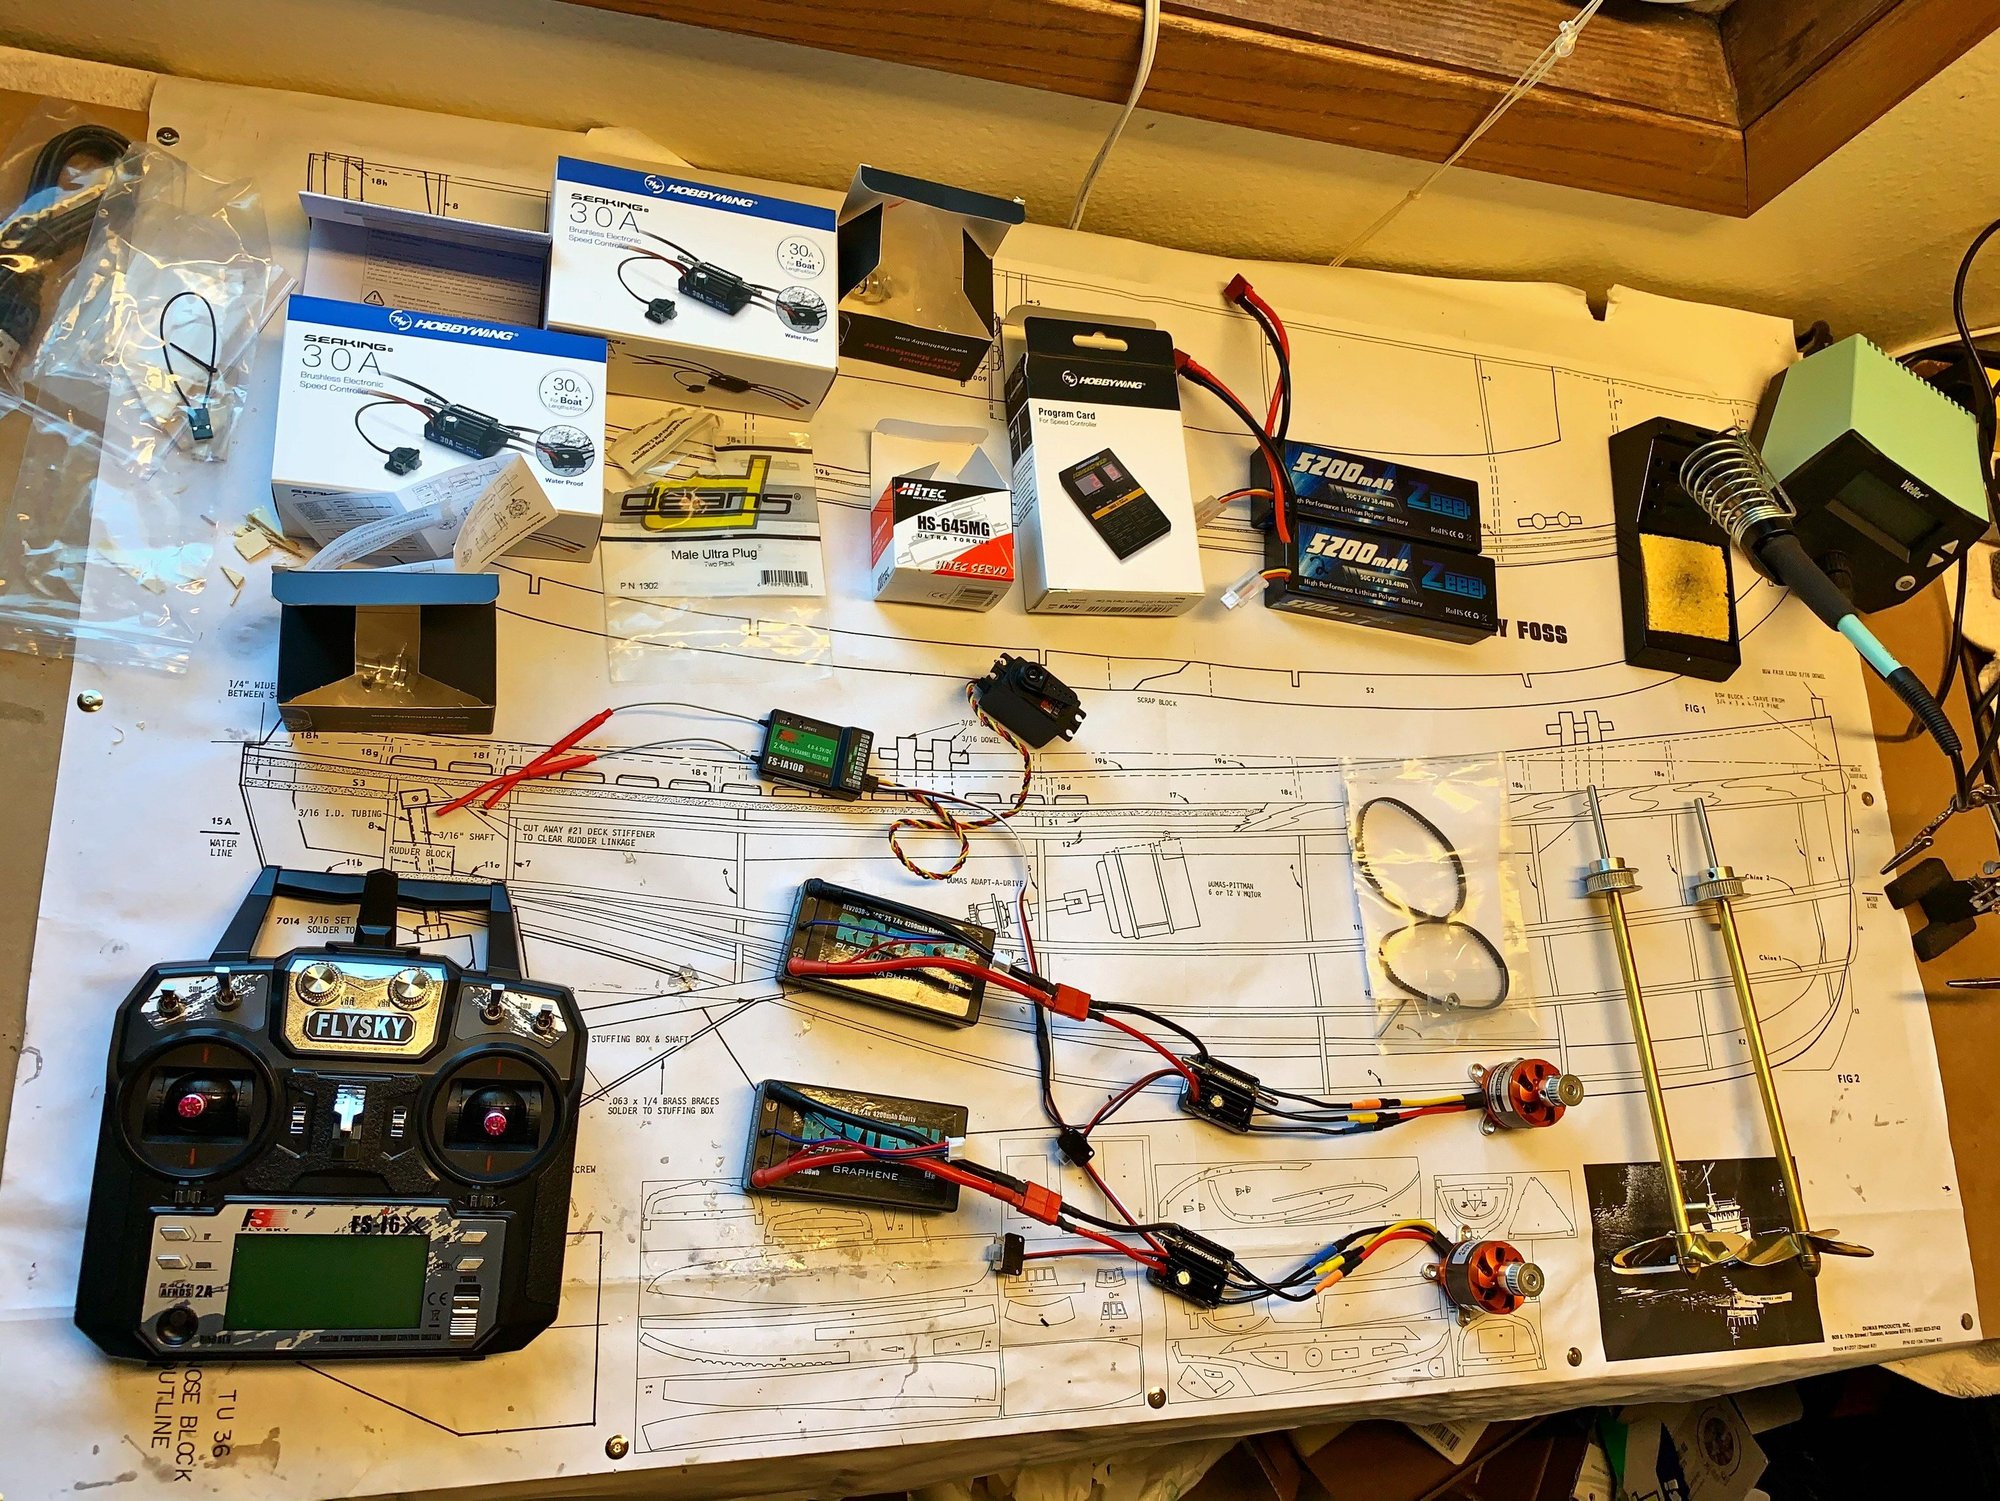
1. Ordered my Brushless Motors, ESCs, Running hardware(props, stuff tube, etc), and a 10 Channel Radio today!
2. Received my Raspberry Pi 3B+ last week. Got it up and running with Raspbian LiteOS(no GUI). Found Mp3 sounds for Turbo diesels and sirens. Plan to tap into Servo controls and play sounds accordingly(throttle, siren)
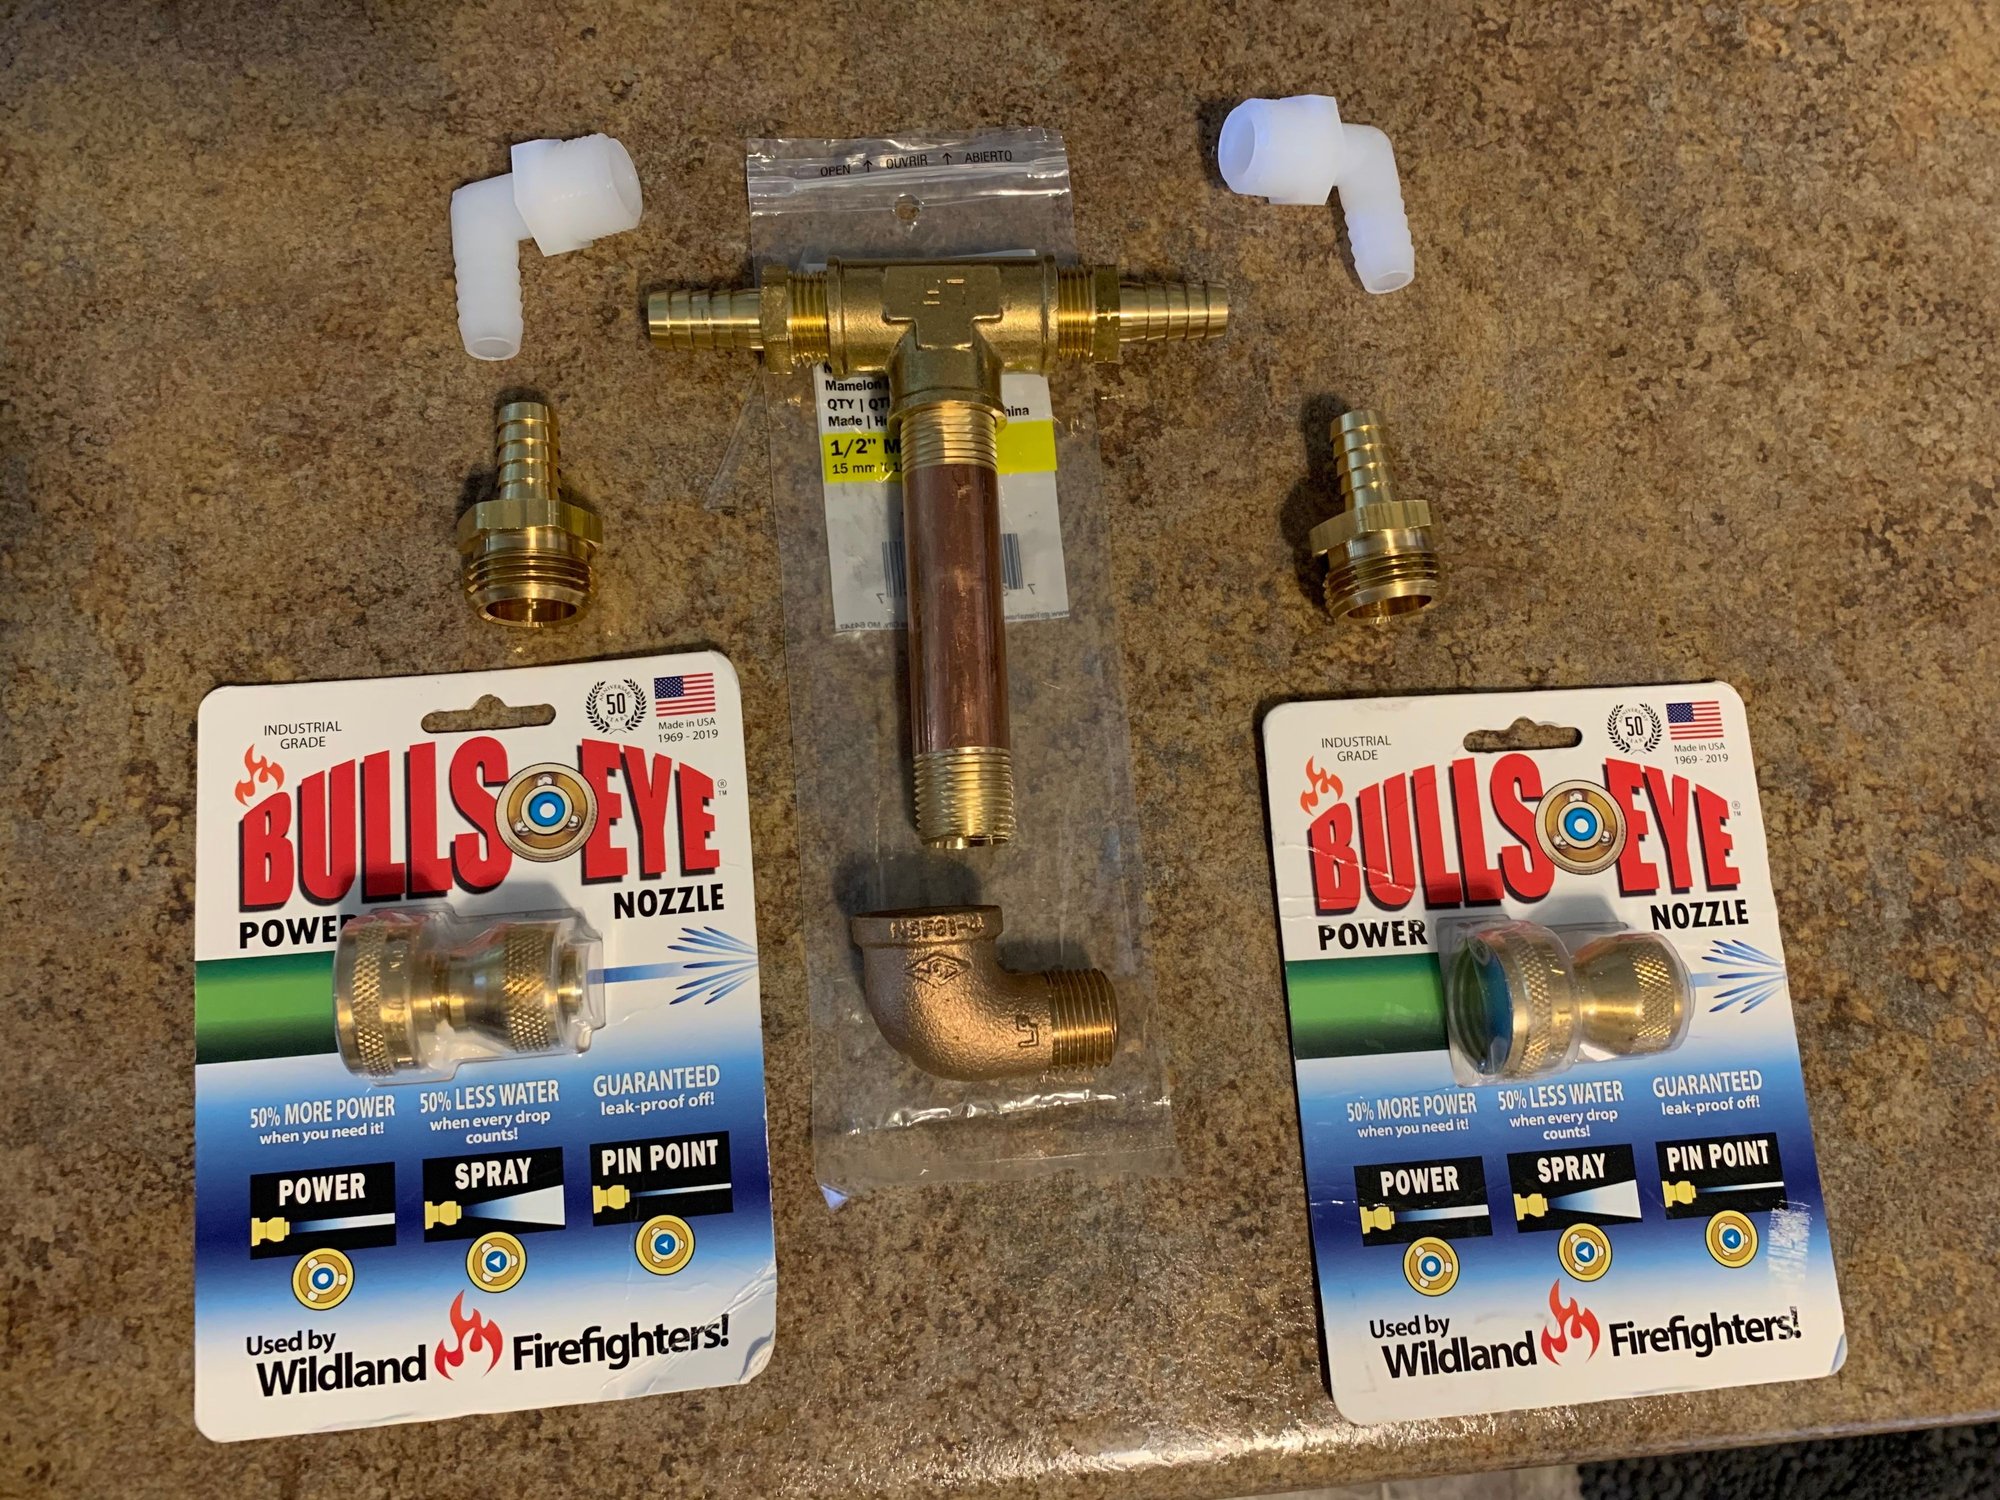
3. Ordered Water Cannon Nozzles - Bulls Eye Power Nozzles x2
4. Received a 330GPH Transfer pump with garden hose hookups. I now have three different pumps to try out(Bilge, Diaphram, and Transfer). I will report back with my tests this weekend. My plan is to test the nozzles with each pump type.
1. Ordered my Brushless Motors, ESCs, Running hardware(props, stuff tube, etc), and a 10 Channel Radio today!
2. Received my Raspberry Pi 3B+ last week. Got it up and running with Raspbian LiteOS(no GUI). Found Mp3 sounds for Turbo diesels and sirens. Plan to tap into Servo controls and play sounds accordingly(throttle, siren)
3. Ordered Water Cannon Nozzles - Bulls Eye Power Nozzles x2
4. Received a 330GPH Transfer pump with garden hose hookups. I now have three different pumps to try out(Bilge, Diaphram, and Transfer). I will report back with my tests this weekend. My plan is to test the nozzles with each pump type.
The following users liked this post:
Martin H (08-23-2021)
04-15-2021 | 12:05 PM
#8
Thread Starter
Member
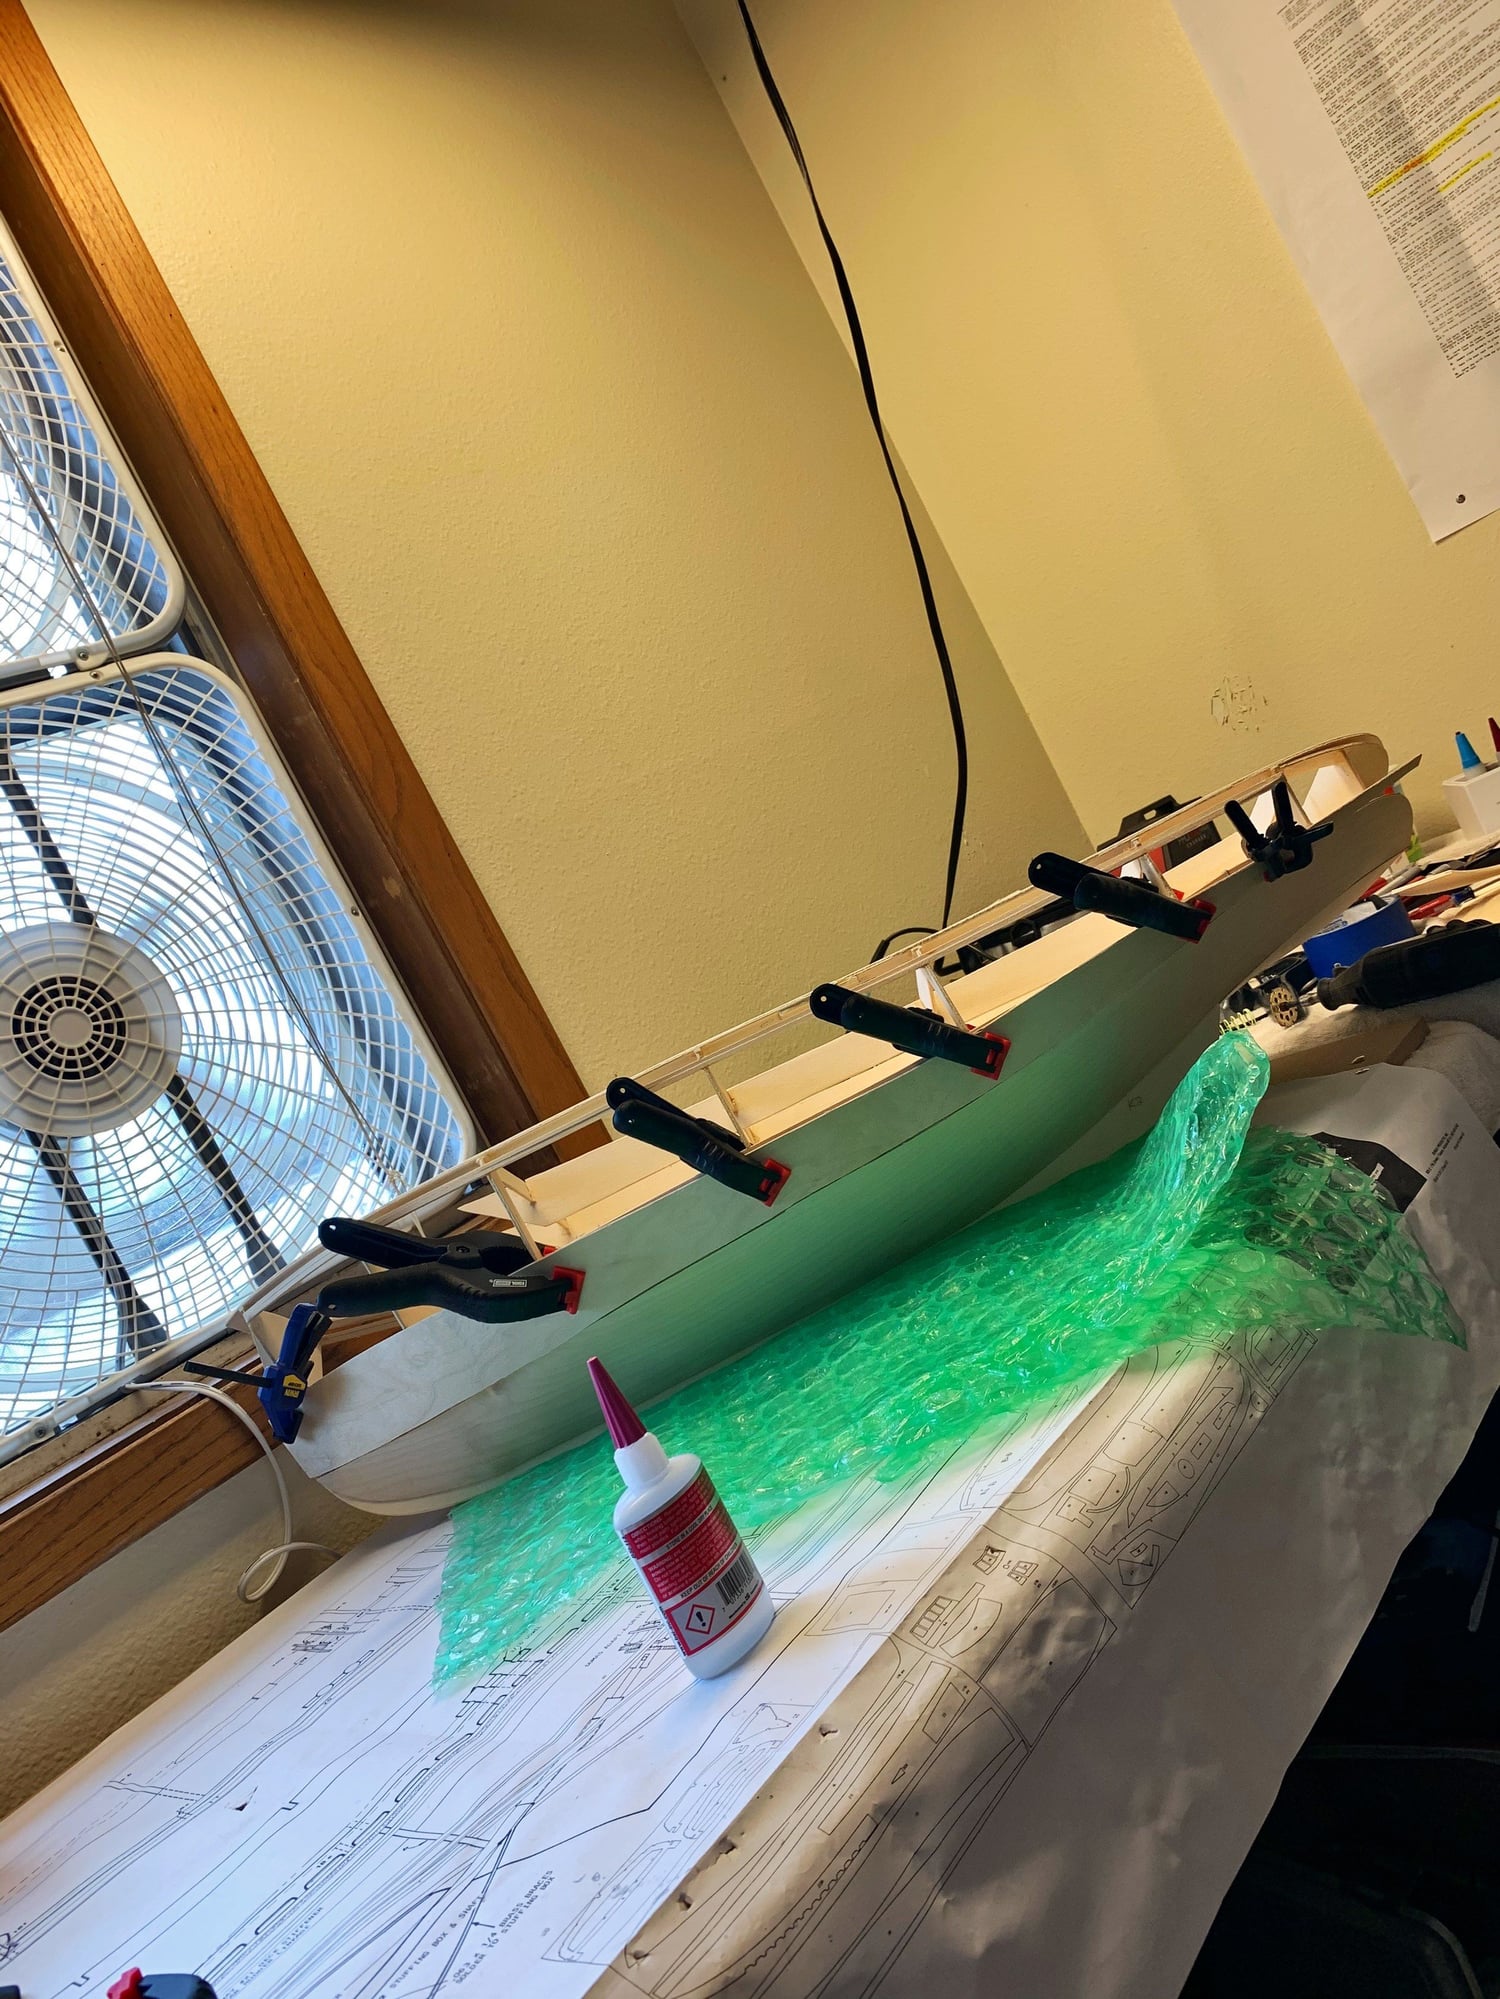
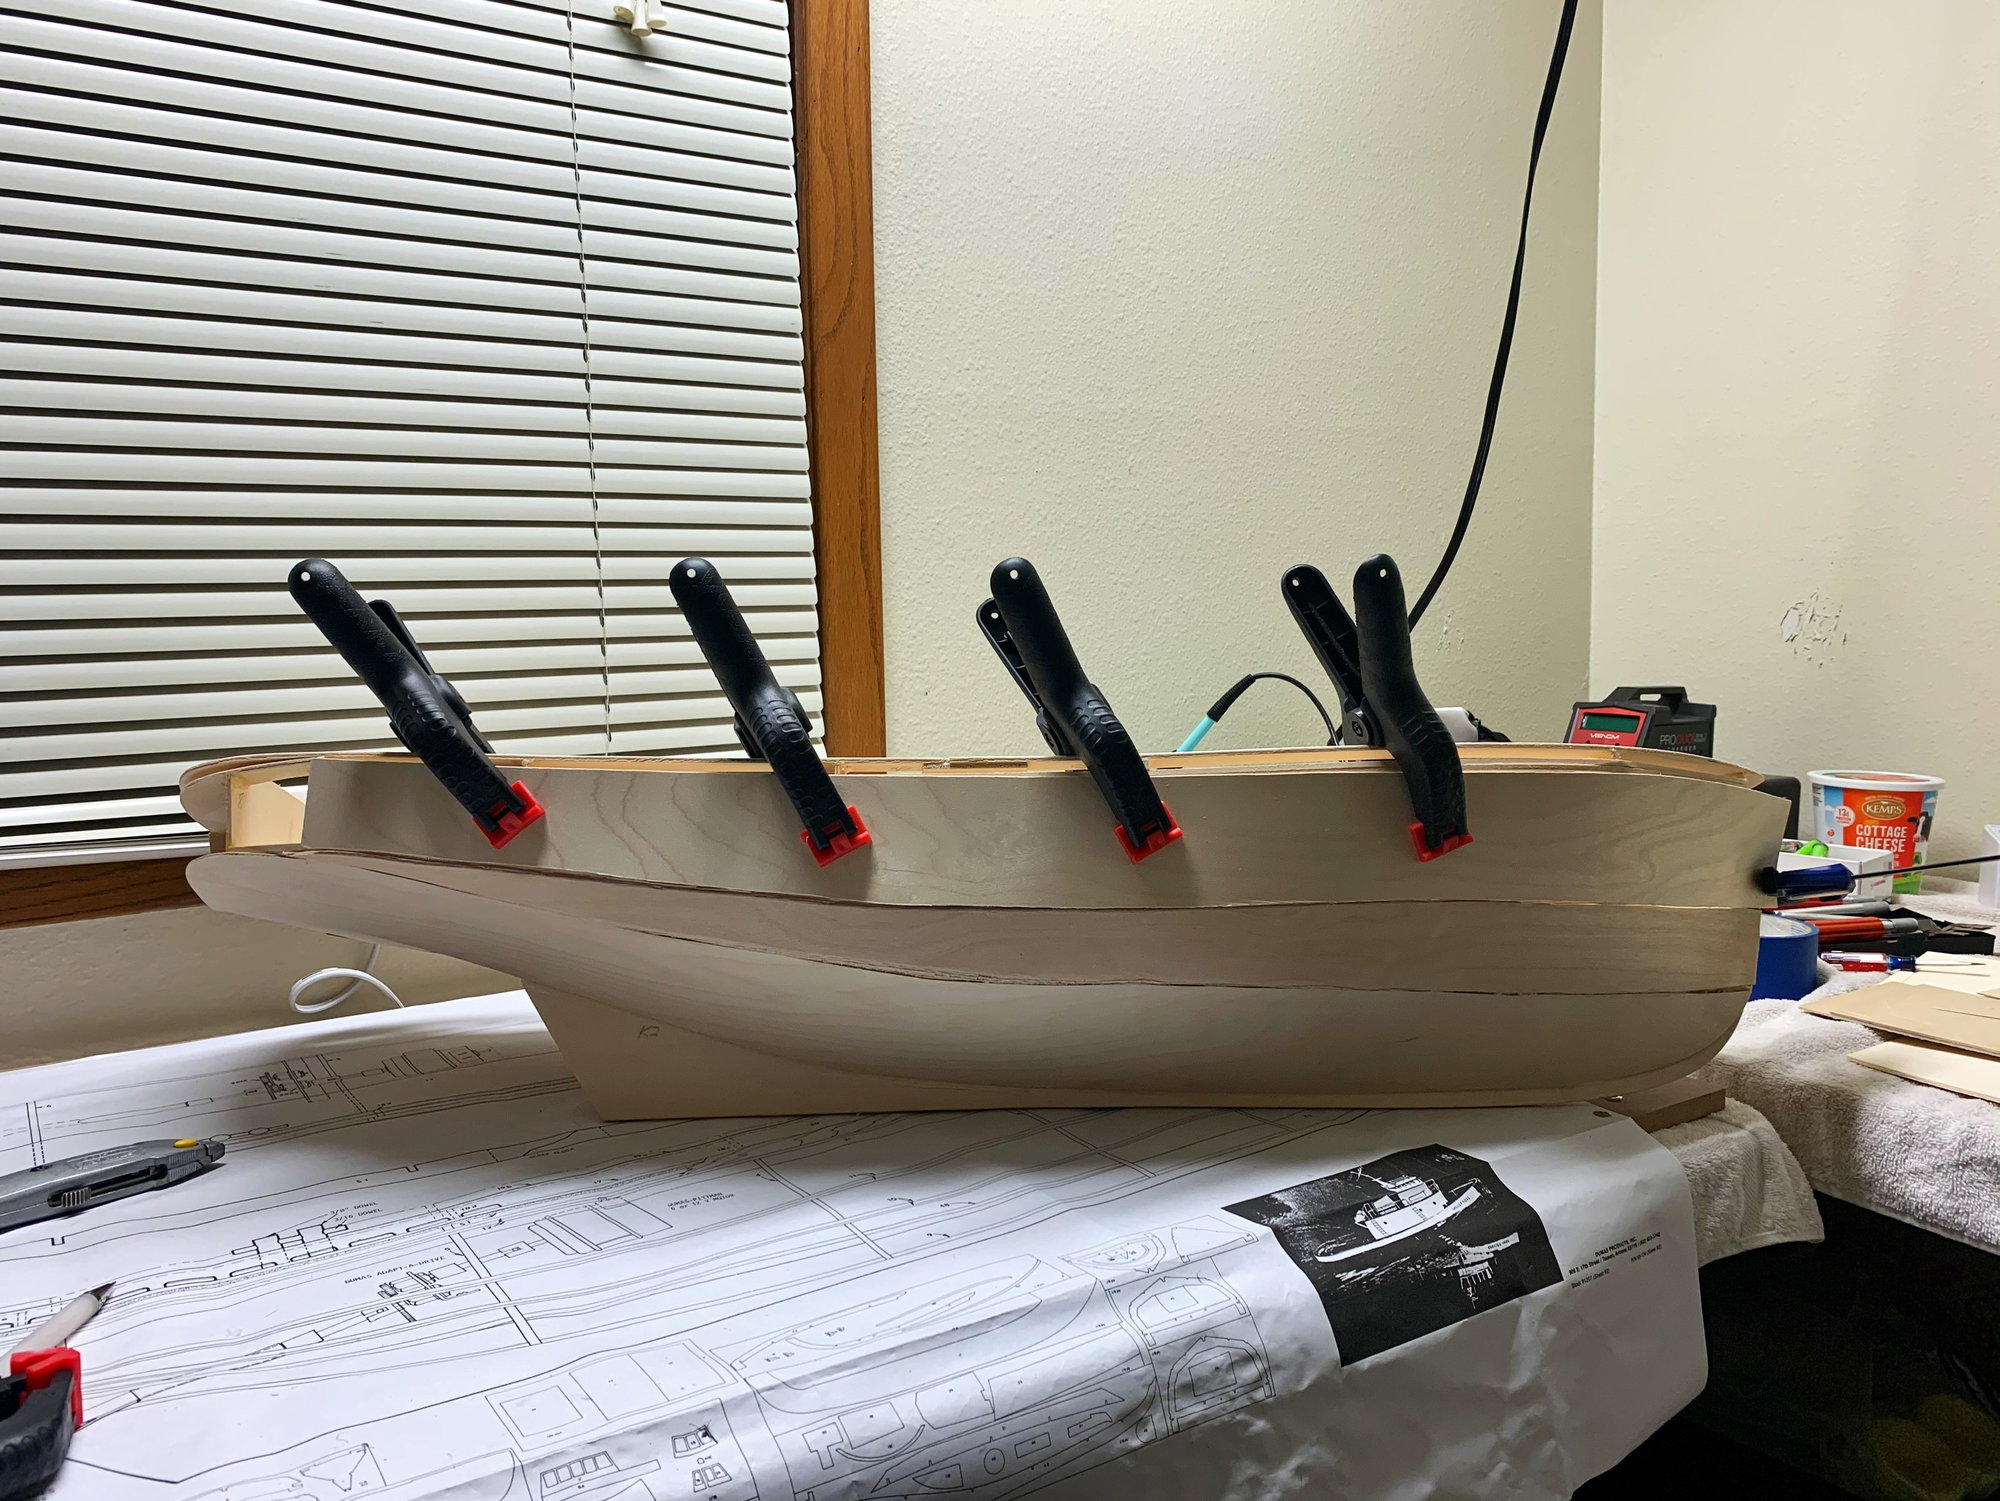
Got the sides all glued up. The next step is gluing on the Top! I'm planning to put two layers of fiberglass over the hull, after I have filled the seams with epoxy and west marine 404 filler.
Last edited by birdo; 04-15-2021 at 12:11 PM.
The following users liked this post:
Martin H (08-23-2021)
04-15-2021 | 06:27 PM
#9
Thread Starter
Member
More progress today. I can't glue the top on until I epoxy the inside chines to the panels and settle on a pump. At this point the hardest parts have been done. Fiberglass, paint, drive train, electronics, and final touches are FUN.
I found some mini brass cleats, and a bronze water strainer pickup for the water cannon pump(s).
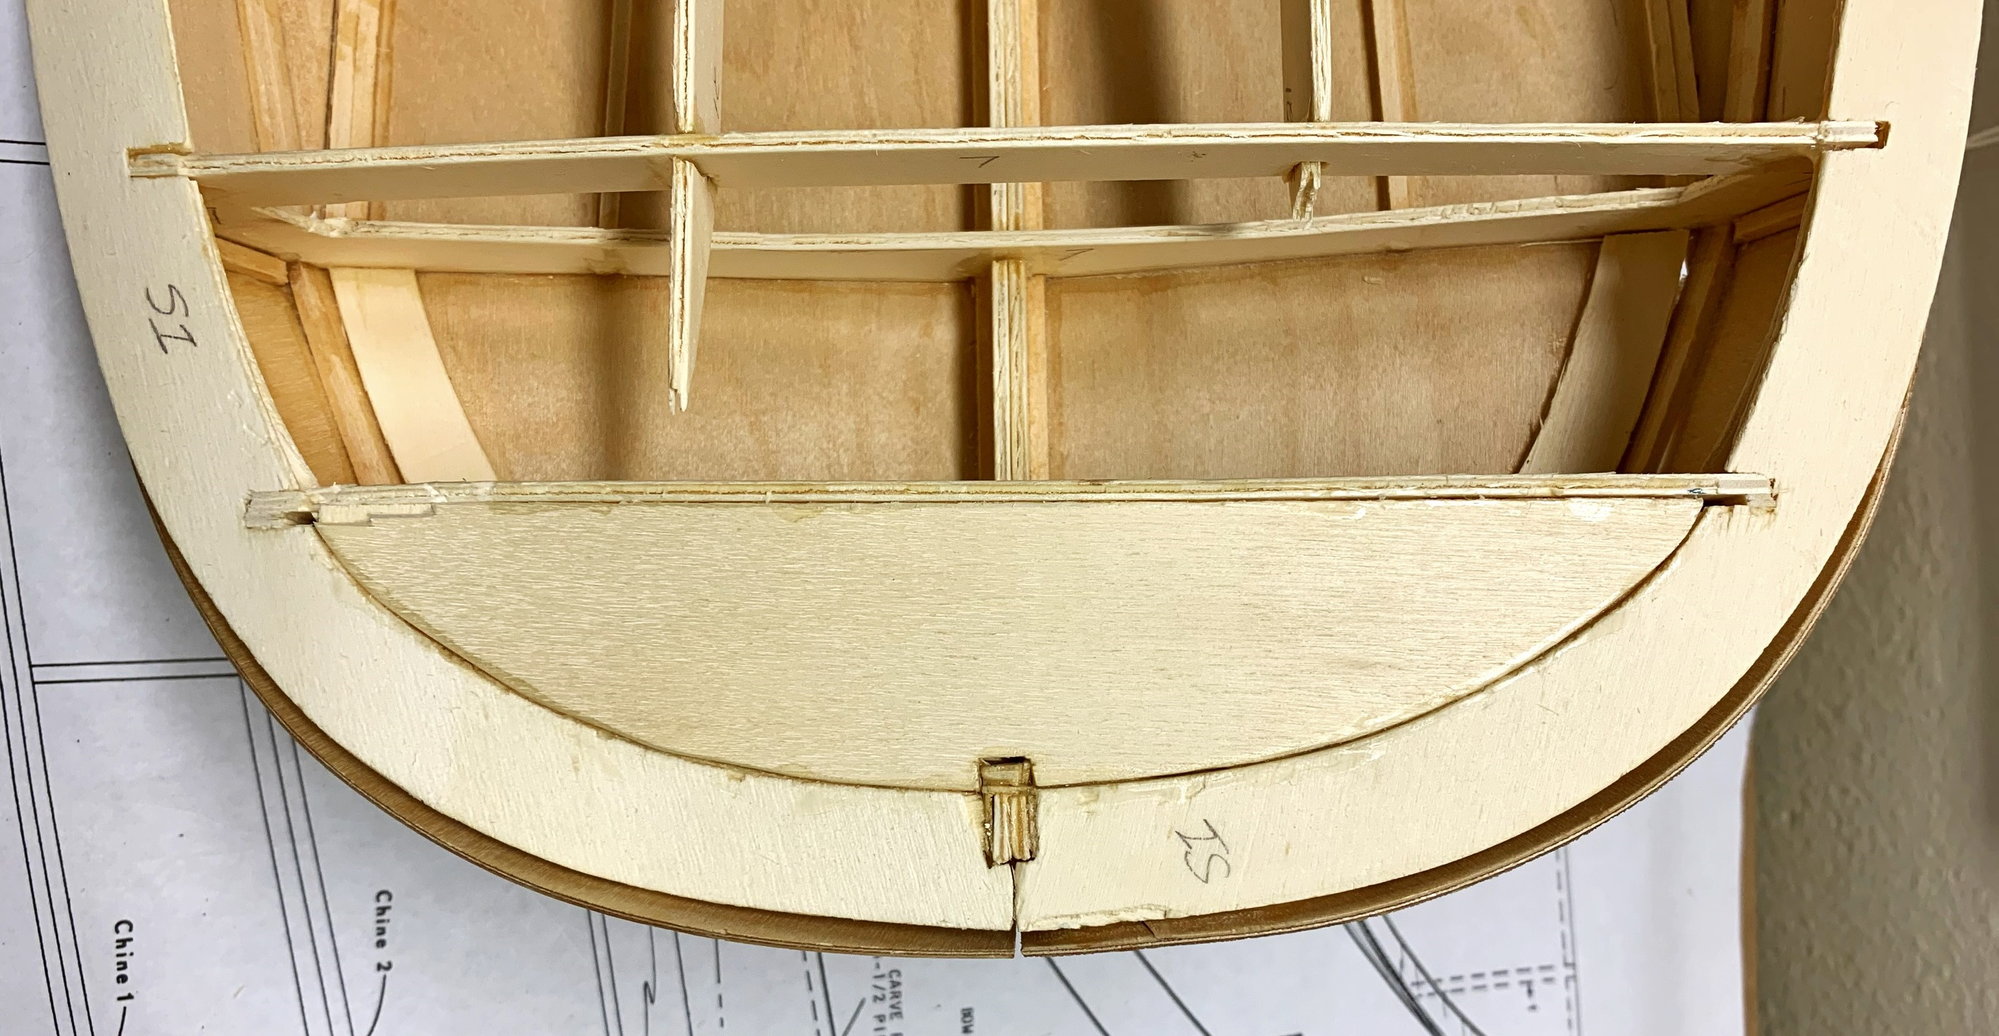
Cut pieces to fill in the stern area flat.
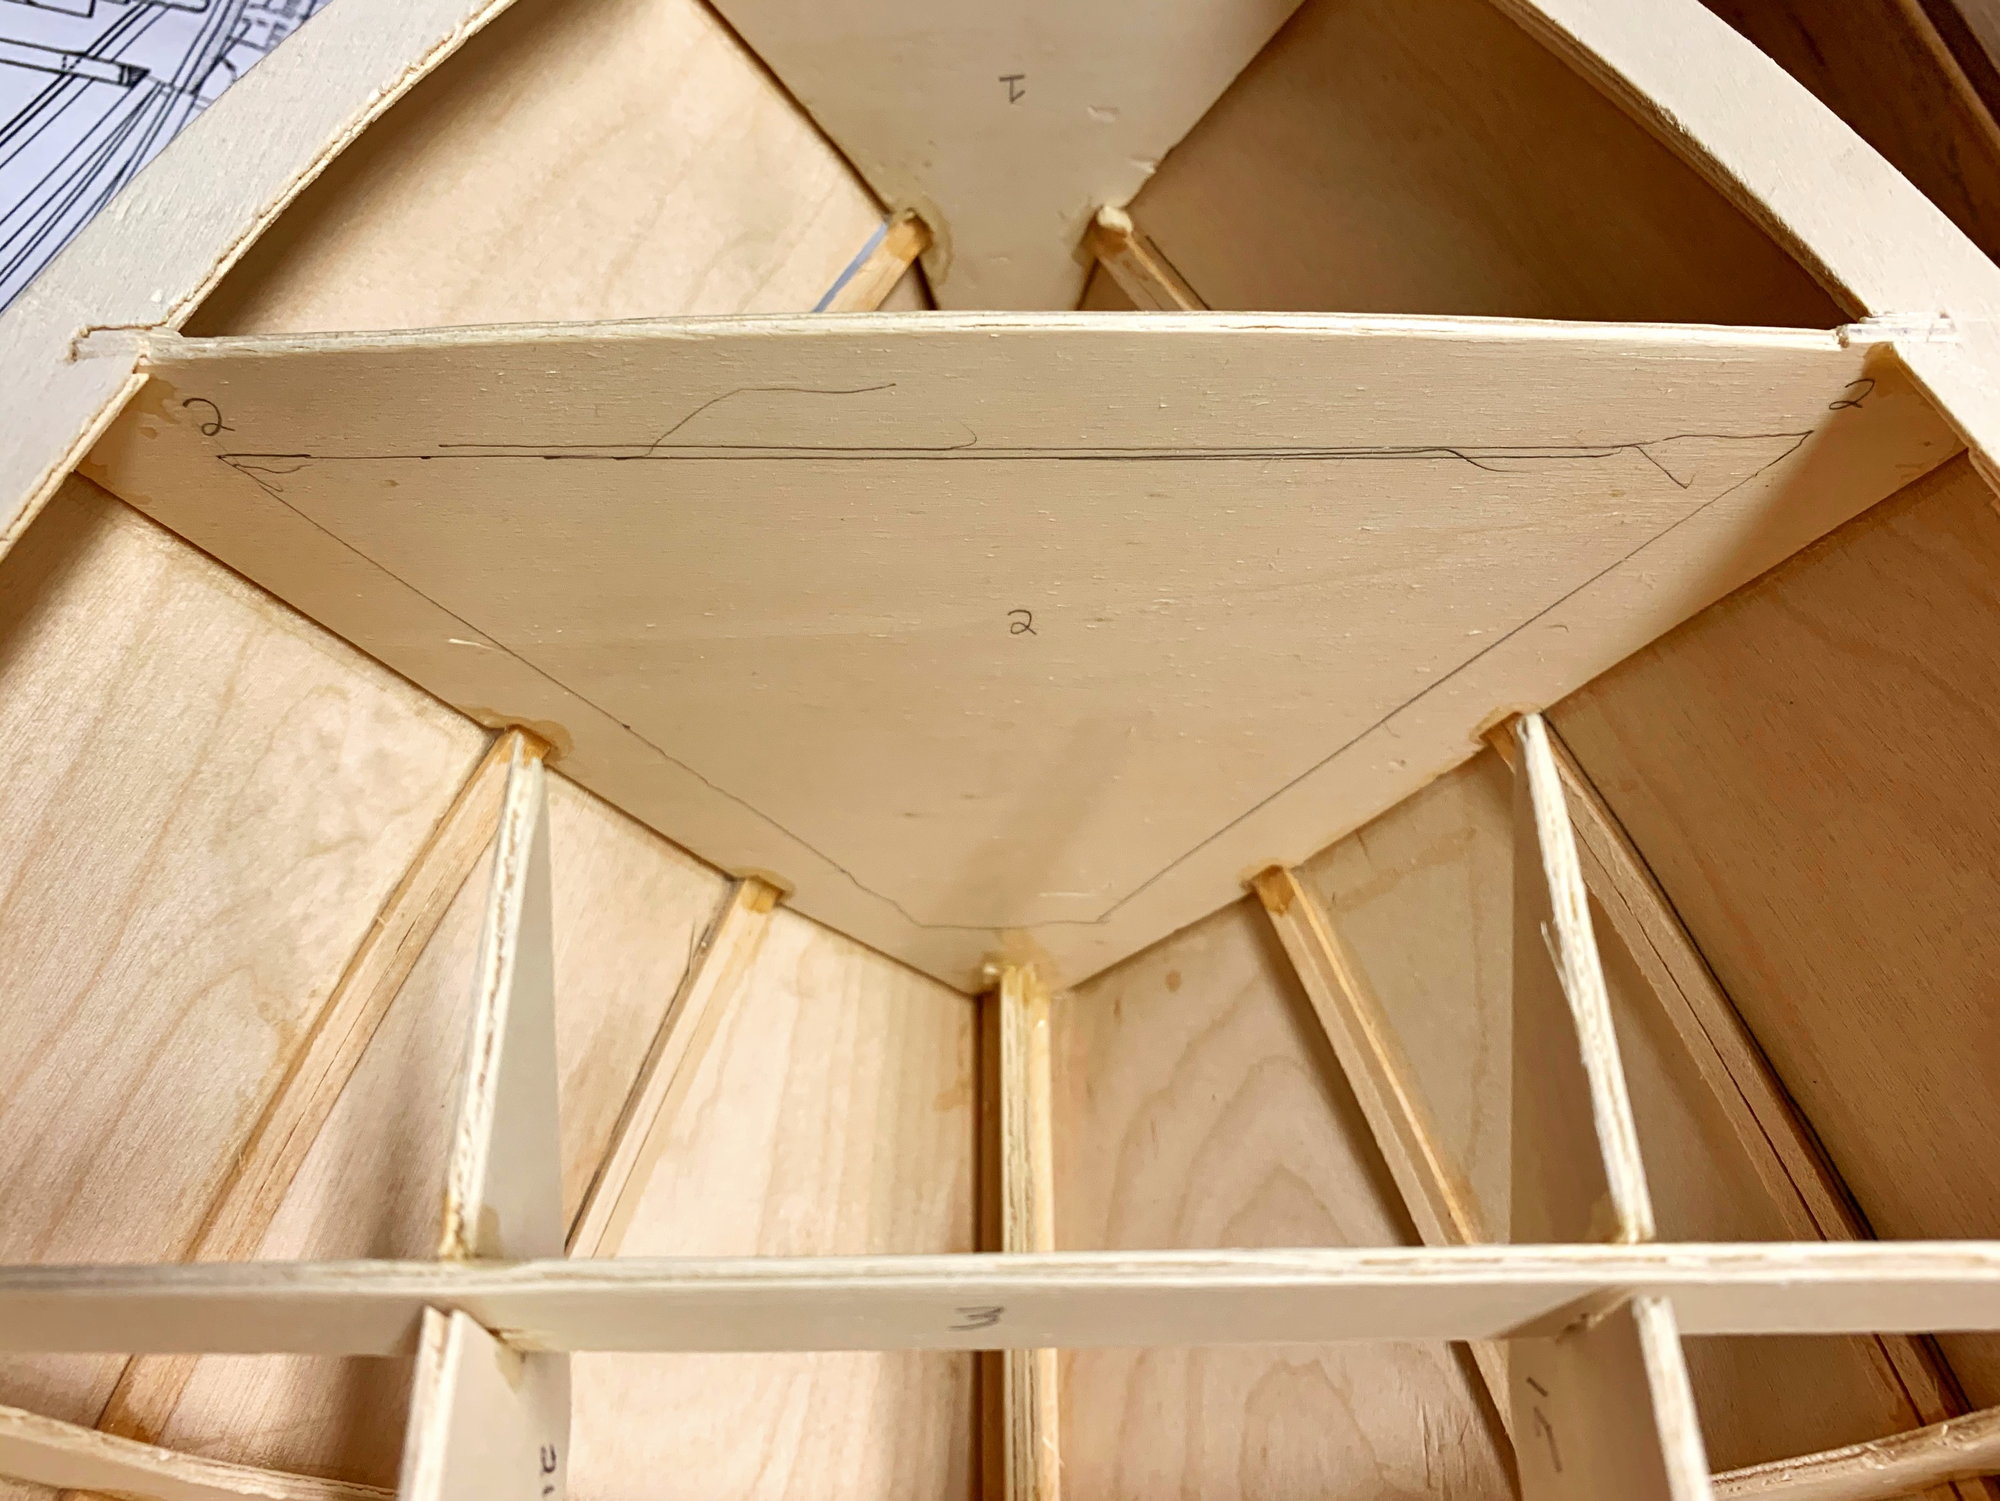
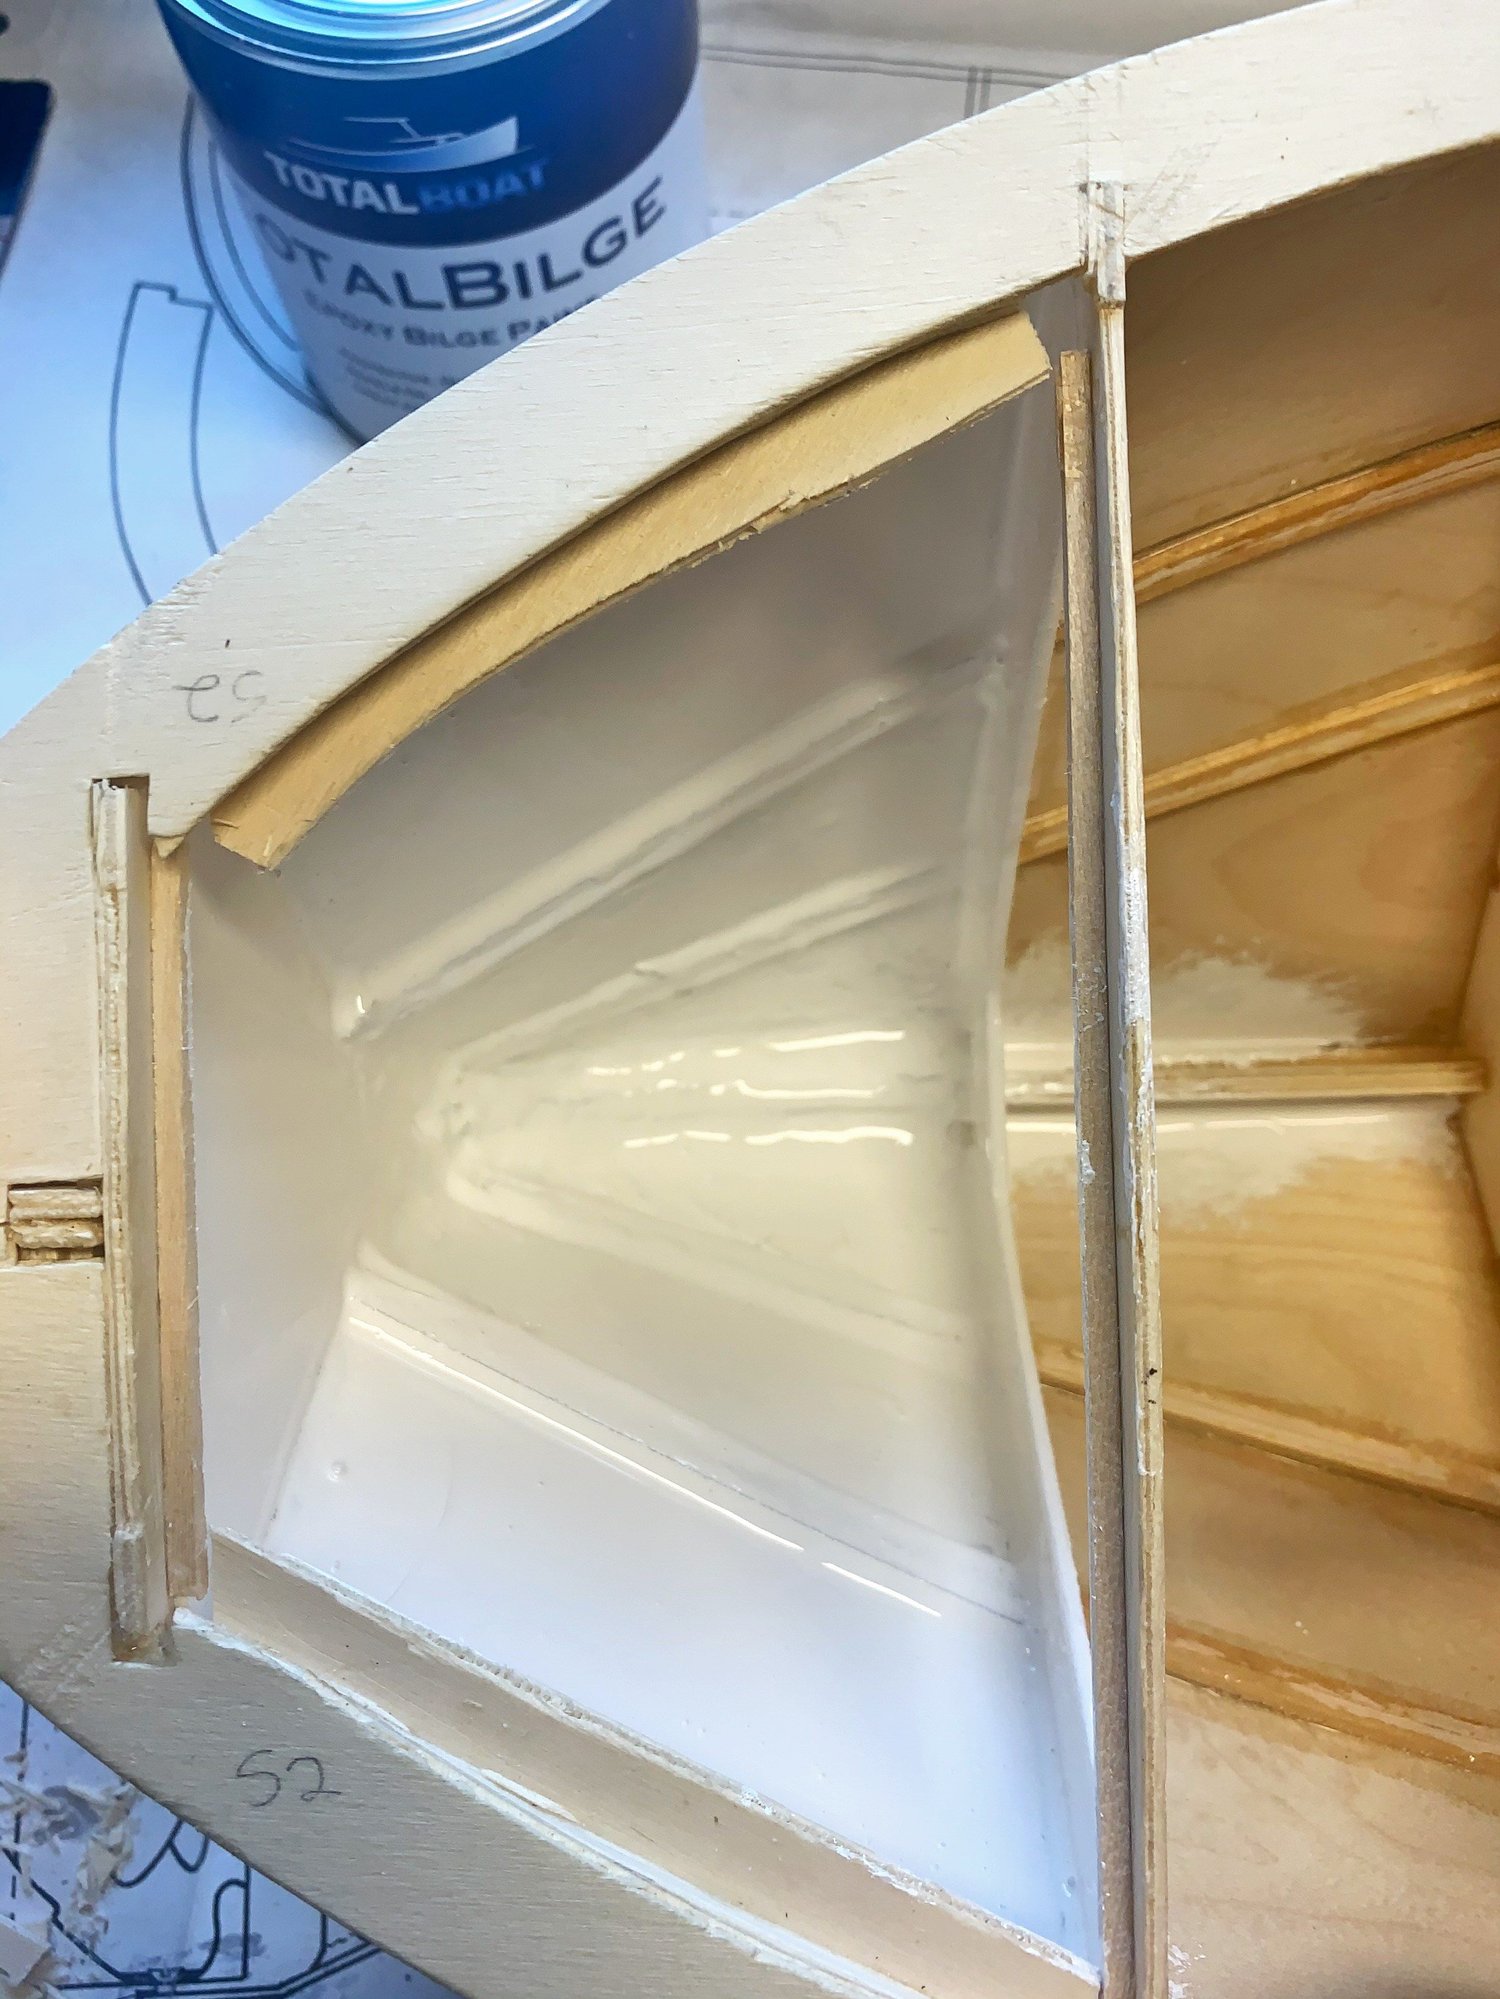
I'm opening up the front, so I can pipe water to my water canon.
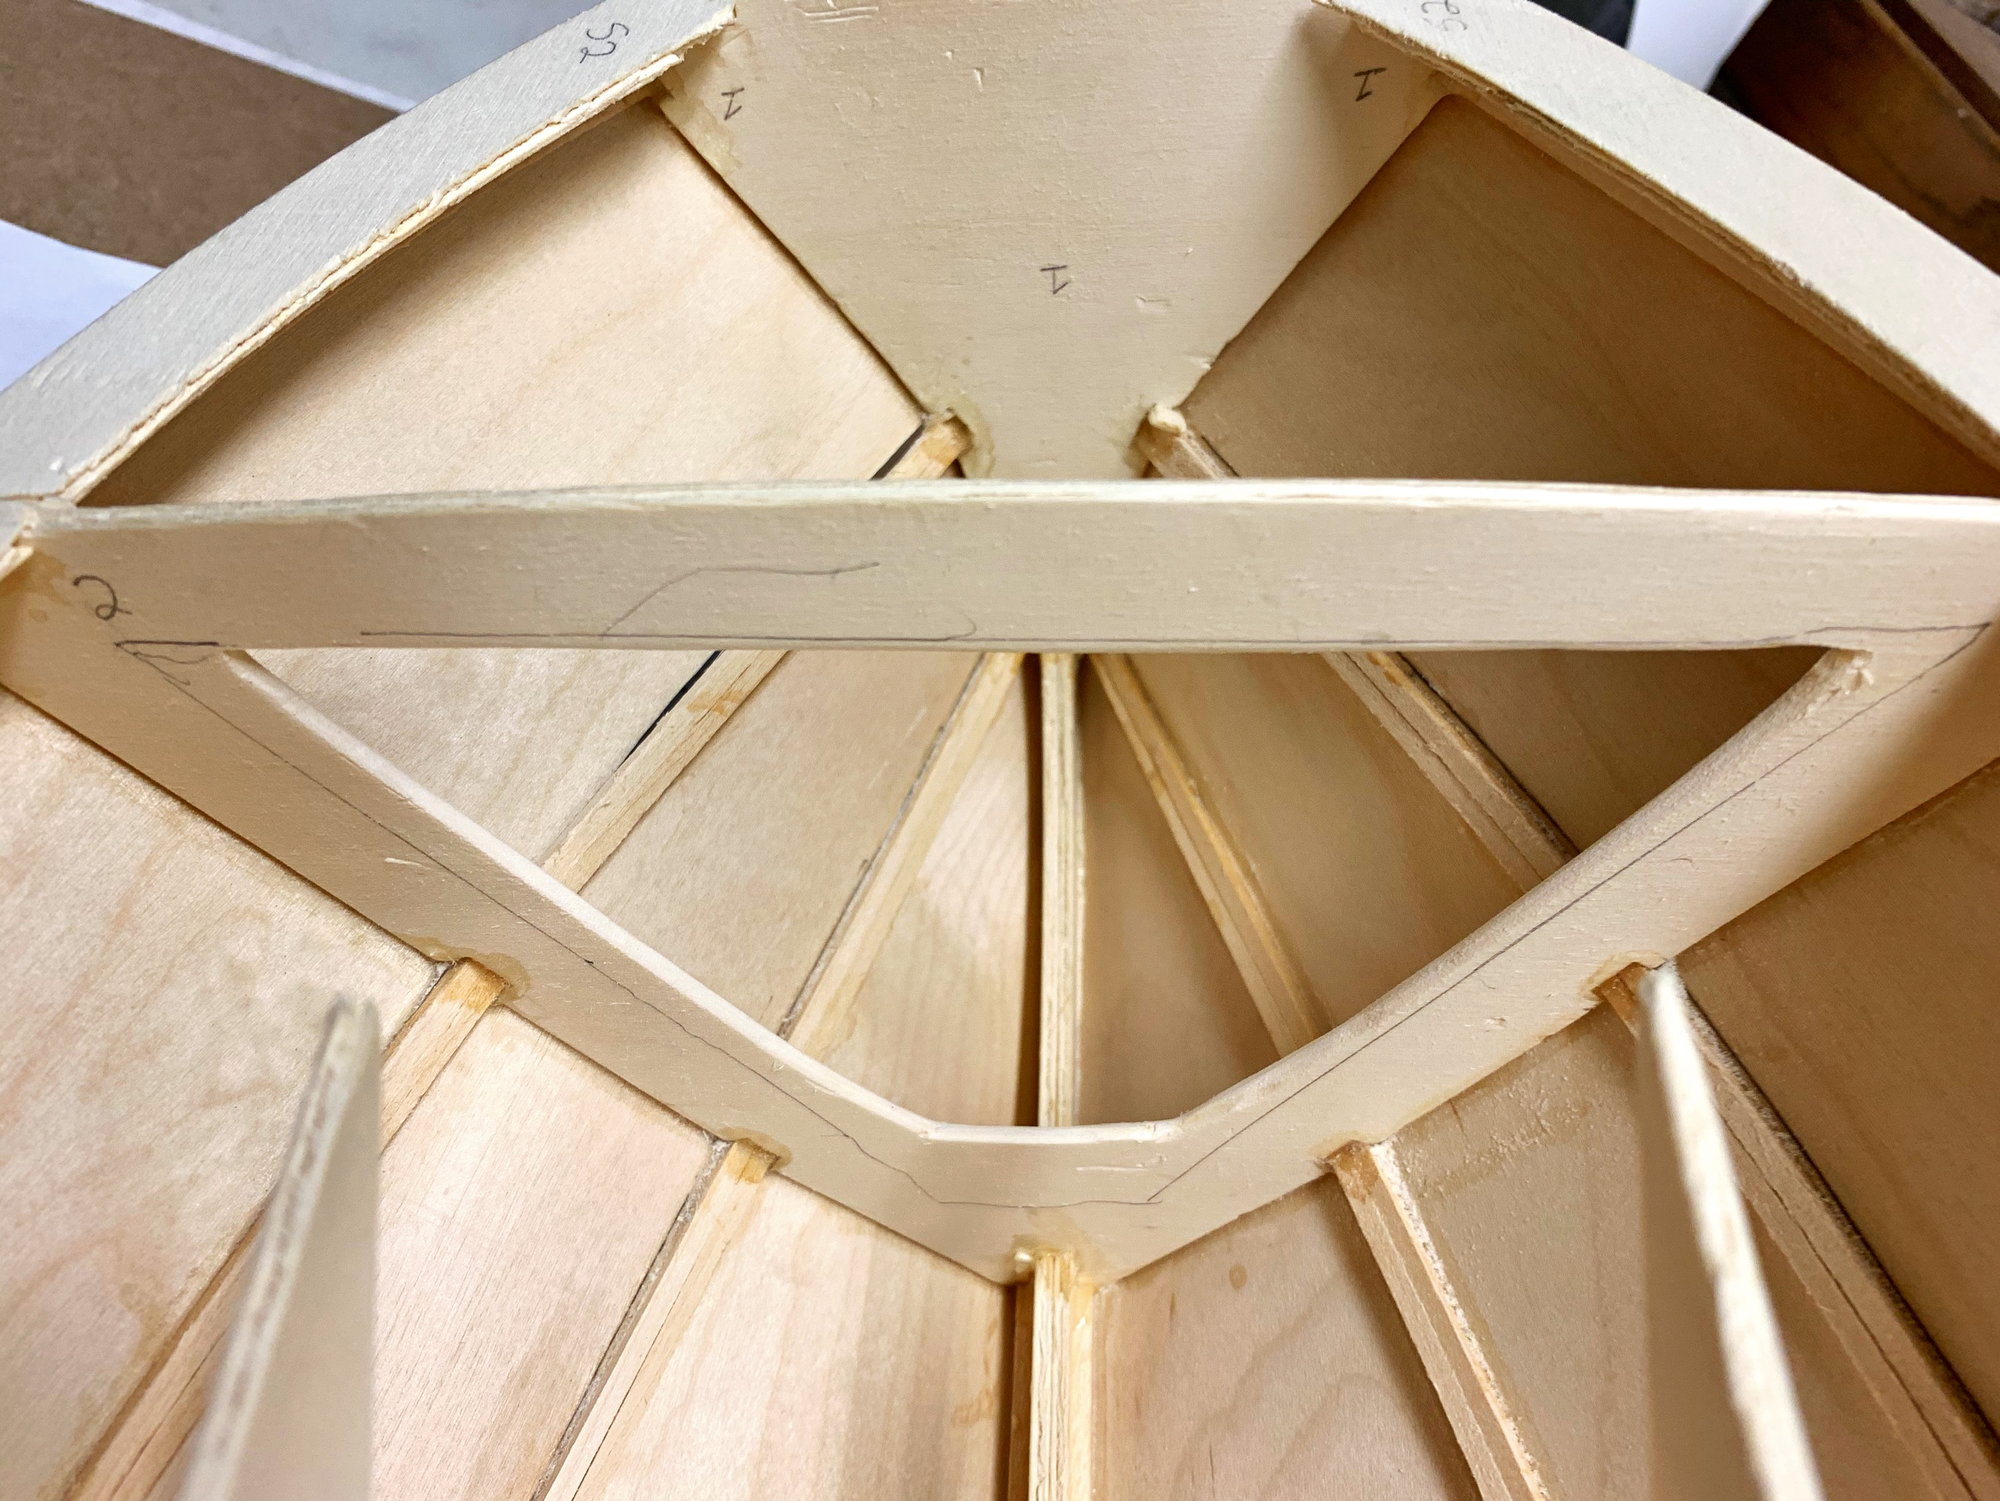
That's better!
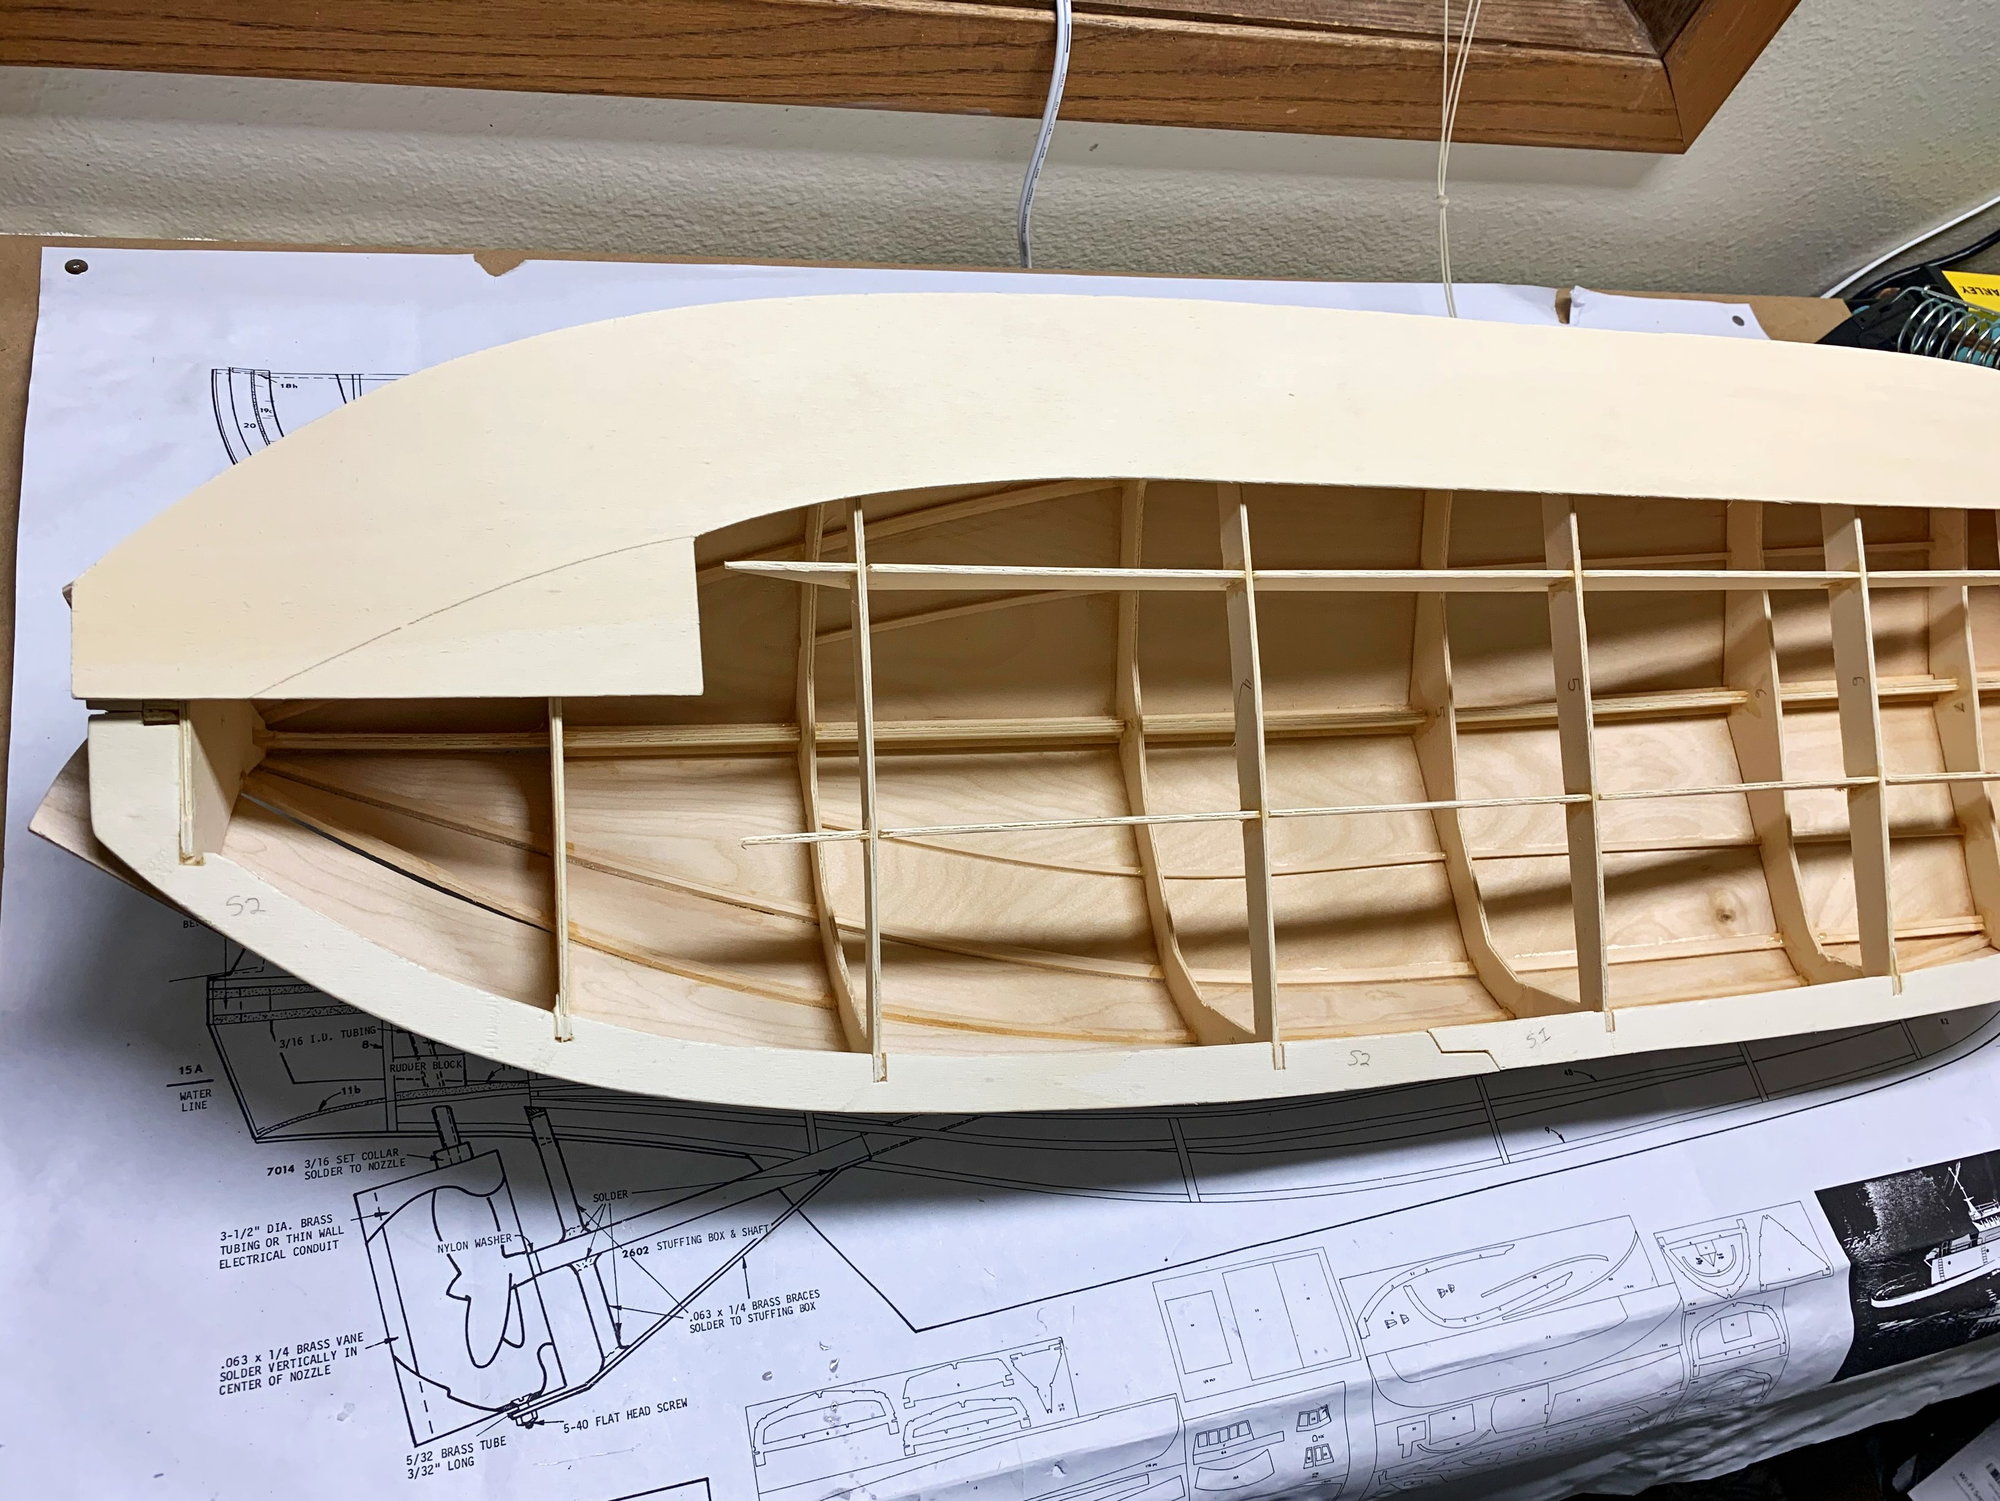
Going to open up the front most chamber for water cannon shenanigans.
I found some mini brass cleats, and a bronze water strainer pickup for the water cannon pump(s).
Cut pieces to fill in the stern area flat.
I'm opening up the front, so I can pipe water to my water canon.
That's better!
Going to open up the front most chamber for water cannon shenanigans.
Last edited by birdo; 04-15-2021 at 06:29 PM.
The following 2 users liked this post by birdo:
Martin H (08-23-2021),
Rhodeislander (09-29-2021)
04-19-2021 | 04:25 PM
#10
Thread Starter
Member
Spent a few days trying to figure out my water cannons. They will be LEAD FREE brass hardware except for the flexible hose, so the turret can turn left and right. I plan to put a 3/4" PVC pipe around the 1/2" Brass pipe to create a pivot. I will then Epoxy/Fiberglass another pivot to the PVC, so the turret can pivot up and down. I'm waiting on a Brass flange, which will mount to the front deck and pass through the water from top side to bilge. I have been reinforcing the entire bow area with fiberglass, wood, and epoxy. The front deck is getting 1/4" Birch plywood to reinforce the cannon area.
04-24-2021 | 04:37 AM
#11
Thread Starter
Member
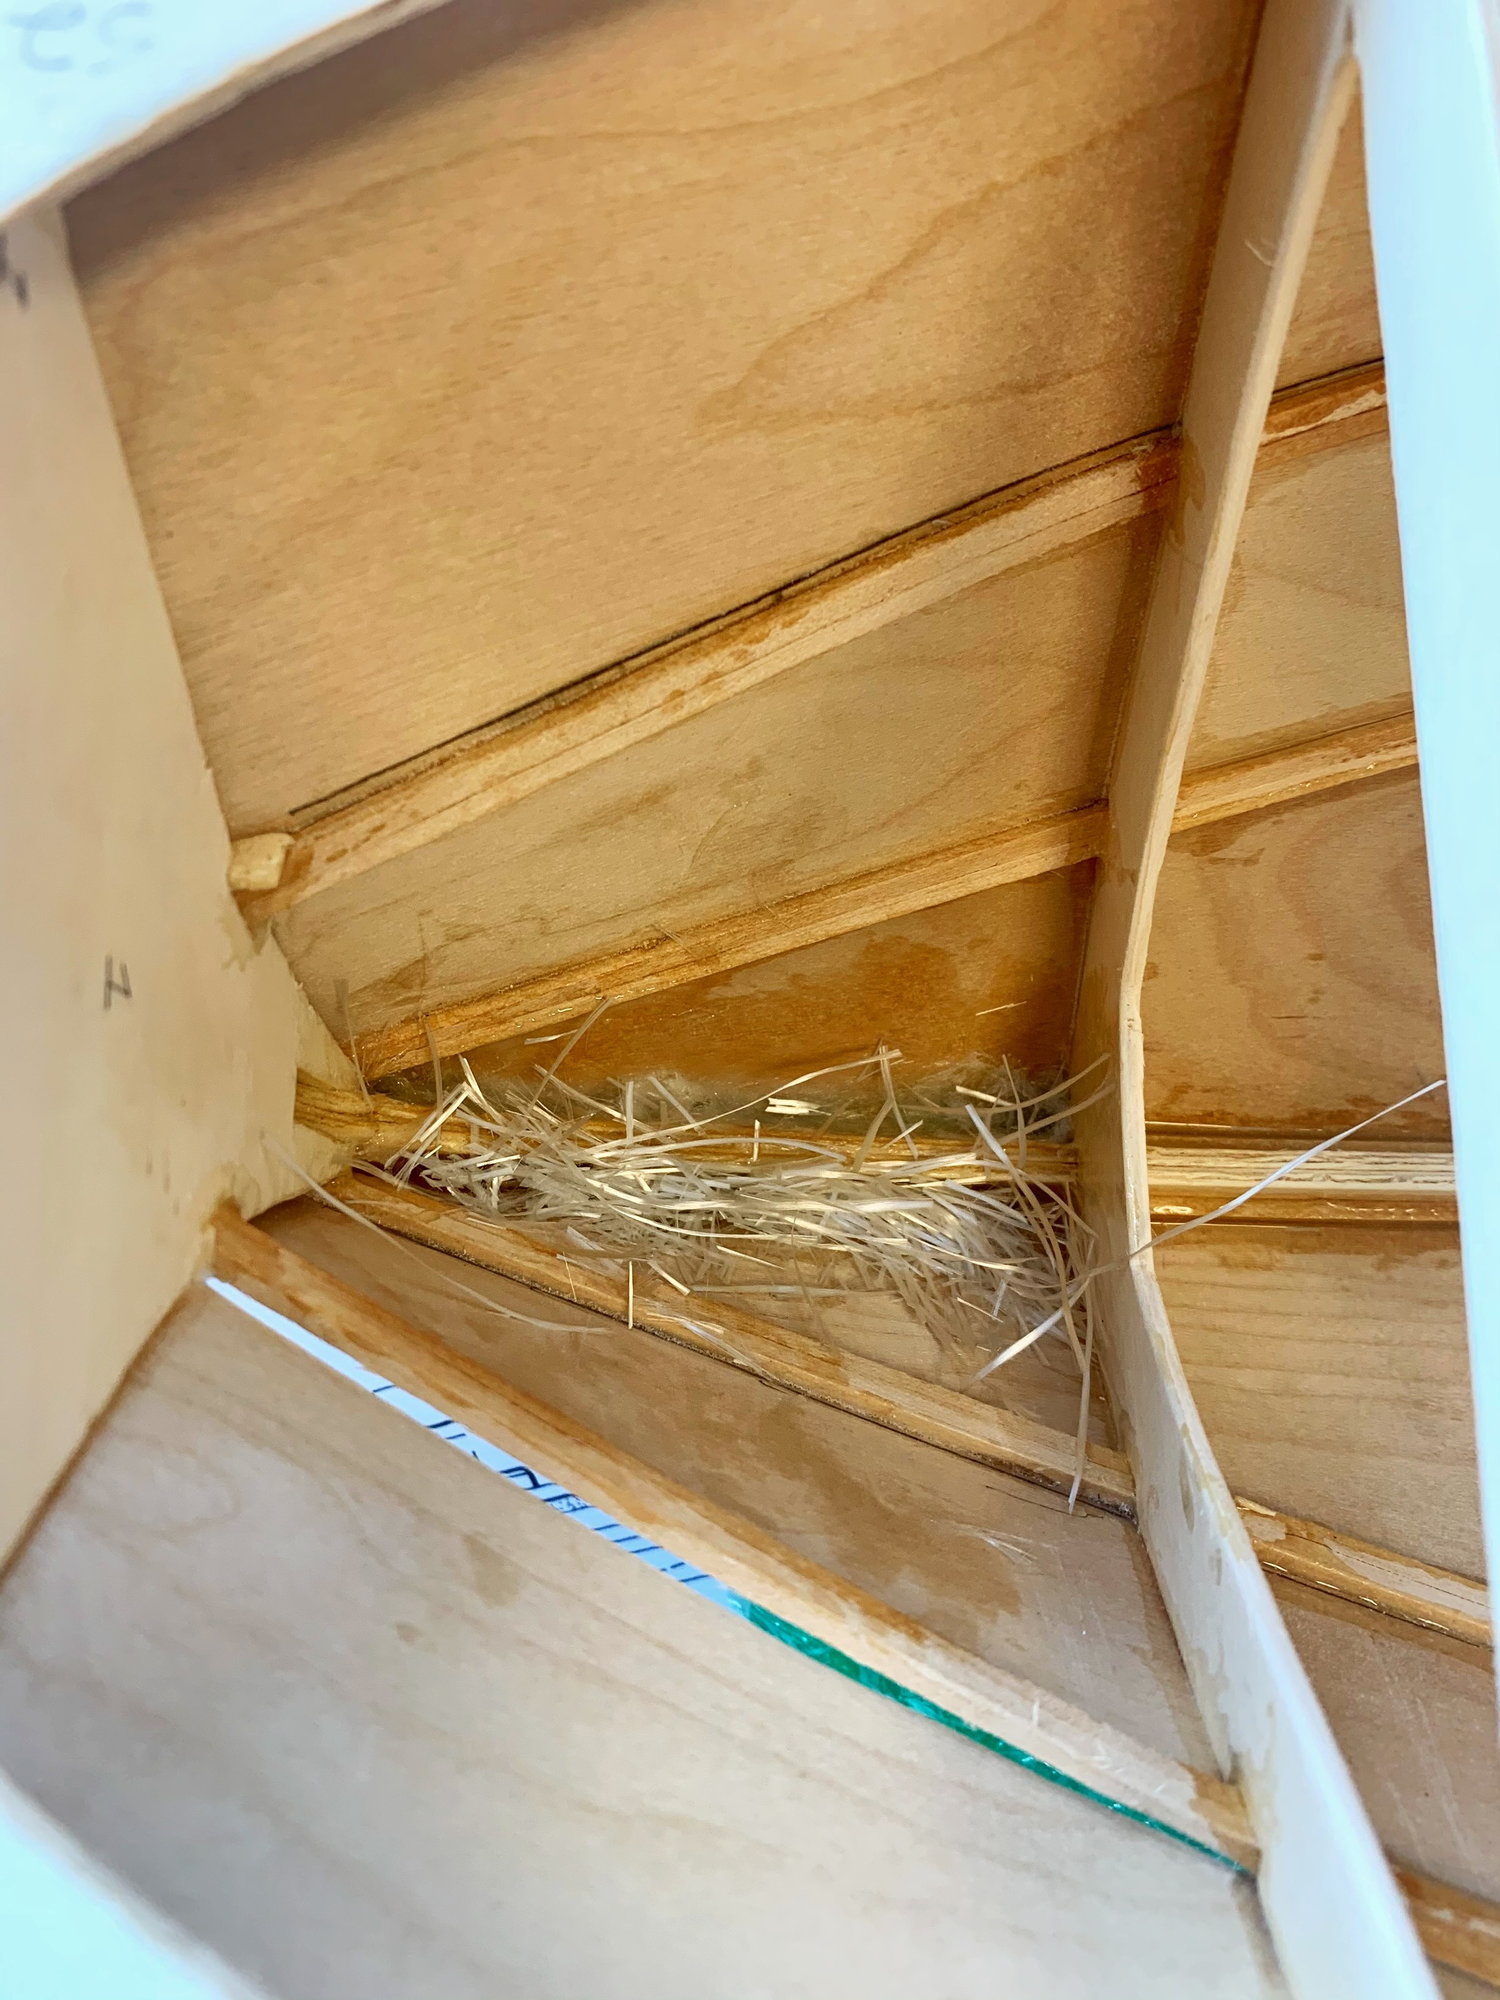
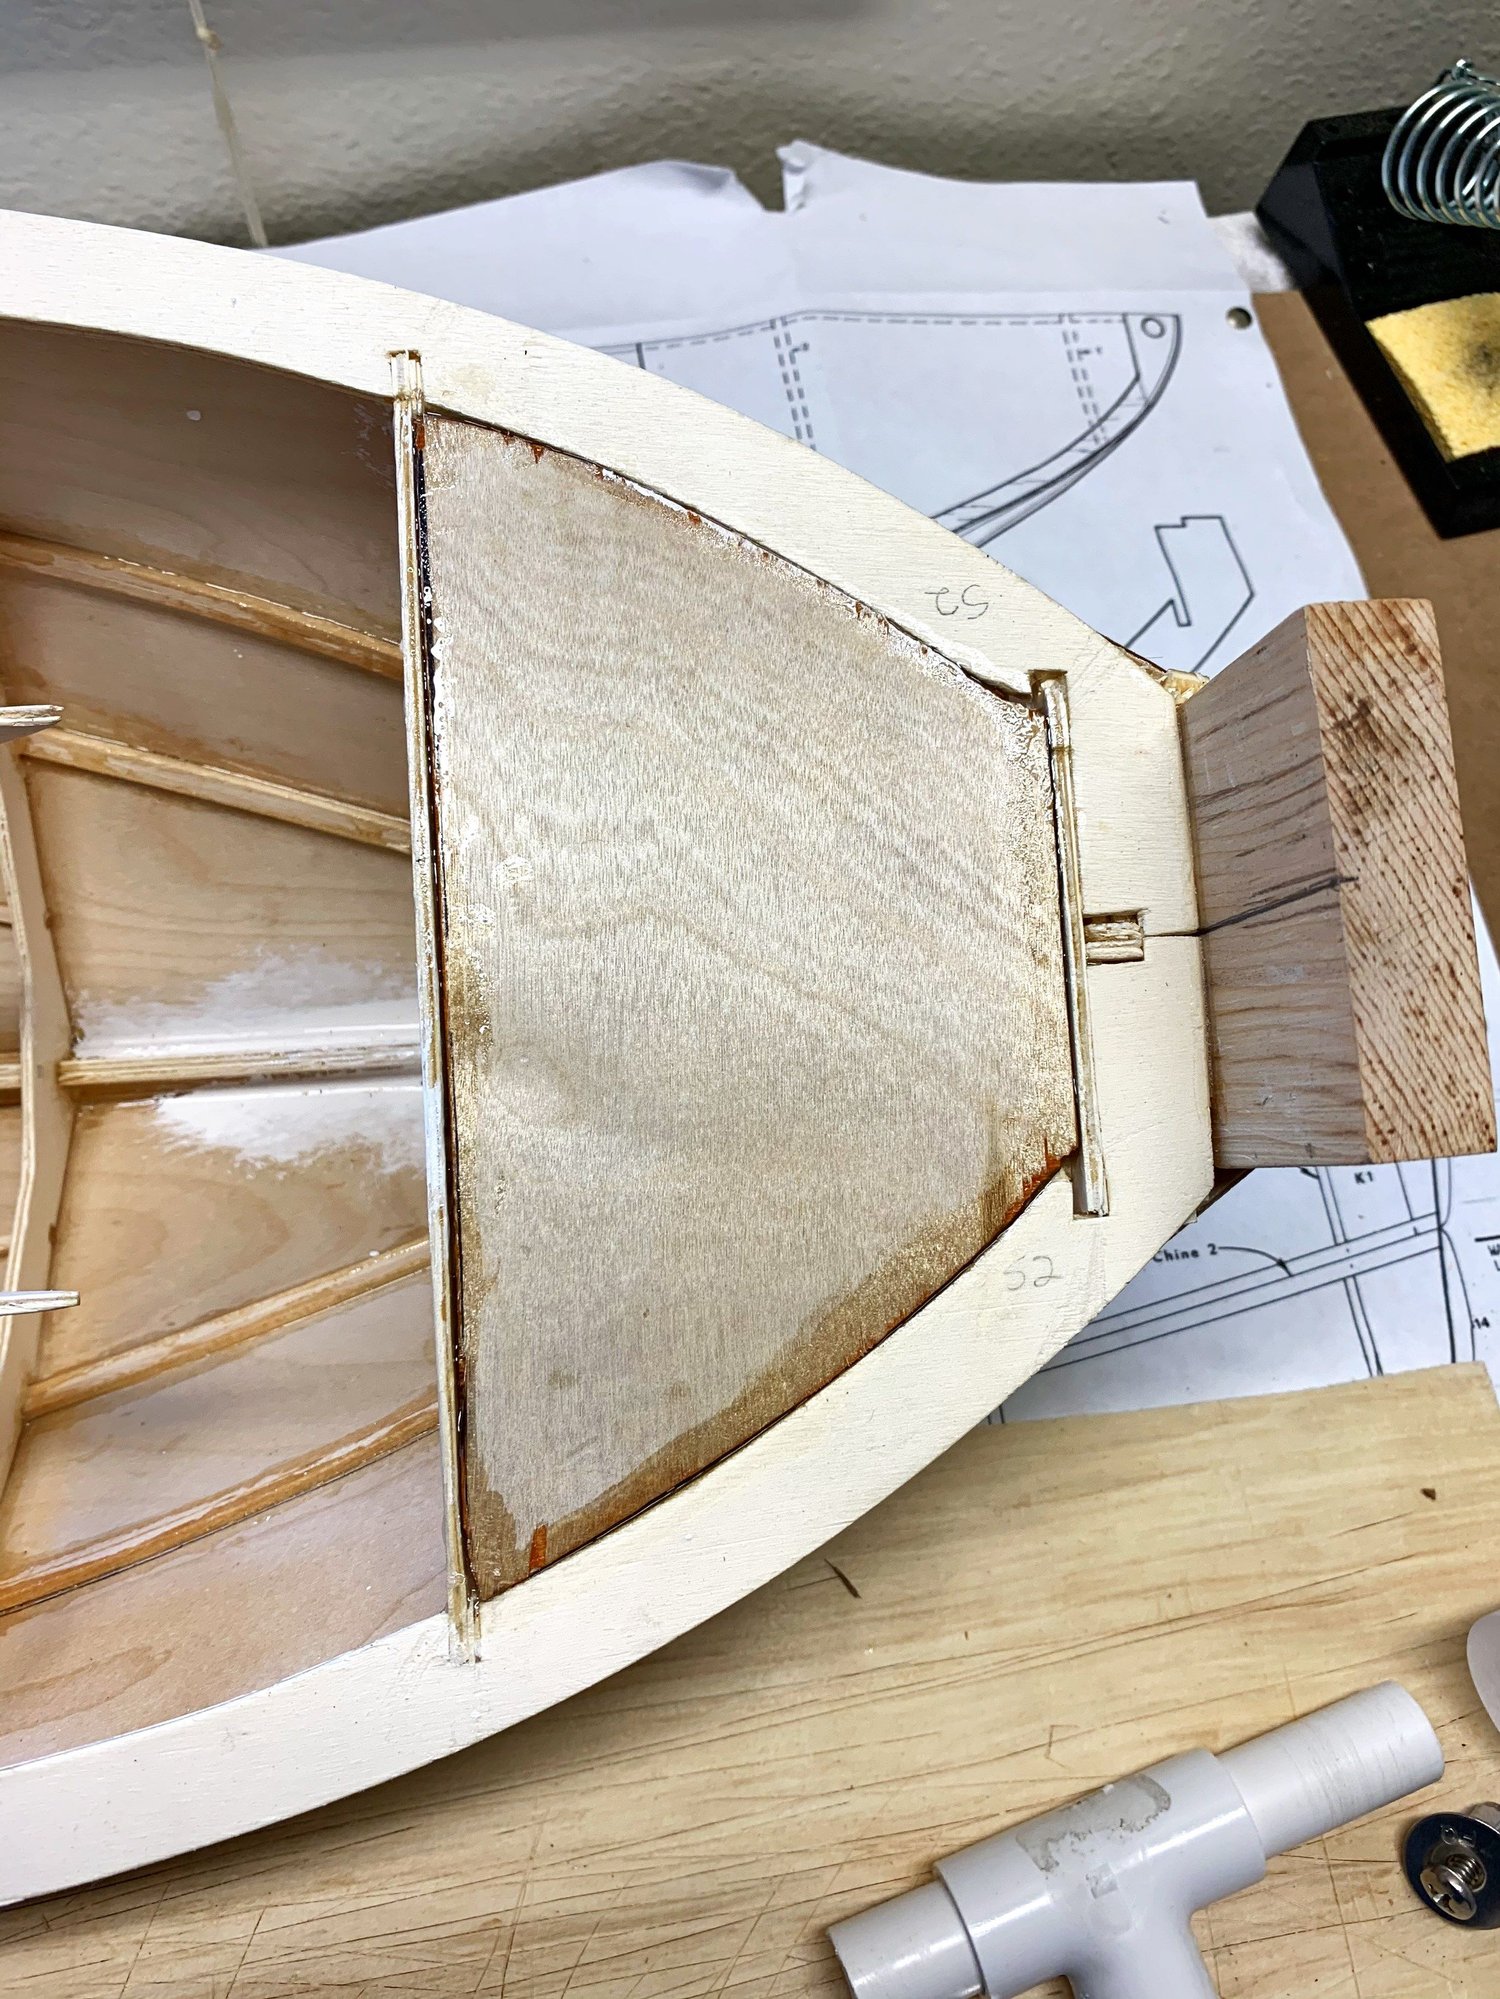
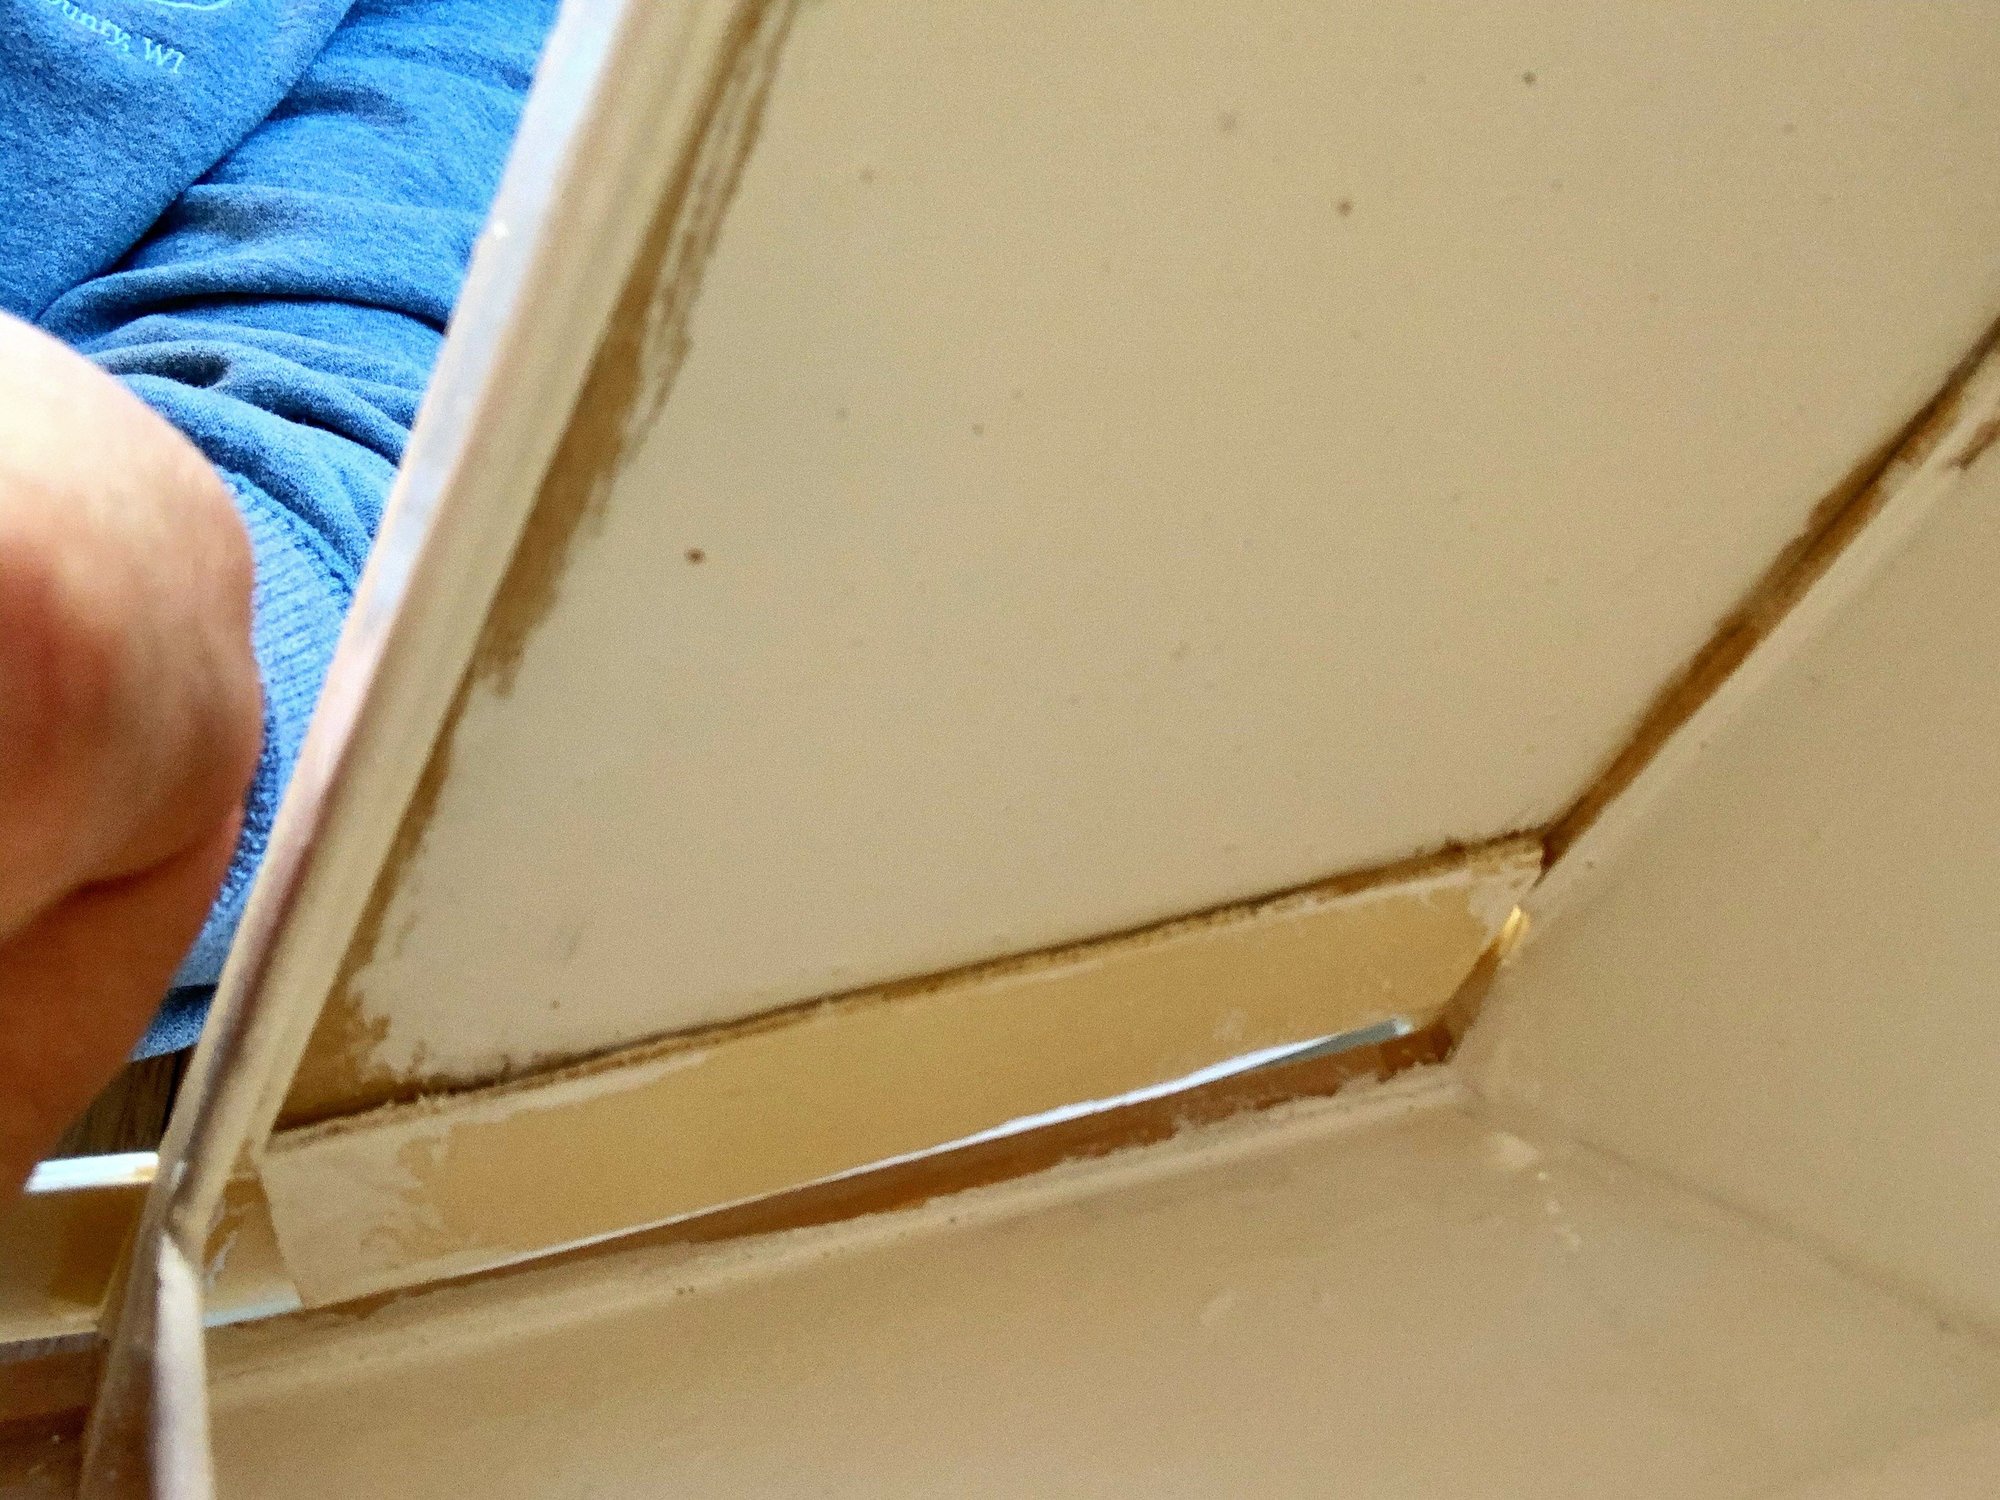
I wet the keel area with epoxy, then I added fiberglass strands, then more epoxy on top.
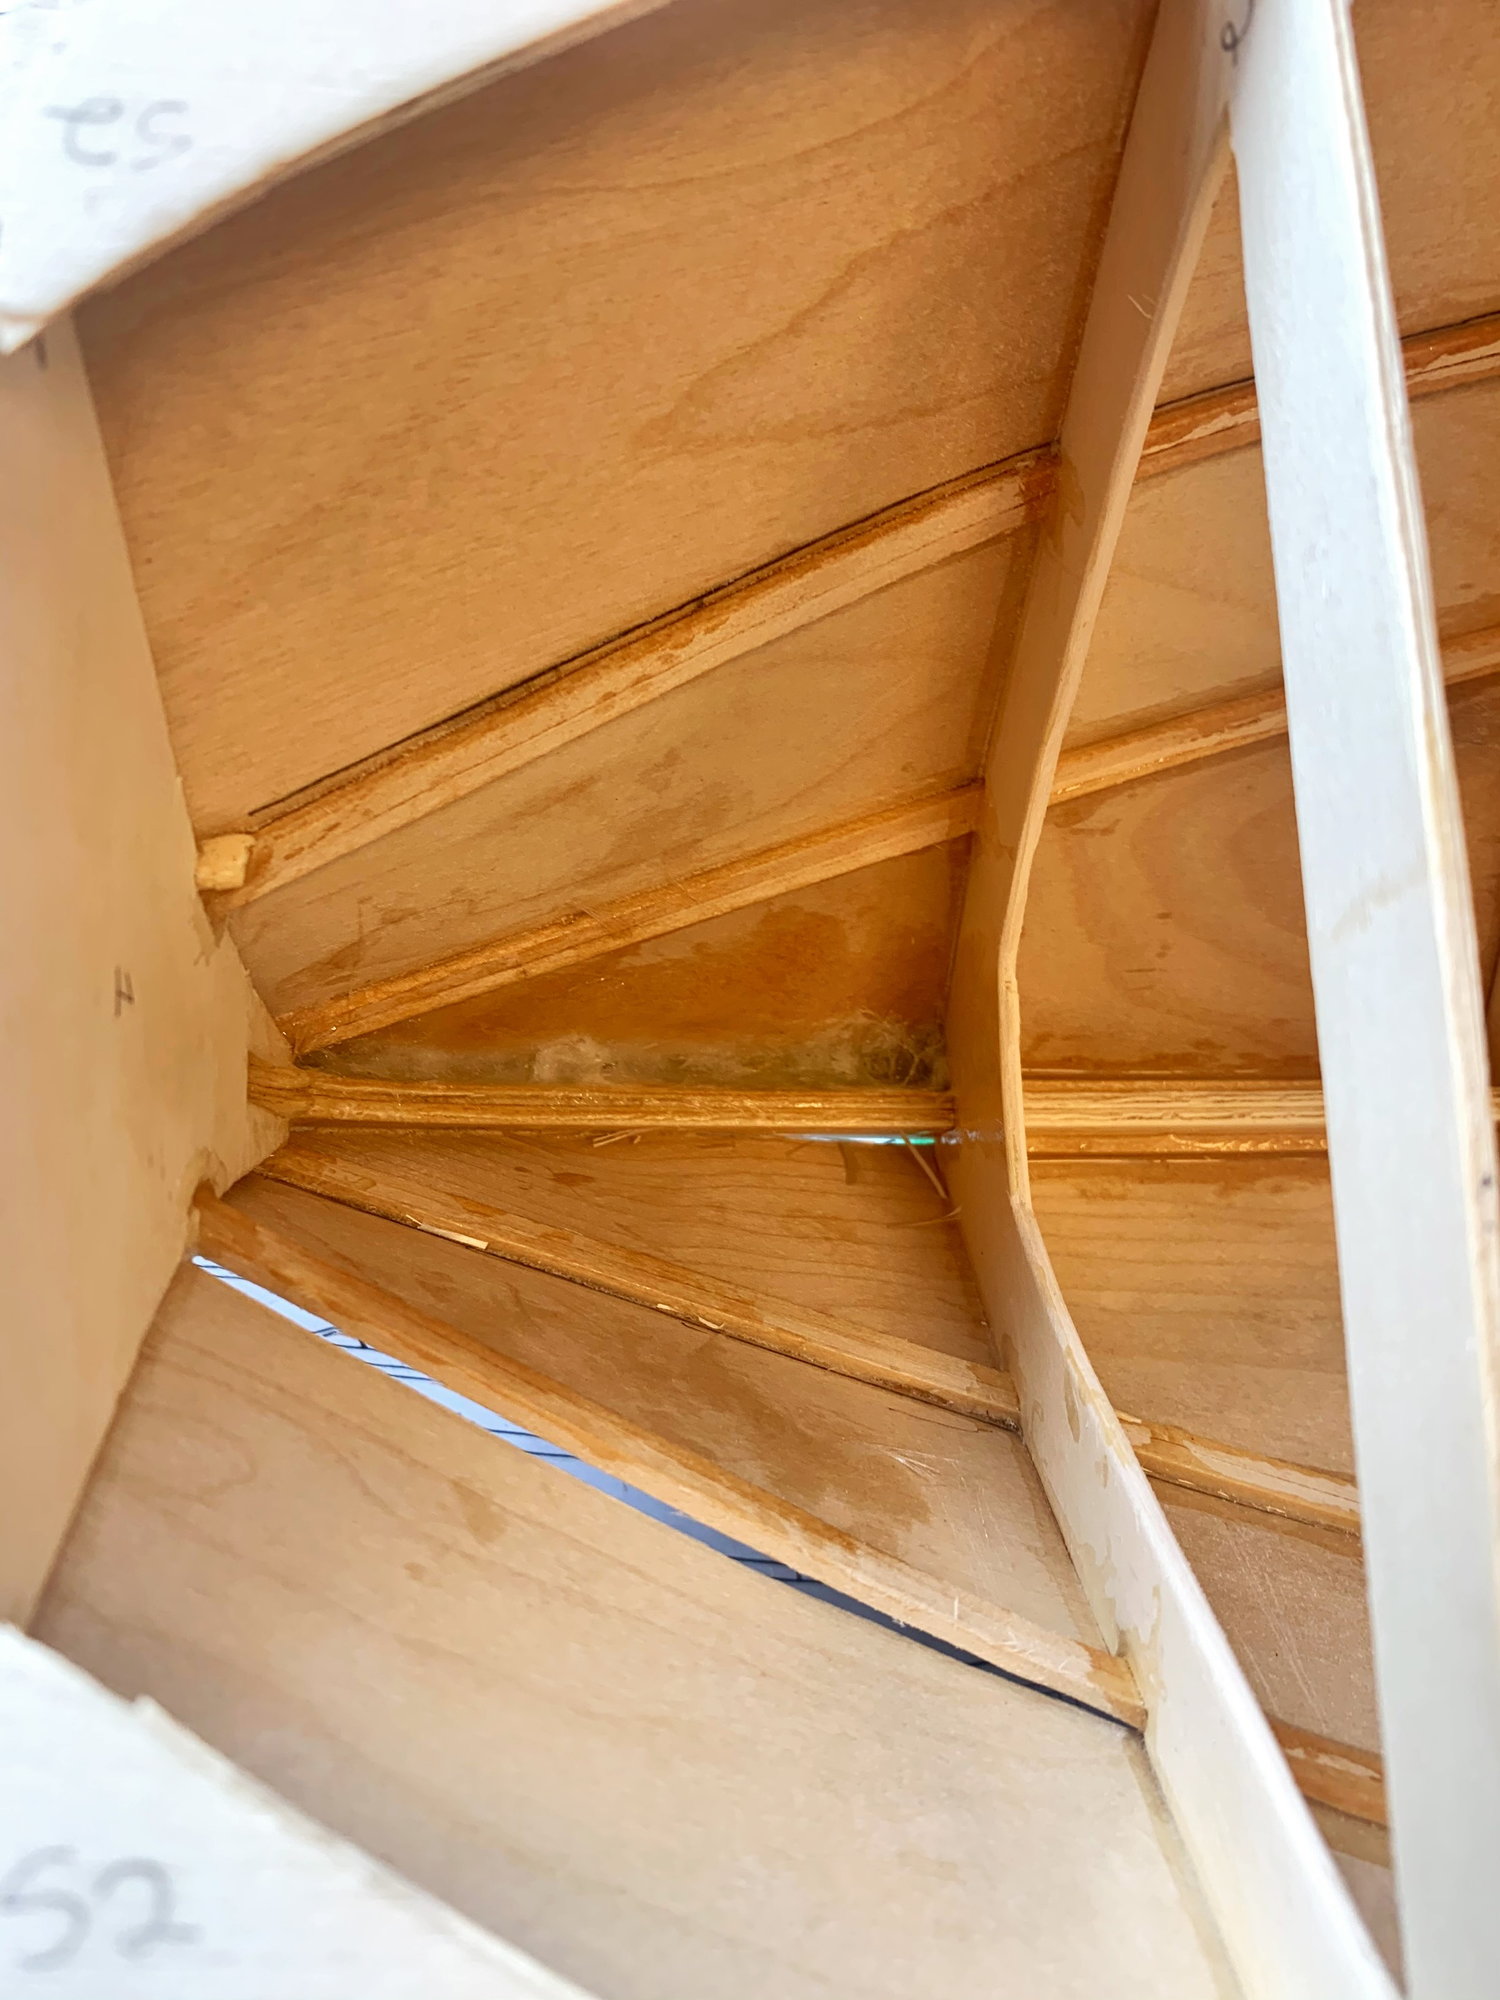
Cured
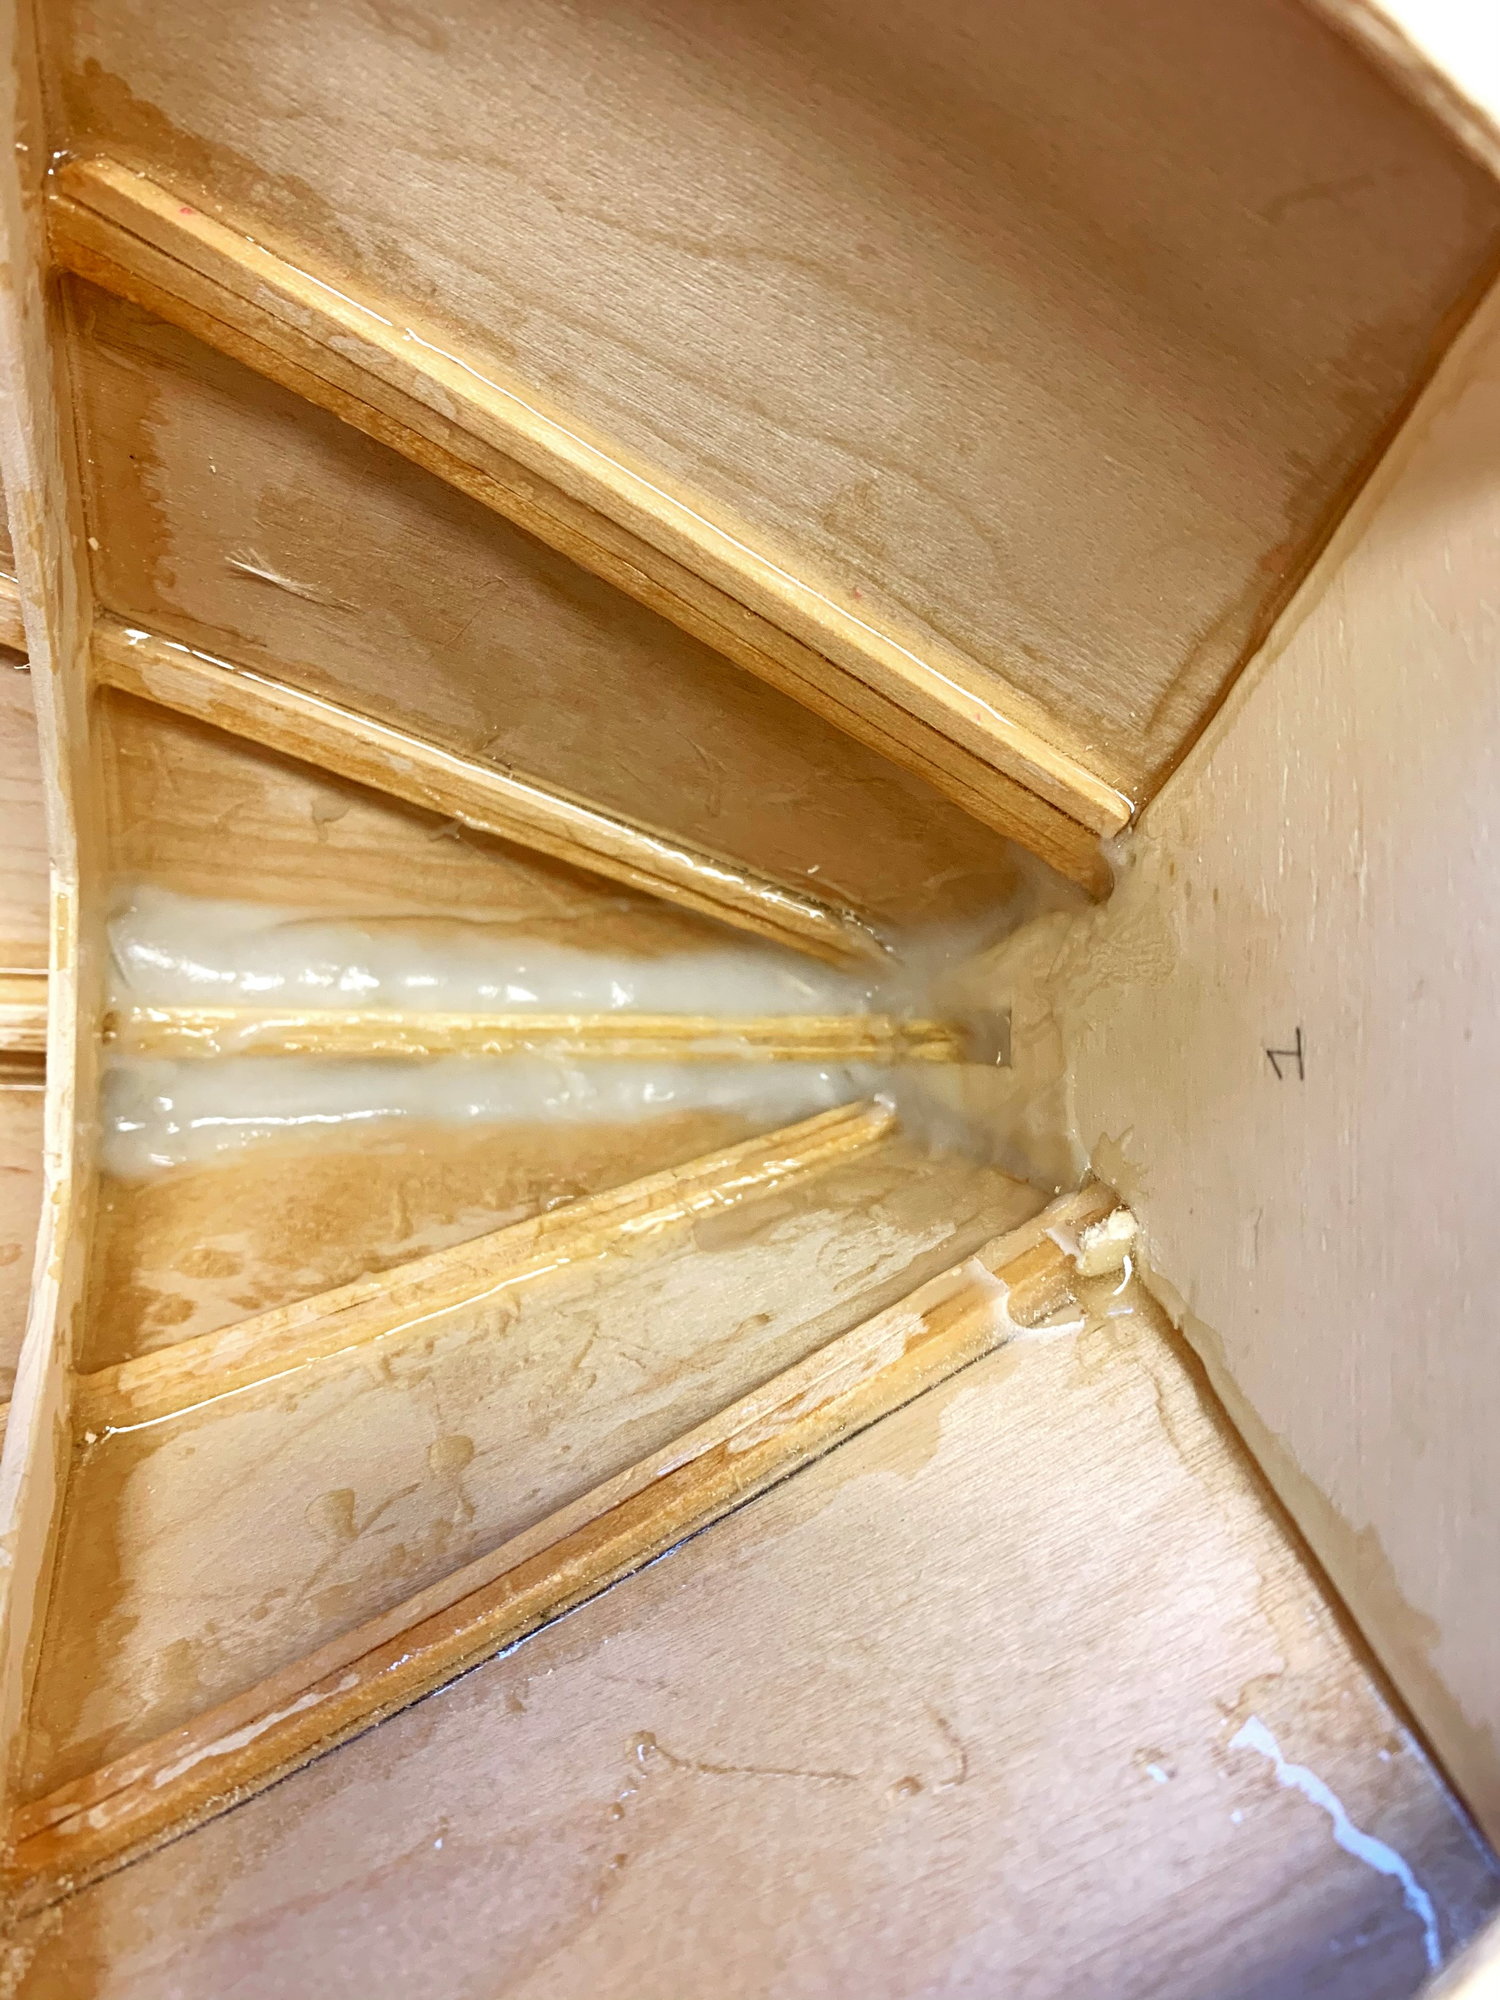
2 part Boat Epoxy and 404 High Density filler to make peanut butter. When it started to setup, I went back and smoothed it down with my finger for a nice transition. I'm going to drill two small drain holes in the bulkhead. No water will get trapped up in the front now.
Last edited by birdo; 04-24-2021 at 04:41 AM.
04-26-2021 | 11:18 AM
#12
Thread Starter
Member
Drilled the drain holes and glued the 1/4" plywood holds in place. Time for paint! Doing two layers, then I will glue the 1/4" plywood on. After that i can GLUE THE TOP ON!
04-28-2021 | 03:55 AM
#13
Thread Starter
Member
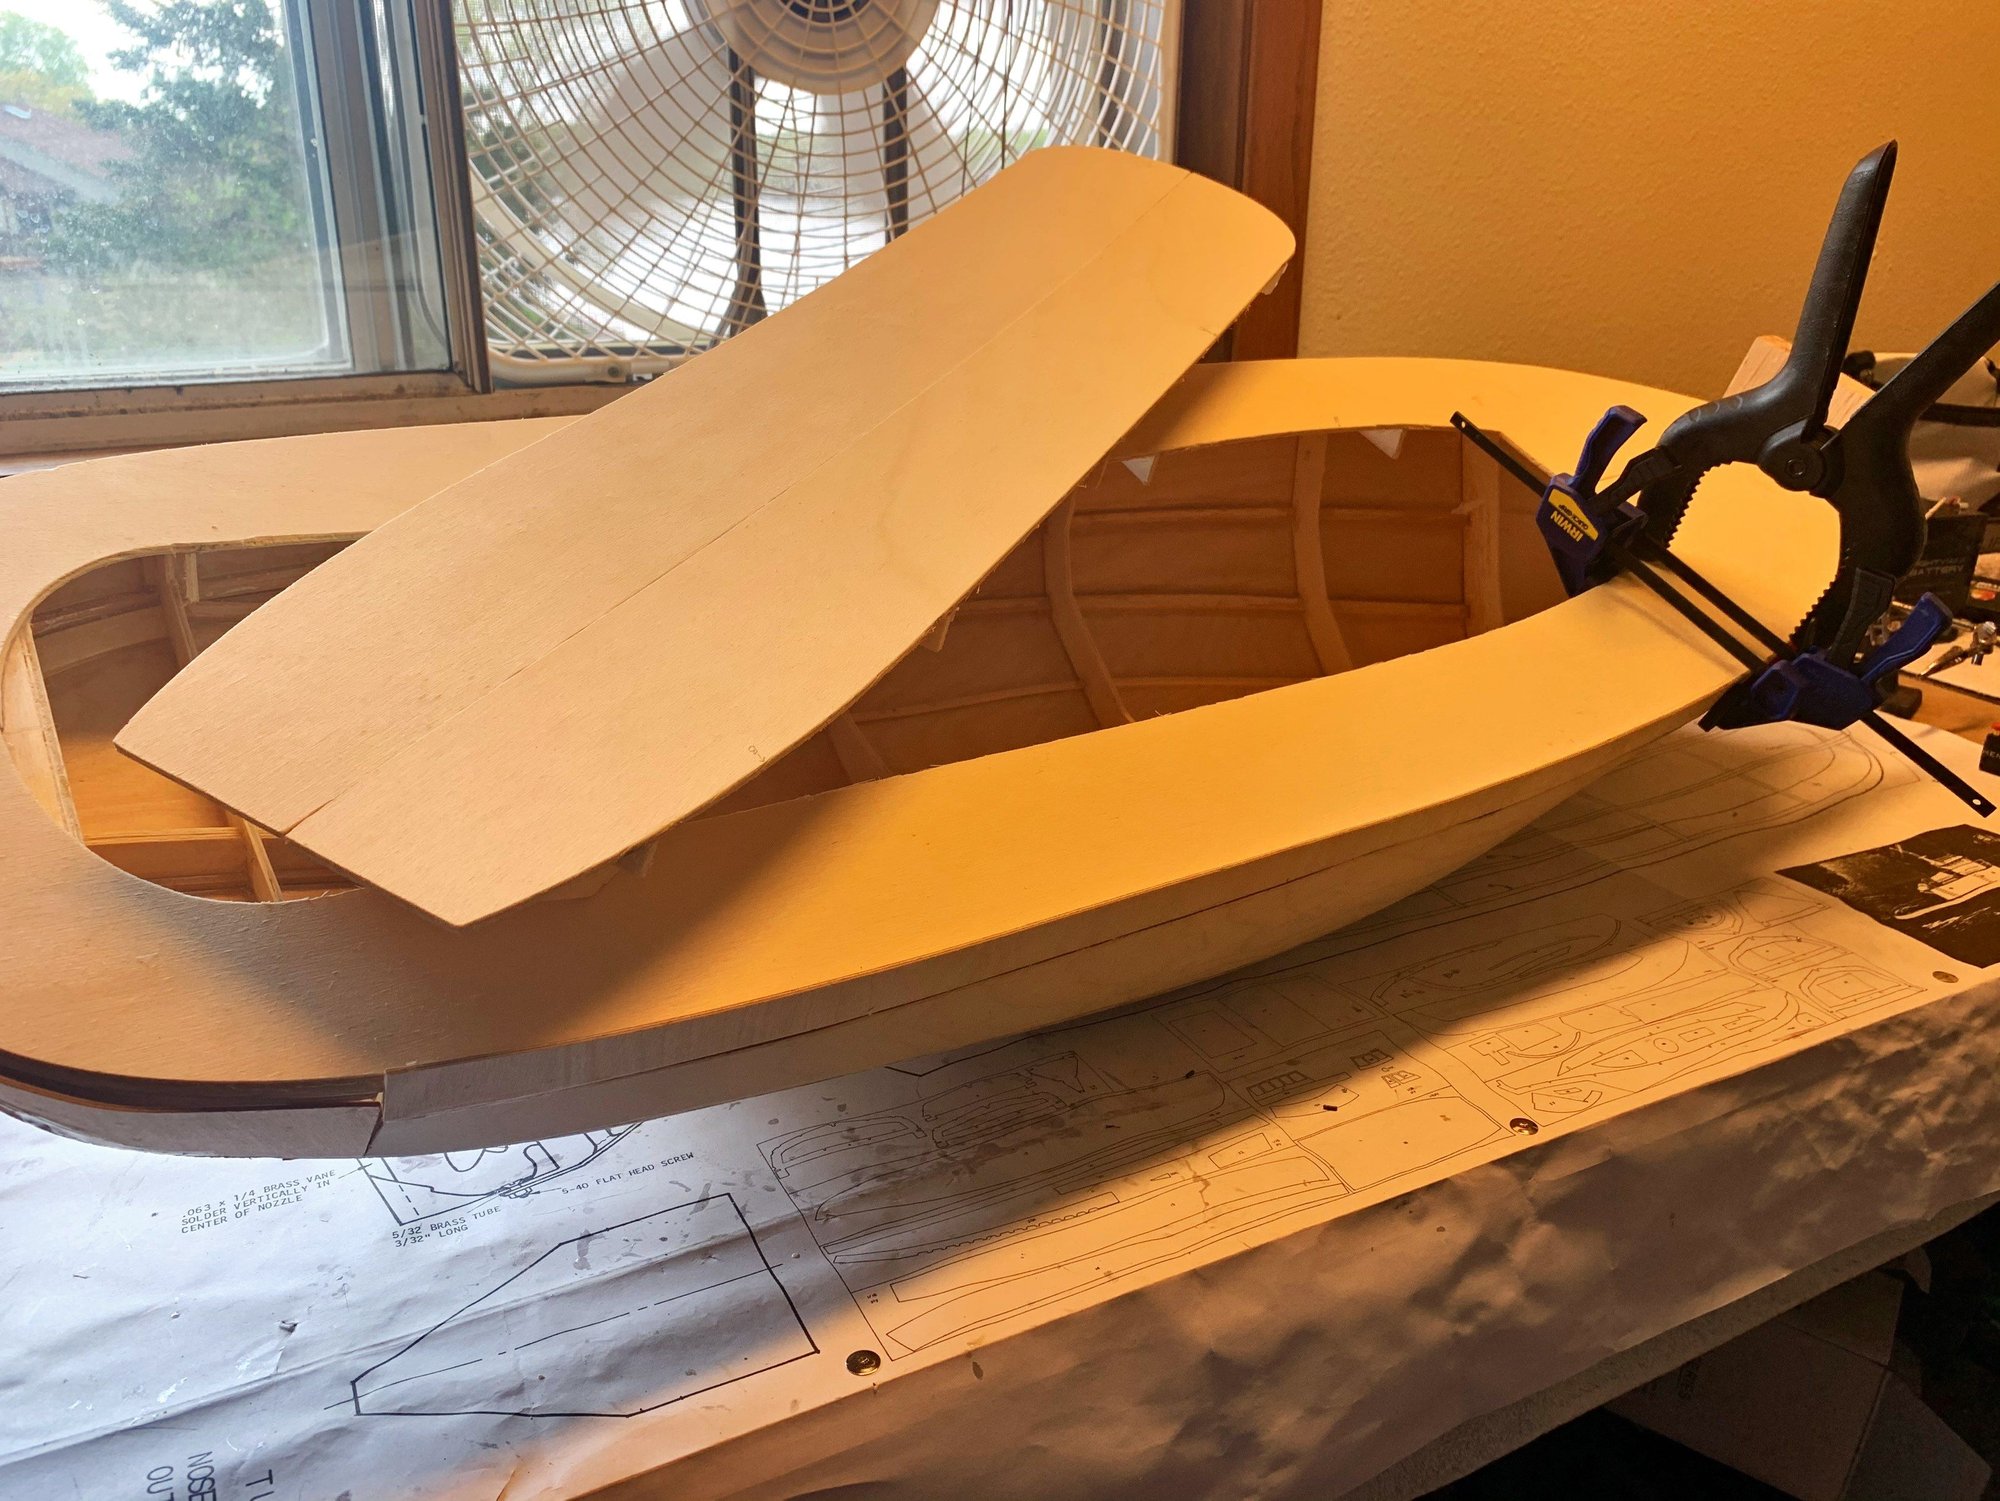
Got the front buttoned up last night. Time for the top to go on today!
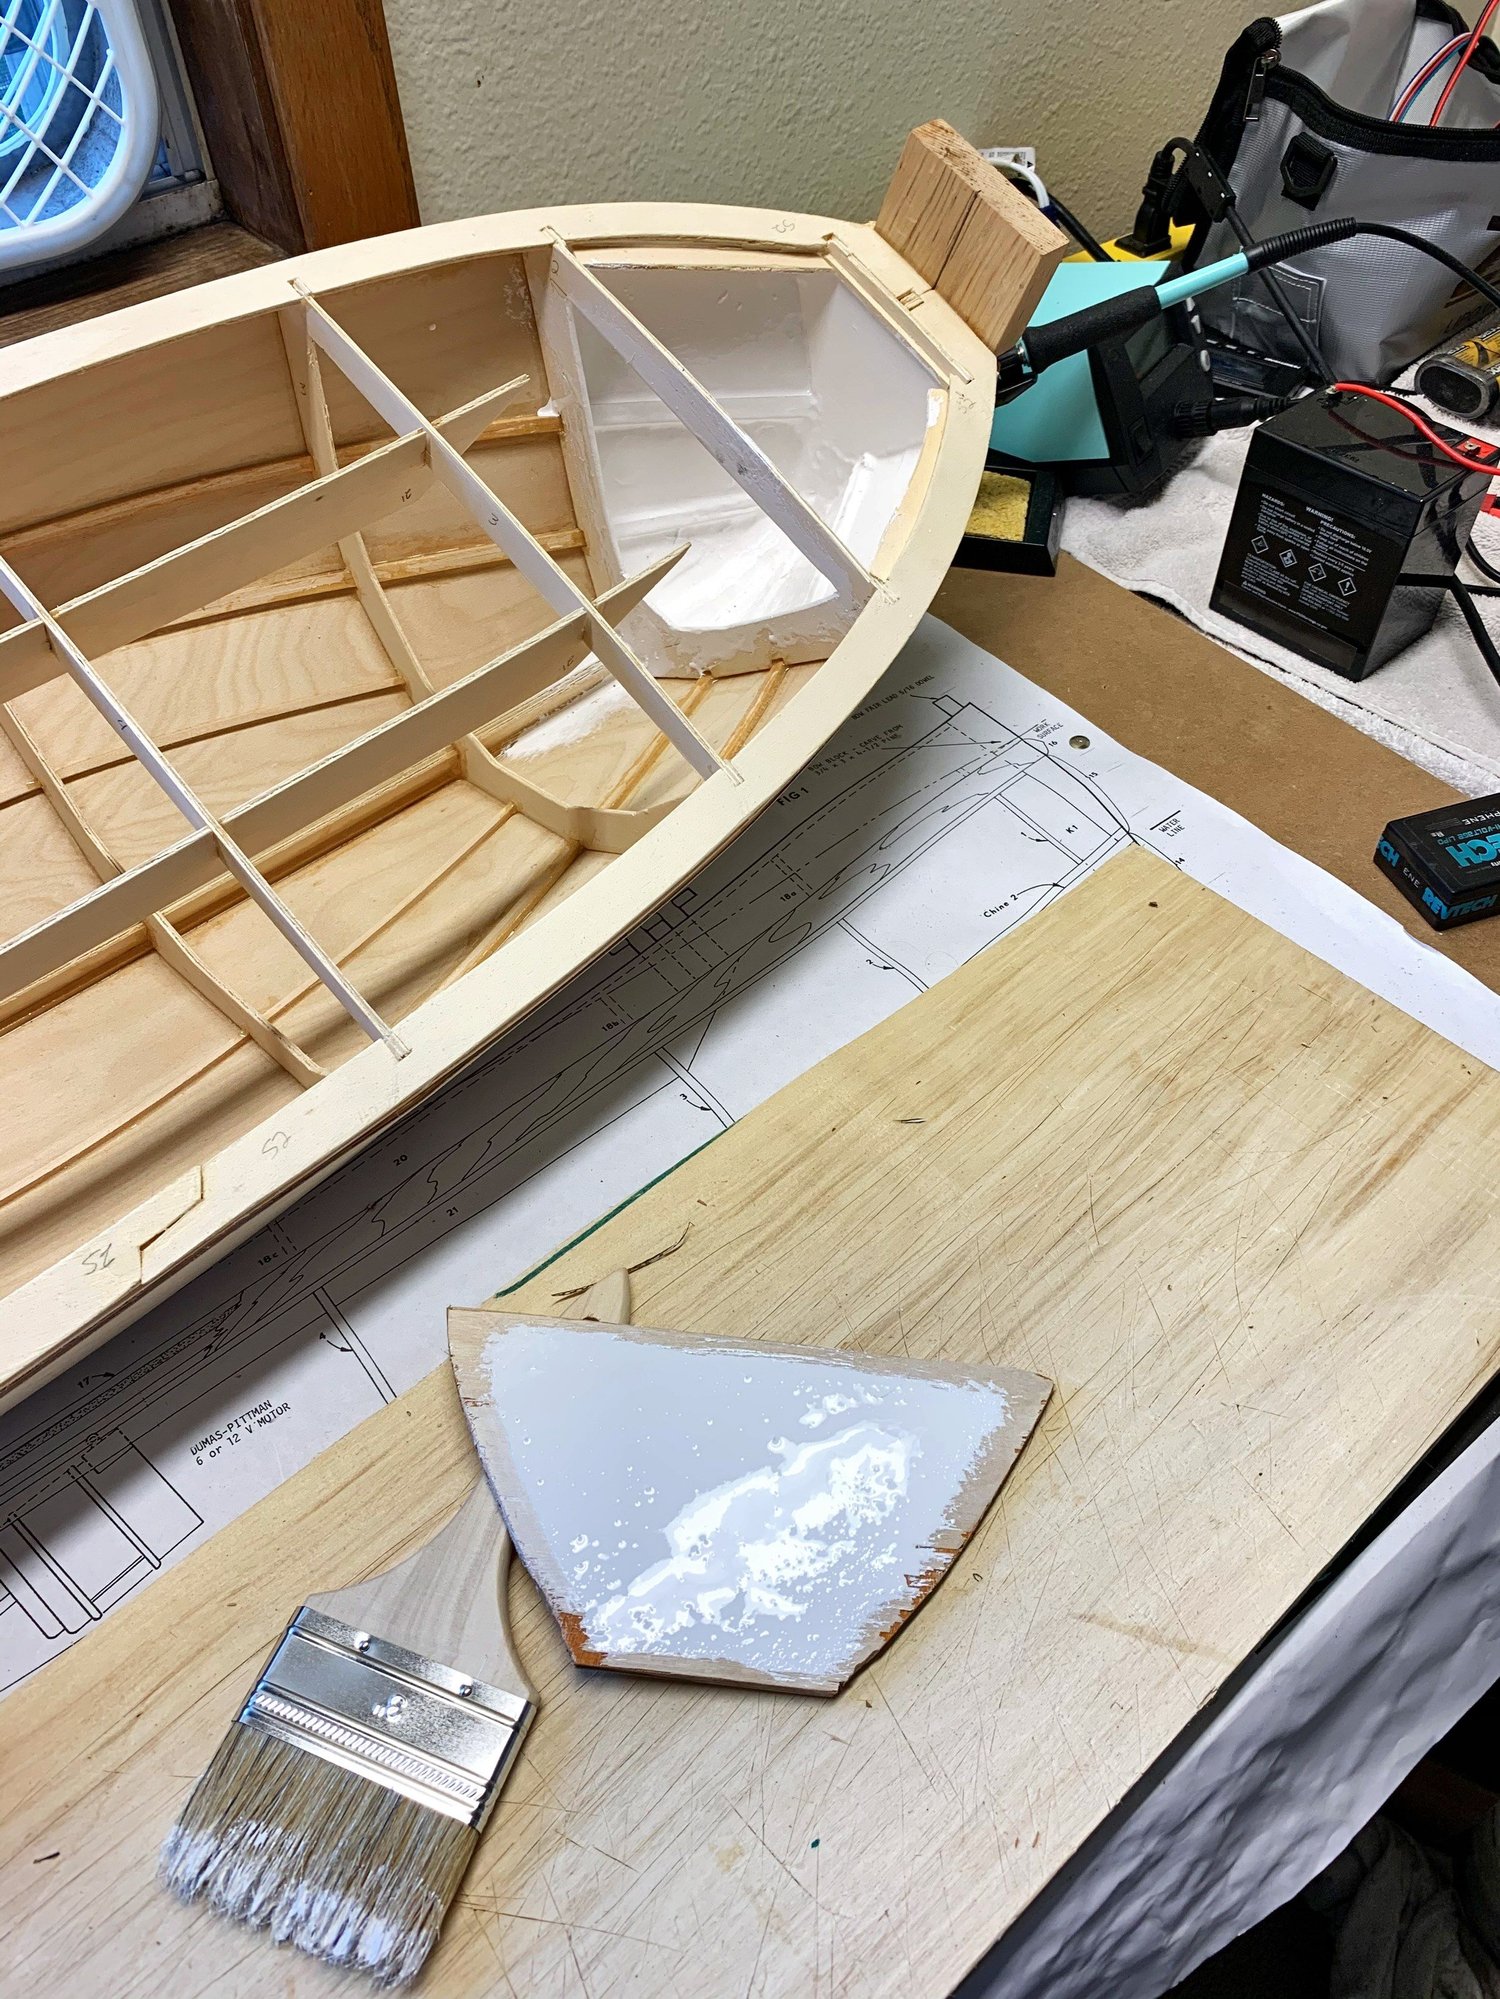
Painting the top now, cause it's much easier!
30 Epoxy in place
Looking good under there
and over there
Painting the top now, cause it's much easier!
30 Epoxy in place
Looking good under there
and over there
04-28-2021 | 11:51 AM
#14
Thread Starter
Member
30 minute Epoxy applied thin and even to both surfaces.
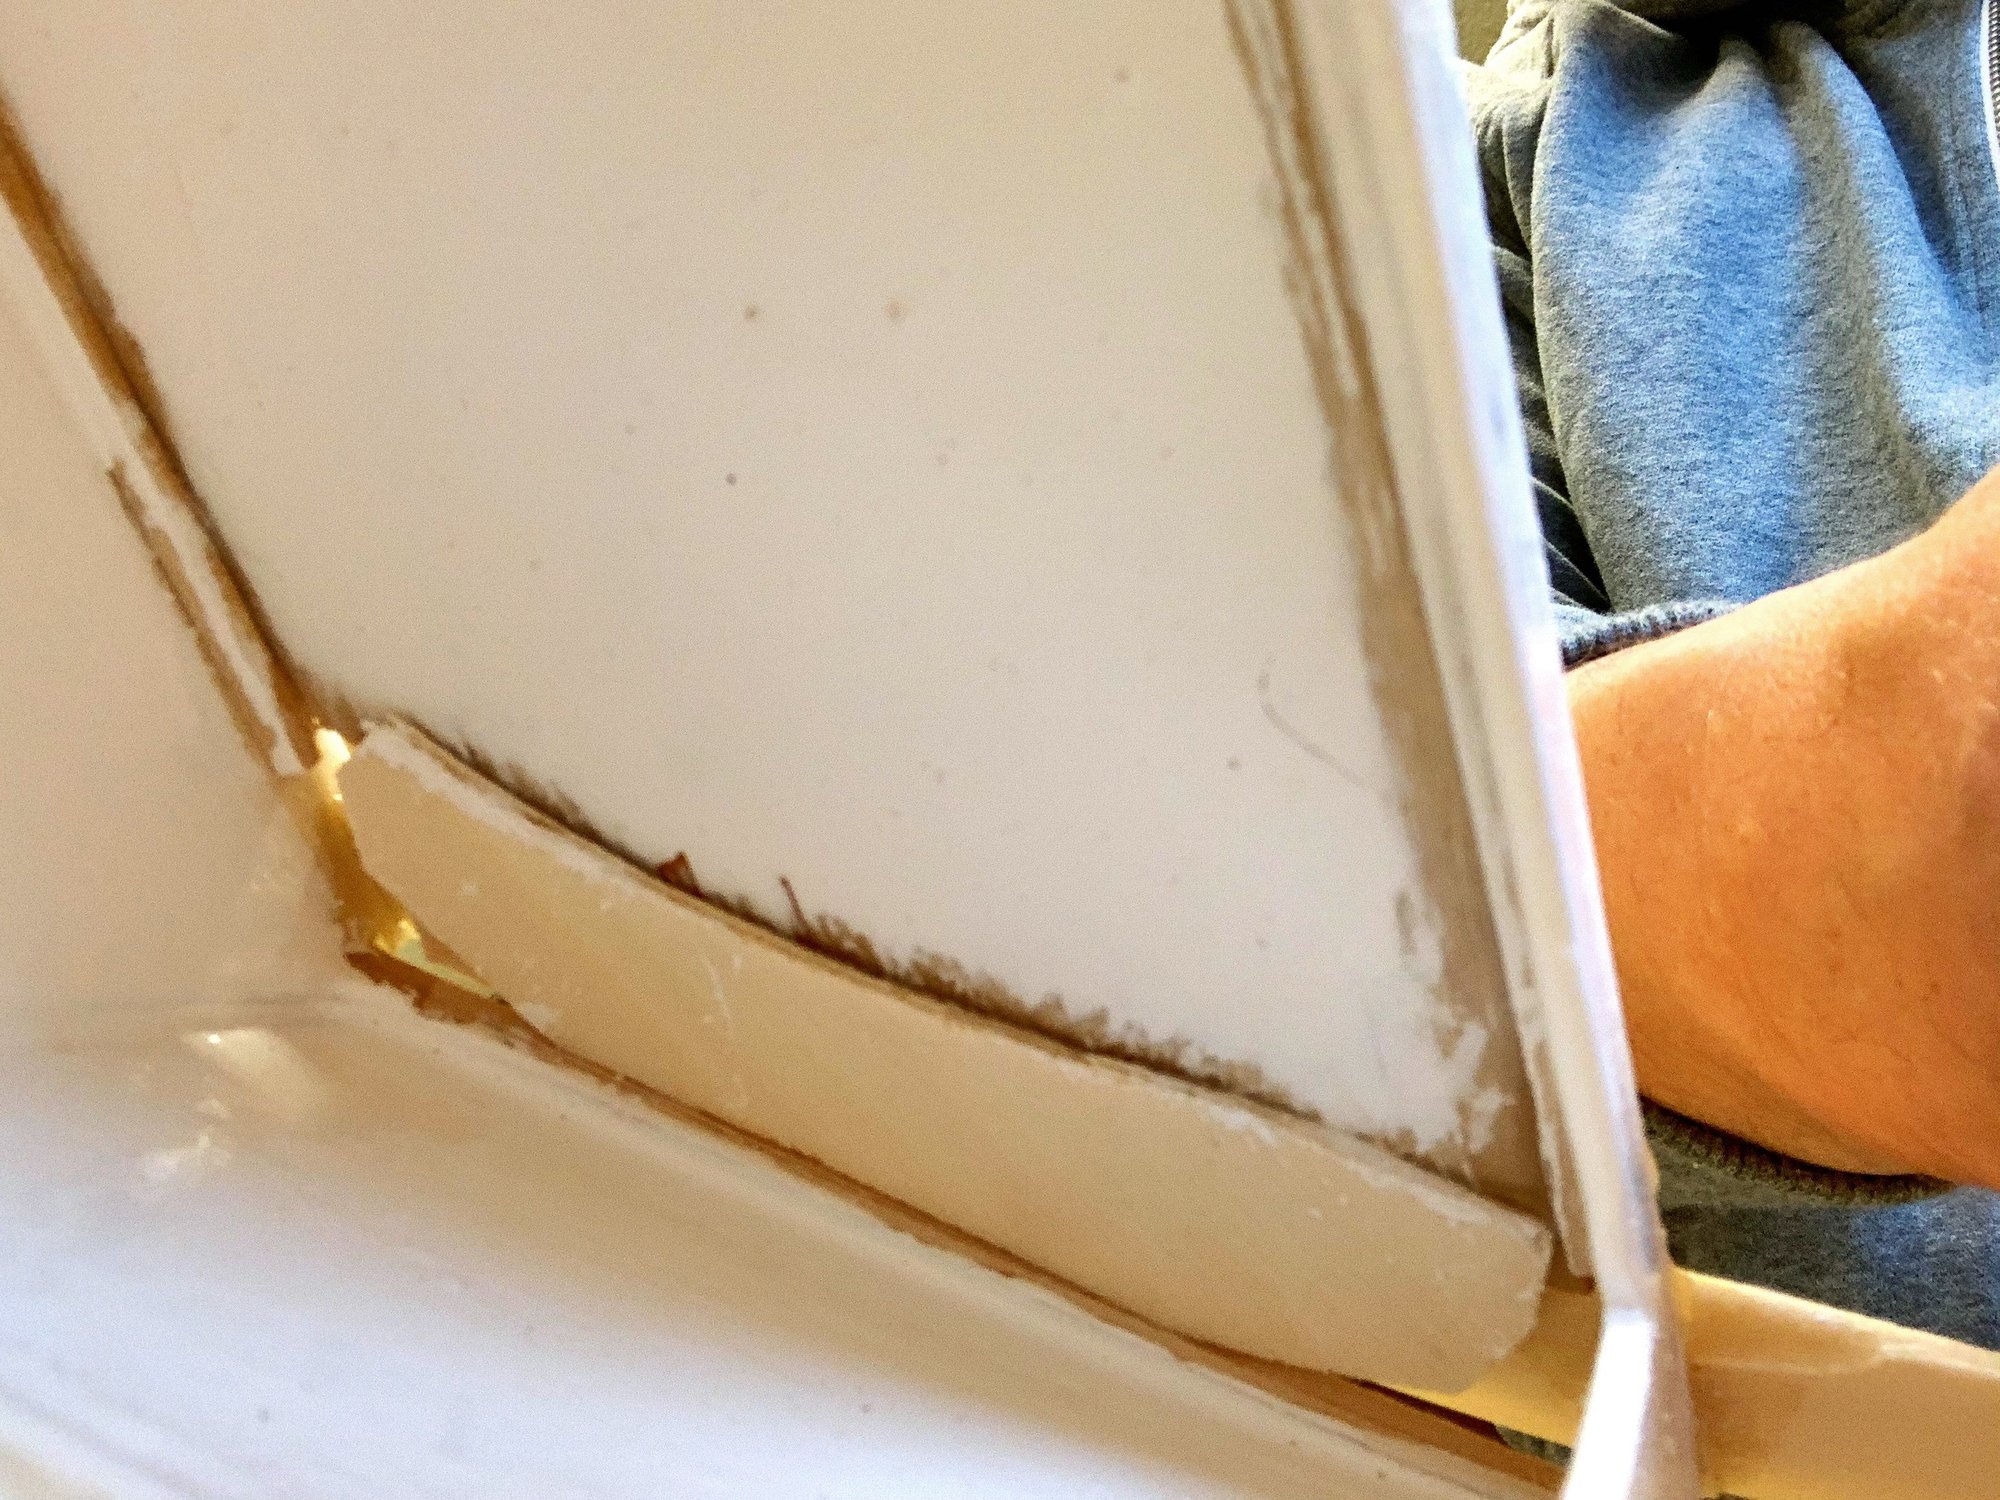
Clamps, Clamps everywhere! Broke the already broken and glued Number 6 bulkhead, fix that later....
The following users liked this post:
Martin H (08-23-2021)

 05-03-2021 | 11:42 AM
#17
Thread Starter
Member
I've been searching for a way to adapt the 3/16" Dumas Driveshaft/Stuffing Box to the world of Metric. I found some spacers on eBay that go from 3/16" to 6mm. I was then able to source some GT2 6mm shaft pulleys! Right now I'm looking at the following math.
x2 750kv Outrunner motors on 3s Lipo = 11.1volts*750 = 8,325 Max RPM
x2 750kv Outrunner motors on 2s Lipo = 7.4volts*750 = 5,550 Max RPM
Geared down 2:1 (20 tooth motor Pulley and 40 tooth output shaft) = 8,325/2 = 4162.5 Final RPM
Geared down 2:1 (20 tooth motor Pulley and 40 tooth output shaft) = 5,550/2 = 2775 Final RPM
I really like how the math is working out. The target RPM for the Dumas Props is 2-3k RPM. If I want to speed around I can run 3s or tool around on 2s.
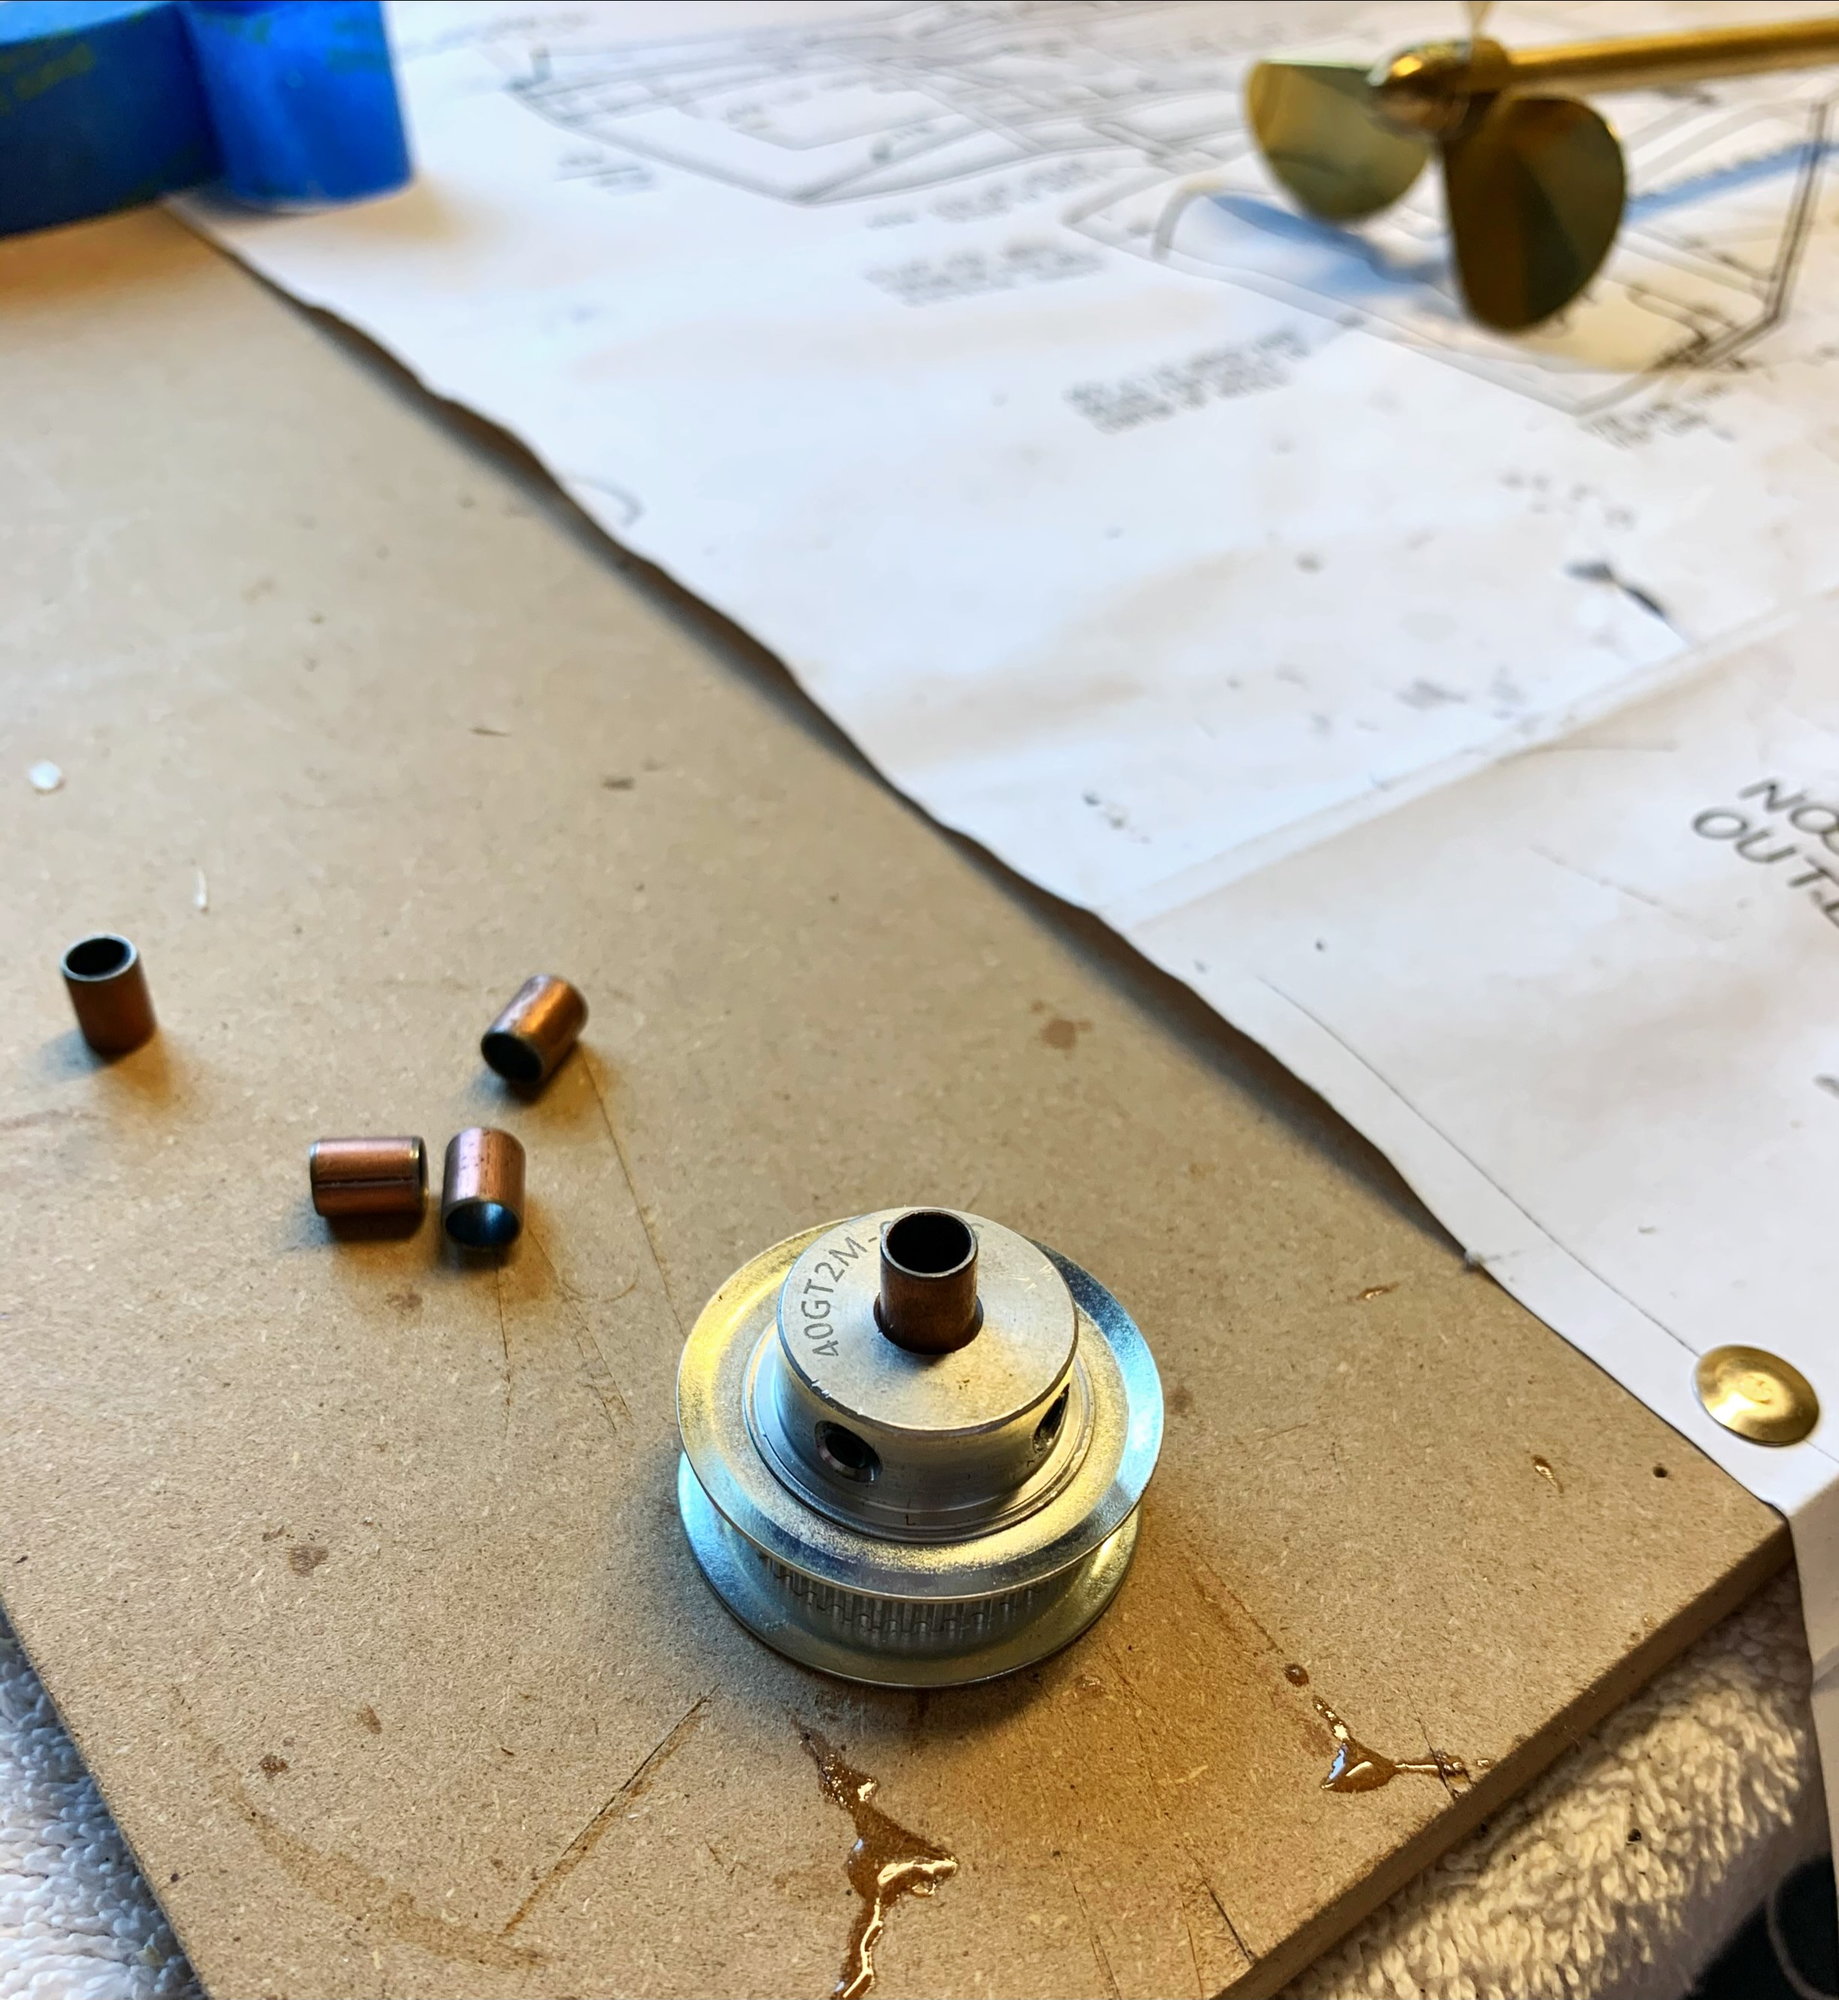
Using a hammer, I tapped the spacers into each side of the 40 Tooth Pulley. Nice and tight fit!
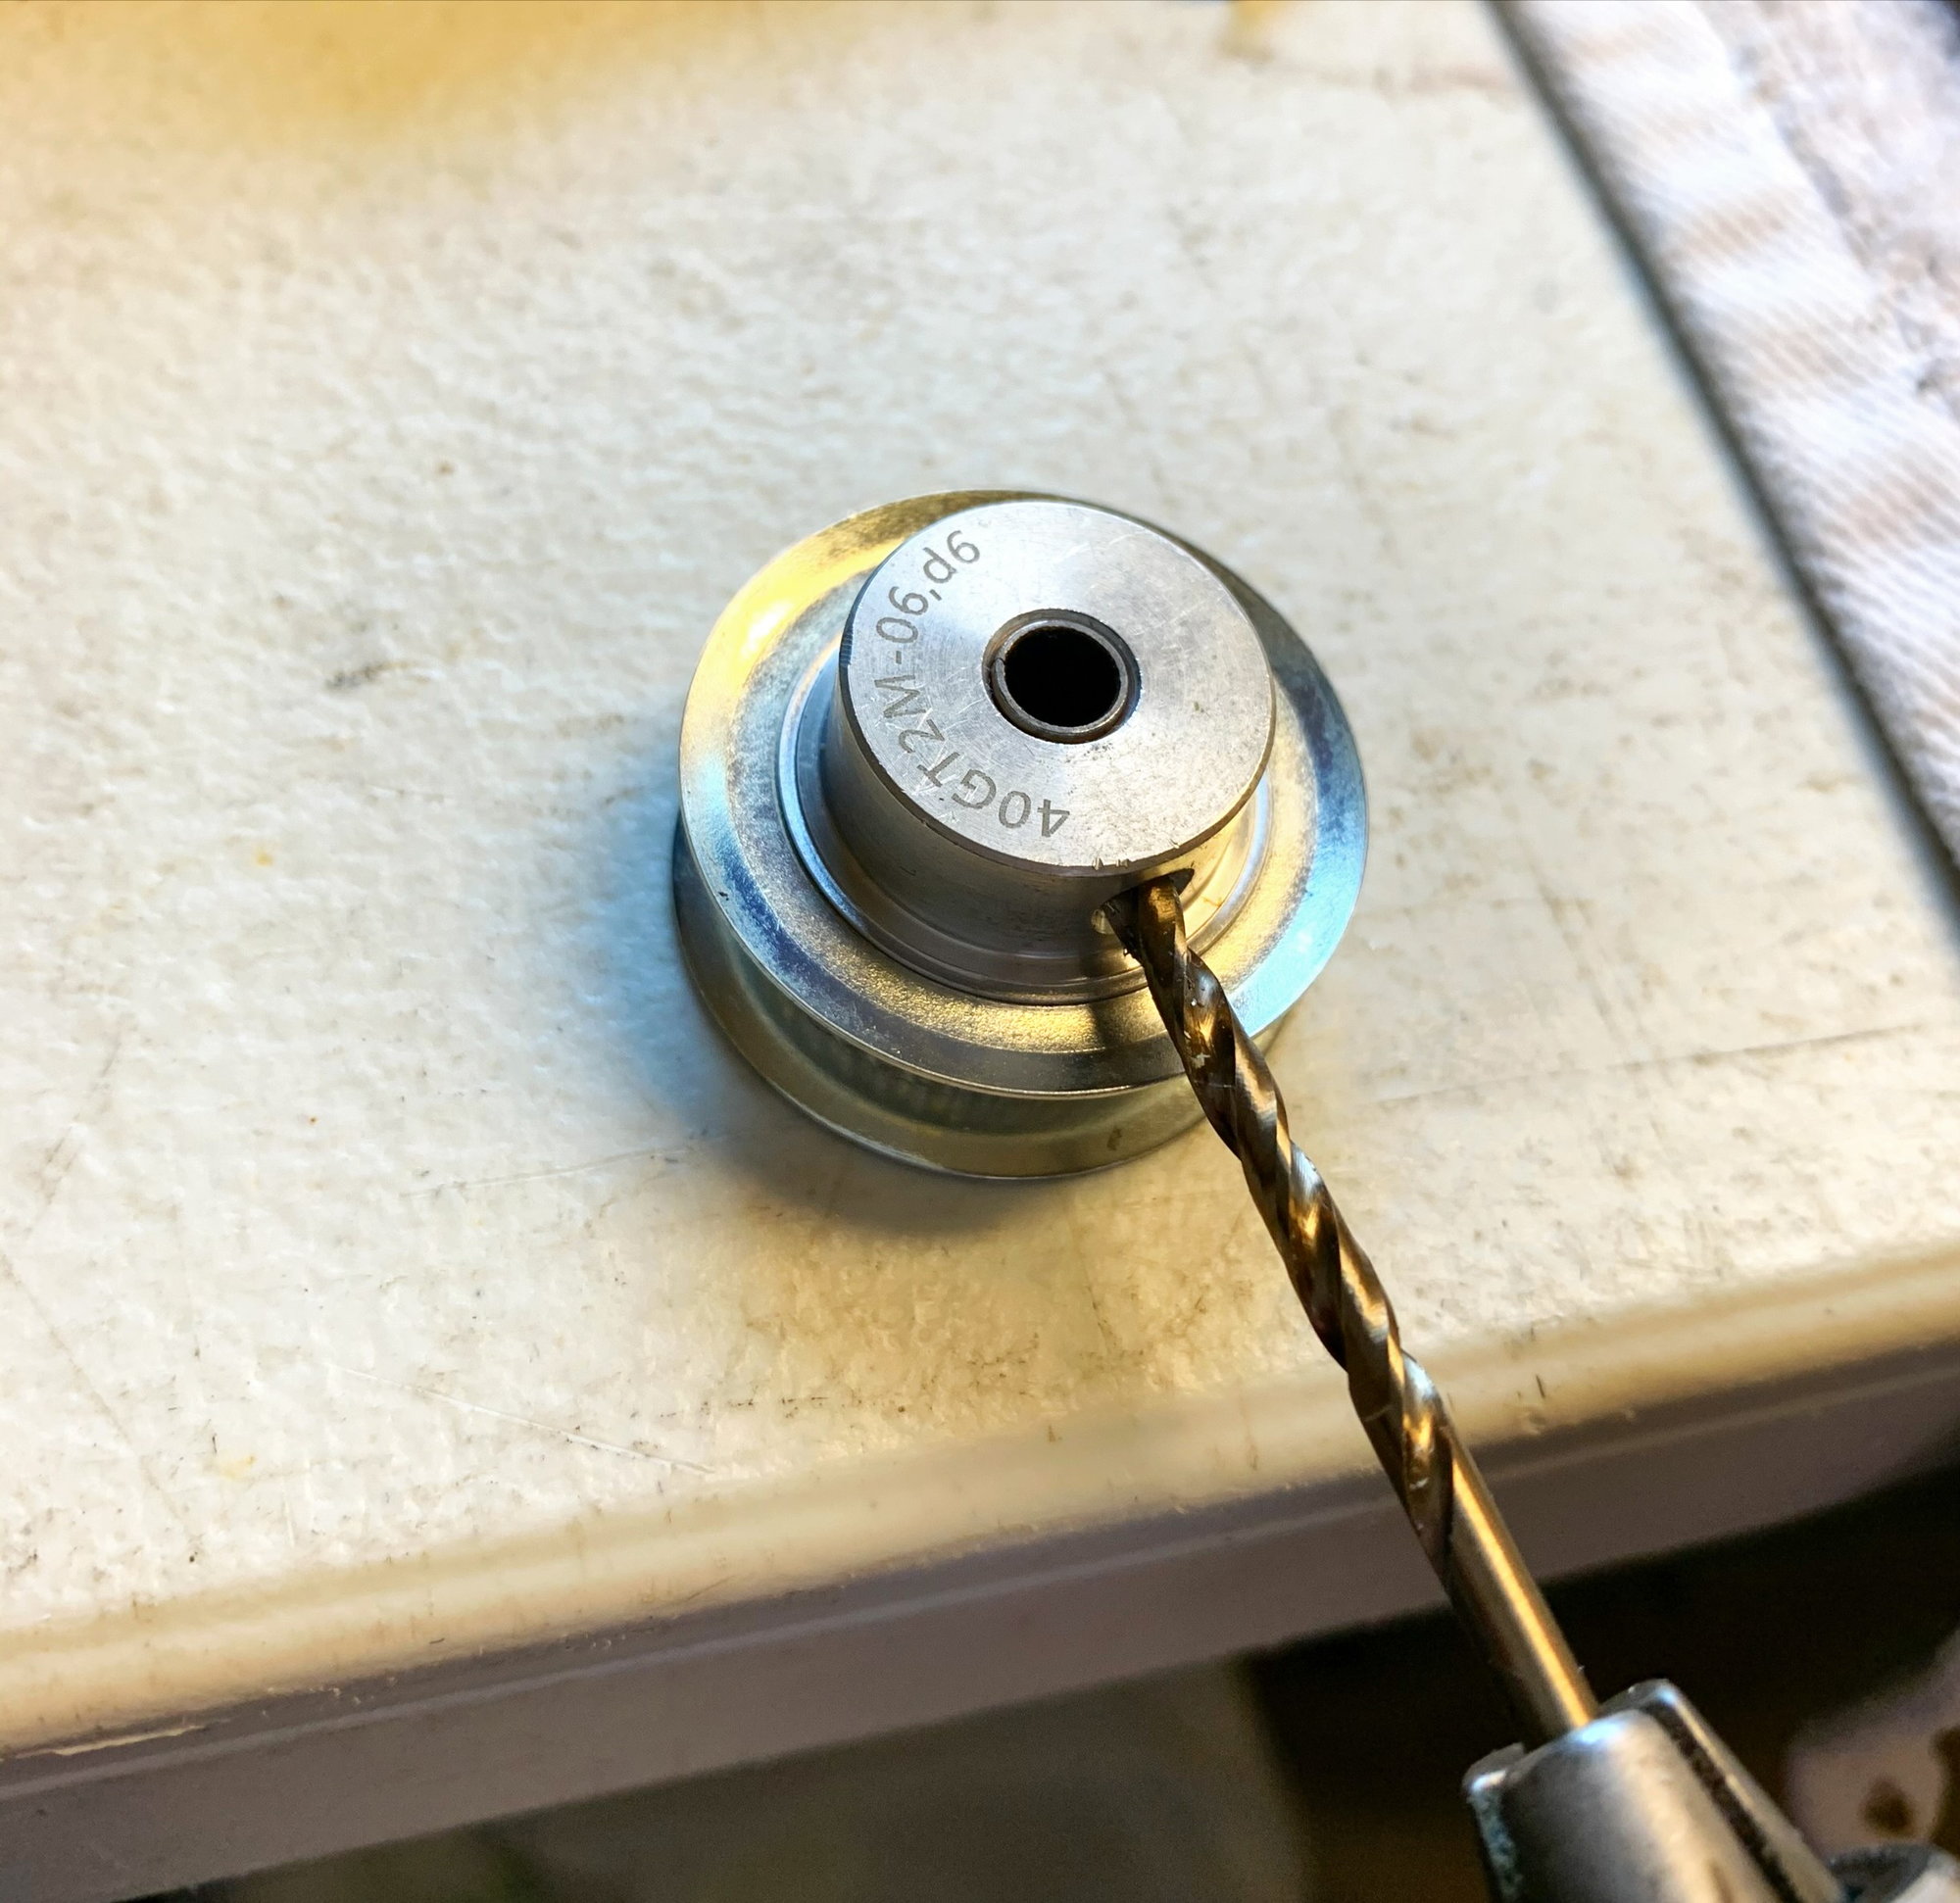
Then I used a 3.2mm drill bit to create holes in the spacers, while trying not to hit any threads for the set screws.
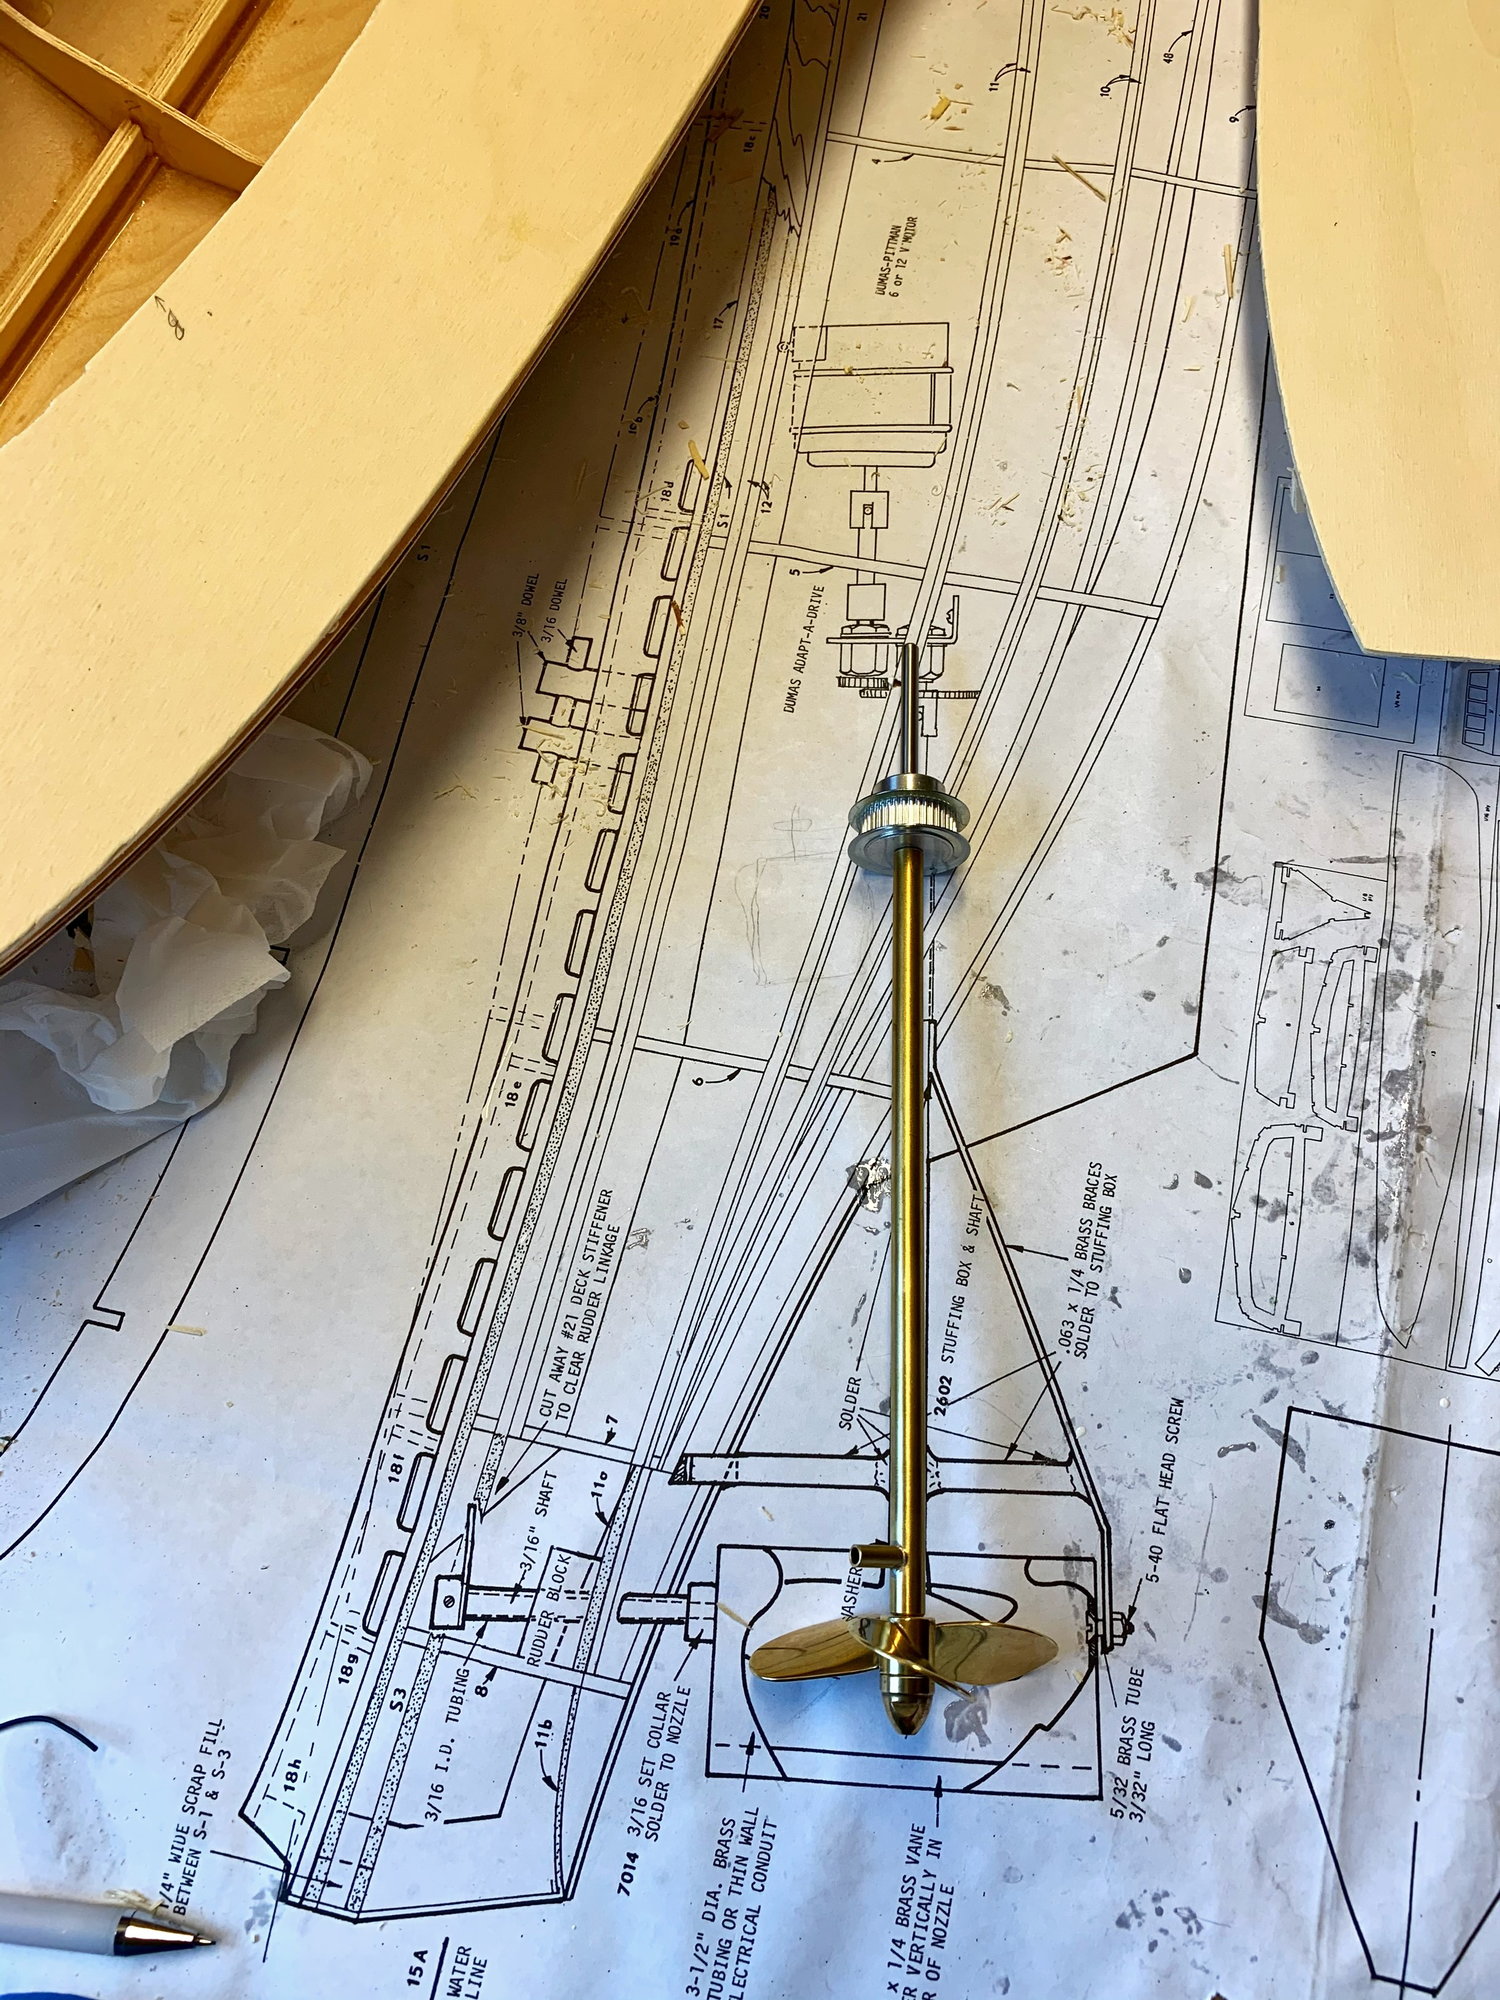
I will have to shorten the shaft, but everything is lining up just how I want it! I'm trying to keep all drive train elements behind bulkhead number 5.
x2 750kv Outrunner motors on 3s Lipo = 11.1volts*750 = 8,325 Max RPM
x2 750kv Outrunner motors on 2s Lipo = 7.4volts*750 = 5,550 Max RPM
Geared down 2:1 (20 tooth motor Pulley and 40 tooth output shaft) = 8,325/2 = 4162.5 Final RPM
Geared down 2:1 (20 tooth motor Pulley and 40 tooth output shaft) = 5,550/2 = 2775 Final RPM
I really like how the math is working out. The target RPM for the Dumas Props is 2-3k RPM. If I want to speed around I can run 3s or tool around on 2s.
Using a hammer, I tapped the spacers into each side of the 40 Tooth Pulley. Nice and tight fit!
Then I used a 3.2mm drill bit to create holes in the spacers, while trying not to hit any threads for the set screws.
I will have to shorten the shaft, but everything is lining up just how I want it! I'm trying to keep all drive train elements behind bulkhead number 5.
Last edited by birdo; 05-03-2021 at 01:12 PM.
The following users liked this post:
Martin H (08-23-2021)
05-05-2021 | 07:10 AM
#18
Thread Starter
Member
Wired up the Radio, Motors, ESCs, and Servo last night. Everything is working. Using my hands I rigged up the pulleys and prop. The slowest speed is very slow, going to be happy with this setup!
05-05-2021 | 04:58 PM
#19

What are you using for ESC's?
The following users liked this post:
Martin H (08-23-2021)
05-06-2021 | 09:09 AM
#22
Thread Starter
Member
I cut the wheel house section out early, it makes gluing the final top pieces in place much easier. I will be epoxying the wheel house section as well today(supports underneath). I test fitted my water pump, and it fits in the bilge well. I will have to notch the wheel house support in one area to clear the pump.
05-07-2021 | 01:19 PM
#23
Thread Starter
Member
Got some more goodies in the mail today! I'll be waiting another week or three for my Kort Nozzles to arrive from Great Britain.
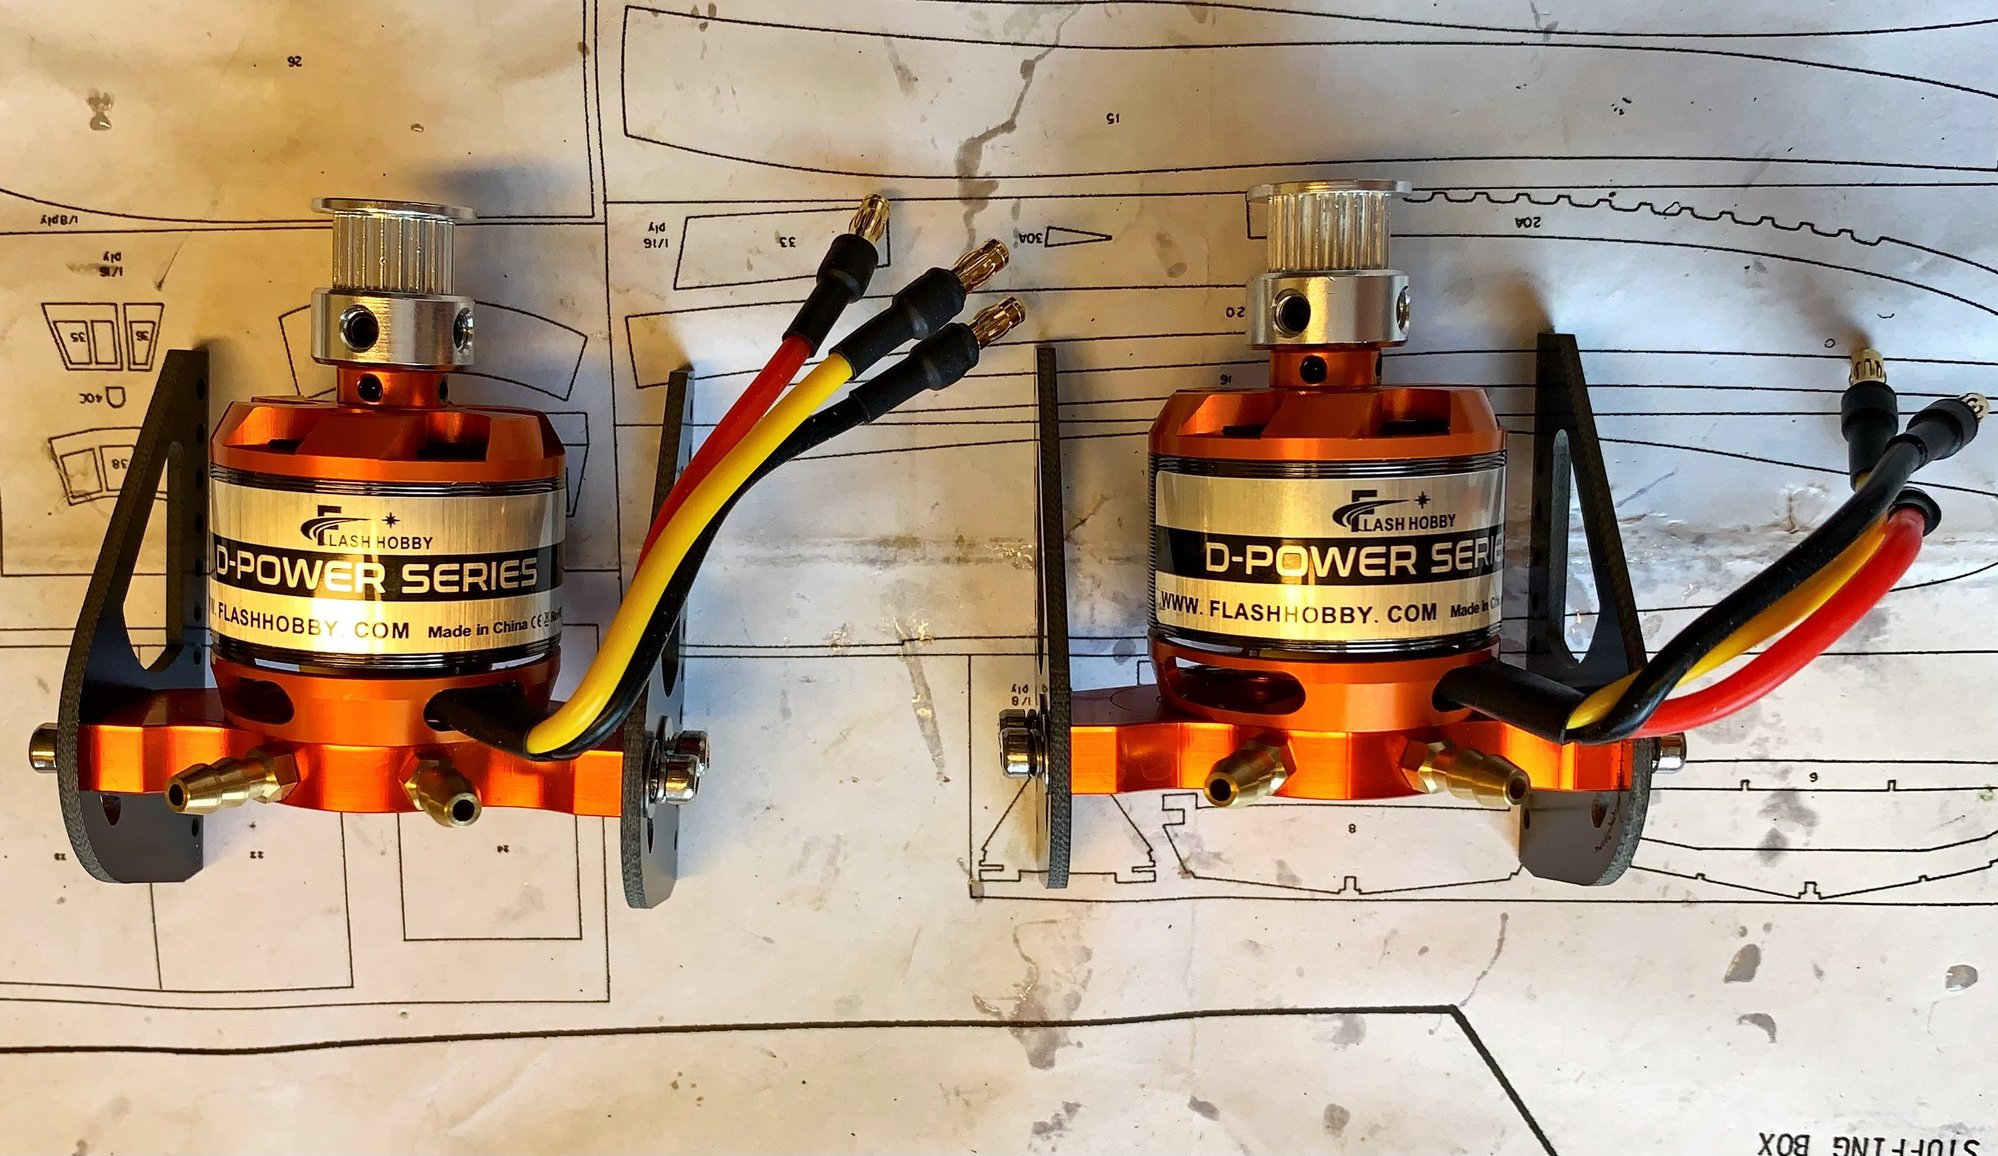
"Offshore Electrics" Water cooled Motor mounts. Perfect for these Outrunner motors! Colors almost match too
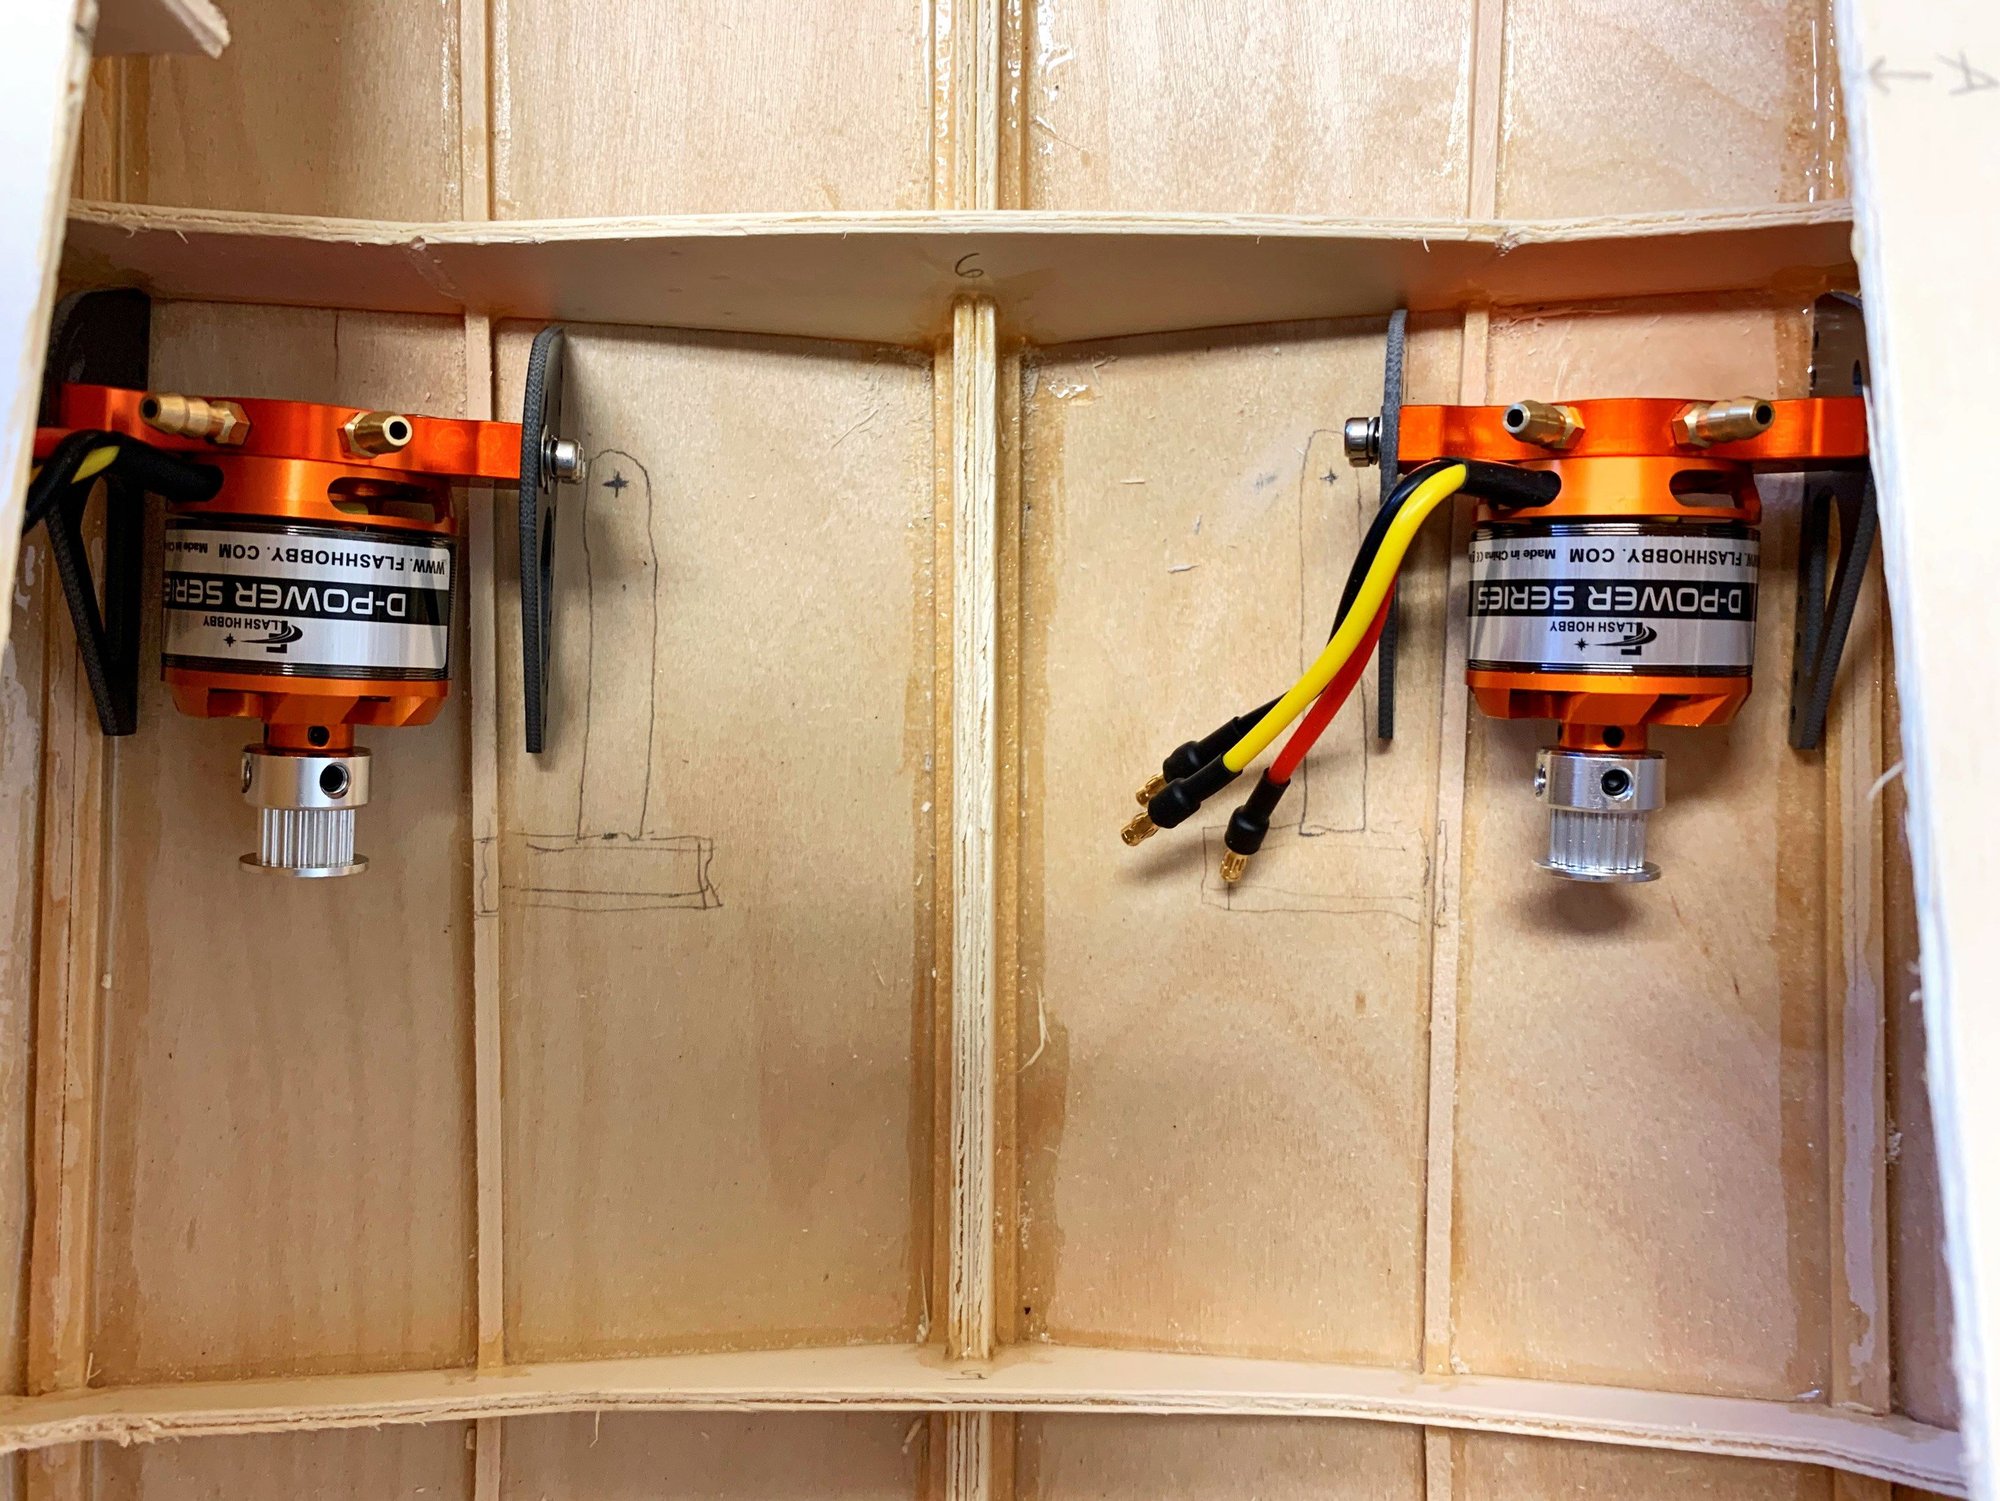
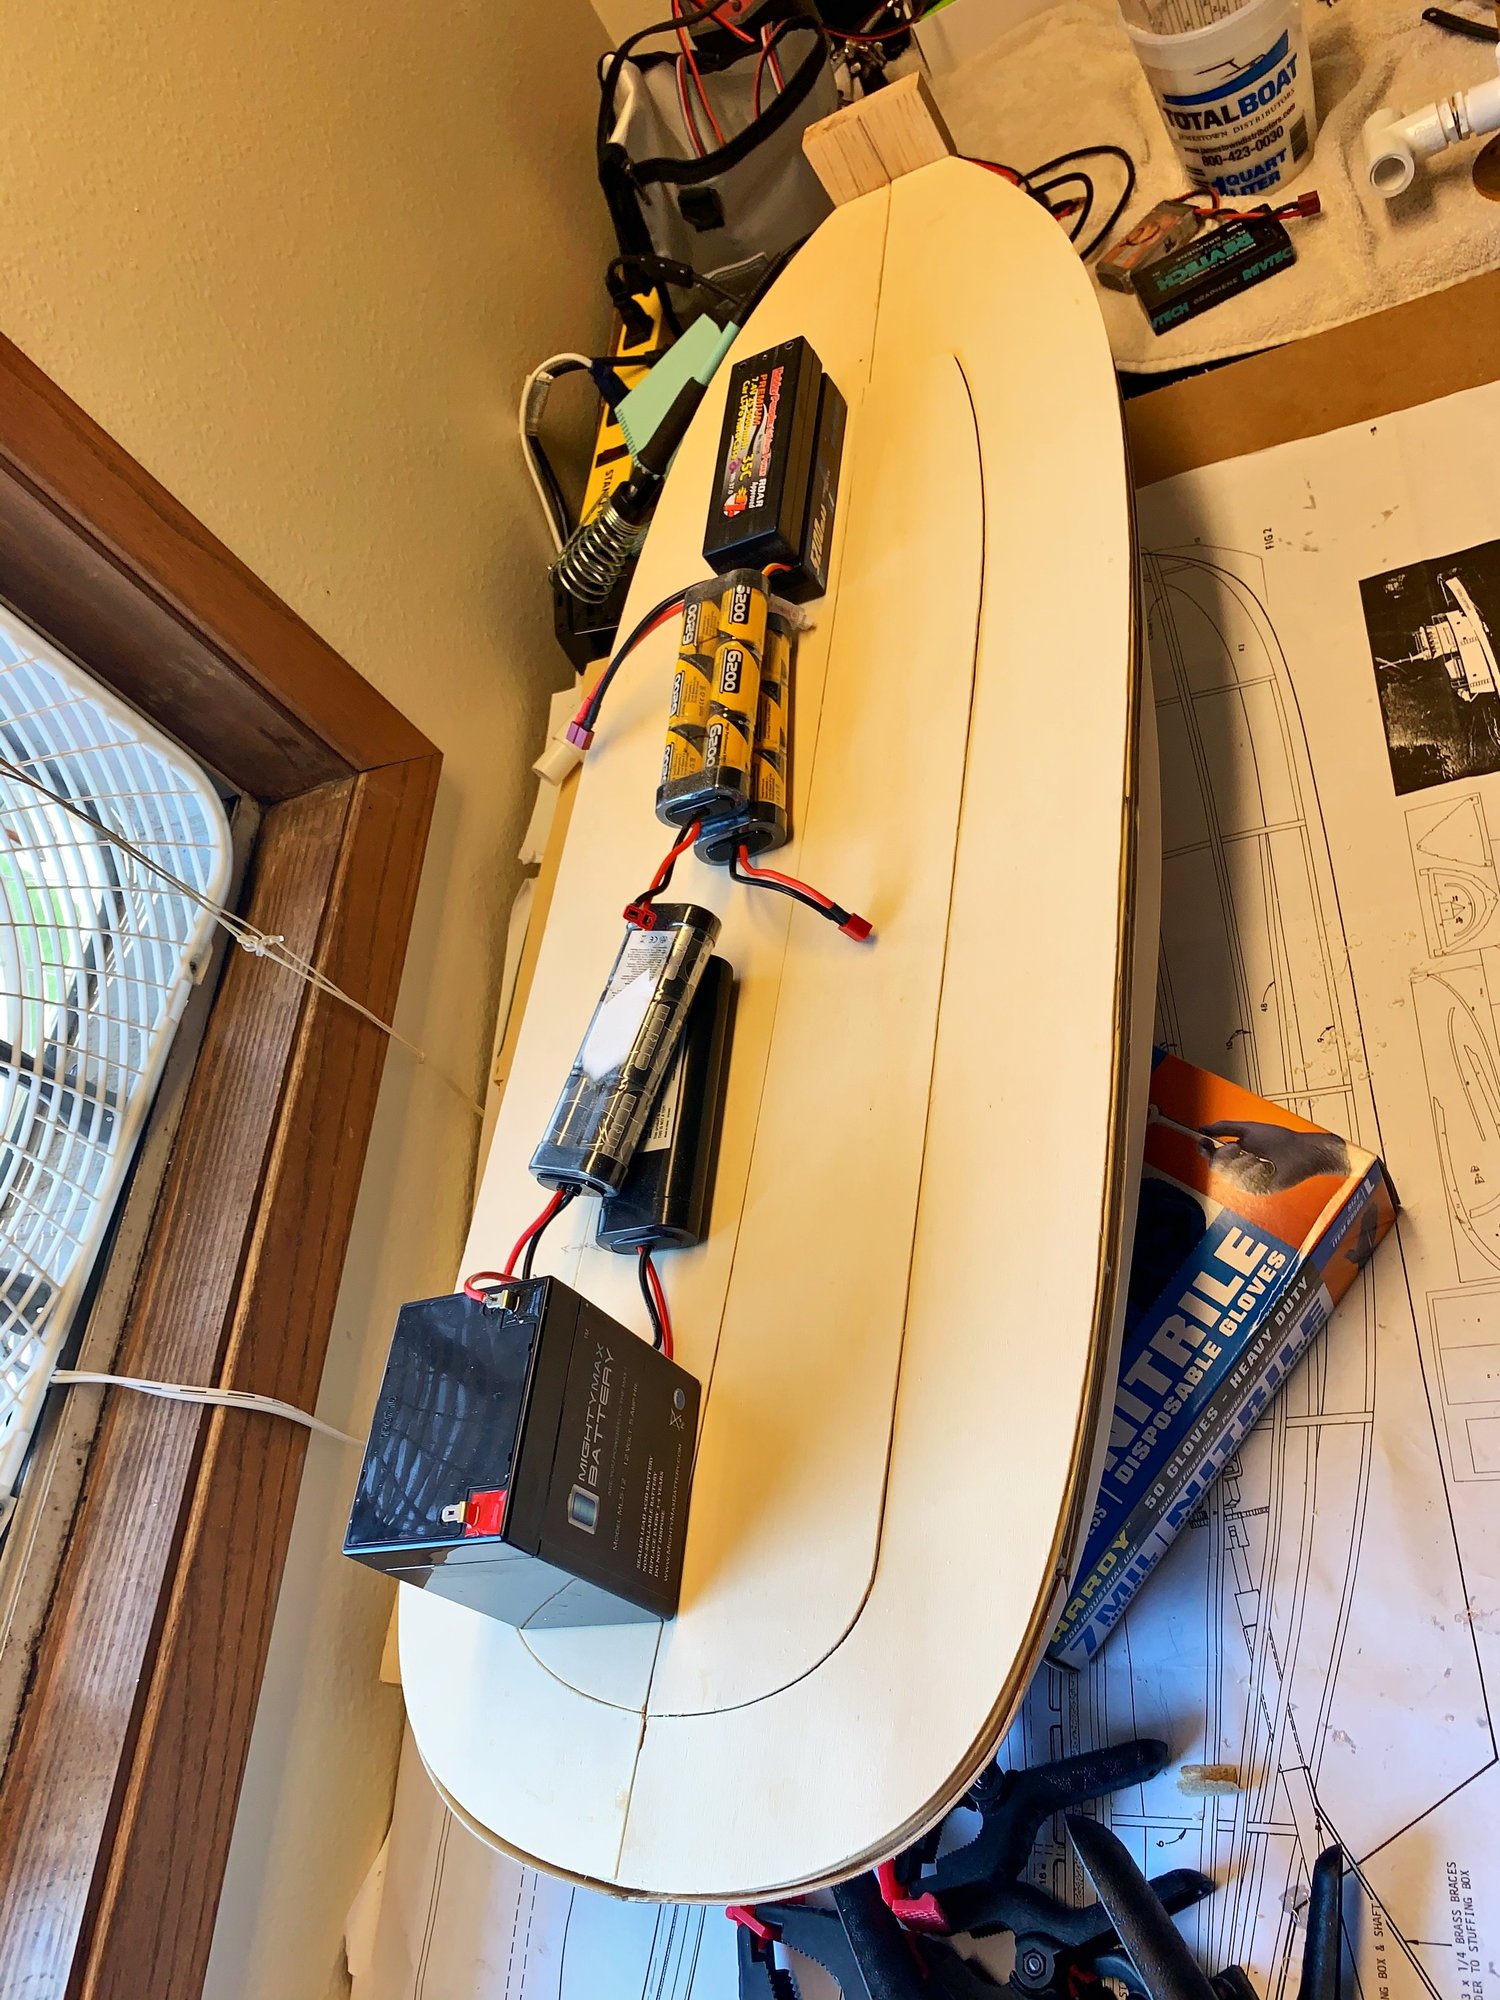
Everything propulsion is going to fit within two bulkheads, one chamber. Motors, Driveshafts, Batteries and ESCs. Radio and Rudder Servo will be in the final chamber alone from motors and escs.
"Offshore Electrics" Water cooled Motor mounts. Perfect for these Outrunner motors! Colors almost match too
Everything propulsion is going to fit within two bulkheads, one chamber. Motors, Driveshafts, Batteries and ESCs. Radio and Rudder Servo will be in the final chamber alone from motors and escs.
The following users liked this post:
Martin H (08-23-2021)

