


DIY german E50 build
 01-20-2012 | 06:04 AM
#26

Thread Starter

Well, spent about 2 hours last night working on the upper and lower notched hull seam.......what a PIA! 4mm plastic really makes it tough. I had a feeling this was going to one of the toughest parts but I need to figure this trick out because I am going to use it with my turret.....can't wait to start that.I have a lot of ideas forthat one that will be kinda fun. I will post some more pics this weekend....
 01-20-2012 | 06:17 AM
#27
Junior Member
Joined: Jan 2012
Posts: 18
Likes: 0
Received 0 Likes
on
0 Posts
From: chatham, ON, CANADA
nice thing about the king tiger and the E50 is that they were going to be built using alot of the same parts and fetures on the same asembly line in the factory, would have been cool to see in battle if they built it in time.....
01-23-2012 | 05:36 PM
#28
Thread Starter
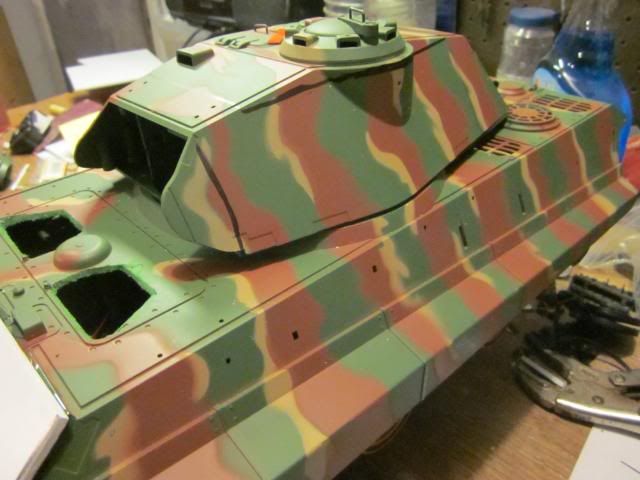
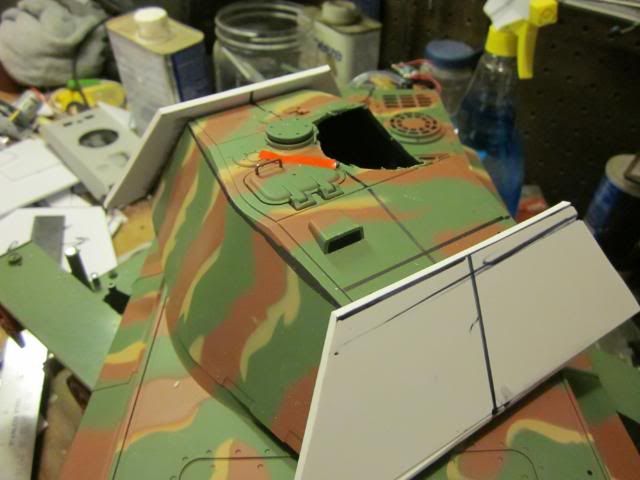
Well, been cutting and chopping again.....sarting the redo on the upper armor plate....

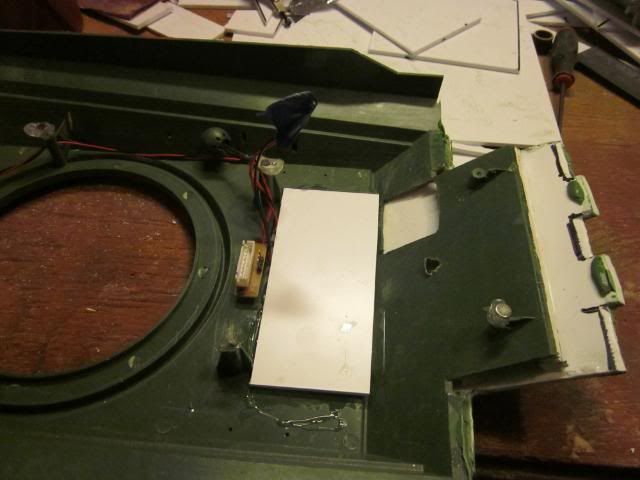
and let the glue sit....but I still have some more time so its on to the turret....time to brake down the sucker...
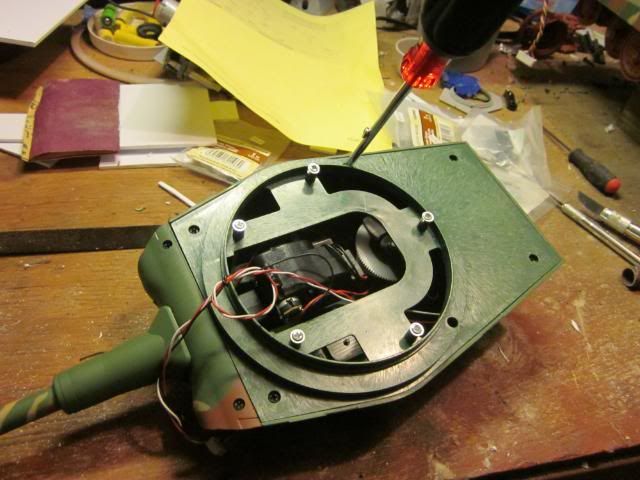
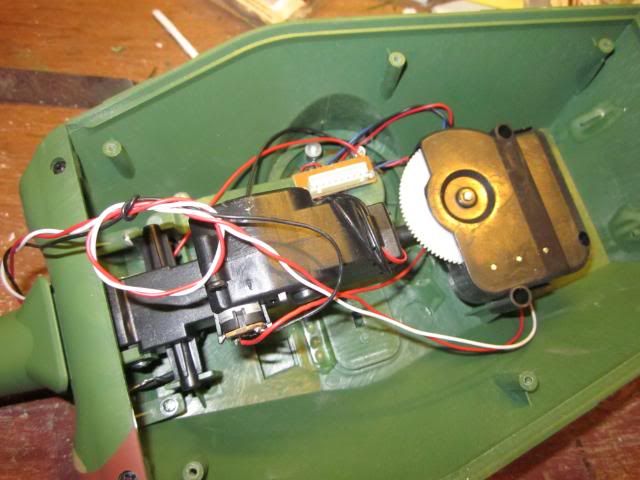
note that all of the workings of the turret aremounted on the roof....
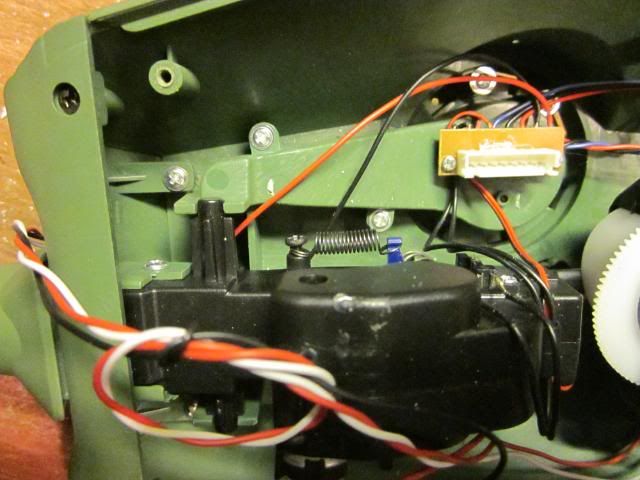

Time for some thinking......
and let the glue sit....but I still have some more time so its on to the turret....time to brake down the sucker...
note that all of the workings of the turret aremounted on the roof....
Time for some thinking......
01-23-2012 | 05:53 PM
#29
Thread Starter
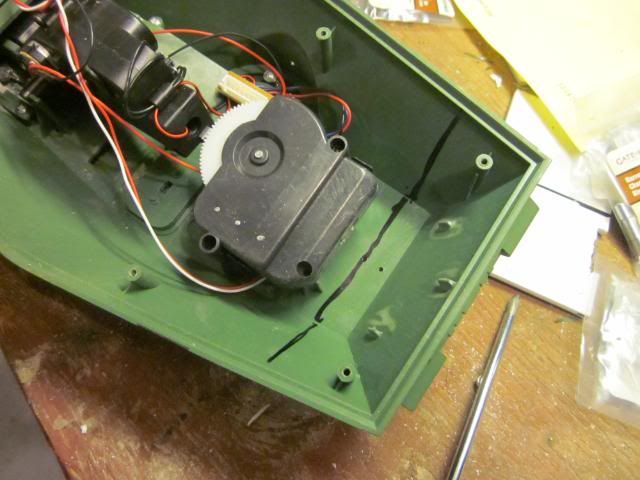
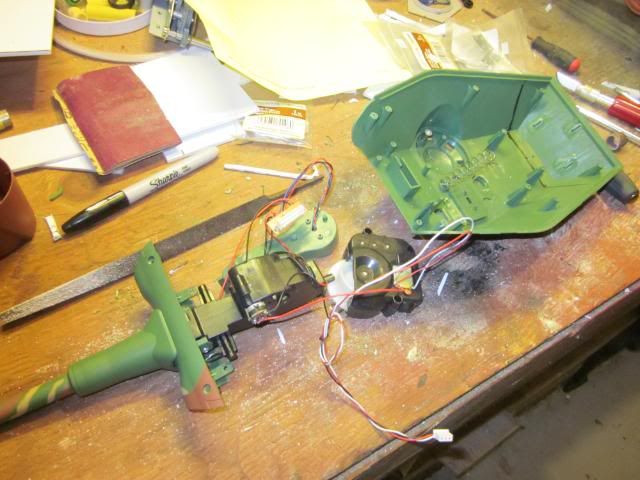
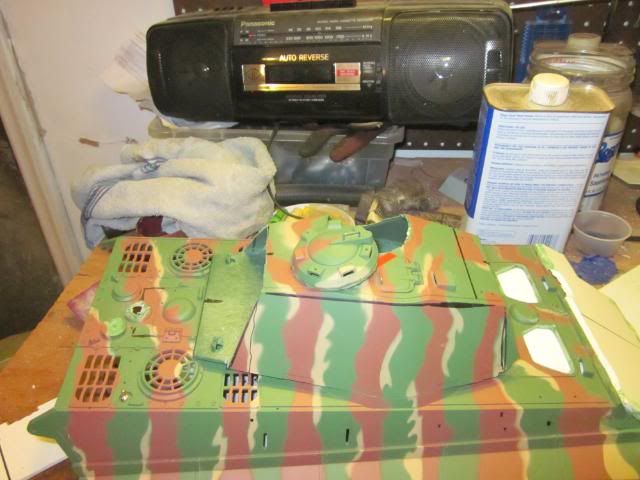
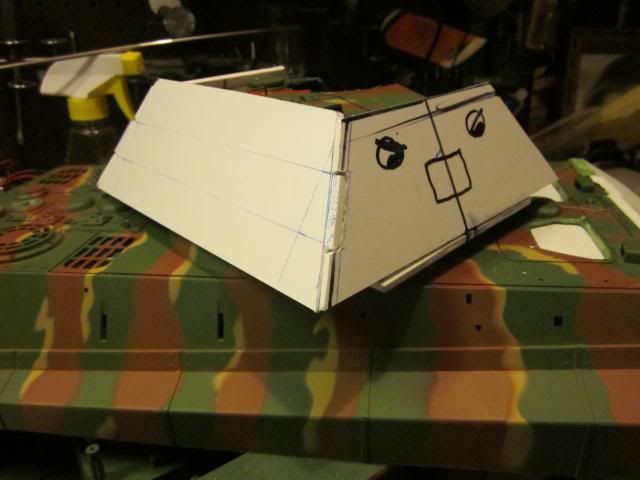
Well here is what i have to work with.....
The lines I have marked on the turret are how much I can cut off the turret with out hitting something I need in the roof of the to make the guts work....
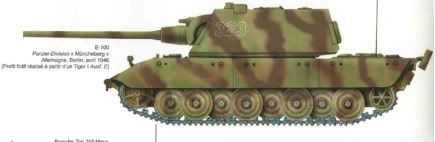
So what should I design? I am kinda thinking that if the germens had had time, they would have chosen todesign something that was easy to produce...so the curver king tiger sides would not be an option imo. I think they would havegone with something like on of the E100designs...just smaller for the king tiger 88mm...some thing like this....

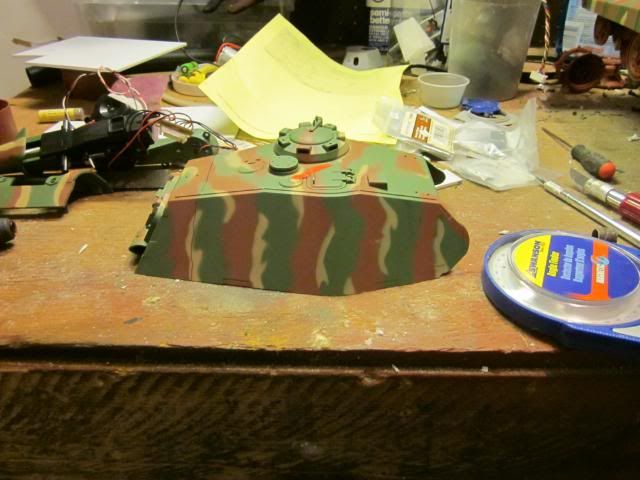
So off come the ends of the prosche turret...and on go some triangles with the slope I want for the turret....
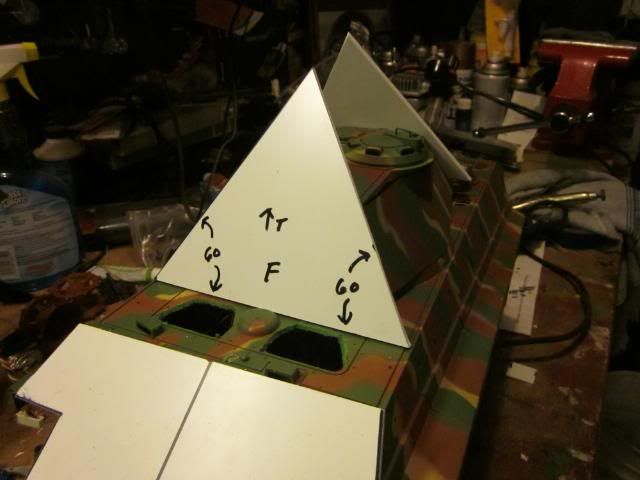
Why triangles?...because I am not sure how tall I want the turret to be....on to more thinking.....
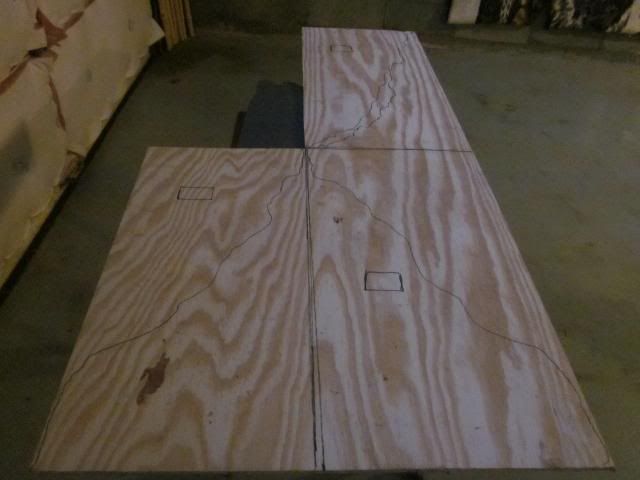
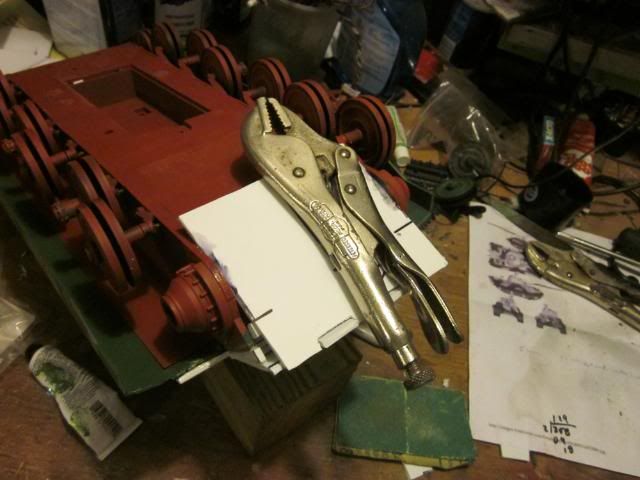
In the mean time...I picked up something they were throwing away at work for some housing for the nead battle field...should be able to get 3 corners of a damaged house out of these.....to the jig saw......
The lines I have marked on the turret are how much I can cut off the turret with out hitting something I need in the roof of the to make the guts work....
So what should I design? I am kinda thinking that if the germens had had time, they would have chosen todesign something that was easy to produce...so the curver king tiger sides would not be an option imo. I think they would havegone with something like on of the E100designs...just smaller for the king tiger 88mm...some thing like this....
So off come the ends of the prosche turret...and on go some triangles with the slope I want for the turret....
Why triangles?...because I am not sure how tall I want the turret to be....on to more thinking.....
In the mean time...I picked up something they were throwing away at work for some housing for the nead battle field...should be able to get 3 corners of a damaged house out of these.....to the jig saw......
01-24-2012 | 03:39 AM
#30

Looks great so far Scott. had me worried there for a little while with that major surgery on the hull but it seems to be coming together nicely.<div>Remember the Germans took their angles from the vertices so it is easy to get them wrong. We tend to set angles fro horizontal in fabrication in this country. </div>
01-24-2012 | 05:25 AM
#31
Thread Starter
Yup, If you look at the upper hull and the front of the turret...they are both 60 degrees, one our way, one their way...I still have some work one the suspension, the last wheel on the right side hits the idler. I am going to have to cut it out and move it forward about 2mm....funny since I did not move ether the ft or rear suspension mounting points on ether side. Just the act of makeing the rear wheel a inner wheel made it hit the idler. It did not do this on the left side because the swing arm moves foward rather than rearward.....

 01-27-2012 | 05:27 AM
#34
Thread Starter
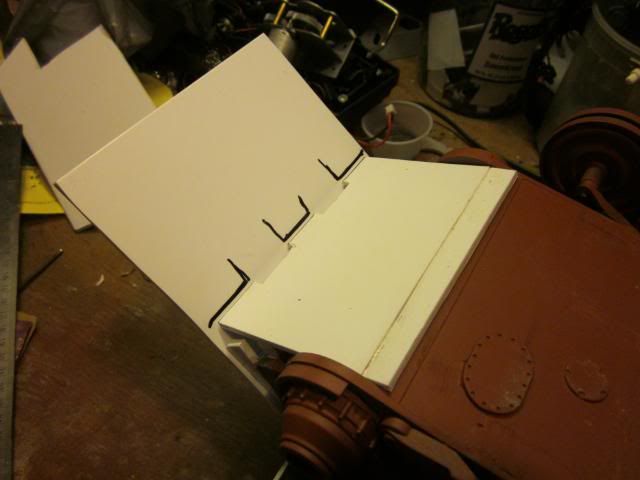
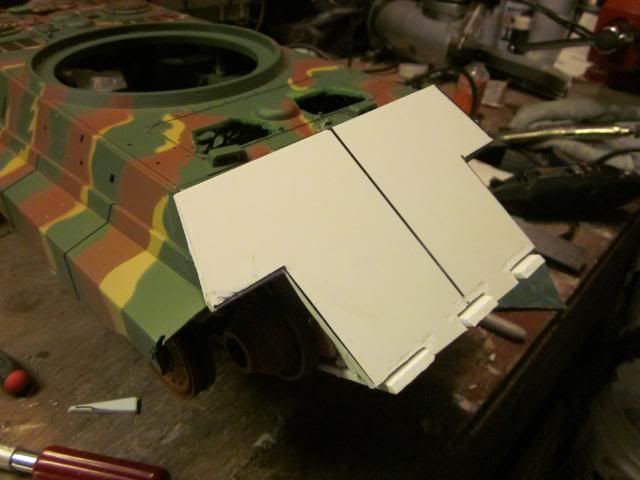
I'm back....started on the lower front plate.....

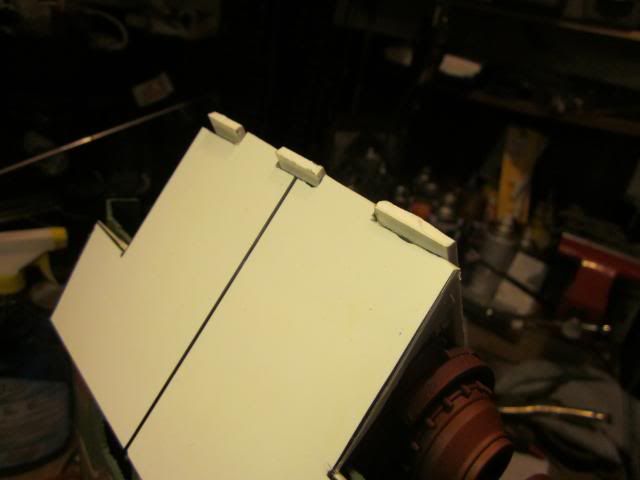
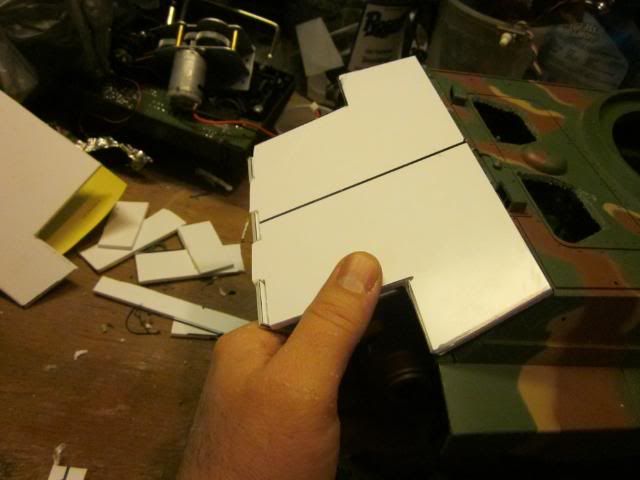
Hey, lets do something while the glue is setting....time for battle field stuff....
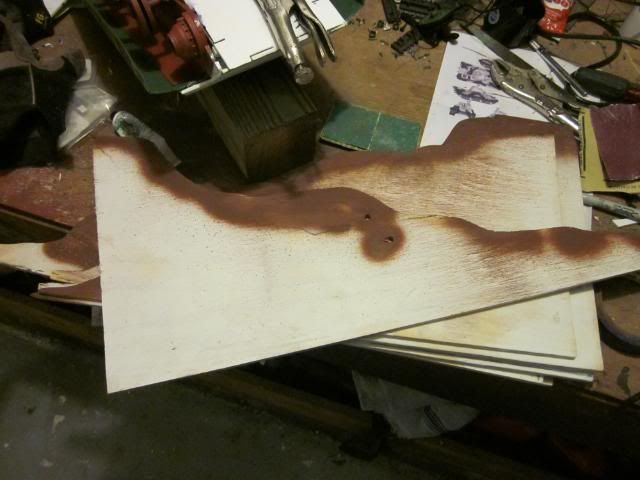
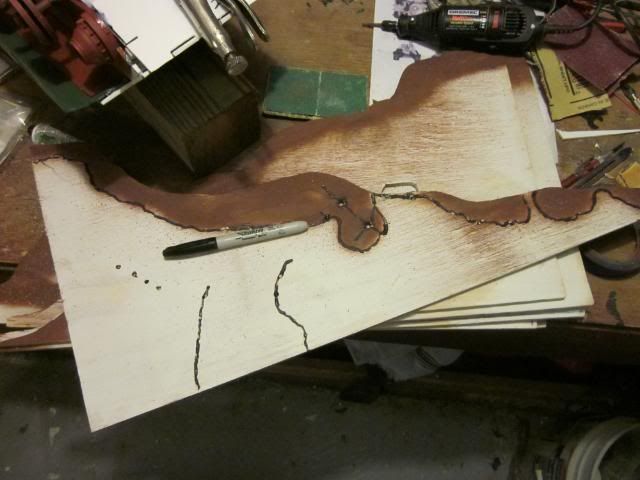
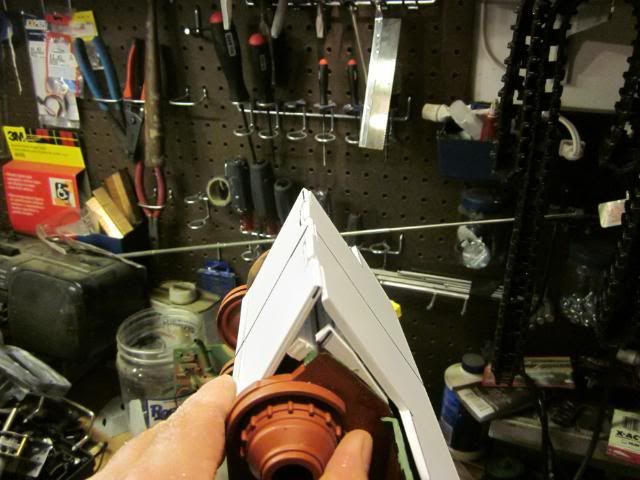
Add some hinges.....
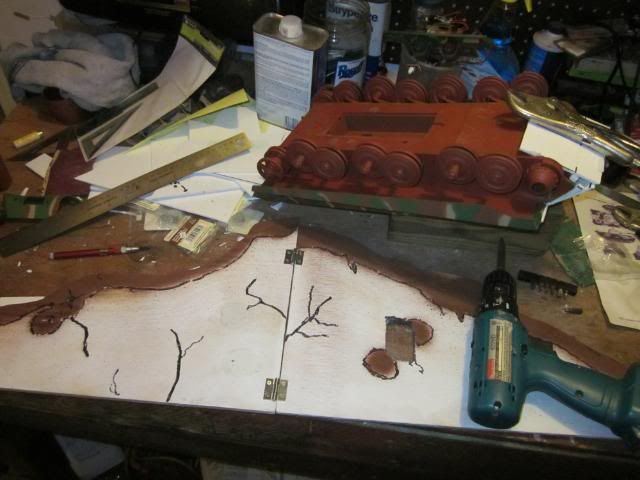

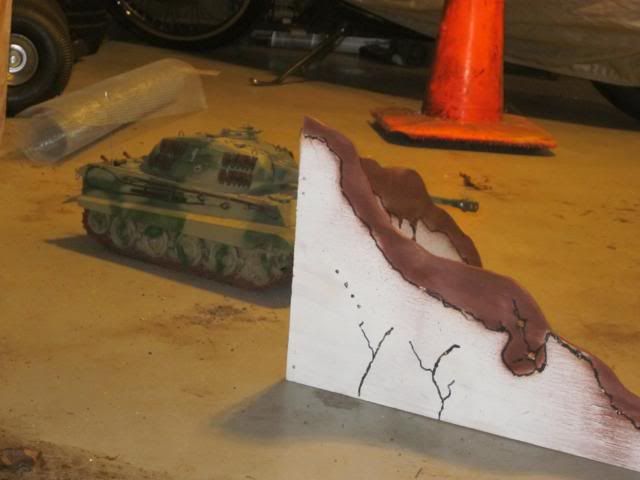
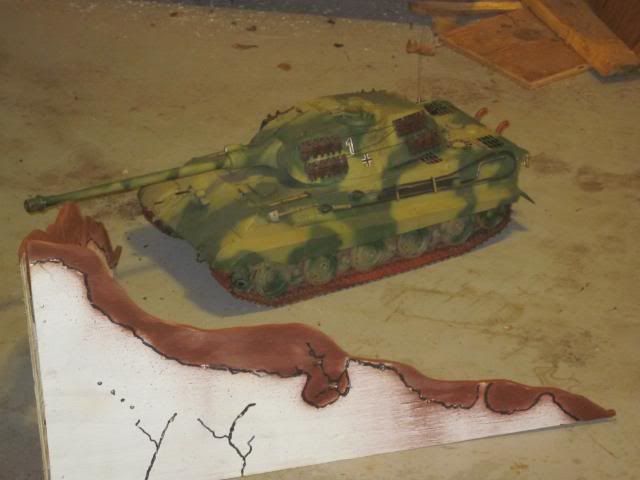
and the king tiger has some place to hide...
that was wednesday's work...
Hey, lets do something while the glue is setting....time for battle field stuff....
Add some hinges.....
and the king tiger has some place to hide...
that was wednesday's work...
01-27-2012 | 05:48 AM
#35
Thread Starter
Last night was productive.....started on the toeing hook mouning points.....

and then the mounts for the working hatches......
omg, what have I done!
here is the rear of the turret and the shelf for the front of the turret....
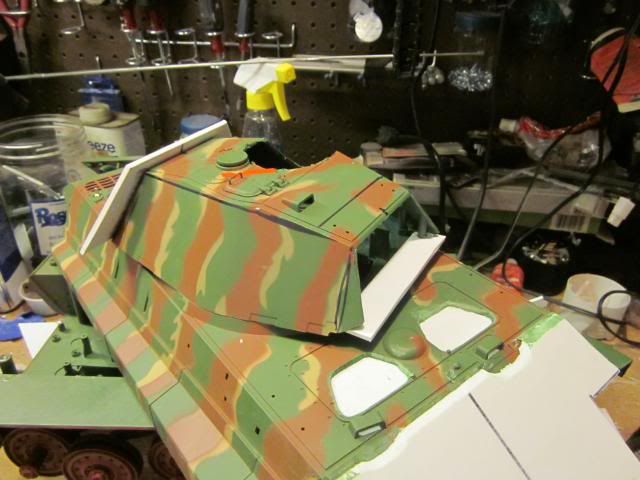
front of the turret....
another angle....
and the fitting of one side.....E50 mad!
I better do the other side.....
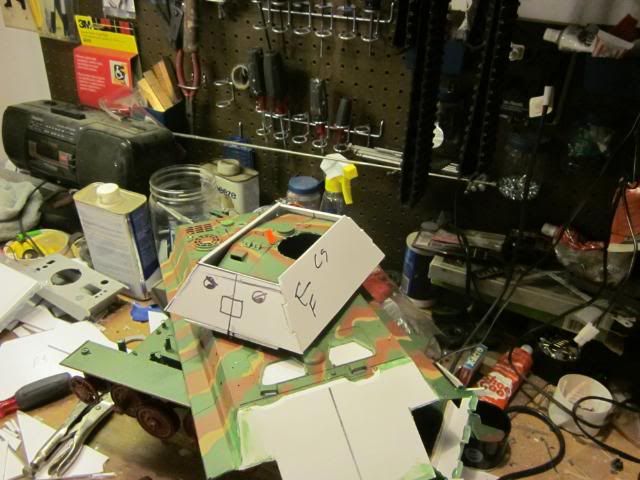
the e50 has a clubhouse on top of it.........Well the glue has set so back to the lower hull...

I'll see what I can get don this weekend...
and then the mounts for the working hatches......
omg, what have I done!
here is the rear of the turret and the shelf for the front of the turret....
front of the turret....
another angle....
and the fitting of one side.....E50 mad!
I better do the other side.....
the e50 has a clubhouse on top of it.........Well the glue has set so back to the lower hull...
I'll see what I can get don this weekend...
02-01-2012 | 06:19 AM
#36
Thread Starter
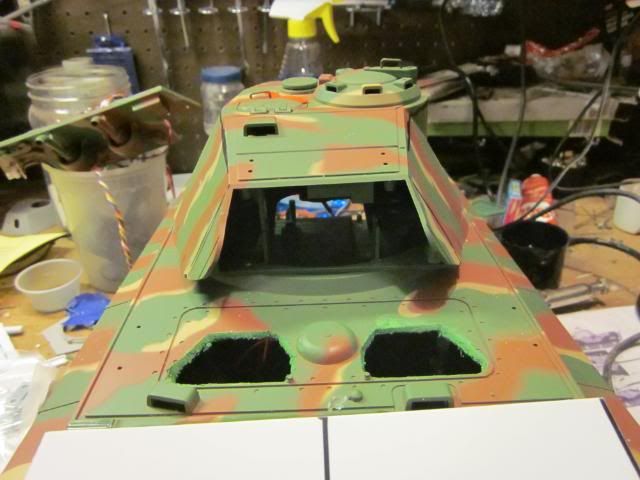
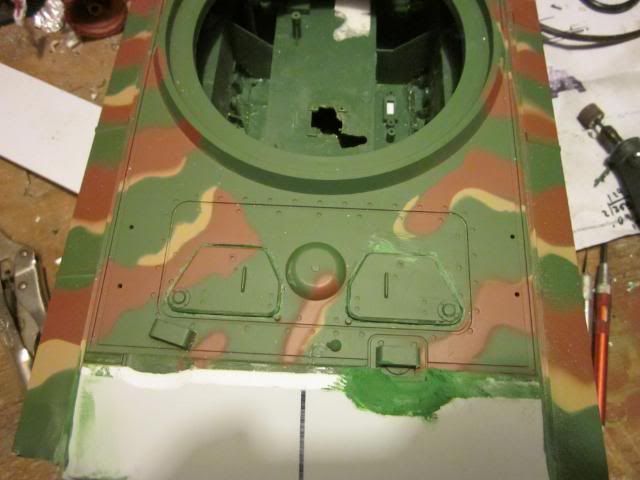
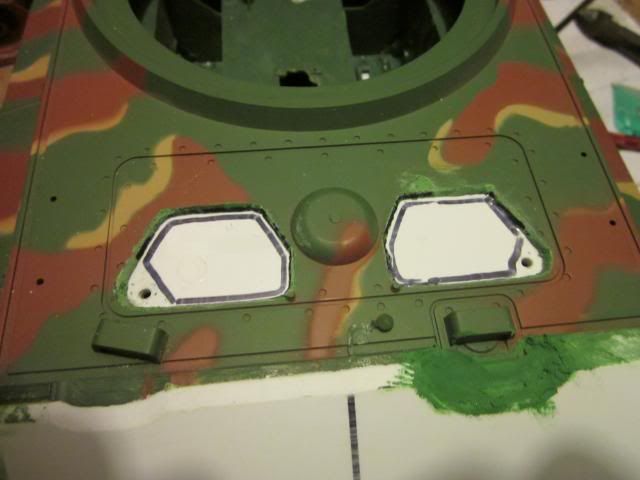
For the one or two people following this...here is the next step....hatches, they got to open imo. Here is how I make them work.....</p>
I already cut them out using the drill method. I cleaned up the edges and added some green puddy....I also added a sheet of 2.5mm plastic car under them...</p>
 </p>
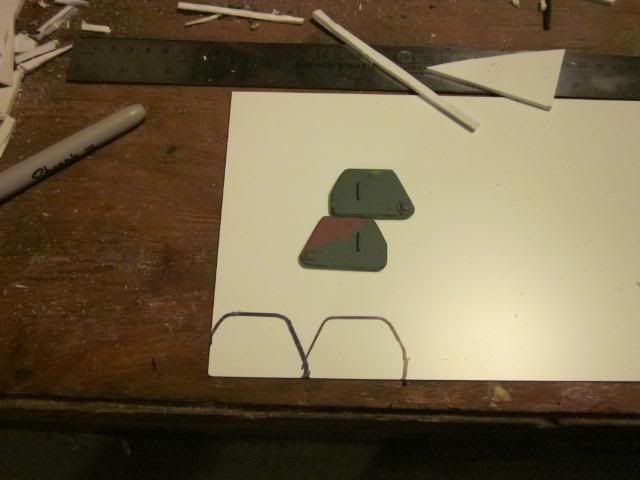
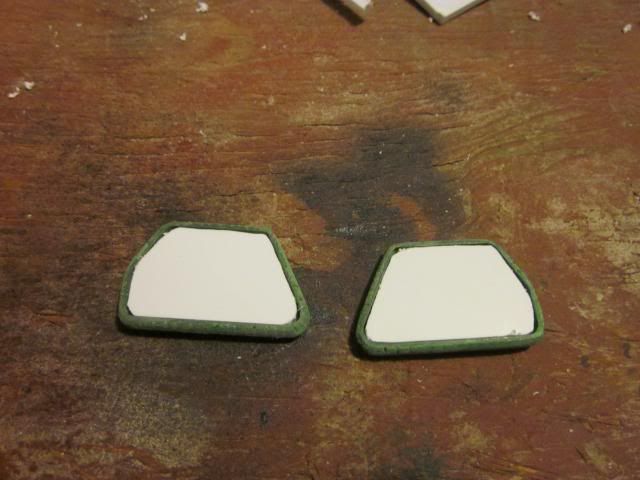
</p>next I need some liners for the under sides....</p>
 </p>
</p>and "like a glove!" * in the Ace Ventura voice*</p>
 </p>
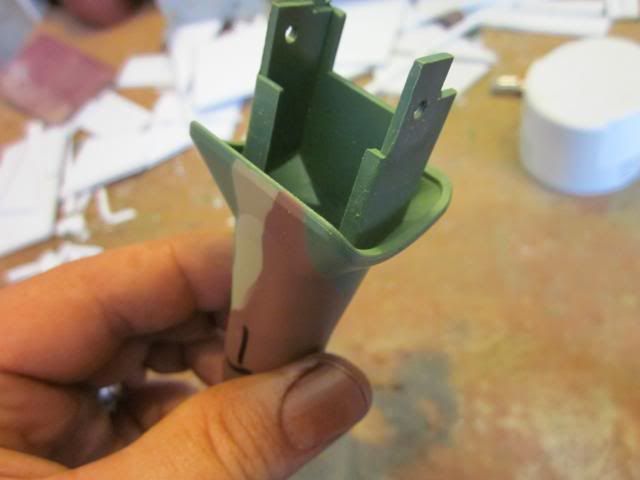
</p>next its time to find the center line for the mount....</p>
 </p>
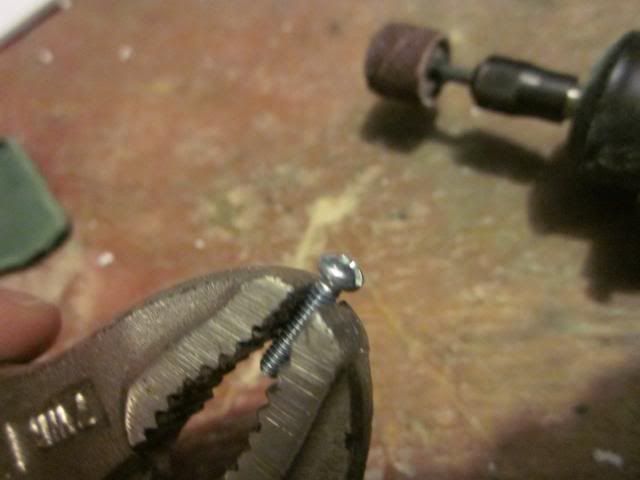
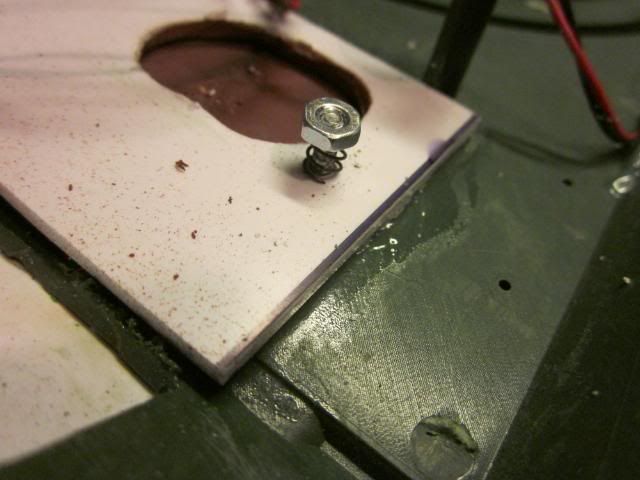
</p>Time to mod some small bolts.....</p>
 </p>
</p>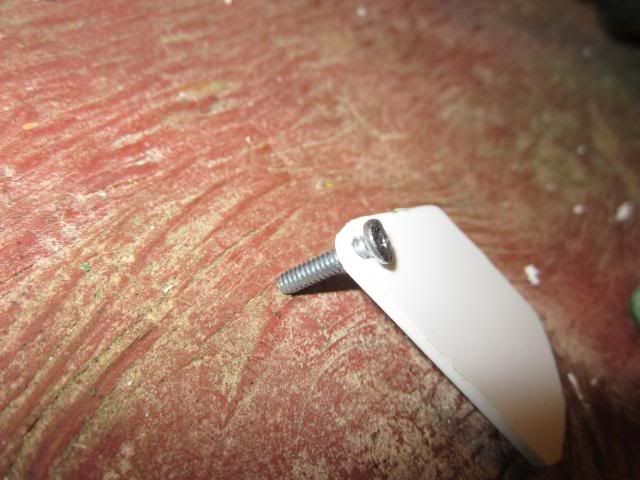 </p>
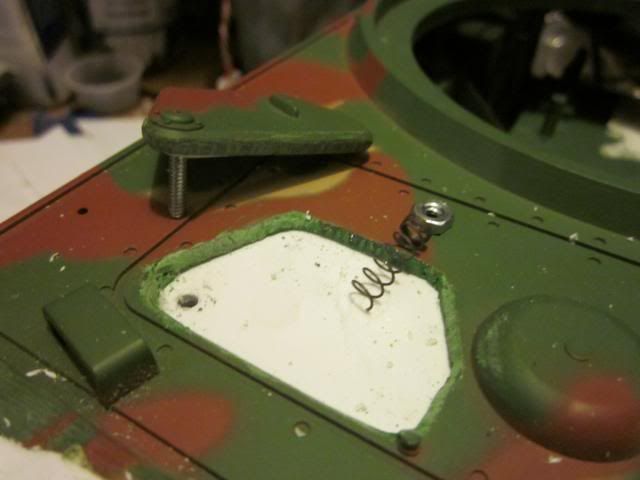
</p>then you sandwitch bolt in the liner and glue the whole mess togather...then add a small spring and a nut and tou have a spring loaded hatch...</p>
 </p>
</p>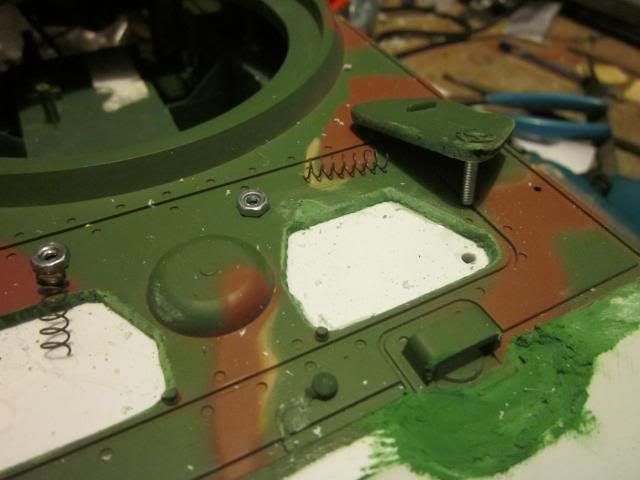 </p>
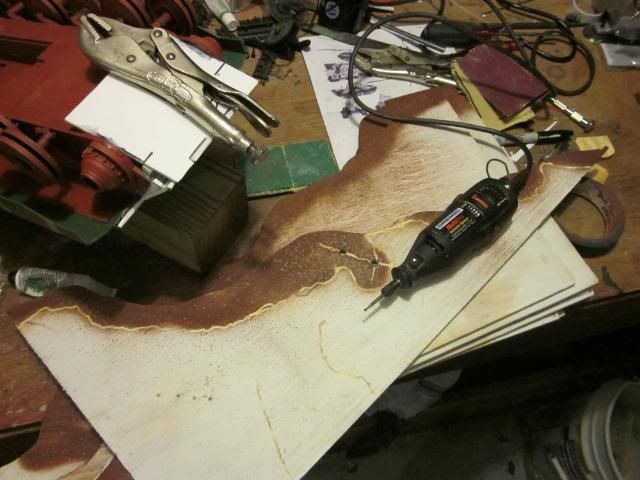
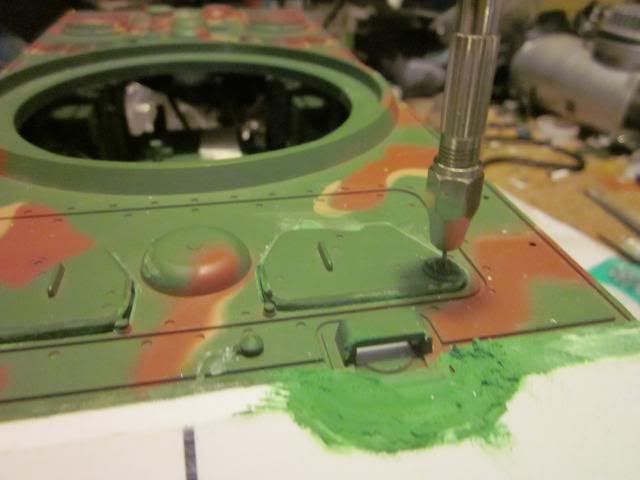
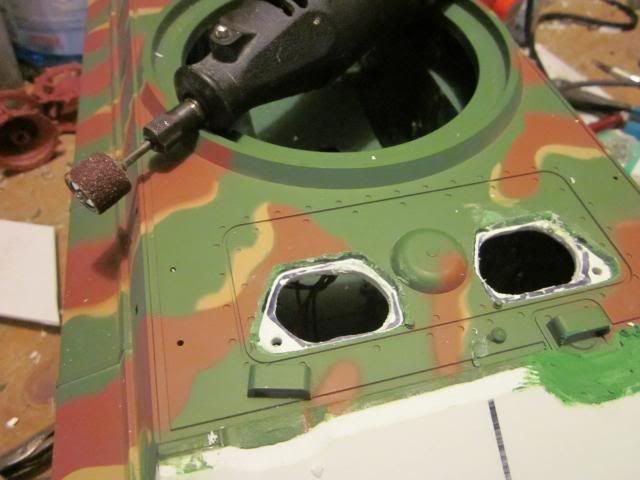
</p>Time to mark the hatch openings....</p>
 </p>
</p>and its dremmel time....</p>
 </p>
</p>well that was last night......</p>
02-01-2012 | 07:48 AM
#37
Well, it's looking ... different so far!  Sure hope you finish it. Don't know what I'm going to do with all these pictures of it then!!
Keep hard at it! Me and the other guy will continue to follow your progress!
~ Jeff
Sure hope you finish it. Don't know what I'm going to do with all these pictures of it then!! Keep hard at it! Me and the other guy will continue to follow your progress!
~ Jeff
02-01-2012 | 10:36 AM
#39
Thread Starter
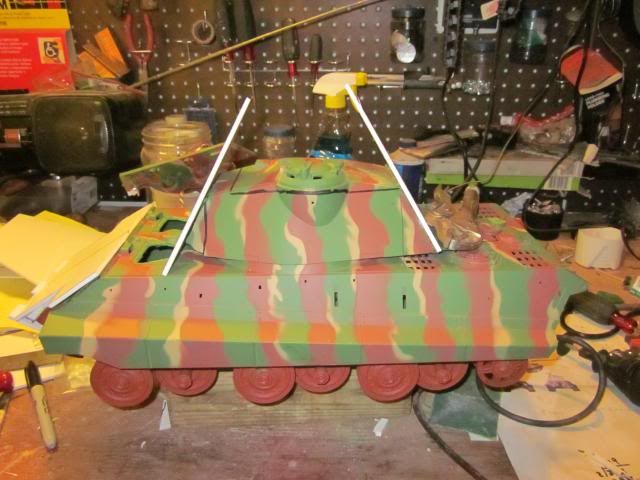
It will get done.....don't worry that was just a roughsnap togather of the turret, its not even glued. I am not happy with the top of hull clearance and I am thinking about a "brake line" in thesides to narrow the frontplate.....I am still thinking about making theturret lower. One thing I did not plan onwas the porsche turretkt'shad that huge razed ring on the hull. I want to cover that with the armor.

 02-01-2012 | 03:57 PM
#41
Senior Member
I'm following it too. So that is two confirmed "groupies" Scot...carry on. I know form the replies that there are many more following this thread. For those of you who don't know Scot is a talented tanker. I battled against his Mato KT a few weeks ago at our recent NEAD battleday. He did a fantastic job and it looked like a $1,000 Tamiya. I hope to have a NEAD battleday again soo so stay tuned area tankers. Come join us and you can see Scots handiwork for yourself. Maybe he will bring the E50 project for us to see firsthand.
Bob
Bob
 02-01-2012 | 04:29 PM
#43
My Feedback: (1)
Joined: May 2009
Posts: 372
Likes: 0
Received 0 Likes
on
0 Posts
From: Pearl City, HI
And, I'm number five to admit to following this thread, so Scott - I guess that makes you and Ace! Seriously, I have been so impressed by the effort you've put into this, that I bought a Tamiya Jadgpanther from Bob just so I can try and build one of my own. Thank you very much for posting a step-by-step tutorial on what you've gone through up to now.
02-01-2012 | 06:43 PM
#44
Thread Starter
Thanks guys, you are to kind.......the weild lines are driving me nuts.......anyone have me proof way to make good weild lines? Pics will help as well as small words....remember I think in krayon...
02-01-2012 | 07:10 PM
#45
My Feedback: (1)
Well Scott, I guess i have to chime in too. I have been quietly looking in on this thread, and I too think it is a great project. Keep at it and get 'er done.
As for the weld lines, I usually use milliput for mine. I roll it into fine, long pieces and then take a length of it to fit the weld I am doing. Place it where needed and take a hobby knife, or toothpick, or anything you have that fits the bill, and make the shapes to simulate a weld bead. There are other methods, like using a syringe with tamiya putty to do this, but my preferred method is milliput. hope this helps.
As for the weld lines, I usually use milliput for mine. I roll it into fine, long pieces and then take a length of it to fit the weld I am doing. Place it where needed and take a hobby knife, or toothpick, or anything you have that fits the bill, and make the shapes to simulate a weld bead. There are other methods, like using a syringe with tamiya putty to do this, but my preferred method is milliput. hope this helps.
02-06-2012 | 08:07 PM
#46
Thread Starter
Been working on some little details...like this silly hl headlights

Hit it with a razor saw and ....

I am kinda thinking about making it into a "ir" light...late in the war the germans were looking at ways they could move and fight at night to avoid air power. To do this the "right" way, they would need a ir tight for the driver, one for the gunner and one for the comander.I am kicking around the idea of making the front light larger( cutting up a ball point pin body) and adding a red tinted "lense"....since the tank is going to be a fighter, I can make the ir bulb from the battle system into a light on the mantel sorta like the t55's( where do you think they got the idea?) and then rig something for the comander...this is a good sitefor german ir stuff
http://www.hmvf.co.uk/pdf/Tabby02.pdf
I am also looking at what kind of mantel I am going to use as this will effect the turret.....here is the stock one...

I am thinking about getting rid of the curve or doing something like center drilling a chess peace so I have something like the prodction turret kt.I will post more work this week.....
Hit it with a razor saw and ....
I am kinda thinking about making it into a "ir" light...late in the war the germans were looking at ways they could move and fight at night to avoid air power. To do this the "right" way, they would need a ir tight for the driver, one for the gunner and one for the comander.I am kicking around the idea of making the front light larger( cutting up a ball point pin body) and adding a red tinted "lense"....since the tank is going to be a fighter, I can make the ir bulb from the battle system into a light on the mantel sorta like the t55's( where do you think they got the idea?) and then rig something for the comander...this is a good sitefor german ir stuff
http://www.hmvf.co.uk/pdf/Tabby02.pdf
I am also looking at what kind of mantel I am going to use as this will effect the turret.....here is the stock one...
I am thinking about getting rid of the curve or doing something like center drilling a chess peace so I have something like the prodction turret kt.I will post more work this week.....
02-06-2012 | 11:23 PM
#47
Time to get the milliput out for a new mantlet.
~ Jeff
~ Jeff
02-14-2012 | 06:04 AM
#48
Thread Starter
back to the e50 build.....time to put the drivers and hull gunners to bed...lets make some handles...</p>
 </p>
</p>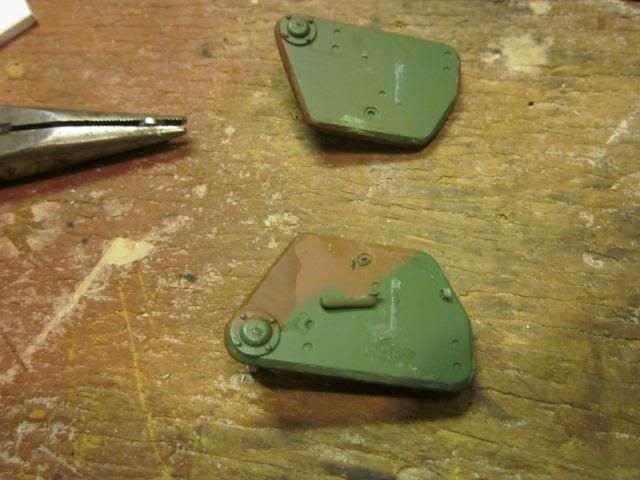 </p>
</p> </p>
</p> </p>
</p>add a spring and nut and you have a working hatch....</p>
 </p>
</p> </p>
</p>next...on to the rear deck....the e50 was supose to have a july 45 kt rear deck....kinda like this...</p>
 </p>
</p>so the hacking begins</p>
 </p>
</p> </p>
</p>I need more gas for my torch...so that it for the rear deck for tonight..</p>
02-14-2012 | 09:02 AM
#49
Thread Starter
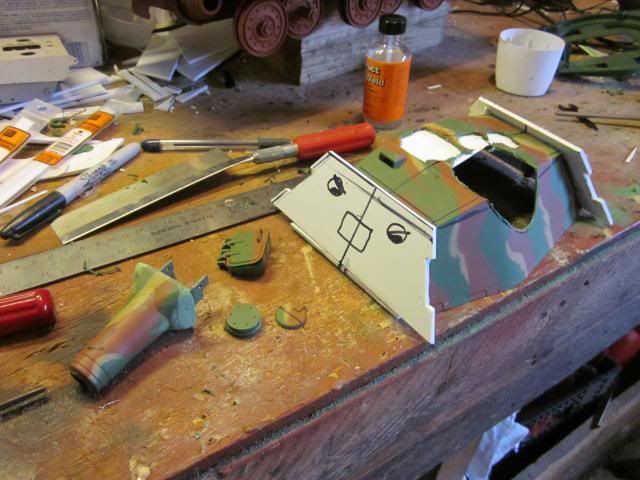
Time to "mess" with the turret....and loard knows the turret is a mess.....</p>
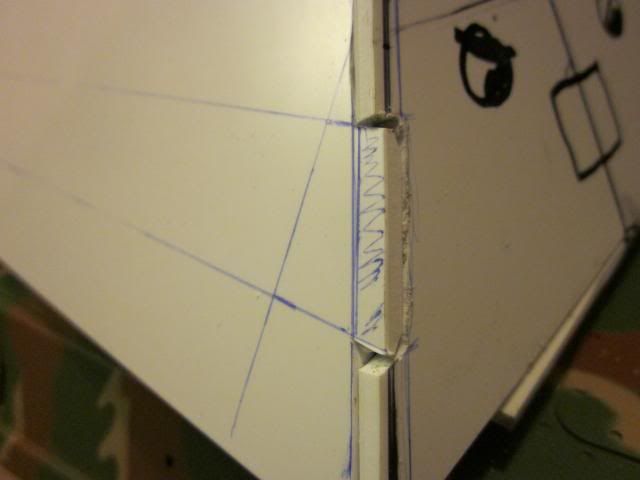
First I changed the rear plates angle...so now my side plates do not fit....</p>
 </p>
</p>then I removed the rest of the hatches, vent and empty shell hatch and made some patches to stranthen the old turret roof...</p>
 </p>
</p> </p>
</p>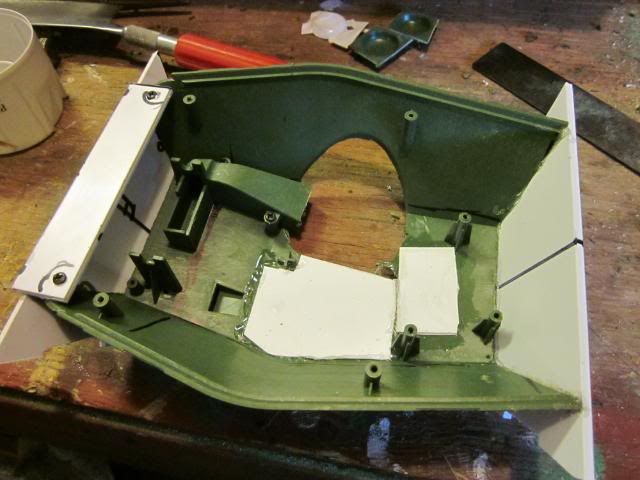 </p>
</p>Time to get the gun in place....old hole is 23x30mm so i find the center point and open it up...</p>
 </p>
</p>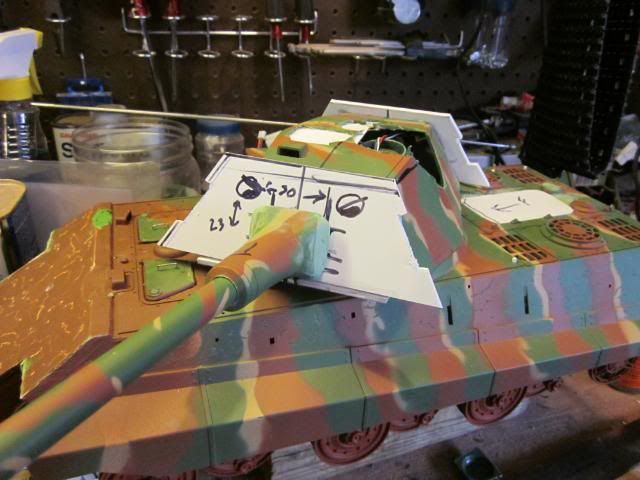 </p>
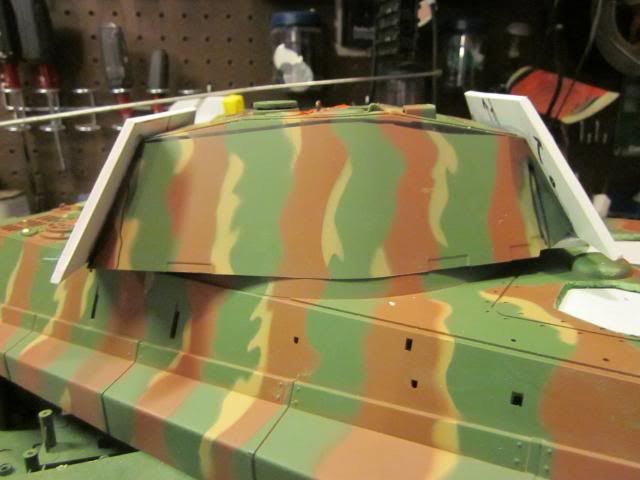
</p>mantel needs work...angles are all off</p>
 </p>
</p>still need more work.....here is a temp roof....with the stuff placed on it....</p>
 </p></p>
Thats it for today....almost looking like a tank....almost..</p>

