


Modify Head light HL LEOPARD2A6 !
 09-11-2013 | 03:44 AM
#1
Thread Starter
Junior Member
Joined: Sep 2012
Posts: 21
Likes: 0
Received 0 Likes
on
0 Posts
From: Samutprakarn, THAILAND
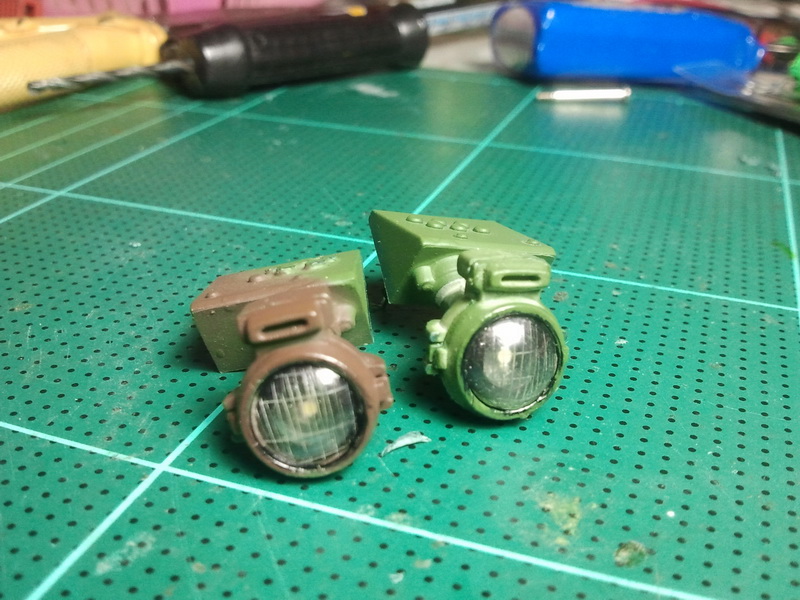
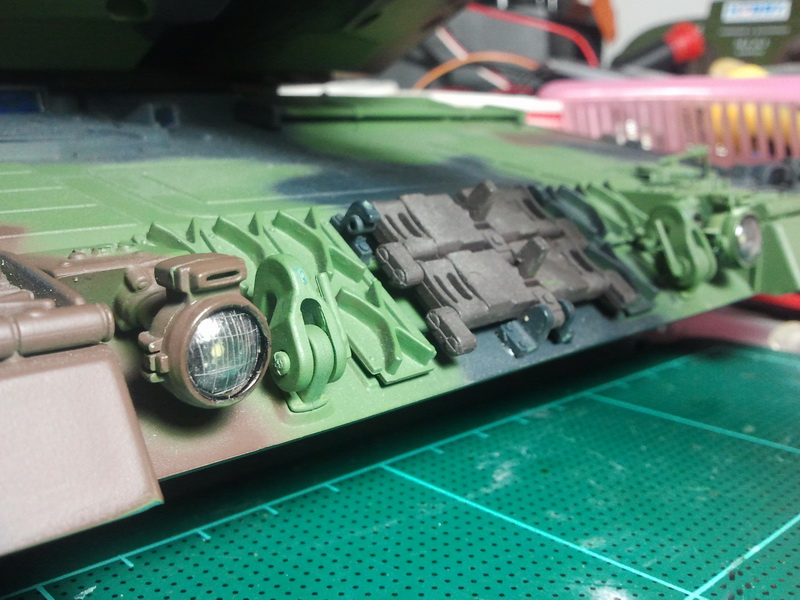
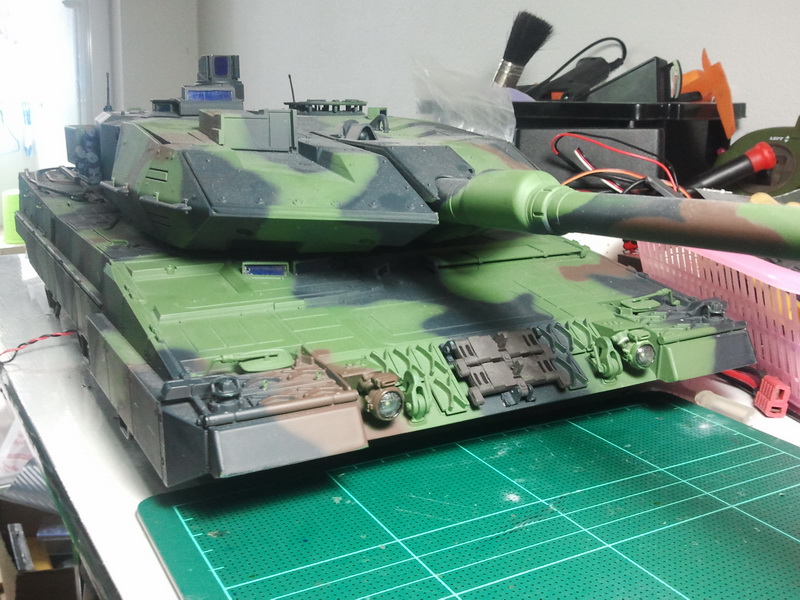
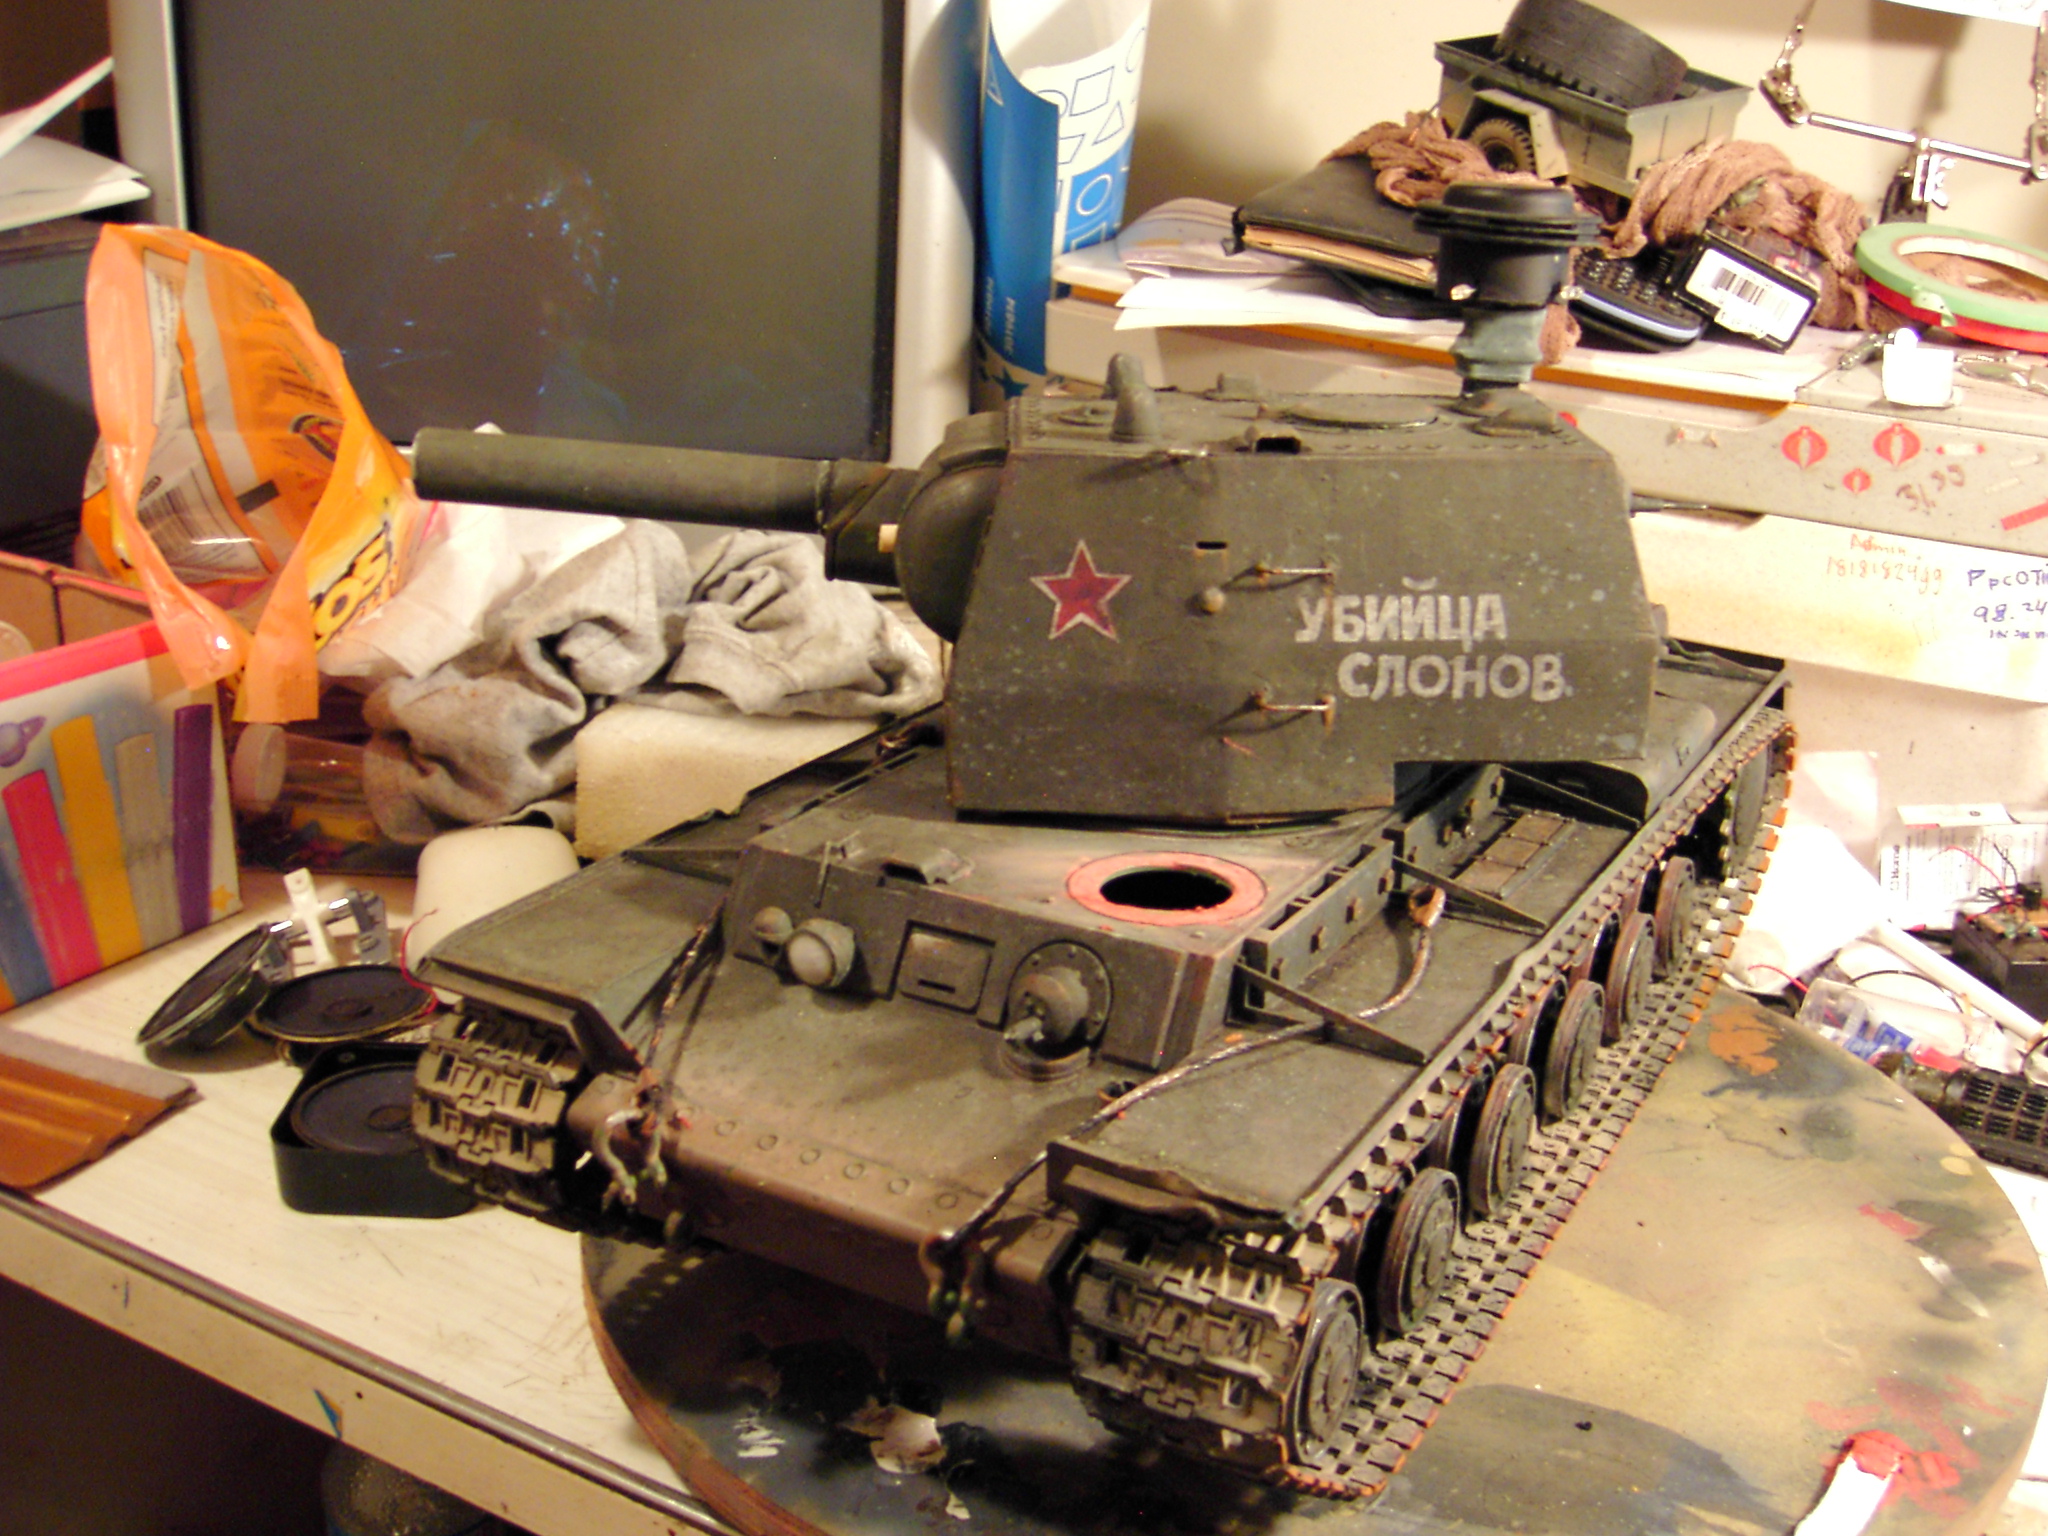
Hello Tank commander.today i am modify head light HL Leopard2a6 , it easy and to share for everyone . Let do it...
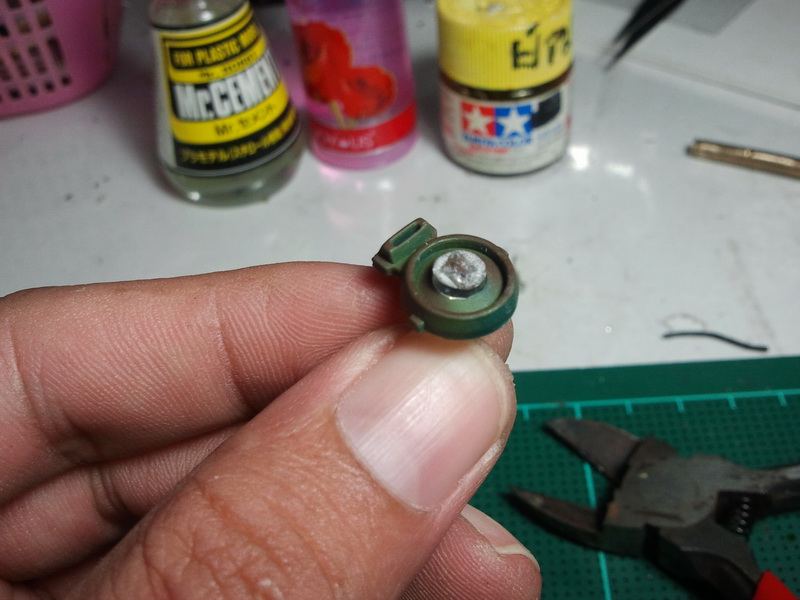
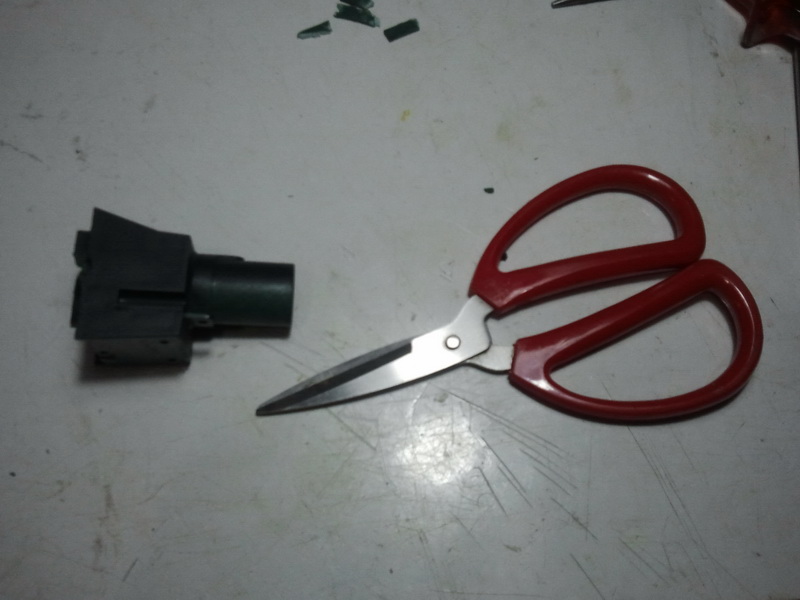
This is original from HL.
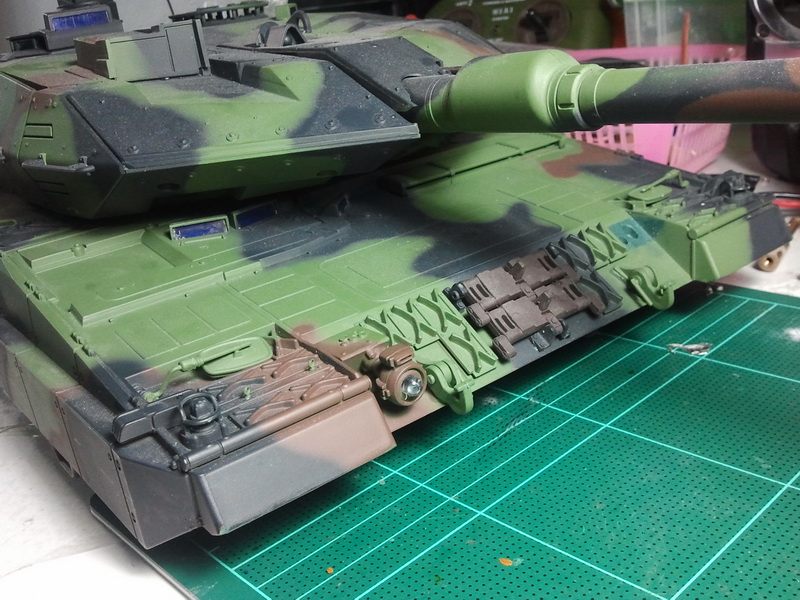

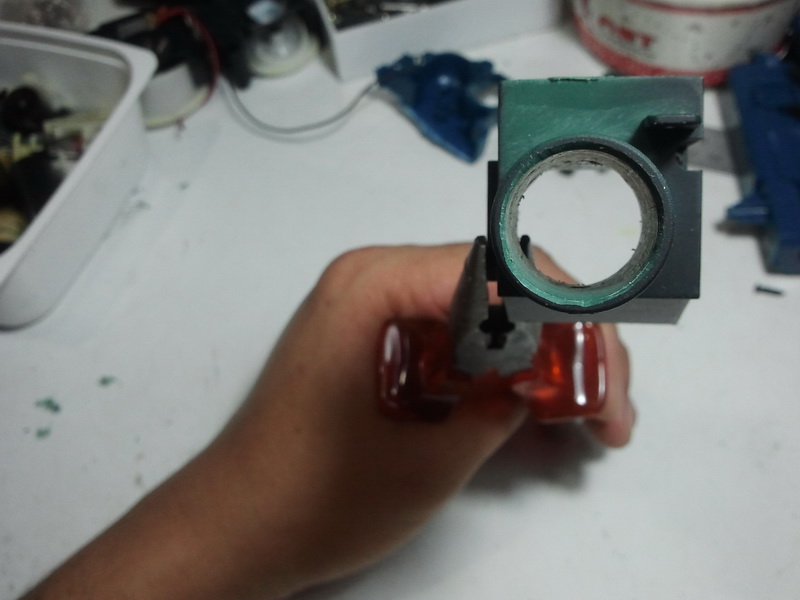
disassemble cover head light.

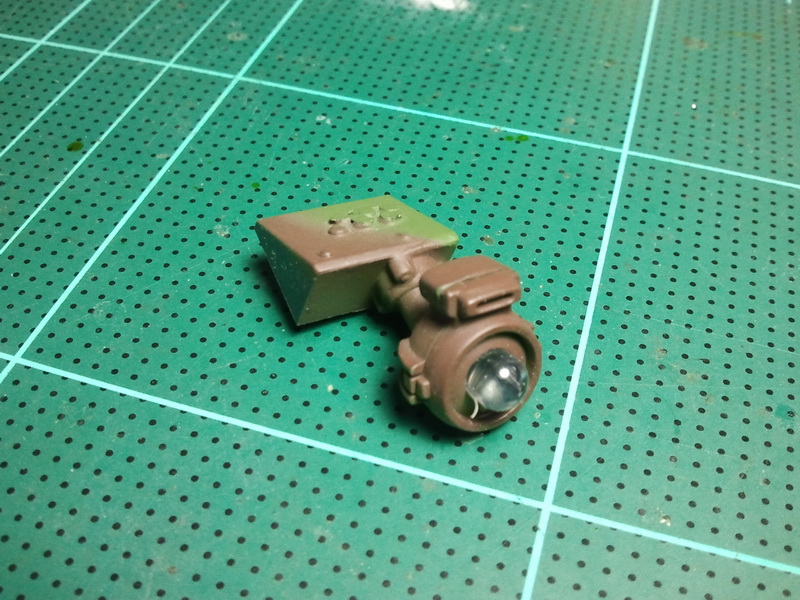
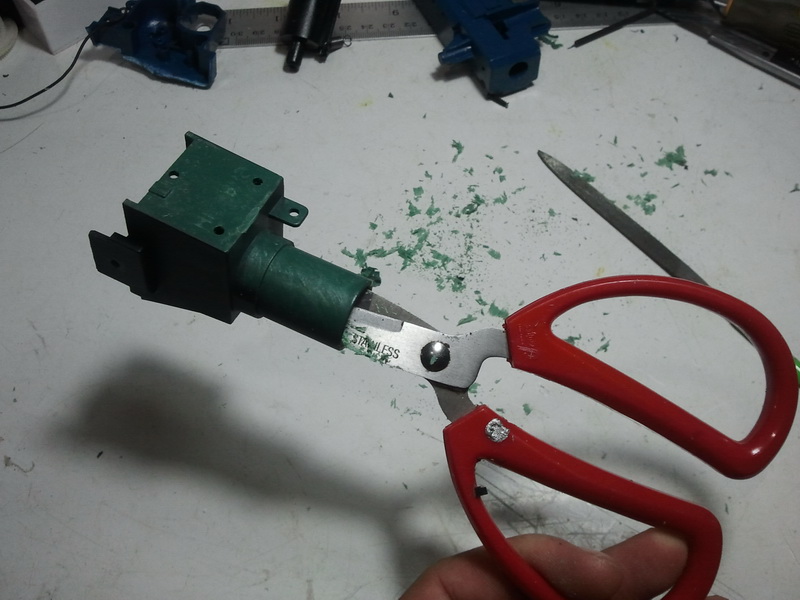
use cutter to break cover headlight.

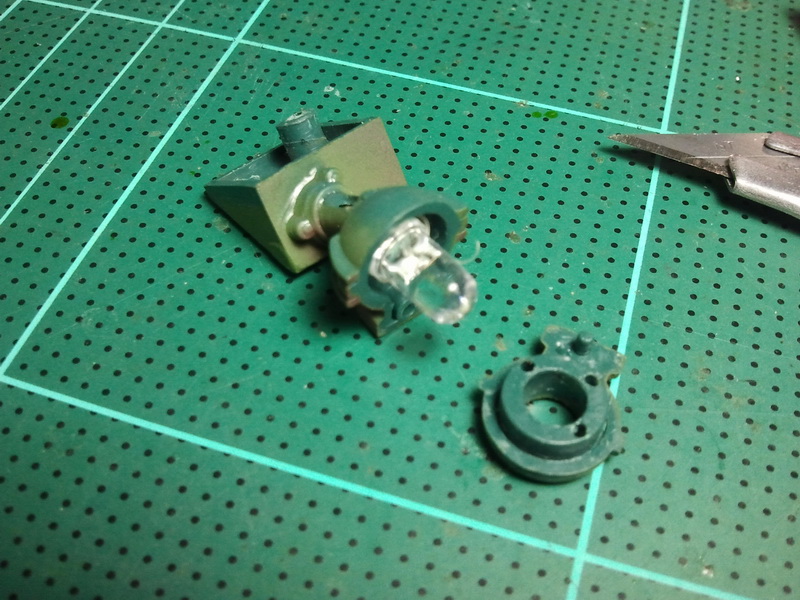
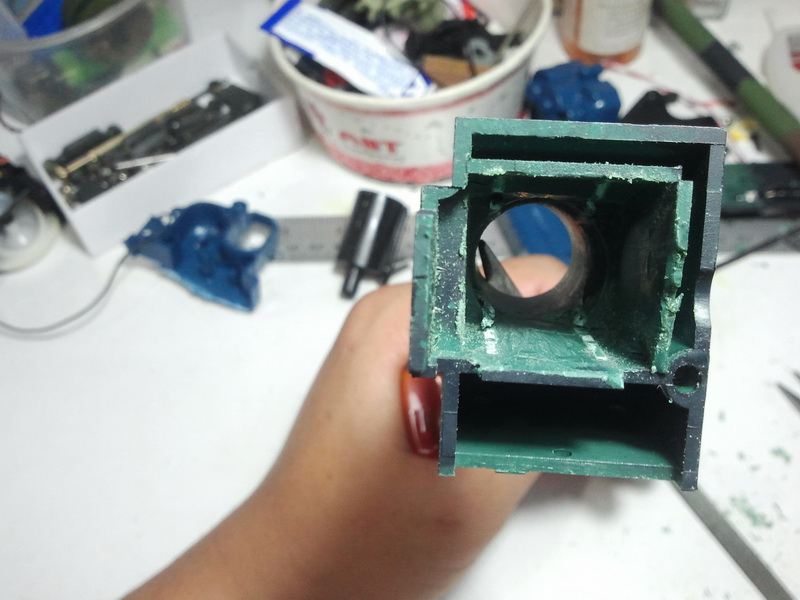
Cut it out!
Polished with sand paper to smooth.
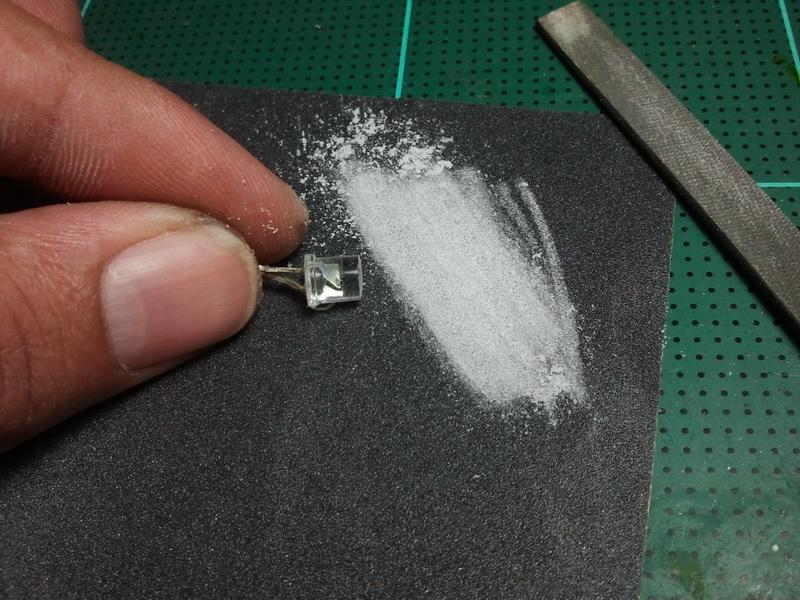
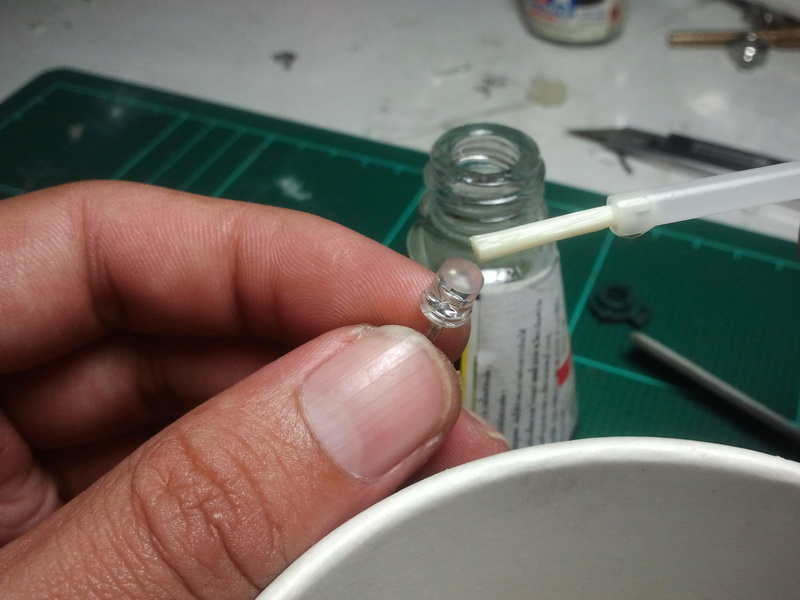
Use the cement liquid for Makes clear.


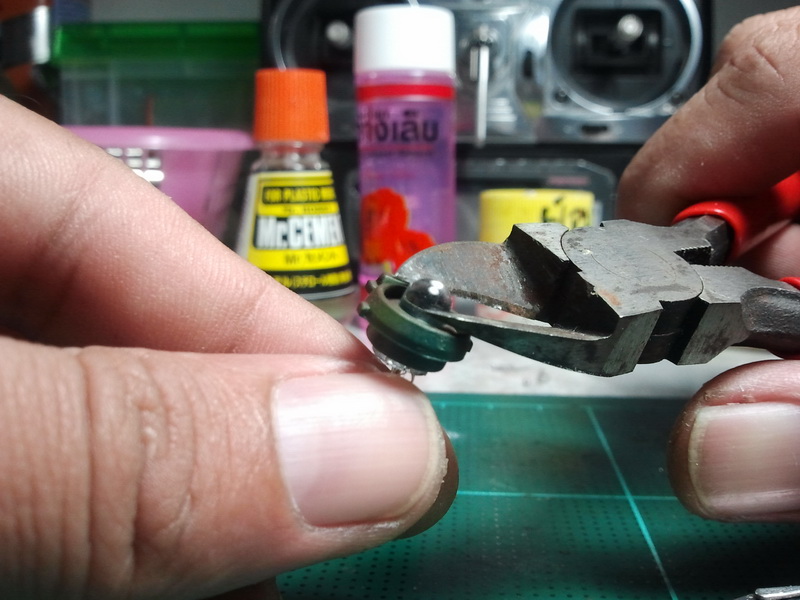
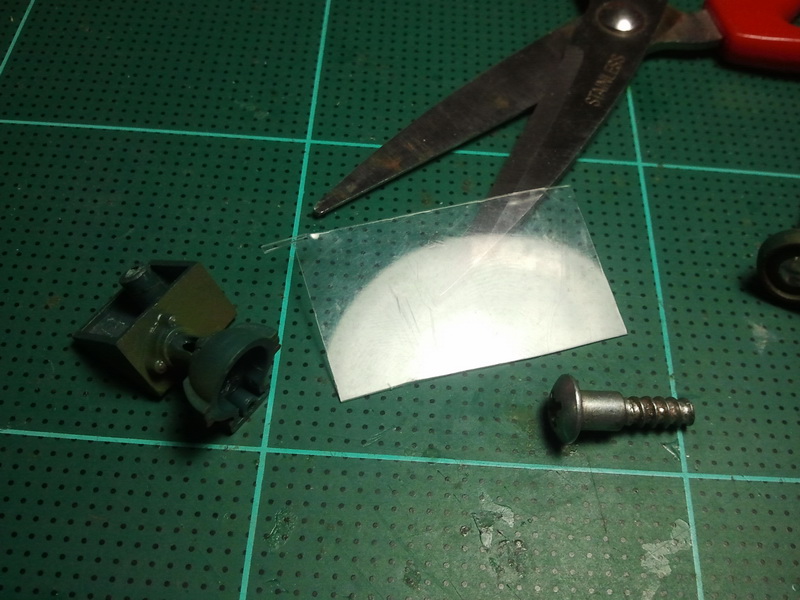
Using plastic sheet and nut for make cover head light.
Glen fire soft
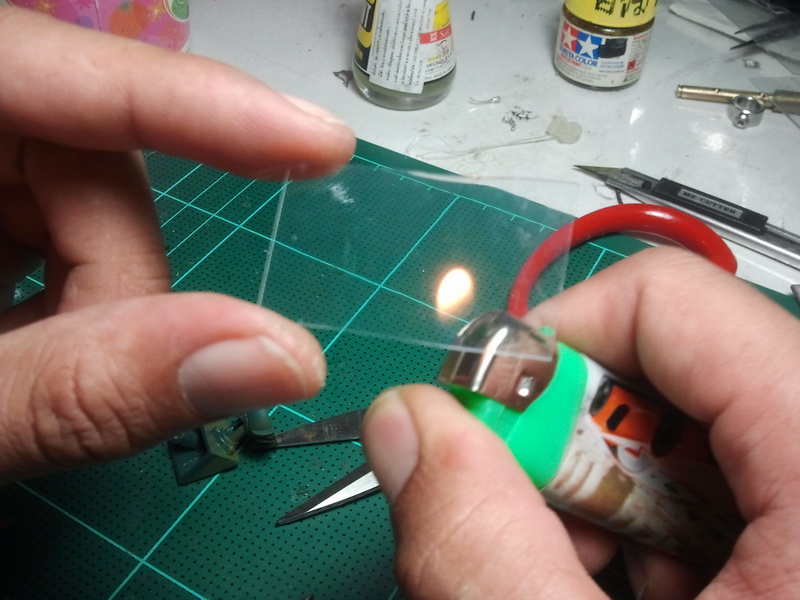
Press nut to cover light
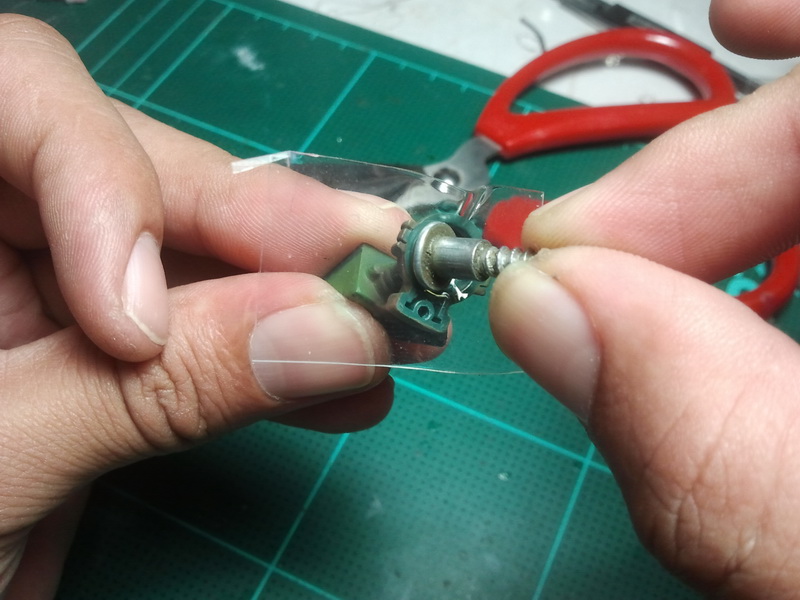
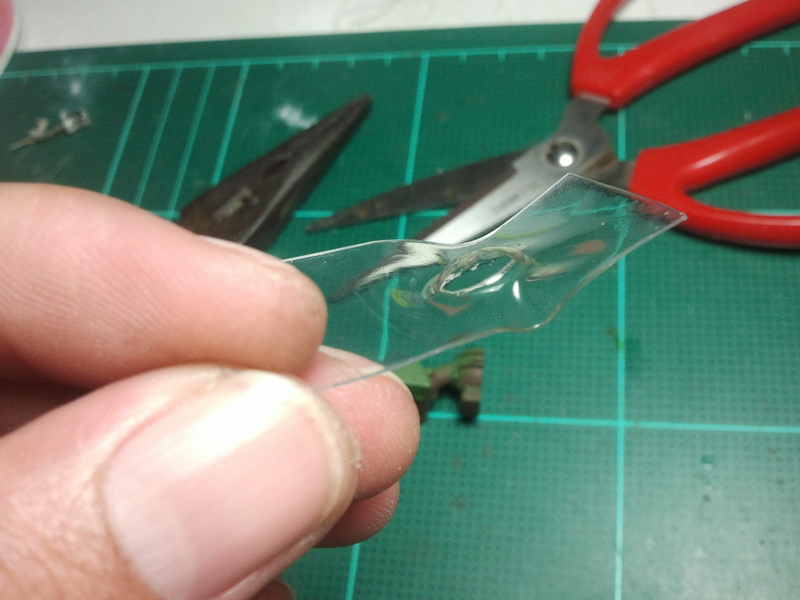
Cut the cover light
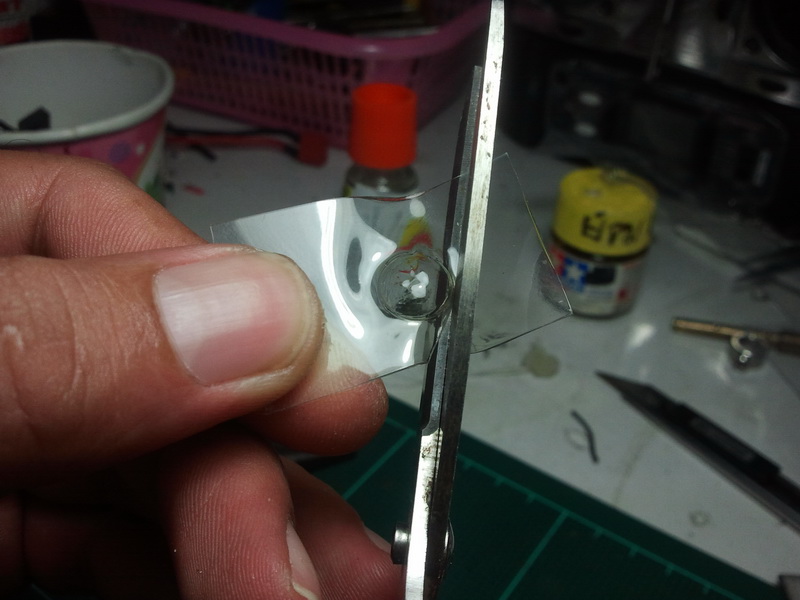
Draw a pattern on the cover.

and finish
This is original from HL.
disassemble cover head light.
use cutter to break cover headlight.
Cut it out!
Polished with sand paper to smooth.
Use the cement liquid for Makes clear.
Using plastic sheet and nut for make cover head light.
Glen fire soft
Press nut to cover light
Cut the cover light
Draw a pattern on the cover.
and finish
Last edited by taksinsugo; 11-05-2013 at 01:50 AM.


 11-13-2013 | 09:00 AM
#7
Thread Starter
Junior Member
Joined: Sep 2012
Posts: 21
Likes: 0
Received 0 Likes
on
0 Posts
From: Samutprakarn, THAILAND
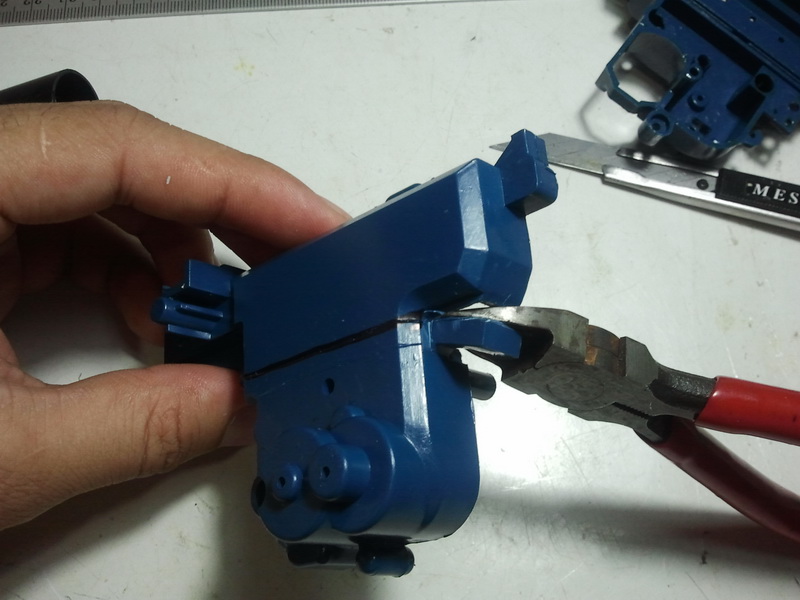
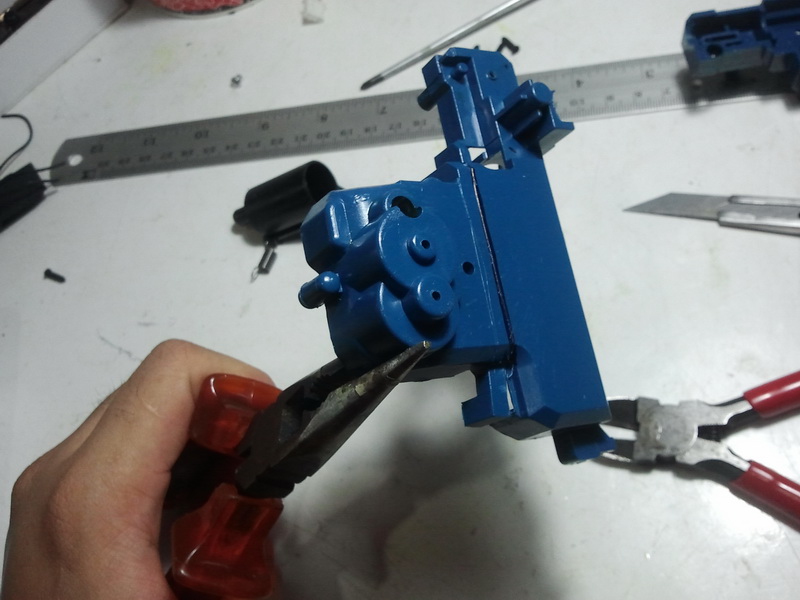
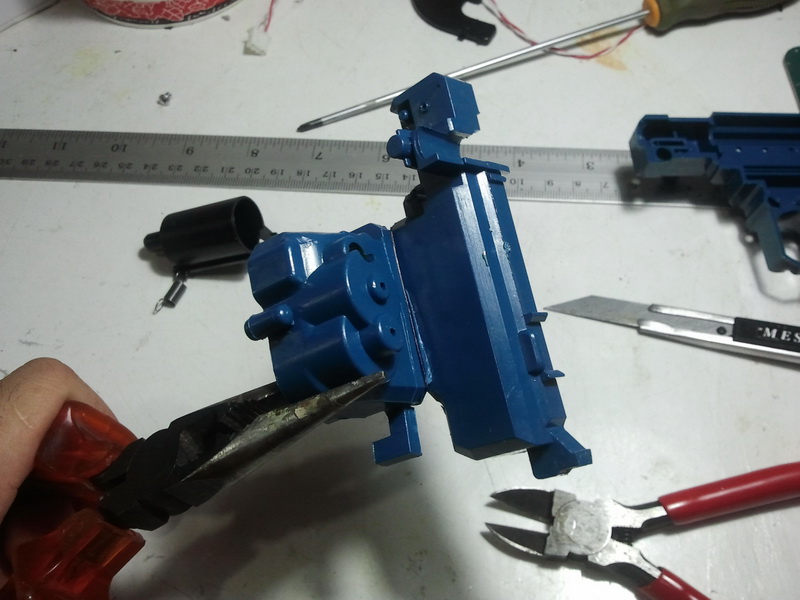
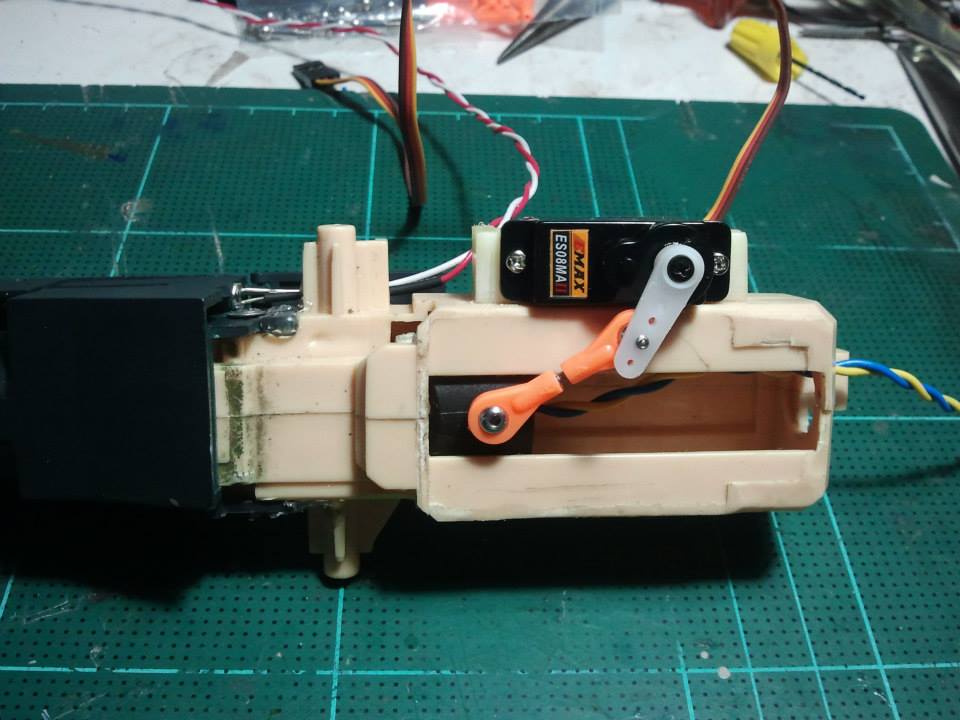
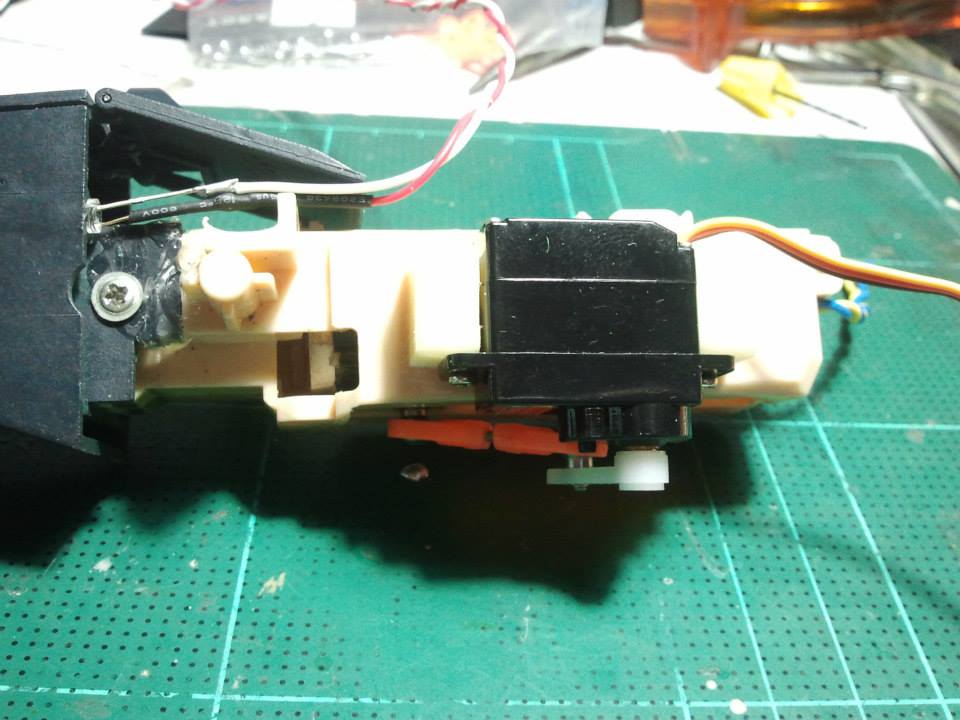
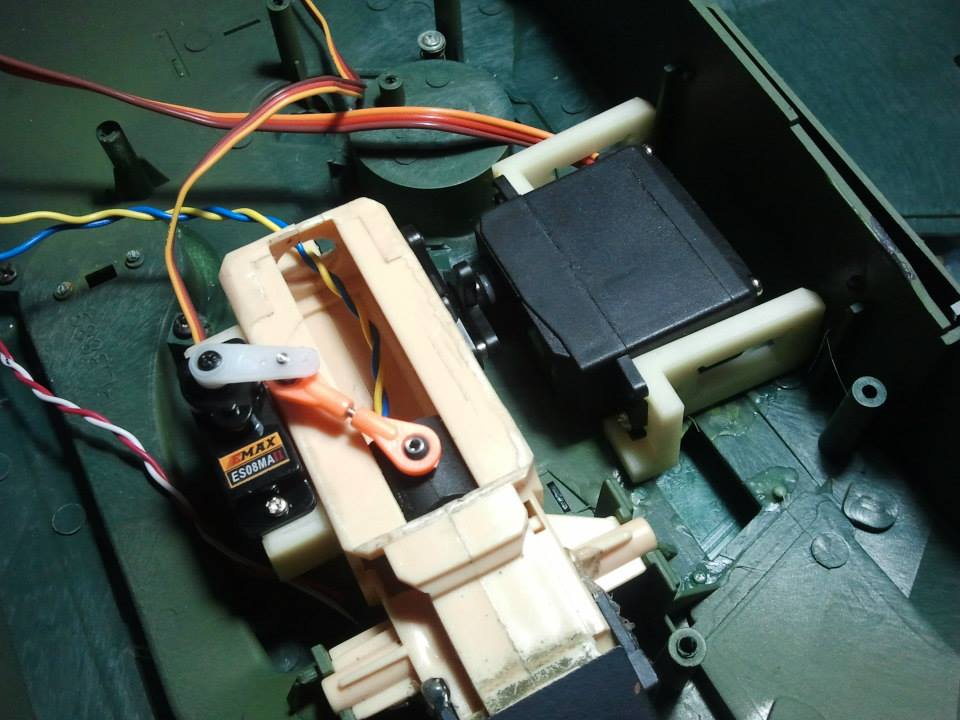
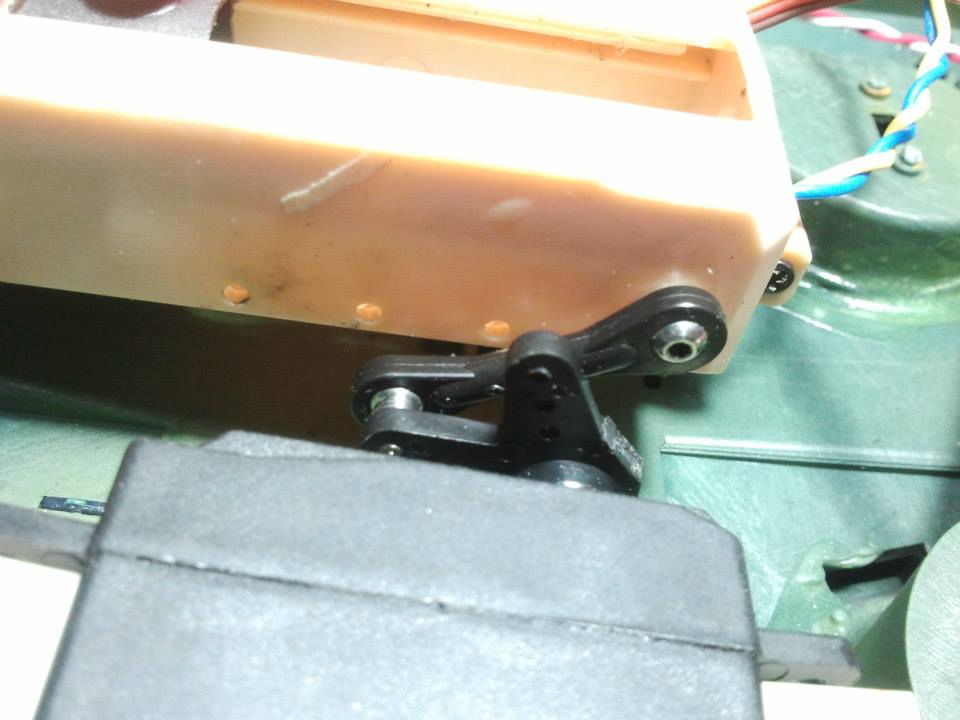
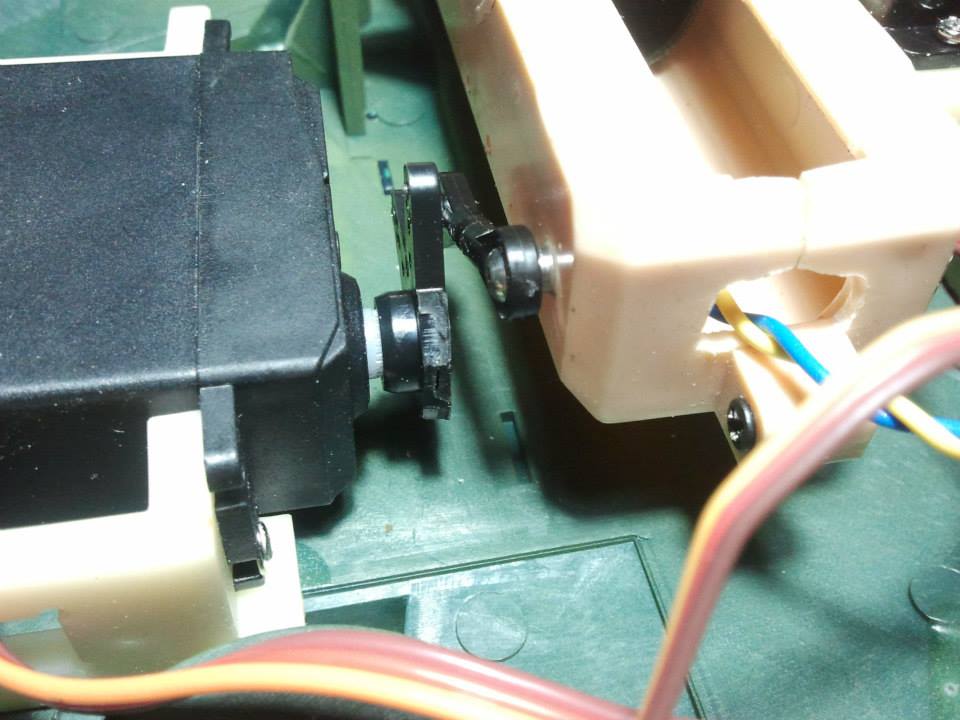
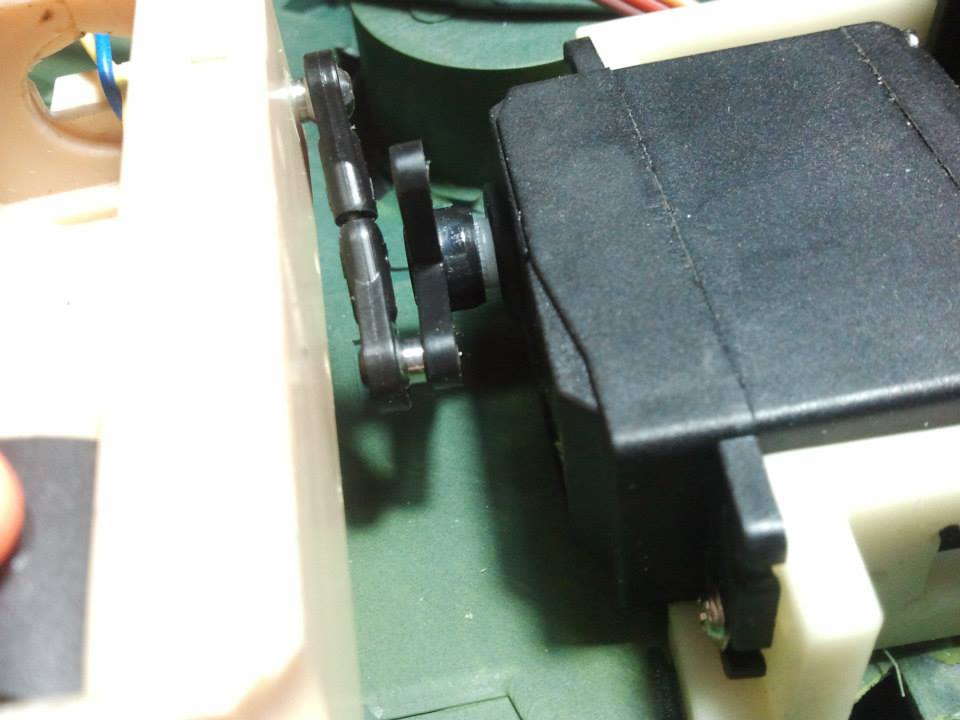
Modified Turret rotation with servo standard !!
It 's speed up
Open cover servo.


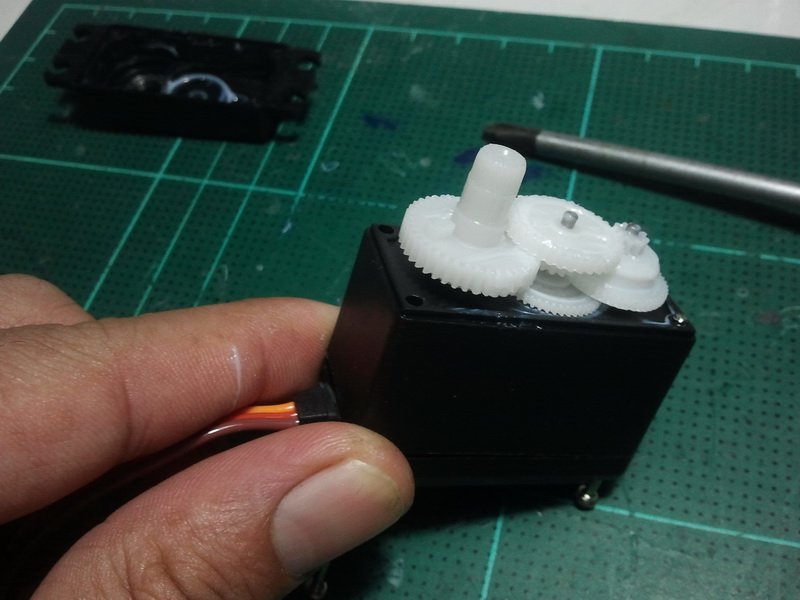
Cut stopper


Solder it out.


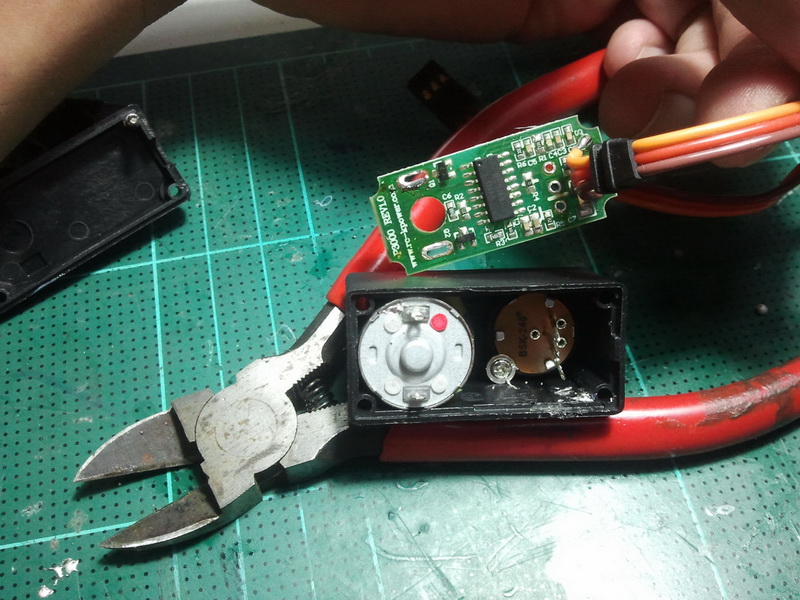
Remove VR center servo


Follow the picture.


Disassembly stock rotation gear.
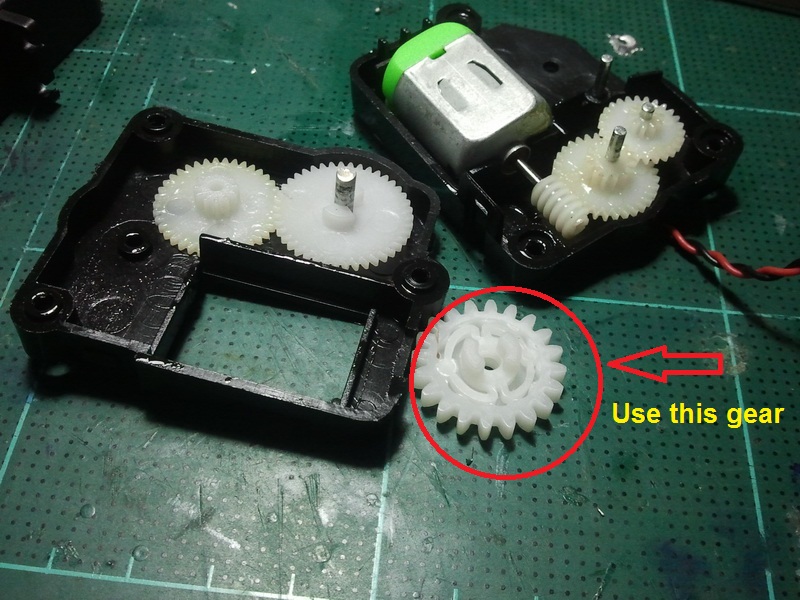
slot center gear for servo shaft
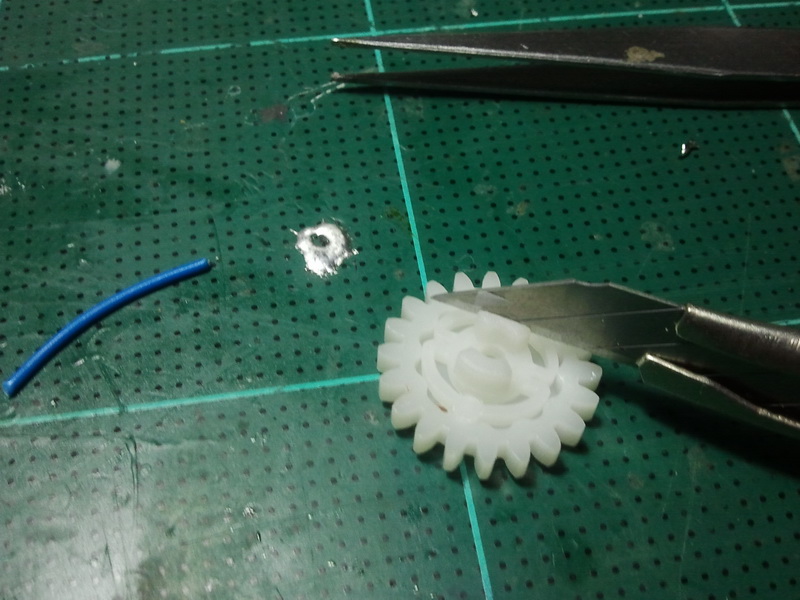
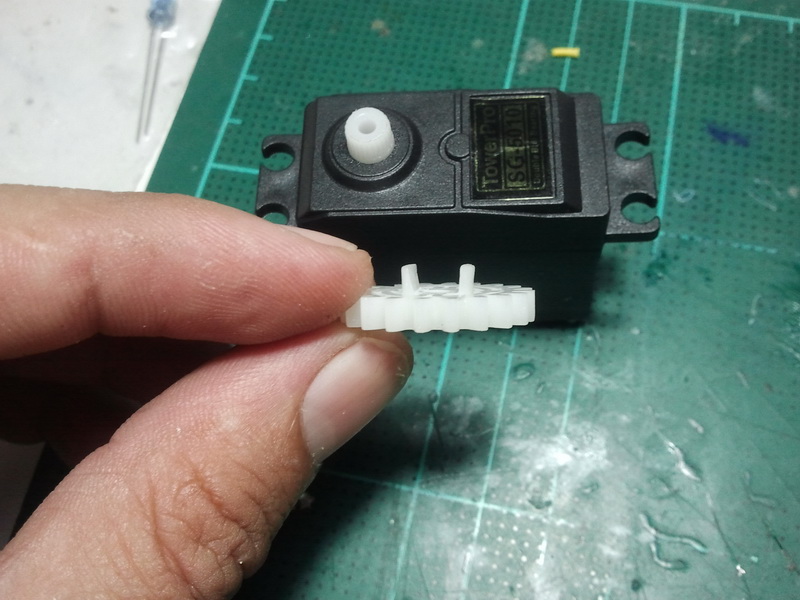
install gear and lock on servo
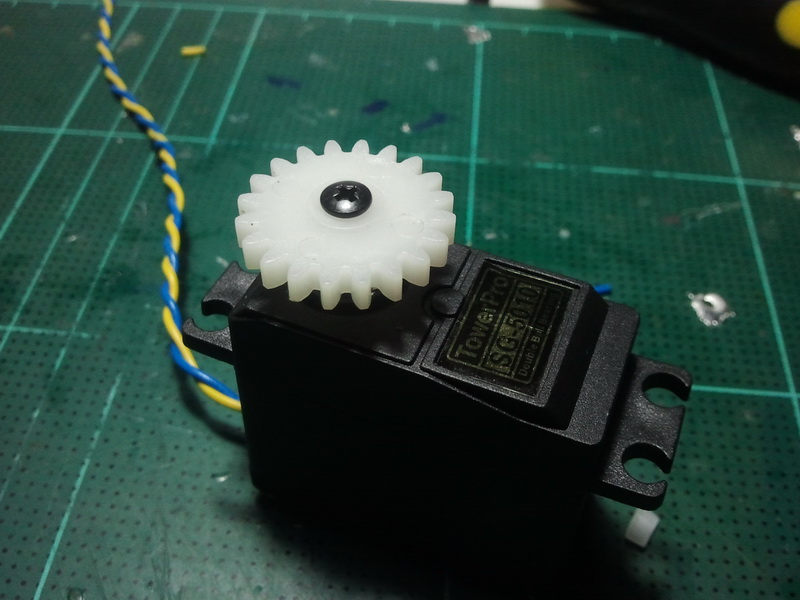
Below on picture and Finnish
It 's speed up
Open cover servo.
Cut stopper
Solder it out.
Remove VR center servo
Follow the picture.
Disassembly stock rotation gear.
slot center gear for servo shaft
install gear and lock on servo
Below on picture and Finnish
Last edited by taksinsugo; 11-13-2013 at 09:06 AM.
11-13-2013 | 10:21 AM
#8


Joined: Apr 2012
Posts: 775
Likes: 0
Received 0 Likes
on
0 Posts
From: Sellersville, PA
Nice mods you are doing on your Leo so far, with great pictures & explained steps to go along with them!
As Airbrushler pointed out, I had done a headlight mod to my HL KV-1 earlier back in March this year, & at first I followed a very similar order of steps in making mine as you have, but after making them several times, I would now have one small suggestion to alter the steps for anyone converting their Heng Long lights, which differs from how you currently show finishing your lens.
Rather than wait to make the line patterns on the lens after I had already heated the plastic, pressed the shape, & made the lens curved, I found it was easier to score those lines on the plastic with my razor knife, using a ruler or straight edge, while the plastic is original & still flat, before it's heated & pressed into a curved shape. Doing the steps in that order you can more easily make very straight lines that are evenly spaced, & get an even cleaner production look to the lens. I also pressed the lens so that the scored lines were on the inside of the lens too, this way the lines can be seen but not felt on the outside of the lens.
~ Craig ~
 yes on the other HL tanks i got the idea off of B.A.D.A.S.S. Force and his KV-1 project
on page 6 http://www.rcuniverse.com/forum/rc-t...l#post11439365
As Airbrushler pointed out, I had done a headlight mod to my HL KV-1 earlier back in March this year, & at first I followed a very similar order of steps in making mine as you have, but after making them several times, I would now have one small suggestion to alter the steps for anyone converting their Heng Long lights, which differs from how you currently show finishing your lens.
Rather than wait to make the line patterns on the lens after I had already heated the plastic, pressed the shape, & made the lens curved, I found it was easier to score those lines on the plastic with my razor knife, using a ruler or straight edge, while the plastic is original & still flat, before it's heated & pressed into a curved shape. Doing the steps in that order you can more easily make very straight lines that are evenly spaced, & get an even cleaner production look to the lens. I also pressed the lens so that the scored lines were on the inside of the lens too, this way the lines can be seen but not felt on the outside of the lens.
~ Craig ~
on page 6 http://www.rcuniverse.com/forum/rc-t...l#post11439365
11-29-2013 | 05:51 AM
#12
Senior Member
Joined: Dec 2009
Posts: 193
Likes: 0
Received 0 Likes
on
0 Posts
From: Pittsfield, ME
06-07-2014 | 08:20 PM
#13
Thread Starter
Junior Member
Joined: Sep 2012
Posts: 21
Likes: 0
Received 0 Likes
on
0 Posts
From: Samutprakarn, THAILAND
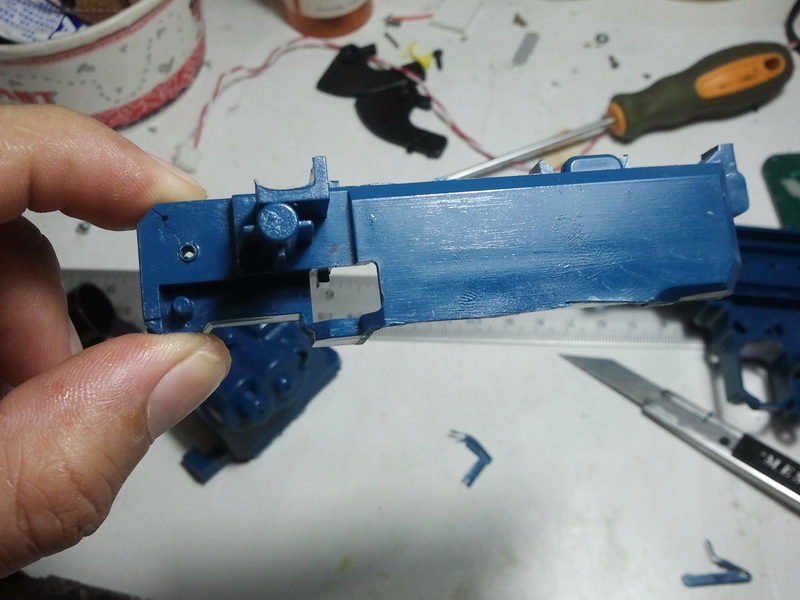
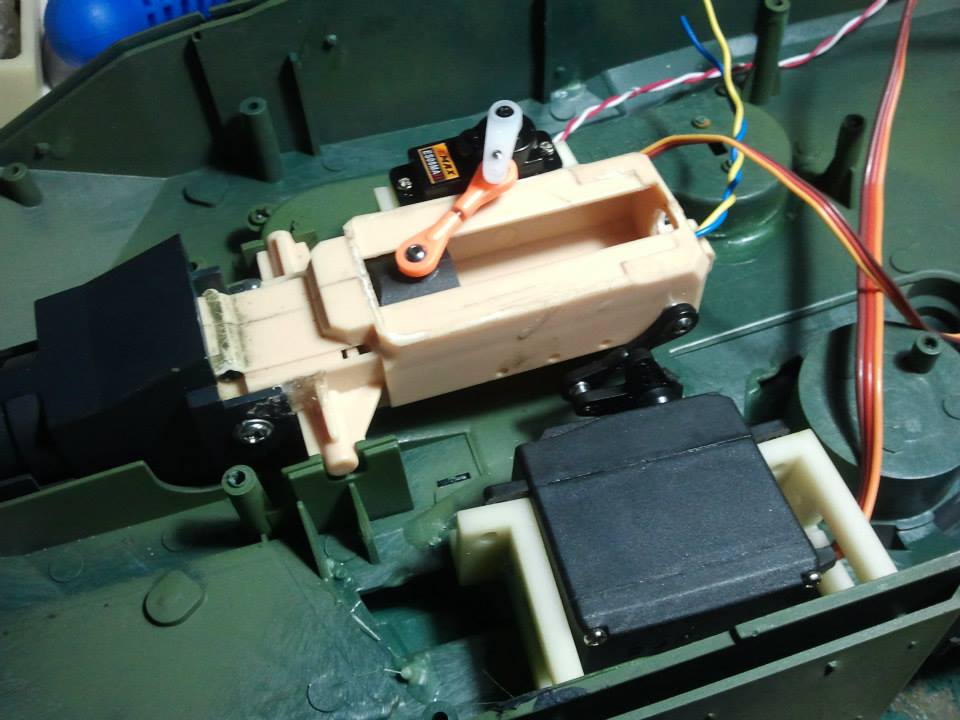
Hello commander!! this manual for modified gun recoil servo for Leopad2A6. It easy to work Let do it!
User the stock BB gun unit from Tank.

disassembled BB Gun unit follow this
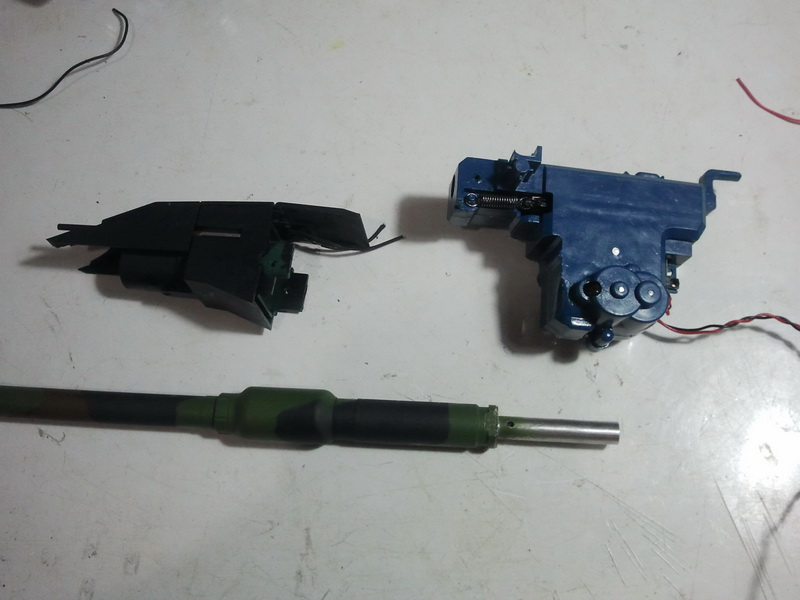
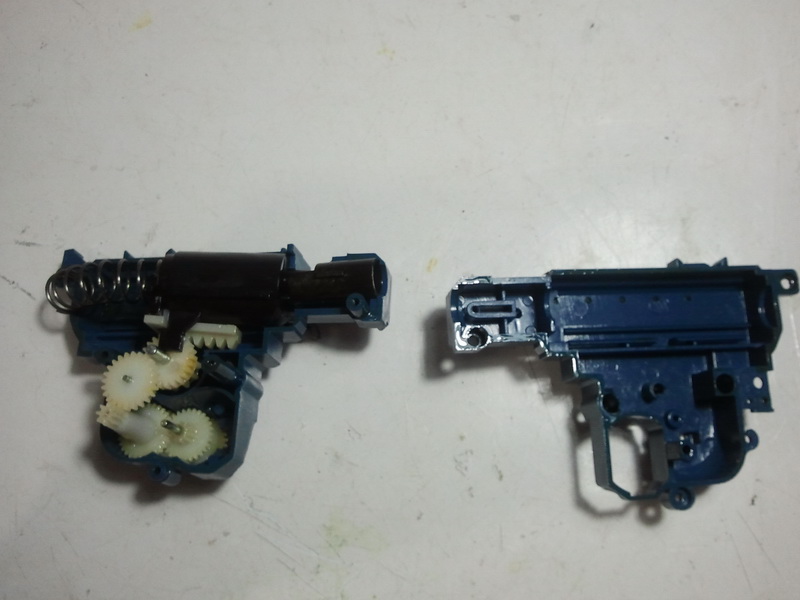
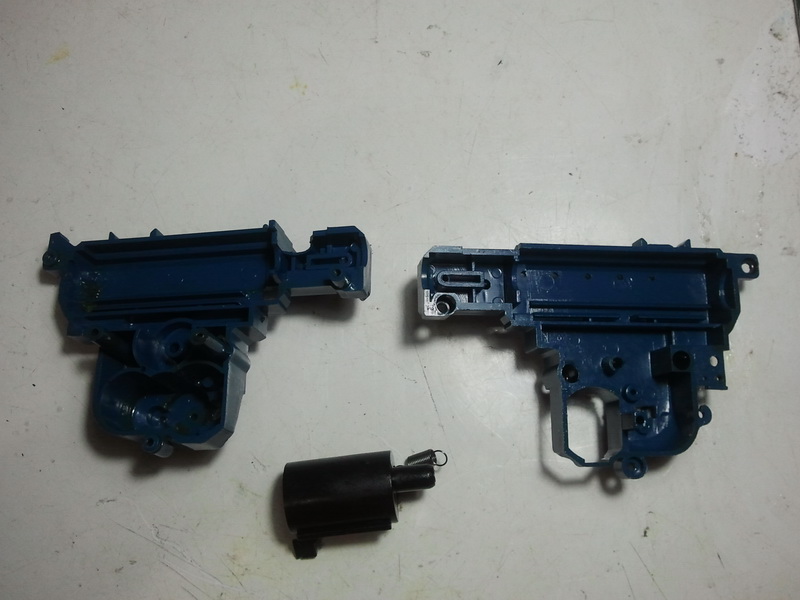

Cut it.


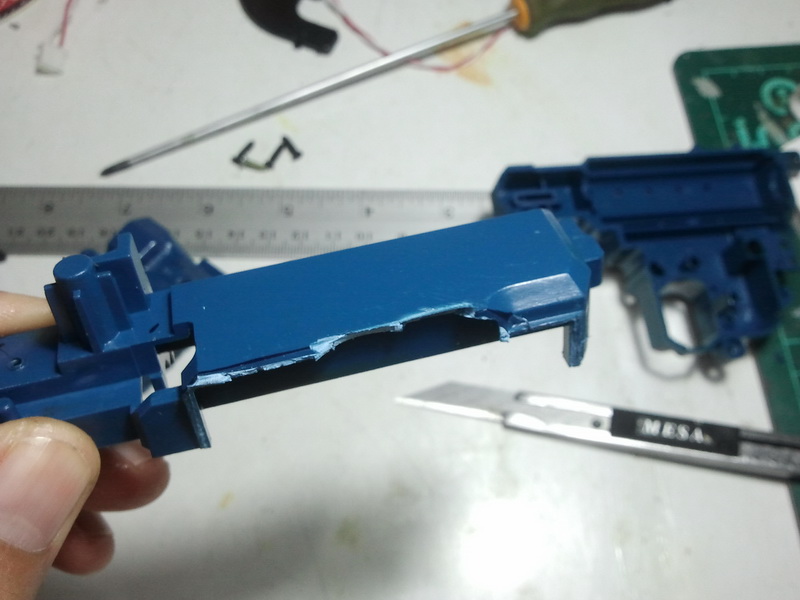
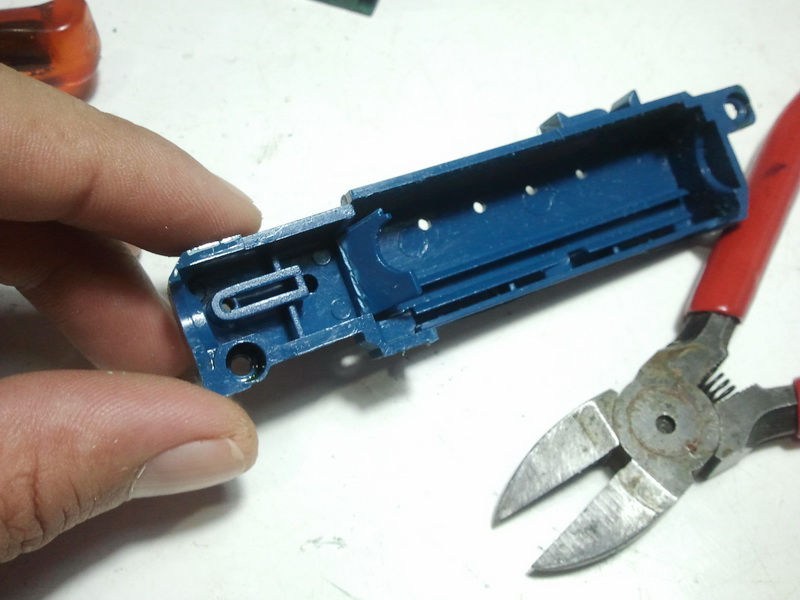
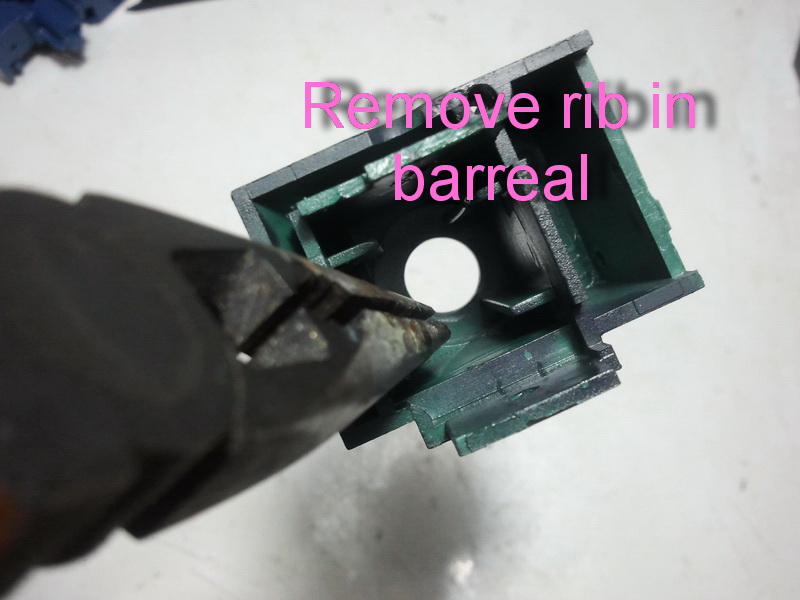
Disassemble barrel and cut all rib to smooth.

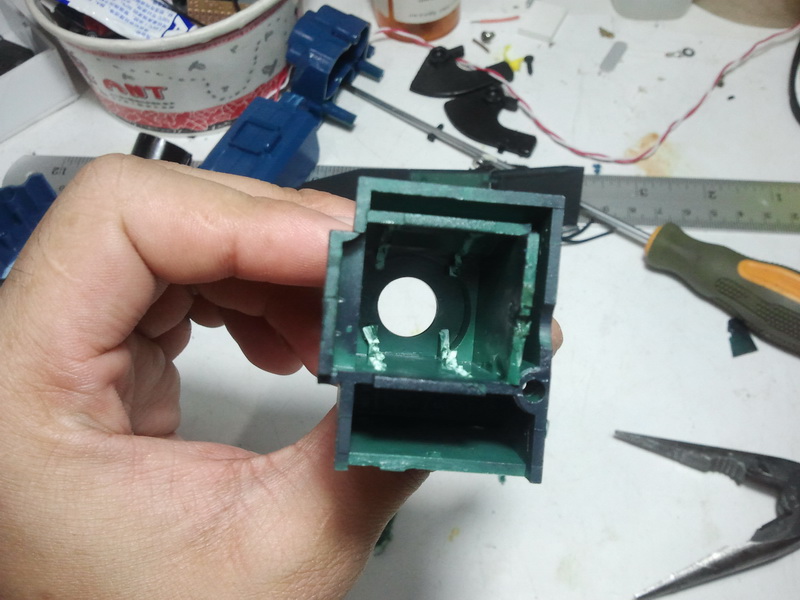
Use scissors to make a hole so big and smooth.


Inserted into the barrel and make sure it does not jam.
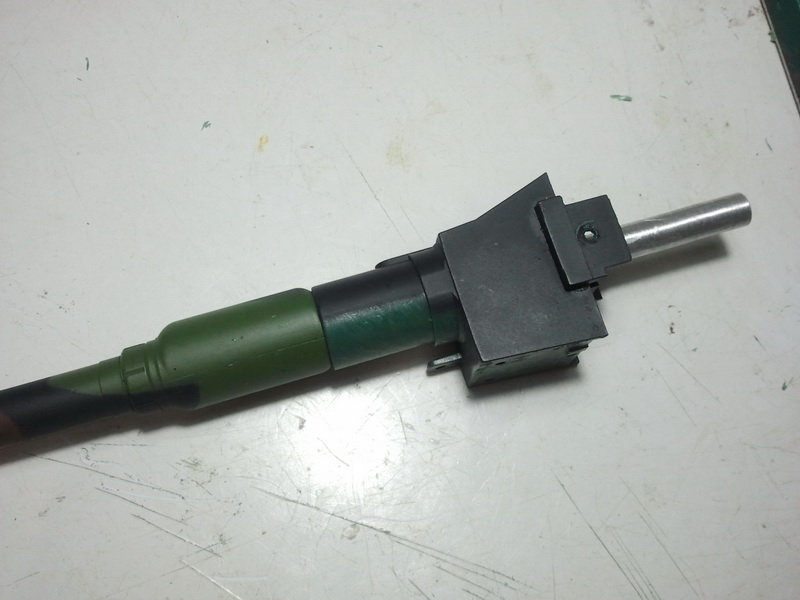

Use Antenna from henglong cut about 60mm.


Use cylinder air gun from HL cut it and dill hole for antenna
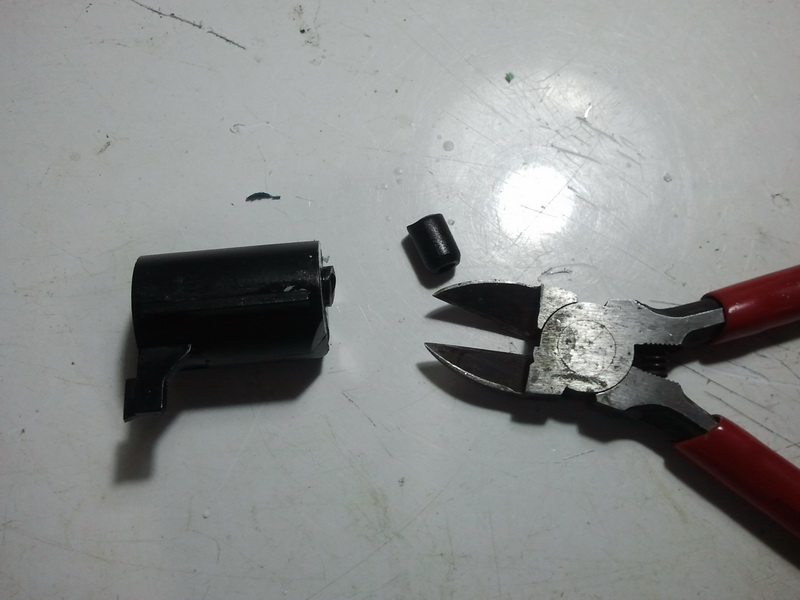

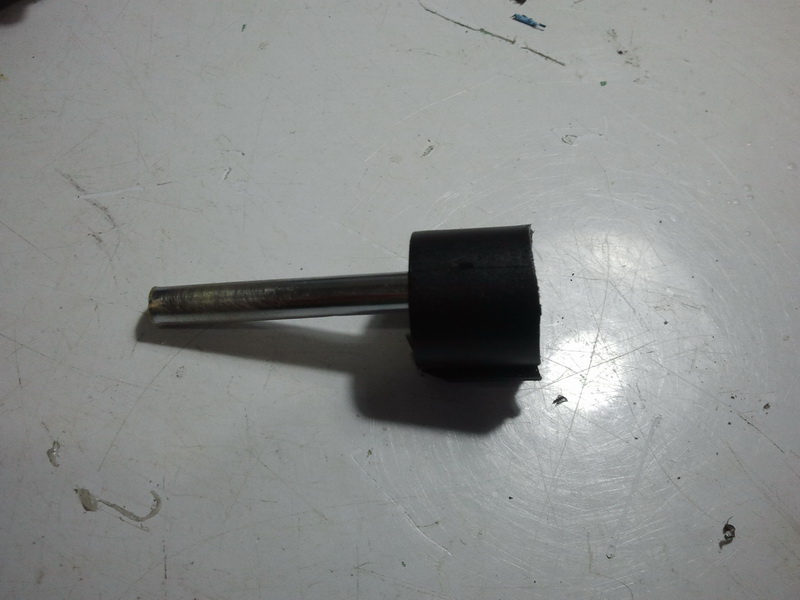
Assemble the gun and then glued a stroke.
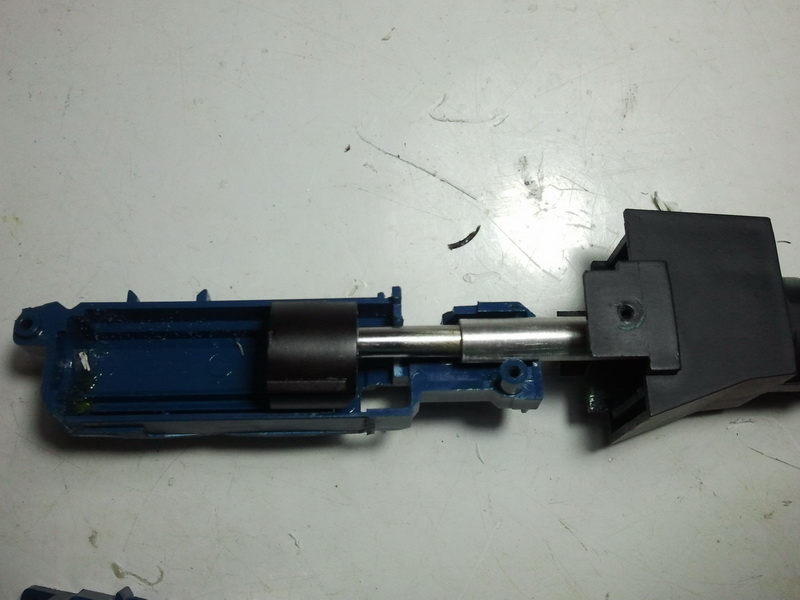
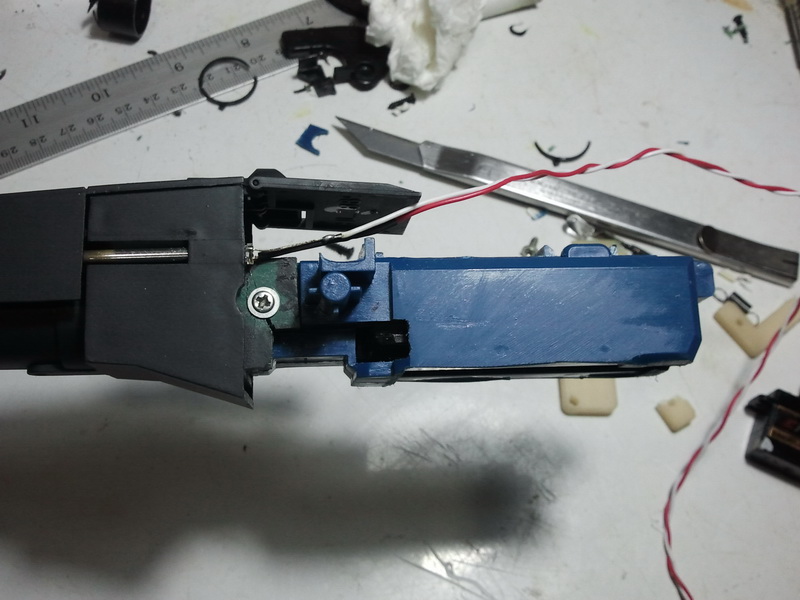
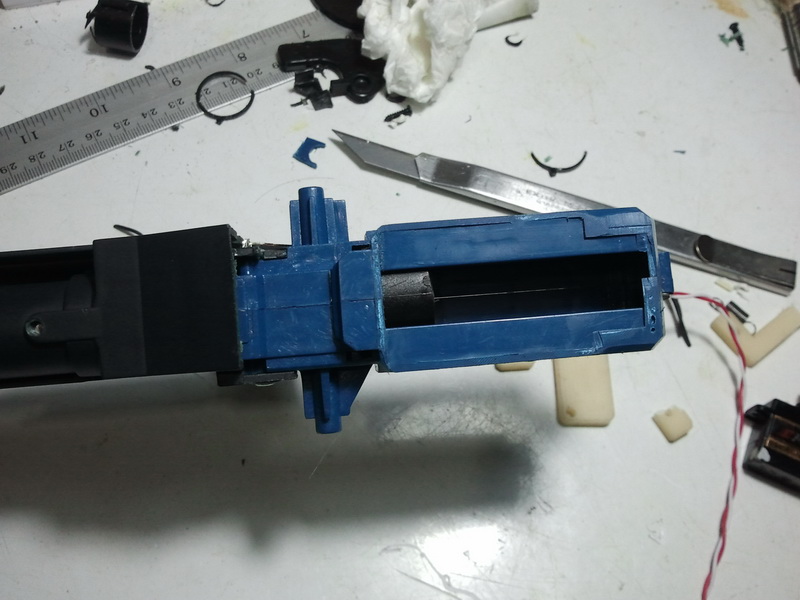
Install support servo ball link and link rod for helicopter follow the picture and finish.


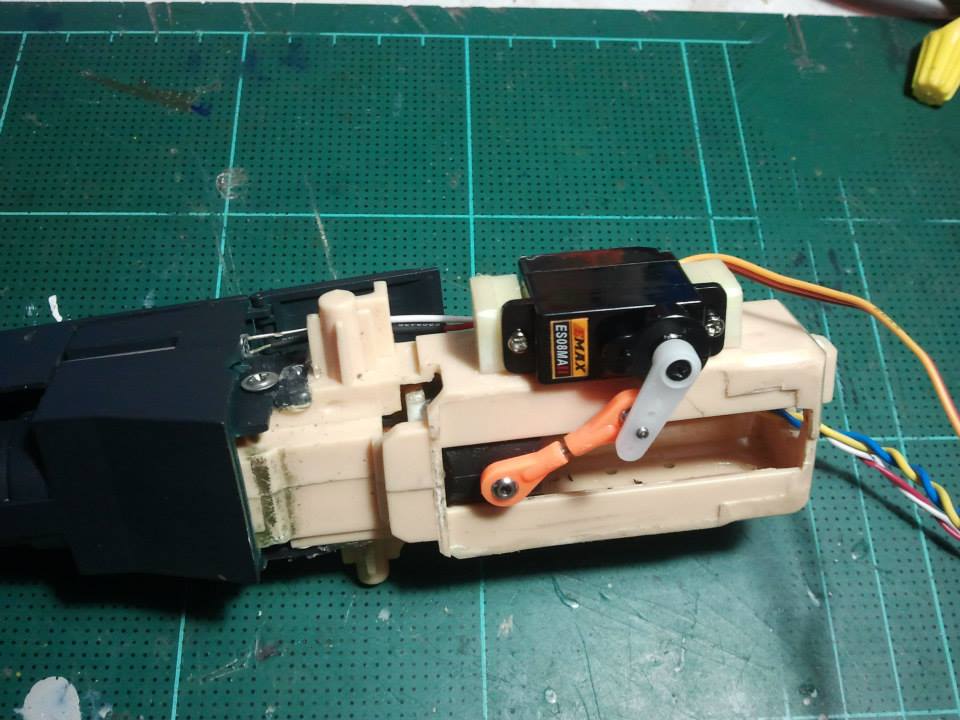
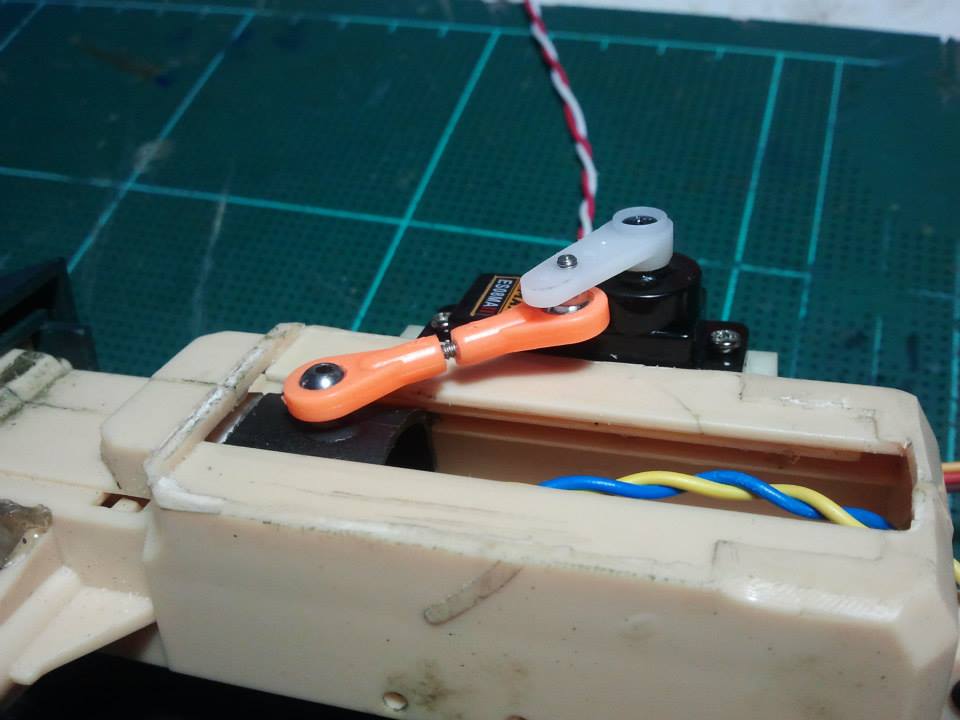
This example gun servo elevator it Up and down to -5-+15 degree
Video
http://www.youtube.com/watch?v=3_yJDsopzF8
User the stock BB gun unit from Tank.
disassembled BB Gun unit follow this
Cut it.
Disassemble barrel and cut all rib to smooth.
Use scissors to make a hole so big and smooth.
Inserted into the barrel and make sure it does not jam.
Use Antenna from henglong cut about 60mm.
Use cylinder air gun from HL cut it and dill hole for antenna
Assemble the gun and then glued a stroke.
Install support servo ball link and link rod for helicopter follow the picture and finish.
This example gun servo elevator it Up and down to -5-+15 degree
Video
http://www.youtube.com/watch?v=3_yJDsopzF8
Last edited by taksinsugo; 06-08-2014 at 07:15 AM.
 06-08-2014 | 07:08 AM
#16
Member
Joined: Jan 2013
Posts: 30
Likes: 0
Received 0 Likes
on
0 Posts
From: , AUSTRALIA
Hi there Taksinsugo.
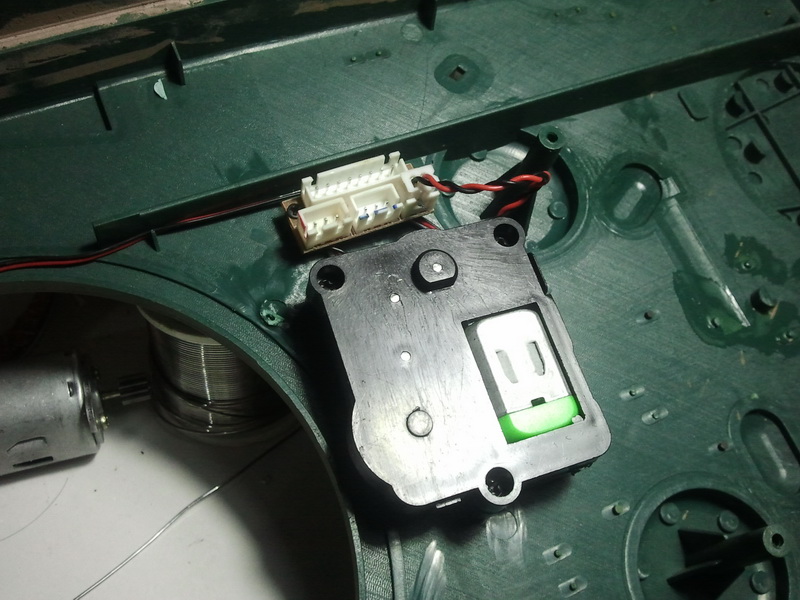
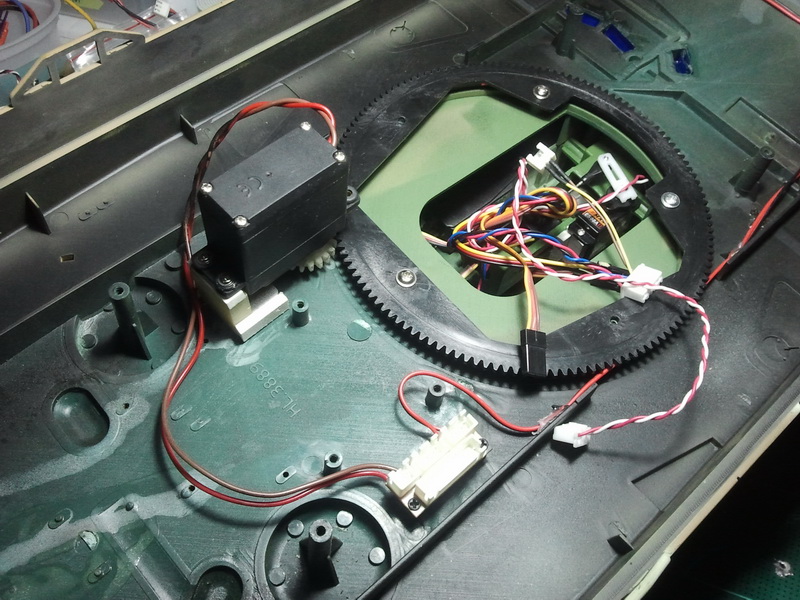
A question about your turret servo modification. It looks like you have wired the new turret servo to the same connections on the hull where the wires for the old turret motor connected, is that correct?
Thanks for your help, Jan
A question about your turret servo modification. It looks like you have wired the new turret servo to the same connections on the hull where the wires for the old turret motor connected, is that correct?
Thanks for your help, Jan
06-08-2014 | 07:23 AM
#17
Thread Starter
Junior Member
Joined: Sep 2012
Posts: 21
Likes: 0
Received 0 Likes
on
0 Posts
From: Samutprakarn, THAILAND
Yes! it is, you can connected direct from old motor from HL.
Thanks for comment.

 11-30-2014 | 04:53 PM
#21
Senior Member
Joined: Nov 2010
Posts: 112
Likes: 0
Received 0 Likes
on
0 Posts
From: Carrollton,
TX
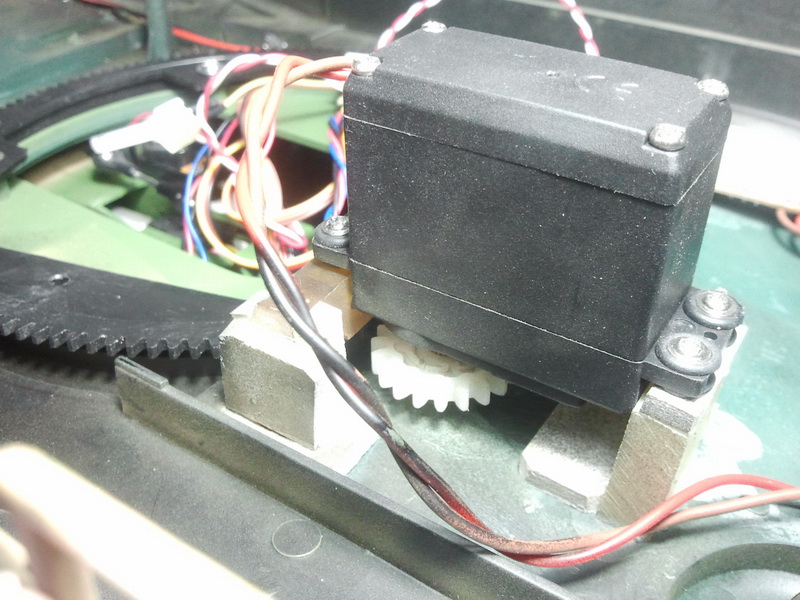
My apology for bumping an old thread, but I have a question about your gearbox. I have seen your videos on youtube and I'm very impress at your Leopard 2 and ZTZ99 speed and little to no noise from the gearbox. Can you take a picture of what you did to your gearbox?
Did you remove two gears, so what are left are just the pinion, one gear, and a drive shaft? I have a pair of Promaxx 480 motors and I'm wondering how you get enough toque to run the tank after removing two gears.
Thanks!


