


HL Leopard 2 Restoration Project
 10-13-2015 | 02:02 PM
#1

Thread Starter
Member
Joined: Apr 2015
Posts: 33
Likes: 0
Received 0 Likes
on
0 Posts
Hi Everyone,
I"m new to this site and to be honest, I'm fairly new to RC Tanks as well. I'm more interested in WW-II US Army Armor, but this Leo caught my eye on E-bay. I won it from TheGreatestMoo and as you will see, it's in need of a lot of work. First off I'll be repairing the gun mount and then I'll move on to the wiring. I'm going to get it running again and I may keep it or re-sell it. I'm not sure, so take a look and let me know what you think.


I"m new to this site and to be honest, I'm fairly new to RC Tanks as well. I'm more interested in WW-II US Army Armor, but this Leo caught my eye on E-bay. I won it from TheGreatestMoo and as you will see, it's in need of a lot of work. First off I'll be repairing the gun mount and then I'll move on to the wiring. I'm going to get it running again and I may keep it or re-sell it. I'm not sure, so take a look and let me know what you think.
Last edited by Rebel 1; 10-13-2015 at 02:12 PM.

 10-13-2015 | 04:14 PM
#3
Thread Starter
Member
Joined: Apr 2015
Posts: 33
Likes: 0
Received 0 Likes
on
0 Posts
Hi YHR,
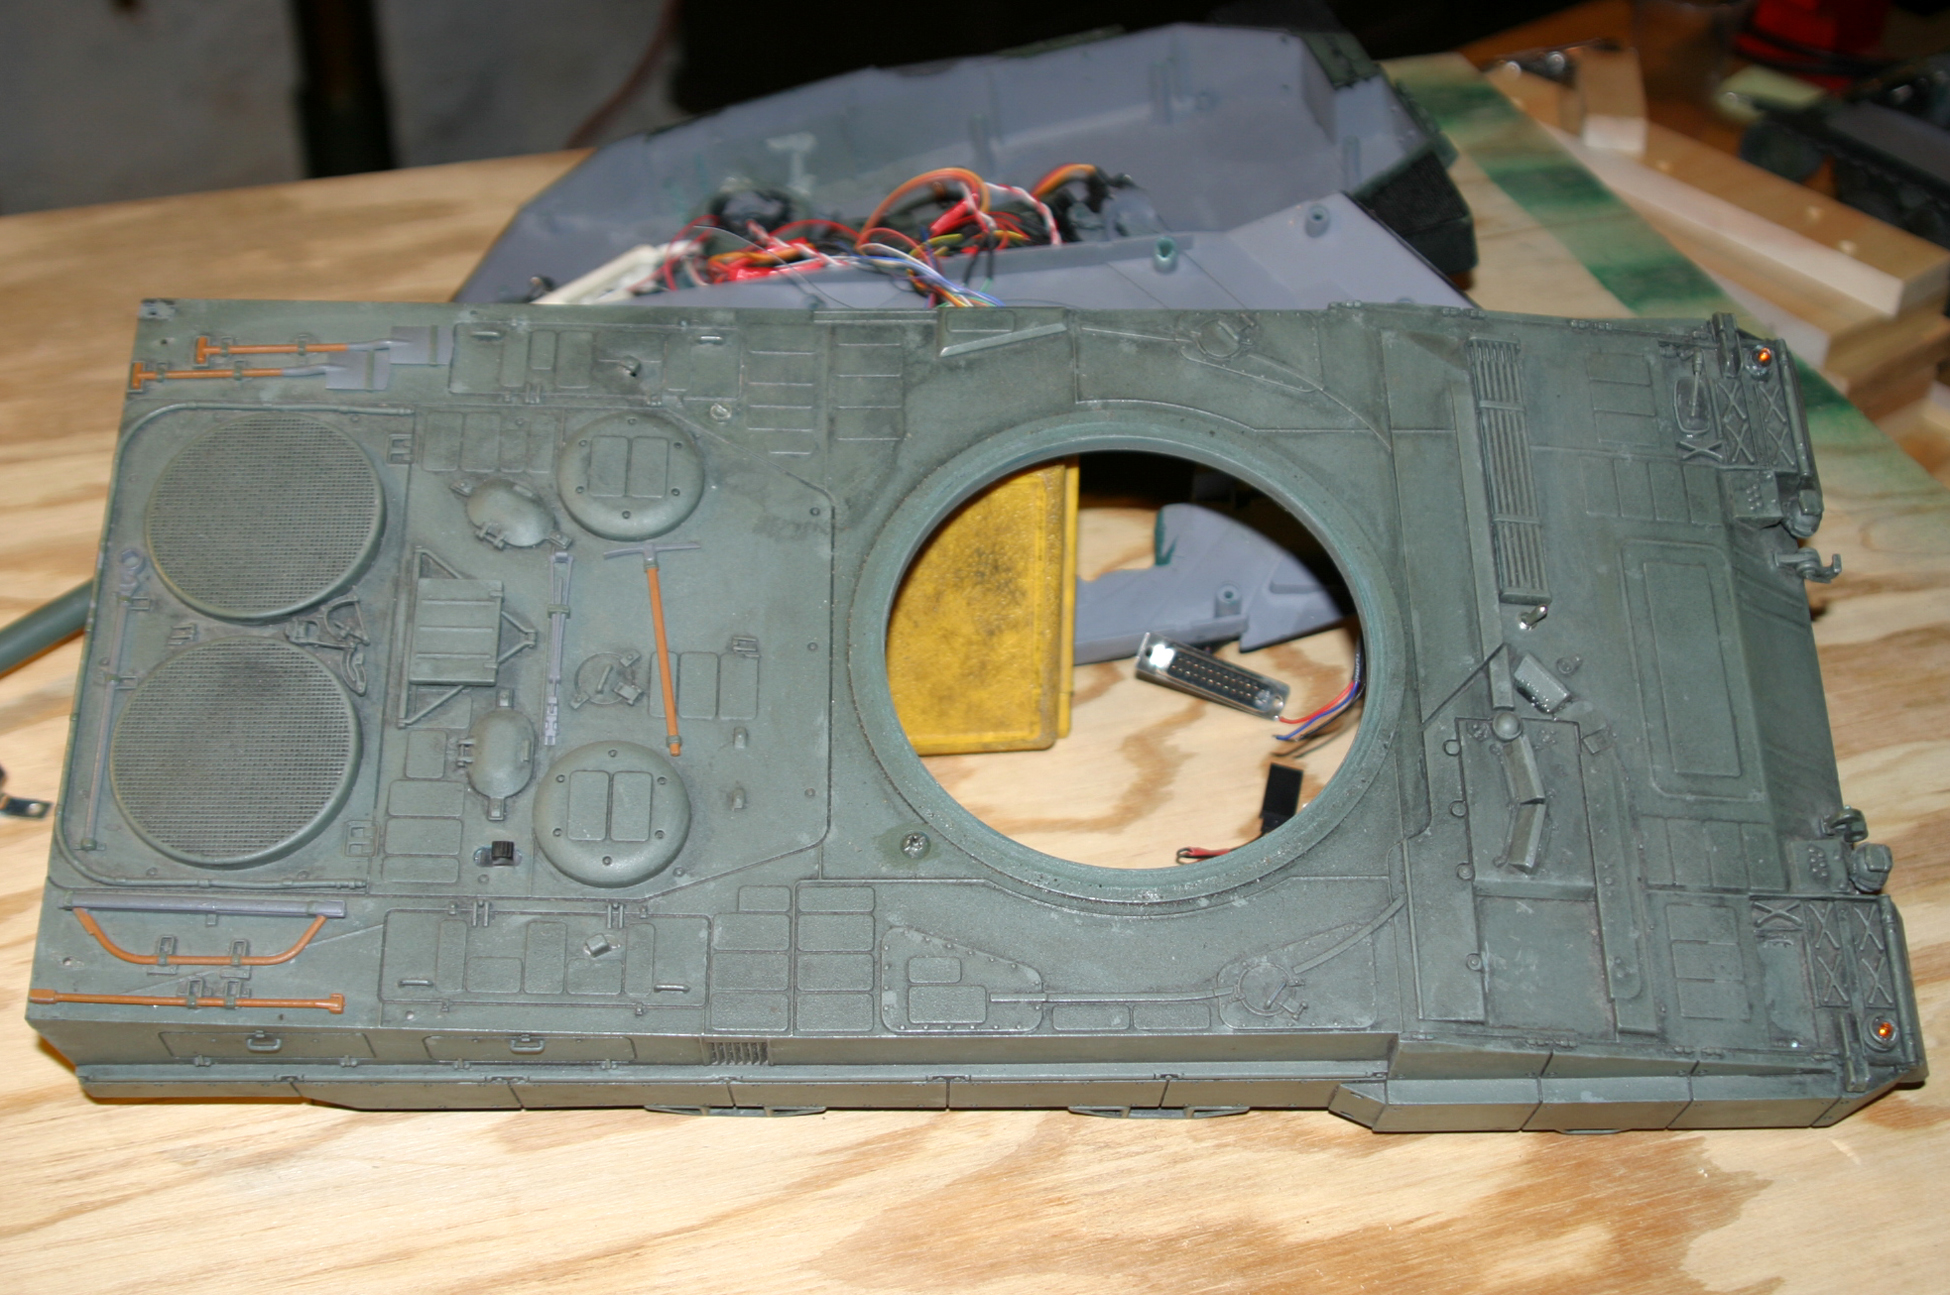
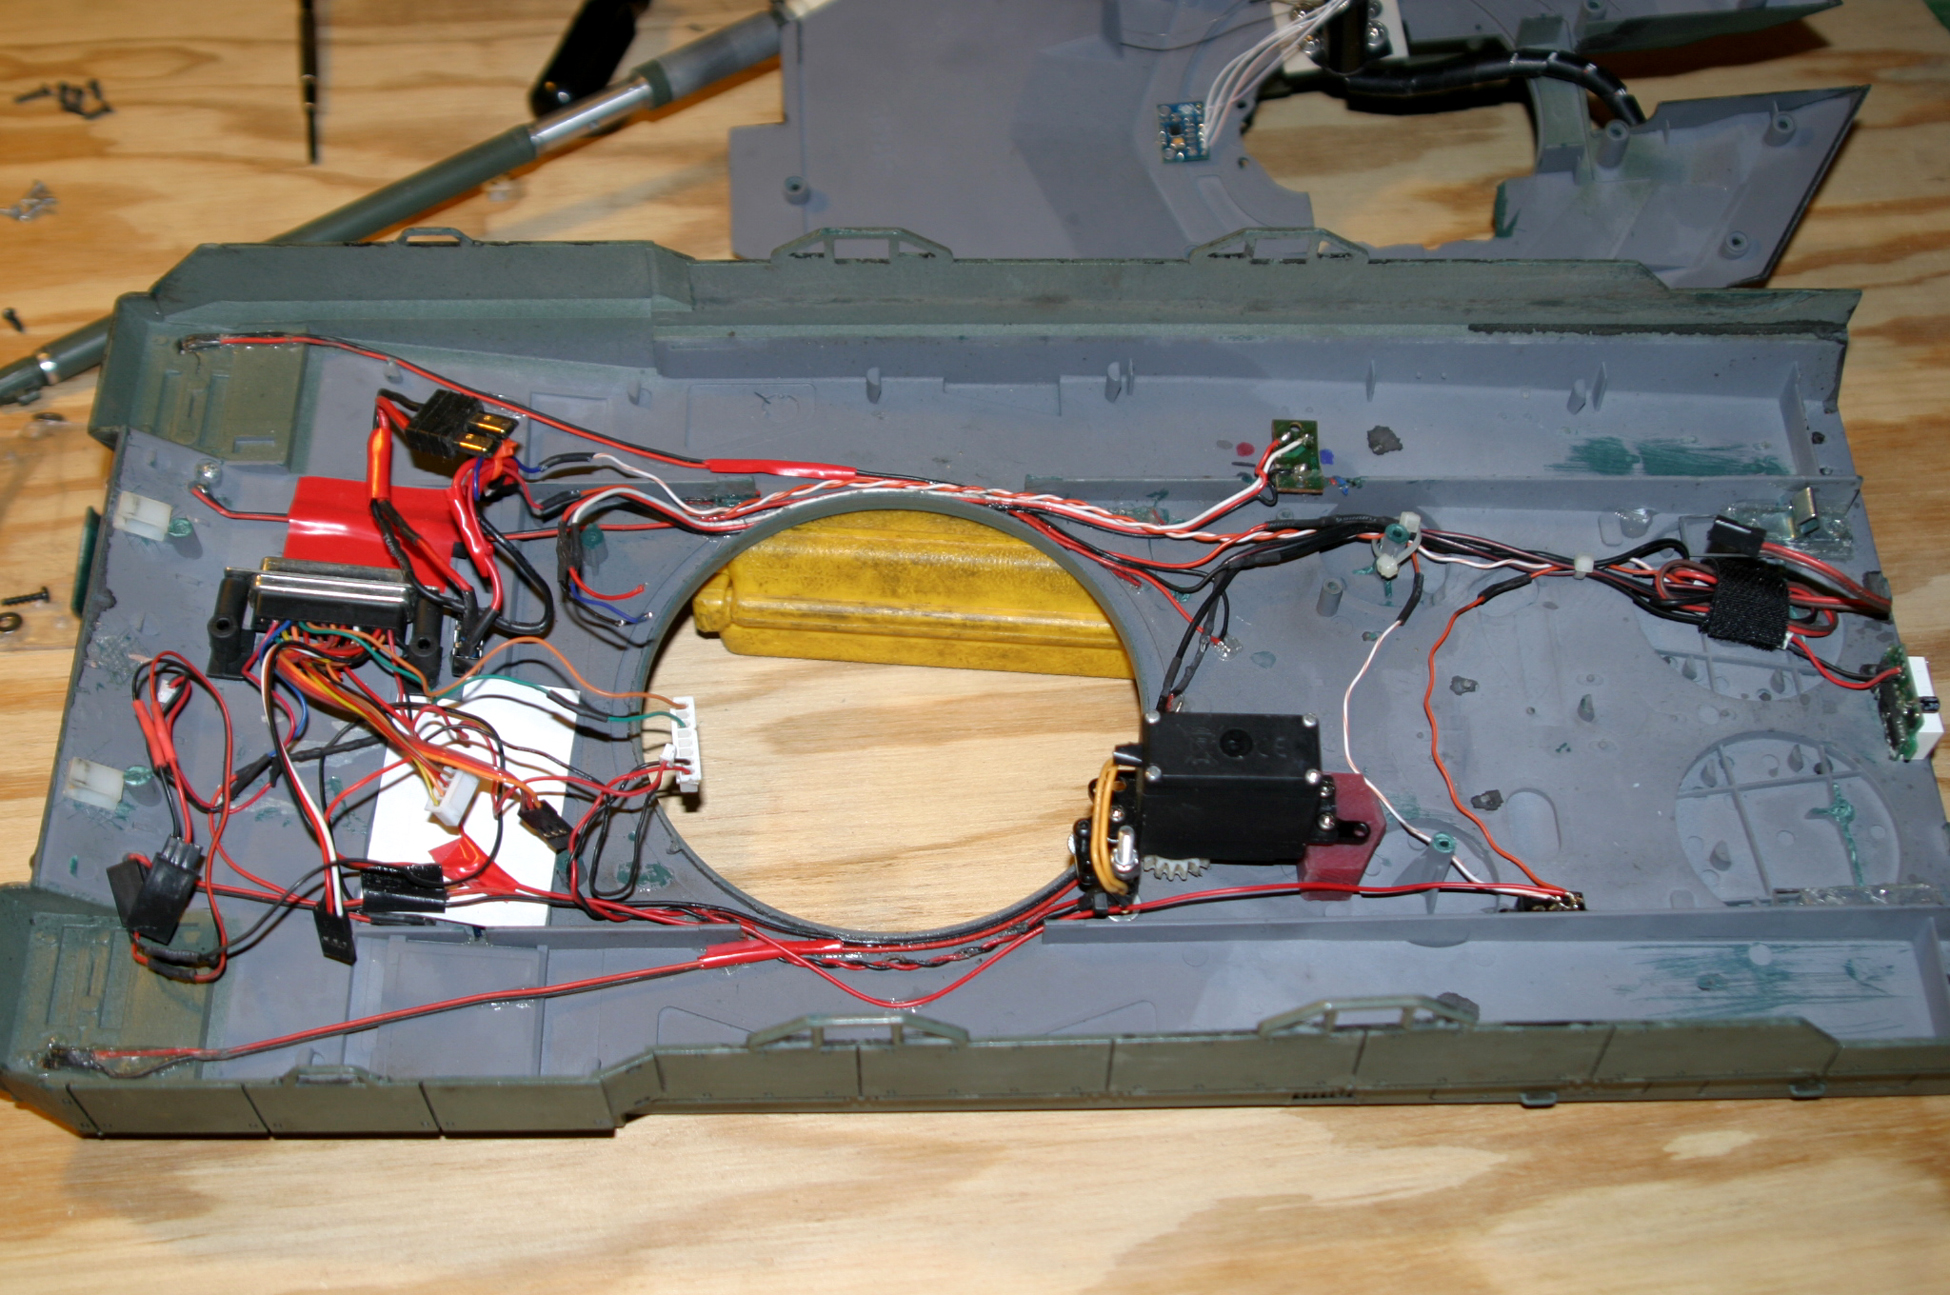
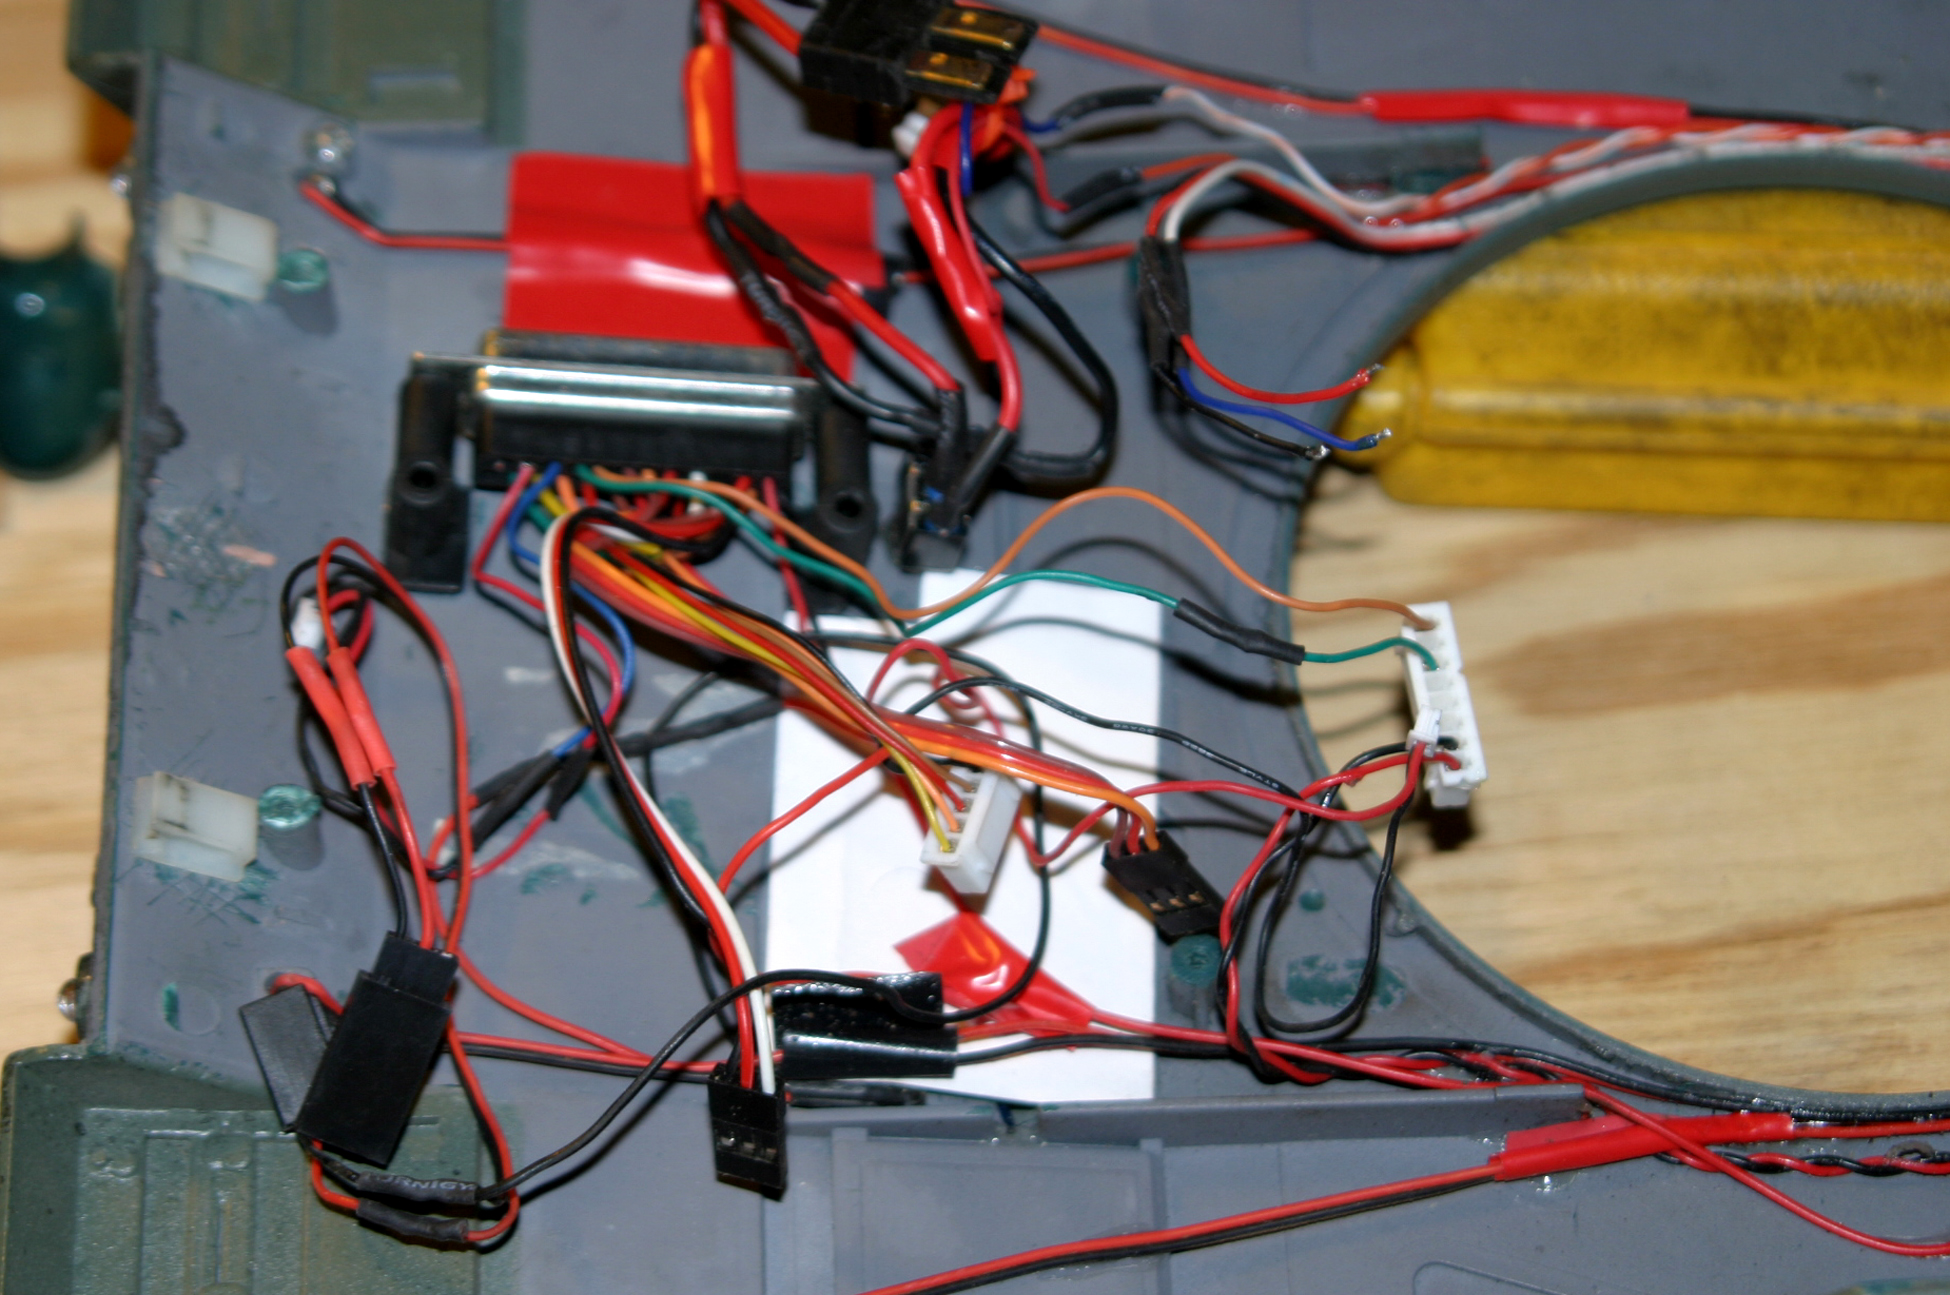
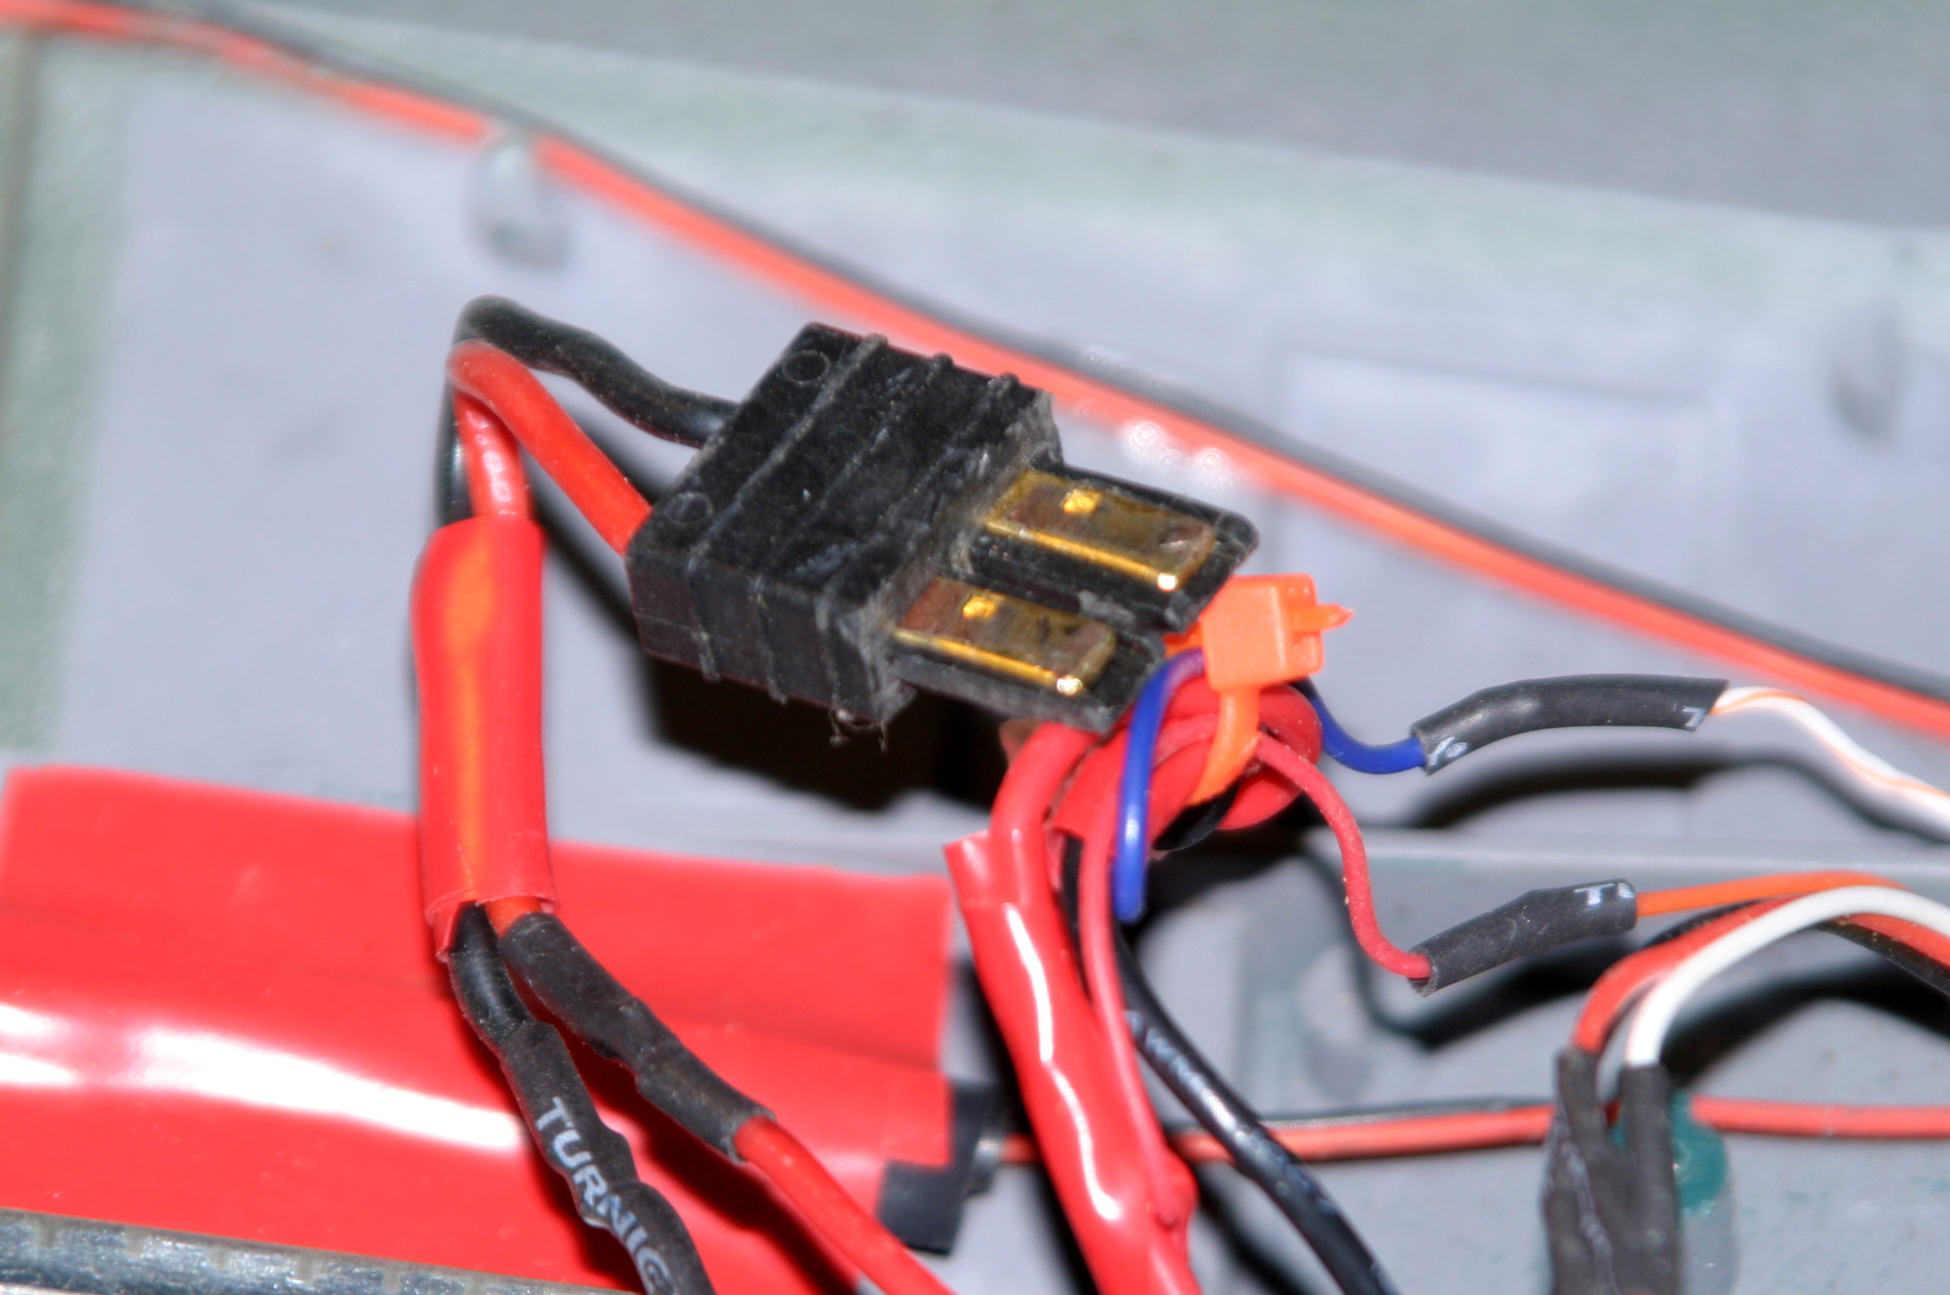
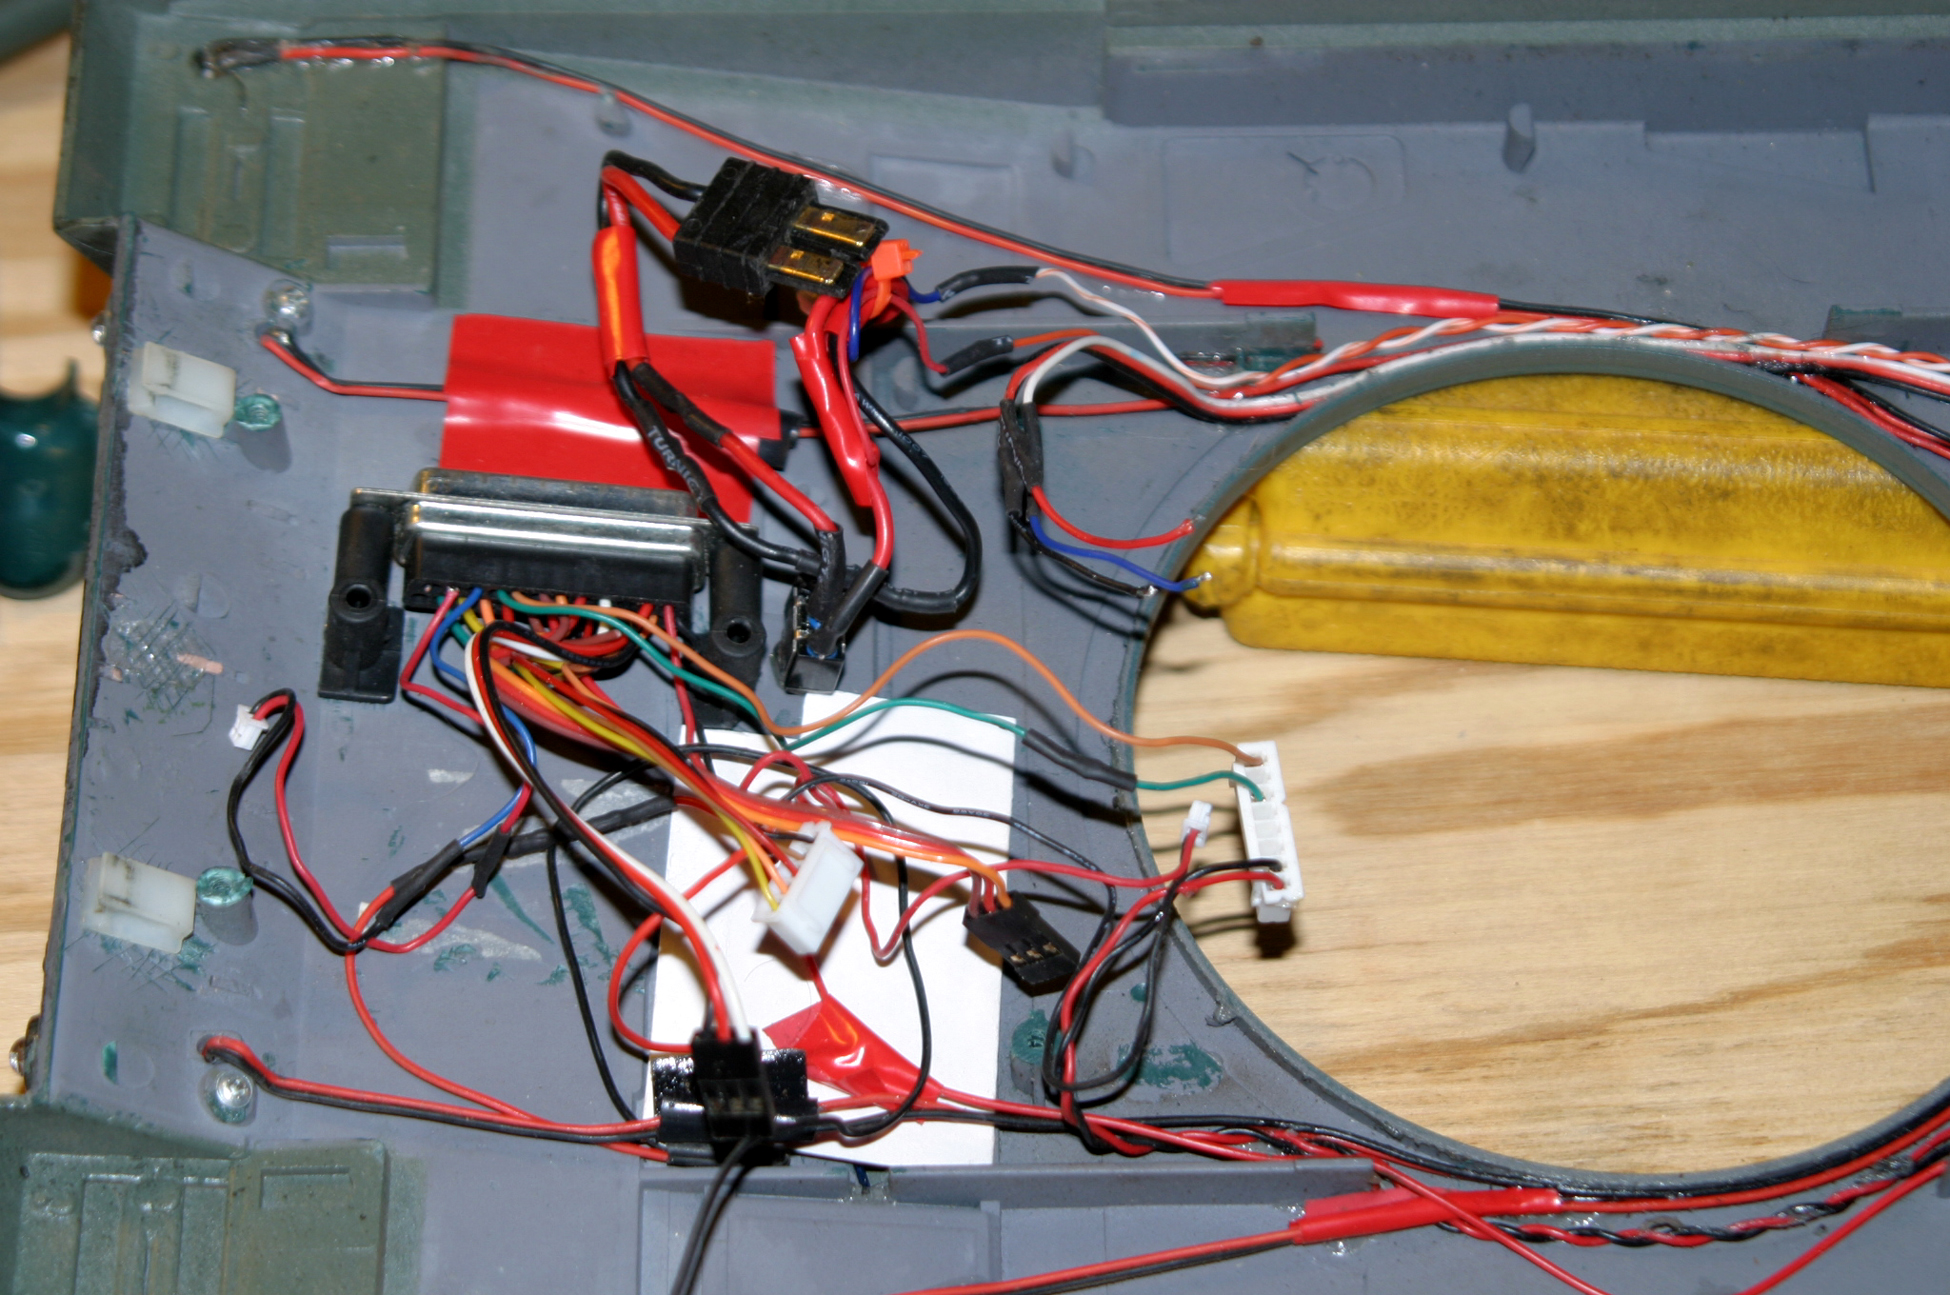
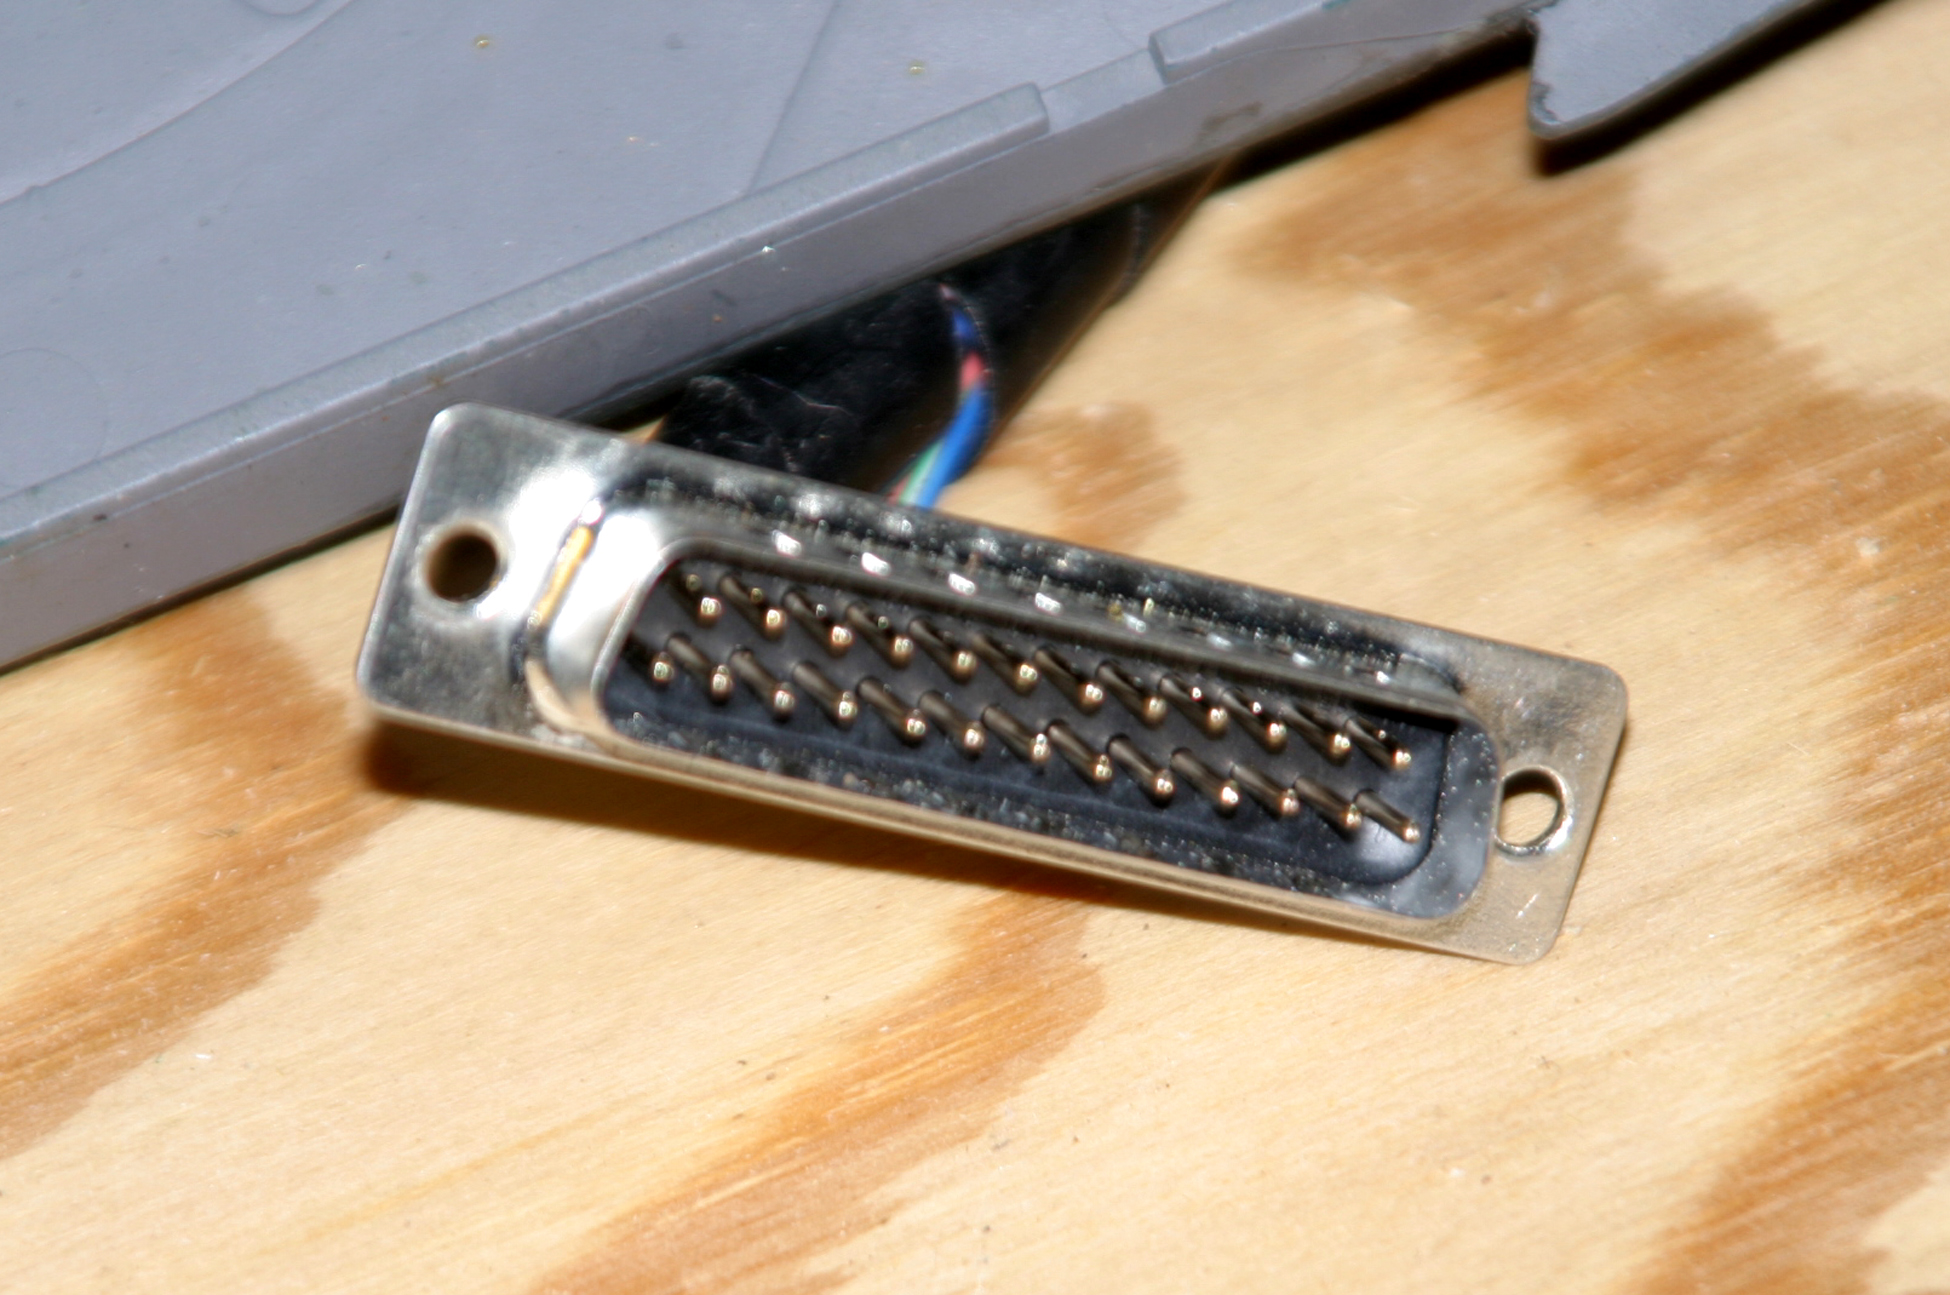
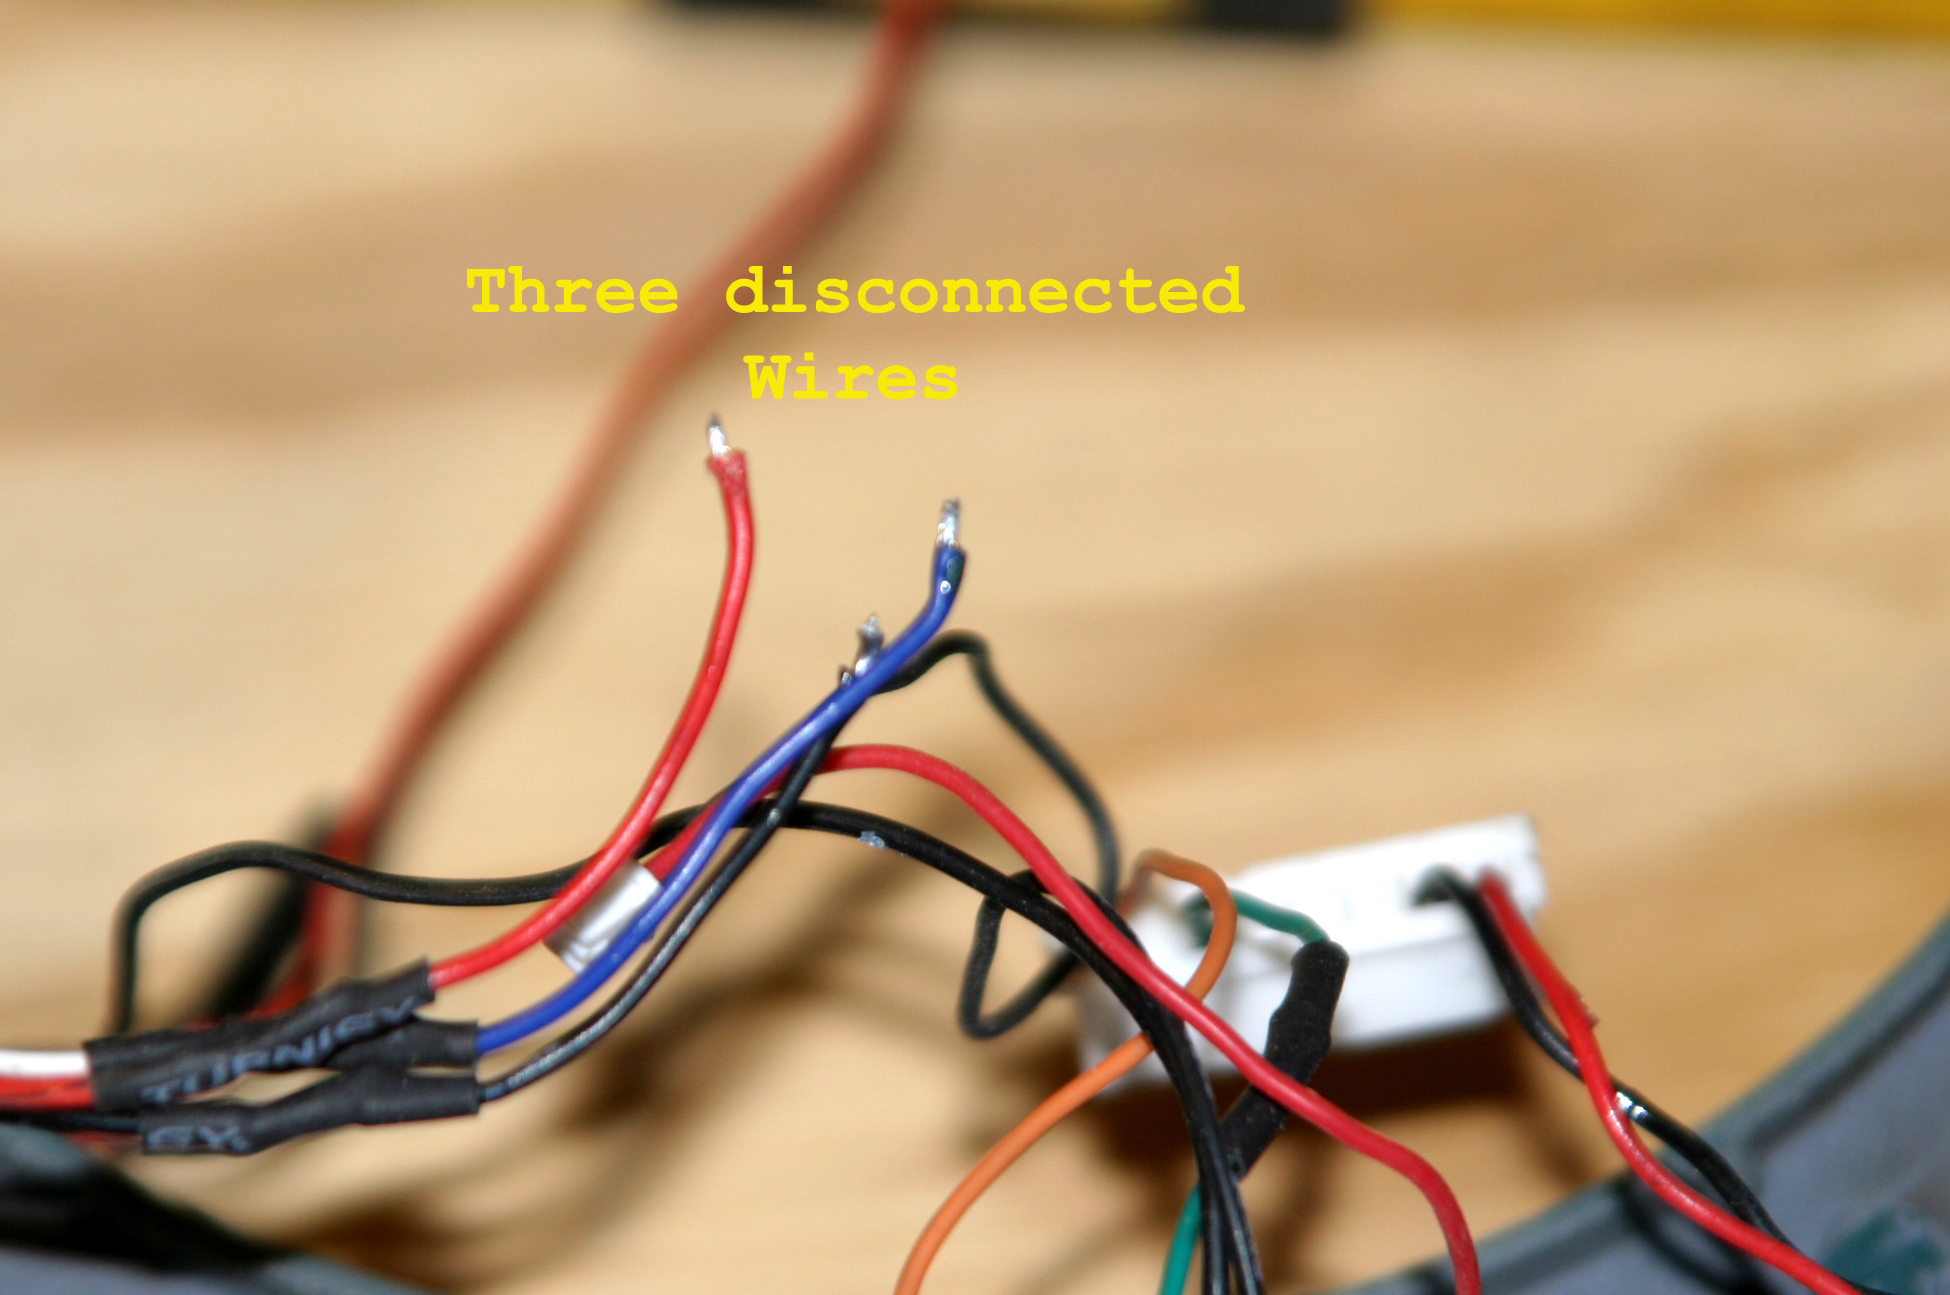
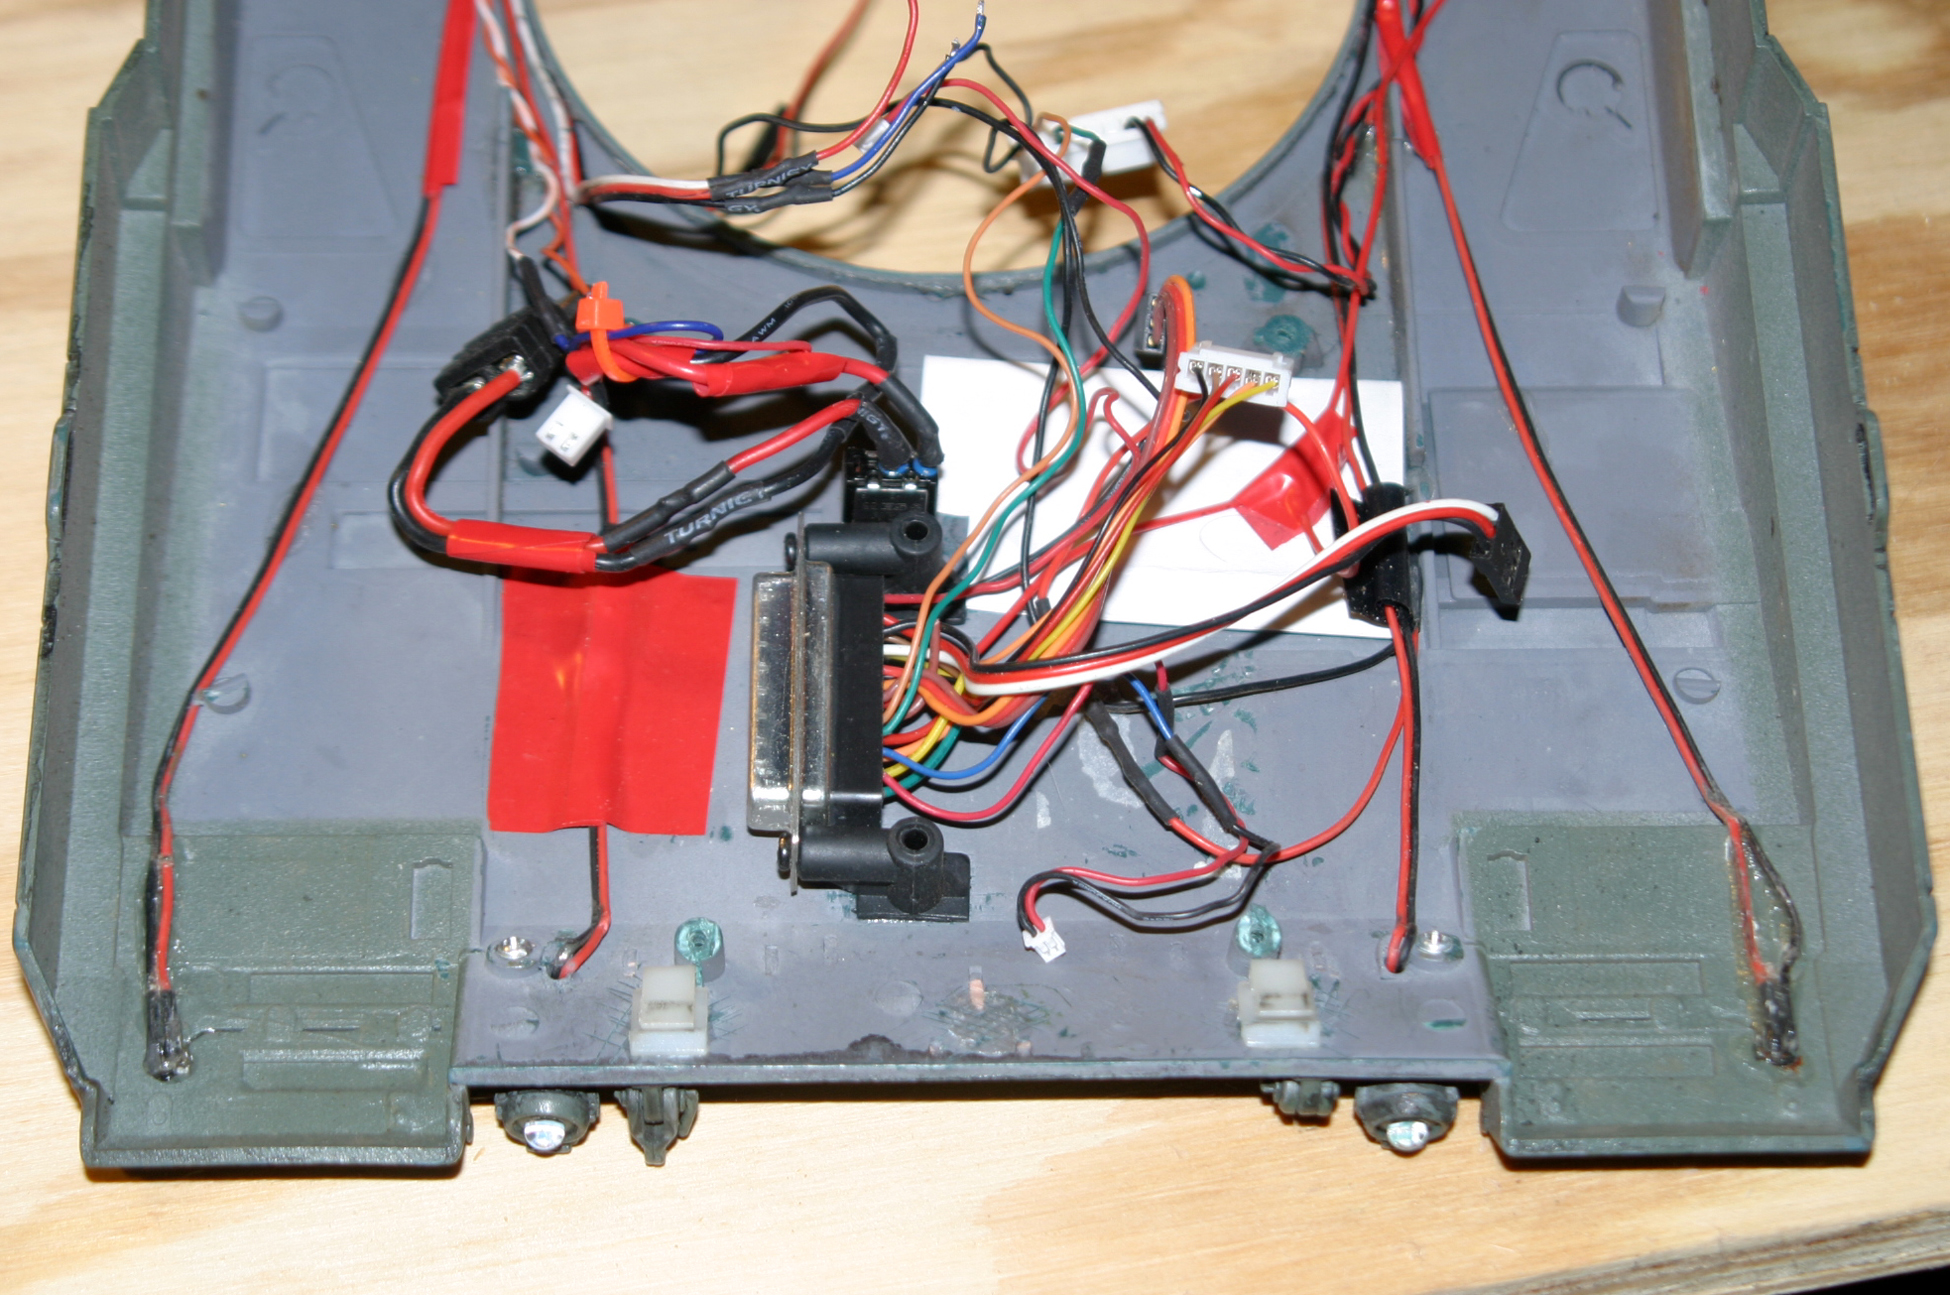
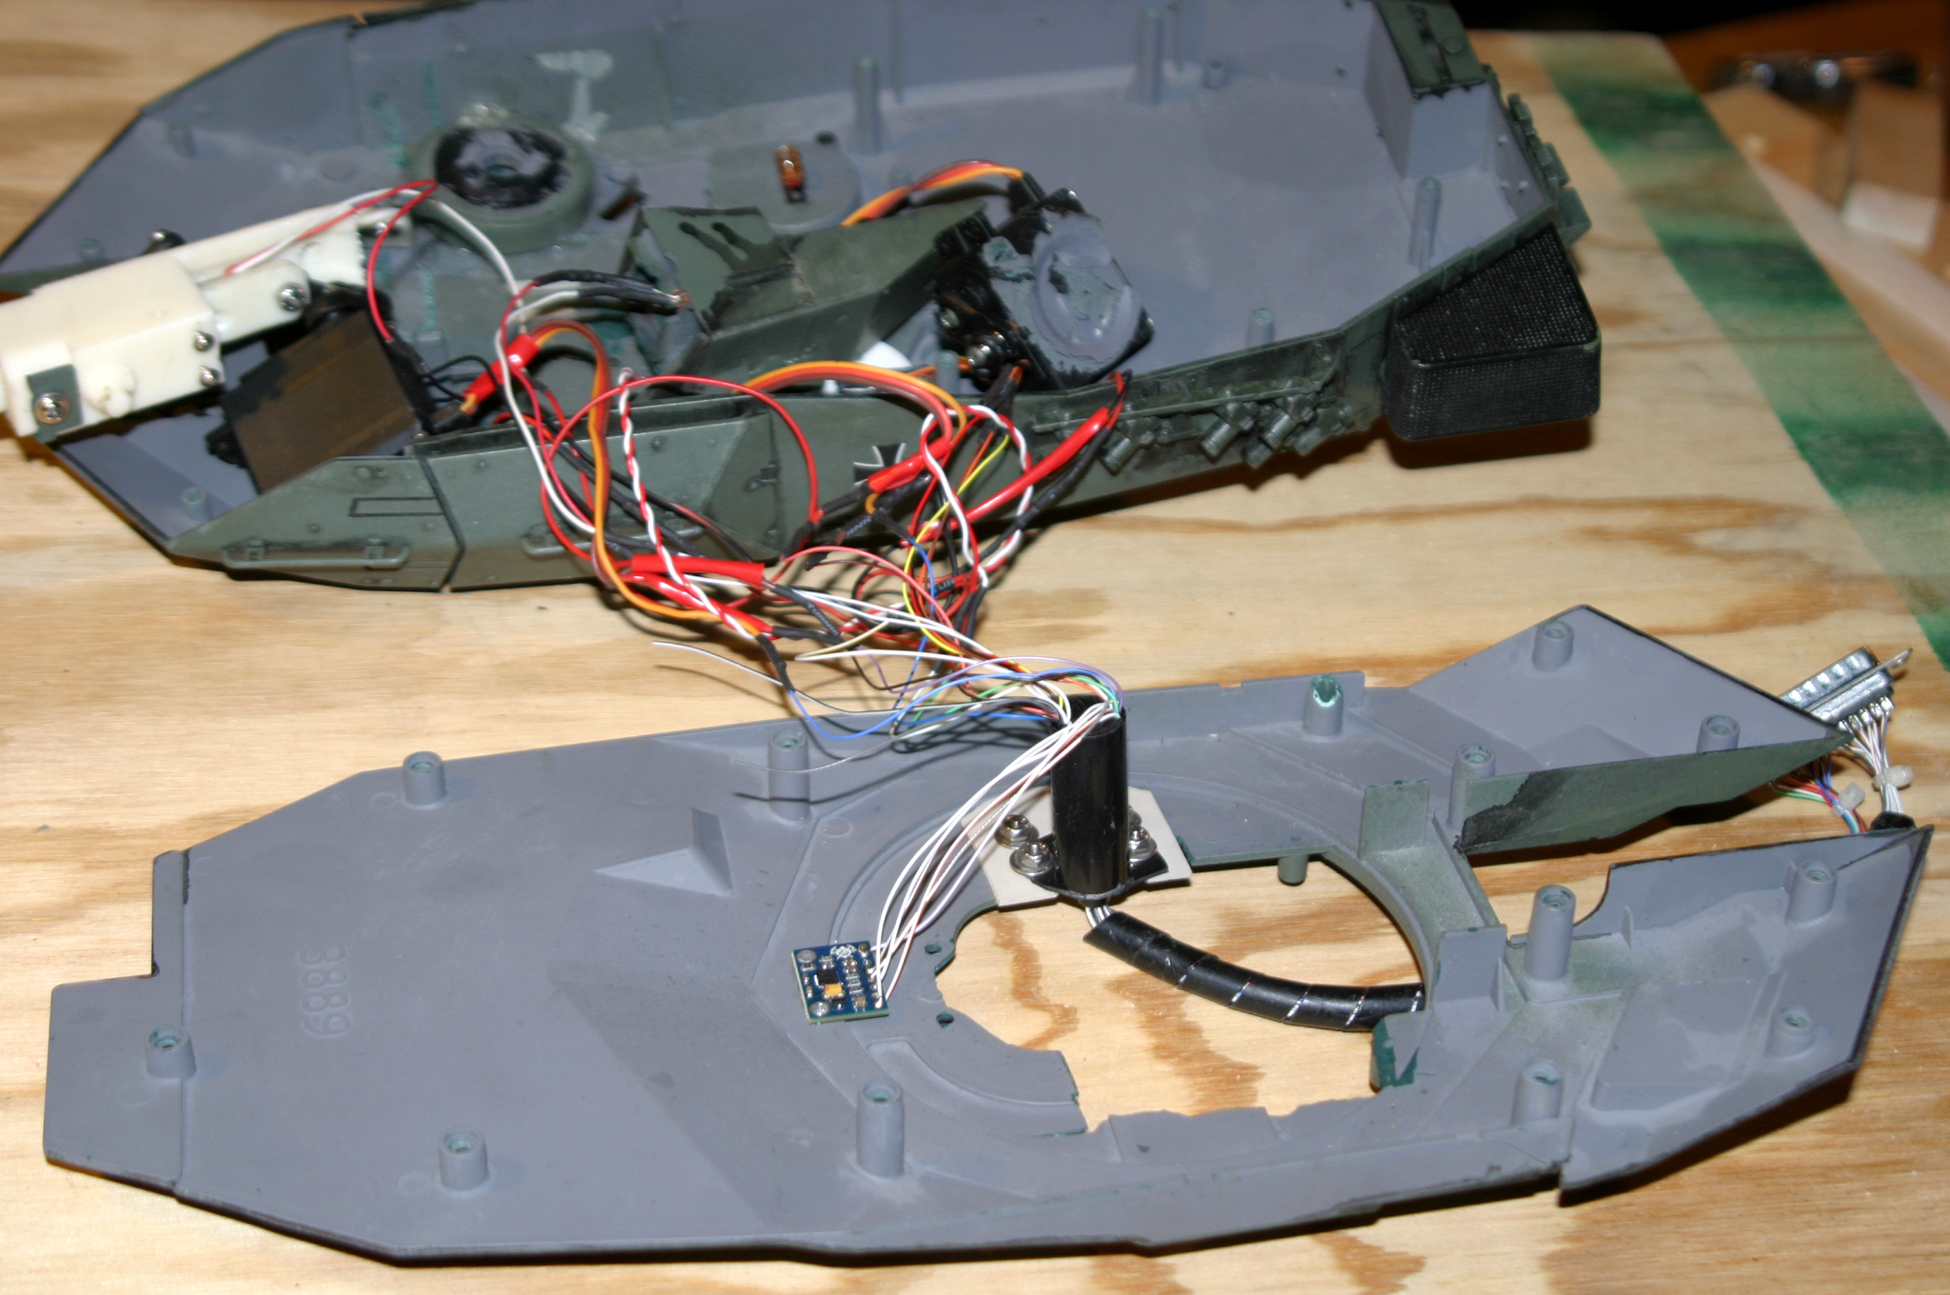
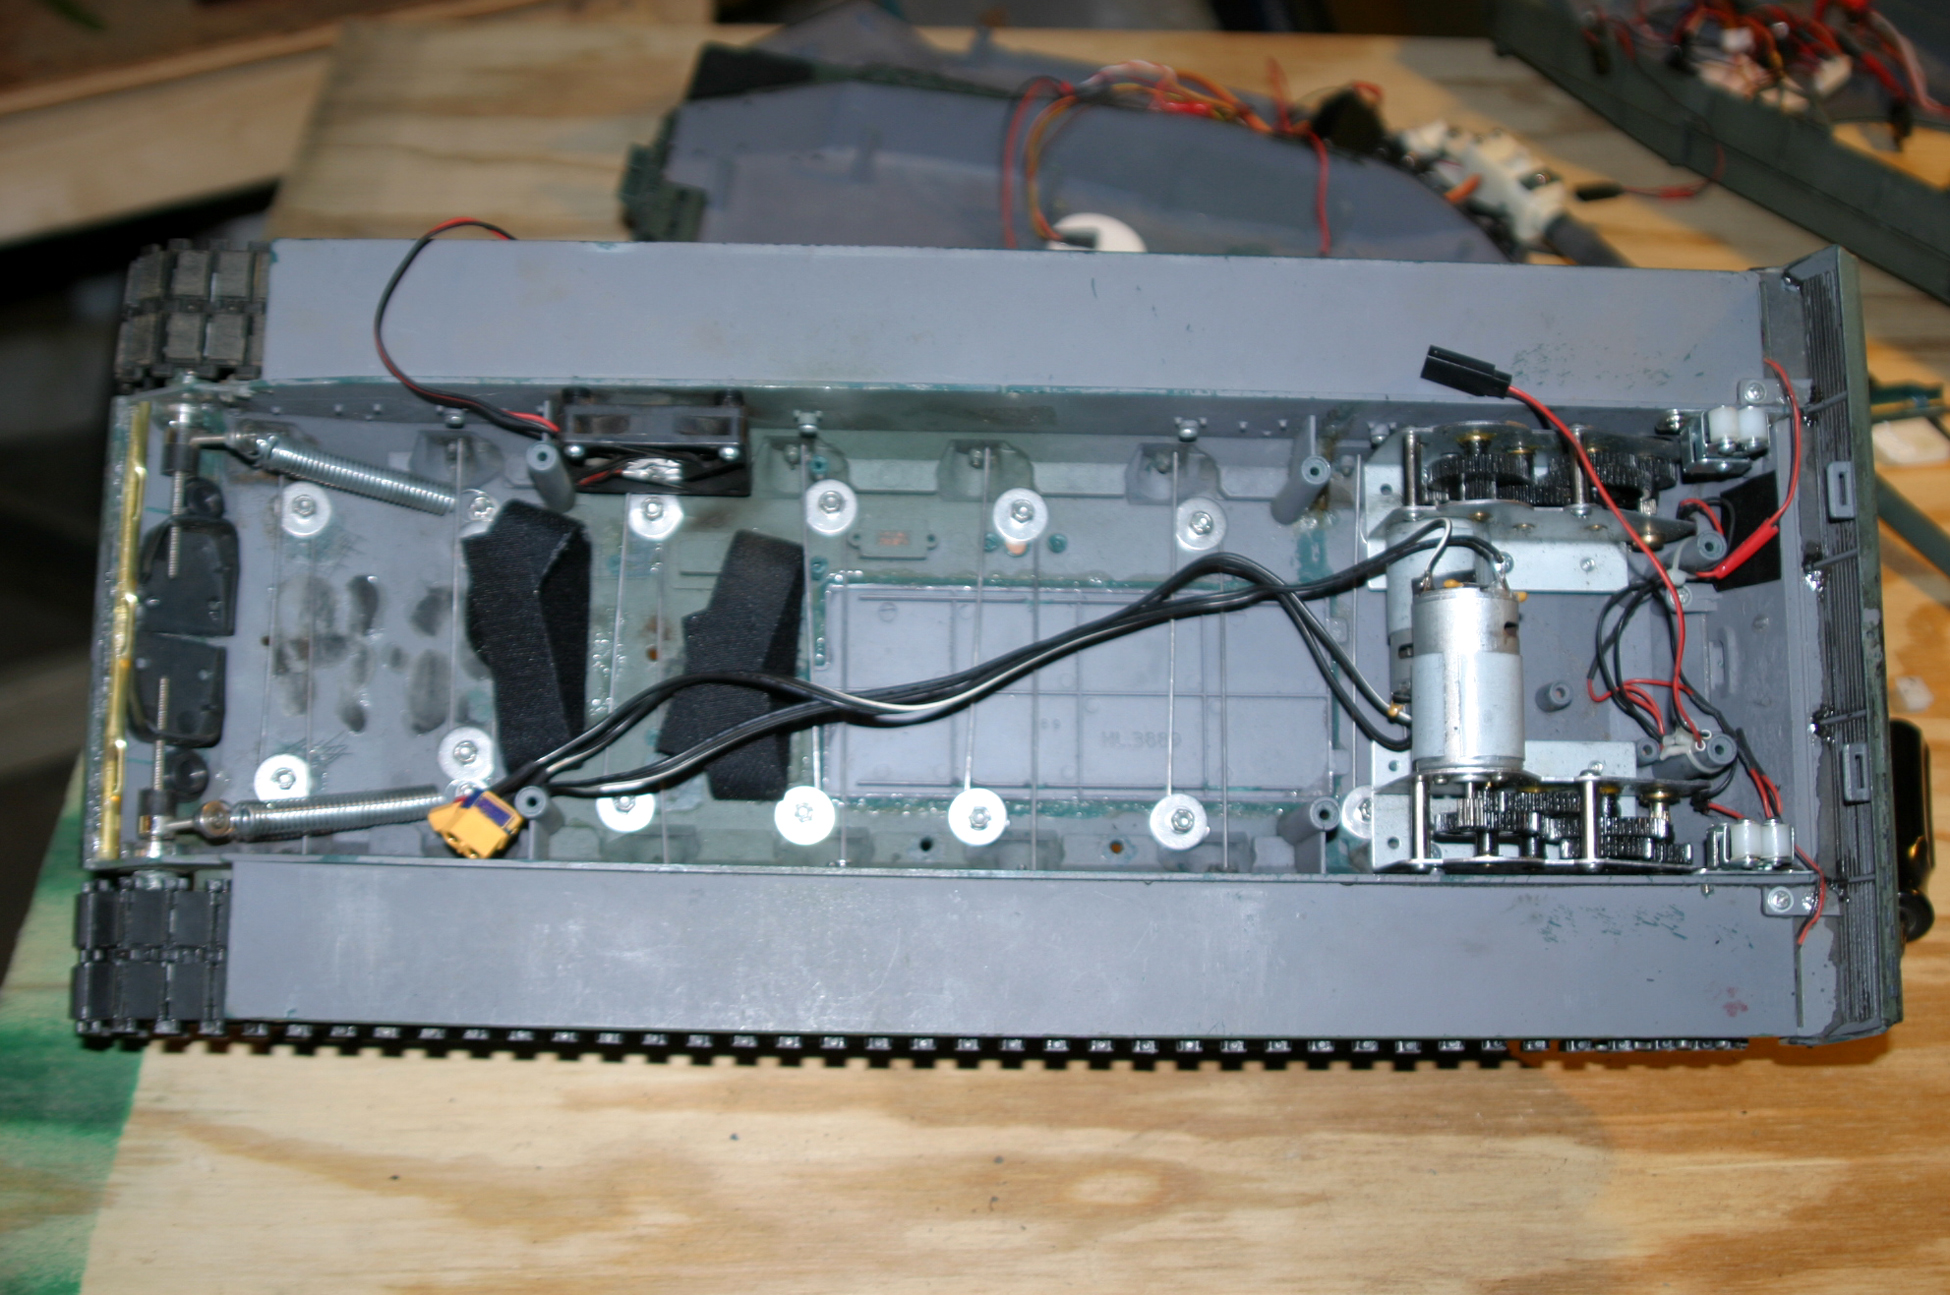
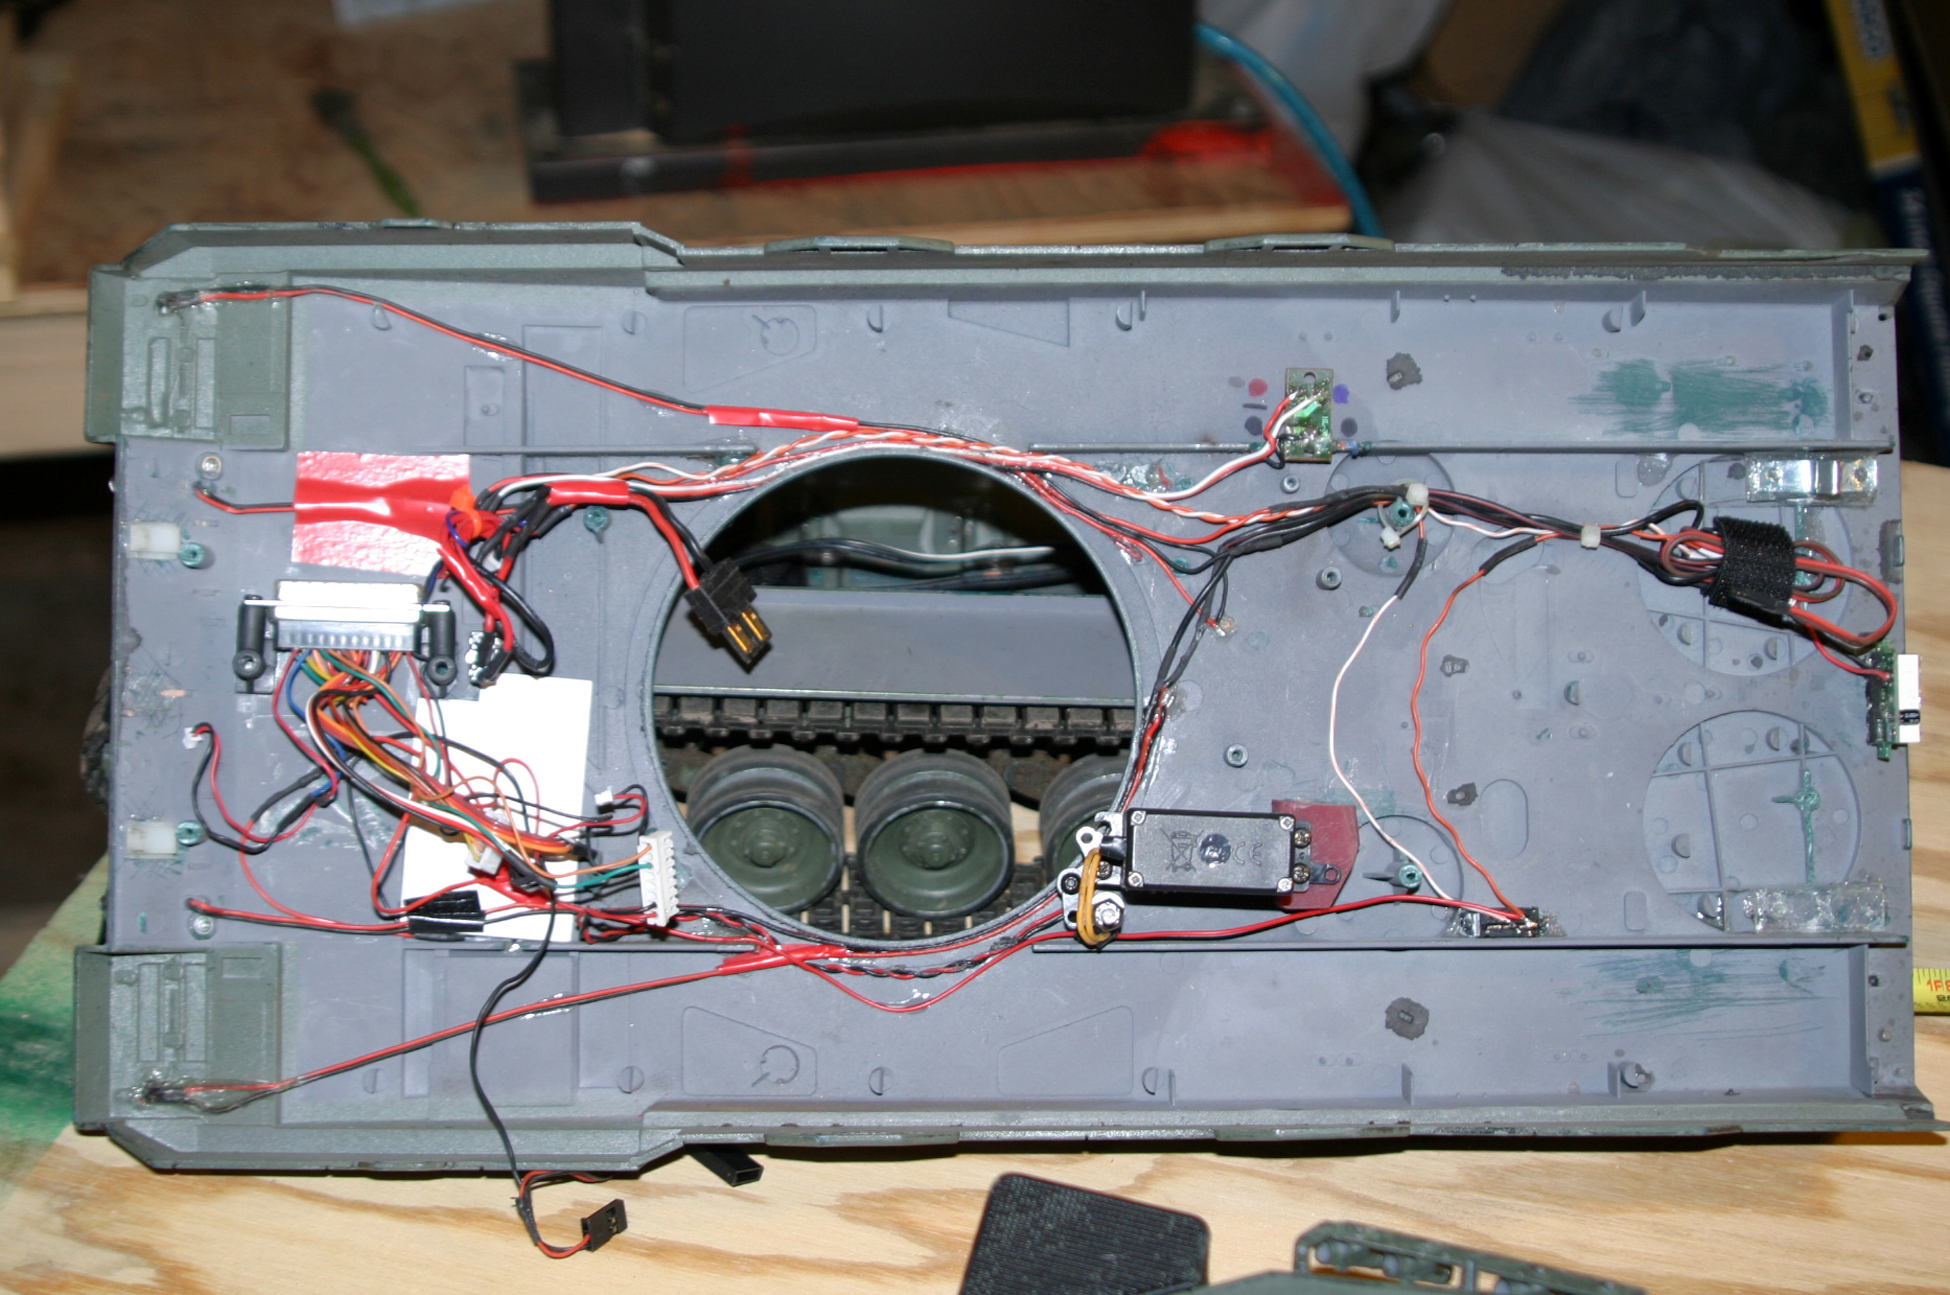
You bet he did!!! Ryan added the torsion bar suspension, metal tracks, metal GB's, 3DP gun mount with recoil, Clark Board and miles and miles of wires. Quite a bit of the wiring is lighting. I just have to sort out a few unattached wires and figure out where everything plugs in.
I've read about Clark Boards, but this is the first for me. What I don't like is there are no mounting holes. I'll have to figure out how to mount it so it doesn't get loose and short something out. Ryan's a great guy and all I have to do is ask him a few questions and it should go back together. I wish he drew up a wiring schematic to make things easier, but he didn't. Of course he knew where things had to go when he put it together.
When I get it working, I'll be making an extensive drawing of all the wires and I'll probably get tags like an electrician would use to make it simple if it has to come apart again.
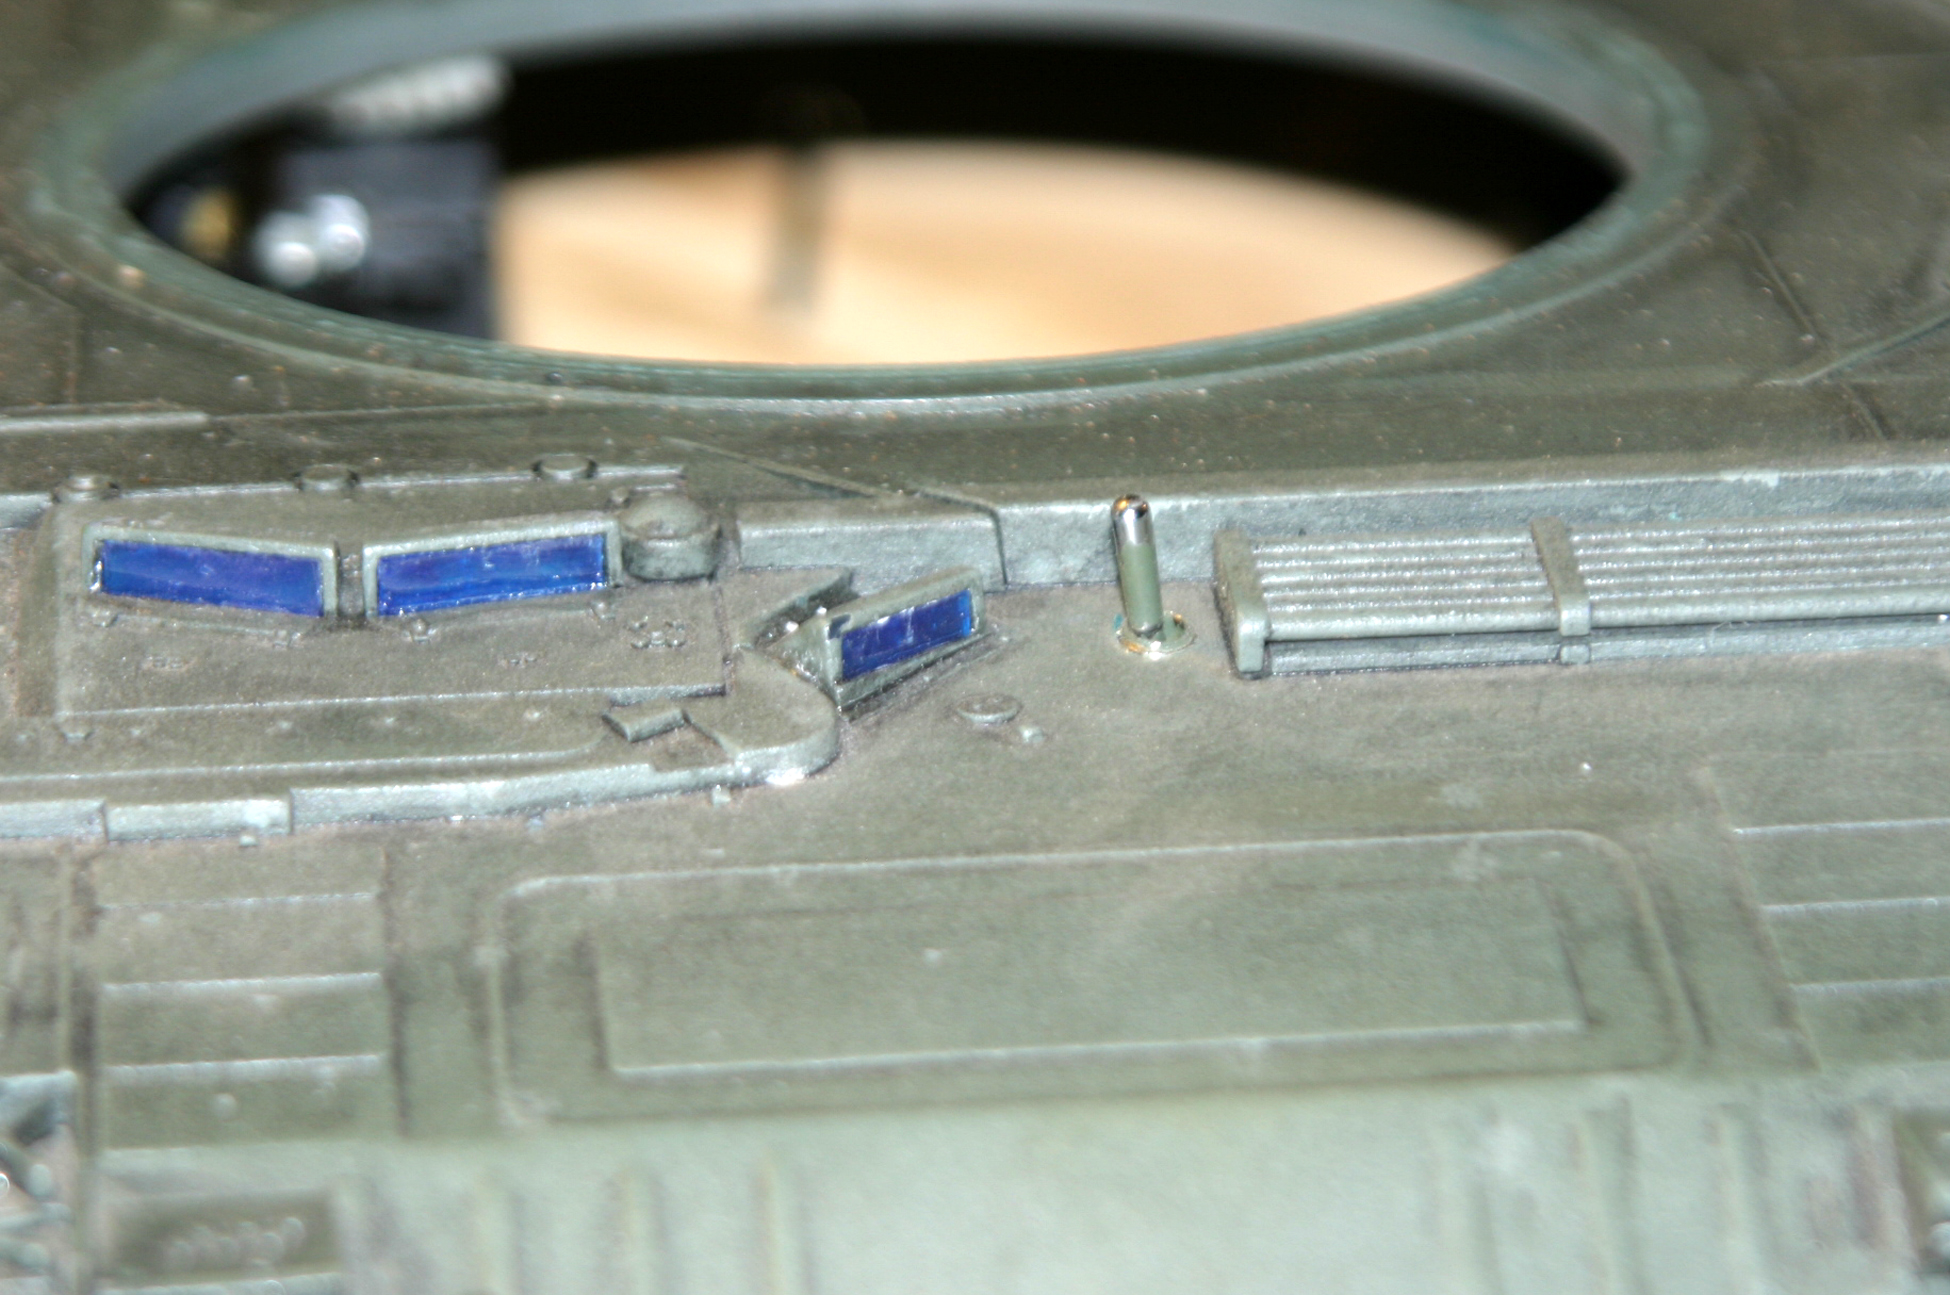
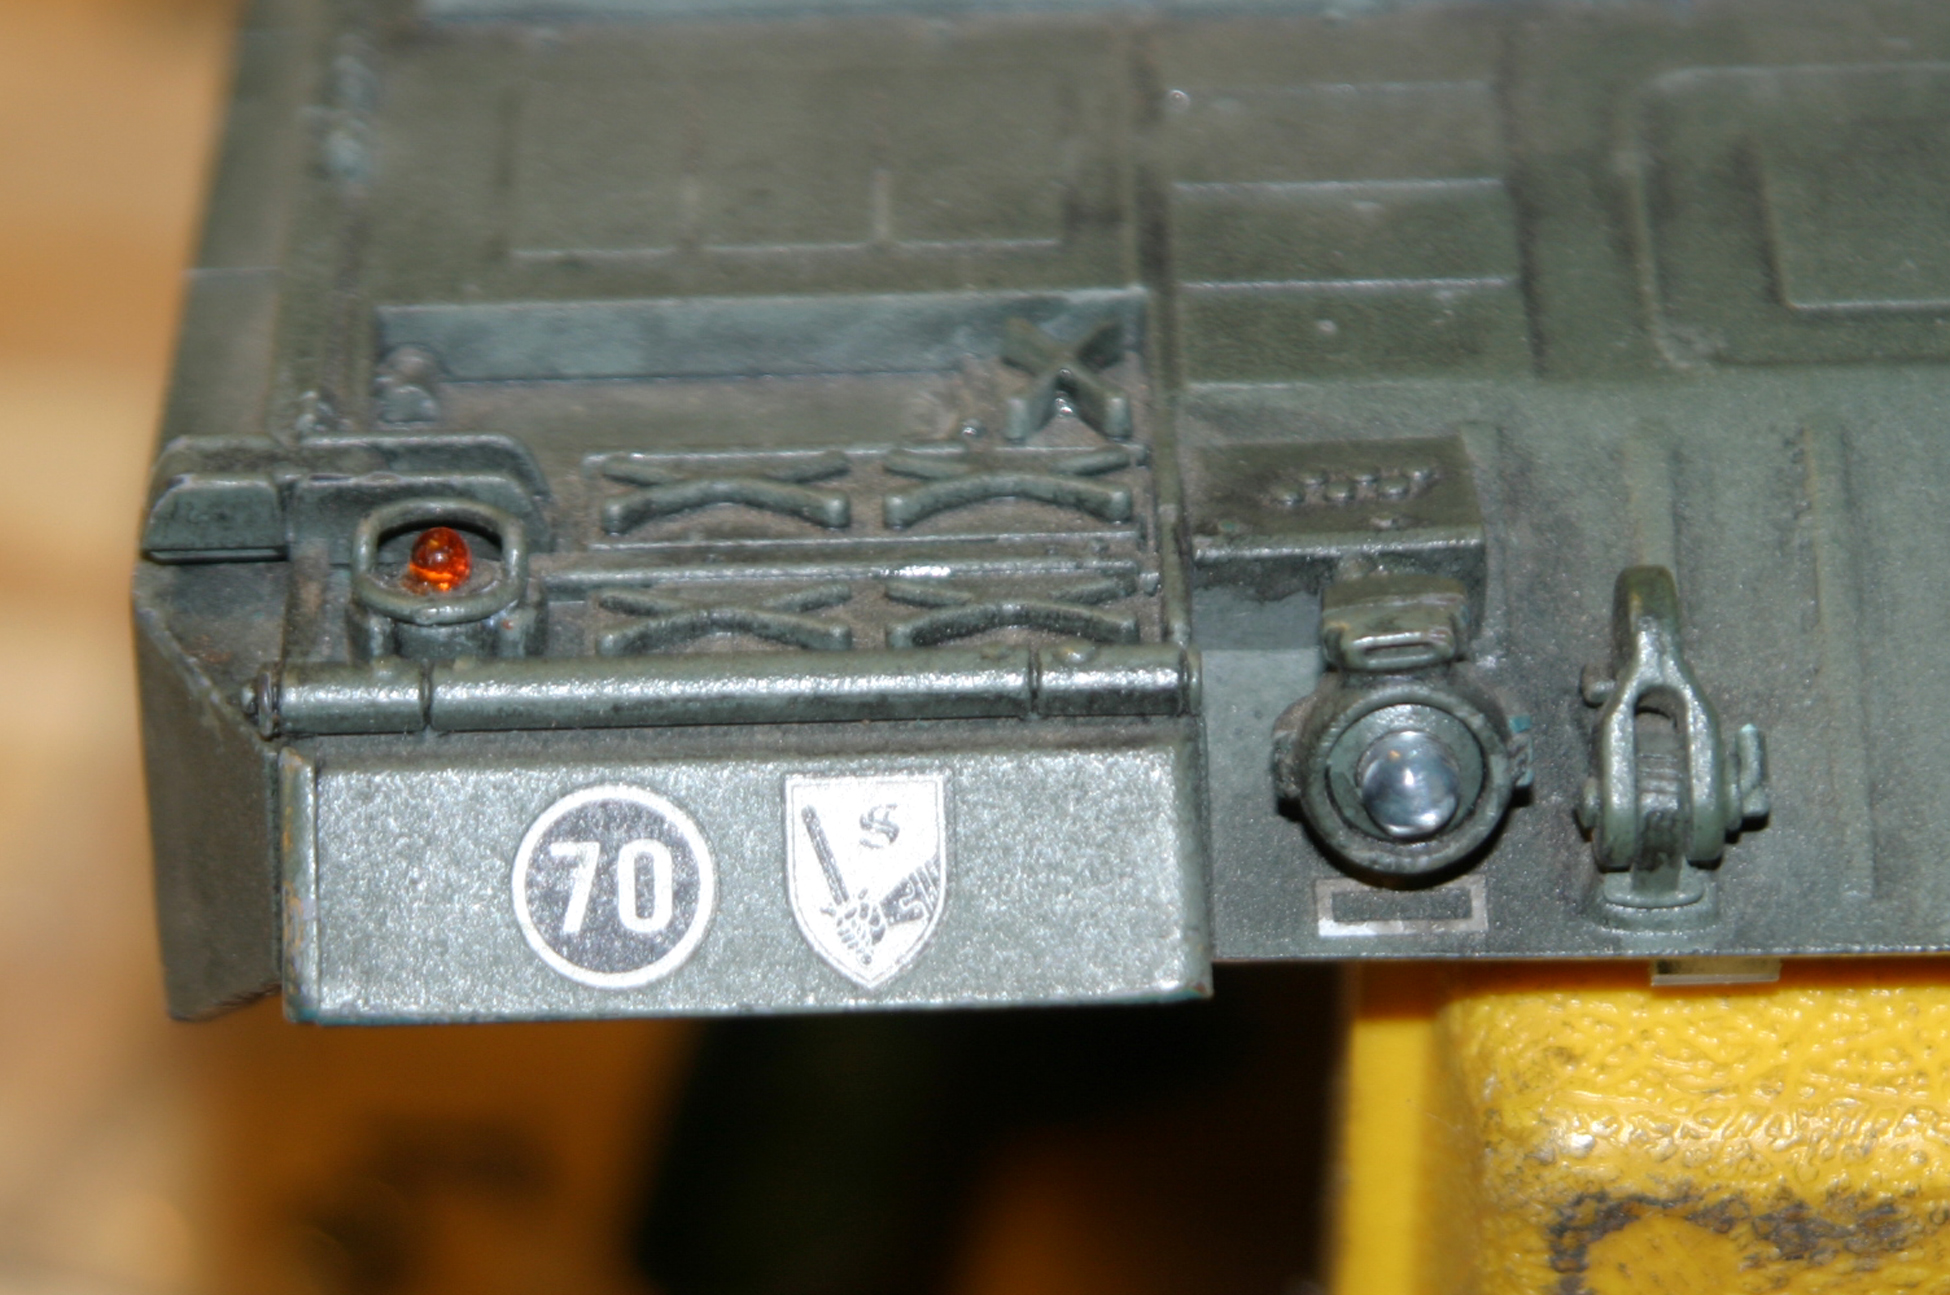
Sorry all the photos are not in order. I'll do a better job the next time I upload photo into my blog.
You bet he did!!! Ryan added the torsion bar suspension, metal tracks, metal GB's, 3DP gun mount with recoil, Clark Board and miles and miles of wires. Quite a bit of the wiring is lighting. I just have to sort out a few unattached wires and figure out where everything plugs in.
I've read about Clark Boards, but this is the first for me. What I don't like is there are no mounting holes. I'll have to figure out how to mount it so it doesn't get loose and short something out. Ryan's a great guy and all I have to do is ask him a few questions and it should go back together. I wish he drew up a wiring schematic to make things easier, but he didn't. Of course he knew where things had to go when he put it together.
When I get it working, I'll be making an extensive drawing of all the wires and I'll probably get tags like an electrician would use to make it simple if it has to come apart again.
Sorry all the photos are not in order. I'll do a better job the next time I upload photo into my blog.
10-14-2015 | 03:52 AM
#4

Joined: Jul 2013
Posts: 378
Likes: 0
Received 0 Likes
on
0 Posts
From: sayreville, NJ
Familiar with styrene? Make a plate with blocks to screw the boards to like I did. That is Clarks GBS unit. If this is your first, I recommend getting the remote and an IR receiver to program it. Read Clarks instructions on his site very thoroughly and over again. And over again...lol It takes takes time and patience to get it set up and operating smooth. What TX are you using?
And yes, that tank has a boatload of work done to it.
And yes, that tank has a boatload of work done to it.
 10-14-2015 | 04:52 AM
#5
Thread Starter
Member
Joined: Apr 2015
Posts: 33
Likes: 0
Received 0 Likes
on
0 Posts
Thanks mcm308!!! Yeah I have styrene sheet. I'll come up with something like what you posted here. I just got a FlySky 9 channel TX with a couple extra RX's with it. I have a couple other tanks and I want to use the same RC system for all of them. My first 1/16th tank is an old Tamiya M4. I added an M51 turret to it and I'm using a mini servo to elevate the gun. It also is converted to airsoft. I'm almost finished with it. I'm still waiting for a couple small ESC's so I can wire it up. I almost had plans to use the CB from this tank in my Sherman. I decided to leave it in the Leo and I'll get another one for my M4.
Thanks again for your photo and help with this project!!! Where did you get the Micro Servo's for your Leo?
Thanks again for your photo and help with this project!!! Where did you get the Micro Servo's for your Leo?
10-14-2015 | 05:03 AM
#6
Thread Starter
Member
Joined: Apr 2015
Posts: 33
Likes: 0
Received 0 Likes
on
0 Posts
If anyone's interested in checking out my Old Tamiya M4 and my M36B-1 build they're on RC Groups Tanks page. Here's a couple links:M4 Sherman http://www.rcgroups.com/forums/showthread.php?t=2412393
M36B-1 upper hull for my Tamiya M4 chassis: http://www.rcgroups.com/forums/showthread.php?t=2495679
I'm planning on building a couple upper hulls out of thin gauge sheet steel to make an M7 and an M-10. I just picked up two HL Sherman's that will be used for the M7 and M10 upper's I'll be building. Then I'll be able to use the M36B-1 upper hull on one of the HL chassis to make it look more realistic with the correct suspension.
In the end I'll have 3 tanks with many upper hulls that can be swapped out to have different tanks on the battle field.
10-15-2015 | 11:59 AM
#7
Thread Starter
Member
Joined: Apr 2015
Posts: 33
Likes: 0
Received 0 Likes
on
0 Posts
Hi Everyone,
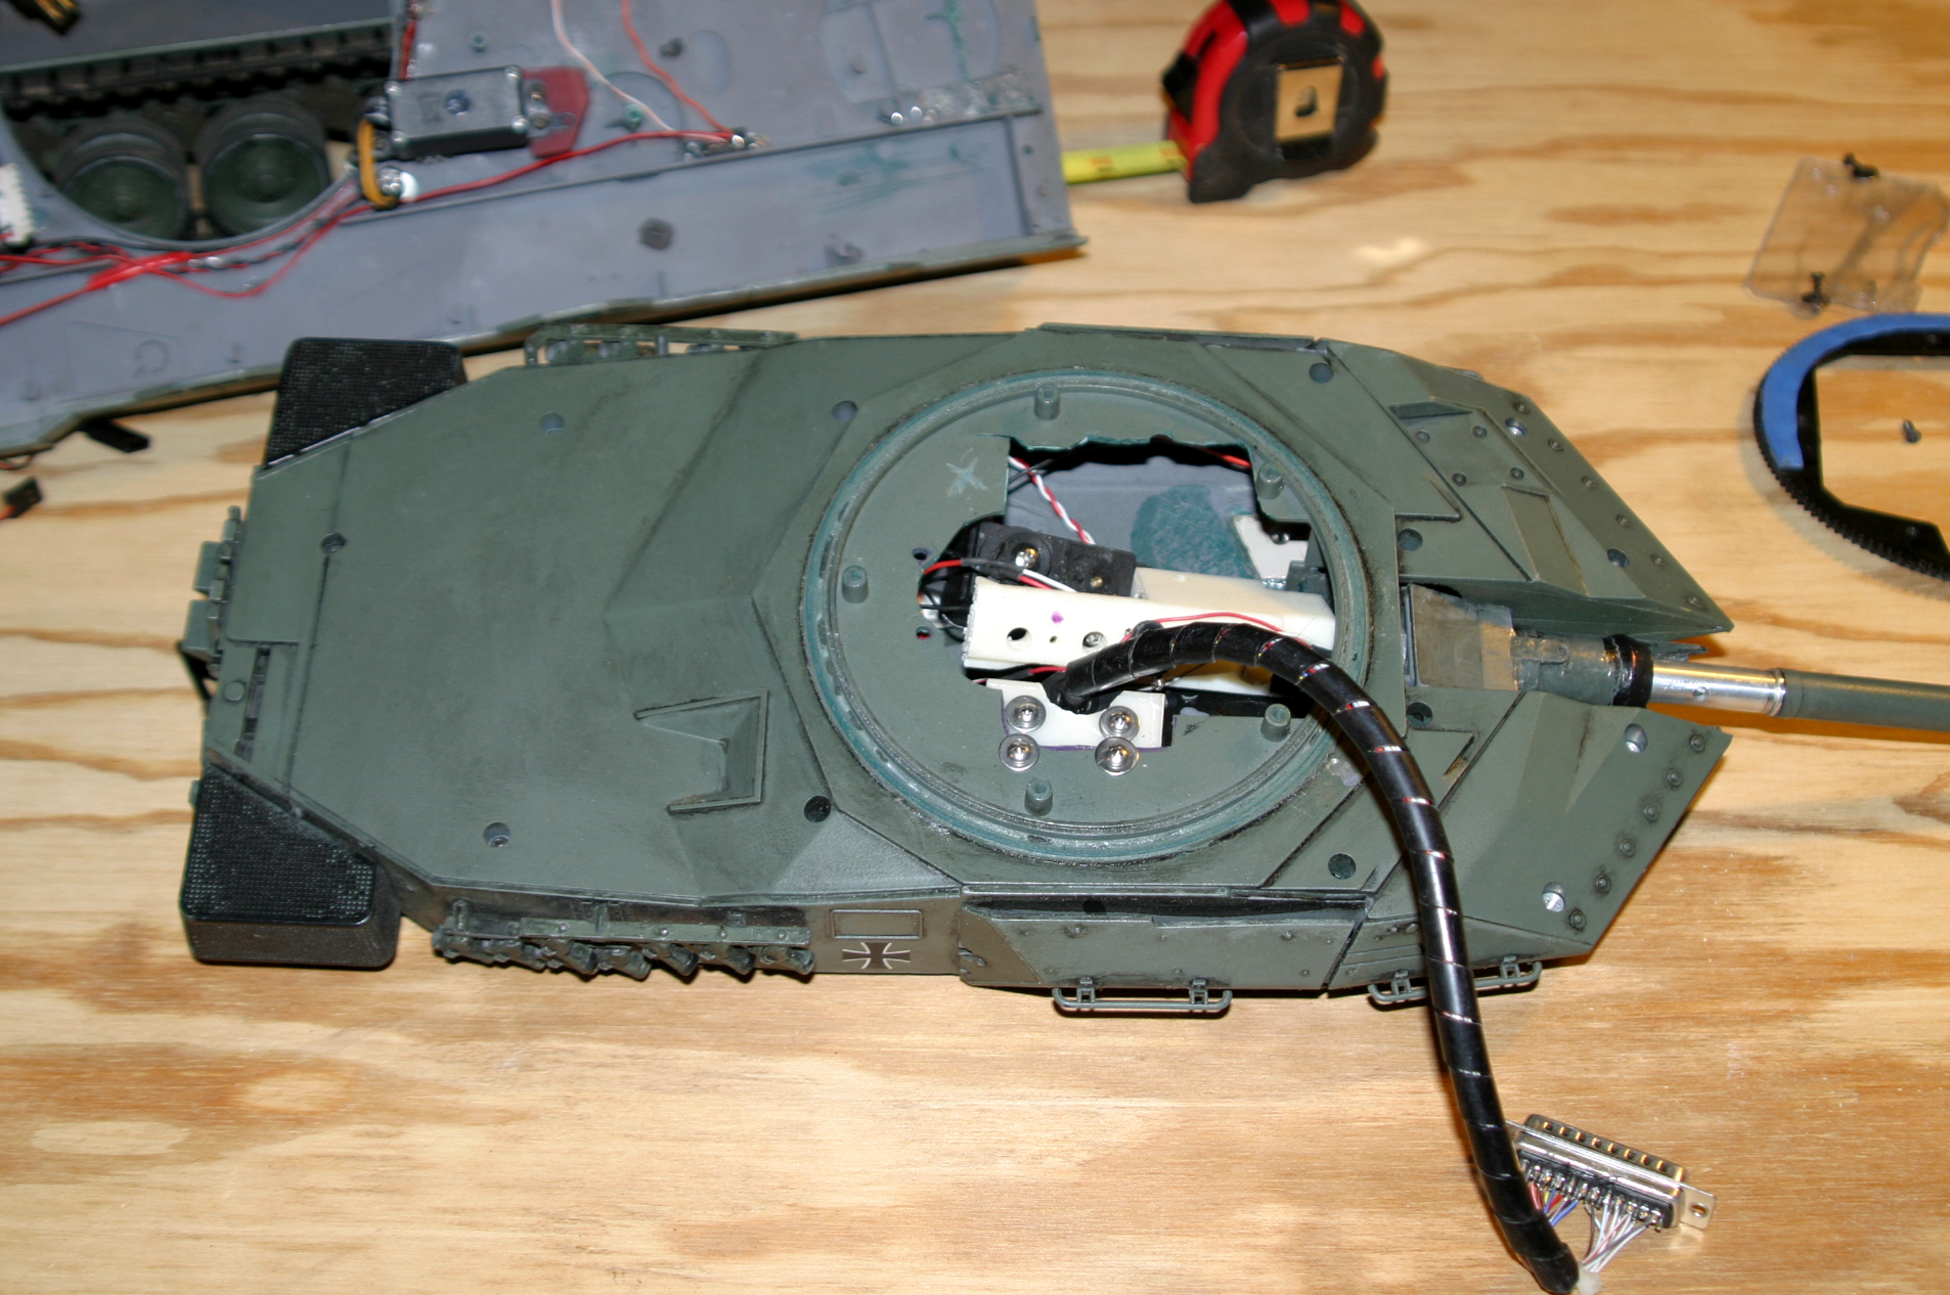
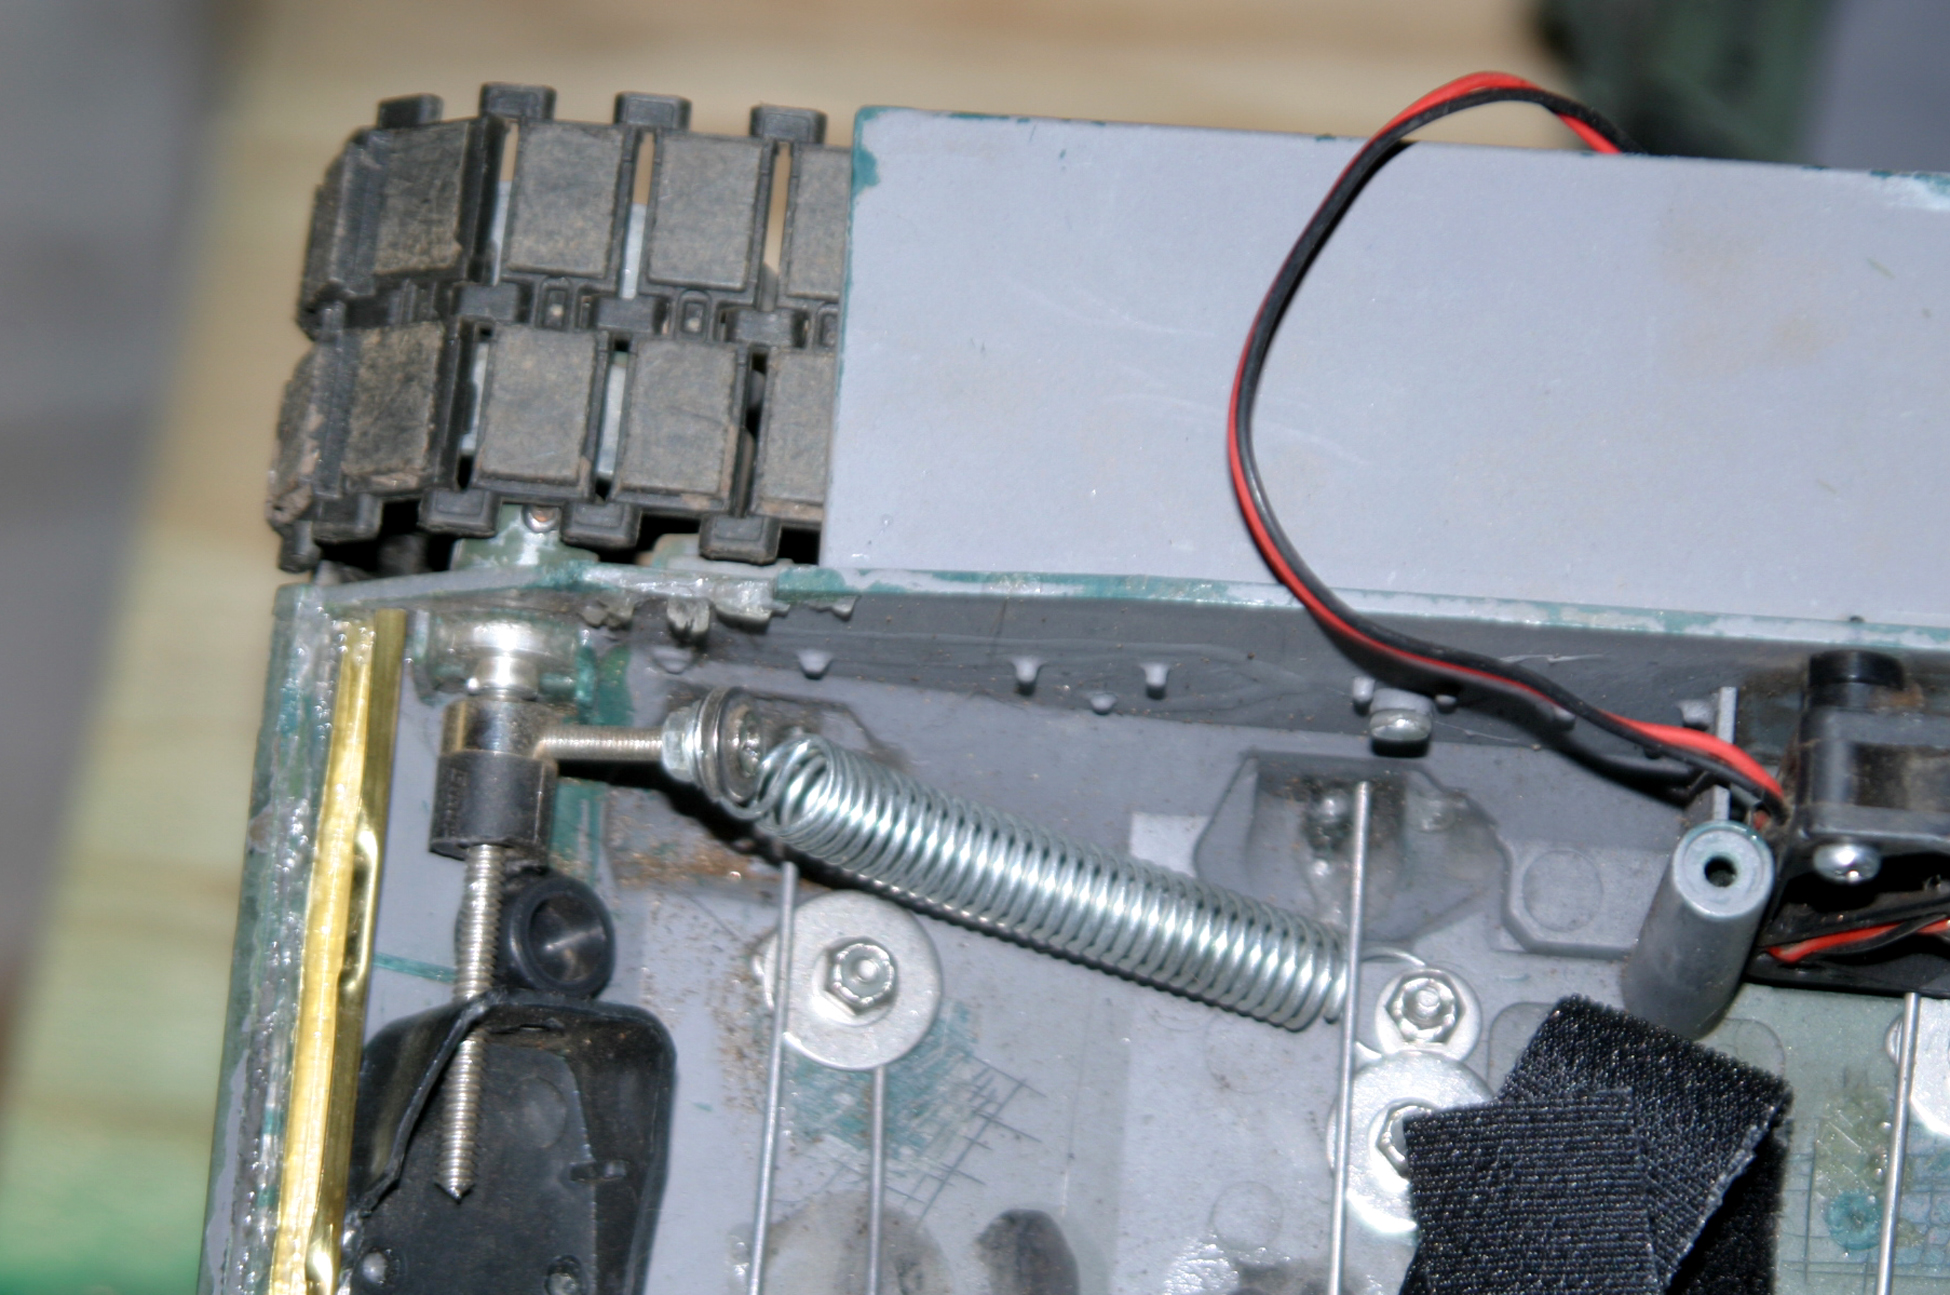
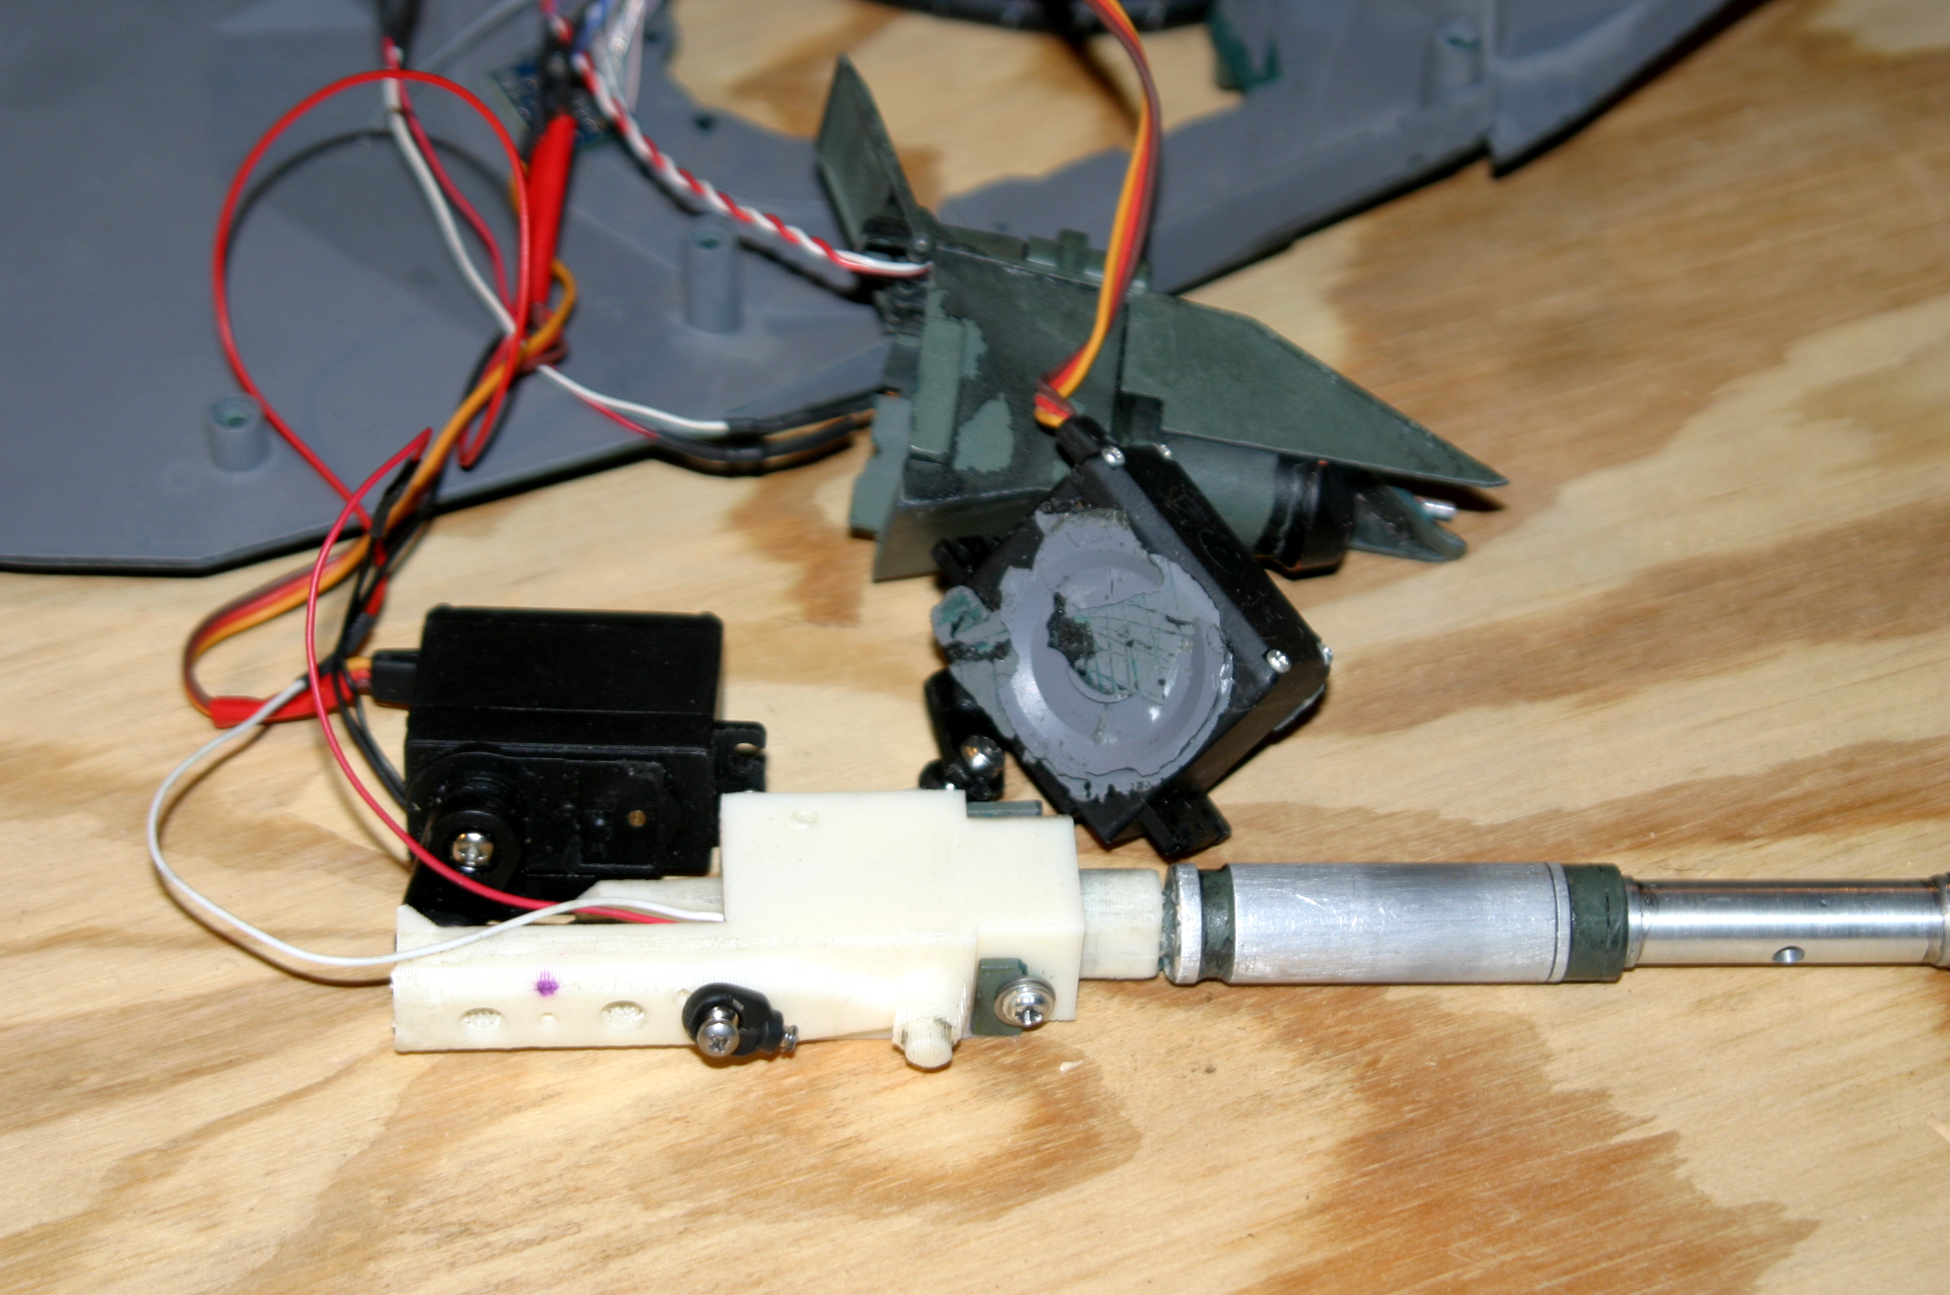
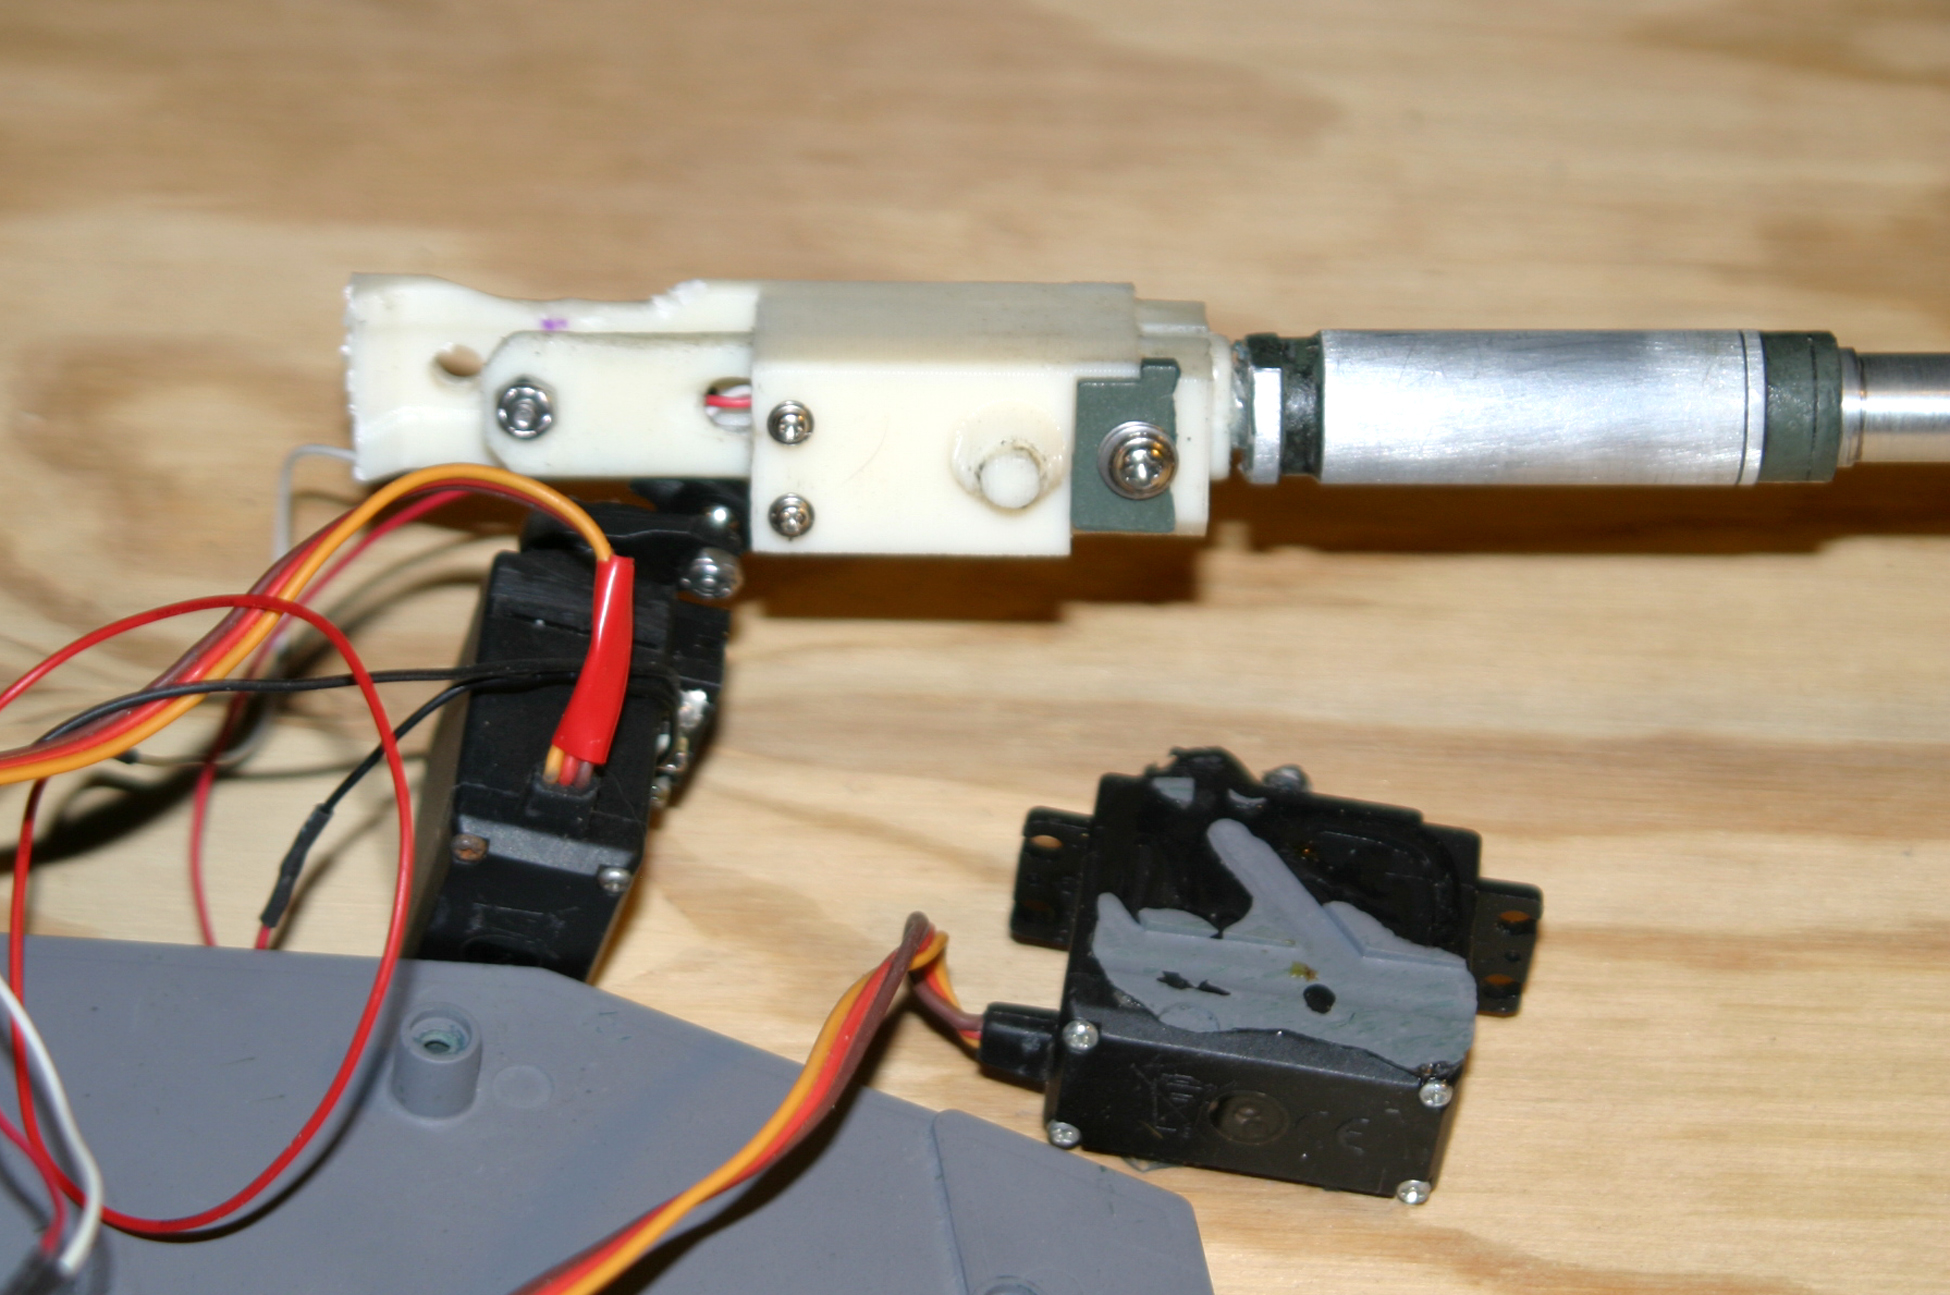
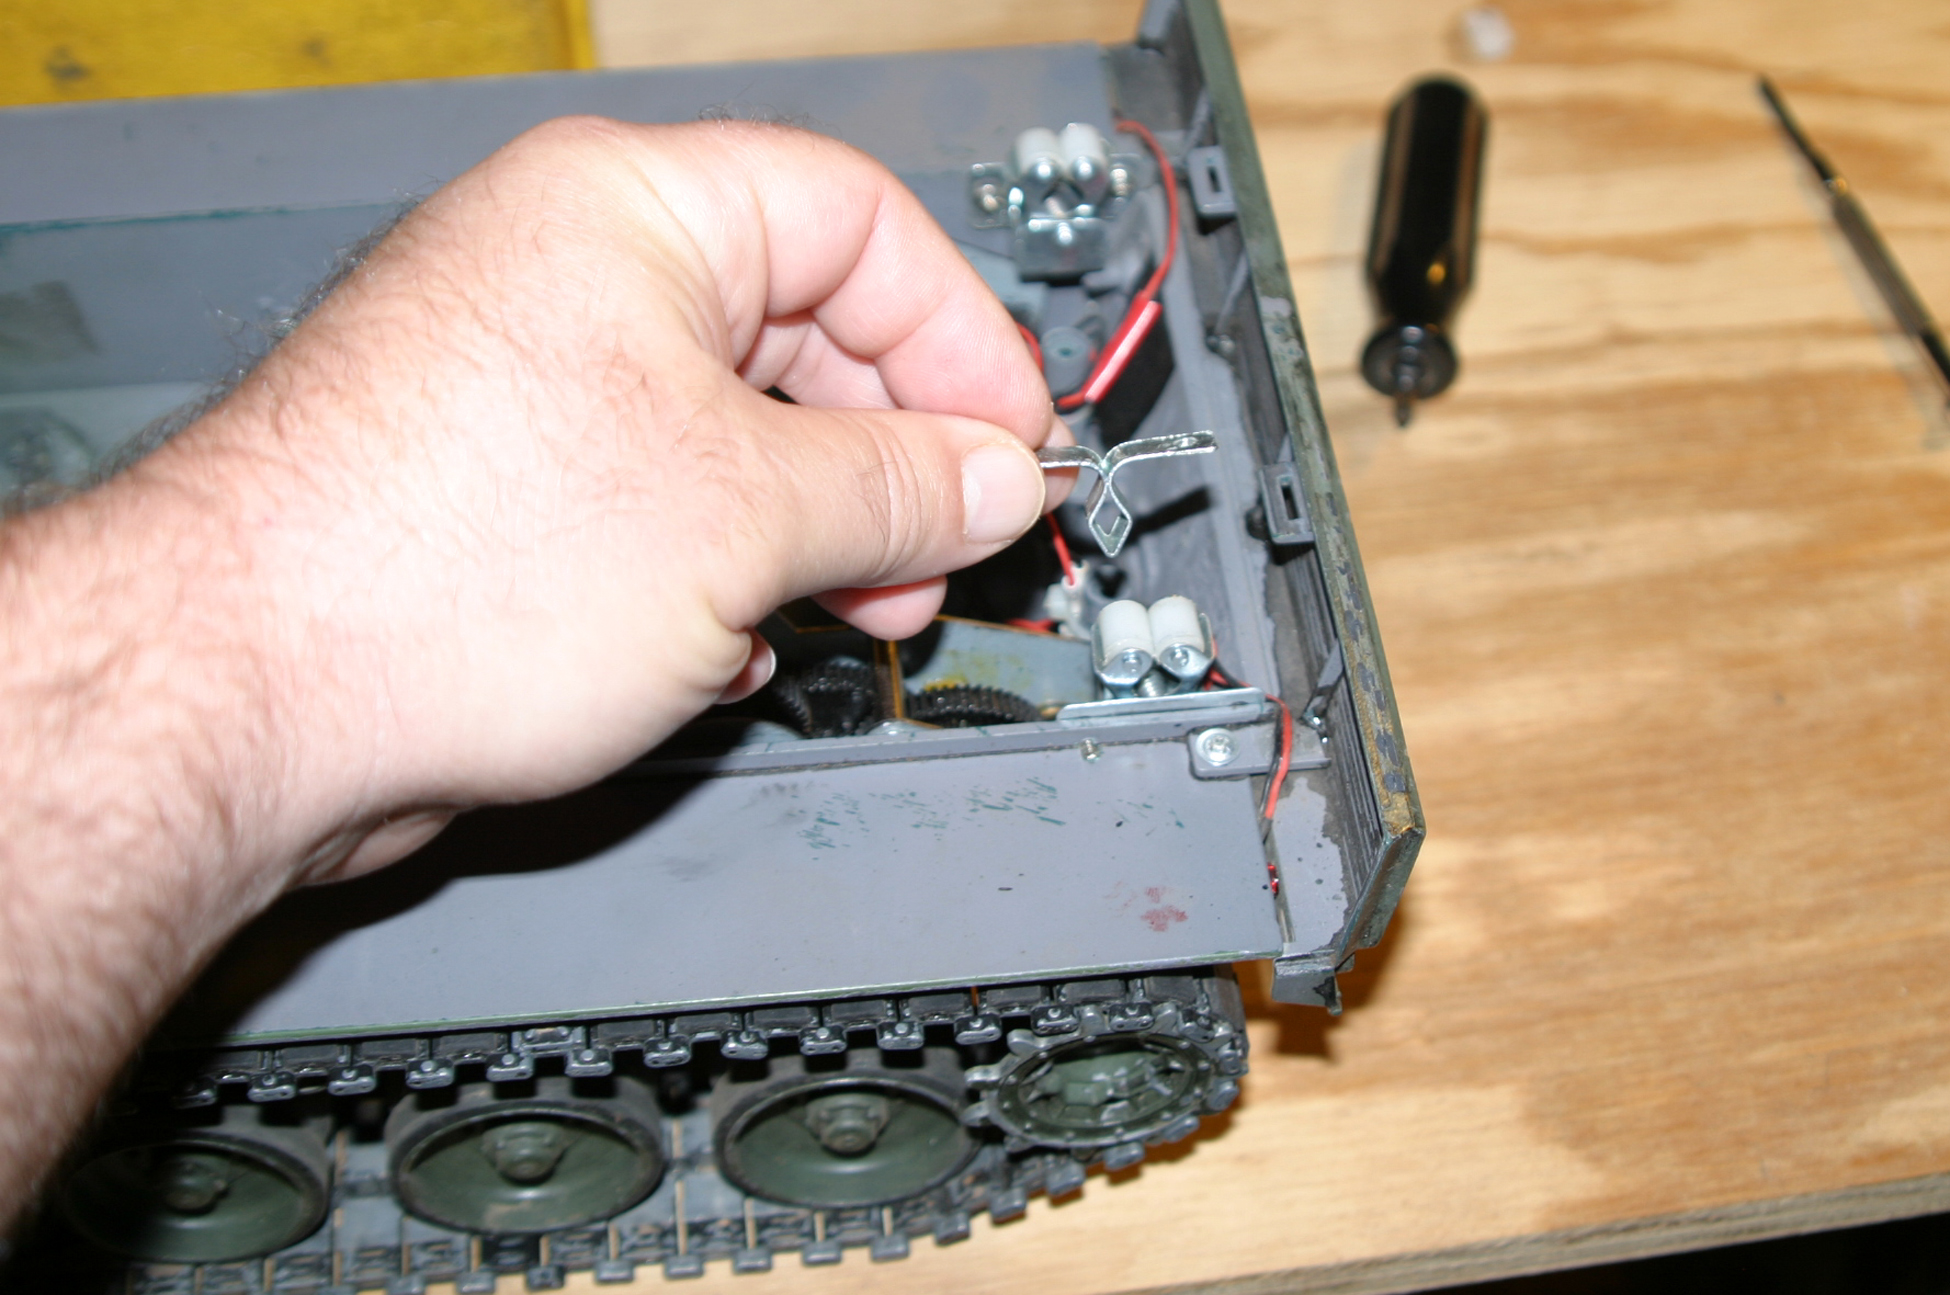
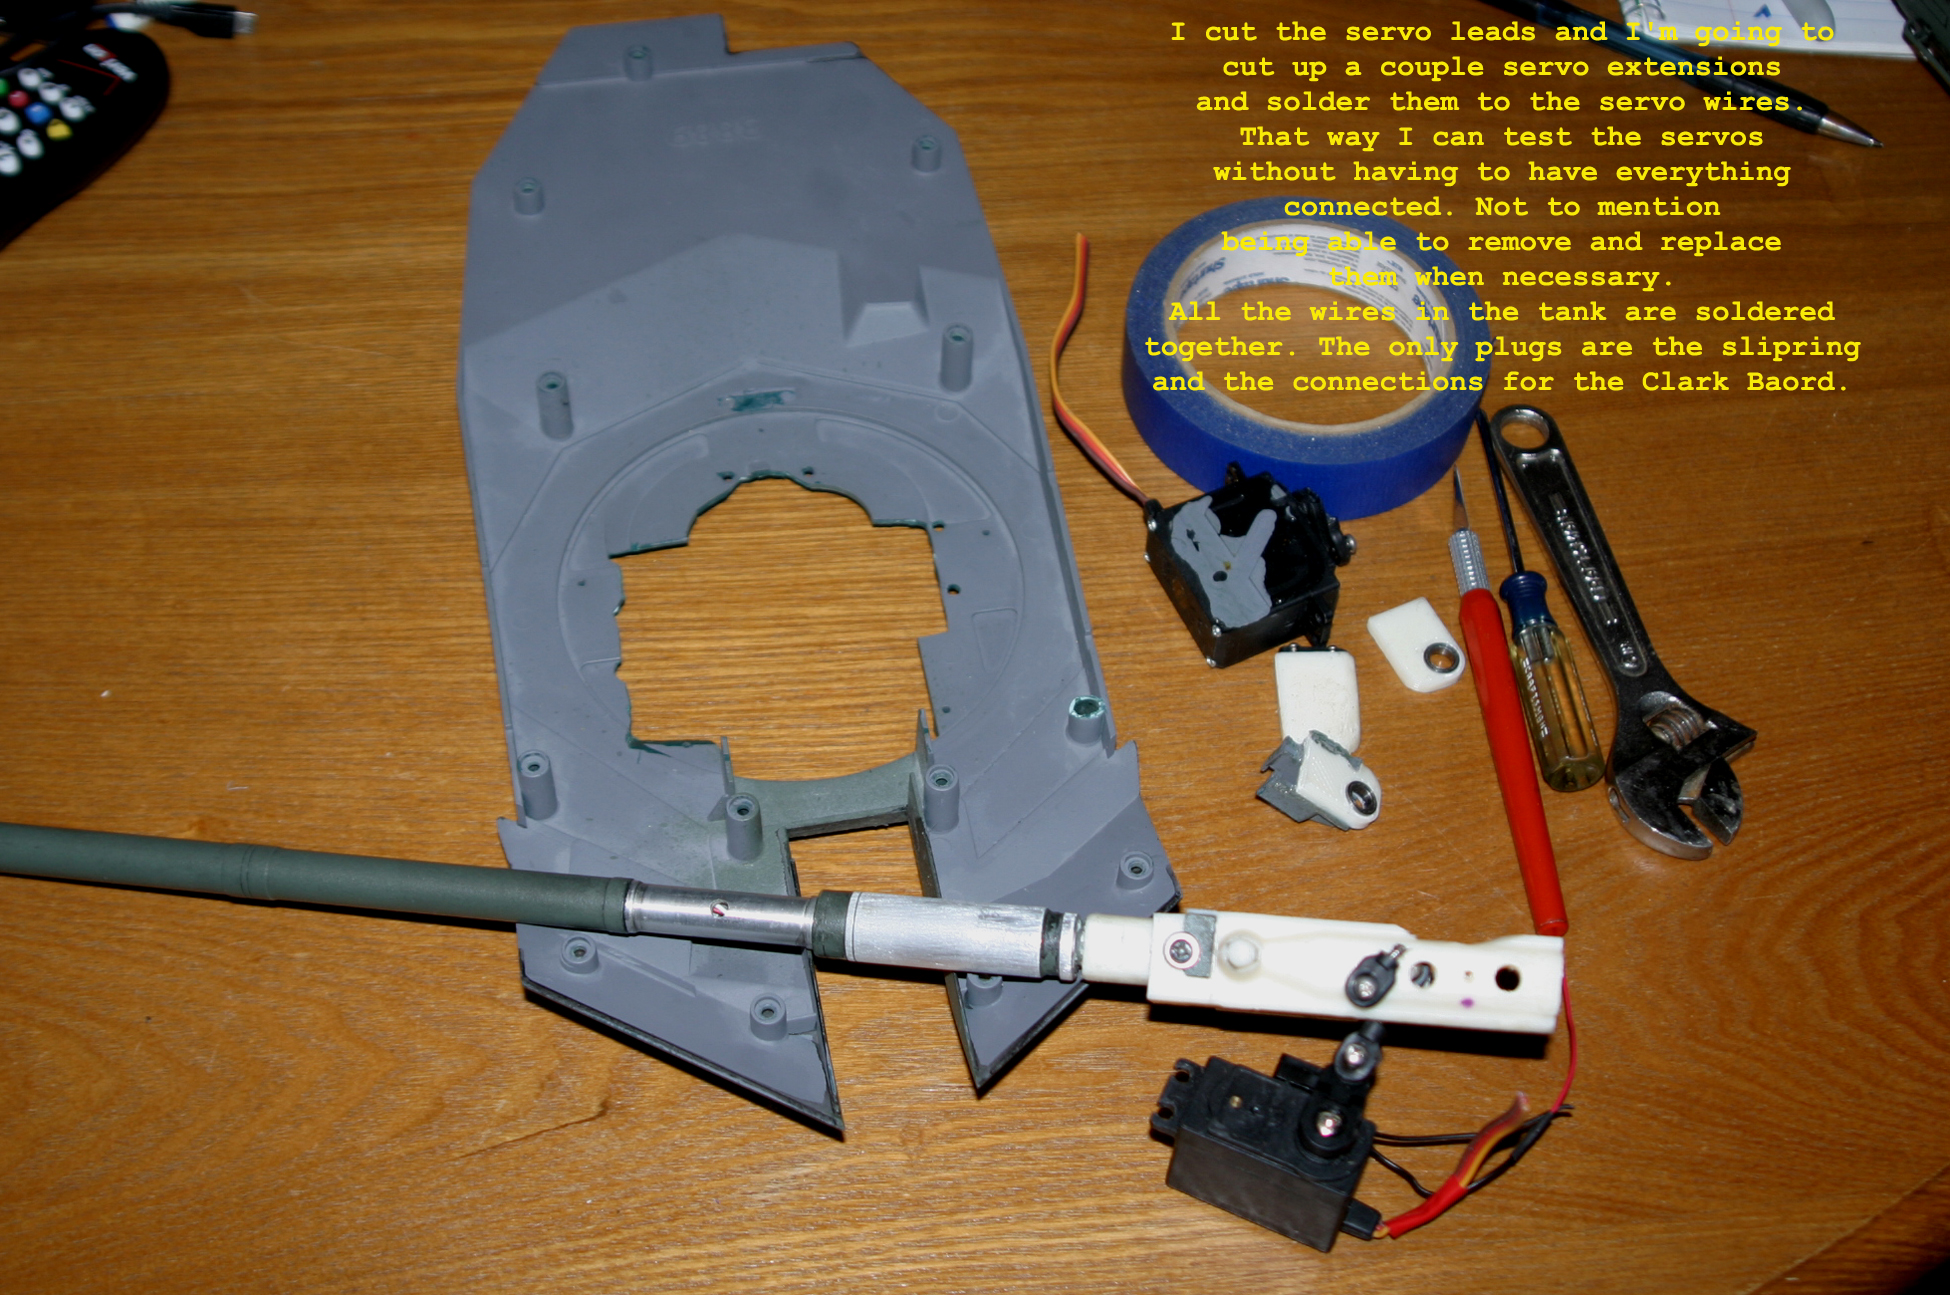
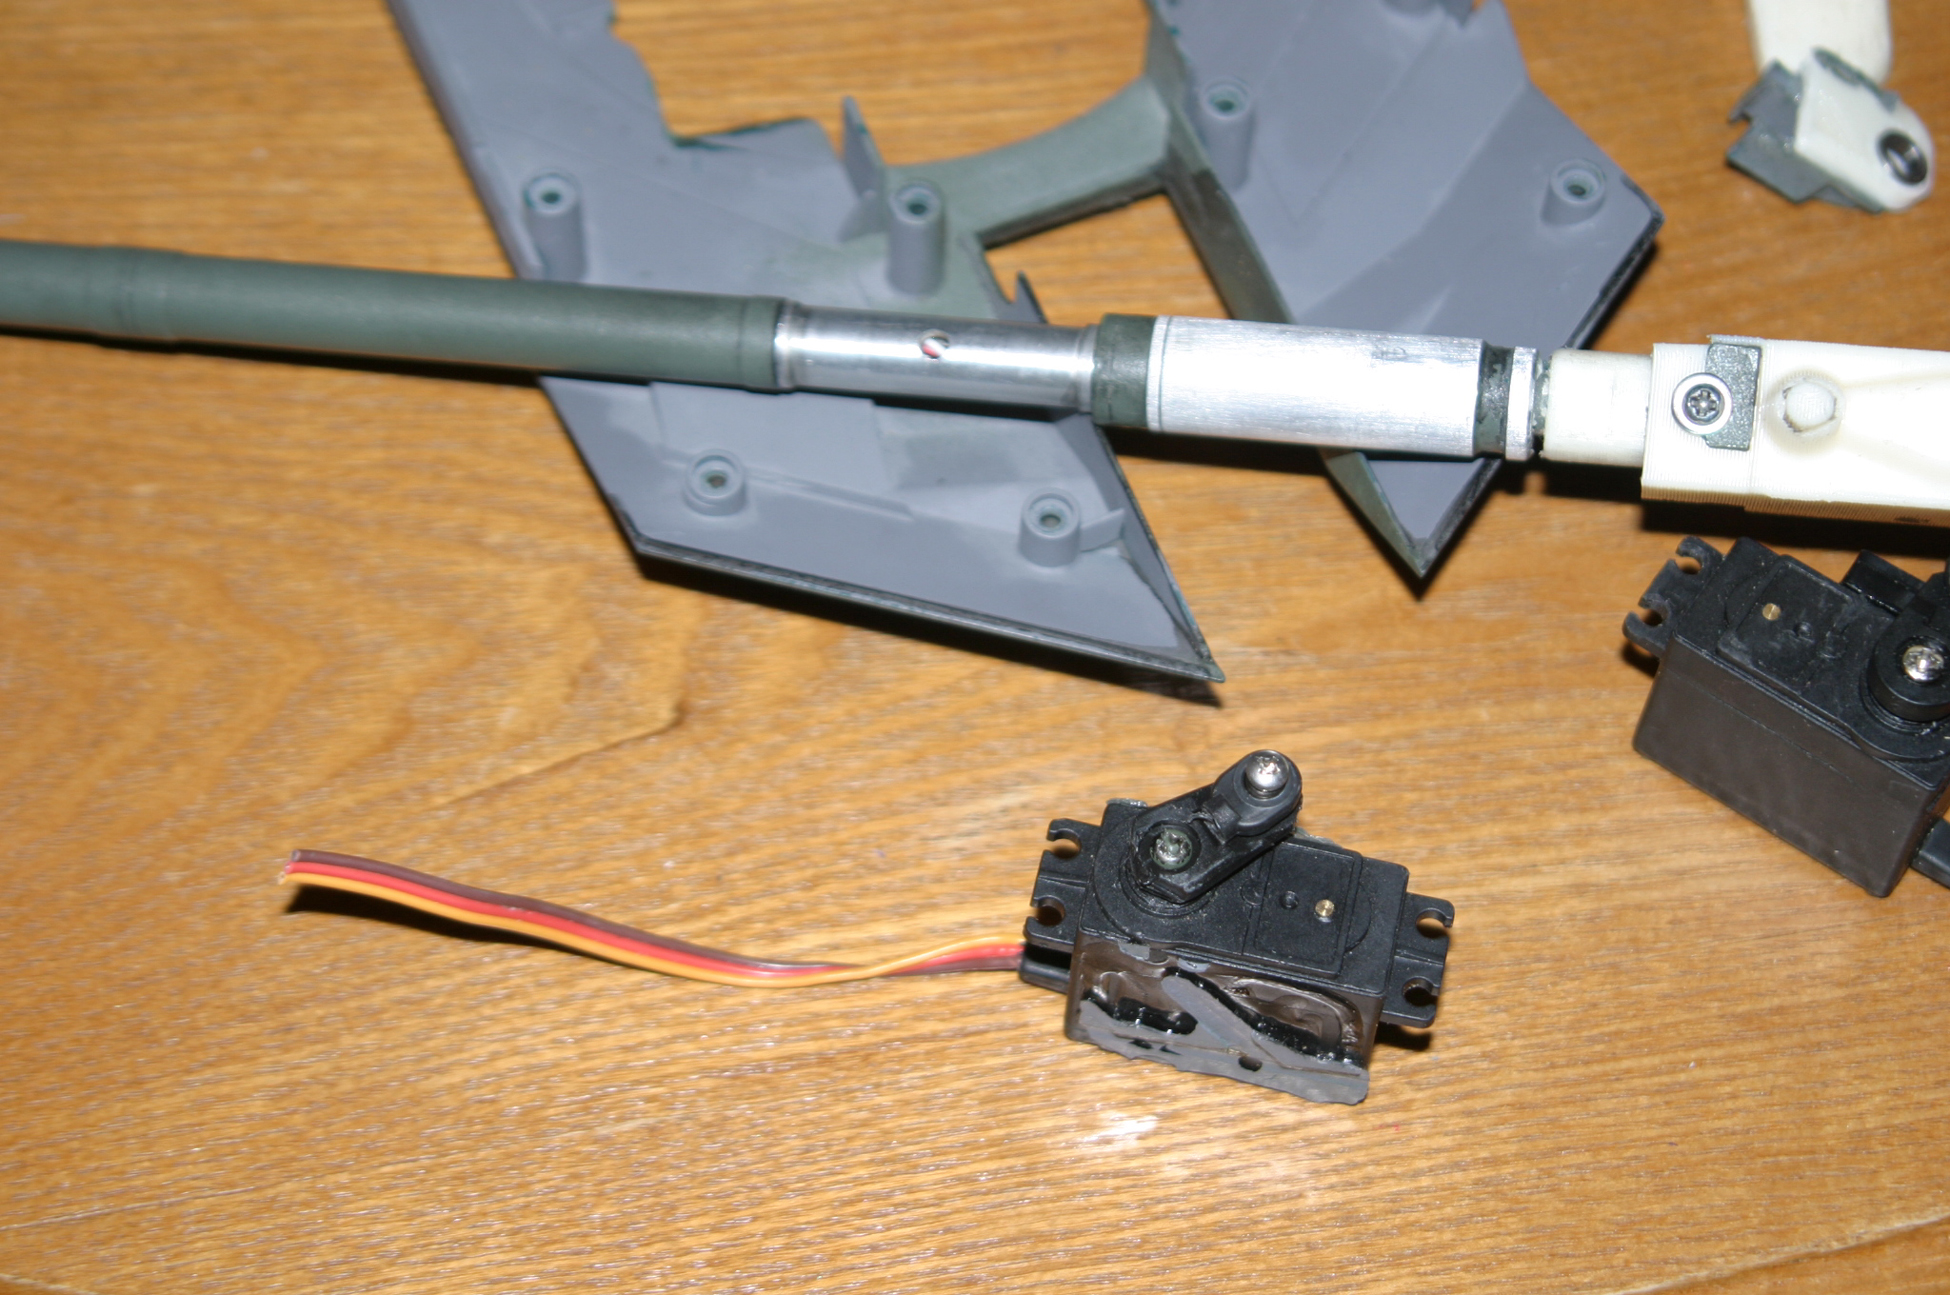
Last night I labeled a few wires in the turret and proceeded to cut the servo wires. I'm going to get two servo extensions and cut the ends off of them. Then I'll solder them to the servo wires where I cut them. By doing this, I'll be able to test the servo's and the gun mount using an extra 2 channel RC system I have. Also I'll be able to unplug the servo's if they need repair or replacing.
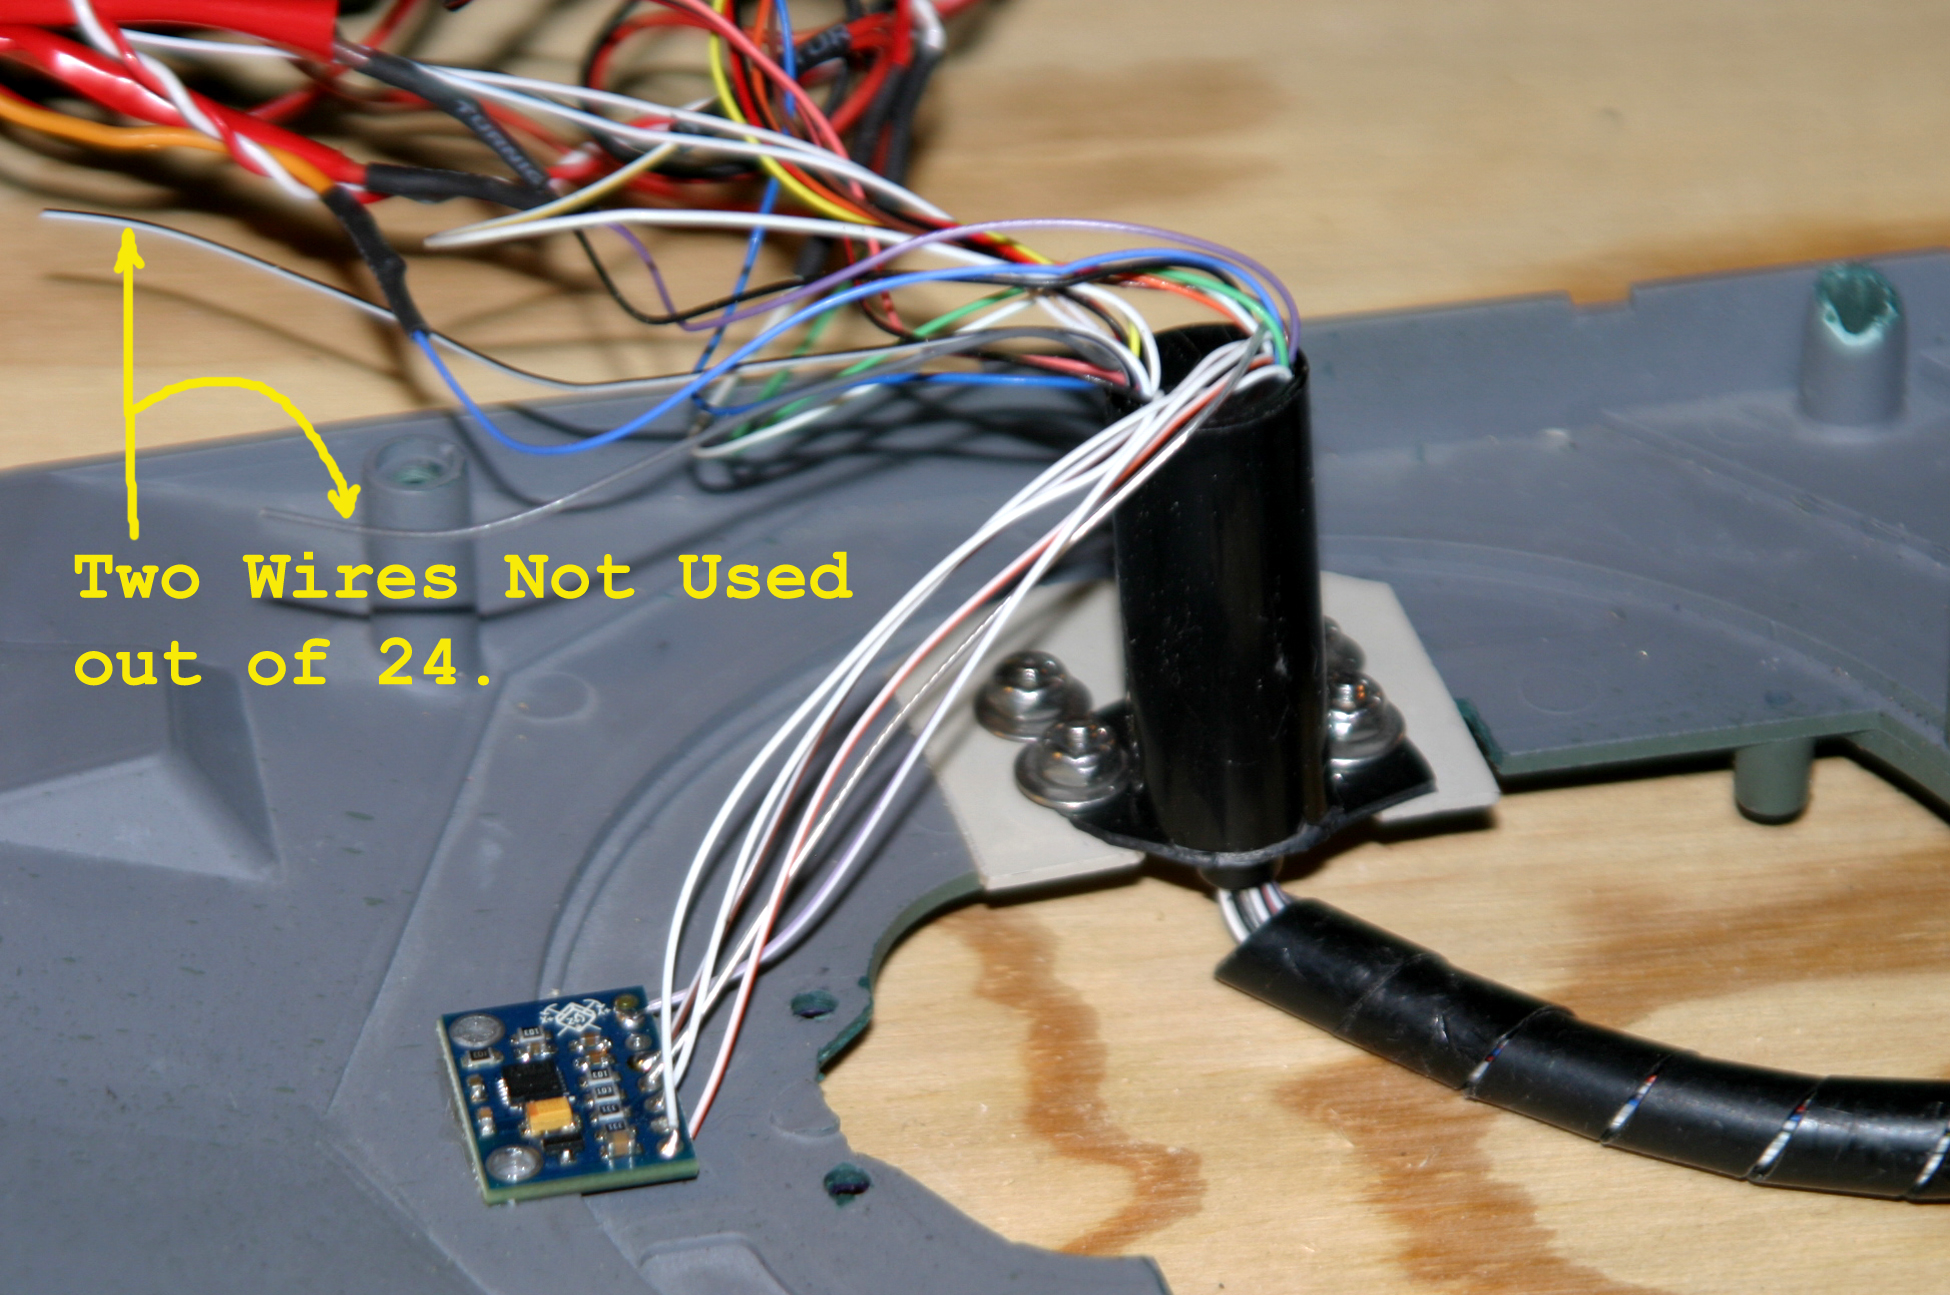
I'm still going to try and clean up the wires and make a wiring schematic drawing to help me the next owner if I decide to ell the tank. Upon closer inspection, I noticed more of the slip-ring wires are not being used. I like the way mcm308 wired his Leo turret. I think I may do my similar to the way he did his. The best thing about somewhat copying mcm308 is the servo wires will plug intop the CB inside the turret and they will no longer be attached to the slip-ring like they are now.
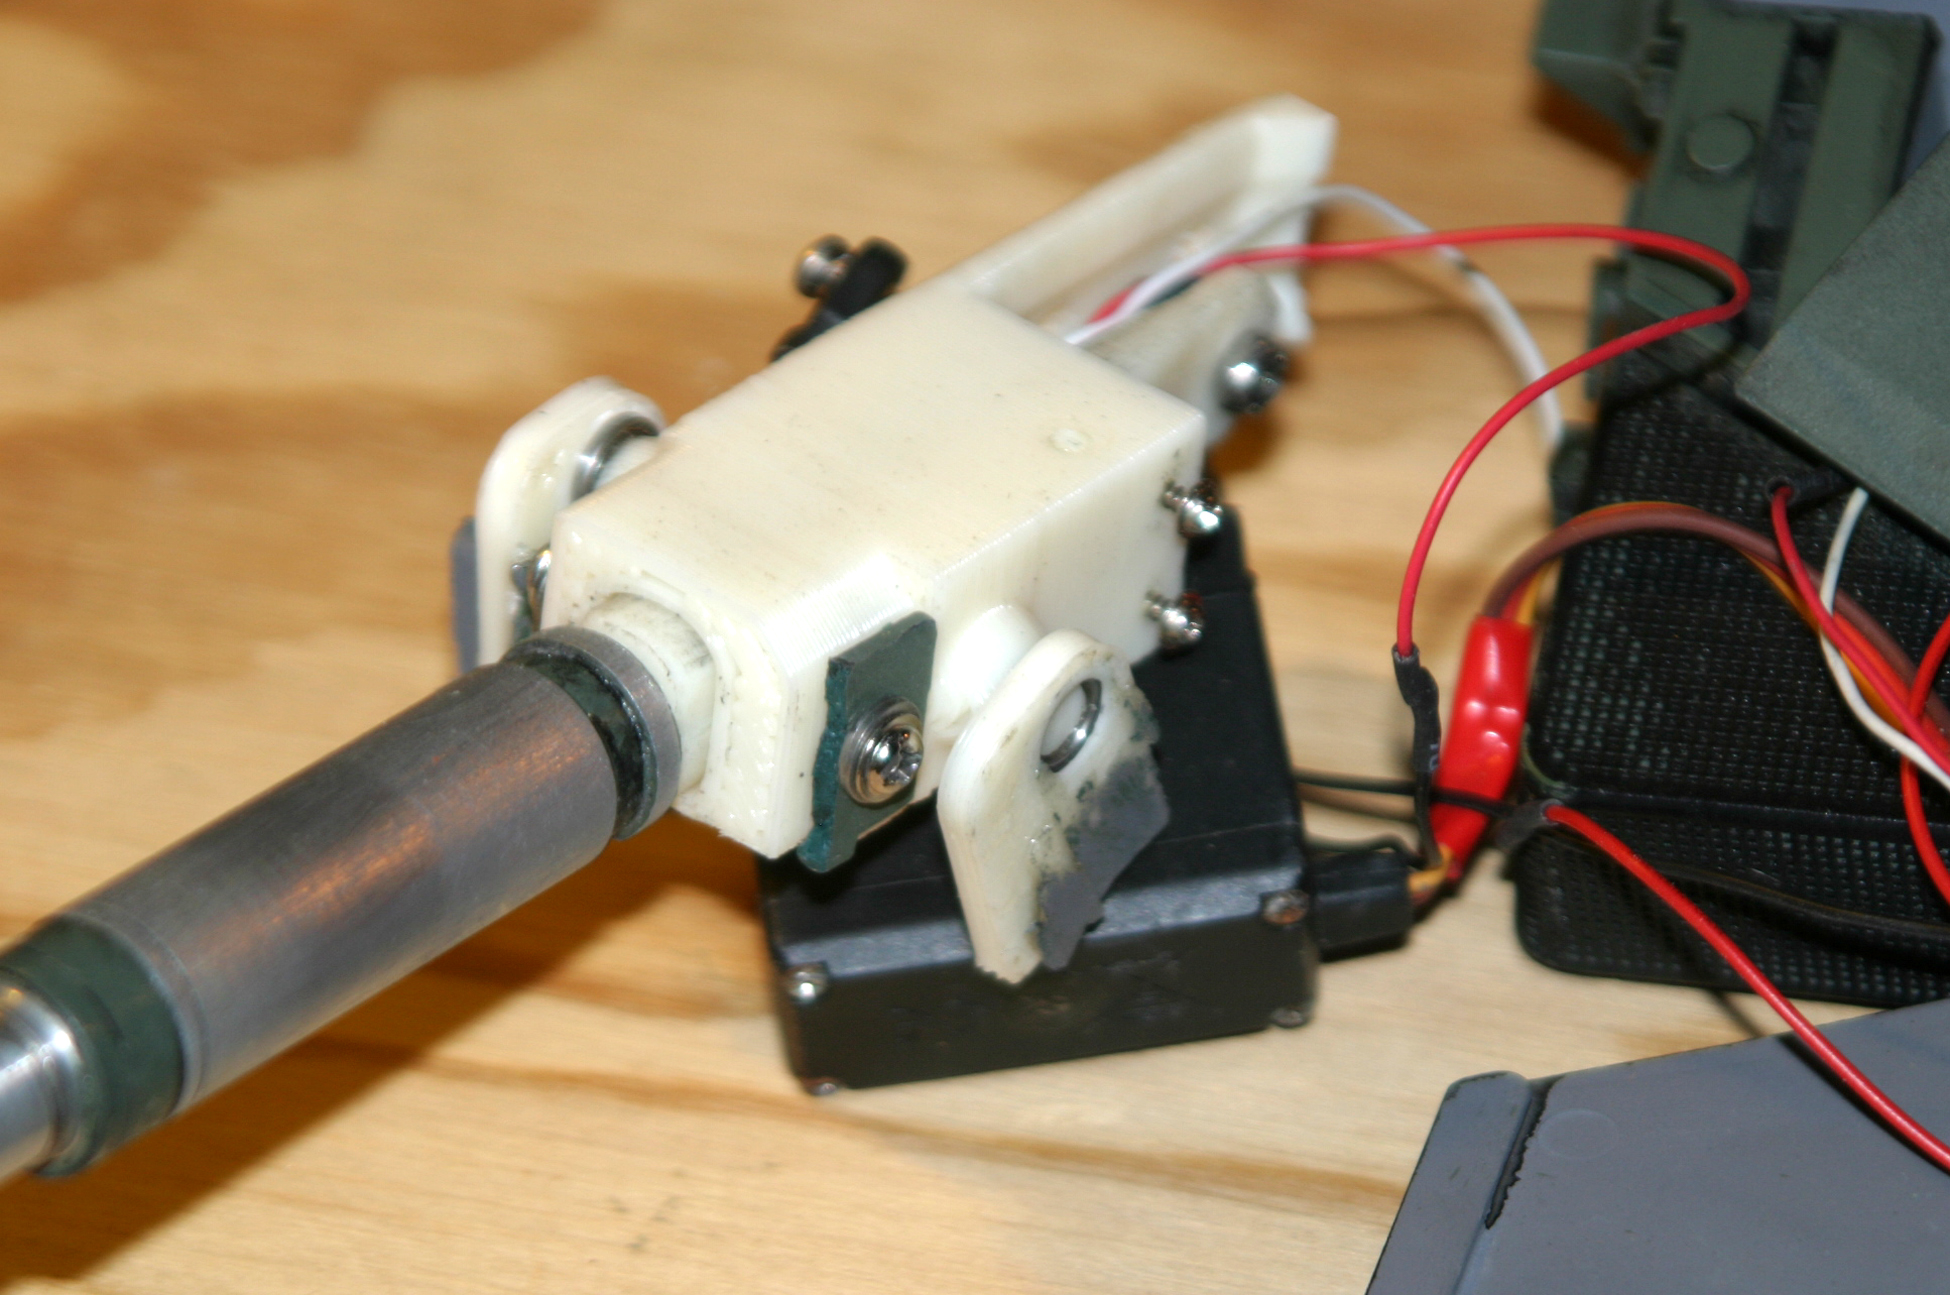
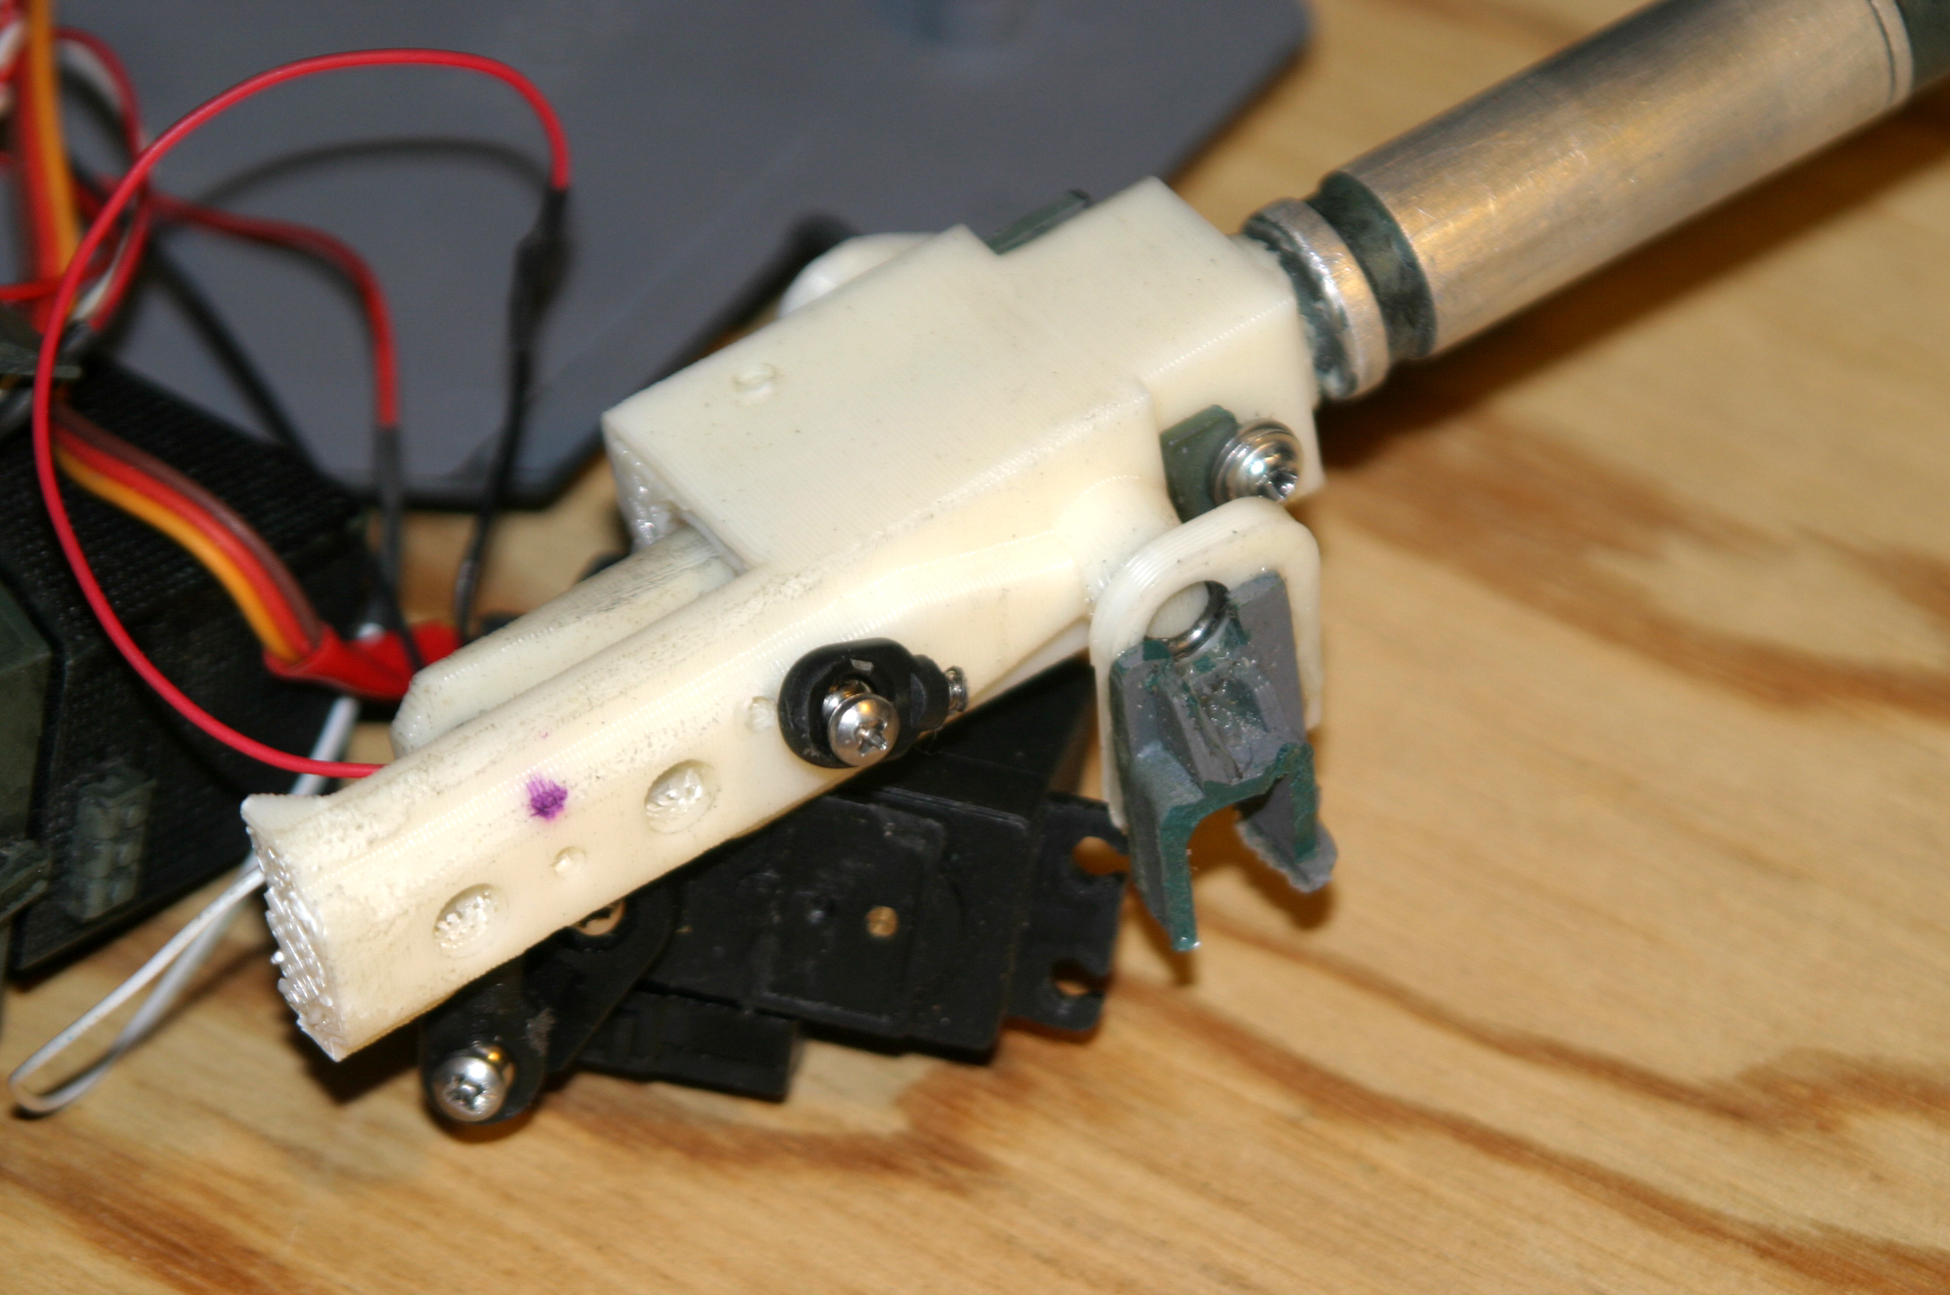
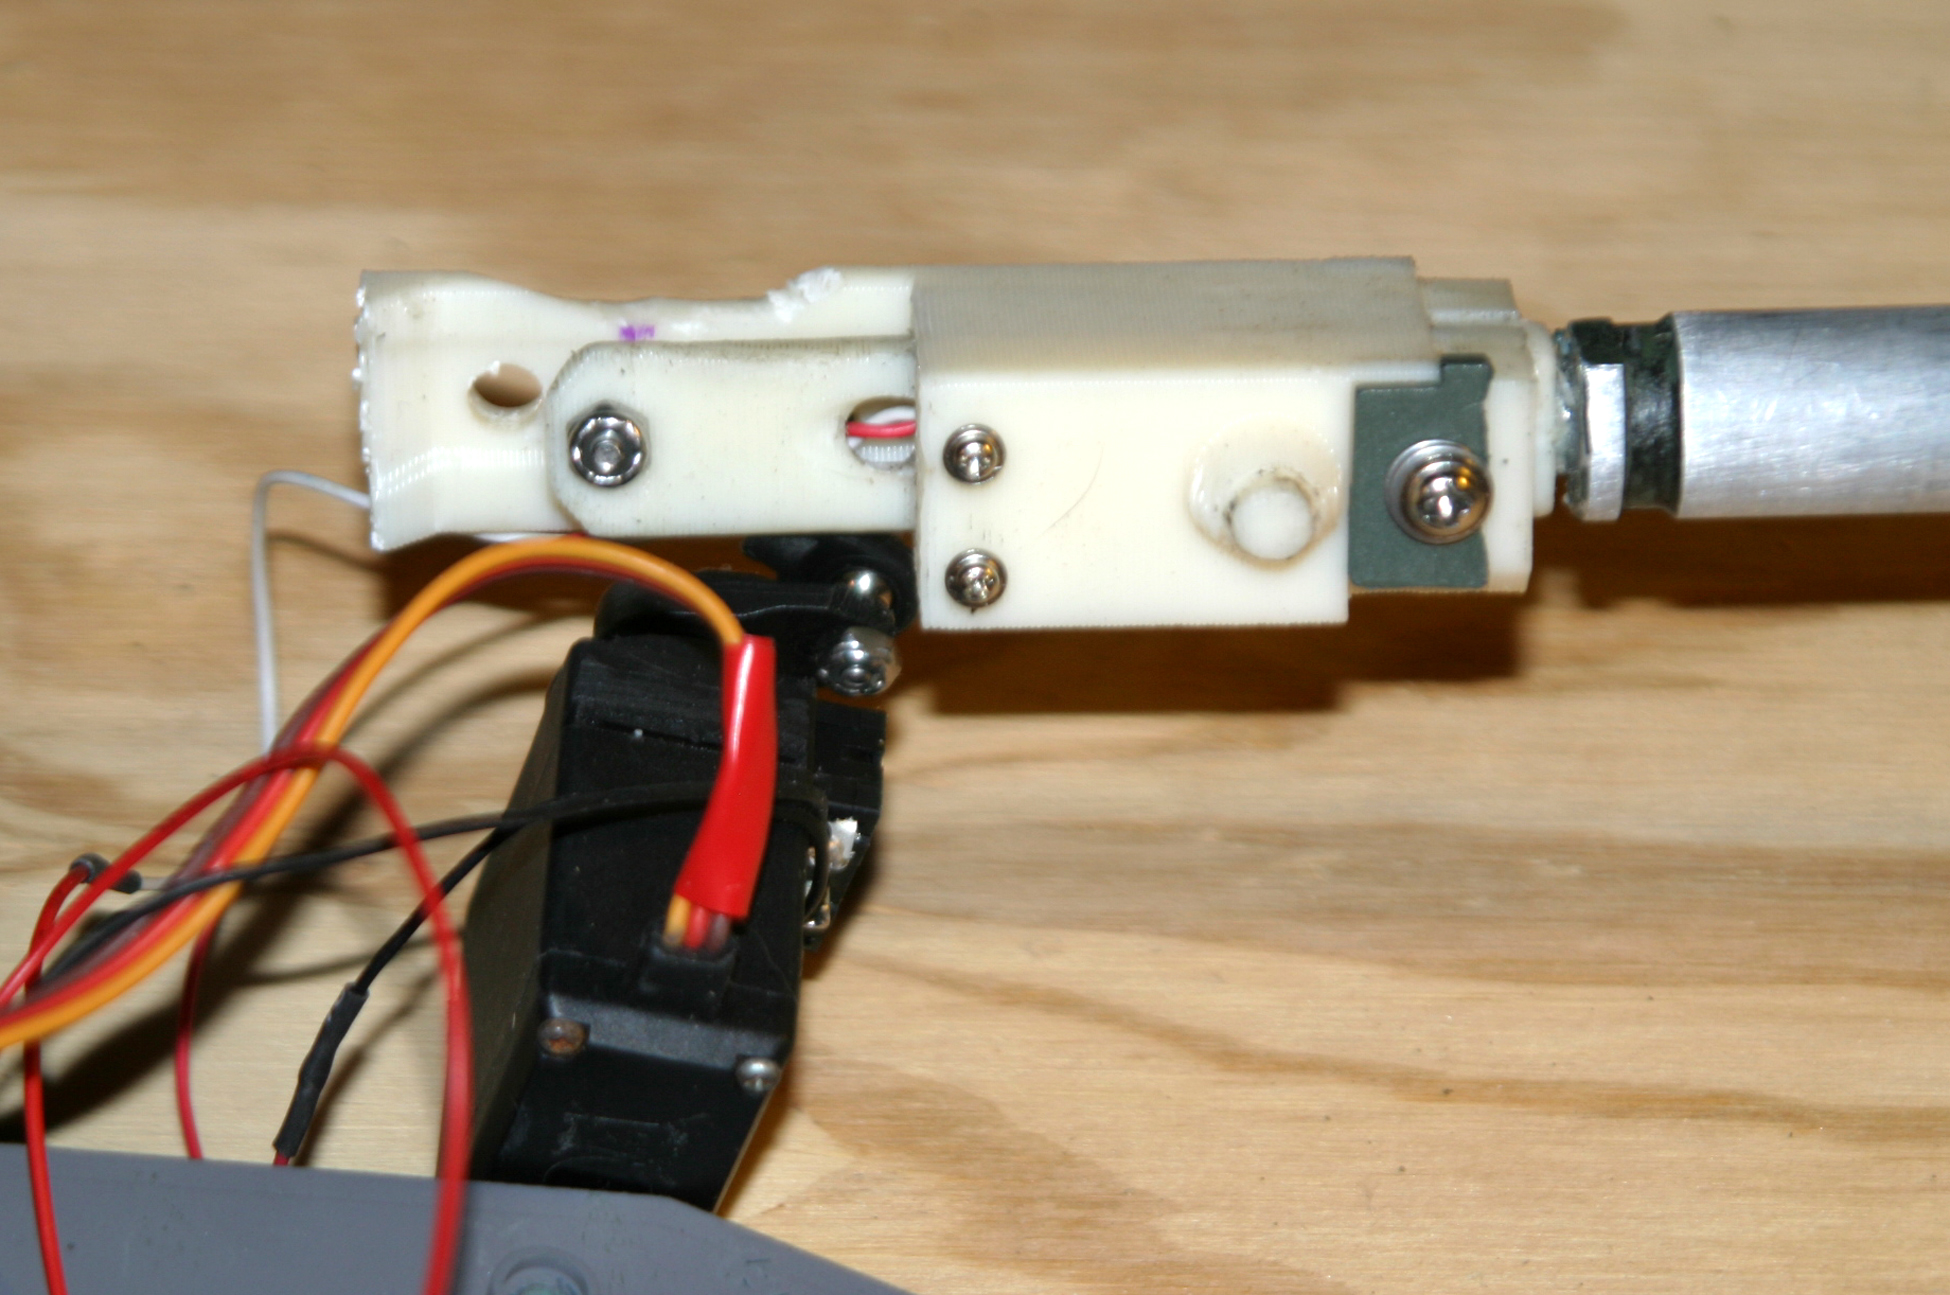
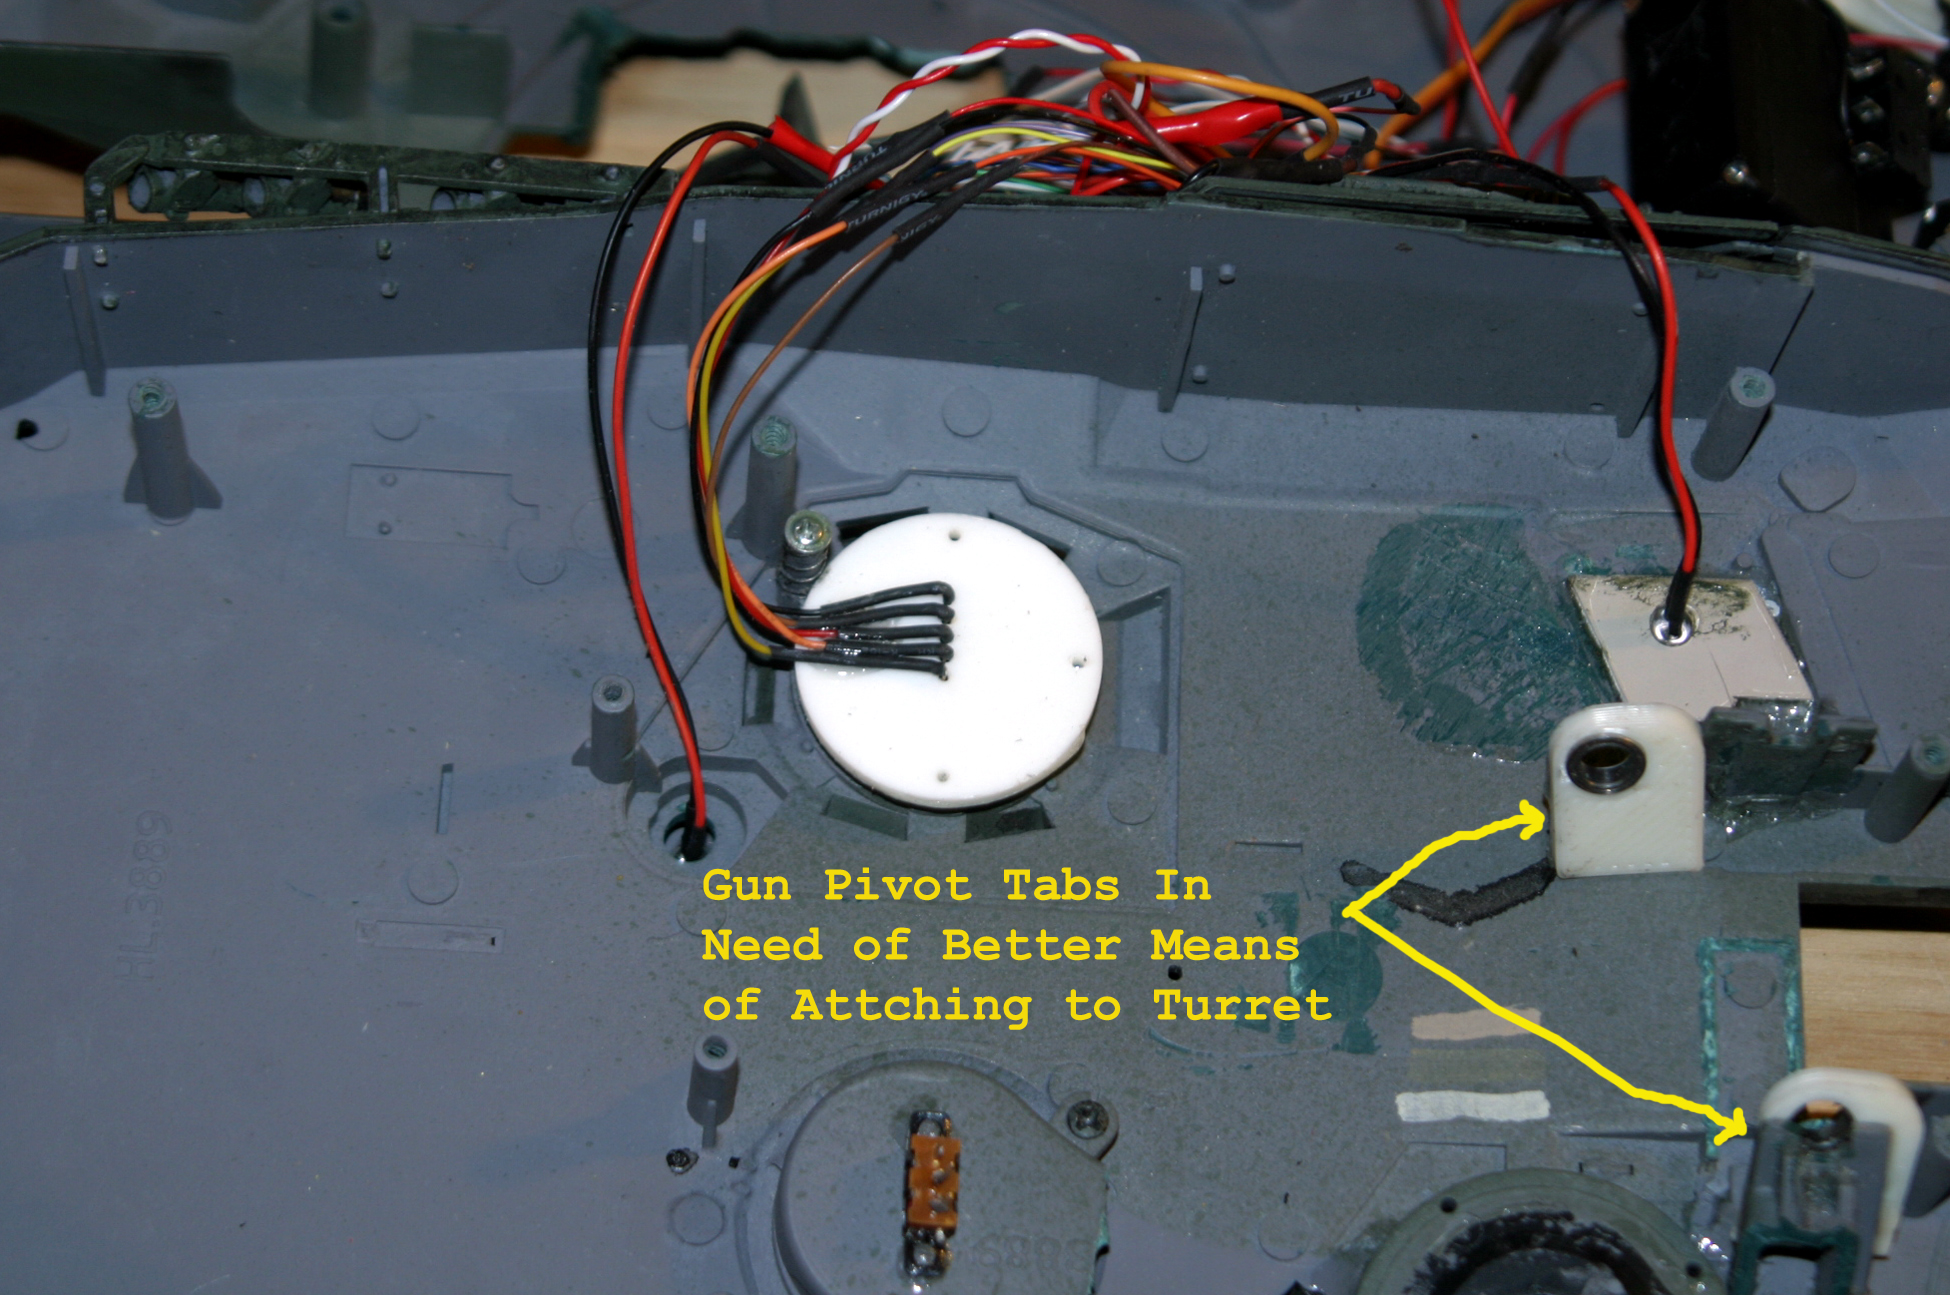
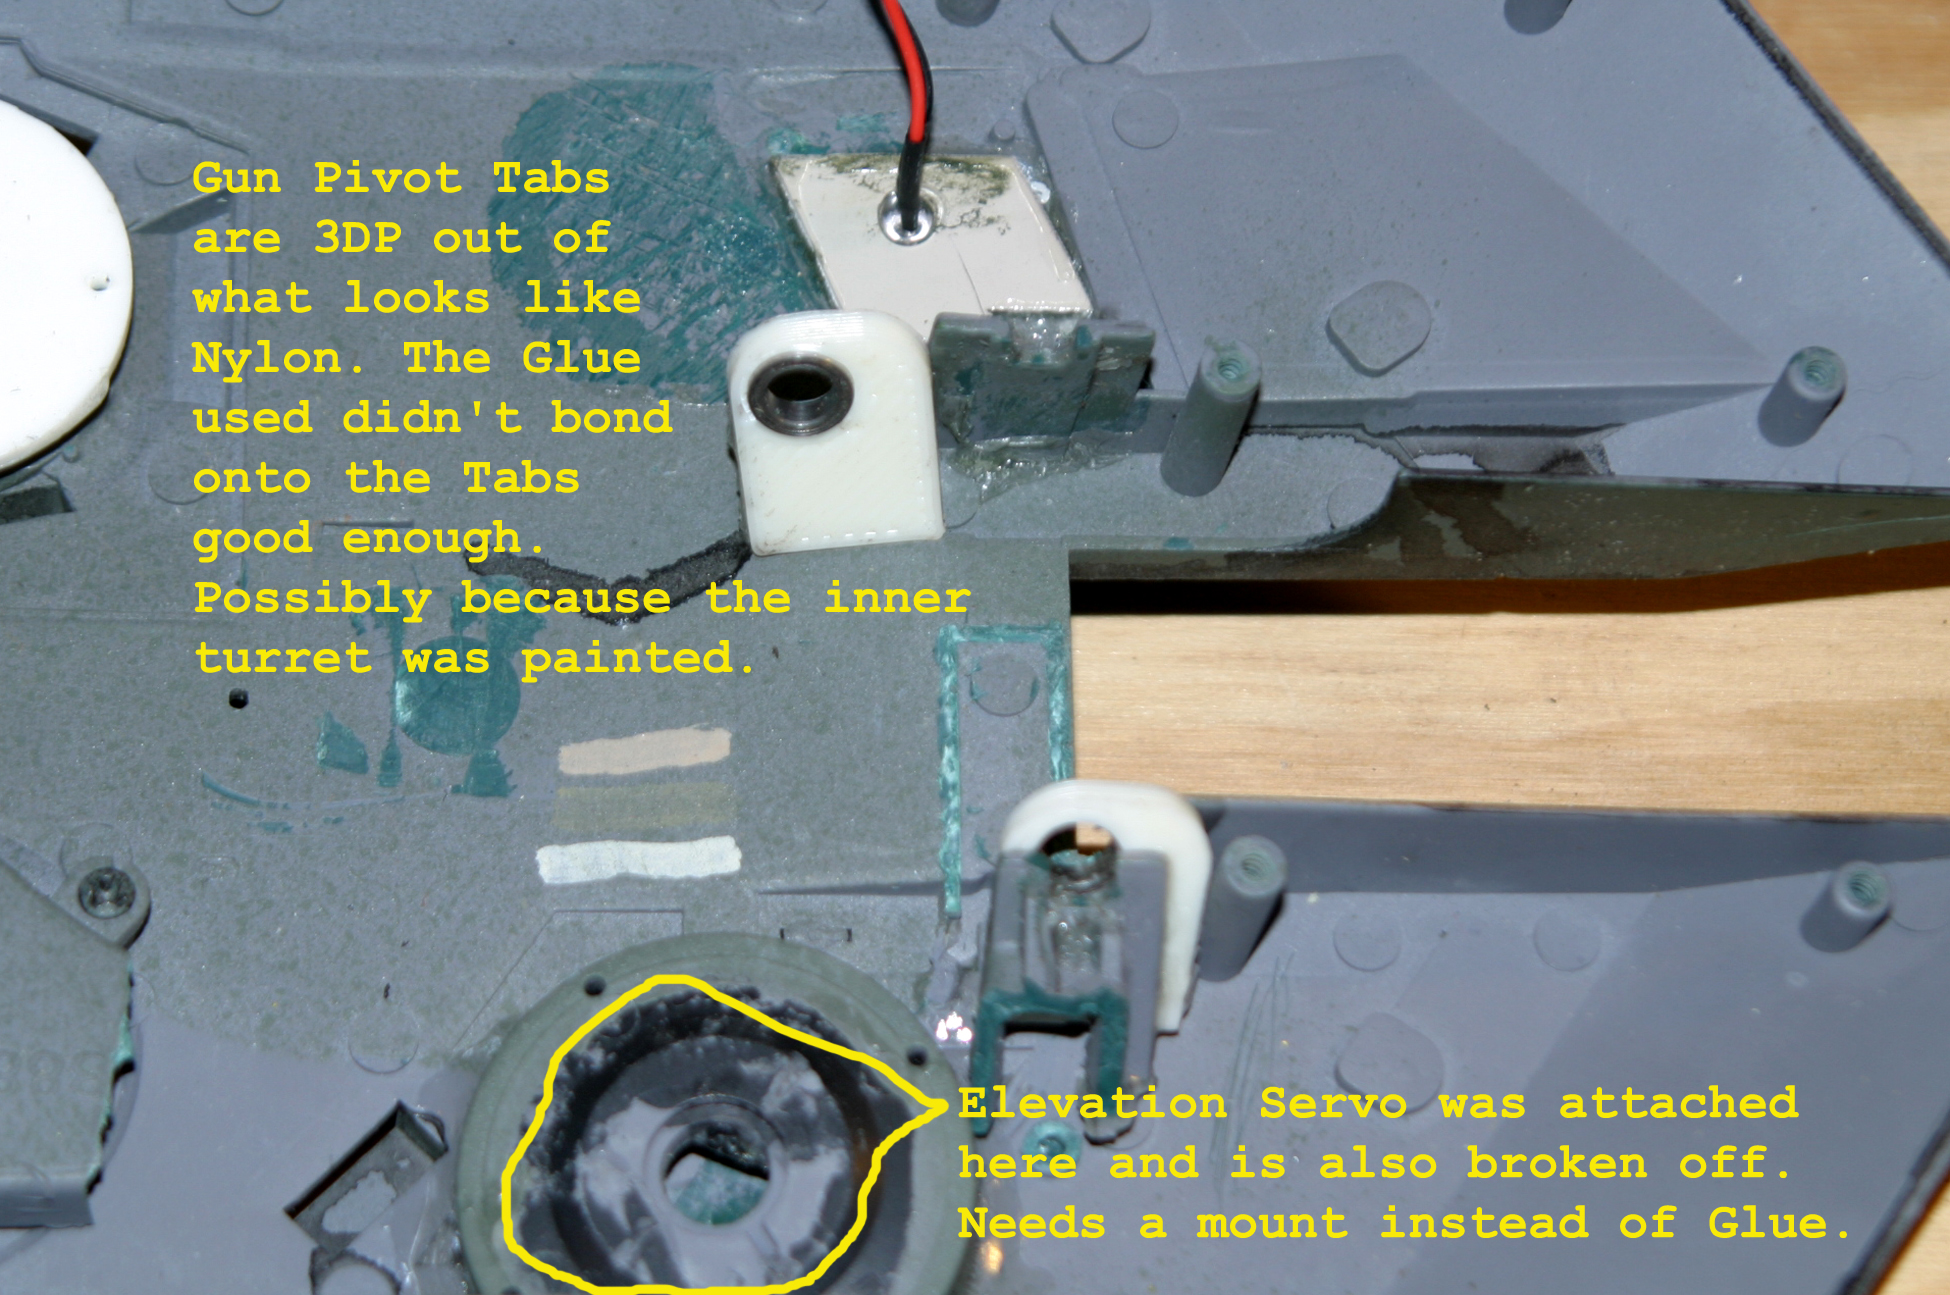
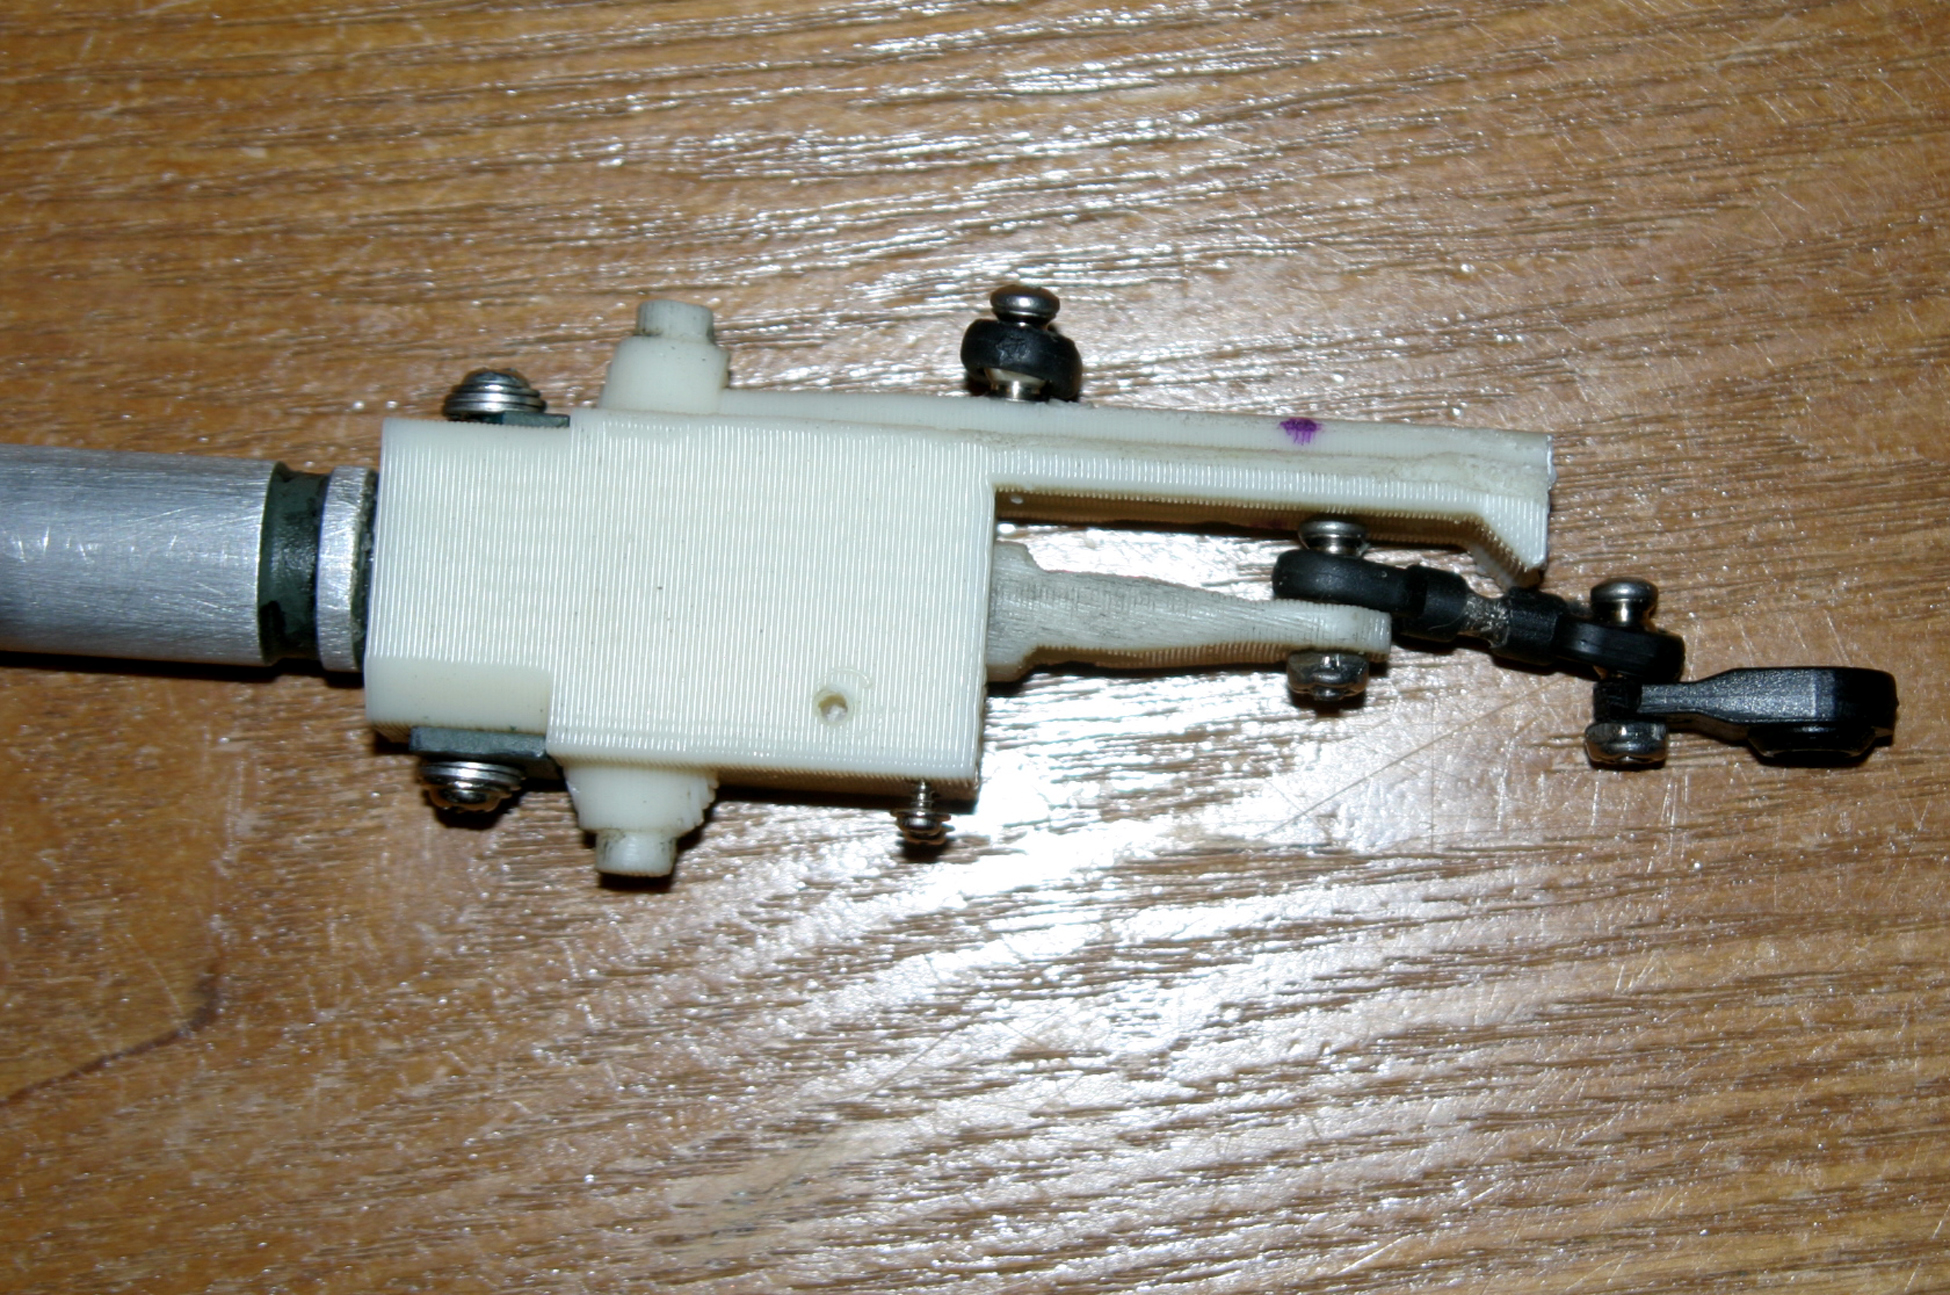
There's also a tab broken off of the end of the 3DP gun body that I'll be gluing on as well as using two 0-80 screws to strengthen it so it doesn't break again.

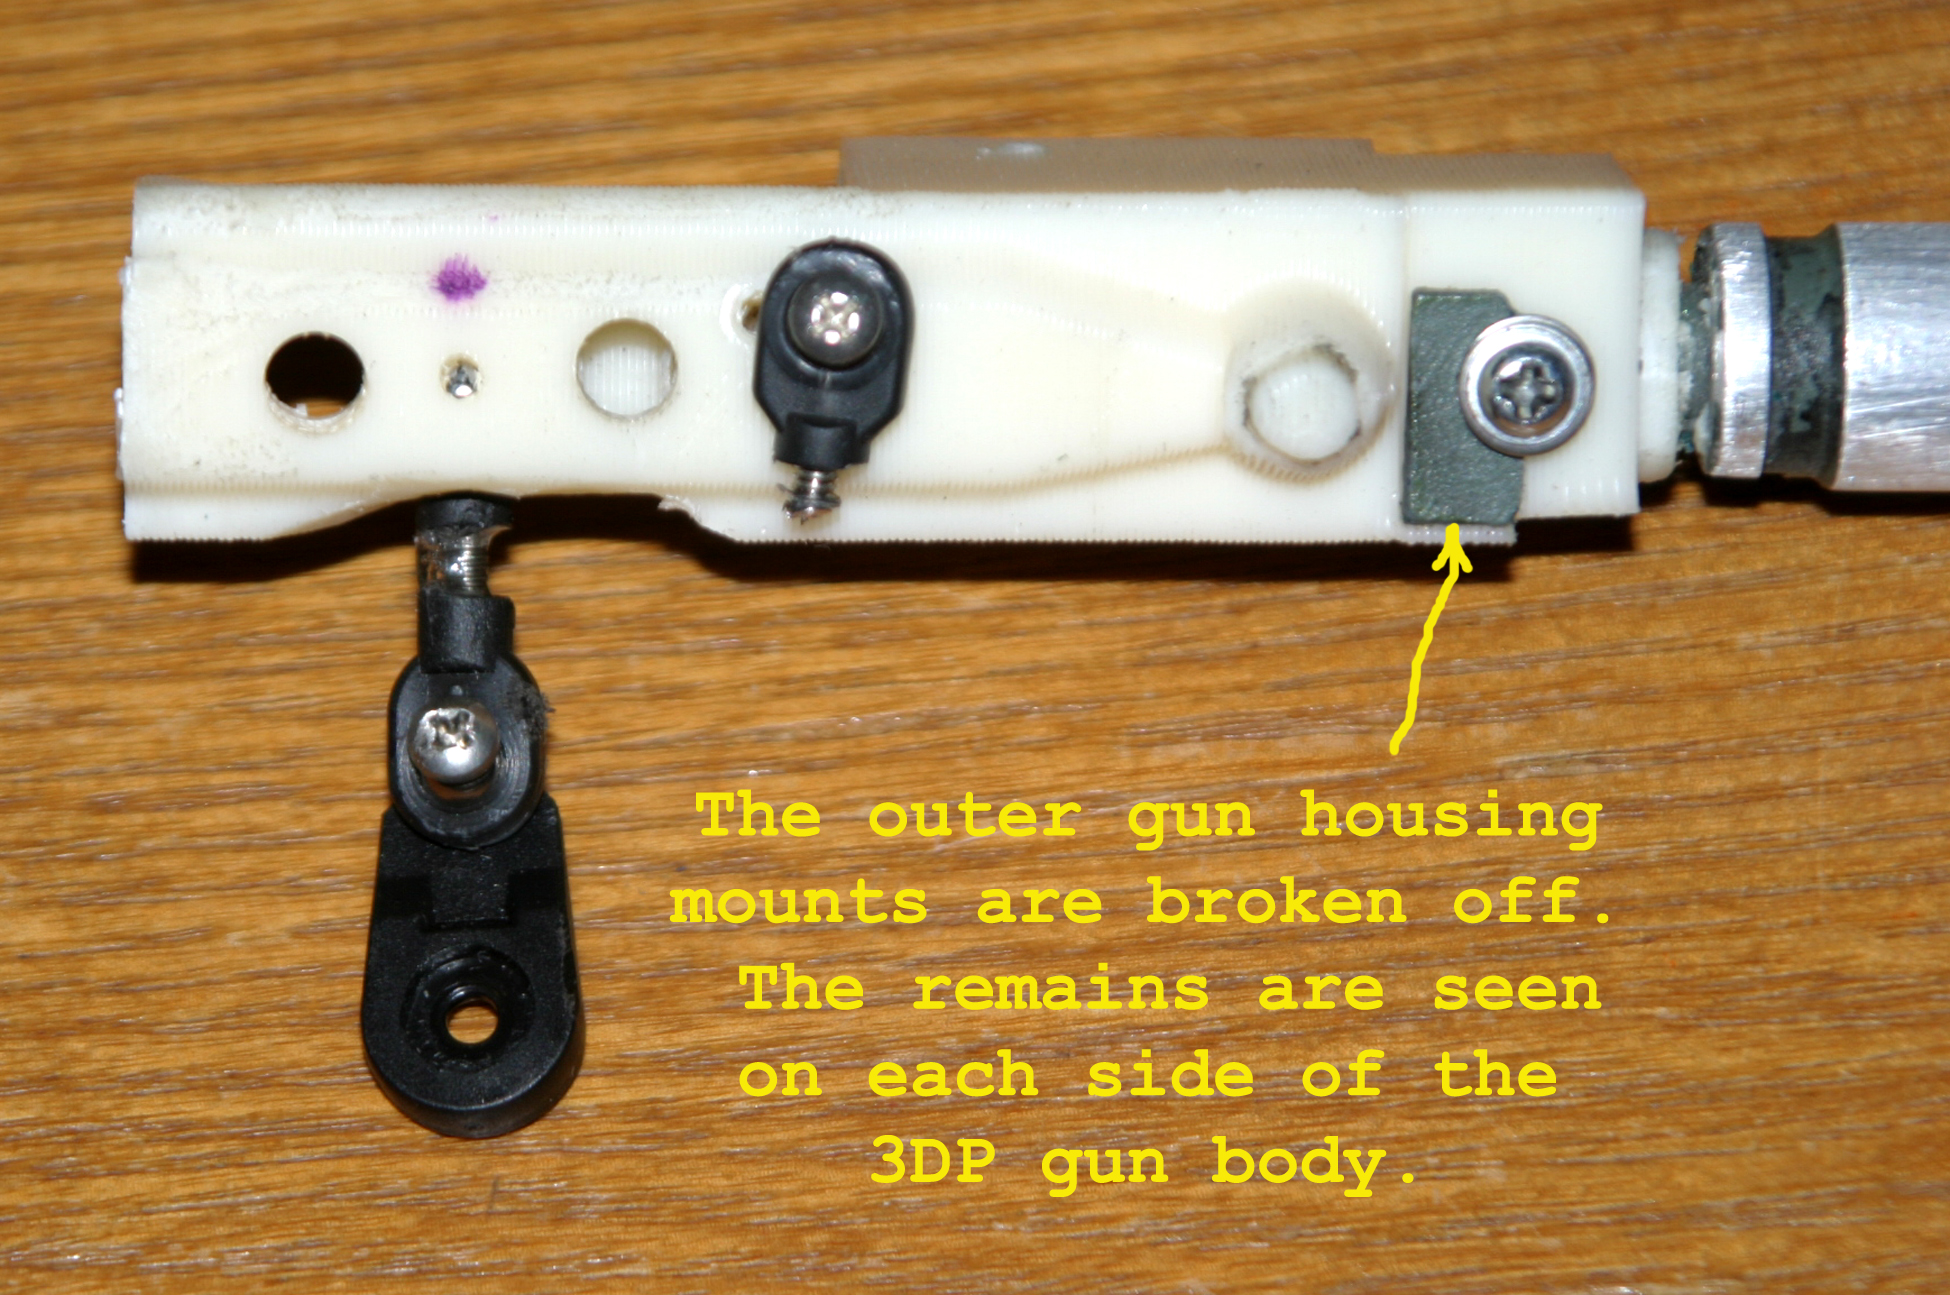
On the back end of the gun body is a broken tab that supports the recoil servo. I'll glue and screw the tab back on for extra strength.
Last night I labeled a few wires in the turret and proceeded to cut the servo wires. I'm going to get two servo extensions and cut the ends off of them. Then I'll solder them to the servo wires where I cut them. By doing this, I'll be able to test the servo's and the gun mount using an extra 2 channel RC system I have. Also I'll be able to unplug the servo's if they need repair or replacing.
I'm still going to try and clean up the wires and make a wiring schematic drawing to help me the next owner if I decide to ell the tank. Upon closer inspection, I noticed more of the slip-ring wires are not being used. I like the way mcm308 wired his Leo turret. I think I may do my similar to the way he did his. The best thing about somewhat copying mcm308 is the servo wires will plug intop the CB inside the turret and they will no longer be attached to the slip-ring like they are now.
There's also a tab broken off of the end of the 3DP gun body that I'll be gluing on as well as using two 0-80 screws to strengthen it so it doesn't break again.
On the back end of the gun body is a broken tab that supports the recoil servo. I'll glue and screw the tab back on for extra strength.
10-15-2015 | 12:44 PM
#8
Joined: Jul 2013
Posts: 378
Likes: 0
Received 0 Likes
on
0 Posts
From: sayreville, NJ
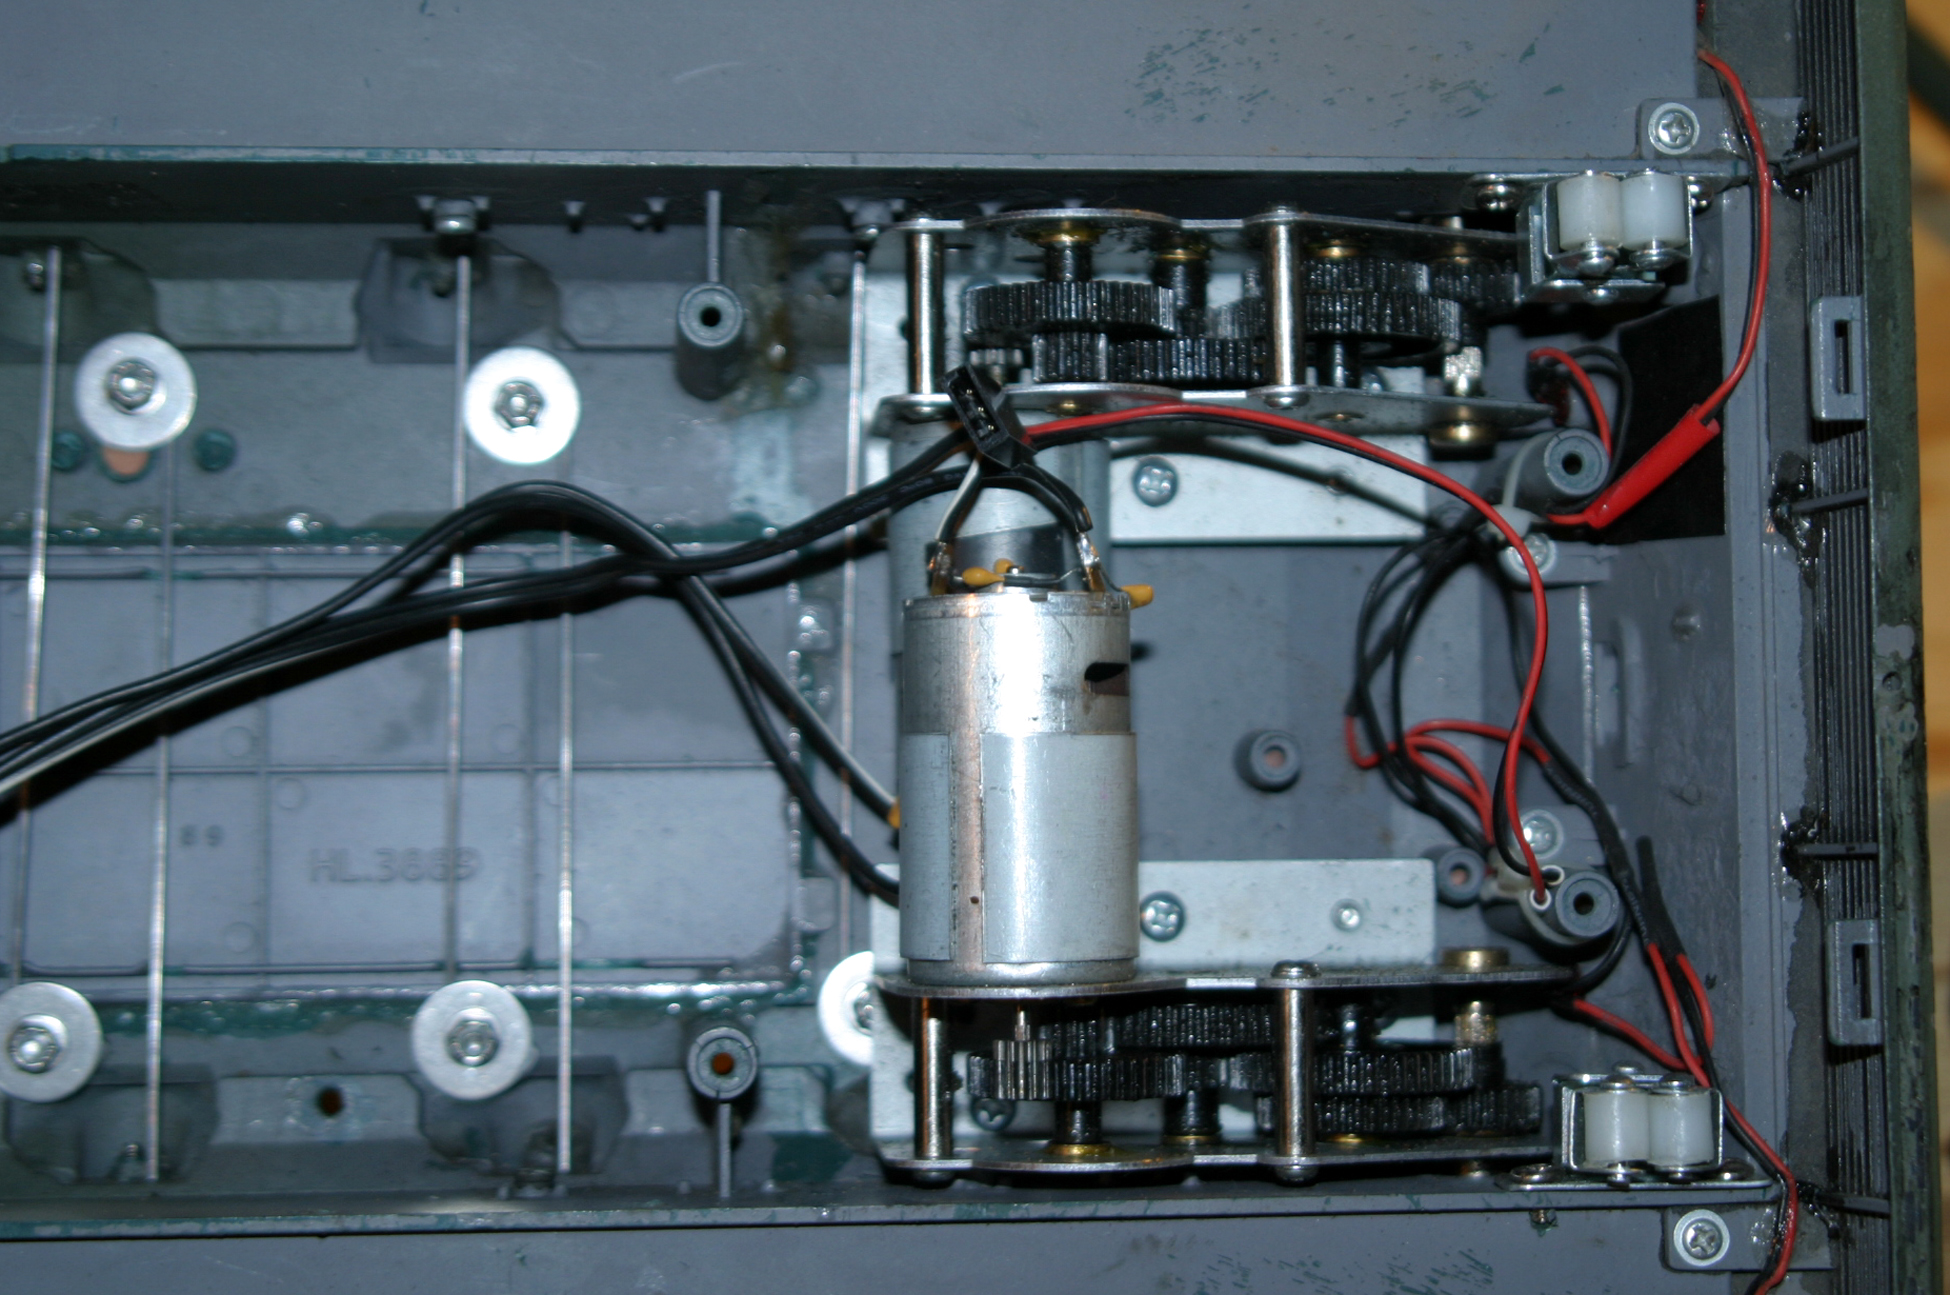
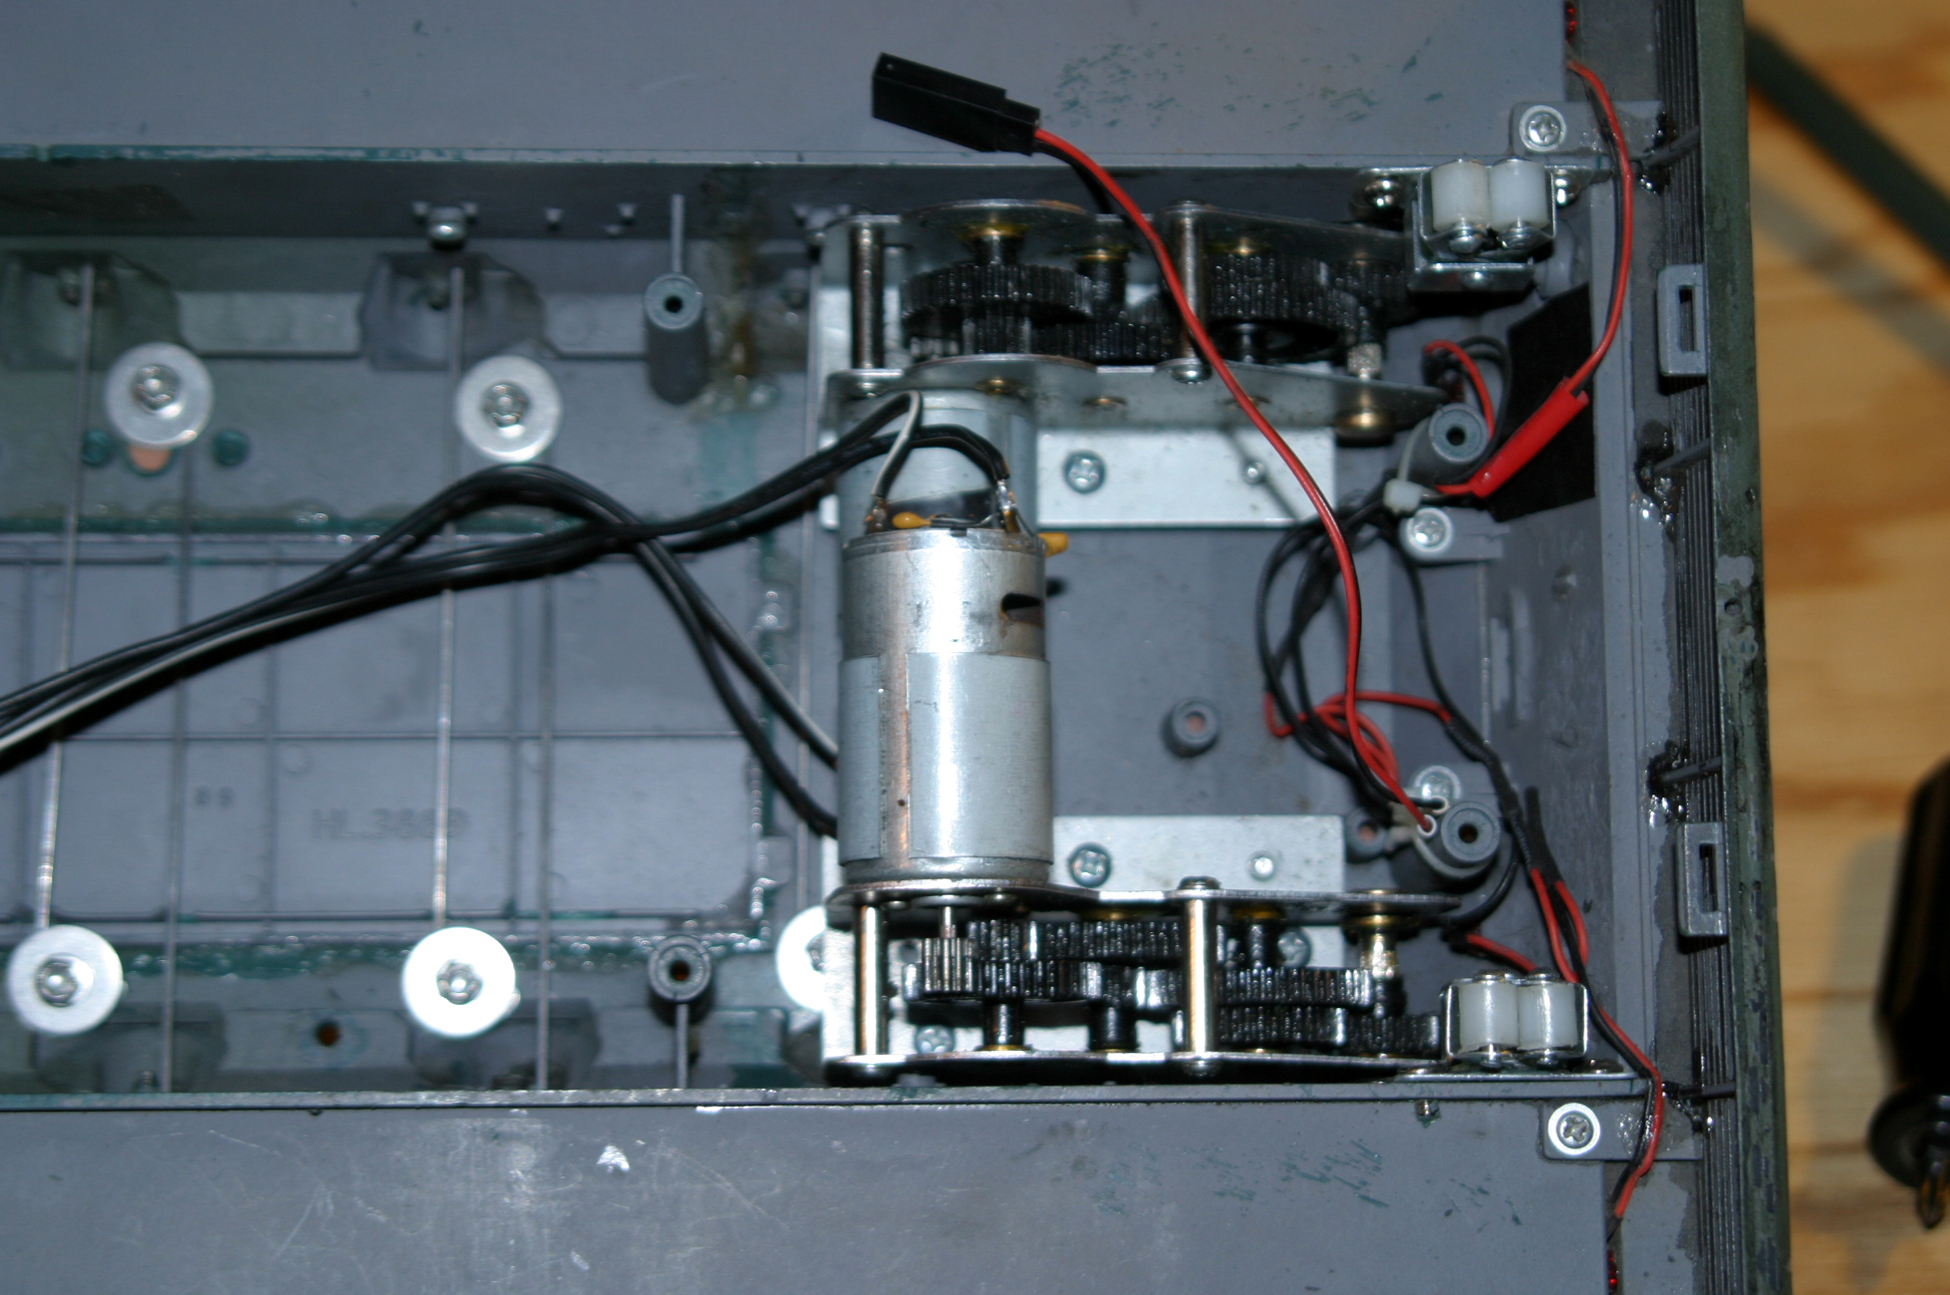
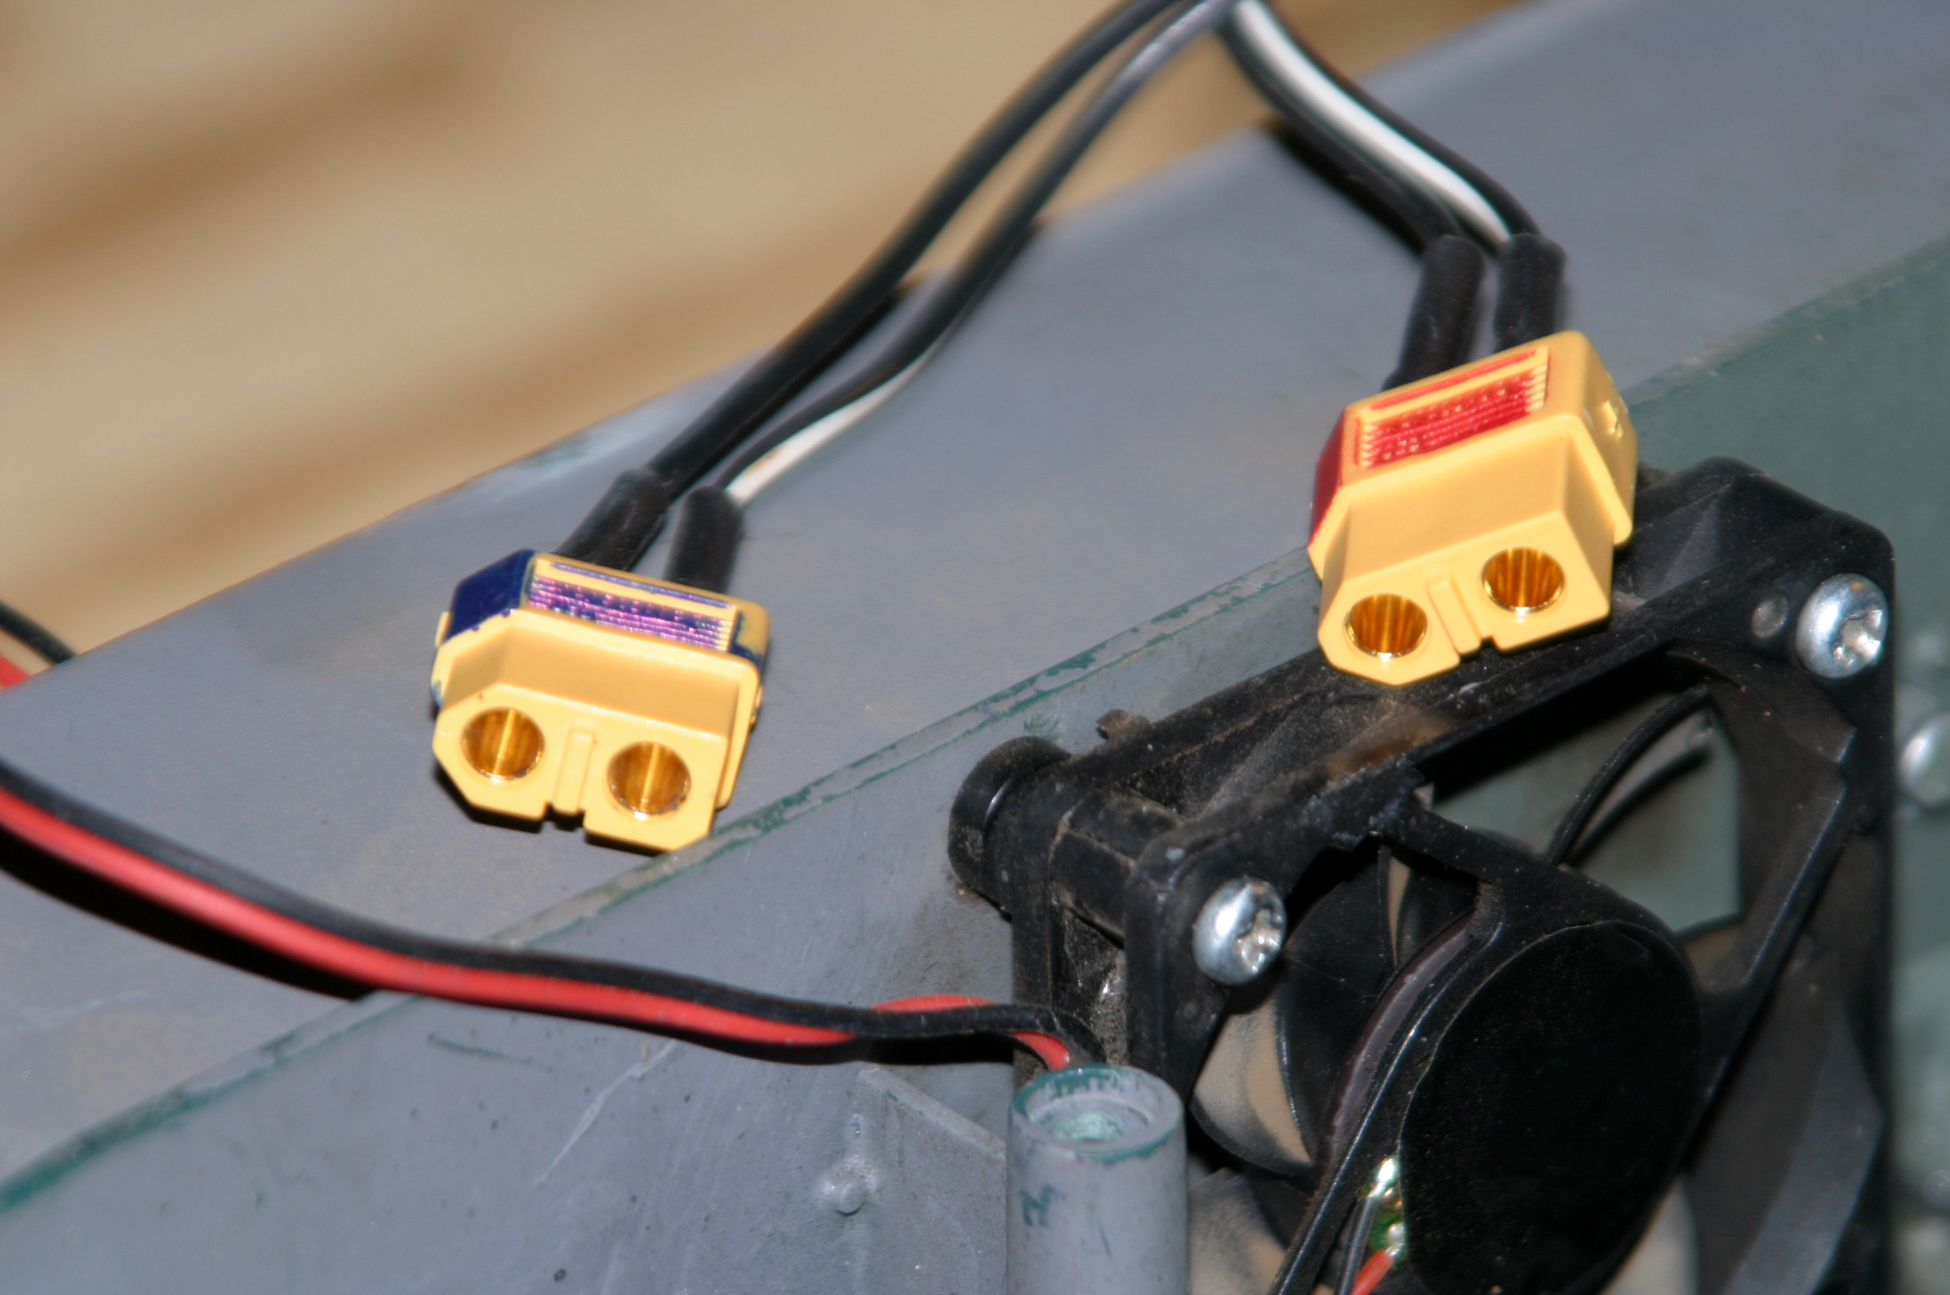
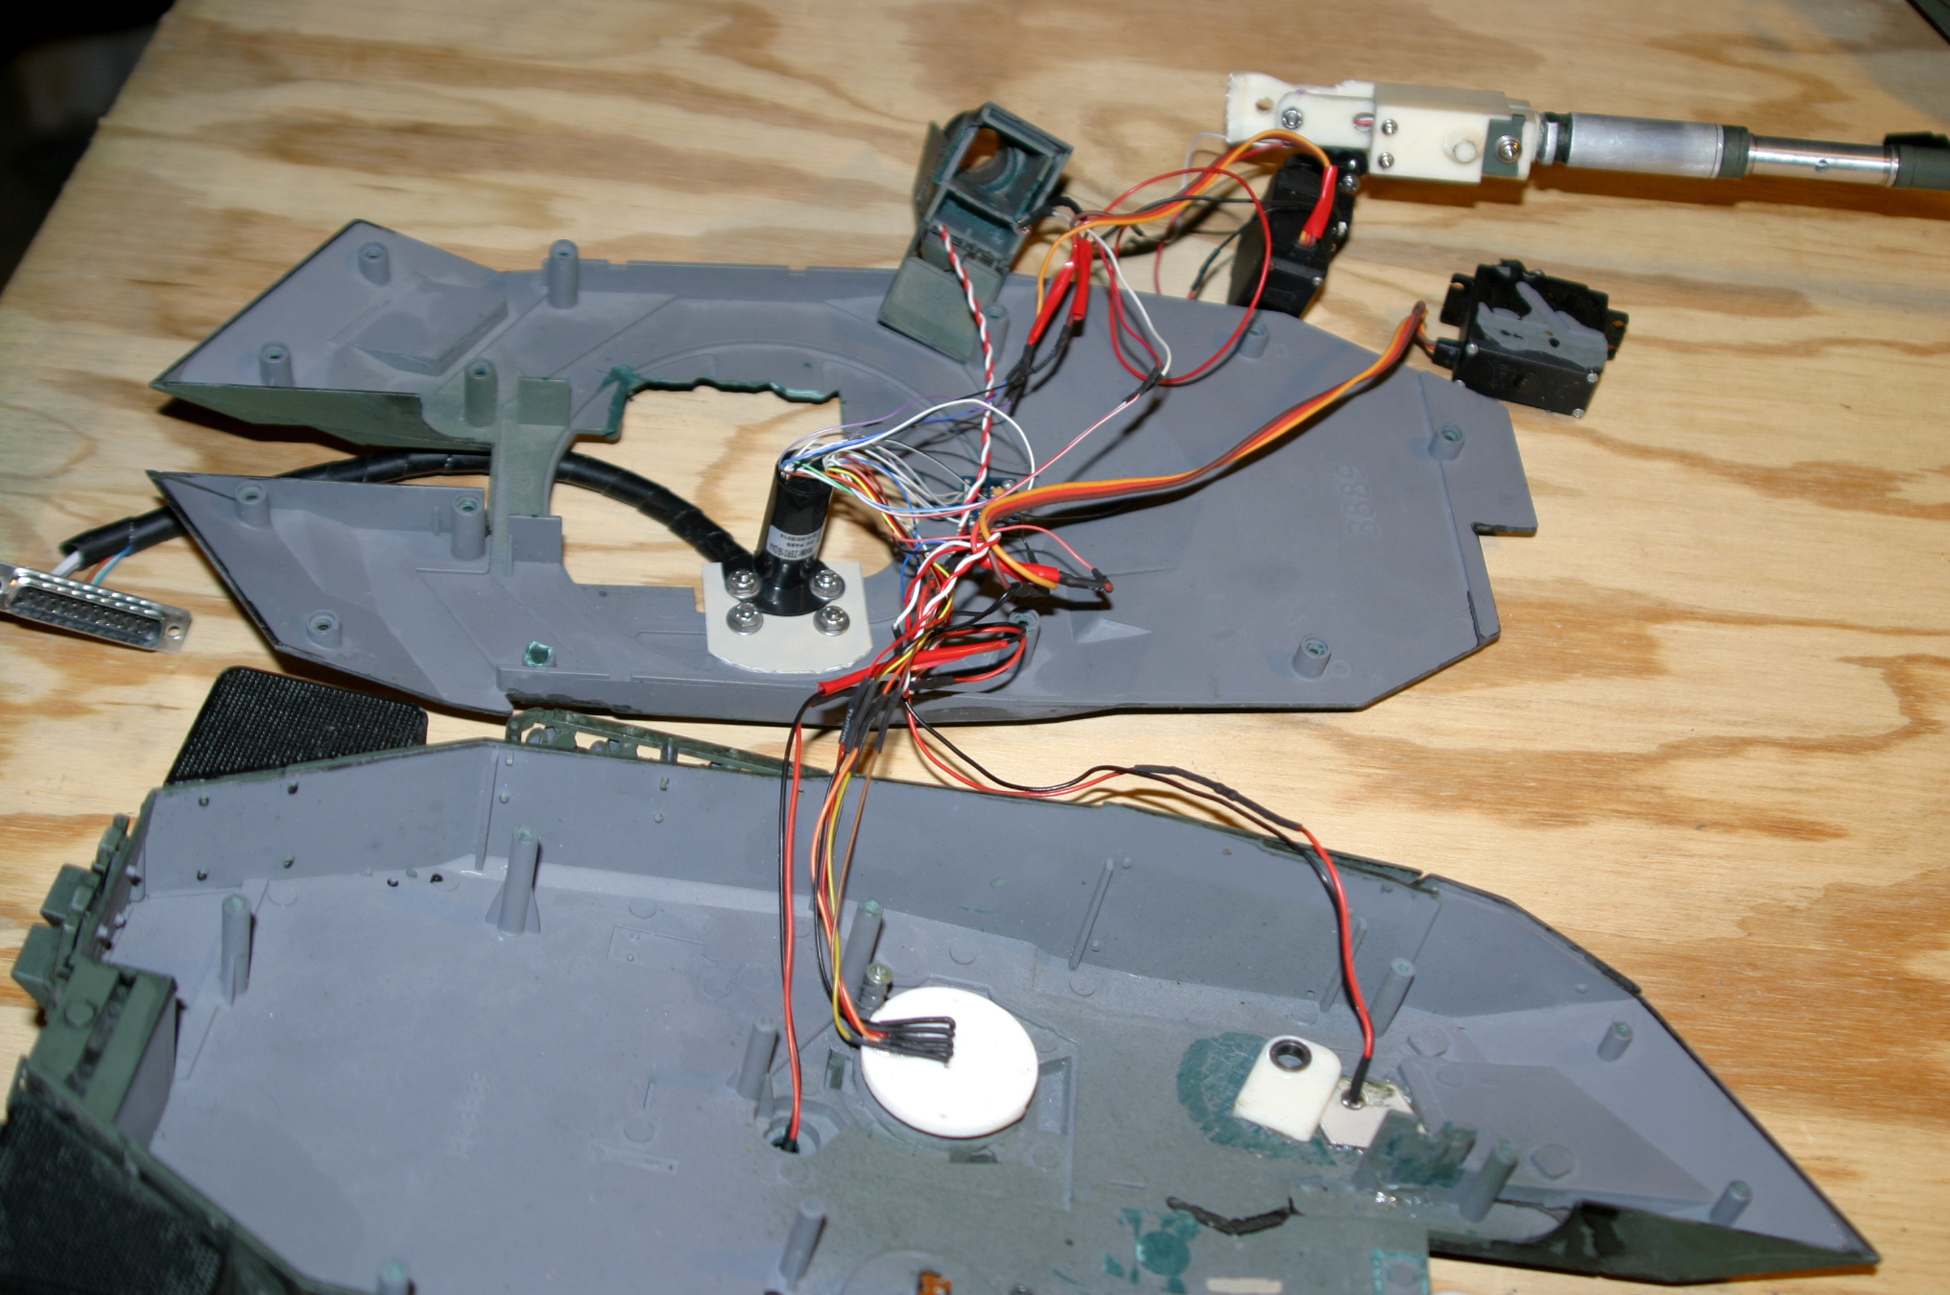
I like everything in the turret, was not my original plan but when I got the Clark board with GBS, the GBS unit needs to be mounted in the turret like I have and level. That required the main board to also be in the turret because the supplied wires with plug for GBS is very short. So everything ended up in the turret, Clark boards, receiver, Benedini TBS mini, and the audio amp. Only problem with this layout is, the motor, battery and speaker wires now run from bottom to top. I dont have a slip ring but right now I have ample slack for quite a few turns before I run into a problem and have to reverse the turret..lol That is the problem I need to figure something out with. Im not sure what kind of wires or amps those slip rings can handle. Never seen one before.
And I have Deans plugs on the motors and battery, and used male and female servo plugs for the speaker connections for when I need to remove the top.
If you buy a 10 pack of servo extension wires, they have male and females you can hack up a few like I did and use for quick connects.
And I have Deans plugs on the motors and battery, and used male and female servo plugs for the speaker connections for when I need to remove the top.
If you buy a 10 pack of servo extension wires, they have male and females you can hack up a few like I did and use for quick connects.
Last edited by mcm308; 10-15-2015 at 12:49 PM.
10-15-2015 | 12:53 PM
#9
Joined: Jul 2013
Posts: 378
Likes: 0
Received 0 Likes
on
0 Posts
From: sayreville, NJ
http://pages.ebay.com/link/?nav=item...721298&alt=web
They also have the mini servos I got. MG90s , seem to work just fine for elevation and recoil, Dirt cheap.
They also have the mini servos I got. MG90s , seem to work just fine for elevation and recoil, Dirt cheap.
10-15-2015 | 01:11 PM
#10
It's good to see you posting some work over here Roger! 
You've done some great work on your Shermans and this project I expect will be no different.
Jeff
You've done some great work on your Shermans and this project I expect will be no different.
Jeff
10-15-2015 | 01:56 PM
#12
Thread Starter
Member
Joined: Apr 2015
Posts: 33
Likes: 0
Received 0 Likes
on
0 Posts
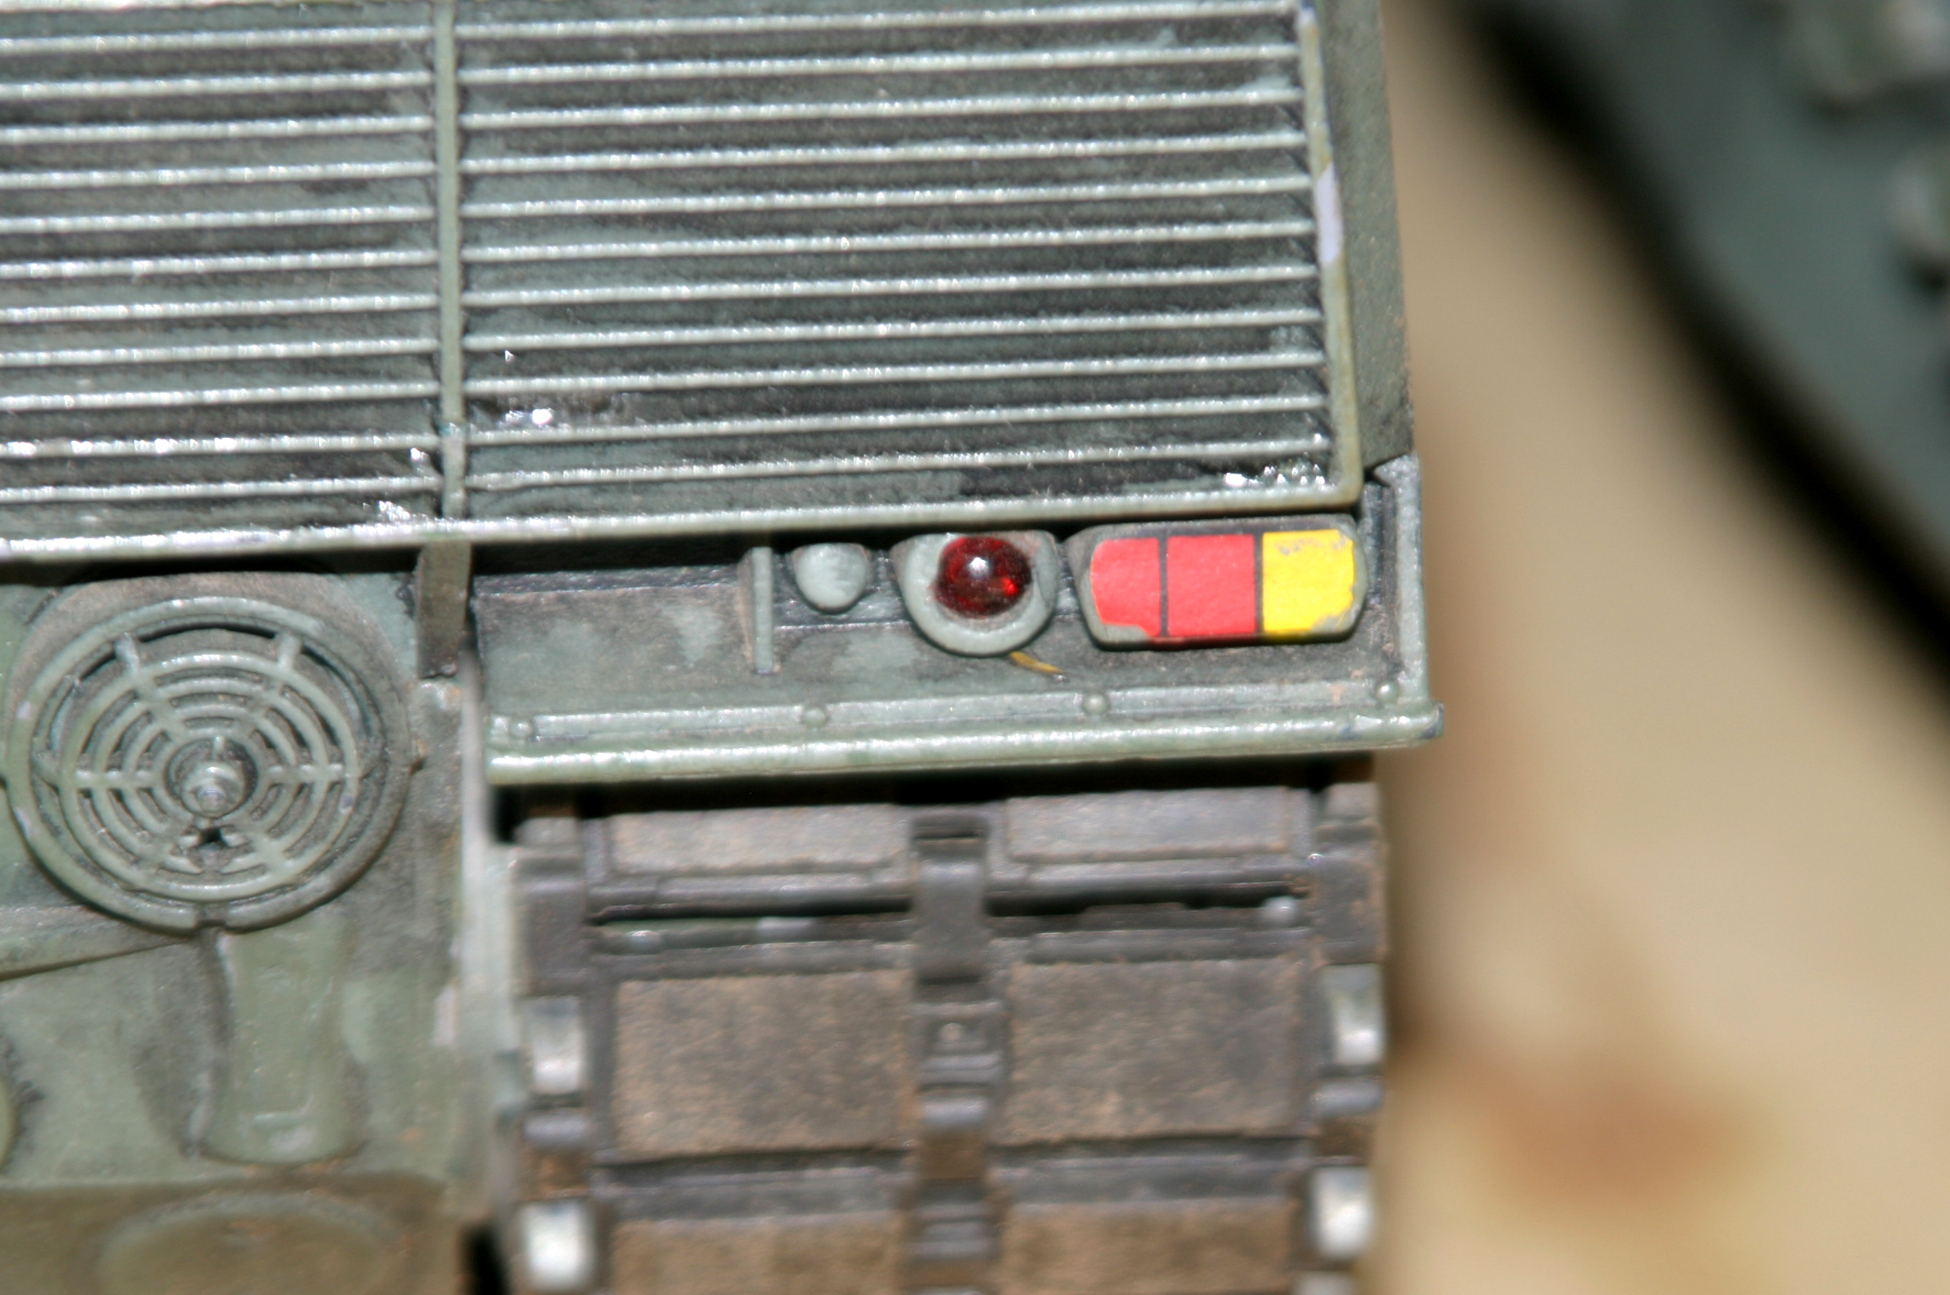
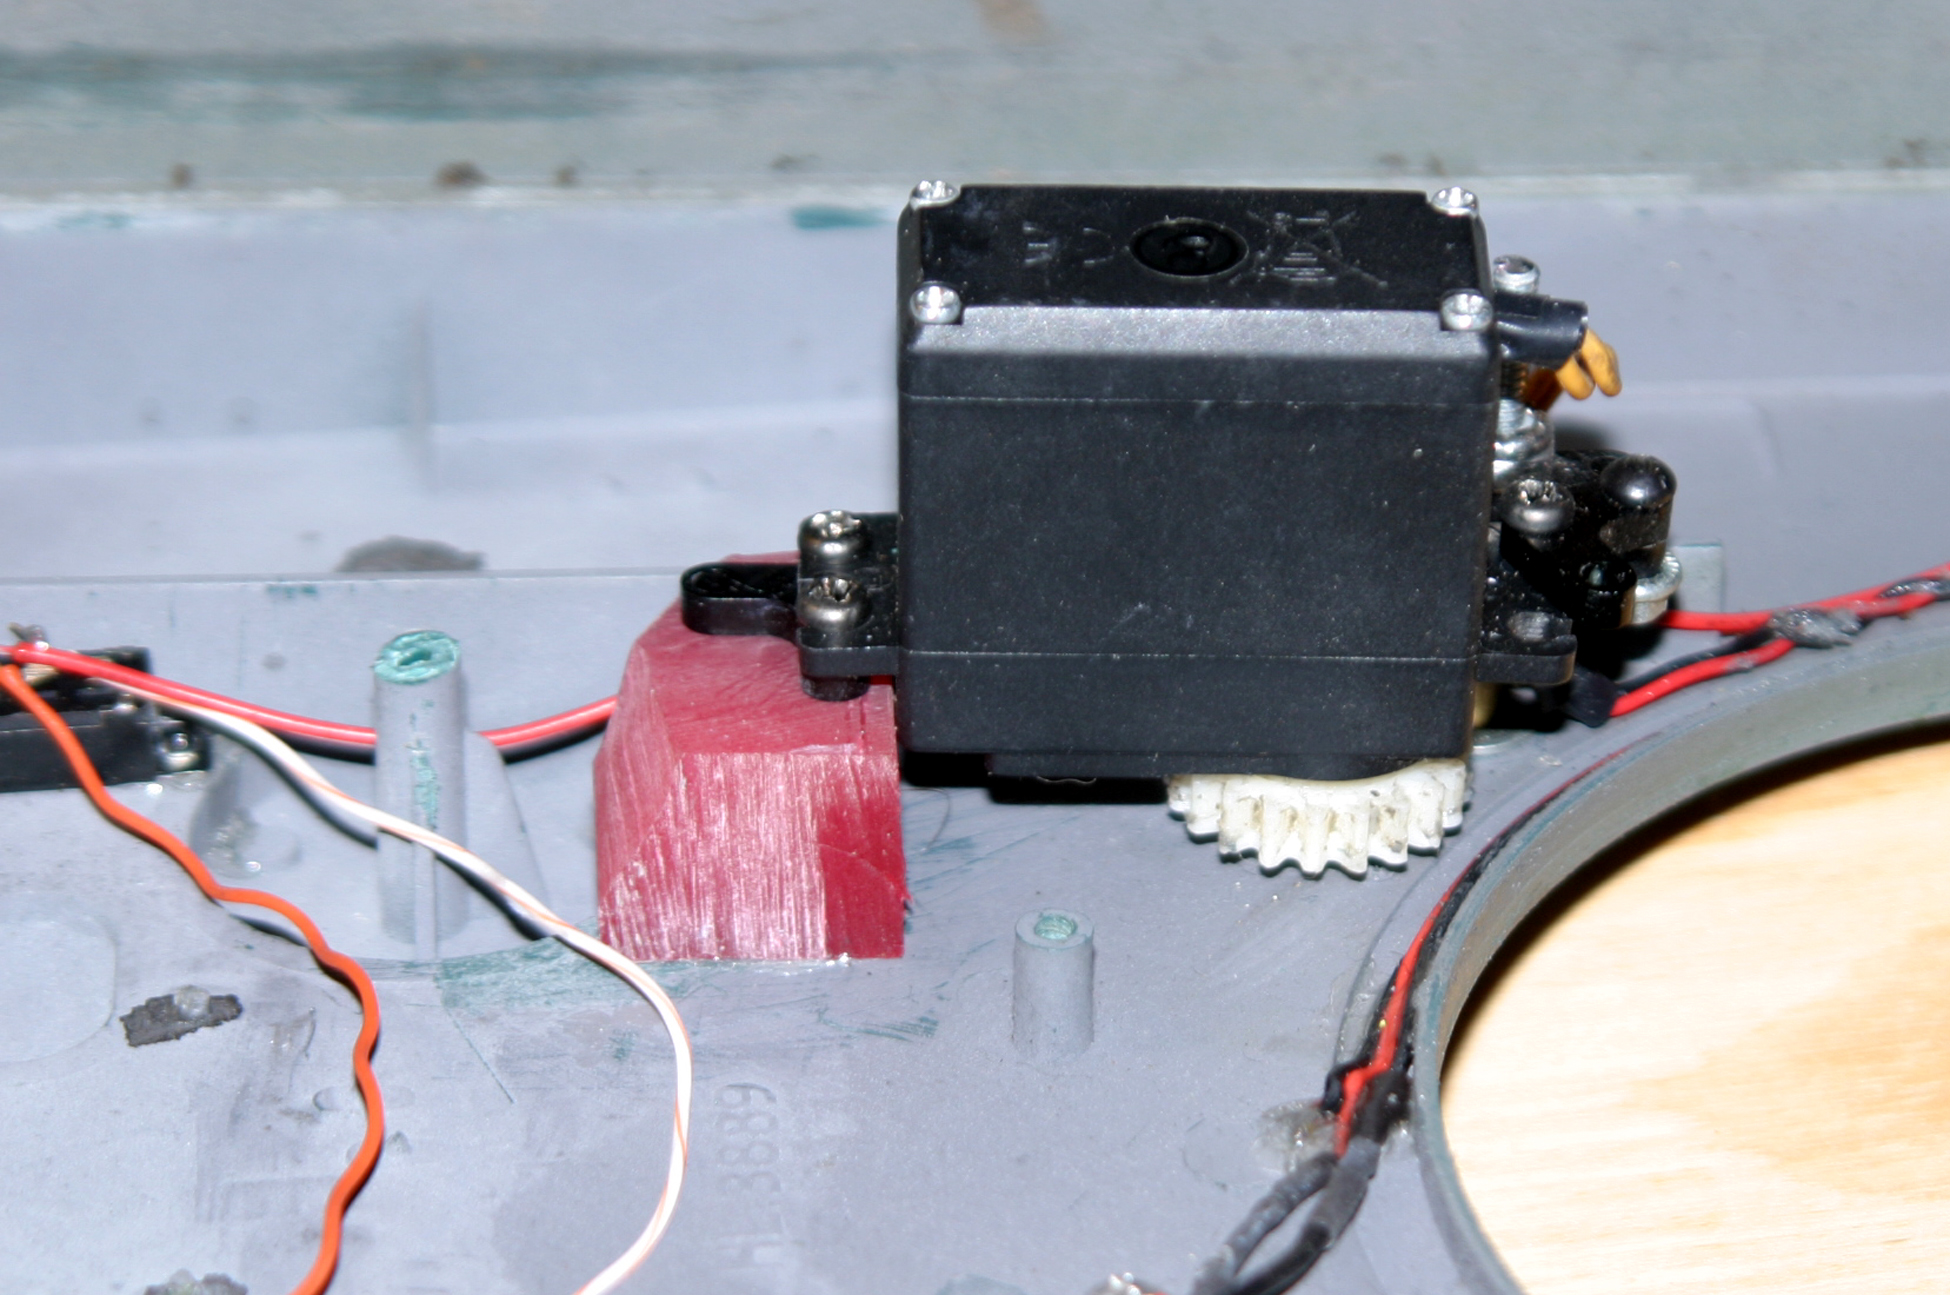
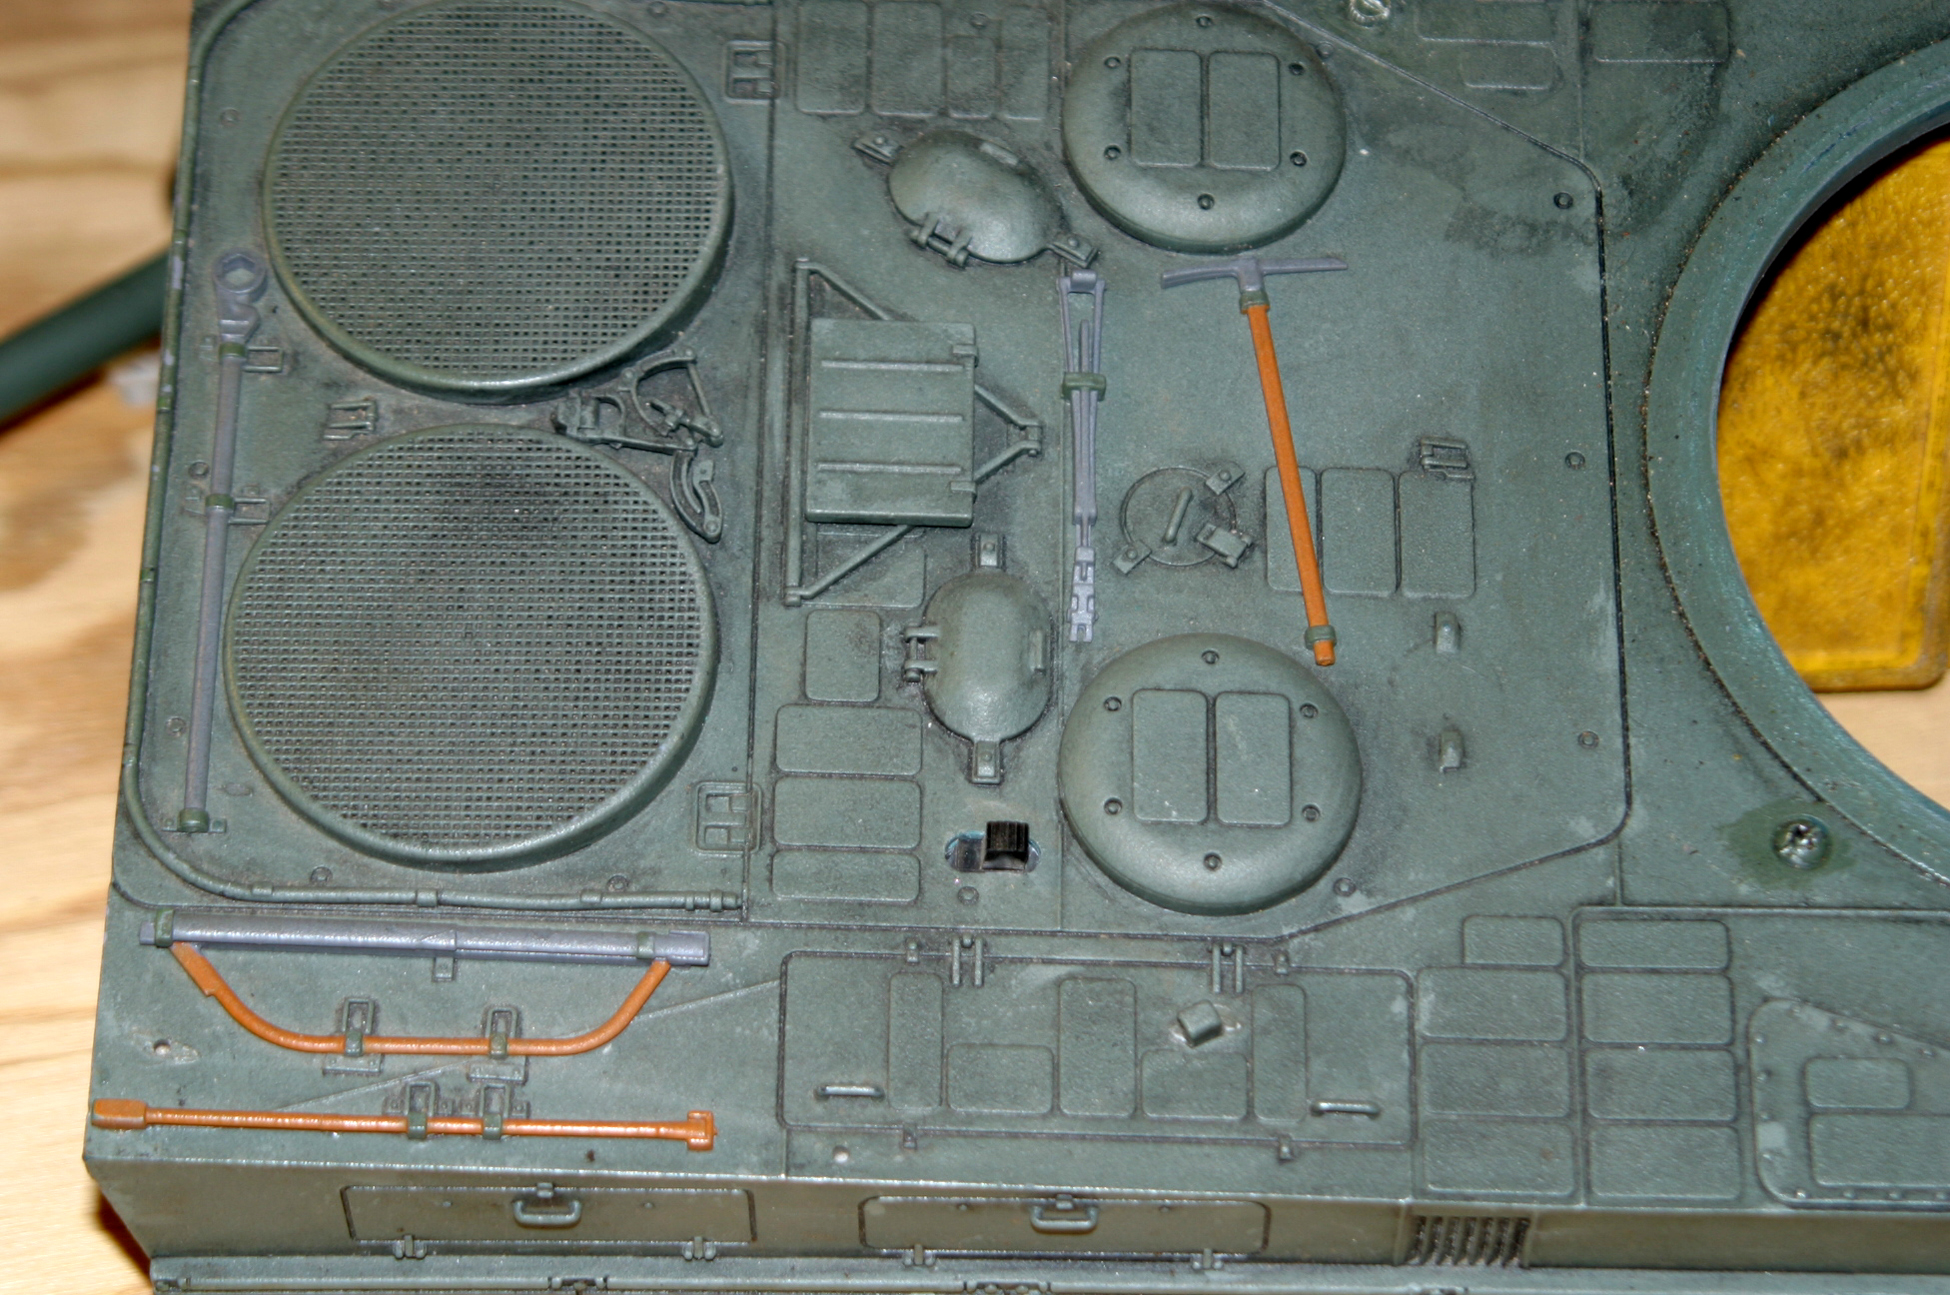
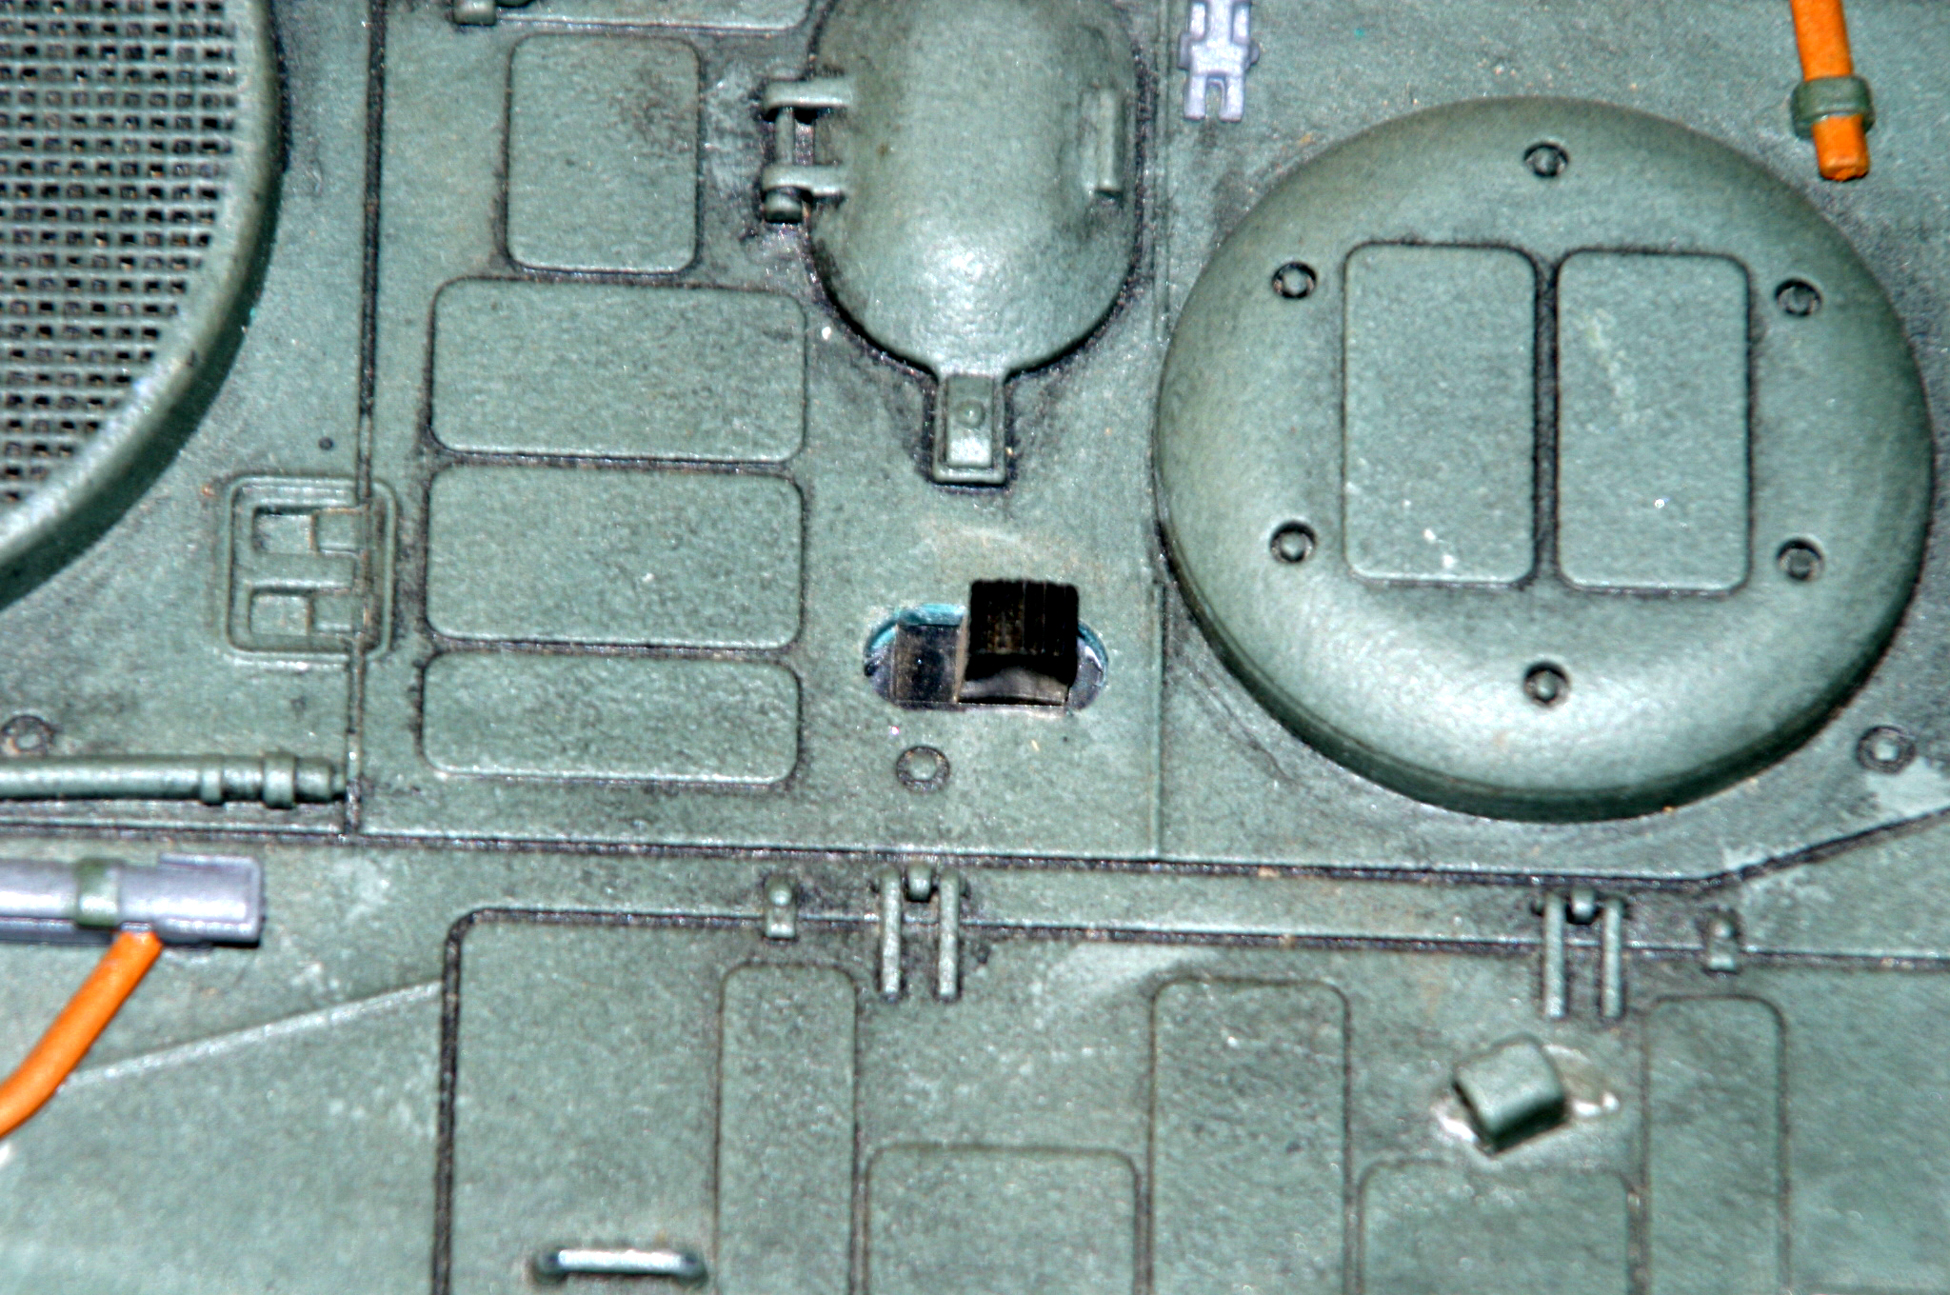
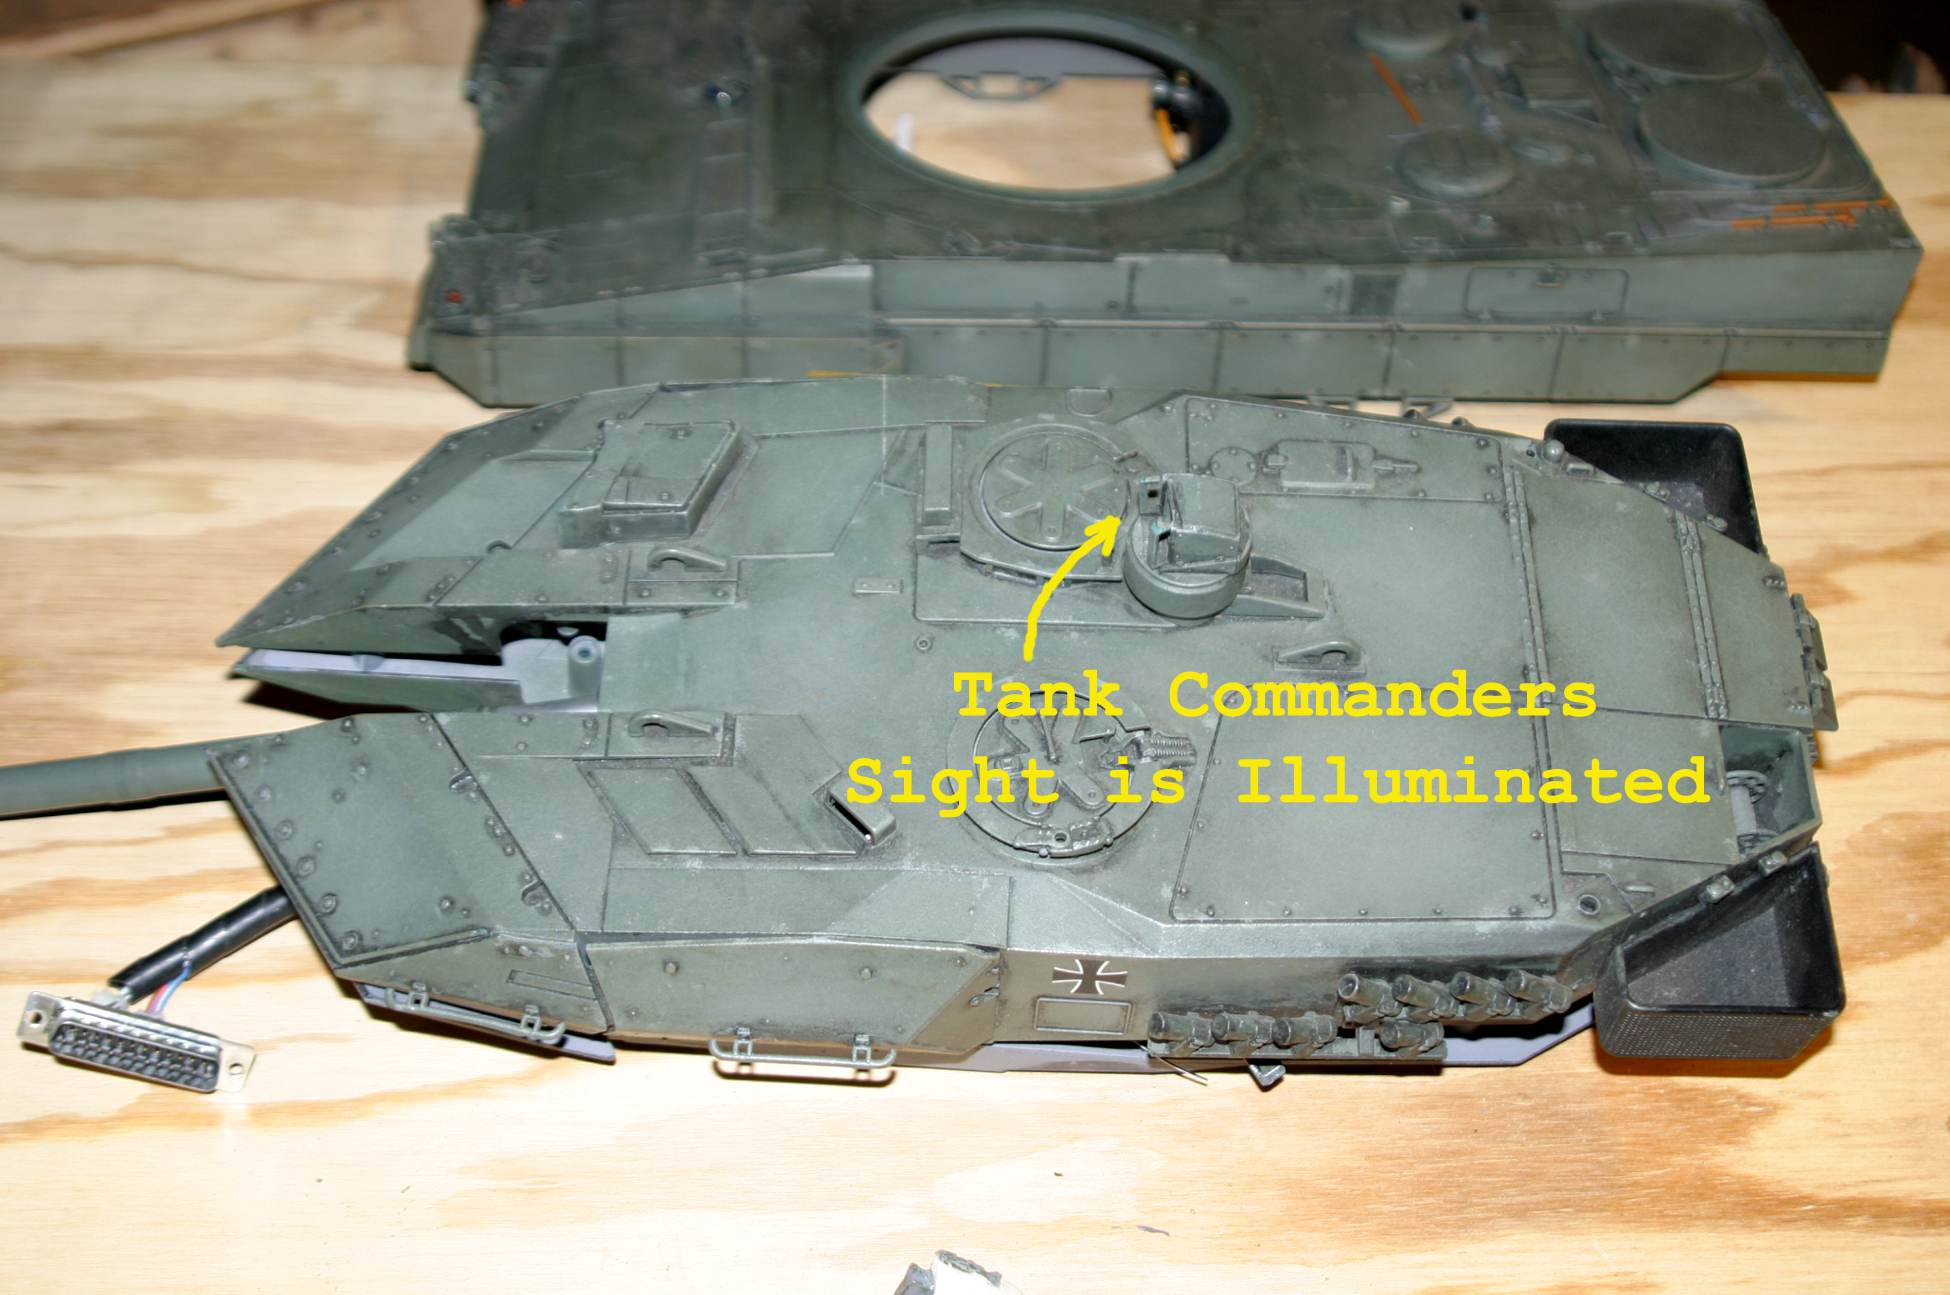
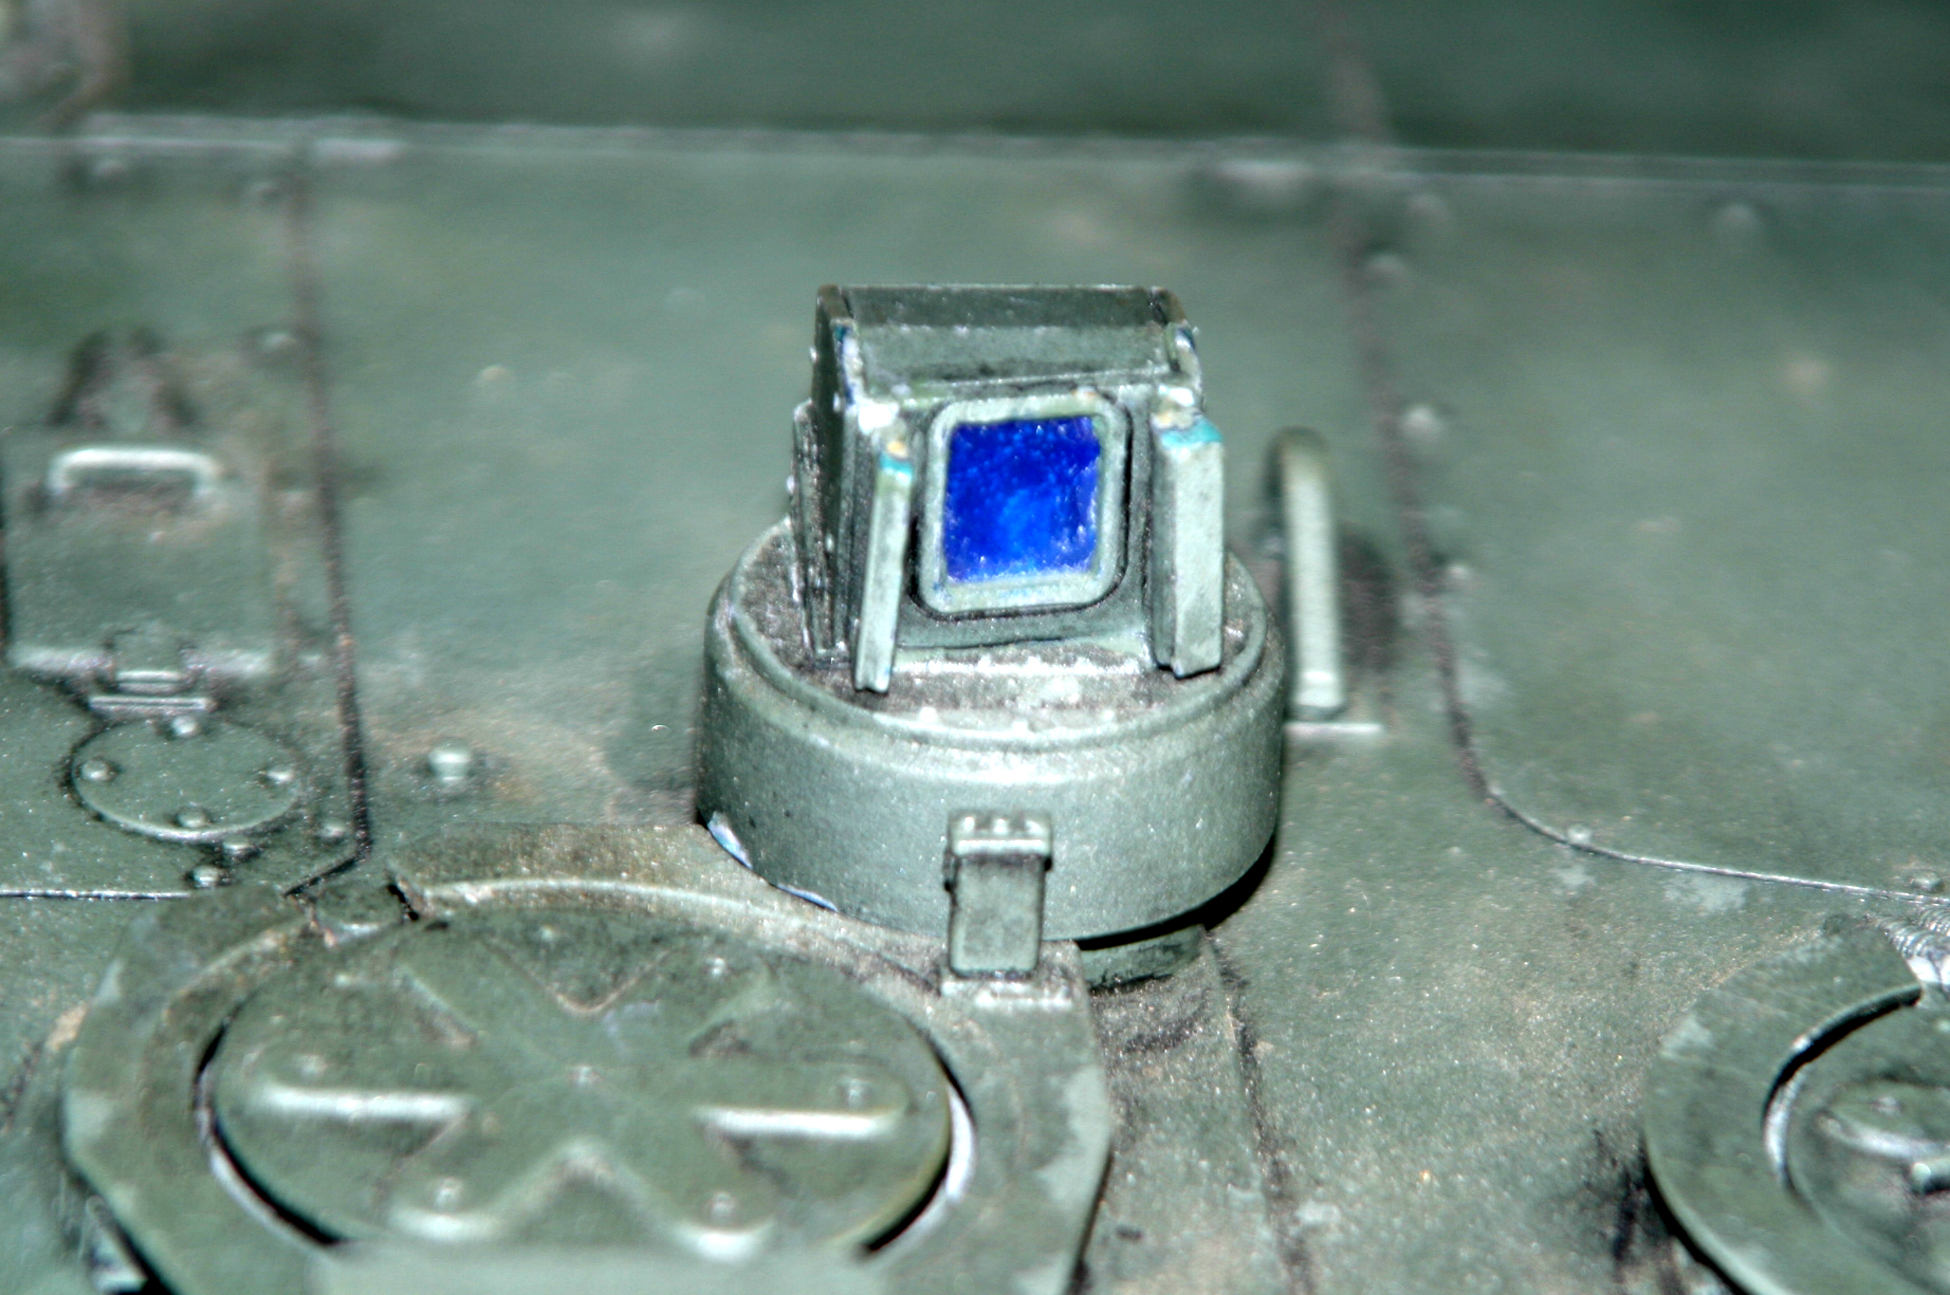
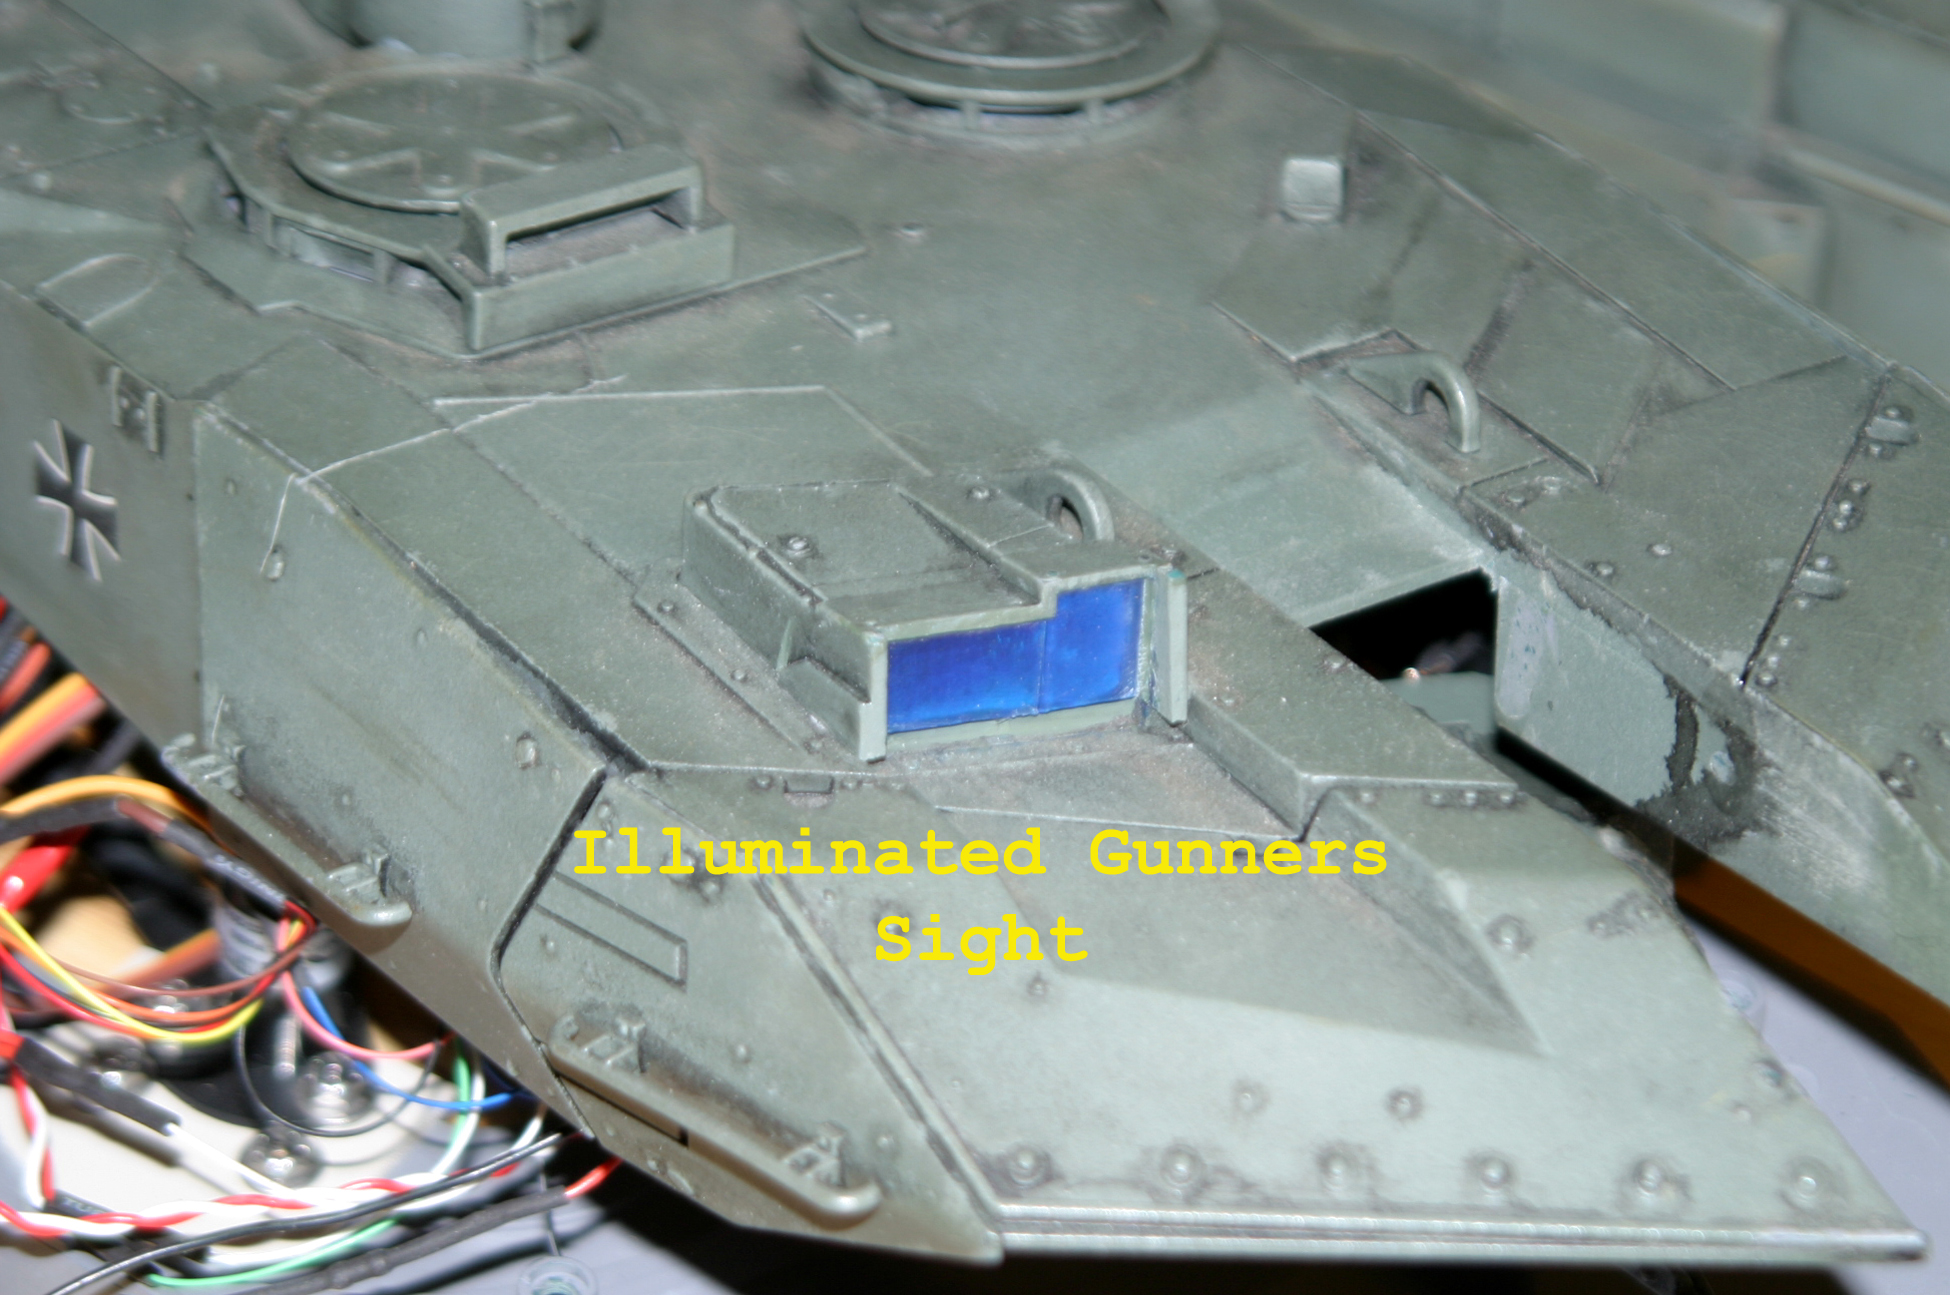
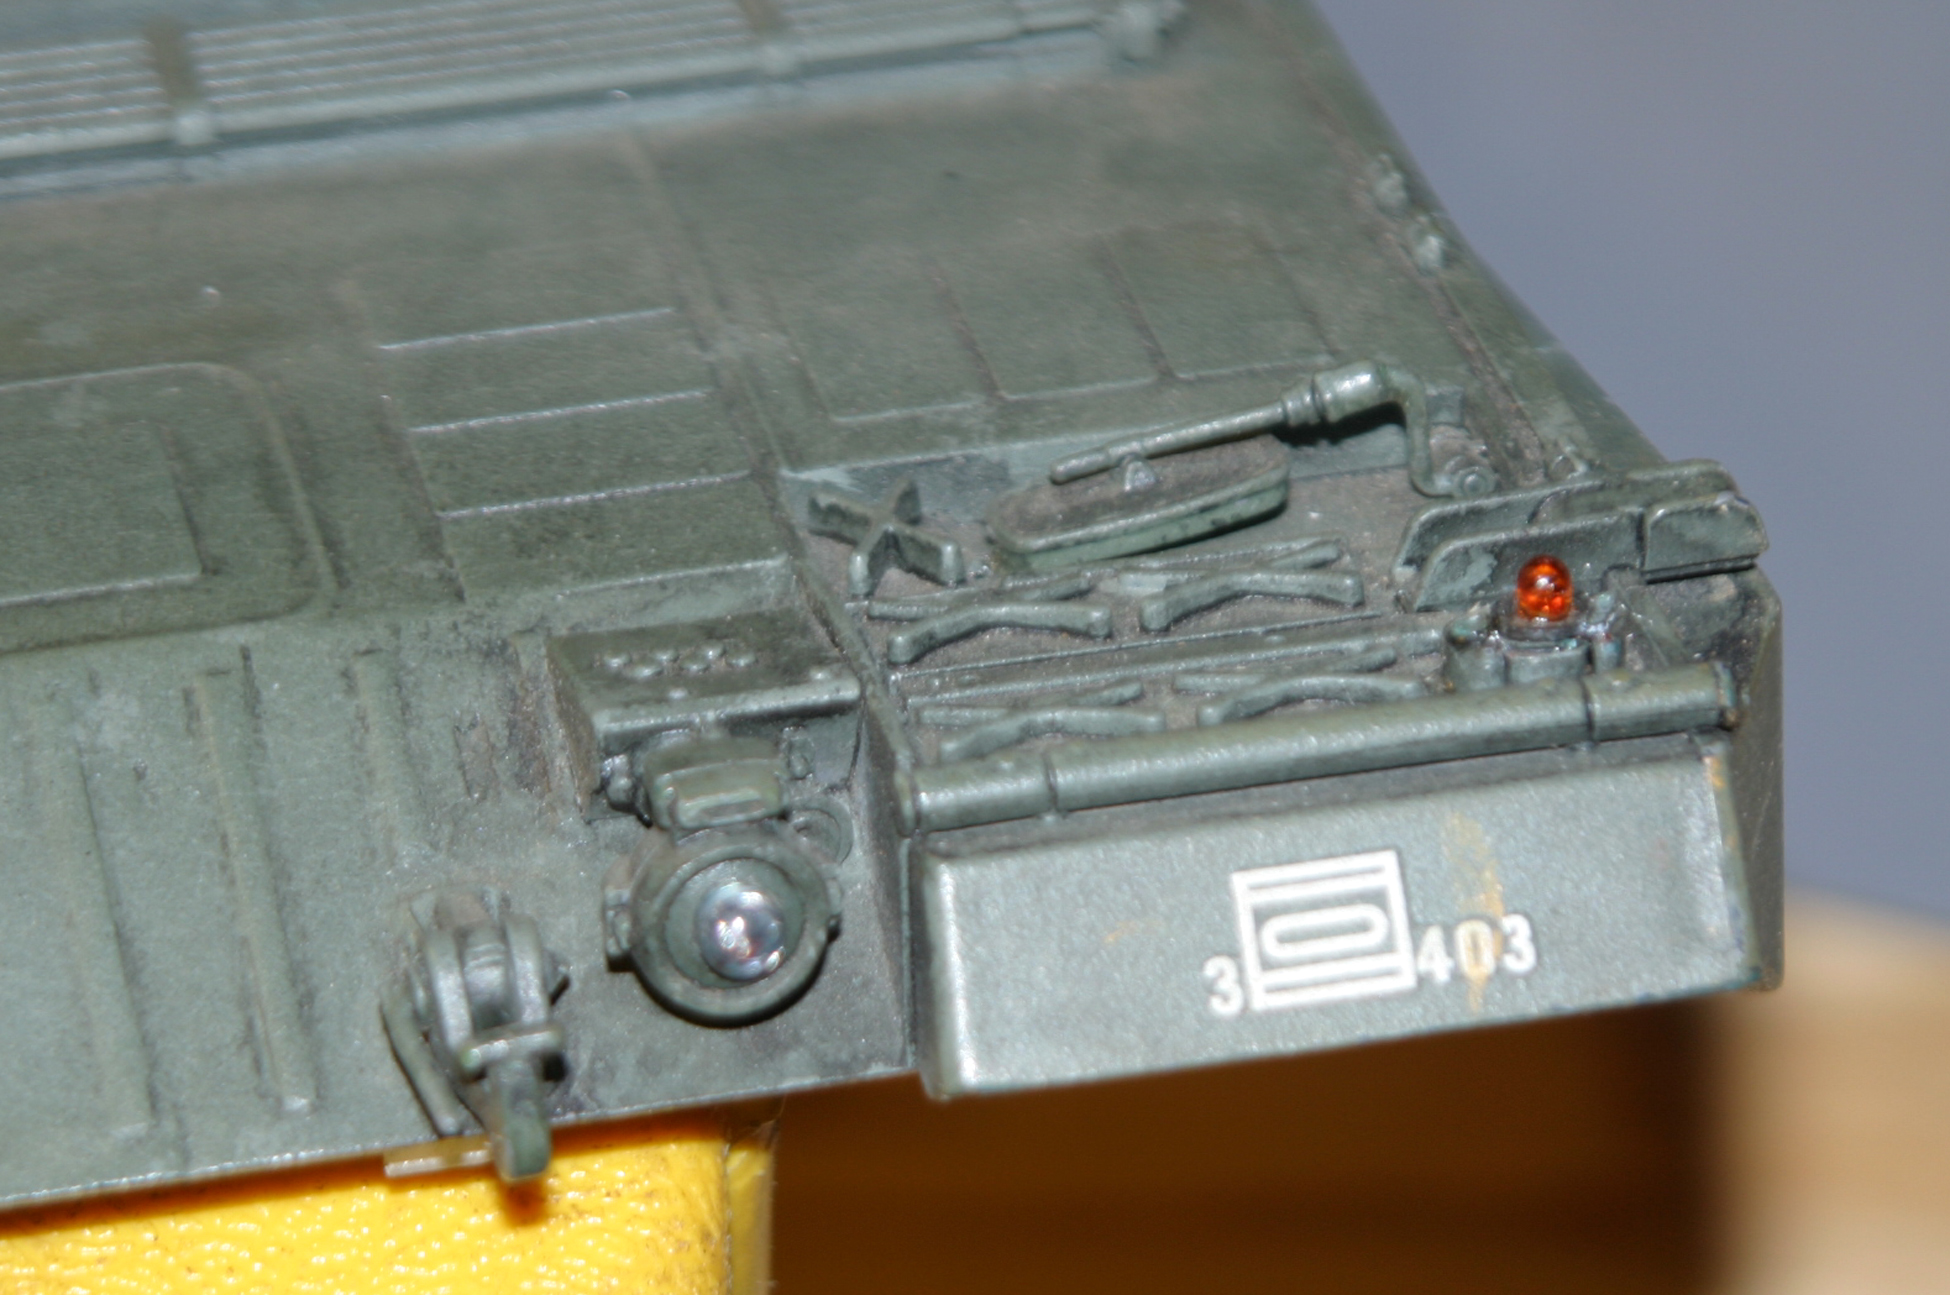
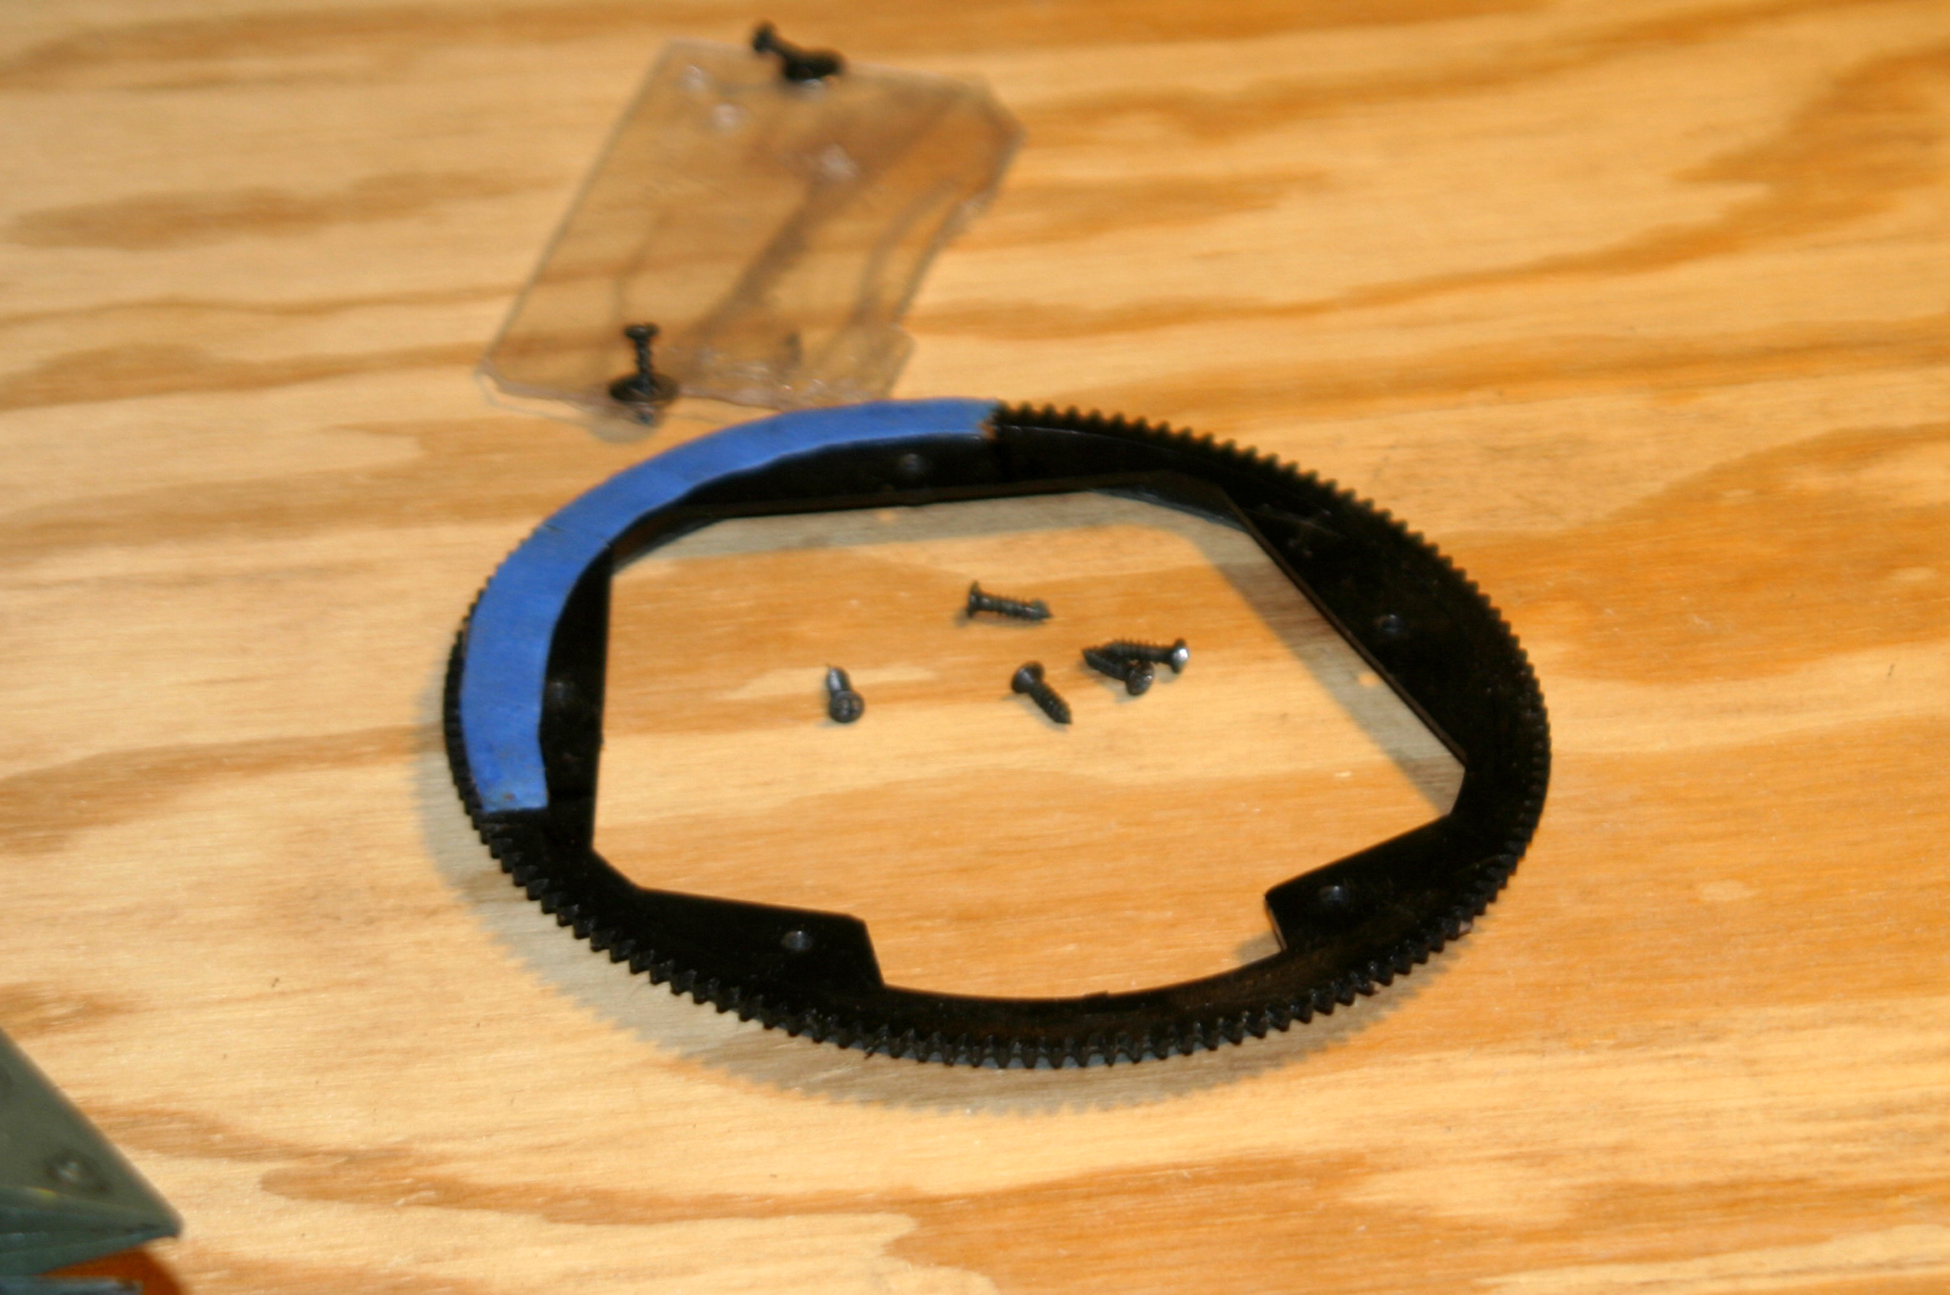
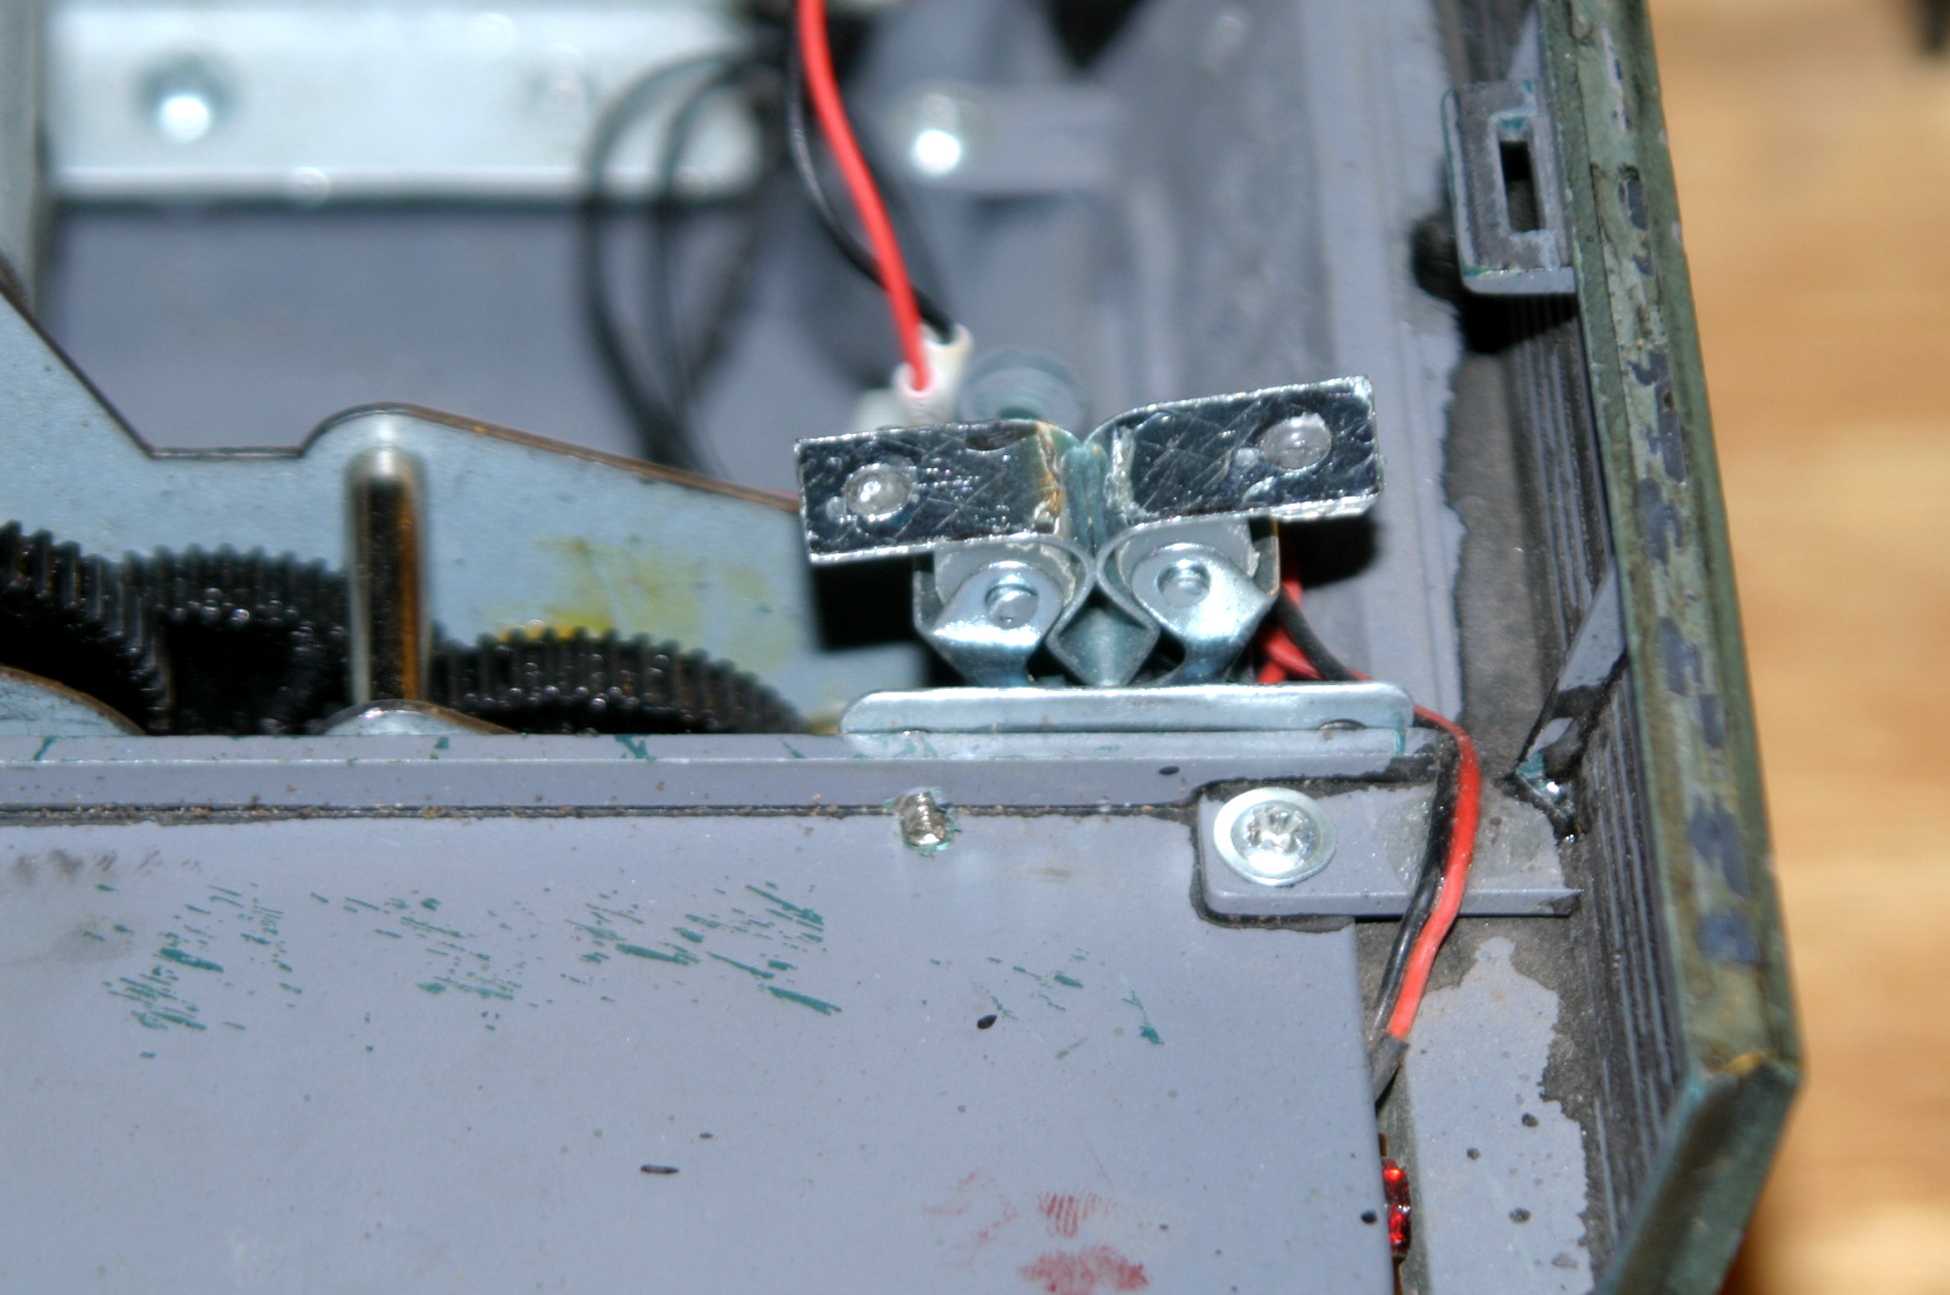
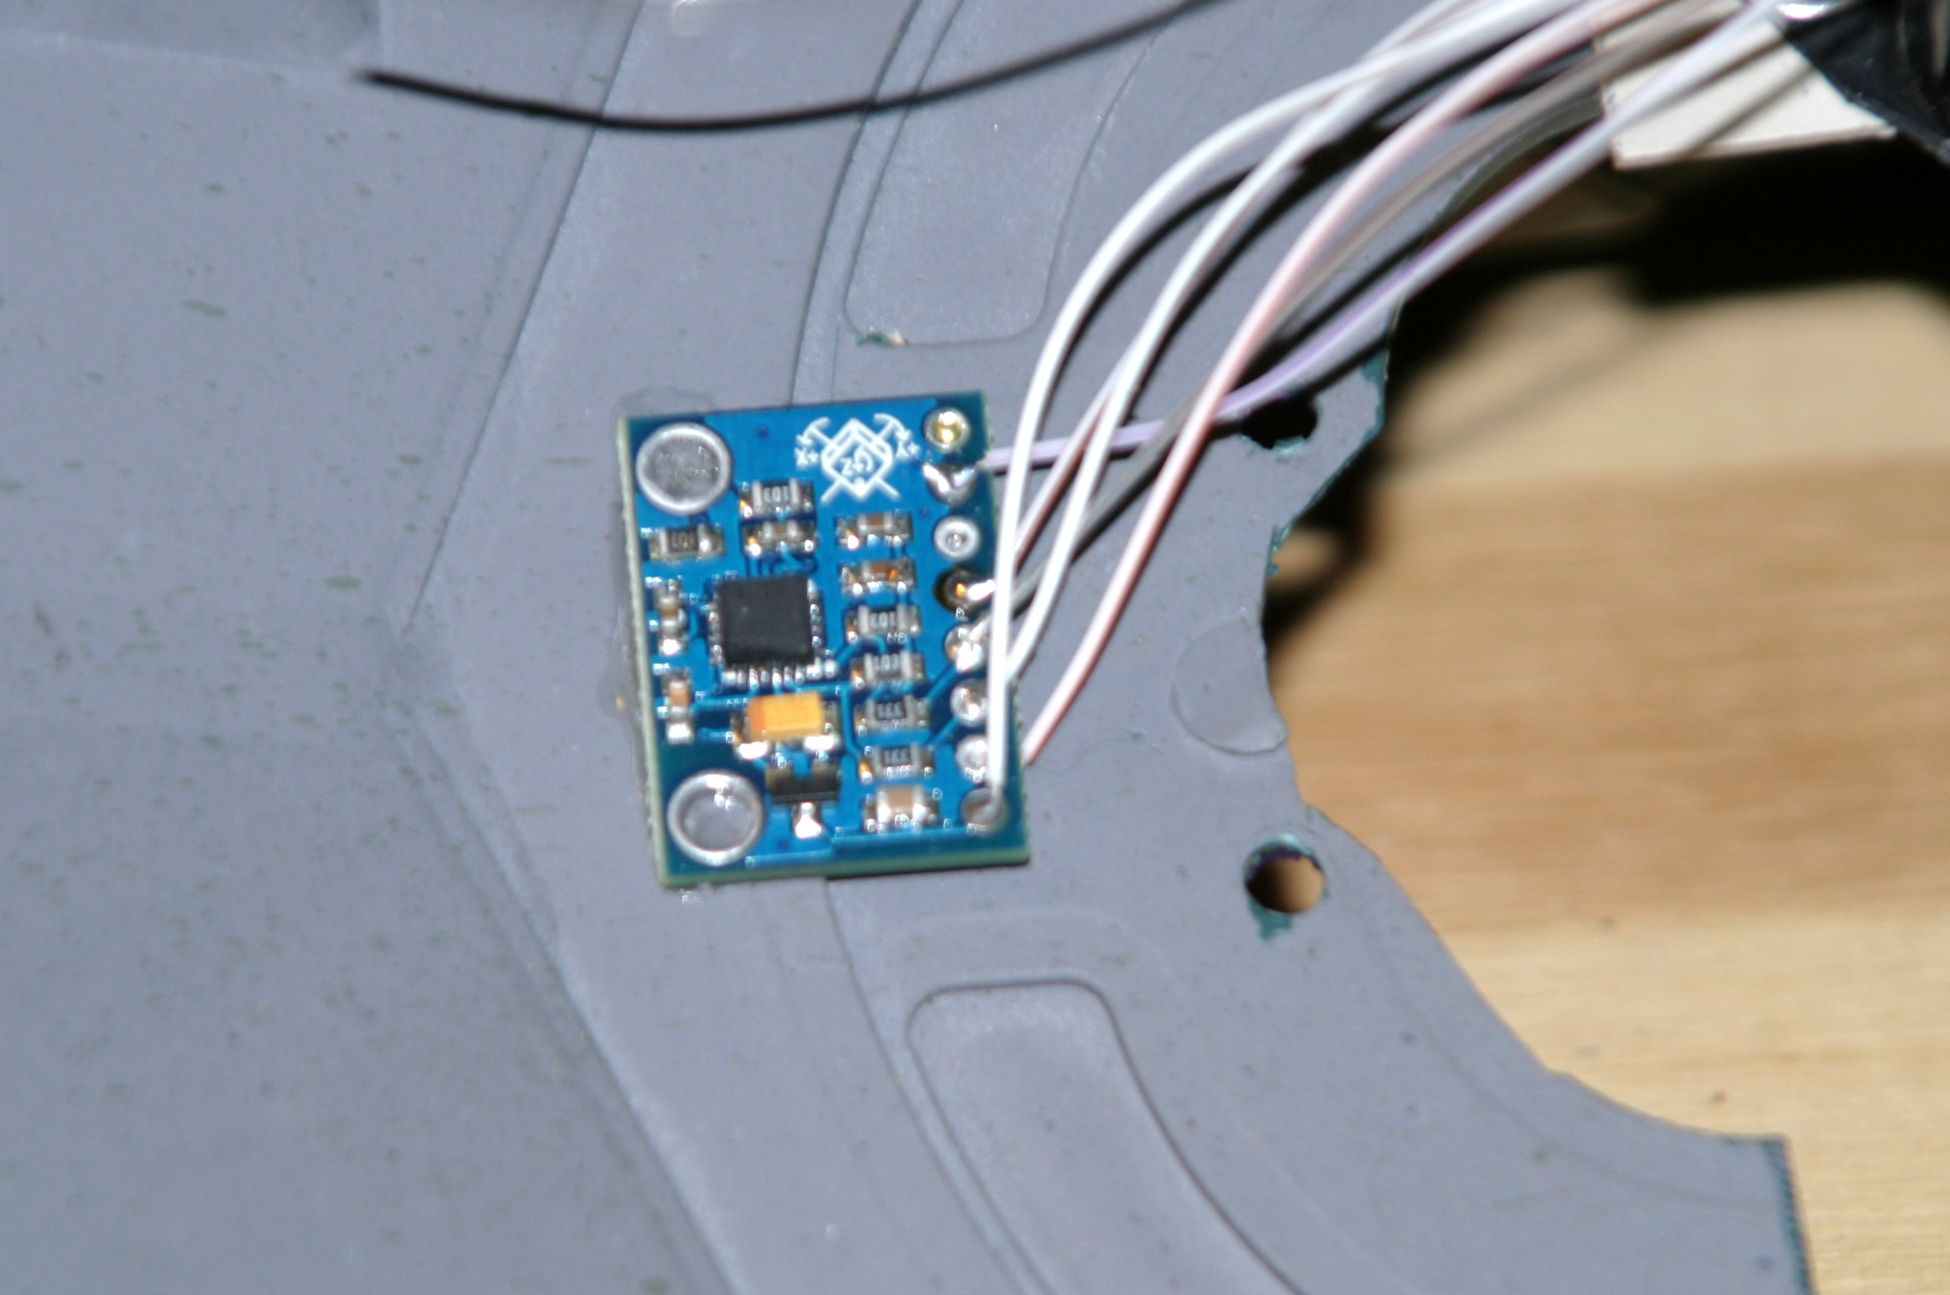
I did a bad job dumping it the first batch of photos here. Does anyone know what this little board is for? Its mounted in the turret, but all the wires go back through the slip-ring. I haven't traced the wires back yet, but they must hook up to the Clark Board. I just don't know what its for. Someday, I hope to buy a new un-built un-molested tank. For now, the fixer uppers are great to learn on!!!LOL
Thank in advance for your help.
Roger
Thank in advance for your help.
Roger
10-15-2015 | 02:21 PM
#13
Joined: Jul 2013
Posts: 378
Likes: 0
Received 0 Likes
on
0 Posts
From: sayreville, NJ
I did a bad job dumping it the first batch of photos here. Does anyone know what this little board is for? Its mounted in the turret, but all the wires go back through the slip-ring. I haven't traced the wires back yet, but they must hook up to the Clark Board. I just don't know what its for. Someday, I hope to buy a new un-built un-molested tank. For now, the fixer uppers are great to learn on!!!LOL
Thank in advance for your help.
Roger
Thank in advance for your help.
Roger

Last edited by mcm308; 10-15-2015 at 02:23 PM.
12-09-2015 | 04:58 AM
#19
Thread Starter
Member
Joined: Apr 2015
Posts: 33
Likes: 0
Received 0 Likes
on
0 Posts
Hi X19912,
Sorry I didn't get back to you sooner. I've been busy with the Holidays and I also was asked to do a project for the Church I go to. I hope to be finished the project soon and get back to my tank builds. I will take some close up photos of the torsion bar setup and post them so all can see.
As for the slip ring, this tank has a 22 wire unit that is available on E-bay. If you have less options in your Leo, you could get away with a cheaper slip ring. I noticed that not all the wires are being used, but its using more than 12 wires and I guess thats why the previous owner went with the 22 wire unit.
Last edited by Rebel 1; 12-09-2015 at 05:05 AM.
12-09-2015 | 08:49 AM
#20
The slip ring can be installed directly into the turret rotation ring. Just be sure to point the "stationary" end into the turret and the turning end into the hull. (I forget the names of the ends...too lazy to look them up.) You can find them on eBay, mostly coming from China, pretty cheap.
Here's both of my applications:
http://www.rcuniverse.com/forum/rc-t...l#post12061337
http://www.rcuniverse.com/forum/rc-t...l#post12052785
A couple of videos on the subj:
https://www.youtube.com/watch?v=PWuOUS8VqJE
https://www.youtube.com/watch?v=Bply7z7__5g
The Taigen turret rotation rings are already setup for the 360 rotation. I used Crius' video to modify my standard HL ring and the Taigen video to find a way to install the slip ring into the same standard HL rotation ring. It takes a little time and patience, but is an easy modification to do.
12-10-2015 | 06:32 AM
#22
Joined: Nov 2015
Posts: 55
Likes: 0
Received 0 Likes
on
0 Posts
Cool pic are always wanted, my bulldog is in a million pieces and so now is the time to go to torsion bars, i have tried piano wire and it has correct spring rat but swing arm adapter is where i am looking for help.
Ive made and posted it in "Bulldog more to scale" thread but it is to fussy to set up so I'm looking for ideas.
Ive made and posted it in "Bulldog more to scale" thread but it is to fussy to set up so I'm looking for ideas.
12-10-2015 | 06:49 AM
#23
Thread Starter
Member
Joined: Apr 2015
Posts: 33
Likes: 0
Received 0 Likes
on
0 Posts
Hi Everyone,
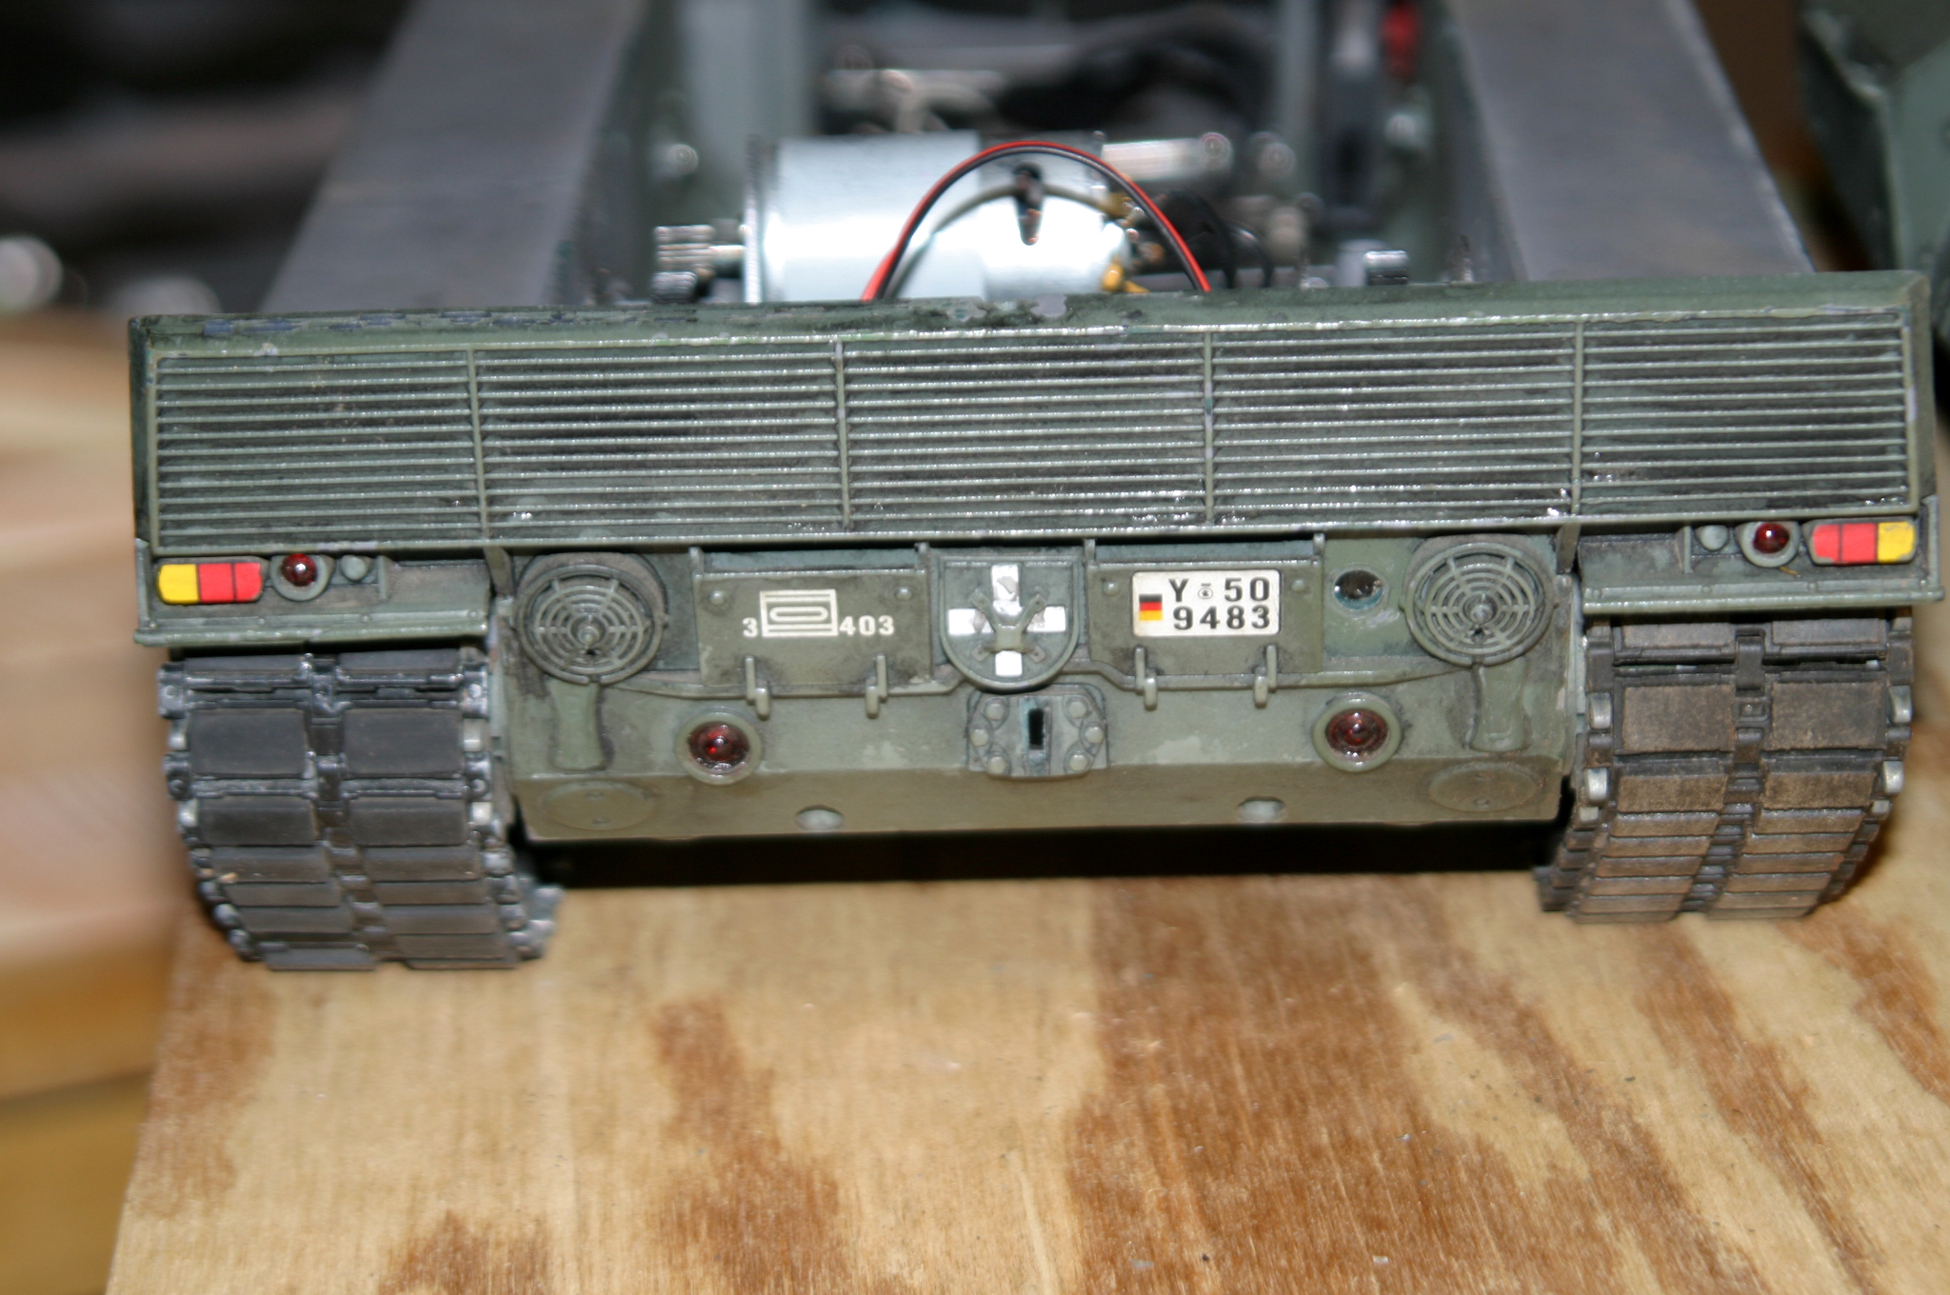
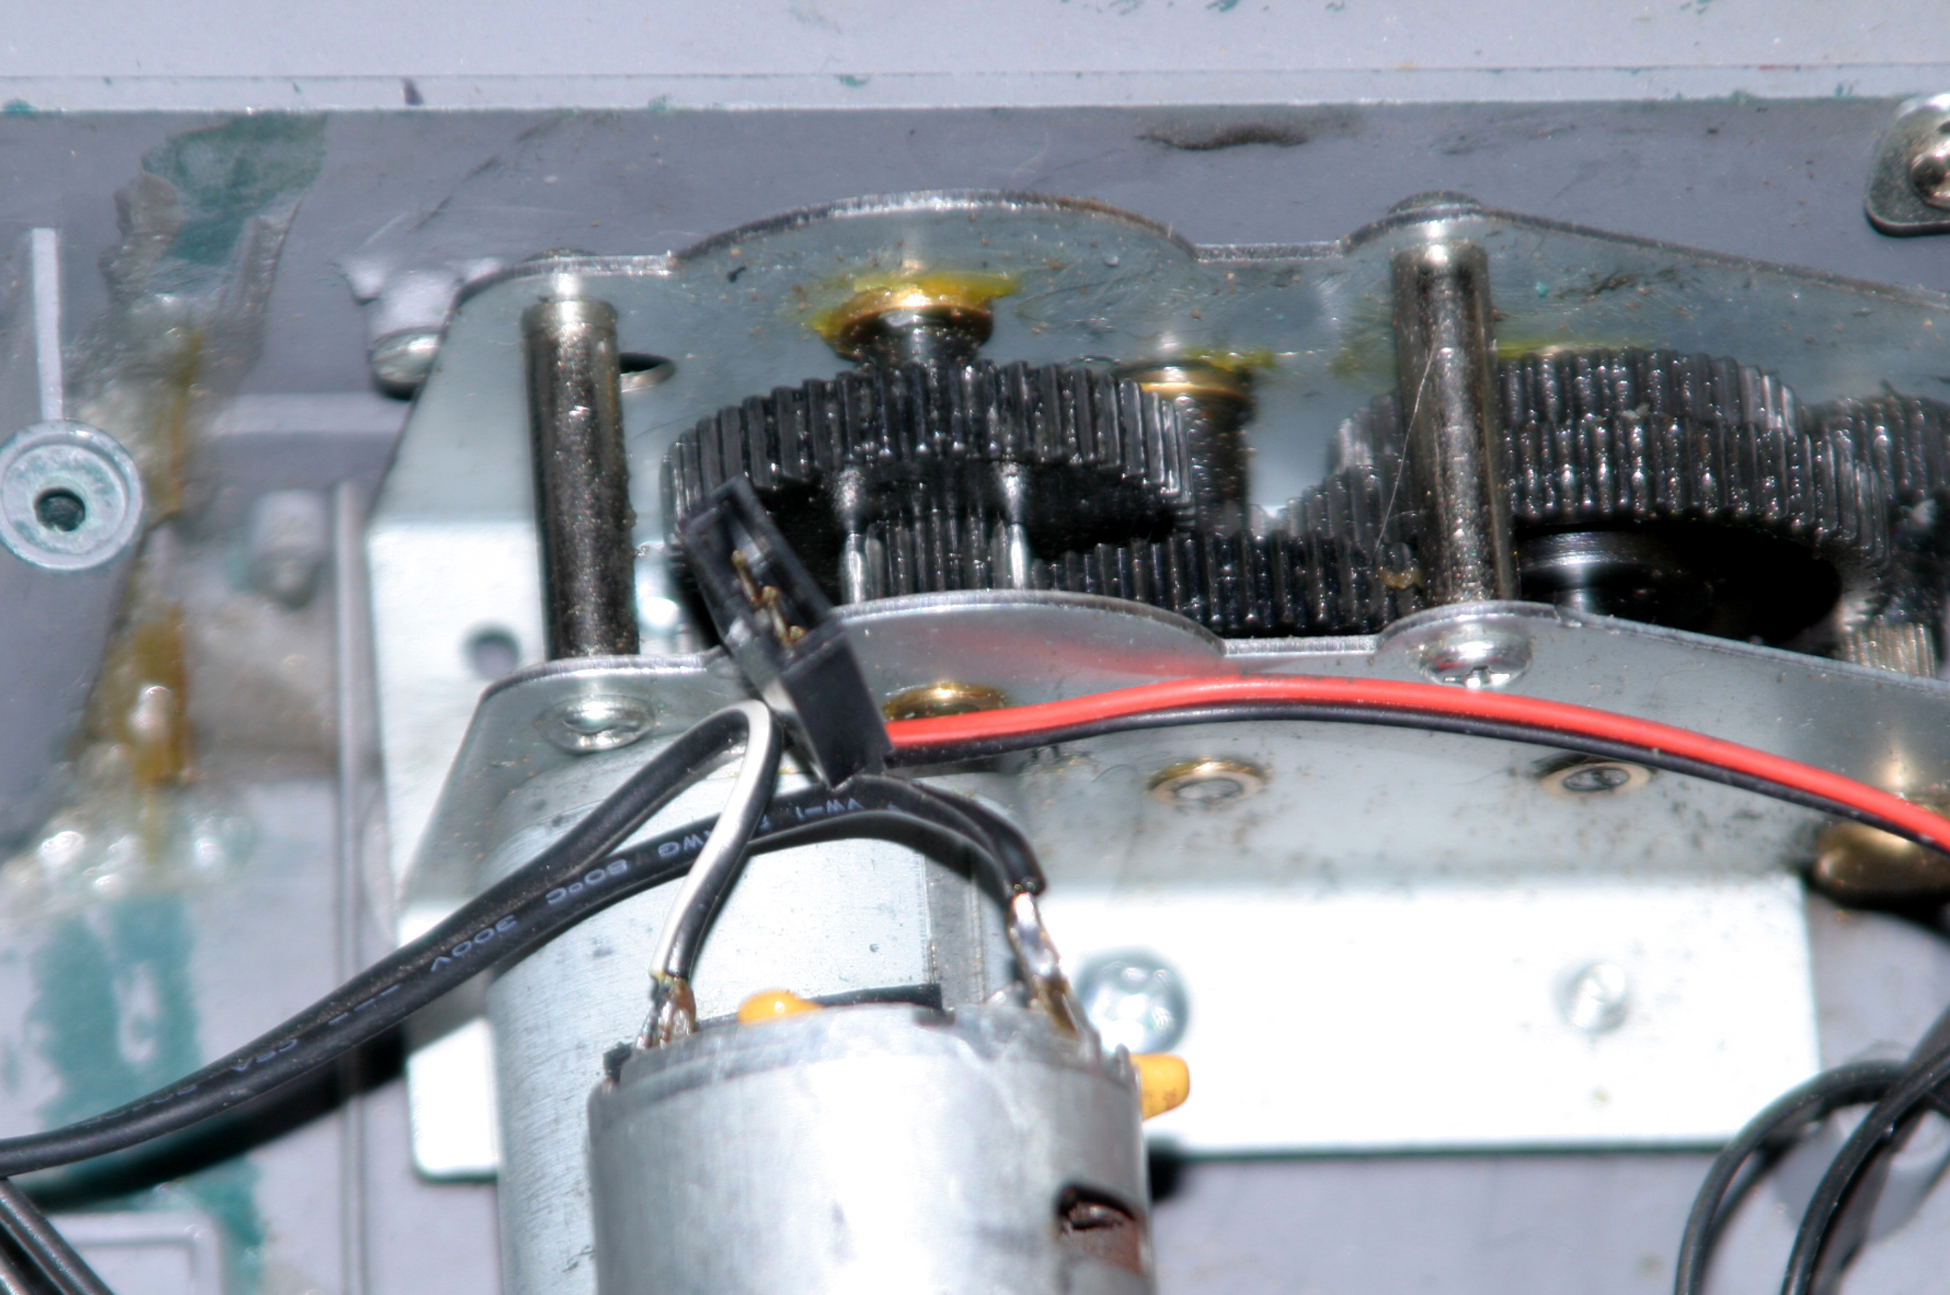
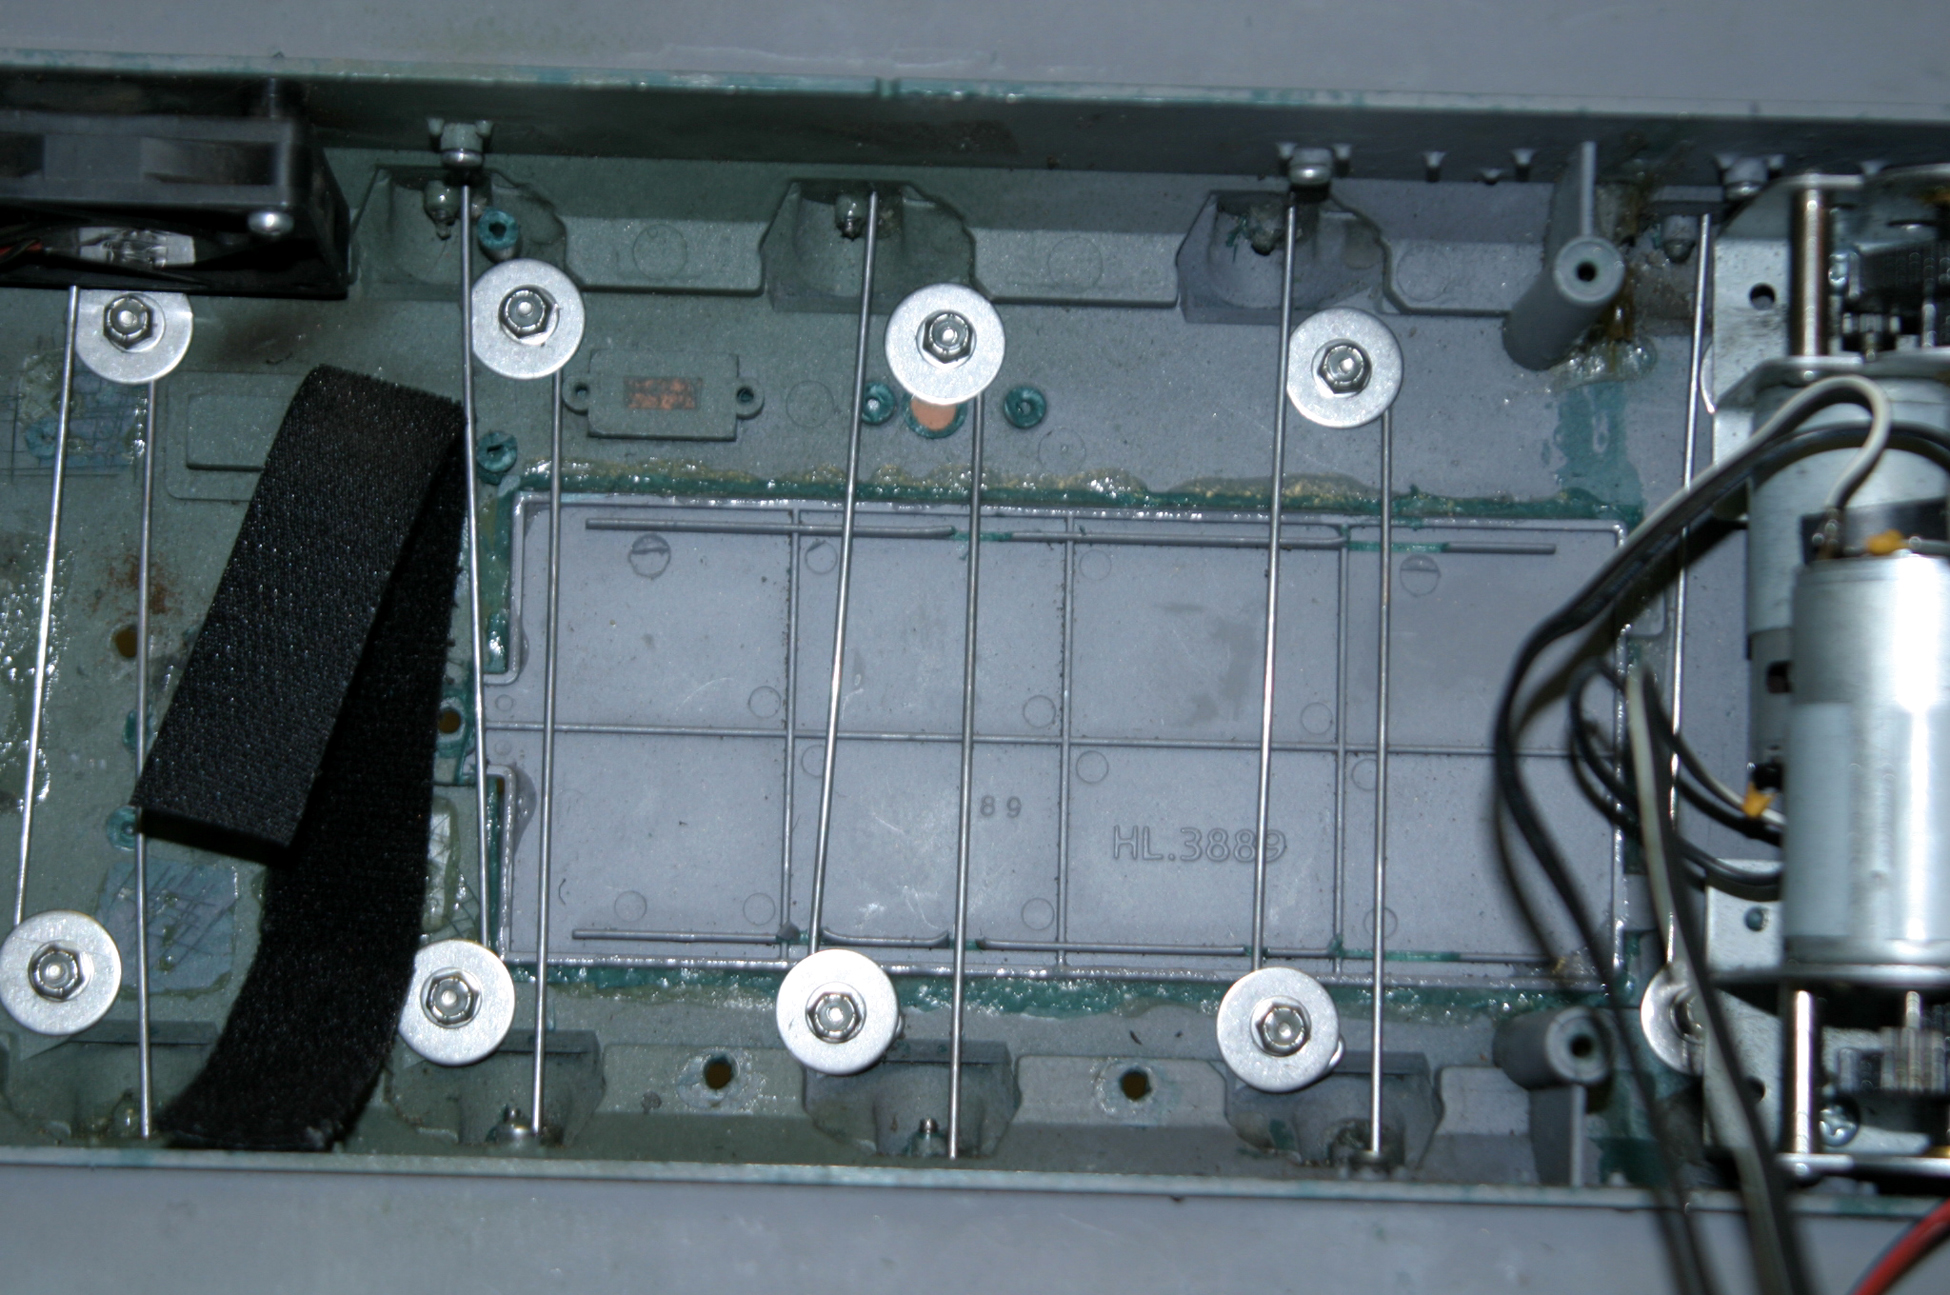
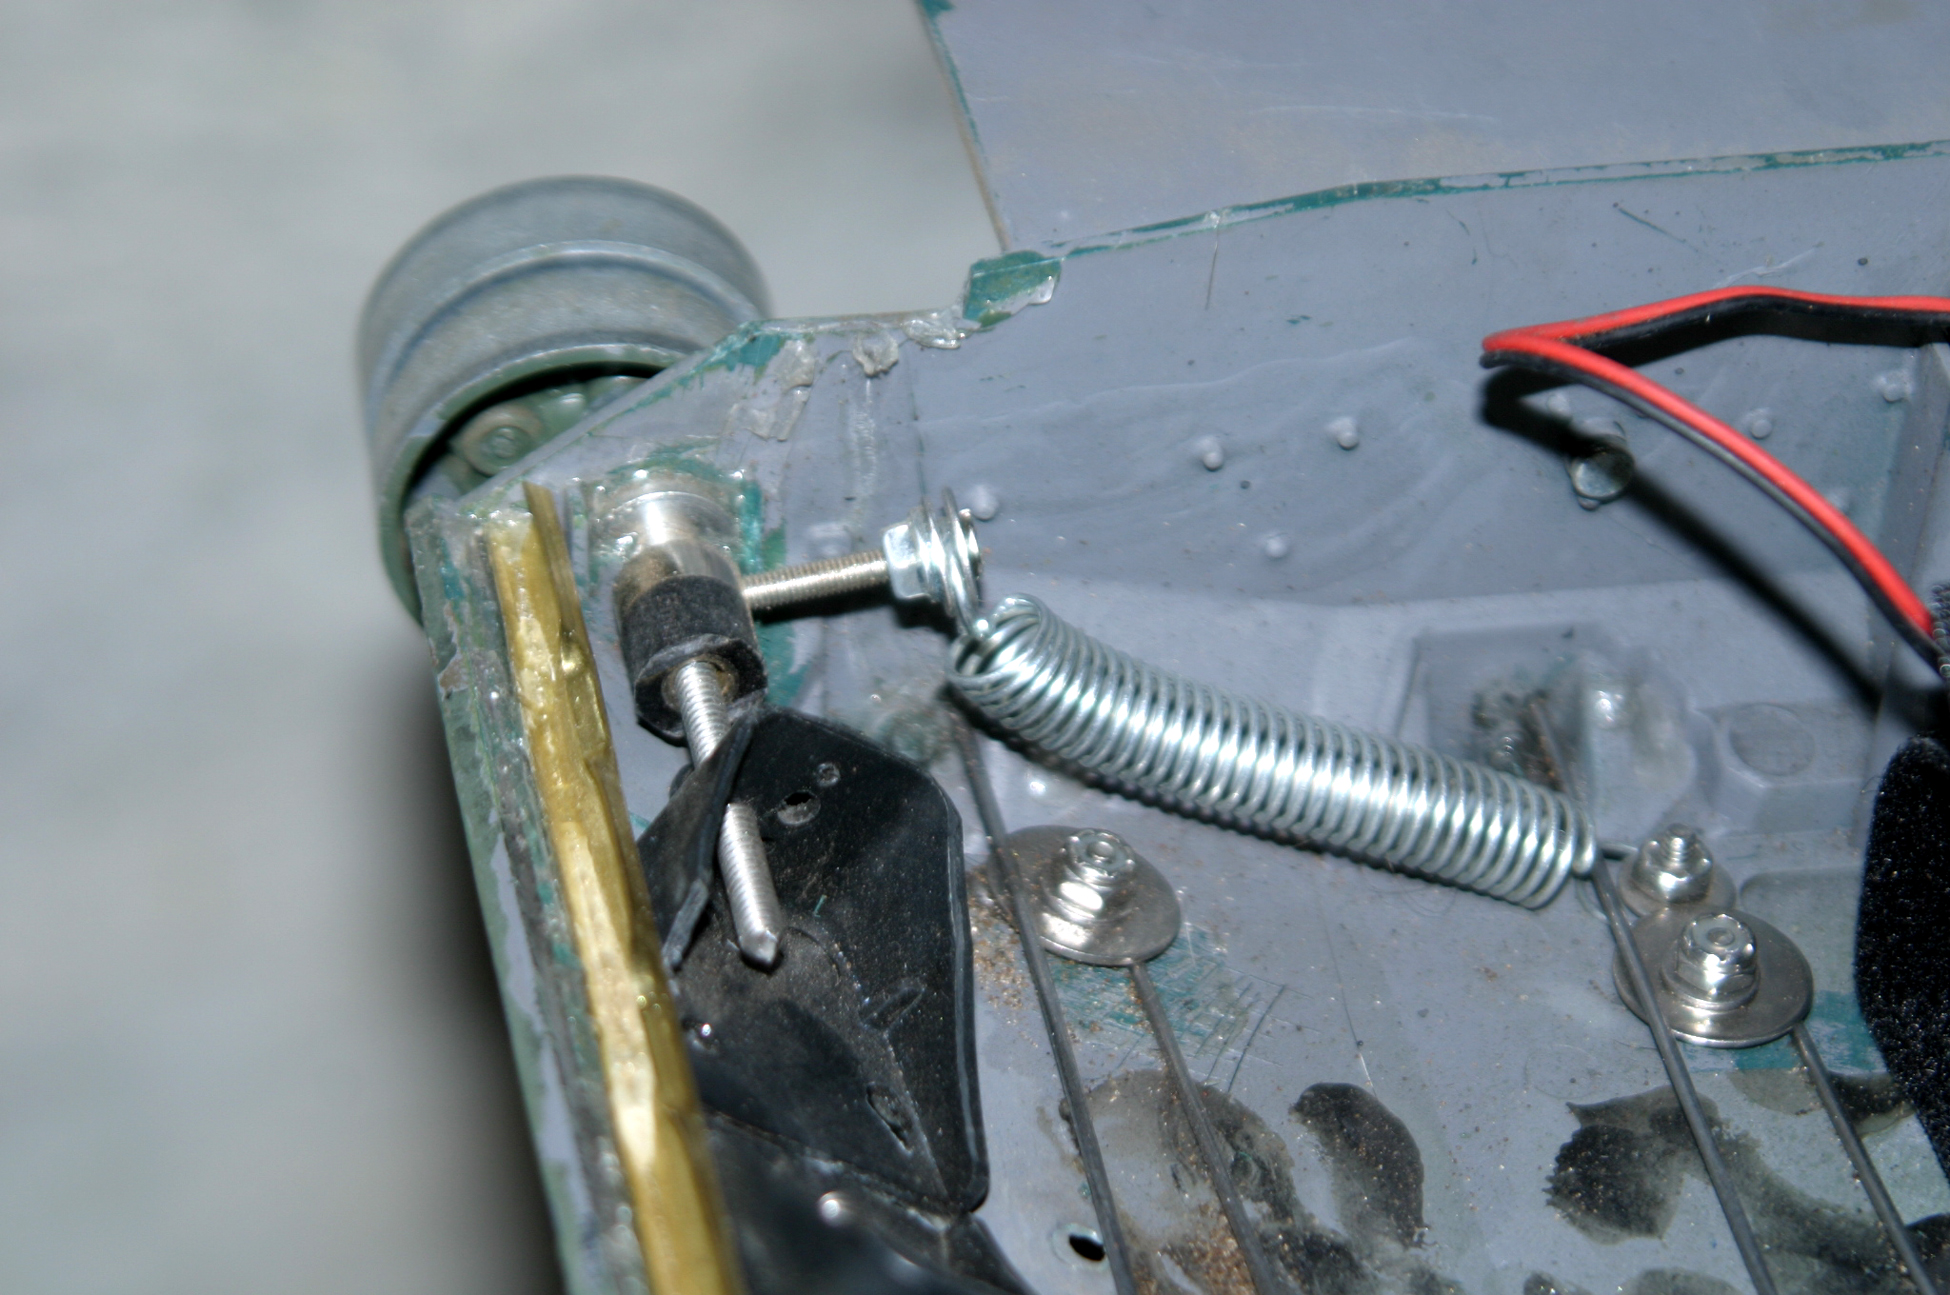
I have no idea how the suspension was on this tank when it was new. The guy I bought it from added all metal suspension arms, wheels tracks and gear boxes. I cleaned off the suspension arms with my air compressor and took these close up photos. The arms screw onto the hull. There appears to be a couple holes in the hull around where the arms attach to it. I don't know which holes are factory or if they were all drilled figuring out the best way for the torsion bars to be placed.
The bar goes through the hull and has a 90 degree bend in it. The back side of the suspension are has a hollow spot between the outer edges where the torsion bar is retained and rides in. It looks like a very simple thing to do if anyone wants to copy it. Of course, with any modification there's always a bit of trial and error involved in getting it to work the way you want. The suspension is in great condition and I have no plans to tear it down to show a more detailed view of it, so these are the best photos I can share with you at this time.
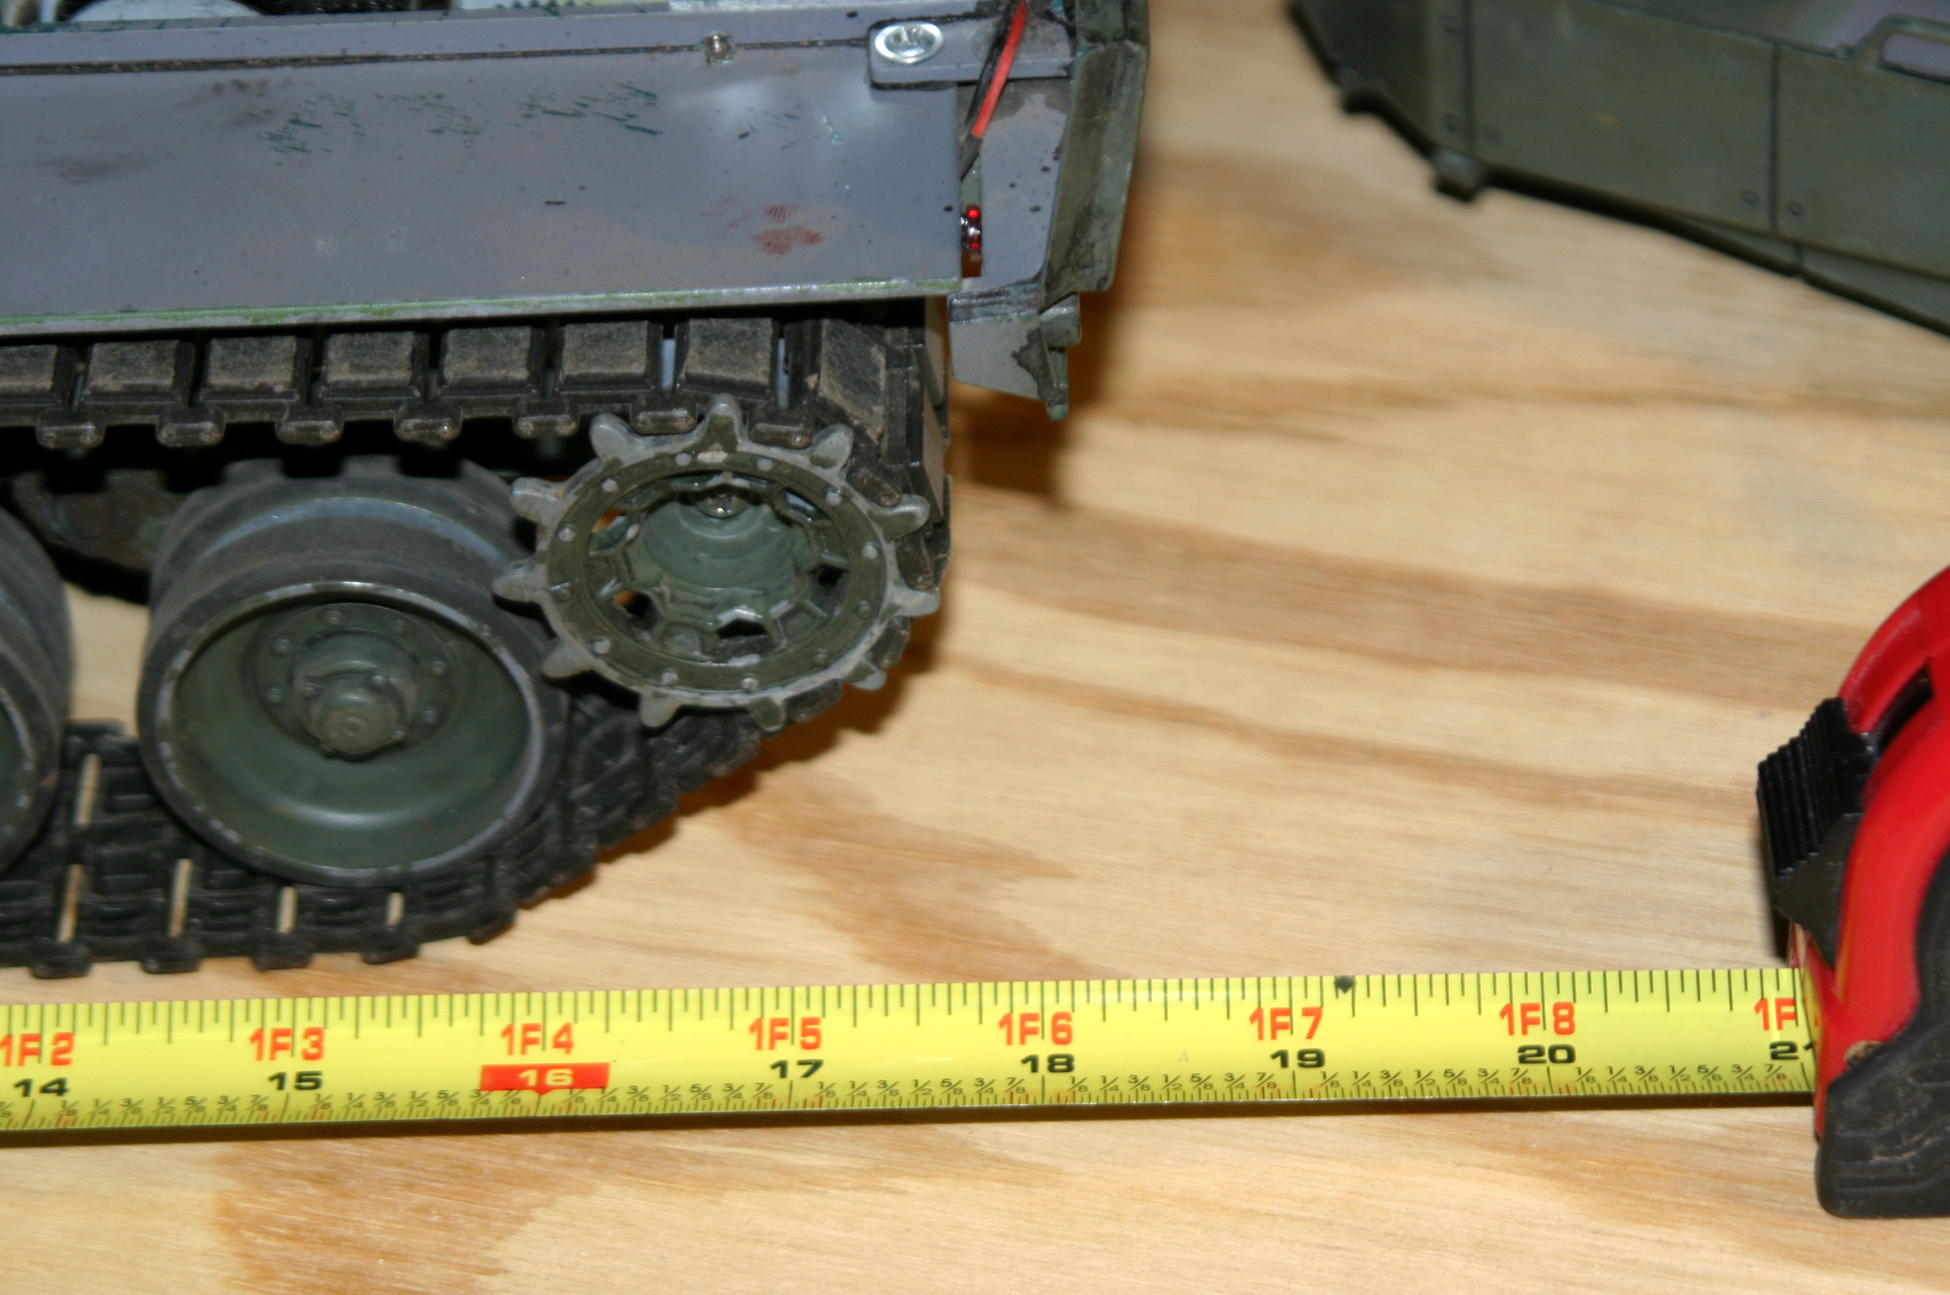
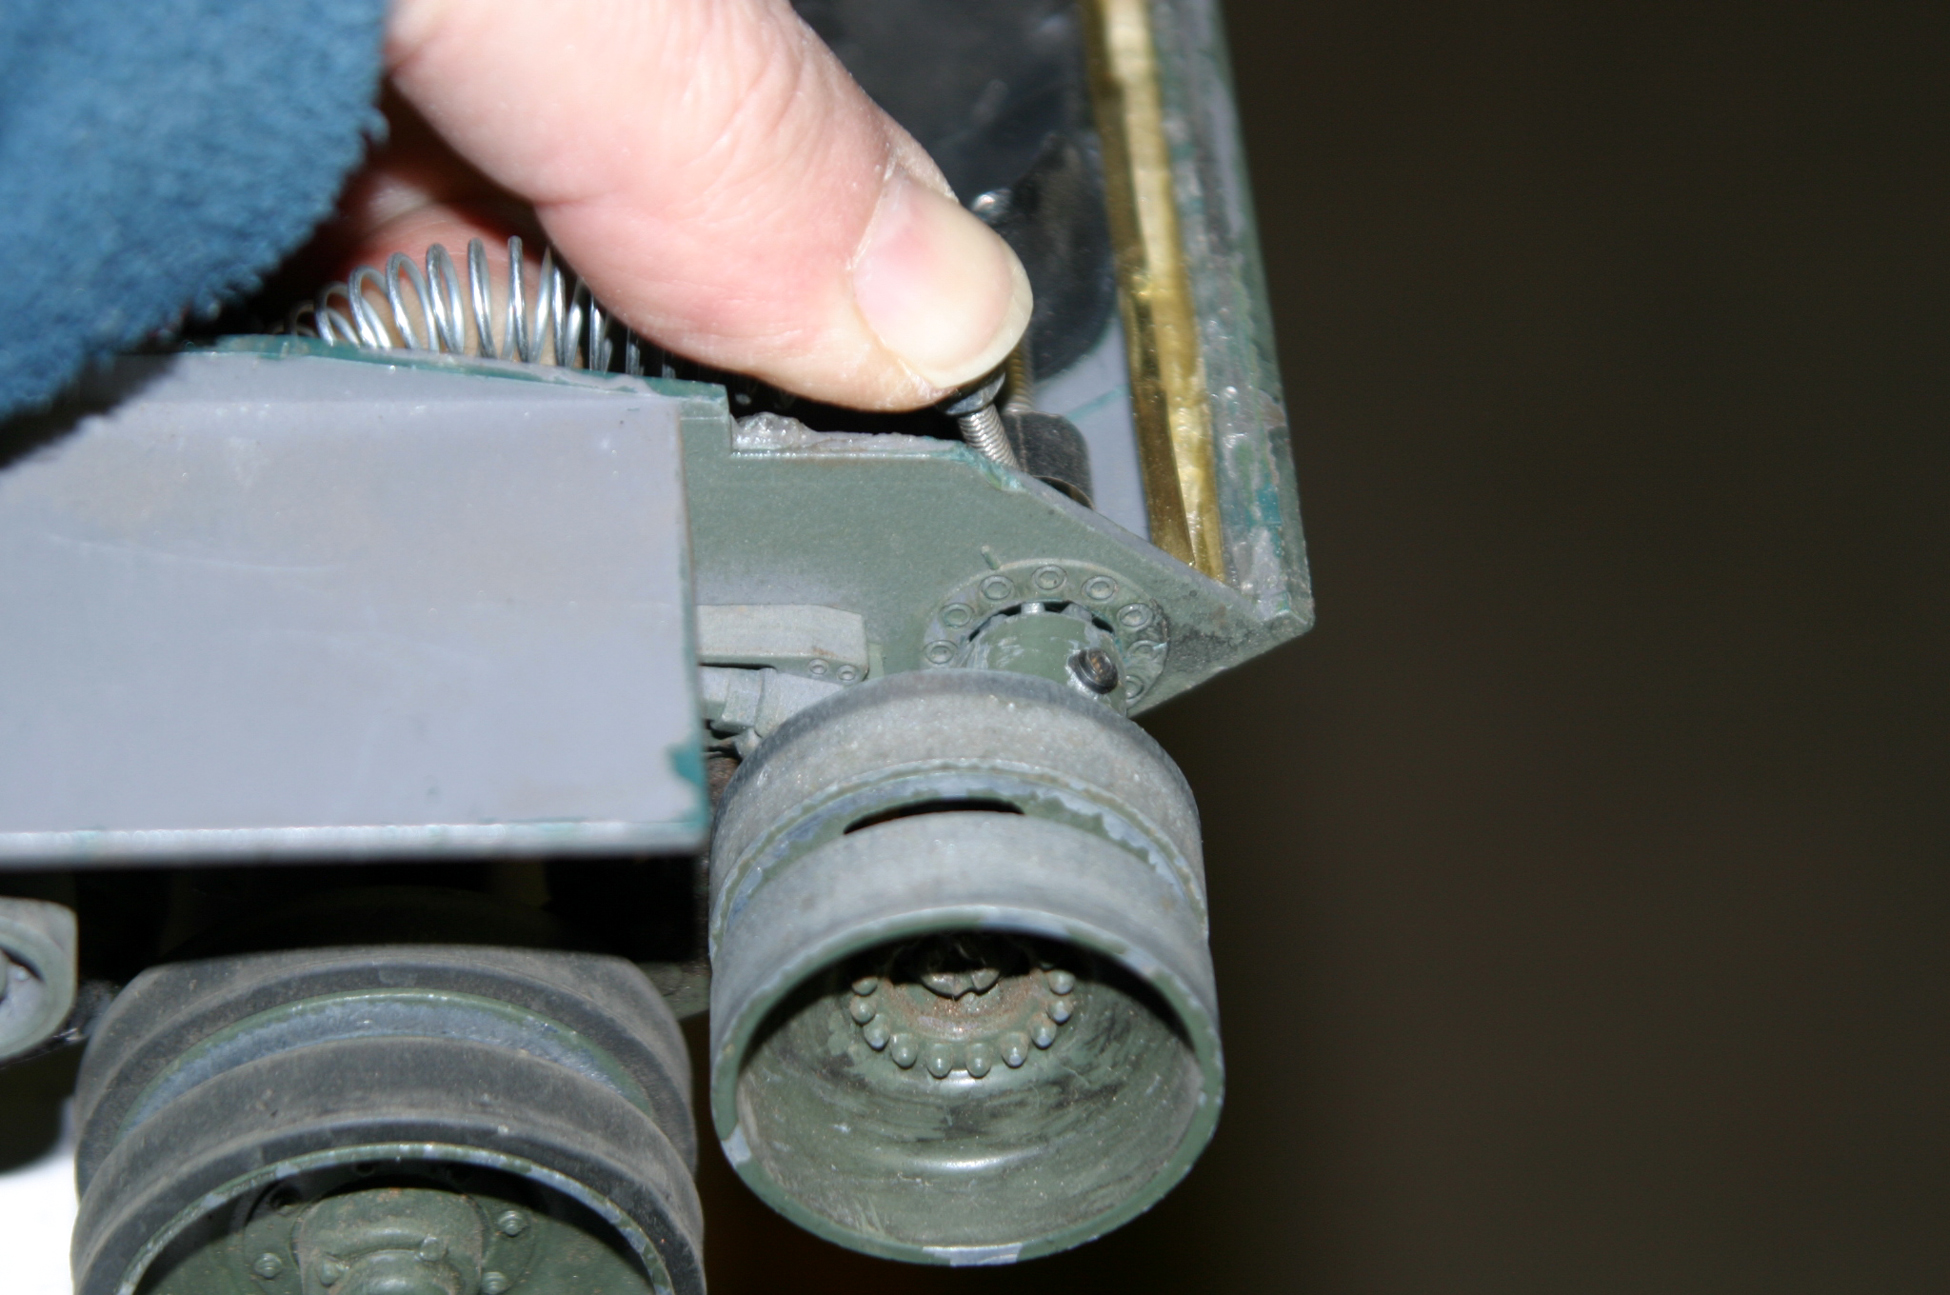
The idler wheel in front is mounted on an eccentric arm that is held at its furthest location to keep tension on the tracks. the first photo shows the wheel putting the maximum tension on the track and the next photo shows the idler moved back so the track can be removed. Once again, I don't know how the track is tensioned on a new Leo from Heng Long. I hope these photos will help anyone that wants to convert their Leo to torsion bars from the stock suspension.
 These images show multiple holes in the hull and the torsion bar exiting to be captivated in the swing arm
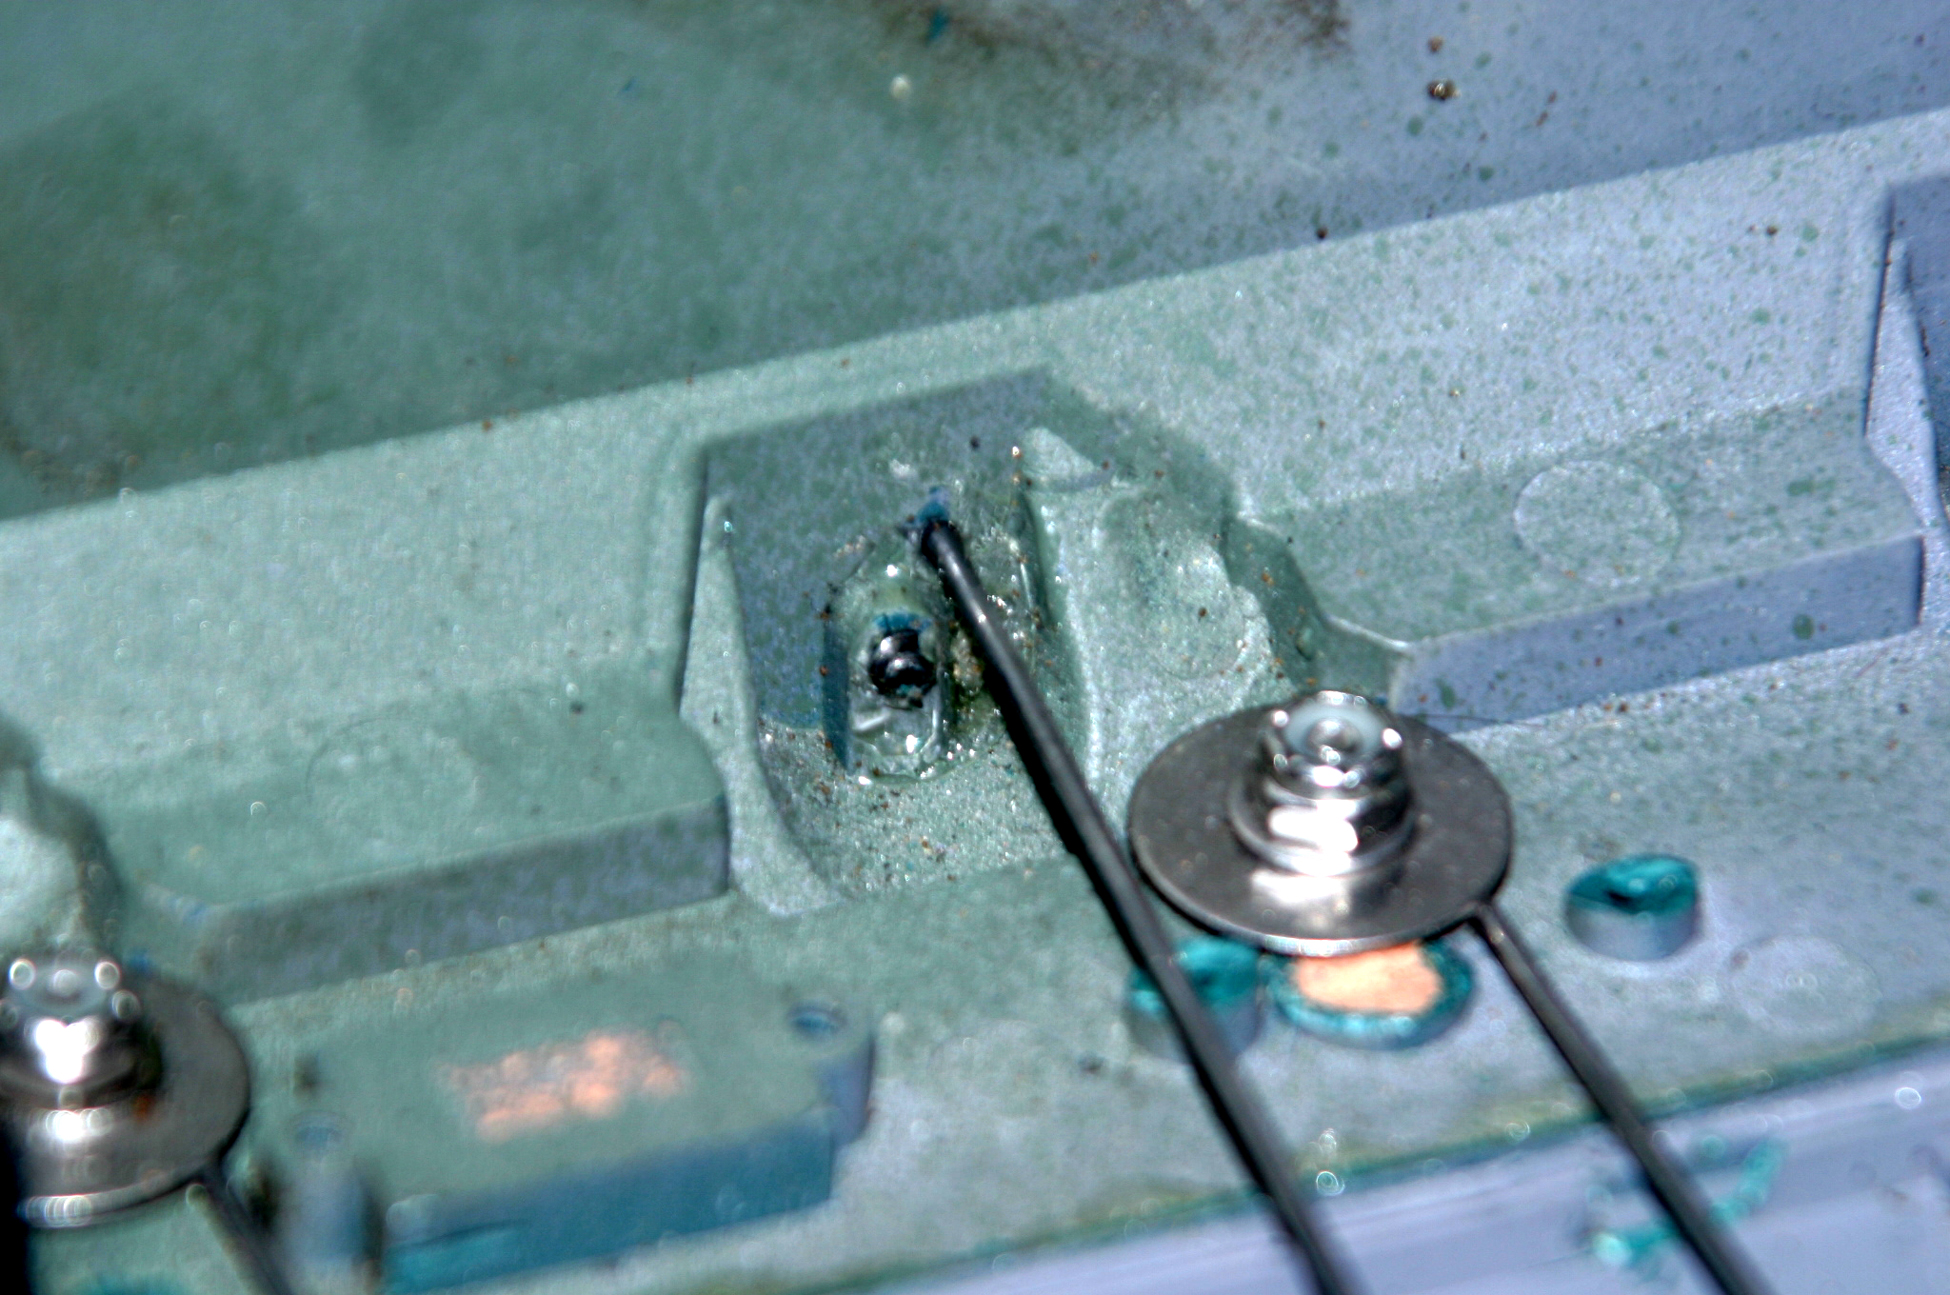
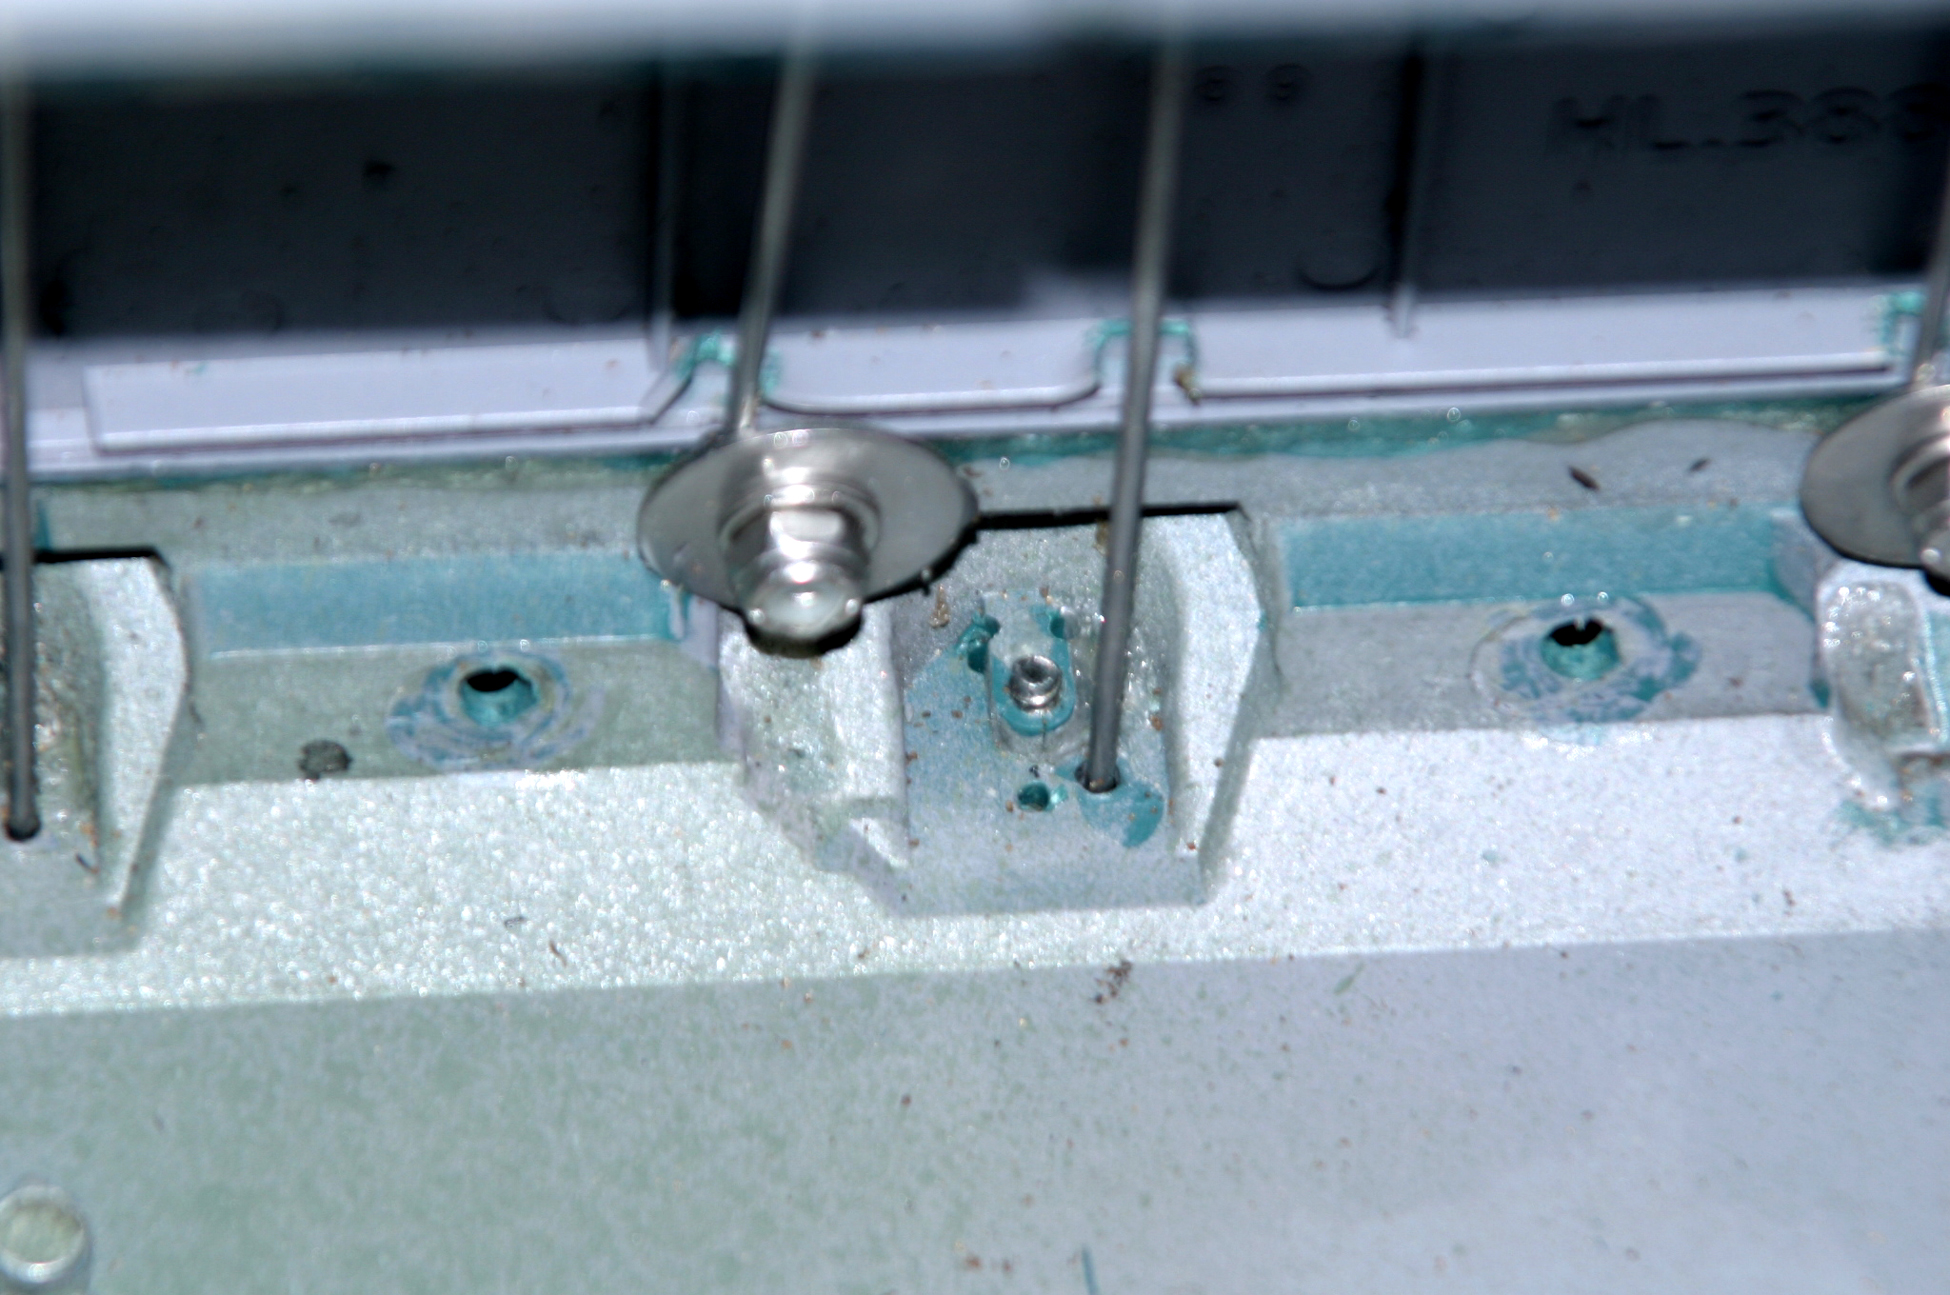
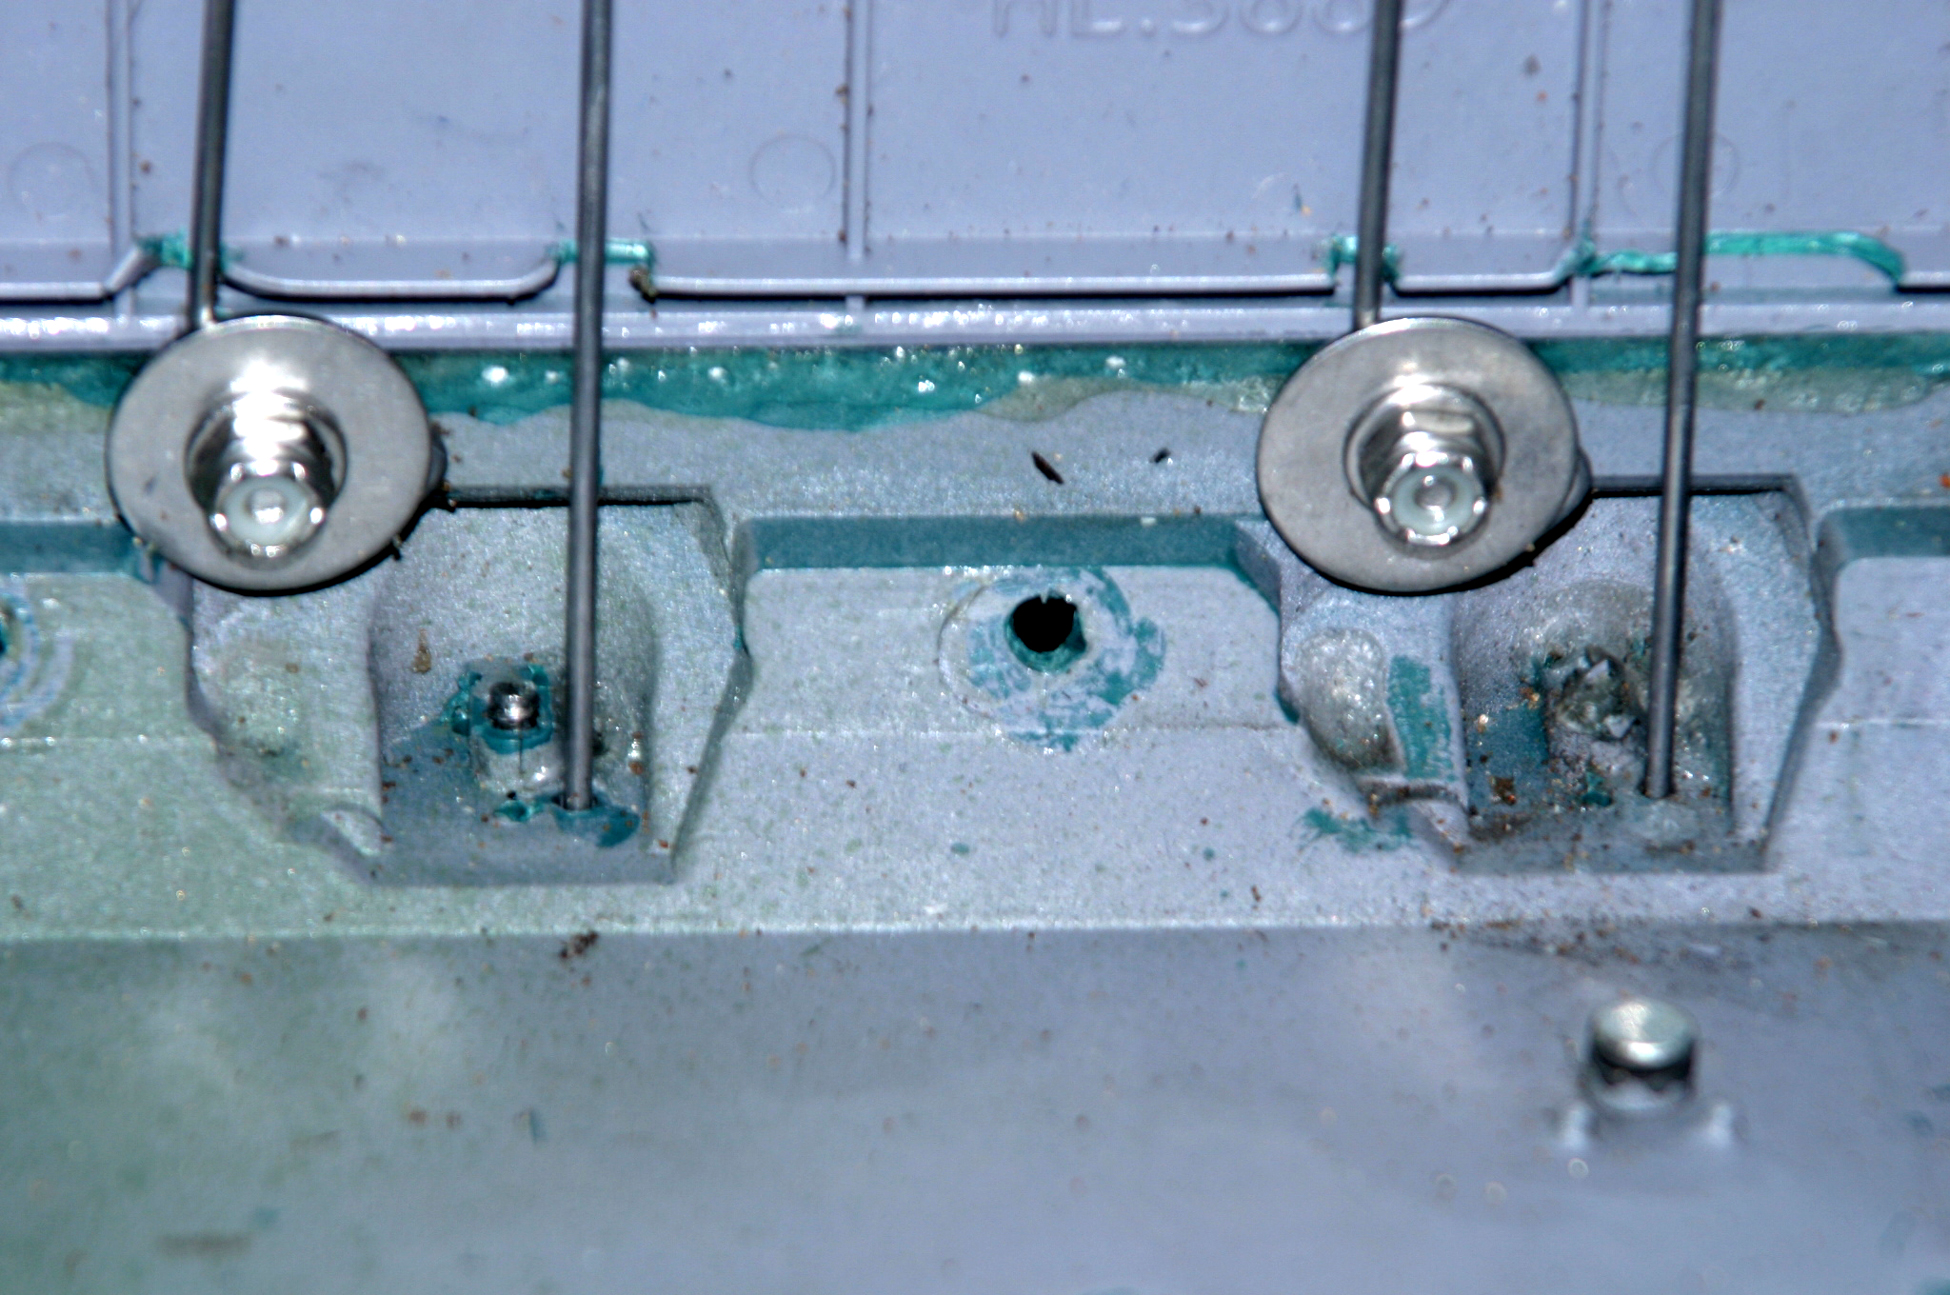
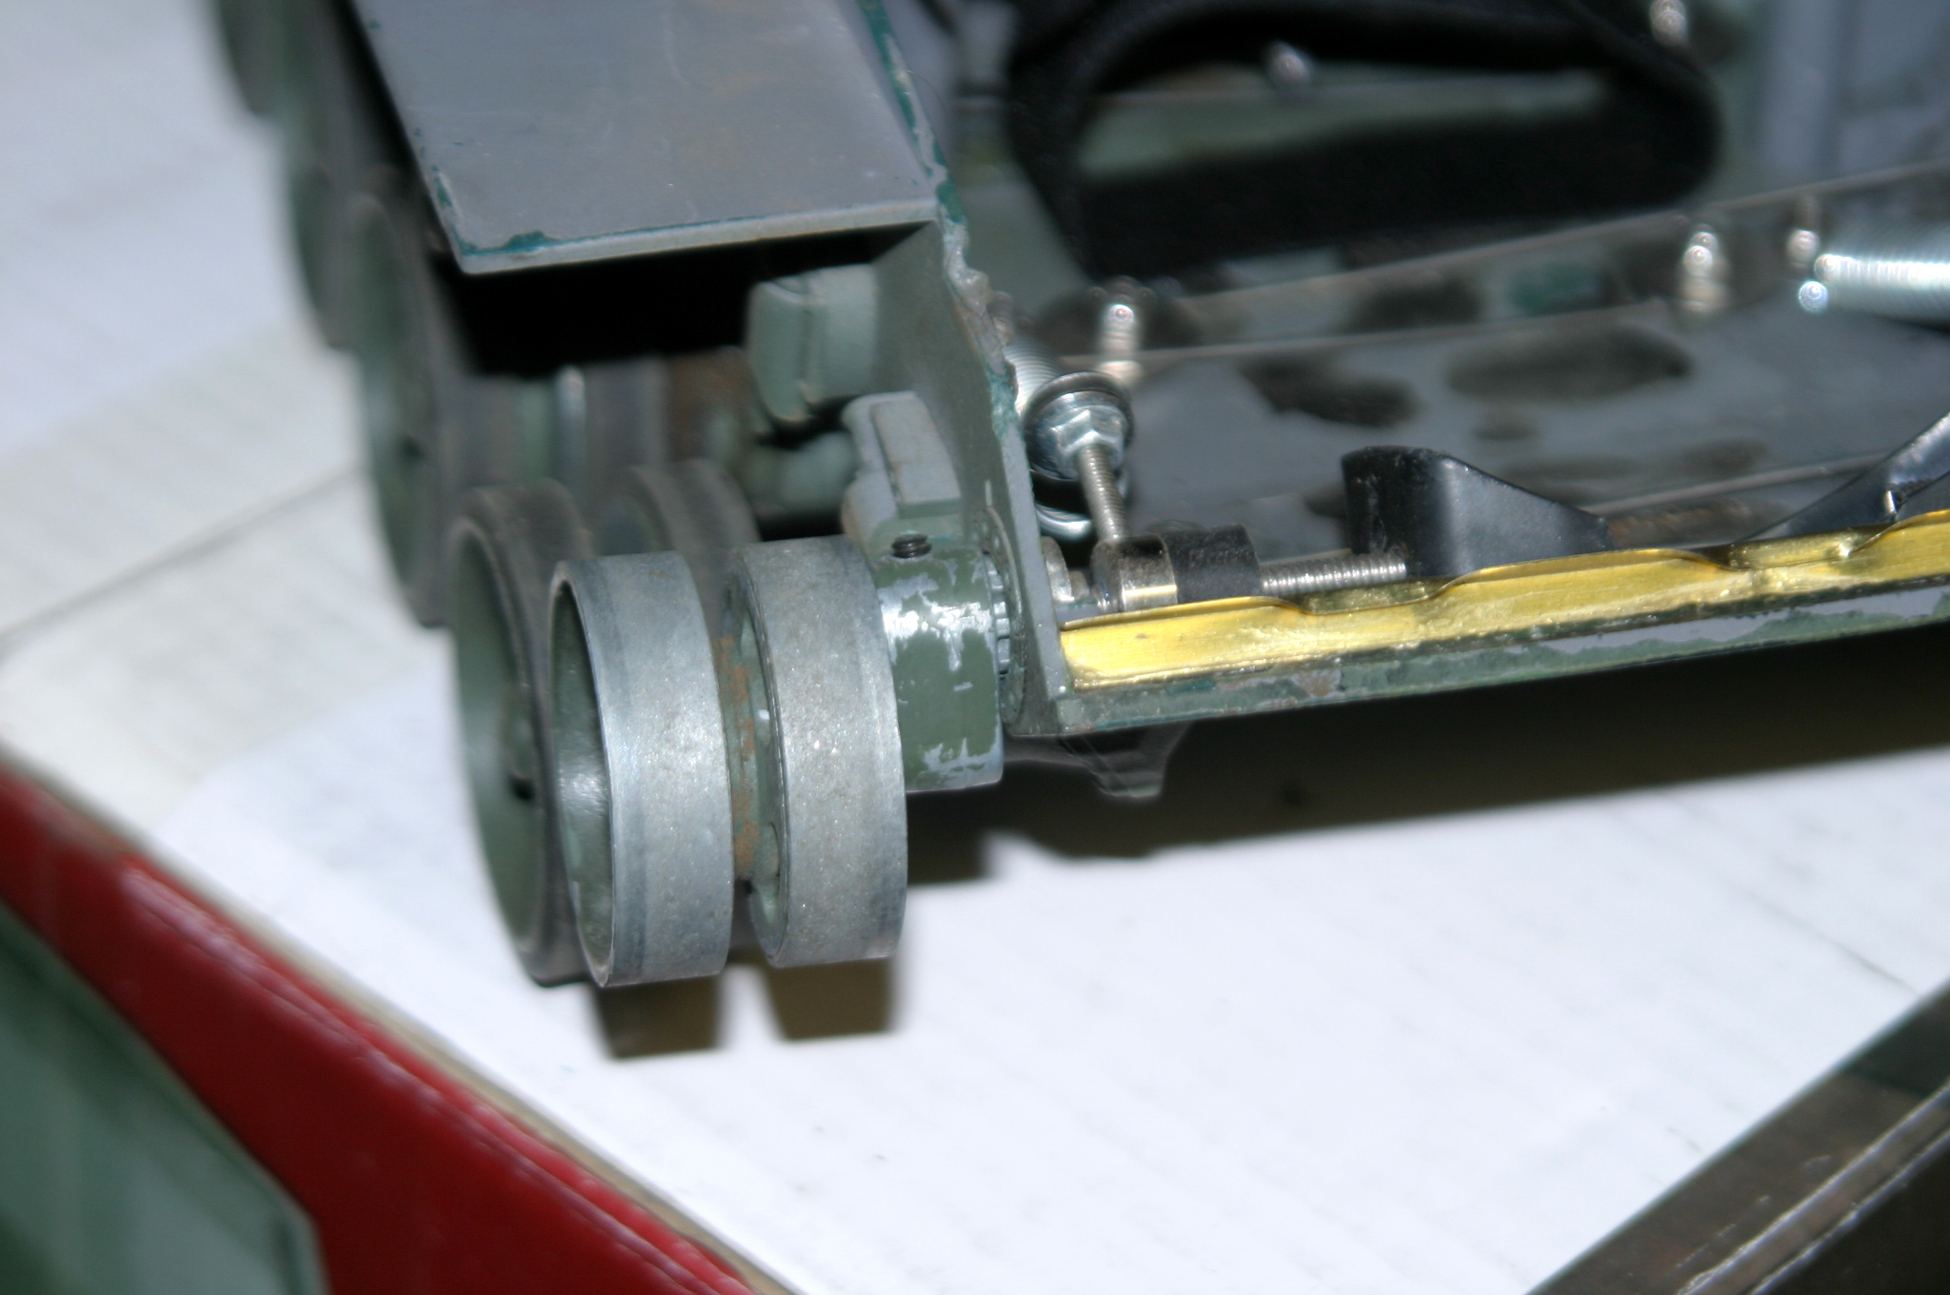
The next two images show the torsion bar as it is located in the swing arms.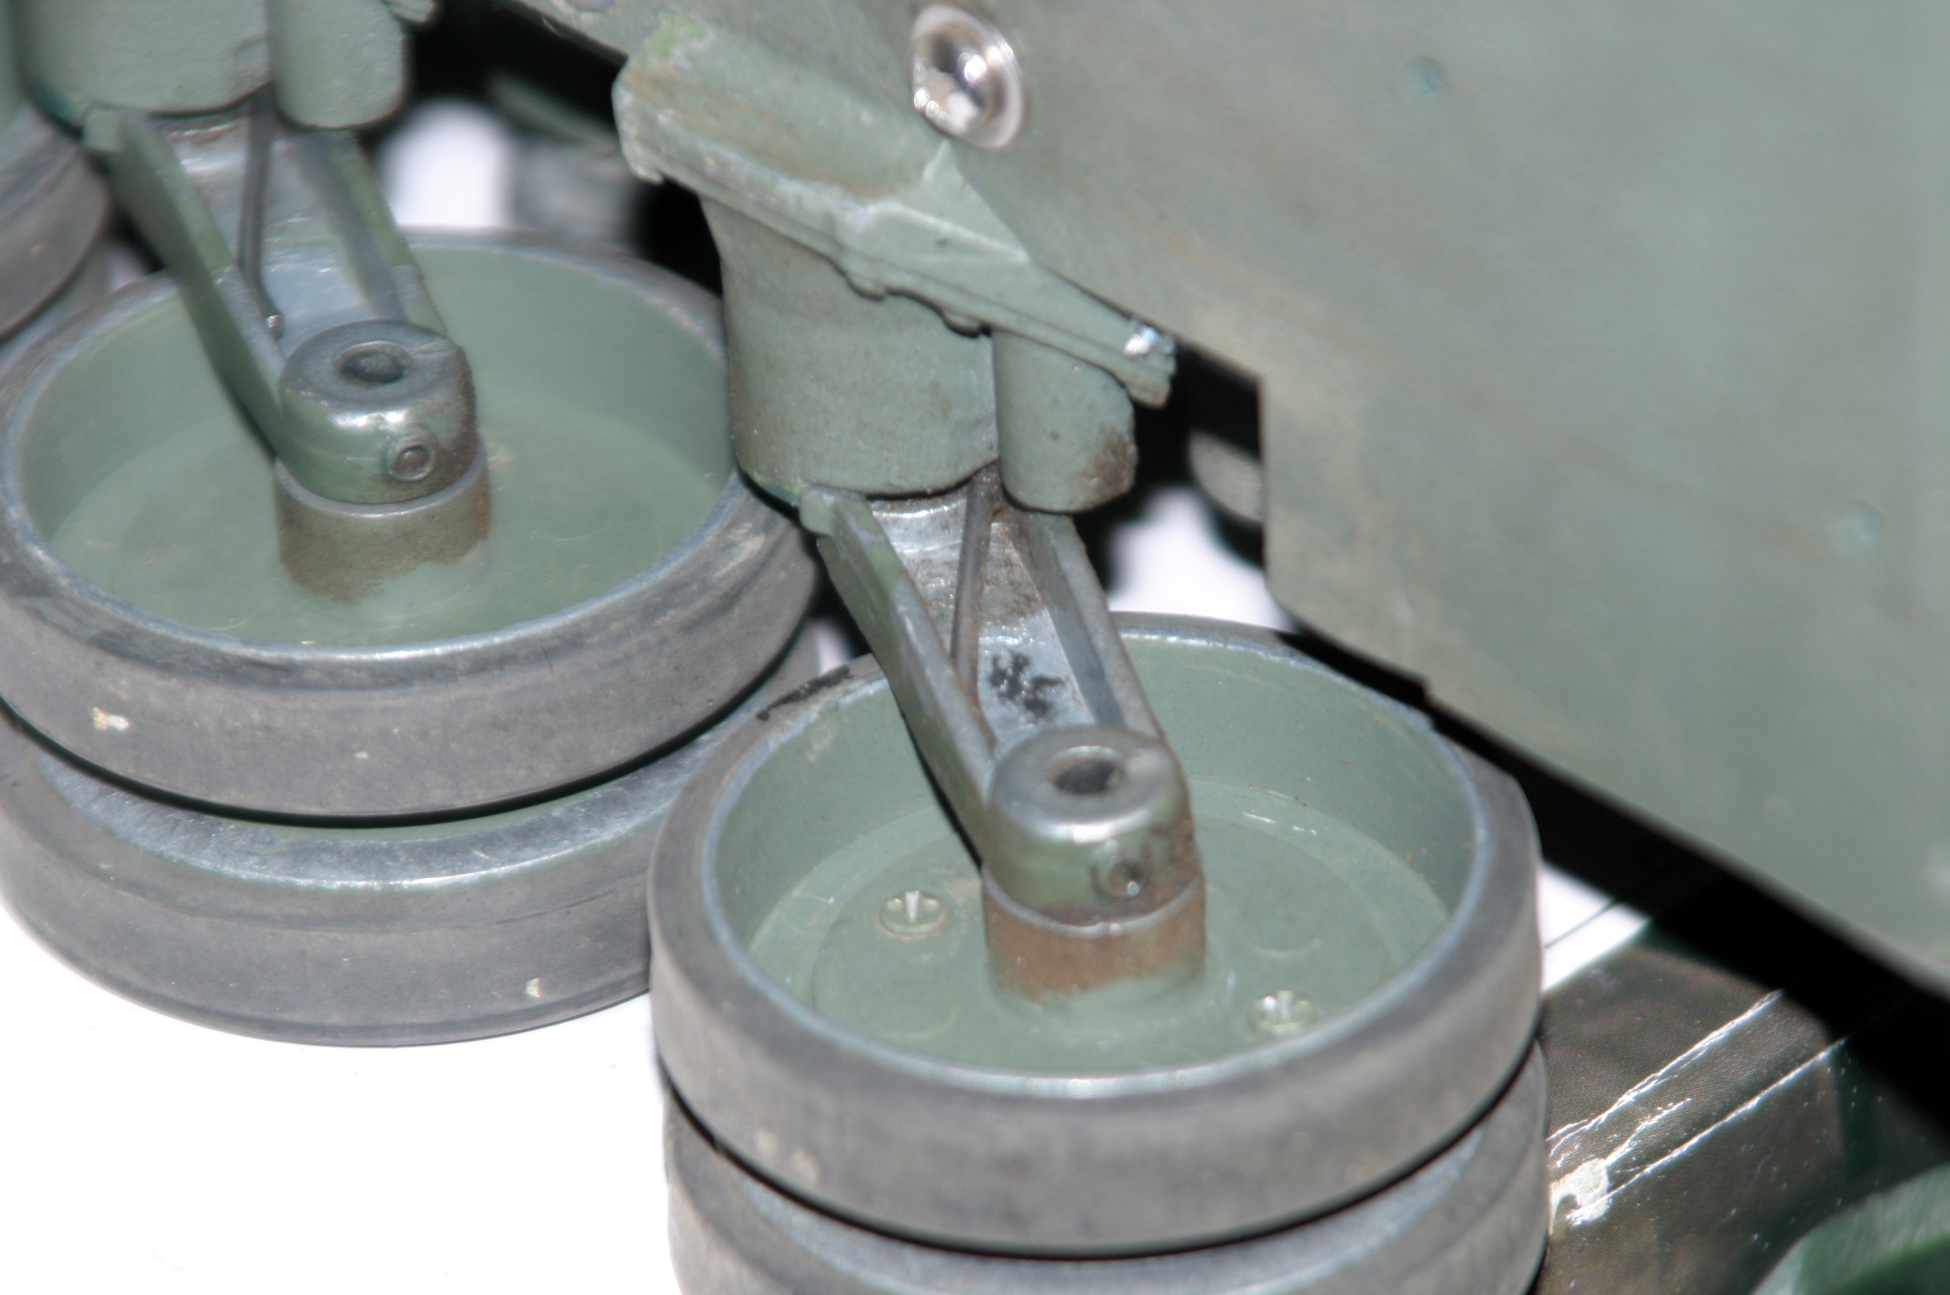
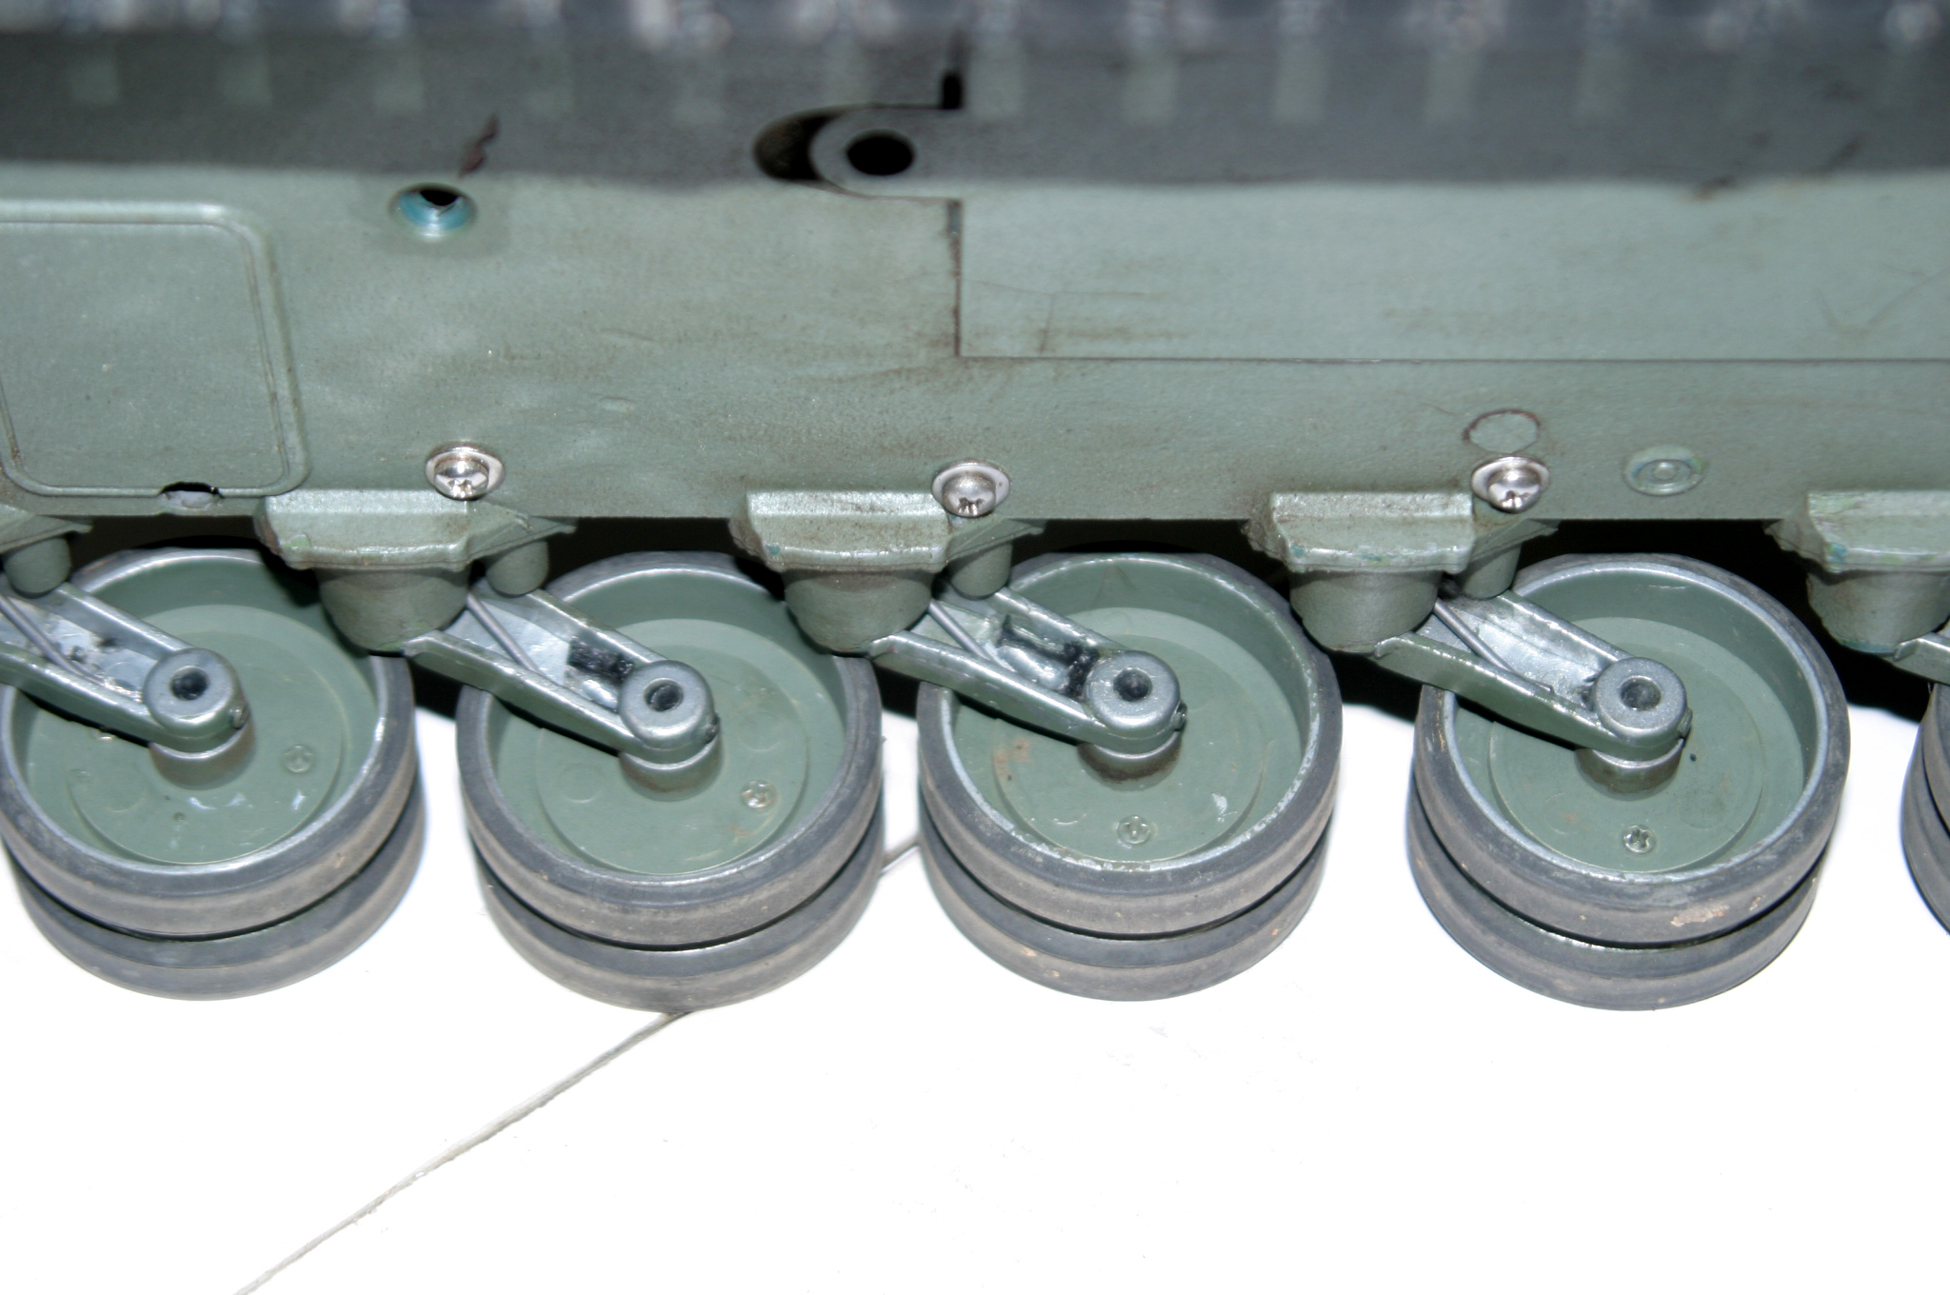
This image shows the idler fully extended and the next is retracted so the track can be easily removed.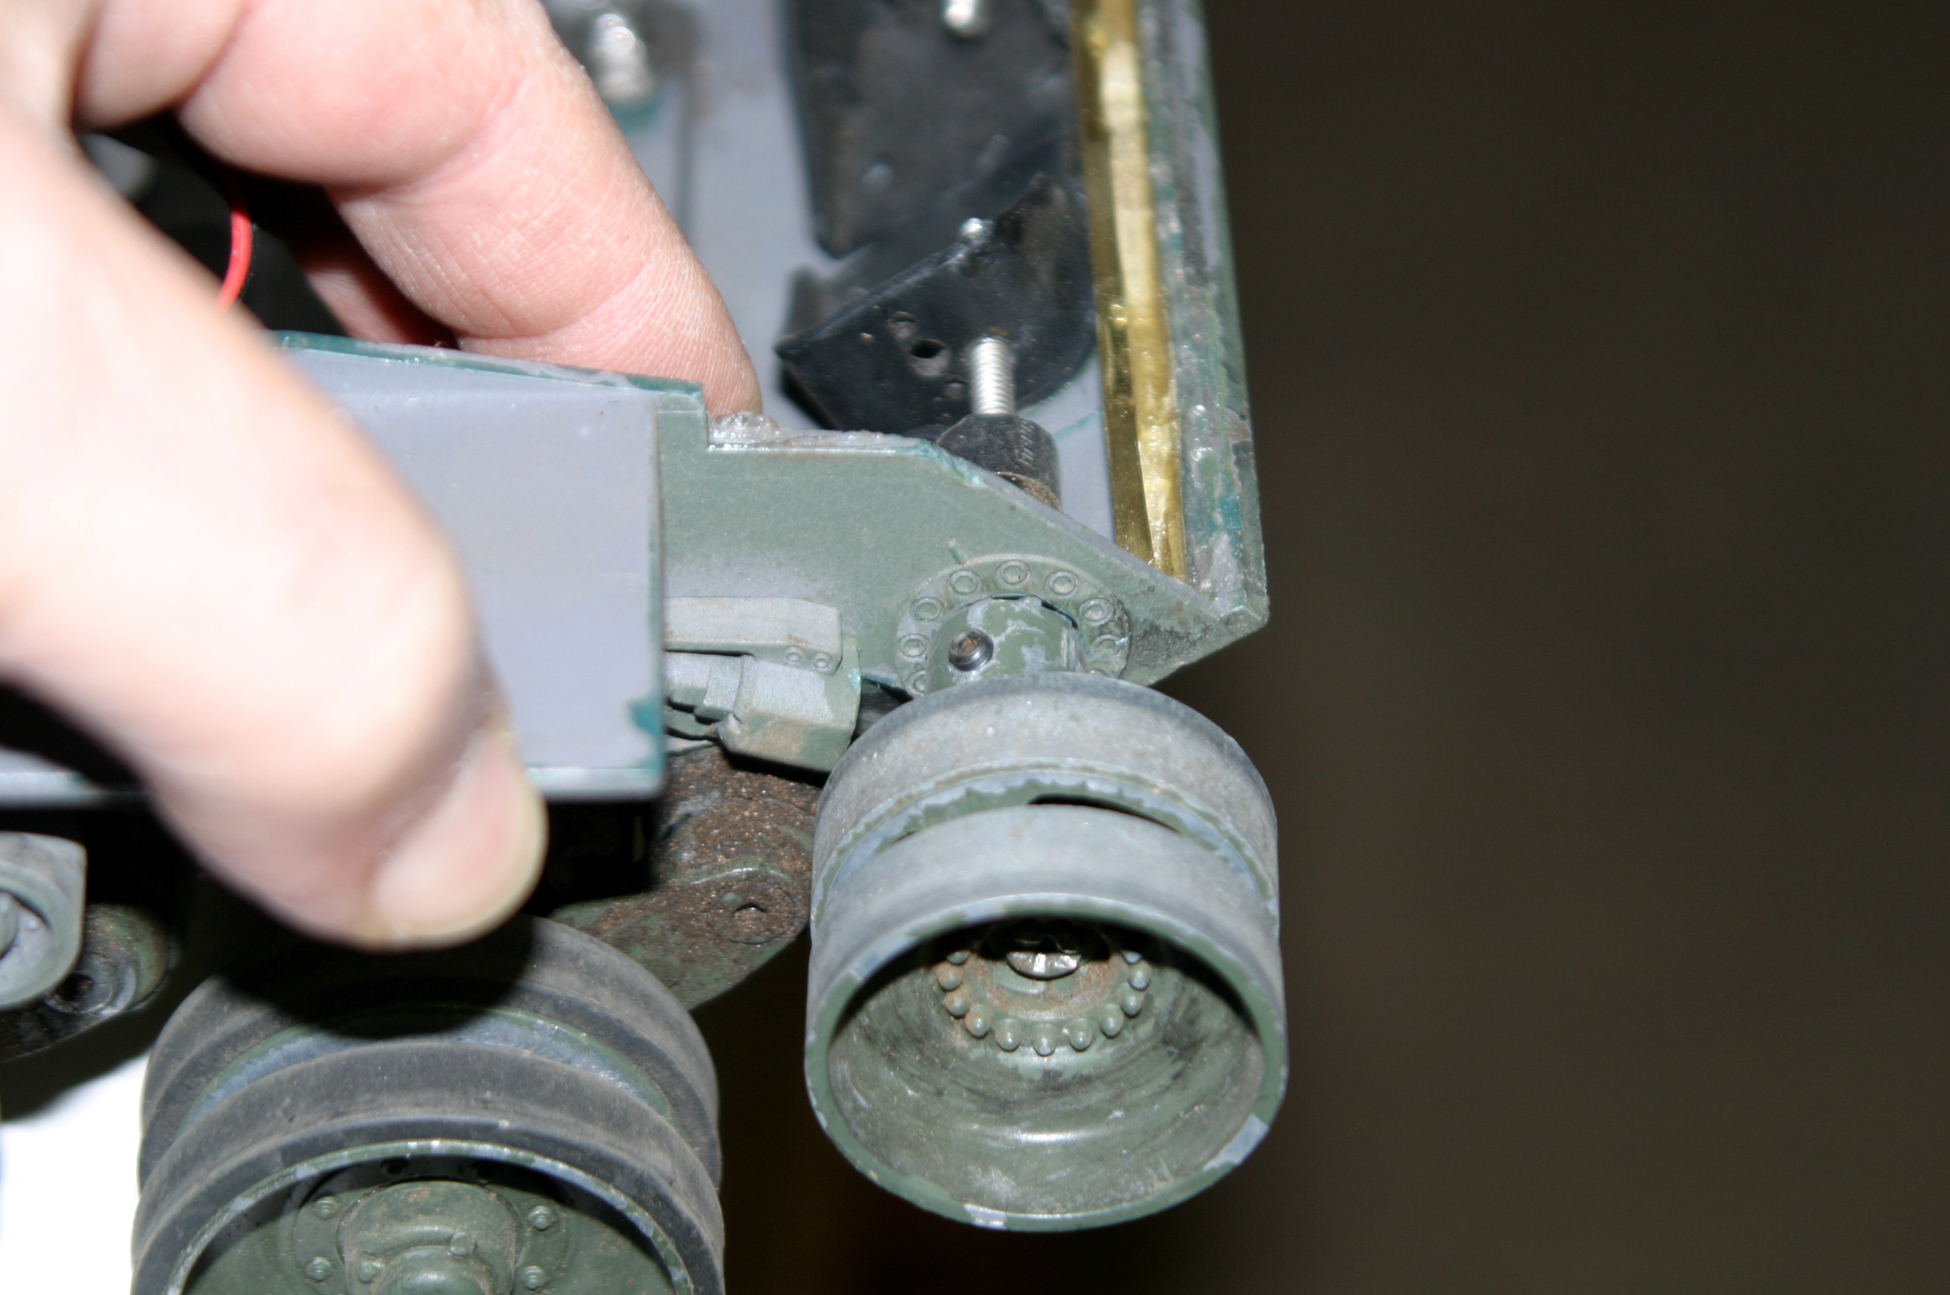
I have no idea how the suspension was on this tank when it was new. The guy I bought it from added all metal suspension arms, wheels tracks and gear boxes. I cleaned off the suspension arms with my air compressor and took these close up photos. The arms screw onto the hull. There appears to be a couple holes in the hull around where the arms attach to it. I don't know which holes are factory or if they were all drilled figuring out the best way for the torsion bars to be placed.
The bar goes through the hull and has a 90 degree bend in it. The back side of the suspension are has a hollow spot between the outer edges where the torsion bar is retained and rides in. It looks like a very simple thing to do if anyone wants to copy it. Of course, with any modification there's always a bit of trial and error involved in getting it to work the way you want. The suspension is in great condition and I have no plans to tear it down to show a more detailed view of it, so these are the best photos I can share with you at this time.
The idler wheel in front is mounted on an eccentric arm that is held at its furthest location to keep tension on the tracks. the first photo shows the wheel putting the maximum tension on the track and the next photo shows the idler moved back so the track can be removed. Once again, I don't know how the track is tensioned on a new Leo from Heng Long. I hope these photos will help anyone that wants to convert their Leo to torsion bars from the stock suspension.
The next two images show the torsion bar as it is located in the swing arms.
This image shows the idler fully extended and the next is retracted so the track can be easily removed.
Last edited by Rebel 1; 12-10-2015 at 06:58 AM.
08-09-2023 | 11:30 AM
#24
Hi Everyone,
I've been away from working on my RC Tanks for far to long. I am Rebel 1, but I changed my Email address so there wasn't anyway to recover my account here. My new user name, rb67mustang, is what I use on many other websites, so that's my new account here. Until I have posted 10 comments and have them reviewed by the moderator, I'm like a complete Newbie here.
I've been away from working on my RC Tanks for far to long. I am Rebel 1, but I changed my Email address so there wasn't anyway to recover my account here. My new user name, rb67mustang, is what I use on many other websites, so that's my new account here. Until I have posted 10 comments and have them reviewed by the moderator, I'm like a complete Newbie here.


