


Tamiya 1/16 Centurion photo build log.
 01-21-2022, 12:40 PM
#26
Thanks for the good photos on the 'gap' on the real thing Mal. I just assumed the you-tuber had the bins taped on for the demonstration but actually they were just not in place. Pretty clever as I did see the turret roof seam.
I like the progress pics!
I like the progress pics!
 01-21-2022, 01:07 PM
#27

Join Date: Nov 2010
Location: HamiltonWaikato, NEW ZEALAND
Posts: 937
Likes: 0
Received 78 Likes
on
55 Posts
Hi Panther F
Not a problem. Actually in that respect the Centurion is like the M41 with a gap between fender stowage boxes & the hull, which isn't evident on the models.
I'd post photo's, but that would side track this thread further
Mal
Not a problem. Actually in that respect the Centurion is like the M41 with a gap between fender stowage boxes & the hull, which isn't evident on the models.
I'd post photo's, but that would side track this thread further
Mal
01-21-2022, 02:53 PM
#28
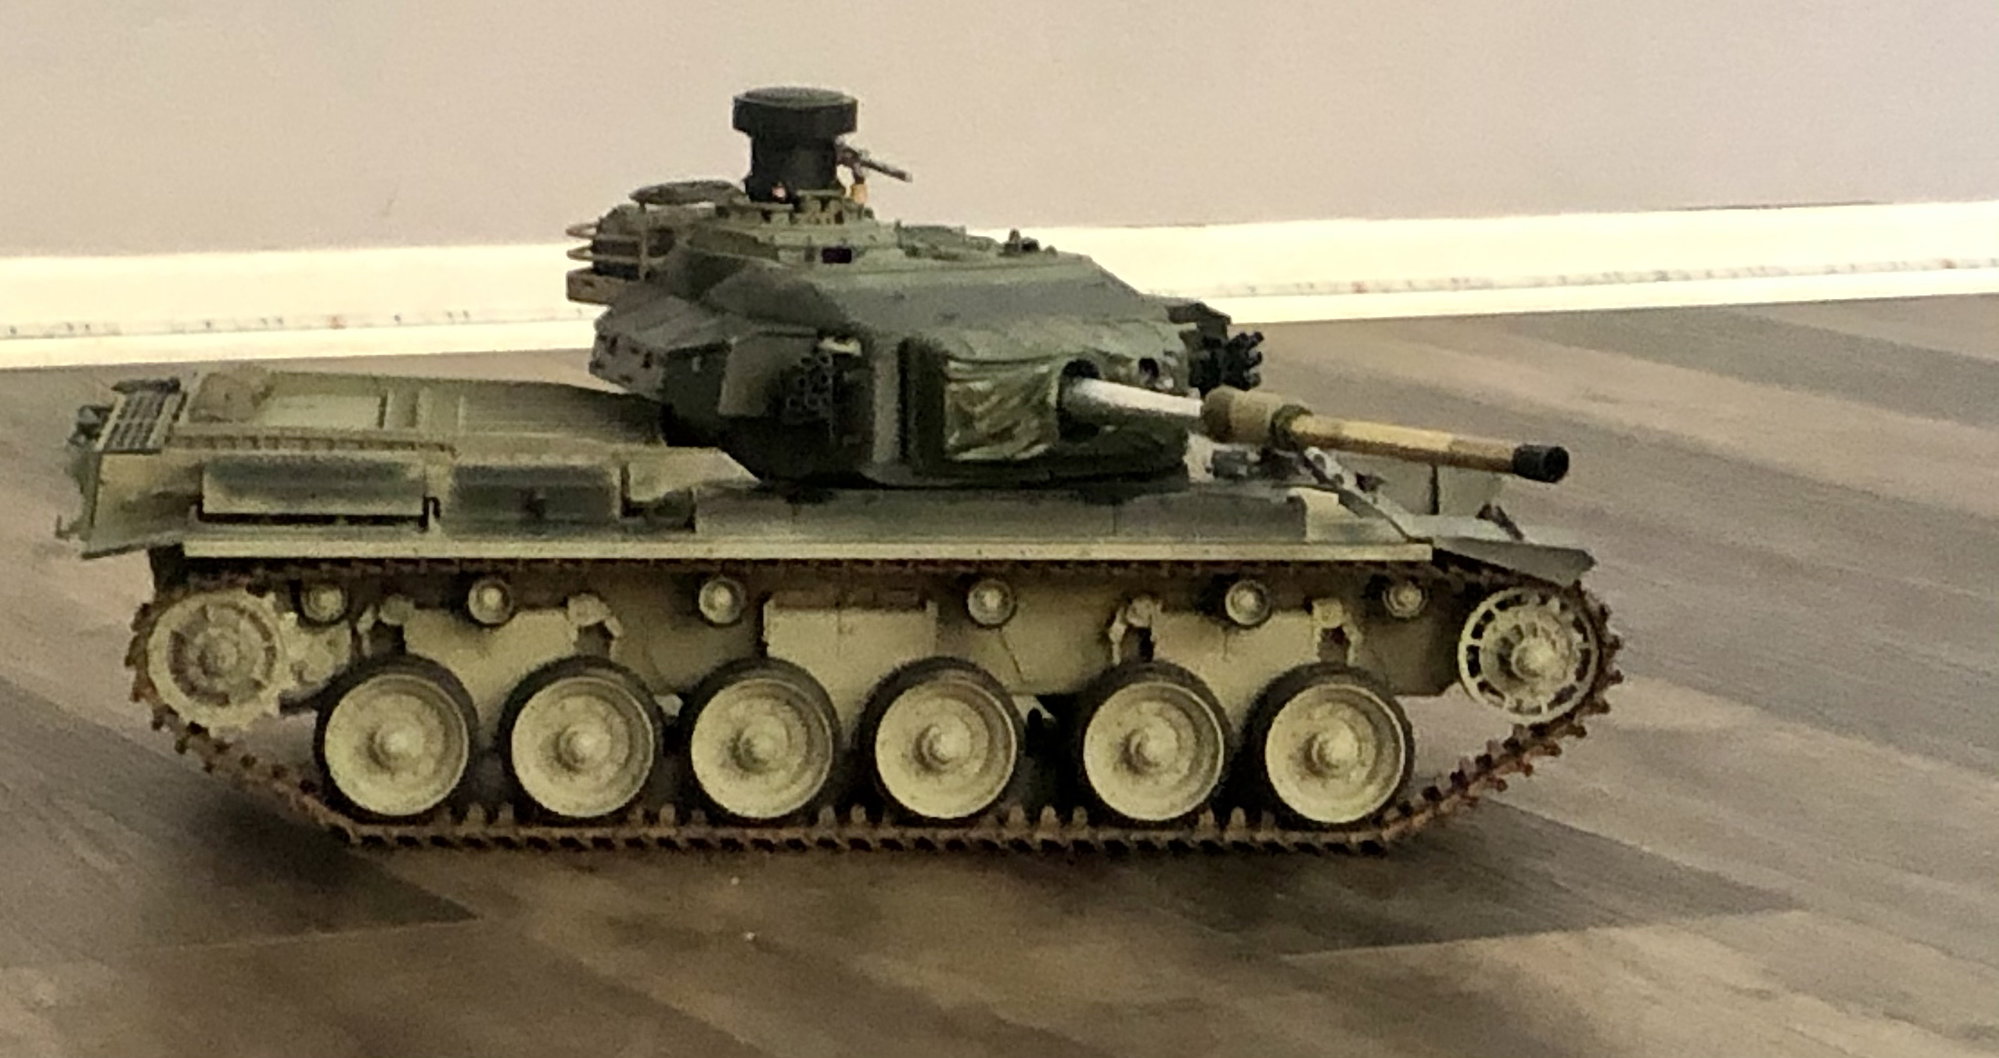
I was aware there is a gap and was surprised at how Tamiya chose to model the turret. Fortunately the way they are molded will make it easy for those wishing to have the gap be able modify the bins as such.
01-21-2022, 03:00 PM
#29
Last of the build photos as from here out it is all small detail parts and custom ad ons.
I did finally conduct the first powered driving test today and a segment of the video I shot is up on my Instagram @ fsttanks. Speed & handling wise at 8.4 volts the Centurion is about equal to what we see with the Tamiya Pershing or Sherman. I did not drive the tank outdoor as it is not ready for that yet.
I did finally conduct the first powered driving test today and a segment of the video I shot is up on my Instagram @ fsttanks. Speed & handling wise at 8.4 volts the Centurion is about equal to what we see with the Tamiya Pershing or Sherman. I did not drive the tank outdoor as it is not ready for that yet.
01-21-2022, 03:09 PM
#30
Join Date: Nov 2010
Location: HamiltonWaikato, NEW ZEALAND
Posts: 937
Likes: 0
Received 78 Likes
on
55 Posts
Hi Fsttanks
the gap lack - that's how they did it on both their 1/35th & 1/25 models, though no springs on those.
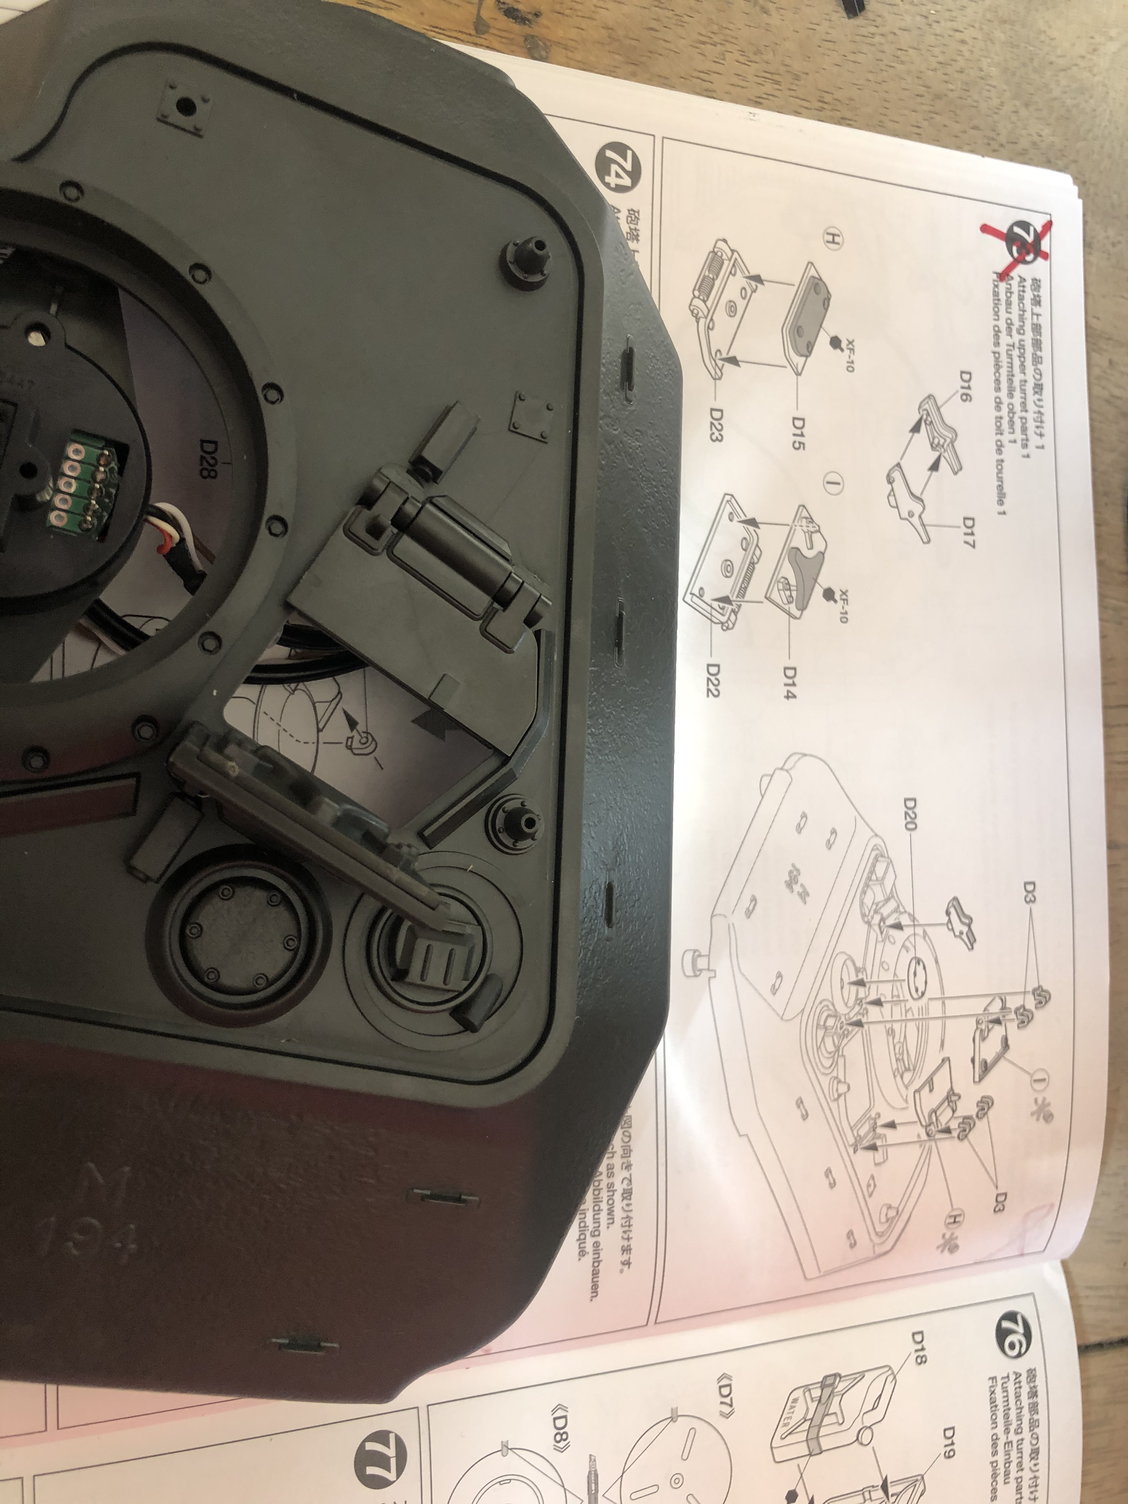
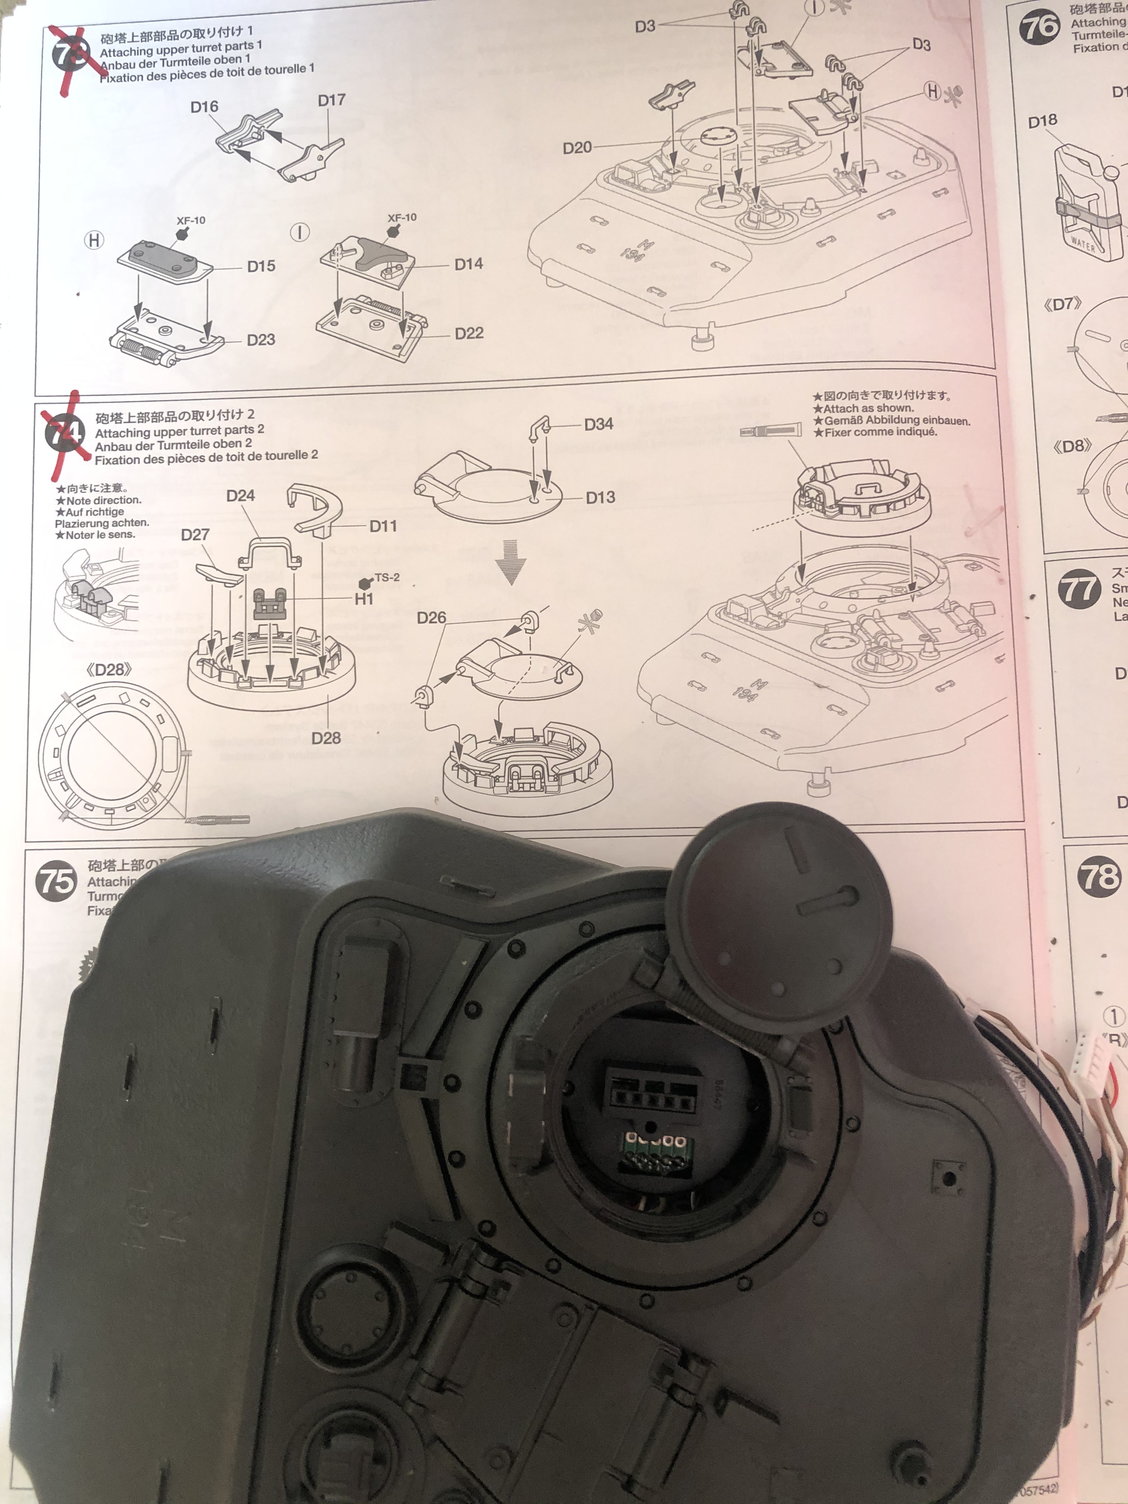
Is the turret top magnetically attached stock or is that your influence?
Mal
the gap lack - that's how they did it on both their 1/35th & 1/25 models, though no springs on those.
Is the turret top magnetically attached stock or is that your influence?
Mal
01-21-2022, 03:45 PM
#31
I will take a photo and post it later of the top of the turret with the bin lids on to help clarify.

 01-21-2022, 04:35 PM
#34
01-23-2022, 01:14 PM
#37
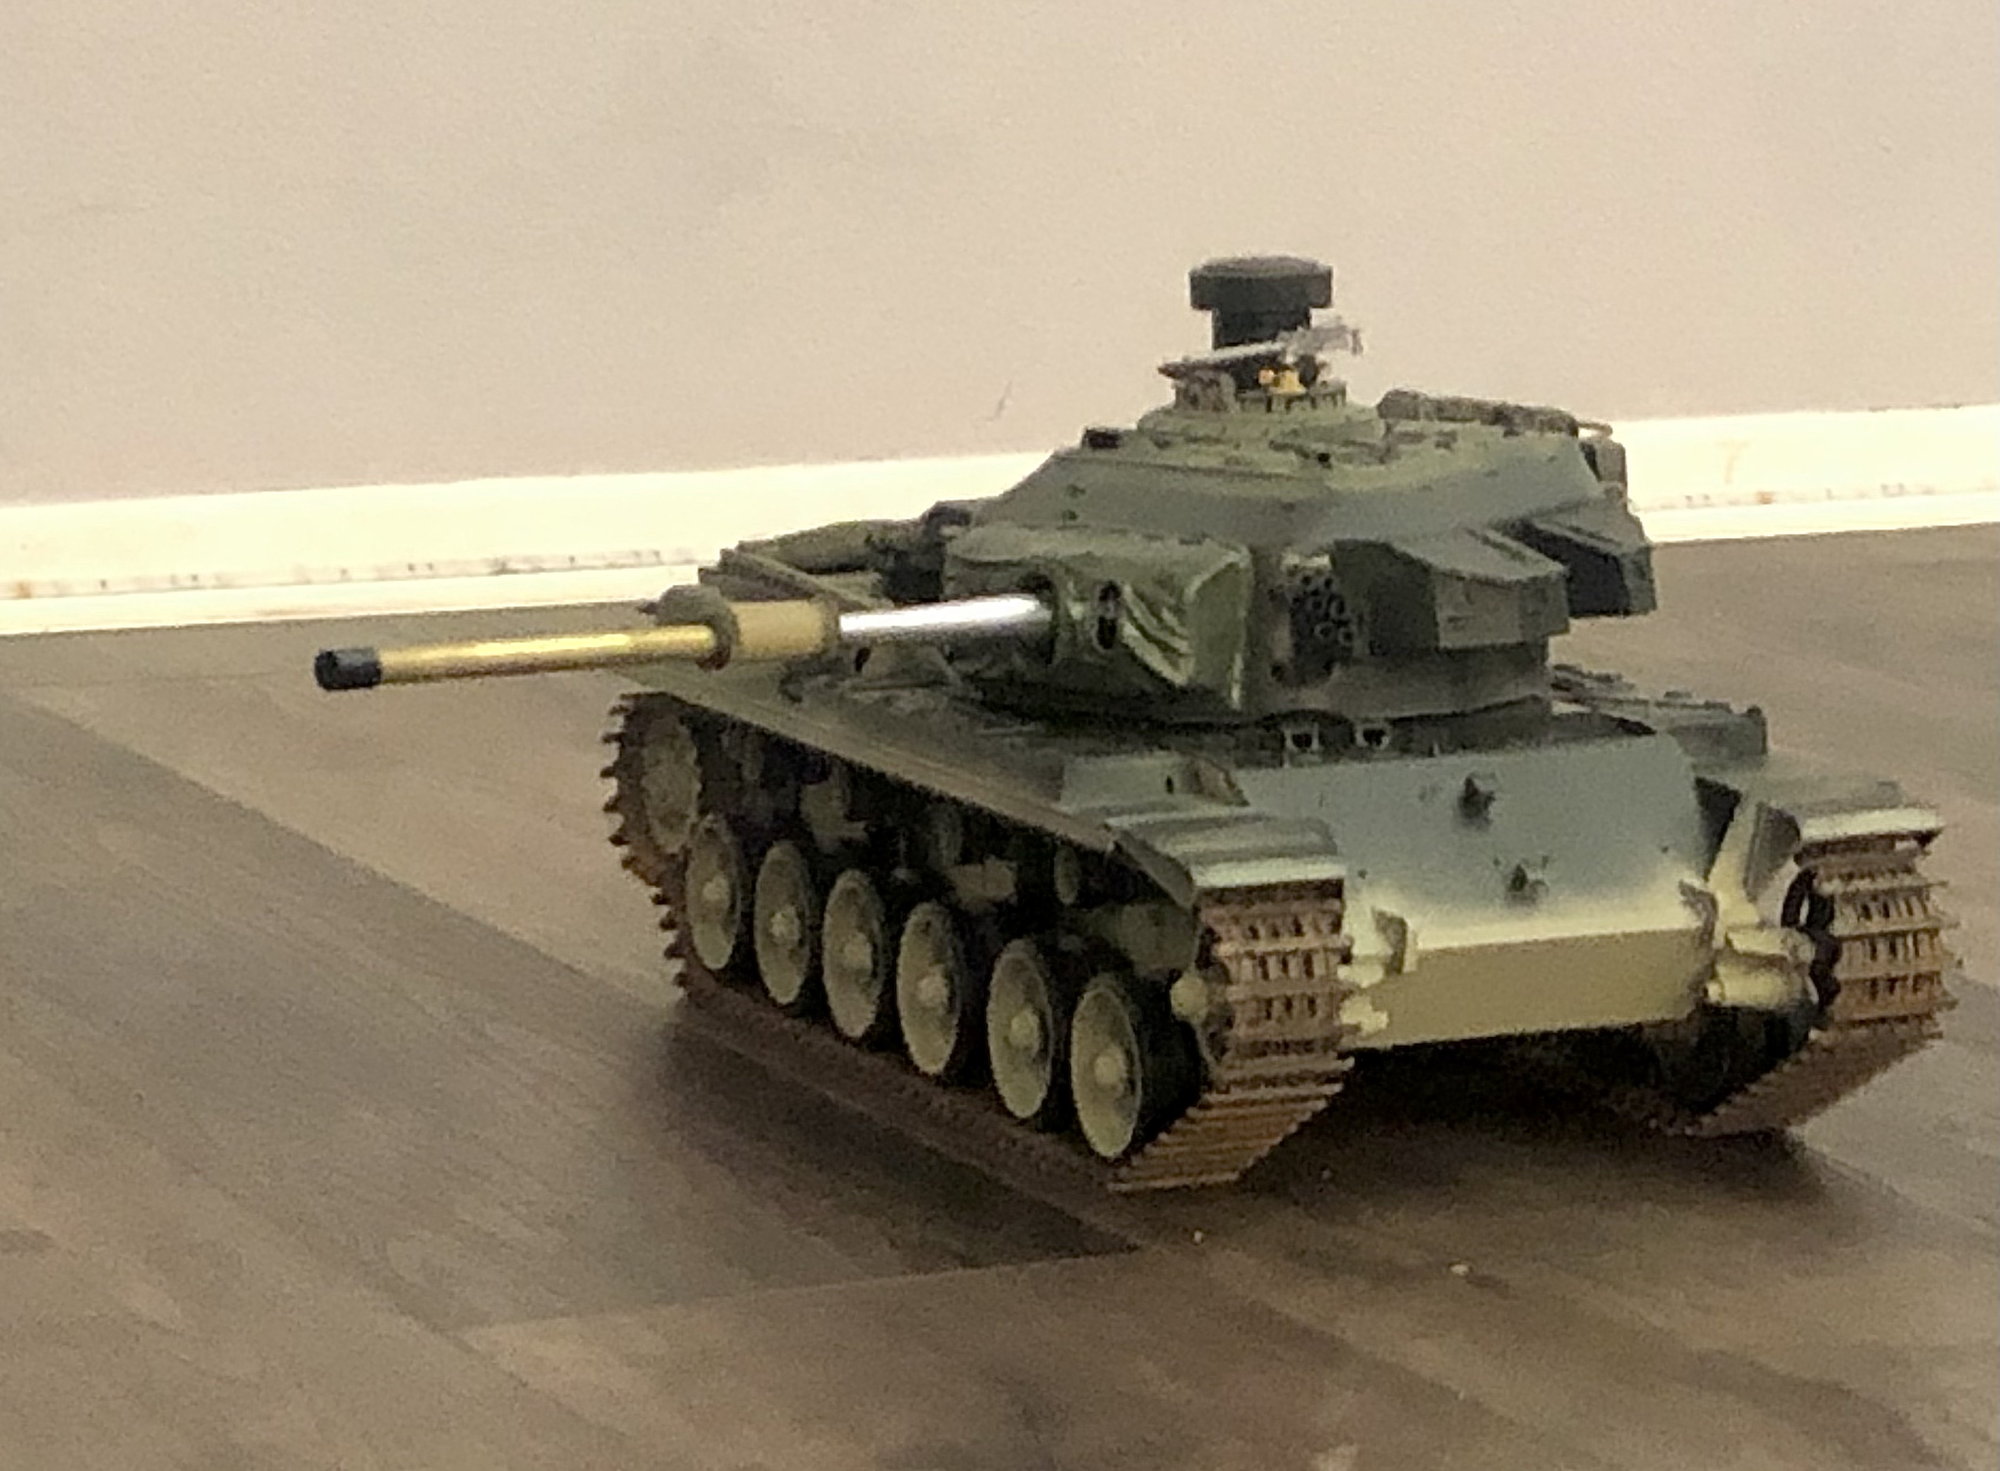
1. I was asked about the changes I did to the battery and speaker layout. Tamiya has the battery sitting in the rear above the gearboxes. This makes the tank very tail heavy and causes a pronounced rear sag. The Tamiya speaker arrangement has the speaker in the forward most section of the hull.
To balance the tank better I moved the battery to the forward most section of the hull and the speaker to just aft of the turret. The Tamiya speaker box “kinda” fit aft of the turret but I wanted more free space so I did not use it. The speaker will at some point have a custom box built for it. Also the speaker I received is faulty and has very poor clarity for a Tamiya factory speaker regardless of it use in their box or open as I have it now. I will be replacing it shortly.
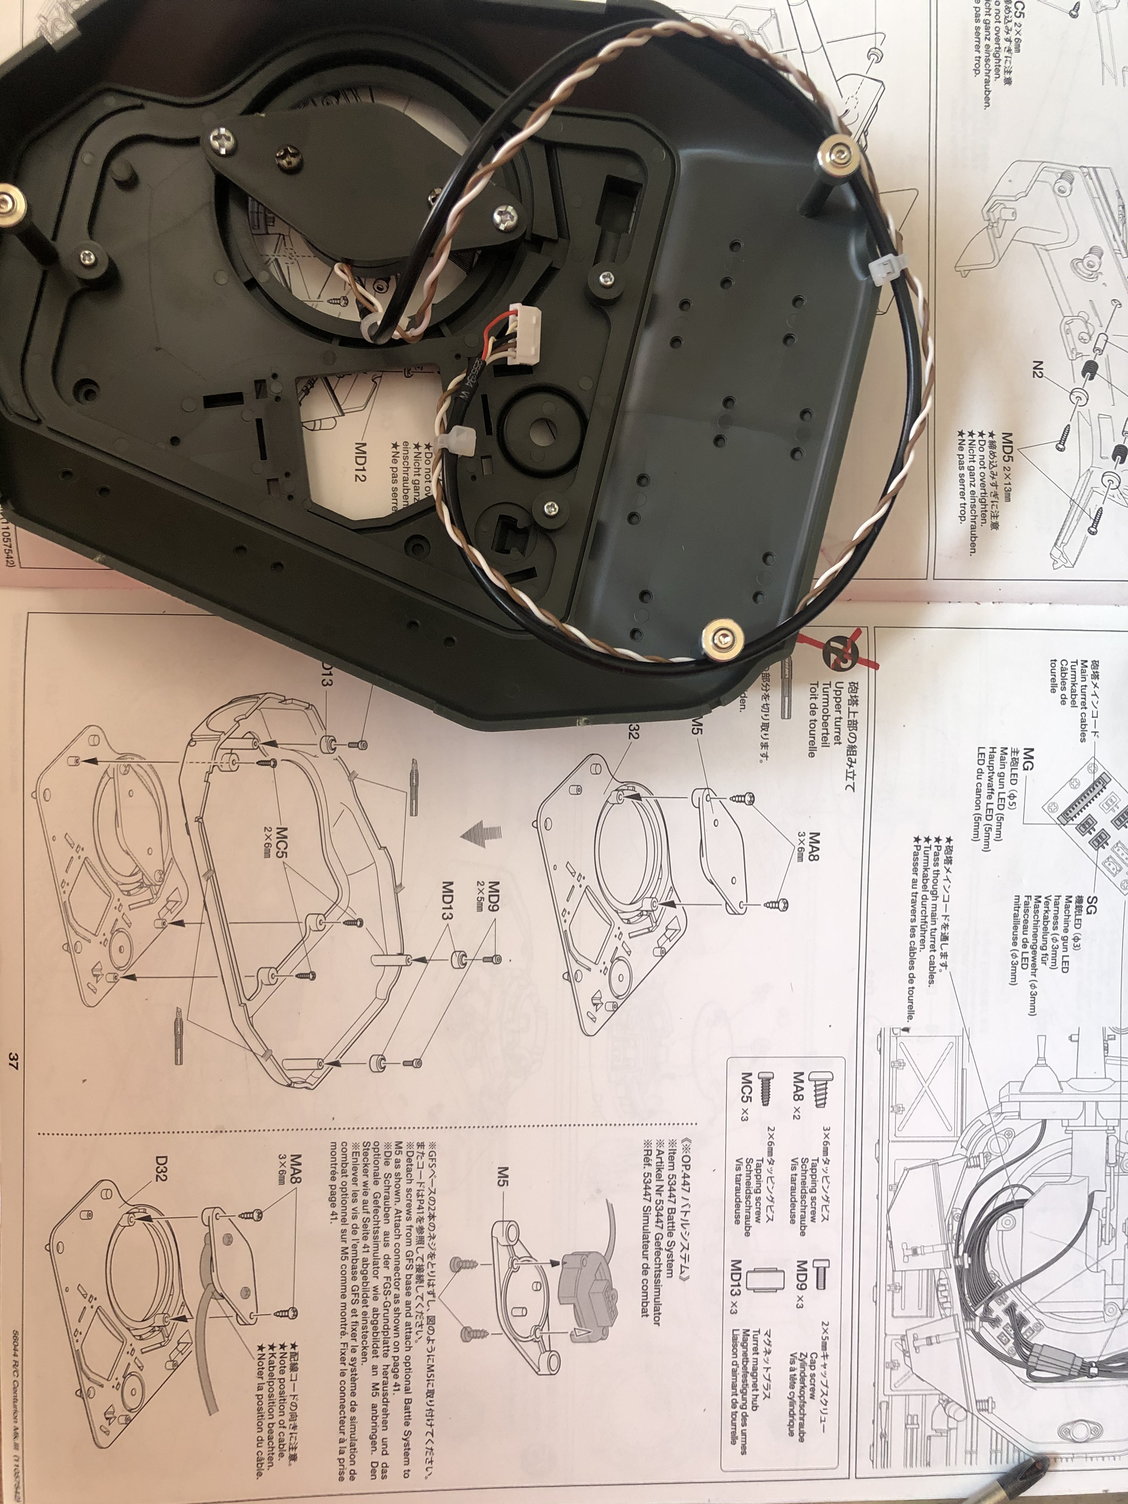
2. Some asked me about the Philippine plastic? Well it seems thinker then on prior Tamiya tanks and there are a few parts with color variations. Namely the turret halves. Otherwise it is typical Tamiya parts fit quality.
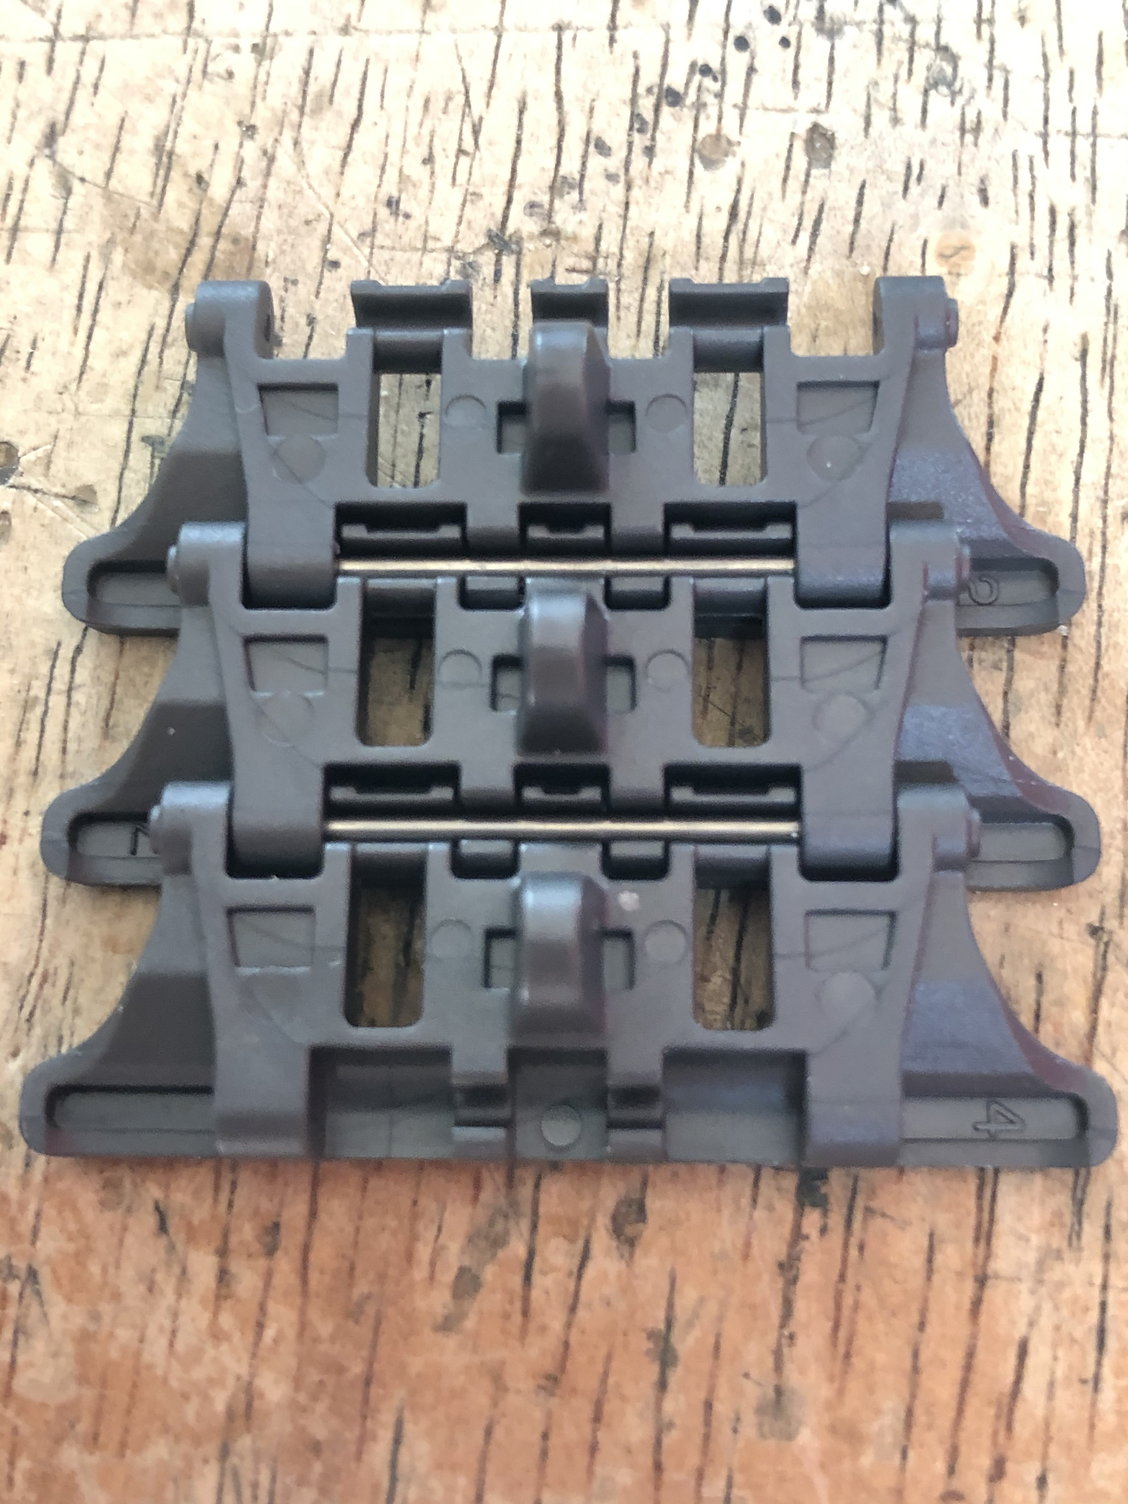
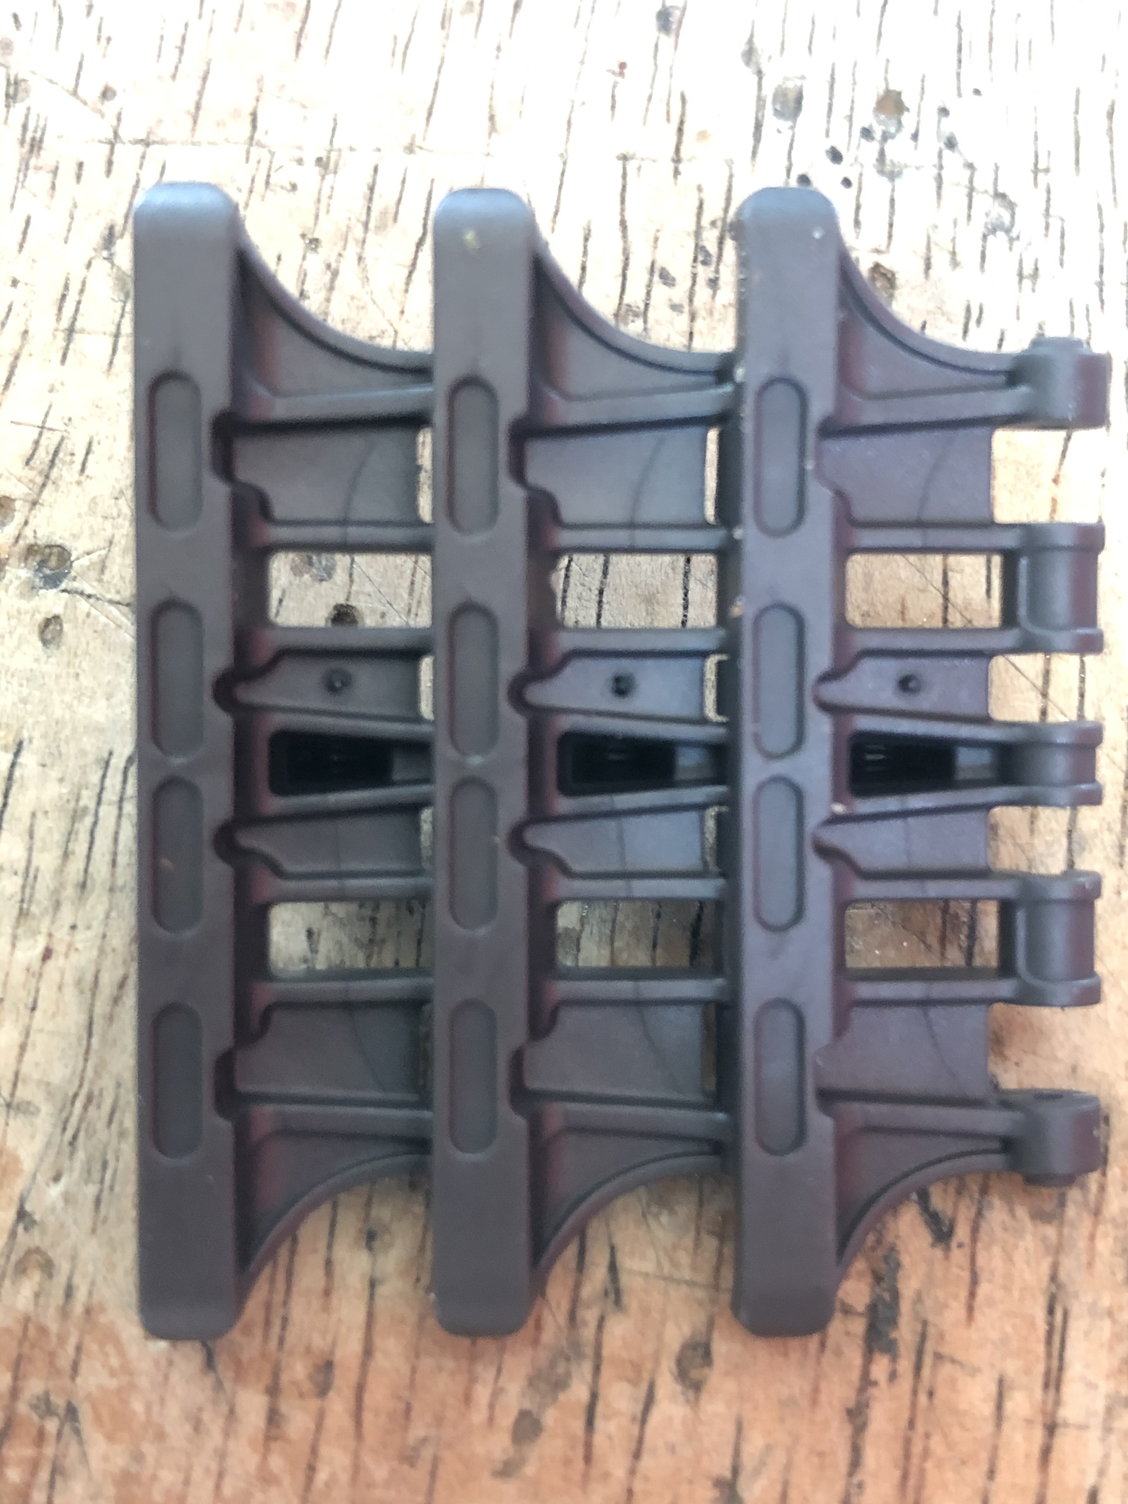
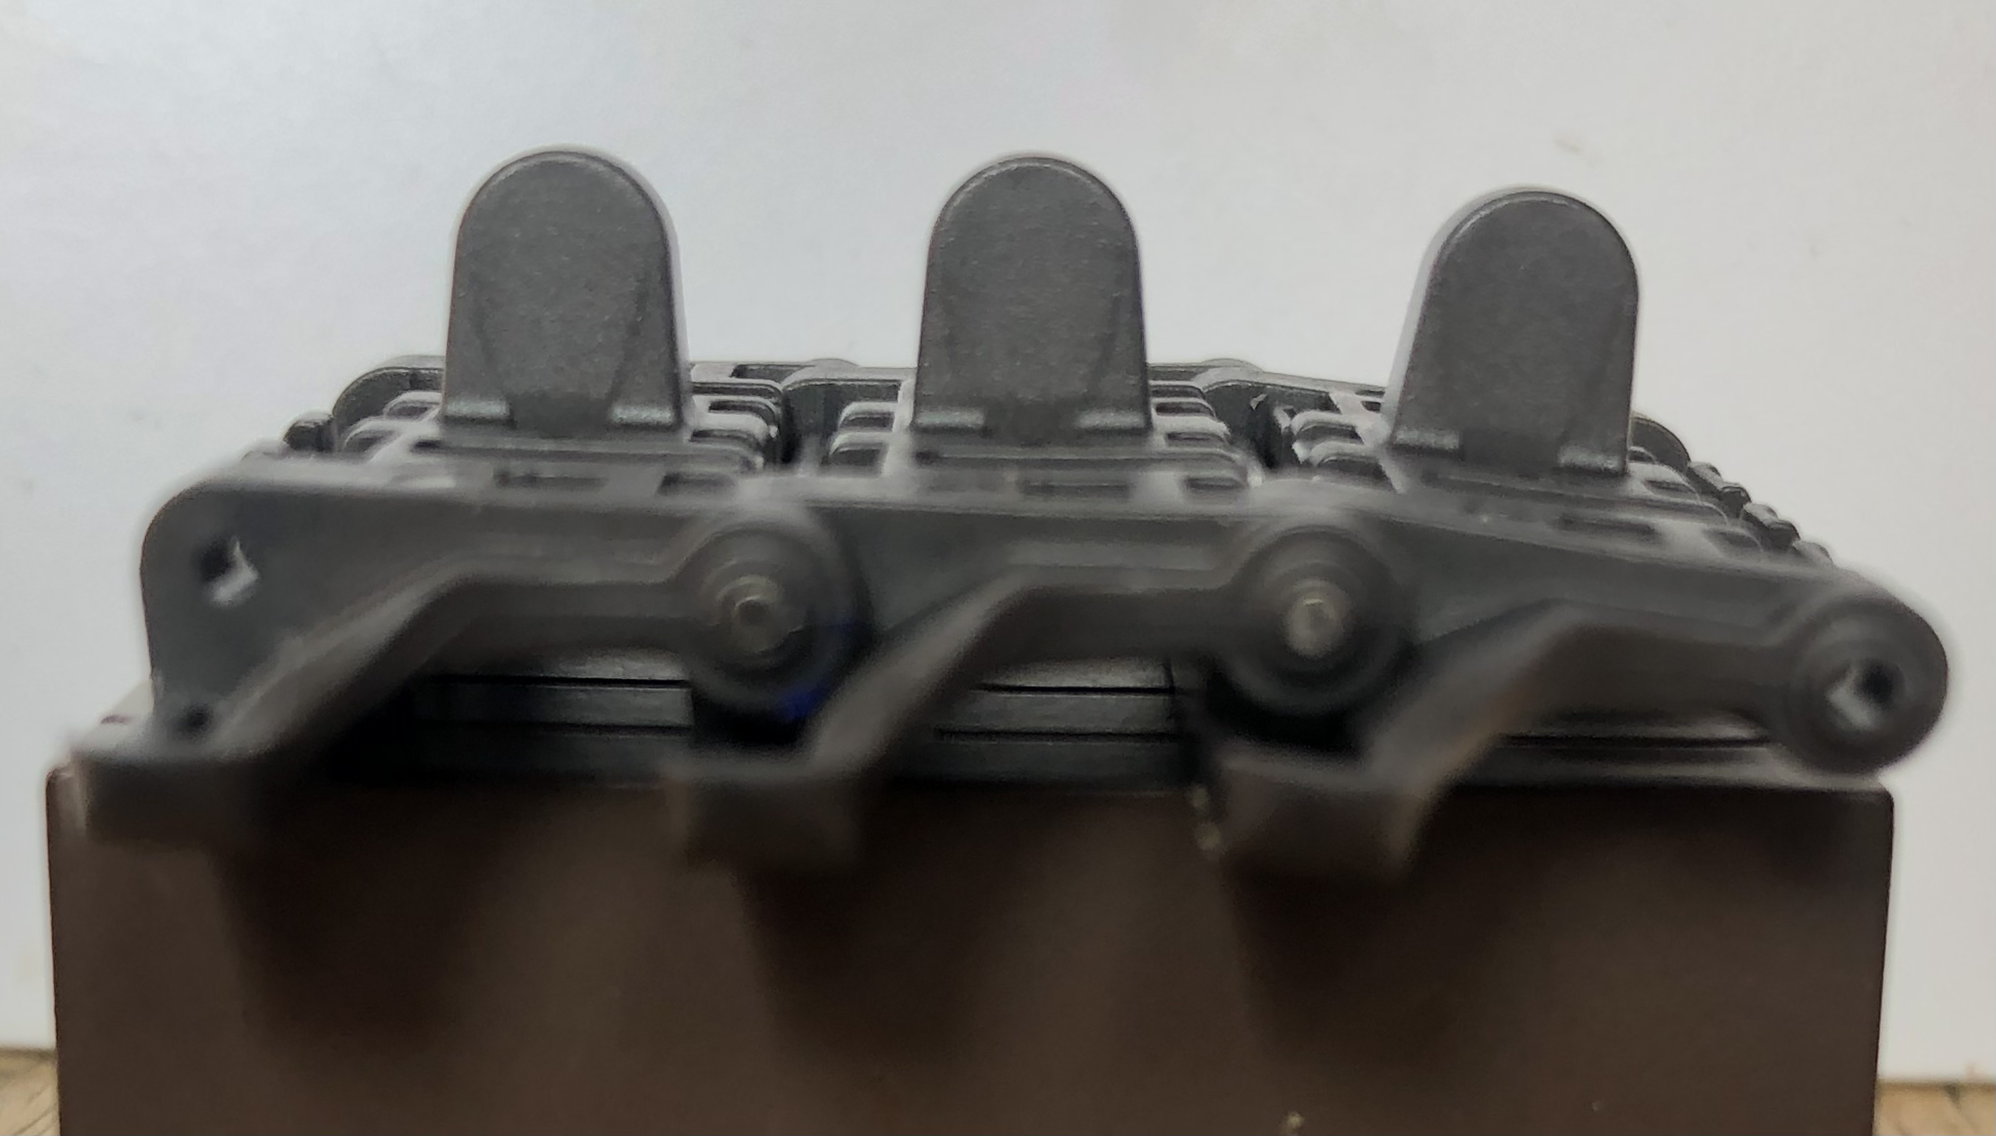
3. The close up of tracks.
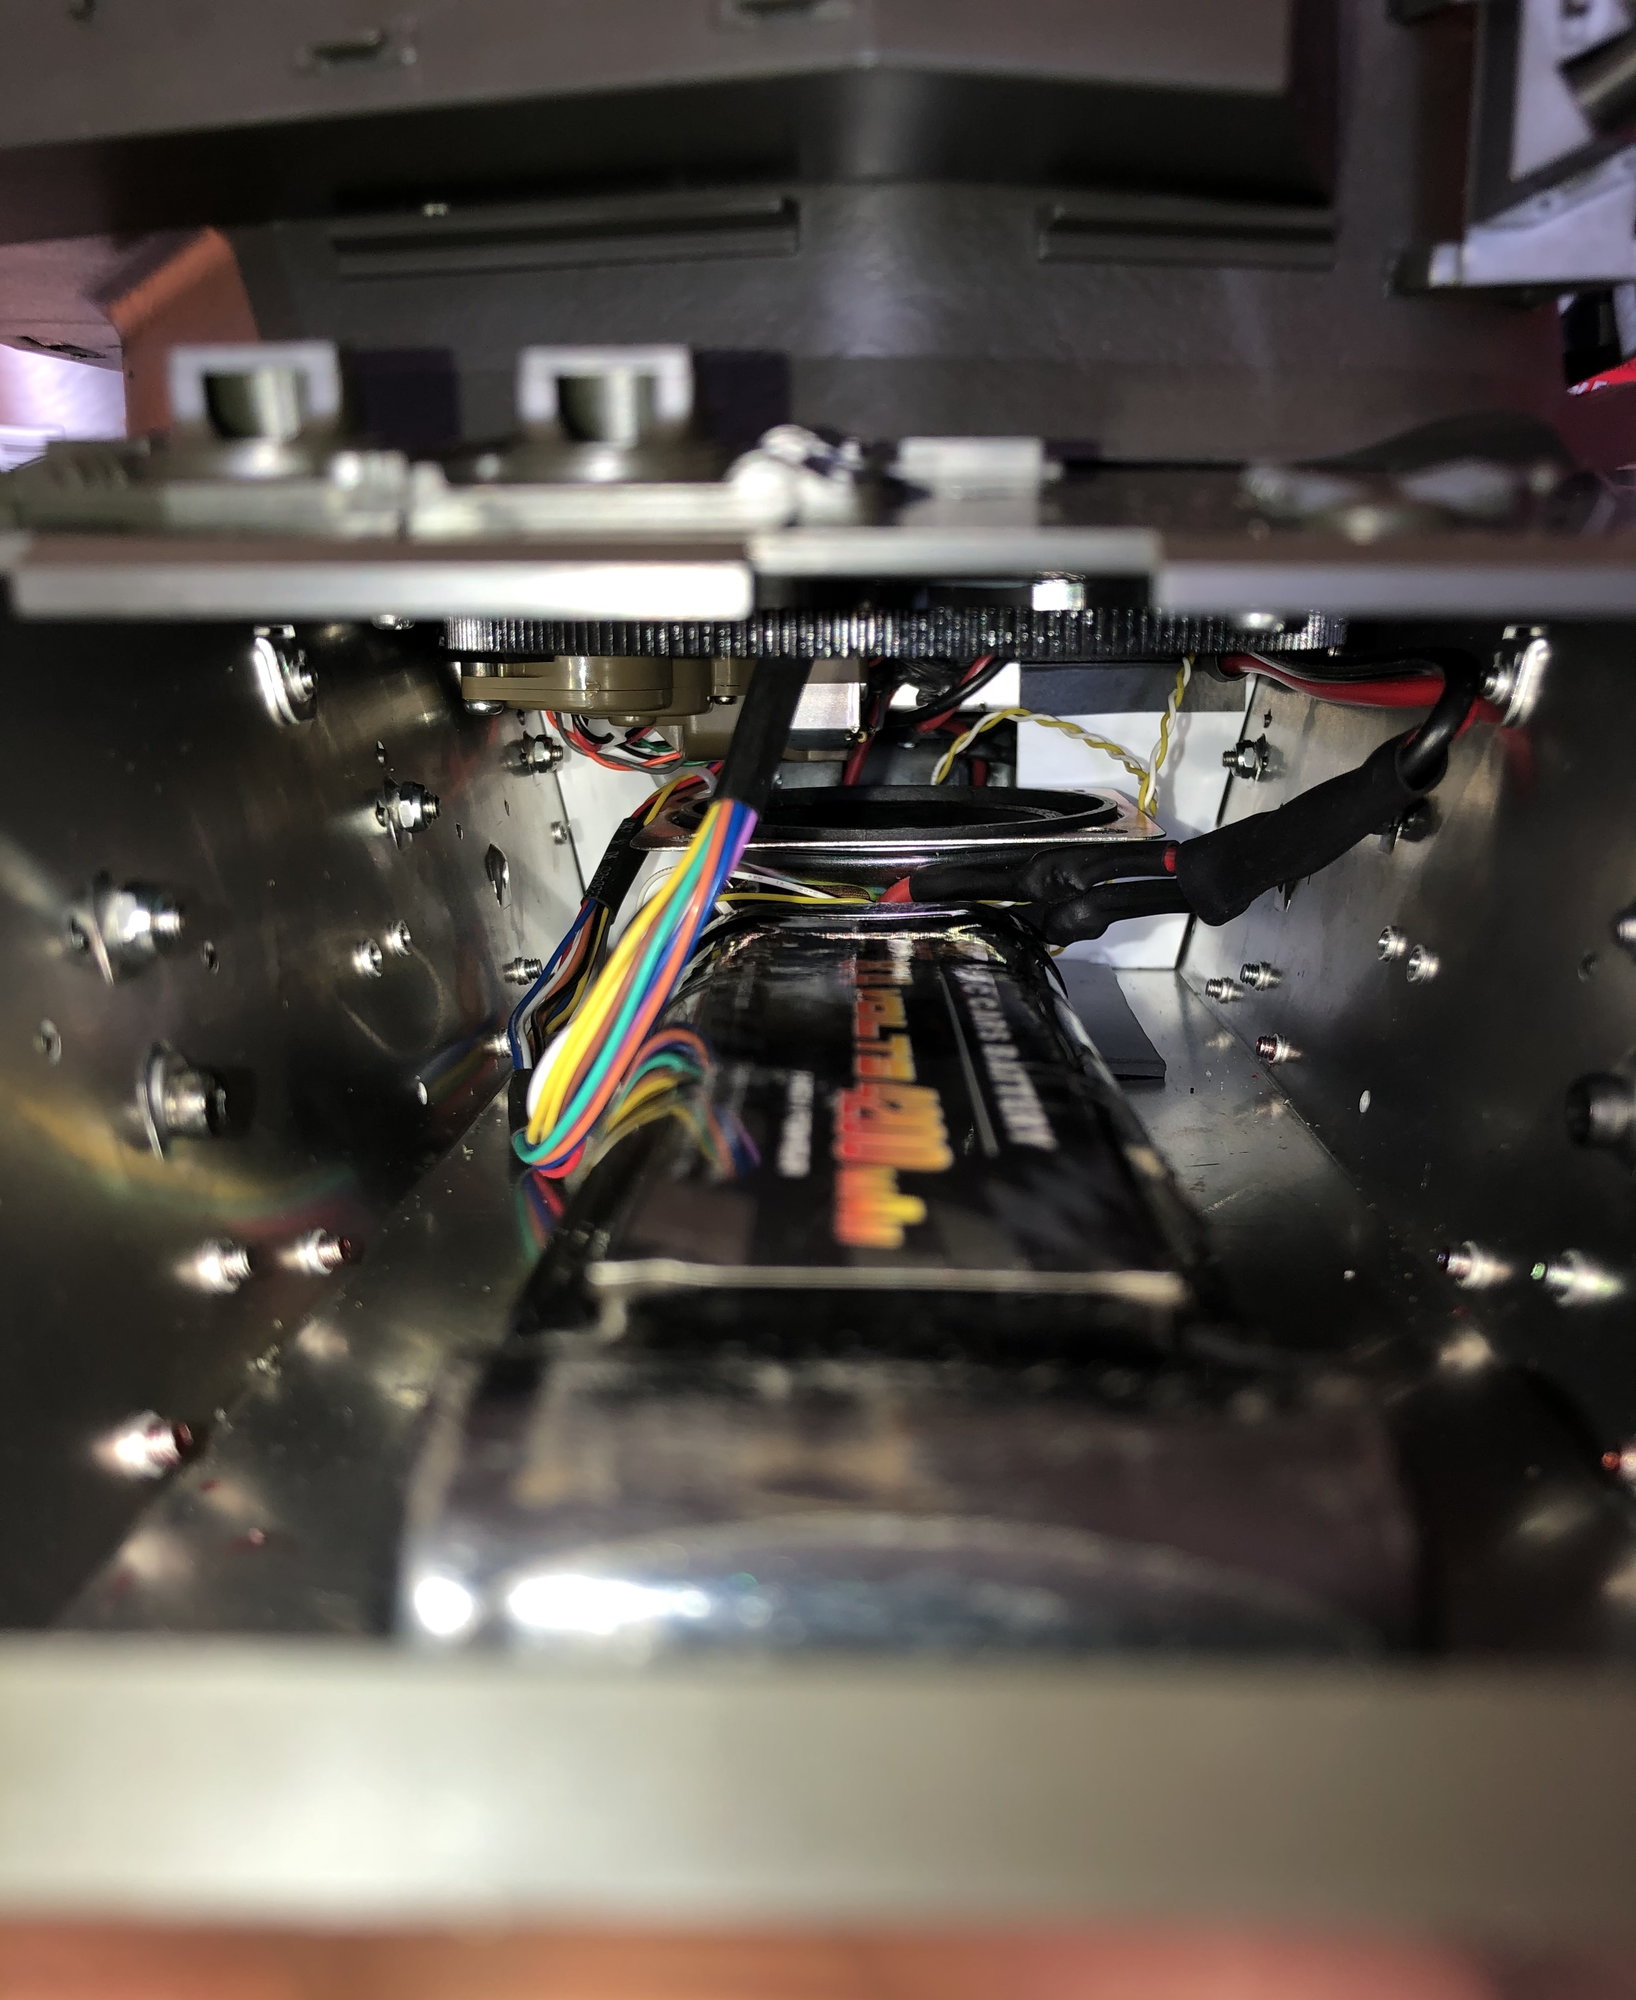
Forward hull looking toward rear.
To balance the tank better I moved the battery to the forward most section of the hull and the speaker to just aft of the turret. The Tamiya speaker box “kinda” fit aft of the turret but I wanted more free space so I did not use it. The speaker will at some point have a custom box built for it. Also the speaker I received is faulty and has very poor clarity for a Tamiya factory speaker regardless of it use in their box or open as I have it now. I will be replacing it shortly.
2. Some asked me about the Philippine plastic? Well it seems thinker then on prior Tamiya tanks and there are a few parts with color variations. Namely the turret halves. Otherwise it is typical Tamiya parts fit quality.
3. The close up of tracks.
Forward hull looking toward rear.
01-24-2022, 02:52 AM
#38
We appreciate the thread, you're doing a great job and there is a lot of great info here, but please remember that a lot of us here are not on Facebook or Instagram so if the video is not posted here we will not be able to see it. Danke
01-24-2022, 03:24 AM
#39
Thanks for adding the images of the build,as they say a picture is worth a thousand words😎 One of the good points of a Tamiya kit is that the pivot points for the mantlet is correct, HL and the others still have them set further back for the airsoft . Nice to see they have improved the pivot point with bearings, elevation should have a smooth action and servo will not be overloaded .
Last edited by ronnie42; 01-24-2022 at 03:27 AM.
01-24-2022, 09:49 AM
#40
Very nice build so far, looking forward to your final result.
May I ask how many of the 5x8x2.5 ball bearings you used to replace bushings?
Also that thing is way bigger than i saw it in my minds eye.
Will Rich be selling the 105mm gun once you guys figure out final fitment?
Thanks and keep up the great work.
May I ask how many of the 5x8x2.5 ball bearings you used to replace bushings?
Also that thing is way bigger than i saw it in my minds eye.
Will Rich be selling the 105mm gun once you guys figure out final fitment?
Thanks and keep up the great work.
01-24-2022, 11:54 AM
#41
Very nice build so far, looking forward to your final result.
May I ask how many of the 5x8x2.5 ball bearings you used to replace bushings?
Also that thing is way bigger than i saw it in my minds eye.
Will Rich be selling the 105mm gun once you guys figure out final fitment?
Thanks and keep up the great work.
May I ask how many of the 5x8x2.5 ball bearings you used to replace bushings?
Also that thing is way bigger than i saw it in my minds eye.
Will Rich be selling the 105mm gun once you guys figure out final fitment?
Thanks and keep up the great work.
Rich will be selling the 105 guns. The one I am using now is just temporary �scratch built� and NOT what Rich will have available for sale.
I will be posting my thoughts on the build shortly. Teaser....There are more screws then on any other Tamiya tank!!!!
I look forward to watching your video build and hearing your thought as you work through putting it together.
01-24-2022, 12:25 PM
#42
30 bearing if you include the two I used in the mantle.
Rich will be selling the 105 guns. The one I am using now is just temporary �scratch built� and NOT what Rich will have available for sale.
I will be posting my thoughts on the build shortly. Teaser....There are more screws then on any other Tamiya tank!!!!
I look forward to watching your video build and hearing your thought as you work through putting it together.
I don't know which of us has built more Tamiya tanks, but if I can include the volume of grain of kosher salt sized bolts for the DKLMRC road wheels on my JS-2 nothing would be able to touch it, LOL.
You'll hear be complain about so many screws for sure in the video, but also get to hear me squeal gleefully over rubber tires.
01-24-2022, 01:15 PM
#43
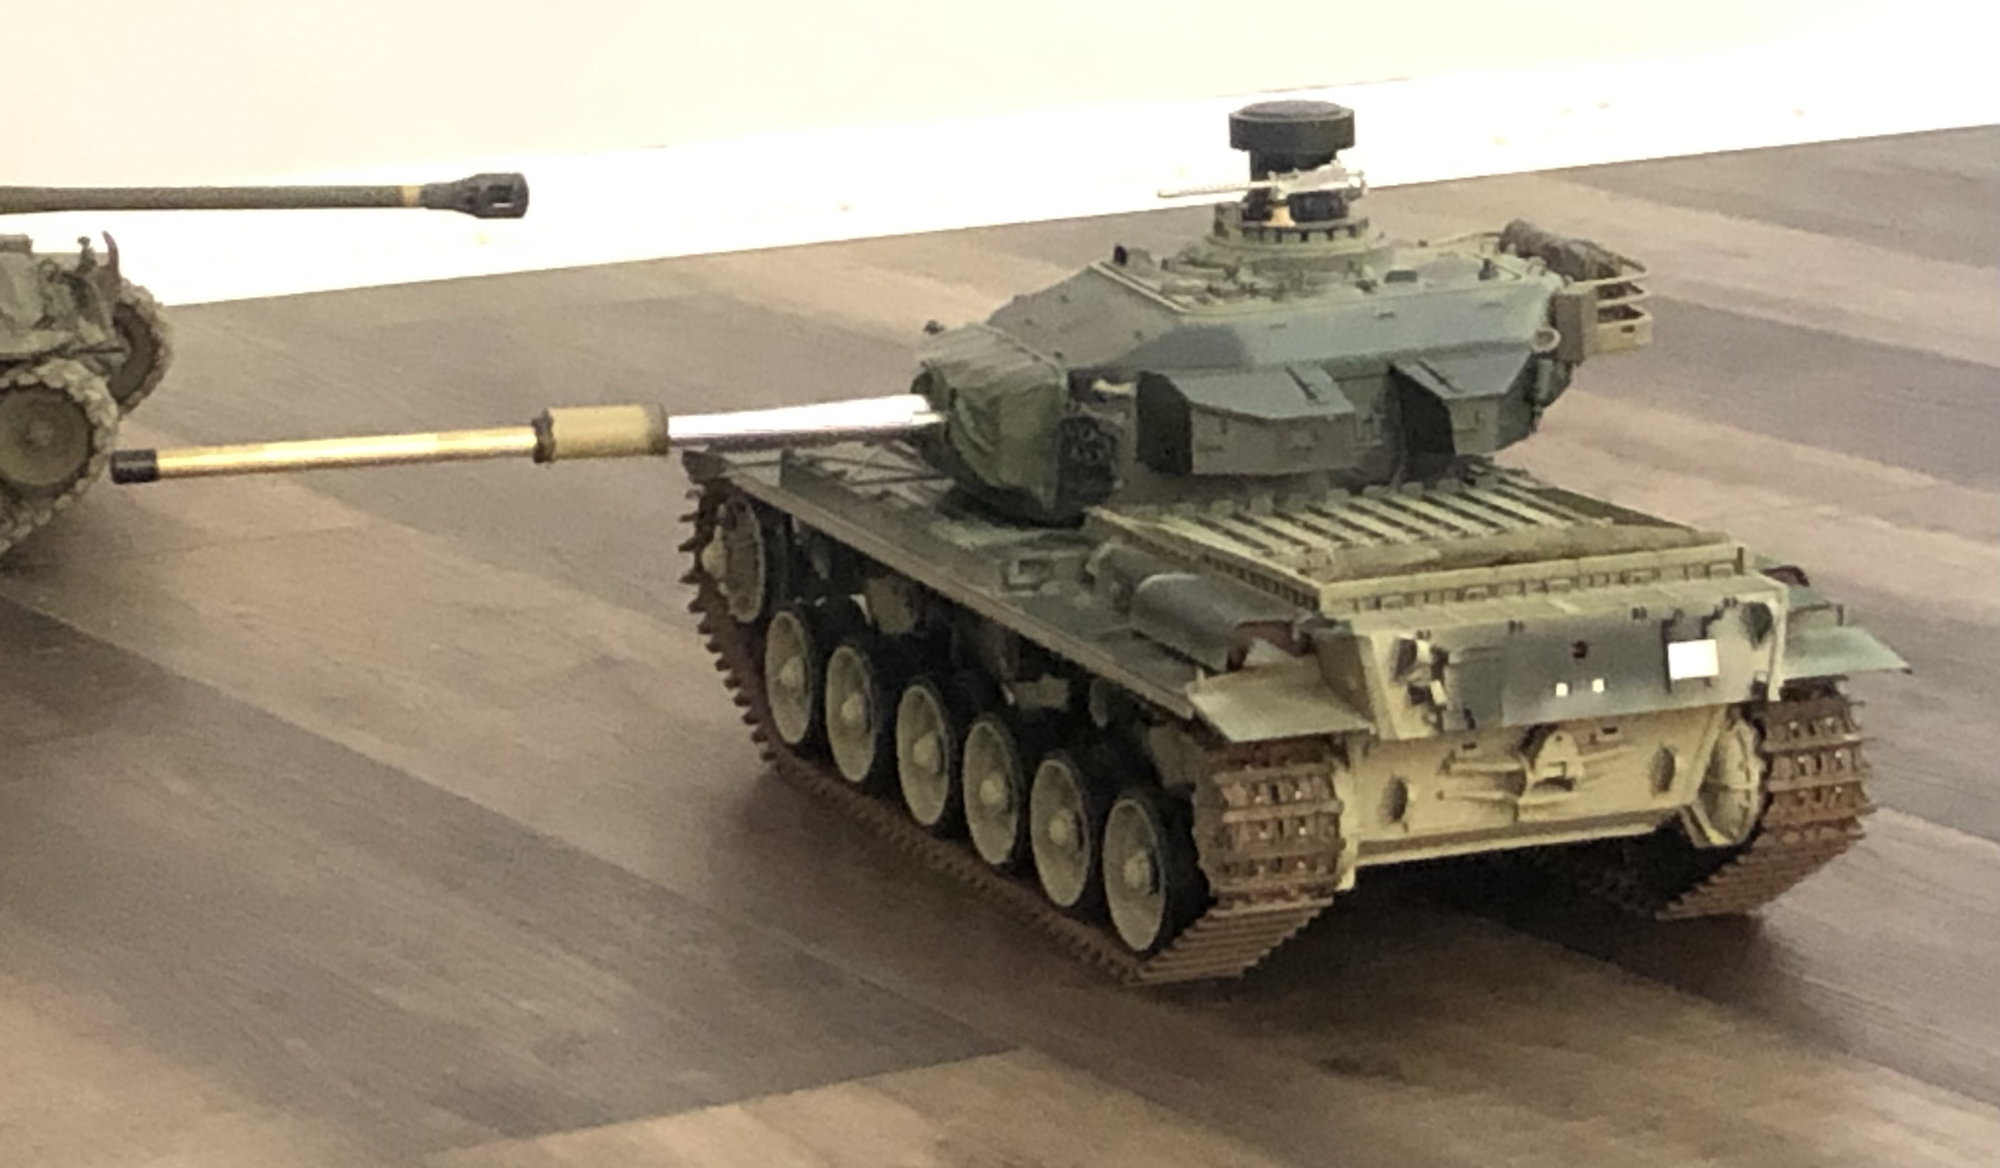
Progress update photos.
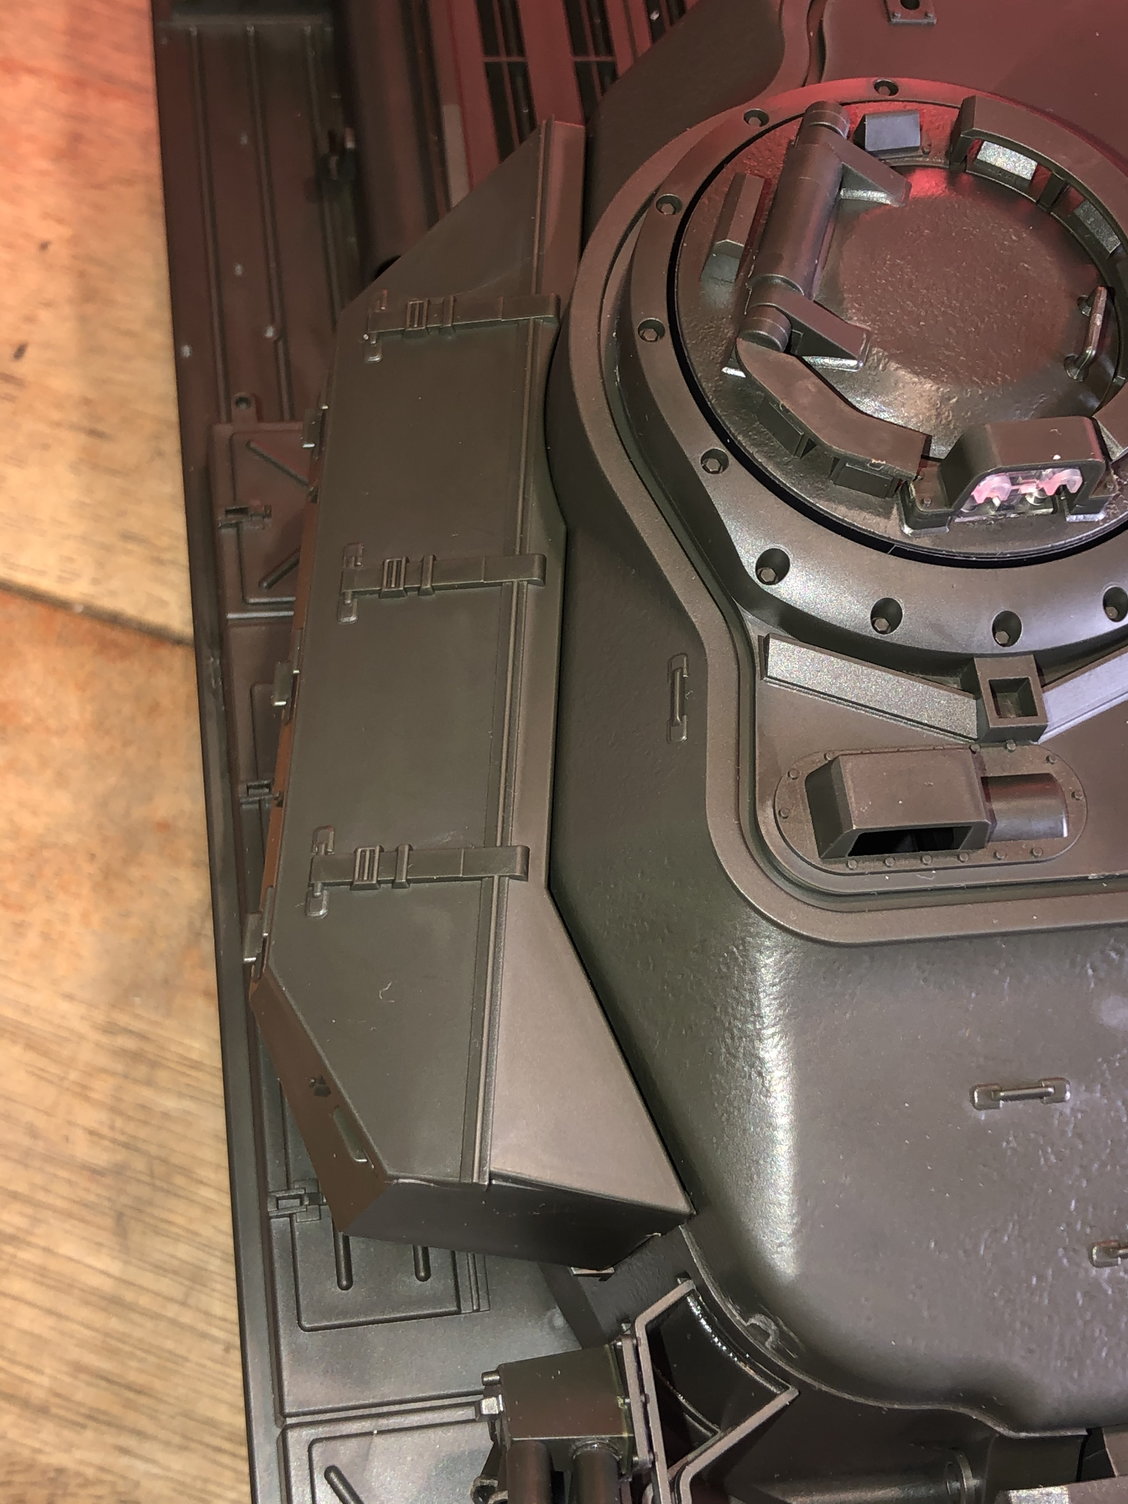
Now fully functional and IR system tested its time to head to paint and detailing. Shown in photo installed on the tank turret is a Tamiya IR receiver. For those that do not known, yes it is removable.
New test videos are now up on my Instagram @ fsttanks
Note: The rear lower hull exhaust deflector and tow bar where not installed. I deemed them a liability to my style of hard use. They would have just been ripped off or broken in short order. Also since I plan on converting the tank to a later engine design (when kits become available) they would need to be removed then anyways. Lastly I removed the front fender extension “splash/mud” guards. No real reason other then I like the look of more track showing.
Last edited by Fsttanks; 01-24-2022 at 01:32 PM.
01-24-2022, 02:33 PM
#45
My disappointment is the light weight track construction. Fortunately I am sure this tank will be popular enough that someone will make tougher all metal tracks.....unlike the M551.
01-24-2022, 03:09 PM
#46
Wow, that was fast! Did you sleep any? 
Looks great.
Looks great.
01-24-2022, 03:33 PM
#47
It is actually taking me much longer then expected. Usually I can bang out a �box stock� Tamiya tank in three days start to finish paint and weathering.
This one went together smoothly but uses 25-35% more screws then most other Tamiya tanks. Then there is the barrel which took time and the turret basket. Made four different baskets.....picked the least accurate but most durable as it will be nearly unseen after all the �kit� detailing is added.
Unfortunately work will be getting in the way over the next few days and I will not be able to finish the base paint until early next week.
The following users liked this post:
bowlman (01-24-2022)
01-24-2022, 04:24 PM
#48
That kinda surprised me too. But I will say even without them Tamiya does give you your money�s worth with this tank. The DMD11 runs the tank rather smoothly and has all the lighting option built in so it should be easy to add any desired lighting.
My disappointment is the light weight track construction. Fortunately I am sure this tank will be popular enough that someone will make tougher all metal tracks.....unlike the M551.
My disappointment is the light weight track construction. Fortunately I am sure this tank will be popular enough that someone will make tougher all metal tracks.....unlike the M551.
As for tracks Carson at DKLM has the M551 CAD drawings completed but as of fall last year was struggling to find a factory to take the job, I also asked him today about tracks for the Centurion but I fear the manufacturing in China is still problematic.
I will try to reach out to Kenny Kong again to see if he is interested, but he sounded like he was done with tracks last time I asked about the M551.
01-24-2022, 04:31 PM
#50
If they actually fit that would be a small miracle, everything out of china whether it be HL, Torro, or Haya appear to be just different enough to not mesh with Tamiya sprockets, nor are the sprockets able to work on Tamiya driveshafts.