


150% enlarged WingontheWeb HO-229
 03-12-2013, 03:07 AM
#401


ORIGINAL: lrb75
I have tons of room in the HE-162.... But at almost 20lbs the gear and the wing loading can't take much more. So 6000mah is what I got. BTW you build tooooooo fast!
I have tons of room in the HE-162.... But at almost 20lbs the gear and the wing loading can't take much more. So 6000mah is what I got. BTW you build tooooooo fast!
Haha. Things will slow down now. When my wife and son our away visiting fam and i can stay out in the shop all day i get on a roll and knock stuff out really quickly. Plus, what you see in the above pictures is the quick and easy part, everything left to do now takes forever to do!
 03-12-2013, 04:25 AM
#402
Senior Member
My Feedback: (2)

Join Date: Dec 2002
Location: Hudson, FL
Posts: 429
Likes: 0
Received 0 Likes
on
0 Posts
Hi Thomas, sorry for your loss man, I always program my ESC on larger planes to NOT have a low voltage cut off. I use my timer on the radio to clue me when to setup to land before my batteries get to low. I personally would rather run the batteries low than deal with an motor out.
Aaron D.
Aaron D.
 03-12-2013, 08:31 PM
#404
I got to sneak out for a little less than 2 hours after putting the little guy to bed..
So.
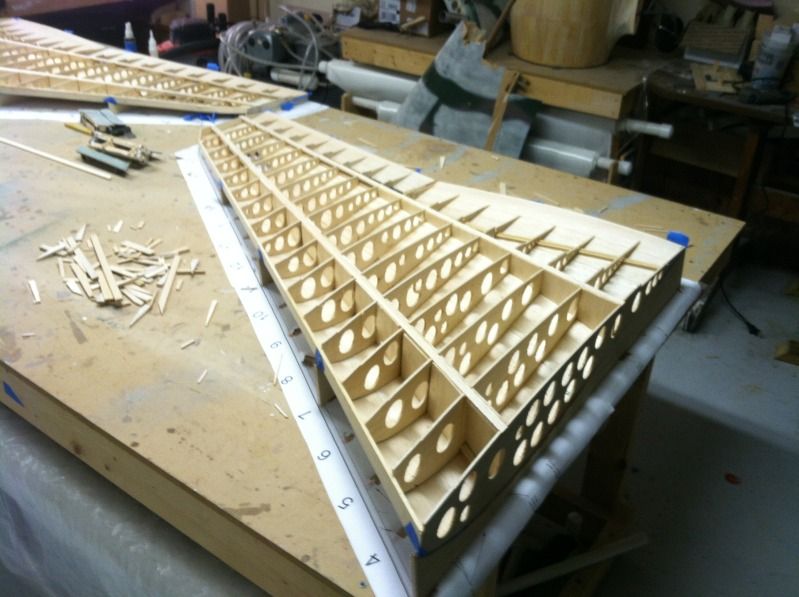
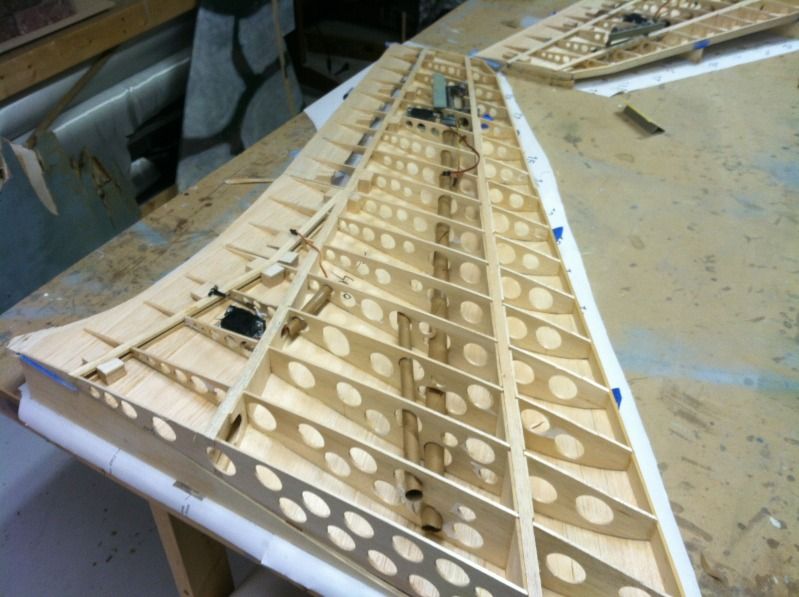
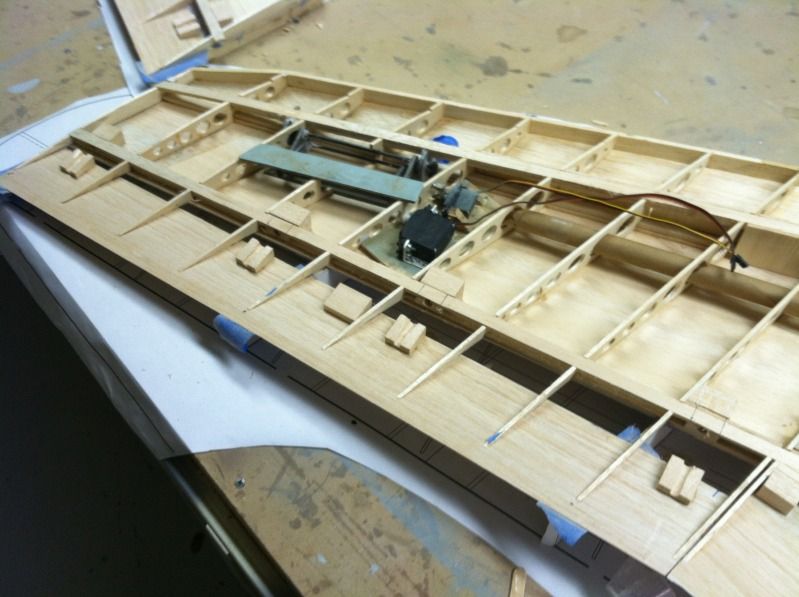
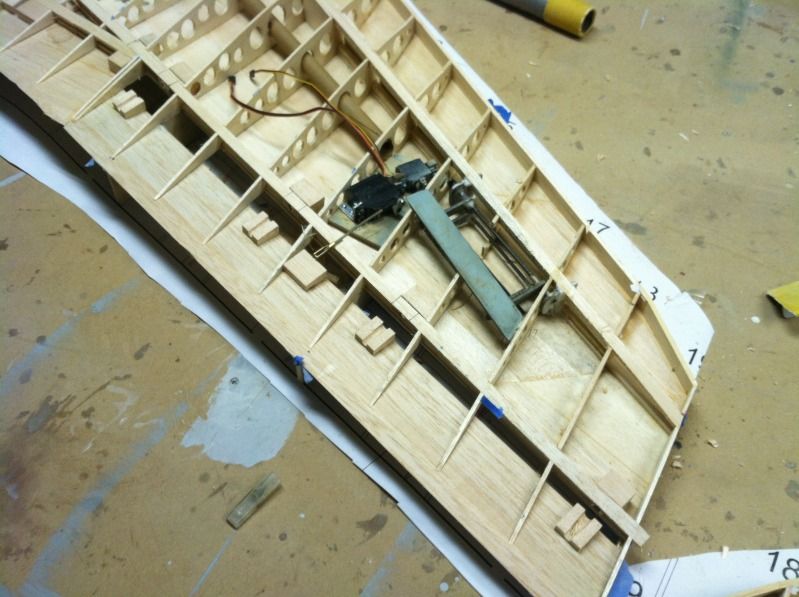
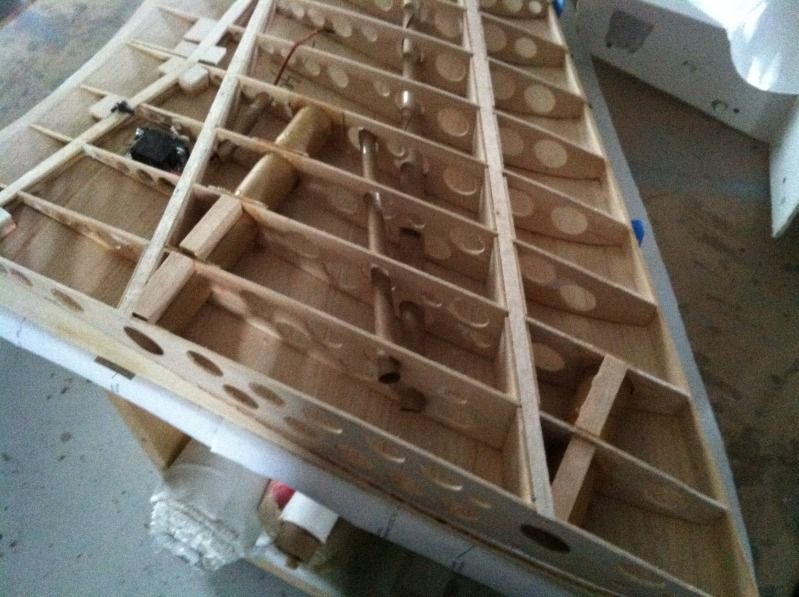
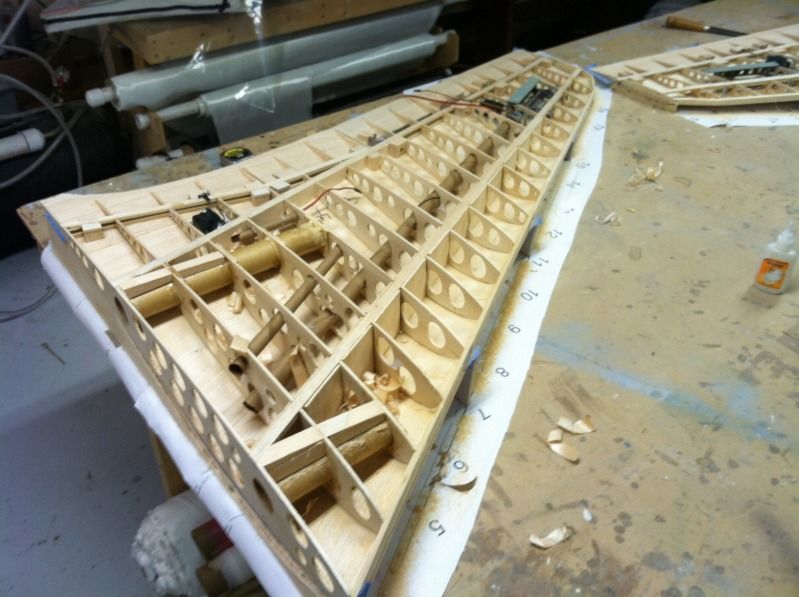
The upper drag rudder holes were cut in the top wing skins. Then the wings were placed upside down in the sheeting jigs. Then I installed the front and rear bottom wing spars. The old drag rudders were then cut free from the remnants of the old wing panels, but where left attached to the wing spars. Tomorrow I will cut them free from the wing spars and prep the pieces for installation to the new wing panels (and possibly install them). The drag rudder and elevon servo's and mounting plates were also removed from the old wing panels.
All shear webbing has been installed. The Inboard flap LE and wing TE pieces installed. The wing tube socket holes enlarged and prepped for wing tube installation. The TE wing building tabs removed and sanded to the airfoil shape.
Overall, it was a very productive night. things left to do.. Install LOTS of hinge blocks. Install servo mounts. Install and hook-up drag rudders. Make up the wing tube socket ply doublers and install the wing tube sockets. Make up and install the servo conduit tubes. Sheet the wings, Install and shape the LE and wingtip block. Cut the flaps and elevons free and Cap their LE's. Install the hinge extensions.. Glass everything, and then off to paint and detailing! That's not much at all. haha
Oh yea, there's repairing the center section as well...


So.
The upper drag rudder holes were cut in the top wing skins. Then the wings were placed upside down in the sheeting jigs. Then I installed the front and rear bottom wing spars. The old drag rudders were then cut free from the remnants of the old wing panels, but where left attached to the wing spars. Tomorrow I will cut them free from the wing spars and prep the pieces for installation to the new wing panels (and possibly install them). The drag rudder and elevon servo's and mounting plates were also removed from the old wing panels.
All shear webbing has been installed. The Inboard flap LE and wing TE pieces installed. The wing tube socket holes enlarged and prepped for wing tube installation. The TE wing building tabs removed and sanded to the airfoil shape.
Overall, it was a very productive night. things left to do.. Install LOTS of hinge blocks. Install servo mounts. Install and hook-up drag rudders. Make up the wing tube socket ply doublers and install the wing tube sockets. Make up and install the servo conduit tubes. Sheet the wings, Install and shape the LE and wingtip block. Cut the flaps and elevons free and Cap their LE's. Install the hinge extensions.. Glass everything, and then off to paint and detailing! That's not much at all. haha
Oh yea, there's repairing the center section as well...
03-12-2013, 10:08 PM
#405
Senior Member

Join Date: Jul 2012
Location: , CA
Posts: 433
Likes: 0
Received 0 Likes
on
0 Posts
Real bummer,to see,the pieces. Sorry. I must say your camo was FANTASTIC. hope you get it or a version of it flying. Would love to see some flight video.
Cheers
Bubba
03-13-2013, 02:12 PM
#406
Drag rudders were cut free from the old wing spars, cleaned up and installed into the new wing panels. They are tack glued for now. Once the lil one goes to bed, ill epoxy the drag rudders in permanently and get to work on the rest of the stuff left.


03-13-2013, 08:13 PM
#407
Tonights progress..
Drag rudder mechanism permanently installed. (see pictures in previous post, its just epoxied in place now).
ALL of the Hinge blocking is done! I think this process alone took about 4 days the first time i did them. Its amazing how quickly it goes once you know what your doing. lol


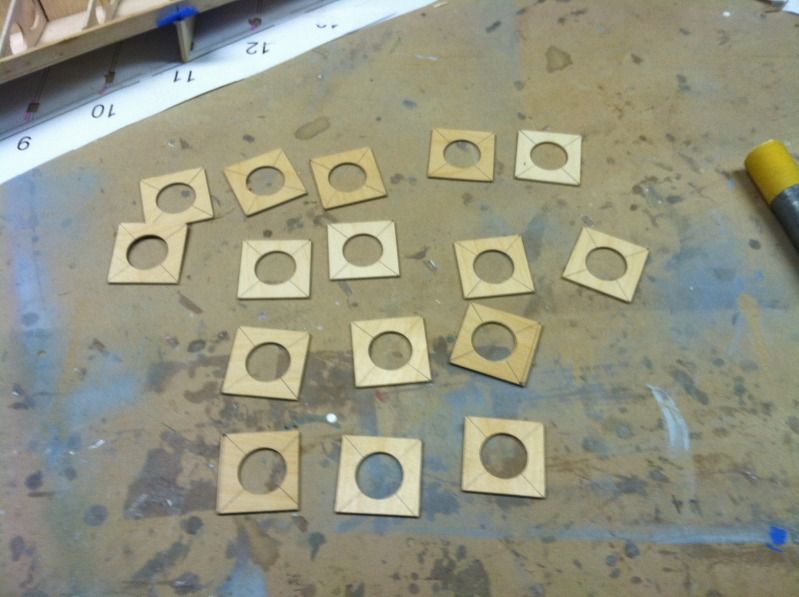
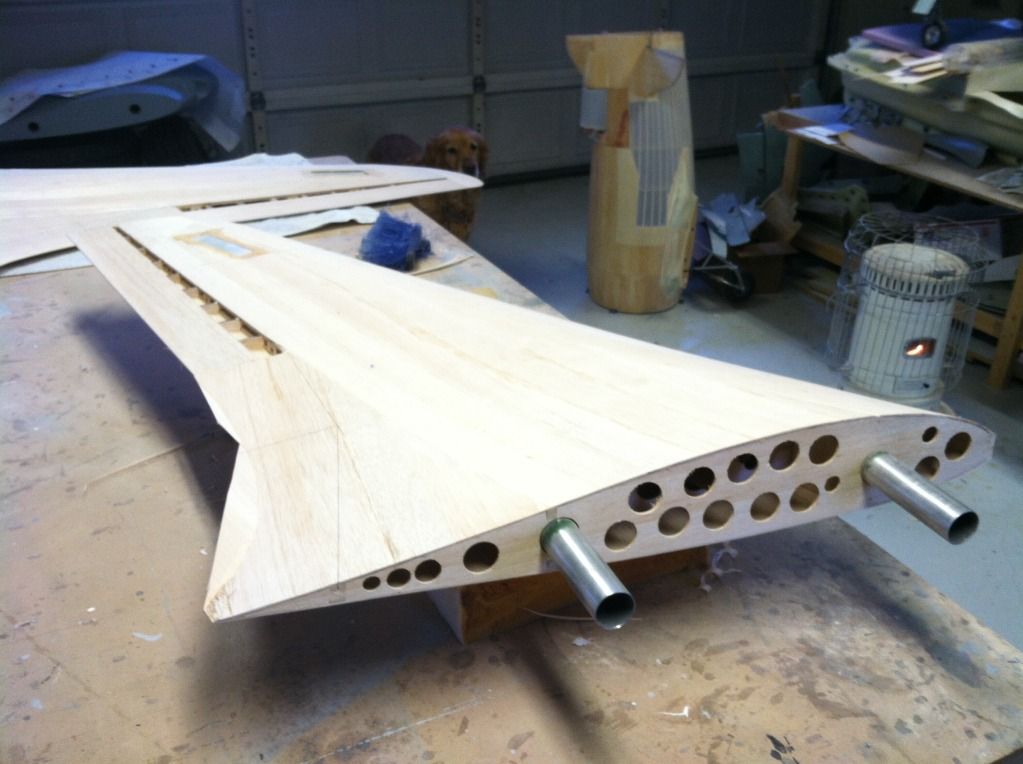
All of the wing tube socket ply doublers have been cut out and the holes for the sockets to fit, as the holes are only 1 1/2" right now, which is a perfect fit for the wing tube.
At this pace, I can have the wings completed and ready to glass by monday. The problem is, I am still waiting on my wing tube sockets and wood order to ship (hopefully they ship tomorrow), but i don't expect my luck to be that good.
So tomorrow, the plan is to install the servo mounts, servo extension conduits, sand the hinge blocks down to the correct shape and height with all the wing ribs. If there is time left, i'll start cutting the wing tip parts out. I'm also going to use the old wingtips to pull some clear wingtip lenses for the nav lights.
At this point, my wings are nearly at the same completion point as my buddy Tom's..
Drag rudder mechanism permanently installed. (see pictures in previous post, its just epoxied in place now).
ALL of the Hinge blocking is done! I think this process alone took about 4 days the first time i did them. Its amazing how quickly it goes once you know what your doing. lol
All of the wing tube socket ply doublers have been cut out and the holes for the sockets to fit, as the holes are only 1 1/2" right now, which is a perfect fit for the wing tube.
At this pace, I can have the wings completed and ready to glass by monday. The problem is, I am still waiting on my wing tube sockets and wood order to ship (hopefully they ship tomorrow), but i don't expect my luck to be that good.
So tomorrow, the plan is to install the servo mounts, servo extension conduits, sand the hinge blocks down to the correct shape and height with all the wing ribs. If there is time left, i'll start cutting the wing tip parts out. I'm also going to use the old wingtips to pull some clear wingtip lenses for the nav lights.
At this point, my wings are nearly at the same completion point as my buddy Tom's..
03-14-2013, 12:48 PM
#408
Our local club photographer sent some smaller samples of the Horton's previous flight... soooo here ya go's!

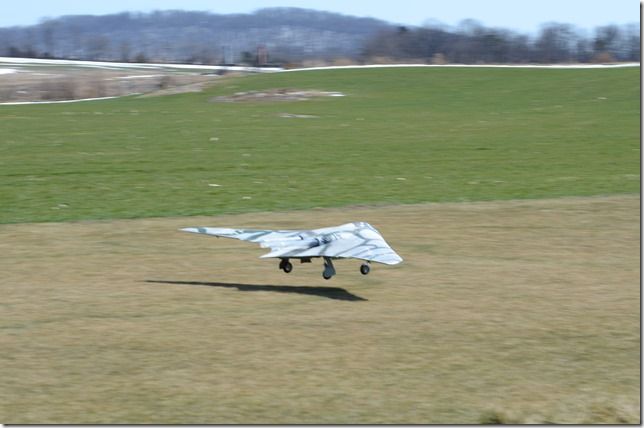

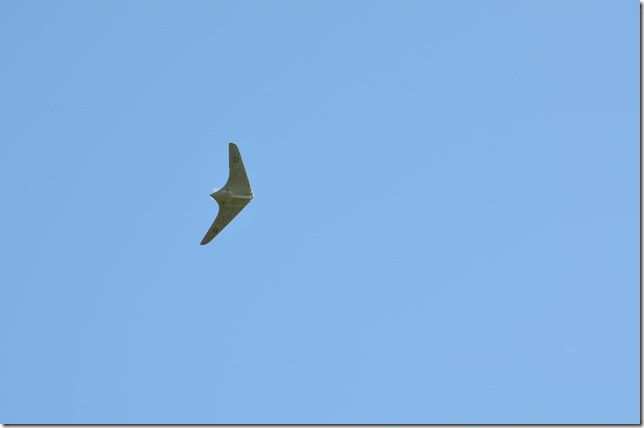
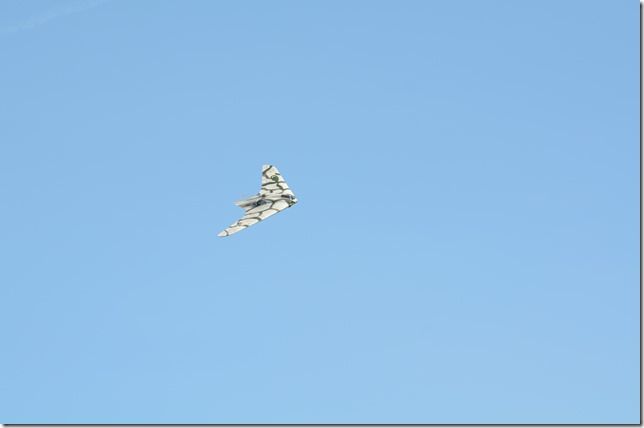

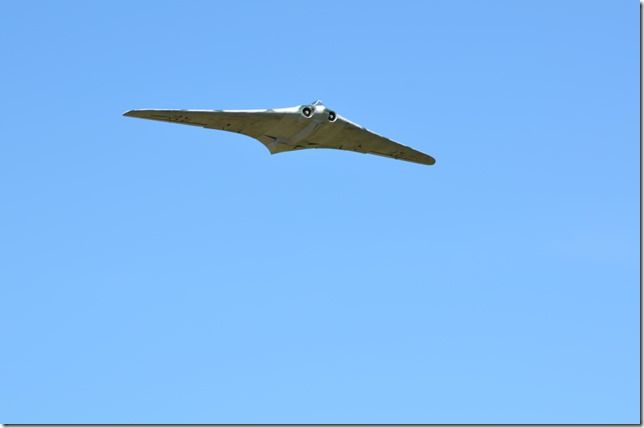
In this photo you have to look VERY hard for the Horton, as this is the last time it was seen in one piece:

The pile of pieces:

In this photo you have to look VERY hard for the Horton, as this is the last time it was seen in one piece:
The pile of pieces:
03-14-2013, 08:16 PM
#409
Day 6's progress..
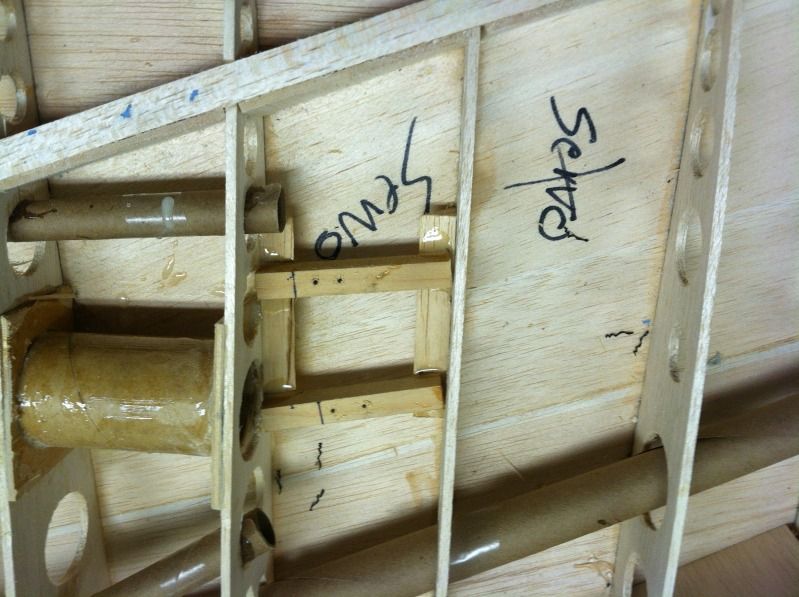
Elevon and drag rudder servo mount plate is installed in both wing panels. The drag rudders are getting an upgraded linkage using ball-links instead of my music wire Z-bend setup in the previous wings. The previous setup had a good bit of slop in its linkages which made for some less than accurate drag rudder extension, the ball link setup should fix that problem and make it easier to maintain as well.
All servo extension conduits are installed.
inboard flap servo's and mounts installed
All hinge and control arm blocking has been cut down and sanded to the correct height and shape as the surrounding wing structure.
The trailing edge has been sanded down to follow the taper of the bottom of the wing ribs. Right now I am debating on adding a piece of 1/64" ply along the TE between the wing sheetings to help prevent hangar rash. I really prefer to, but at the same time, any additional weight behind the CG has a very significant effect.
For instance, it takes 1oz of weight 17" infront of the CG point to move the CG forward 1/2" forward. The very tip of the wings are about 17-19" aft of the CG, so one extra ounce there will require an ounce 17-19" infront of the CG.. and to add to that, the center section repairs will probably add 1 to 3oz of weight 25-30" aft of the CG. So i am apprehensive about adding more weight behind the CG..
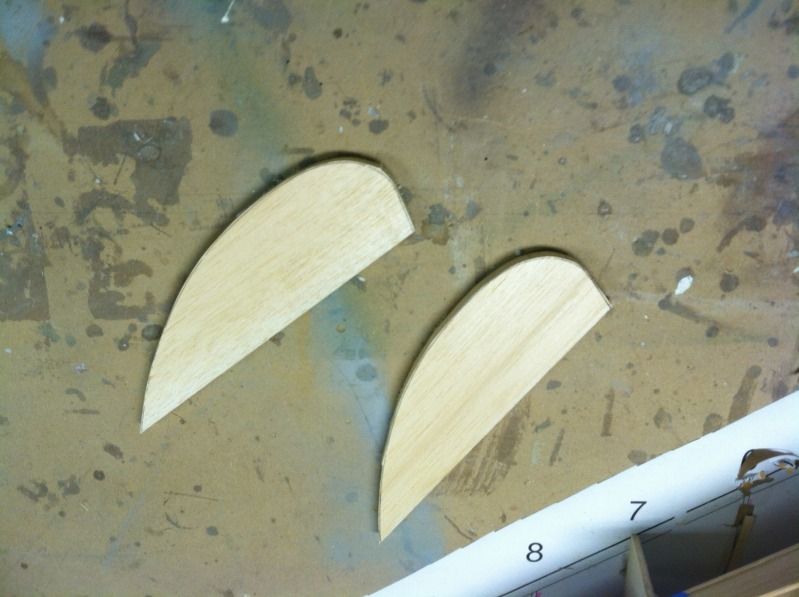
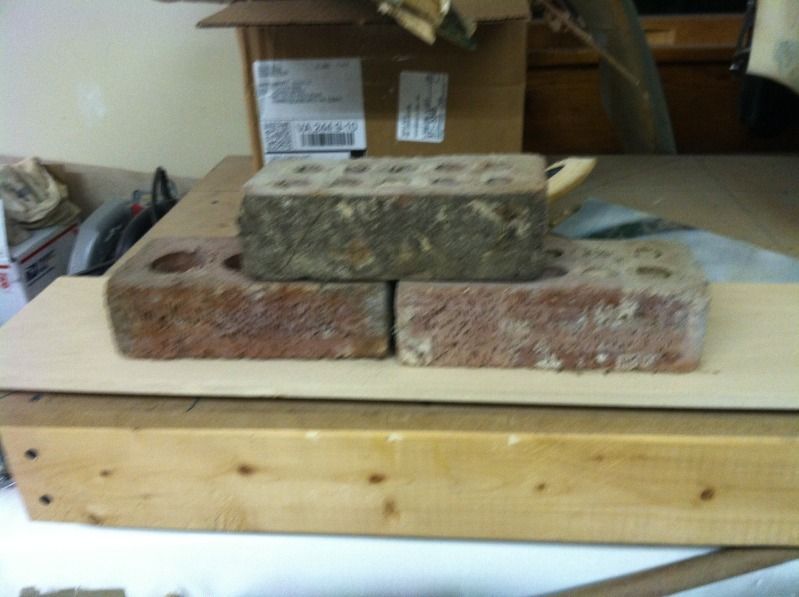
The elevon hinge holes have been routed in the elevon hing blocks and the 7/32" brass tube hinge extension tubes have had their holes drilled in the wing side elevon hinge blocks. I also cut out the 1/64" ply wing tip core and the 1/2" balsa wingtip blanks. One of each of these balsa blanks was glued to one of the ply cores and weighted down to dry. tomorrow i'll sand the balsa blank to the same profile shape as the core and then glue the laminate to the other balsa blank.
Other than installing the wing tubes and shaping the LE of the ribs to the correct profile, the wing is now ready to be sheeted. Unfortunately, I am still waiting on my wing tube sockets and my wood order from National Balsa to arrive..


Tomorrow is family night, so the only thing I really plan to do is get the wing tip laminates completed. Saturday I will (hopefully) install the wing tubes if the sockets arrive, setup the new drag rudder linkage's and do the layups for the center section repairs.
Sunday I will probably be going over to Tom's to help him install his wing tubes, then depending on when I get back from that, I'll try and finish up the center section repairs.
Elevon and drag rudder servo mount plate is installed in both wing panels. The drag rudders are getting an upgraded linkage using ball-links instead of my music wire Z-bend setup in the previous wings. The previous setup had a good bit of slop in its linkages which made for some less than accurate drag rudder extension, the ball link setup should fix that problem and make it easier to maintain as well.
All servo extension conduits are installed.
inboard flap servo's and mounts installed
All hinge and control arm blocking has been cut down and sanded to the correct height and shape as the surrounding wing structure.
The trailing edge has been sanded down to follow the taper of the bottom of the wing ribs. Right now I am debating on adding a piece of 1/64" ply along the TE between the wing sheetings to help prevent hangar rash. I really prefer to, but at the same time, any additional weight behind the CG has a very significant effect.
For instance, it takes 1oz of weight 17" infront of the CG point to move the CG forward 1/2" forward. The very tip of the wings are about 17-19" aft of the CG, so one extra ounce there will require an ounce 17-19" infront of the CG.. and to add to that, the center section repairs will probably add 1 to 3oz of weight 25-30" aft of the CG. So i am apprehensive about adding more weight behind the CG..
The elevon hinge holes have been routed in the elevon hing blocks and the 7/32" brass tube hinge extension tubes have had their holes drilled in the wing side elevon hinge blocks. I also cut out the 1/64" ply wing tip core and the 1/2" balsa wingtip blanks. One of each of these balsa blanks was glued to one of the ply cores and weighted down to dry. tomorrow i'll sand the balsa blank to the same profile shape as the core and then glue the laminate to the other balsa blank.
Other than installing the wing tubes and shaping the LE of the ribs to the correct profile, the wing is now ready to be sheeted. Unfortunately, I am still waiting on my wing tube sockets and my wood order from National Balsa to arrive..
Tomorrow is family night, so the only thing I really plan to do is get the wing tip laminates completed. Saturday I will (hopefully) install the wing tubes if the sockets arrive, setup the new drag rudder linkage's and do the layups for the center section repairs.
Sunday I will probably be going over to Tom's to help him install his wing tubes, then depending on when I get back from that, I'll try and finish up the center section repairs.
03-16-2013, 02:45 PM
#410
This mornings progress before my wife drug me out of the shop to go do (of all things).... grocery shopping...
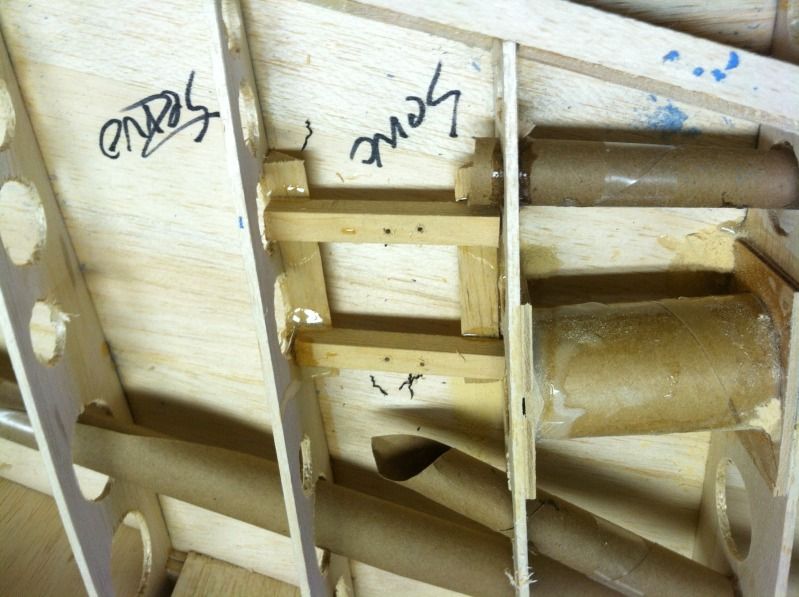
I removed the nose gear door and 2nd fan unit from the center section and then started fitting the wing tube sockets. About an hour or 2 later, I had the first wing tube socket epoxied at both ends.

And hour later, the other wing panel was done. I then went around and epoxied in place all of the socket doublers into place and installed the balsa blocks that connects the wing tube sockets to the lower wing sheeting.

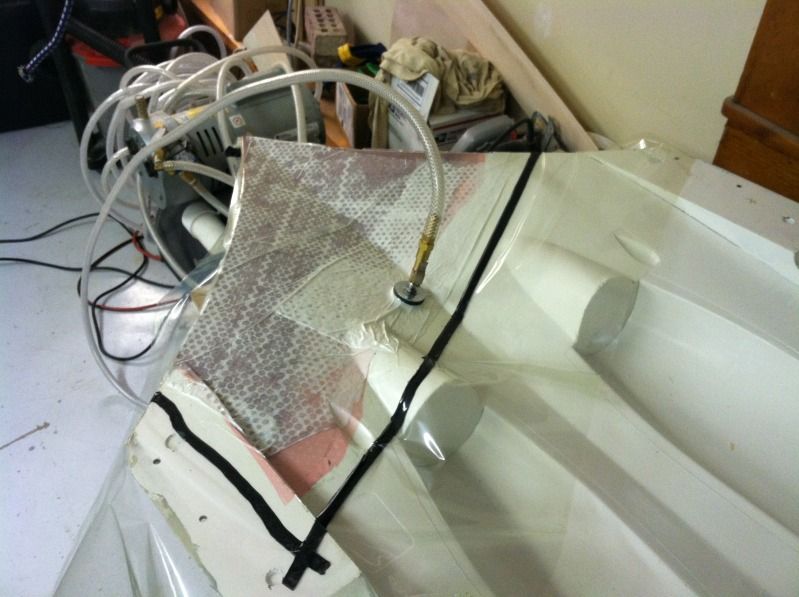
I also pulled the center section mold out of storage and applied the mold release, which took all of 5 minutes.. (I LOVE Frekote!). Then I applied the primer in the area that is going to get a new layup to repair the Bat tail portion of the center section:


Later tonight I am going to do the layup and vacuum bag the new tail section. Tomorrow morning I will get up early and pull the bag off and join the two halves. Then Hopefully by tomorrow afternoon or early evening I can start frankenstein'ing the new Bat tail onto the center section.
I removed the nose gear door and 2nd fan unit from the center section and then started fitting the wing tube sockets. About an hour or 2 later, I had the first wing tube socket epoxied at both ends.
And hour later, the other wing panel was done. I then went around and epoxied in place all of the socket doublers into place and installed the balsa blocks that connects the wing tube sockets to the lower wing sheeting.
I also pulled the center section mold out of storage and applied the mold release, which took all of 5 minutes.. (I LOVE Frekote!). Then I applied the primer in the area that is going to get a new layup to repair the Bat tail portion of the center section:
Later tonight I am going to do the layup and vacuum bag the new tail section. Tomorrow morning I will get up early and pull the bag off and join the two halves. Then Hopefully by tomorrow afternoon or early evening I can start frankenstein'ing the new Bat tail onto the center section.
03-16-2013, 08:11 PM
#413
Last bit of progress for the night.
Wing tube socket installation is 99% complete. I still have 2 pairs of sheer webs to put between the tube sockets and the lower wing sheeting And the wing tube bolt hardpoints. Otherwise, all that is left to do to the wings is the drag rudder linkages and outer flap servo mounts. These tasks will be the secondary goals to complete tomorrow.

The new Bat tail was laid up as well. The primary goal tomorrow is to get the bat tail halves joined and start and complete the repairs to the center section. The majority of these repairs involve the gear doors. Luckily, templates are all made up, so it will be fairly quick and easy to replace the damage parts.

Wing tube socket installation is 99% complete. I still have 2 pairs of sheer webs to put between the tube sockets and the lower wing sheeting And the wing tube bolt hardpoints. Otherwise, all that is left to do to the wings is the drag rudder linkages and outer flap servo mounts. These tasks will be the secondary goals to complete tomorrow.
The new Bat tail was laid up as well. The primary goal tomorrow is to get the bat tail halves joined and start and complete the repairs to the center section. The majority of these repairs involve the gear doors. Luckily, templates are all made up, so it will be fairly quick and easy to replace the damage parts.
03-17-2013, 03:26 AM
#414

Join Date: Jun 2011
Location: Virginia Beach, VA
Posts: 39
Likes: 0
Received 0 Likes
on
0 Posts
Thomas
This is really a work of art... You can really give those German kit builders a run for there money...
You really make this look so easy. But I bet it takes a lot of time and thinking to make it look simple by the pics
This is really a work of art... You can really give those German kit builders a run for there money...
You really make this look so easy. But I bet it takes a lot of time and thinking to make it look simple by the pics
 03-17-2013, 09:42 AM
#417
Join Date: Jun 2011
Location: Virginia Beach, VA
Posts: 39
Likes: 0
Received 0 Likes
on
0 Posts
ORIGINAL: invertmast
Maybe this winter ill be motivated to build the Do335. The more i think about it, the less likely i am to mold its fuselage though unless someone helps fund that in exchange for a fuse.
Maybe this winter ill be motivated to build the Do335. The more i think about it, the less likely i am to mold its fuselage though unless someone helps fund that in exchange for a fuse.
03-17-2013, 02:30 PM
#418
ORIGINAL: 1BadF14
Thats a great plane and I can just imageine how much that would cost... 10k wow the cost of a car and my wife would leave me dead broke she would take the house, my car, my clothes and leave me just 50.00 a month to live on ummm how to tell her is an investment any ideas Thomas.....lol
ORIGINAL: invertmast
Maybe this winter ill be motivated to build the Do335. The more i think about it, the less likely i am to mold its fuselage though unless someone helps fund that in exchange for a fuse.
Maybe this winter ill be motivated to build the Do335. The more i think about it, the less likely i am to mold its fuselage though unless someone helps fund that in exchange for a fuse.
Who said anything about $10k?
03-17-2013, 03:10 PM
#419
I decided to be lazy today and sleep in, so i didnt get as much done as i had hoped.
The mold halves were closed up and awaiting the trailing edge goop to cure.

The damaged main gear tire door was repaired. The halves were glued together with ca, then a piece of glass was attached to the inside and outside to join them back together.

The inner main gear door structure was damaged as well.. Again. So this time the 1/8" liteply piece was replaced with 1/8" aircraft ply that was laminated with carbon fibre on both sides (it wont break again!). Then it was installed and the inner doors rehinged and installed.

The drag rudder servos were mounted and the linkages made up.


The outboard flap servo mounts were also installed. I never liked having these servos exposed on the last wings, so this time they will lay on their sides like the inboard flap and elevon servos.
The flitemetal was also removed from the exhaust path on the damaged side of the bat tail. Once the new layup halves cure, i can start the transplant.

The hardpoints for the wing tube holder bolts were also installed. The wings are now completely ready to be sheeted!
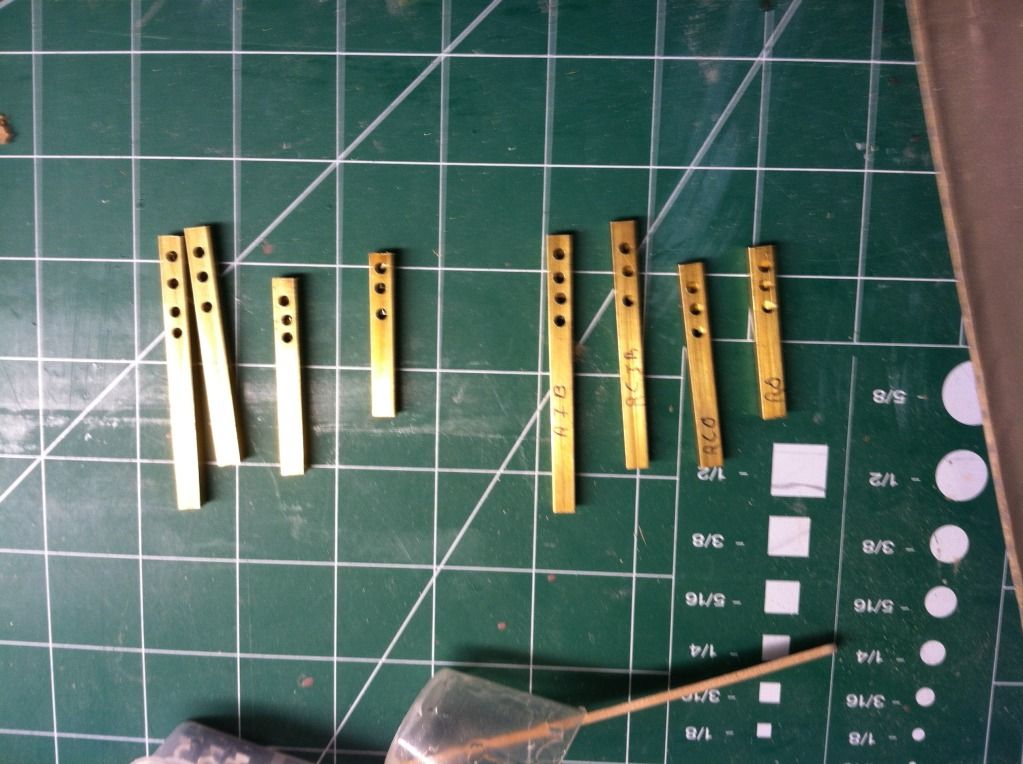
Im done for the evening, but tomorrow i am going to cut the square brass hinge tube hinge extensions to length, repair one of the wing harness' and install the plastic straws for the nav light wires. Ill probably remove the new bat tail from the mold as well.
The mold halves were closed up and awaiting the trailing edge goop to cure.
The damaged main gear tire door was repaired. The halves were glued together with ca, then a piece of glass was attached to the inside and outside to join them back together.
The inner main gear door structure was damaged as well.. Again. So this time the 1/8" liteply piece was replaced with 1/8" aircraft ply that was laminated with carbon fibre on both sides (it wont break again!). Then it was installed and the inner doors rehinged and installed.
The drag rudder servos were mounted and the linkages made up.
The outboard flap servo mounts were also installed. I never liked having these servos exposed on the last wings, so this time they will lay on their sides like the inboard flap and elevon servos.
The flitemetal was also removed from the exhaust path on the damaged side of the bat tail. Once the new layup halves cure, i can start the transplant.
The hardpoints for the wing tube holder bolts were also installed. The wings are now completely ready to be sheeted!
Im done for the evening, but tomorrow i am going to cut the square brass hinge tube hinge extensions to length, repair one of the wing harness' and install the plastic straws for the nav light wires. Ill probably remove the new bat tail from the mold as well.
03-18-2013, 06:16 PM
#420
I'm to exhausted today to do much, so i spent 20-30 minutes doing this...
Popped the new bat tail out of the mold:
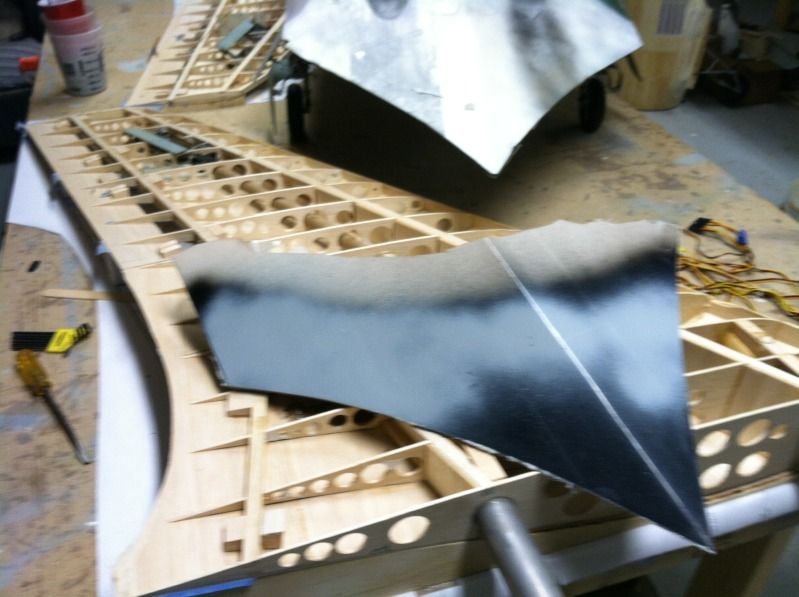

Then cut off the damaged portion of the original bat tail and trimmed the new one to fit with about a 1" overlap all around.. I'll mark the overlaping area tomorrow and sand off the paint. Since this isn't really a structural part, to attach it will involve some medium or thin CA along the overlapped portion, and then the root rib sections will be epoxied in place with some thickened epoxy. So by Wed. i should be able to flight metal the exhaust area and paint the repaired area.


Popped the new bat tail out of the mold:
Then cut off the damaged portion of the original bat tail and trimmed the new one to fit with about a 1" overlap all around.. I'll mark the overlaping area tomorrow and sand off the paint. Since this isn't really a structural part, to attach it will involve some medium or thin CA along the overlapped portion, and then the root rib sections will be epoxied in place with some thickened epoxy. So by Wed. i should be able to flight metal the exhaust area and paint the repaired area.
03-19-2013, 02:53 AM
#422
The new piece overlaps on top of the old piece. The ends are cutcto key together due to how the damage was on the bottom skin (ill get a picture later). The new skin is roughly .010" thick, so it will be sanded to a slight taper to make it paper thin on its LE, and the original will ne sanded to a taper as well in the opposite direction. If done correctly, body fillershould be minimal and any added weiggt from the repair should be very low.
03-19-2013, 05:36 PM
#424
A little bit of work done today.. i'm getting annoyed with my wood order still not being shipped since its been over a week since I placed the order.
Anyways,
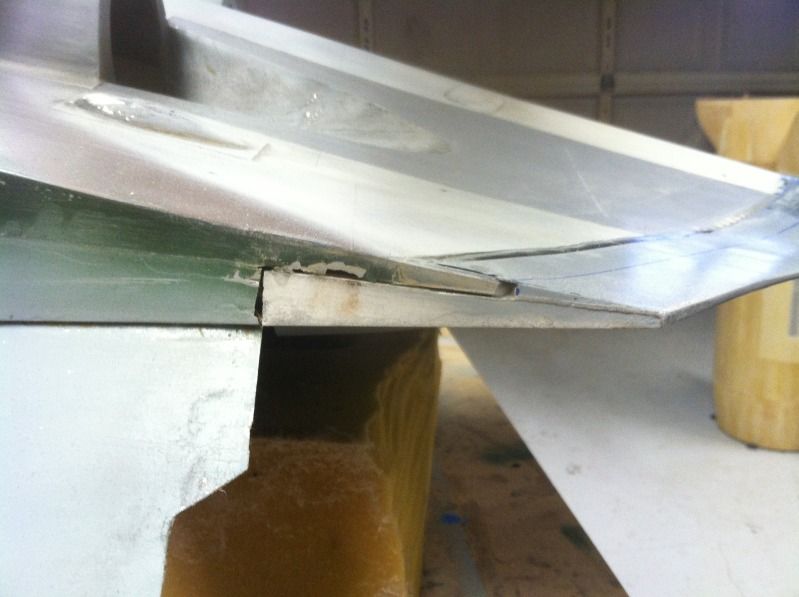
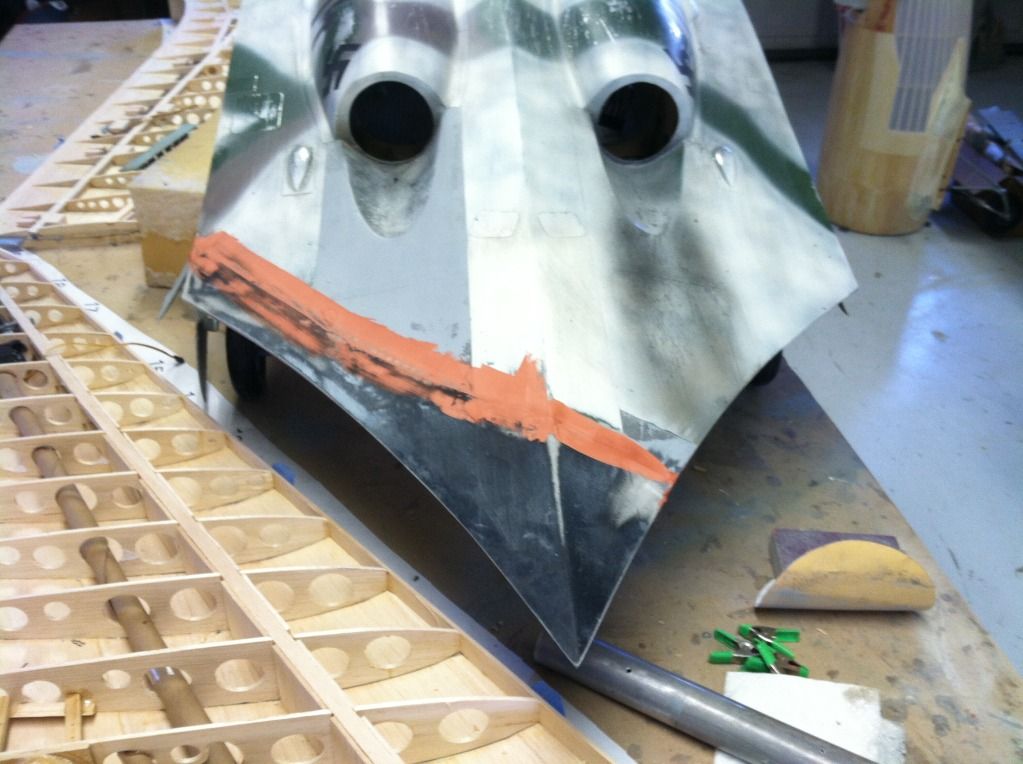
The new bat tail is installed by sanding off the paint from the center section where the new molding overlaps the old. Then the overlapping edge of the new molding is sanded down to a paper thin taper, so as little body filler as possible is needed.

Then thin CA is placed along the joint and allowed to wick between the two parts, securing the new bat tail molding to the center section. The following photo's show the overlapping joint. The center section is now ready for body work and the root rib to be epoxied in place.


Anyways,
The new bat tail is installed by sanding off the paint from the center section where the new molding overlaps the old. Then the overlapping edge of the new molding is sanded down to a paper thin taper, so as little body filler as possible is needed.
Then thin CA is placed along the joint and allowed to wick between the two parts, securing the new bat tail molding to the center section. The following photo's show the overlapping joint. The center section is now ready for body work and the root rib to be epoxied in place.
03-23-2013, 04:12 PM
#425
I cut out the elevon hinge extension tubes:
Then applied some glazing putty to blend in the mew bat tail to the center section:
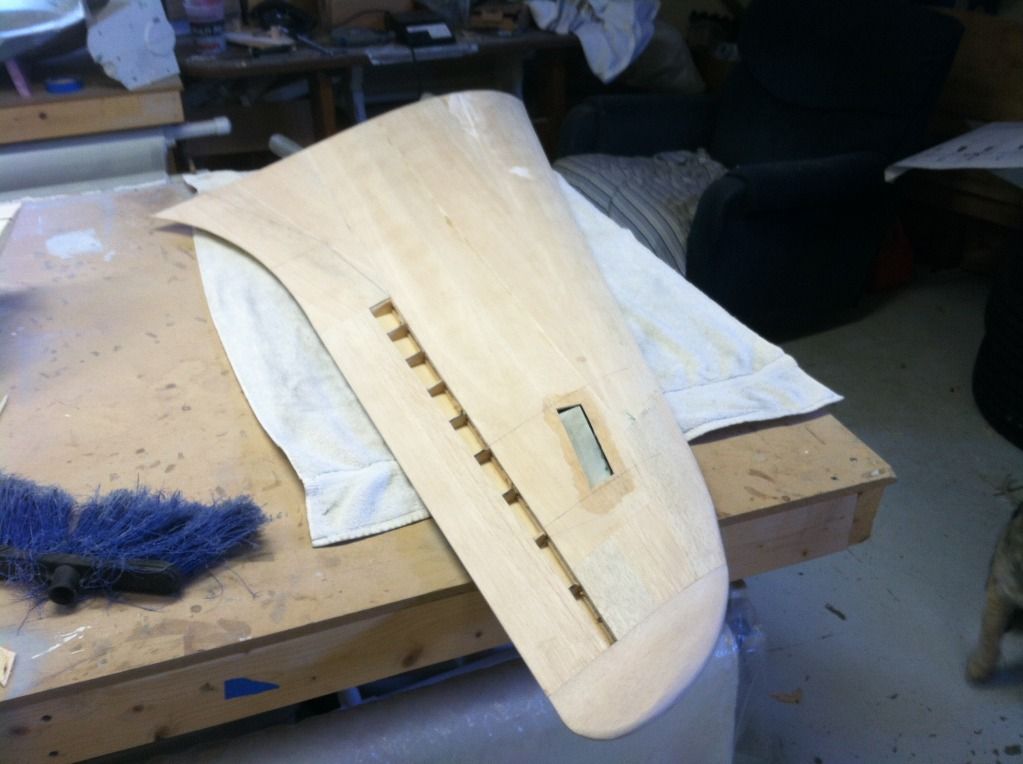
Then the bottom of the sings were sheeted:

Then they were removed from the sheetig jigs.
The right wing panel then had the sheeting sanded flush with the root and tip ribs. Then the 1/4" leading edge stock was installed and rough shaped. The wingtip was then installed and sanded to shape. And then the trailing edge was cut and sanded to the correct shape. Hatch locations for the servos were drawn on place as well. This wing is ready to have its leading edge shaped, elevons and flaps cut off and capped and the elevon hinge extensions installed. Hopefully this will all get done tomorrow as well as glassing the bottom surfaces.
The left wing panel is ready for everything that has been done to the right wing to be accomplished.
Then applied some glazing putty to blend in the mew bat tail to the center section:
Then the bottom of the sings were sheeted:
Then they were removed from the sheetig jigs.
The right wing panel then had the sheeting sanded flush with the root and tip ribs. Then the 1/4" leading edge stock was installed and rough shaped. The wingtip was then installed and sanded to shape. And then the trailing edge was cut and sanded to the correct shape. Hatch locations for the servos were drawn on place as well. This wing is ready to have its leading edge shaped, elevons and flaps cut off and capped and the elevon hinge extensions installed. Hopefully this will all get done tomorrow as well as glassing the bottom surfaces.
The left wing panel is ready for everything that has been done to the right wing to be accomplished.