


Great Planes Sequence 1.20 Build Thread
 05-01-2015 | 03:54 AM
#51
Senior Member
My Feedback: (1)
Joined: Mar 2010
Posts: 313
Likes: 0
Received 0 Likes
on
0 Posts
From: grand rapids, MI
Anyone else having an issue with the canopy? I don't think I have the blind nut issue that they included the "fix" for, but I cannot get it to seat properly. the white forward pins are good, and flush with the front bulkhead, and the forward two tabs line up nicely, but the rear seems as if it is catching or hitting something. This is my first model with a removable canopy, so I don't know if there is a common fix for this problem or if I'm just ignorant. I don't want to be too aggressive with the exacto or emory board yet.
 05-05-2015 | 03:25 PM
#52

Joined: Aug 2005
Posts: 9
Likes: 0
Received 0 Likes
on
0 Posts
From: , TX
Anyone else having an issue with the canopy? I don't think I have the blind nut issue that they included the "fix" for, but I cannot get it to seat properly. the white forward pins are good, and flush with the front bulkhead, and the forward two tabs line up nicely, but the rear seems as if it is catching or hitting something. This is my first model with a removable canopy, so I don't know if there is a common fix for this problem or if I'm just ignorant. I don't want to be too aggressive with the exacto or emory board yet.
Like you I did not need to do the fix on the addendum but when the canopy frame was secured to the fuselage the canopy looked terrible.
I removed all of the screws holding the canopy in place. The back of the canopy is glued in place at the factory. I then filled the holes from the screws with epoxy from the inside. With the canopy frame installed on the fuselage, I taped the canopy in place and drilled new holes for the screws. I then removed the tape and gently lifted the front of the canopy and applied Formula ‘560’ canopy glue with a small brush to inside of the canopy. I then screwed the canopy back in place on the now straight frame and used a little masking tape to hold things down while the glue dried.
It looks great.
X30
05-06-2015 | 06:03 AM
#53

Mine just came in yesterday, unpacked it this morning. So far everything looks good, nothing out of shape or broken. I also bought the metal motor mount for it and that's a very good looking unit. As soon as I get a couple of smaller projects finished I'll get this one going. It will be nice to have a pattern plane flying again and get back to a few contests. So far I'm giving this one high marks.
Rick H.
Rick H.
 06-02-2015 | 08:24 AM
#55

Sorry I've been gone from this project for so long.
Here's is my process for hooking up the pull-pull.
Gather the parts.

Determine how deep the swivel link is and then mark the threaded couplers for 1/2 of the depth.

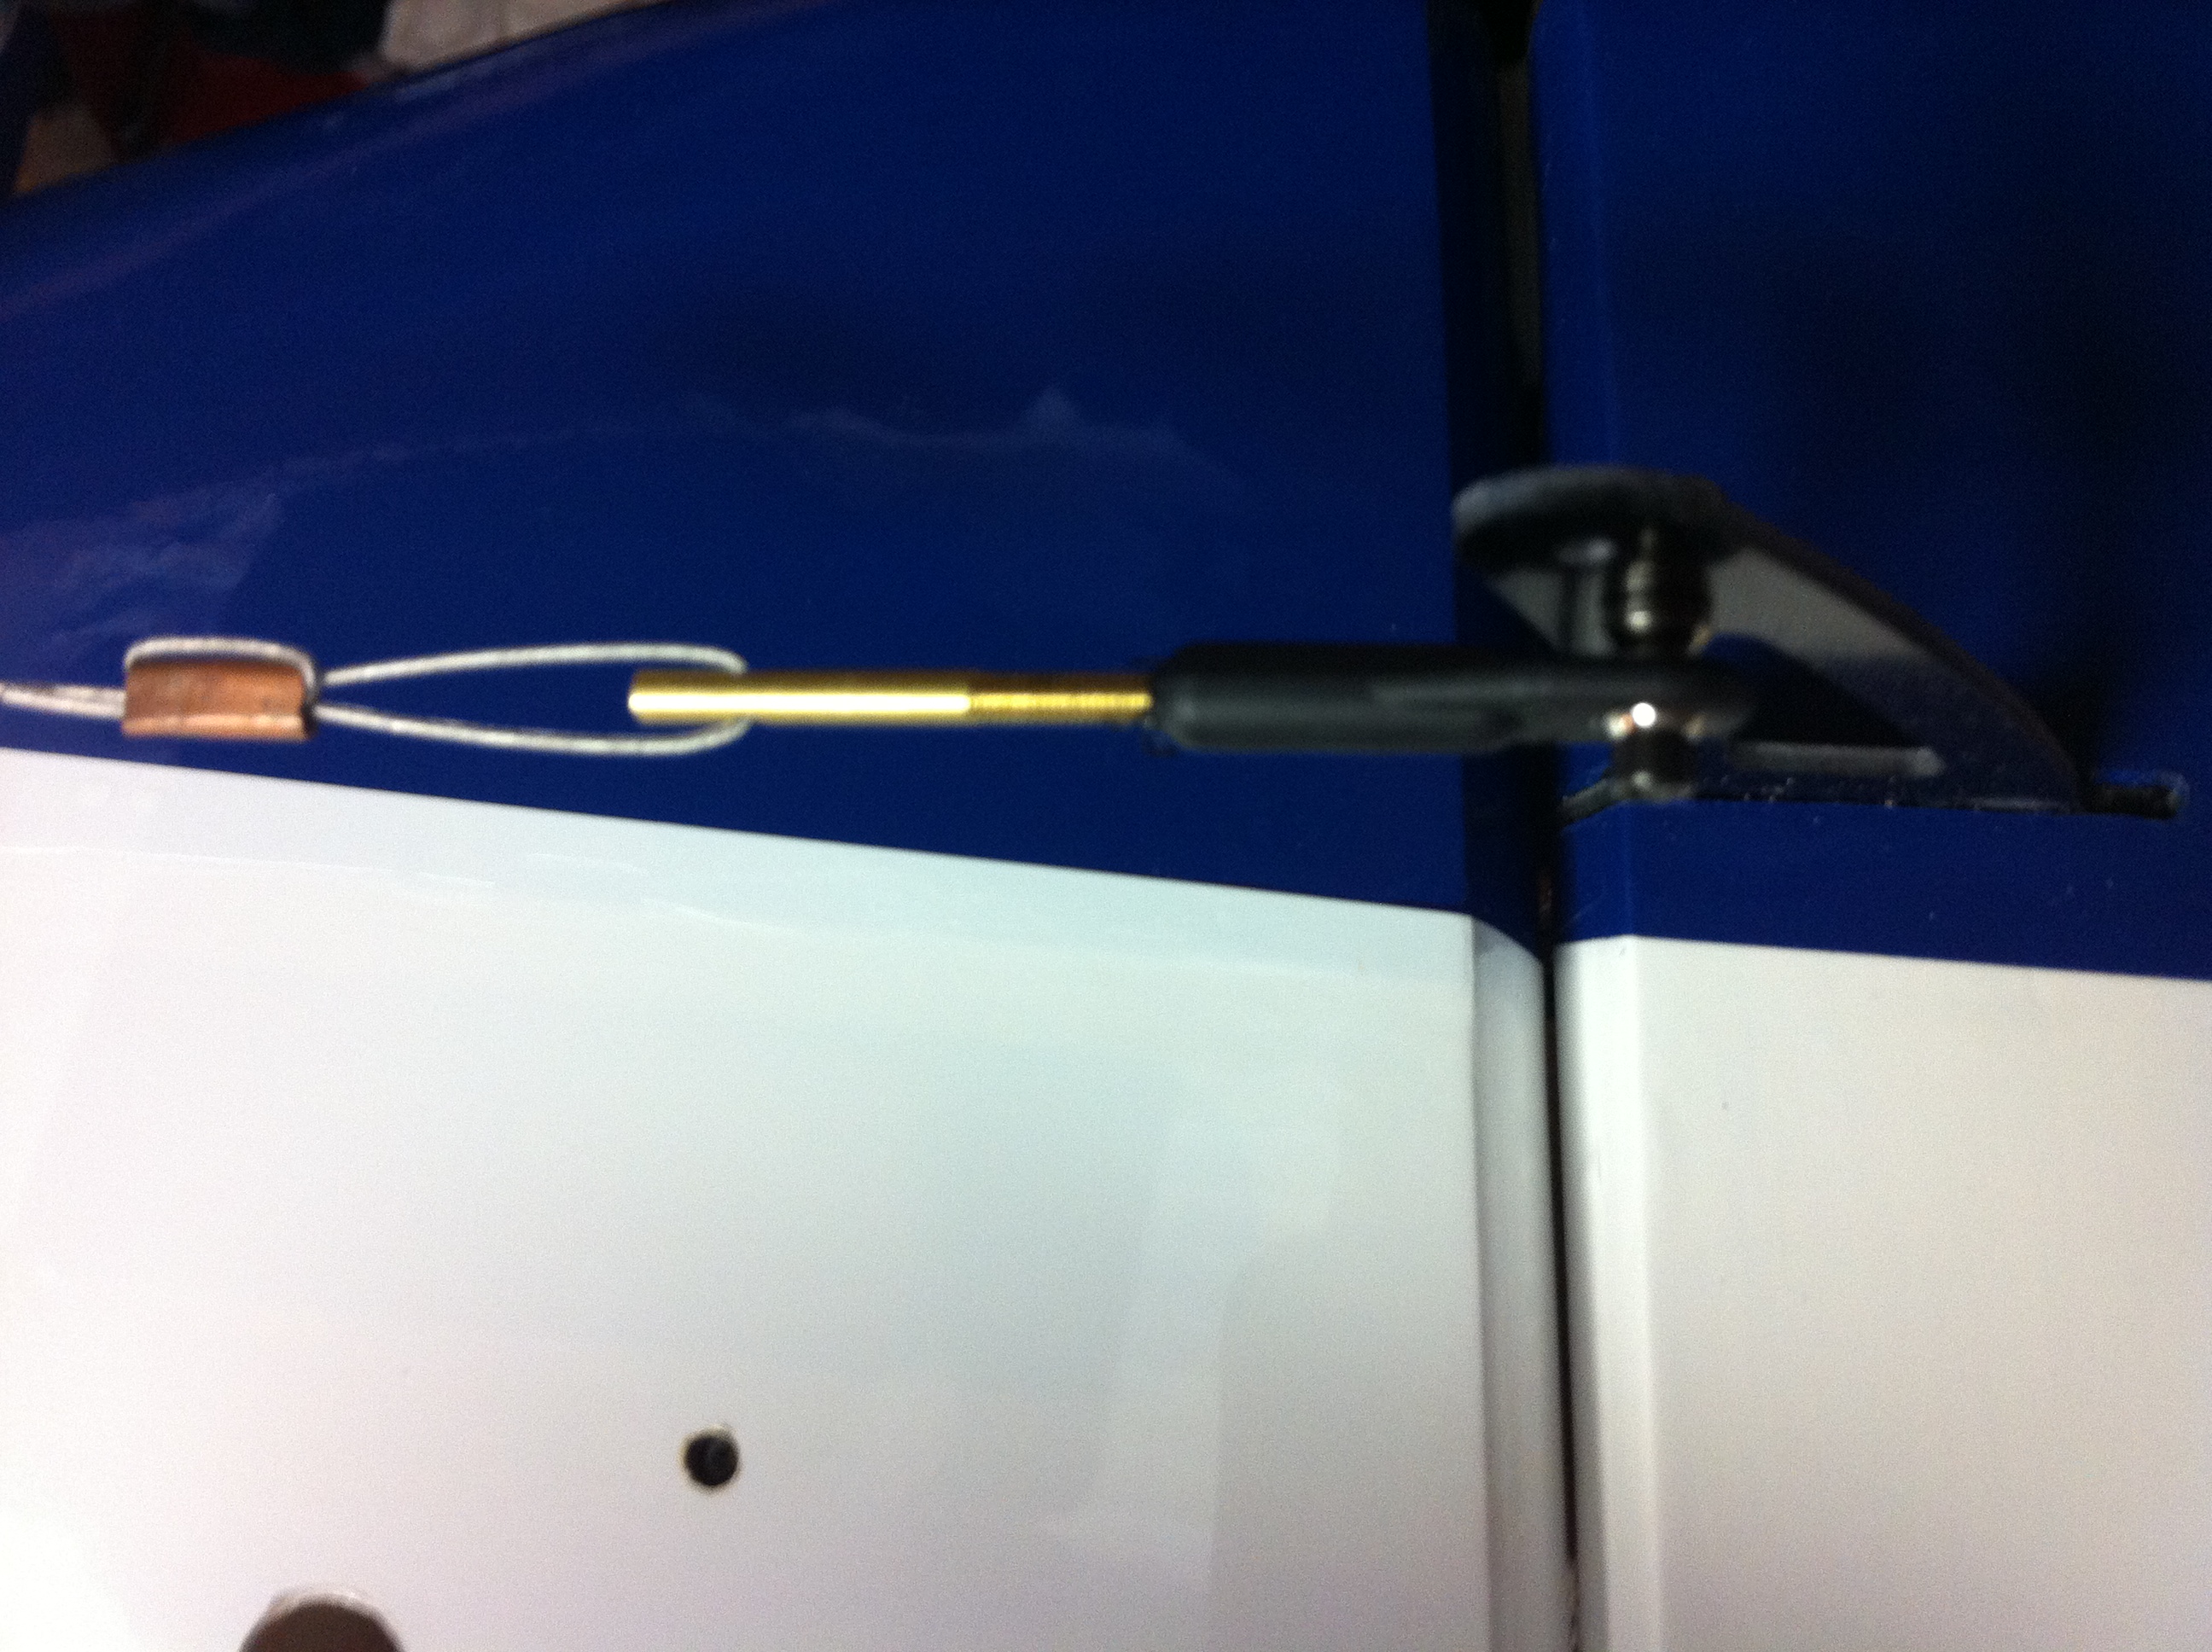
Install on to the swivel link and install swivel link on to the rudder horn (same on the servo arm if you choose to use them there).
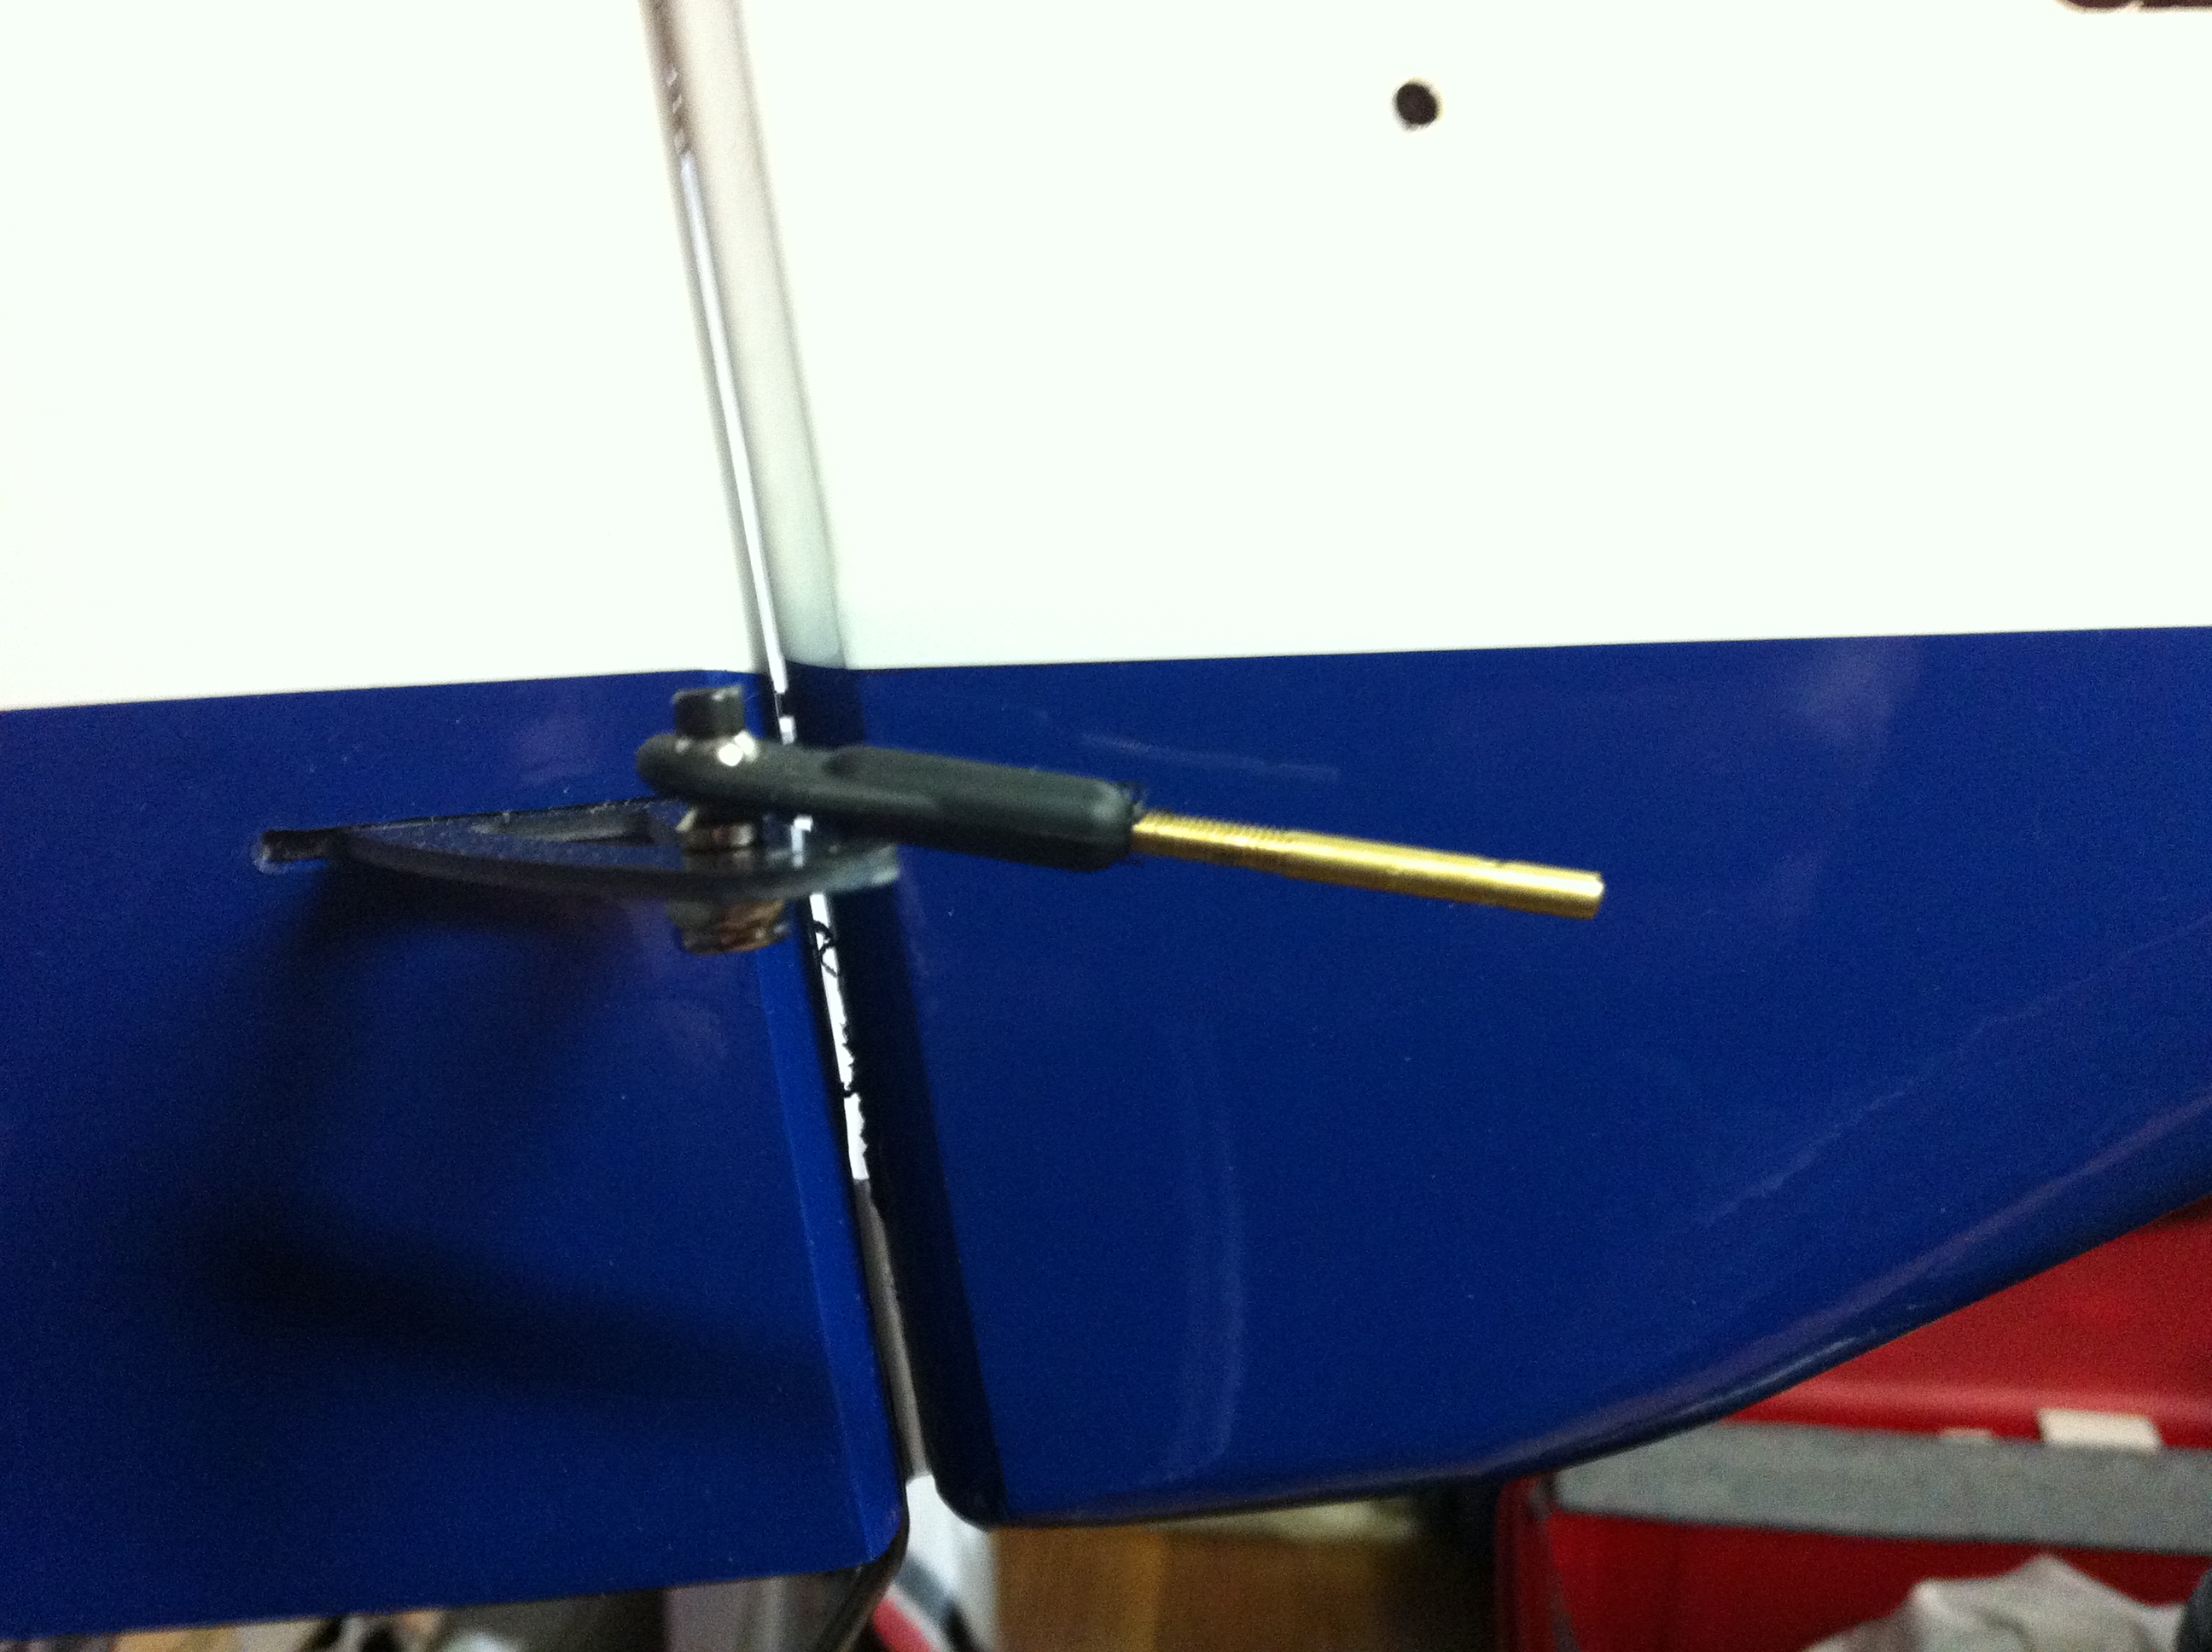
Run a cable up from the back of the fuse, making sure not to wrap it around formers, until you have it up front. I loop it through my servo arm as there is usually enough adjustment with just the rear couplers. Install the brass crimp on the cable. Once I have the correct length needed I pull the cable up through the servo arm hole (outer hole on the Du-Bro arm in this case) and fold it back through the brass crimp.

Then I bend the cable so the crimp can't slide back (about 1/2" to 1" behind the arm).

I loop the wire through the front of the crimp again and this essentially locks it in place.
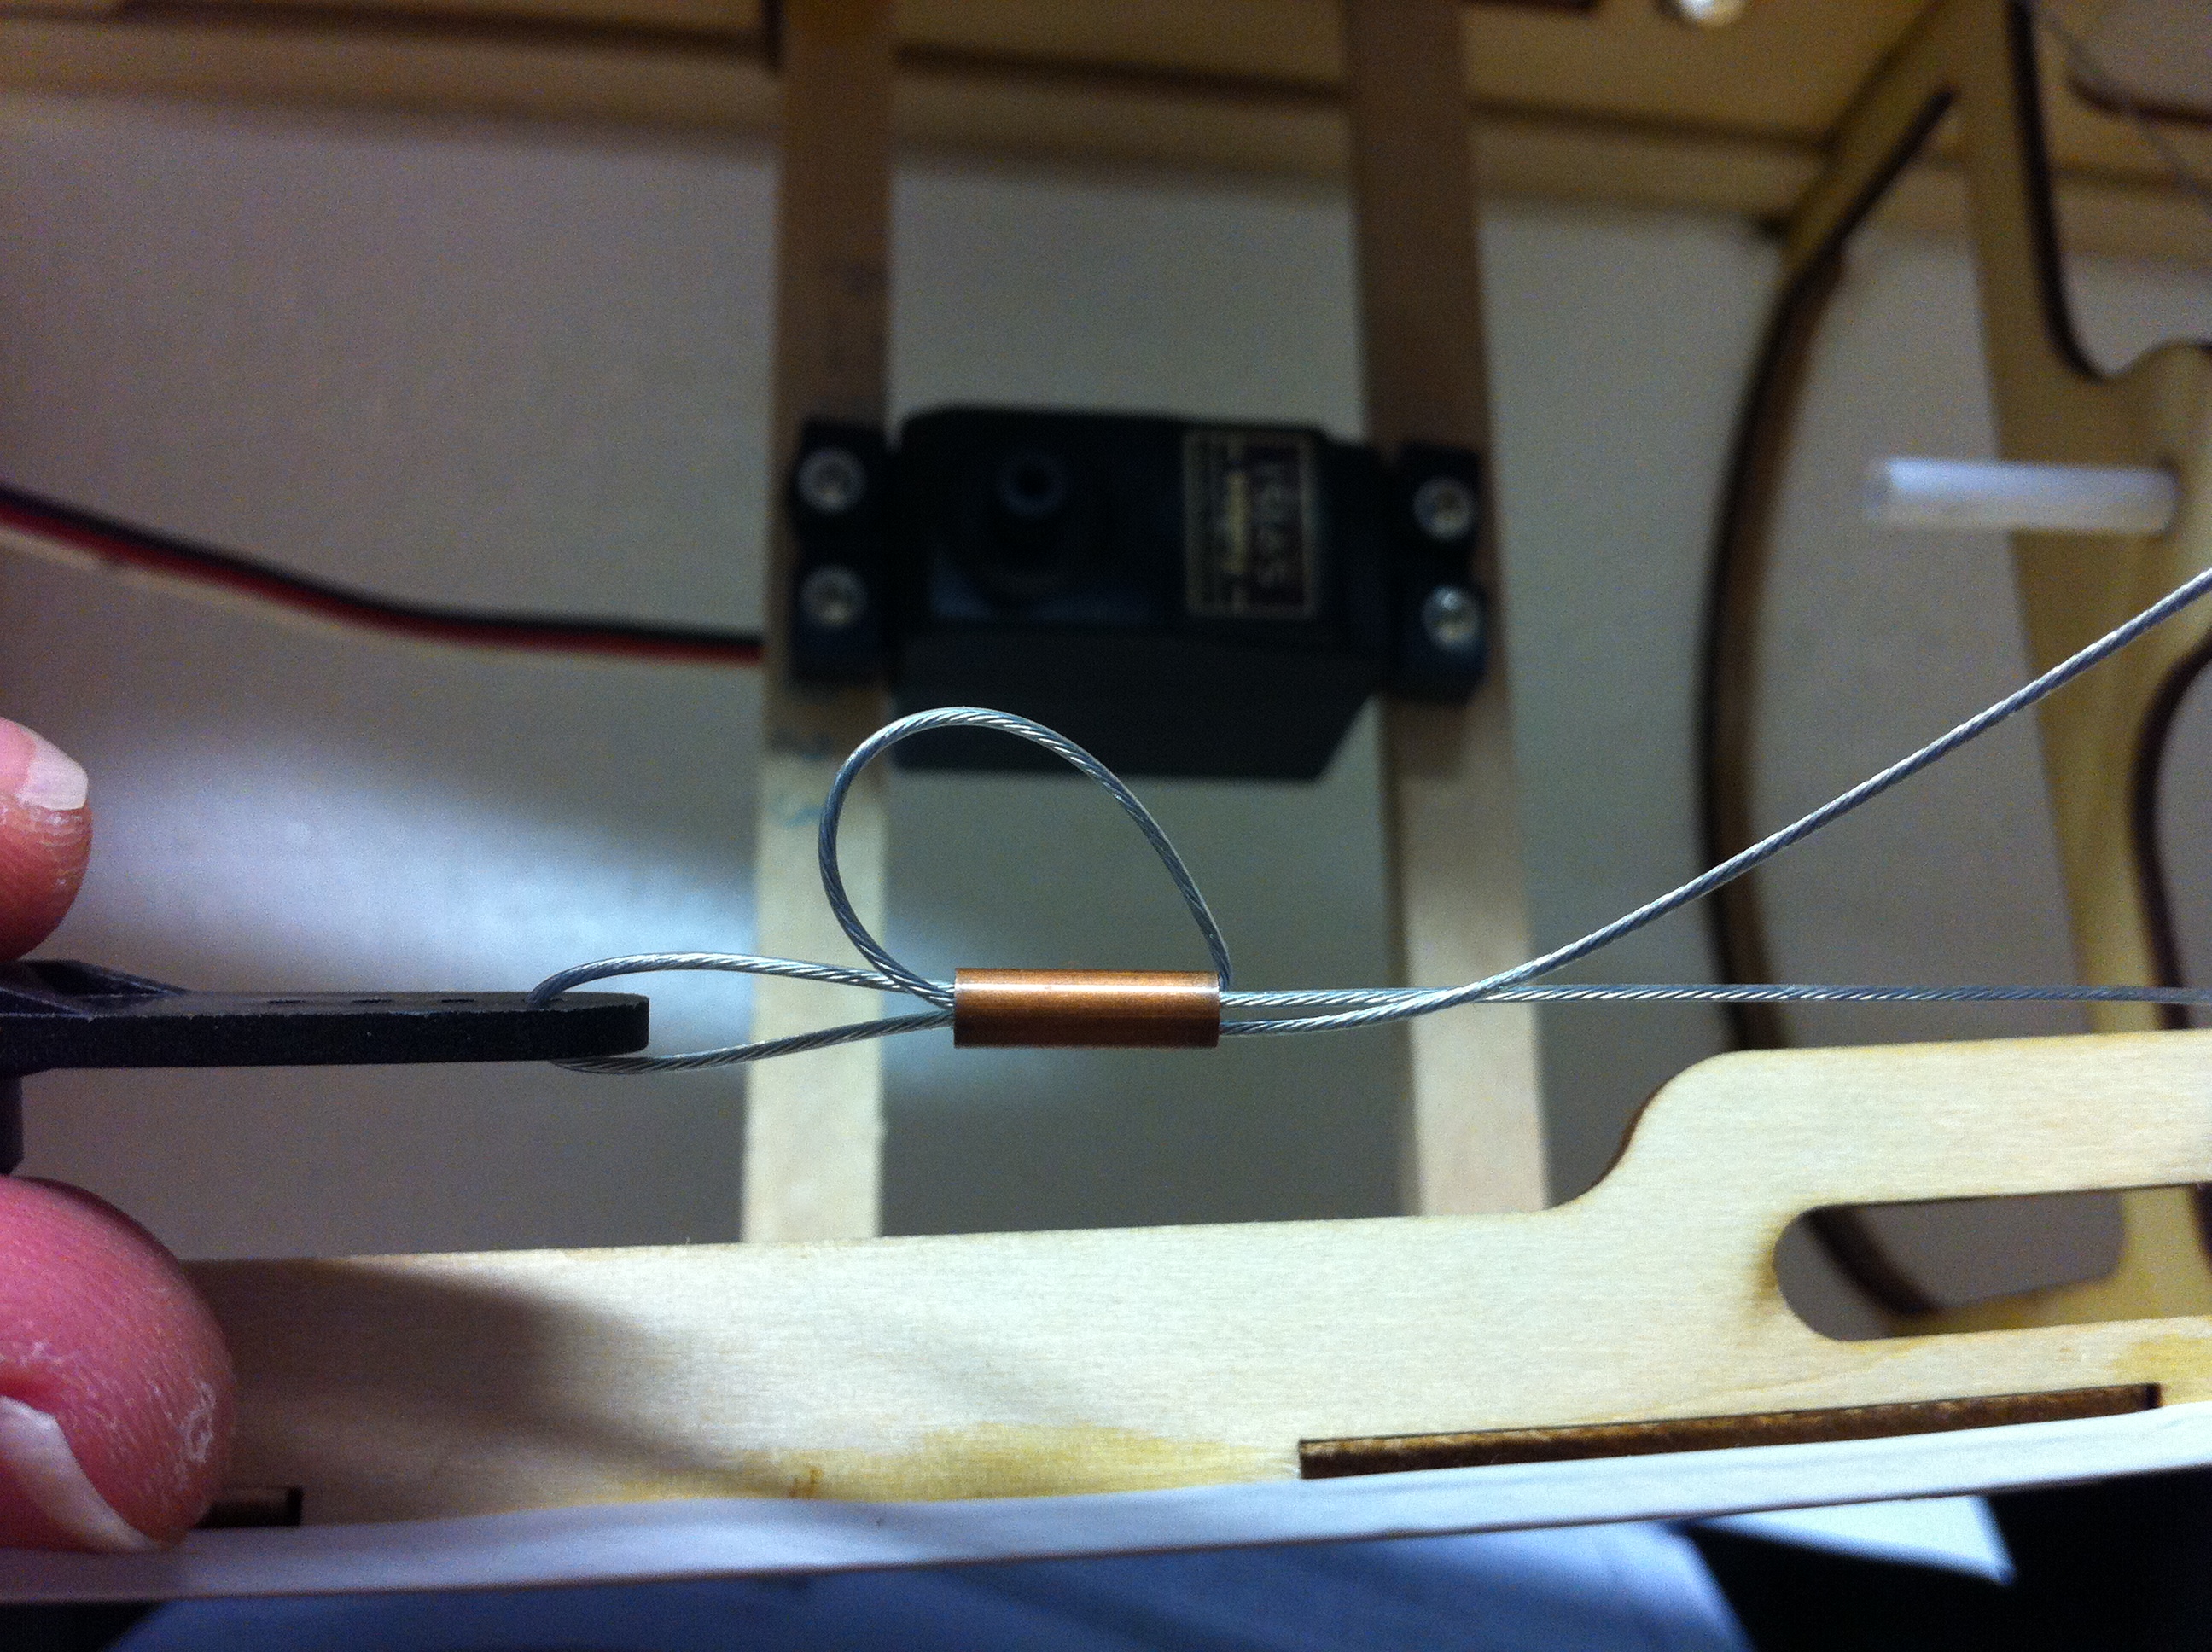
Pull the cable tight.

Once you are happy with it all, squeeze the crimp with pliers until the crimp is flat.

Repeat for the other cable.

Once you have the servo side completed, repeat for the rudder horn side. Just remember to double check to make sure you have it set at the right length, power it up (or leave it powered on), before crimping the rudder crimps.
With the horn modification (relocating the rudder horn holes) I do NOT get full rudder throw, even with the servo end-points bumped up to 140%. ONLY do this if you don't use a lot of rudder. After I fly it I will report back if I have to change to a larger servo arm to get the last bit or rudder travel.
Here's is my process for hooking up the pull-pull.
Gather the parts.
Determine how deep the swivel link is and then mark the threaded couplers for 1/2 of the depth.
Install on to the swivel link and install swivel link on to the rudder horn (same on the servo arm if you choose to use them there).
Run a cable up from the back of the fuse, making sure not to wrap it around formers, until you have it up front. I loop it through my servo arm as there is usually enough adjustment with just the rear couplers. Install the brass crimp on the cable. Once I have the correct length needed I pull the cable up through the servo arm hole (outer hole on the Du-Bro arm in this case) and fold it back through the brass crimp.
Then I bend the cable so the crimp can't slide back (about 1/2" to 1" behind the arm).
I loop the wire through the front of the crimp again and this essentially locks it in place.
Pull the cable tight.
Once you are happy with it all, squeeze the crimp with pliers until the crimp is flat.
Repeat for the other cable.
Once you have the servo side completed, repeat for the rudder horn side. Just remember to double check to make sure you have it set at the right length, power it up (or leave it powered on), before crimping the rudder crimps.
With the horn modification (relocating the rudder horn holes) I do NOT get full rudder throw, even with the servo end-points bumped up to 140%. ONLY do this if you don't use a lot of rudder. After I fly it I will report back if I have to change to a larger servo arm to get the last bit or rudder travel.
Last edited by JAS; 06-02-2015 at 08:30 AM.
06-02-2015 | 08:38 AM
#56
My cowl ring was 1/32" short on the sides. Here's what i did to fix this.
I marked where the ring was short so I knew where to add wood to.

I marked some 1/32" plywood for what I needed.
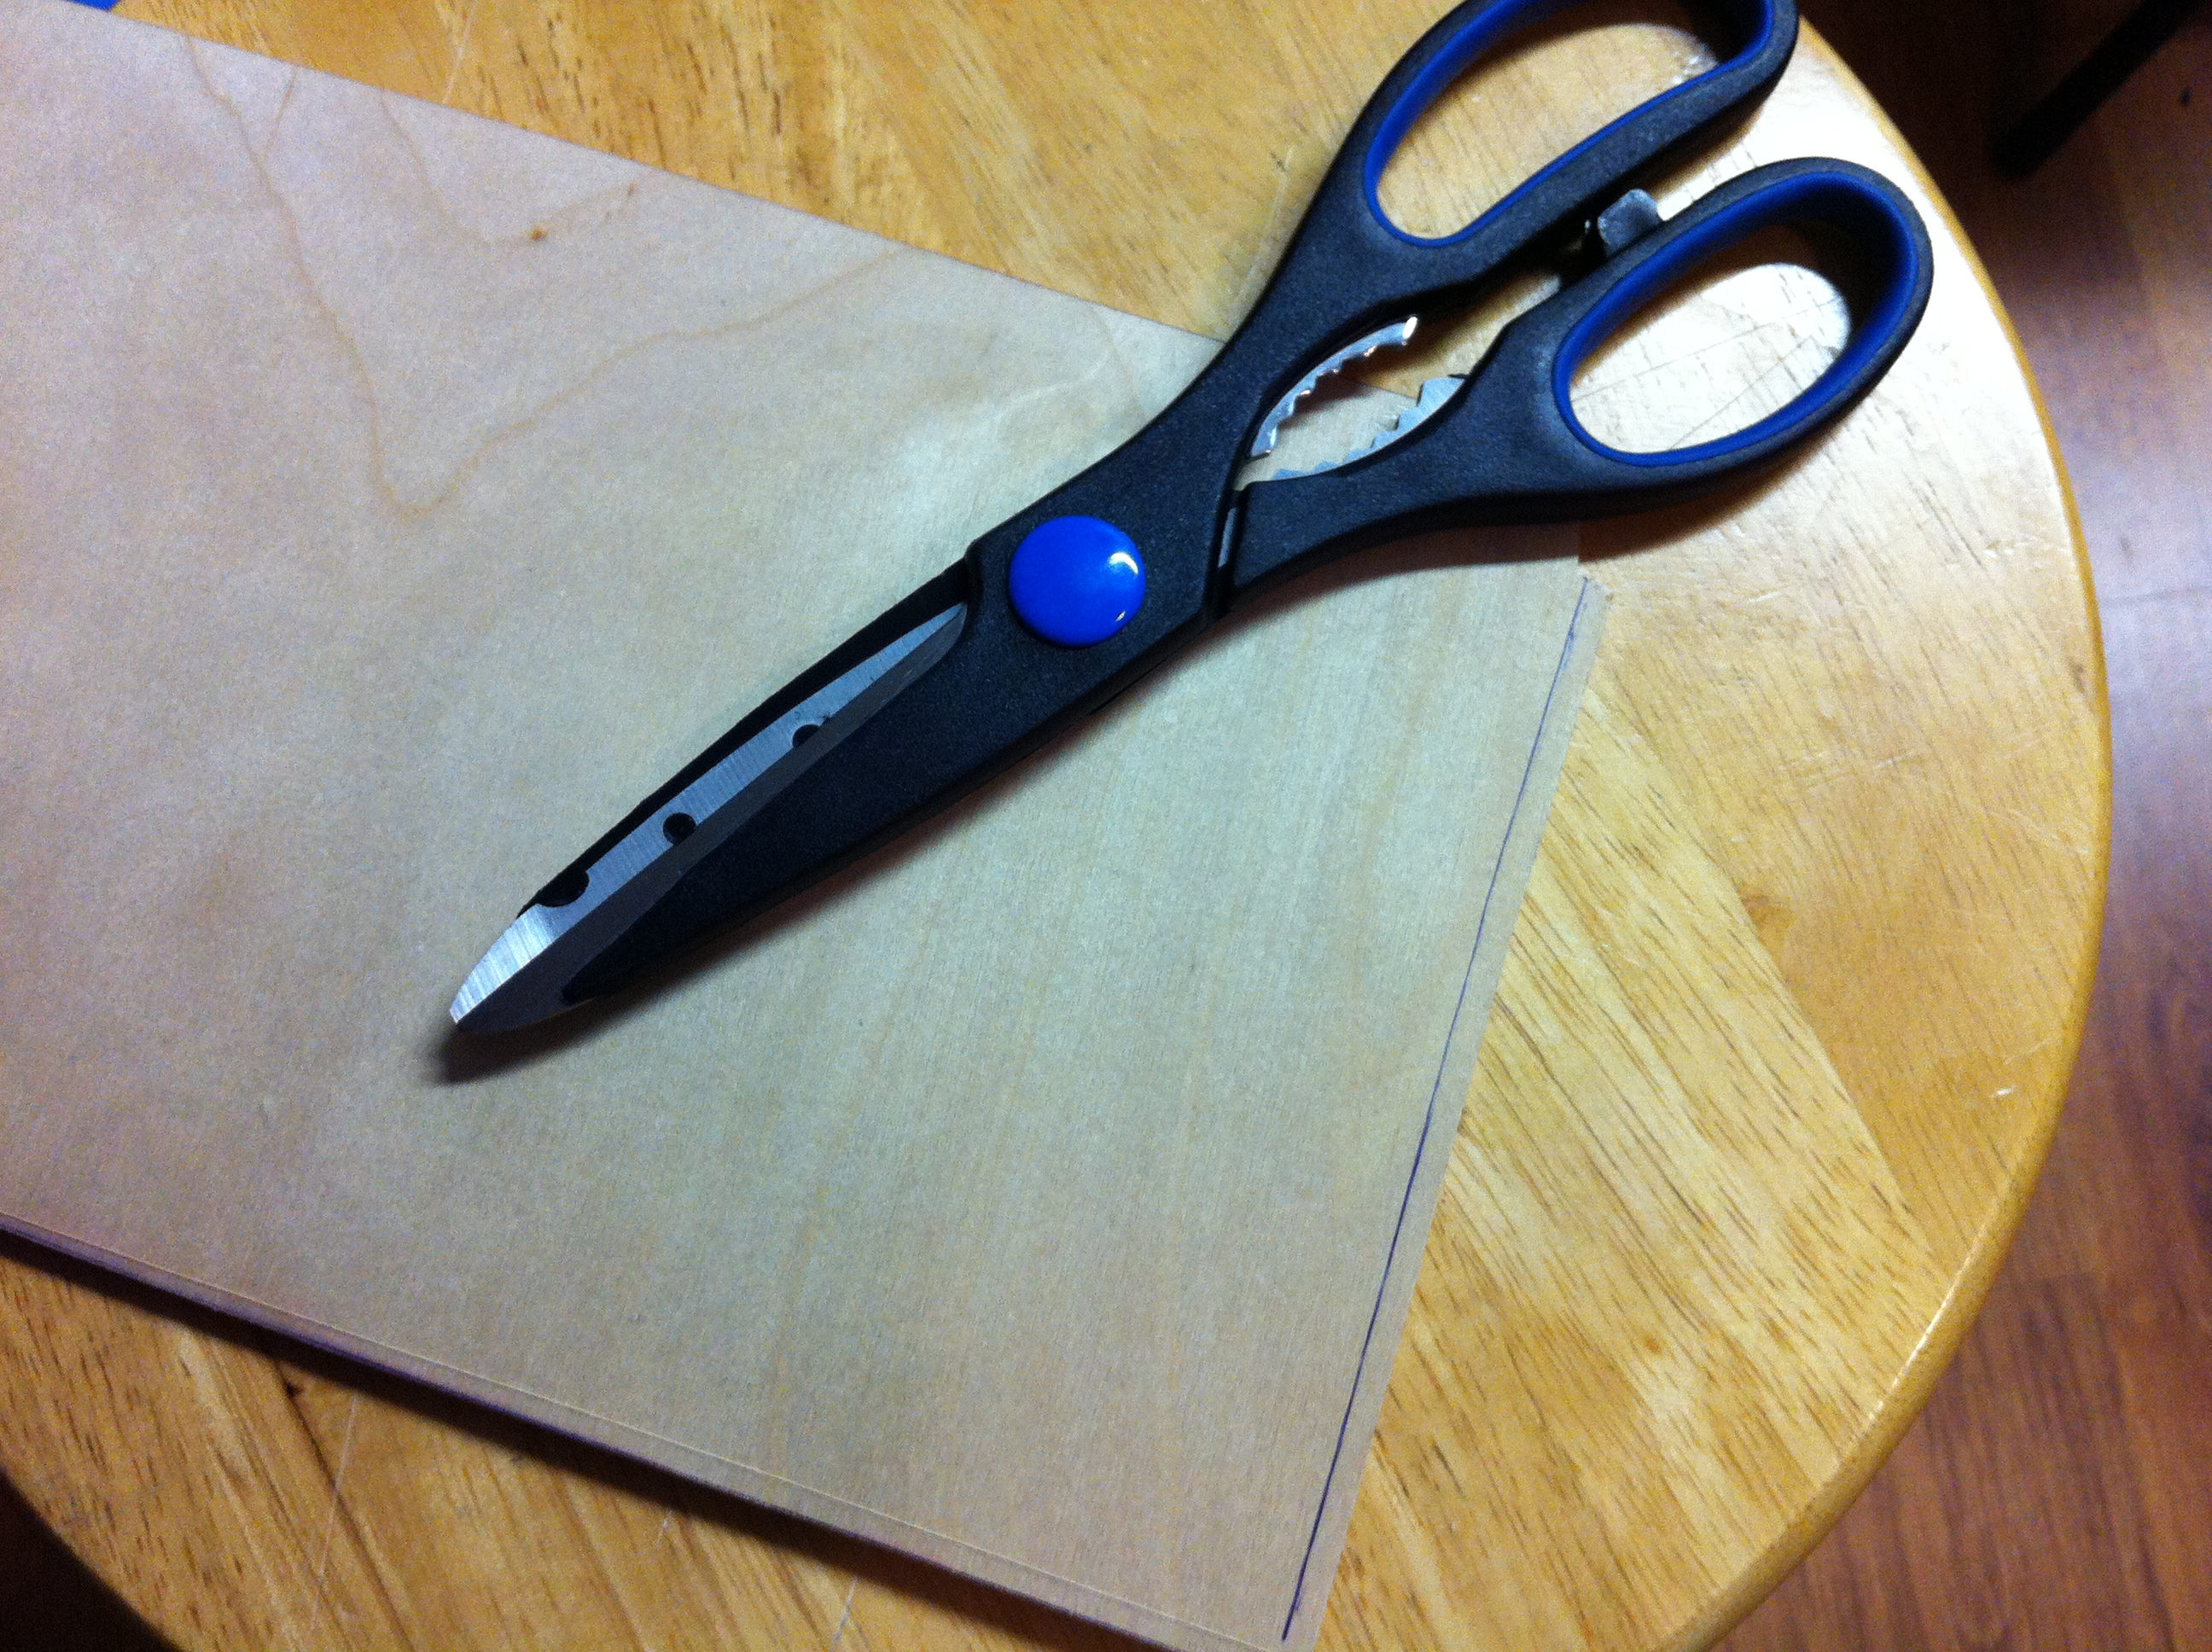
Then I cut the strips (any way you want to cut it, scissors was my way).

Using some Medium Zap, I glued them on between the marks.

Then i finished it with a final sanding to fit the fuse.

Next is motor mounting. I am spacing it out a bit so the cowling fits 'better'. I'll explain once it's done.
I marked where the ring was short so I knew where to add wood to.
I marked some 1/32" plywood for what I needed.
Then I cut the strips (any way you want to cut it, scissors was my way).
Using some Medium Zap, I glued them on between the marks.
Then i finished it with a final sanding to fit the fuse.
Next is motor mounting. I am spacing it out a bit so the cowling fits 'better'. I'll explain once it's done.
06-22-2015 | 06:33 PM
#57
Well just to revive this thread and because I am about to have to deal with this question: I'm going to go budget on the power set up with this plane because the learning curve will be steep and cost is a factor. Once I know what I'm doing a little more I'll upgrade but for now, if you were ordering the entire power system from HK, what ESC, motor and battery would you order to fly this plane through Advanced? I've spent quite a bit of time looking and doing some research and have come up with a list but am interested in what others think other than "don't do this".. I am planning on an ESC that has some room left in it and will not be running right at max capability at any time. I'll be ordering in the next couple of weeks and hope to fly the plane in the next 4 weeks. I am planning on using the motor mount sold by Hobbico that has been used by several on this plane, hope I won't have to do much if any mods, want a motor that will bolt right up if possible. This will give me 2m planes with a 4 stroke, a 2 stroke and electric. It will be interesting to see which one I like best as all three are good designs.
Rick H.
Rick H.
10-20-2015 | 11:10 AM
#58
Member
Joined: Jun 2003
Posts: 62
Likes: 0
Received 0 Likes
on
0 Posts
From: Folsom, CA
Thanks Jason and everyone else for all the info here! Did anyone finish and fly theirs yet? I've seen the flight reports from the Flying Giants and Model Aviation reviews, would be nice to hear some more thoughts on it.
11-01-2015 | 06:04 PM
#59
Elevator pushrods
I checked and its 12/13mm to the end of the inside of the swivel link.

With the link and clevis in place I measure for the correct length. I make sure there is a few mm of rod that goes past the end of the clevis opening (see pic a few down).
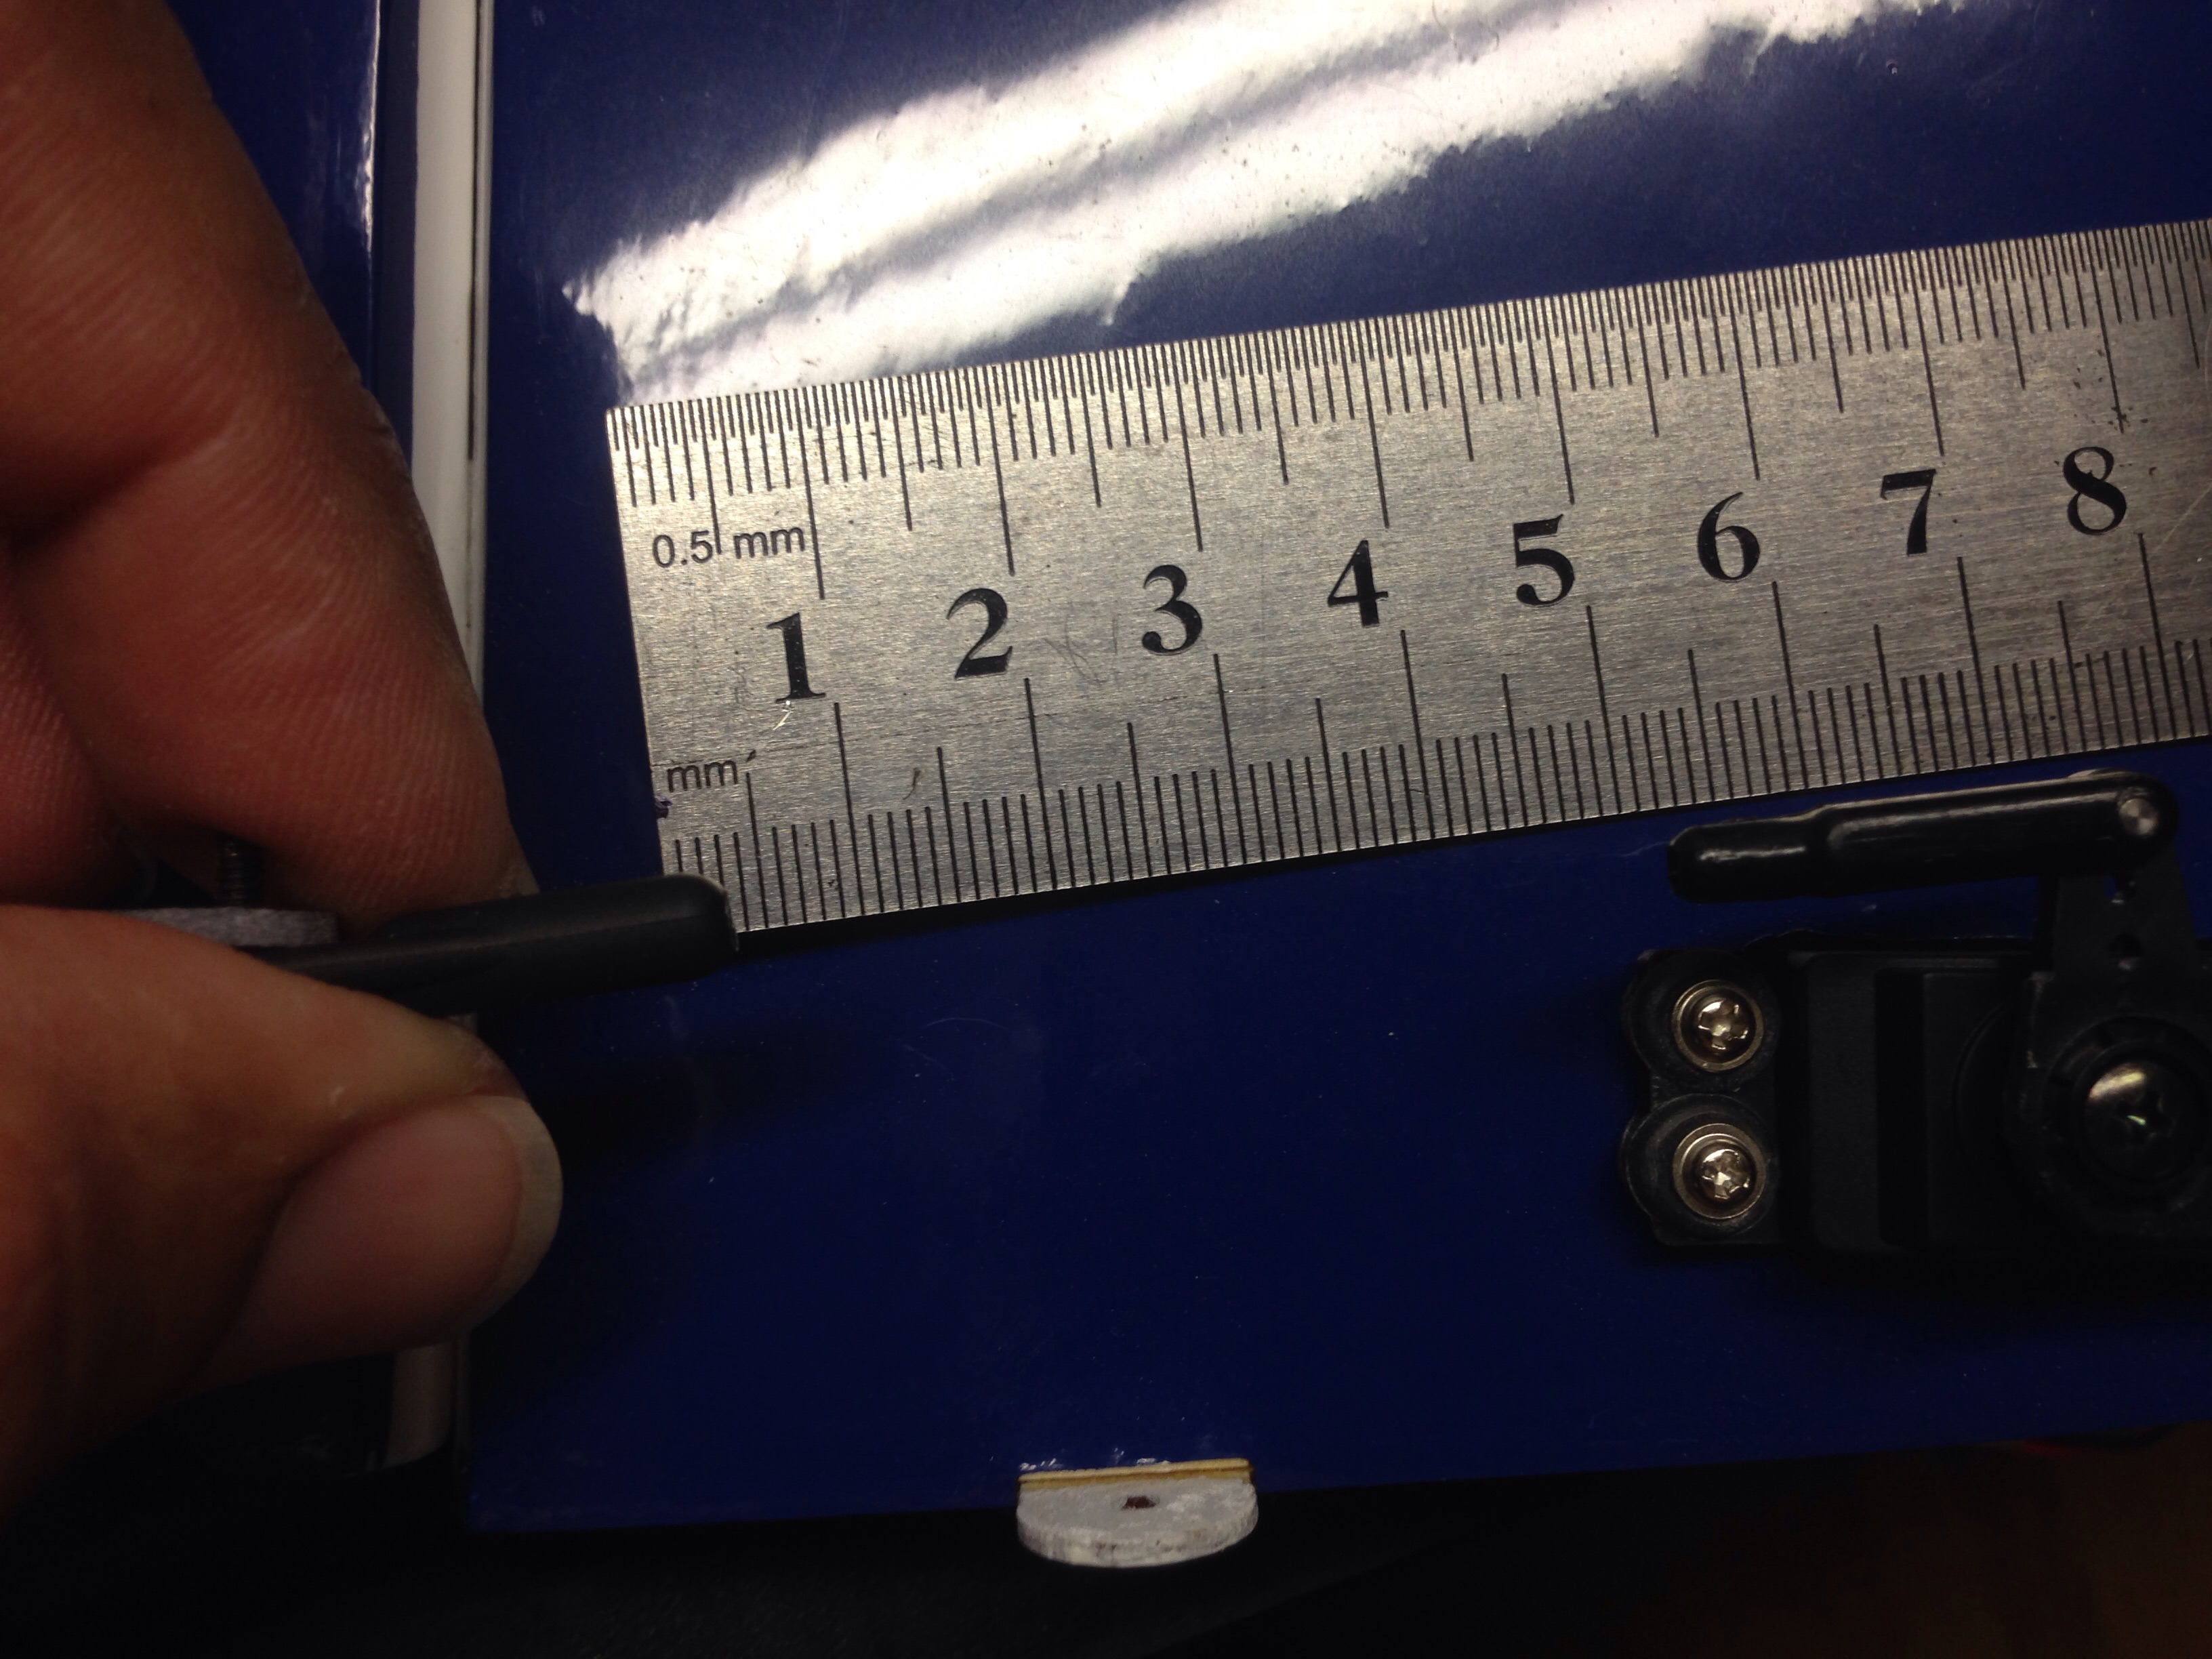
After measured to the proper length, roll-cut with a new razor blade.

Sanded (while spinning) and cleaned with alcohol on a paper towel.

Marked 12mm with silver Sharpie. Swivel links and clevis' were predrilled earlier.

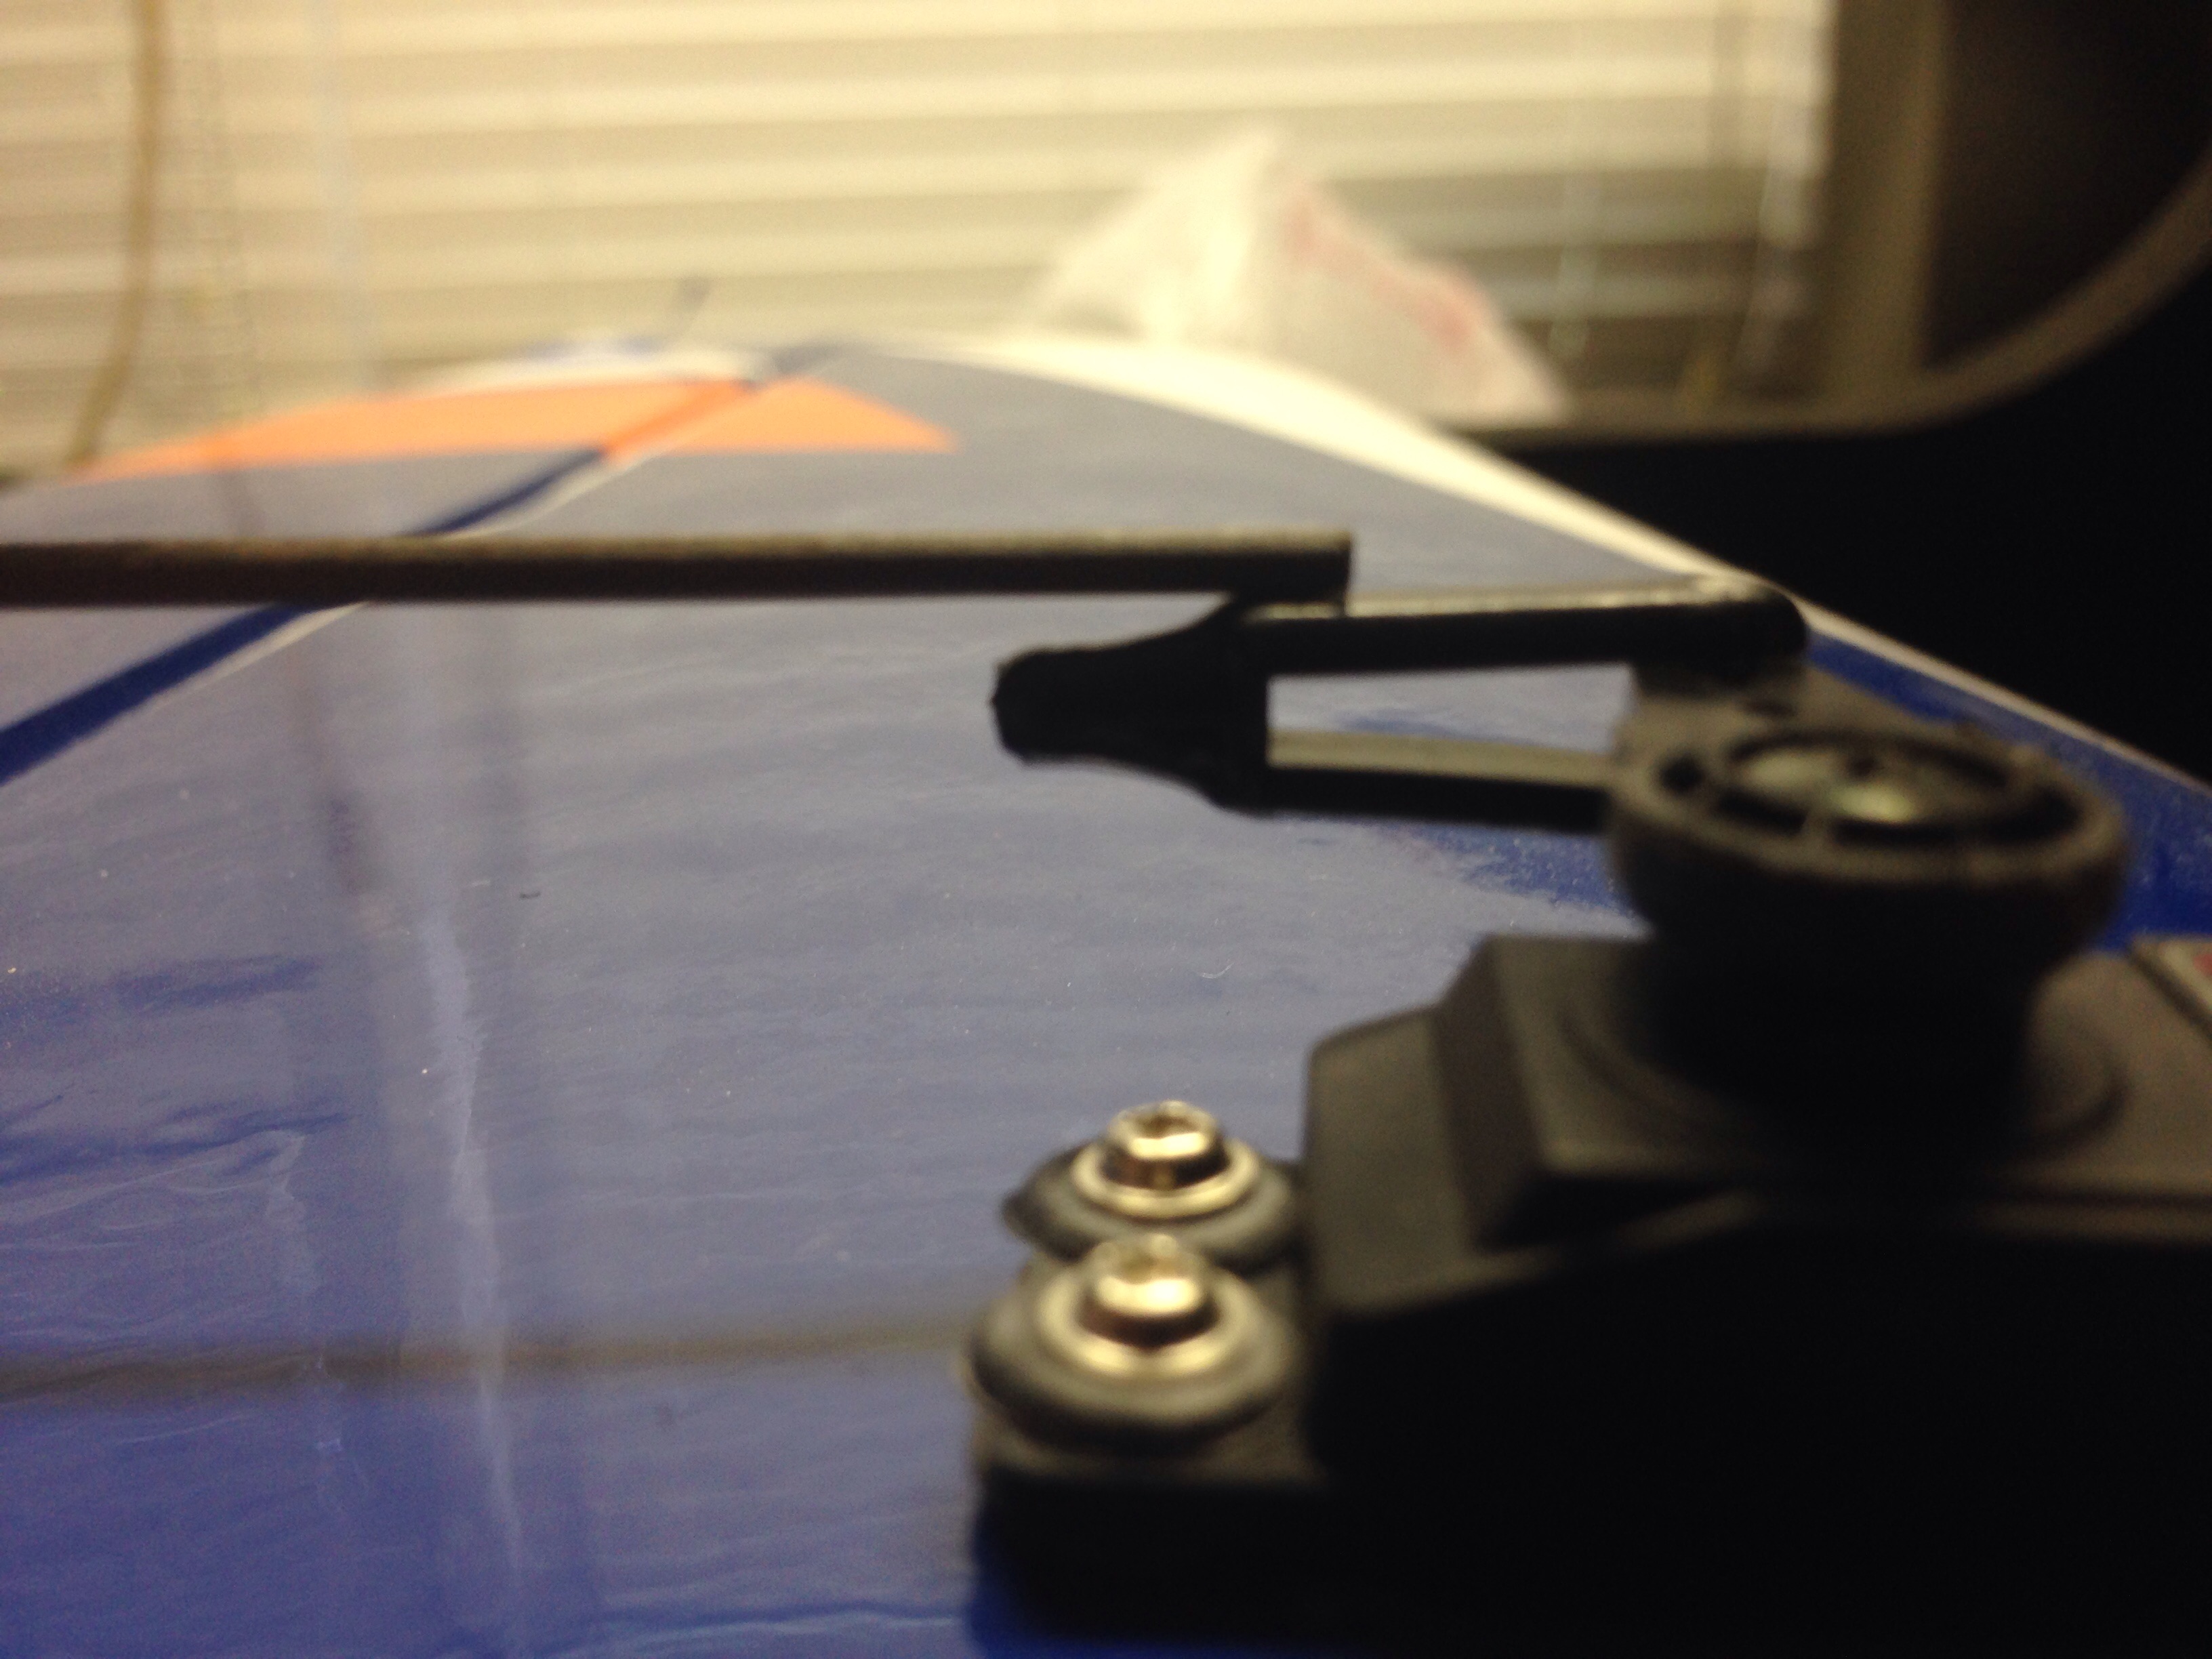
This is a tricky part. Since the carbon rod doesn't just slide into the redrilled hole, you have to 'tap' it in. I use a small hammer or pliers/side cutters, but make sure you don't just smash it in to the link. You could splinter the carbon rod and ruin the link and have to drill out the carbon and start over. Tap in, while pushing down against the bench/link until it reaches your mark.

Just a double check after screwed back on to the horn (with nut if loose).
Silver Sharpie to mark how far to go.

DO NOT RUSH THIS PART!!! I pushed on the clevis a little at a time (make sure it's the correct orientation to snap on to the servo arm and horn) and check length (with nut on horn side) and powered up. Adjust until happy with placement.
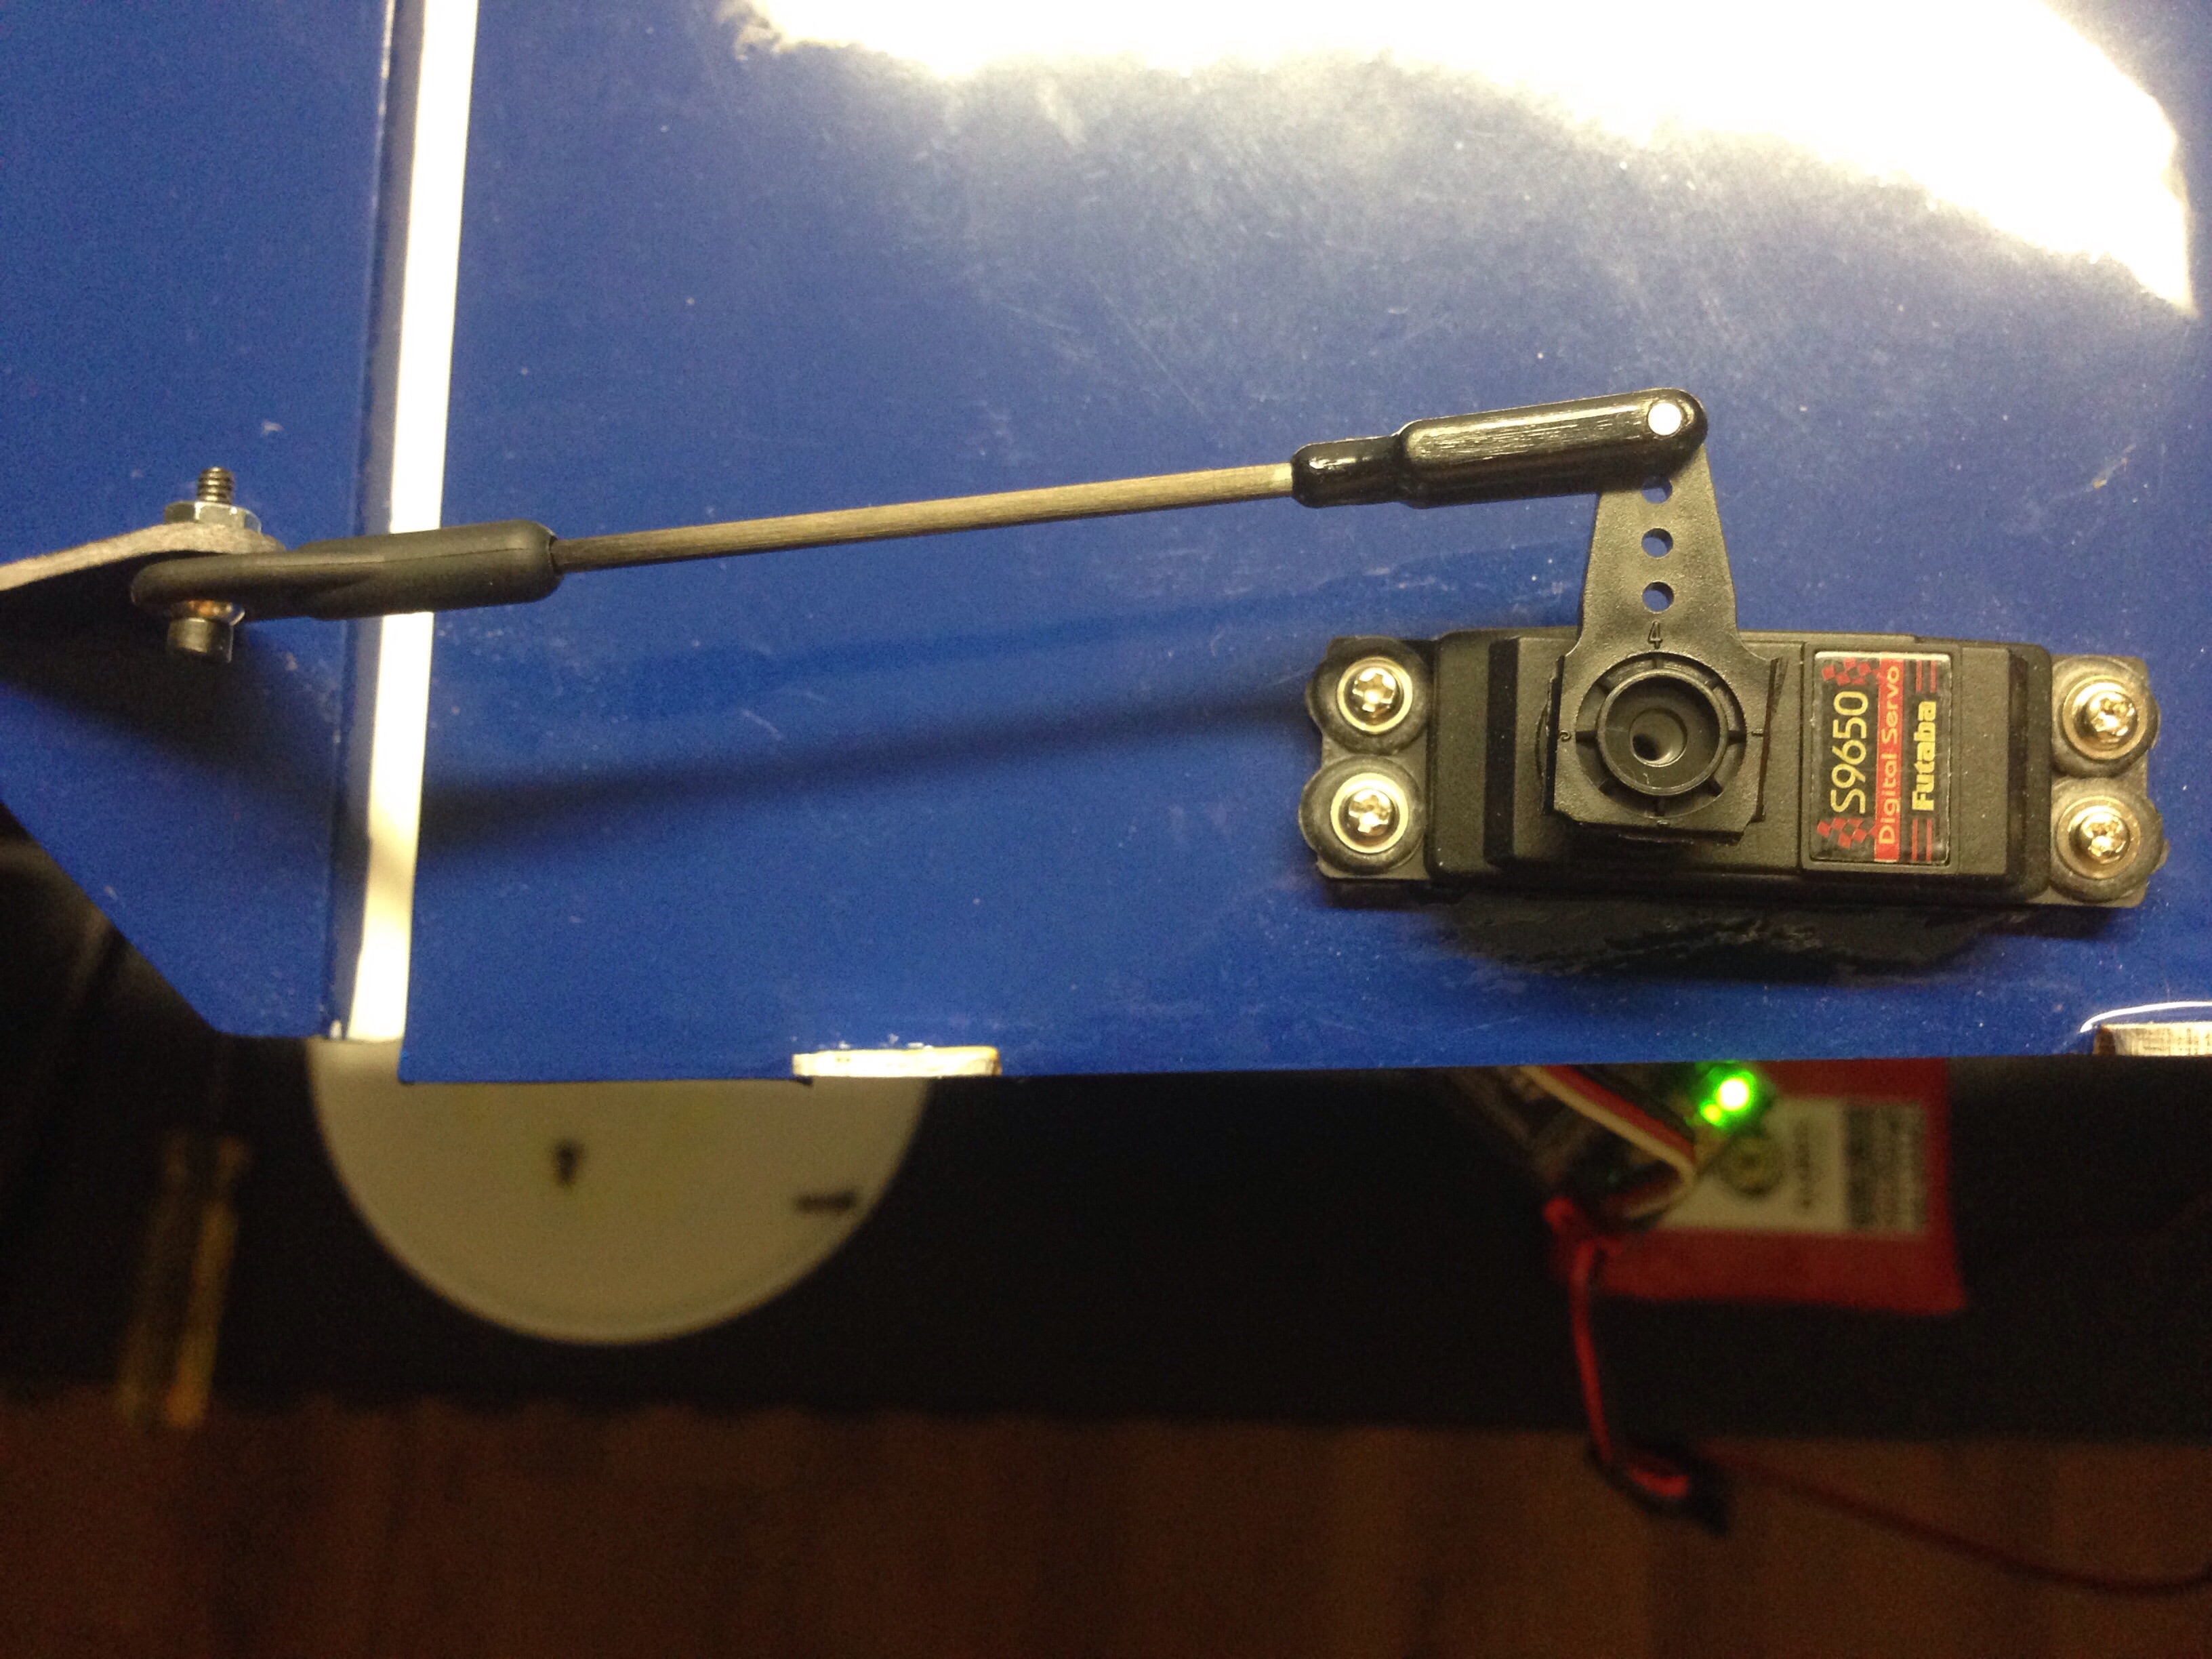
* also notice, I changed from the 6-star (3-hole) to 4-star (4-hole) servo arms for more throw, personal taste on high rate.
Once I was happy with everything I used SMALL drops of thin (2 usually) and let it 'soak in' to the link so it went into the link (vertical). MAKE SURE NO CA GETS INTO LINK BALL OR CLEVIS PIN!!! Repeat 2 more times. Do the same on the clevis side. Don't use accelerator either.

Once the glue is dry (takes longer than you think) you can mount up your pushrod and blue thread lock the swivel link nut.
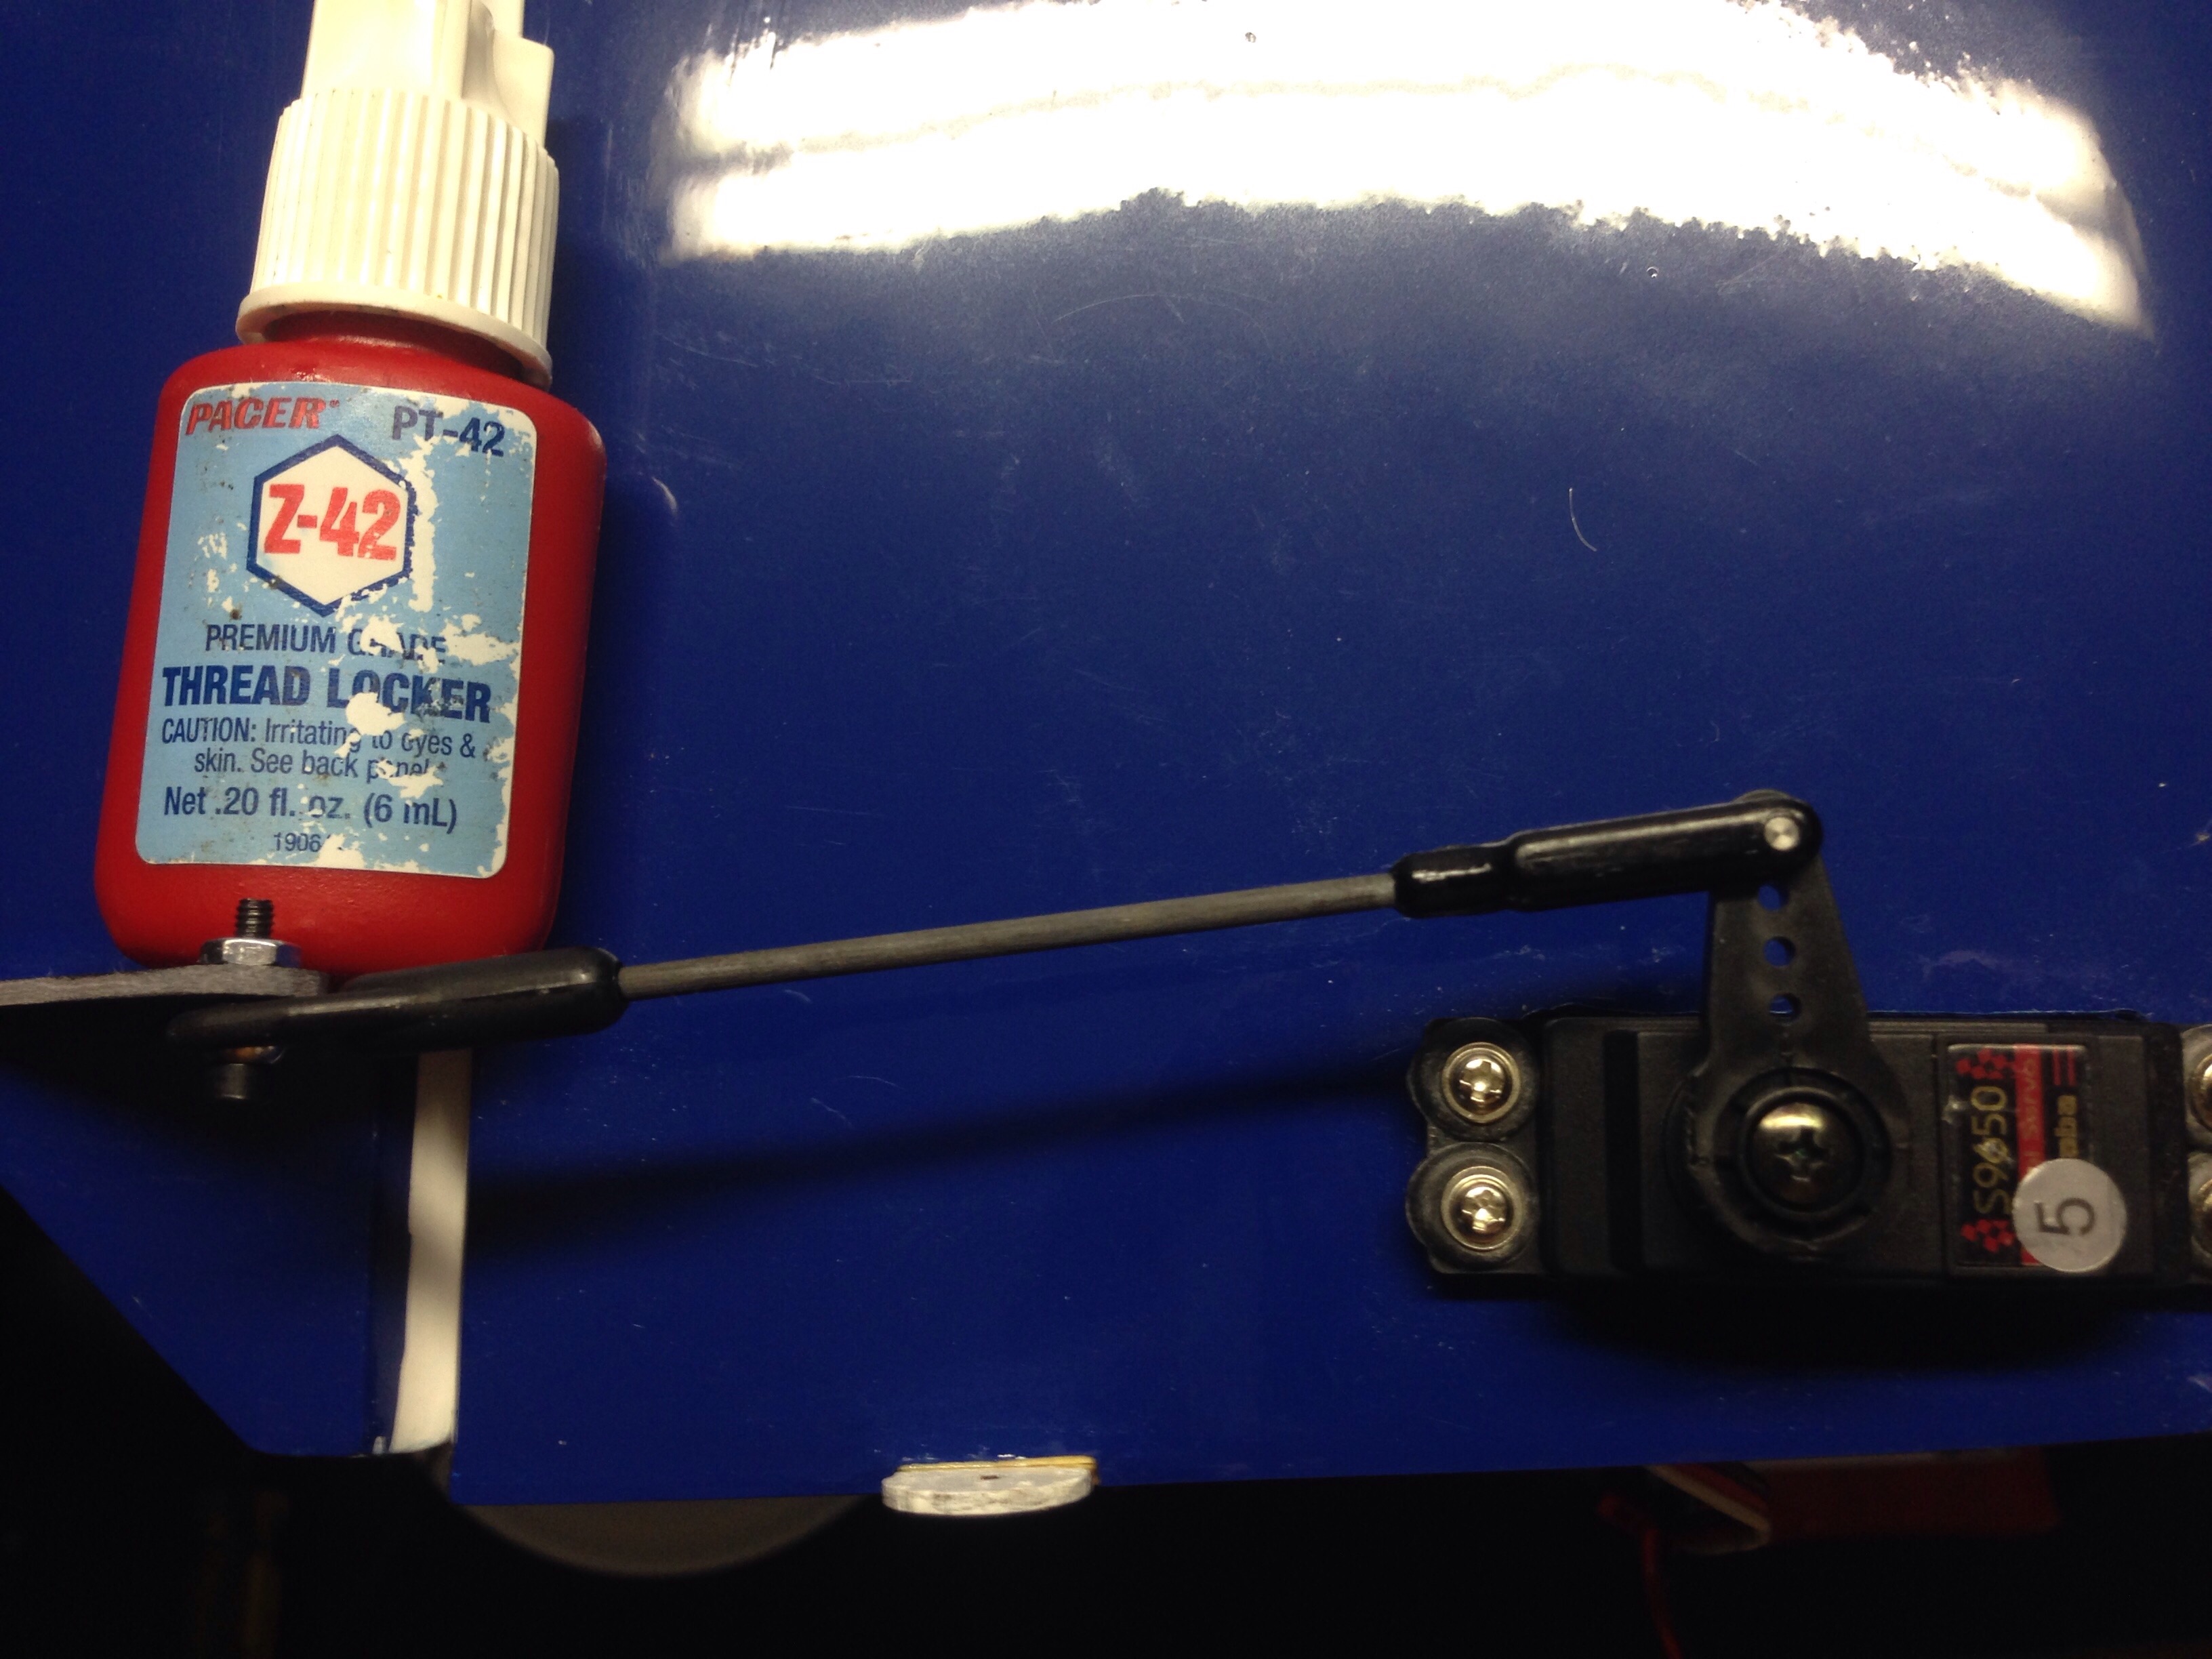
All done

I was hoping to finish this before the contest this weekend but I have a trip that takes me away until Friday. I plan to finish it the week after (with updates on the rest of the build) and fly it with a full set-up report.
I checked and its 12/13mm to the end of the inside of the swivel link.
With the link and clevis in place I measure for the correct length. I make sure there is a few mm of rod that goes past the end of the clevis opening (see pic a few down).
After measured to the proper length, roll-cut with a new razor blade.
Sanded (while spinning) and cleaned with alcohol on a paper towel.
Marked 12mm with silver Sharpie. Swivel links and clevis' were predrilled earlier.
This is a tricky part. Since the carbon rod doesn't just slide into the redrilled hole, you have to 'tap' it in. I use a small hammer or pliers/side cutters, but make sure you don't just smash it in to the link. You could splinter the carbon rod and ruin the link and have to drill out the carbon and start over. Tap in, while pushing down against the bench/link until it reaches your mark.
Just a double check after screwed back on to the horn (with nut if loose).
Silver Sharpie to mark how far to go.
DO NOT RUSH THIS PART!!! I pushed on the clevis a little at a time (make sure it's the correct orientation to snap on to the servo arm and horn) and check length (with nut on horn side) and powered up. Adjust until happy with placement.
* also notice, I changed from the 6-star (3-hole) to 4-star (4-hole) servo arms for more throw, personal taste on high rate.
Once I was happy with everything I used SMALL drops of thin (2 usually) and let it 'soak in' to the link so it went into the link (vertical). MAKE SURE NO CA GETS INTO LINK BALL OR CLEVIS PIN!!! Repeat 2 more times. Do the same on the clevis side. Don't use accelerator either.
Once the glue is dry (takes longer than you think) you can mount up your pushrod and blue thread lock the swivel link nut.
All done
I was hoping to finish this before the contest this weekend but I have a trip that takes me away until Friday. I plan to finish it the week after (with updates on the rest of the build) and fly it with a full set-up report.
Last edited by JAS; 11-01-2015 at 06:57 PM.
 11-16-2015 | 12:08 PM
#61
Joined: Aug 2005
Posts: 9
Likes: 0
Received 0 Likes
on
0 Posts
From: , TX
I have been flying this airplane on 6s during the past contest season and did very well with it.
While it does fly nicely on 6s, it does not have the vertical performance of the 2-meter pattern ships.
The APC 11X8E prop they recommended in the instructions is the worst prop of all the ones I tried.
It pulled lots of amps with the least performance. The Graupner G-Sonic 15X10 worked well but a Falcon carbon 16X10 is my favorite.
I still found myself adding power early to compensate during large vertical maneuvers.
Currently I�m in the middle of converting my Sequence over to a 8s setup.
I hope this will make me more competitive with the 10s 2-meter planes.
X-30
11-17-2015 | 12:46 PM
#63
Joined: Aug 2005
Posts: 9
Likes: 0
Received 0 Likes
on
0 Posts
From: , TX
12-23-2015 | 09:16 PM
#64
Joined: Aug 2005
Posts: 9
Likes: 0
Received 0 Likes
on
0 Posts
From: , TX
Since May, I�ve been flying my Sequence with the stock setup on the Rimfire motor.
After trying a number of props to get the performance I�ve wanted I came to the conclusion that If I�m going to successfully compete with the 2 meter ships that I would have to convert over to a 8s set up.
While I could perform all the required maneuvers with the stock setup I couldn�t maintain speed on tall vertical maneuvers.
A couple of weeks ago I completed converting my Sequence over to a 8s setup.
I�m running a 295 KV Tacon 110 on 4000 mah batteries with a Graupner 18X10 prop. I am very pleased with this setup.
Currently I�ll pulling 71 amps at takeoff and pull at most 65 amps during the maneuvers.
I�m consuming between 2.3 to 2.45 amps running though the intermediate pattern.
I do want to try some different props as I have about 15 amps more I could comfortably extract from this system.
X30
03-23-2016 | 01:14 PM
#65
Joined: Aug 2005
Posts: 9
Likes: 0
Received 0 Likes
on
0 Posts
From: , TX
After settling on the APC 18x12 thin electric prop, I finally got to try the 8S Sequence in competition. This is my first year flying intermediate. My goal was to finish somewhere in the middle of the pack. Flying against the 2-meter birds I managed to pull off a 2nd and a 1st place in the 2 contests I�ve flown so far. After this experience I have 2 thoughts. First, the Sequence is a fine sport bird on 6s, If you really want something to compete with the usual 2 meter pattern planes you�ll need an 8s setup. Second, You will not find a finer group of gentlemen to fly with than the folks here in district 6. I am honored and pleased to be part of this talented group. While it is a contest and we all want to do our best, all of the flyers are very supportive of each other with a free exchange of ideas and tips to improve everyone�s flying. If you have a chance to fly a contest in this district, I�d highly recommend it.
X30
X30
03-25-2016 | 12:58 PM
#66

Senior Member
Joined: Jan 2004
Posts: 390
Likes: 0
Received 0 Likes
on
0 Posts
From: La Herradura Edo. de Mexico, 53920 MEXICO
Hello X-30!
A couple of questions on your 8s setup, which I am also considering for
a Hacker A60-5s-V2 (295k) I already have.
How much did the CG move when you went to 8s? Weight of 8s packs?
Is there a need to move the rudder servo back to the tail?
On the APC 18x12 - how many watts output are you getting?
What is the all up weight including 8s with this setup!
Many thanks in advance!
To JAS
Did you check the wing incidence? 0.5 deg?
Is there any way to fit adjusters?
Thanks
03-27-2016 | 02:33 PM
#67
Joined: Aug 2005
Posts: 9
Likes: 0
Received 0 Likes
on
0 Posts
From: , TX
Hi Rodney,
I have two 4s batteries moved back as far as they can go without doing any modifications. I also moved my receiver pack back. This combined with an improved tail wheel puts the CG just where I want it. I did not move the rudder servo back, but there would be no harm in doing that. My 4s 4000mah batteries are a little on the heavy side at 417 grans each. The total weight ready to fly is right at 10.5 pounds.
I�m pulling 80.8 amps/2410 watts on takeoff and in the air the prop unloads down to 70.0 amps/2160 watts full throttle.
X30
QUOTE=rodney tanner;12194272]Hello X-30!
A couple of questions on your 8s setup, which I am also considering for
a Hacker A60-5s-V2 (295k) I already have.
How much did the CG move when you went to 8s? Weight of 8s packs?
Is there a need to move the rudder servo back to the tail?
On the APC 18x12 - how many watts output are you getting?
What is the all up weight including 8s with this setup!
Many thanks in advance!
To JAS
Did you check the wing incidence? 0.5 deg?
Is there any way to fit adjusters?
Thanks[/QUOTE]
03-30-2016 | 04:03 PM
#68
Senior Member
Joined: Jan 2004
Posts: 390
Likes: 0
Received 0 Likes
on
0 Posts
From: La Herradura Edo. de Mexico, 53920 MEXICO
[QUOTE=X-30;12195038]Hi Rodney,
I have two 4s batteries moved back as far as they can go without doing any modifications. I also moved my receiver pack back. This combined with an improved tail wheel puts the CG just where I want it. I did not move the rudder servo back, but there would be no harm in doing that. My 4s 4000mah batteries are a little on the heavy side at 417 grans each. The total weight ready to fly is right at 10.5 pounds.
I’m pulling 80.8 amps/2410 watts on takeoff and in the air the prop unloads down to 70.0 amps/2160 watts full throttle.
X30
Hi X30
Many thanks for the info.
Prop - APC 18x12?
Motor Mount for the A60 5s
I saw you posted a mounting shot on RCG.
The x mount is behind the fire wall.
How exactly did you mount the bind nuts?
Could you post your box assembly steps/tips with a pic if possible?
Many thanks in advance.
03-31-2016 | 05:35 PM
#69
Joined: Aug 2005
Posts: 9
Likes: 0
Received 0 Likes
on
0 Posts
From: , TX
Rodney,
That is correct, the numbers shown are with the APC 18X12 Thin Electric Prop.
My motor mounting is nothing special. I used the Great Planes metal mount just as shown in the Sequence kit instructions. I did have to drill some holes in the mount to accommodate the larger motor. Your method probably weighs less than mine.
Having the adjustable mount made for an easy motor change...
X30
09-13-2016 | 11:00 AM
#70

Joined: Jun 2004
Posts: 139
Received 0 Likes
on
0 Posts
From: Uphall, Scotland, UNITED KINGDOM
Hi,
I would be really interested in how the actual / final / best c of g position is compared to the manual, and also if the control throws are different.
thank you.
Tom
I would be really interested in how the actual / final / best c of g position is compared to the manual, and also if the control throws are different.
thank you.
Tom
04-03-2017 | 05:58 AM
#71
My Feedback: (6)
Joined: Aug 2005
Posts: 63
Likes: 0
Received 0 Likes
on
0 Posts
From: Willingboro, NJ
You guys that are flying the sequence on 6 cell and the rimfire 120. What are you using for a prop. I've tried a 16X10 a 15X10 and a 15X8. The airplane flies well but I get about 4.5 minutes and can not get all the way through the Intermediate pattern. I tried an E Flite 110 on 8 cells and I got the time but not the power. I'd like to stay with the motors I've got any suggestions.
04-03-2017 | 08:07 AM
#72

Hello bafflerback.
Try a 17 x 8. APC Thin E or Xoar E:
http://www3.towerhobbies.com/cgi-bin...?&I=LXEYH0&P=7
http://www3.towerhobbies.com/cgi-bin...?&I=LXAPUA&P=7
A few of us (in the Sequence 1.20 thread over in RC Groups) have been playing with 17 x 12 even.
Tim
Try a 17 x 8. APC Thin E or Xoar E:
http://www3.towerhobbies.com/cgi-bin...?&I=LXEYH0&P=7
http://www3.towerhobbies.com/cgi-bin...?&I=LXAPUA&P=7
A few of us (in the Sequence 1.20 thread over in RC Groups) have been playing with 17 x 12 even.
Tim
04-04-2017 | 04:43 AM
#73
My Feedback: (6)
Joined: Aug 2005
Posts: 63
Likes: 0
Received 0 Likes
on
0 Posts
From: Willingboro, NJ
Thanks Tim. I haven't tried the 17X8. I have tried the 17X10 and the 16X12. The airplane flies great but I just don't seem the have enough duration to get all the way through the Intermediate pattern. I'm getting better at converting my downline speed into momentum but it still cuts it too close for comfort. I tried a 14X12 on 8 cells but with that power combination you have to be real careful on the up lines and things were way too hot on landing. I'm between a rock and a hard place. I really don't want to convert it to gas or glow and replacing my 6 cell 5000's with 6000's or bigger is almost not an option. What battery are you guys running and what kind of duration are you getting. I built this airplane because I didn't want to run 10 cells.
04-04-2017 | 07:36 AM
#74
Initially my gut said this was an 8s plane, not 6s. X-30 illustrated that point in this thread. The plane is just too heavy for 6s. I have seen and competed against this plane. The plane (as set up the way X-30 has it) has plenty of power and time to easily complete the Intermediate schedule.
04-04-2017 | 12:33 PM
#75
Joined: Aug 2005
Posts: 9
Likes: 0
Received 0 Likes
on
0 Posts
From: , TX
You guys that are flying the sequence on 6 cell and the rimfire 120. What are you using for a prop. I've tried a 16X10 a 15X10 and a 15X8. The airplane flies well but I get about 4.5 minutes and can not get all the way through the Intermediate pattern. I tried an E Flite 110 on 8 cells and I got the time but not the power. I'd like to stay with the motors I've got any suggestions.
The best one I used was a Falcon carbon 16X10.
This gave me the best amp draw vs. performance that I could find for competition.
Anything bigger drew too much current, especially during the summer months here in Texas.
While the plane flew well and I could do all the maneuvers, I was definitely at a disadvantage with a 6s system.
At Big_Gs suggestion I went to 8s. OMG what a difference!
Now I have a truly competitive airplane. I fly both the intermediate and advanced routines with this setup.
Think about it, the Sequence is almost a 2-meter plane.
If you want a Falcon 16X10 prop with covers, I�ll make you a deal...

X-30


