


JW B³ker Jungmeister build


 09-10-2022, 03:54 AM
#177


[QUOTE [img]https://cimg7.ibsrv.net/gimg/www.rcuniverse.com-vbulletin/2000x1504/788a3bd9_9a06_4bff_8dfd_09b6ddc43f7b_9a6271f74e1ec edd16558459f94cb3caa32fb7bc.jpeg
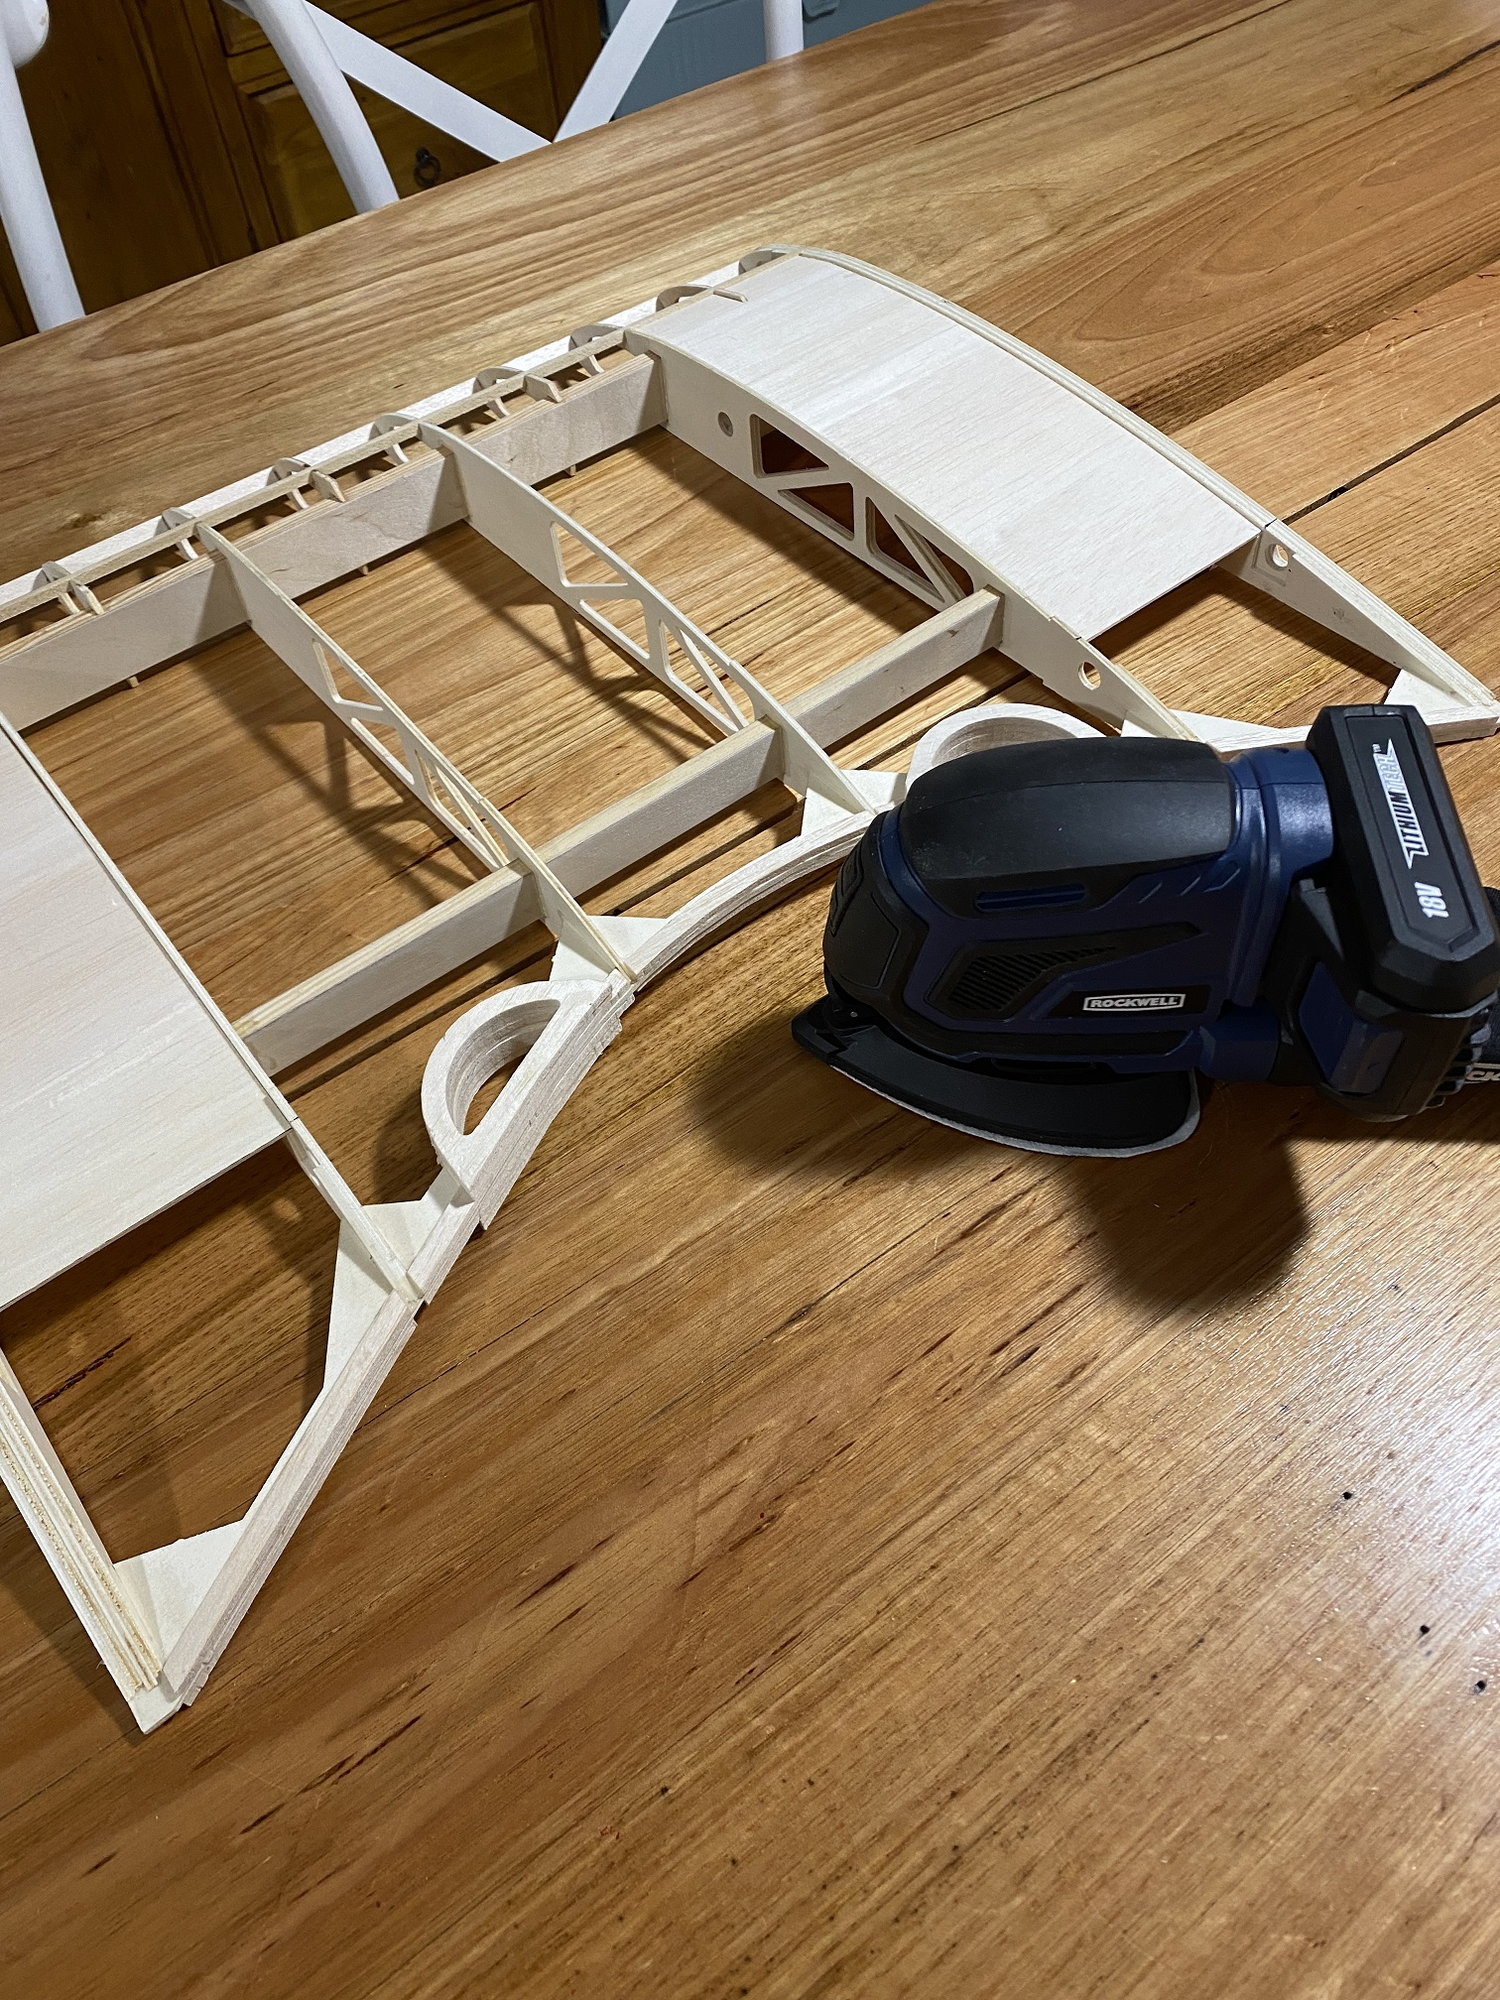
If you don't have one of these power tools you are going to need one. The sander head saved me HOURS of work.
If you don't have one of these power tools you are going to need one. The sander head saved me HOURS of work.
You have talked me into it, must say not looking forward to tackling this!!

 09-15-2022, 01:06 AM
#181
Yes! I took a couple weeks off but I'm back at it. I'm about to glue the fittings into the cabane struts. I'll be using hysol epoxy but first I needed to make some hardware.
My strut mounts are going to be a little bit different than the plans because I didn't bend the covers onto the metal side plates. For that reason my front bottom cabane mounts were too thick for the factory supplied bolt (just take my word for it). I didn't have any longer ones around so I just made a set. Plus I made a couple thick washer/standoffs for the back of the fittings to hold them slightly away from the fuselage.

Standoff washers on top then two wedge washers for the front bolts because the side of the fuselage is not 90 degrees to the bolt axis, then you see the long bolts I made and the stock ones below them.
My strut mounts are going to be a little bit different than the plans because I didn't bend the covers onto the metal side plates. For that reason my front bottom cabane mounts were too thick for the factory supplied bolt (just take my word for it). I didn't have any longer ones around so I just made a set. Plus I made a couple thick washer/standoffs for the back of the fittings to hold them slightly away from the fuselage.
Standoff washers on top then two wedge washers for the front bolts because the side of the fuselage is not 90 degrees to the bolt axis, then you see the long bolts I made and the stock ones below them.
Last edited by mitchilito; 09-15-2022 at 01:09 AM.
09-15-2022, 02:12 AM
#182
Going great, I just returned from a mates machine shop after getting some of the landing brackets that are bolted to the bottom of the bottom centre section re-drilled so the head and nuts of the bolts do not poke out of 2 mm balsa skin!! SLOWLY_SLOWLY !!
Now that you have had your little break things should start to pick up on your build
Now that you have had your little break things should start to pick up on your build
Last edited by tmac48; 09-15-2022 at 02:15 AM.
09-16-2022, 01:53 AM
#183
Got a lot done yesterday. As I said before, the plans say "glue the strut fittings to the struts with the struts in place" or words to that effect. This is absolutely necessary but how to do it? After much thought this is what I did:
As you'll find out once you get here, the cabanes are the core foundation of the load structure on this aircraft. Everything starts with them. And their cross wires are the key. In the previous steps I got them fitted PERFECTLY but during the glue up how can you pin the wires in place when they are already tensioned? Answer: by having the bottom cabane bolts very loose. But in order to be able to apply glue to all the fittings and strut pockets you have to have the bottom brackets tight with the struts sticking up. Then you can drop the center section - with its brackets, already smothered with glue - down into them. See the problem here? I had to practiced this process several times without glue (very time consuming) to find a way to get it all to come together. It went something like this:
1) I cleaned all the brackets thoroughly then scuffed them up with scotchbrite.
2) I bolted the bottom brackets (with the cross wires loosely hanging in place of course) to the fuselage snugly and the top brackets to the wing center section somewhat loosely.
3) I applied Hysol to all the pockets and fittings. You MUST use an epoxy that is slow cure because this process is going to take almost an hour once you mix your glue. (God forbid you get interrupted in the middle for any reason and can't finish! You would be in real trouble!!)
4) It gets tricky here: apply glue to all fittings and pockets then drop the center section down on the struts as best as you can on both sides. They will NOT go all the way into place because the struts are tight. Then loosen the bottom bolts on one side as loose as possible so you can drop the fittings in further. Retighten then do the same on the other side. The gooped up epoxy will help to loosely hold things together enough for you to sneak the fittings all the way into place. I systematically snugged/loosened the bottom bolts to keep the whole mess from falling apart during the process. It sounds complicated because it WAS complicated.
5) Now the fun part: pinning/tensioning the wires. I used 4 short 3mm bolts instead of the little pins because they'd be easier to work with. At this stage the bottom brackets are retightened on both sides to keep the whole mess from falling apart. So: loosen one side, install the wire pins then do the same on the other side. Once the pins are installed and both side bottom brackets are tightened the wires will tension (which pulls everything together) and the assembly is done. You will have to perfect your process through (dry) practice.
At this point the whole assembly is not yet constrained if you move the center section in a forward direction - at least not until the glue cures in the diagonal struts. So you will see in the pictures I roped/bungied the center section to the rear for cure up.
See, that wasn't so hard, was it. . . . . . .?
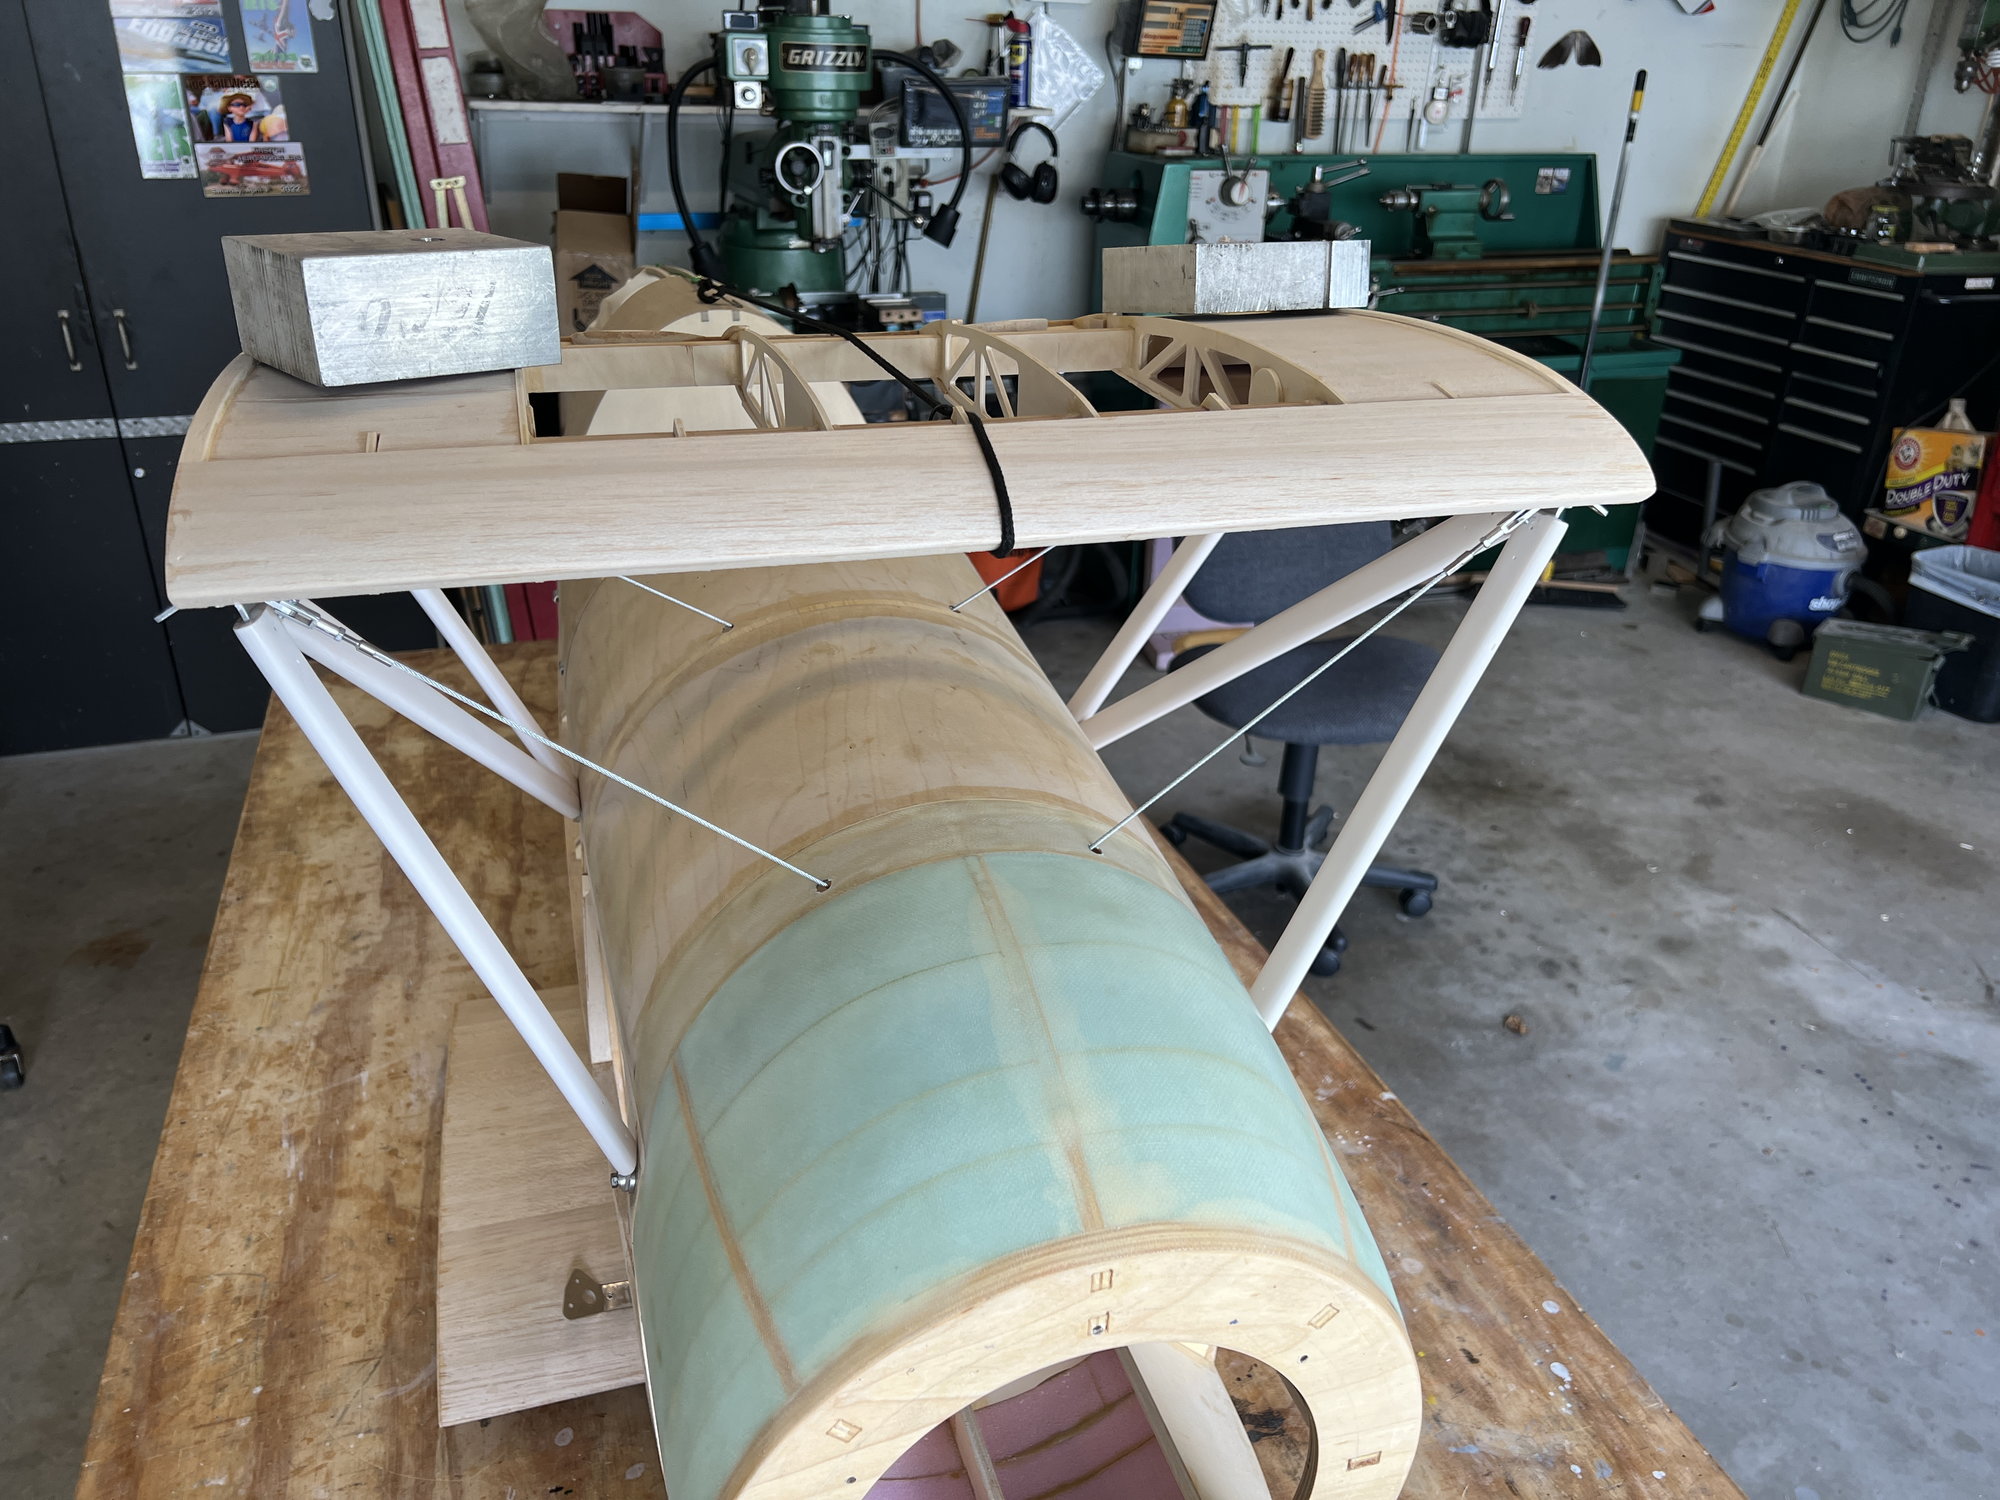
The weights on top are redundant but seemed like a good idea anyway. I remeasured everything for plumb (it's perfect), but there really wasn't anything to be done about it at this point!
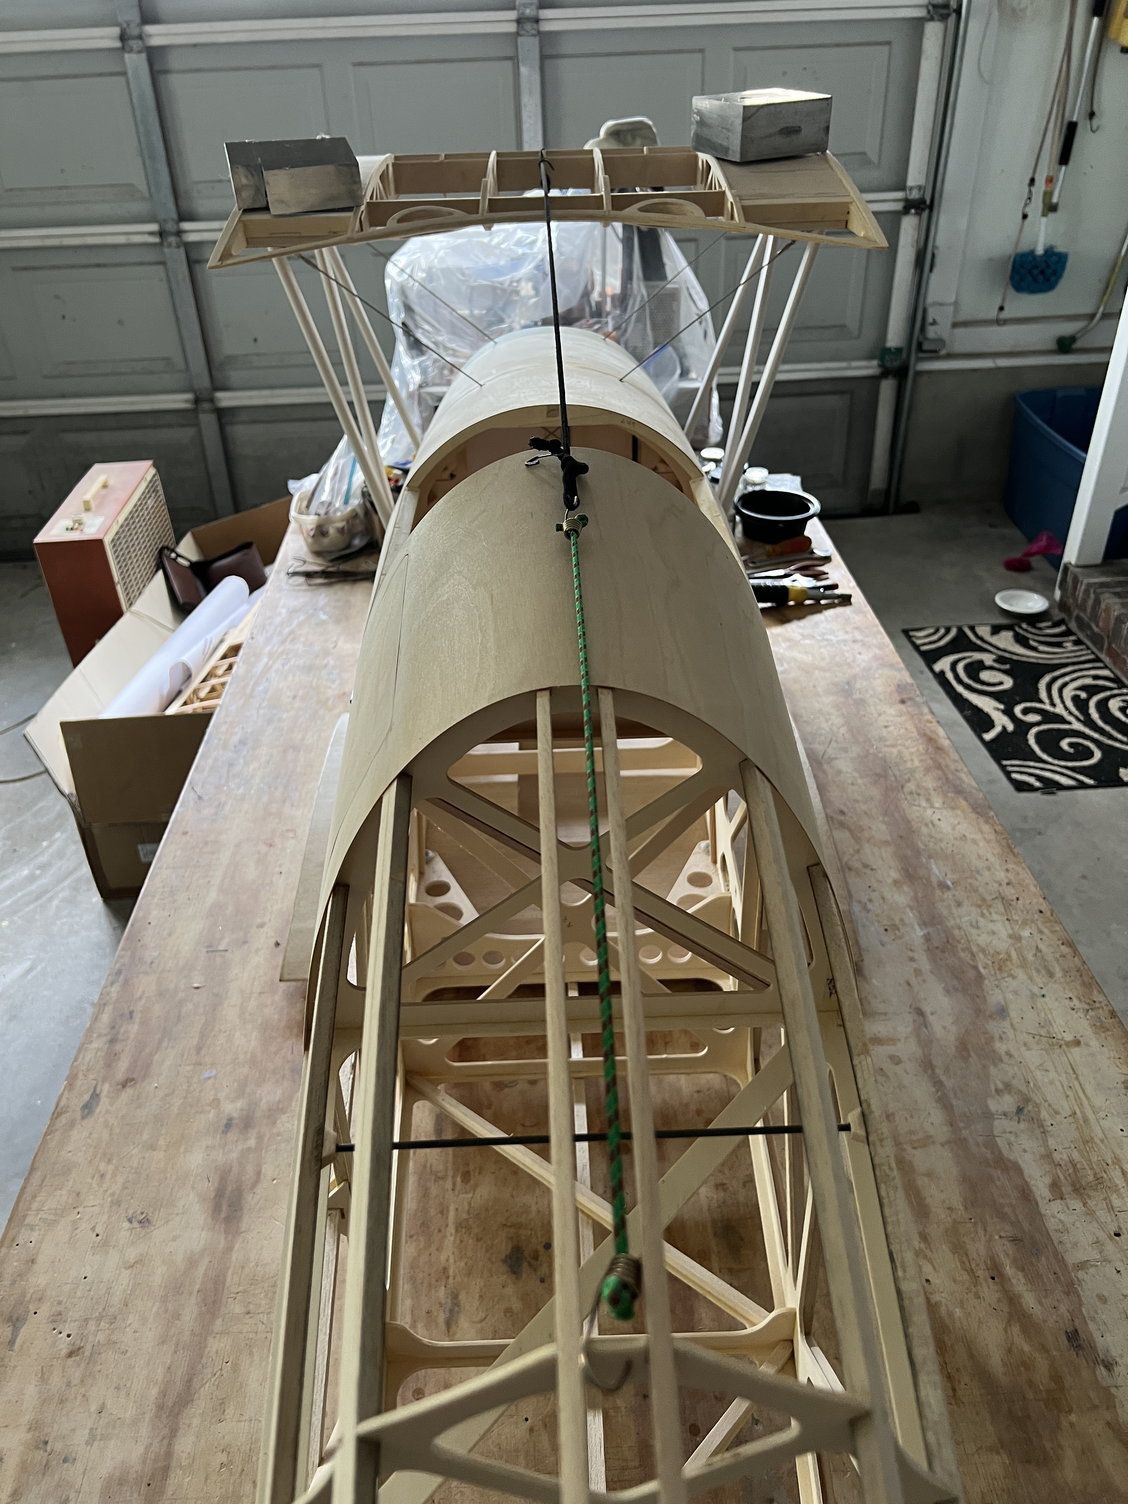
Here's a good pic of the rope/bungee pulling aft.
As you'll find out once you get here, the cabanes are the core foundation of the load structure on this aircraft. Everything starts with them. And their cross wires are the key. In the previous steps I got them fitted PERFECTLY but during the glue up how can you pin the wires in place when they are already tensioned? Answer: by having the bottom cabane bolts very loose. But in order to be able to apply glue to all the fittings and strut pockets you have to have the bottom brackets tight with the struts sticking up. Then you can drop the center section - with its brackets, already smothered with glue - down into them. See the problem here? I had to practiced this process several times without glue (very time consuming) to find a way to get it all to come together. It went something like this:
1) I cleaned all the brackets thoroughly then scuffed them up with scotchbrite.
2) I bolted the bottom brackets (with the cross wires loosely hanging in place of course) to the fuselage snugly and the top brackets to the wing center section somewhat loosely.
3) I applied Hysol to all the pockets and fittings. You MUST use an epoxy that is slow cure because this process is going to take almost an hour once you mix your glue. (God forbid you get interrupted in the middle for any reason and can't finish! You would be in real trouble!!)
4) It gets tricky here: apply glue to all fittings and pockets then drop the center section down on the struts as best as you can on both sides. They will NOT go all the way into place because the struts are tight. Then loosen the bottom bolts on one side as loose as possible so you can drop the fittings in further. Retighten then do the same on the other side. The gooped up epoxy will help to loosely hold things together enough for you to sneak the fittings all the way into place. I systematically snugged/loosened the bottom bolts to keep the whole mess from falling apart during the process. It sounds complicated because it WAS complicated.
5) Now the fun part: pinning/tensioning the wires. I used 4 short 3mm bolts instead of the little pins because they'd be easier to work with. At this stage the bottom brackets are retightened on both sides to keep the whole mess from falling apart. So: loosen one side, install the wire pins then do the same on the other side. Once the pins are installed and both side bottom brackets are tightened the wires will tension (which pulls everything together) and the assembly is done. You will have to perfect your process through (dry) practice.
At this point the whole assembly is not yet constrained if you move the center section in a forward direction - at least not until the glue cures in the diagonal struts. So you will see in the pictures I roped/bungied the center section to the rear for cure up.
See, that wasn't so hard, was it. . . . . . .?
The weights on top are redundant but seemed like a good idea anyway. I remeasured everything for plumb (it's perfect), but there really wasn't anything to be done about it at this point!
Here's a good pic of the rope/bungee pulling aft.
Last edited by mitchilito; 09-16-2022 at 03:52 AM.
The following users liked this post:
tmac48 (09-16-2022)
09-16-2022, 03:18 PM
#184
Mitch did I read someplace that you were thinking of coming to Australia for a holiday? would be great if we could time it for when I'm at this stage ( free accommodation of course )
09-17-2022, 12:18 AM
#185
Mitch can you remember having any trouble with the alignment of the tip of the wings. Without the sub rear spar extension(F13) it does seem to line up, did you need to sand that part ( F13) so as it angles down enough to line things up?
09-17-2022, 02:10 AM
#186
While we're on this subject, it did make me realize that it would be a HUGE help to have two people for this step. One person could help hold the center section while the second jockeys it into the strut pockets. Wish I'd thought of that before. . . .!!!
Last edited by mitchilito; 09-17-2022 at 02:31 AM.
09-17-2022, 02:18 AM
#187
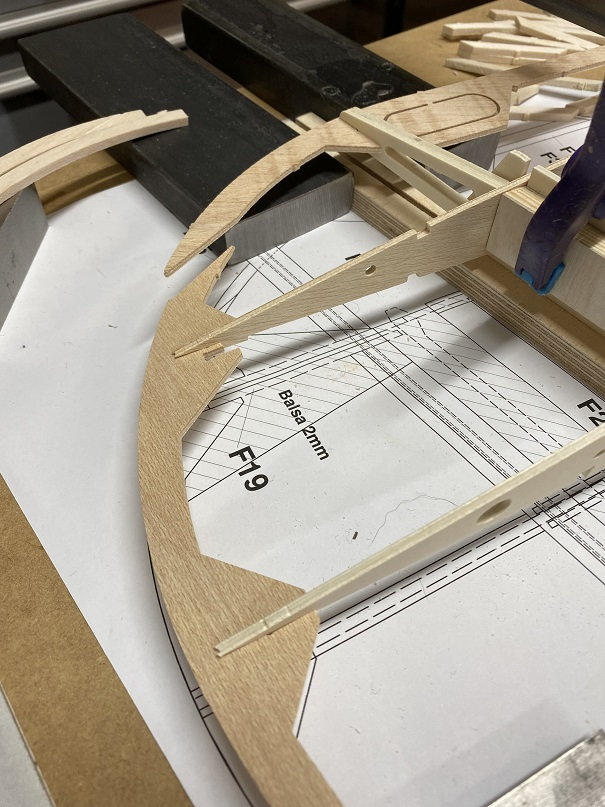
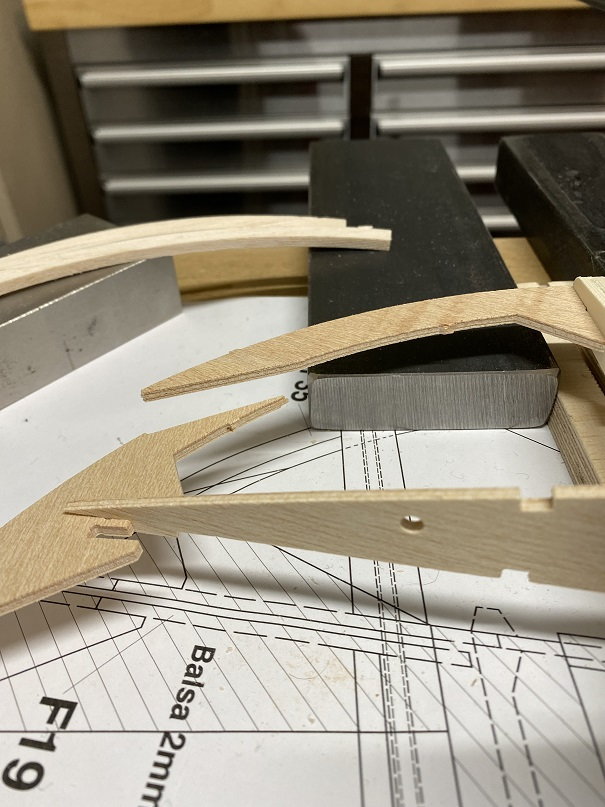
Edit: You got me thinking, so I went out and took a pic of a wing tip. The structure of the wing pulls the tip bow into a somewhat cambered shape. You don't want to mess with that. Just glue the bow to the trailing edge piece before assembly then build away.
Last edited by mitchilito; 09-17-2022 at 02:42 AM.
09-17-2022, 03:04 AM
#188
Well that takes care of that then! The bow that is in yours is exactly what mine looks like, didn't look correct but all sanded up it looks just fine. As they say a picture is worth a thousand words!!
Thank you once again.
tmac48.
Thank you once again.
tmac48.
Last edited by tmac48; 09-17-2022 at 05:50 AM.
09-18-2022, 03:25 AM
#189
At this point it's time to rig the entire airframe, starting with the tail surfaces. Most of the hard work on the tail rigging is already done during build but the final fuselage anchor needed to be installed. The plans show it going THROUGH the fuselage and actually transecting the bottom hinge plate. I don't really understand what JW wanted and I felt I had a better way (like a dozen other times on this build ). I simply installed a bottom anchor plate cut out of 1.5mm aluminum. There are several advantages to this and no drawbacks IMHO. It also happens to be the way I've done every other tail rigging I've ever had with no problems.

Better angle on the wires, no added structure for the bottom anchor, doesn't penetrate the covering.

Simple is almost always better.
). I simply installed a bottom anchor plate cut out of 1.5mm aluminum. There are several advantages to this and no drawbacks IMHO. It also happens to be the way I've done every other tail rigging I've ever had with no problems.Better angle on the wires, no added structure for the bottom anchor, doesn't penetrate the covering.
Simple is almost always better.
 09-20-2022, 12:34 AM
#194
Mitch I have noticed that the trailing edge of the elevator has balsa fillers on the top and bottom and sanded to the contour of the ribs. The wings on the other hand do not. I guess we need to attach the top covering around the trailing edge and glue it to the bottom of the wings trailing edge so it follows the contour of the ribs . Is this how you see it?
09-20-2022, 03:44 AM
#195
Mitch I have noticed that the trailing edge of the elevator has balsa fillers on the top and bottom and sanded to the contour of the ribs. The wings on the other hand do not. I guess we need to attach the top covering around the trailing edge and glue it to the bottom of the wings trailing edge so it follows the contour of the ribs . Is this how you see it?
09-20-2022, 03:56 AM
#196
I going to use a similar process to glue the wing struts as I did for the cabanes: dry rig every thing then glue and rig in place for the cure. I'm going to do this without the X's (drag braces) in between the struts then install them later after cure.

make sure to bend a left and a right set! I threw my bending jig in the pic. It has a nicely rounded edge to bend against
make sure to bend a left and a right set! I threw my bending jig in the pic. It has a nicely rounded edge to bend against
The following users liked this post:
tmac48 (09-21-2022)
09-21-2022, 03:37 AM
#199
Once again the instructions/plans that JW provided appear to be for an earlier iteration of this airplane. The detail that shows the flying/landing wire lengths show a total of 8 flying wires. On Voglesang's website, the pictures he has of the JW Bucker do indeed show double flying wires. I guess somewhere along the line they decided one was enough. Along those lines, for some reason they left one of the LANDING wire strut brackets a double wire bracket. I just can't imagine why. . .
With all that said, that detail also calls out exact wire lengths - hole to hole in the clevises. That is of course just a starting point because they will all need to be adjusted during the rig process. As for how to hook up the wires, this is what I settled on: you start the process by hooking up the landing wires, then the flying wires to the outer struts, then the last wires hook to the bottom center section bracket where they are the easiest to deal with.
I didn't know what JW had in mind for how to hook up the wires/struts at the field before flight. So I called a buddy that had a 50% Bucker (from a different manufacturer) and asked him how he did it. He said he left the struts hooked to the wires and just hung it all off the top center section for transport. At the field you just push the wires/struts into place and drop in the bolts.
Be sure to read the captions:
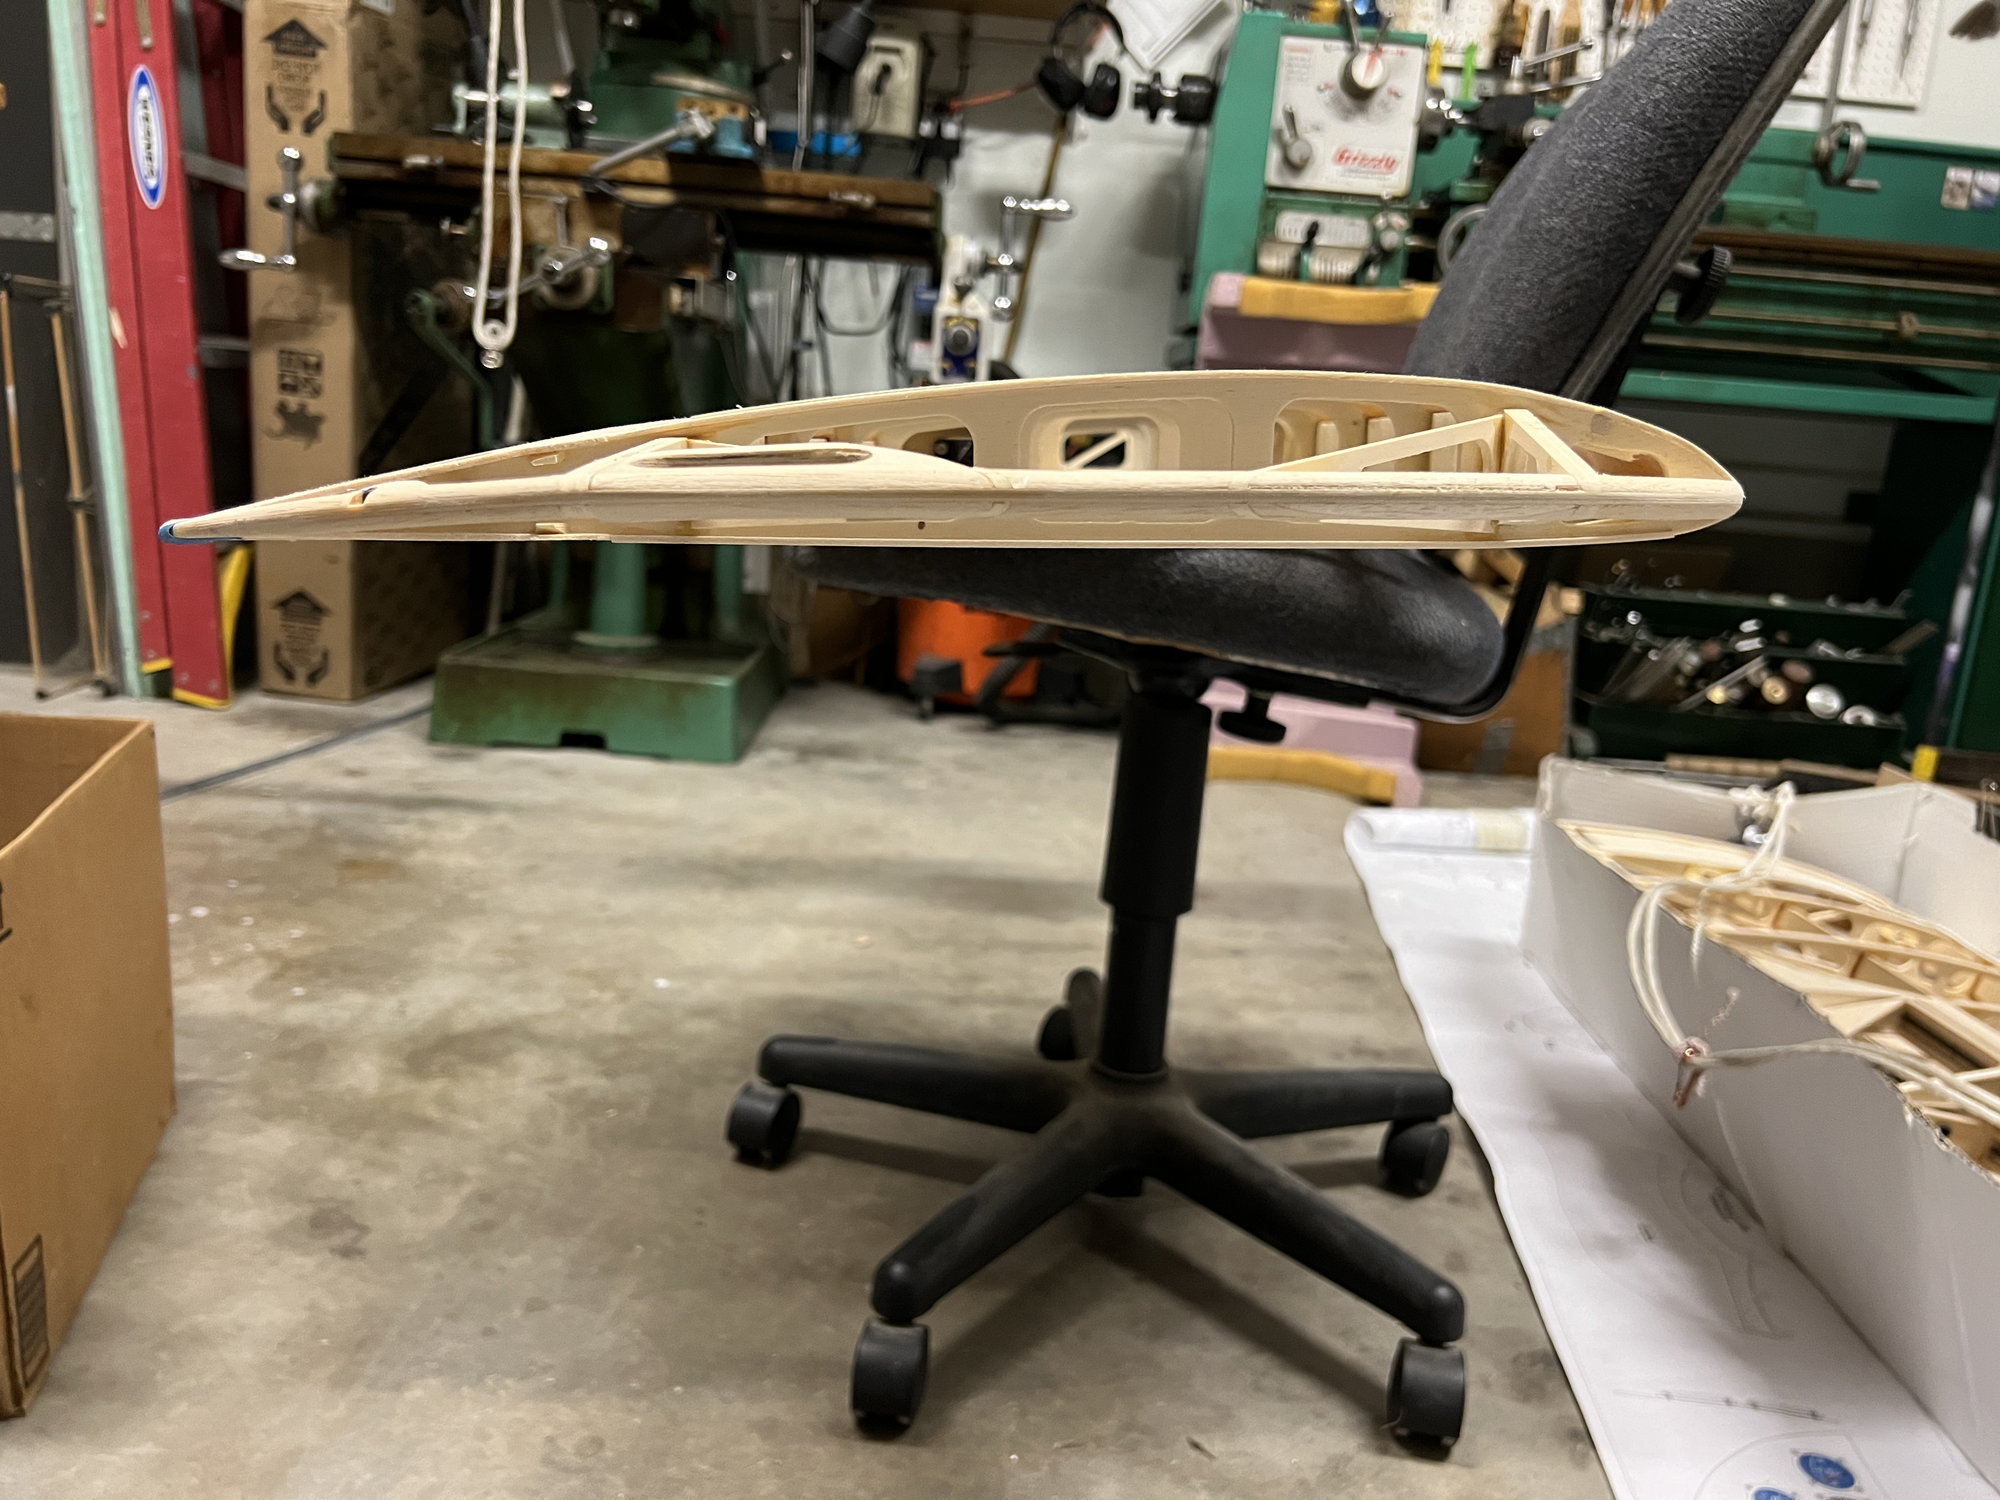
I started by checking all incidences using the center sections as a base.

After I got them as close as I could with the meter I did what JW recommends: site down the airframe by eye to verify. This works very well.

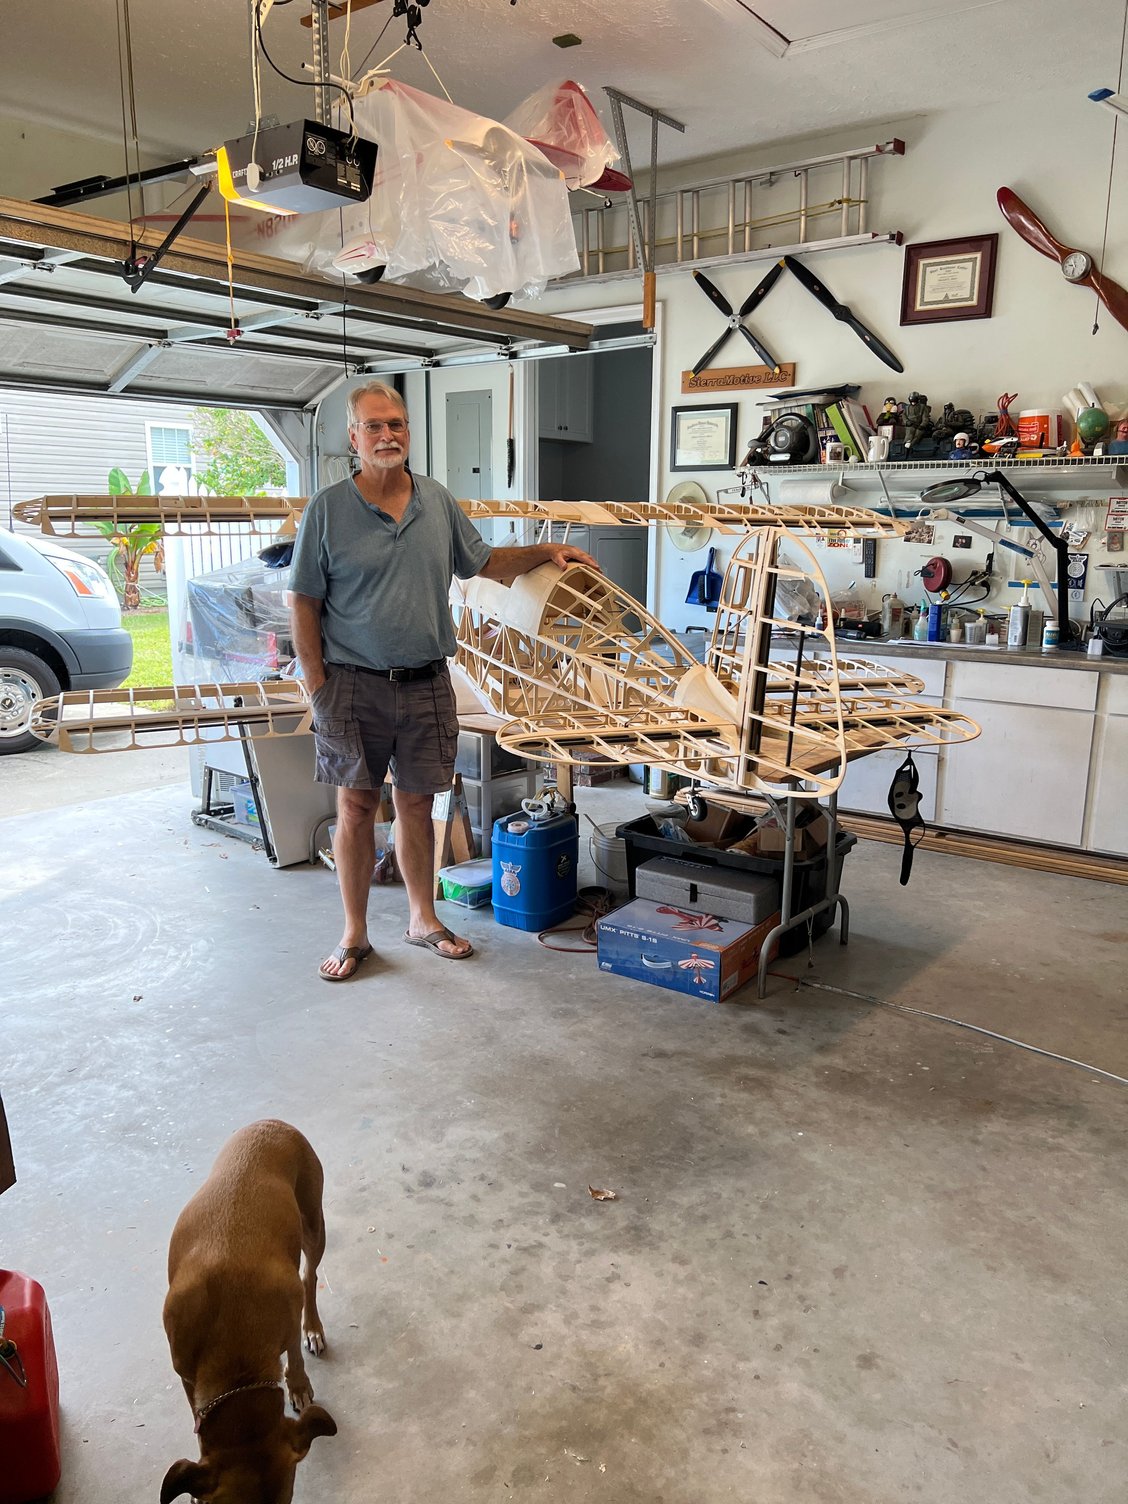
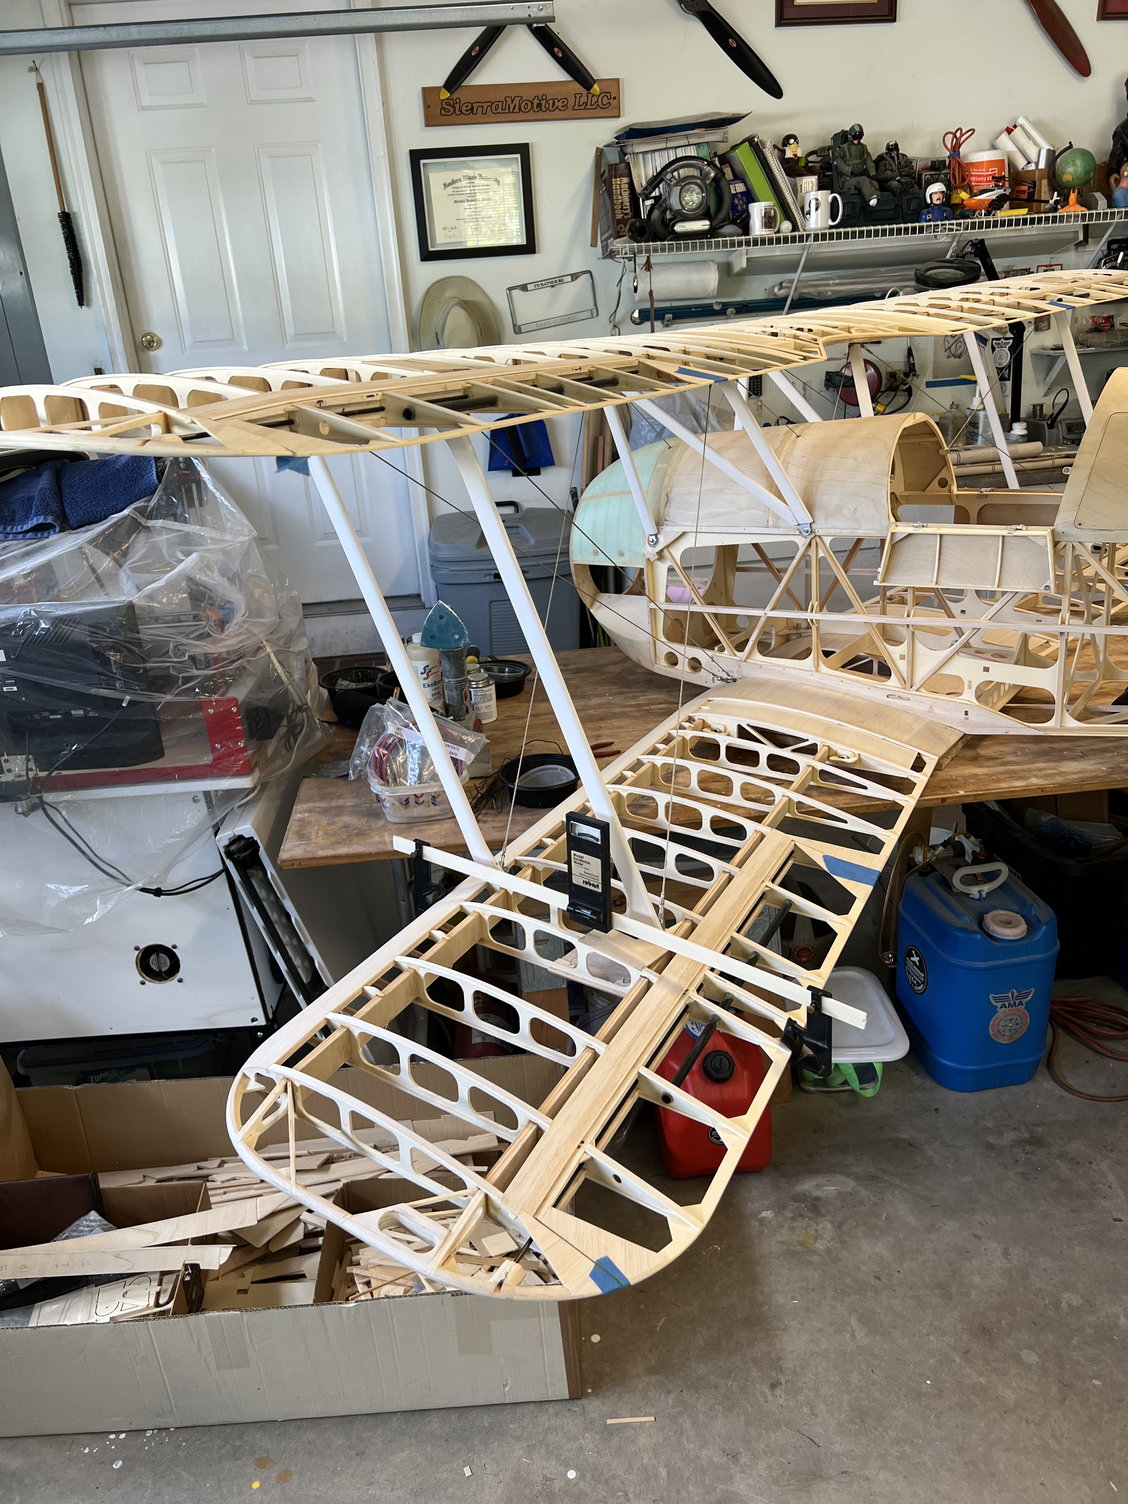
With all that done, here it is ready to glue up. the wires are dropped off the struts so they can be removed/glued up and reinstalled. Then the wires reattached for cure. The drag Xs will be glued in at this time also. Man, I wish I had this build thread when I started!!!!
With all that said, that detail also calls out exact wire lengths - hole to hole in the clevises. That is of course just a starting point because they will all need to be adjusted during the rig process. As for how to hook up the wires, this is what I settled on: you start the process by hooking up the landing wires, then the flying wires to the outer struts, then the last wires hook to the bottom center section bracket where they are the easiest to deal with.
I didn't know what JW had in mind for how to hook up the wires/struts at the field before flight. So I called a buddy that had a 50% Bucker (from a different manufacturer) and asked him how he did it. He said he left the struts hooked to the wires and just hung it all off the top center section for transport. At the field you just push the wires/struts into place and drop in the bolts.
Be sure to read the captions:
I started by checking all incidences using the center sections as a base.
After I got them as close as I could with the meter I did what JW recommends: site down the airframe by eye to verify. This works very well.
With all that done, here it is ready to glue up. the wires are dropped off the struts so they can be removed/glued up and reinstalled. Then the wires reattached for cure. The drag Xs will be glued in at this time also. Man, I wish I had this build thread when I started!!!!
Last edited by mitchilito; 09-21-2022 at 03:41 AM.

