


Welcome to Club SAITO !


 07-10-2020, 11:23 AM
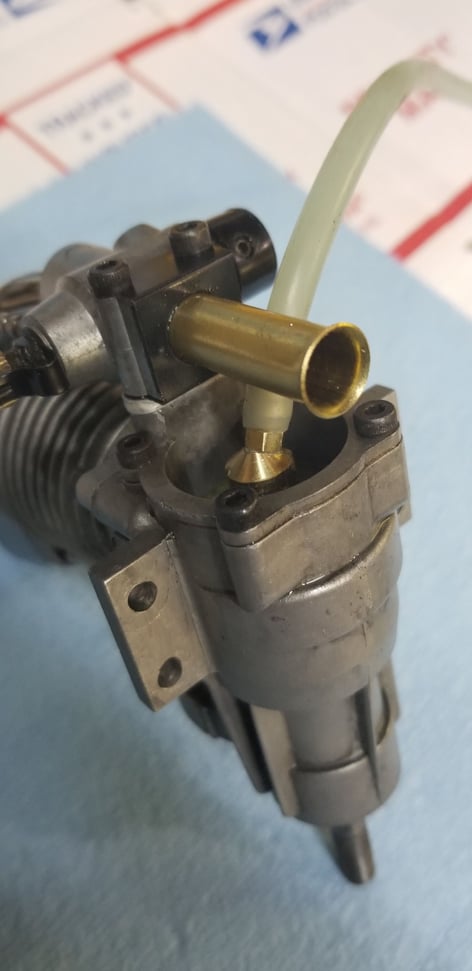
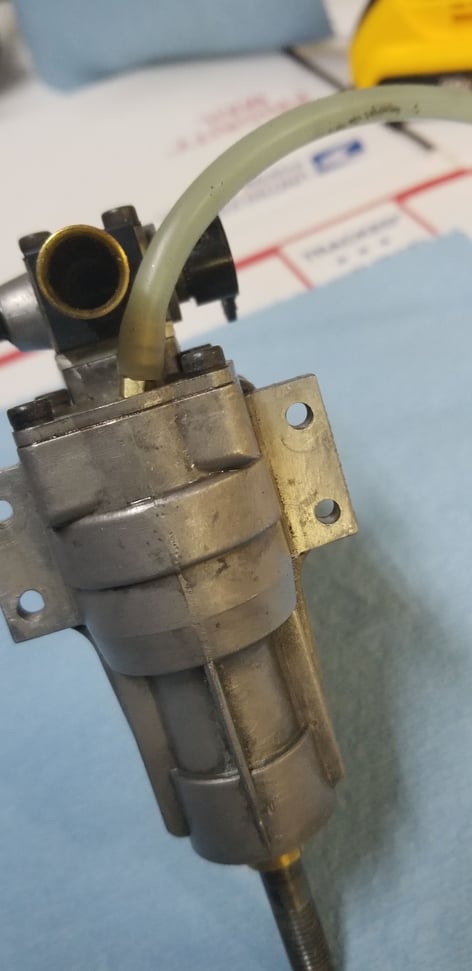
Pics are of a customer's fa150. He said he replaced the piston ring and bearings and doesn't understand why it is down on power. Clearly the rear bearing was not fully seated.
Parts damaged: Piston, Con Rod and Bearings. An expensive fix that could have been easily avoided.
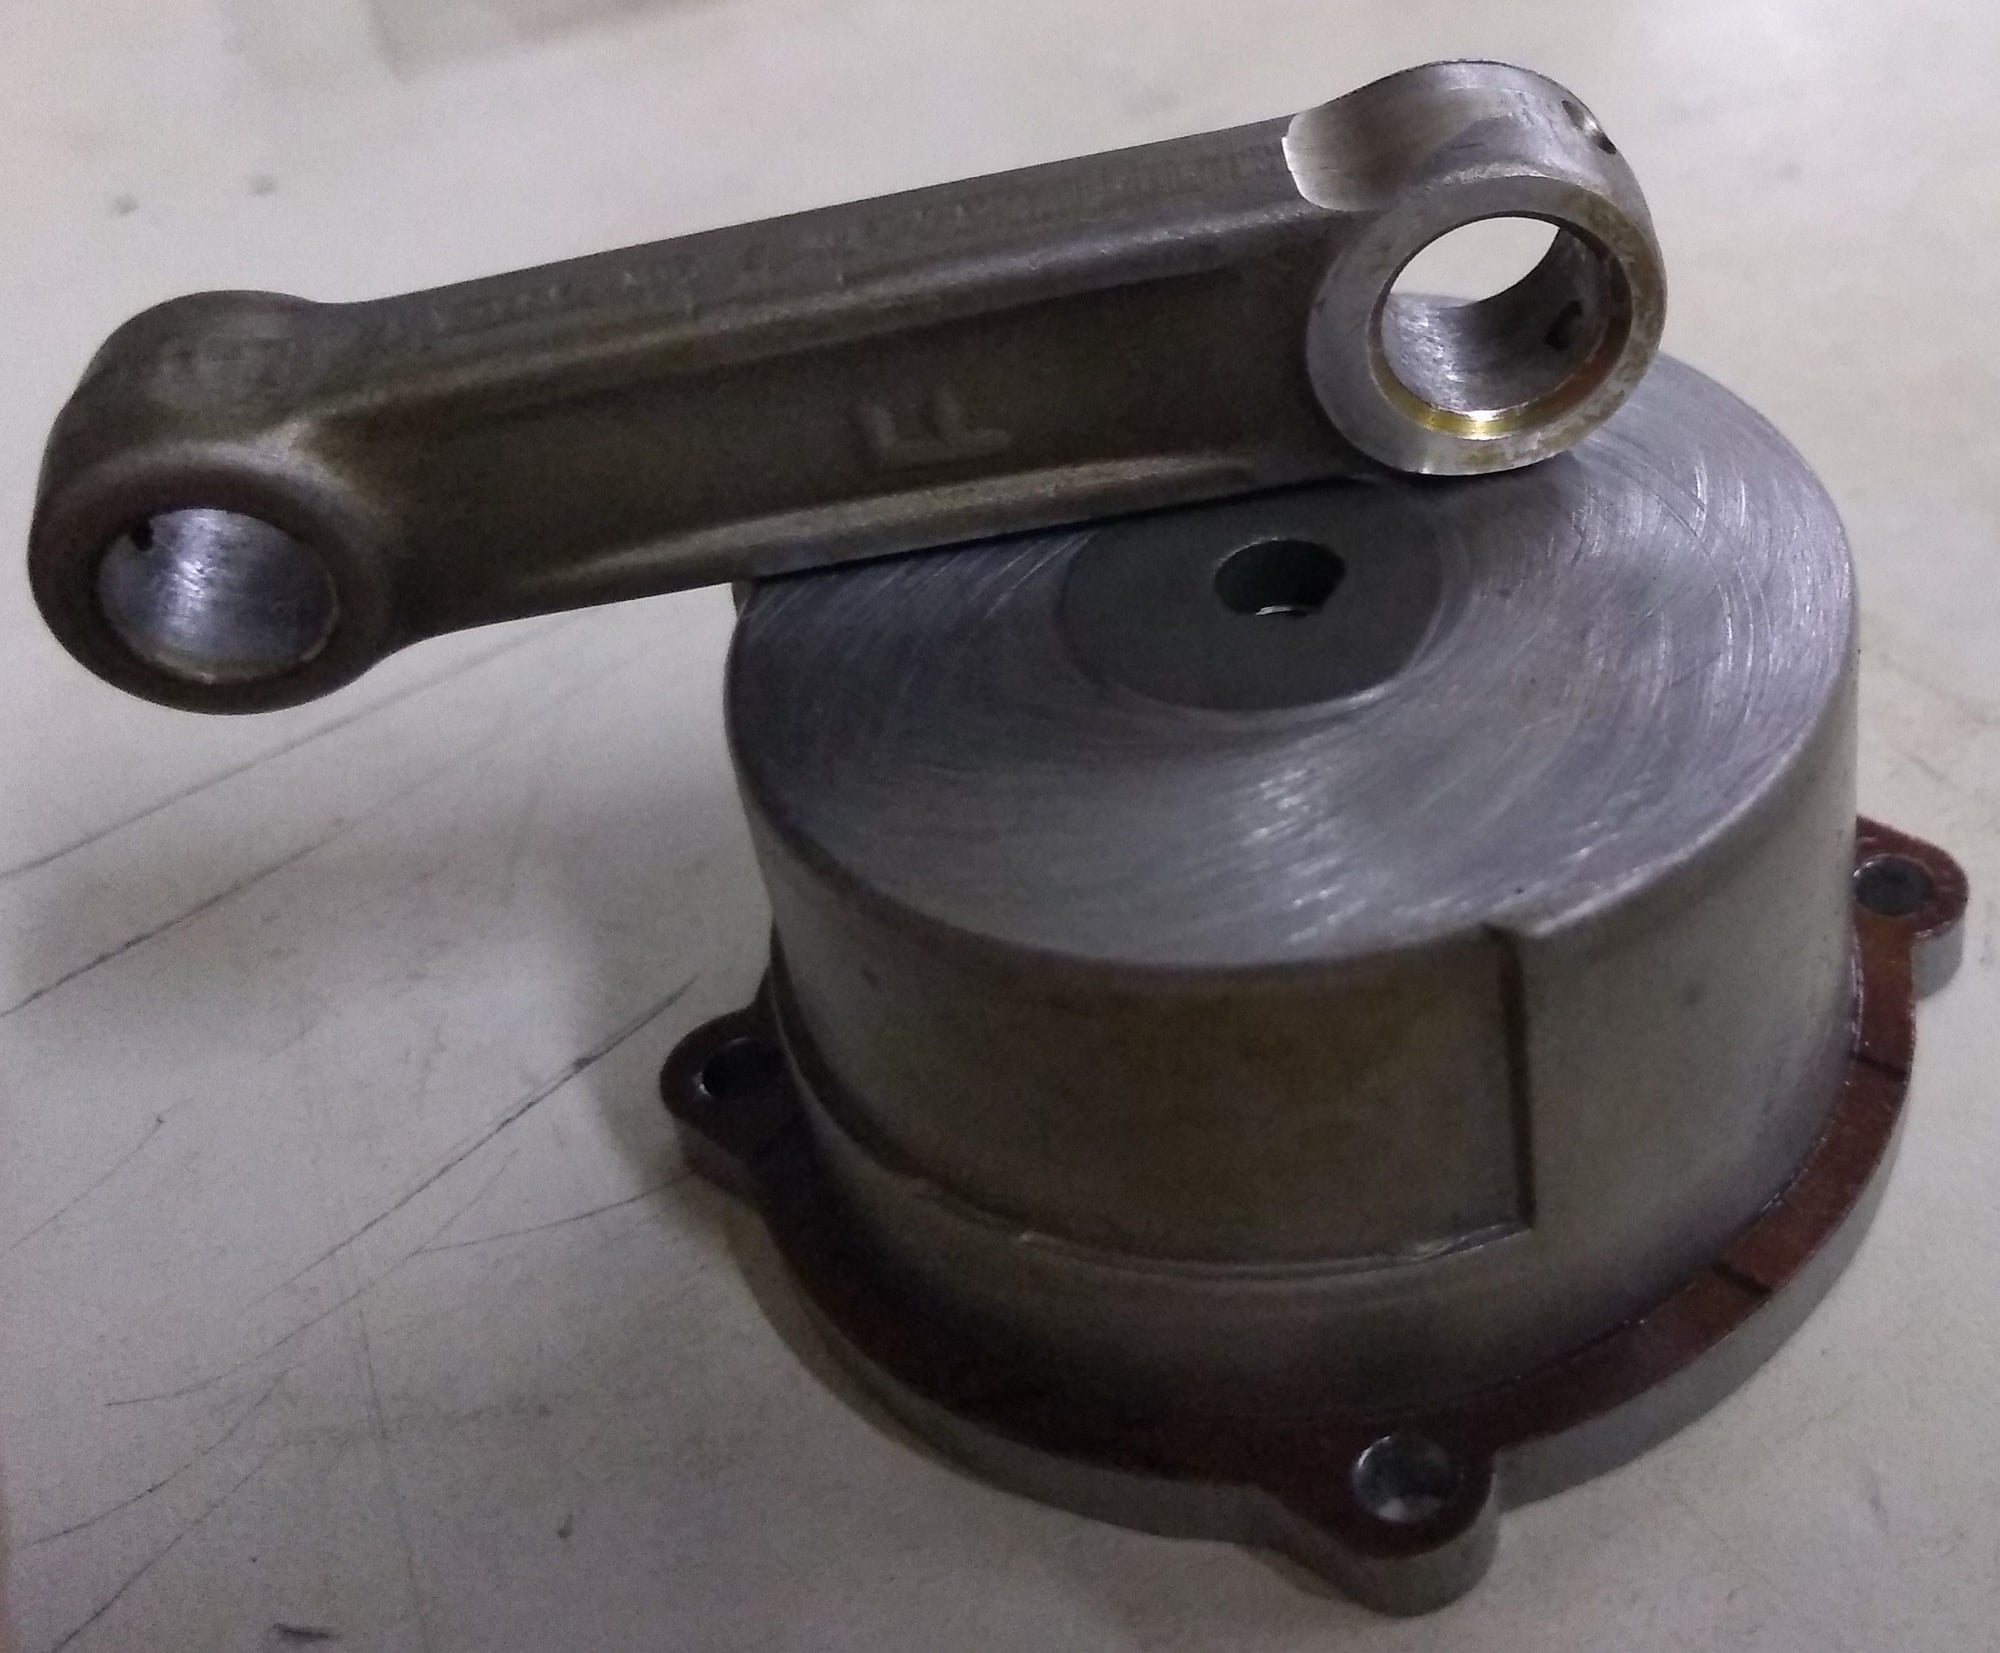
Bronze bushings smeared with aluminum swarf.
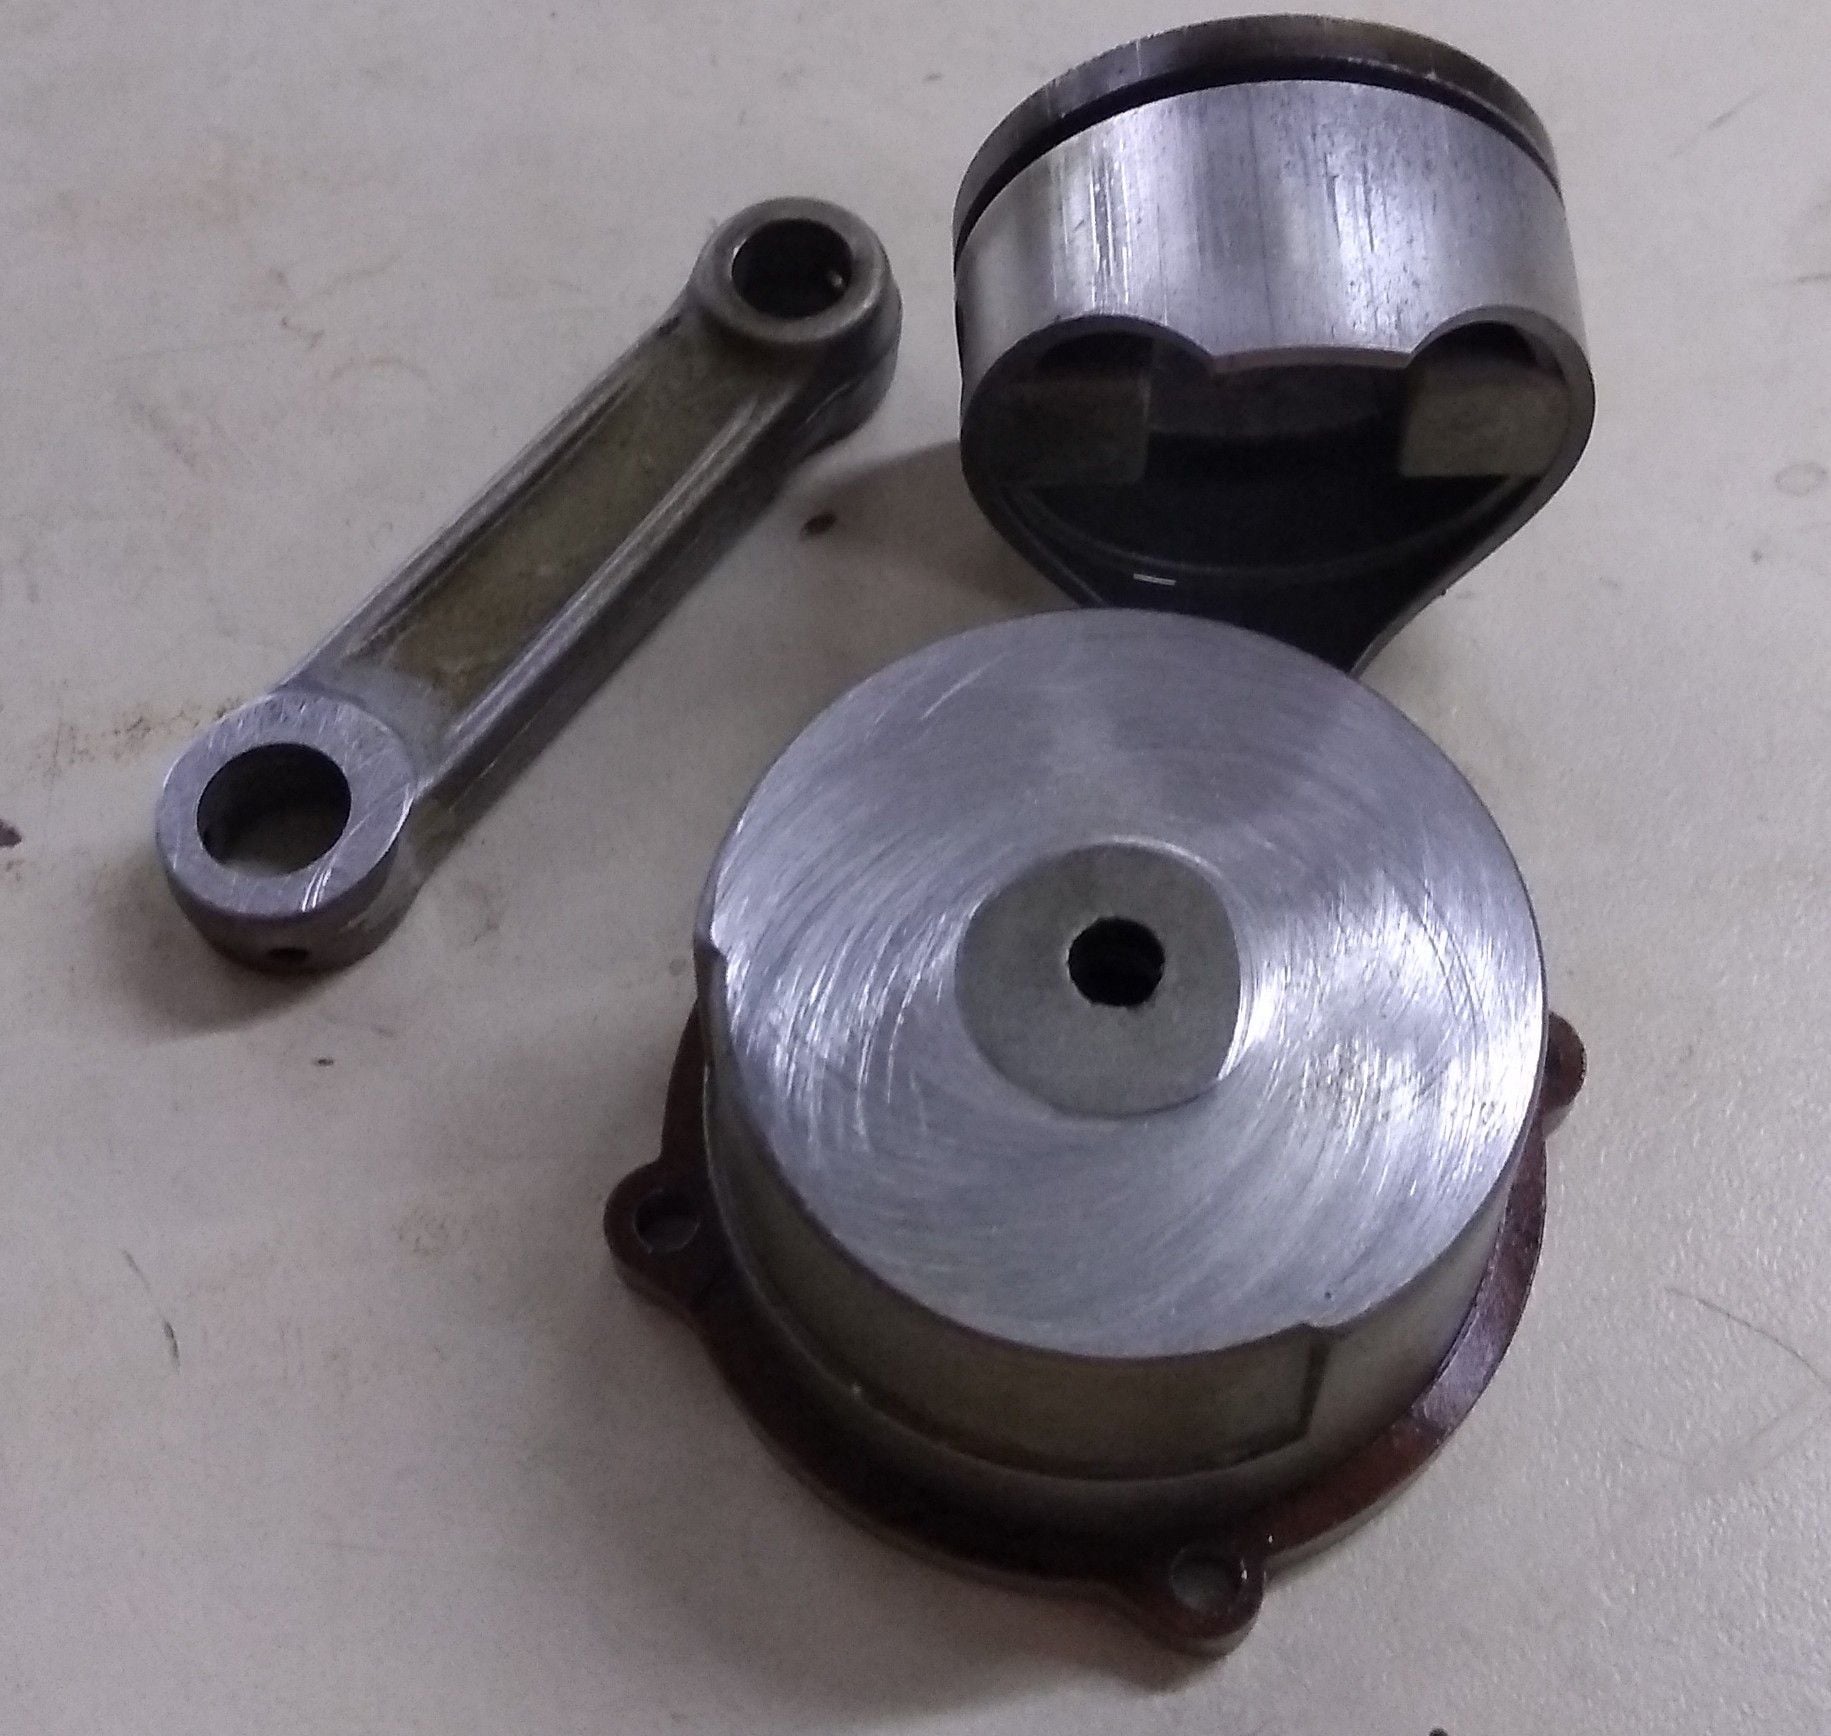
Big end of rod worn, aluminum swarf smeared on piston and in ring groove, rear cover gouged out.
Parts damaged: Piston, Con Rod and Bearings. An expensive fix that could have been easily avoided.
Bronze bushings smeared with aluminum swarf.
Big end of rod worn, aluminum swarf smeared on piston and in ring groove, rear cover gouged out.
07-10-2020, 01:24 PM
 07-10-2020, 01:37 PM

My Feedback: (102)

Join Date: Dec 2001
Location: Colonial Beach, VA
Posts: 20,370
Likes: 0
Received 25 Likes
on
25 Posts
It worked for me yesterday, and they send an E-mail either the same day if ordered in the AM, the next day if ordered in the PM, they use the term,(dispatched). Gary swears by them also.
Does the customer want it back or could be a project for someone?
 07-10-2020, 01:52 PM
The local customer has it back but has no use for it really. It's a good looking engine. The crank has been shortened about .25". Comes with exhaust header but no muffler.
Parts needed to make it right:
Bearings
Piston
Con Rod
Rear cover
Valve springs
Tappets
Gasket set
Muffler
Cam and pin look good. Has new ring.
PM me an offer shipped.
Last edited by Glowgeek; 07-10-2020 at 02:09 PM.
 07-11-2020, 02:10 PM
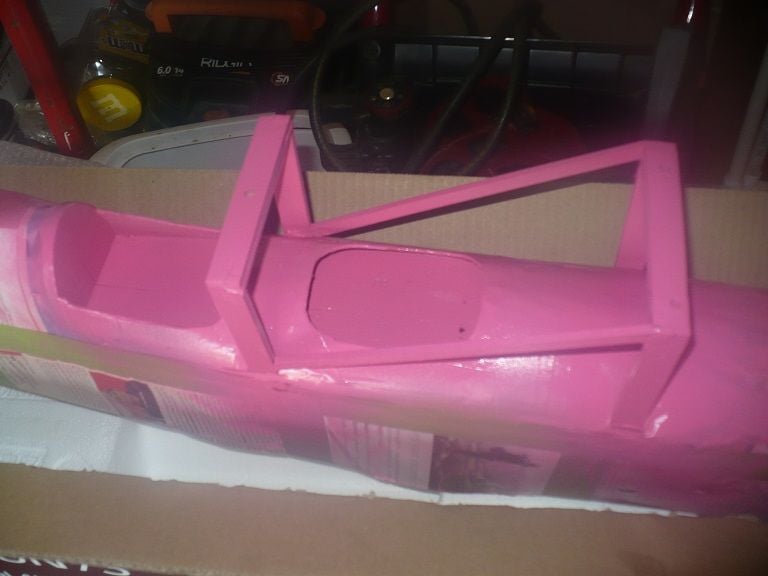
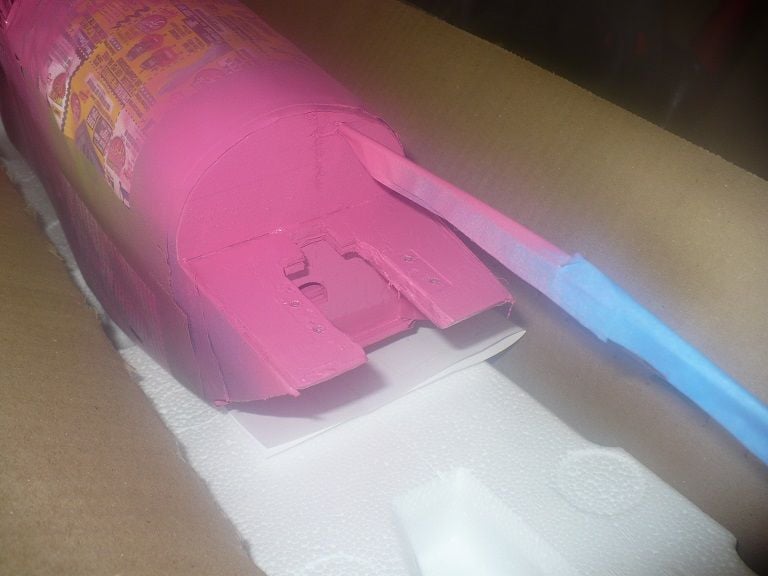
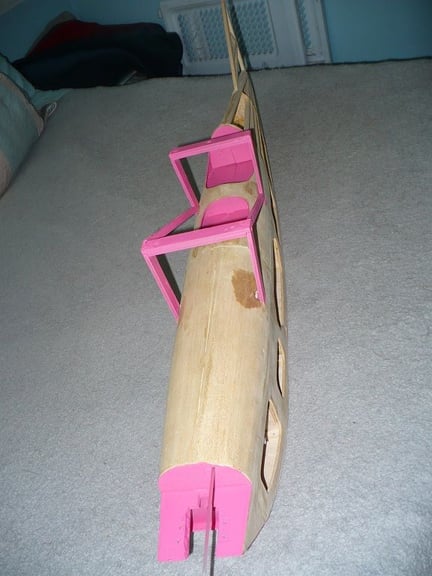
The main wing struts and cross brace were stained (Its a Pete N Poke thing I guess) but I decided they would look better matching the firewall. I haven't made a final decision on the color for the static struts, they will either be bright red to match the checkerboard on the vertical fin or painted to match the firewall and main wing struts.
07-12-2020, 08:52 AM
The paint is dry and the masking is off. As you can see the boys had to jump in and check it out. I swear I hear airplane noise coming from those two! 
07-12-2020, 11:03 AM
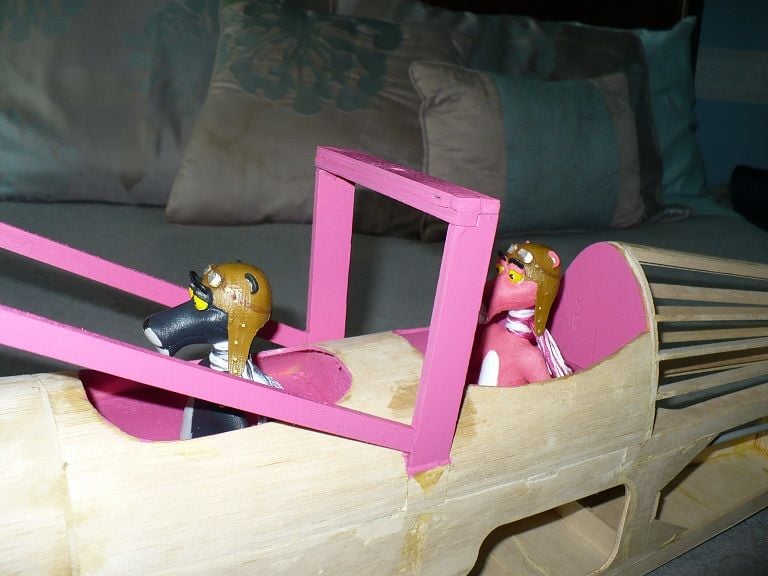
Nothing PC about it I wanted something to contrast with Pinky so I came up with the natural color of a panther and Blackie was born. Both were the product of British Expat living in NW France. Douglas received a 3D printer for Christmas from his kids. The panthers were an early project for him. He made the scarves and did all the painting himself. I take no credit for my flight crew except for the concept. They came into my possession back in January. I can't complain the airframe was free and the building is fairly good it just needs completing.
Last edited by FlyerInOKC; 07-12-2020 at 02:11 PM.
07-12-2020, 06:11 PM
Junior Member
Join Date: Mar 2020
Posts: 13
Likes: 0
Received 0 Likes
on
0 Posts
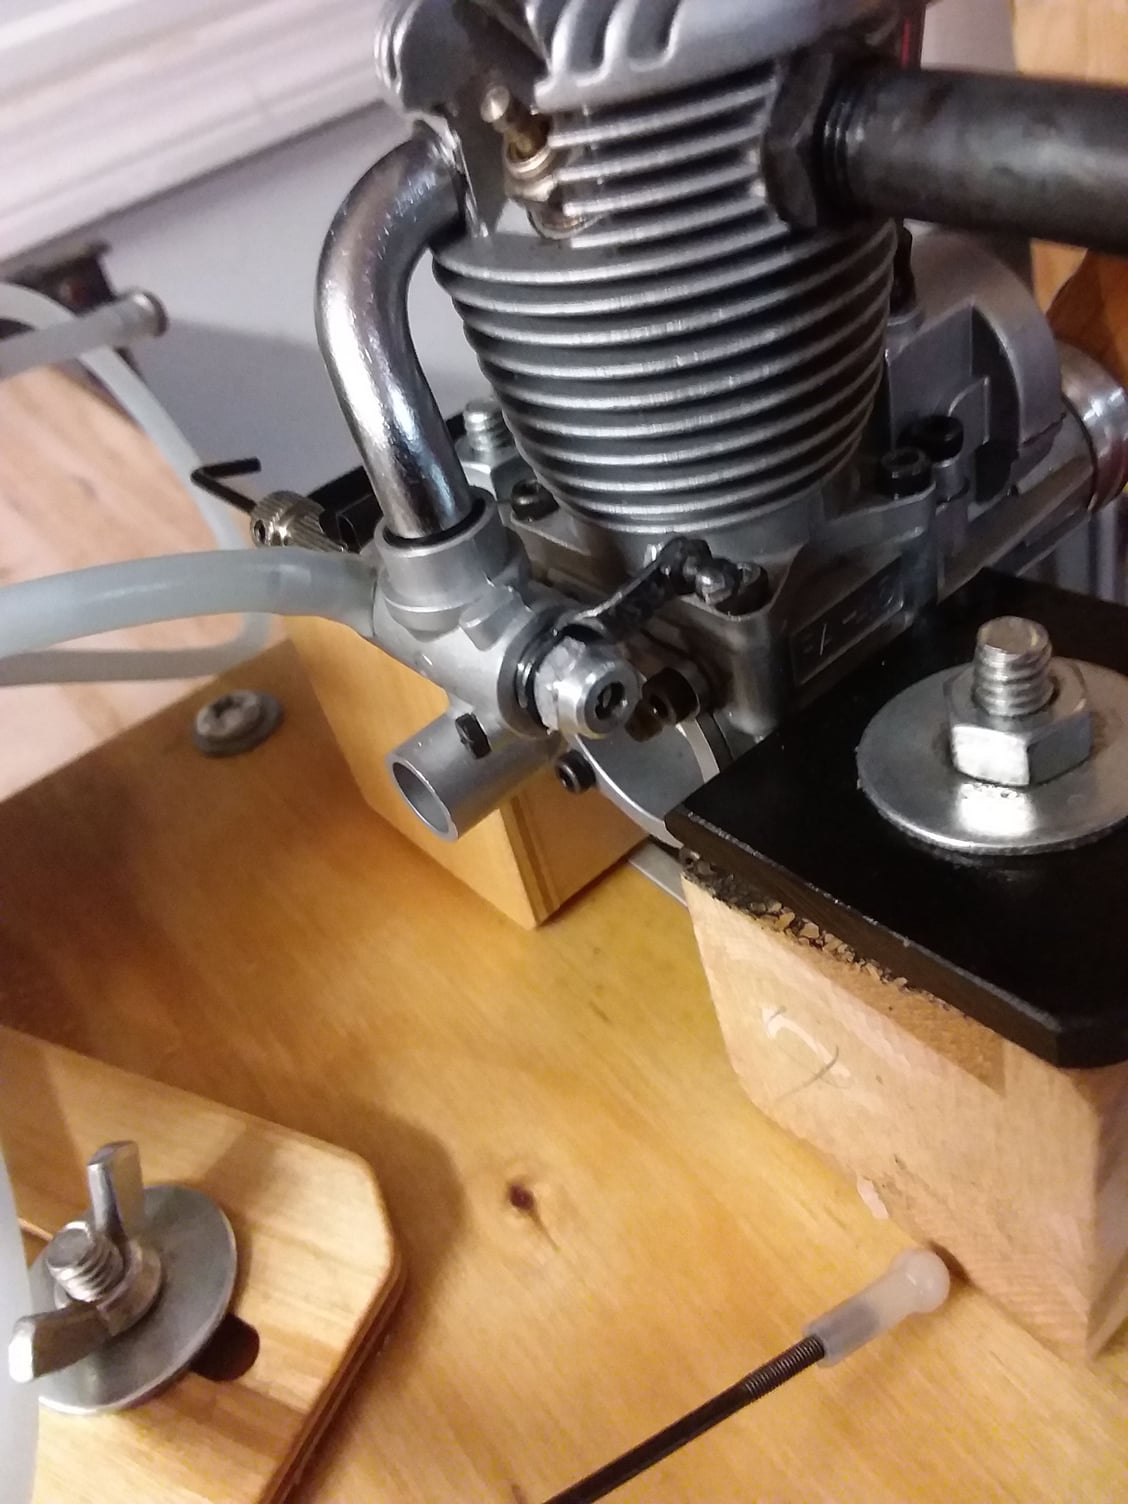
This is a first for me. I have 20 Saitos an this is the first time I can't get one to run. I bought it used but it has barely been run. Clean as a whistle...cleaned the carb, new glow plug, adjusted the valves. I even thought someone may have disassembled the engine and messed up the timing so I pulled the head and timing cover and checked that. Everything good. I think it has something to do with the carb. The low speed needle /throttle arm has a nut attaching it to the barrel. On my other engines it is easier to tell the starting point for the low speed setting. Flush is where I usually start. At the flush point on this engine, I am flooding
07-12-2020, 07:06 PM
Junior Member
Join Date: Mar 2020
Posts: 13
Likes: 0
Received 0 Likes
on
0 Posts
 07-12-2020, 07:28 PM
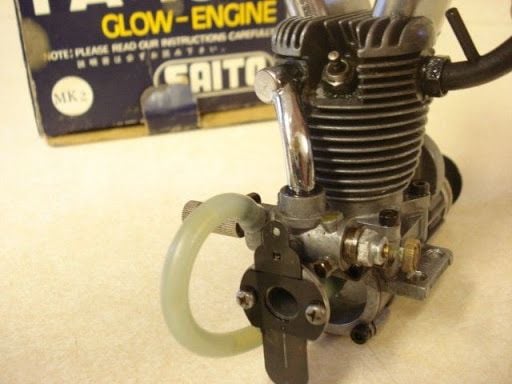
Graniteguru, I had one of the fa45's with that setup.
To set the lsn starting position put a T-pin in the carb and close the throttle barrel on it. That will keep the throttle open at about idle postion. Put a piece of fuel tubing on the carb fuel nipple and blow through the tubing while adjusting the lsn. Adjust the lsn to where you barely hear air hissing.
Set the hsn to 2 turns out from seated for start up.
07-12-2020, 07:41 PM
Junior Member
Join Date: Mar 2020
Posts: 13
Likes: 0
Received 0 Likes
on
0 Posts
Graniteguru, I had one of the fa45's with that setup.
To set the lsn starting position put a T-pin in the carb and close the throttle barrel on it. That will keep the throttle open at about idle postion. Put a piece of fuel tubing on the carb fuel nipple and blow through the tubing while adjusting the lsn. Adjust the lsn to where you barely hear air hissing.
Set the hsn to 2 turns out from seated for start up.
To set the lsn starting position put a T-pin in the carb and close the throttle barrel on it. That will keep the throttle open at about idle postion. Put a piece of fuel tubing on the carb fuel nipple and blow through the tubing while adjusting the lsn. Adjust the lsn to where you barely hear air hissing.
Set the hsn to 2 turns out from seated for start up.
07-12-2020, 08:39 PM

My Feedback: (1)
hey guys, I balanced this crazy prop, it's hub was wayyyy off.. it's a Beechwood 13x6 Masterscrew. I cut it down to 12" on a lathe (not mine). it came out great. well it took close to 1/8" of glue on one side of the hub, and I also had to remove some wood off the other side of the hub with a drum sander (not much). but it's very well balanced now. do you think I can trust it?
Jim
Jim
07-13-2020, 02:11 AM
My Feedback: (102)
Join Date: Dec 2001
Location: Colonial Beach, VA
Posts: 20,370
Likes: 0
Received 25 Likes
on
25 Posts
All the 45's I've seen were set up like this, Lonnie has advised you well. Here, you can read about 4 similar engine but none with a set up like yours: http://sceptreflight.com/Model%20Engine%20Tests/Saito%20FA-45%20%281%29.html
This one is the MKII: http://sceptreflight.com/Model%20Engine%20Tests/Saito%20FA-45%20%282%29.html
This one is the MKII: http://sceptreflight.com/Model%20Engine%20Tests/Saito%20FA-45%20%282%29.html
Last edited by Hobbsy; 07-13-2020 at 02:19 AM. Reason: Add content
07-13-2020, 03:40 AM
hey guys, I balanced this crazy prop, it's hub was wayyyy off.. it's a Beechwood 13x6 Masterscrew. I cut it down to 12" on a lathe (not mine). it came out great. well it took close to 1/8" of glue on one side of the hub, and I also had to remove some wood off the other side of the hub with a drum sander (not much). but it's very well balanced now. do you think I can trust it?
Jim
Jim