


Welcome to Club SAITO !


 07-30-2022, 07:49 PM


Hey guys,
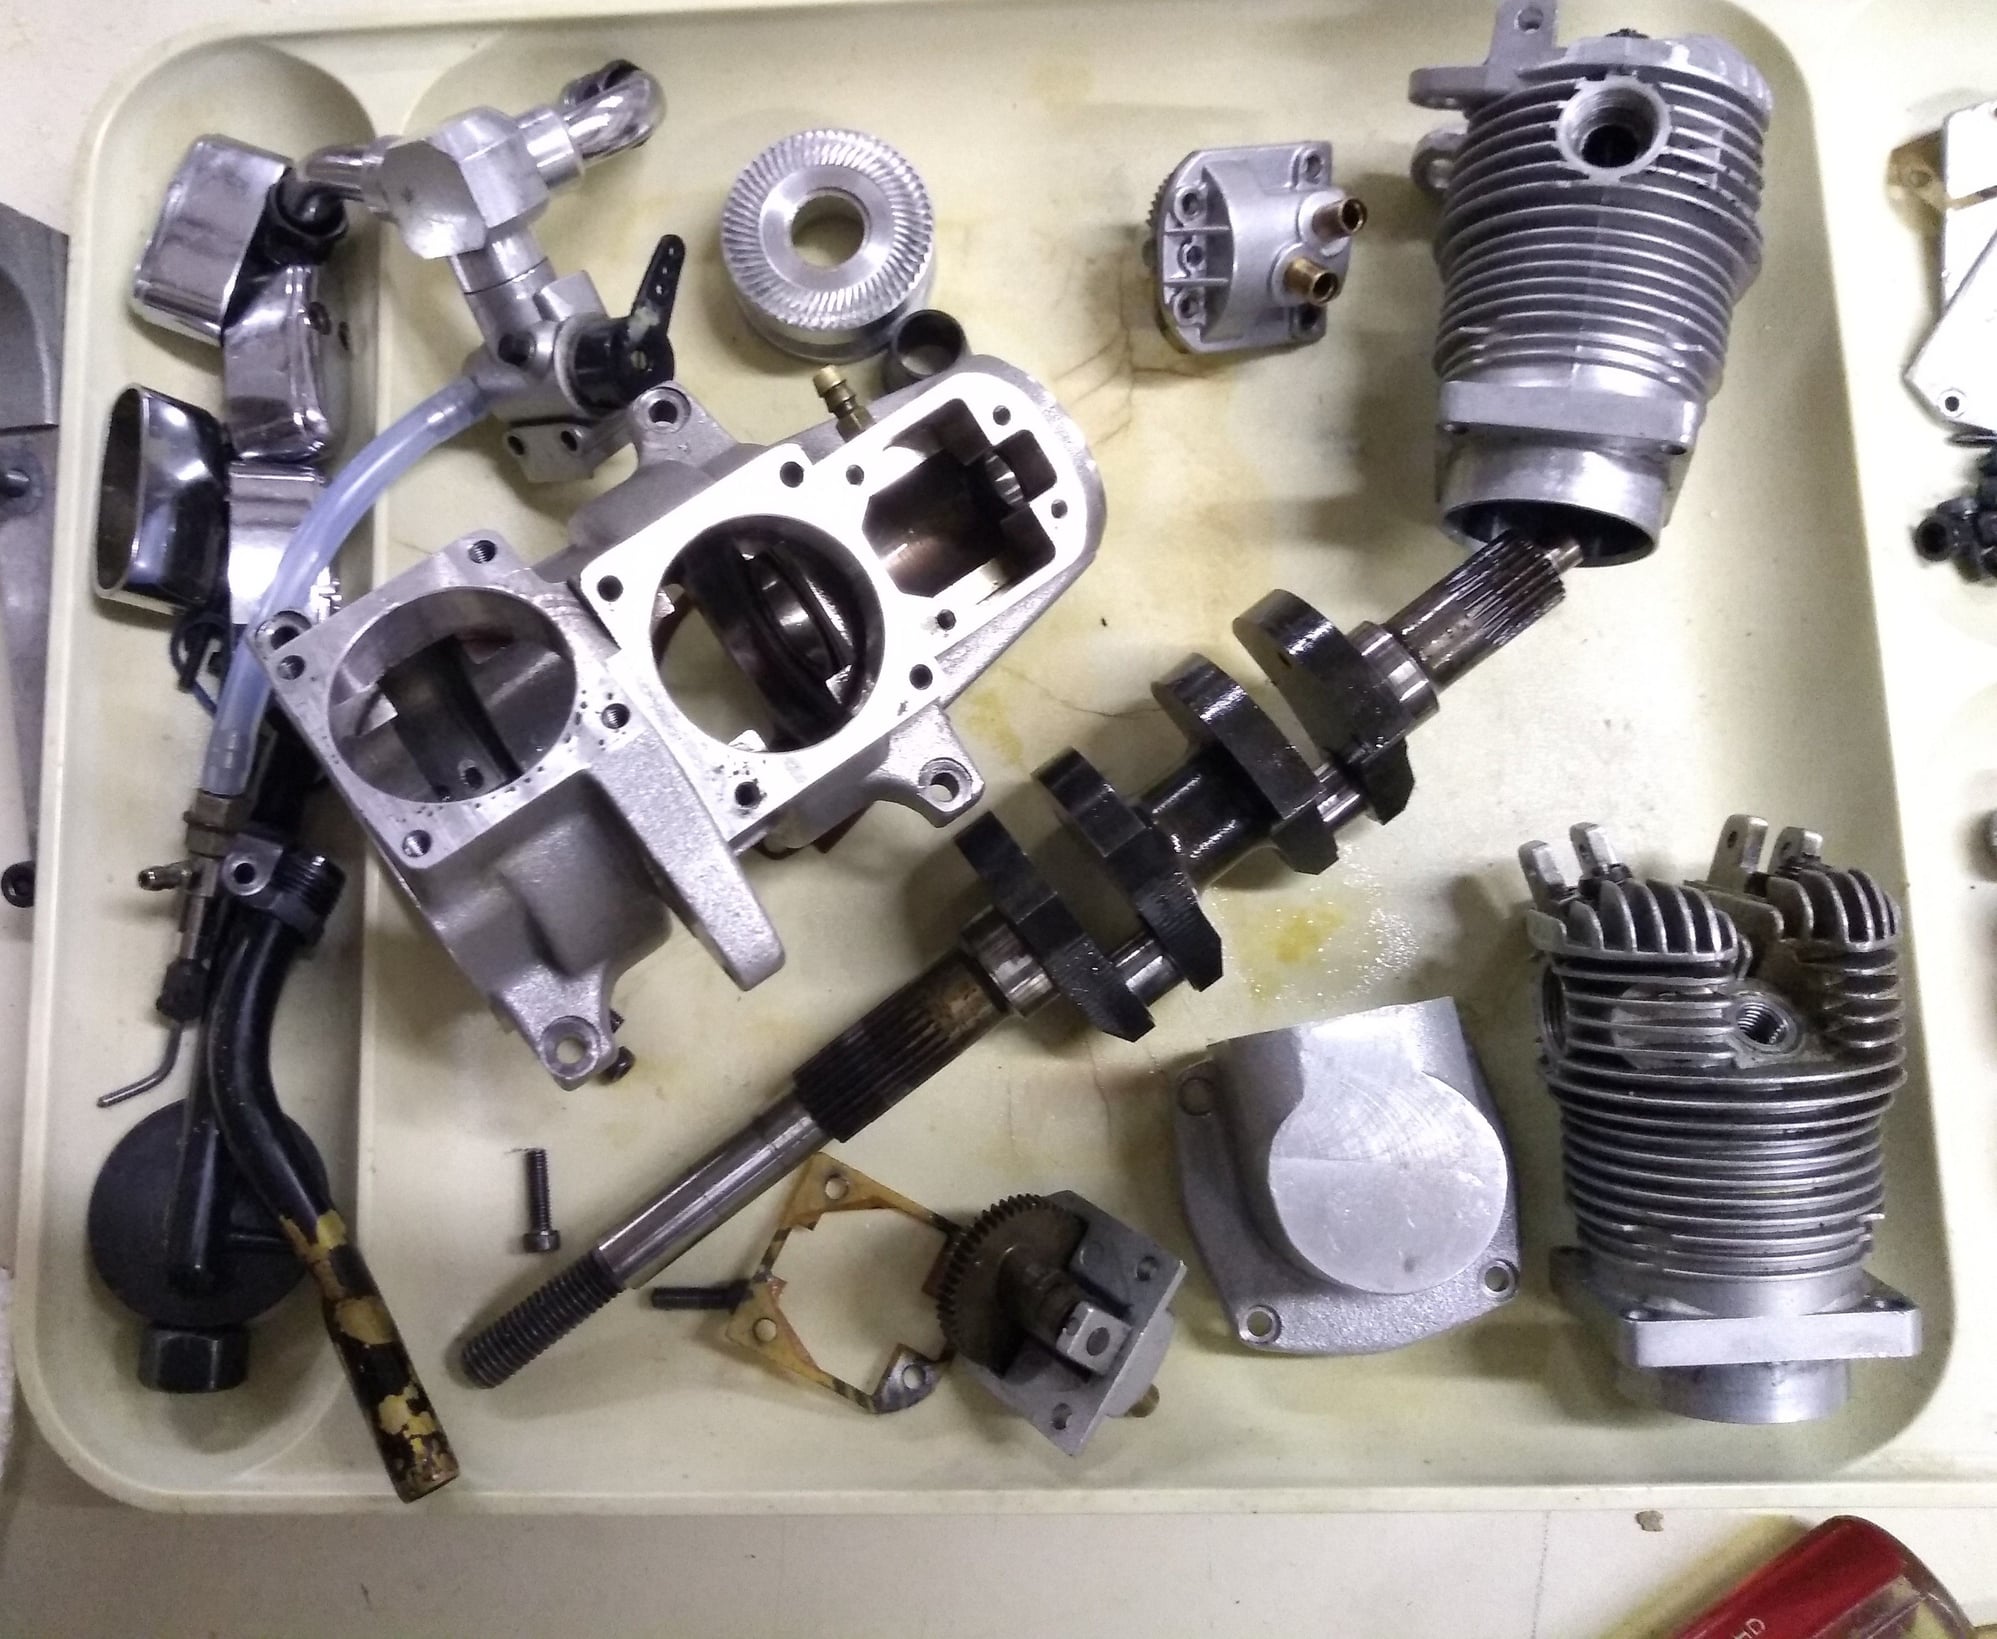
Thanks the cylinder is factory finish. The case was a new old stock, silver case that was powder coated gloss black. The gold tone on the intake tube is a Ceramakote finish.
Pete, can you paint my old Futaba green?
Thanks the cylinder is factory finish. The case was a new old stock, silver case that was powder coated gloss black. The gold tone on the intake tube is a Ceramakote finish.
Pete, can you paint my old Futaba green?
Last edited by Jesse Open; 07-30-2022 at 07:56 PM.
 07-31-2022, 02:49 AM
Senior Member


There are two other variations on this color theme.
 07-31-2022, 09:43 AM
Latest overhaul. Needs cleaned up, bearings, tappets and a Timesert kit to repair glow plug threads. Needs some kind of usable exhaust too. It's a low time engine so worth the trouble for sure.
07-31-2022, 01:34 PM
Question about Timeserts. Are they just tightened down to the shoulder and bonded in place? I ask because I've never used them. The OG owner had stripped two plug holes and got them fixed with Timeserts, then broke one of the Timeserts. There is a piece of Timesert down in the plug hole. Should that piece just unthread with some heat?
07-31-2022, 02:55 PM
Guess the supply chain isn't going to be corrected anytime soon. I wonder if I will even see the hydraulic kit for my tractor this year at all.
07-31-2022, 04:44 PM
The thing sold in like 3 minutes. HDhucker PM'd first and got it. I threw him a few extra bucks and got it.
Question about Timeserts. Are they just tightened down to the shoulder and bonded in place? I ask because I've never used them. The OG owner had stripped two plug holes and got them fixed with Timeserts, then broke one of the Timeserts. There is a piece of Timesert down in the plug hole. Should that piece just unthread with some heat?
Question about Timeserts. Are they just tightened down to the shoulder and bonded in place? I ask because I've never used them. The OG owner had stripped two plug holes and got them fixed with Timeserts, then broke one of the Timeserts. There is a piece of Timesert down in the plug hole. Should that piece just unthread with some heat?
The insert is usually locked in place as the last step of the installation. The tip of the insert is flared into place. You will probably need to relieve that flare. Careful use of a countersink, hand turned may do the trick. Just cut till the lip is gone. The plug being in a blind bore is not going to help!
Timeserts are thin wall and the opposing vee forms make fractures pretty easy.
If you happen to try a tapered Easy Out , go easy!! Snap On and some others offer straight splined removal tools that minimize the expansion. You don't get many chances to test options so just take your time

Just a floating piece, in the bore, no flare may move with an Easy Out . If Loctite is present, heat is your tool. Oil too
Since this is a rather special engine, you may want to try contacting Saito in Japan directly and see if they can help, no telling what they may have on hand (?)
Is there any chance of subbing a single cylinder equiv?
Last edited by Jesse Open; 07-31-2022 at 05:20 PM.
07-31-2022, 05:08 PM
I see, thanks. Apparently the "last few threads" that lock the insert in place are what remains in the glow plug hole. This could get ugly......
Viewing the threads in the hole it appears that whoever installed the Timesert didn't use any type of adhesive to retain the top half of the insert. It appears that the same heavy handed "glow plug stripper" probably overtightened the glow plug into the insert and broke the insert, either during glow plug installation or during removal. The top portion of the time were obvious came out with the plug.
Any ideas on how to remove those last few "locked/expanded insert threads?
Last edited by Glowgeek; 07-31-2022 at 05:37 PM.
07-31-2022, 05:31 PM
May not be bad. Just work it thru.
Basically, some heat, in case there is threadlock, anerobic stuff. Just take the short route out,
I have made tools for thin wall removal using appropriately sized "Allen" wrenches. Use as-is if you can find one that just drives in and bites enough to allow turning the insert as needed. You may however need to grind the flats a bit to avoid a too tight fit. A delicate balancing act but with patience you may be a happy camper!
Good luck... Really
BTW, Judicious use of the Timesert sized tap drill, chucked up in a tap handle and turned by hand may work. (Be careful not to wallow and damage what threads are left) Get the cutting lip of the drill to bite the insert. Slow turn with pressure. A good enough bite and you can turn the bugger right on out!
Last edited by Jesse Open; 07-31-2022 at 05:42 PM.
07-31-2022, 05:57 PM
Thanks Gary, really.
The Timesert kit for 1/4-32 x .180" is $124! Holy sheep dip!!
I watched a couple of vids while you were typing. Apparently removing and refreshing inserts is commonplace. Excellent!
Do you feel the use of the provided thread locker would keep the insert from breaking off near the bottom and unscrewing in the case where overtightening of the glow plug occured?
Last edited by Glowgeek; 07-31-2022 at 06:04 PM.
07-31-2022, 06:45 PM
I'm not well sold on the method of locking the insert end on the inside. Some of the larger, solid thread repairs have used pins, punched staking etc to lock the insert in place.
The Timesert outer (Top) face seats against the plug washer. When you remove the plug, especially if it was overtorqued when installed, the insert may back out a bit, The locked inside resists leaving a chance for the very thin insert to fracture (?) Just one scenario
The Saitos limited space minimizes your options here.
Some high temp Loctite, no inside flare. Very careful plug installation with minimal torque, a bit of graphite for anti-sieze on the washer and plug threads at installation may be helpful.
Never attempt to remove the plug until thd engine cools as well.
Just suggestions of course.
Last edited by Jesse Open; 07-31-2022 at 06:48 PM.
08-01-2022, 02:48 AM
Senior Member
Re, those exhaust pipes, MacGregor's has the one without the pressure tap and Horizon has the pressure tapped one. Saito engine code VV.
https://www.hobbyplastic.co.uk/index.php?main_page=product_info&cPath=88_95_136_193_205&products_id=2455
https://www.horizonhobby.com/product/muffler-pipe-right-ddvvxy/SAI182TD74A.html
https://www.hobbyplastic.co.uk/index.php?main_page=product_info&cPath=88_95_136_193_205&products_id=2455
https://www.horizonhobby.com/product/muffler-pipe-right-ddvvxy/SAI182TD74A.html
Last edited by 1200SportsterRider; 08-01-2022 at 02:52 AM.
08-01-2022, 02:59 AM
I'm not well sold on the method of locking the insert end on the inside. Some of the larger, solid thread repairs have used pins, punched staking etc to lock the insert in place.
The Timesert outer (Top) face seats against the plug washer. When you remove the plug, especially if it was overtorqued when installed, the insert may back out a bit, The locked inside resists leaving a chance for the very thin insert to fracture (?) Just one scenario
The Saitos limited space minimizes your options here.
Some high temp Loctite, no inside flare. Very careful plug installation with minimal torque, a bit of graphite for anti-sieze on the washer and plug threads at installation may be helpful.
Never attempt to remove the plug until thd engine cools as well.
Just suggestions of course.
The Timesert outer (Top) face seats against the plug washer. When you remove the plug, especially if it was overtorqued when installed, the insert may back out a bit, The locked inside resists leaving a chance for the very thin insert to fracture (?) Just one scenario
The Saitos limited space minimizes your options here.
Some high temp Loctite, no inside flare. Very careful plug installation with minimal torque, a bit of graphite for anti-sieze on the washer and plug threads at installation may be helpful.
Never attempt to remove the plug until thd engine cools as well.
Just suggestions of course.
08-01-2022, 03:08 AM
Re, those exhaust pipes, MacGregor's has the one without the pressure tap and Horizon has the pressure tapped one. Saito engine code VV.
https://www.hobbyplastic.co.uk/index.php?main_page=product_info&cPath=88_95_136_193_205&products_id=2455
https://www.horizonhobby.com/product/muffler-pipe-right-ddvvxy/SAI182TD74A.html
https://www.hobbyplastic.co.uk/index.php?main_page=product_info&cPath=88_95_136_193_205&products_id=2455
https://www.horizonhobby.com/product/muffler-pipe-right-ddvvxy/SAI182TD74A.html
08-01-2022, 05:05 AM
Lonnie,
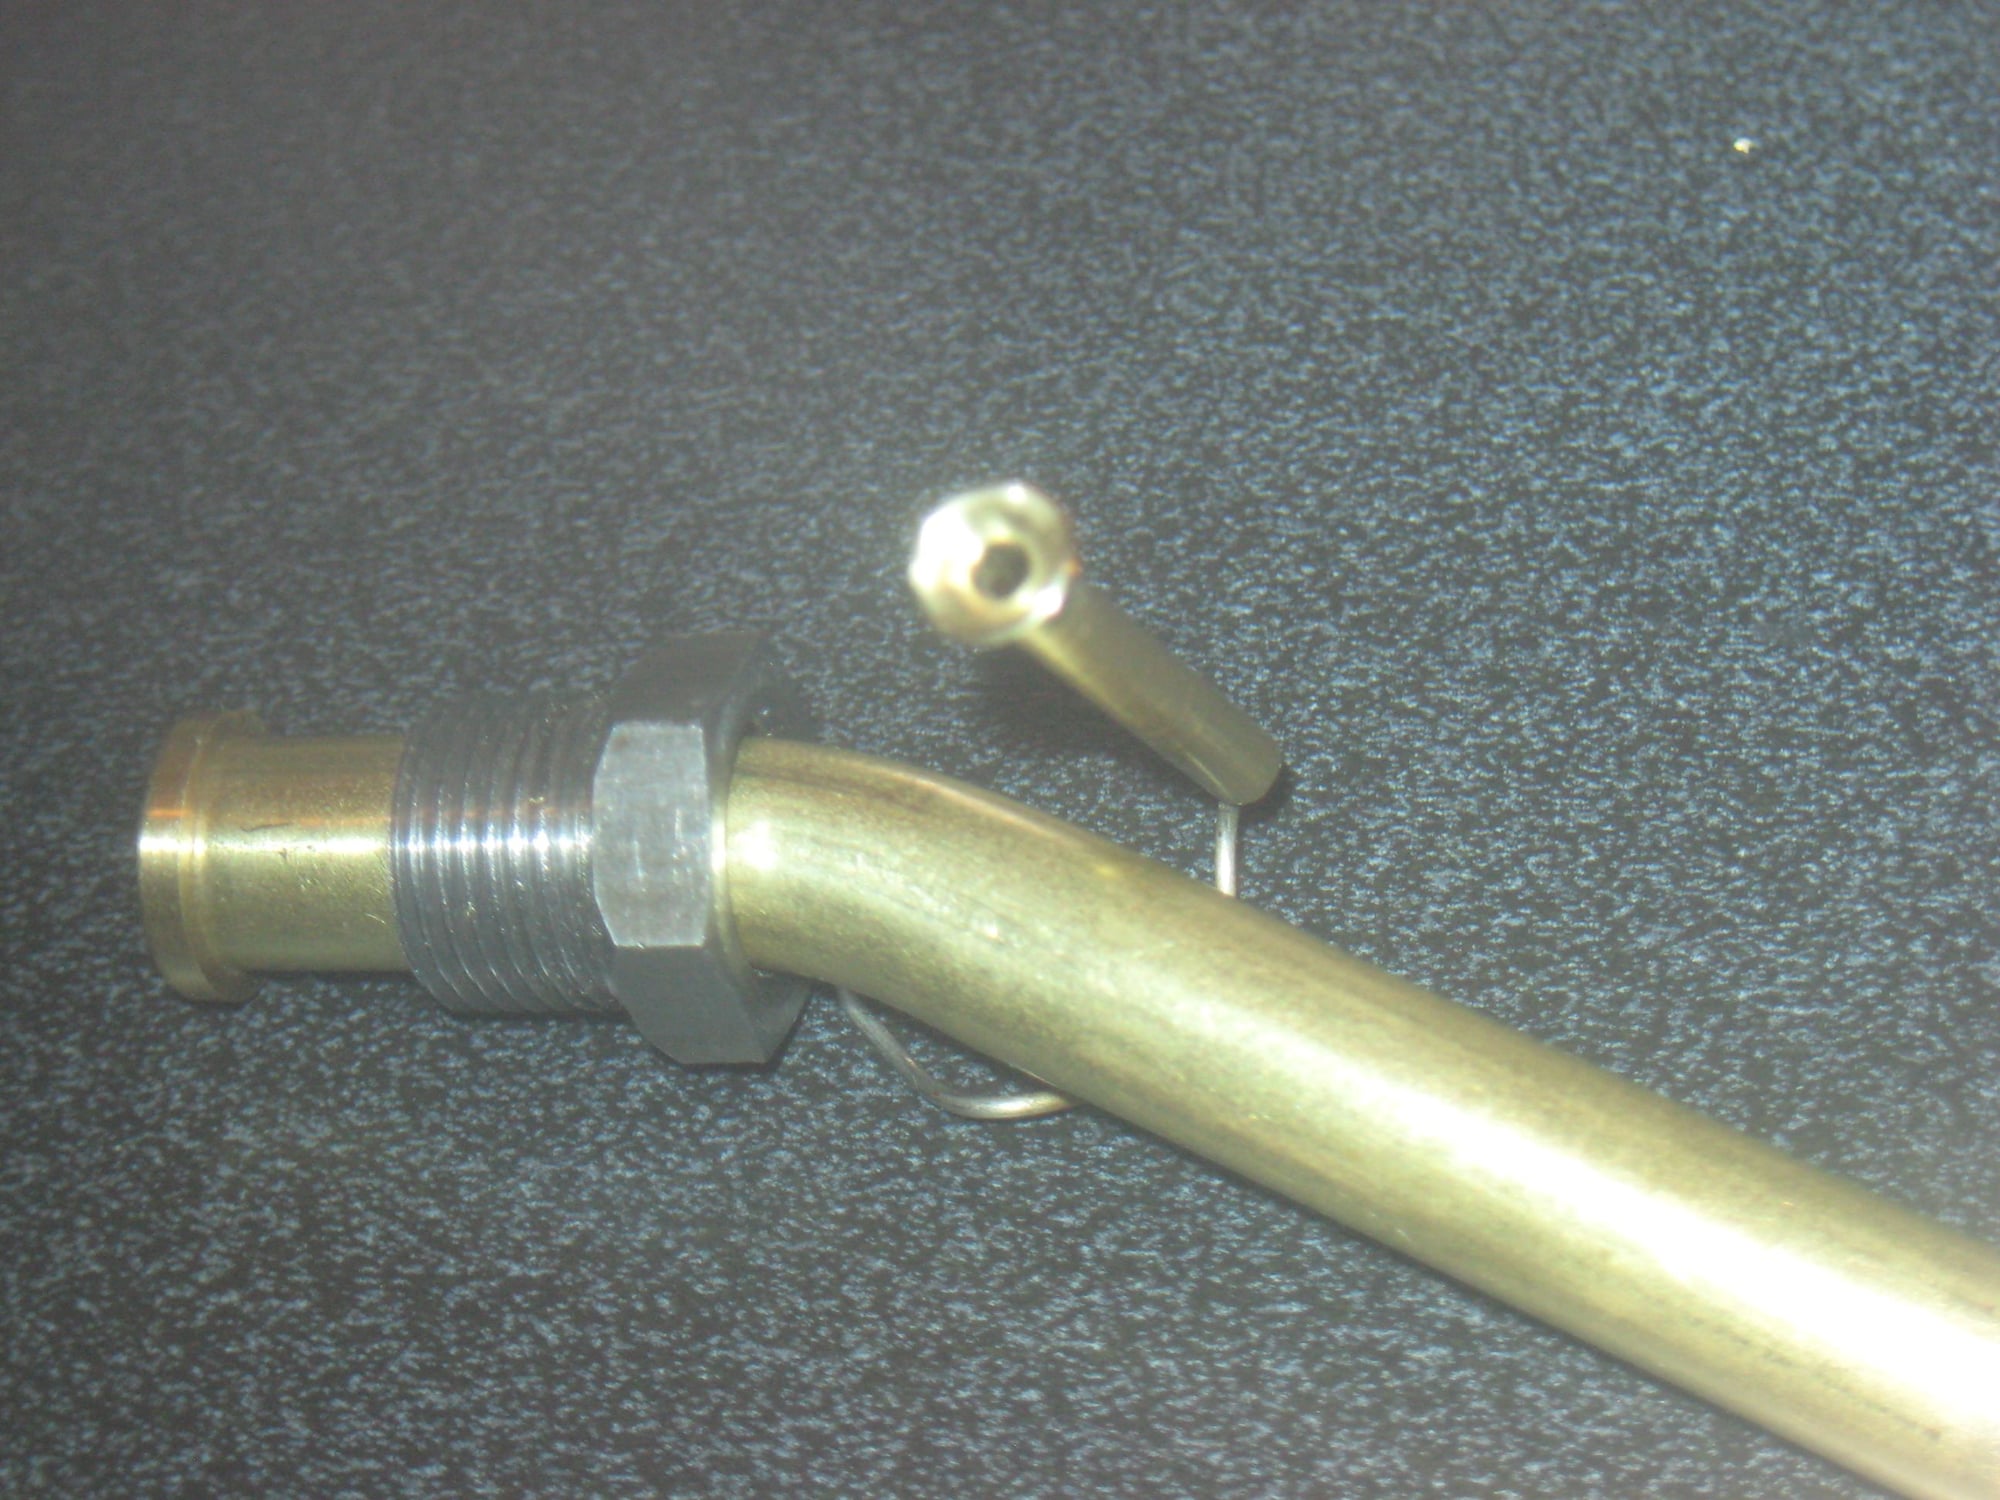
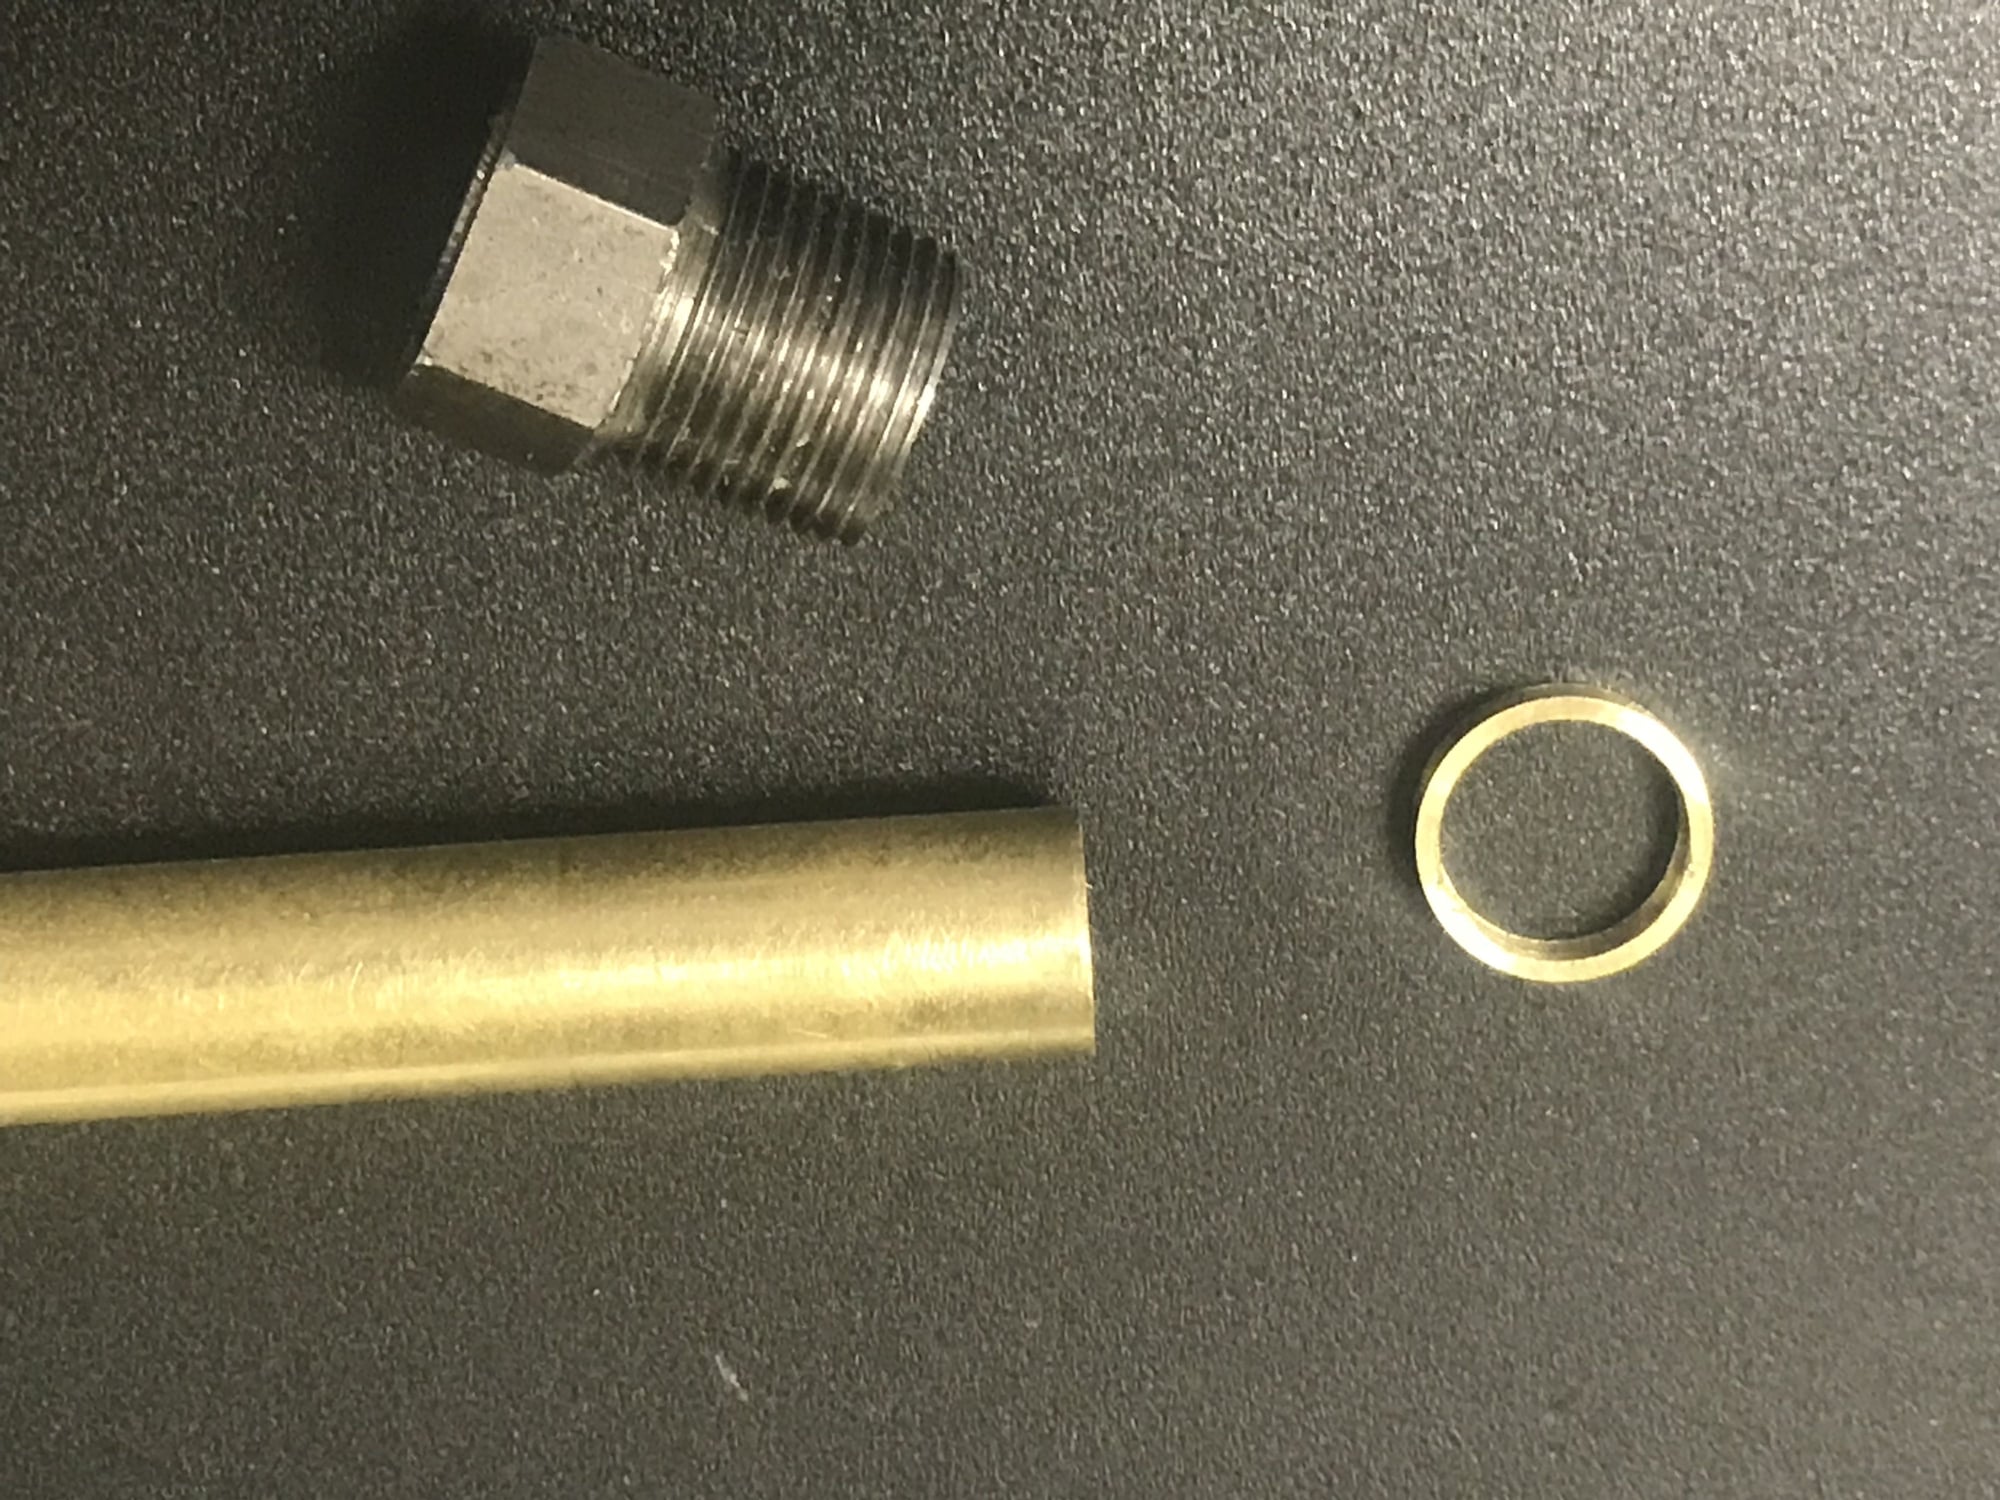
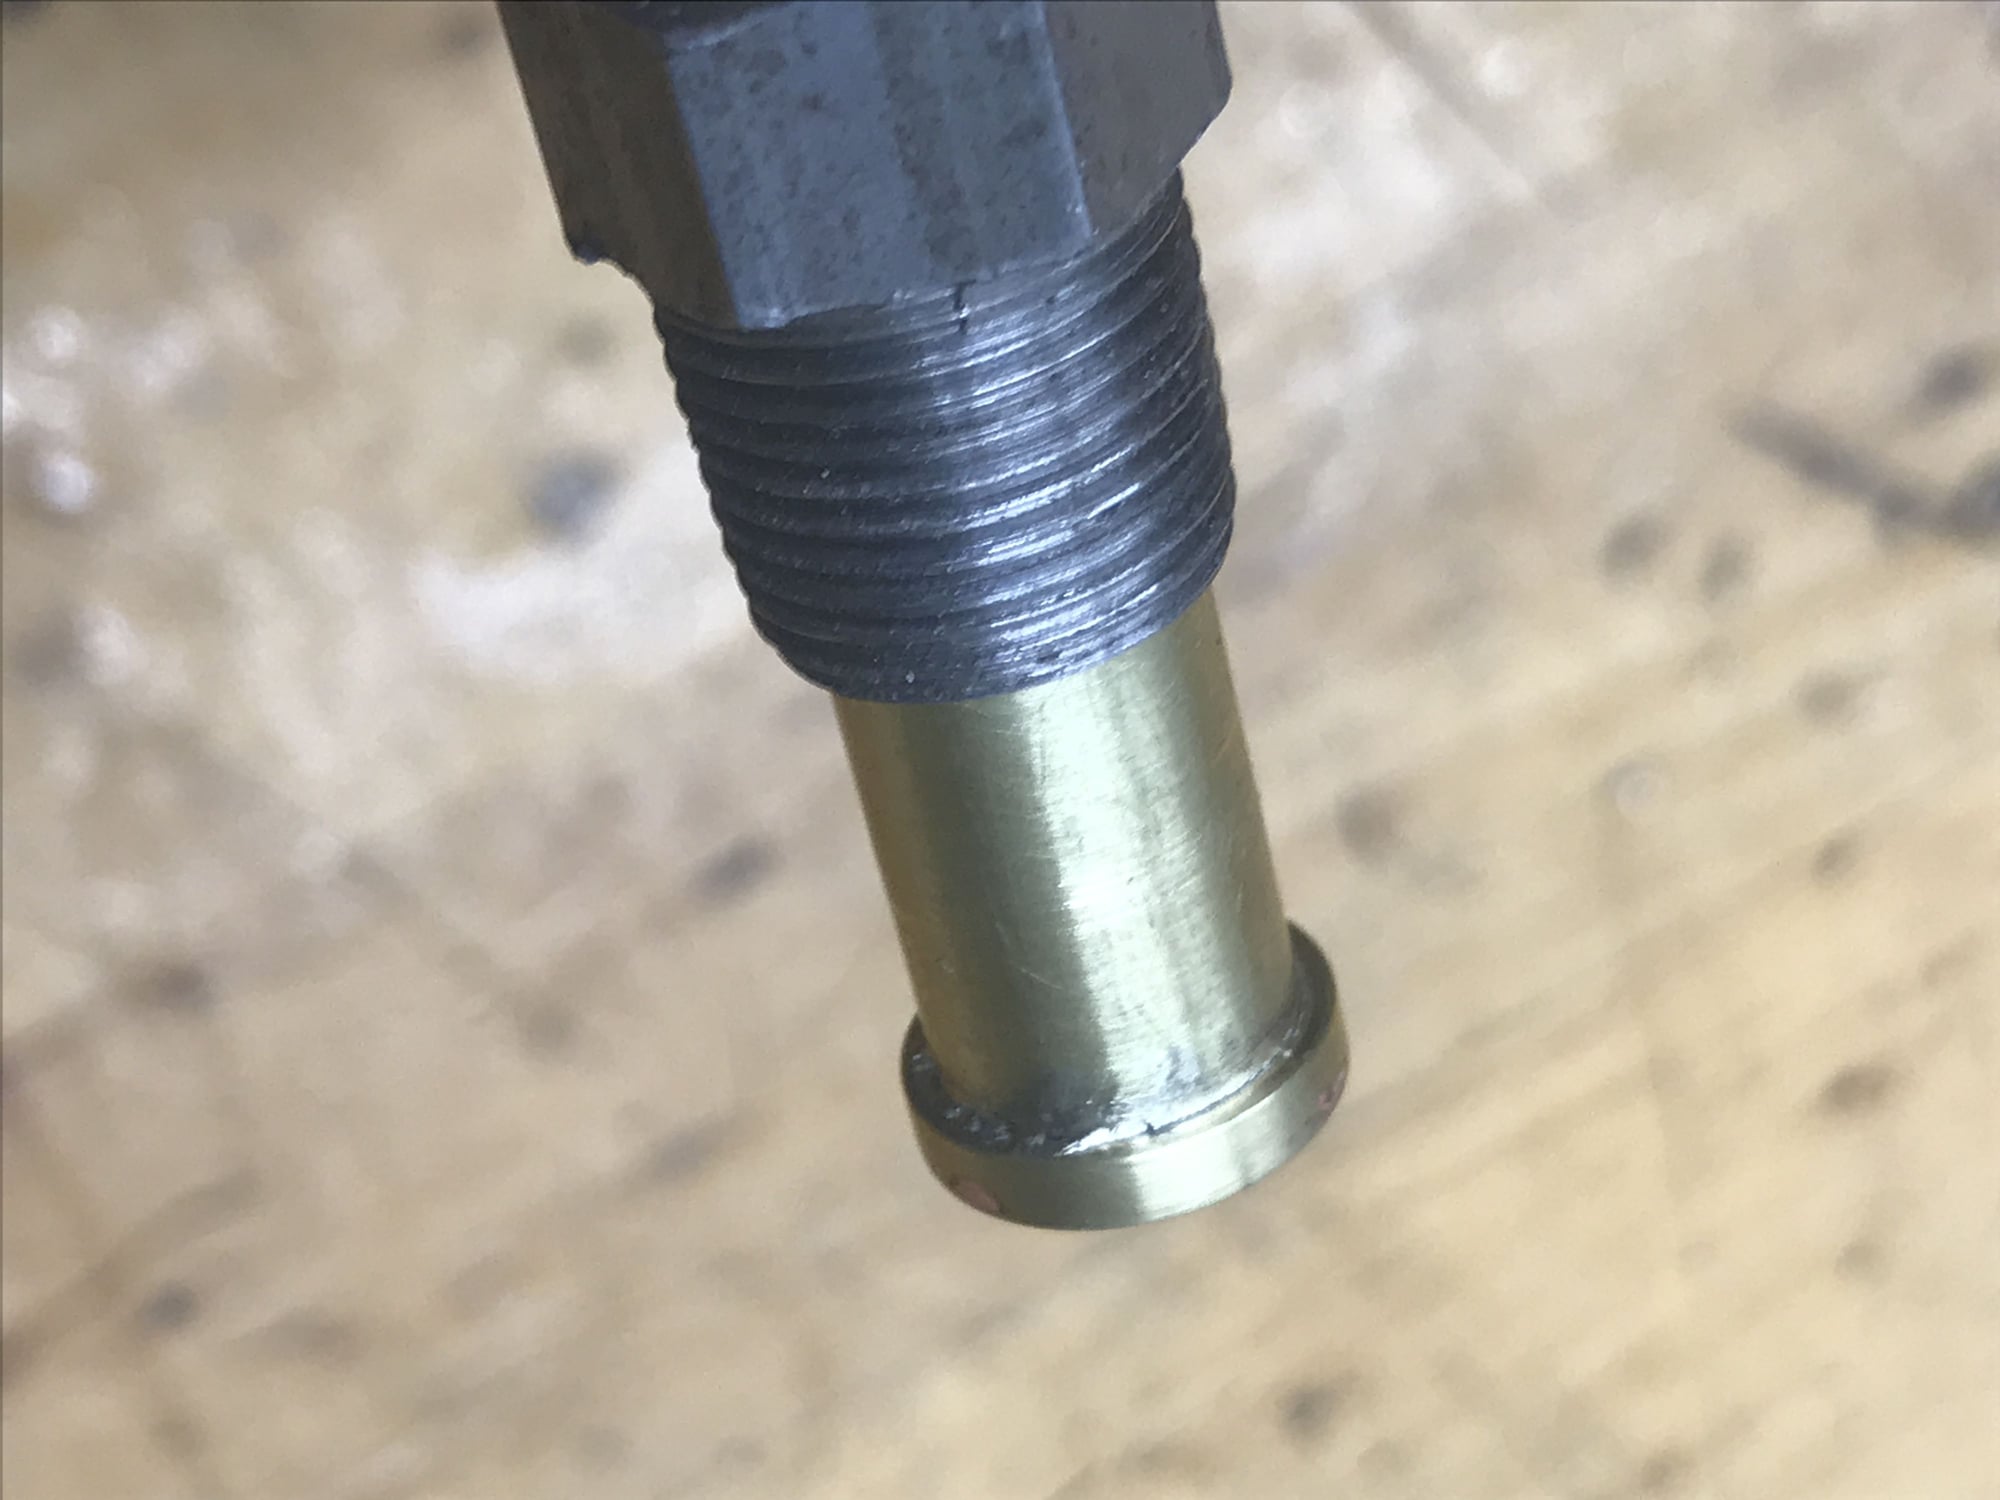
Pipes are fairly easy to fabricate as needed. There are just a few bits to fabricate. The male flare nut, a close fitting brass ring an a pressure tap in this case. I can loan you the die and send you some metric hex stock to make the flare nuts. The ring is turned from brass or mild steel. It is silver brazed in place at assembly,
Take a short piece of brass tube and anneal the end. Chuck it up in your Makita drill. Spin it up. Use a small, greased drill shank to roll out a flange.
Just form a saddle on the flange so it fits to the exhaust pipe. Silver braze in place then drill the pressure hole from the end thru the side of the ex pipe.
Makes just the pipe you want.

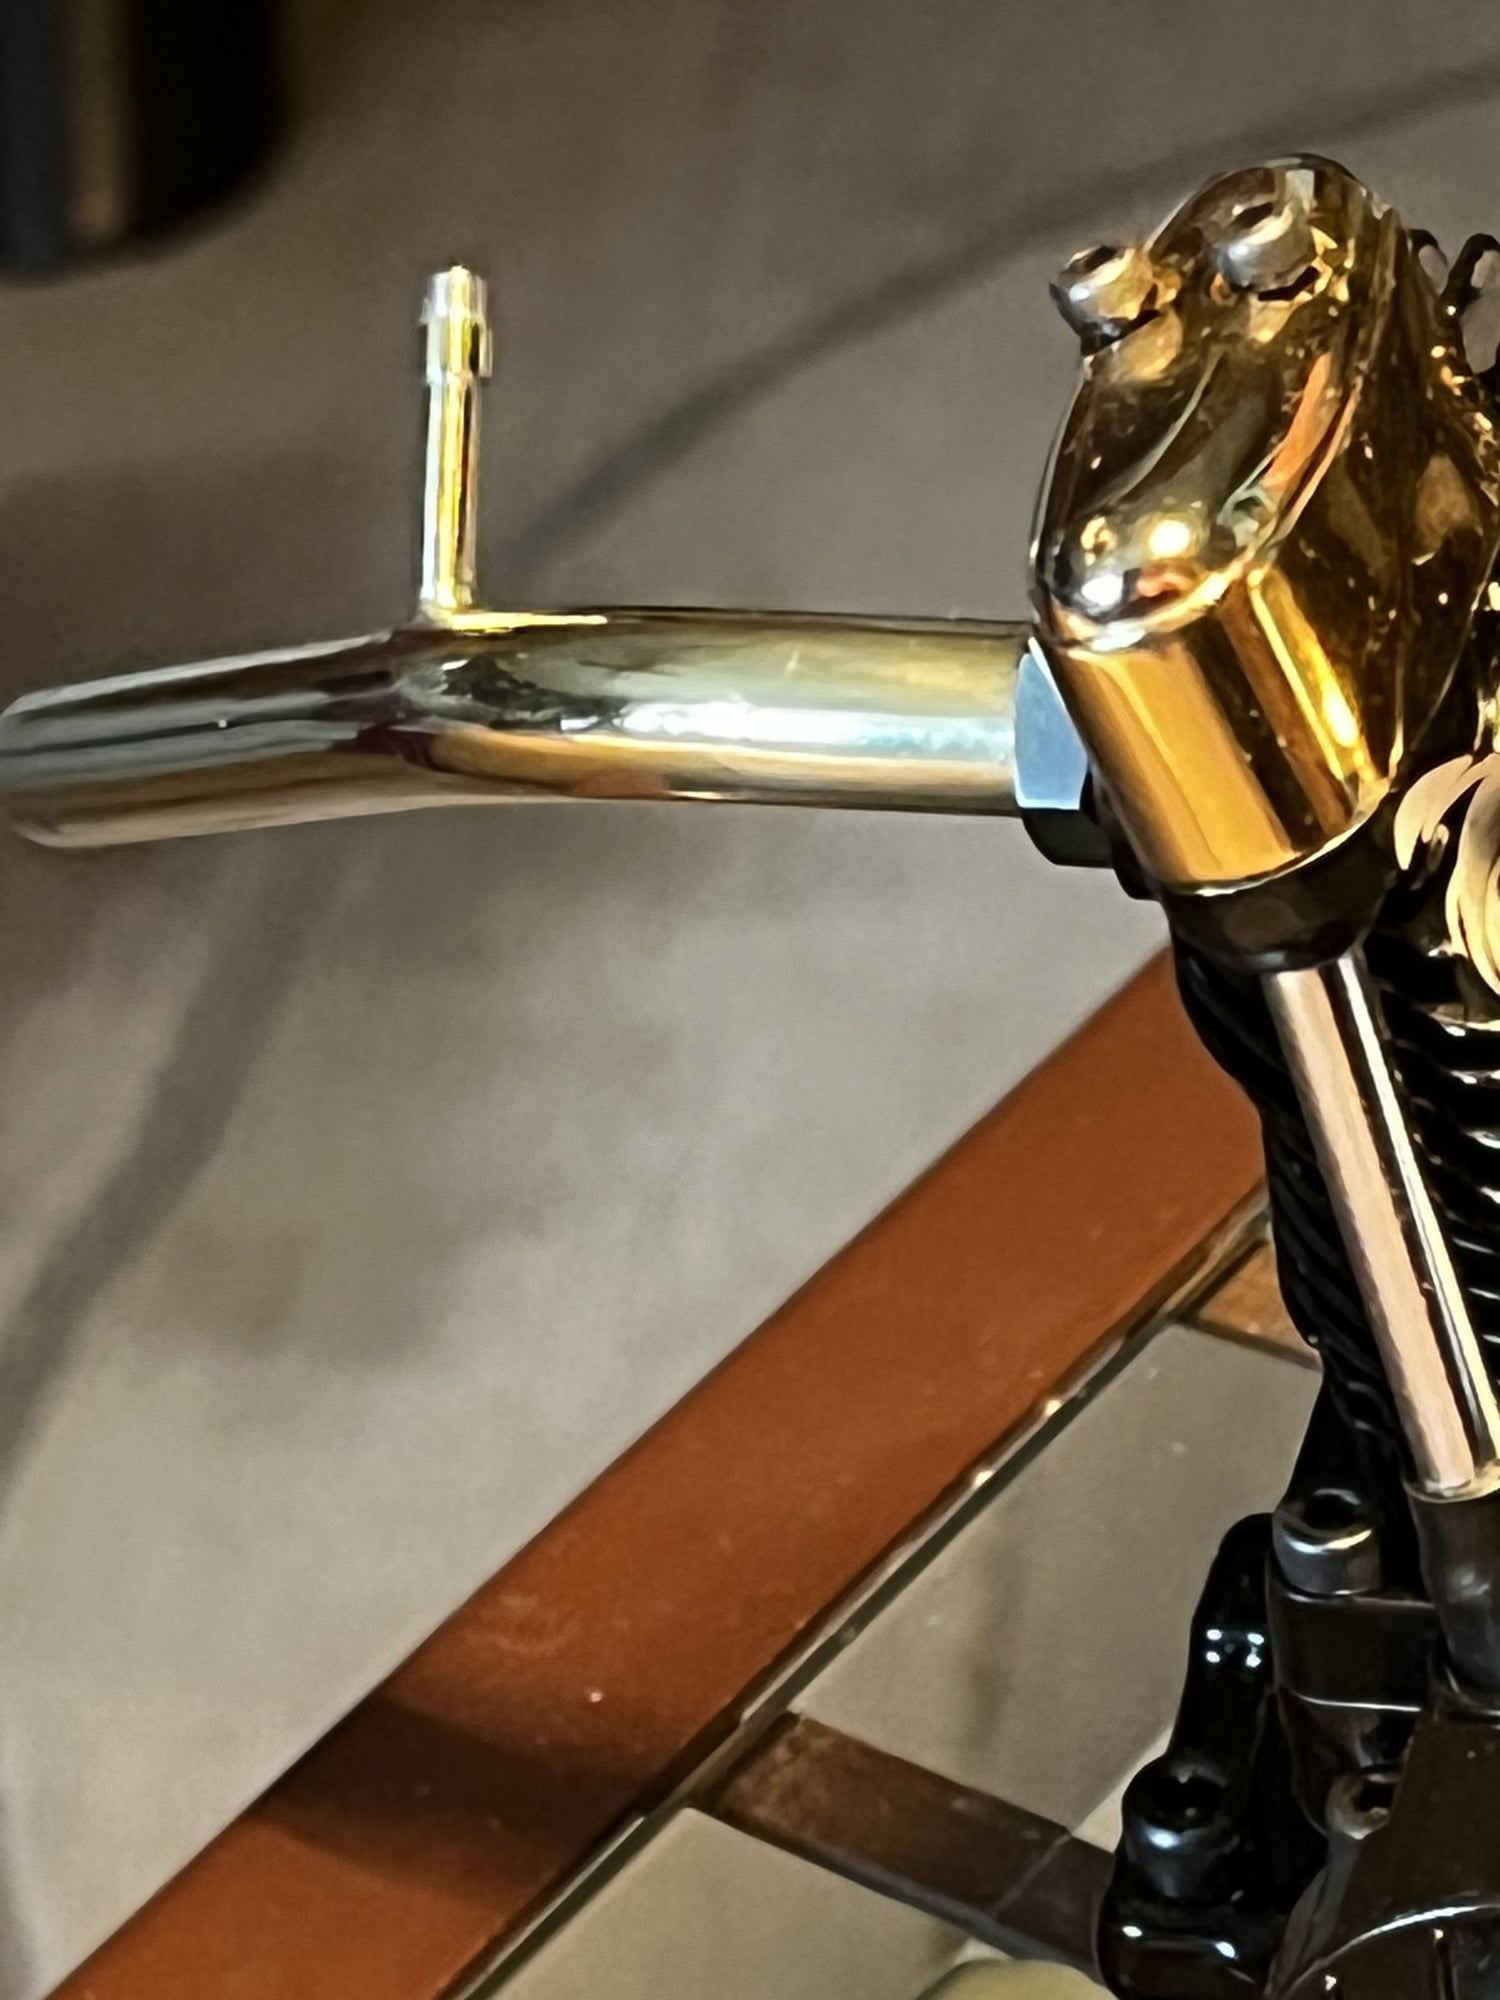
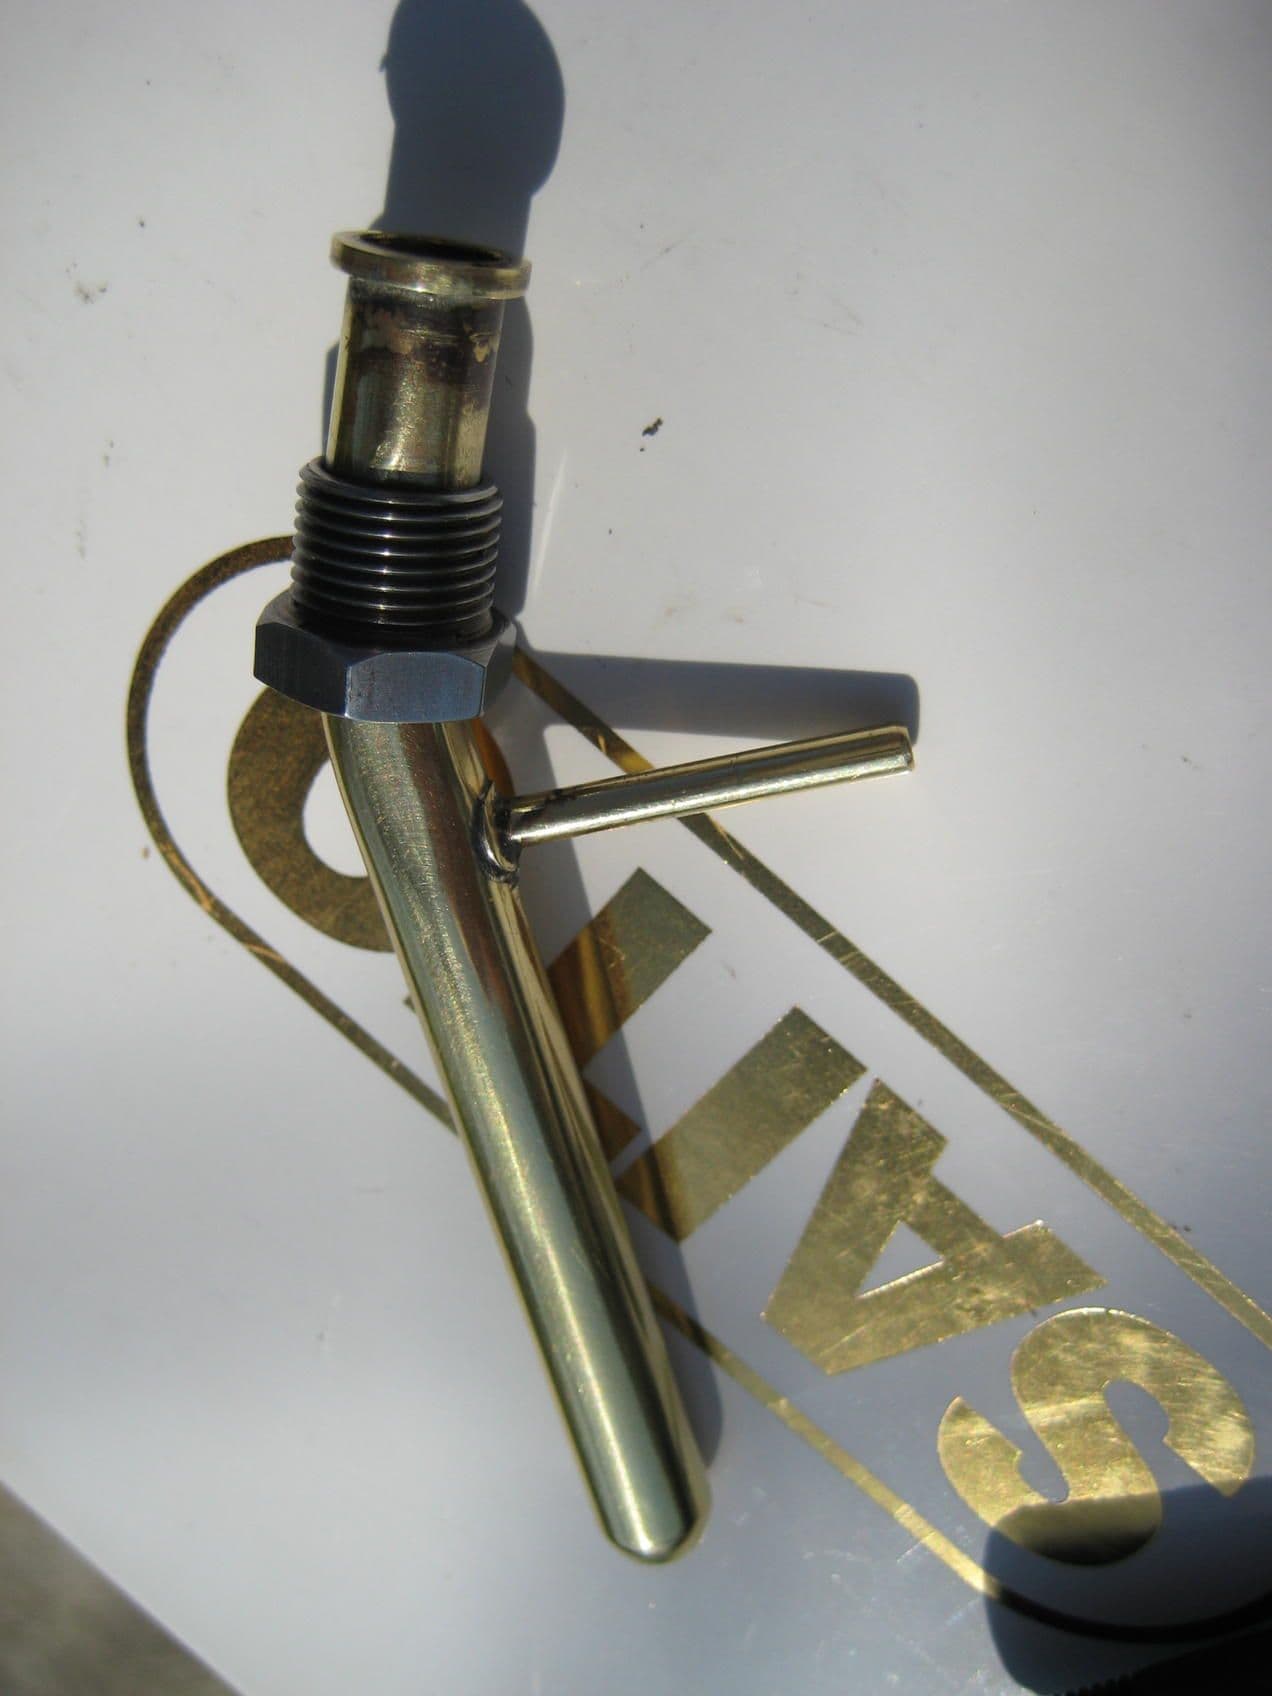
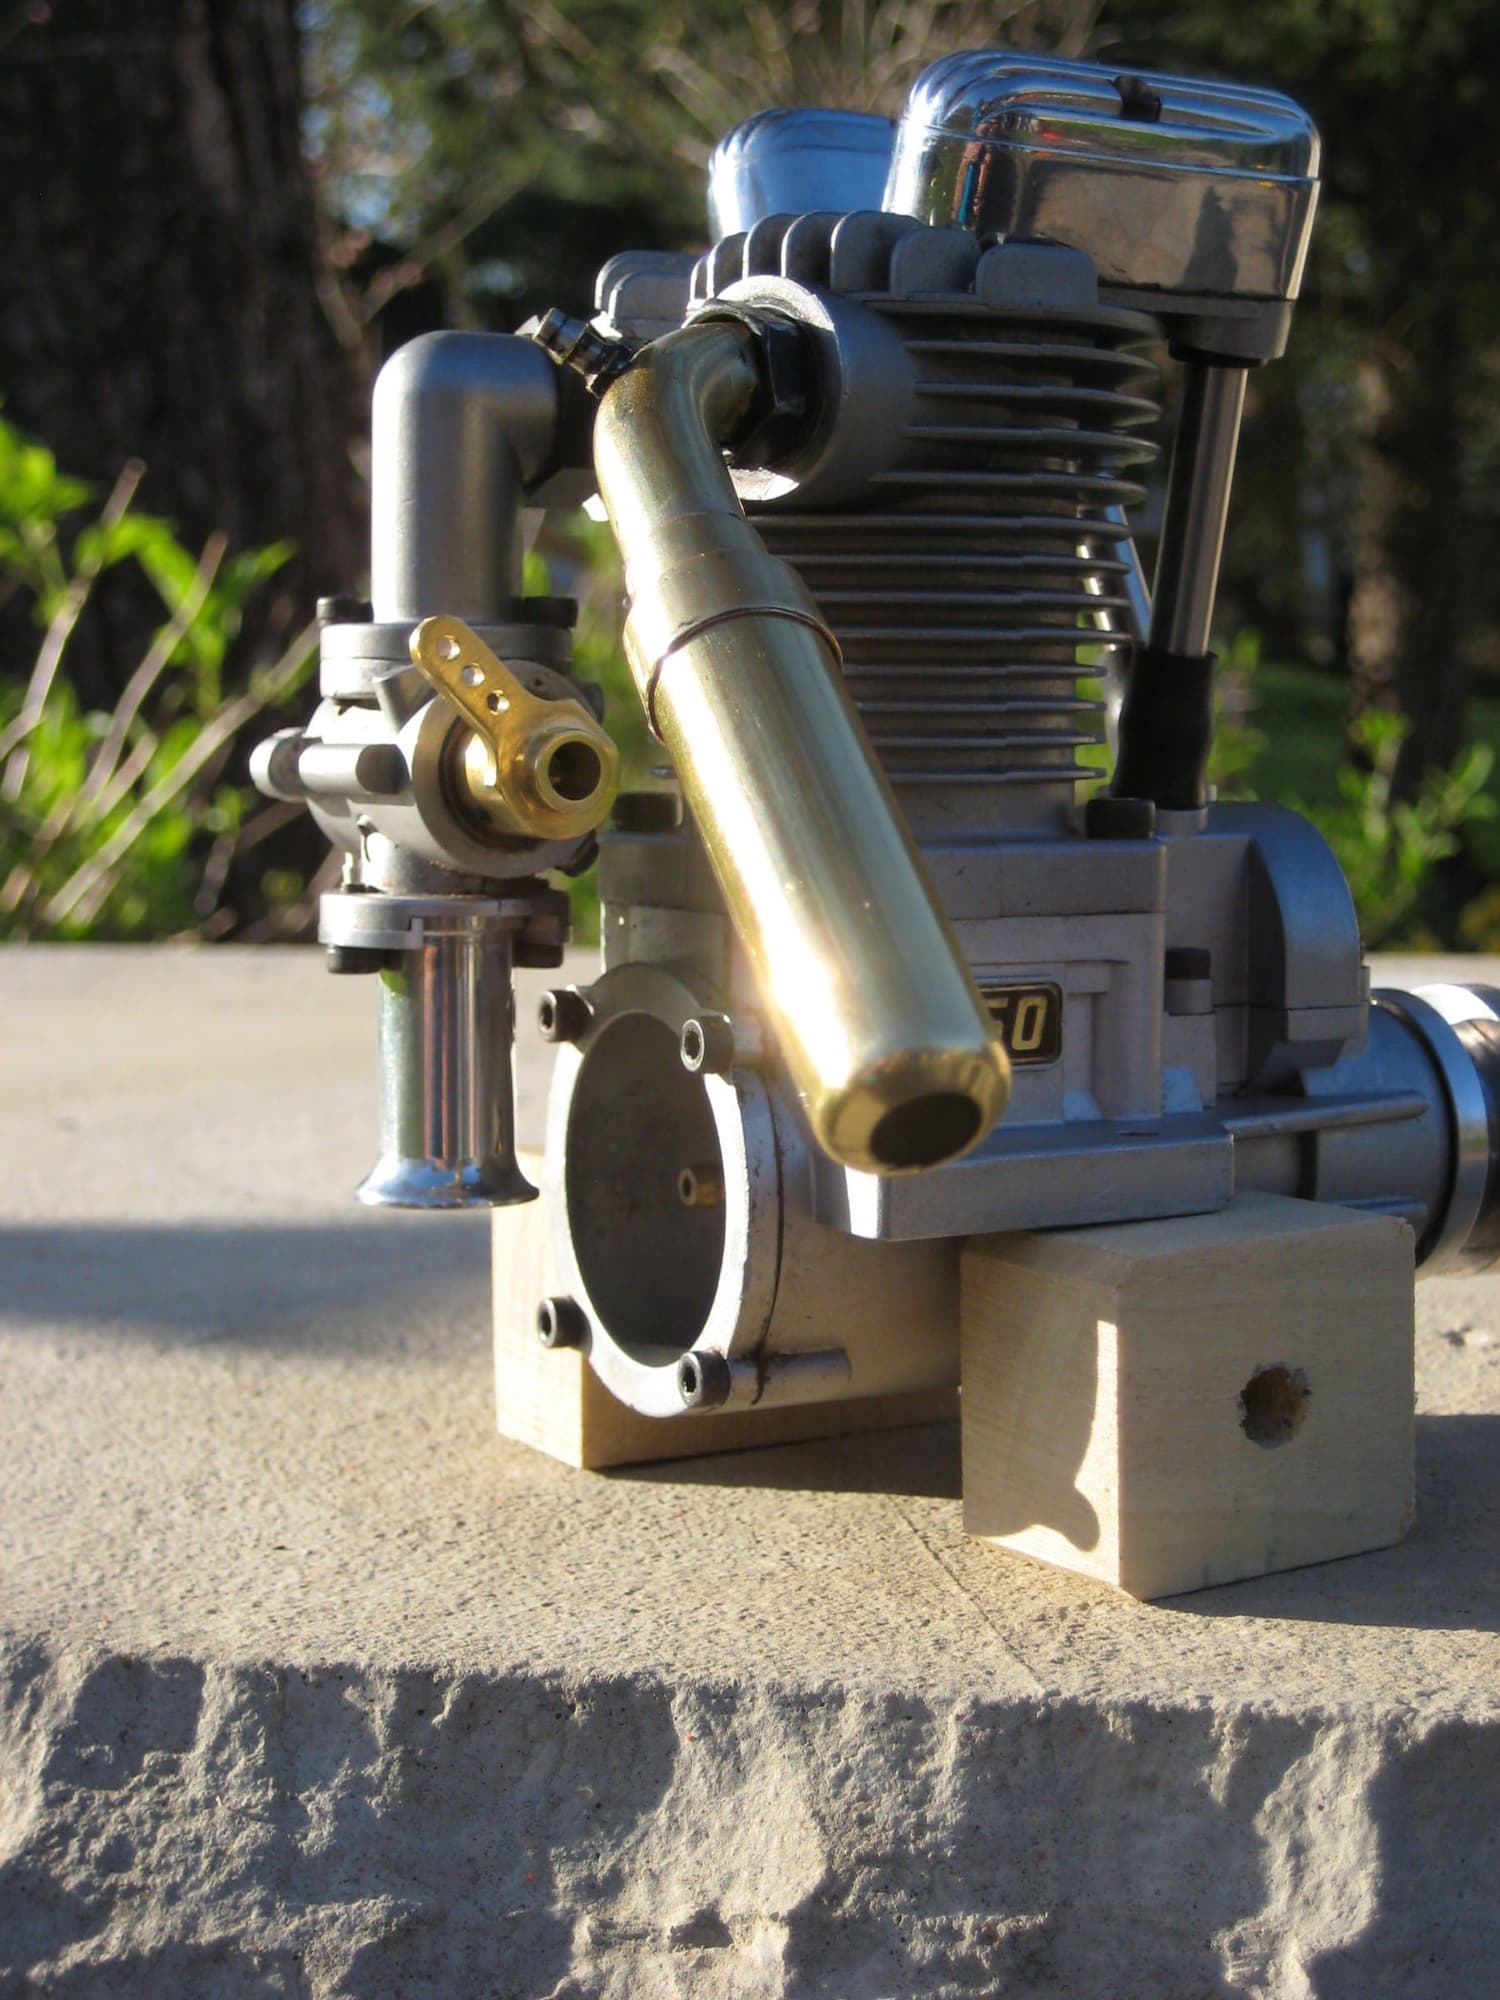
Old , necked rifle cartridges make nice tapered transition sections. The big bore, reverse cone finished pipe makes sweet noises.
Plenty of methods to choose from.
Pipes are fairly easy to fabricate as needed. There are just a few bits to fabricate. The male flare nut, a close fitting brass ring an a pressure tap in this case. I can loan you the die and send you some metric hex stock to make the flare nuts. The ring is turned from brass or mild steel. It is silver brazed in place at assembly,
Take a short piece of brass tube and anneal the end. Chuck it up in your Makita drill. Spin it up. Use a small, greased drill shank to roll out a flange.
Just form a saddle on the flange so it fits to the exhaust pipe. Silver braze in place then drill the pressure hole from the end thru the side of the ex pipe.
Makes just the pipe you want.
Old , necked rifle cartridges make nice tapered transition sections. The big bore, reverse cone finished pipe makes sweet noises.
Plenty of methods to choose from.
Last edited by Jesse Open; 08-01-2022 at 04:25 PM.
08-01-2022, 06:31 PM
My Feedback: (1)
hey guys. a good amount of the sheeted plastic covering came of the ShoeString's covering. but the glue is still on the plane. should I sand all the old glue off before I put more covering on? I'm guessing yes. so I started to sand it off but it doesn't want to leave its wooden home easily.
Lonnie you lucky guy. you got to get a video of it running for us.
Jim
Lonnie you lucky guy. you got to get a video of it running for us.
Jim
08-01-2022, 10:51 PM
hey guys. a good amount of the sheeted plastic covering came of the ShoeString's covering. but the glue is still on the plane. should I sand all the old glue off before I put more covering on? I'm guessing yes. so I started to sand it off but it doesn't want to leave its wooden home easily.
Lonnie you lucky guy. you got to get a video of it running for us.
Jim
Lonnie you lucky guy. you got to get a video of it running for us.
Jim
Two methods have worked for me: a min plane (no idea what they are called in English, but those things that use an oldfahioned razorblade of sorts, like this: David Combischaafje een altijd scherp schaafblokje met wisselmesjes | 647104 (gereedschappro.nl)
But you really have to set the blade to plane as thin as you can get it. Like really no more than the thickness of light printing paper. That will remove the old glue completely but you have to be pretty focused not to take off any unnecessary material.
Another method is to carefully wash the wing with some solvent, but that only removes the bulk and will always leave a bit of glue and color behind.
Both methods are basically mutually exclusive. Use one, you can't (or won't need) to use the other.
08-02-2022, 06:46 AM

I have one. It's a small razor plane that uses a standard double sided razor blade as a replaceable blade. I have one I find the German made blades to be the sharpest.
I own this one: https://www.slecuk.com/building-aids/metal-razor-plane
I own this one: https://www.slecuk.com/building-aids/metal-razor-plane
Last edited by FlyerInOKC; 08-02-2022 at 06:53 AM.
08-02-2022, 01:02 PM
[QUOTE=Jesse Open;12737763]Attachment 2272042
The insert is usually locked in place as the last step of the installation. The tip of the insert is flared into place. You will probably need to relieve that flare. Careful use of a countersink, hand turned may do the trick. Just cut till the lip is gone. The plug being in a blind bore is not going to help!
Timeserts are thin wall and the opposing vee forms make fractures pretty easy.
If you happen to try a tapered Easy Out , go easy!! Snap On and some others offer straight splined removal tools that minimize the expansion. You don't get many chances to test options so just take your time
Just a floating piece, in the bore, no flare may move with an Easy Out . If Loctite is present, heat is your tool. Oil too
Since this is a rather special engine, you may want to try contacting Saito in Japan directly and see if they can help, no telling what they may have on hand (?)
Is there any chance of subbing a single cylinder equiv?[/QUOTE]
Thanks.
The front cylinder on 200TI has reversed placement of the intake and ehaust ports compared to the single cylinder FA91. The rear cylinder is made from a standard FA91 cylinder, rotated 180� so the intake and exhaust ARE on the correct sides, HOWEVER, on the 200TI the intake port is side entry instead of rear entry. I suppose, in a pinch, an FA91 cylinder could be reworked into a rear cylinder. That would entail nothing more than plugging off the rear entry intake port and machining a side entry port. Doable for sure, as the FA91 cylinder was designed/cast to be machined as either rear or side intake port, depending on application.
BTW, my rear cylinder is the one with the Timesert issue.
Last edited by Glowgeek; 08-03-2022 at 03:40 AM.
08-03-2022, 06:43 AM
[QUOTE=Glowgeek;12738073]
My bet is you will have the reprobate up and running. As you know, delideration and patience can pay off in a big way!
Attachment 2272042
The insert is usually locked in place as the last step of the installation. The tip of the insert is flared into place. You will probably need to relieve that flare. Careful use of a countersink, hand turned may do the trick. Just cut till the lip is gone. The plug being in a blind bore is not going to help!
Timeserts are thin wall and the opposing vee forms make fractures pretty easy.
If you happen to try a tapered Easy Out , go easy!! Snap On and some others offer straight splined removal tools that minimize the expansion. You don't get many chances to test options so just take your time
Just a floating piece, in the bore, no flare may move with an Easy Out . If Loctite is present, heat is your tool. Oil too
Since this is a rather special engine, you may want to try contacting Saito in Japan directly and see if they can help, no telling what they may have on hand (?)
Is there any chance of subbing a single cylinder equiv?[/QUOTE]
Thanks.
The front cylinder on 200TI has reversed placement of the intake and ehaust ports compared to the single cylinder FA91. The rear cylinder is made from a standard FA91 cylinder, rotated 180� so the intake and exhaust ARE on the correct sides, HOWEVER, on the 200TI the intake port is side entry instead of rear entry. I suppose, in a pinch, an FA91 cylinder could be reworked into a rear cylinder. That would entail nothing more than plugging off the rear entry intake port and machining a side entry port. Doable for sure, as the FA91 cylinder was designed/cast to be machined as either rear or side intake port, depending on application.
BTW, my rear cylinder is the one with the Timesert issue.
My bet is you will have the reprobate up and running. As you know, delideration and patience can pay off in a big way!