


Lets build a great planes sailplane
 01-25-2015 | 04:09 PM
#1

This time I plan to follow the instructions to the letter. This is my first sail plane. So far the instructions are clear and easy to follow.
The balsa looks good. Very clean die-cut. One sheet was laser cut. Here are the sheets spread out on the work table. The first step is to label the parts.
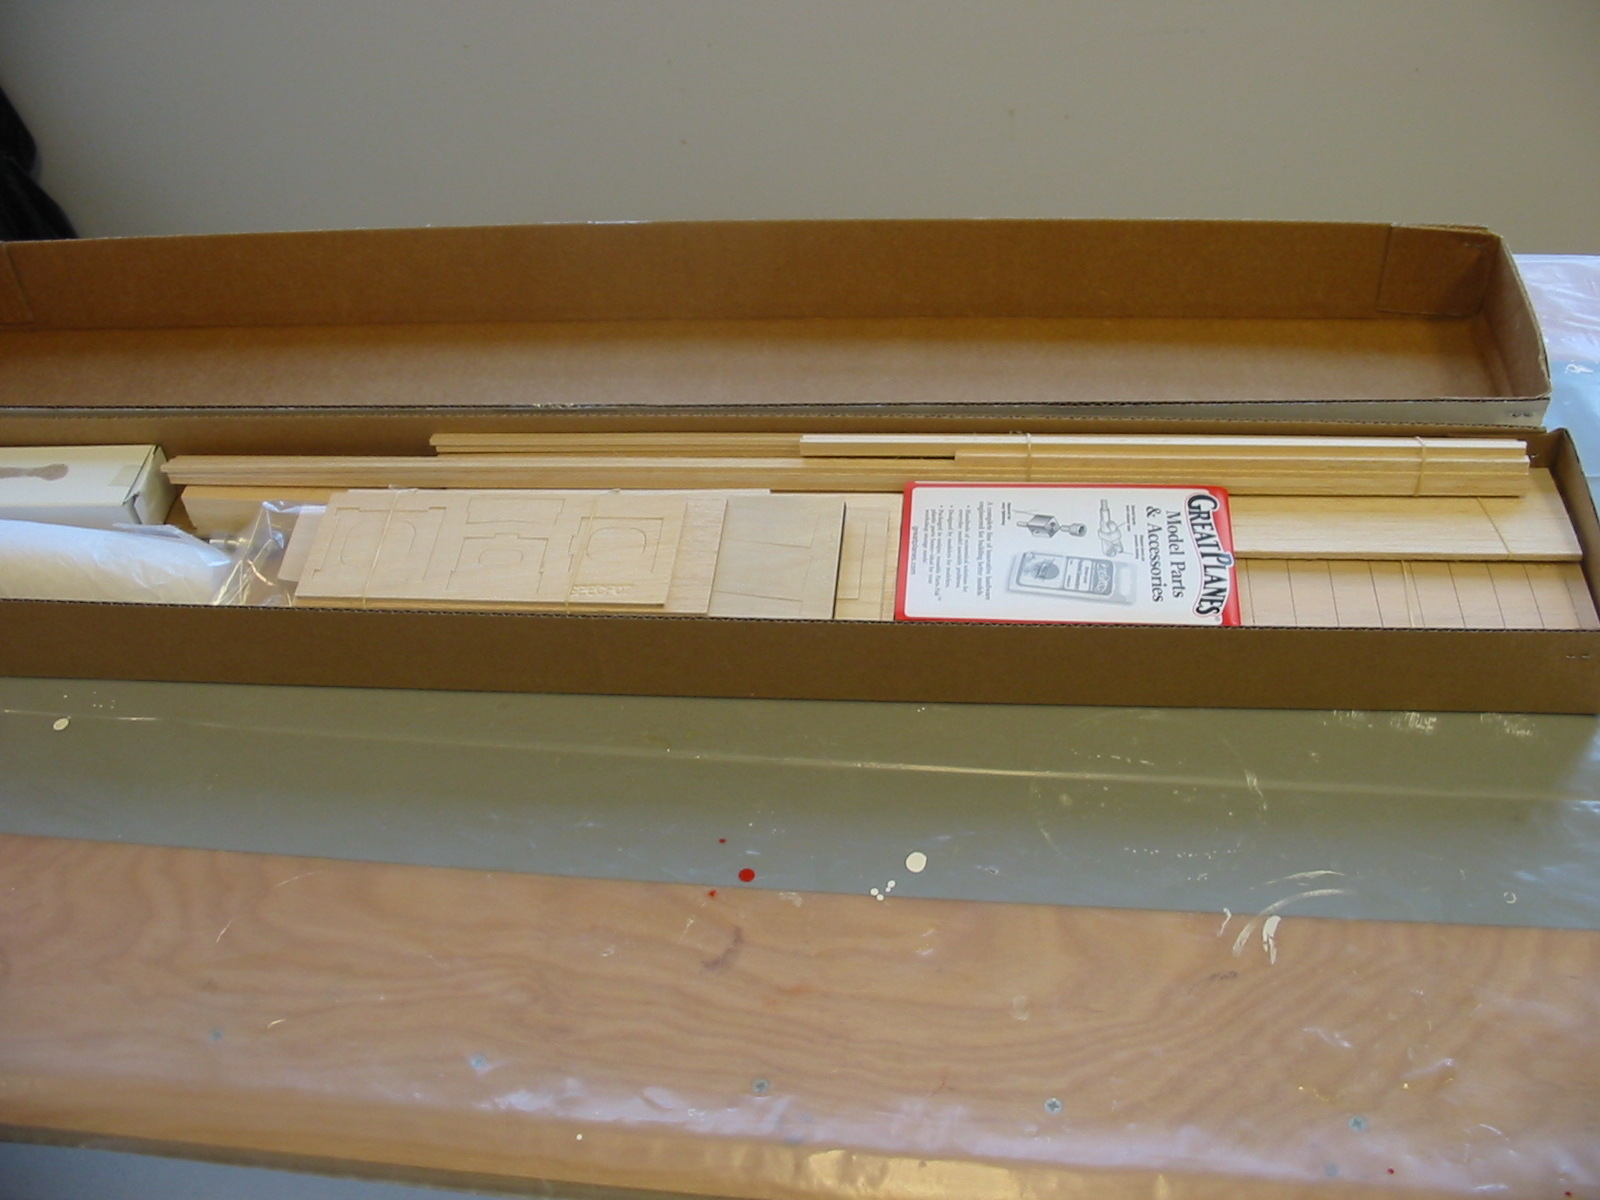
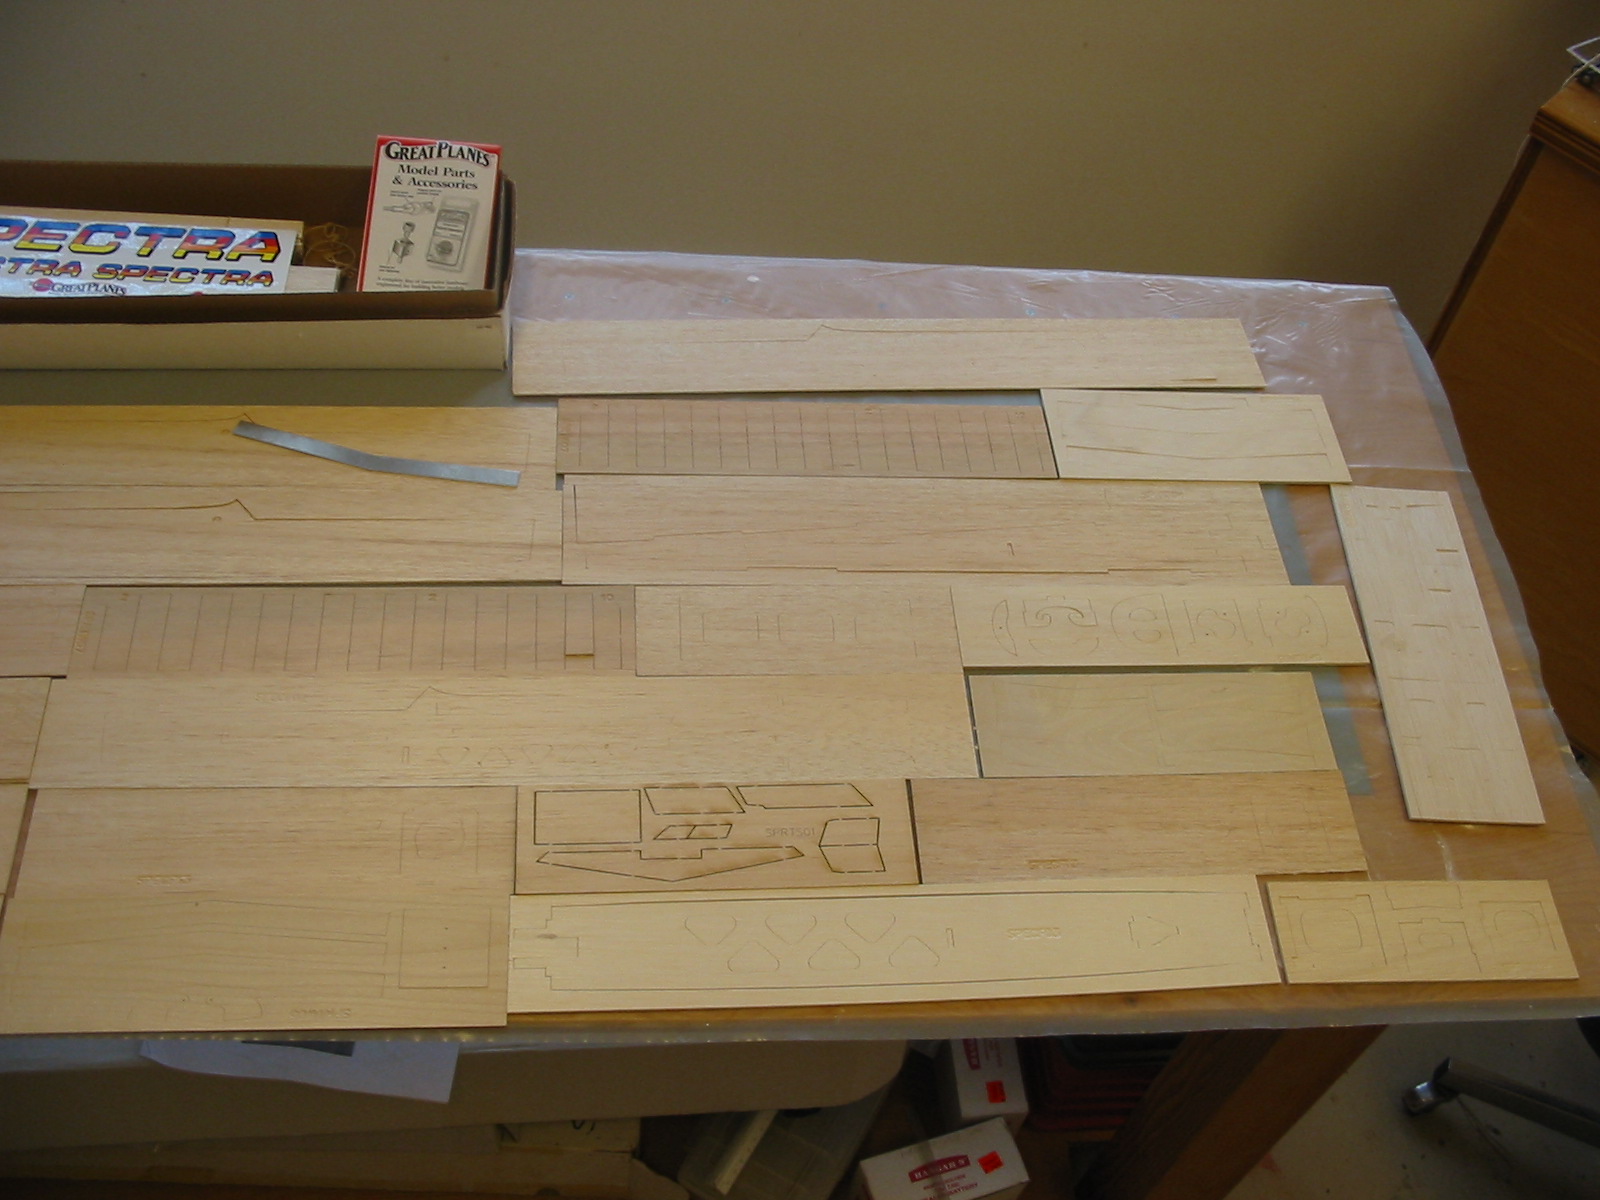
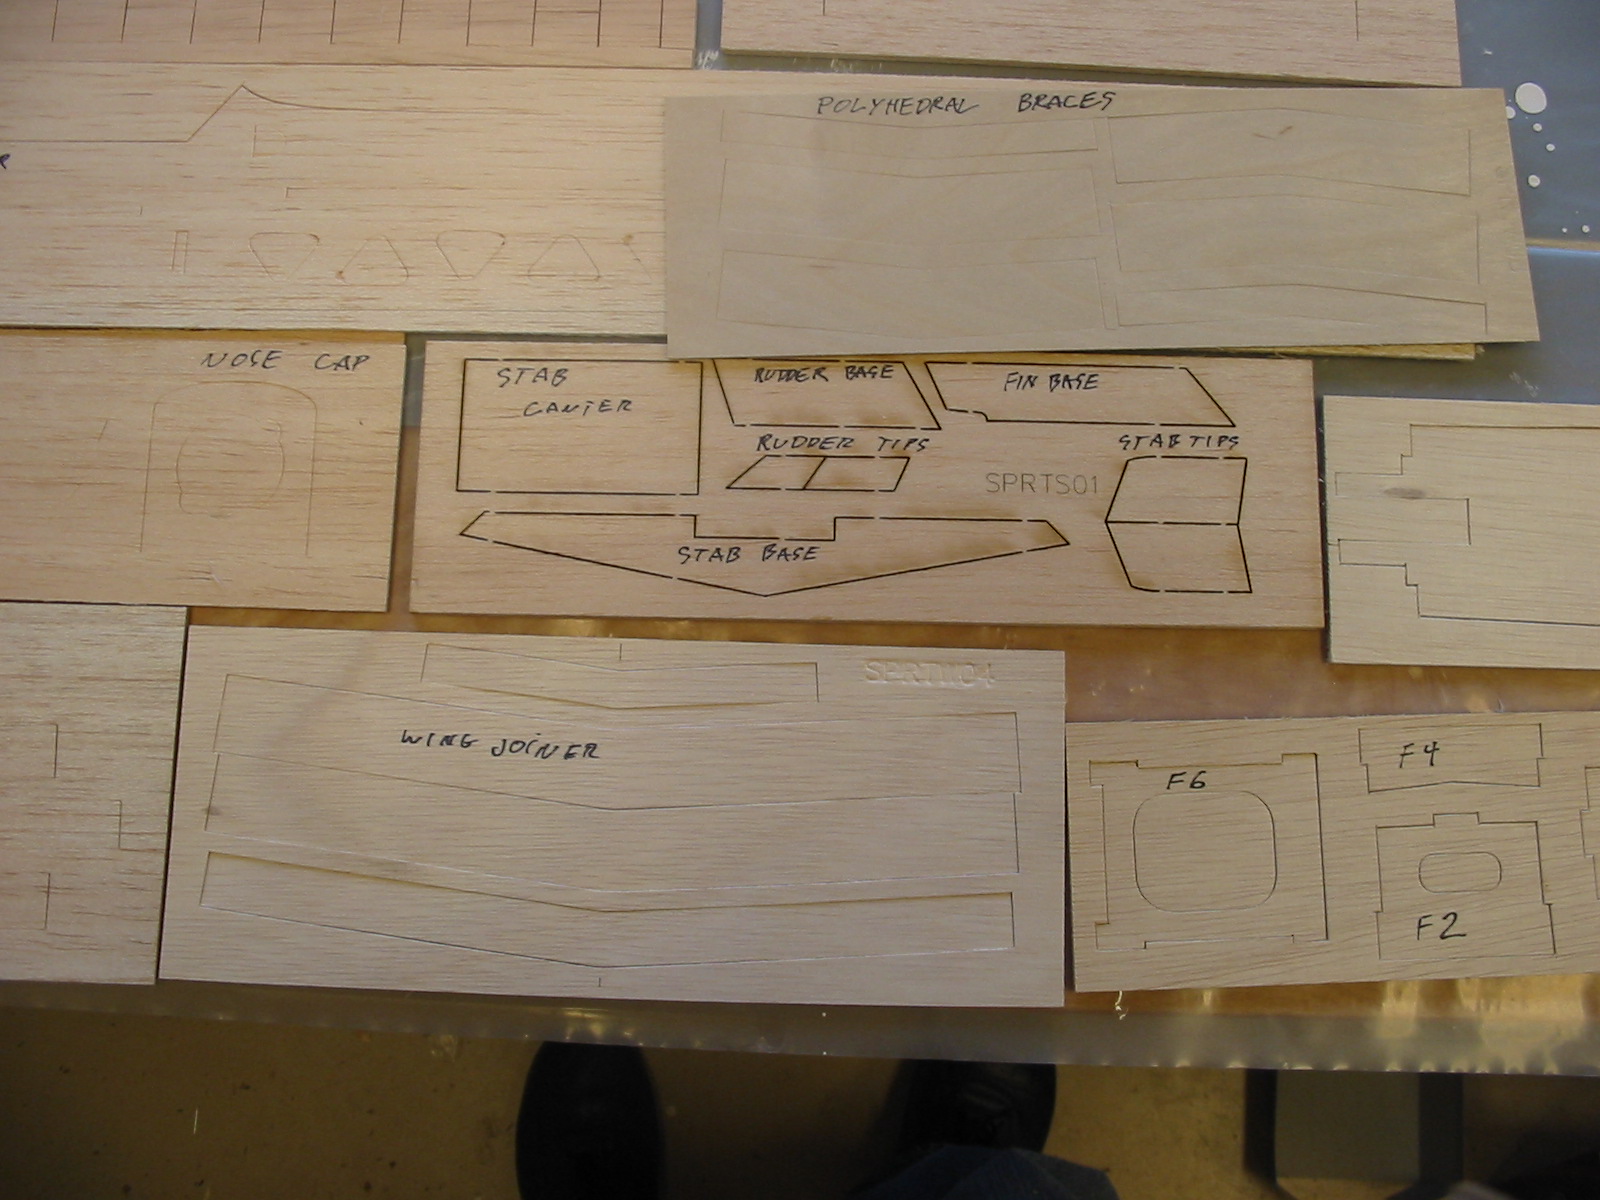
The balsa looks good. Very clean die-cut. One sheet was laser cut. Here are the sheets spread out on the work table. The first step is to label the parts.
 01-25-2015 | 04:26 PM
#2
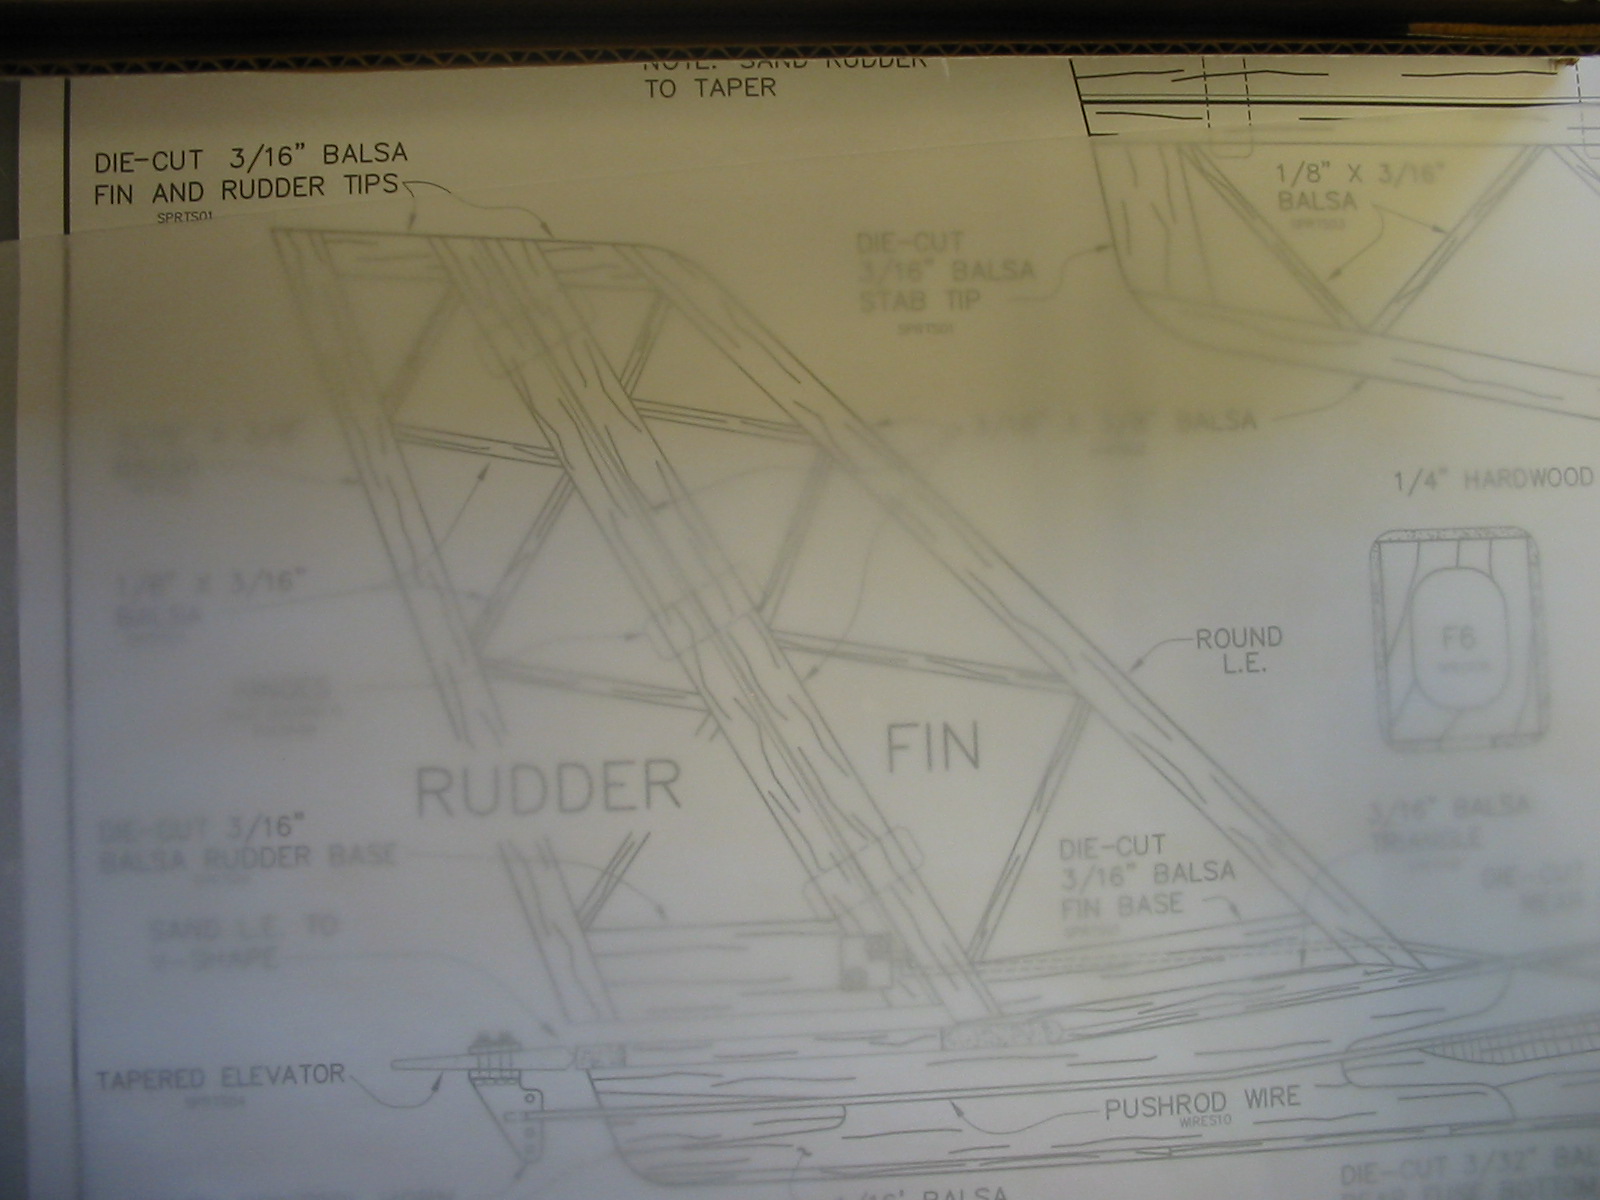
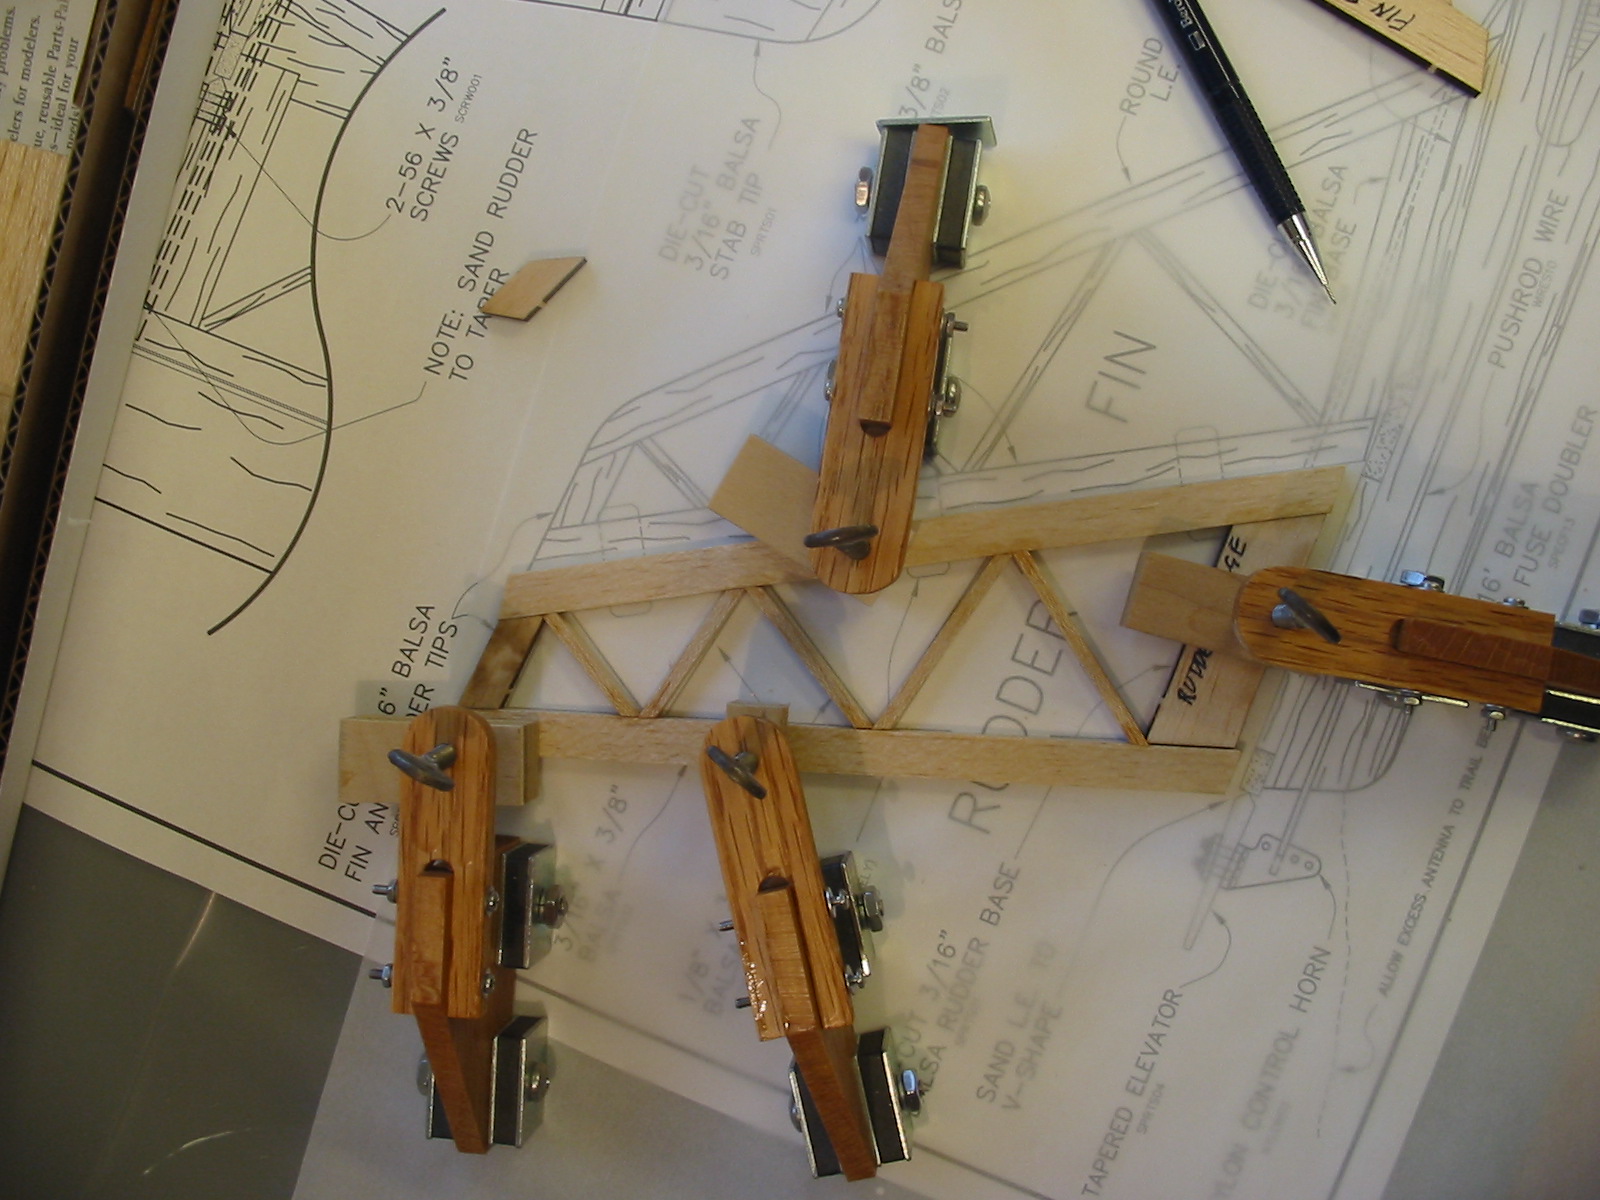
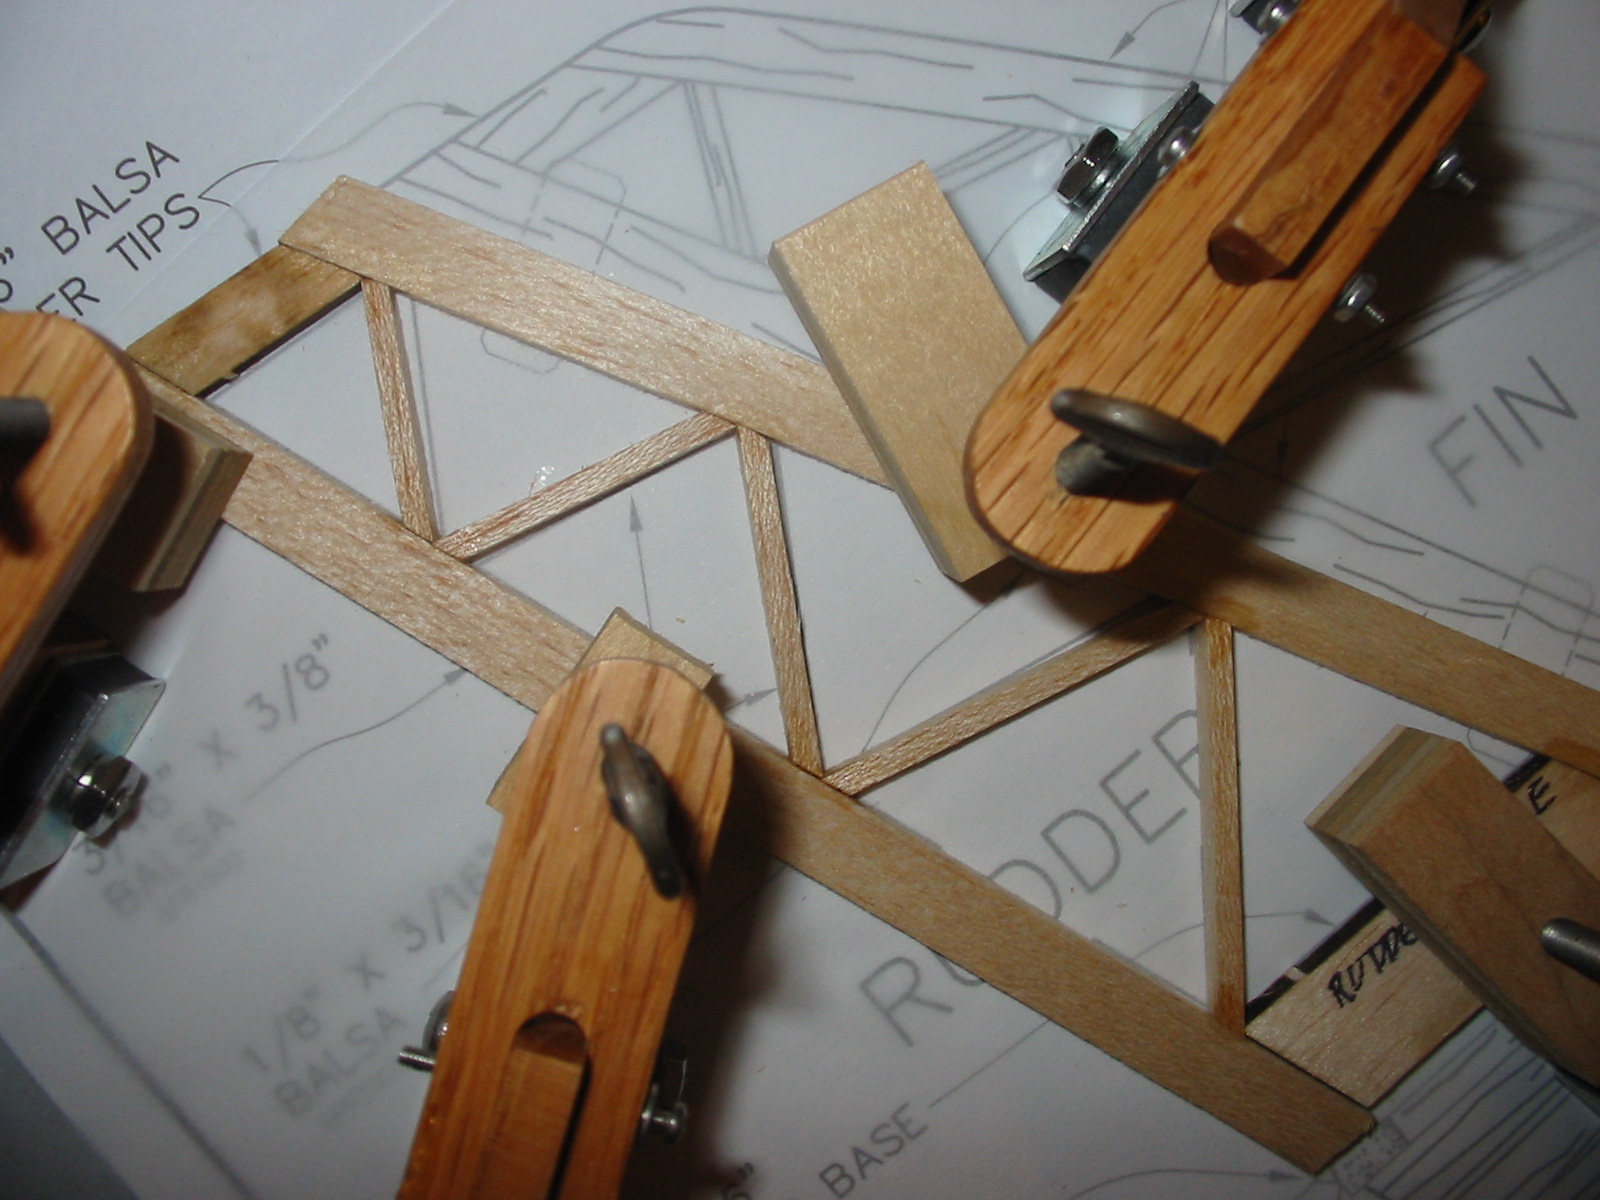
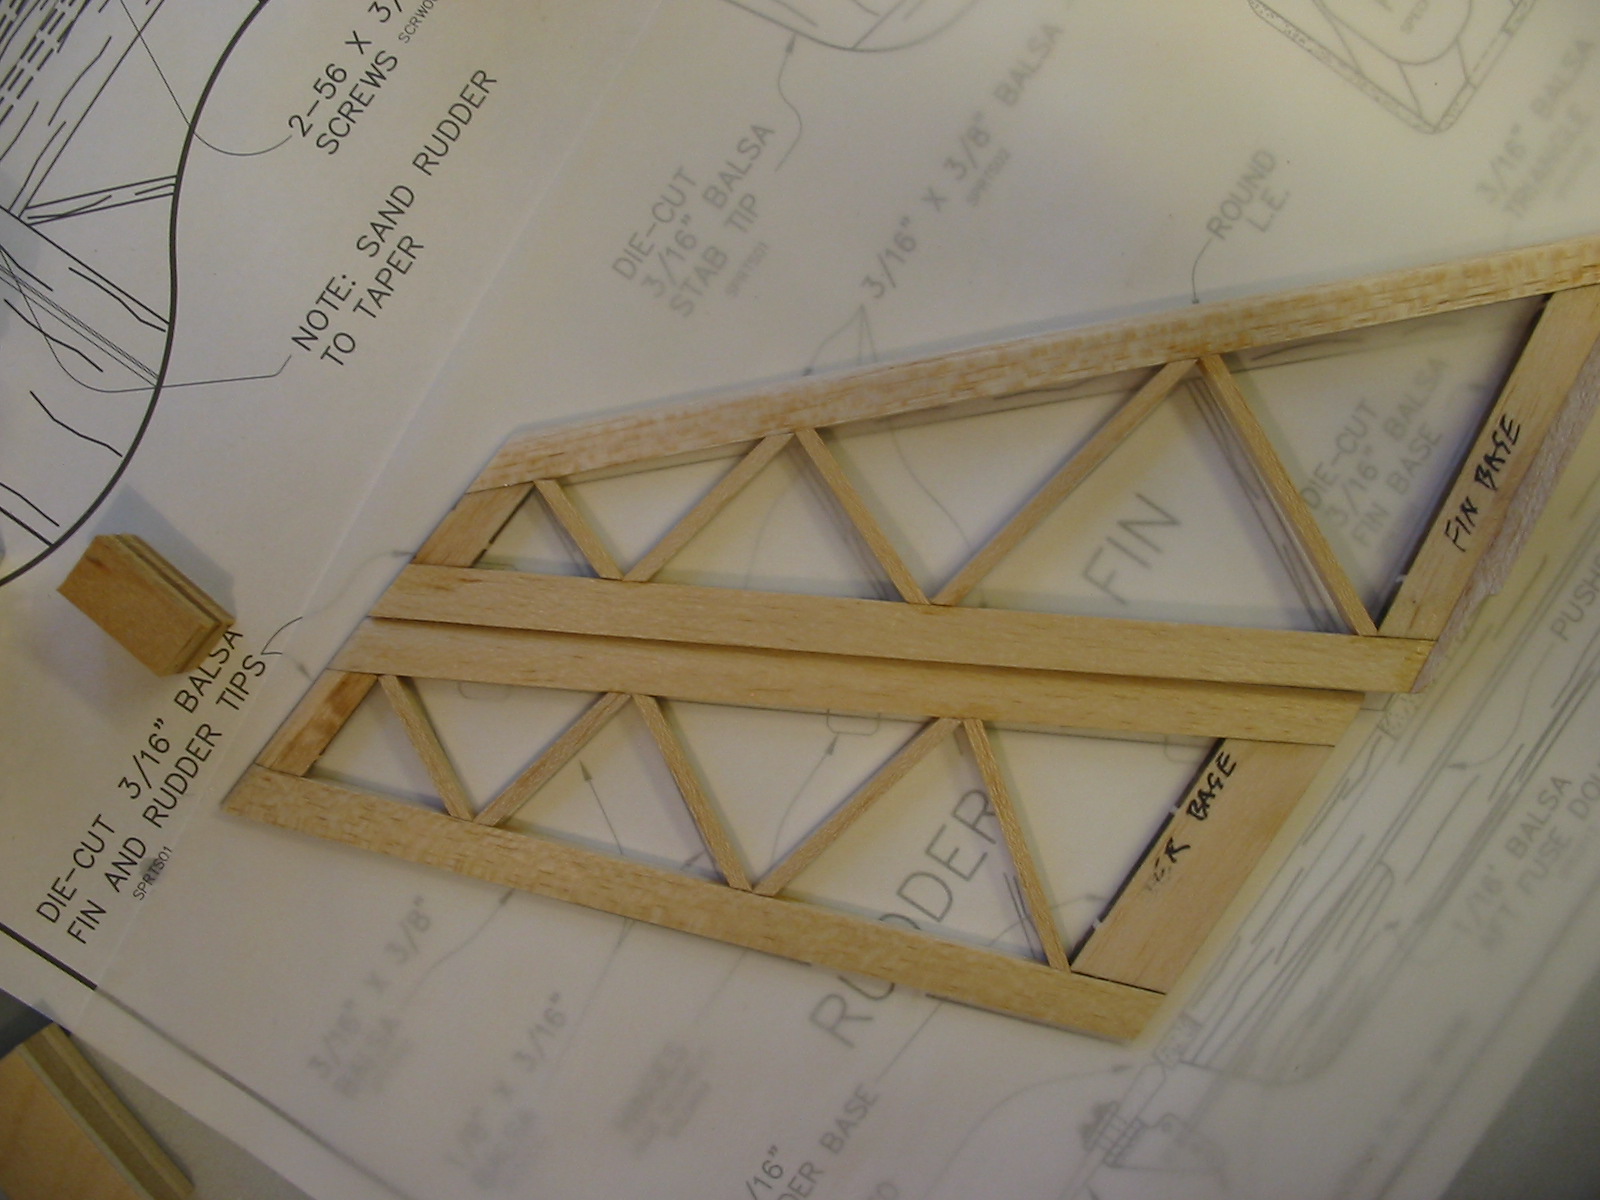
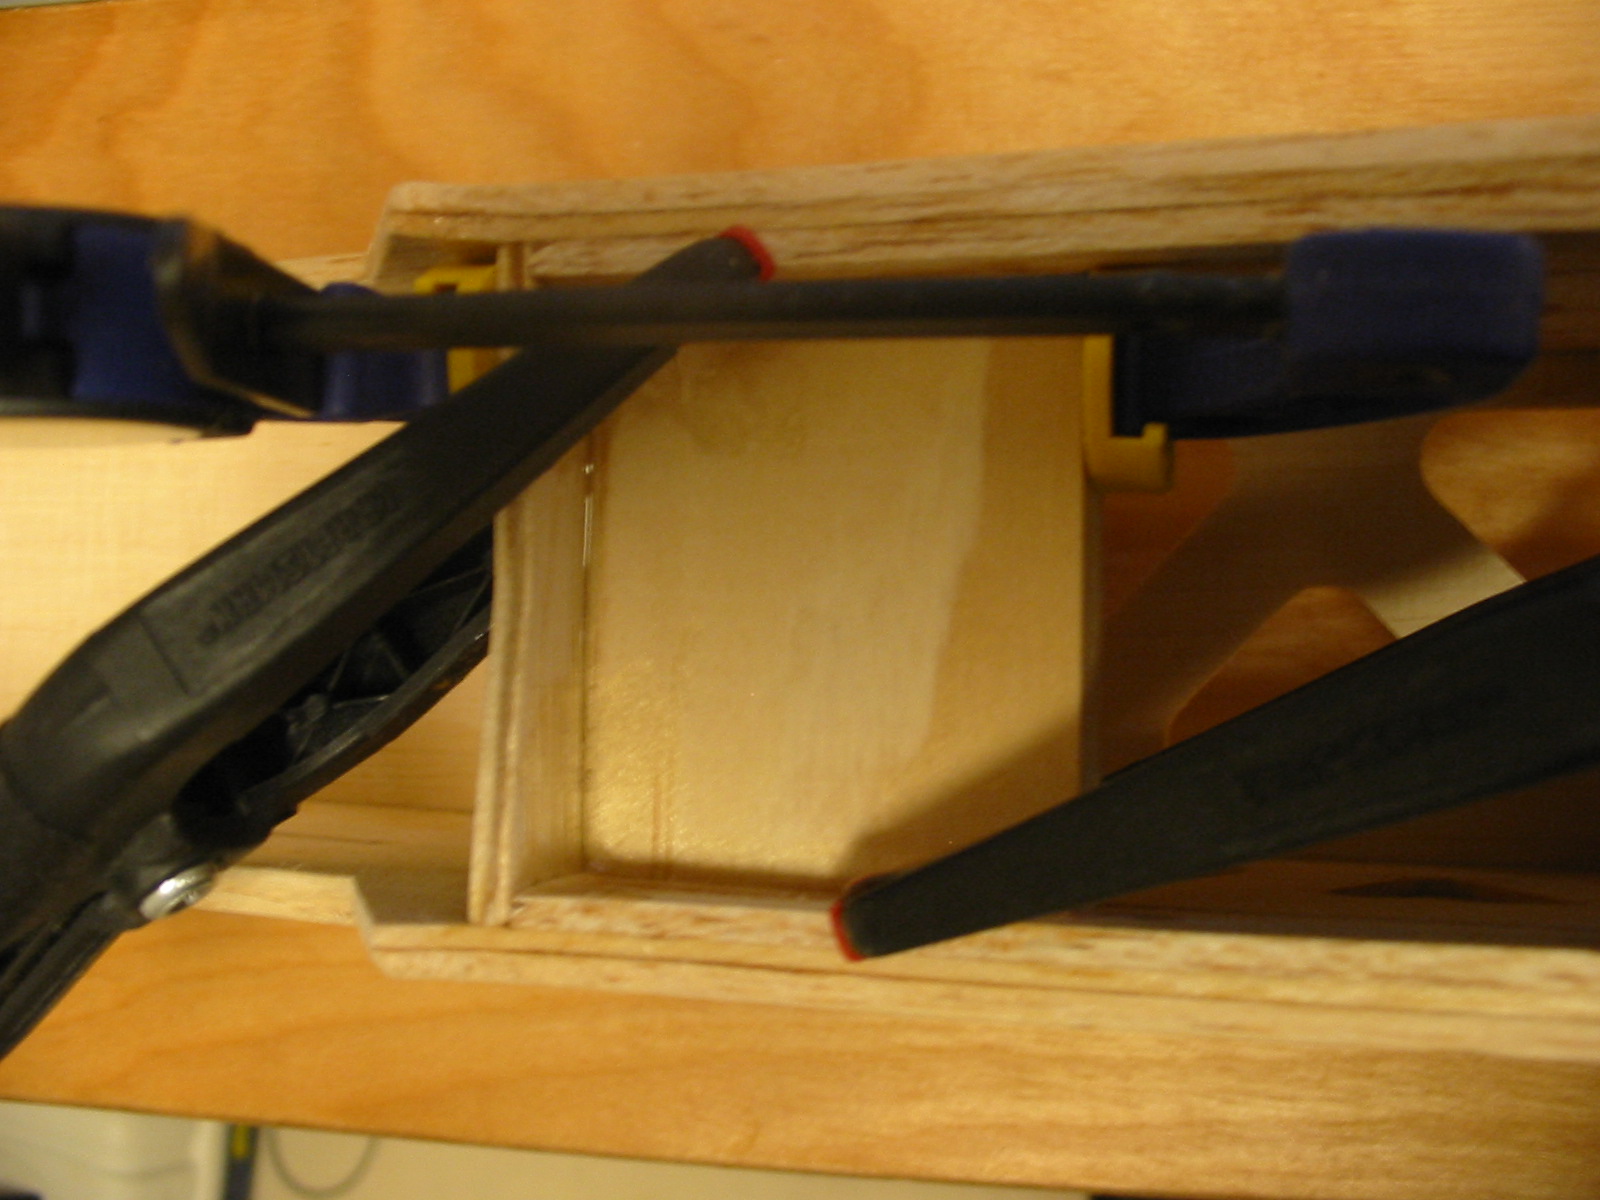
At this point the instructions are a bit out of date. They call for wax paper over the plans. Parchment paper works better. There is a layer of painters plastic and a sheet of parchment paper over the plans. You can see the degree of transparence. It works well protecting the plans and the work bench. The next three images are the rudder and fin constructed with magnets. The techniques used to construct these parts were suggested in other build threads. The cross members were cut just over size and sanded to fit. This worked well. The ca did not stick to the parchment paper. To keep the shop warm there is a small propane heater with a fan sitting on the table behind it. This combination stirs the air enough to blow the fumes away. No problem with the ca fumes attacking my eyes. The fan is a must when using ca.
01-25-2015 | 04:43 PM
#3
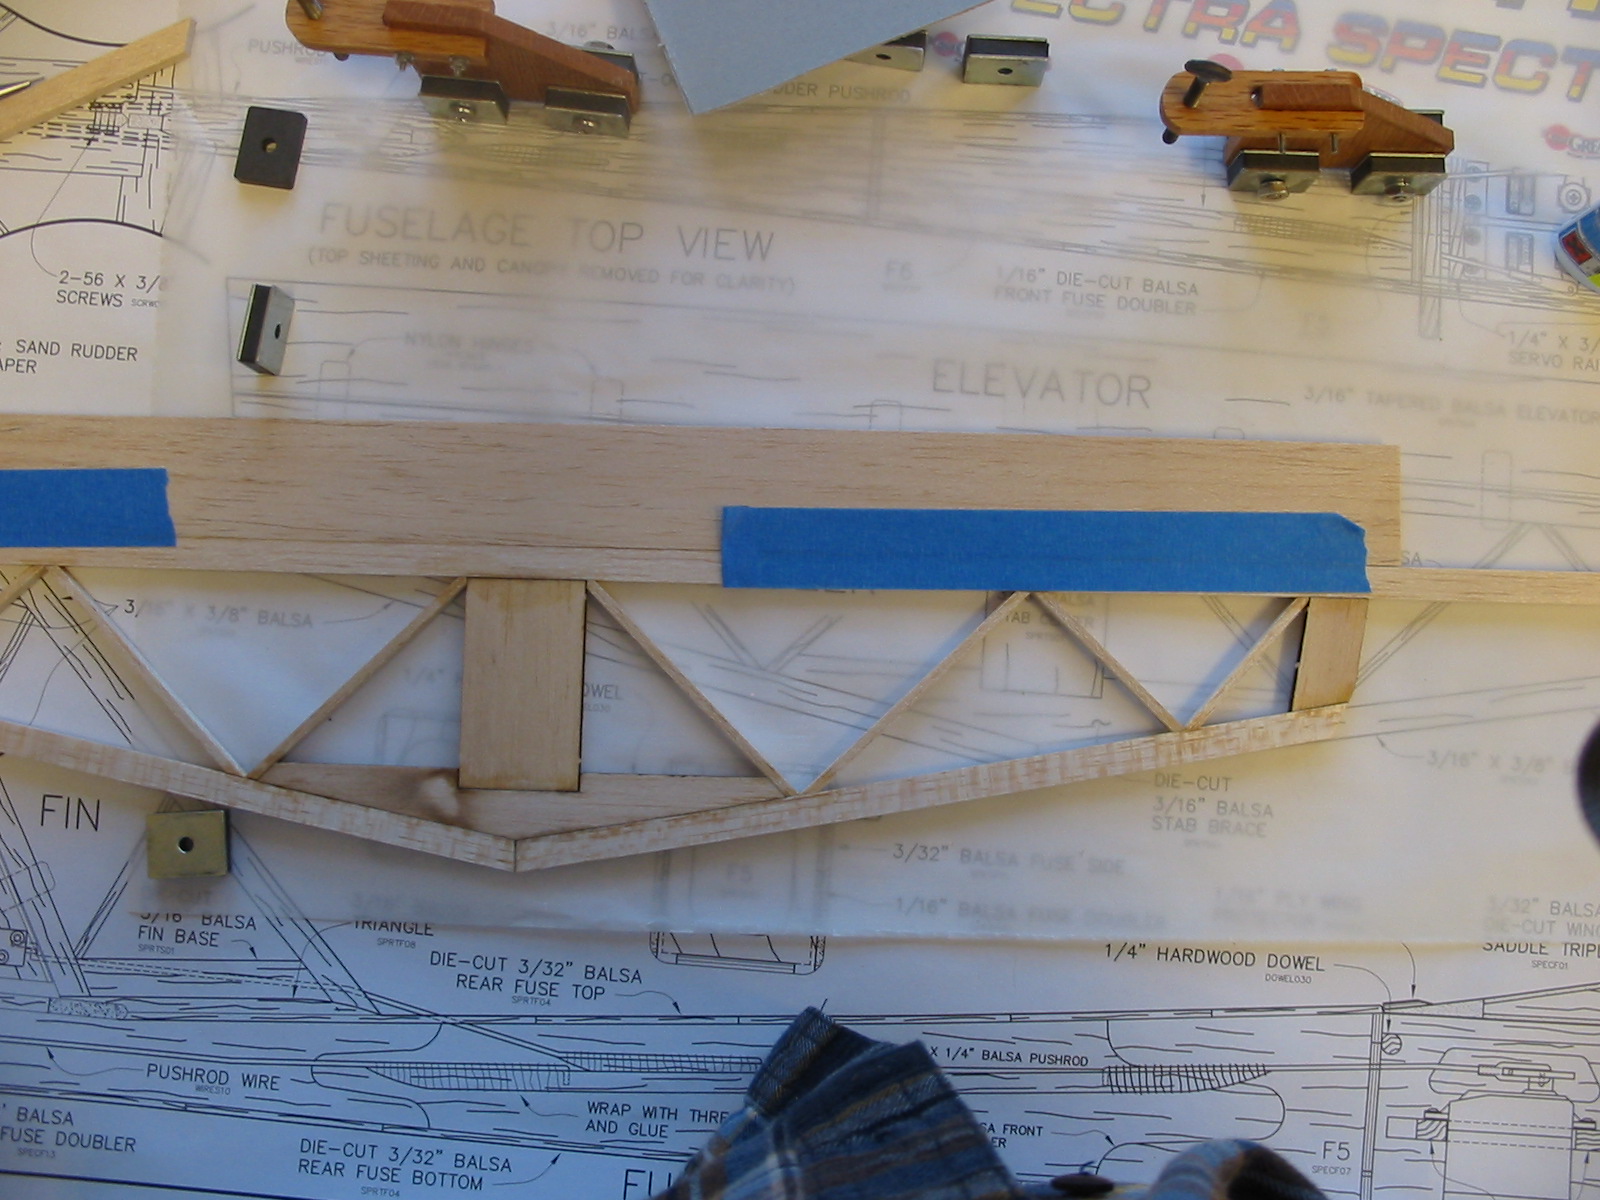
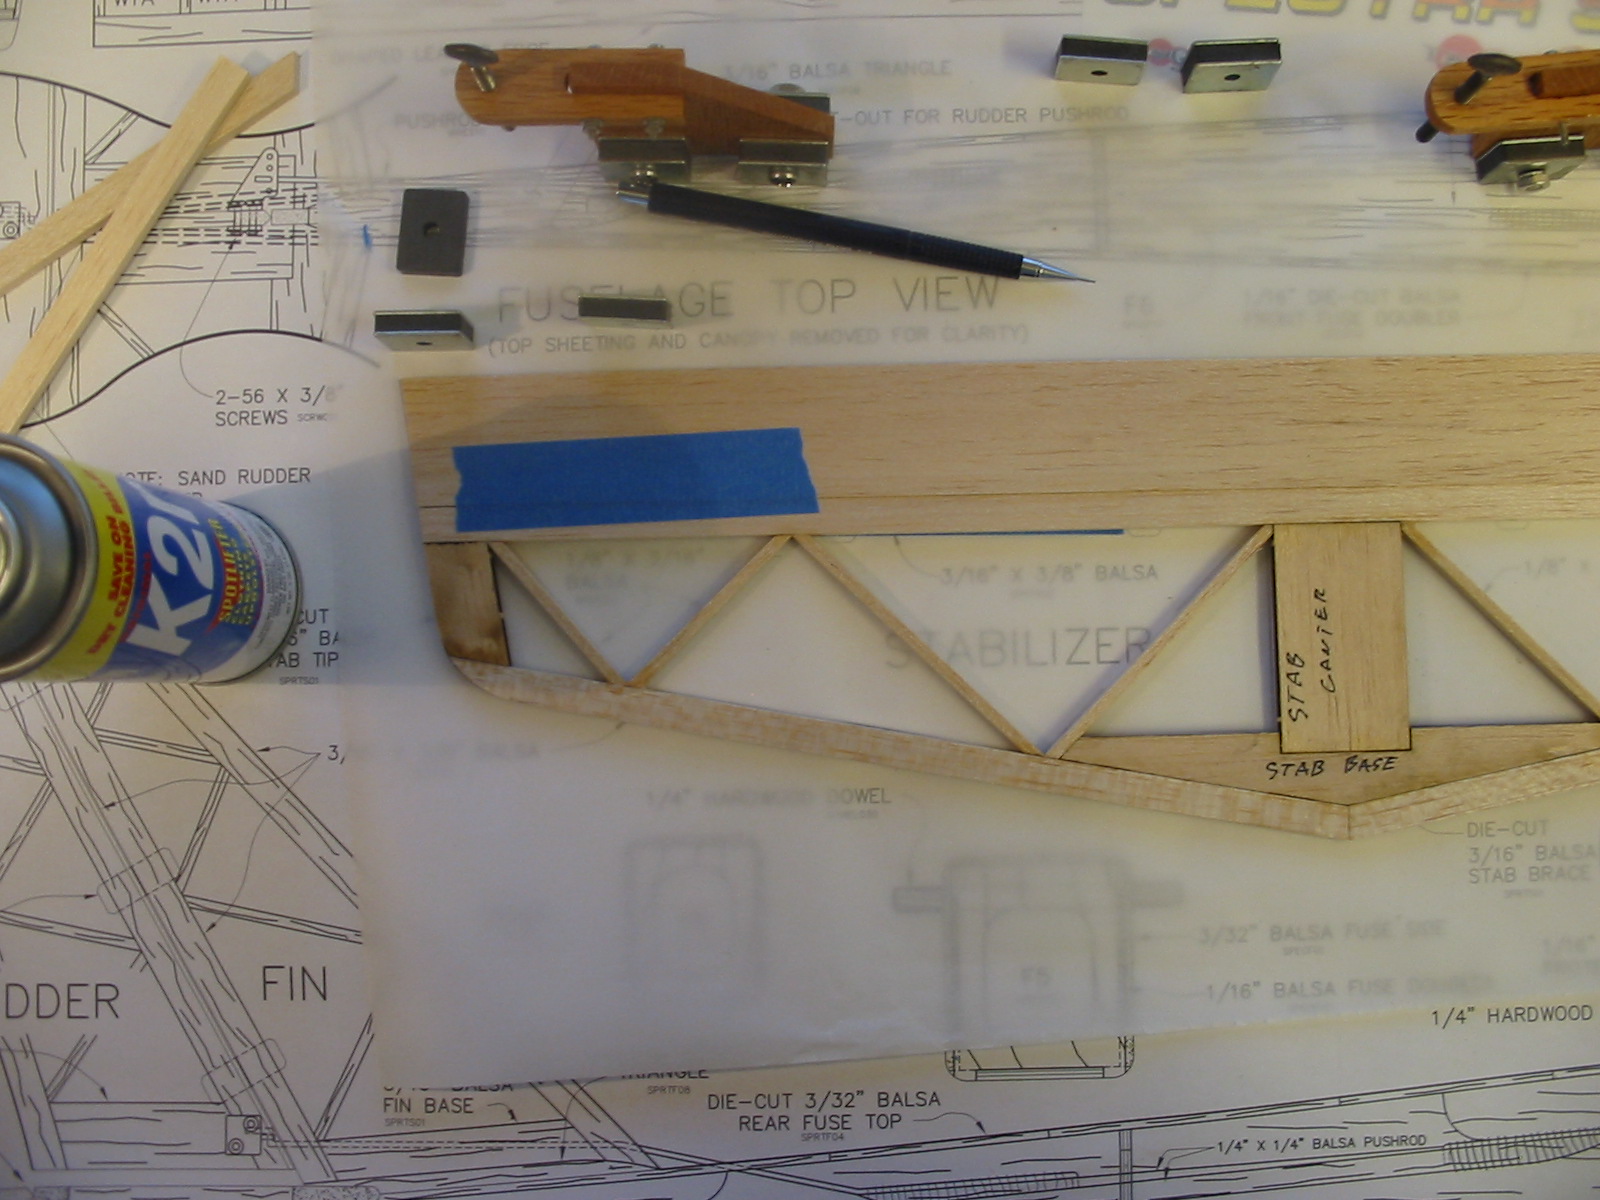
The horizontal stabilizer was assembled with magnets and then CAed together.
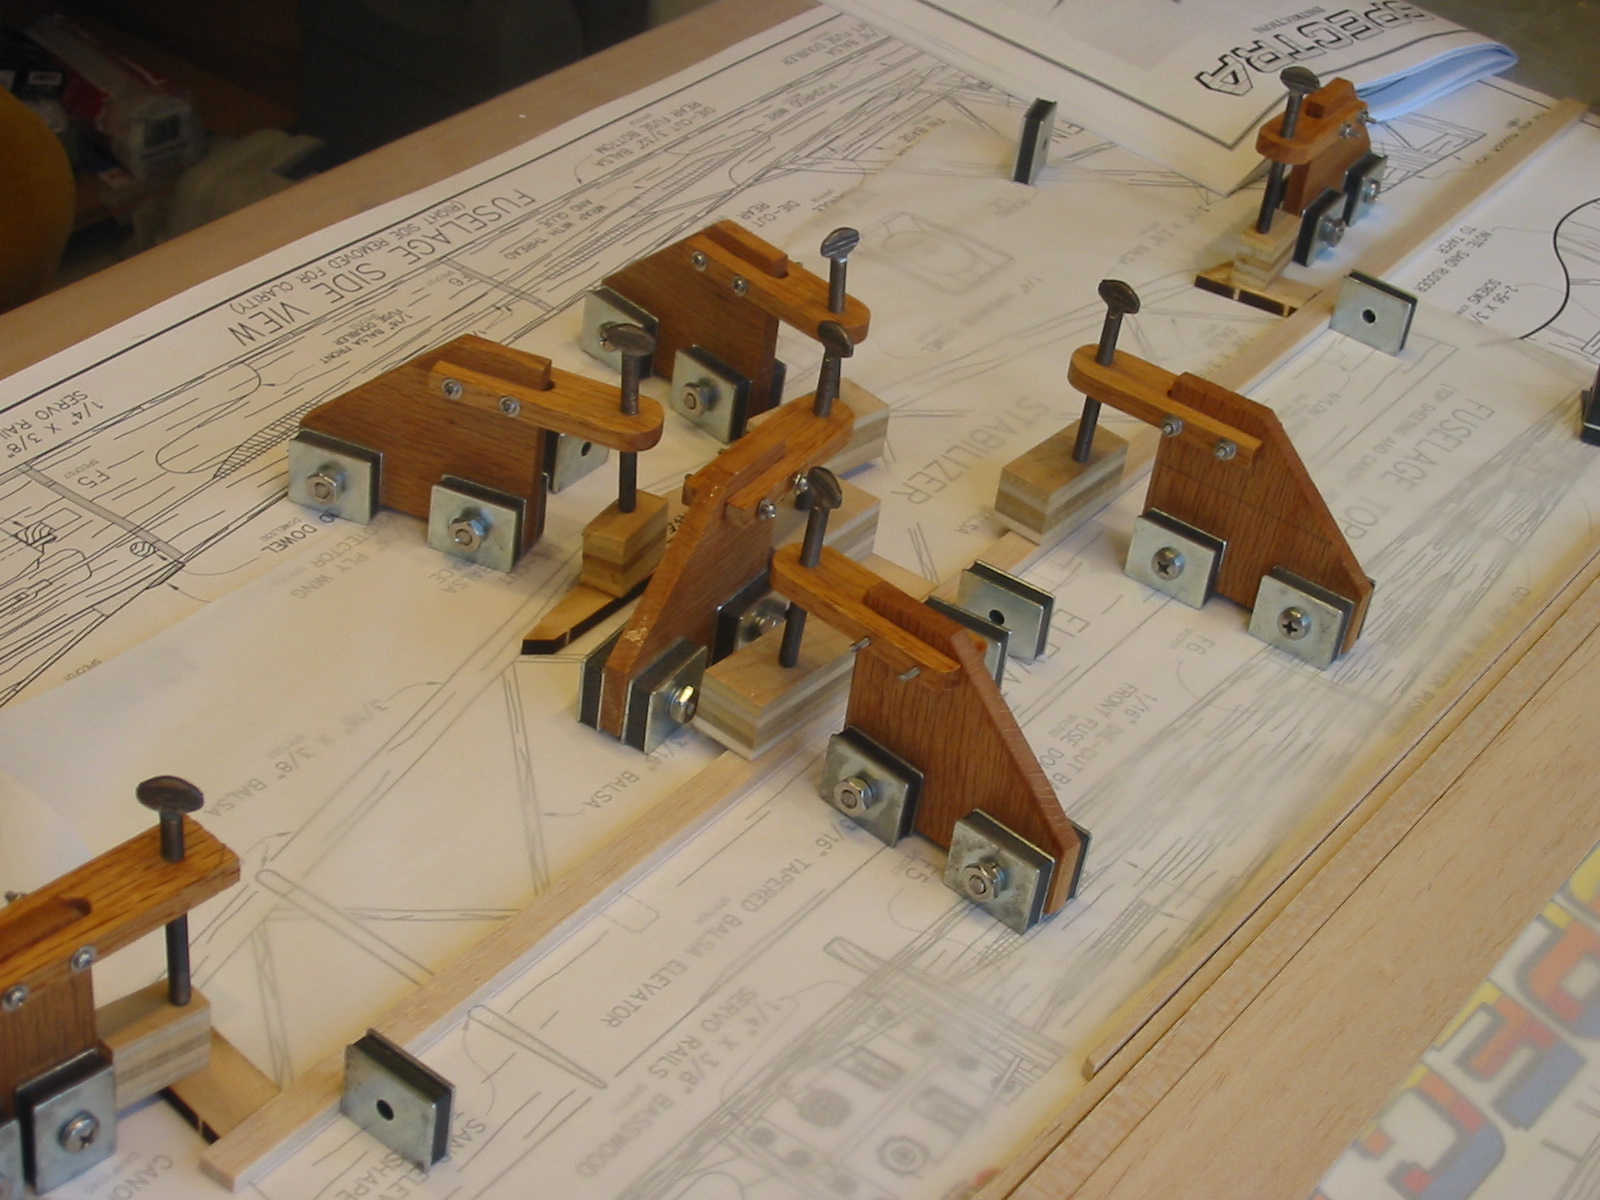
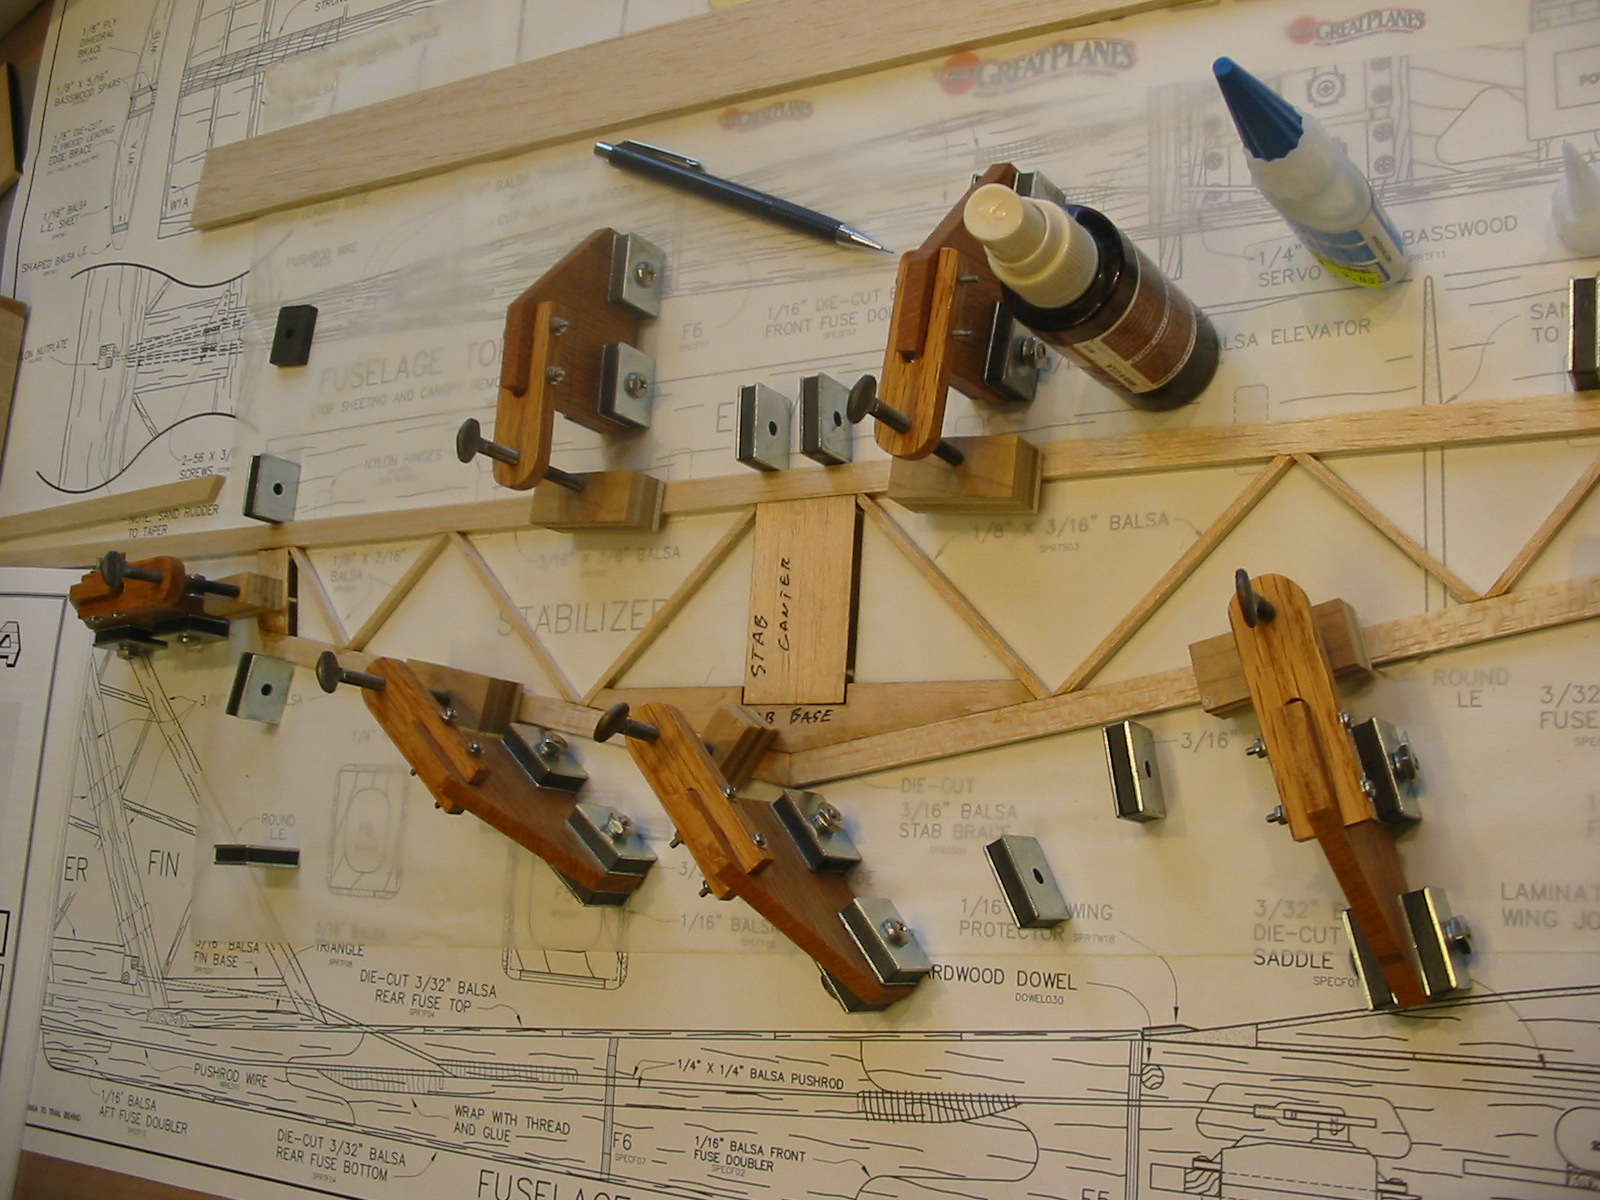
These magnetic presses are homemade. The screw is not vertical with the cross arm of the press. The guide hole was drilled with a drill press and most likely is not the cause of the miss alignment. It most likely is out of alignment due to cutting the threads. any ideas how to get these right.
Stabilizer taped to the elevator and ready to sand.
Last edited by YellowBlueBird; 01-25-2015 at 04:45 PM. Reason: spelling
01-26-2015 | 08:19 PM
#5
What controls does the Riser have? This one has only elevator and rudder flight controls and motor of course. I forgot to take the camera to the shop this morning. There will be pictures tomorrow.
01-27-2015 | 02:10 AM
#6
Senior Member
My Feedback: (1)
Joined: Oct 2004
Posts: 238
Likes: 0
Received 0 Likes
on
0 Posts
From: La Vista, NE
Just like yours: Rudder, Elevator, Electric Motor if you like. But also has instructions to do spoilers. Which mine will have. Mine will be a strict sailplane. No Electric motor. I will have a cox .049 on a detachable pod http://www.sigplanes.com/SIG-Power-Pod_p_77.html for it on top of the wing, like the one I had set up for my Gentle Lady back in the early 80's when I didn't feel like setting up the high-start. And I am going to make my wings into 2 half's for easier carrying. I also have the Sig Riser 100 to build after this one. This is the Sig Site: http://www.sigplanes.com/Kits--Sailplanes_c_34.html
Last edited by Aquila1954; 01-27-2015 at 02:20 AM.
01-27-2015 | 02:26 AM
#7
Senior Member
My Feedback: (1)
Joined: Oct 2004
Posts: 238
Likes: 0
Received 0 Likes
on
0 Posts
From: La Vista, NE
I also have a ARF Spectra that my brother bought me back in 2004. Never flown yet, was working on it so he can learn. But, he passed away before it got done. Had trouble getting CG just right. It came with electric all set up already. I have a Airtronics RD6000 Radio setup in it. 72mhz.
01-27-2015 | 04:37 PM
#9
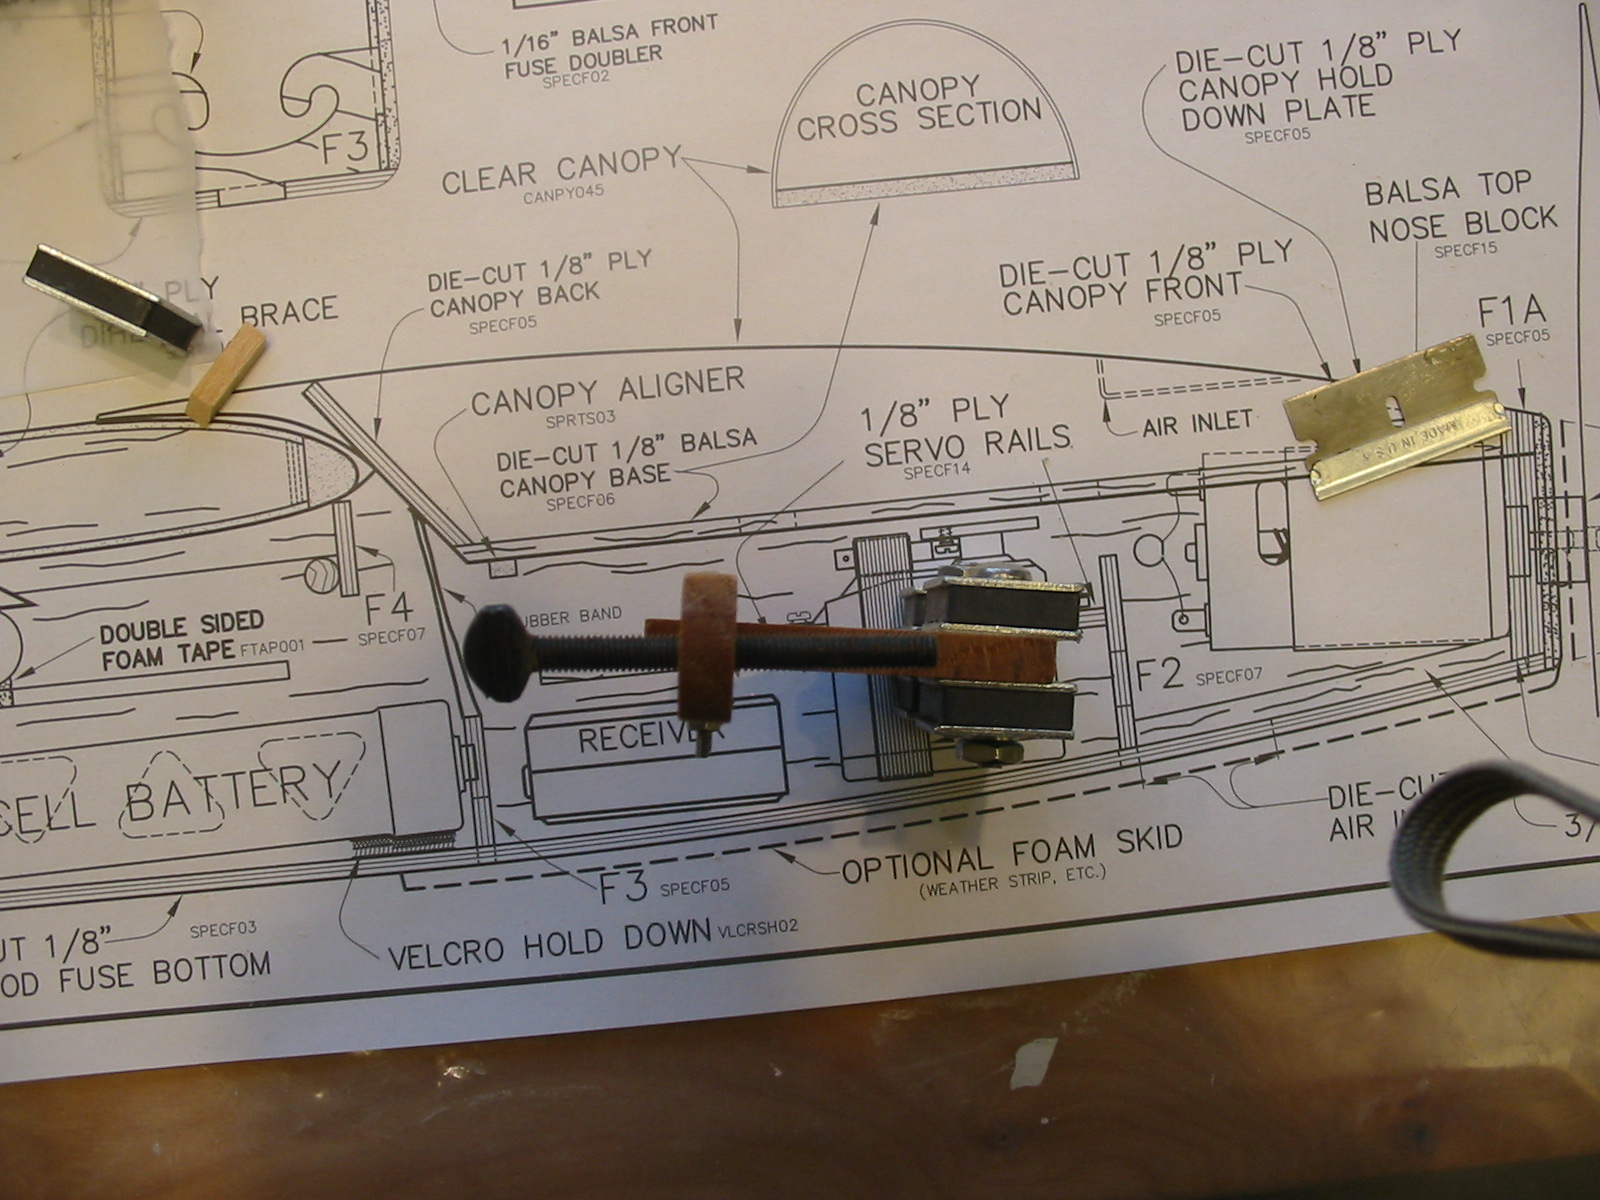
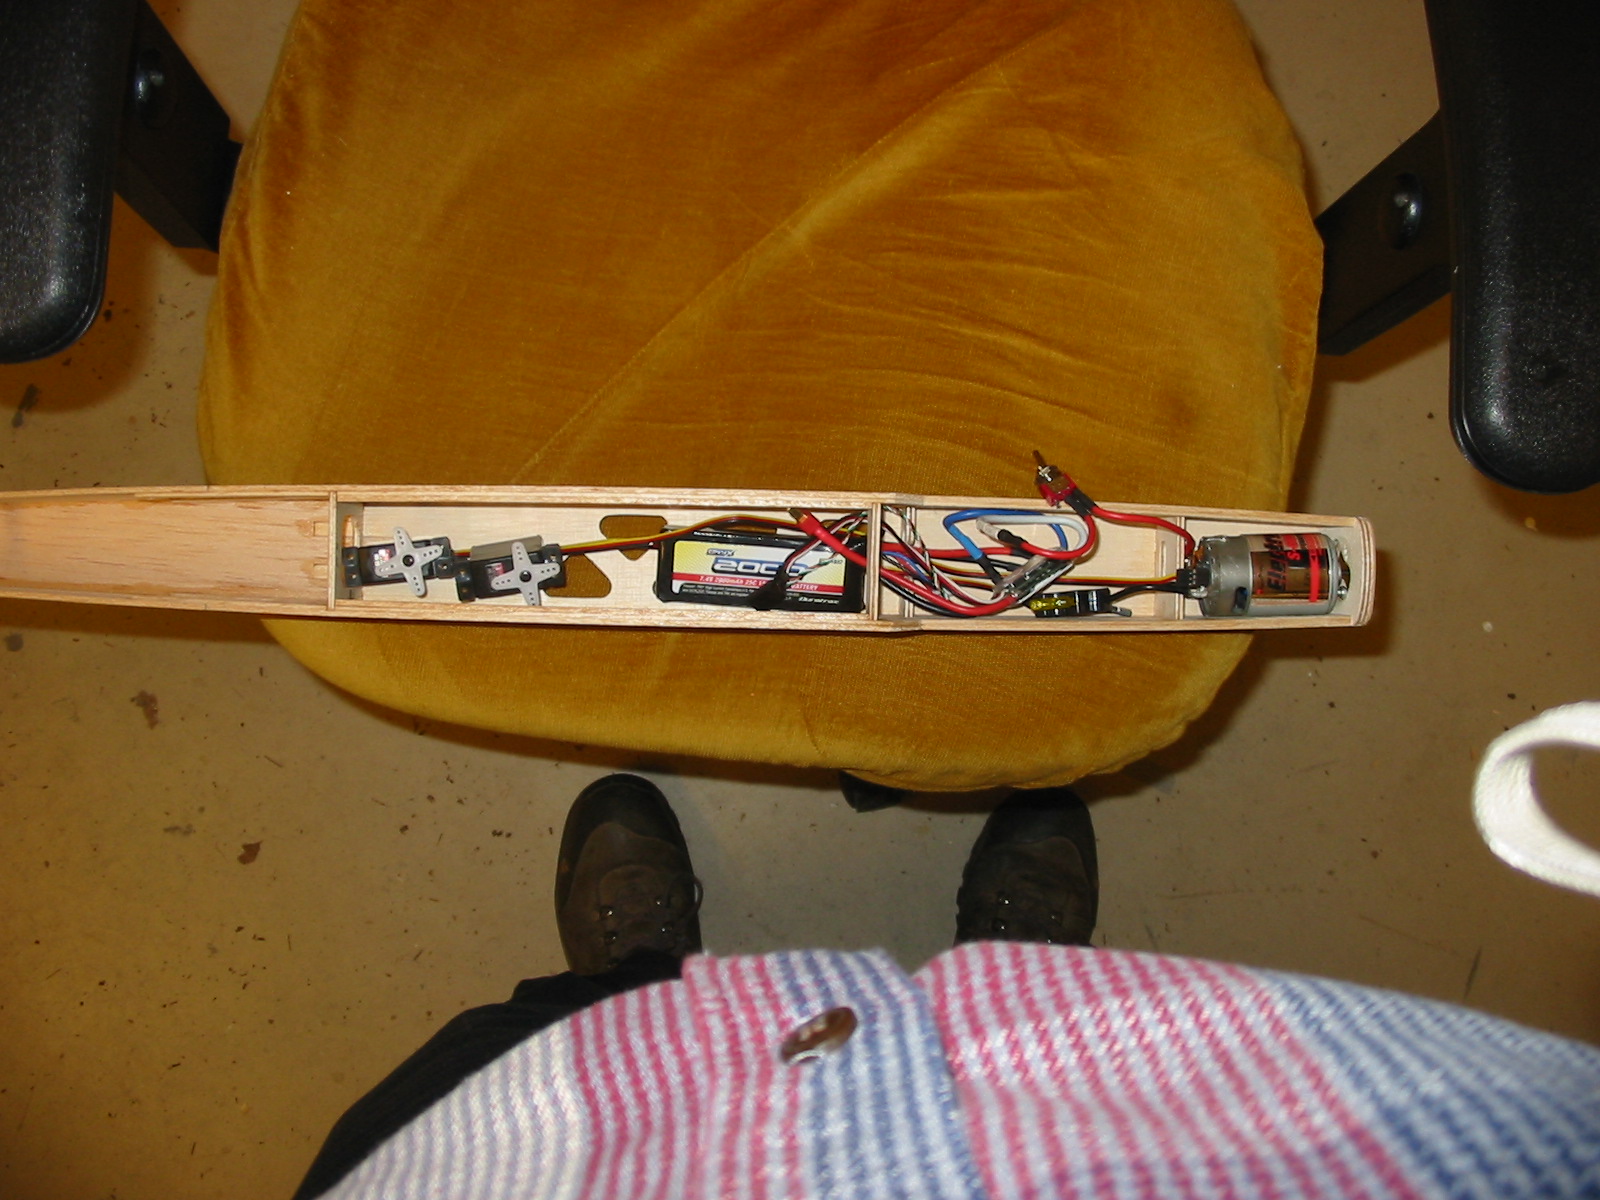
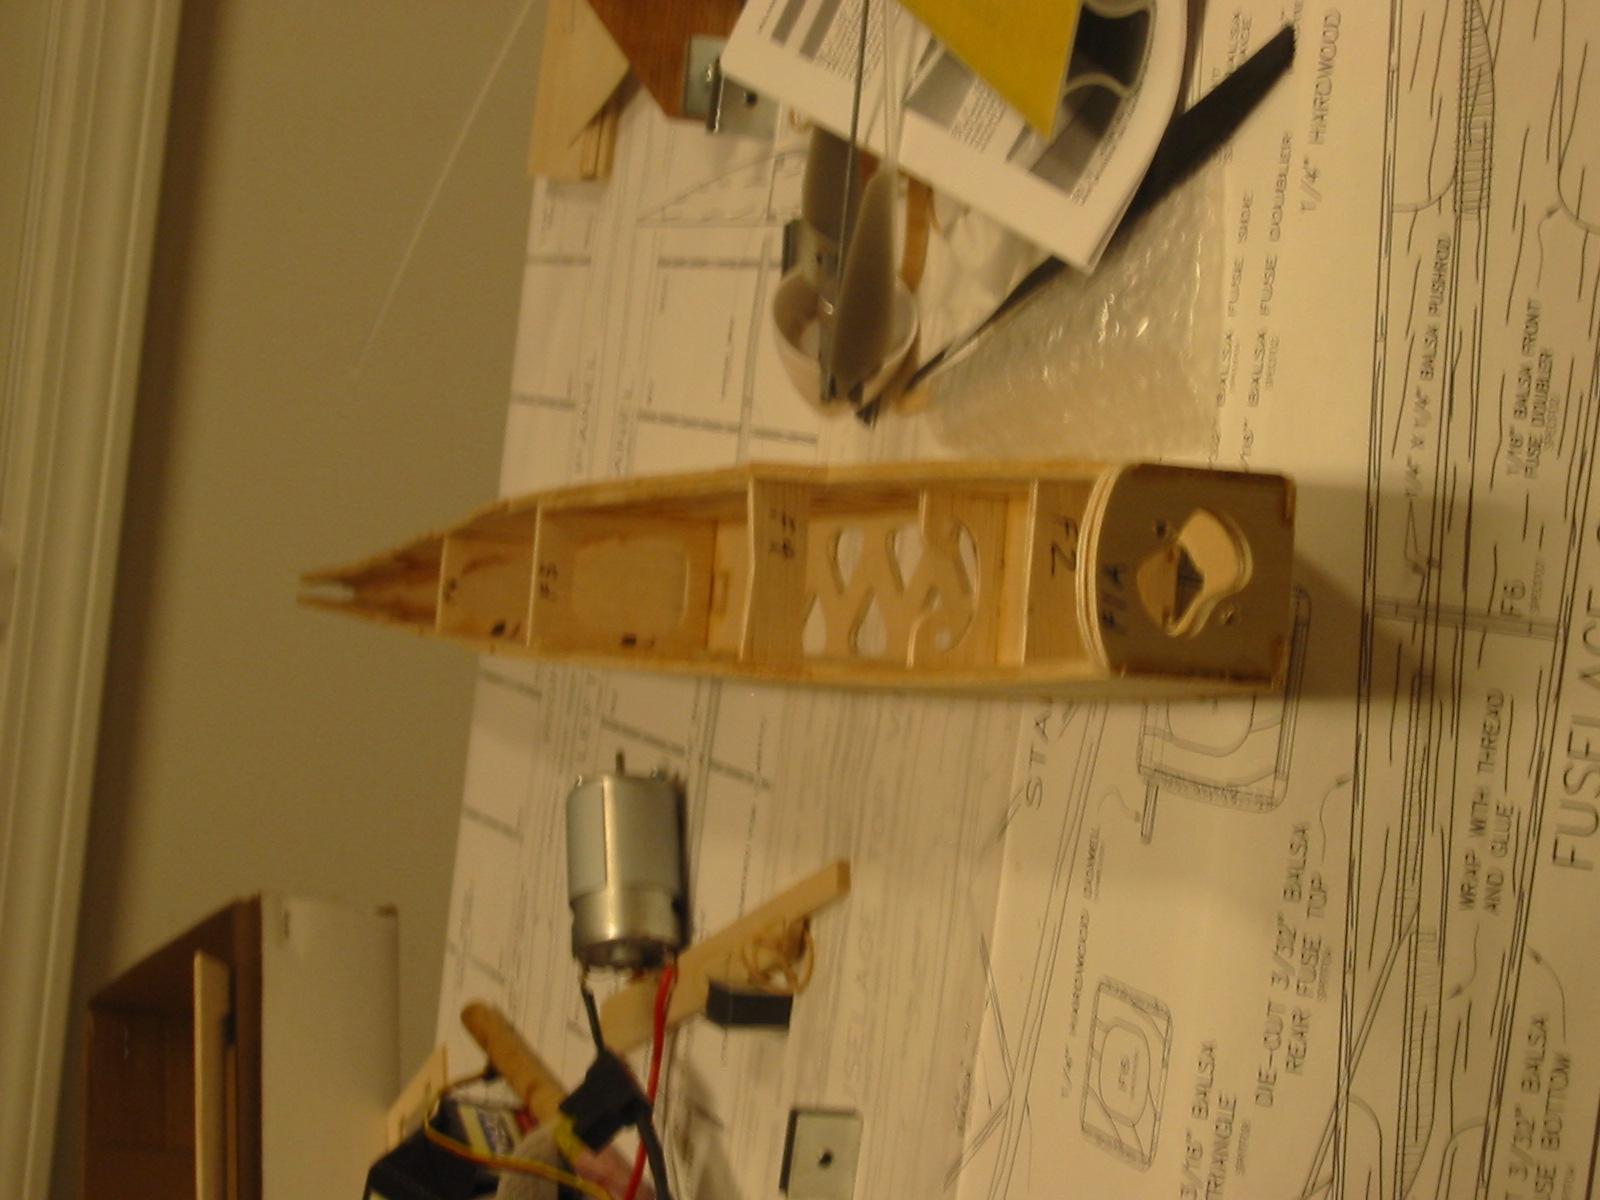
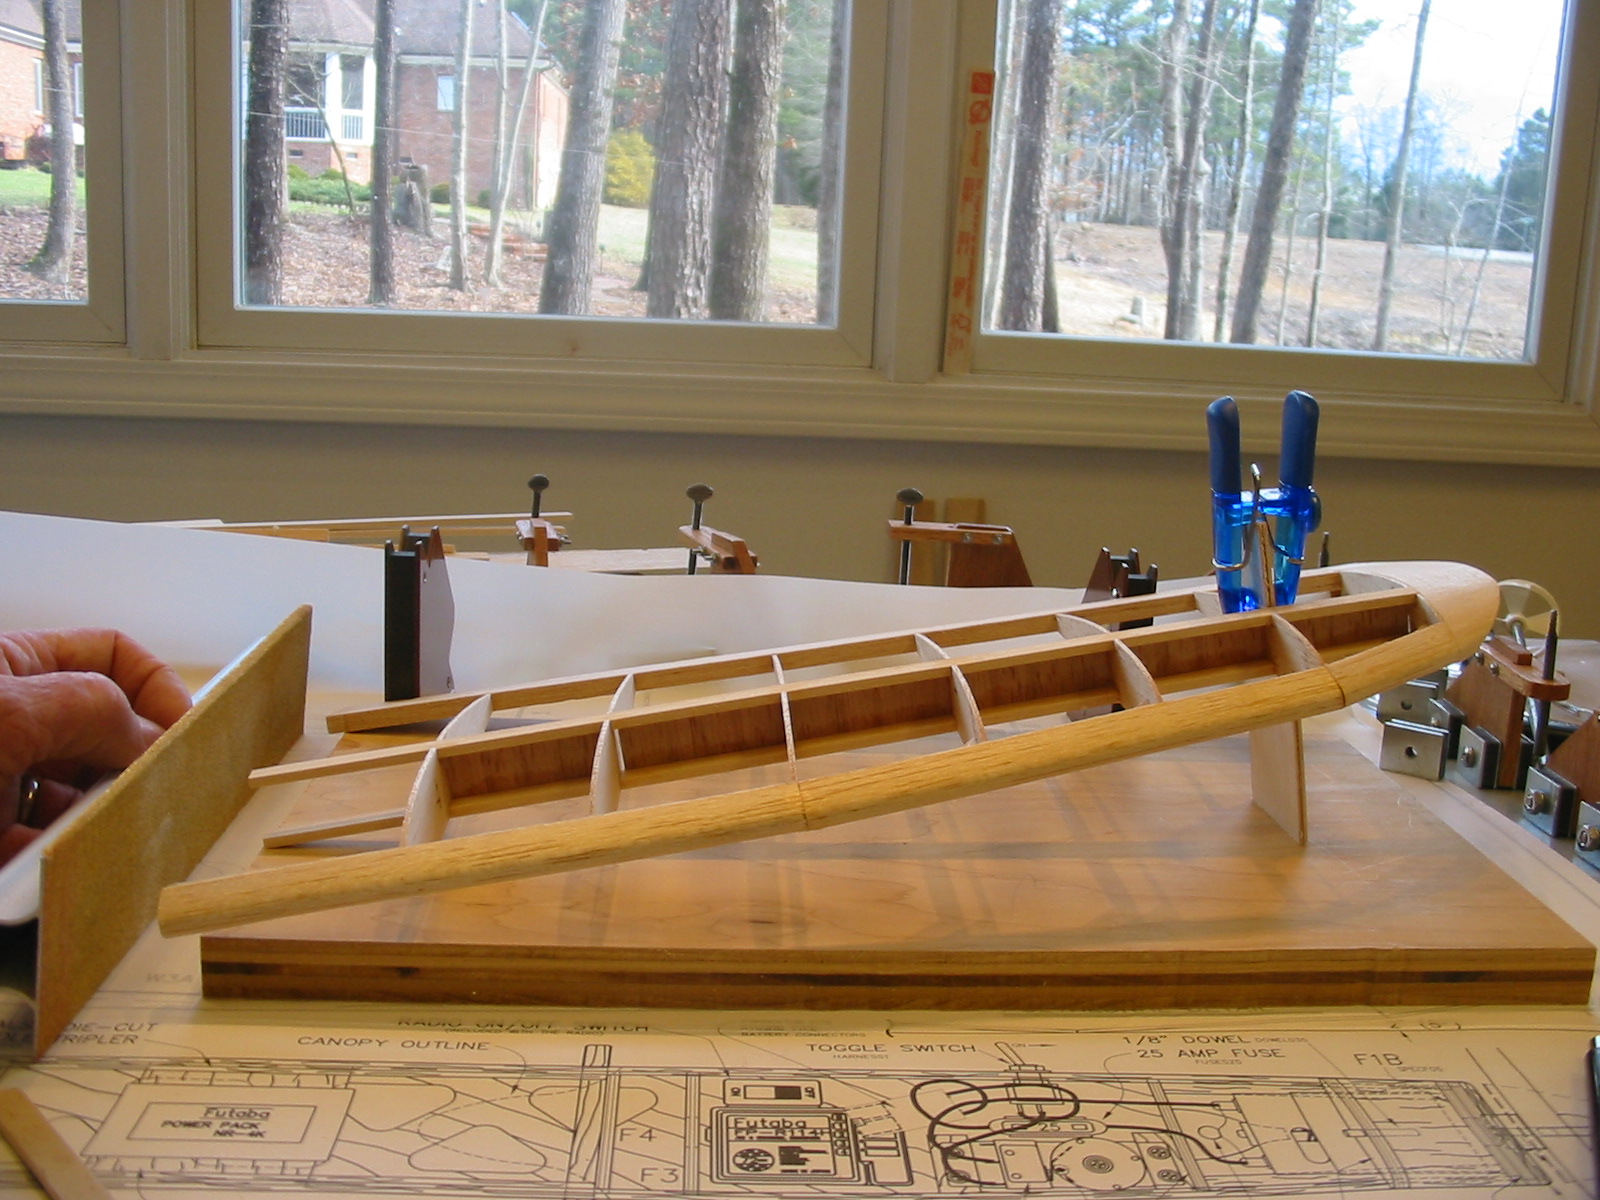
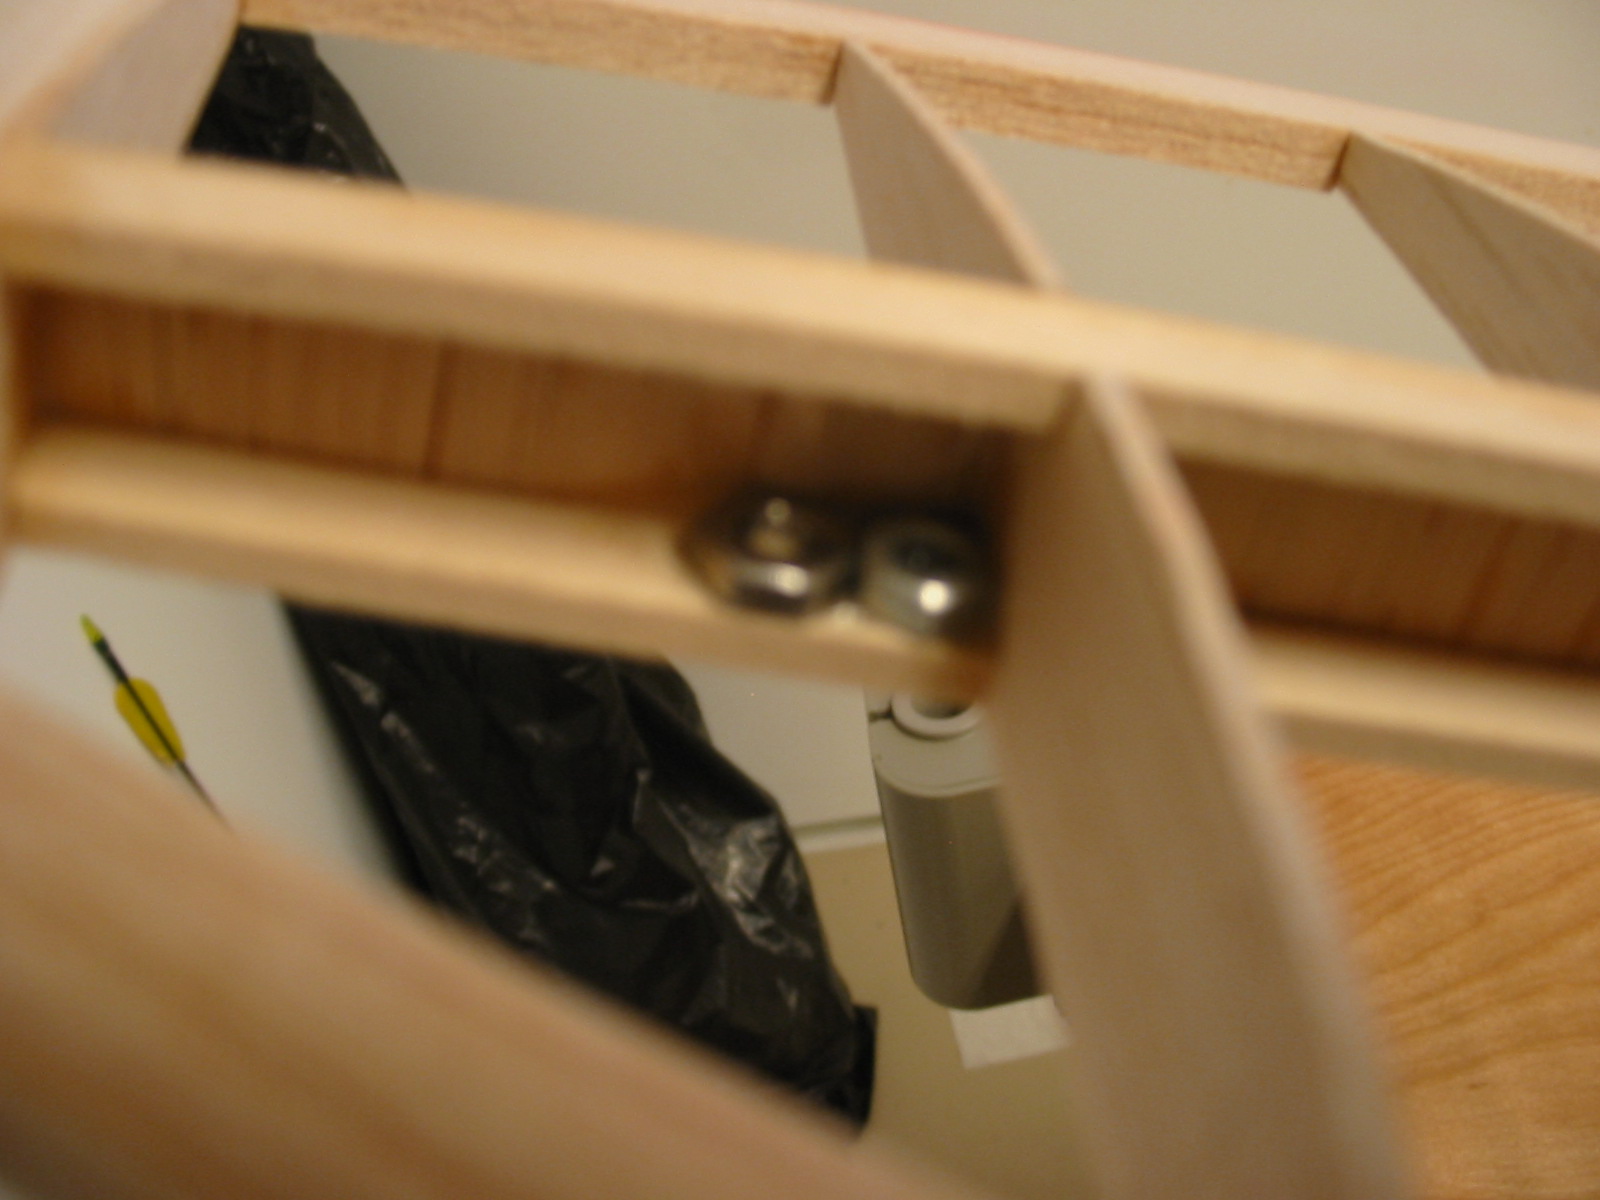
The fuselage up to this point was a one day build. Placing the servos one behind the other instead of side by side may work out better since that will keep the pushrods off of the bulkhead. The wires look a bit long and the ones that came with the engine are very stiff. The ones that came with the ESC are much easer to work with. Would it be worth while to replace the stiffer wiring?
01-27-2015 | 08:02 PM
#10
Senior Member
My Feedback: (1)
Joined: Oct 2004
Posts: 238
Likes: 0
Received 0 Likes
on
0 Posts
From: La Vista, NE
I am a noobie when it come with the 2.4 radio's. I am planning on buying the FlyShy fs-16 http://www.hobbypartz.com/79p-106-fs-i6-6ch-remote.html end of the Week. Since I am on a fixed income, I can't buy the expensive stuff. And I heard pretty good reviews on it.
But for you I really can't say. Sorry
But for you I really can't say. Sorry
01-28-2015 | 01:39 AM
#12
Senior Member
My Feedback: (1)
Joined: Oct 2004
Posts: 238
Likes: 0
Received 0 Likes
on
0 Posts
From: La Vista, NE
seen a range test review on youtube of the FlySky i6, and he showed a Mile long test. I sure not flying my sailplane a Mile, out or up. Back in the 80's I flew my Aquila standard class sailplane pretty high. Imagine in you mind, a 8 foot wing span looking only about 4 inches long looking straight up. That's high.
02-13-2015 | 09:12 AM
#14
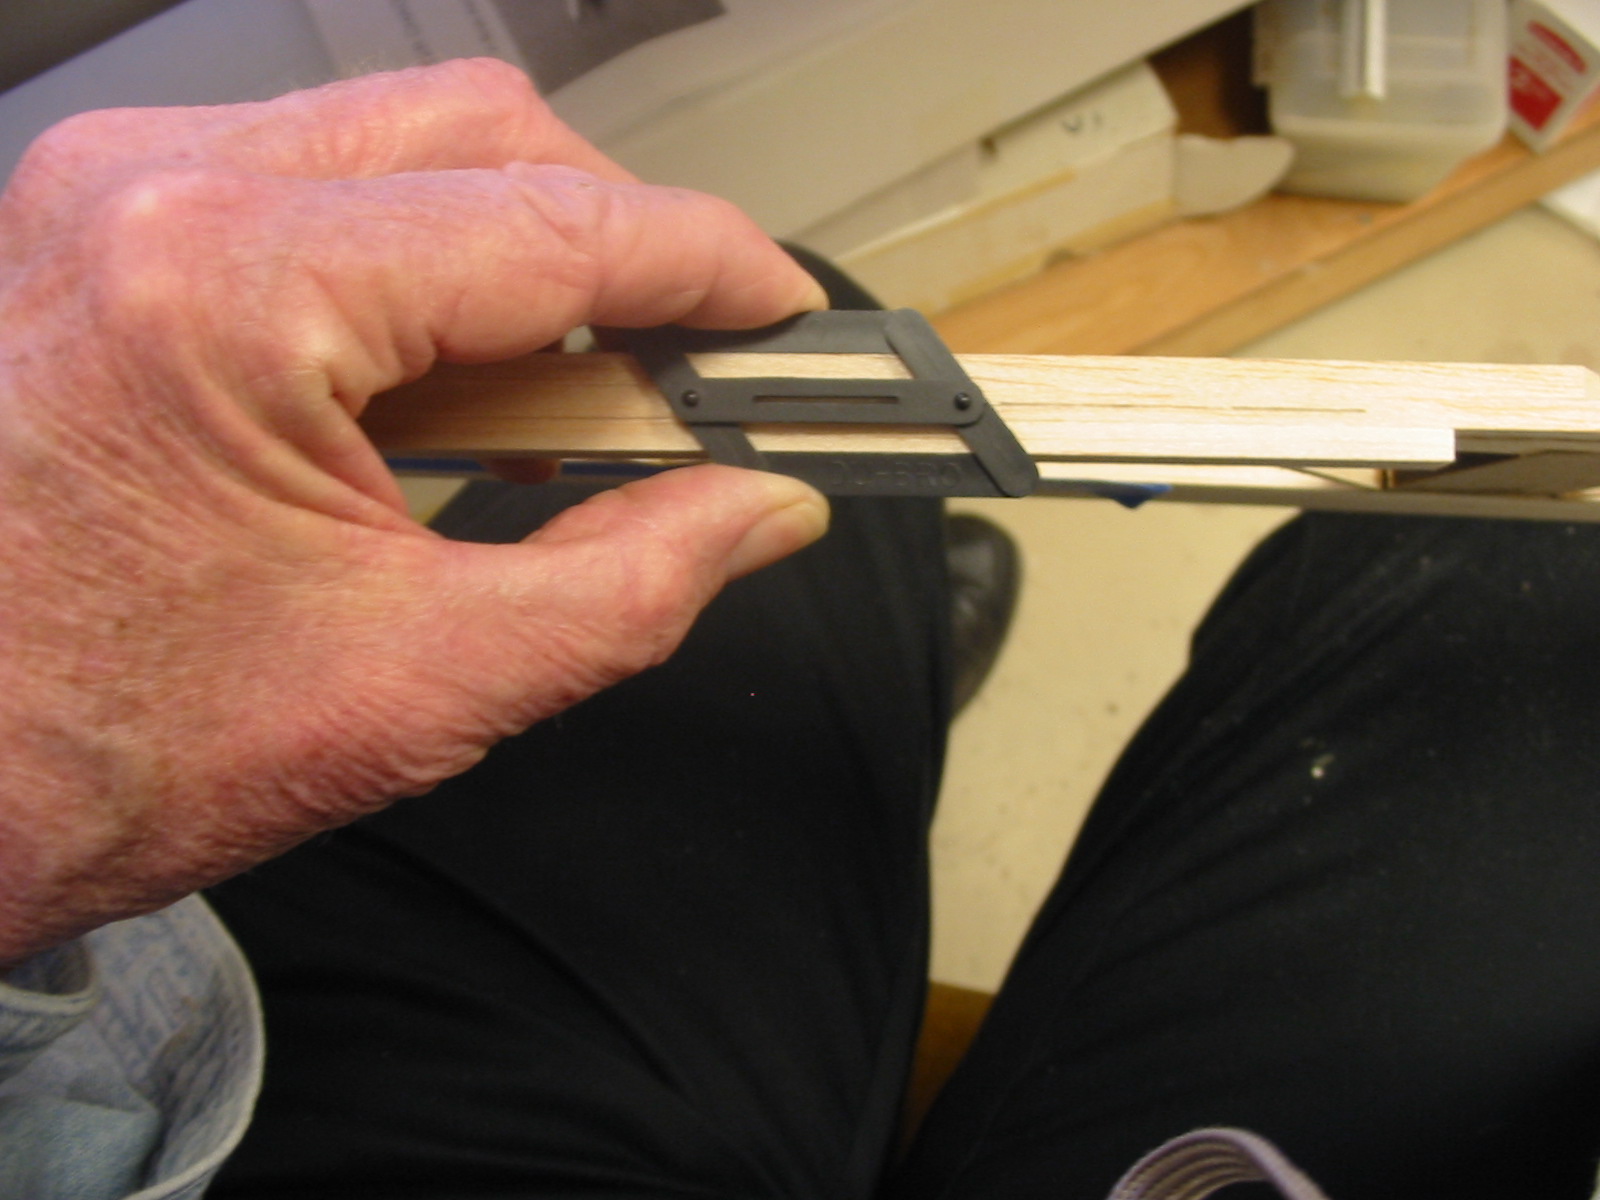
This gadget helps find the center of an aileron
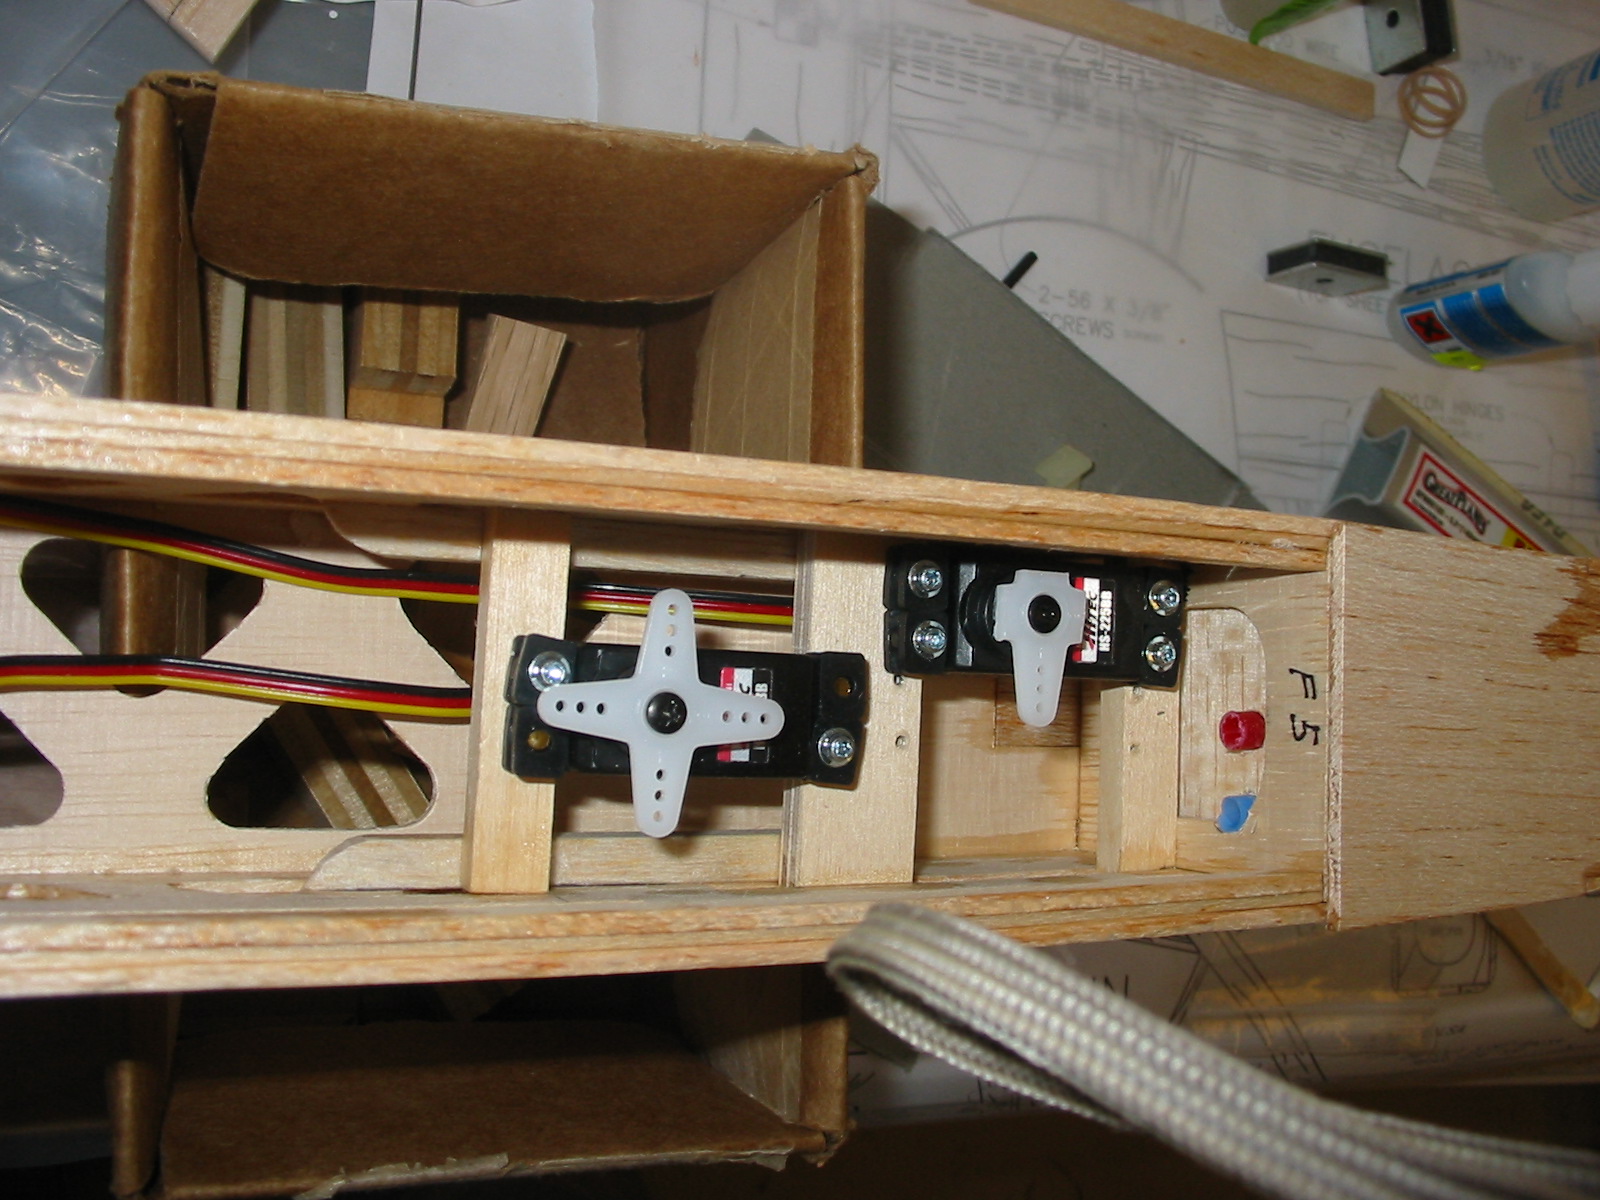
Servo layout. These 255 servos are smaller than the ones it plane was designed for. Instead of using the balsa sticks supplied dubro simi flex rods have been installed.
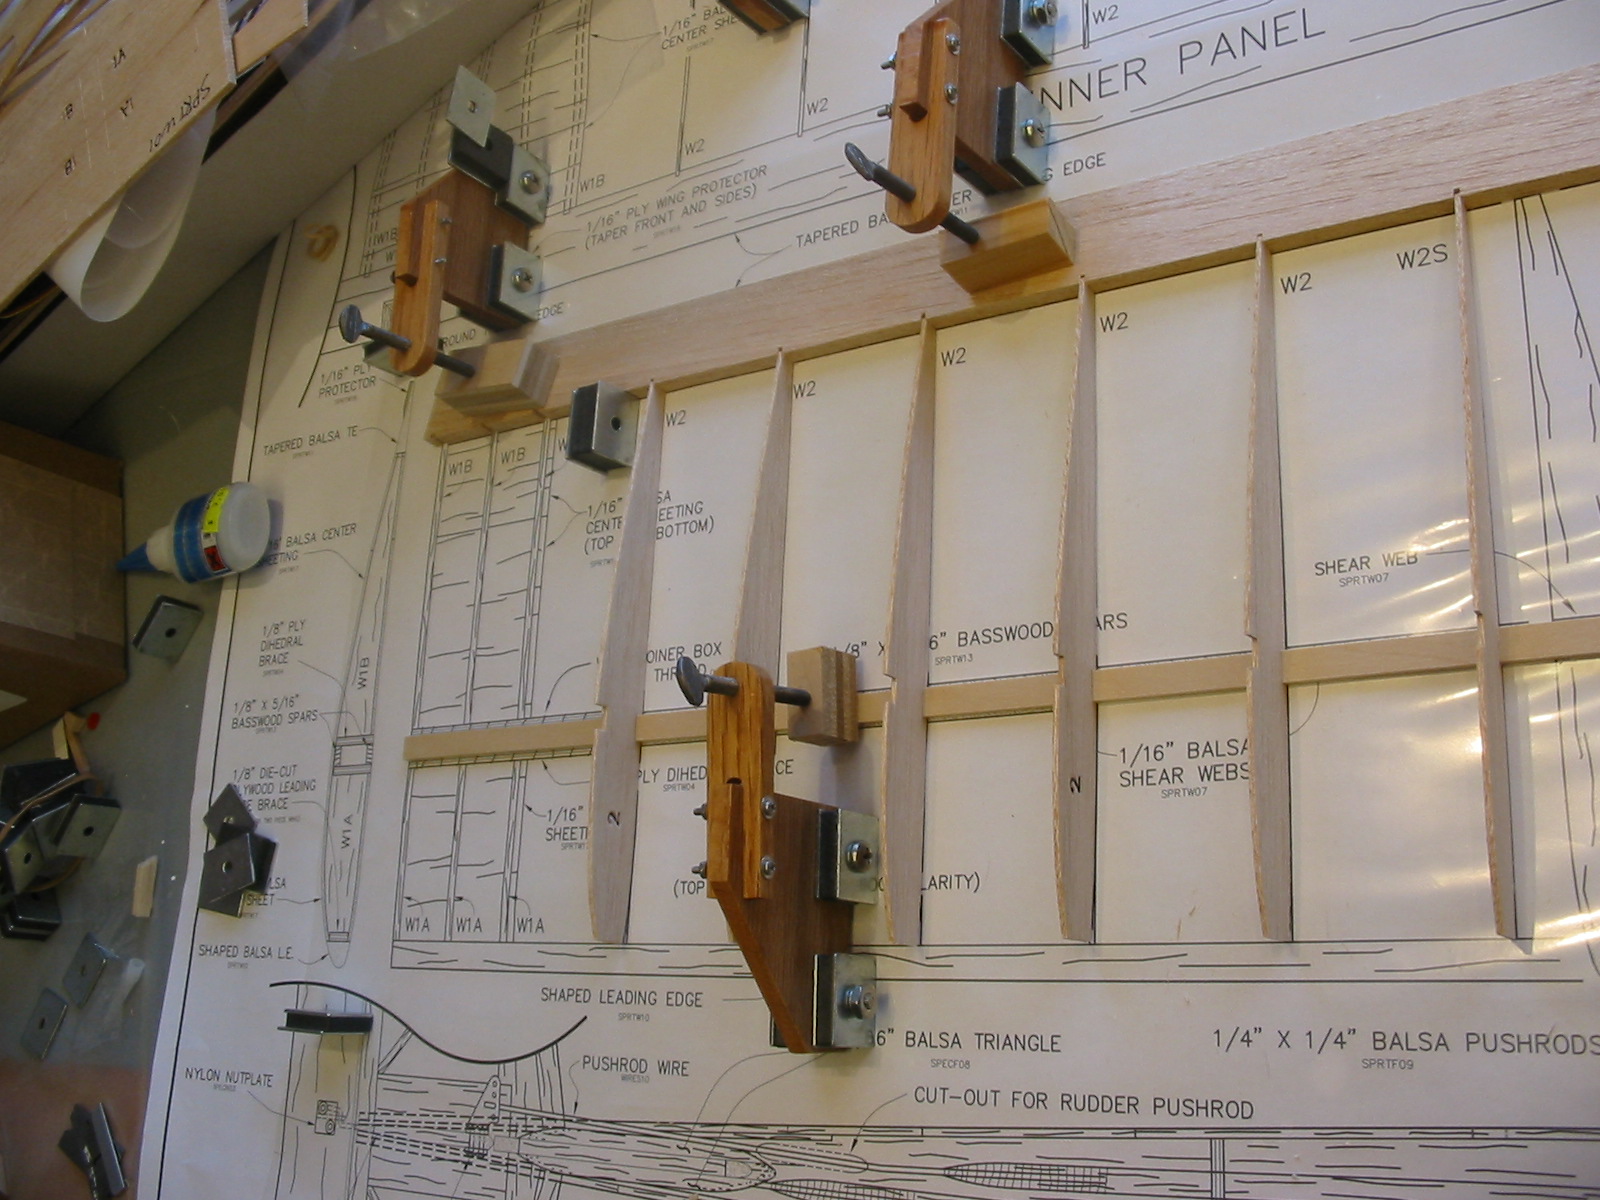
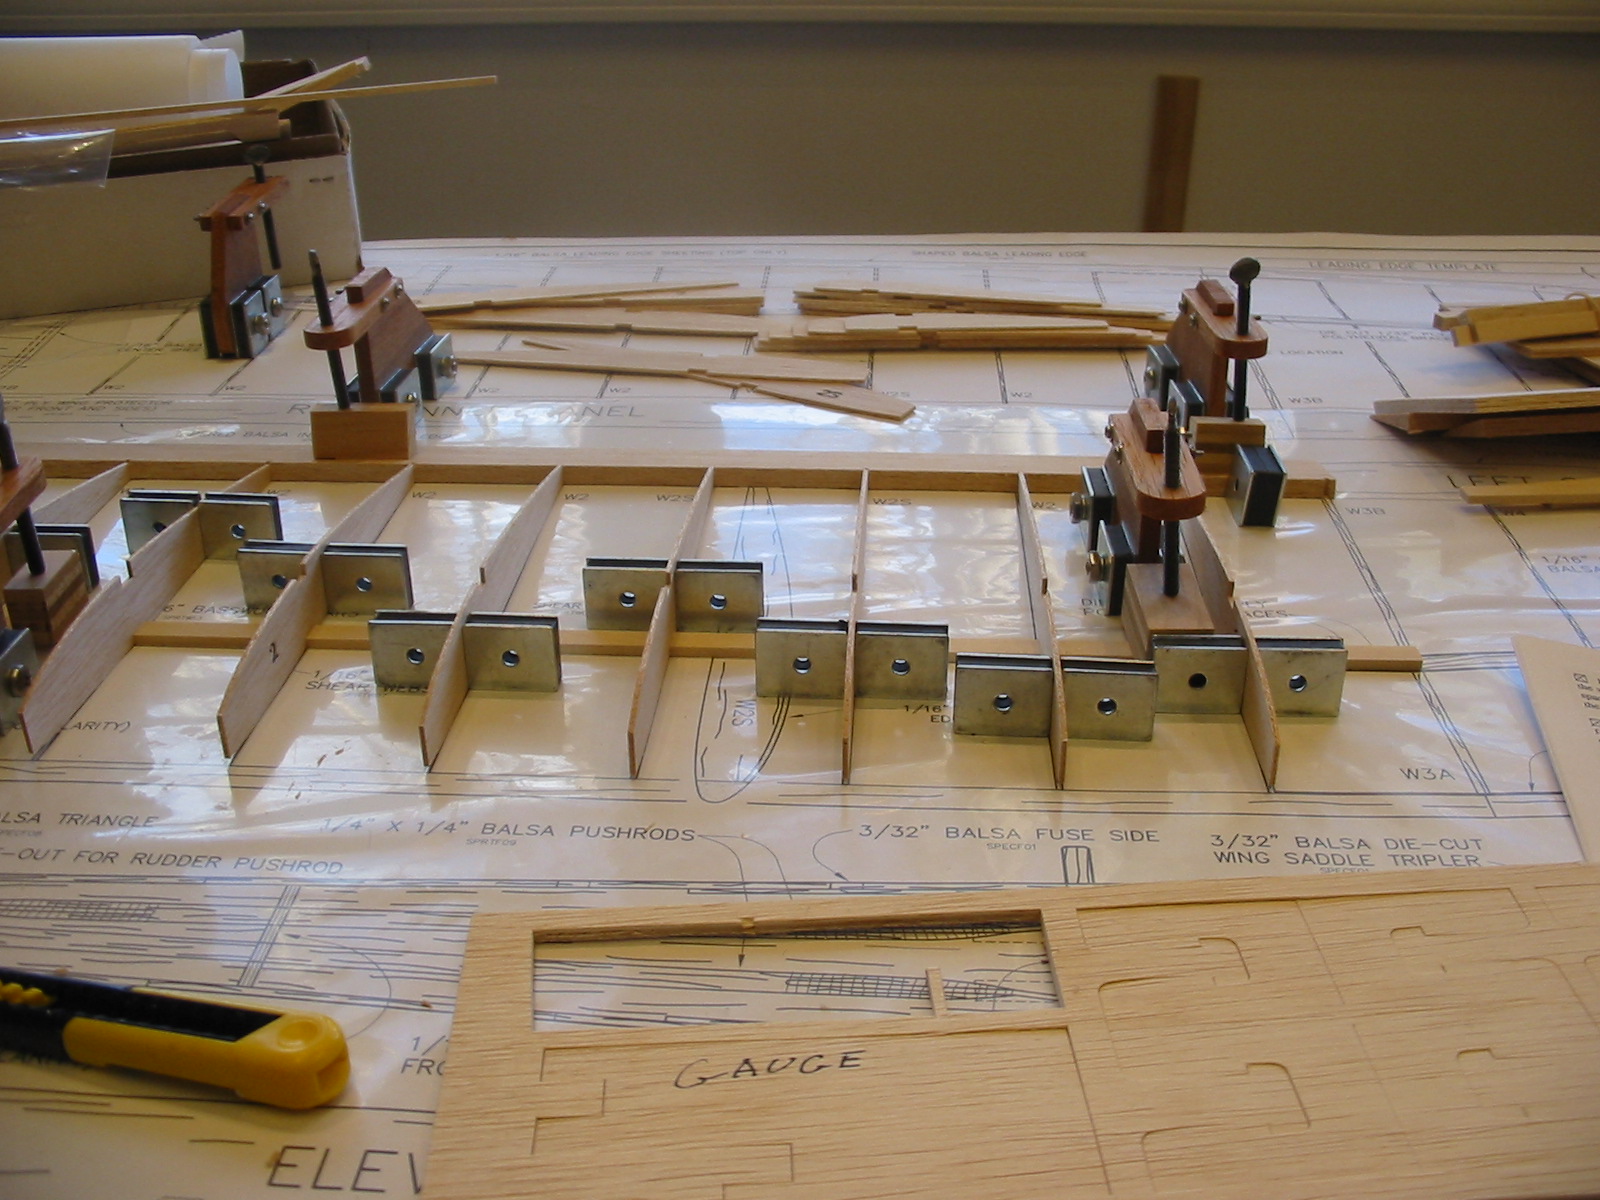
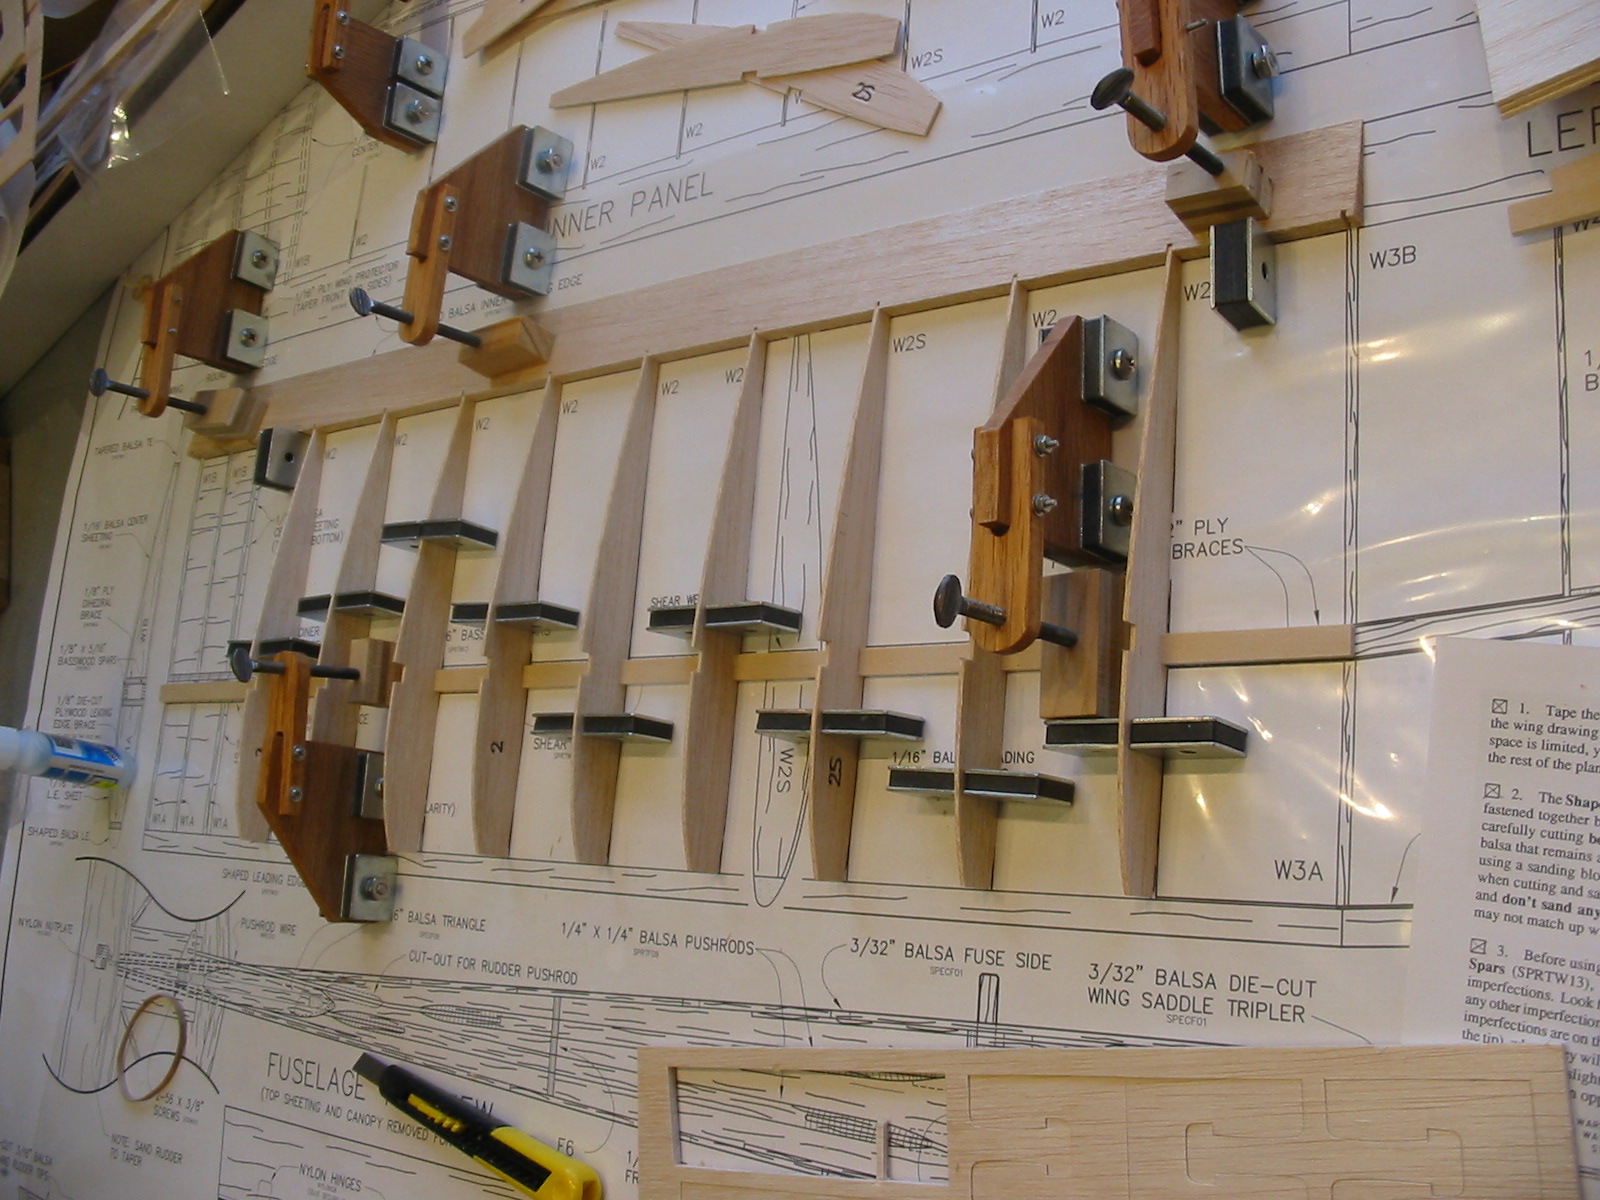
A few images of the wing being built on the mag top bench. I never liked sticking pins in the balsa.
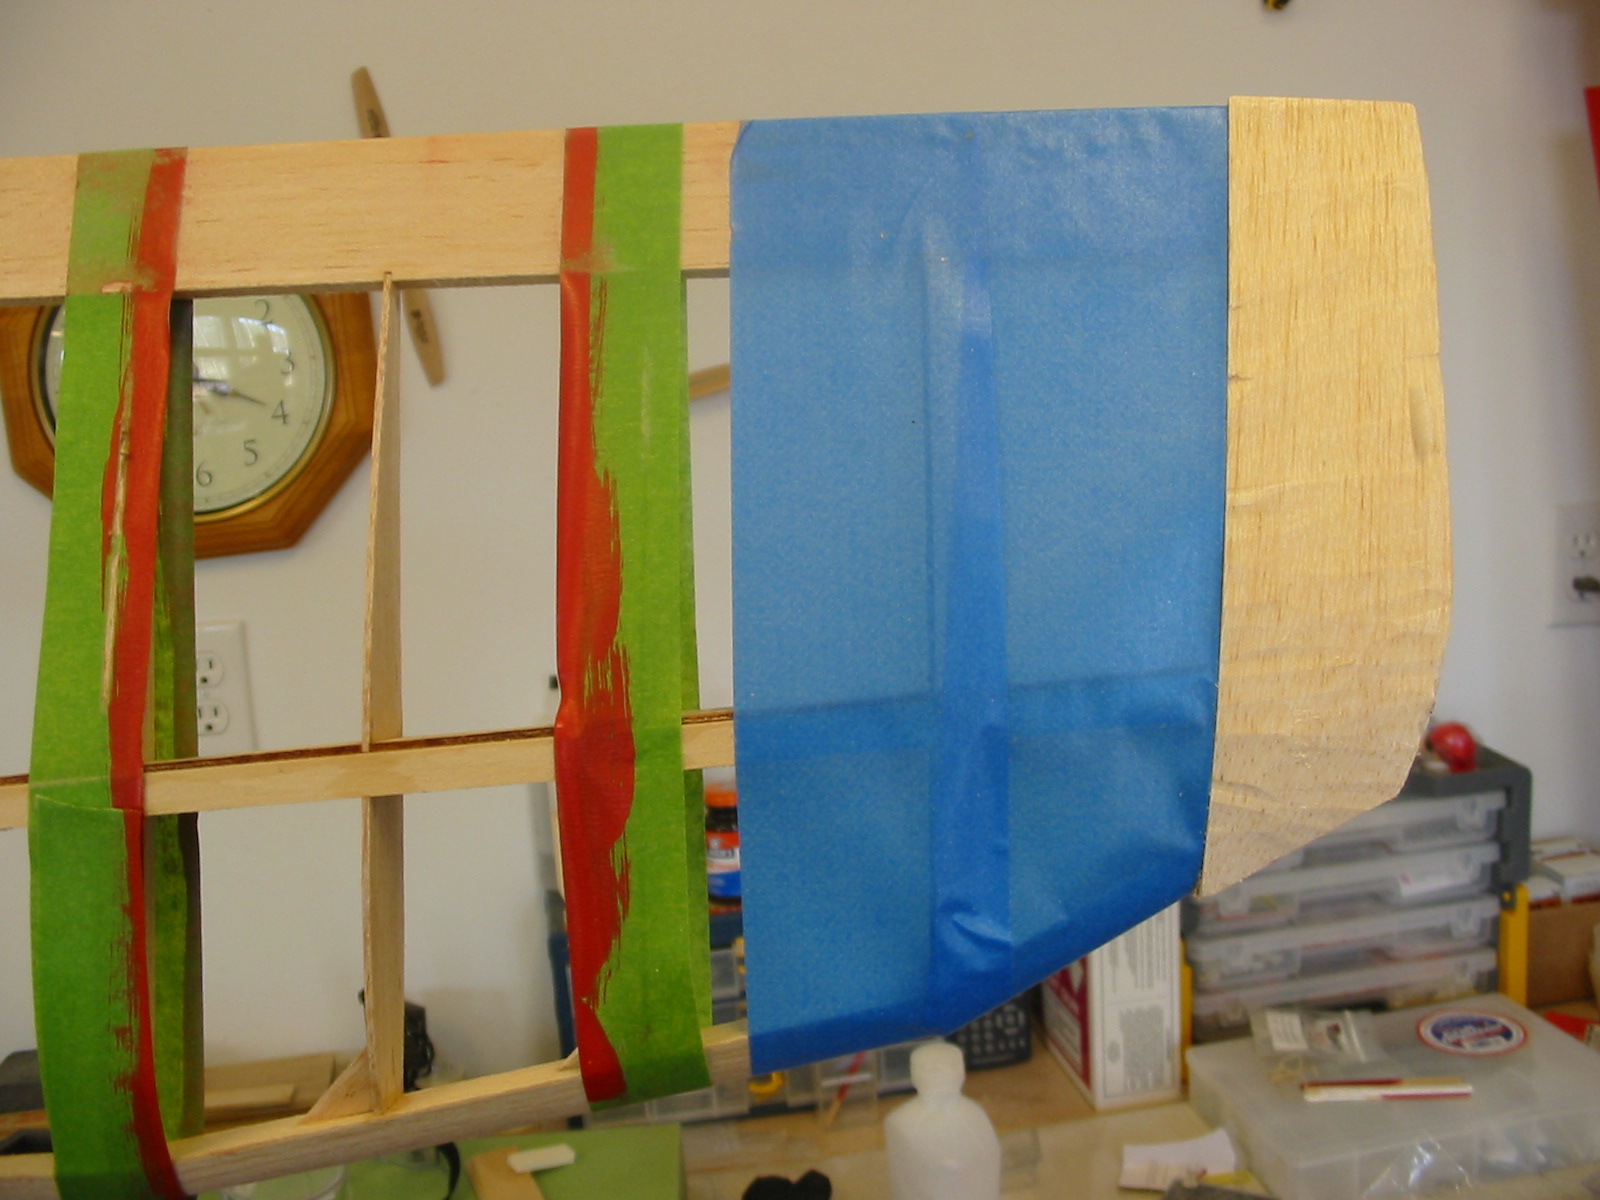
Wing tip ready for sanding. Would you believe that after finishing both wing tips I compared them and discovered that one had been shaped properly for a sailplane and the other shaped as though it were a tarus wing. Fortunately the scrap box has a piece of balsa large enough to make another.
This is how the outer wing panel was sanded to mate with the inner panel.
A small weight was needed to balance the wing.
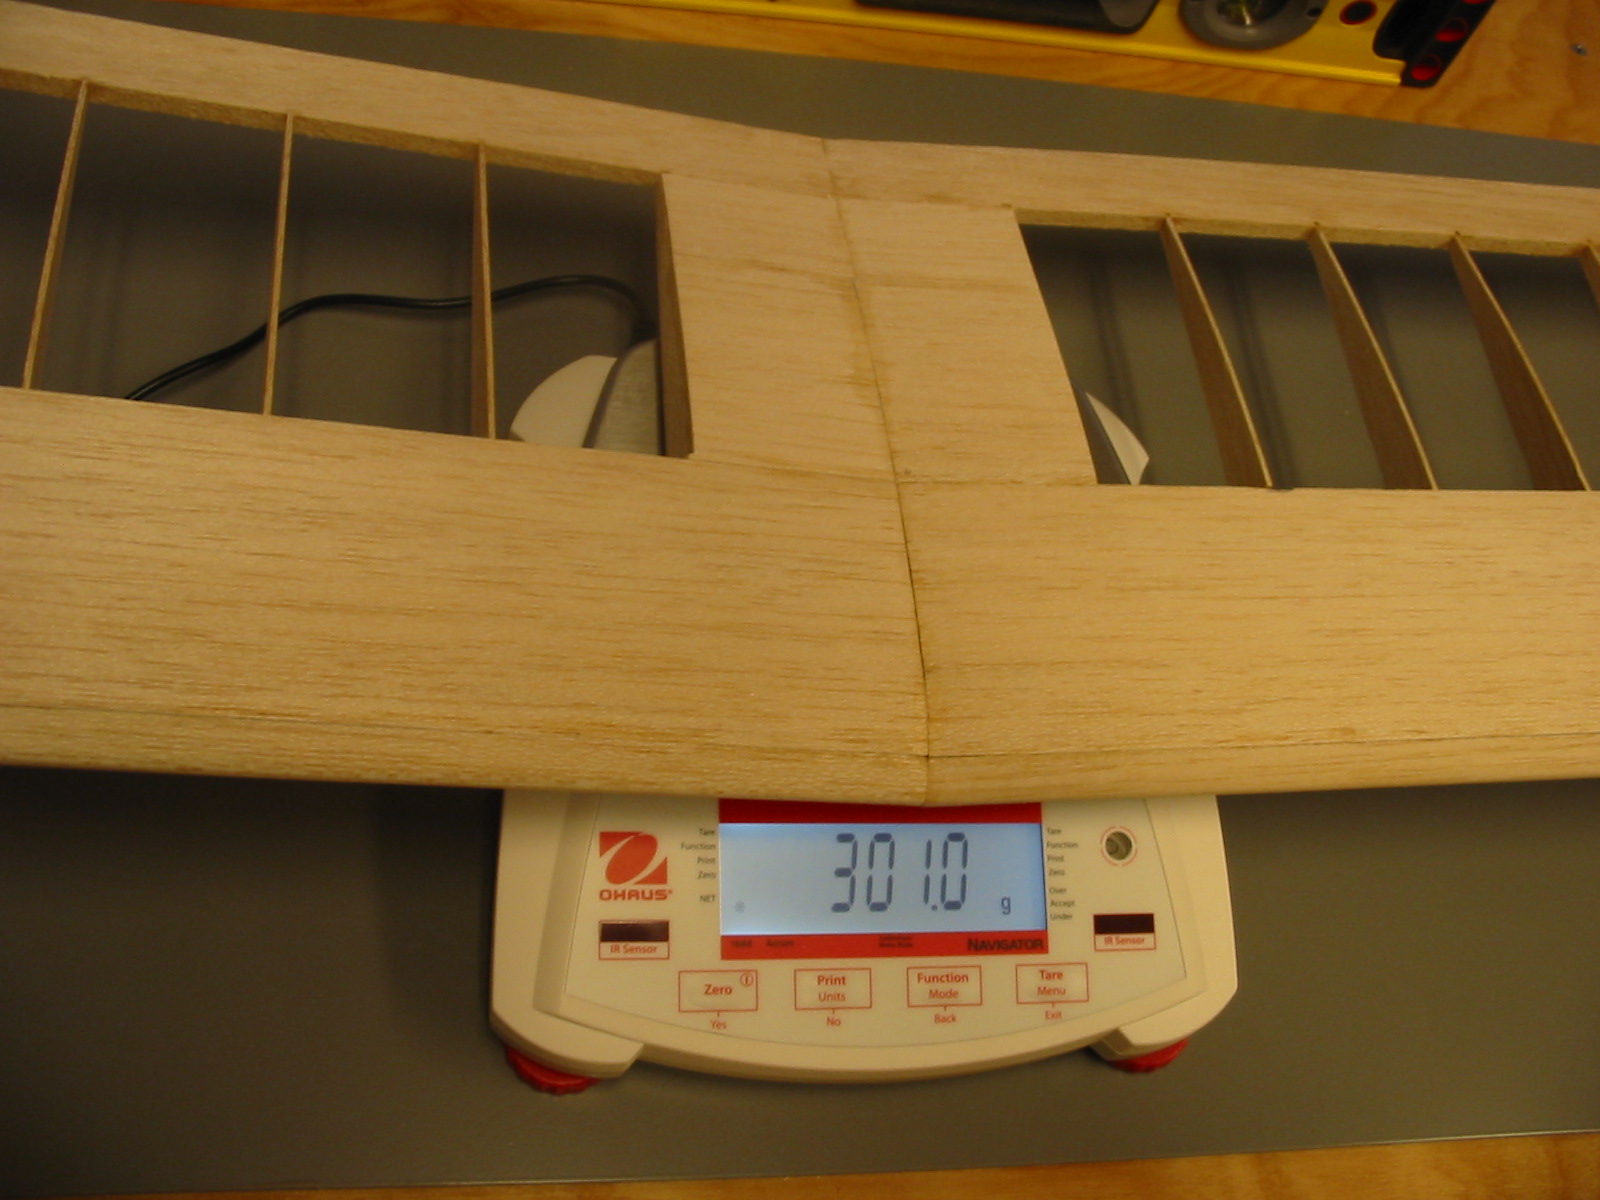
The bare wing weighs 301 grams
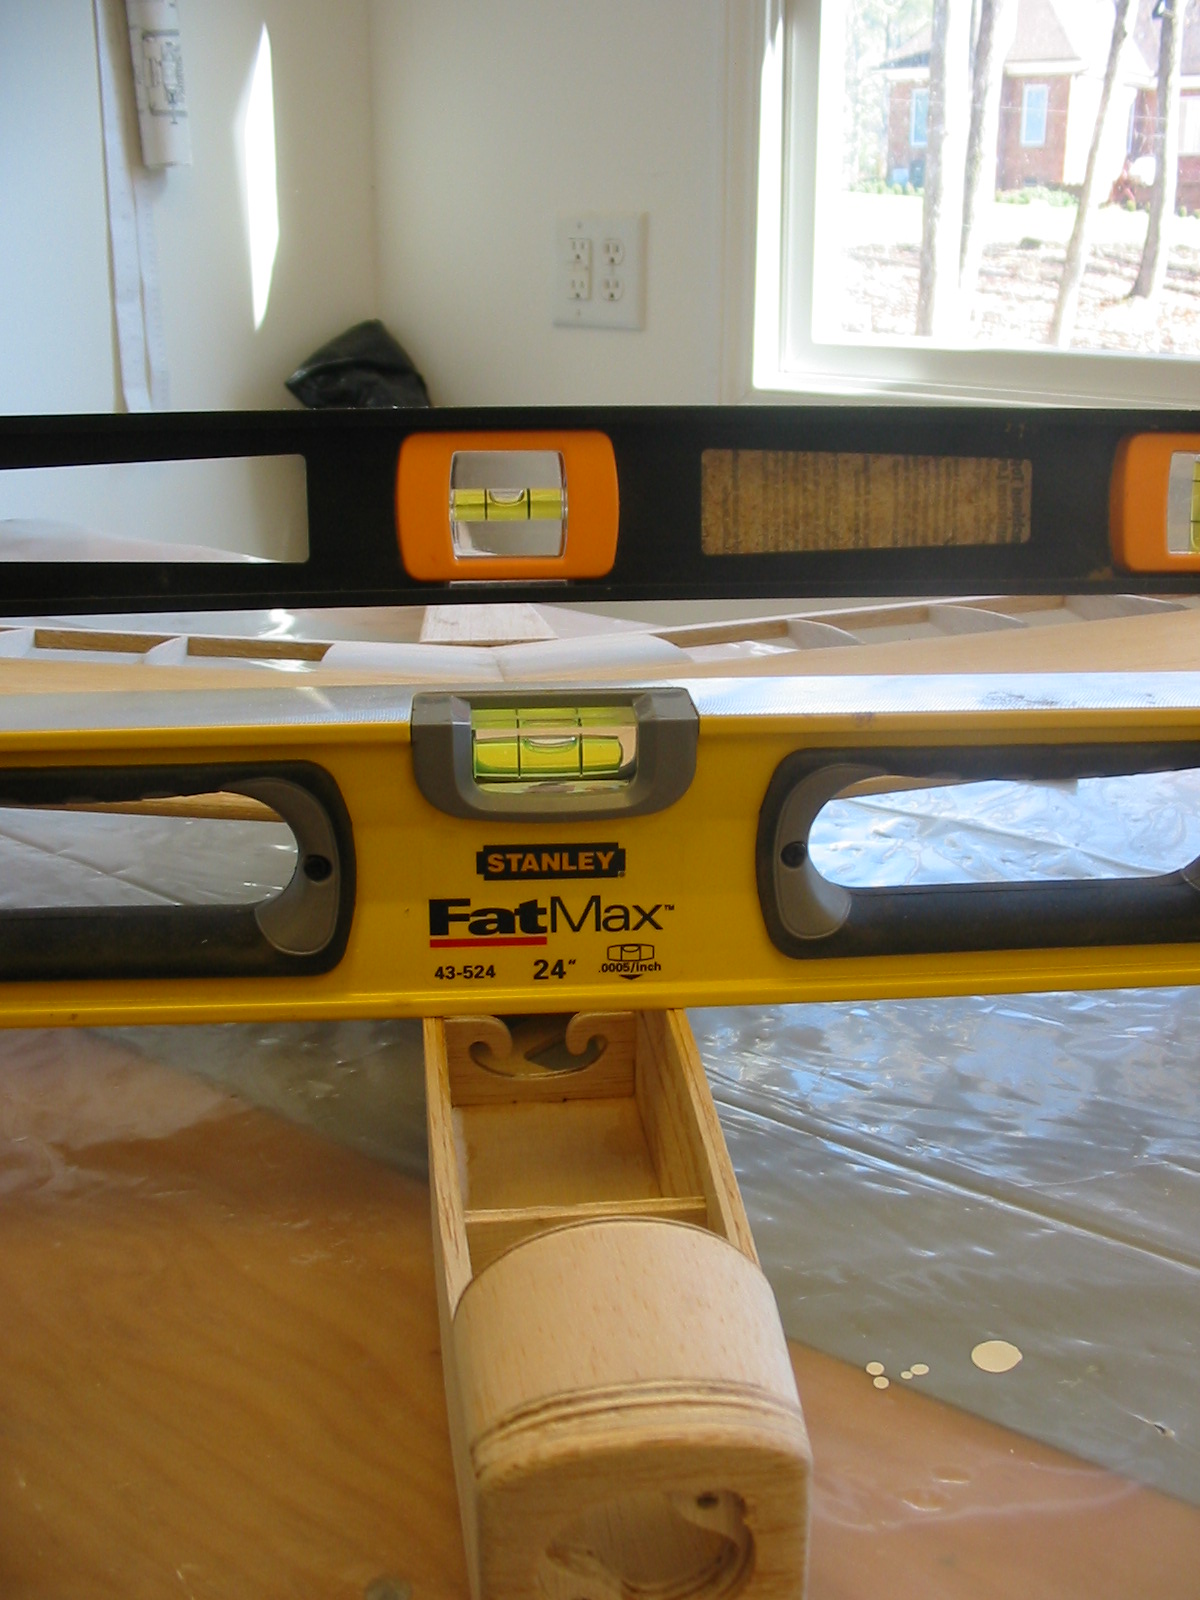
Two levels were used to align the wing to the fuselage.
This wood plate was added in hopes that nylon screws will work for the wing hold downs.
Servo layout. These 255 servos are smaller than the ones it plane was designed for. Instead of using the balsa sticks supplied dubro simi flex rods have been installed.
A few images of the wing being built on the mag top bench. I never liked sticking pins in the balsa.
Wing tip ready for sanding. Would you believe that after finishing both wing tips I compared them and discovered that one had been shaped properly for a sailplane and the other shaped as though it were a tarus wing. Fortunately the scrap box has a piece of balsa large enough to make another.
This is how the outer wing panel was sanded to mate with the inner panel.
A small weight was needed to balance the wing.
The bare wing weighs 301 grams
Two levels were used to align the wing to the fuselage.
This wood plate was added in hopes that nylon screws will work for the wing hold downs.
02-14-2015 | 05:13 PM
#15
Senior Member
Joined: Nov 2010
Posts: 1,359
Likes: 0
Received 0 Likes
on
0 Posts
From: Round Hill, VA
The fuselage up to this point was a one day build. Placing the servos one behind the other instead of side by side may work out better since that will keep the pushrods off of the bulkhead. The wires look a bit long and the ones that came with the engine are very stiff. The ones that came with the ESC are much easer to work with. Would it be worth while to replace the stiffer wiring?
A couple of suggestions.
First, throw away the micro-switch and fuse. Replace them with a 35 Amp brush type ESC.
Then, ditch the NiCd brick and use a 2000 to 3000 mAh 2s LiPo. You can power the receiver and servos of the ESC. It will act as a voltage regulator for the receiver.
All told it will reduce the weight and increase the motor operation time.
If you want to get extravagant, you can use small brushless motor and a brushless ESC. But that would create some motor installation issues. Very hard to re-engineer the fuselage.
02-15-2015 | 02:04 AM
#16
Thanks for the comment. No plan to change the wire size. The wires that came with the motor are very stiff. The wires that came with the brushless ESC are softer and easer to bend. The same wire gauge but with more strands. Why isn't the fuse needed with a brushless ESC?
02-15-2015 | 07:45 AM
#17
Senior Member
Joined: Nov 2010
Posts: 1,359
Likes: 0
Received 0 Likes
on
0 Posts
From: Round Hill, VA
Thanks for the comment. No plan to change the wire size. The wires that came with the motor are very stiff. The wires that came with the brushless ESC are softer and easer to bend. The same wire gauge but with more strands. Why isn't the fuse needed with a brushless ESC?
The fuse is just extra weight and will blow at inconvenient moments. The ESC will shut off before a fuse can blow if there is an overload.
02-15-2015 | 10:35 AM
#18
This is the second attempt to reply, hope it doesn't double post.
Thanks John,
The ESC is the brushed model recommended by Great Planes. Does the brushed ESC have overload protection? From your post it sounds like it does. The wire to the motor and the fuse holder is very stiff. Where can a high strand count wire of about 16 gauge be purchased?
Thanks John,
The ESC is the brushed model recommended by Great Planes. Does the brushed ESC have overload protection? From your post it sounds like it does. The wire to the motor and the fuse holder is very stiff. Where can a high strand count wire of about 16 gauge be purchased?
02-15-2015 | 12:04 PM
#19
Senior Member
Joined: Nov 2010
Posts: 1,359
Likes: 0
Received 0 Likes
on
0 Posts
From: Round Hill, VA
This is the second attempt to reply, hope it doesn't double post.
Thanks John,
The ESC is the brushed model recommended by Great Planes. Does the brushed ESC have overload protection? From your post it sounds like it does. The wire to the motor and the fuse holder is very stiff. Where can a high strand count wire of about 16 gauge be purchased?
Thanks John,
The ESC is the brushed model recommended by Great Planes. Does the brushed ESC have overload protection? From your post it sounds like it does. The wire to the motor and the fuse holder is very stiff. Where can a high strand count wire of about 16 gauge be purchased?
http://www3.towerhobbies.com/cgi-bin/wti0001p?&I=LXKX17


