Go Back  RCU Forums > RC Airplanes > Kit Building
Reload this Page >

TF Beechcraft Bonanza F33A Build

Community
Search
Notices
Kit Building If you're building a kit and have questions or want to discuss kit building post it here.

TF Beechcraft Bonanza F33A Build

Thread Tools
 
Search this Thread
 
Old 08-04-2019, 02:12 AM
  #151  
VincentJ
Thread Starter
 
VincentJ's Avatar
 
Join Date: Mar 2011
Location: Peterborough, NH
Posts: 4,582
Received 118 Likes on 107 Posts
Default

Almost done with the top, one last piece...


Old 08-04-2019, 09:25 AM
  #152  
mkjohnston
My Feedback: (2)
 
Join Date: Jul 2005
Location: Wichita Falls,TX, TX
Posts: 489
Received 7 Likes on 6 Posts
Default

Vince is your block plane made out of wood or solid brass? I looked it up on the website listed and it looks like it is made out of wood.
Your project looks great!.
Thank You
Michael Johnston
Old 08-04-2019, 09:27 AM
  #153  
VincentJ
Thread Starter
 
VincentJ's Avatar
 
Join Date: Mar 2011
Location: Peterborough, NH
Posts: 4,582
Received 118 Likes on 107 Posts
Default

Originally Posted by mkjohnston
Vince is your block plane made out of wood or solid brass? I looked it up on the website listed and it looks like it is made out of wood.
Your project looks great!.
Thank You
Michael Johnston
Thanks Mike, my block plane is made out of brass.
Old 08-07-2019, 06:43 AM
  #154  
VincentJ
Thread Starter
 
VincentJ's Avatar
 
Join Date: Mar 2011
Location: Peterborough, NH
Posts: 4,582
Received 118 Likes on 107 Posts
Default


Old 08-07-2019, 07:33 AM
  #155  
FlyerInOKC
My Feedback: (6)
 
FlyerInOKC's Avatar
 
Join Date: Nov 2004
Location: Oklahoma City, OK
Posts: 14,153
Received 272 Likes on 237 Posts
Default

Wings came out beautiful Vince!
Old 08-07-2019, 10:13 AM
  #156  
SA Flyer
My Feedback: (3)
 
SA Flyer's Avatar
 
Join Date: Jun 2002
Location: SAN ANTONIO, TX
Posts: 146
Received 1 Like on 1 Post
Default

Hola Vince,
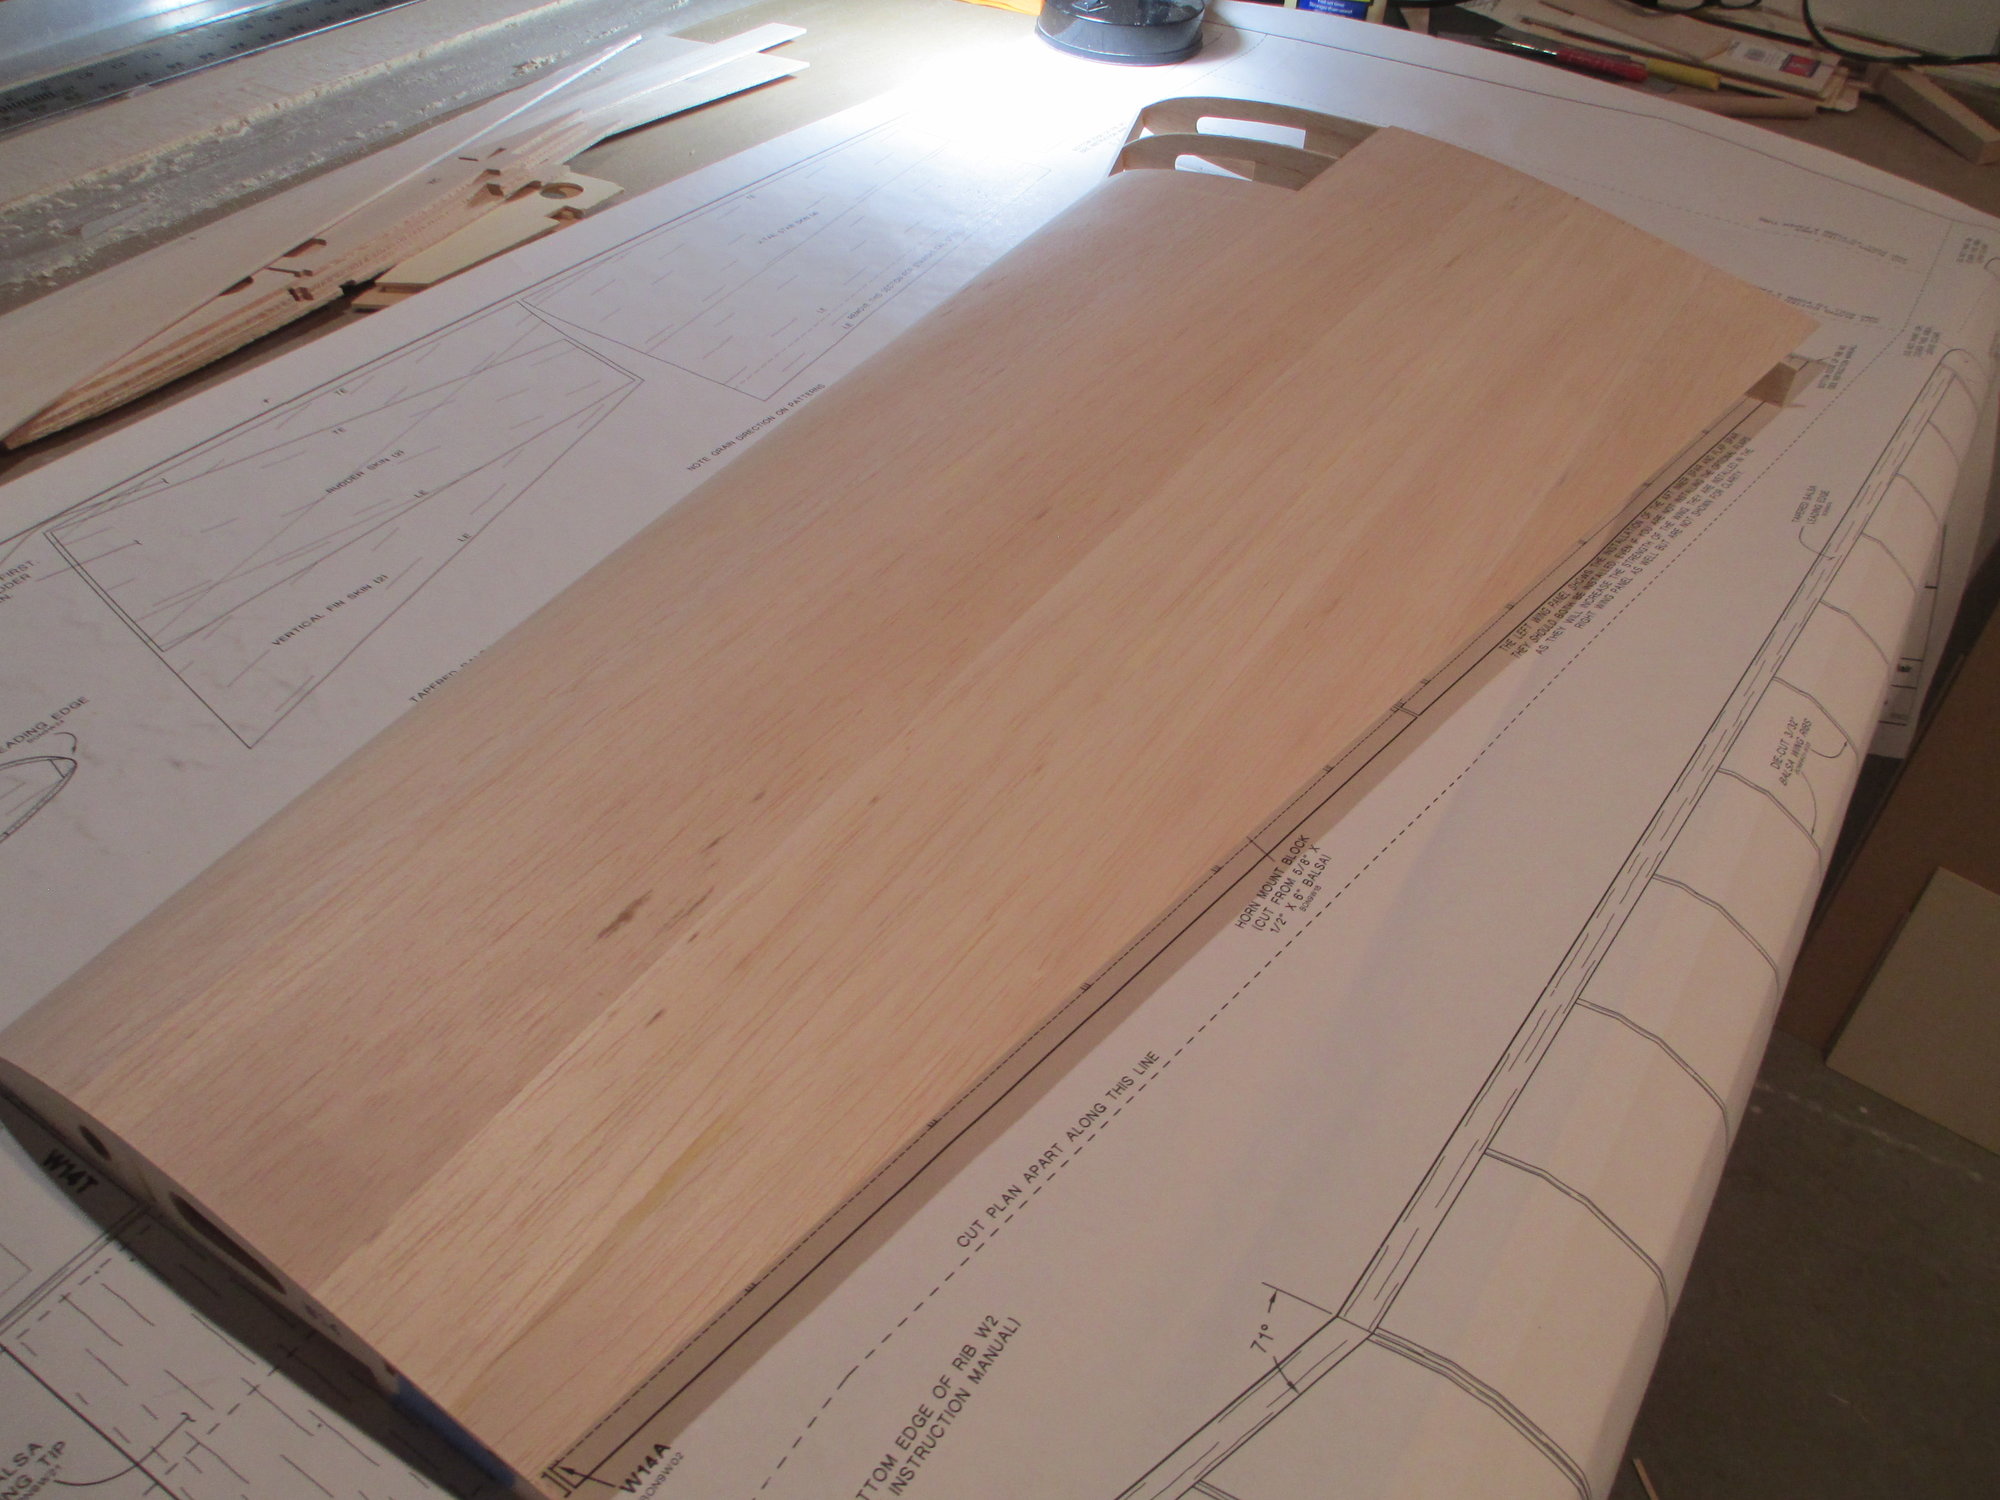
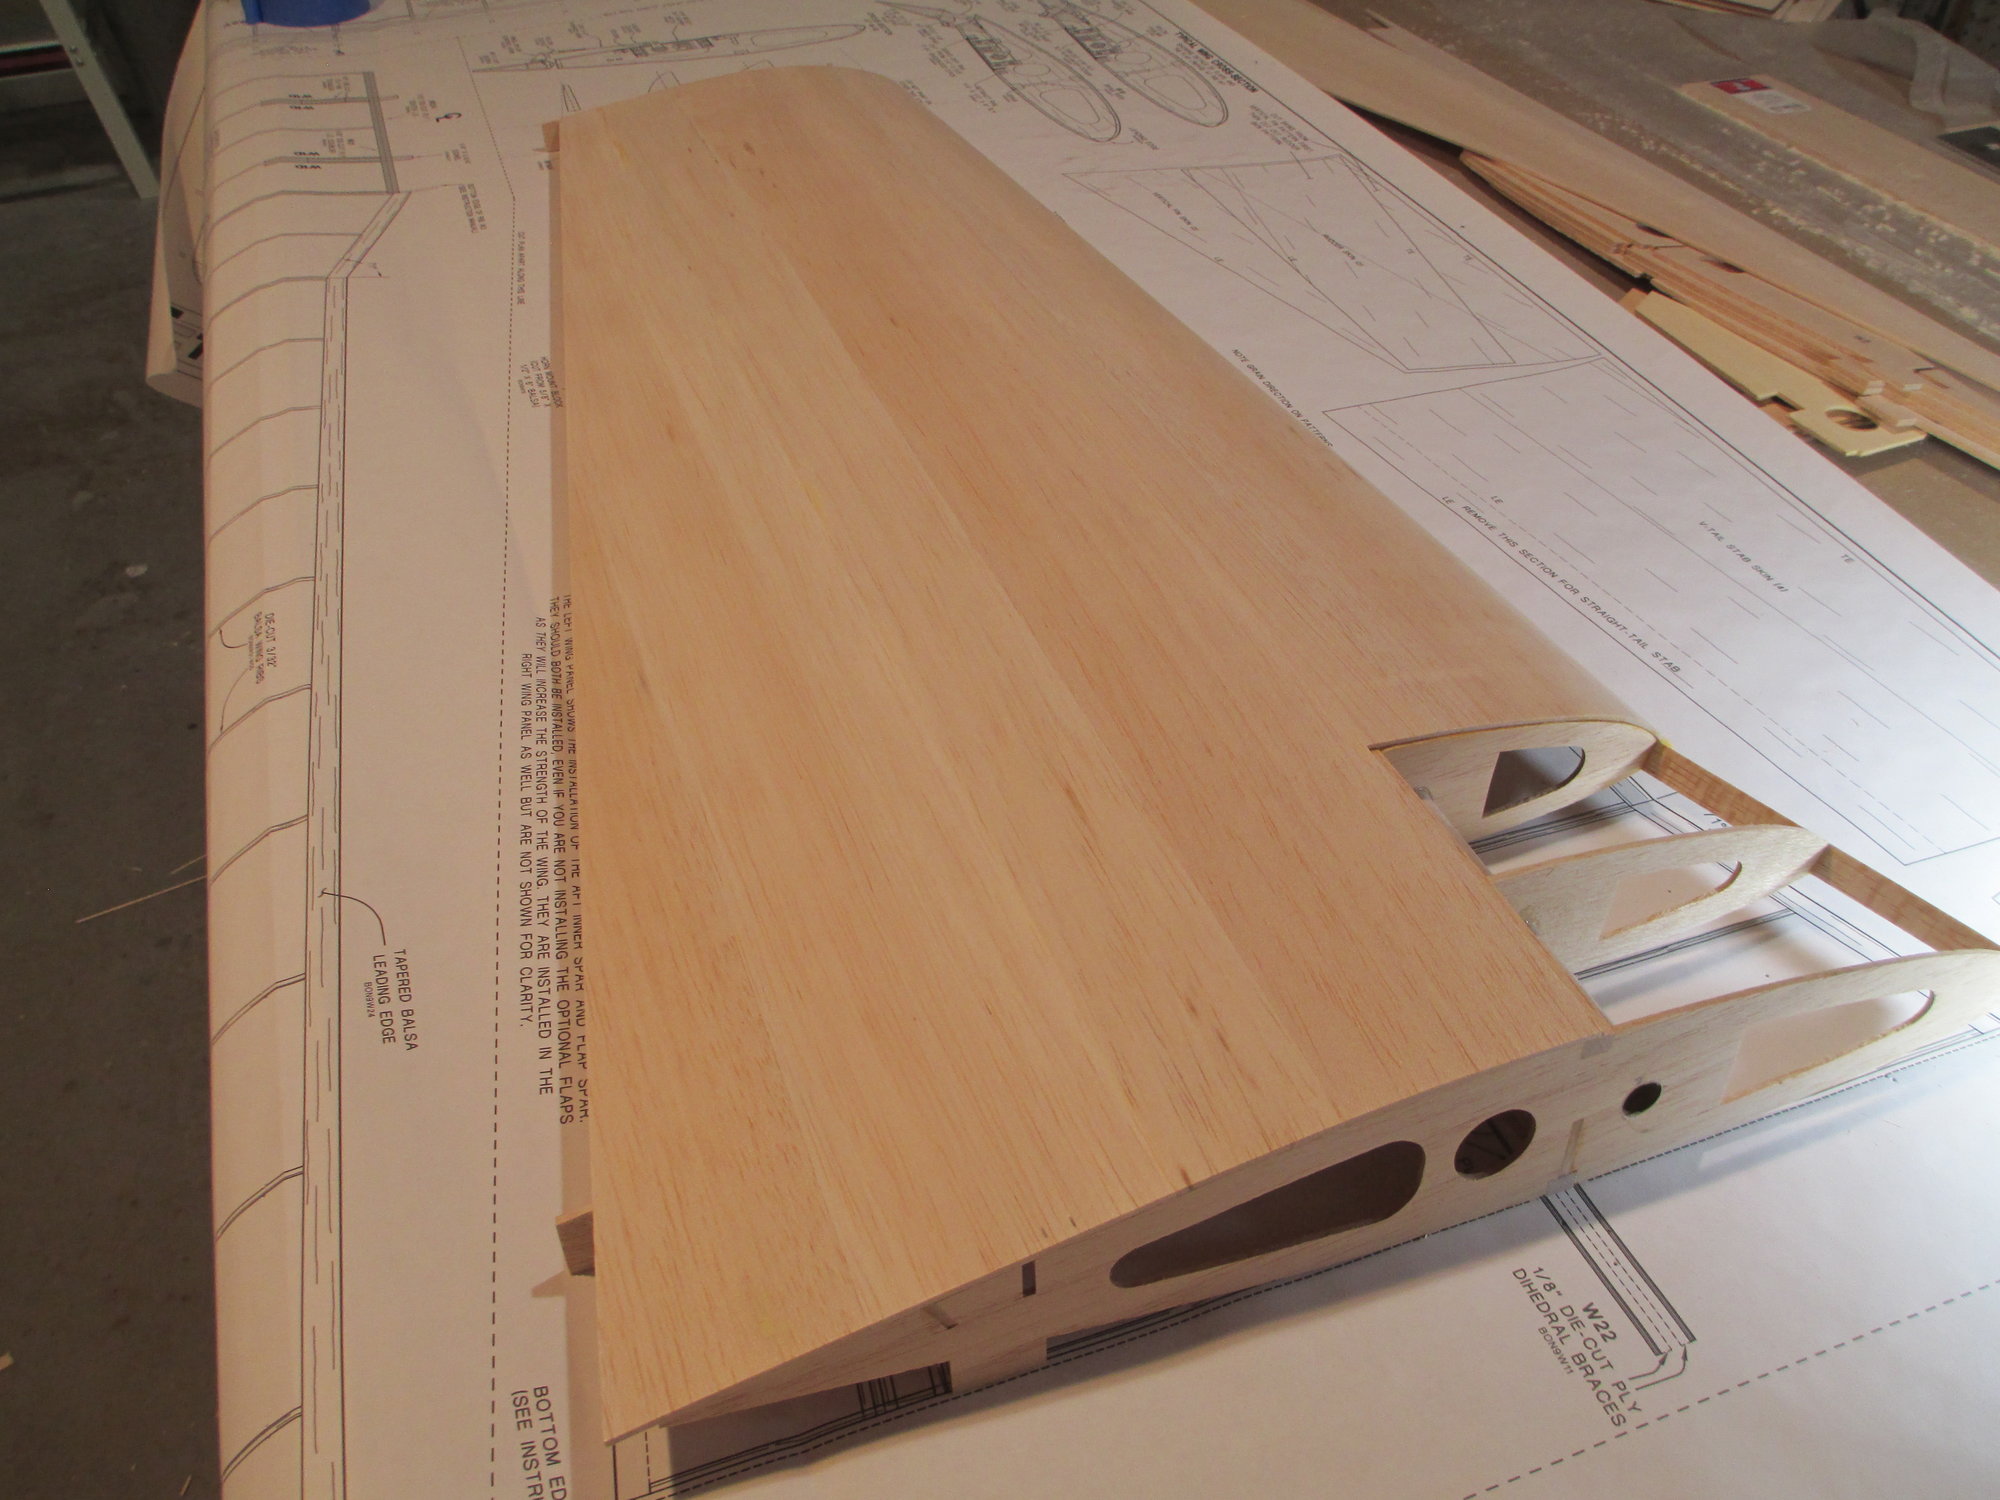
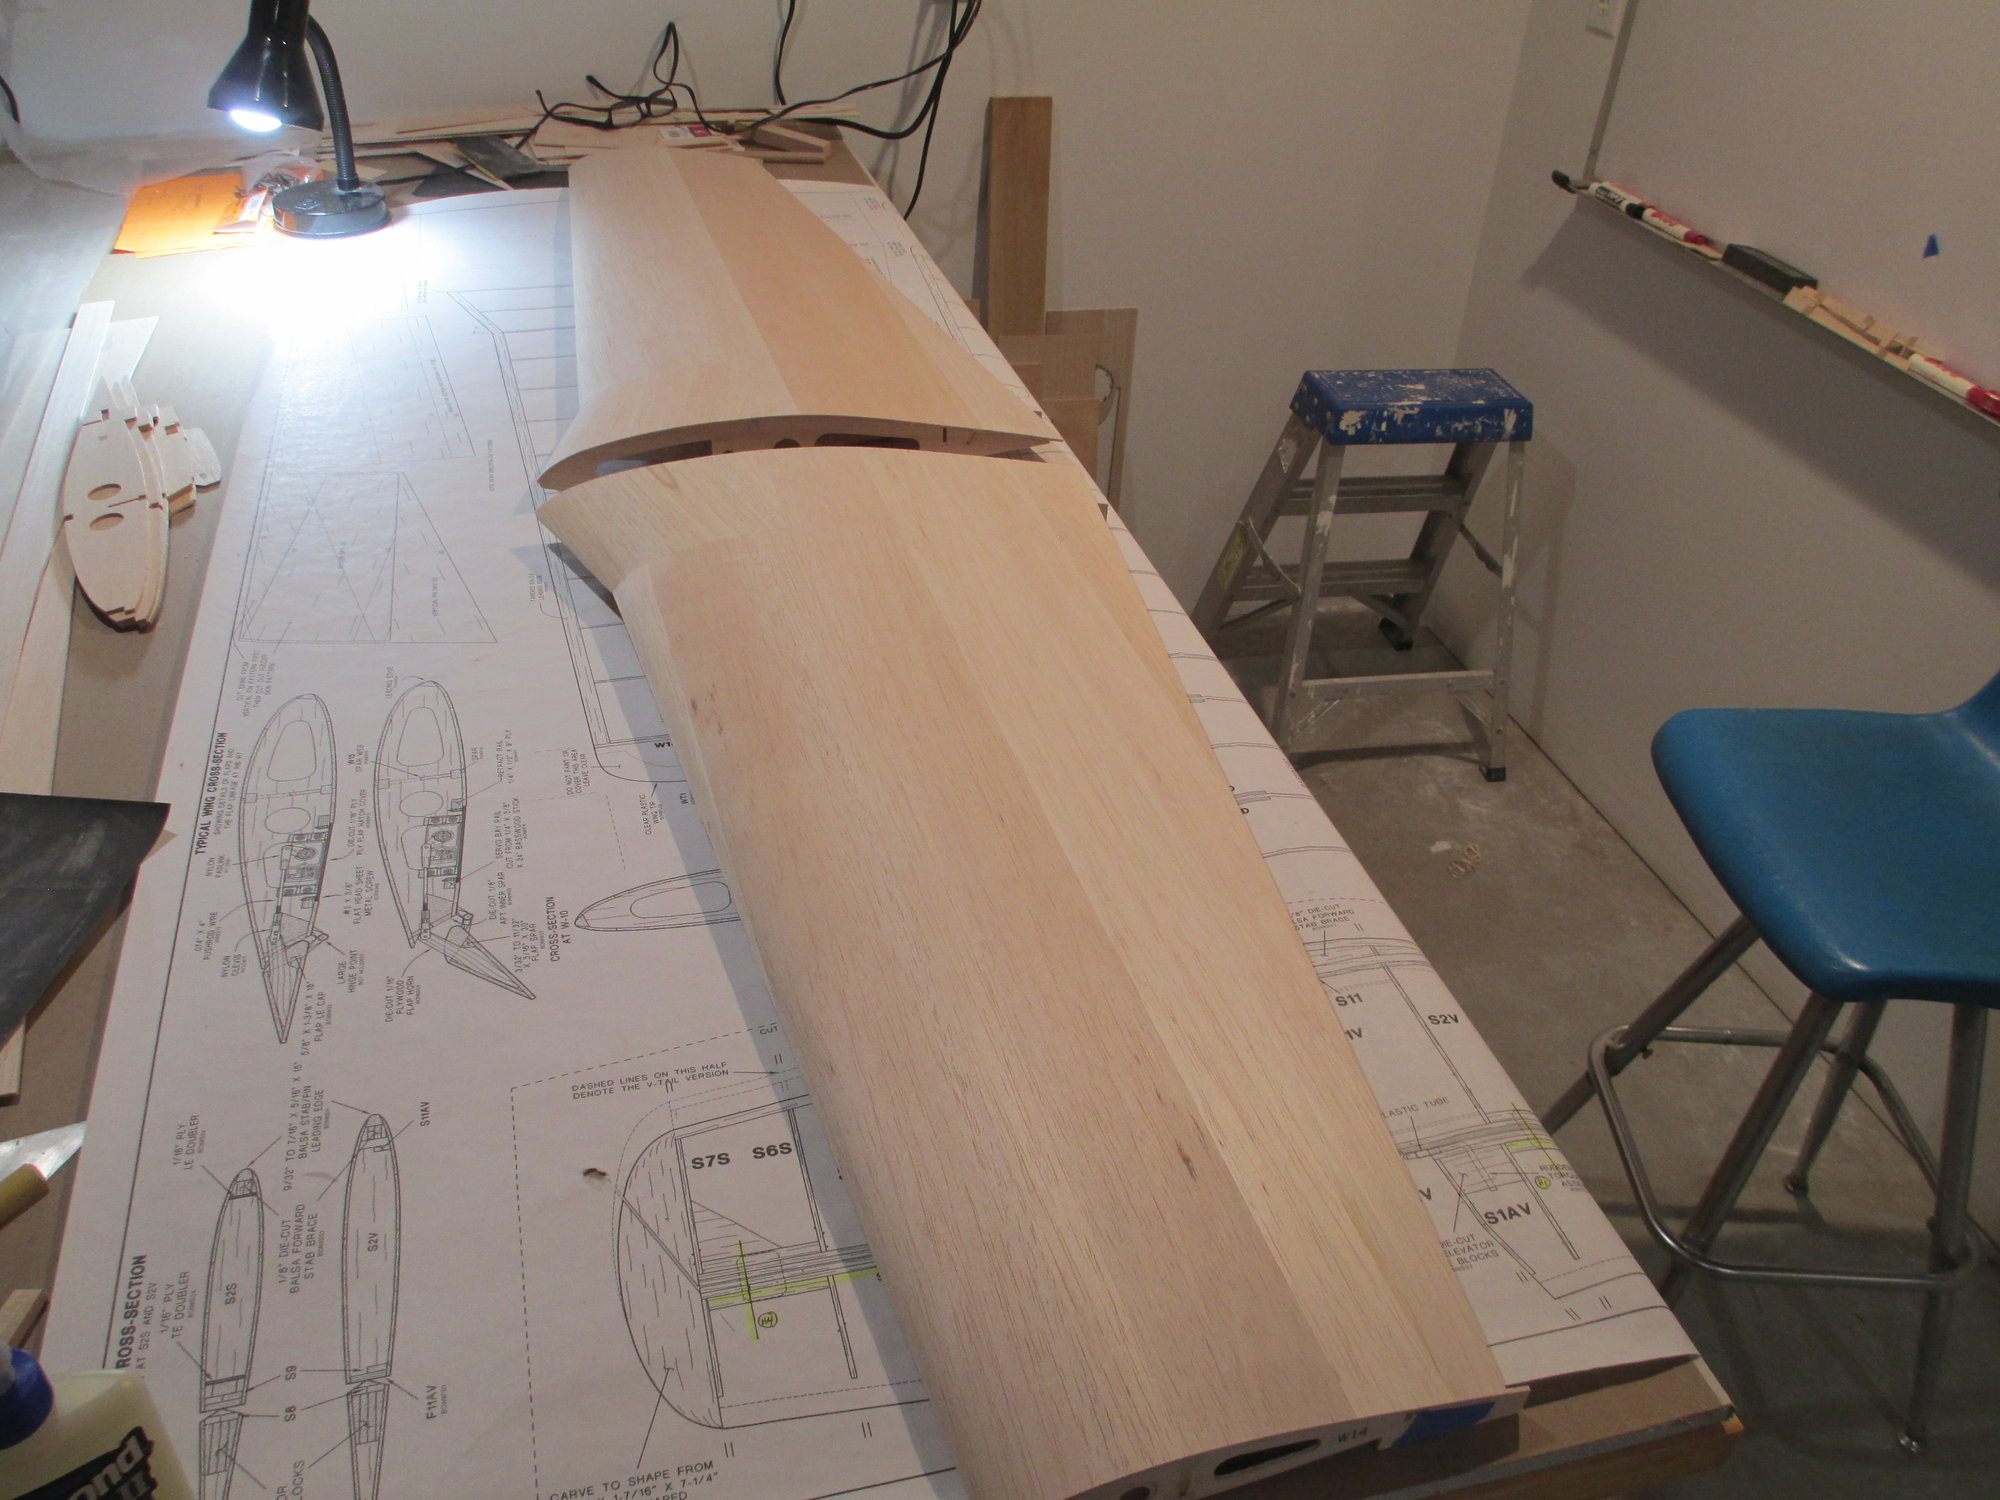
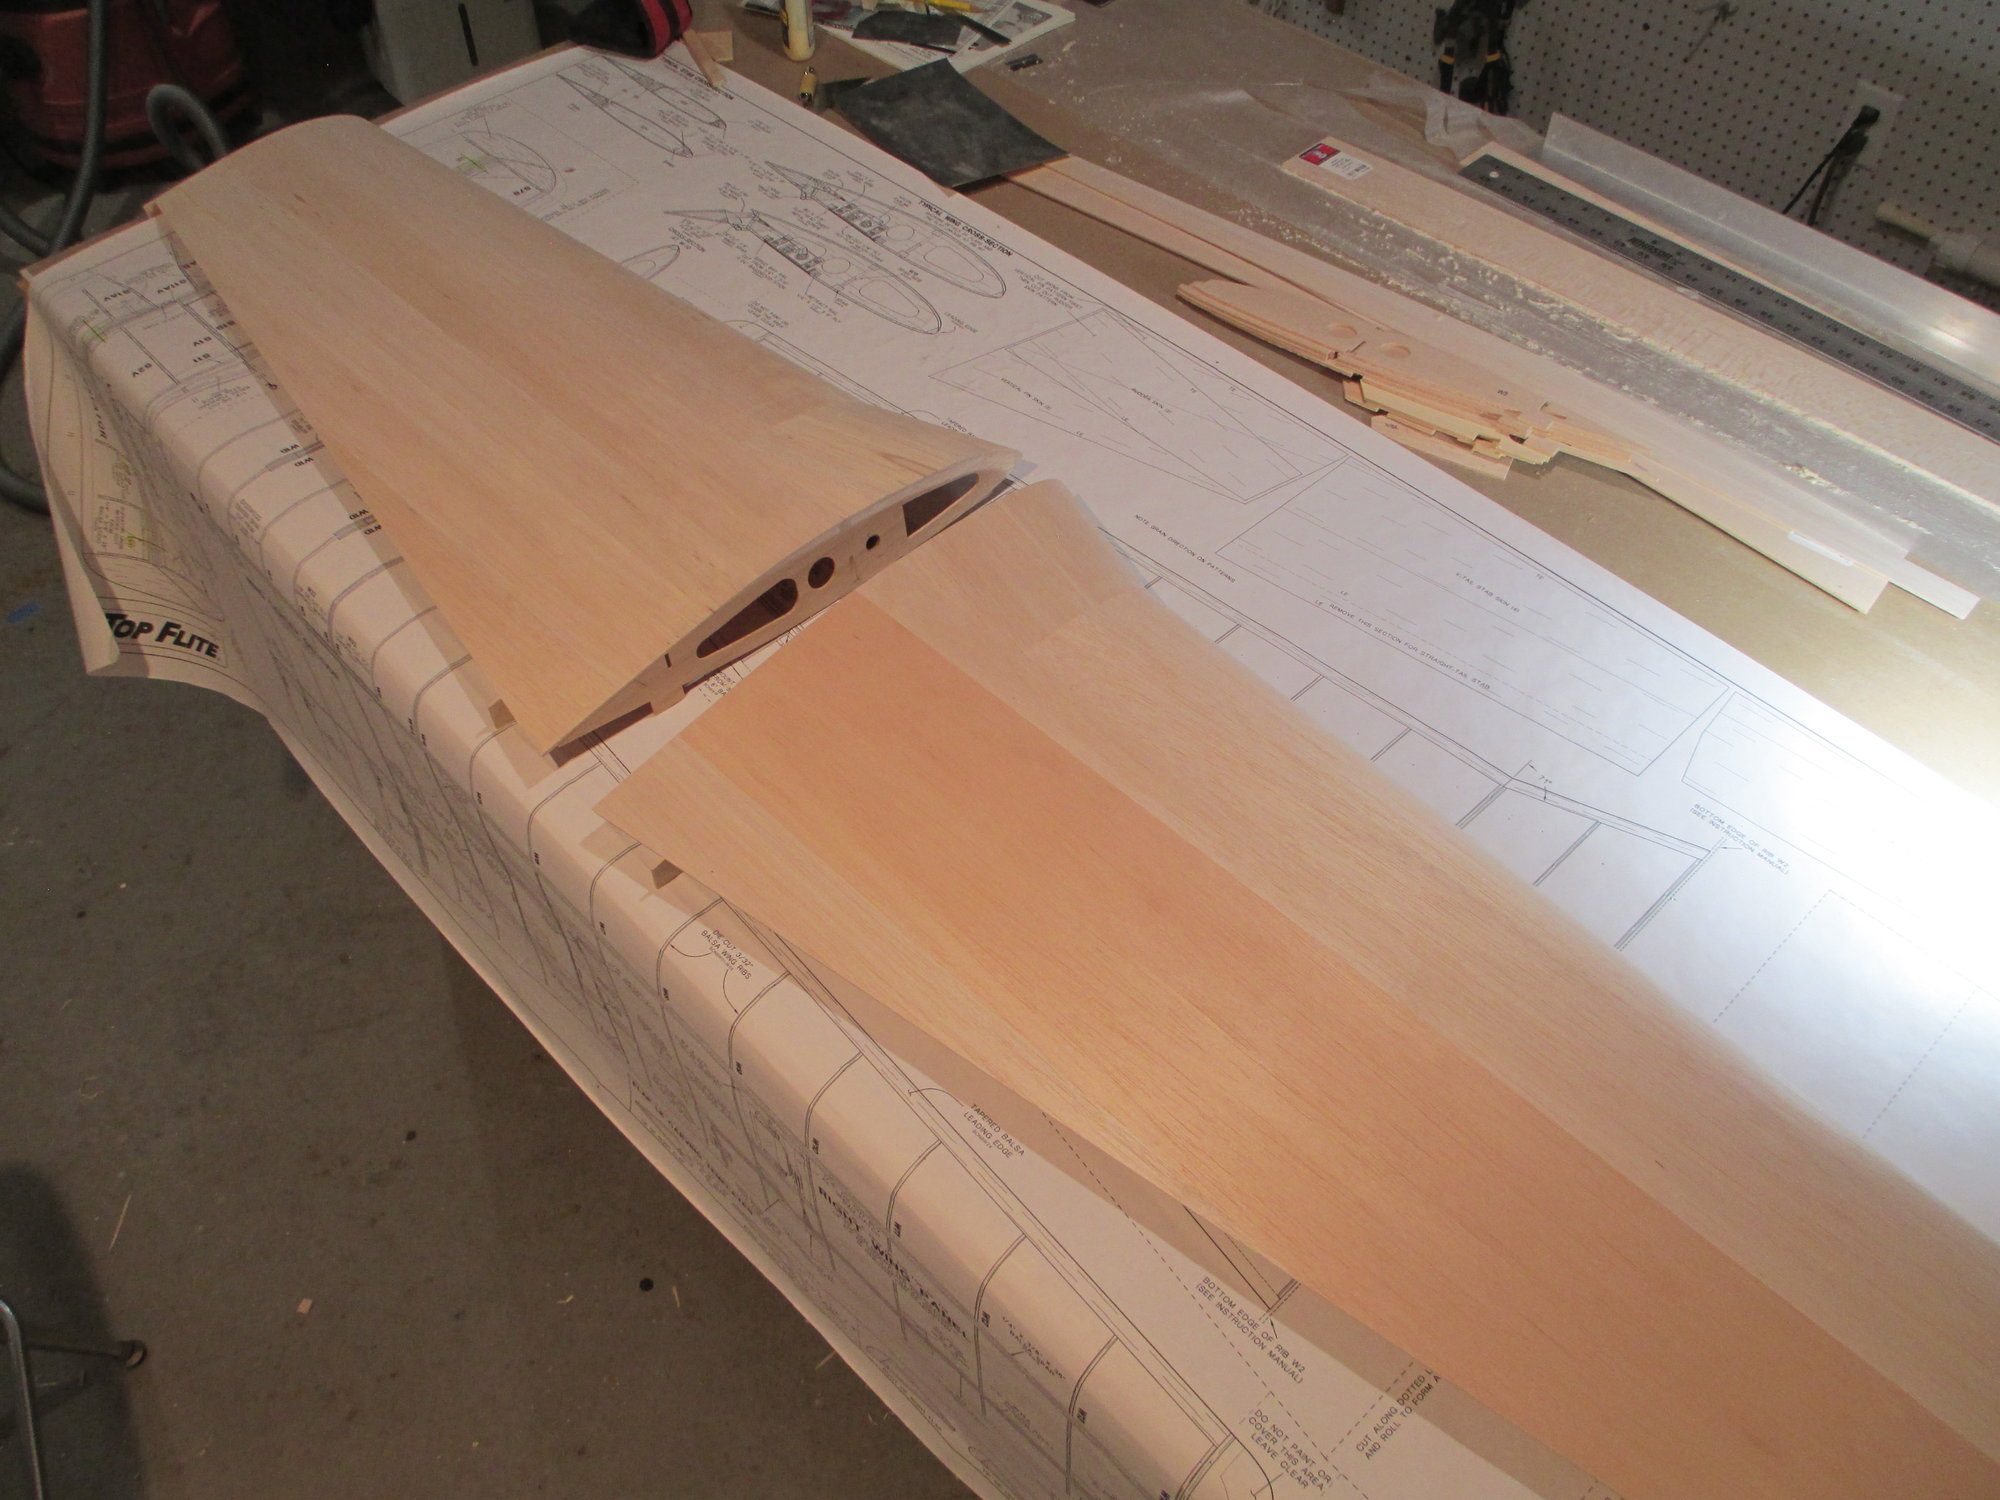
Both wings side by side have such a high wow factor. They just look strong and confident. Next plane I build, and my choices are sport type planes, will have fully sheeted wings.
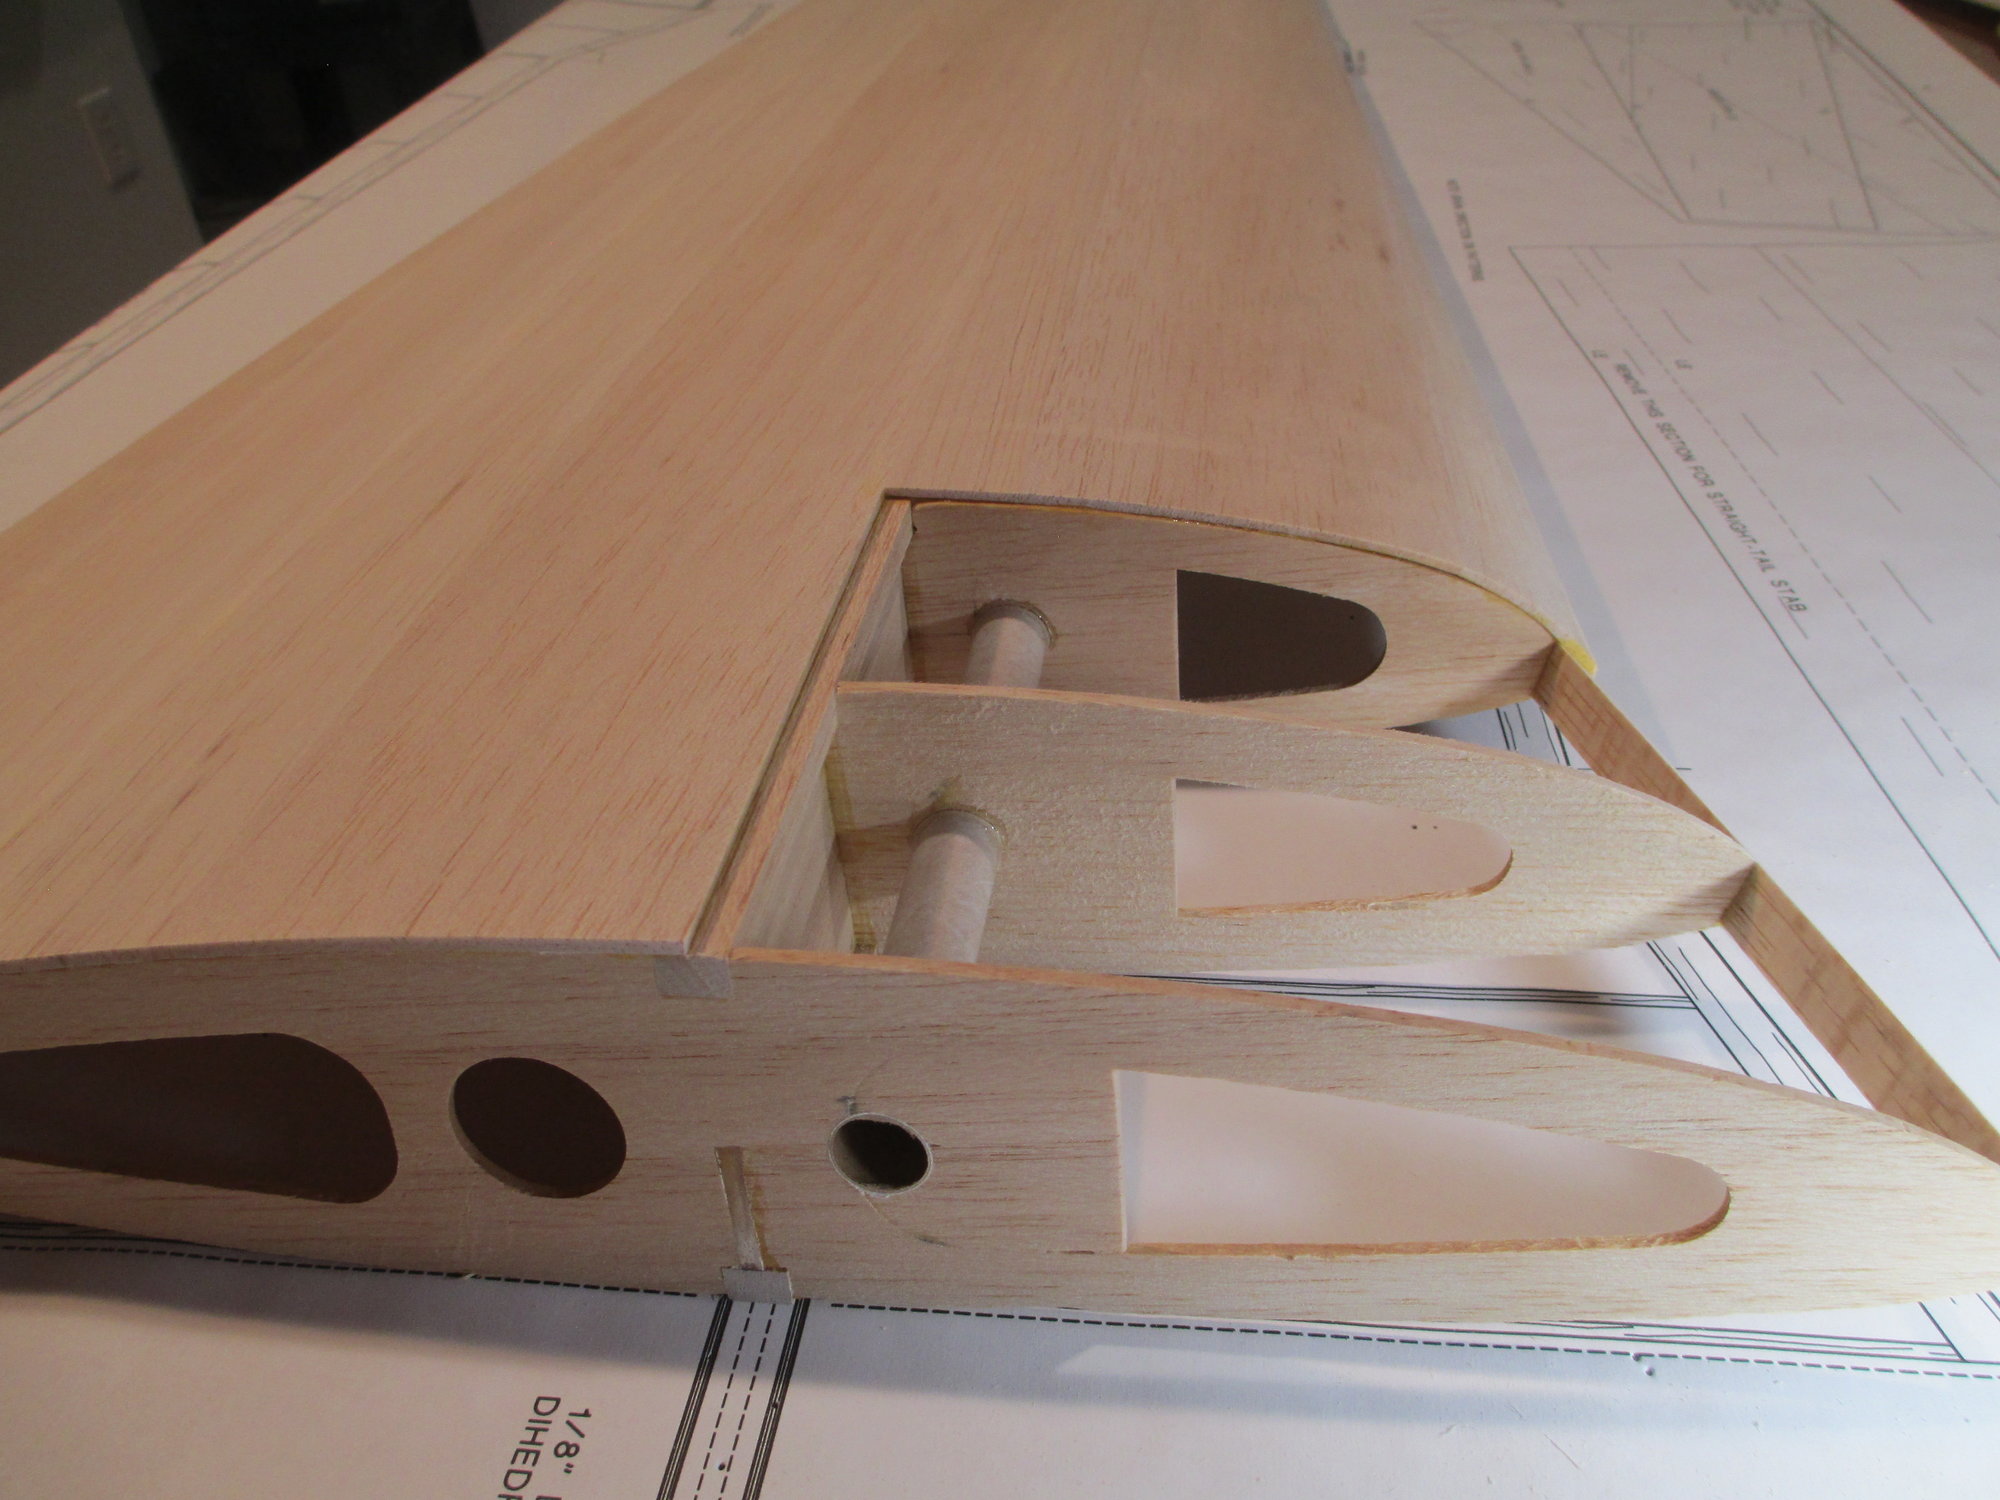
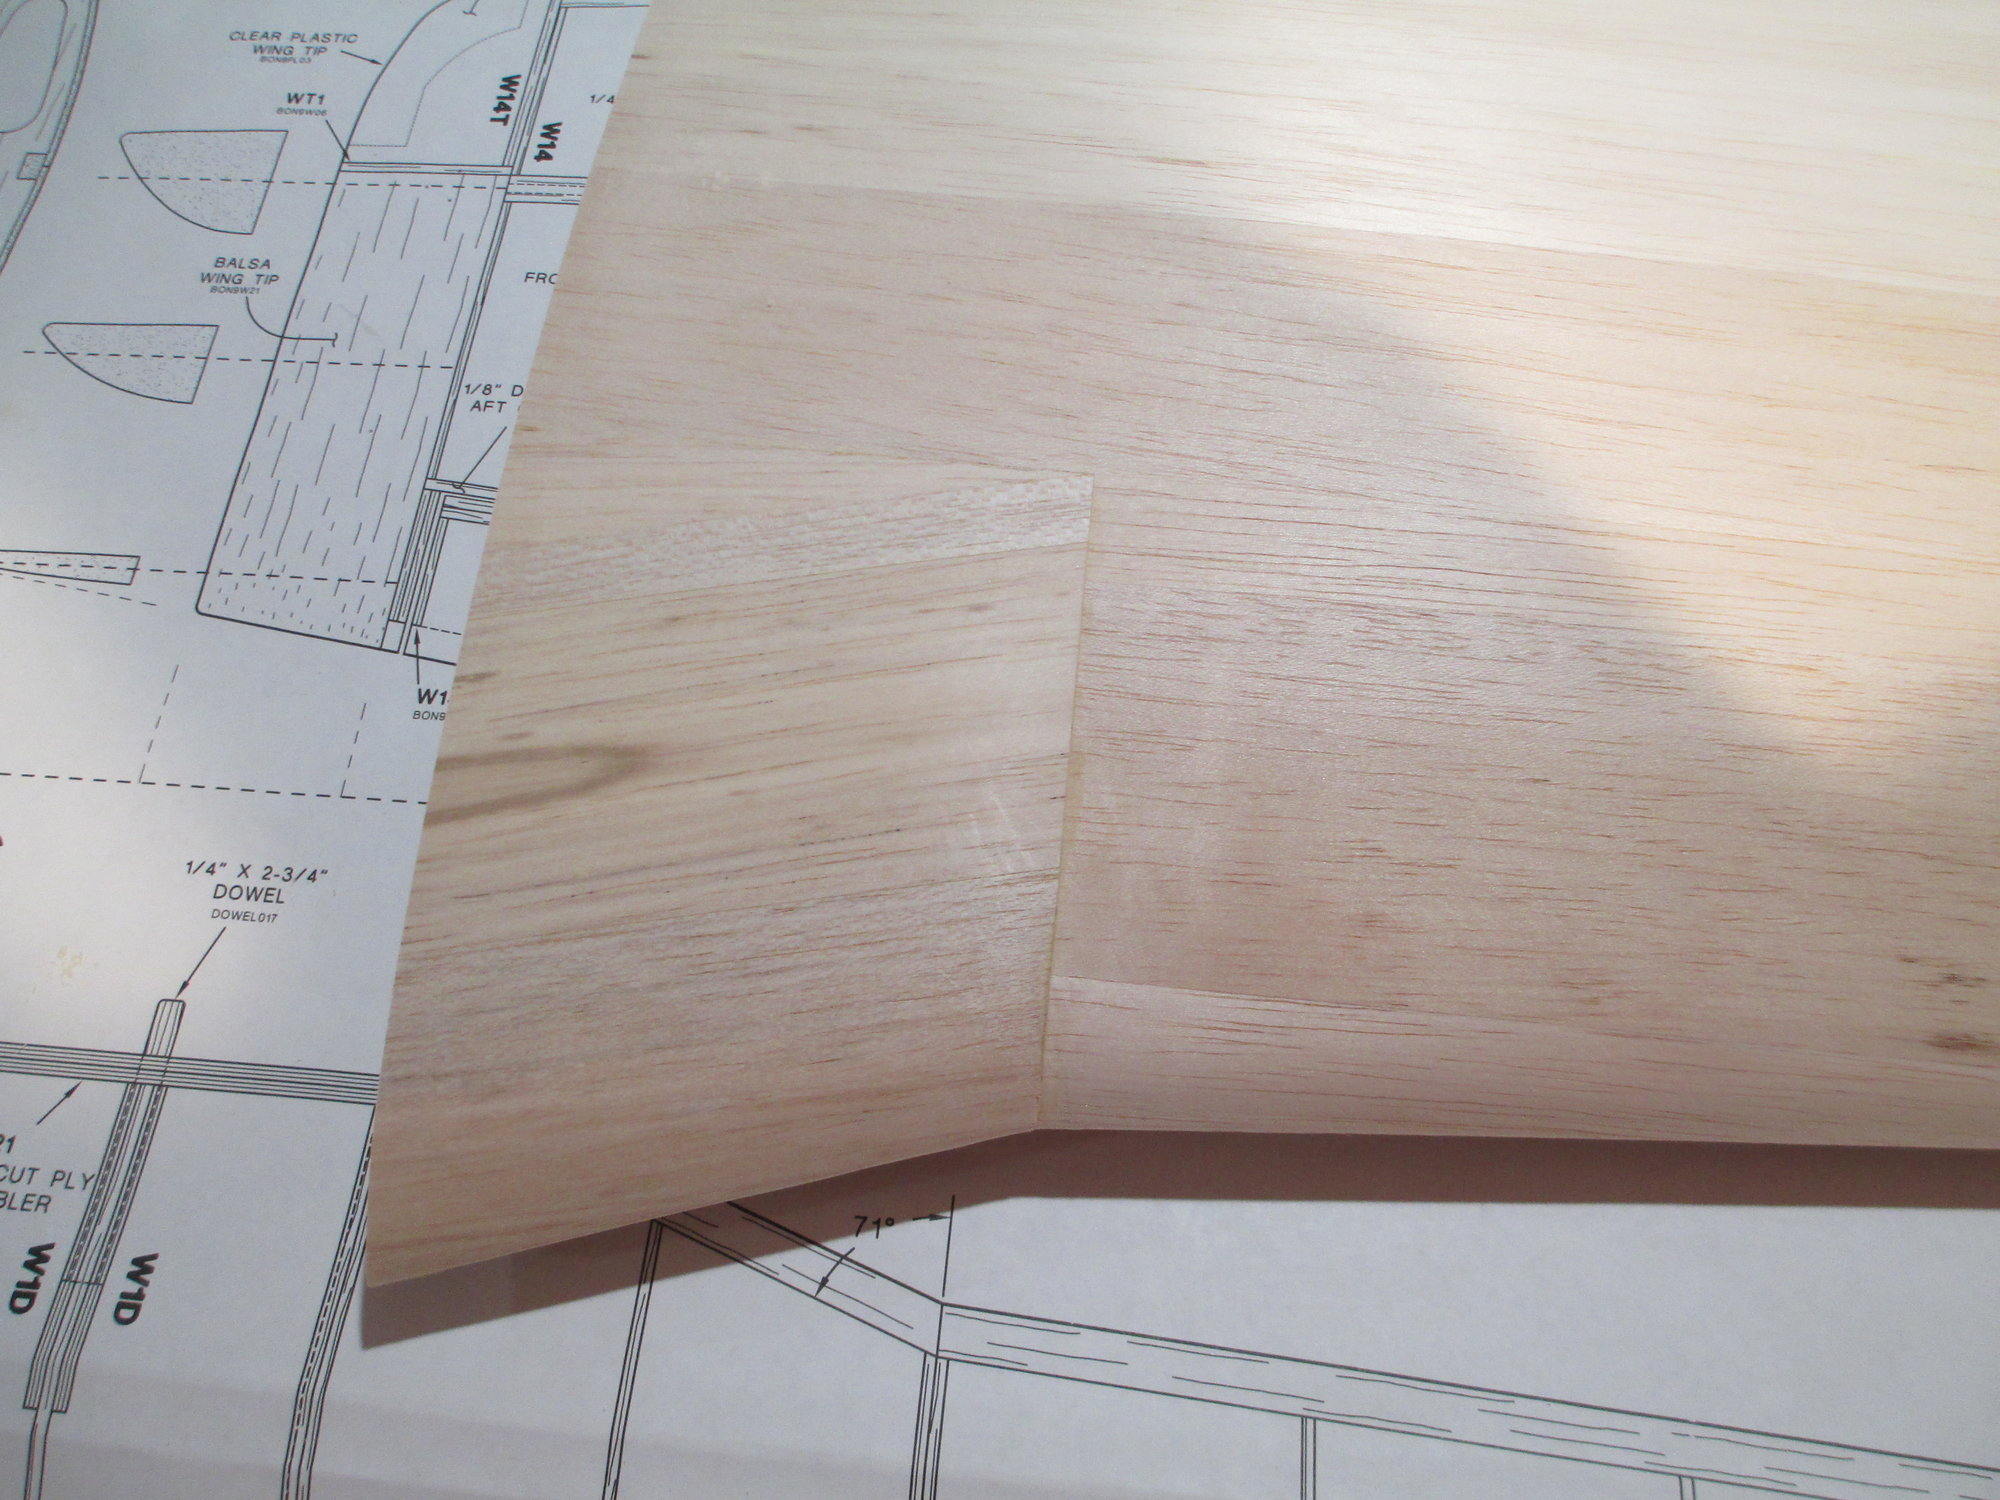
The “swept-forward sheeted area” near the root came out great. Both LEs just flow into each other so smoothly. No matter how much care I’d exercise in measuring and sanding, me centering those two sheeting edges together on top edge of R-2 would have resulted in re-tries or a modification. Like, one edge would not have sat centered on R-3. That is, if R-2 is a 3/32” rib. I would have had to fabricate/add a 1/8” false rib to insure good adhesion.
Not to inflate your ego, but I have added to my list: aluminum angle, Titebond II Premium, and Estes BT-5 Tubes. No block plane yet as I am still good at whittling and sanding.
Thanks for posting great, detailed photos. BTW, what camera are you using?
Later,
Lupe
Old 08-07-2019, 10:55 AM
  #157  
VincentJ
Thread Starter
 
VincentJ's Avatar
 
Join Date: Mar 2011
Location: Peterborough, NH
Posts: 4,582
Received 118 Likes on 107 Posts
Default

Originally Posted by FlyerInOKC
Wings came out beautiful Vince!
Thanks Mike!
Old 08-07-2019, 11:00 AM
  #158  
VincentJ
Thread Starter
 
VincentJ's Avatar
 
Join Date: Mar 2011
Location: Peterborough, NH
Posts: 4,582
Received 118 Likes on 107 Posts
Default

Thanks Lupe, they weren't that bad to make. The flairs on the root definitely raised the difficulty level up a bit... I love sheeted wings as well. Once they are glassed and painted they will be strong and look great!

I'm not at home at the moment (quit rolling your eyes Bob! ), but I'm using a very small, fairly inexpensive Cannon. (the kind that you just point and shoot)

Last edited by VincentJ; 08-08-2019 at 07:16 AM.
Old 08-12-2019, 02:41 PM
  #159  
VincentJ
Thread Starter
 
VincentJ's Avatar
 
Join Date: Mar 2011
Location: Peterborough, NH
Posts: 4,582
Received 118 Likes on 107 Posts
Default


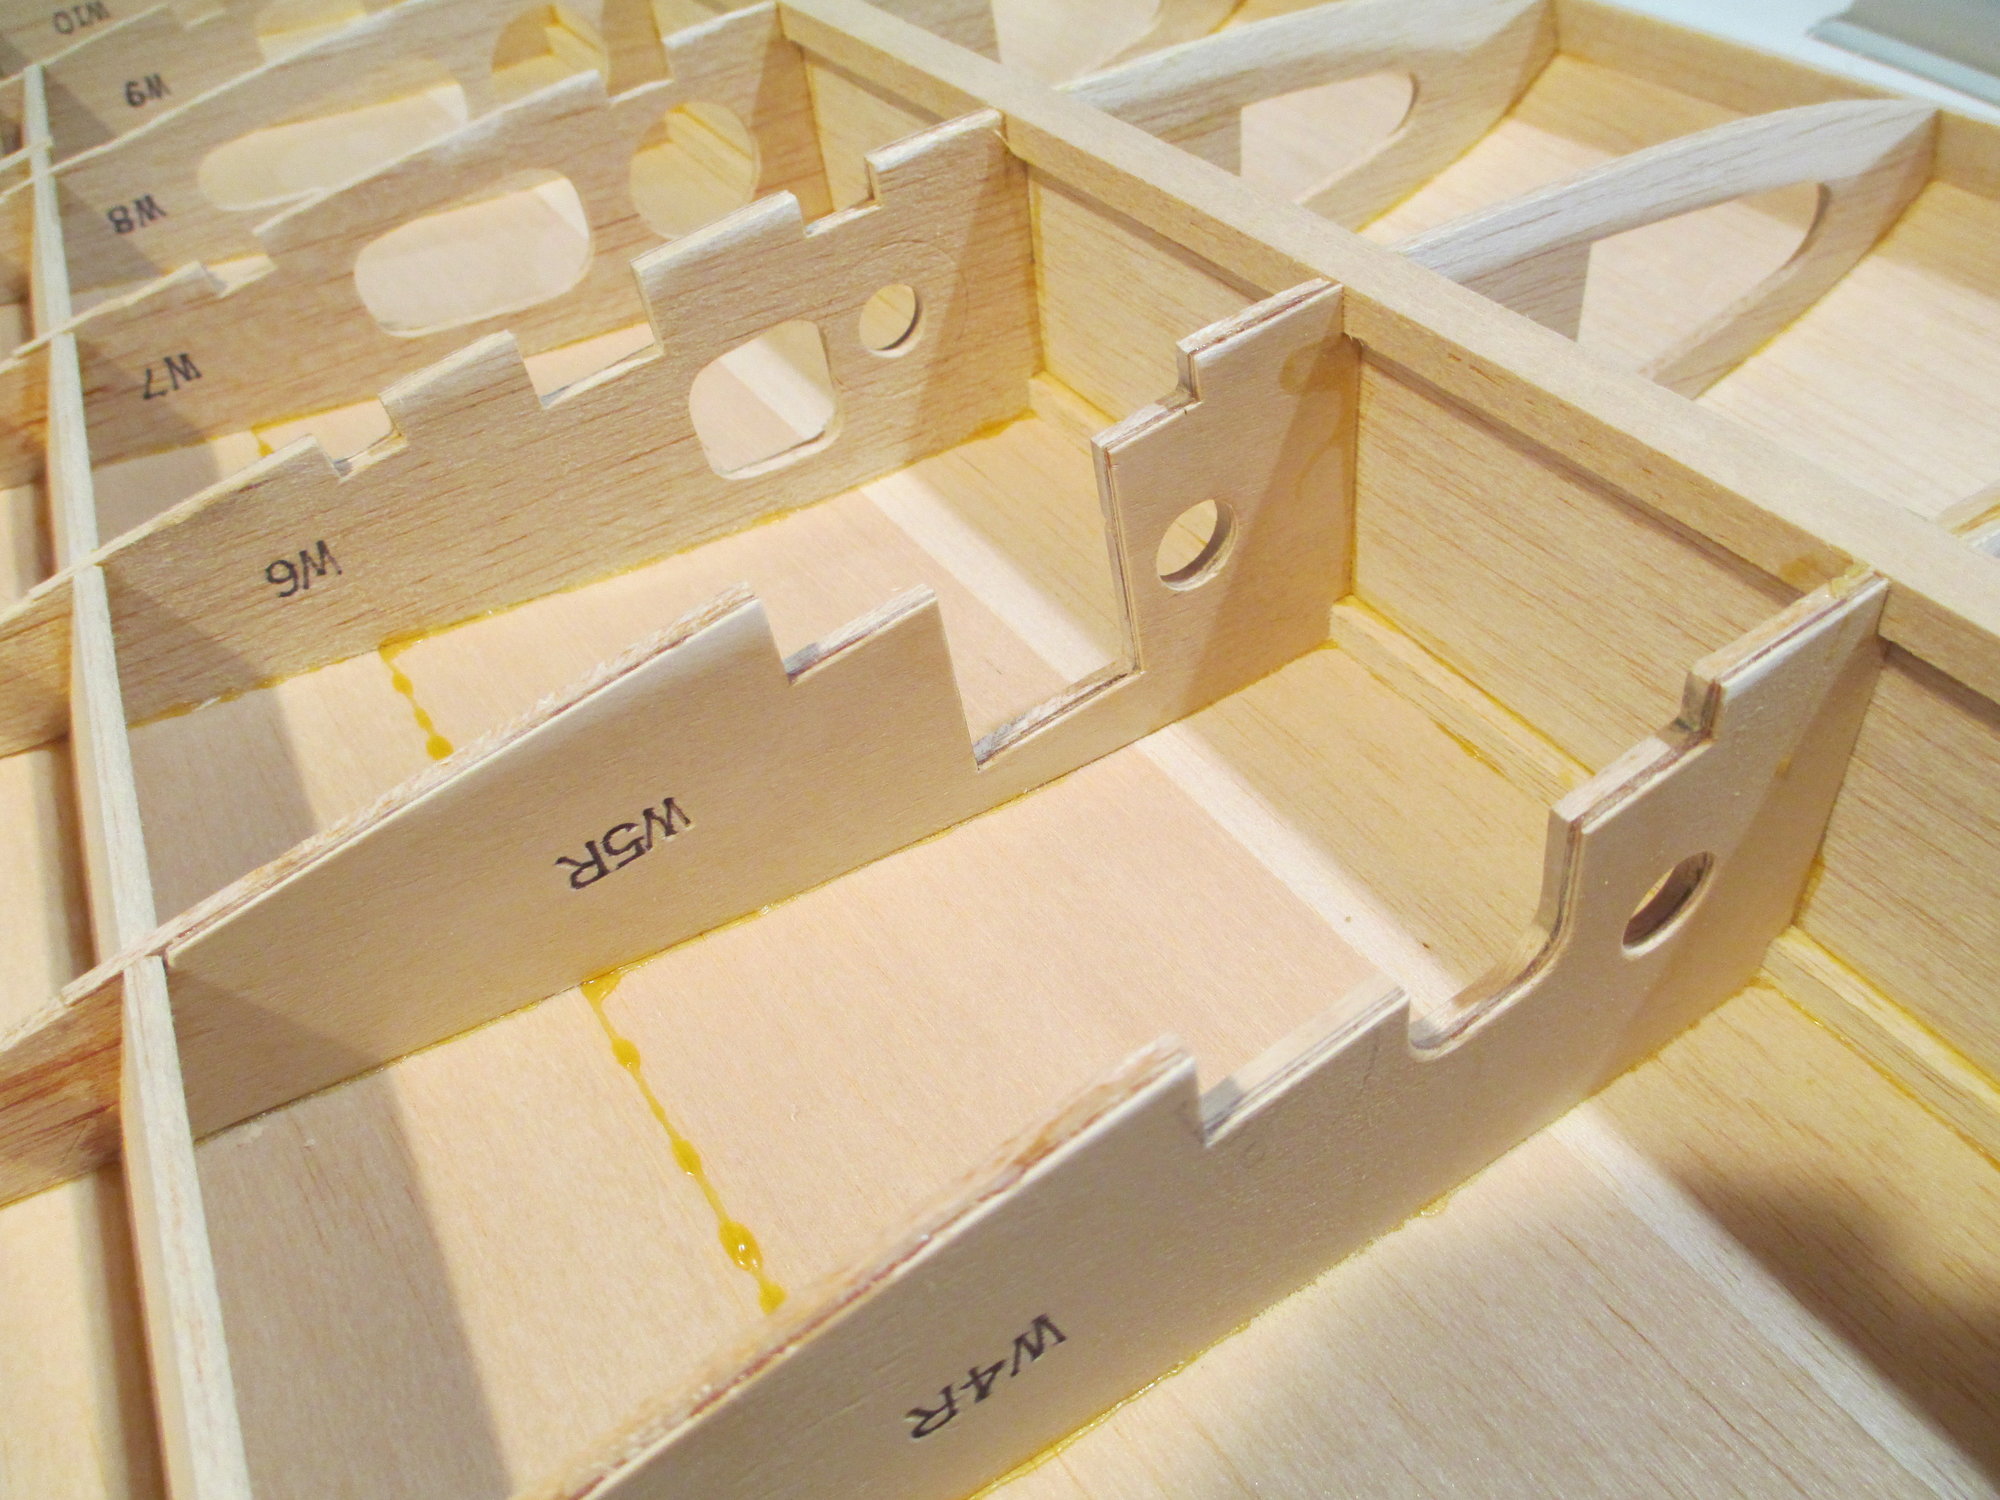
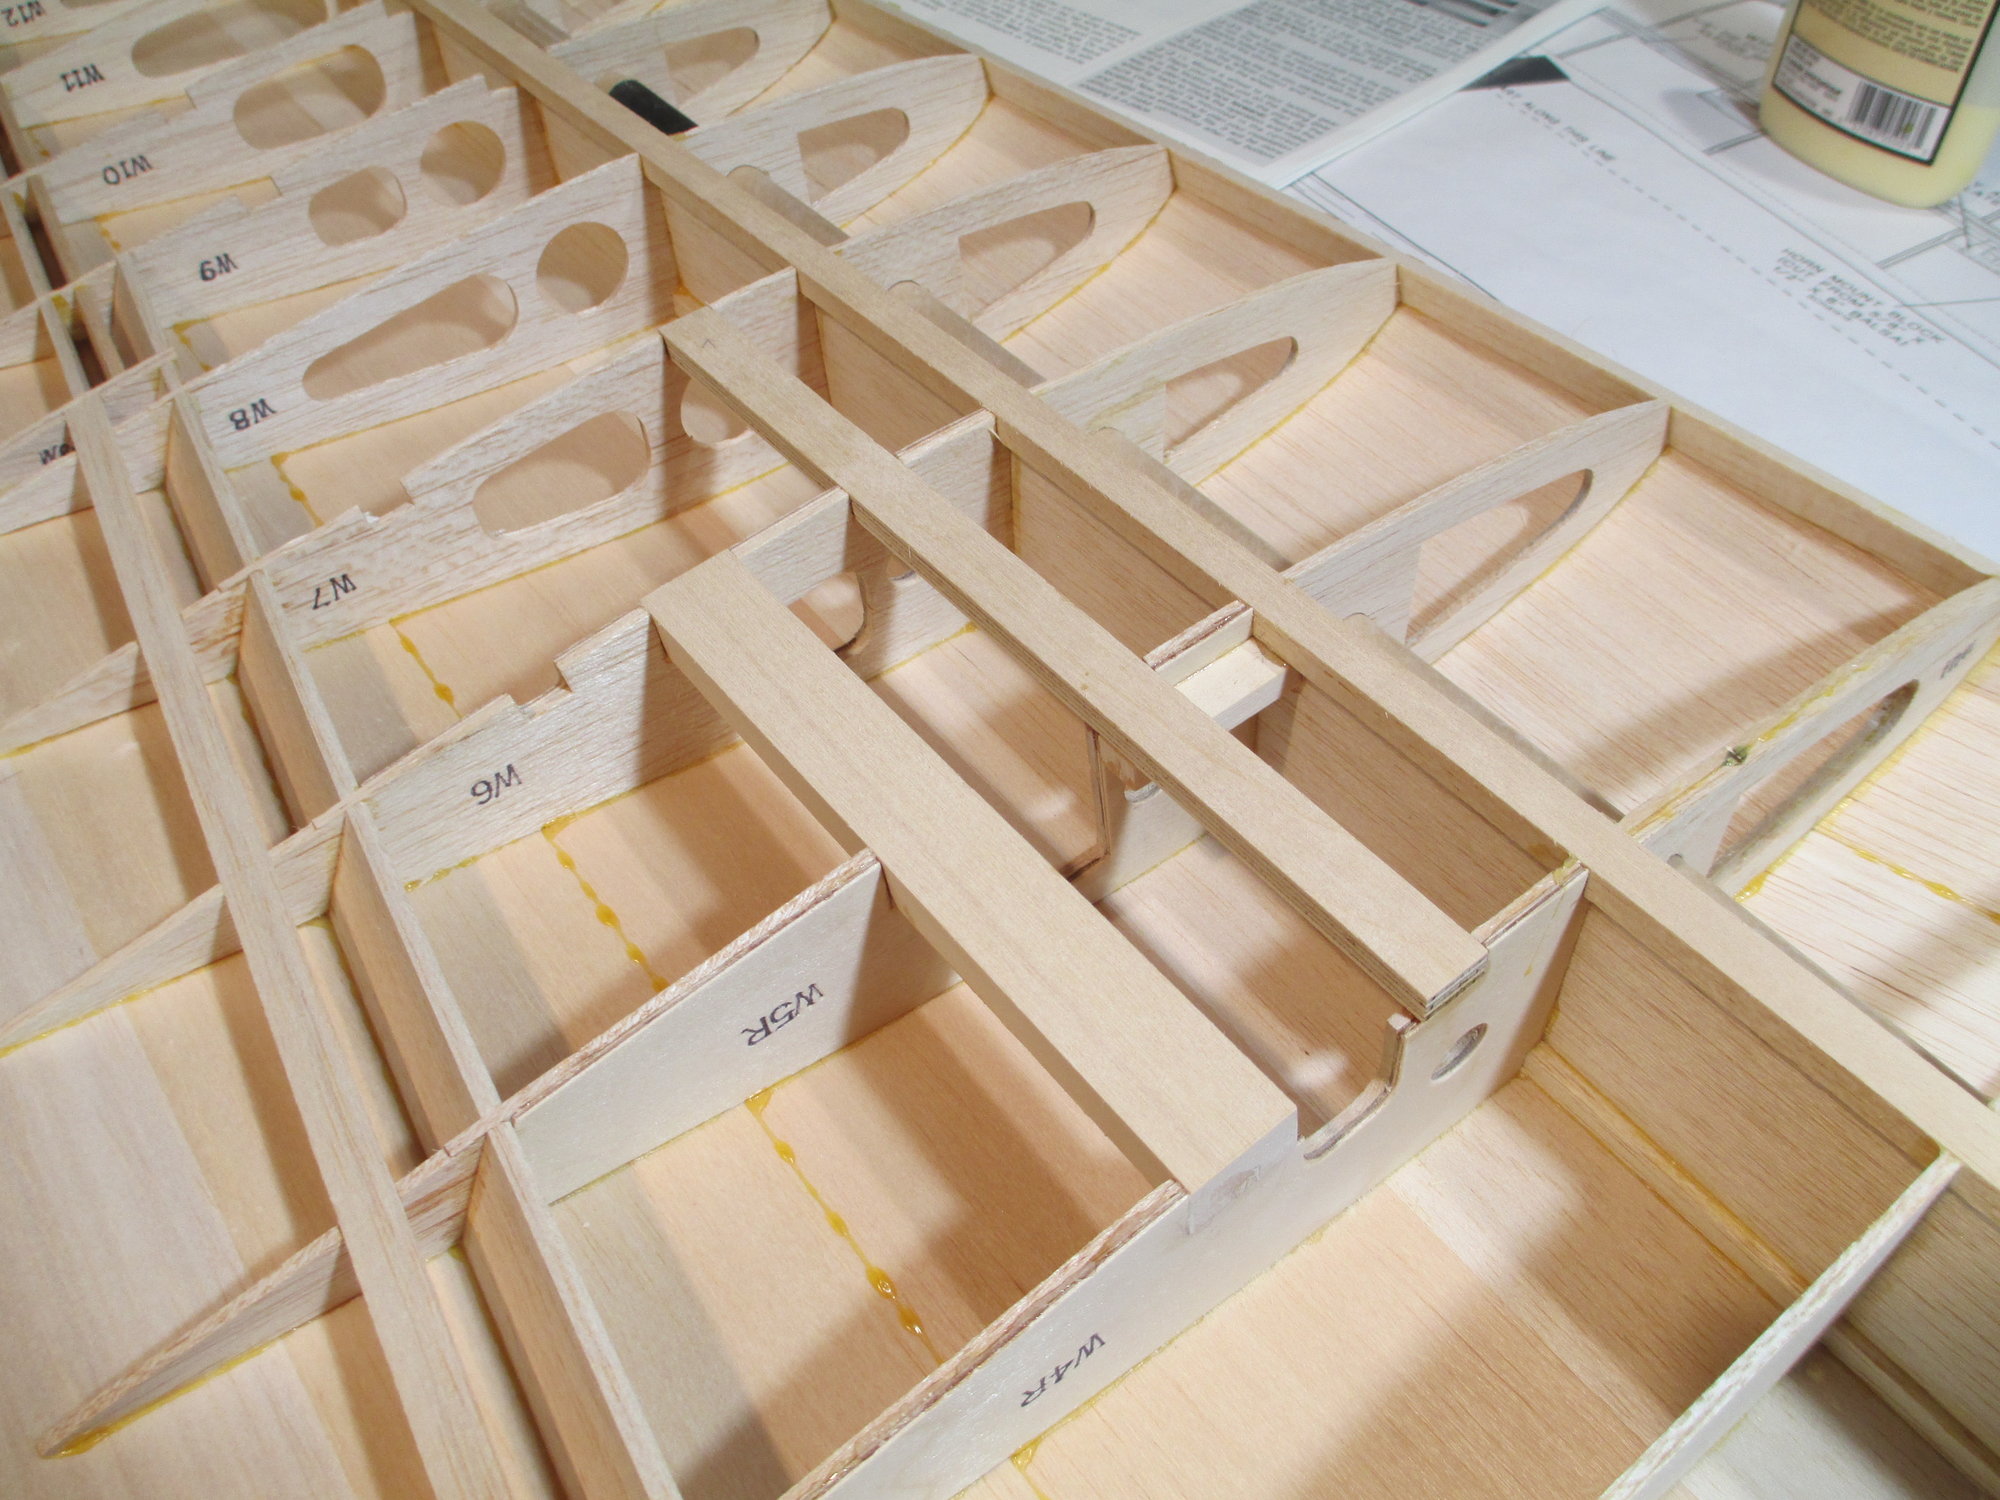
Time to epoxy one of the 1/2" x 3/4" x 6-3/4" basswood landing gear rail into place. The rail is supported by ribs W4, W5 and W6. These ribs are reinforced by epoxying birch plywood to the sides of each ribs.


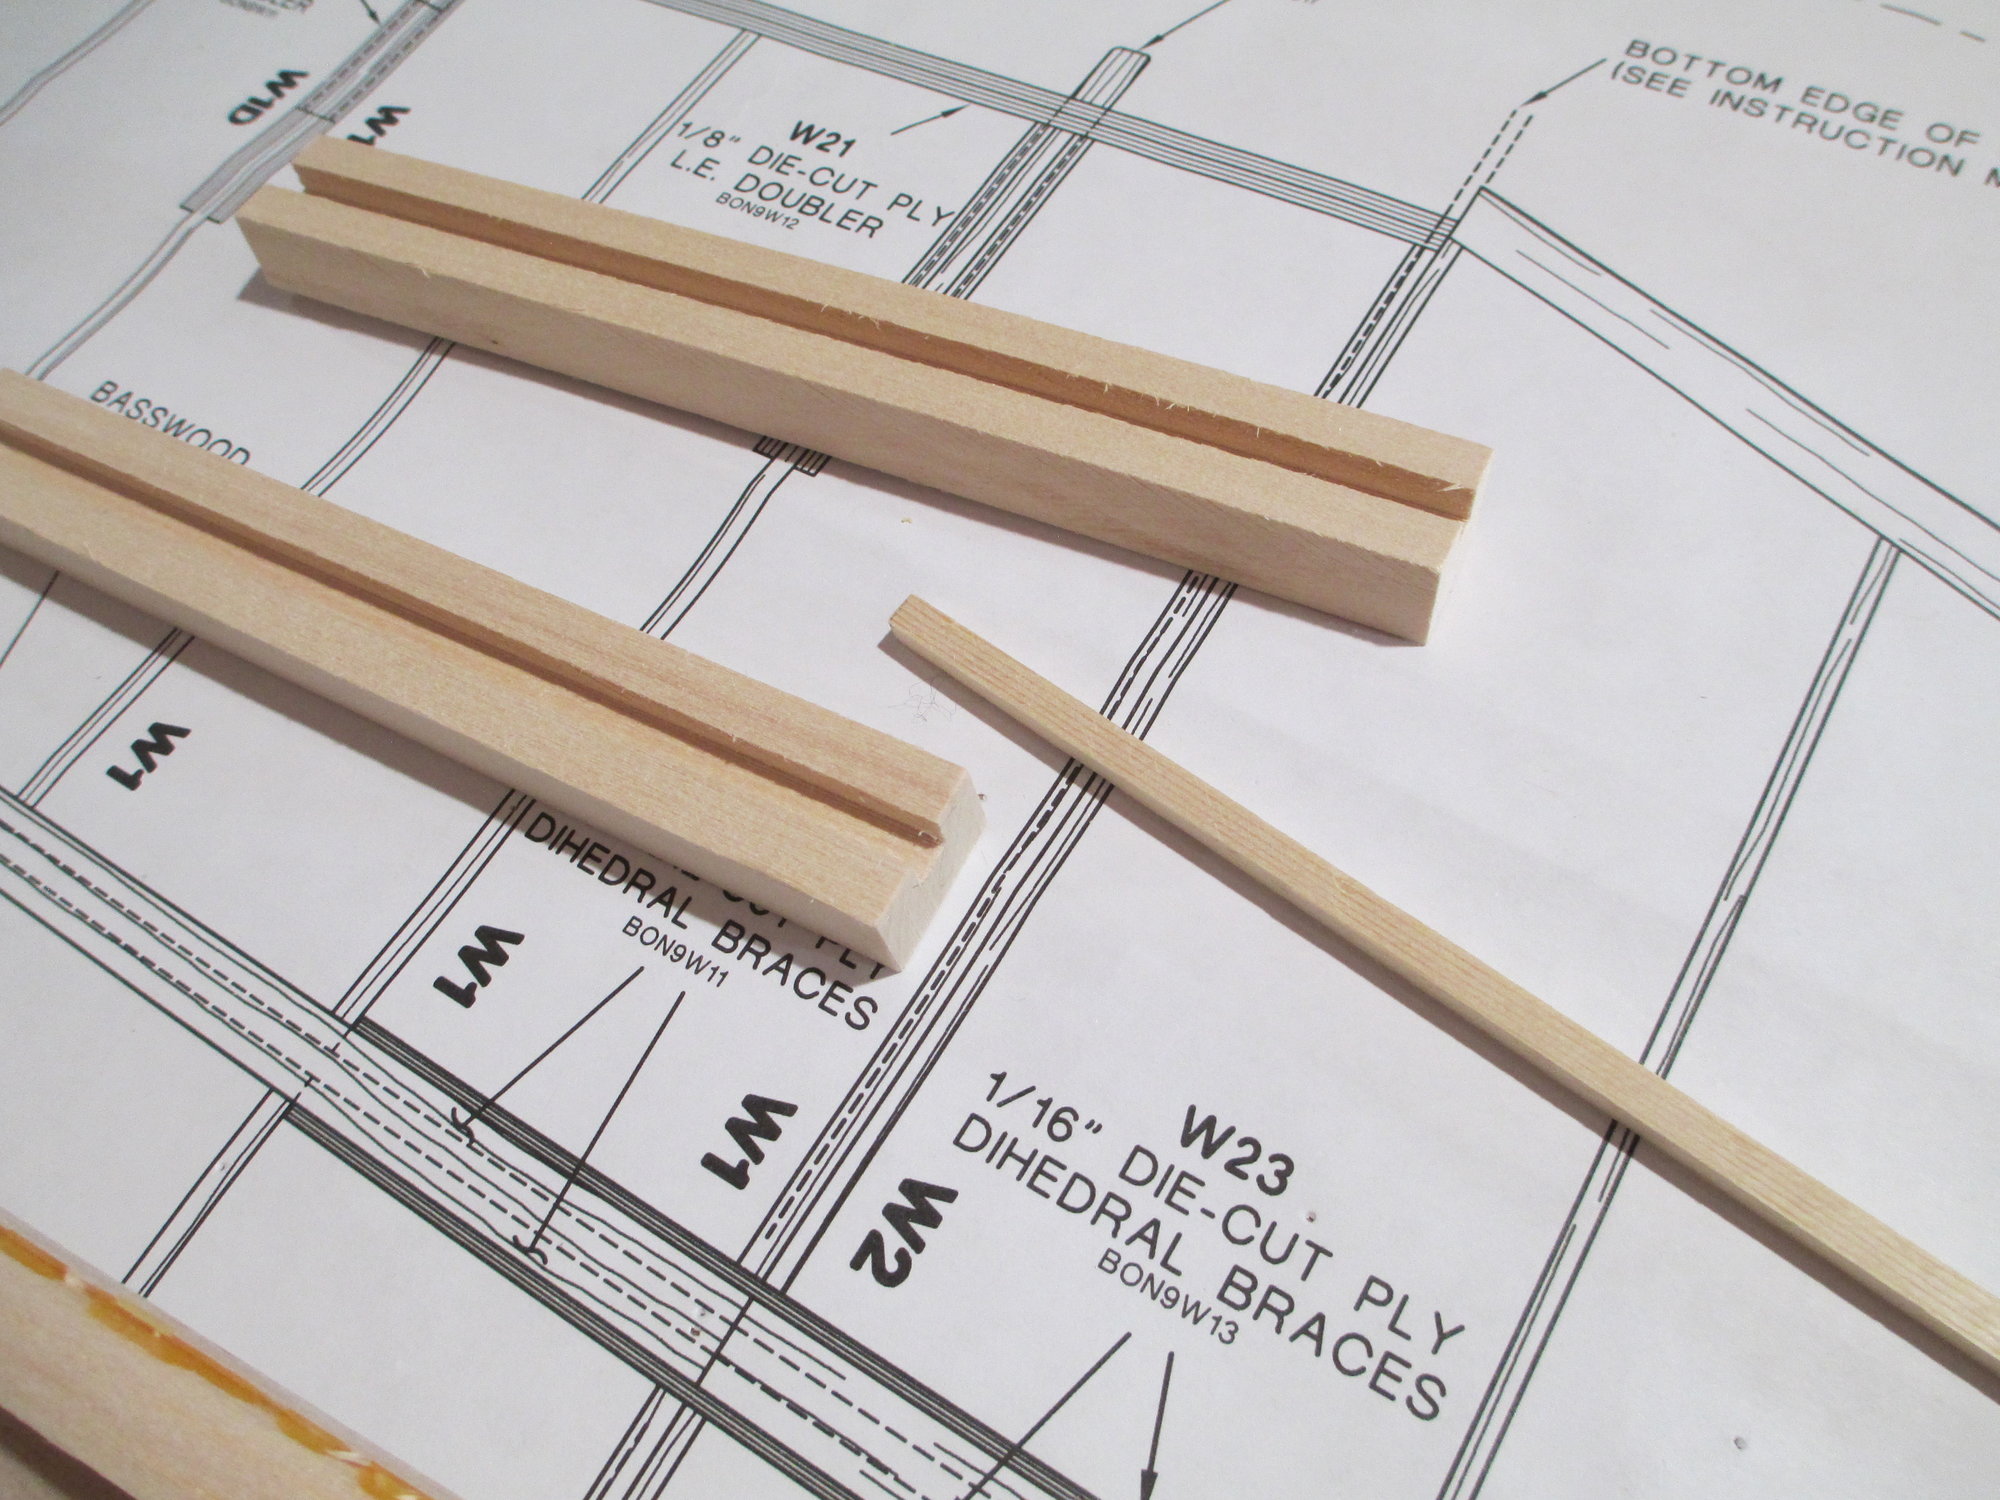
The landing gear brace has a groove cut into on one side. The other side is flush. The purpose of the groove is for the wire used in the fixed landing gear to fit into. Since retracts are being used in this application all you have to do is flip the rail over so the groove is facing down towards the top sheeting.


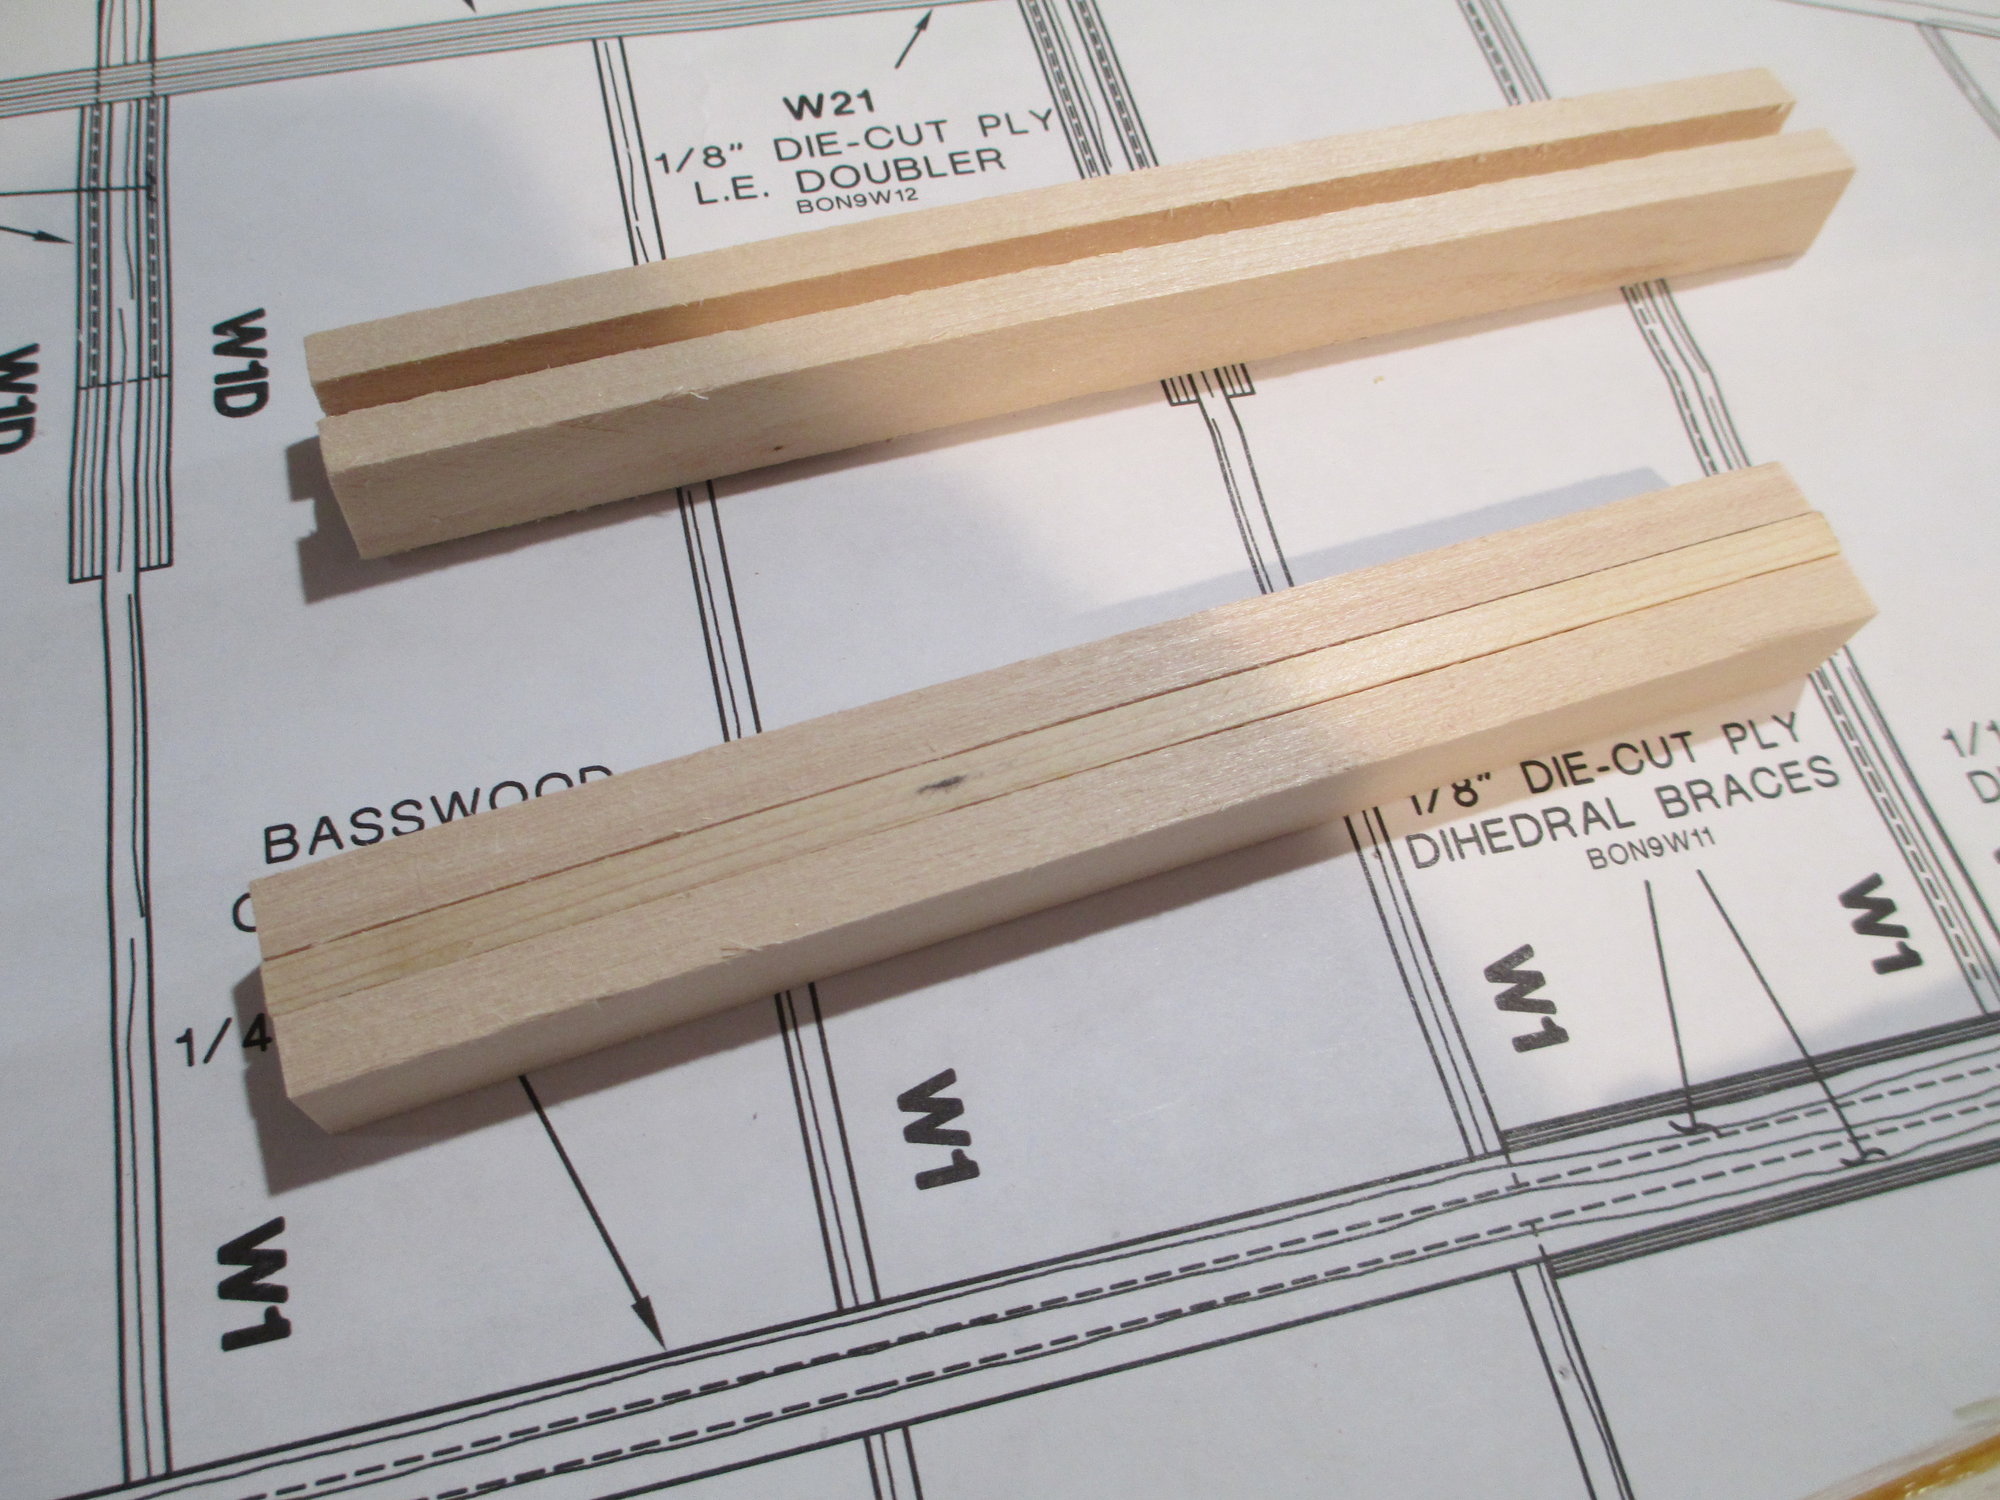
My thoughts to strengthen the rail is to fill in the groove with a piece of basswood. This will also get epoxied in place.


Trial fitment of the rail. Looks good, time to mix-up some 30 minute epoxy.


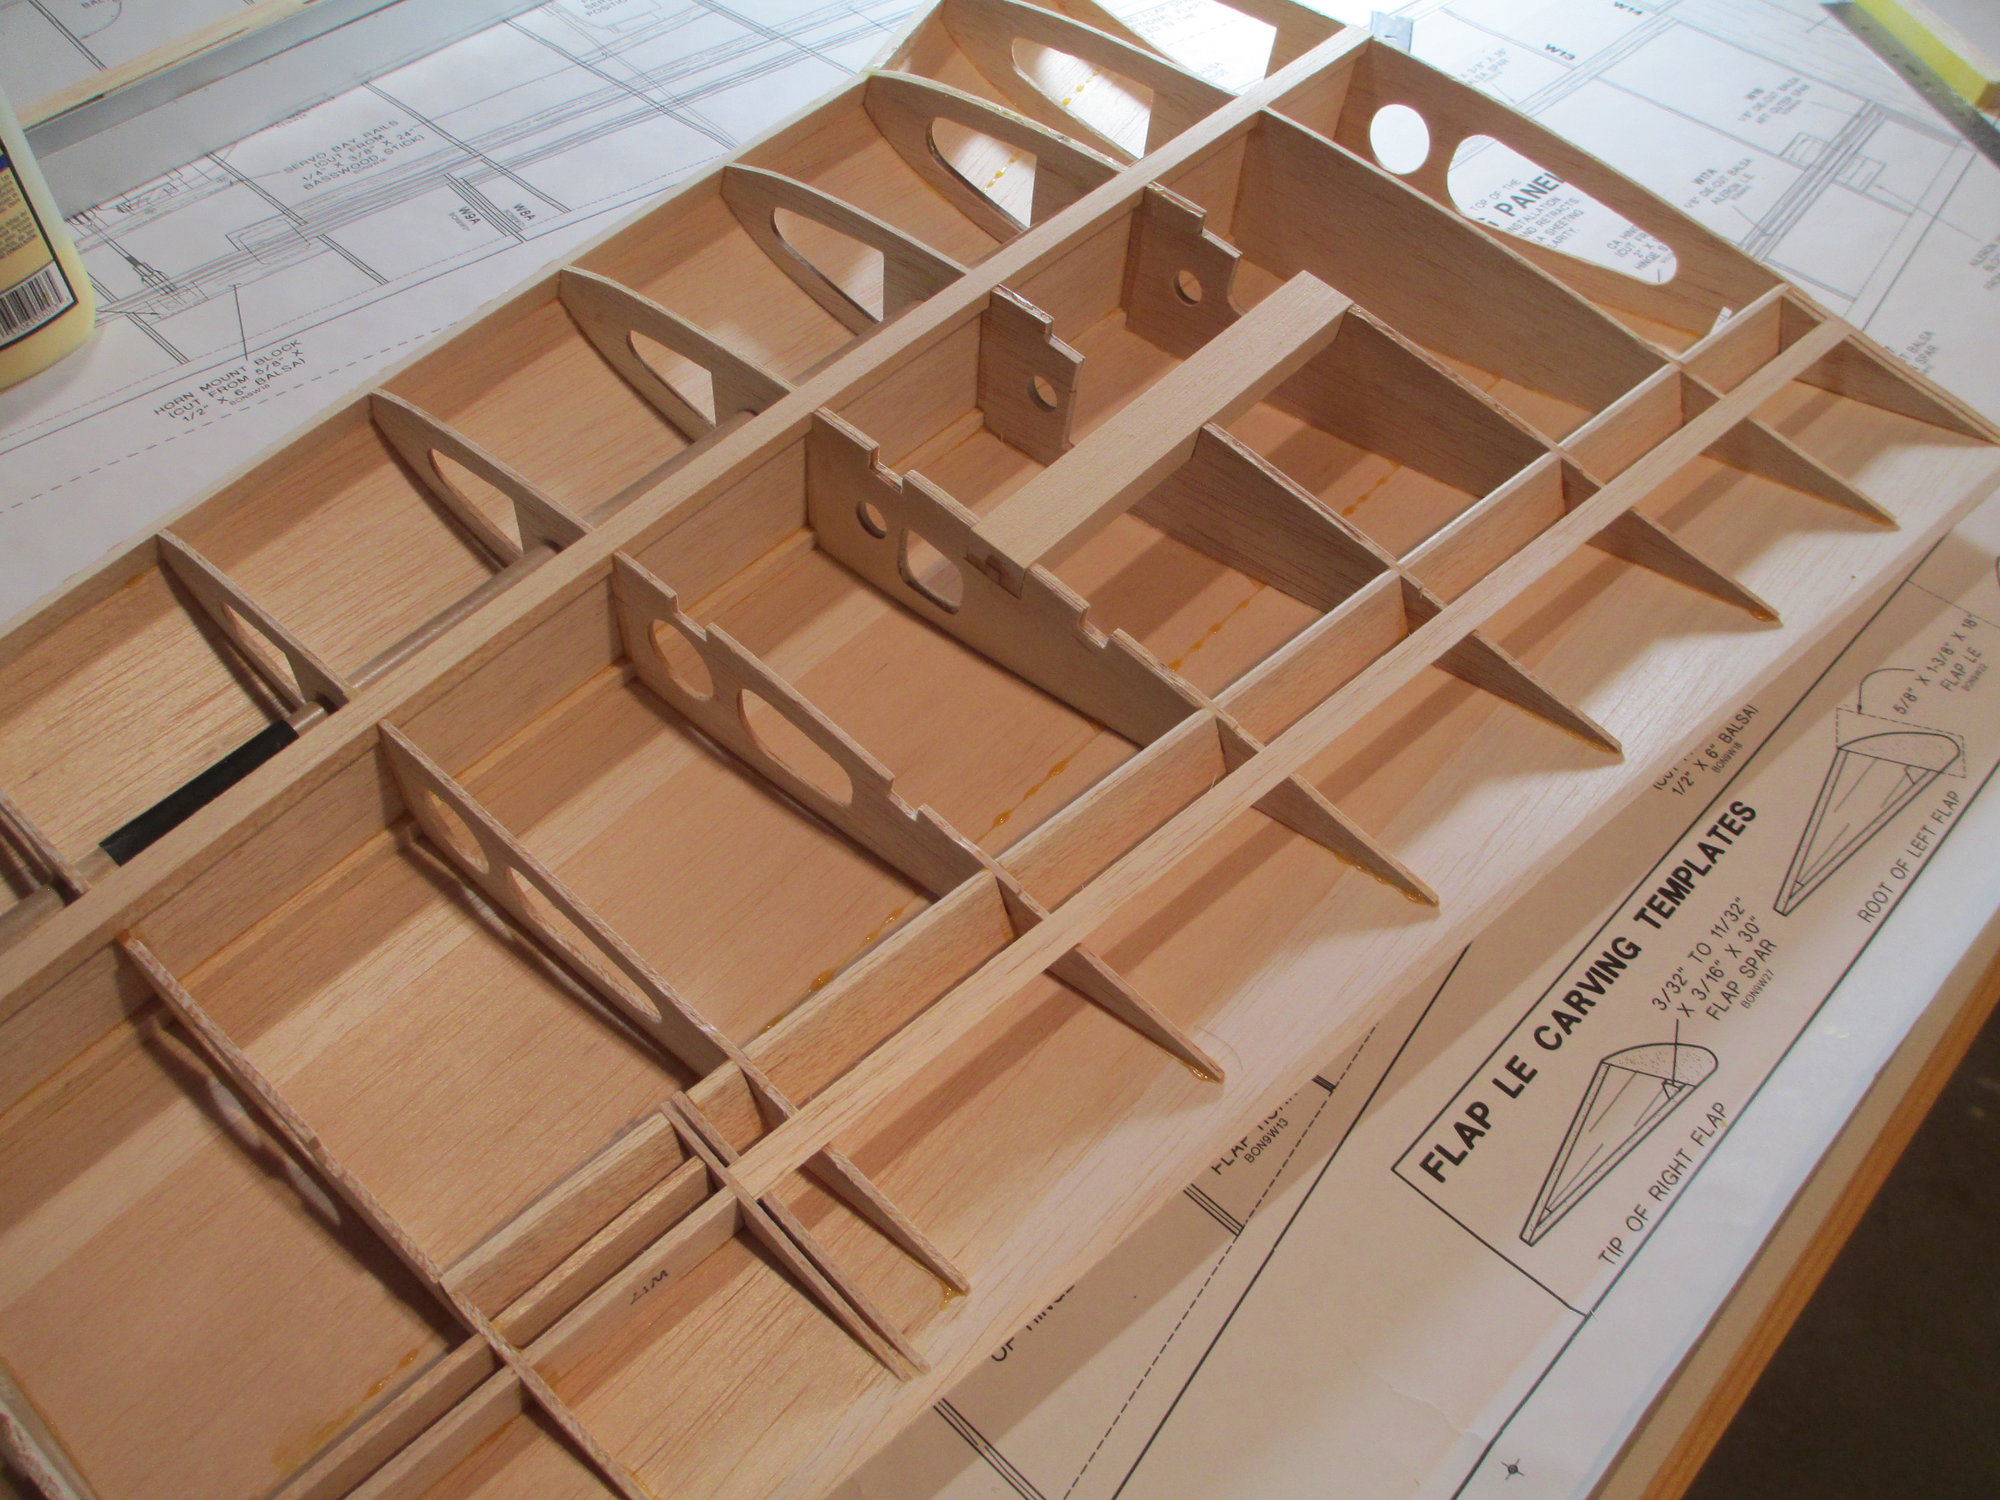
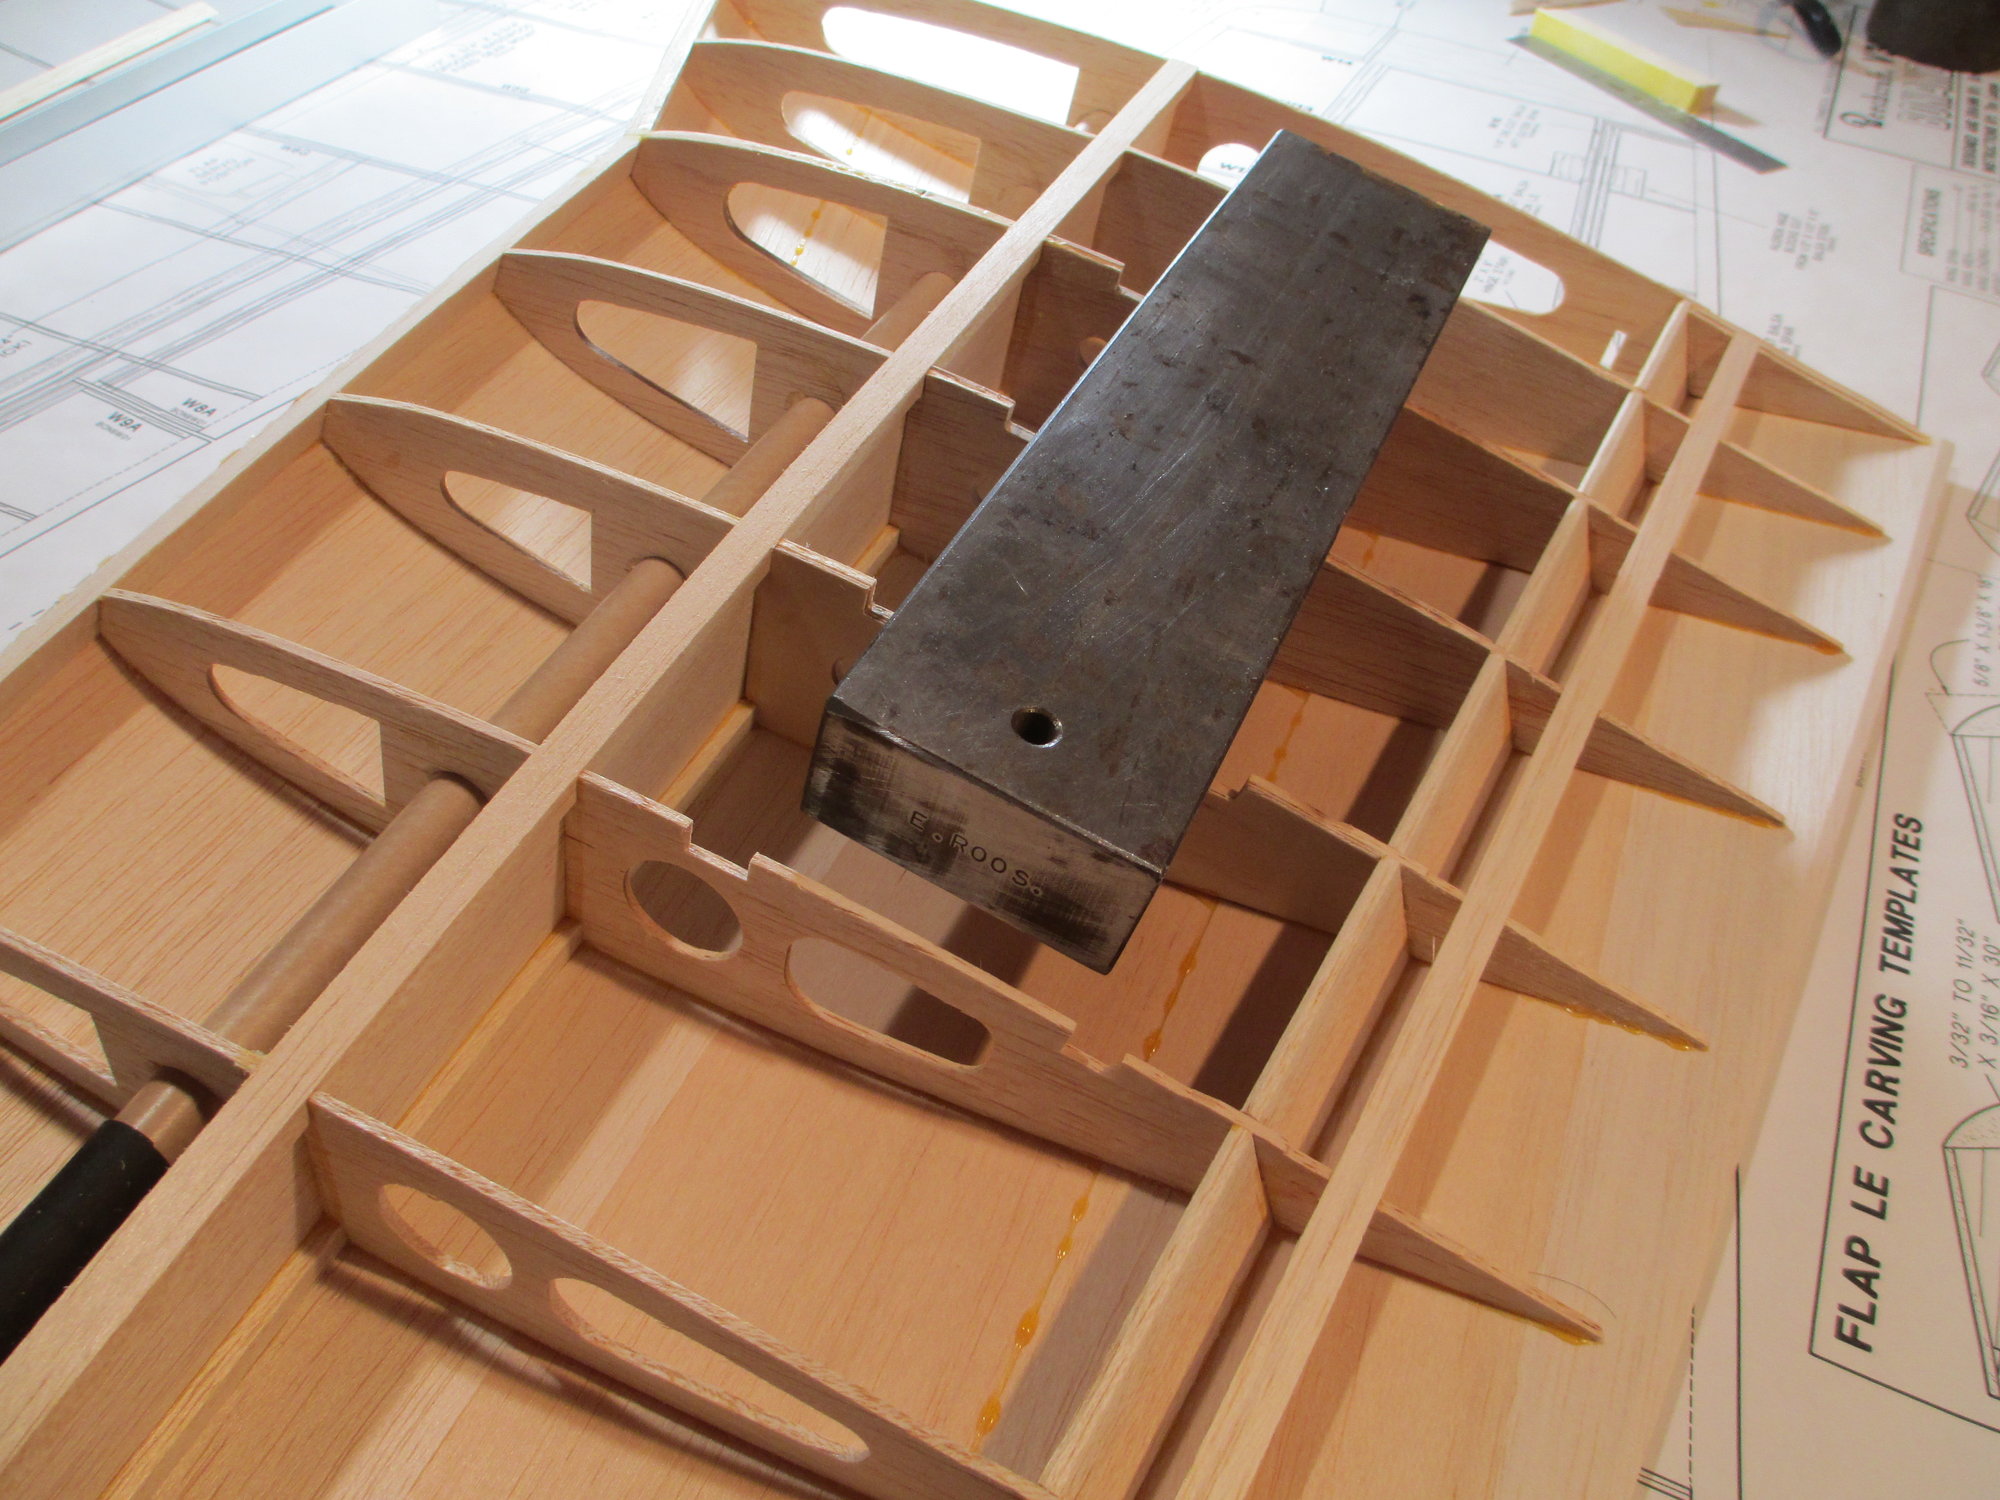
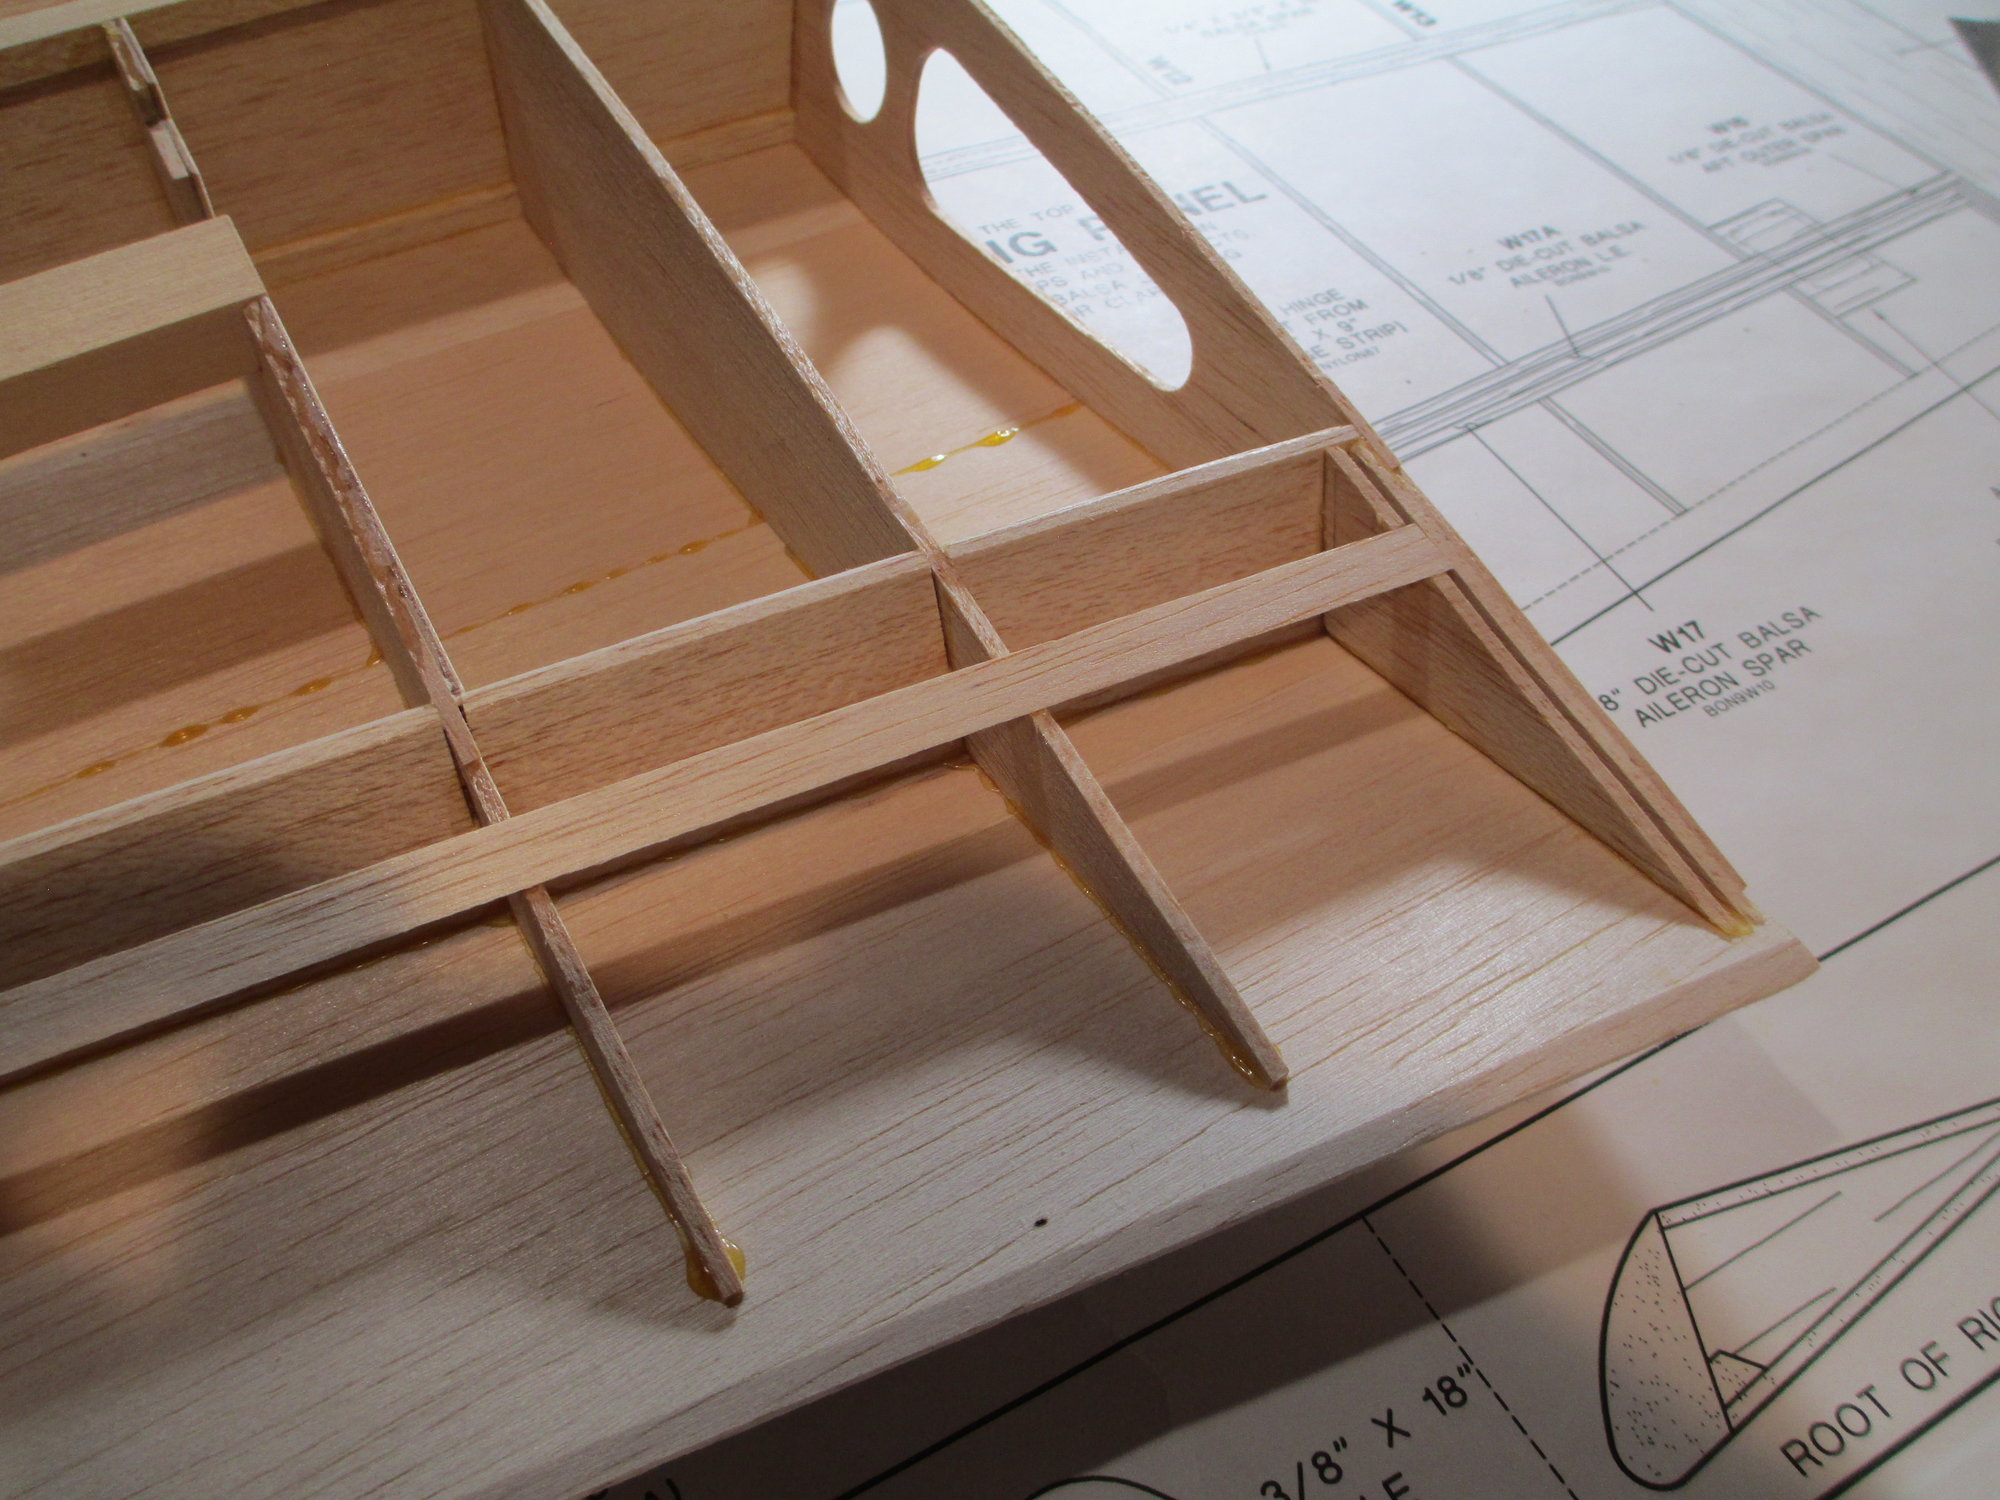
The rest of the flap and aileron structure was also added to complete the bottom of the wing. You can also see the bevel I sanded on the trailing edge of the flap/aileron.


Last edited by VincentJ; 08-12-2019 at 11:13 PM.
Old 08-12-2019, 08:37 PM
  #160  
Constrictor
My Feedback: (46)
 
Constrictor's Avatar
 
Join Date: Jul 2002
Location: Marionville, MO
Posts: 1,017
Likes: 0
Received 0 Likes on 0 Posts
Default

Vincent, id love to see you build an Adrian page 1/4 scale geebee r2.
Old 08-12-2019, 11:09 PM
  #161  
VincentJ
Thread Starter
 
VincentJ's Avatar
 
Join Date: Mar 2011
Location: Peterborough, NH
Posts: 4,582
Received 118 Likes on 107 Posts
Default

Originally Posted by Constrictor
Vincent, id love to see you build an Adrian page 1/4 scale geebee r2.
Maybe someday, I love Geebee's!
Old 08-13-2019, 12:01 AM
  #162  
VincentJ
Thread Starter
 
VincentJ's Avatar
 
Join Date: Mar 2011
Location: Peterborough, NH
Posts: 4,582
Received 118 Likes on 107 Posts
Default


The second (forward) landing gear rail along with a short 1/4" x 3/8" x 1-1/2" rail brace were epoxied into position early this morning.
Old 08-13-2019, 05:02 AM
  #163  
FlyerInOKC
My Feedback: (6)
 
FlyerInOKC's Avatar
 
Join Date: Nov 2004
Location: Oklahoma City, OK
Posts: 14,153
Received 272 Likes on 237 Posts
Default

I love the way Top Flite uses the same construction techniques across multiple aircraft in their catalog. Those flaps sure look familiar!
Old 08-14-2019, 03:11 AM
  #164  
VincentJ
Thread Starter
 
VincentJ's Avatar
 
Join Date: Mar 2011
Location: Peterborough, NH
Posts: 4,582
Received 118 Likes on 107 Posts
Default


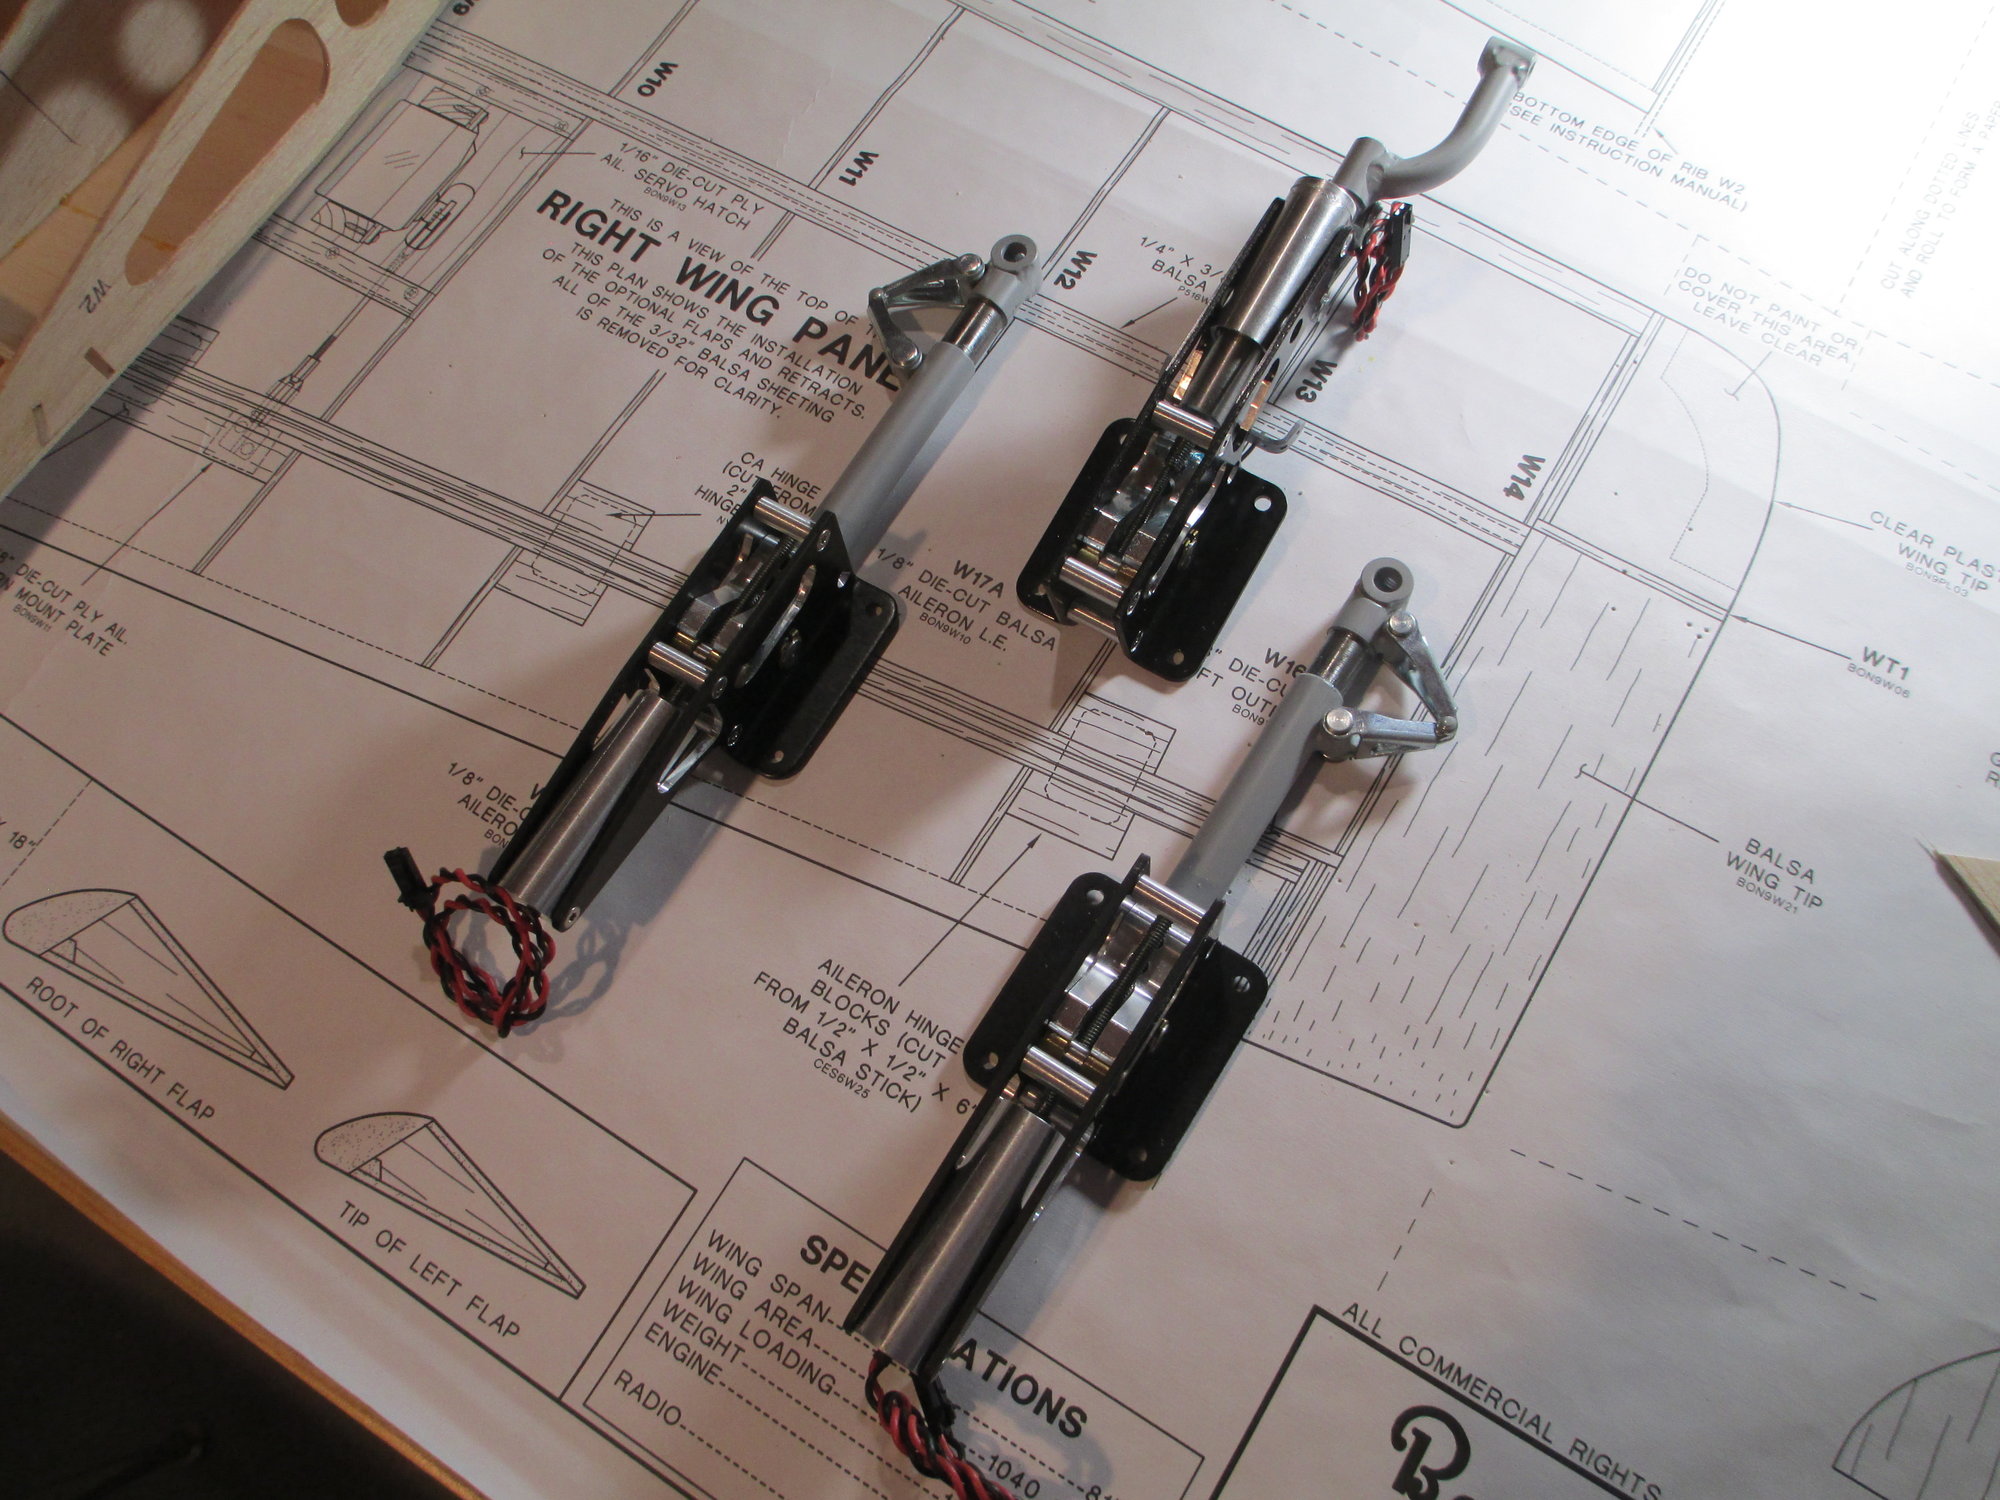
Electric retracts from Robart.


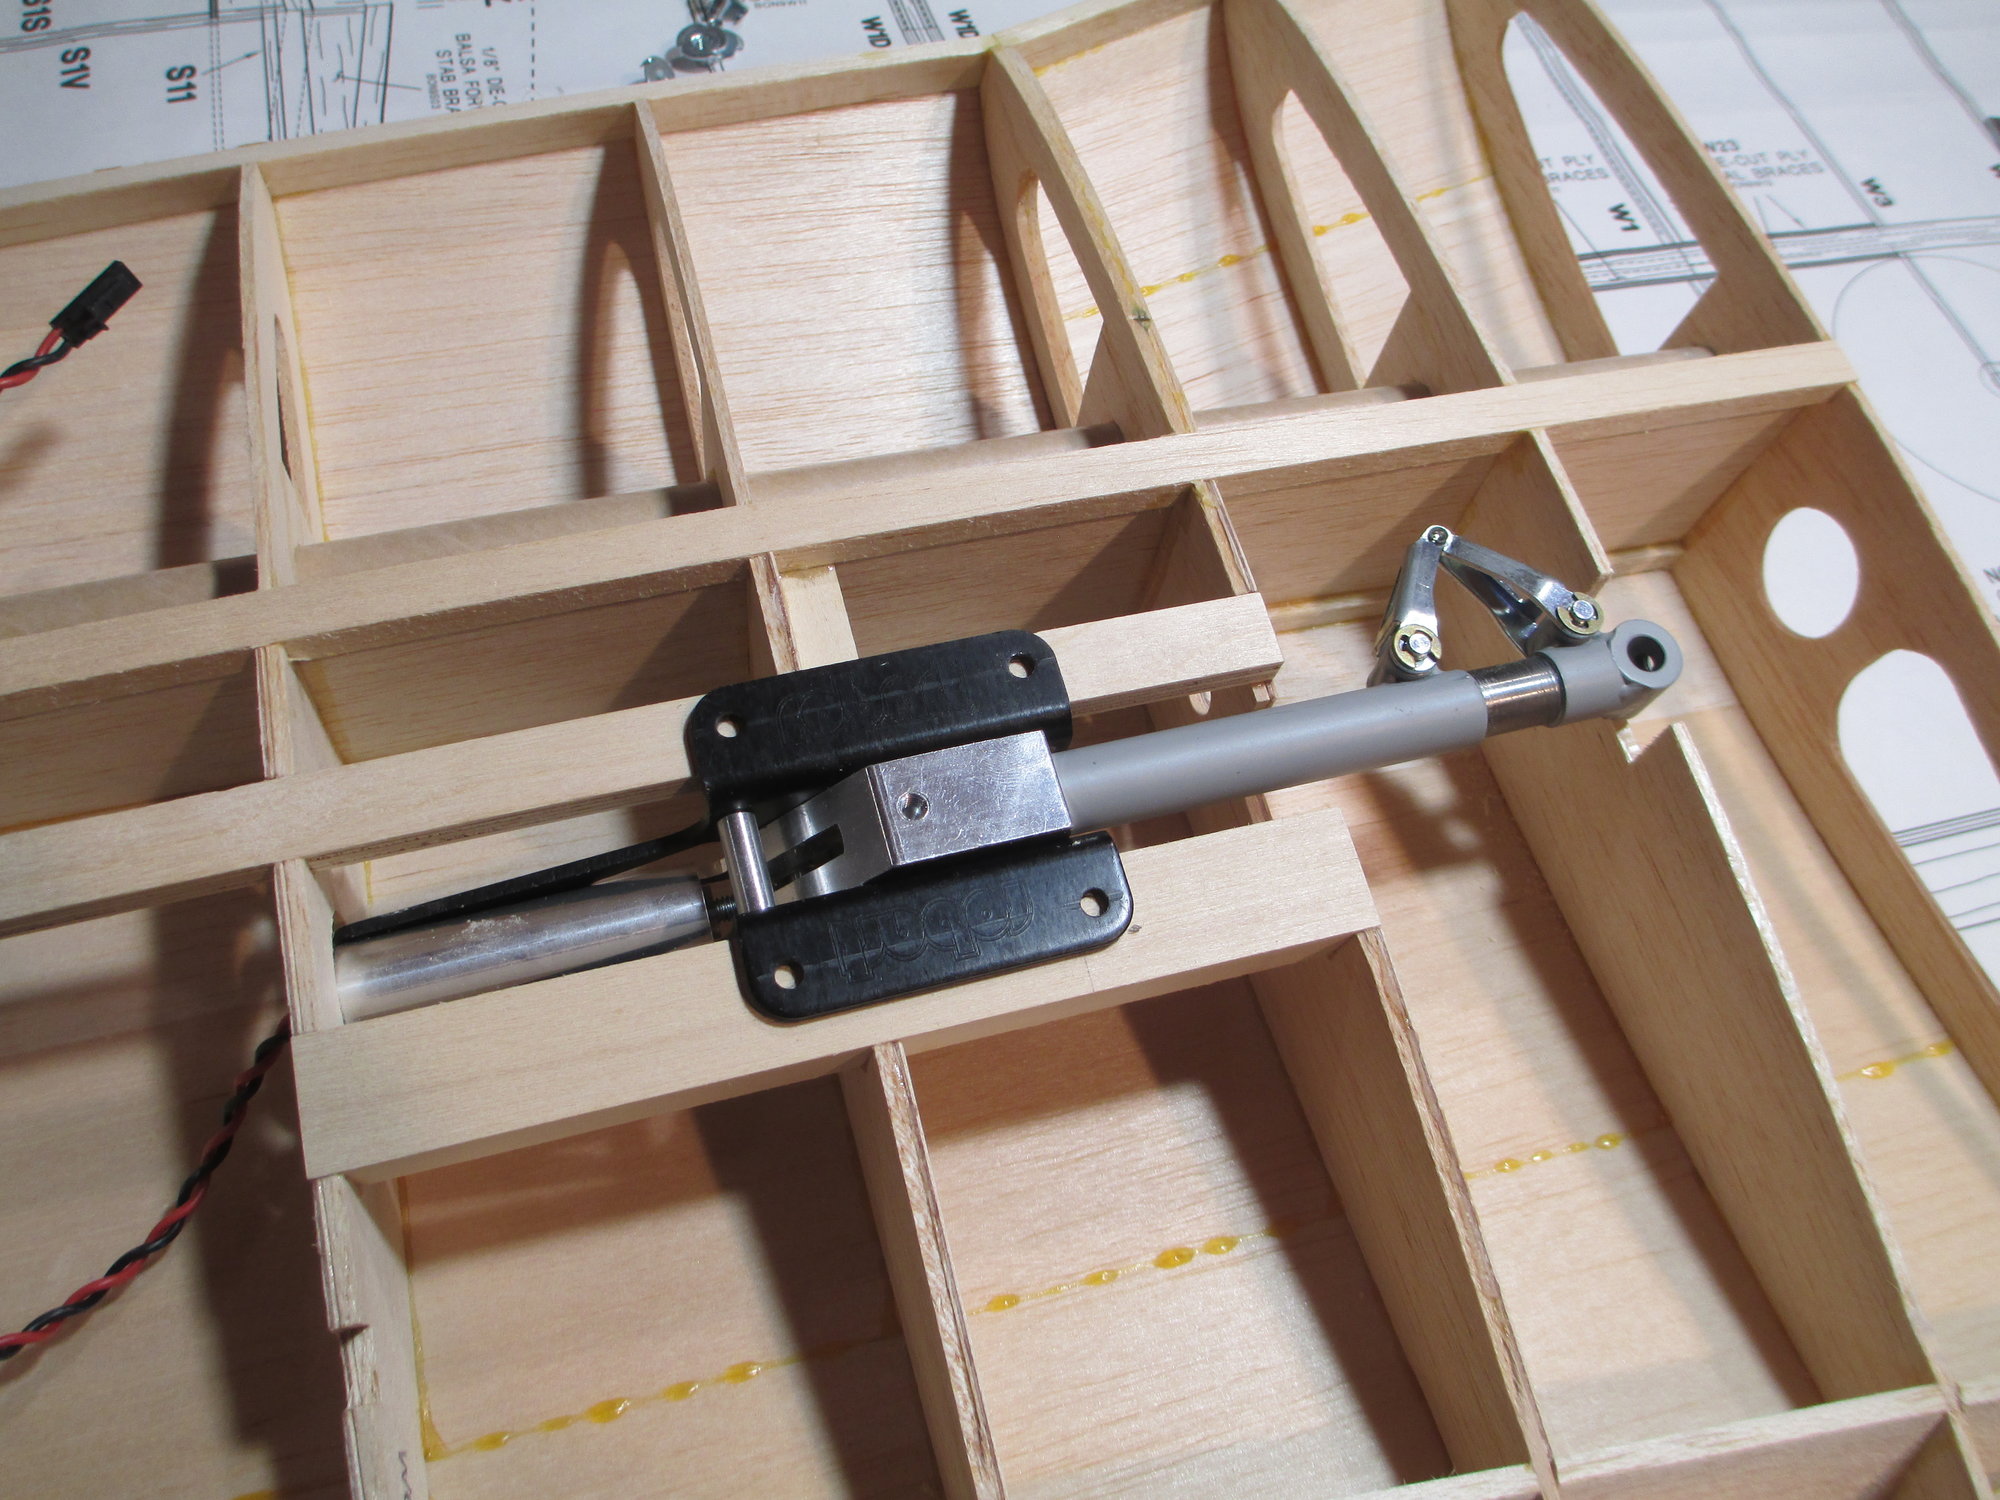
Positioned the right retract in its proper location. Note that I haven't cut out the rib to allow for the wheel as of yet.


With the hole locations marked, I can drill for the mounting bolts.
Old 08-14-2019, 04:26 AM
  #165  
FlyerInOKC
My Feedback: (6)
 
FlyerInOKC's Avatar
 
Join Date: Nov 2004
Location: Oklahoma City, OK
Posts: 14,153
Received 272 Likes on 237 Posts
Default

I like your choice of retracts. I have the pneumatic version of that set for my Caddell A36 Bonanza.
Old 08-14-2019, 04:52 AM
  #166  
Hydro Junkie
 
Hydro Junkie's Avatar
 
Join Date: Nov 2004
Location: Marysville, WA
Posts: 10,527
Received 130 Likes on 123 Posts
Default

Just curious, are you going to recess the gear into the rails or sheet up to them? Seen it done both ways so............
Old 08-14-2019, 05:18 AM
  #167  
FlyerInOKC
My Feedback: (6)
 
FlyerInOKC's Avatar
 
Join Date: Nov 2004
Location: Oklahoma City, OK
Posts: 14,153
Received 272 Likes on 237 Posts
Default

Originally Posted by Hydro Junkie
Just curious, are you going to recess the gear into the rails or sheet up to them? Seen it done both ways so............
Knowing the way Vince plans everything in advance I think he would have move the rails down before assembly or routed the insert area out before gluing them in. He's a little brighter than the rest of us.

Mike
Old 08-14-2019, 06:38 AM
  #168  
VincentJ
Thread Starter
 
VincentJ's Avatar
 
Join Date: Mar 2011
Location: Peterborough, NH
Posts: 4,582
Received 118 Likes on 107 Posts
Default

Originally Posted by Hydro Junkie
Just curious, are you going to recess the gear into the rails or sheet up to them? Seen it done both ways so............
I thought long and hard about recessing them into the rails to give it a cleaner look, but I decided against it. I am going to sheet right up to them. Retracts can be finicky, and they do require maintenance, so I wanted the ability to easily remove them should they need to be serviced... I will try to blend them in as best I can.
Old 08-14-2019, 06:39 AM
  #169  
VincentJ
Thread Starter
 
VincentJ's Avatar
 
Join Date: Mar 2011
Location: Peterborough, NH
Posts: 4,582
Received 118 Likes on 107 Posts
Default

Originally Posted by FlyerInOKC
Knowing the way Vince plans everything in advance I think he would have move the rails down before assembly or routed the insert area out before gluing them in. He's a little brighter than the rest of us.

Mike
Don't know about that Mike, but thanks anyway!!!
Old 08-14-2019, 06:43 AM
  #170  
VincentJ
Thread Starter
 
VincentJ's Avatar
 
Join Date: Mar 2011
Location: Peterborough, NH
Posts: 4,582
Received 118 Likes on 107 Posts
Default


Holes were drilled to accommodate four 6-32 cap head screws. "t" nuts were used on the back side for maximum holding strength. I didn't like the idea of using screws in this application.


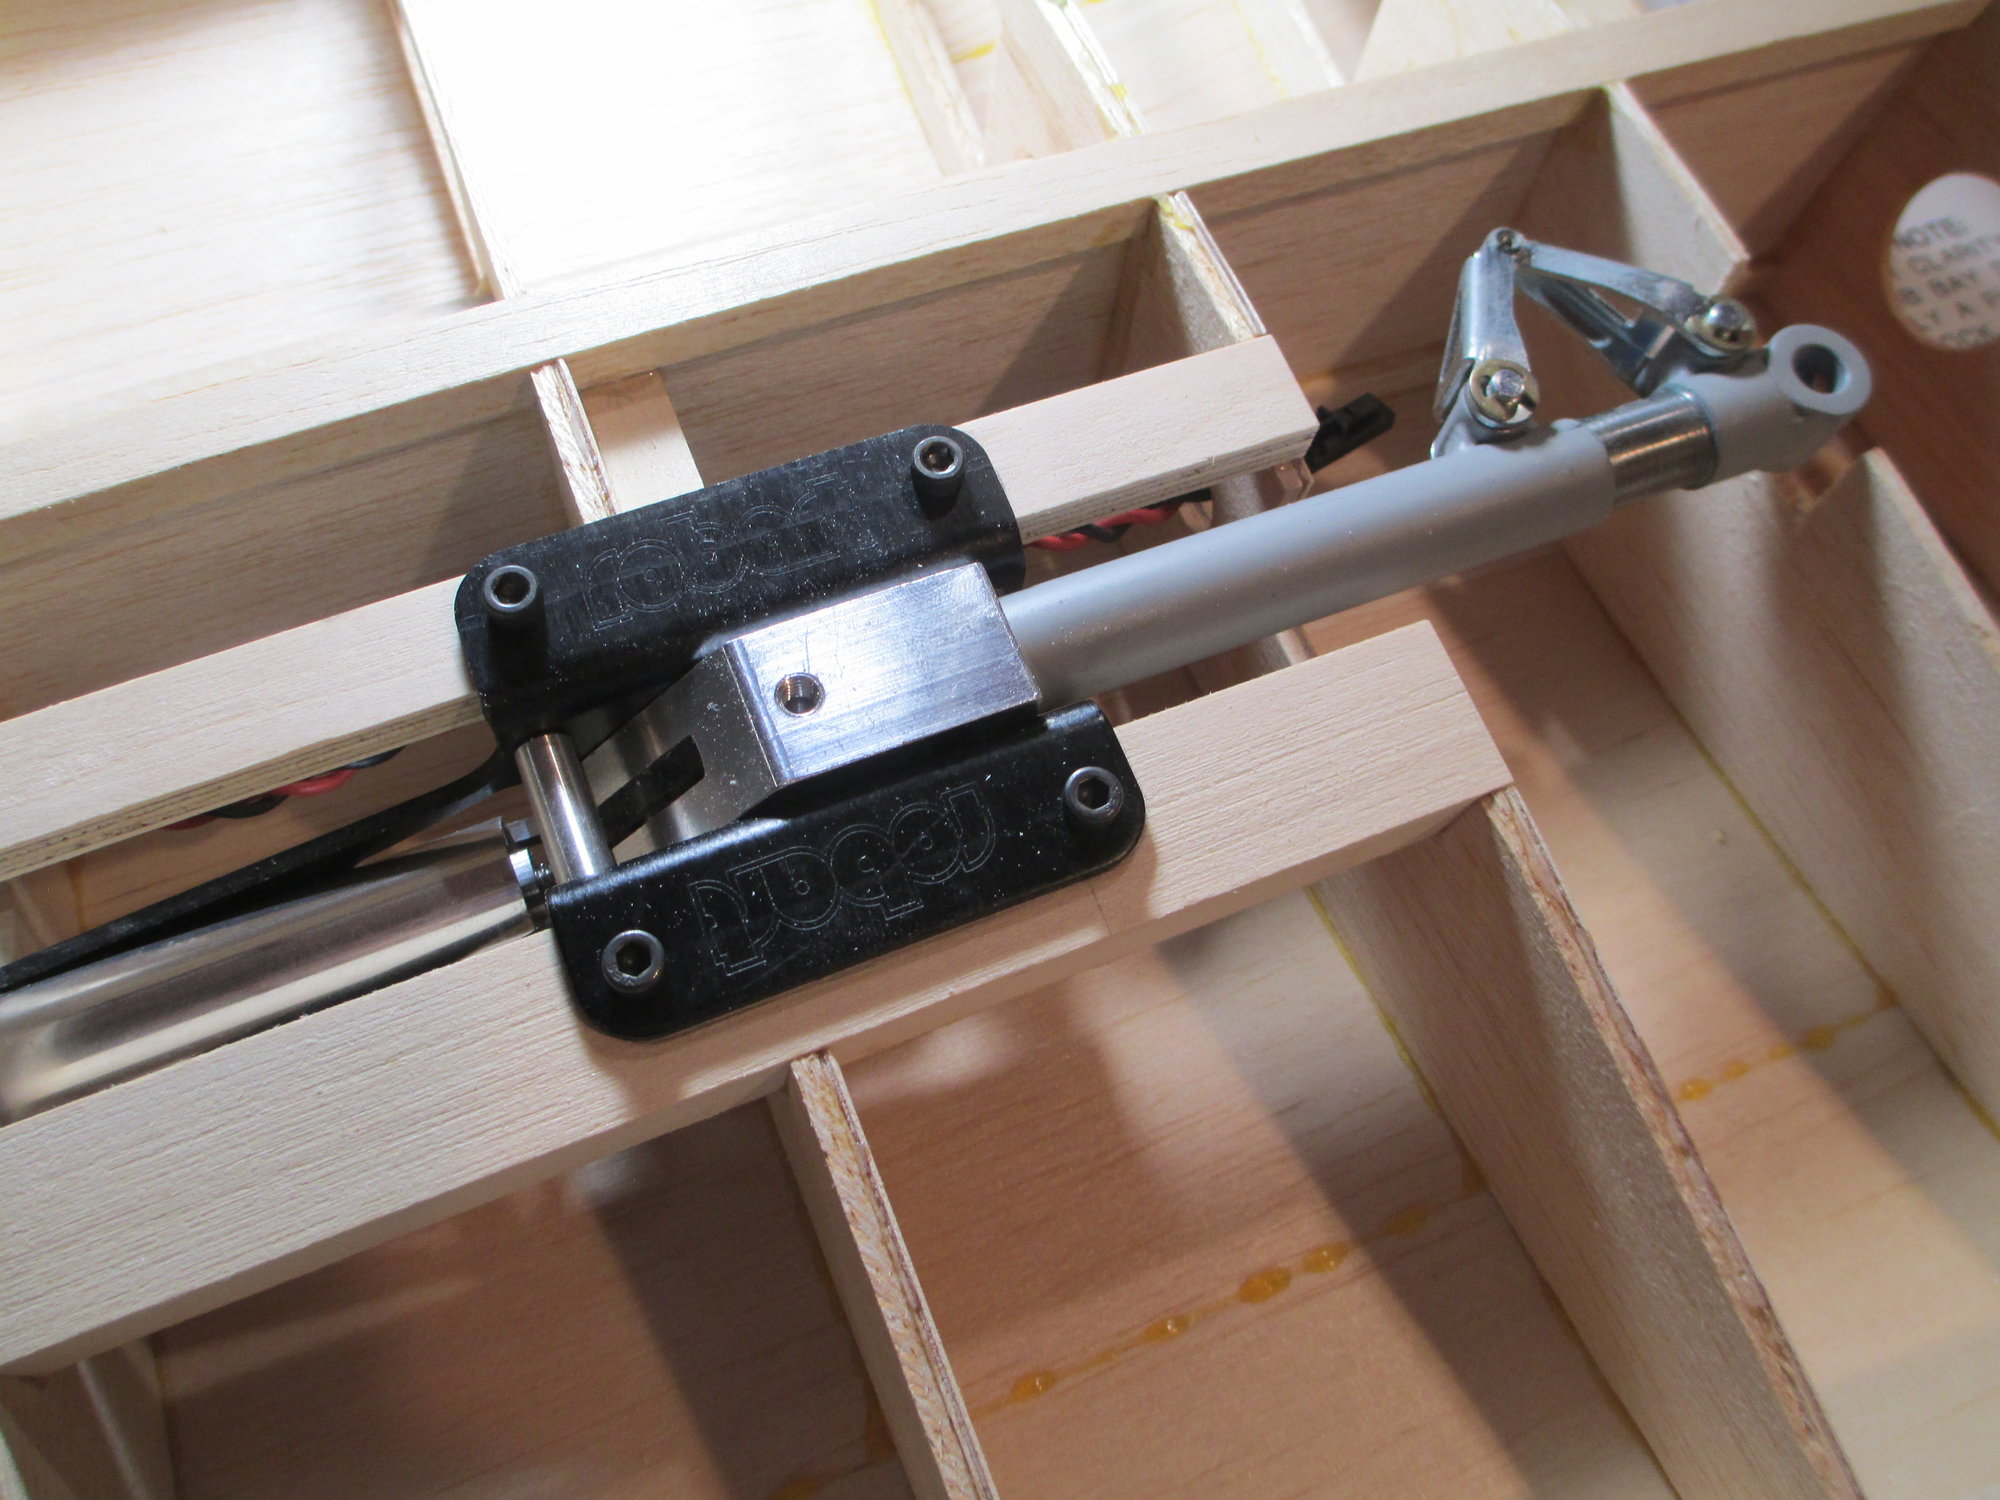
Everything aligned perfectly!
Old 08-14-2019, 09:23 AM
  #171  
FlyerInOKC
My Feedback: (6)
 
FlyerInOKC's Avatar
 
Join Date: Nov 2004
Location: Oklahoma City, OK
Posts: 14,153
Received 272 Likes on 237 Posts
Default

Vince, will you be adding an adhesive around the base to hold the "T" nuts in place?
Old 08-14-2019, 10:45 AM
  #172  
VincentJ
Thread Starter
 
VincentJ's Avatar
 
Join Date: Mar 2011
Location: Peterborough, NH
Posts: 4,582
Received 118 Likes on 107 Posts
Default

Originally Posted by FlyerInOKC
Vince, will you be adding an adhesive around the base to hold the "T" nuts in place?
Yes, I always use epoxy...
Old 08-14-2019, 01:13 PM
  #173  
FlyerInOKC
My Feedback: (6)
 
FlyerInOKC's Avatar
 
Join Date: Nov 2004
Location: Oklahoma City, OK
Posts: 14,153
Received 272 Likes on 237 Posts
Default

I thought you did. I too use epoxy for the same purpose.
Old 08-14-2019, 05:59 PM
  #174  
Hydro Junkie
 
Hydro Junkie's Avatar
 
Join Date: Nov 2004
Location: Marysville, WA
Posts: 10,527
Received 130 Likes on 123 Posts
Default

That makes three of us then. I do take it a step further, however. I normally lightly scuff sand both sides of the flange of an anchor nut before I epoxy it in so the epoxy has more to grab. The platings used don't give the epoxy anything to really grab, weakening the joint.
Old 08-15-2019, 02:49 AM
  #175  
VincentJ
Thread Starter
 
VincentJ's Avatar
 
Join Date: Mar 2011
Location: Peterborough, NH
Posts: 4,582
Received 118 Likes on 107 Posts
Default

Originally Posted by Hydro Junkie
That makes three of us then. I do take it a step further, however. I normally lightly scuff sand both sides of the flange of an anchor nut before I epoxy it in so the epoxy has more to grab. The platings used don't give the epoxy anything to really grab, weakening the joint.
Nice idea!


Contact Us - Archive - Advertising - Cookie Policy - Privacy Statement - Terms of Service -

Copyright © 2024 MH Sub I, LLC dba Internet Brands. All rights reserved. Use of this site indicates your consent to the Terms of Use.