


TF Beechcraft Bonanza F33A Build
 08-15-2019, 04:21 AM
#176

That's just one of those things you learn over the years when working in various types of manufacturing and maintenance. The catch is that you can't sand through all the plating as it will give corrosion an easier time of getting to the base metal, that is unless you use stainless anchor nuts to begin with.
Last edited by Hydro Junkie; 08-15-2019 at 04:28 AM.
 08-15-2019, 05:01 AM
#177

That's just one of those things you learn over the years when working in various types of manufacturing and maintenance. The catch is that you can't sand through all the plating as it will give corrosion an easier time of getting to the base metal, that is unless you use stainless anchor nuts to begin with.
Mike
08-15-2019, 05:43 AM
#178


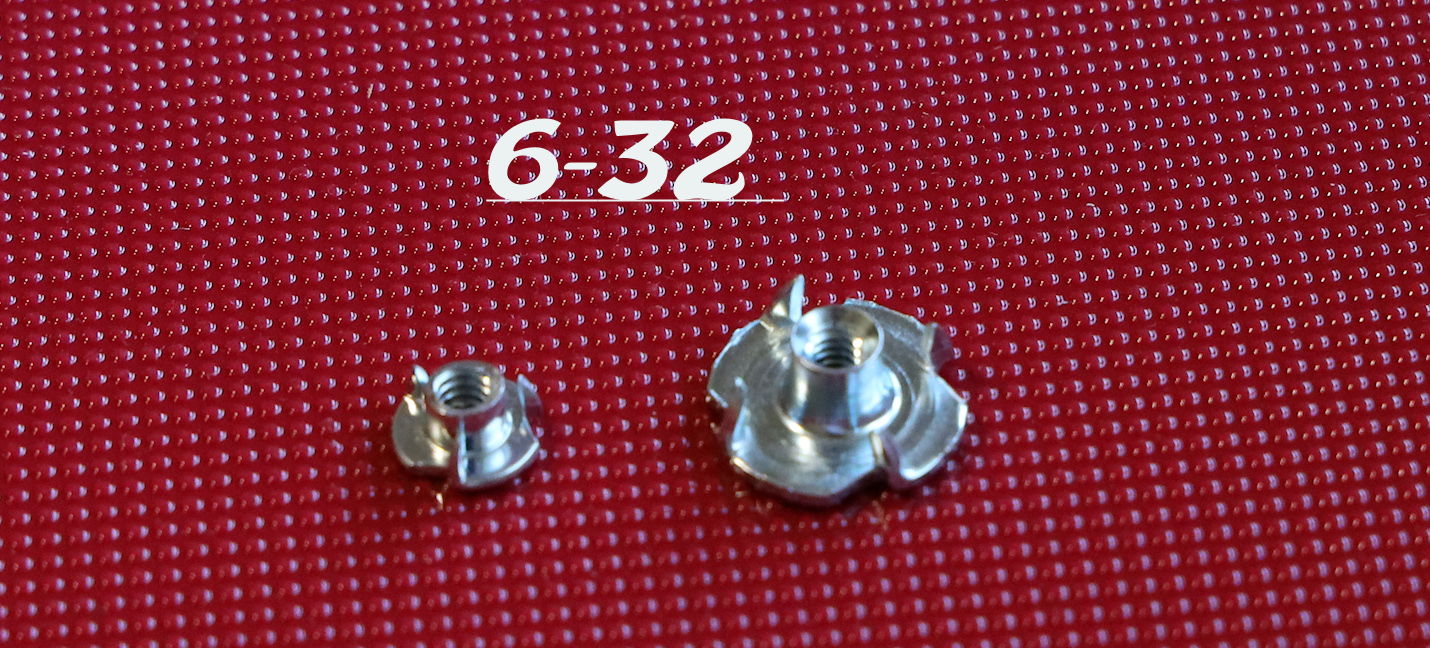
Which 6-32 nut is more effective for firewalls, landing gear and such? From my last online order I received the smaller sized T-nut. Was expecting the type with the larger flange. Is the smaller flange size likely to fail or pull through later?
And, very nice work Vincent.
08-15-2019, 10:14 AM
#179

Thread Starter
Which 6-32 nut is more effective for firewalls, landing gear and such? From my last online order I received the smaller sized T-nut. Was expecting the type with the larger flange. Is the smaller flange size likely to fail or pull through later?
And, very nice work Vincent.
08-17-2019, 02:01 AM
#180
Thread Starter
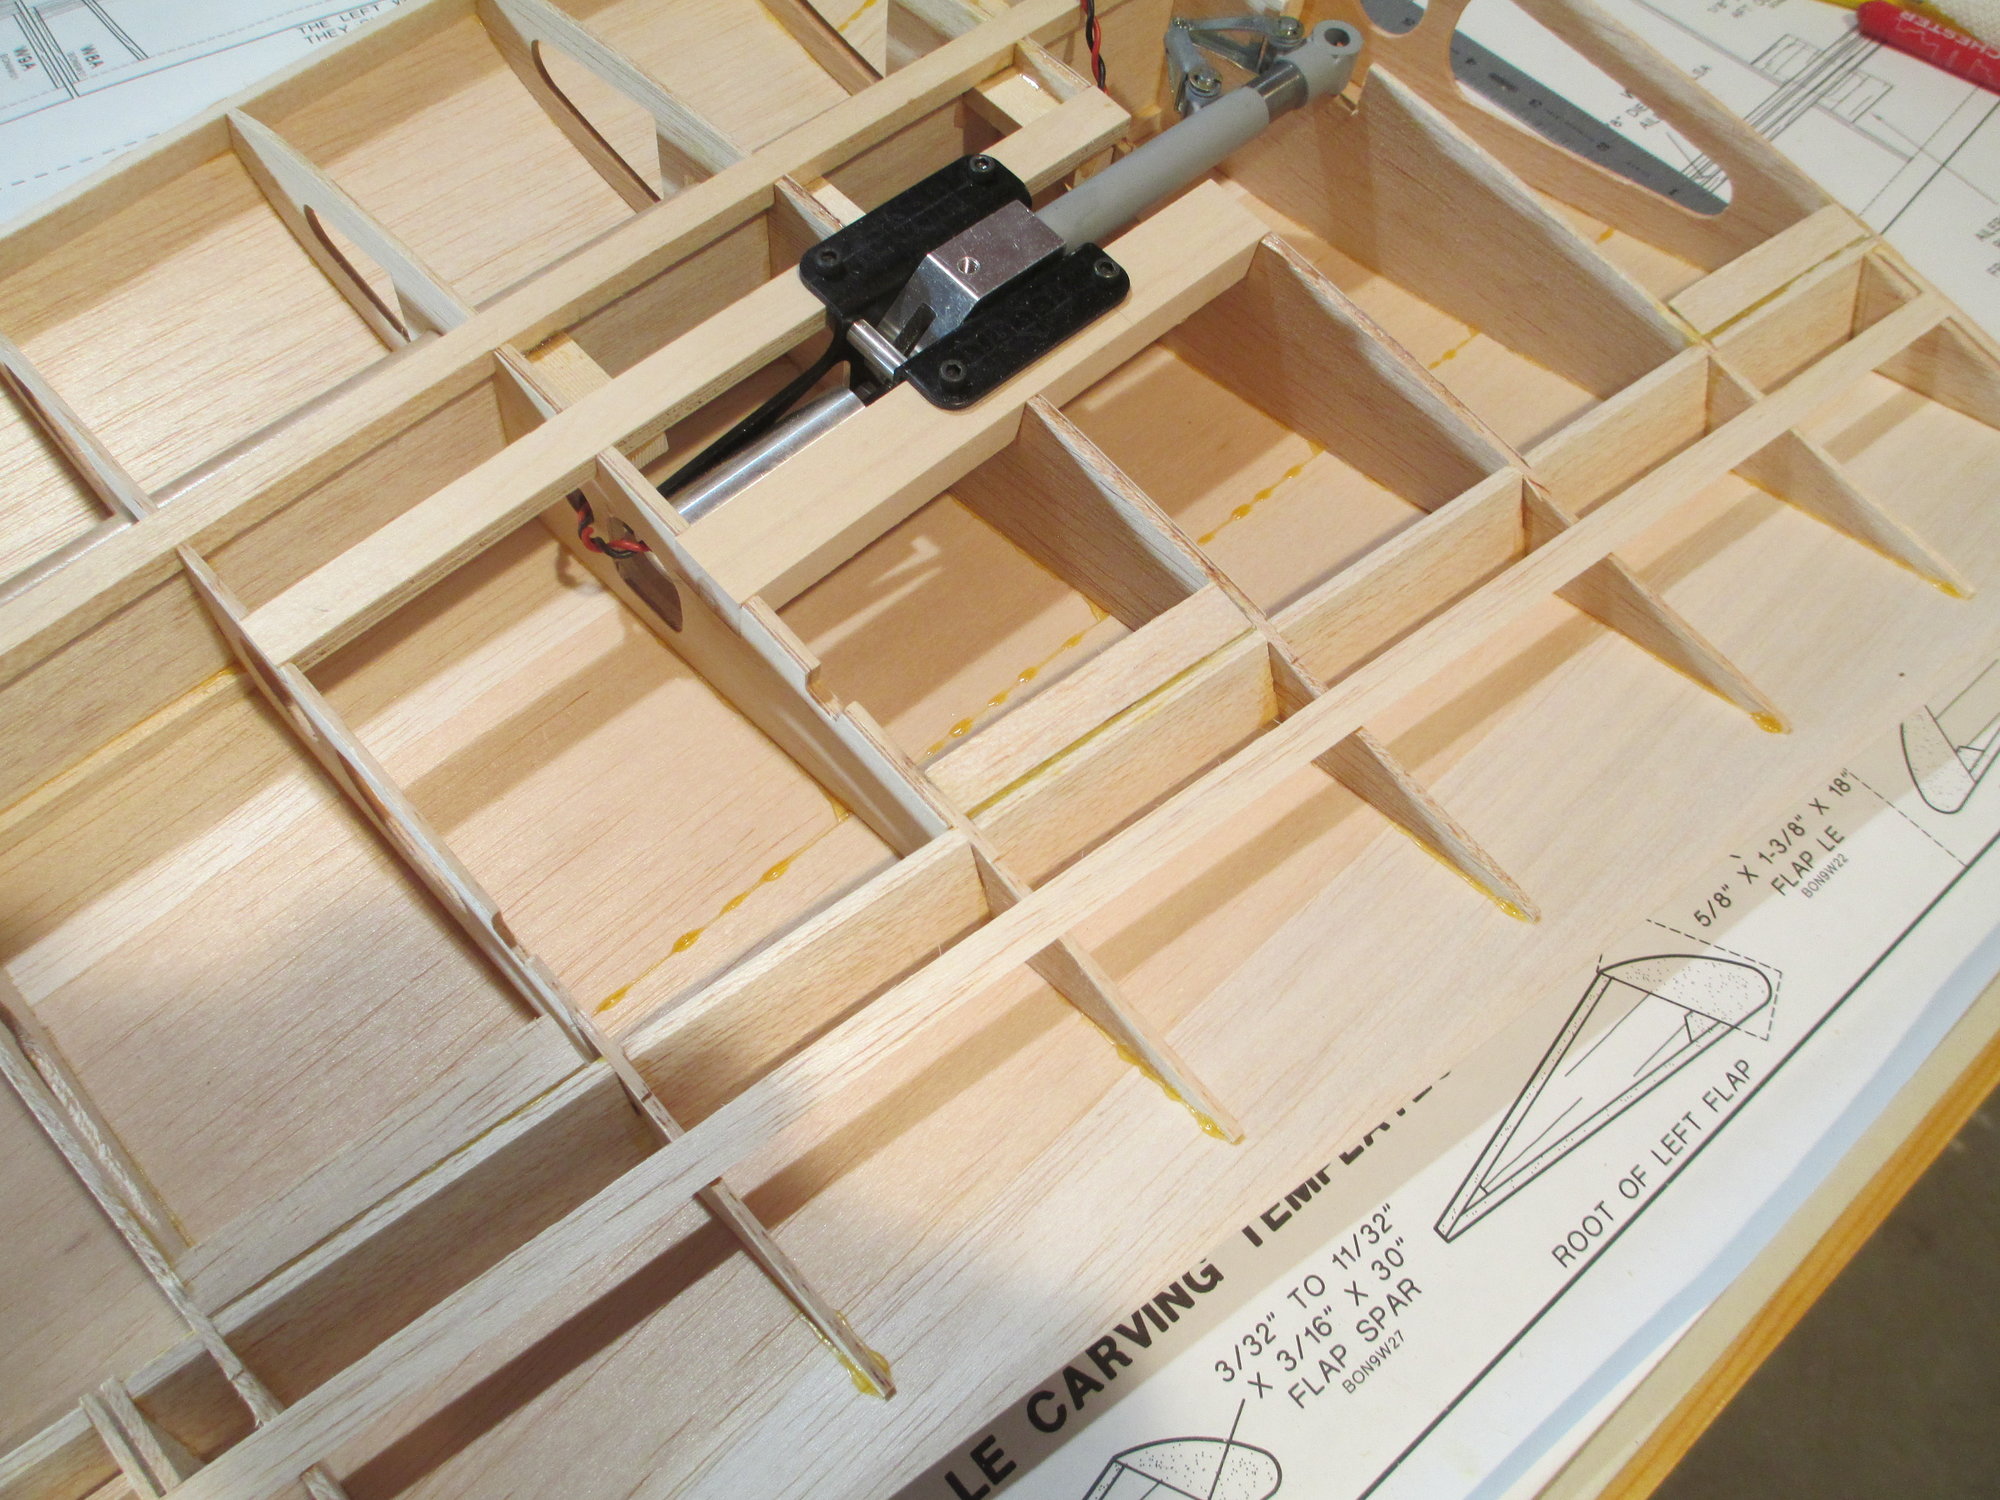
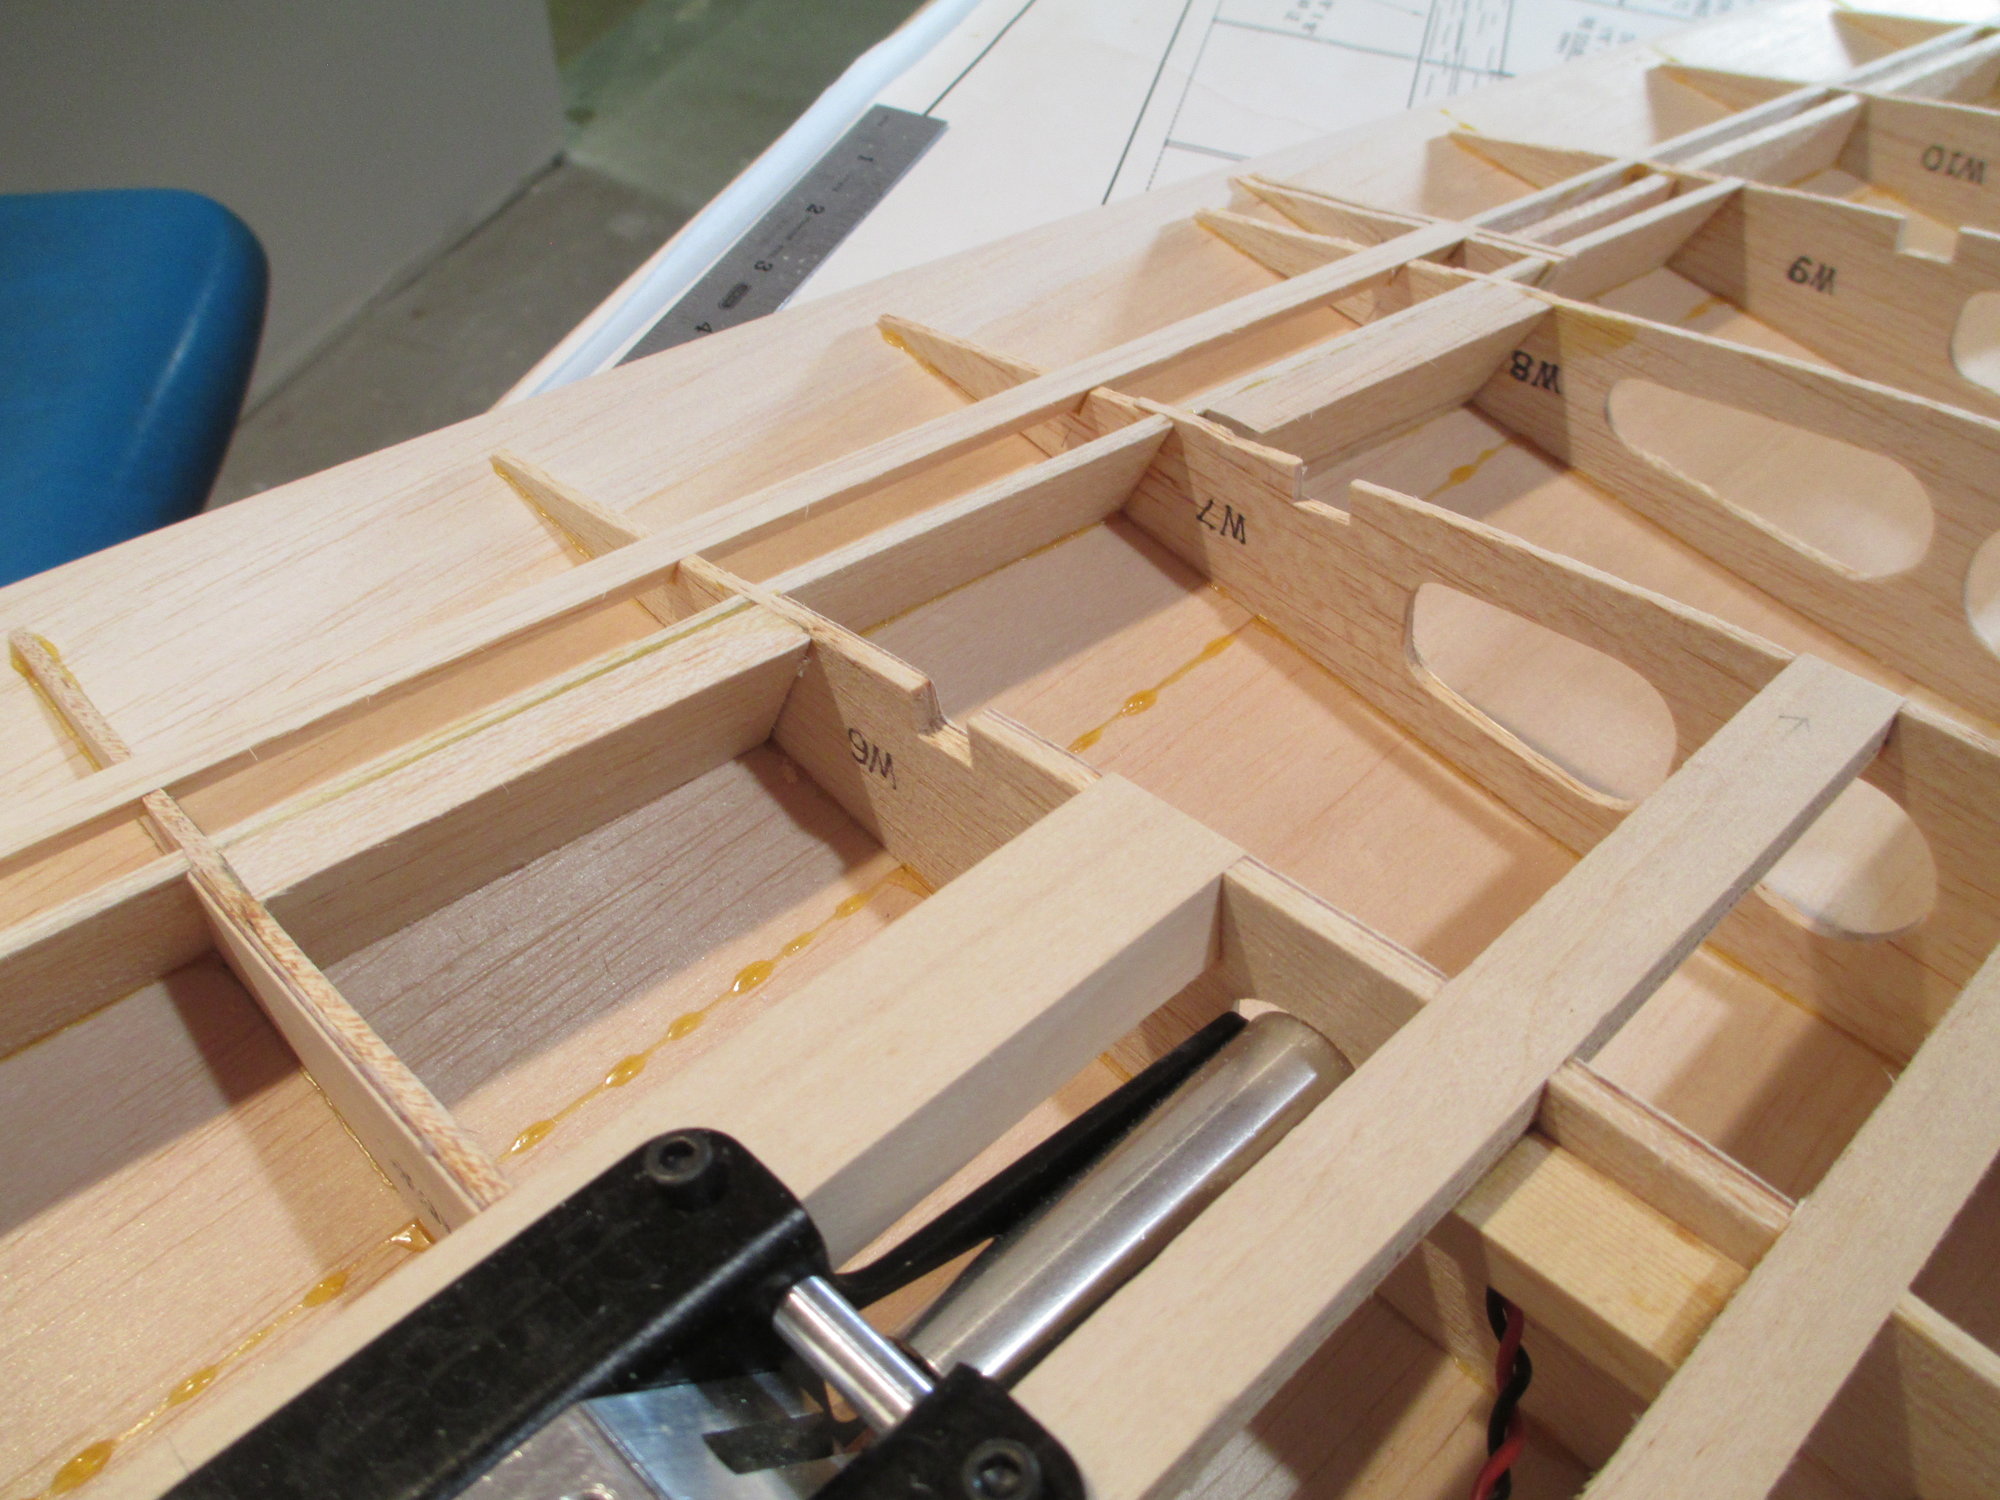
Not satisfied with the minimal flap hinge blocking called for on the plans, I decided to add a bit more wood for the hinges to anchor into.
Back side of the added blocking. With all the angles, it was quite the trick to get them to fit properly.
The rest of the blocking is now added. Remember the blocking I'm adding now was supposed to be the only hinge blocking that was called for in the plans.
 08-17-2019, 11:52 PM
#182
Thread Starter
 08-18-2019, 02:11 AM
#183
Thread Starter

Flap hinge blocks for both wing halves are completed.
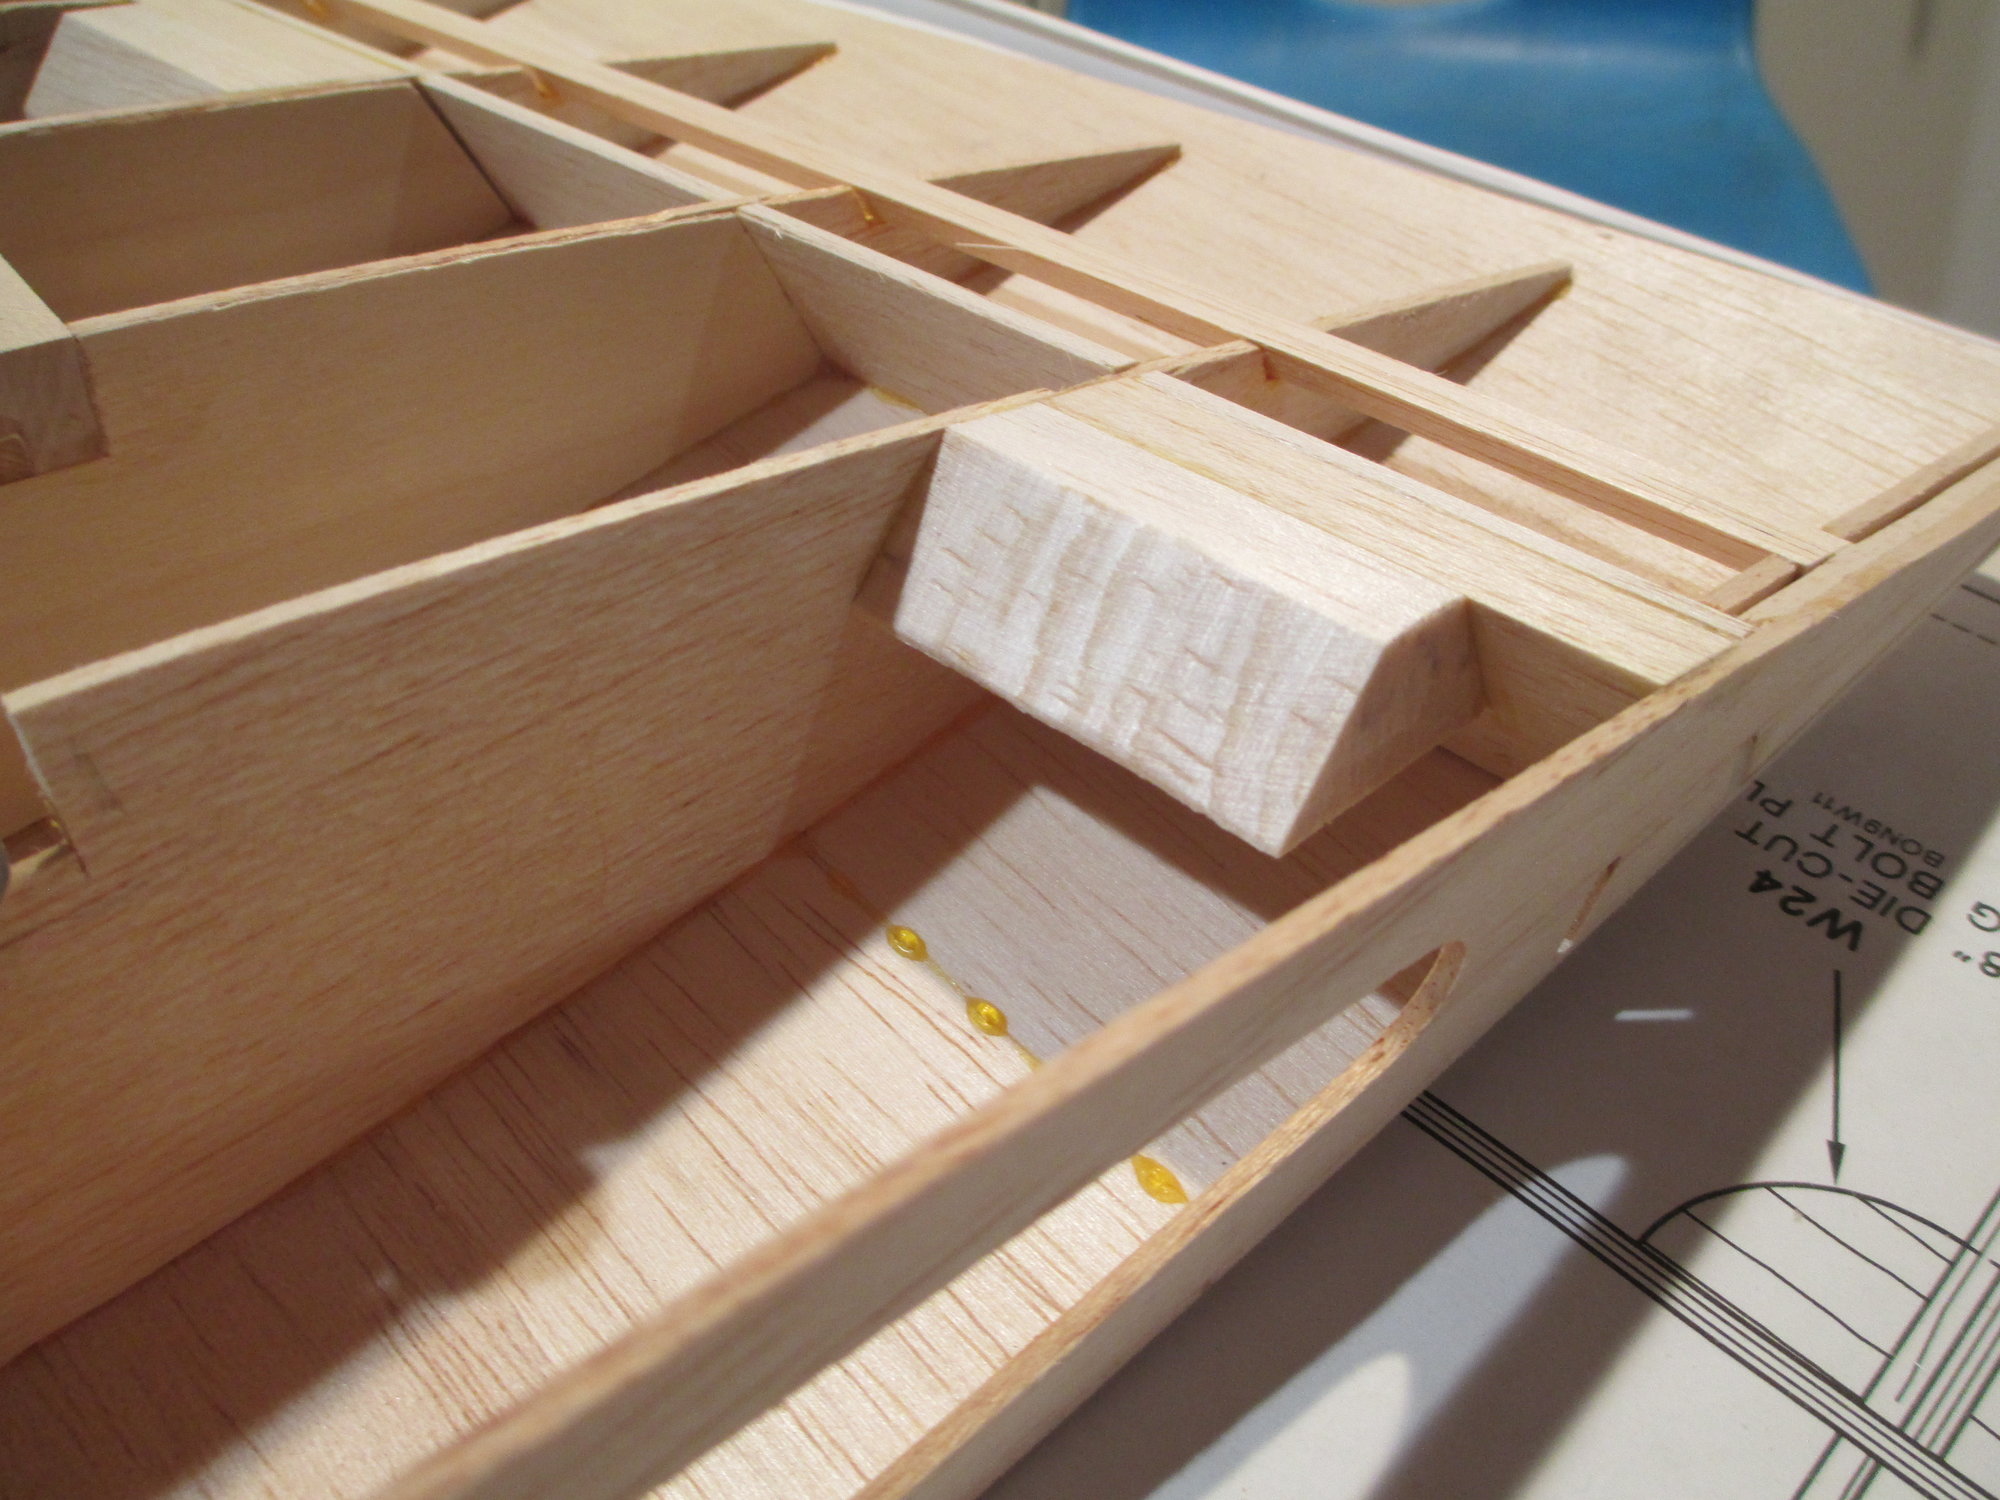
You can clearly see how much extra wood I added for the hinge to anchor. The stock hinge block would have only been the outer (tapered) block.
Last edited by VincentJ; 08-18-2019 at 10:31 AM.
08-19-2019, 12:57 AM
#185
Thread Starter
08-19-2019, 01:20 AM
#186
Thread Starter
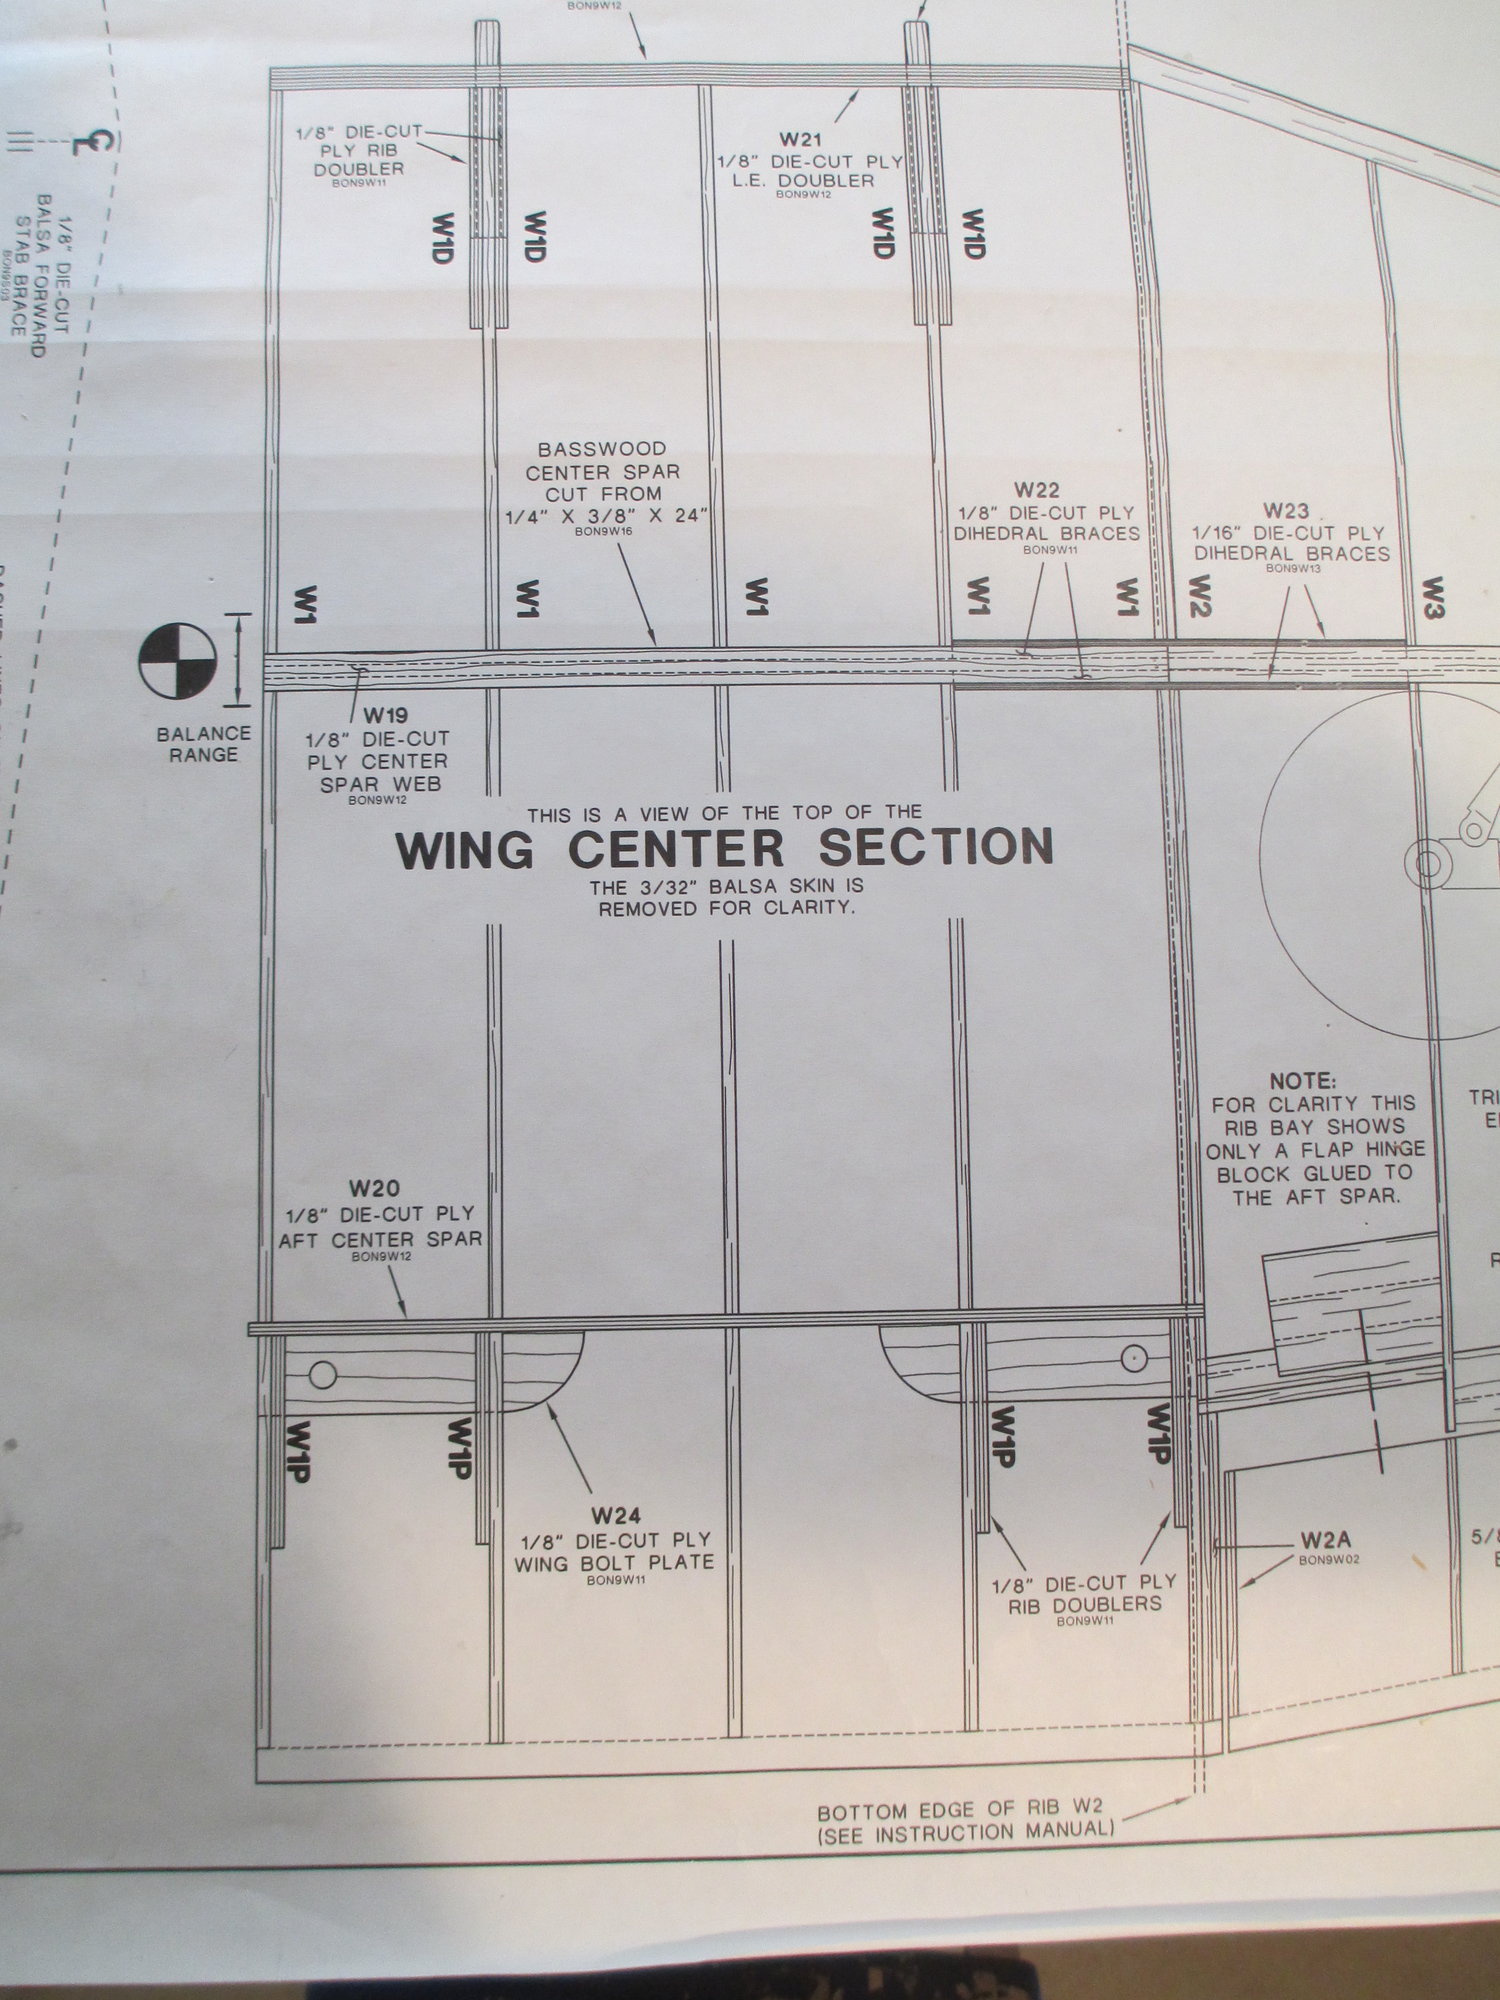
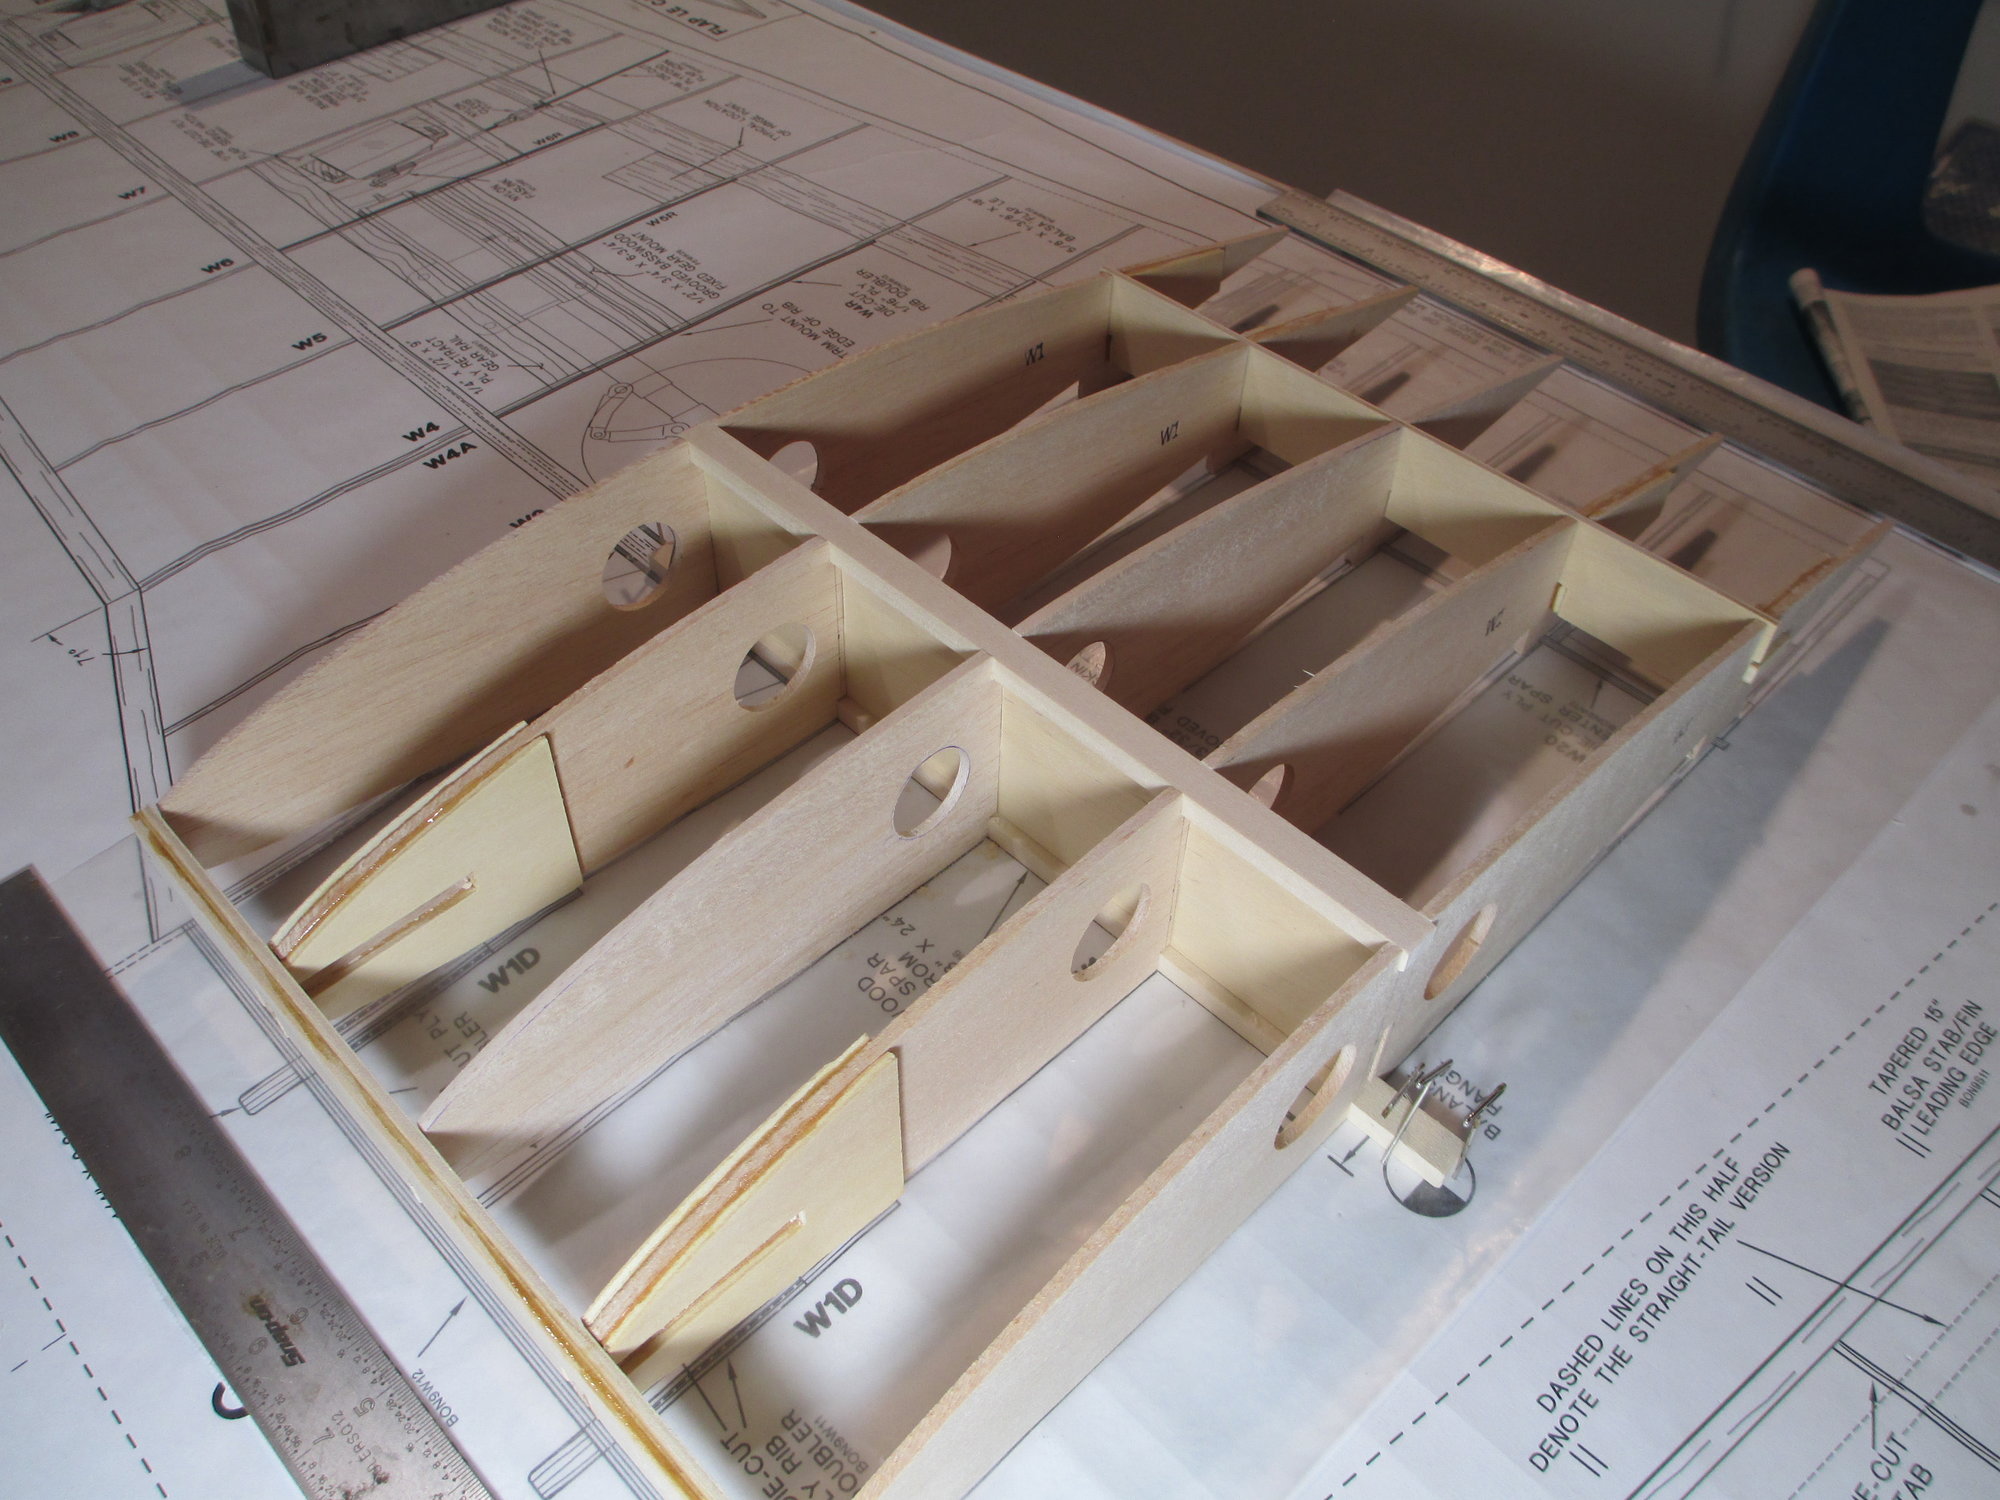
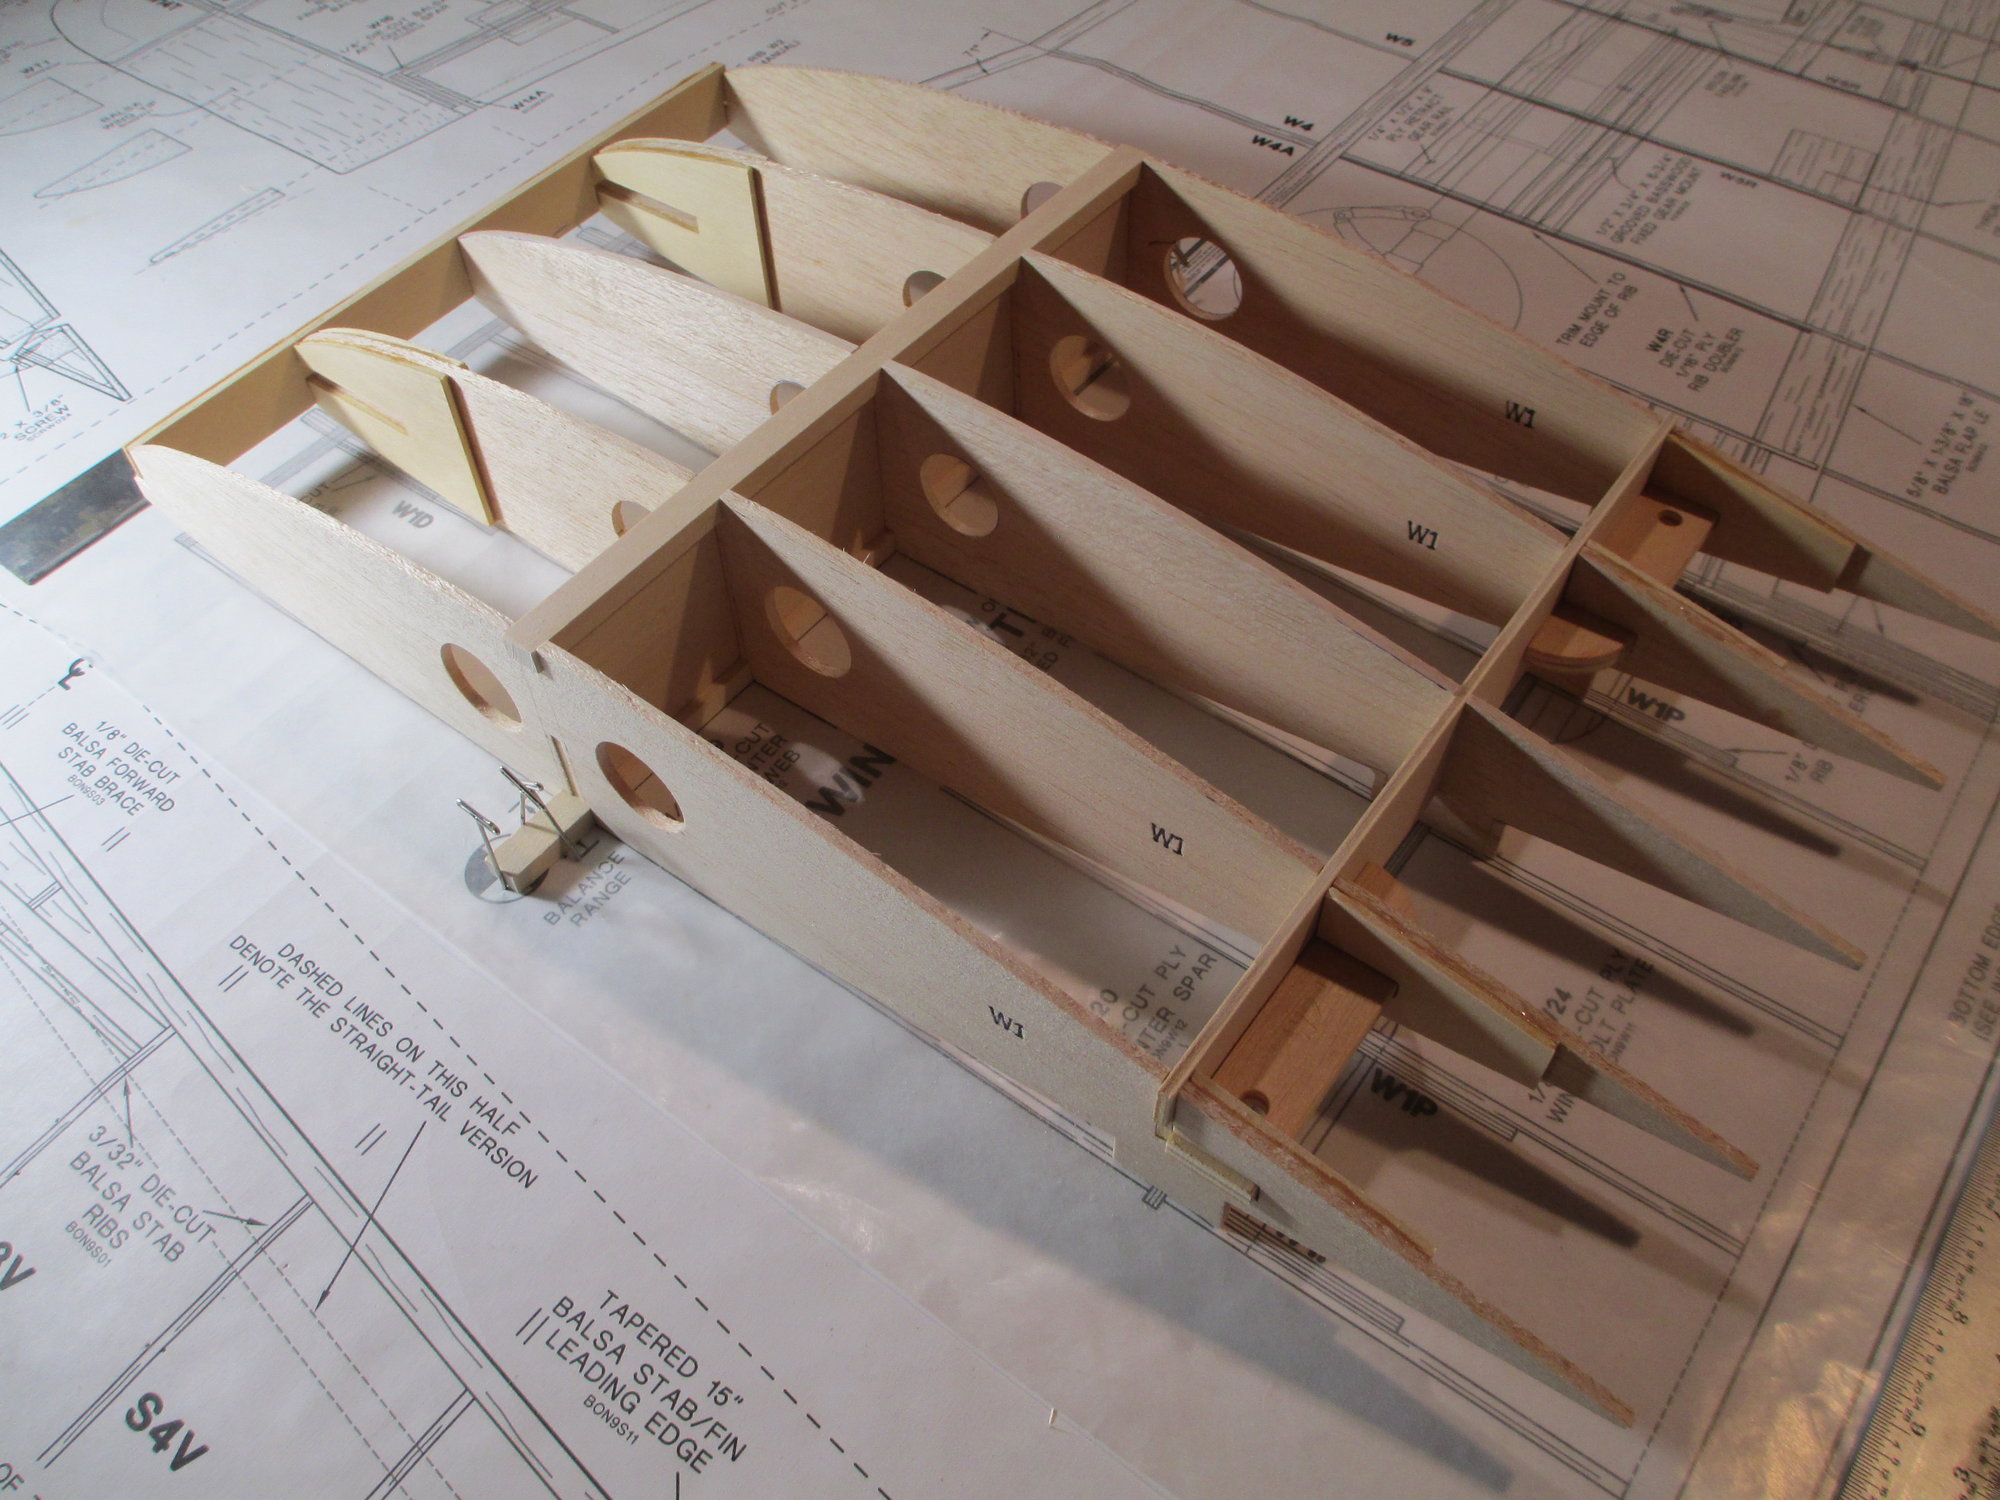
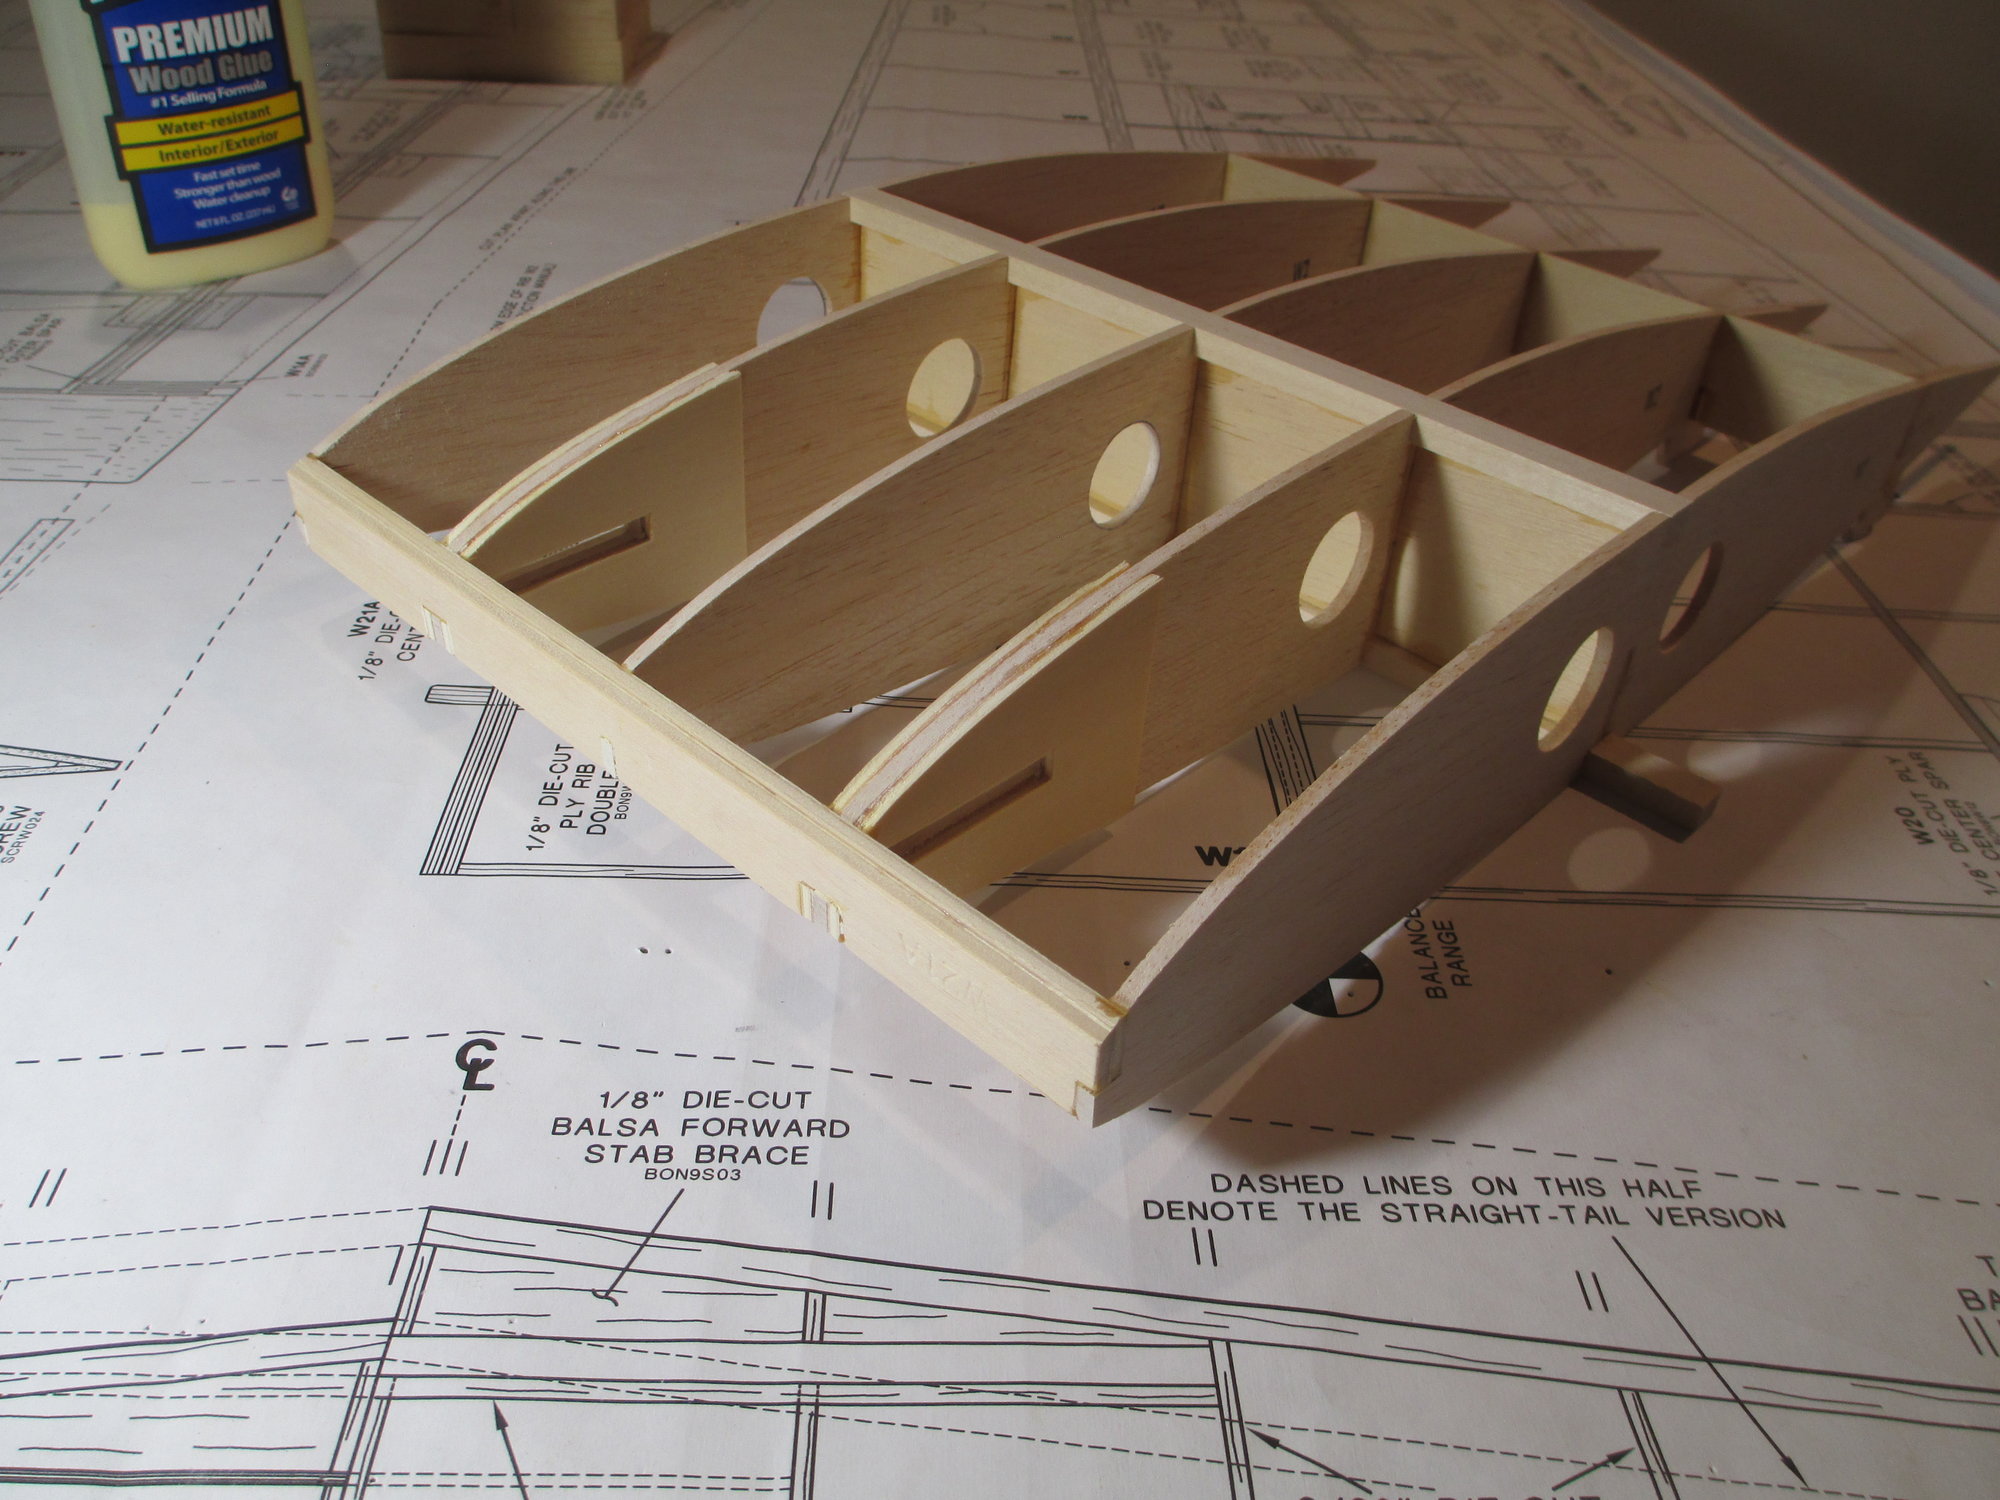
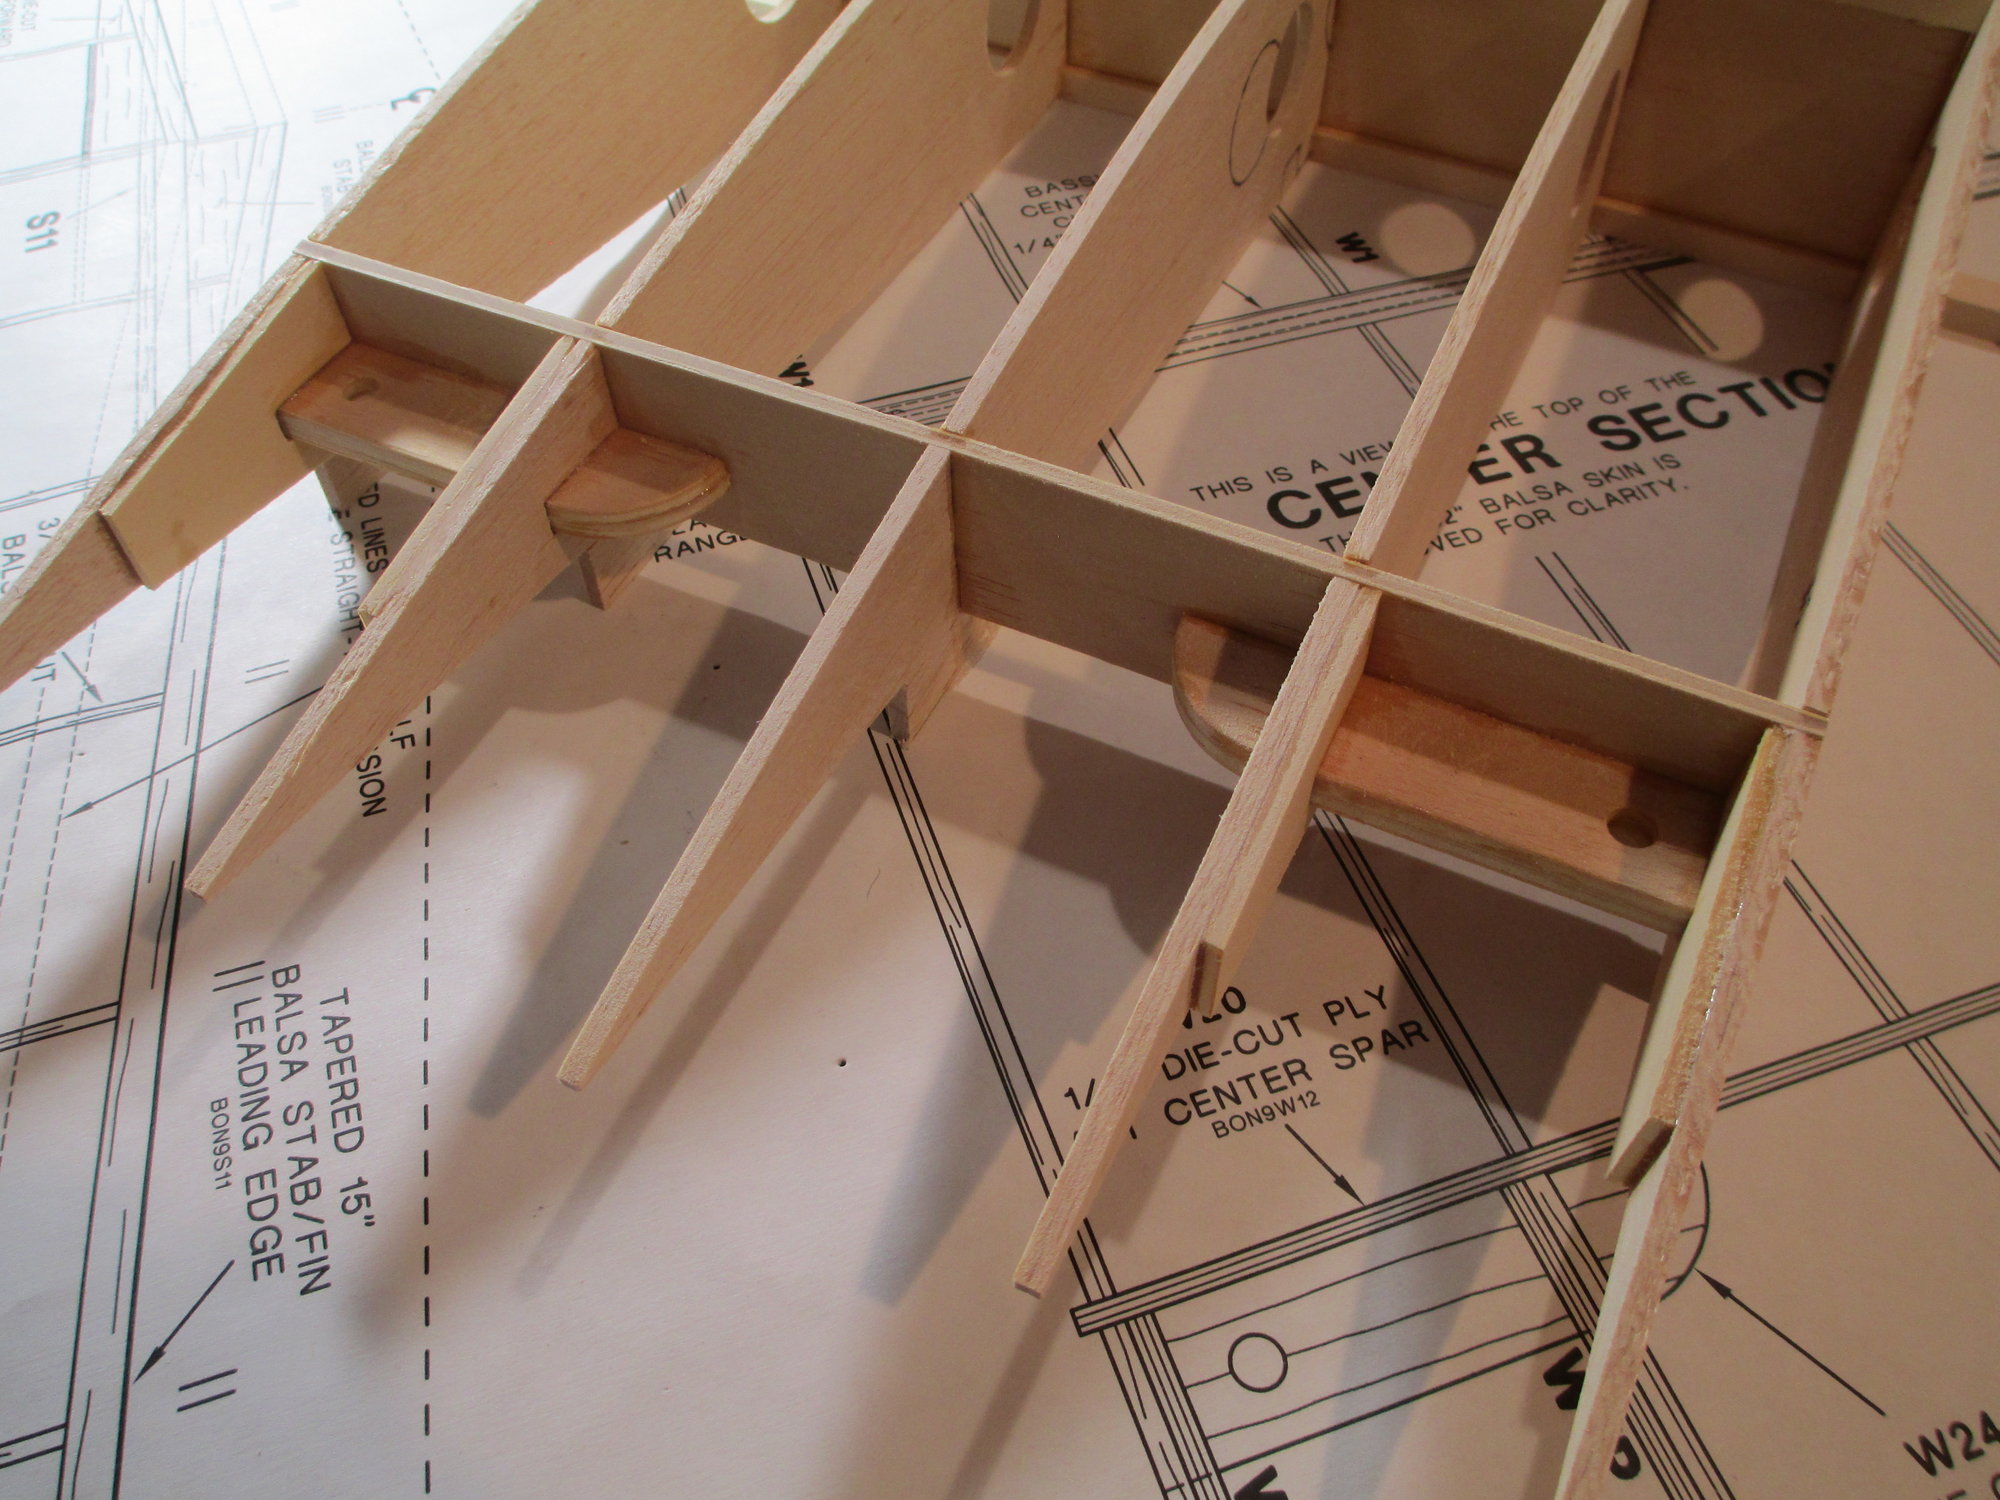
Here is the plan to build the Center Section that will ultimately join the right and left wing panels together.
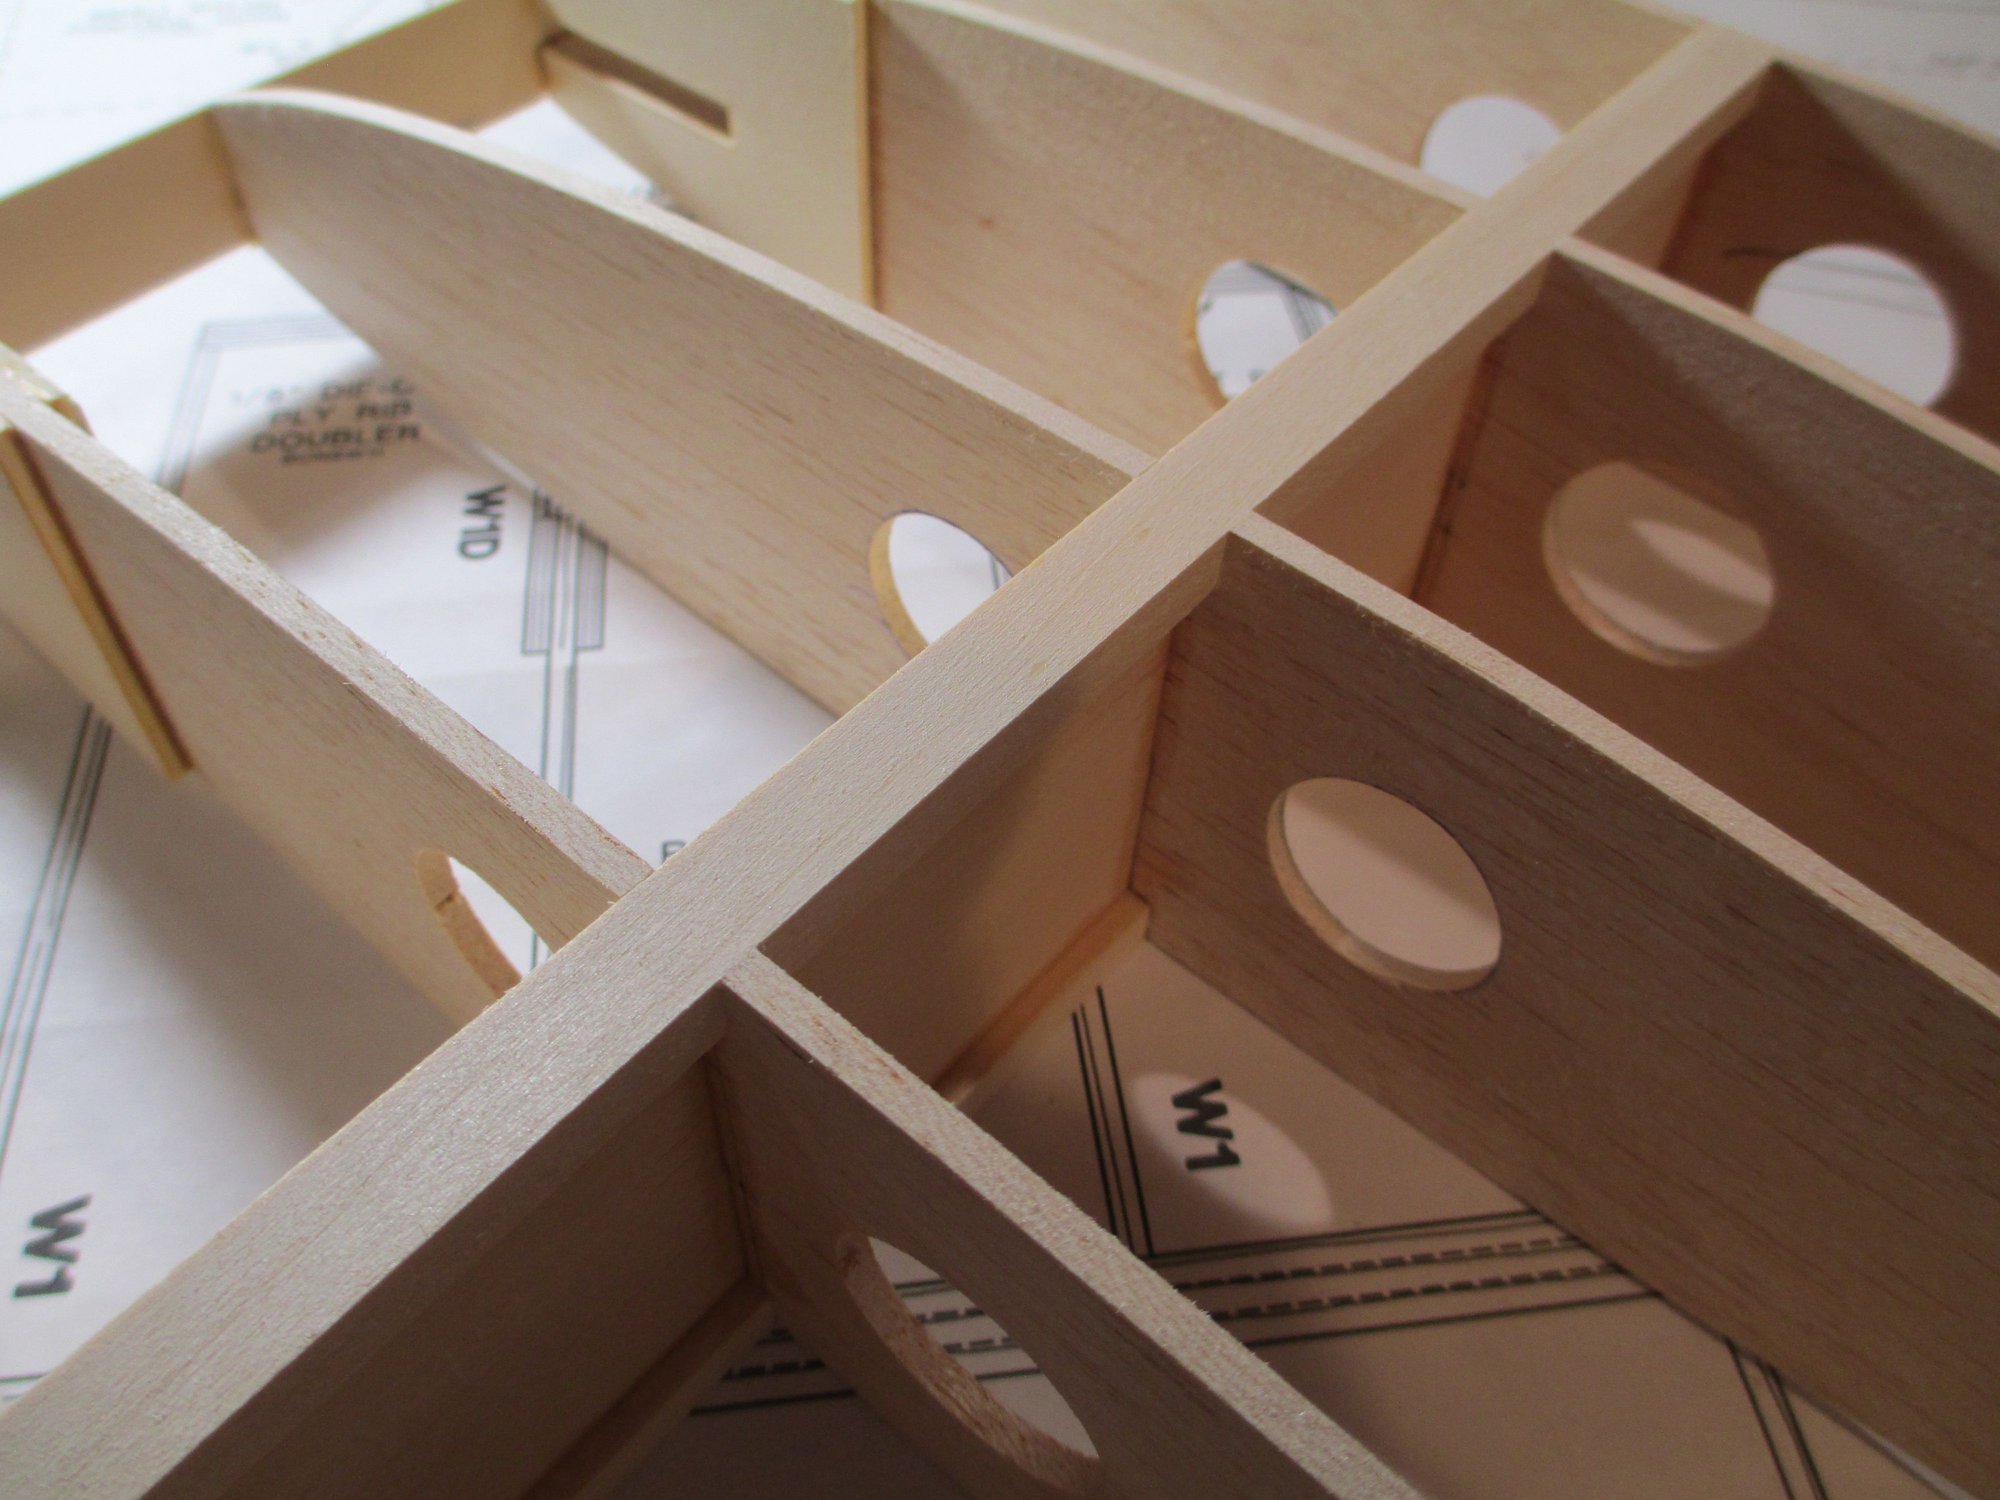
Before I can start to assemble the Center Section, four (W1) ribs need to be reinforced with 1/8" birch plywood doublers shown. These will be epoxied to the appropriate side(s) of each rib. Care must be taken to be sure that each doubler is epoxied on the correct side of each rib...
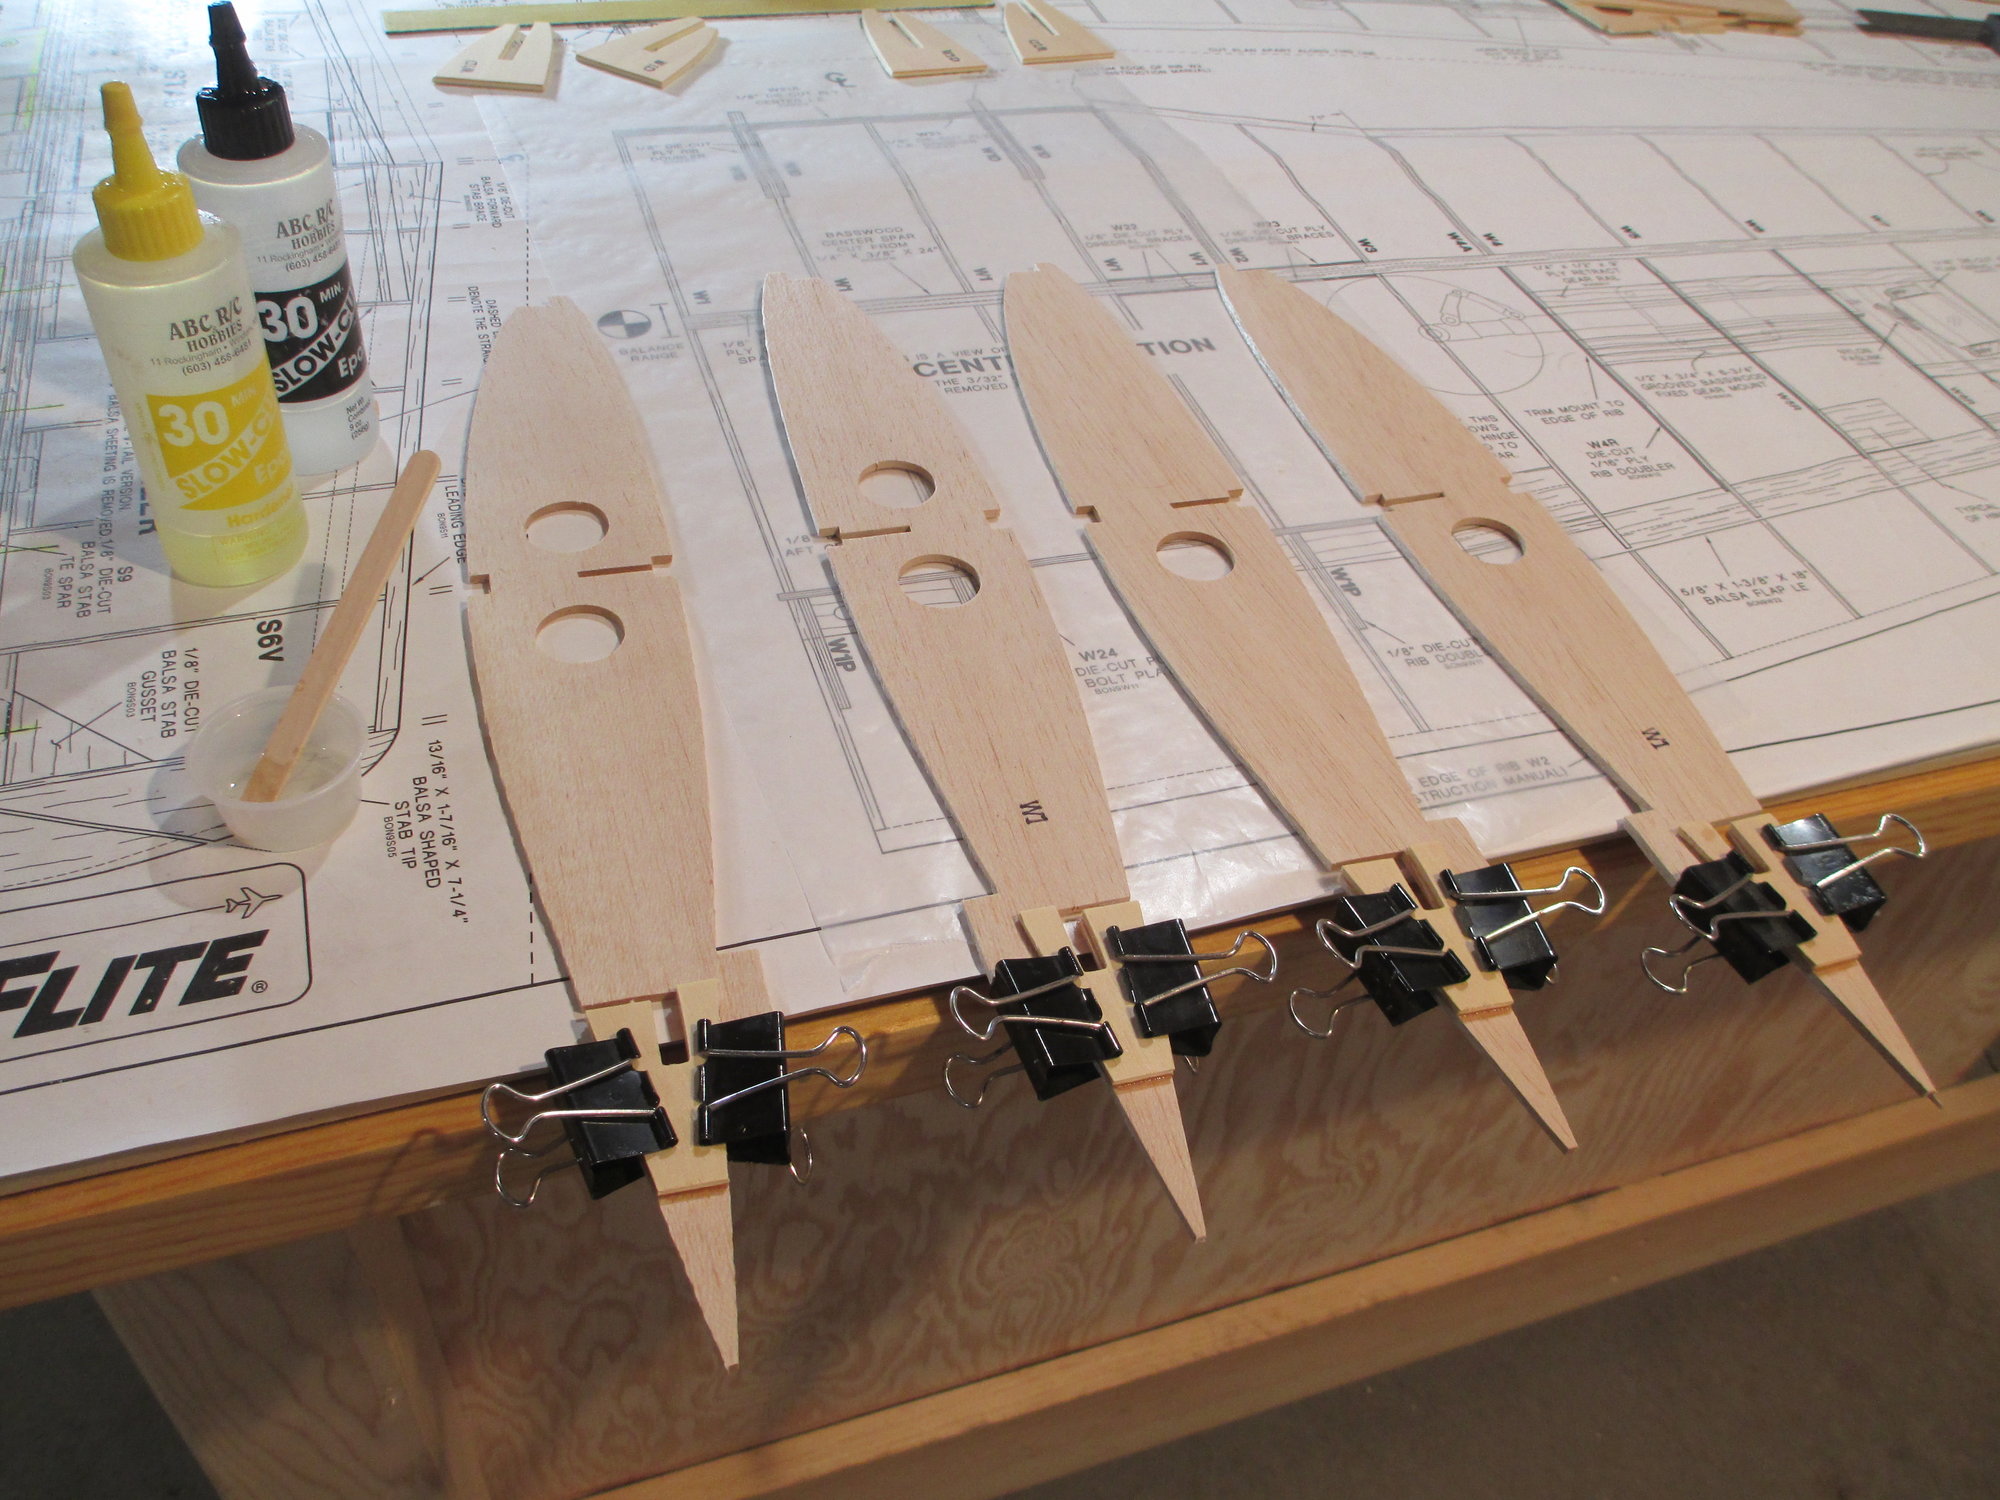
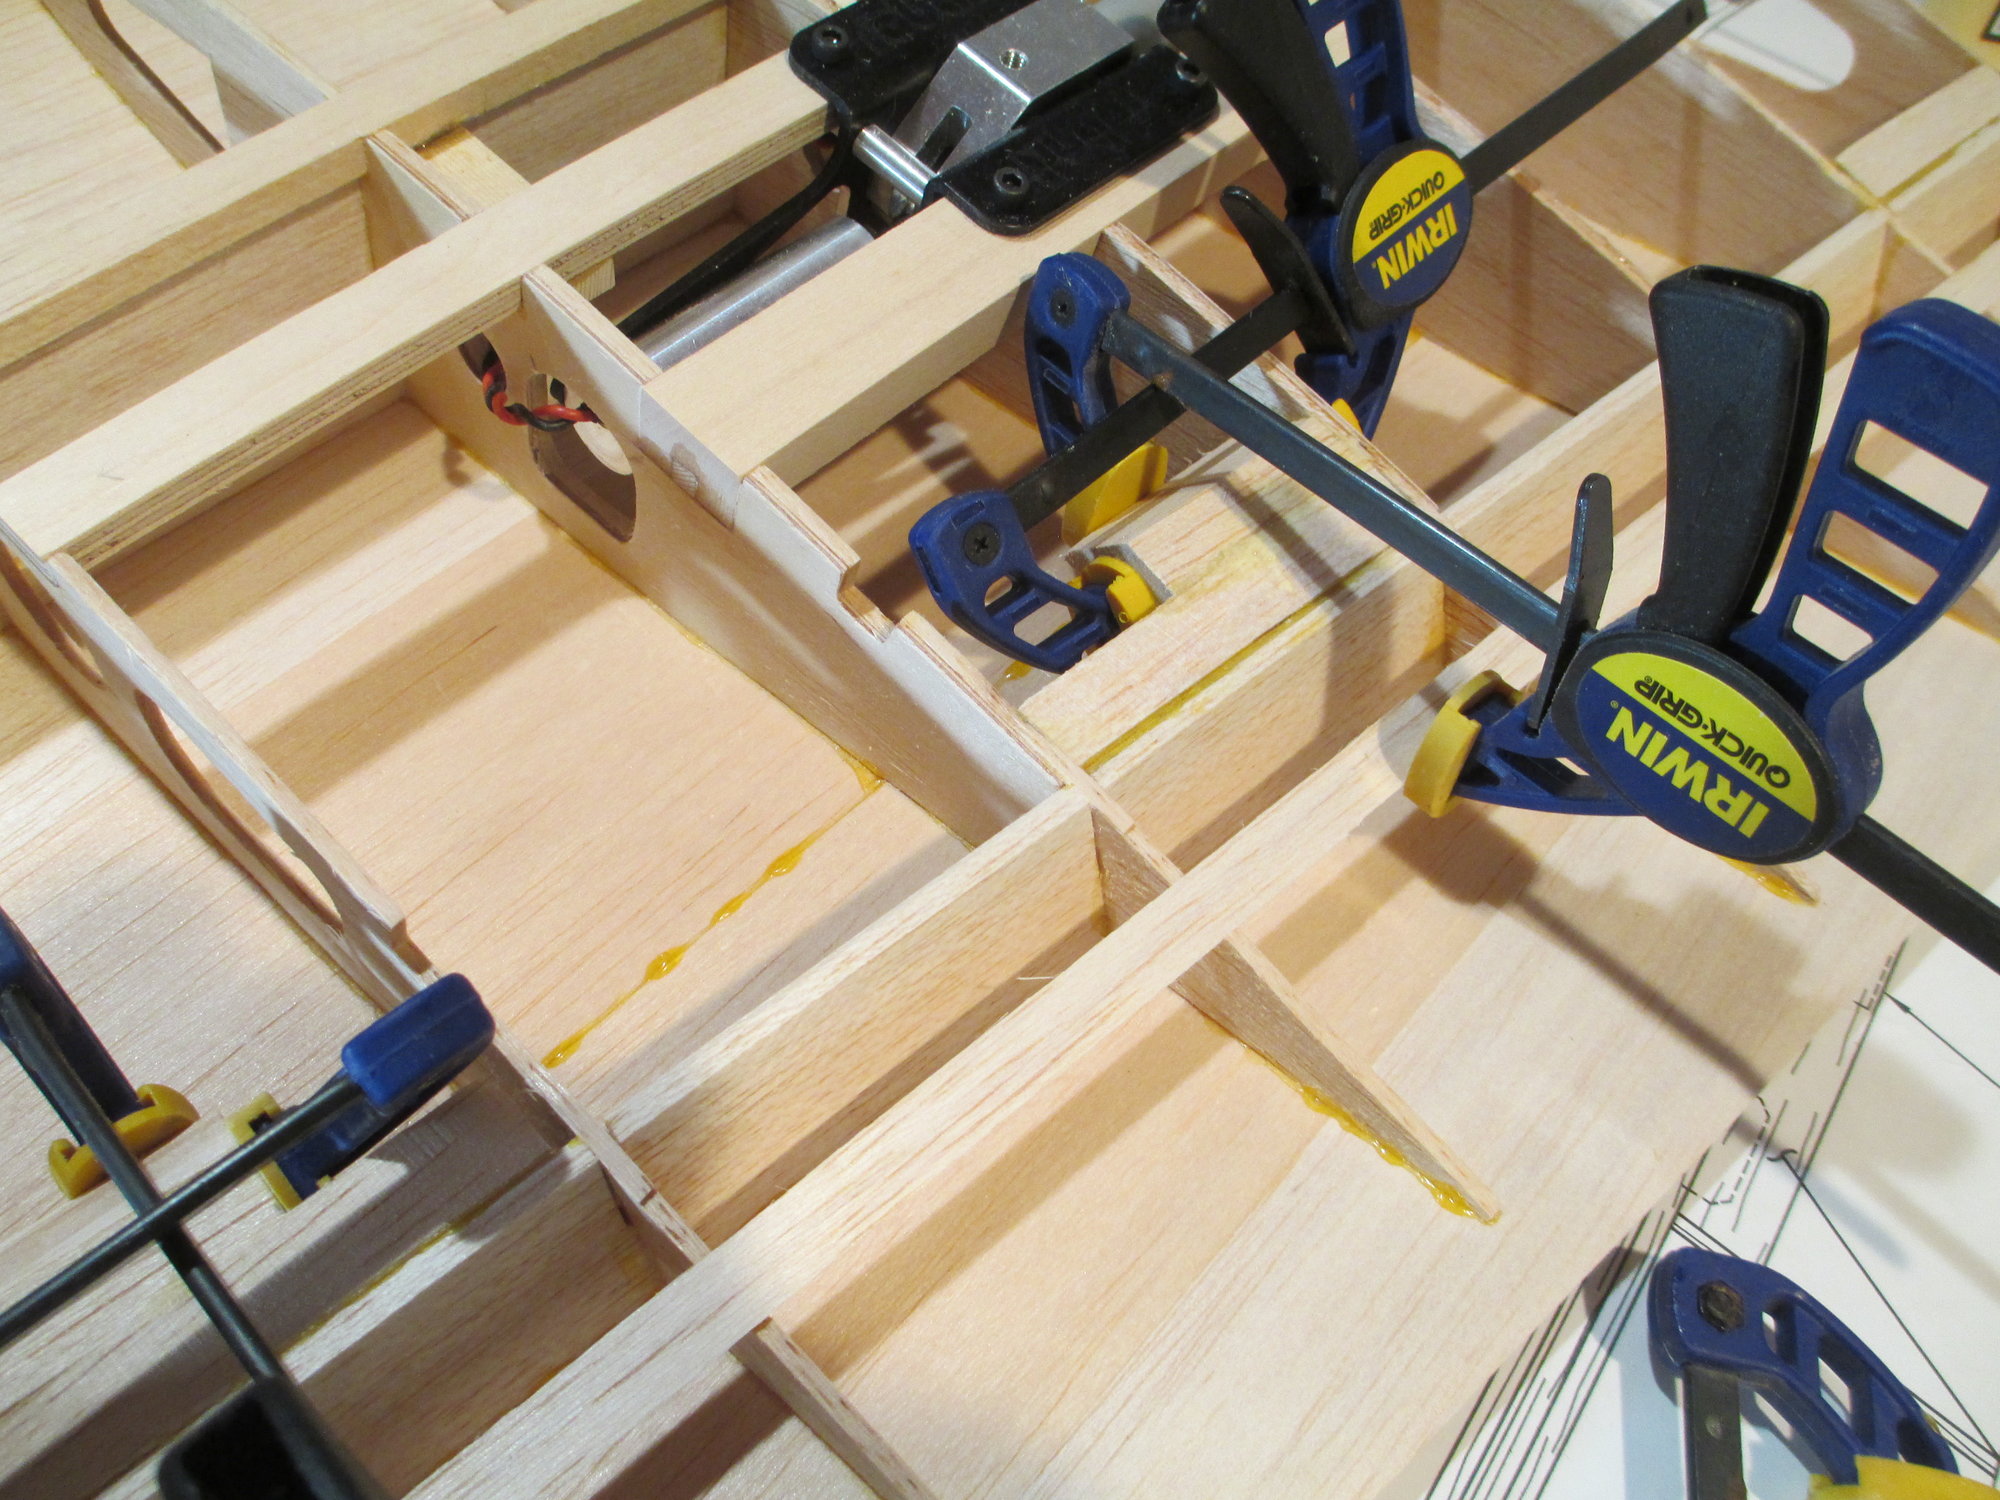
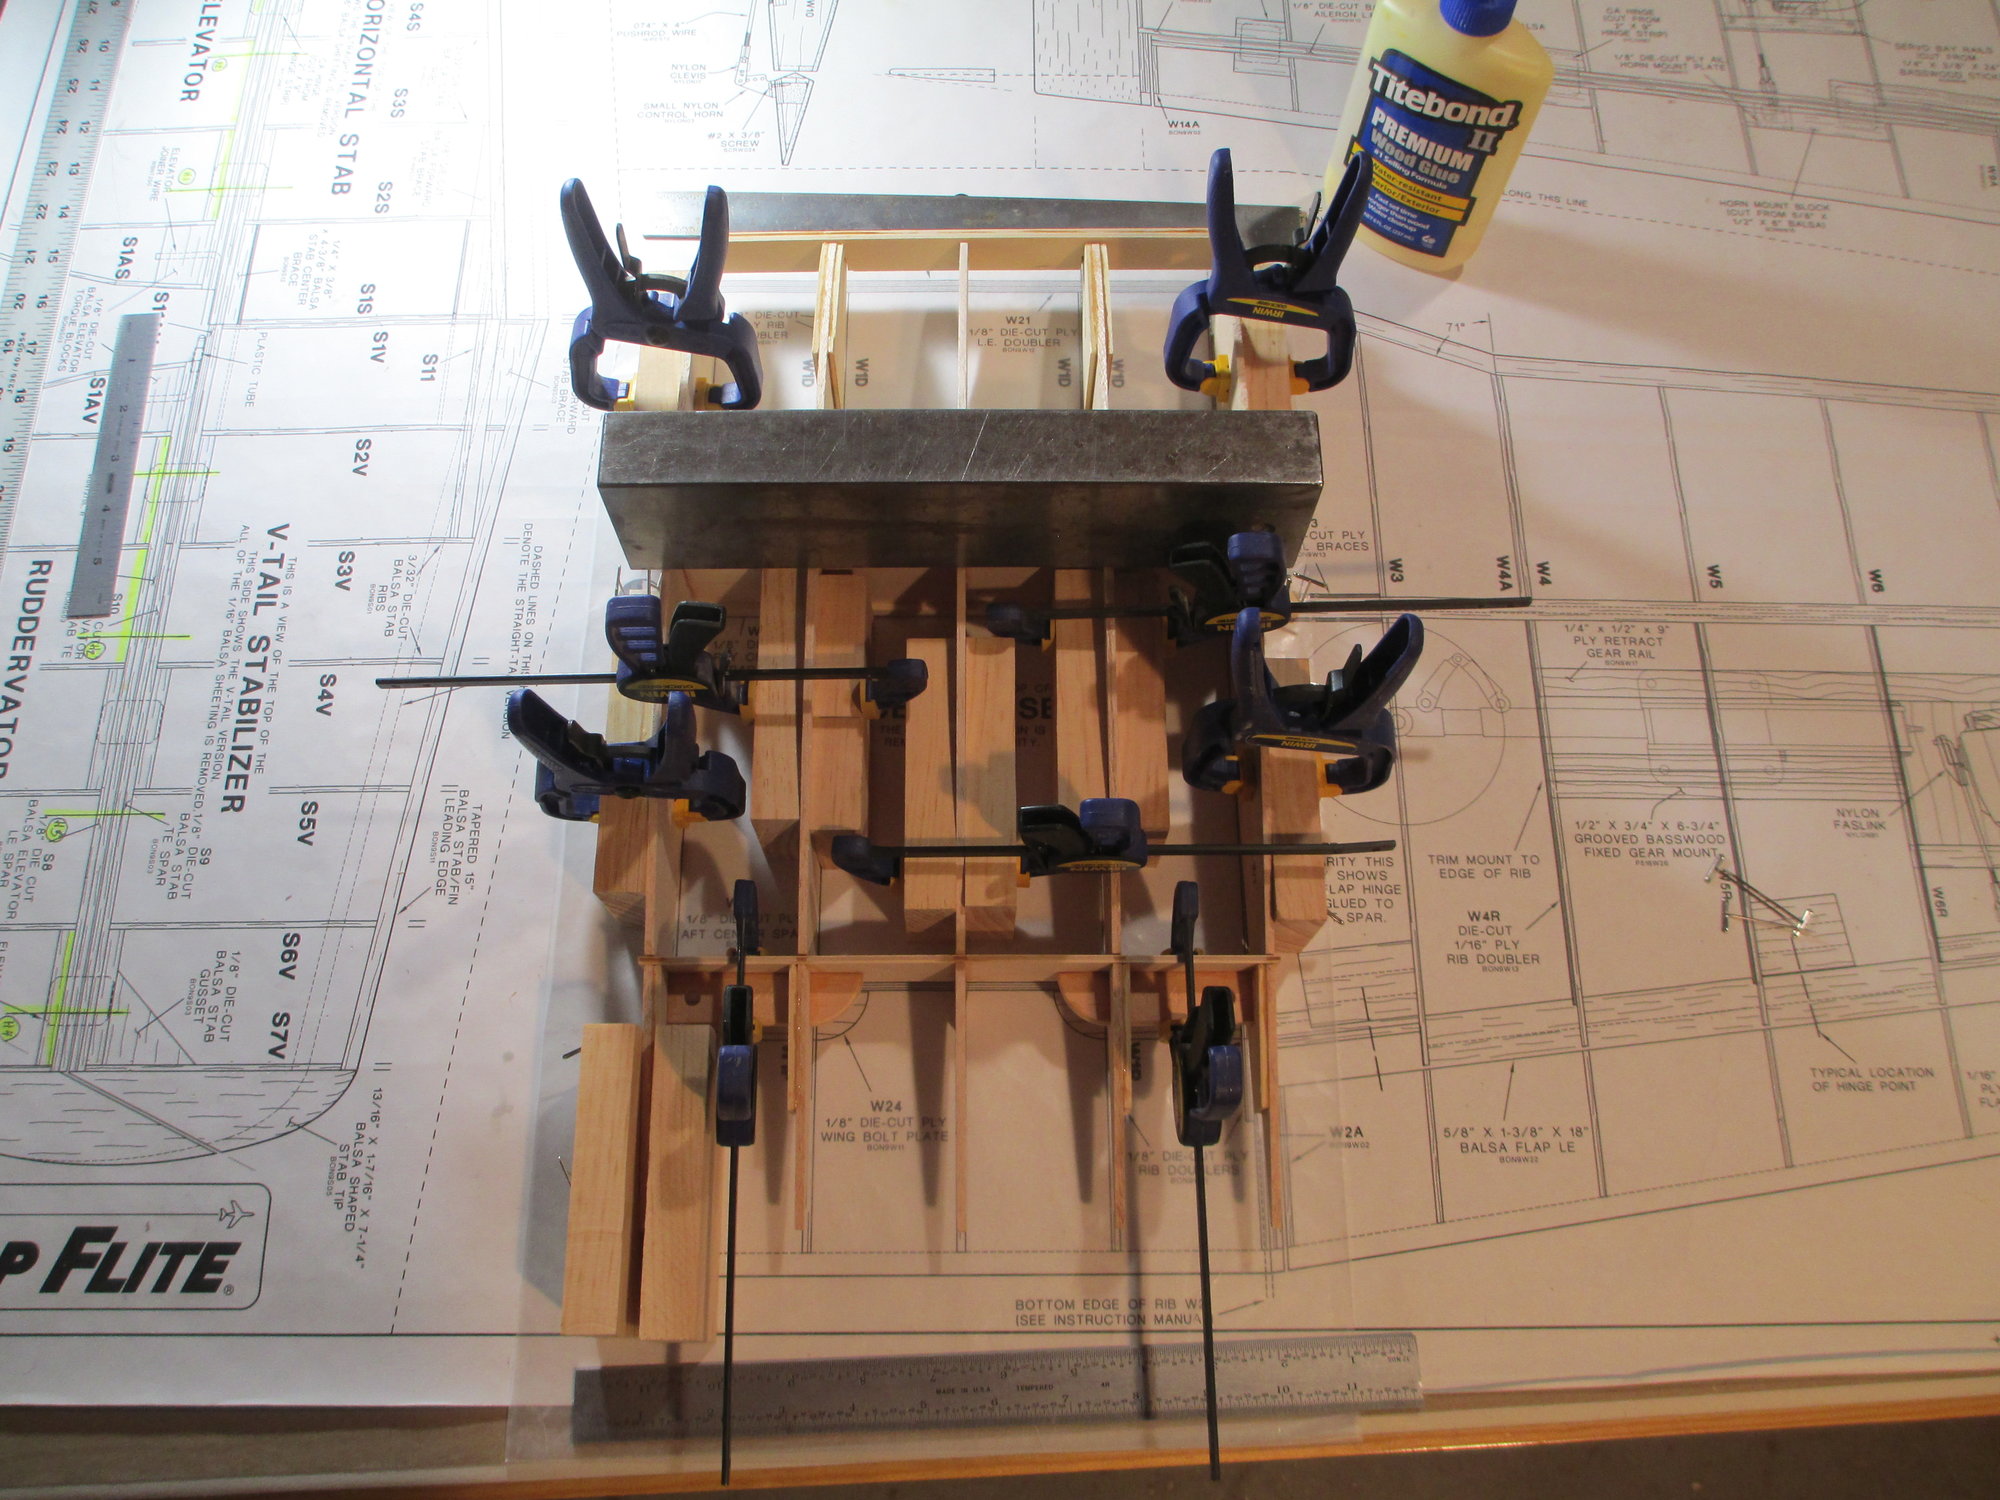
So here is a bit of a building tip that I often use when epoxying small parts onto something larger such as you see here. After applying the epoxy, use small spring clamps securing the parts together. These spring clamps will do a good job of applying enough clamping pressure to hold the parts in alignment. If needed, you can slide the parts if they move out of alignment. I will keep the spring clamps on for about 10 or 15 minutes. Checking the unused epoxy left in my mixing cup will tell me when the epoxy is starting to firm up a bit.
Once the epoxy has started to firmed up, I remove the spring clamps. Lay them on a flat surface and apply weight over the top and allow them to fully cure. If I had tried to go from spreading the epoxy to this point I can pretty much assure you that the parts will have slid out of alignment, causing you pain and aggravation. Allowing the epoxy to firm up, gives just the right amount of resistance that stops parts from sliding.
Last edited by VincentJ; 08-19-2019 at 07:22 AM.
08-19-2019, 03:11 PM
#187
Thread Starter
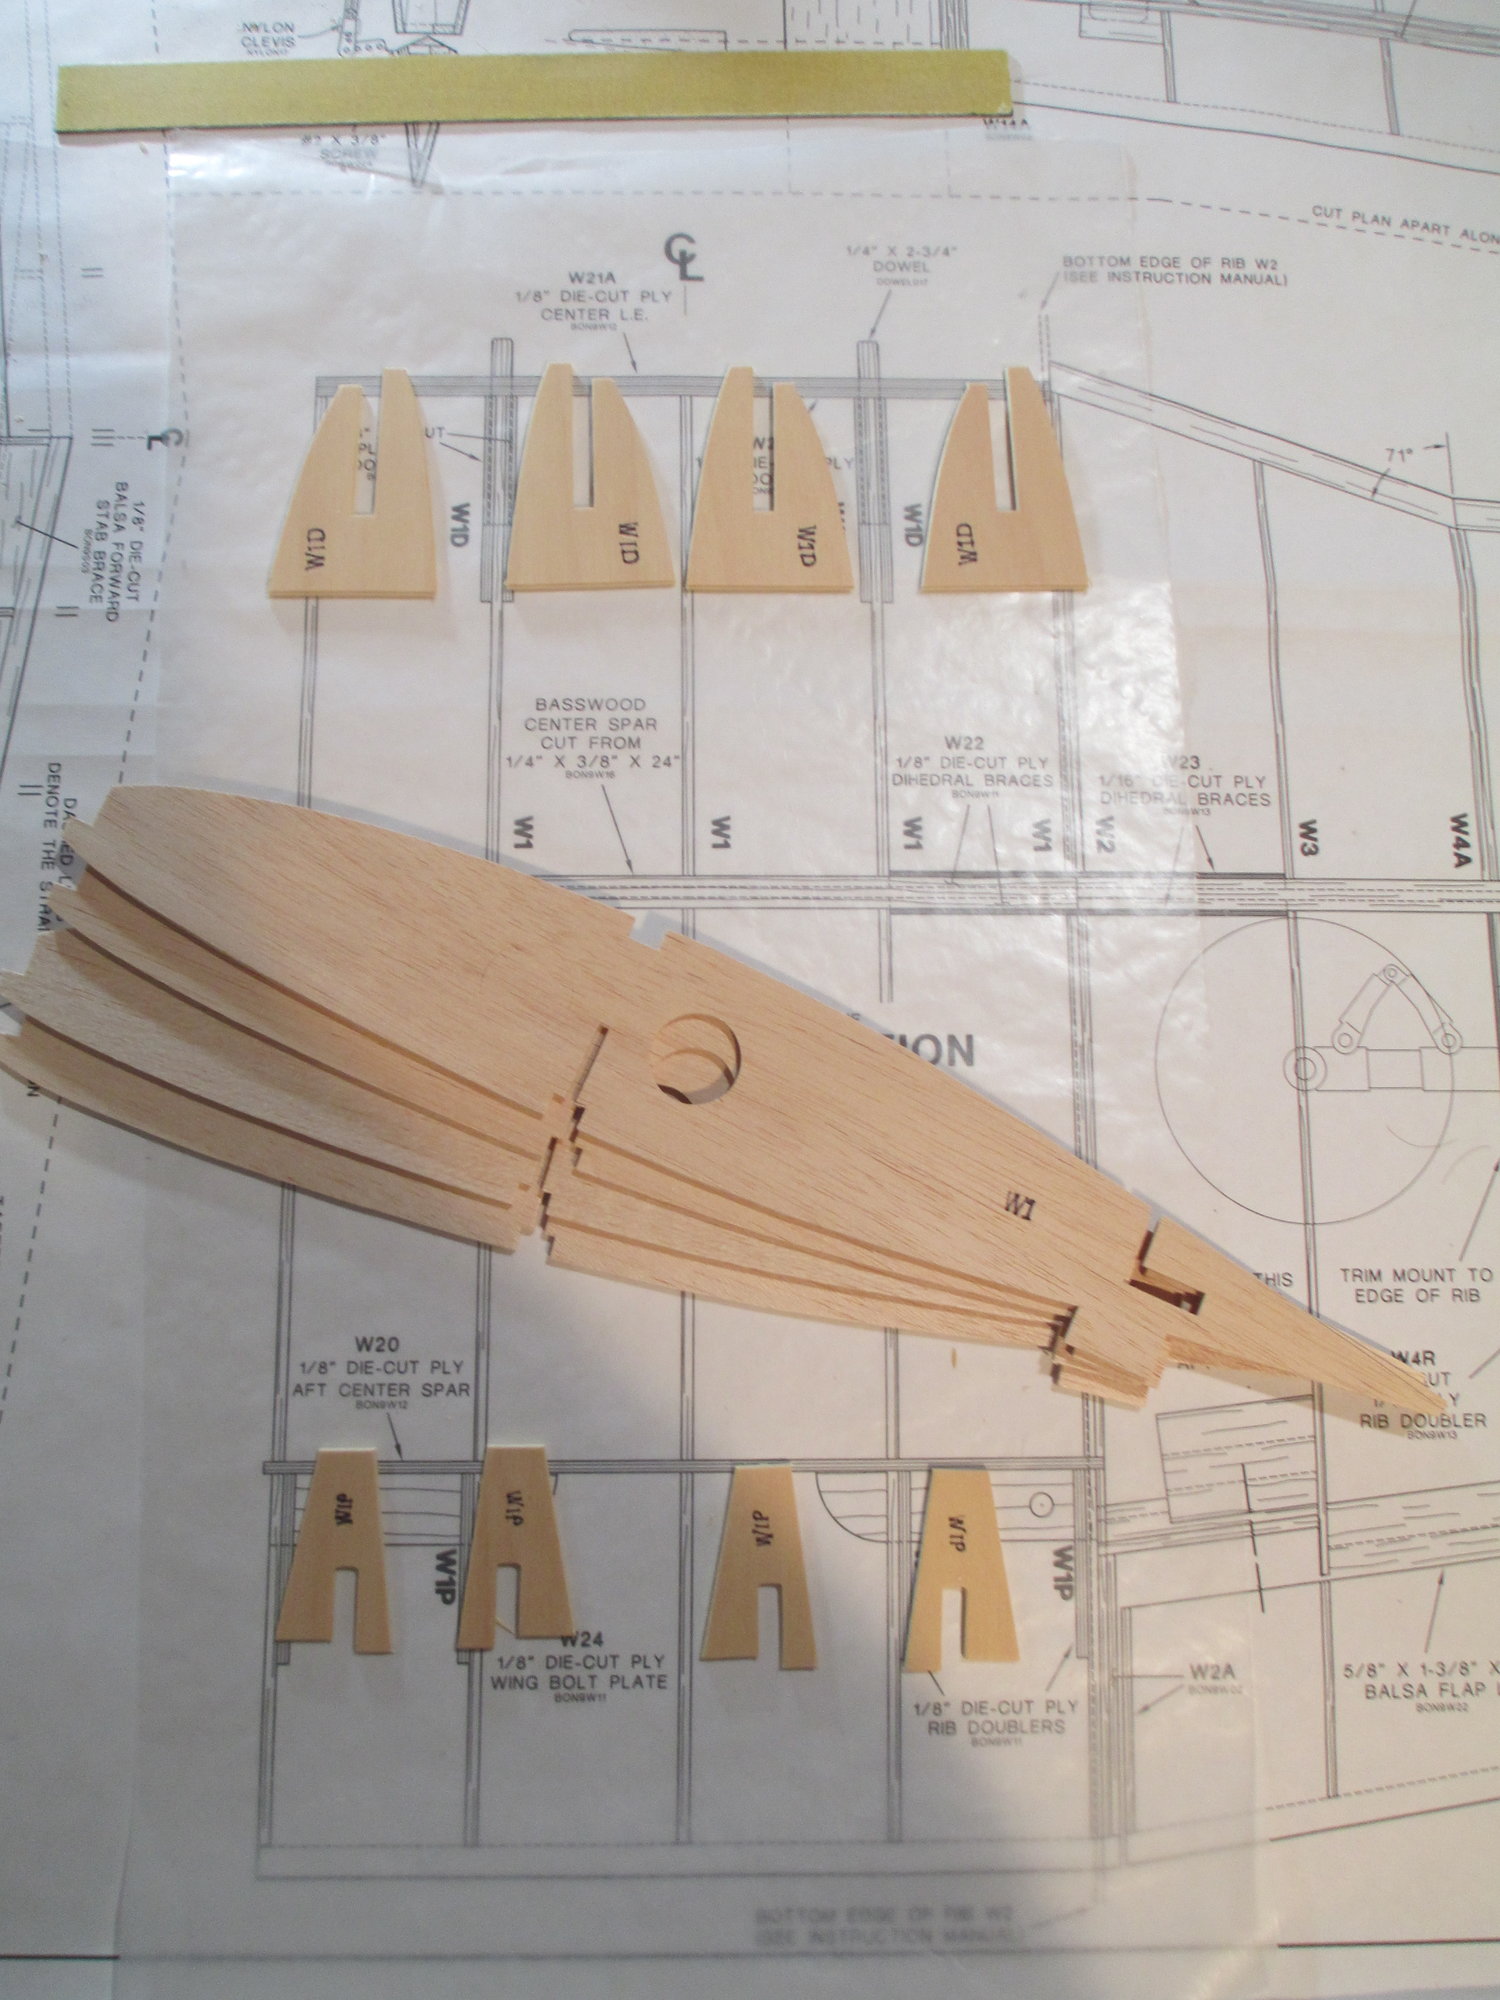
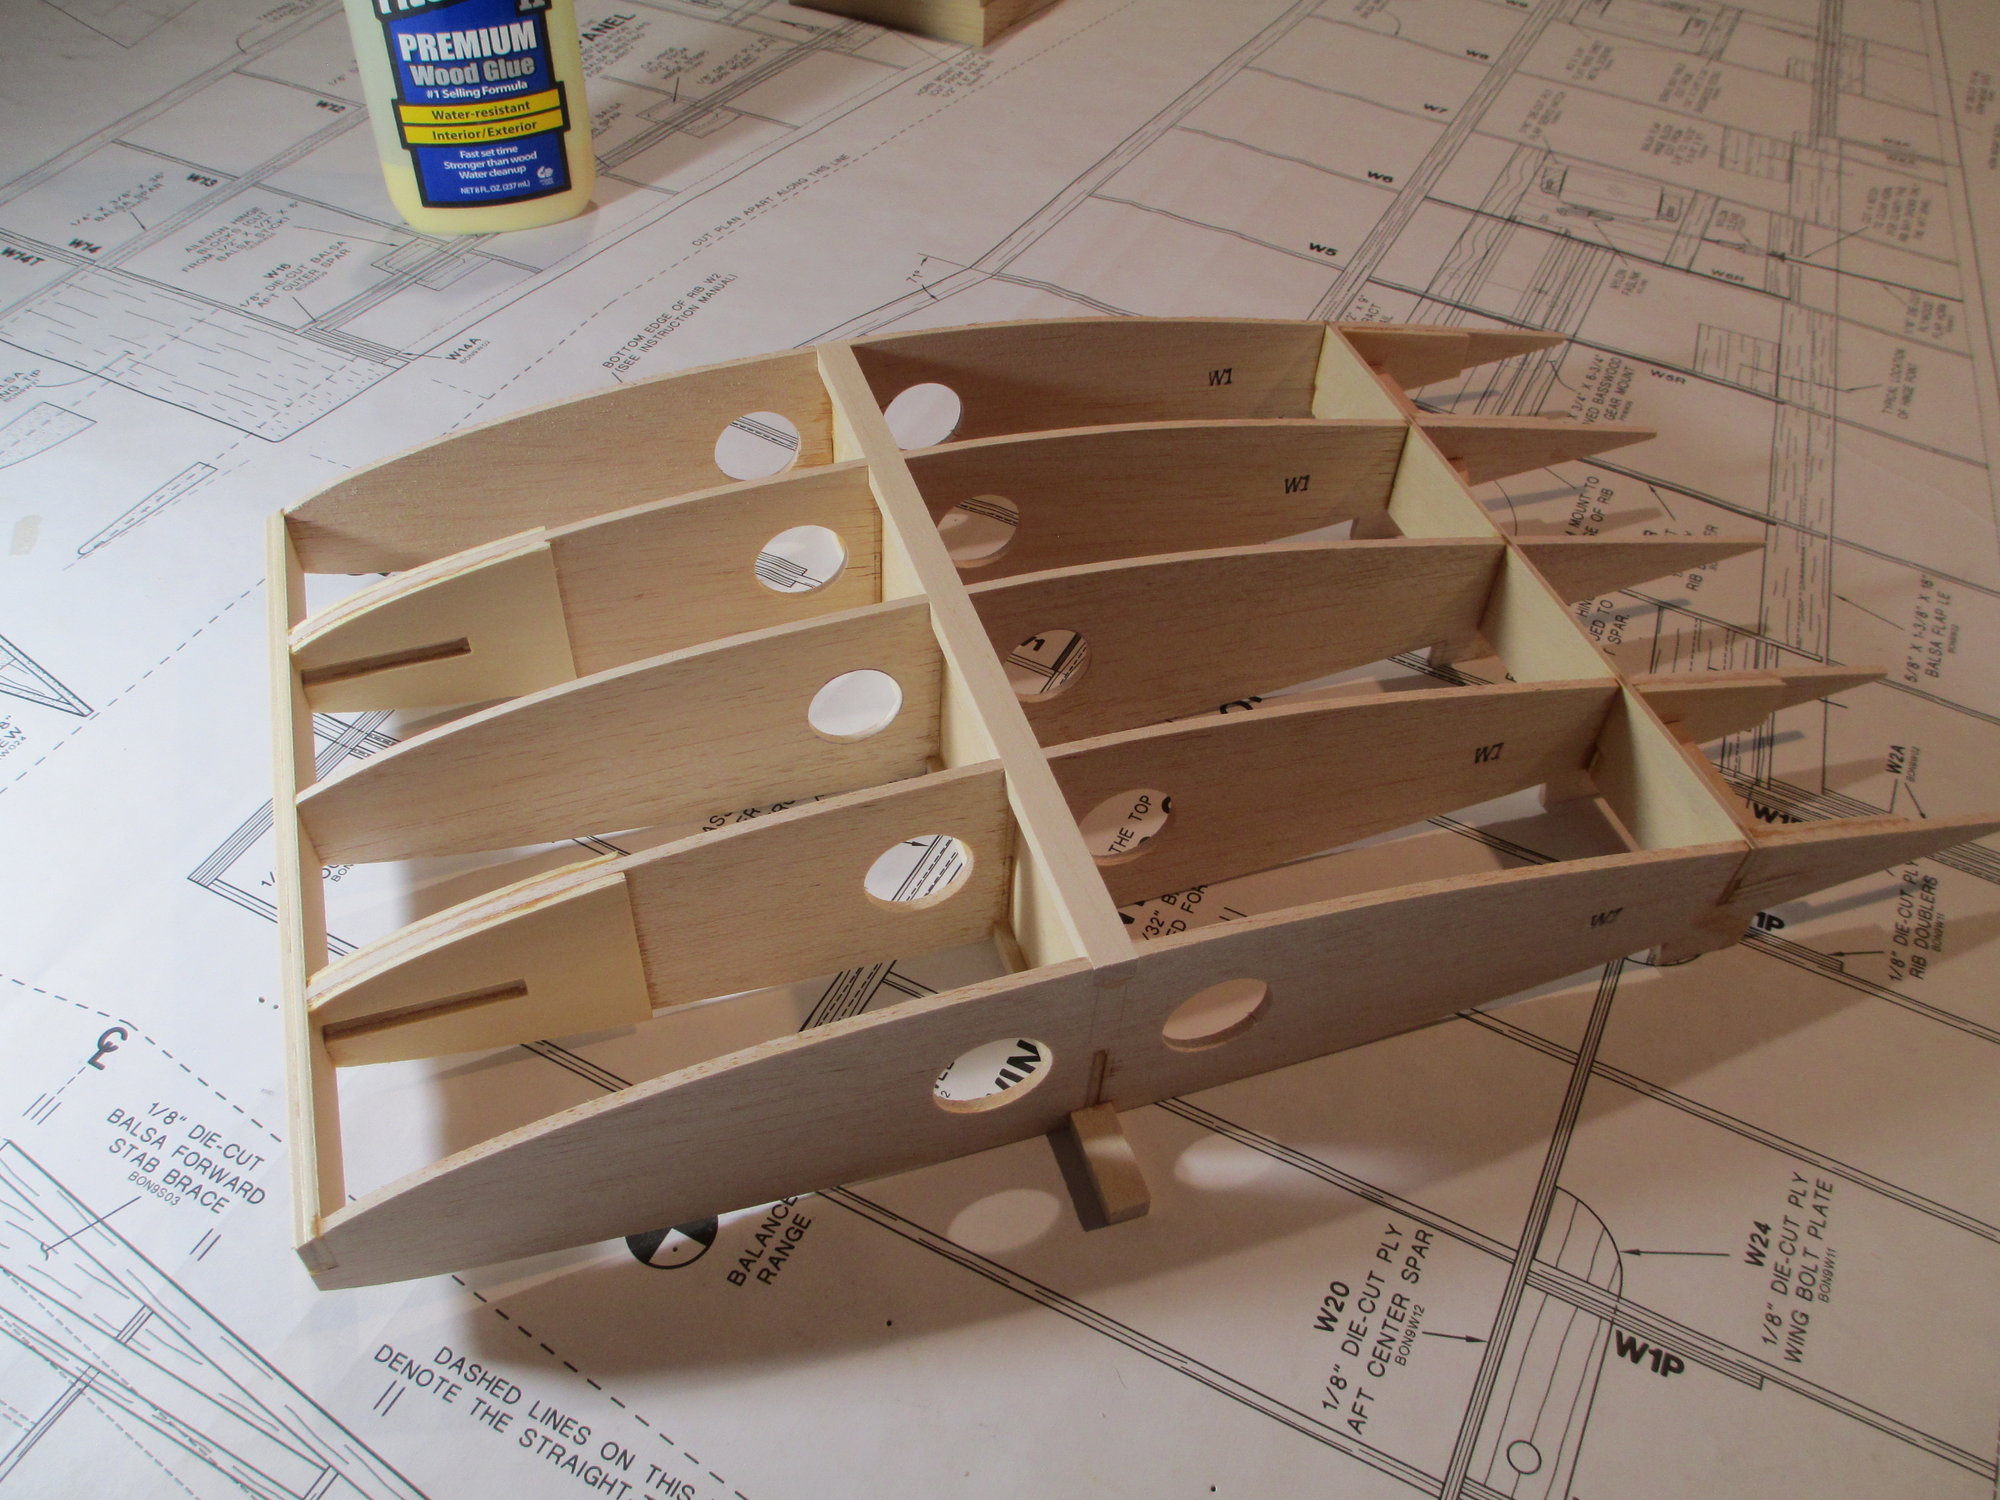
Today was one of those days where you take one step forward and three back... It all started with the delivery of the mail. I was eagerly awaiting supplies that I ordered. Of course when I opened the box I was sent the wrong items, so off to the post office to re-box and send back!  OK, VJ just a minor set-back, you'll assemble the wing's center section. Right, until I notice I'm short one rib!!!
  I looked everywhere for it, I don't think it was in the kit.
  No problem, I'll cut my own rib. Oh no, this rib is 1/8" thick, and I don't have the right balsa stock to make it. Stop what I'm doing and jump in my vehicle to buy a sheet of balsa that's 35 minutes away... Sorry for the rant, I feel better now.

The rib that I had to duplicate is the first one on the bottom.
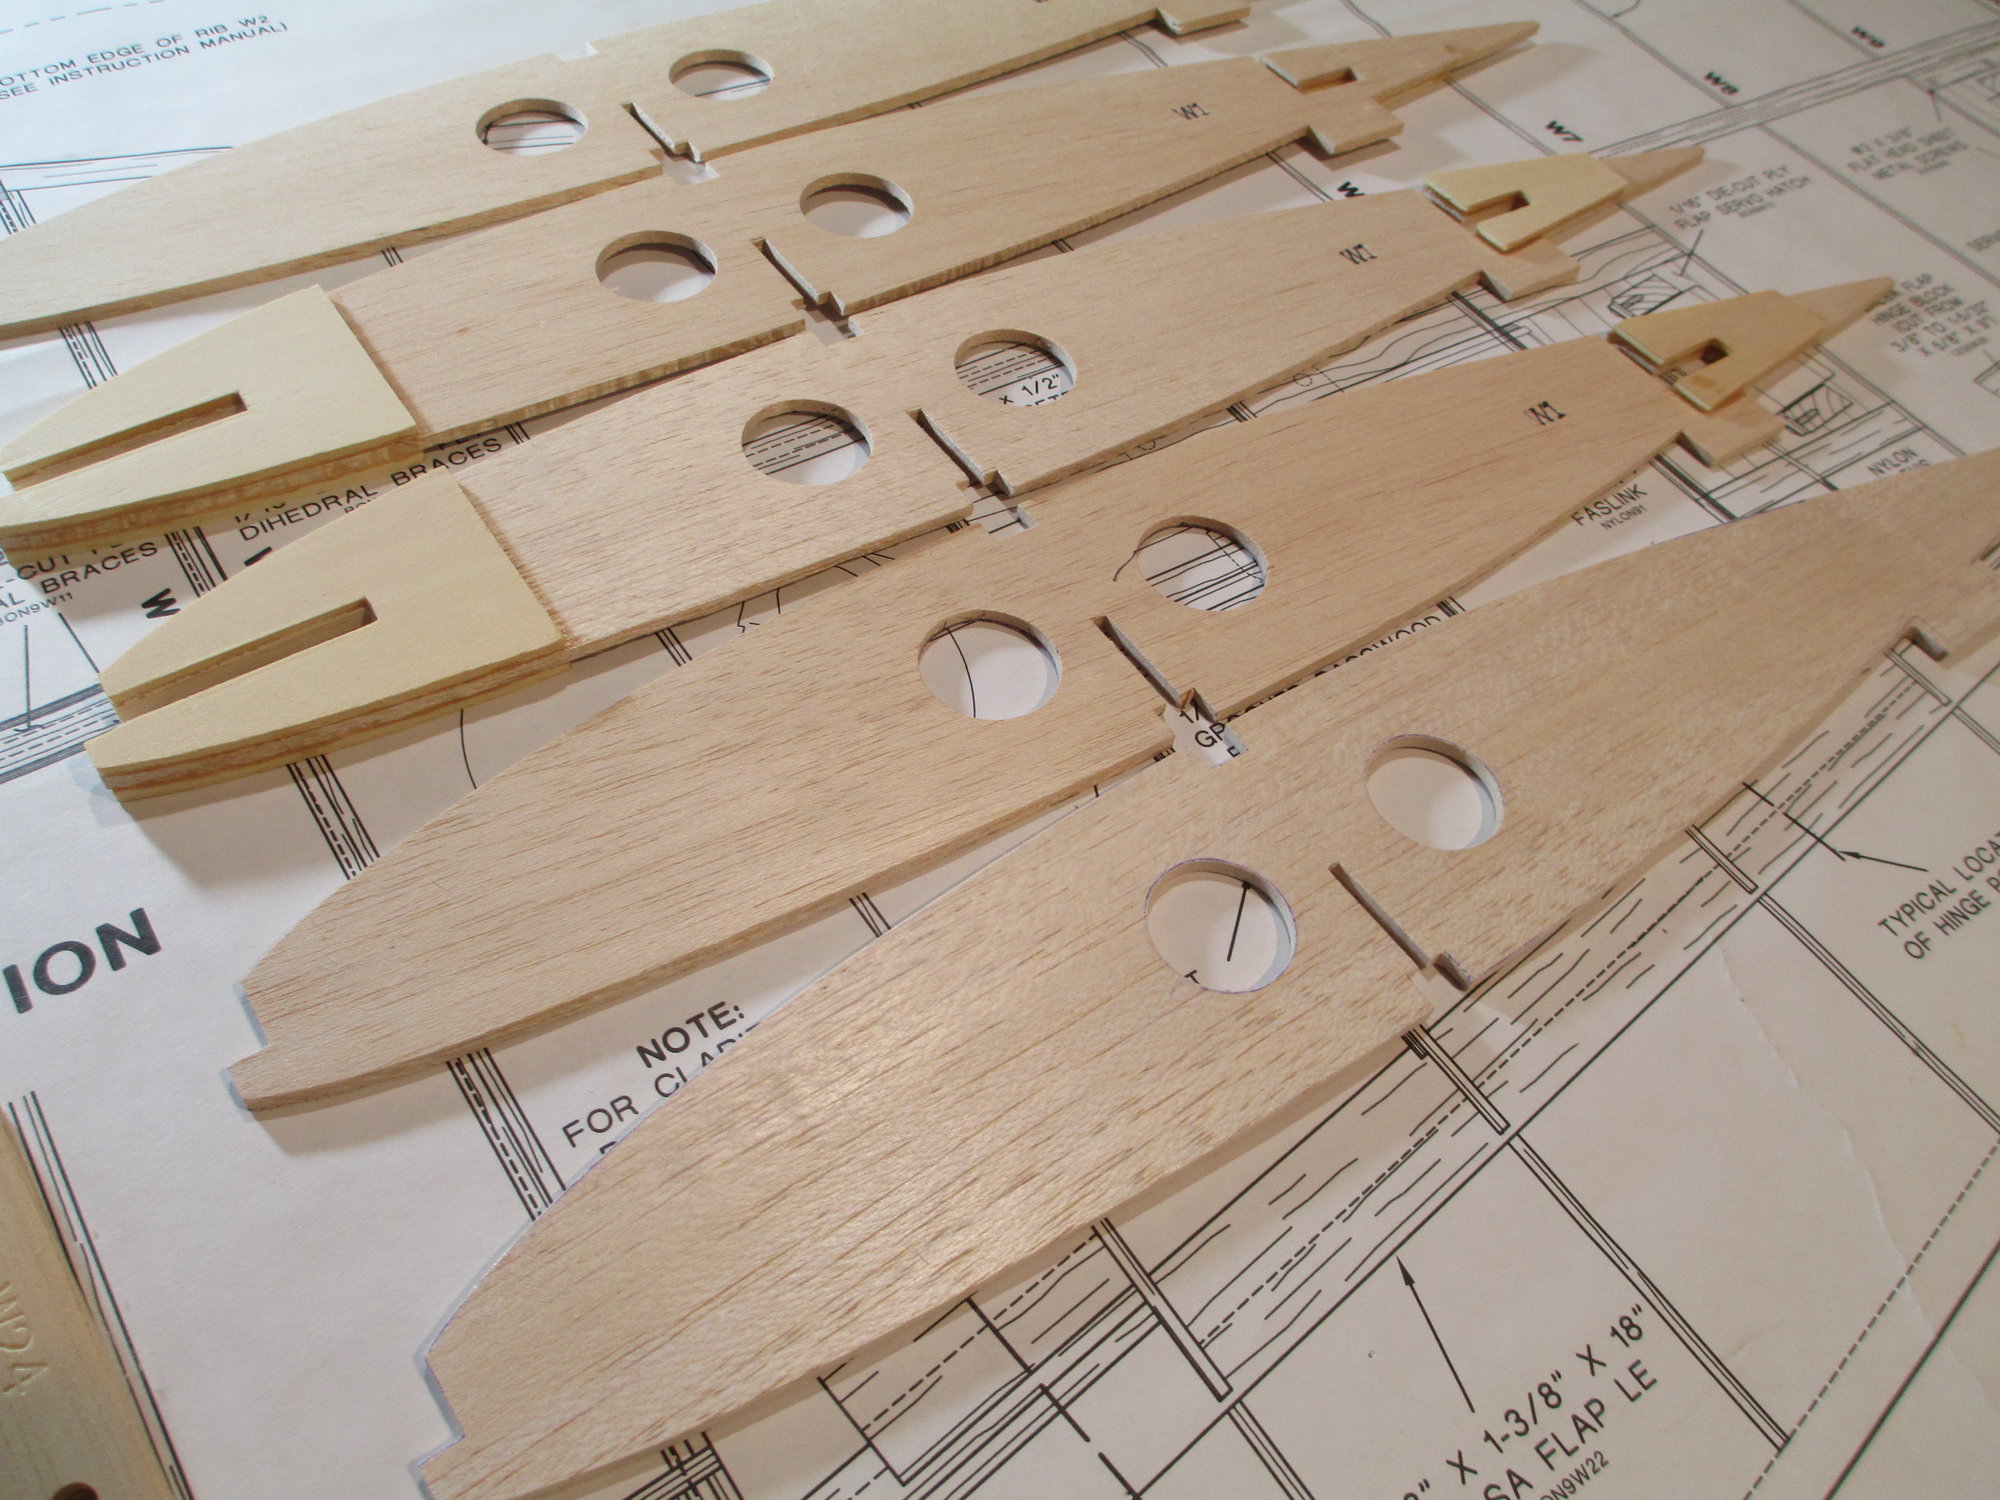
OK, VJ just a minor set-back, you'll assemble the wing's center section. Right, until I notice I'm short one rib!!! I looked everywhere for it, I don't think it was in the kit. No problem, I'll cut my own rib. Oh no, this rib is 1/8" thick, and I don't have the right balsa stock to make it. Stop what I'm doing and jump in my vehicle to buy a sheet of balsa that's 35 minutes away... Sorry for the rant, I feel better now. The rib that I had to duplicate is the first one on the bottom.
Last edited by VincentJ; 08-19-2019 at 06:08 PM.
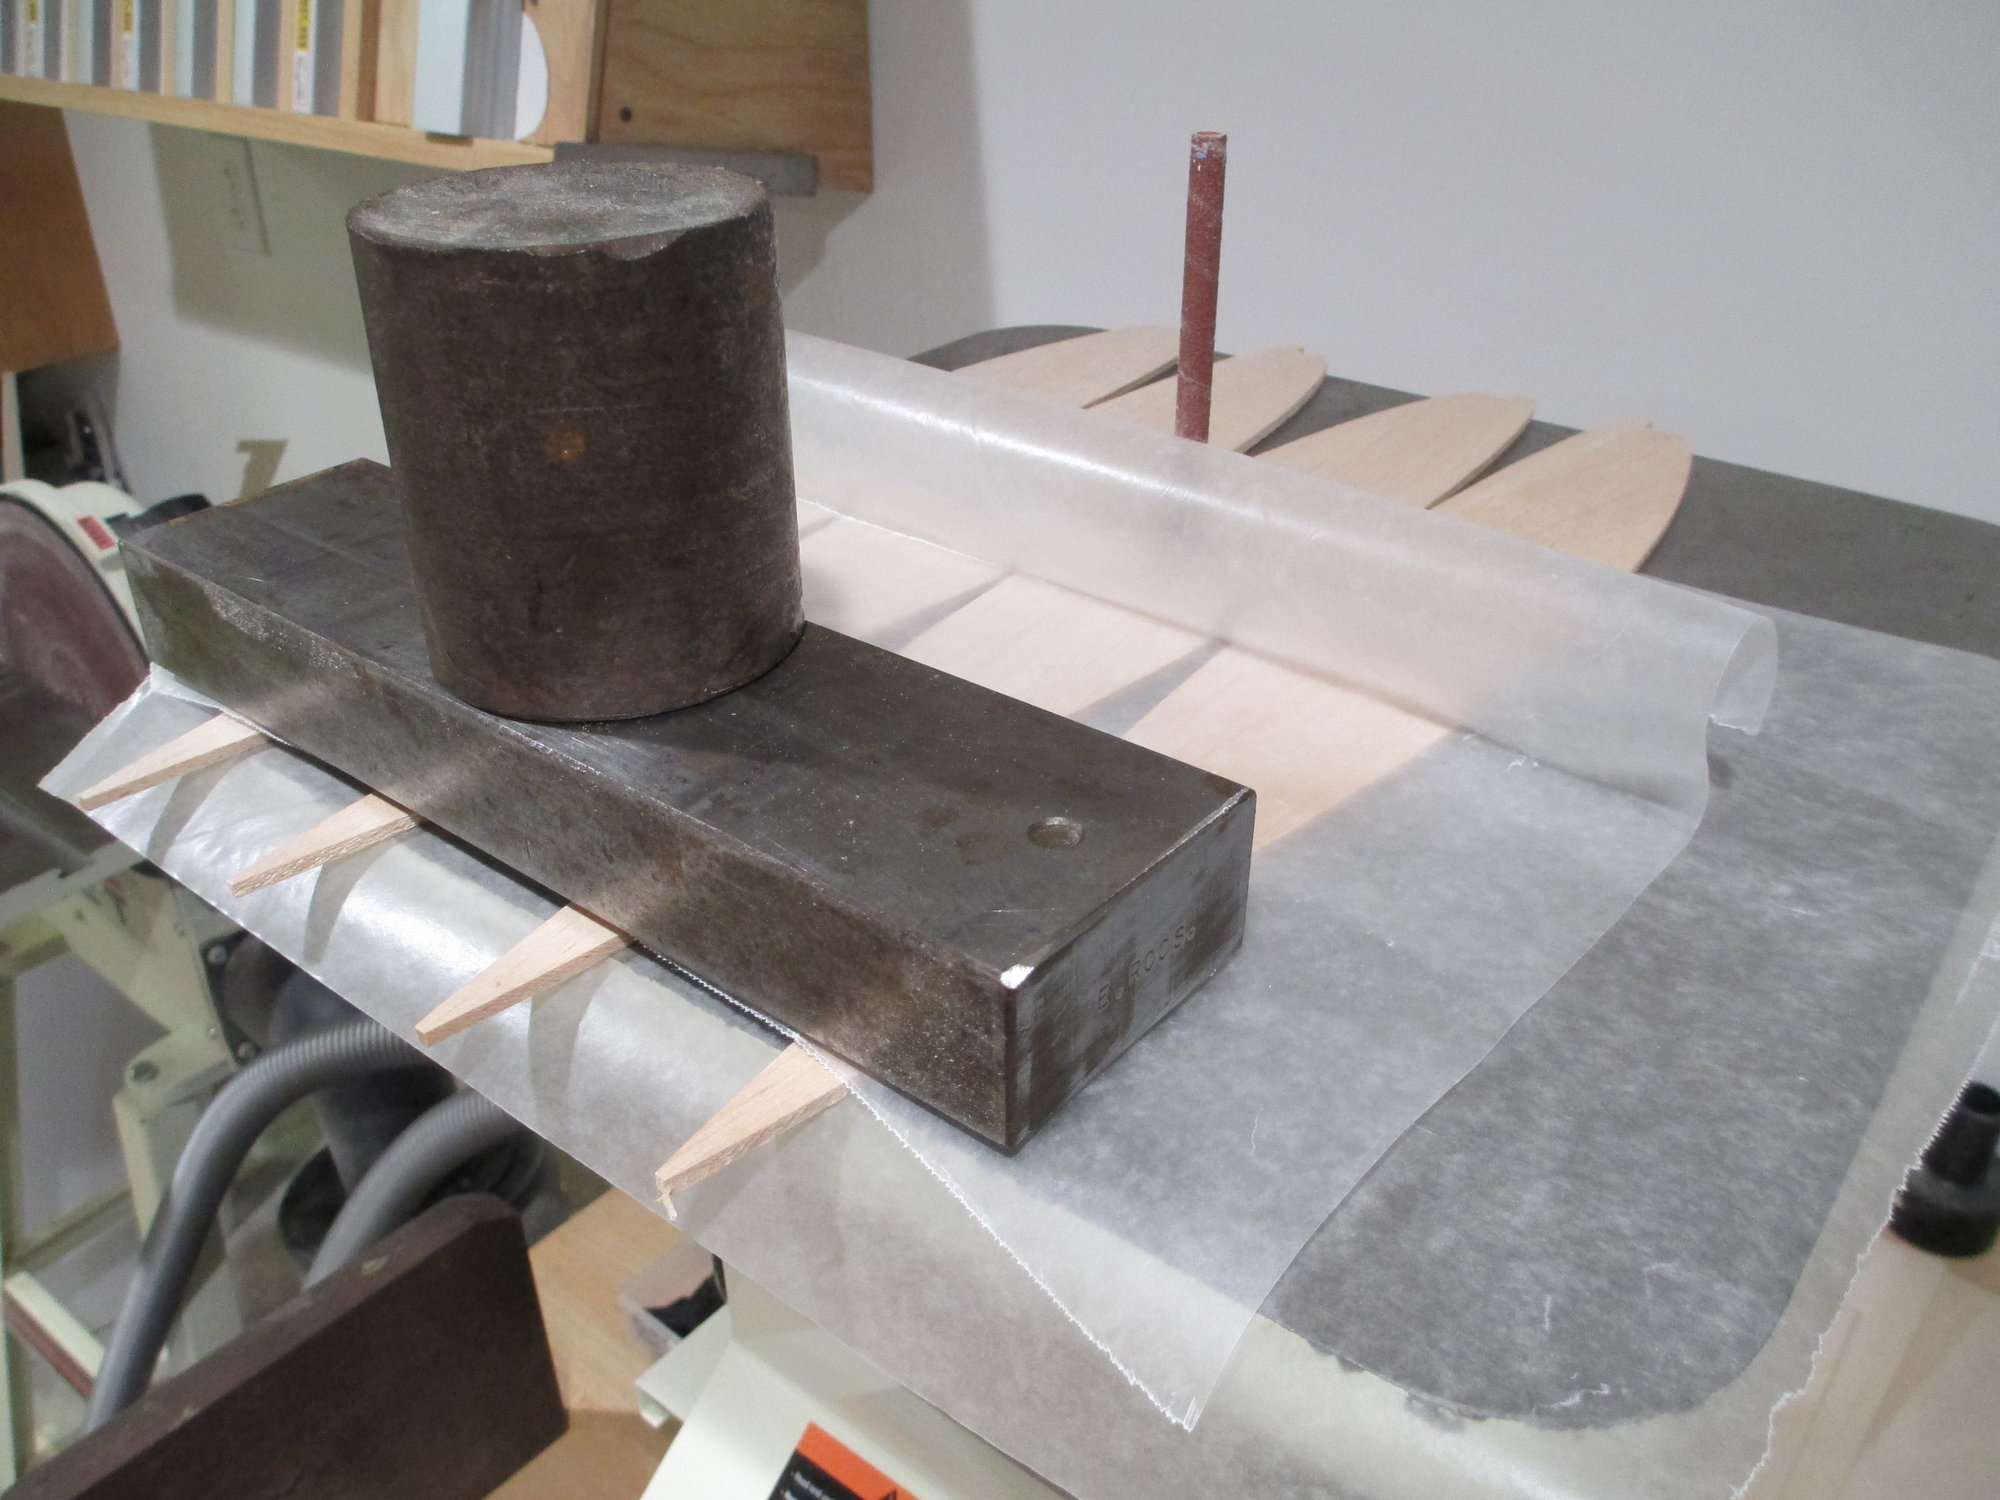
08-20-2019, 02:49 AM
#190
Thread Starter
08-20-2019, 02:57 AM
#191
Thread Starter
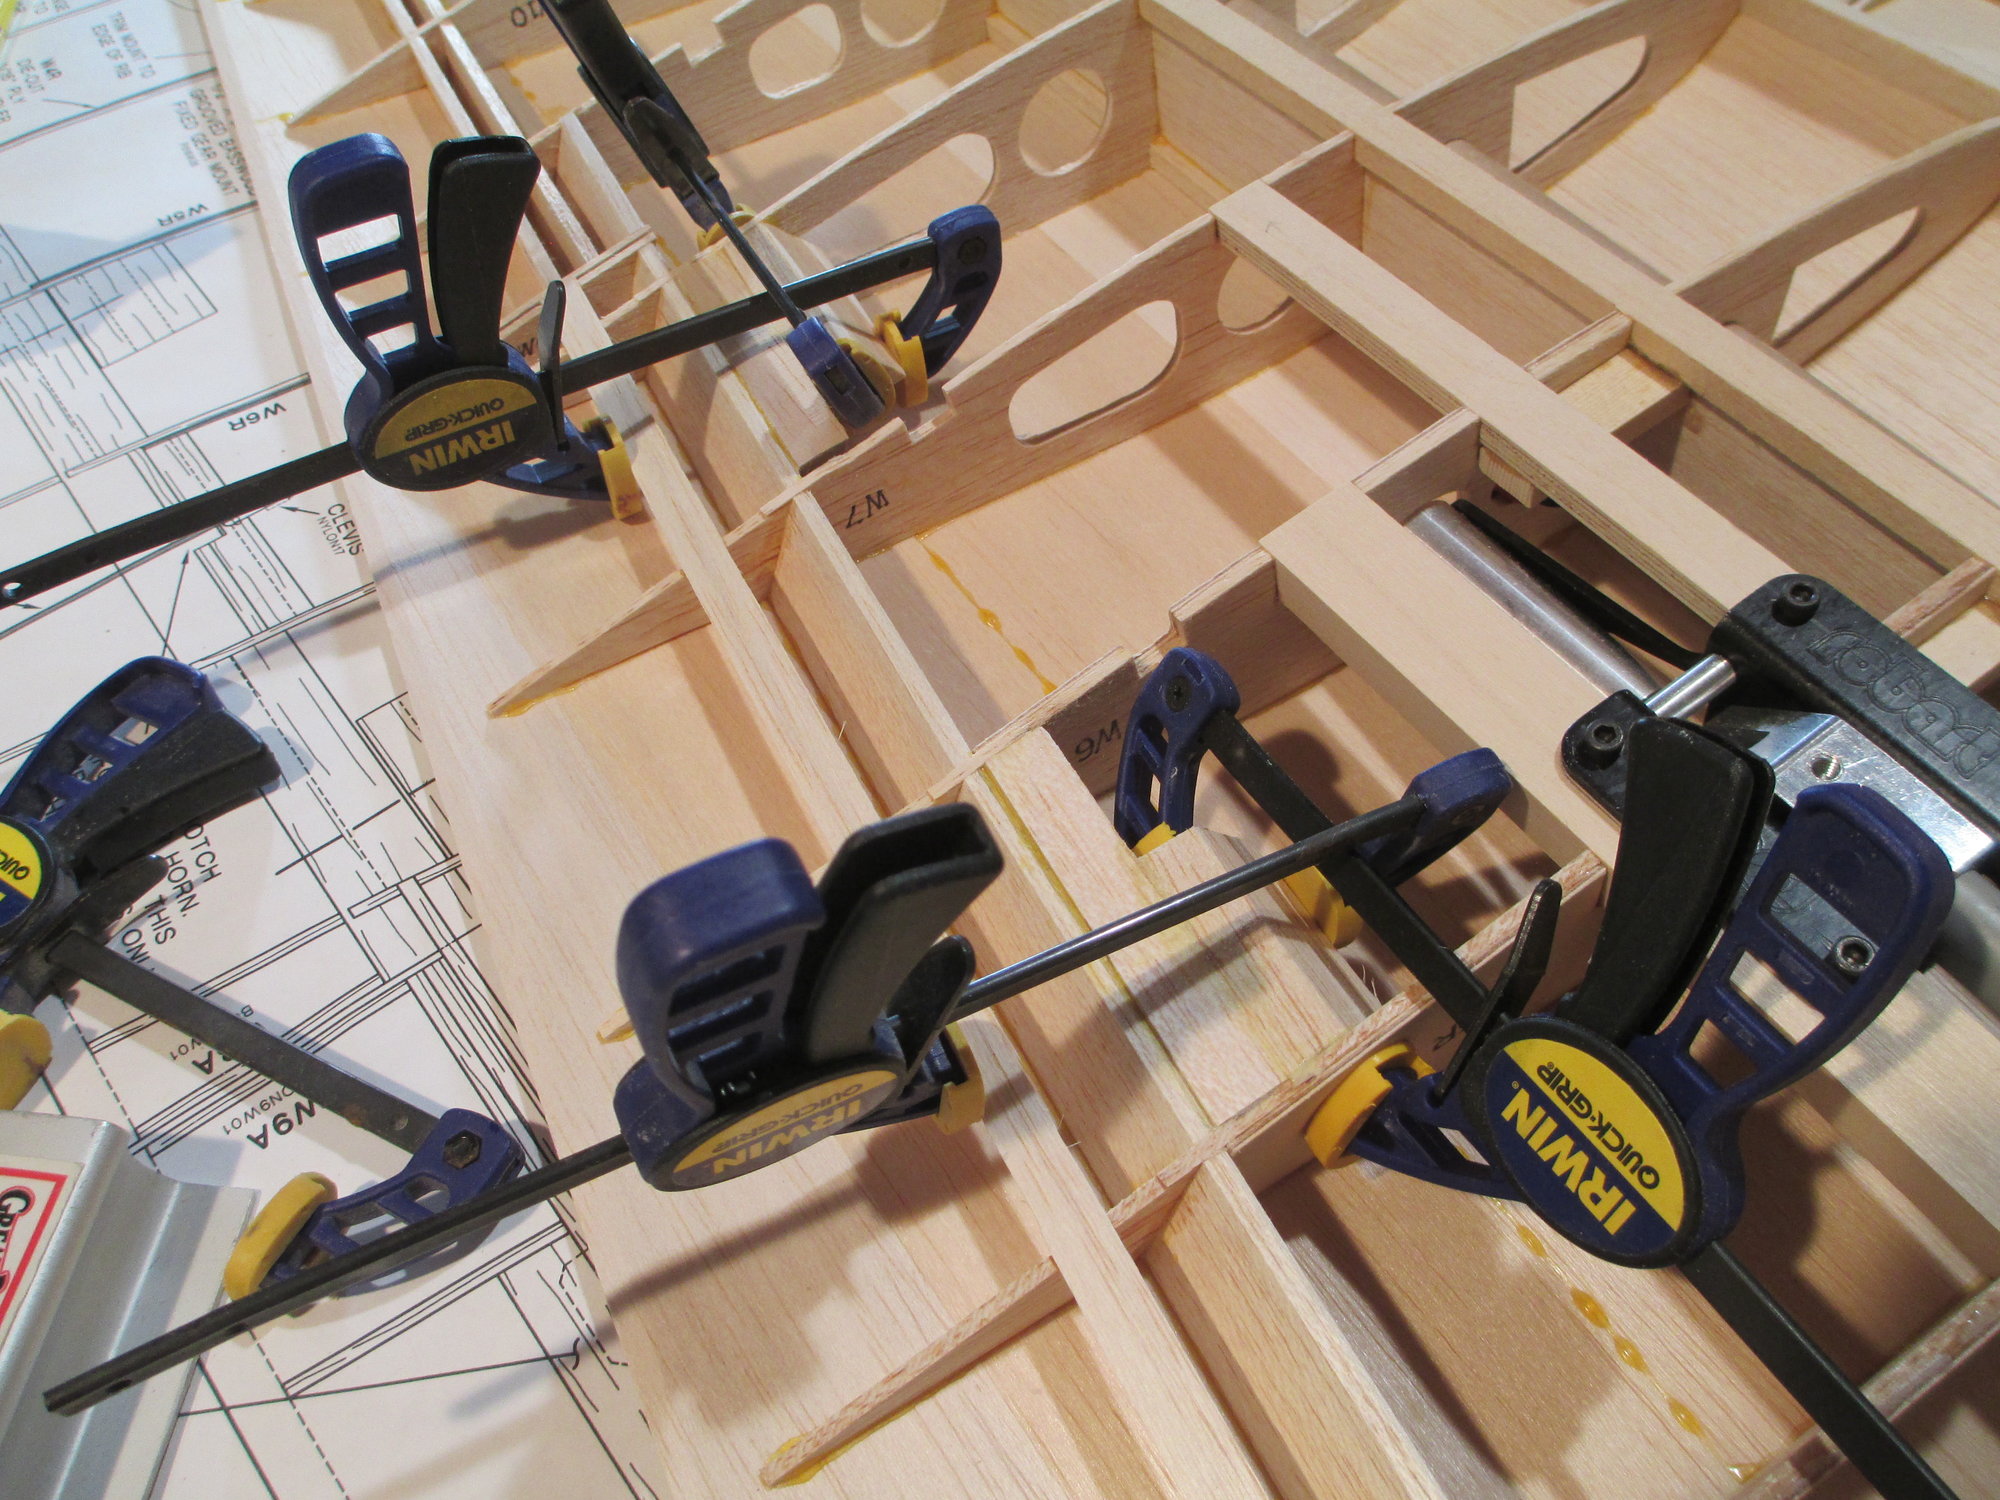
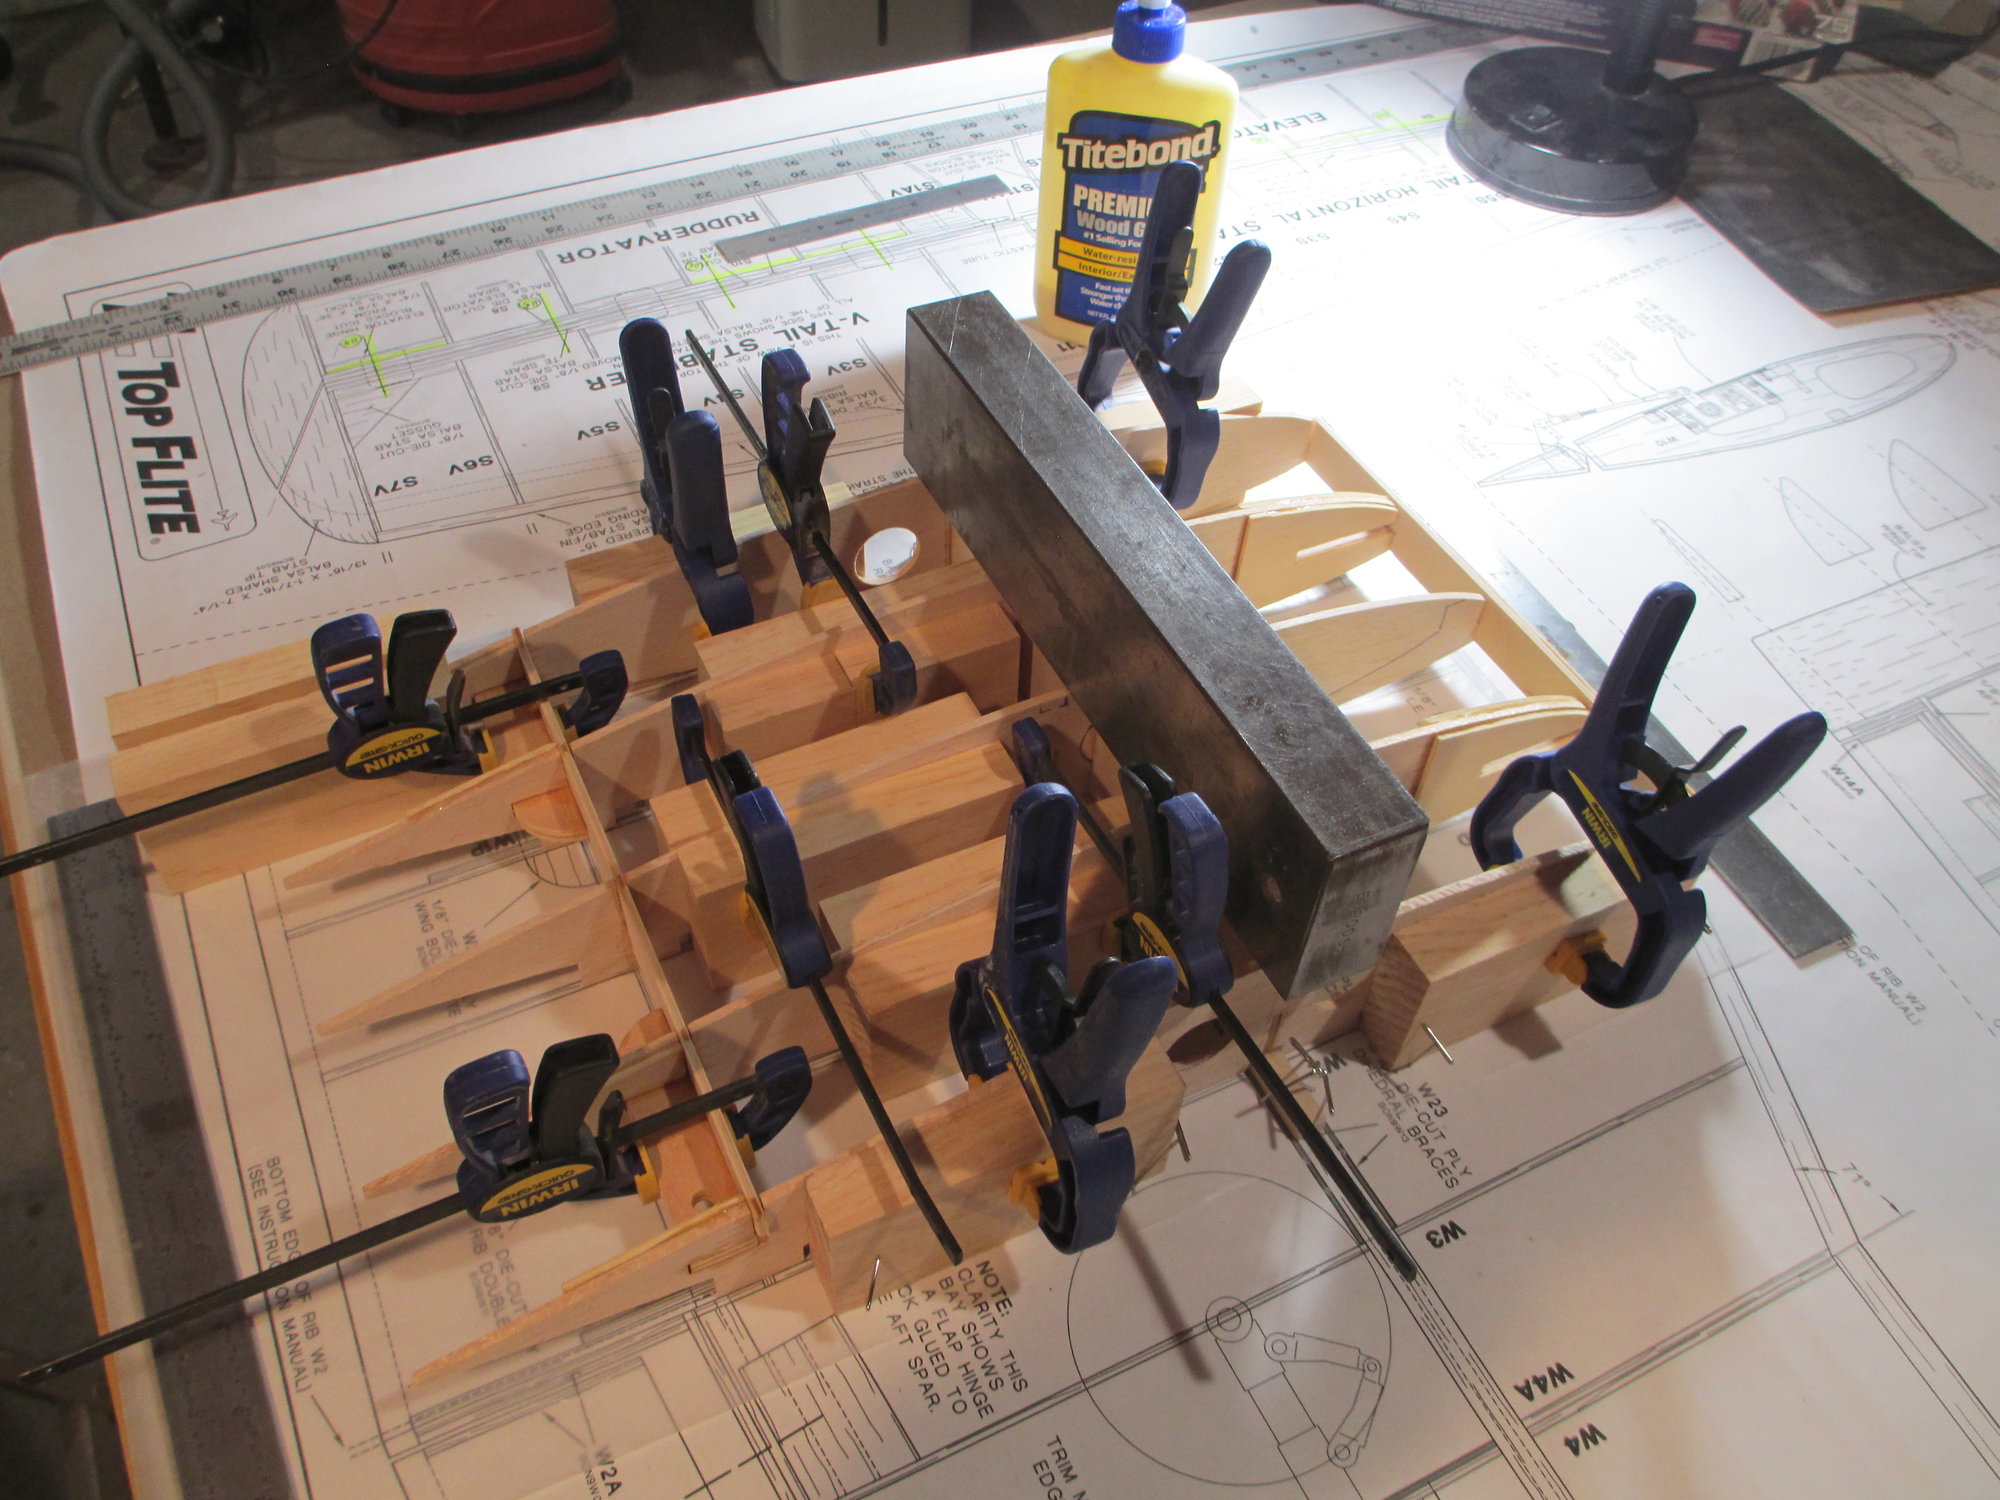
Preliminary dry fit before glue up.
Everything lines up as it should, time for glue.
This is what it takes to make sure that all of the ribs are plumb and directly over the lines of the plans.
 08-20-2019, 07:20 AM
#193
Thread Starter
 08-20-2019, 09:23 PM
#199
Guys, it could be worse. You could be like me, working 12 hour shifts, over night, three days a week with one or two more 9 hour shifts to start or end the week. To make matters worse, the wife works from home so I need to be quiet while she's working, just in case one of her co-workers or supervisor calls. Needless to say, I don't get much time to work on anything
Last edited by Hydro Junkie; 08-20-2019 at 09:25 PM.
08-20-2019, 11:49 PM
#200
Thread Starter
That's pretty rough Hydro, I agree.
I've learned over time to just accept it as it is and get out of bed and be productive, which is why I head down to my workshop so early!
I've learned over time to just accept it as it is and get out of bed and be productive, which is why I head down to my workshop so early!