


TF Beechcraft Bonanza F33A Build


 08-21-2019, 05:42 AM
#202

Thread Starter
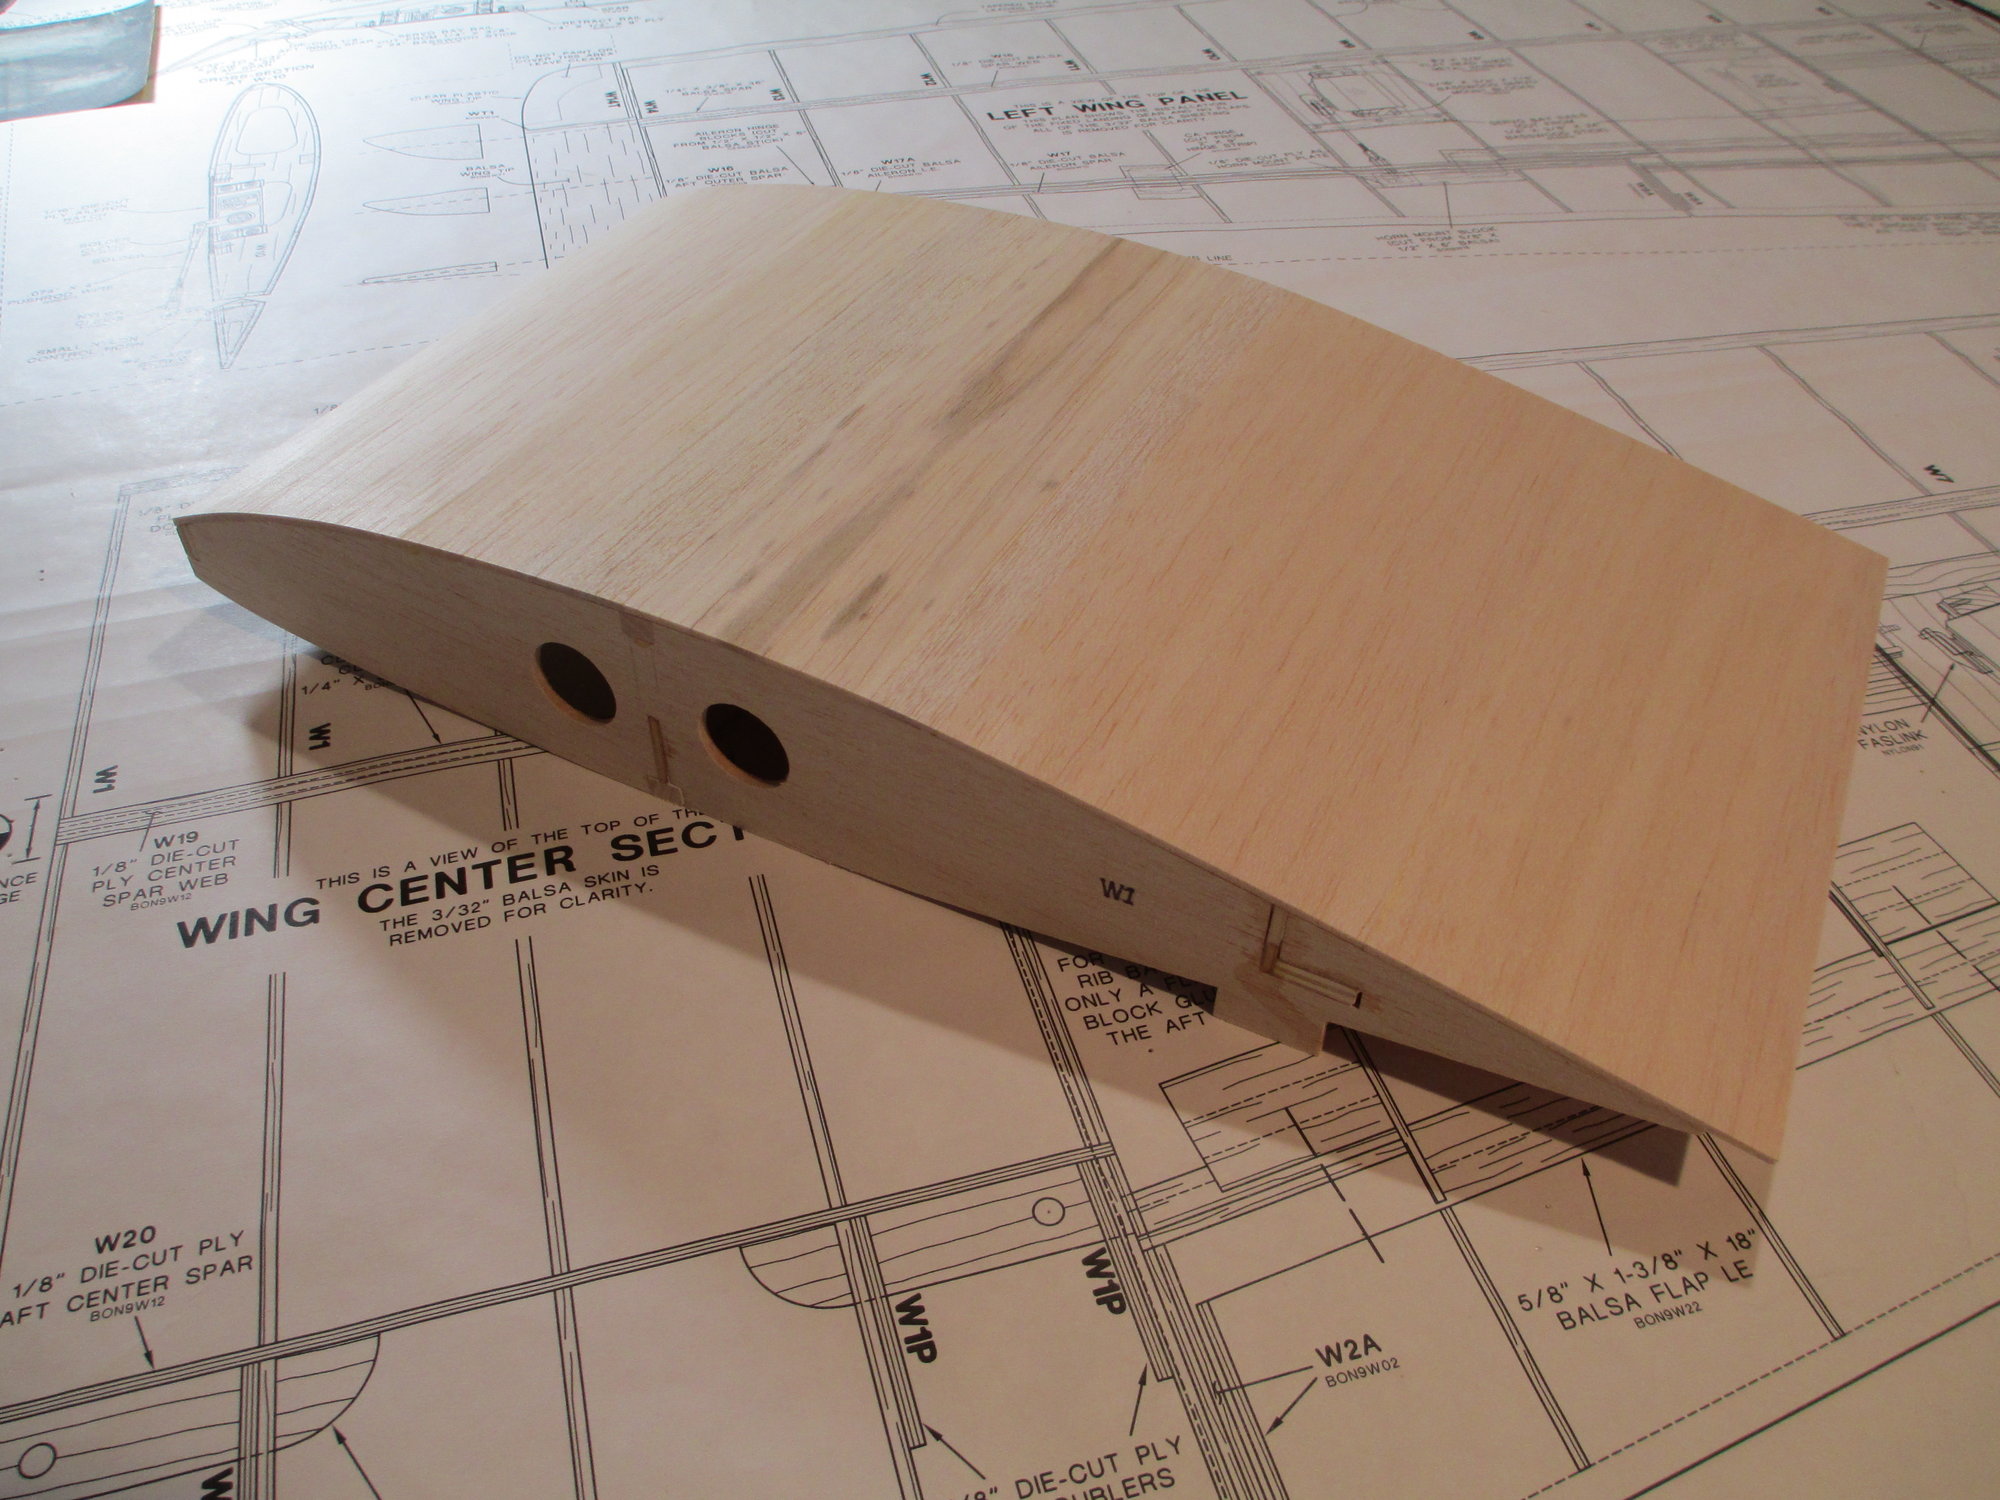
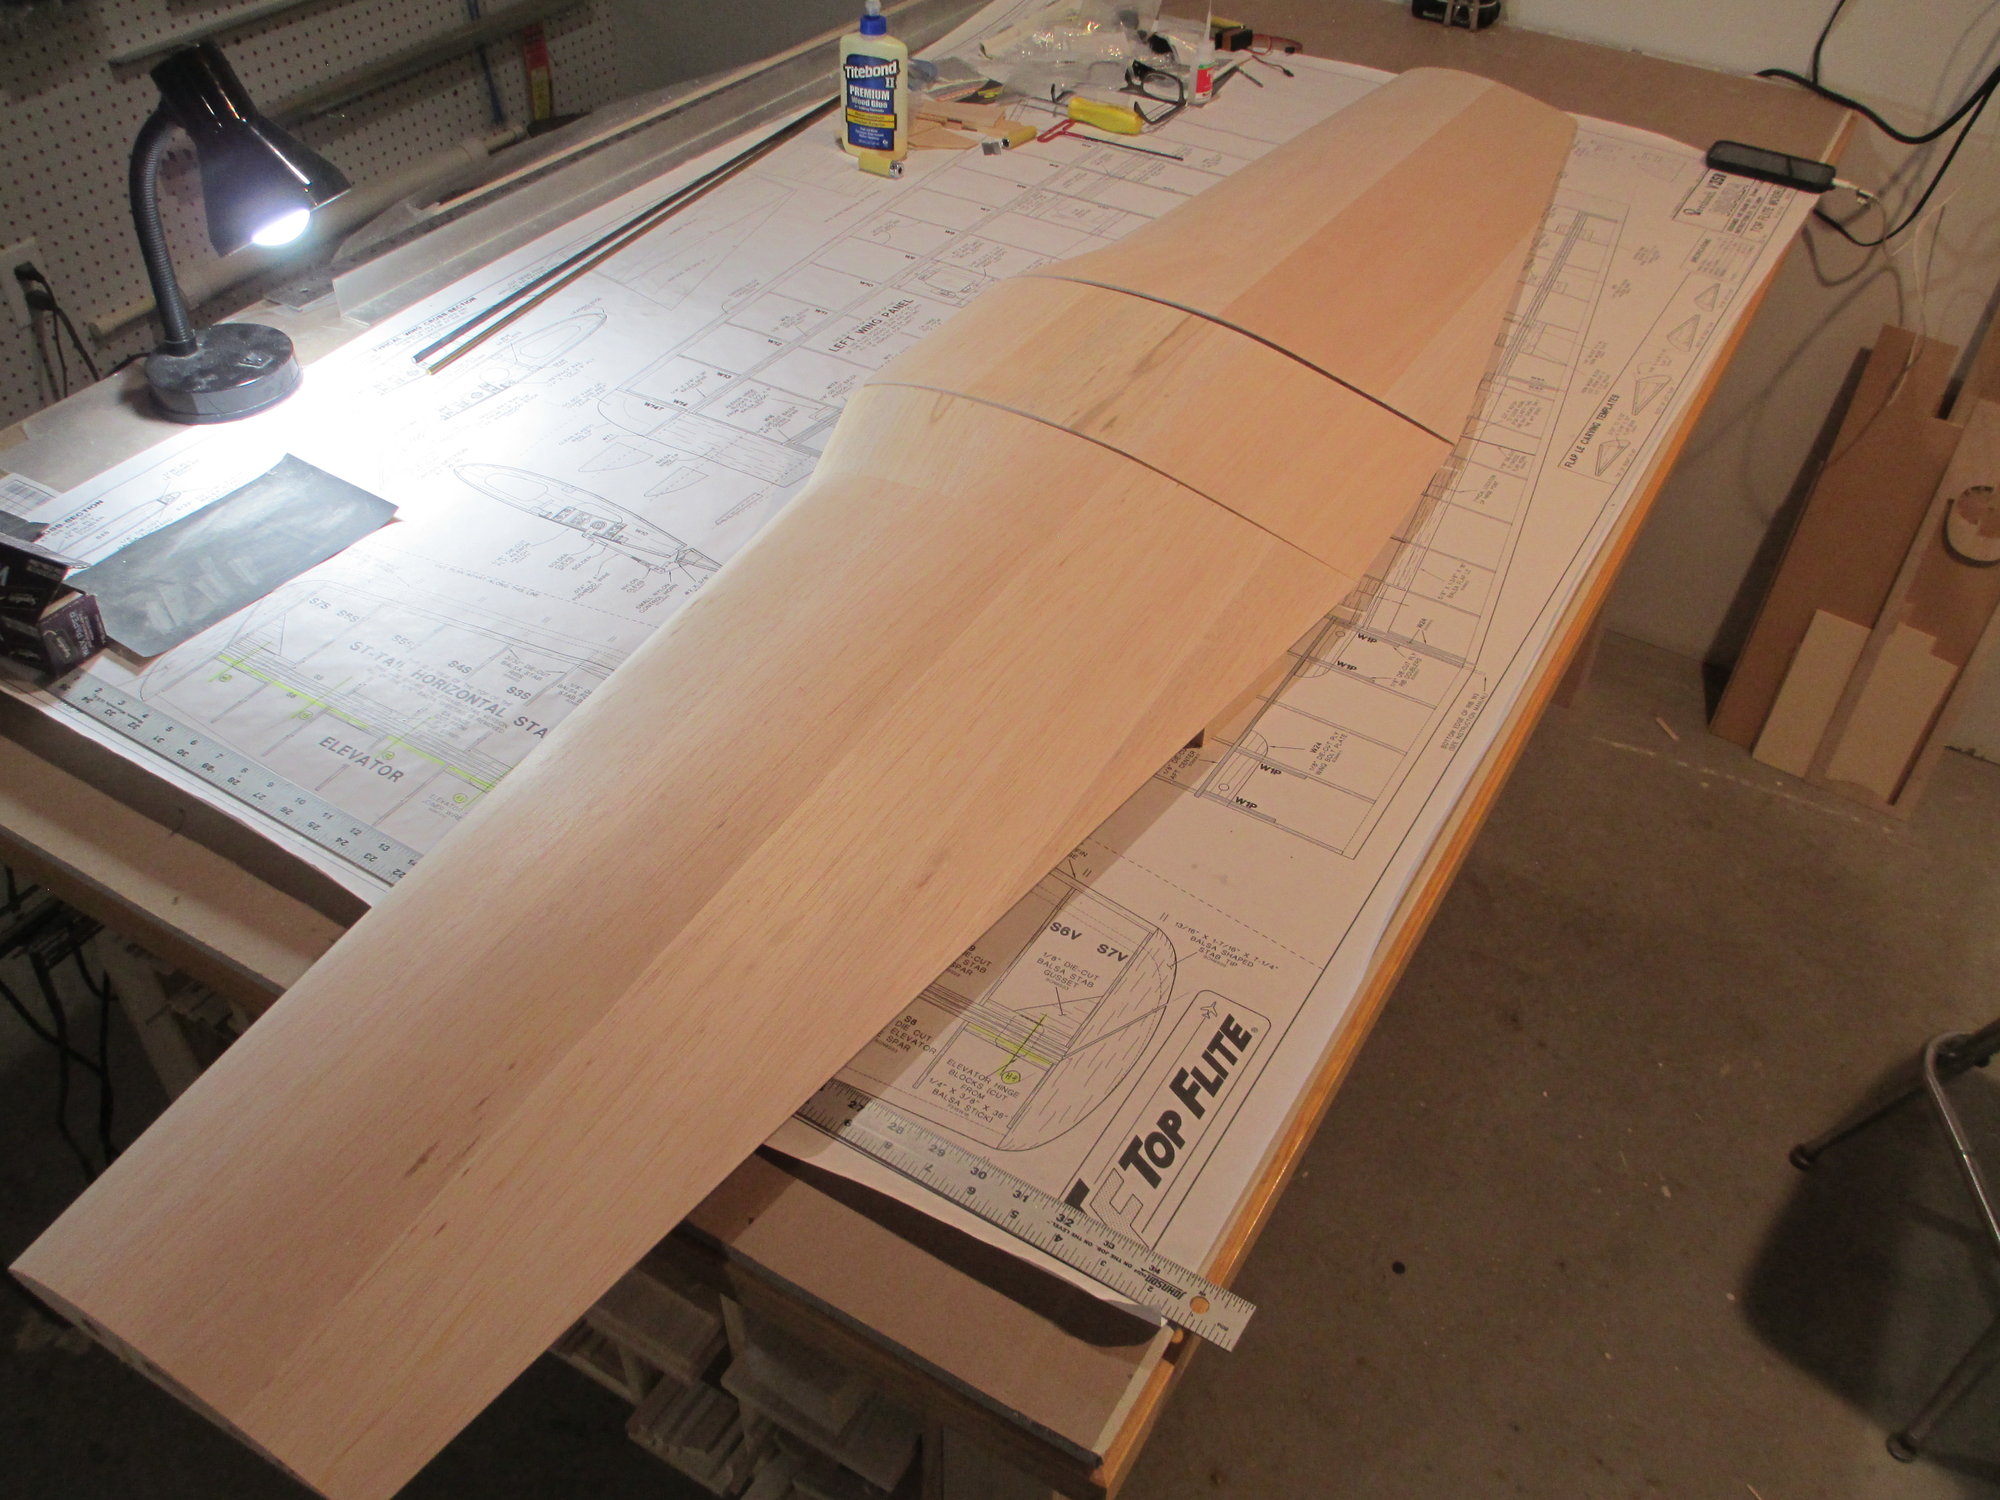
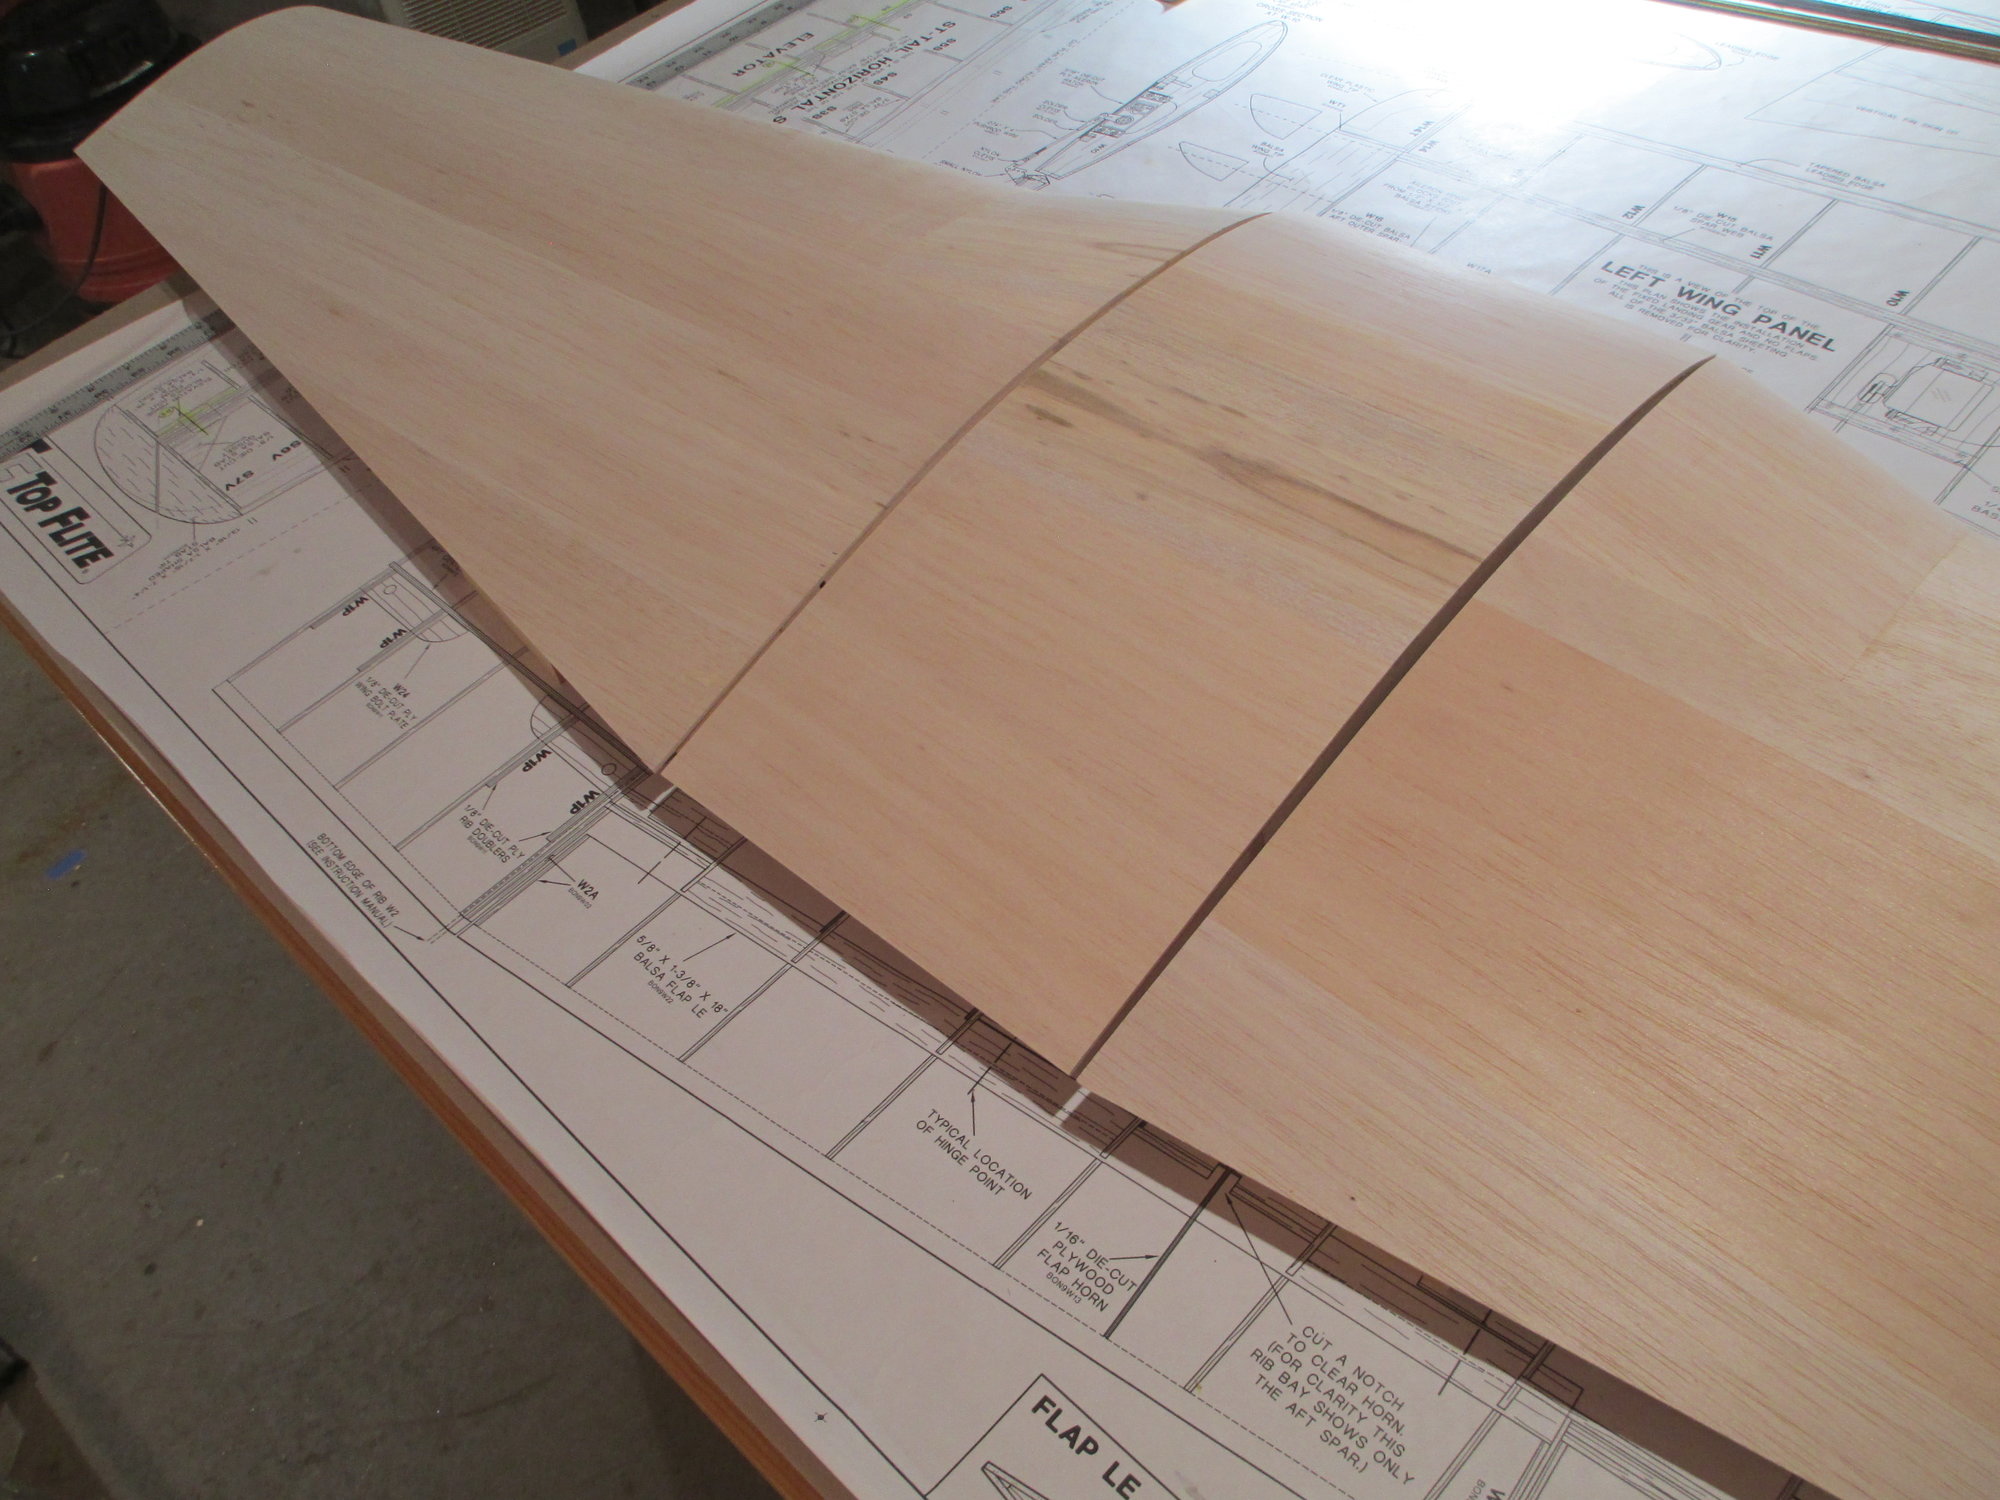
I'll have some pictures to post this evening Mike. Top sheeting of the Center Section to show.
08-21-2019, 11:02 AM
#203
My Feedback: (2)
Hydro' I work the night shift and I just started 2 months ago! Sometimes I go in at 5:30 pm in the afternoon and then I won't get off until 7am the next day! I . I sleep almost all day and then get up and go right back to it!
But to work on my airplanes has been kind of hard lately. I did and a fast repair on my current flying airplane and found that it didn't work at all! so I need to rip the bottom out of the fuel compartment. I almost decided to take it to a swap meet next week and get rid of it! This airplane is a GP Easy sport ARF and the landing gear bends real easy in fact I bent the nose gear back into the bottom of the fuse and was just from landing! yikes ha
Your build looks amazon Vince and I need to work on my skills
thanks
Michael


 08-22-2019, 03:02 PM
#206
Thread Starter
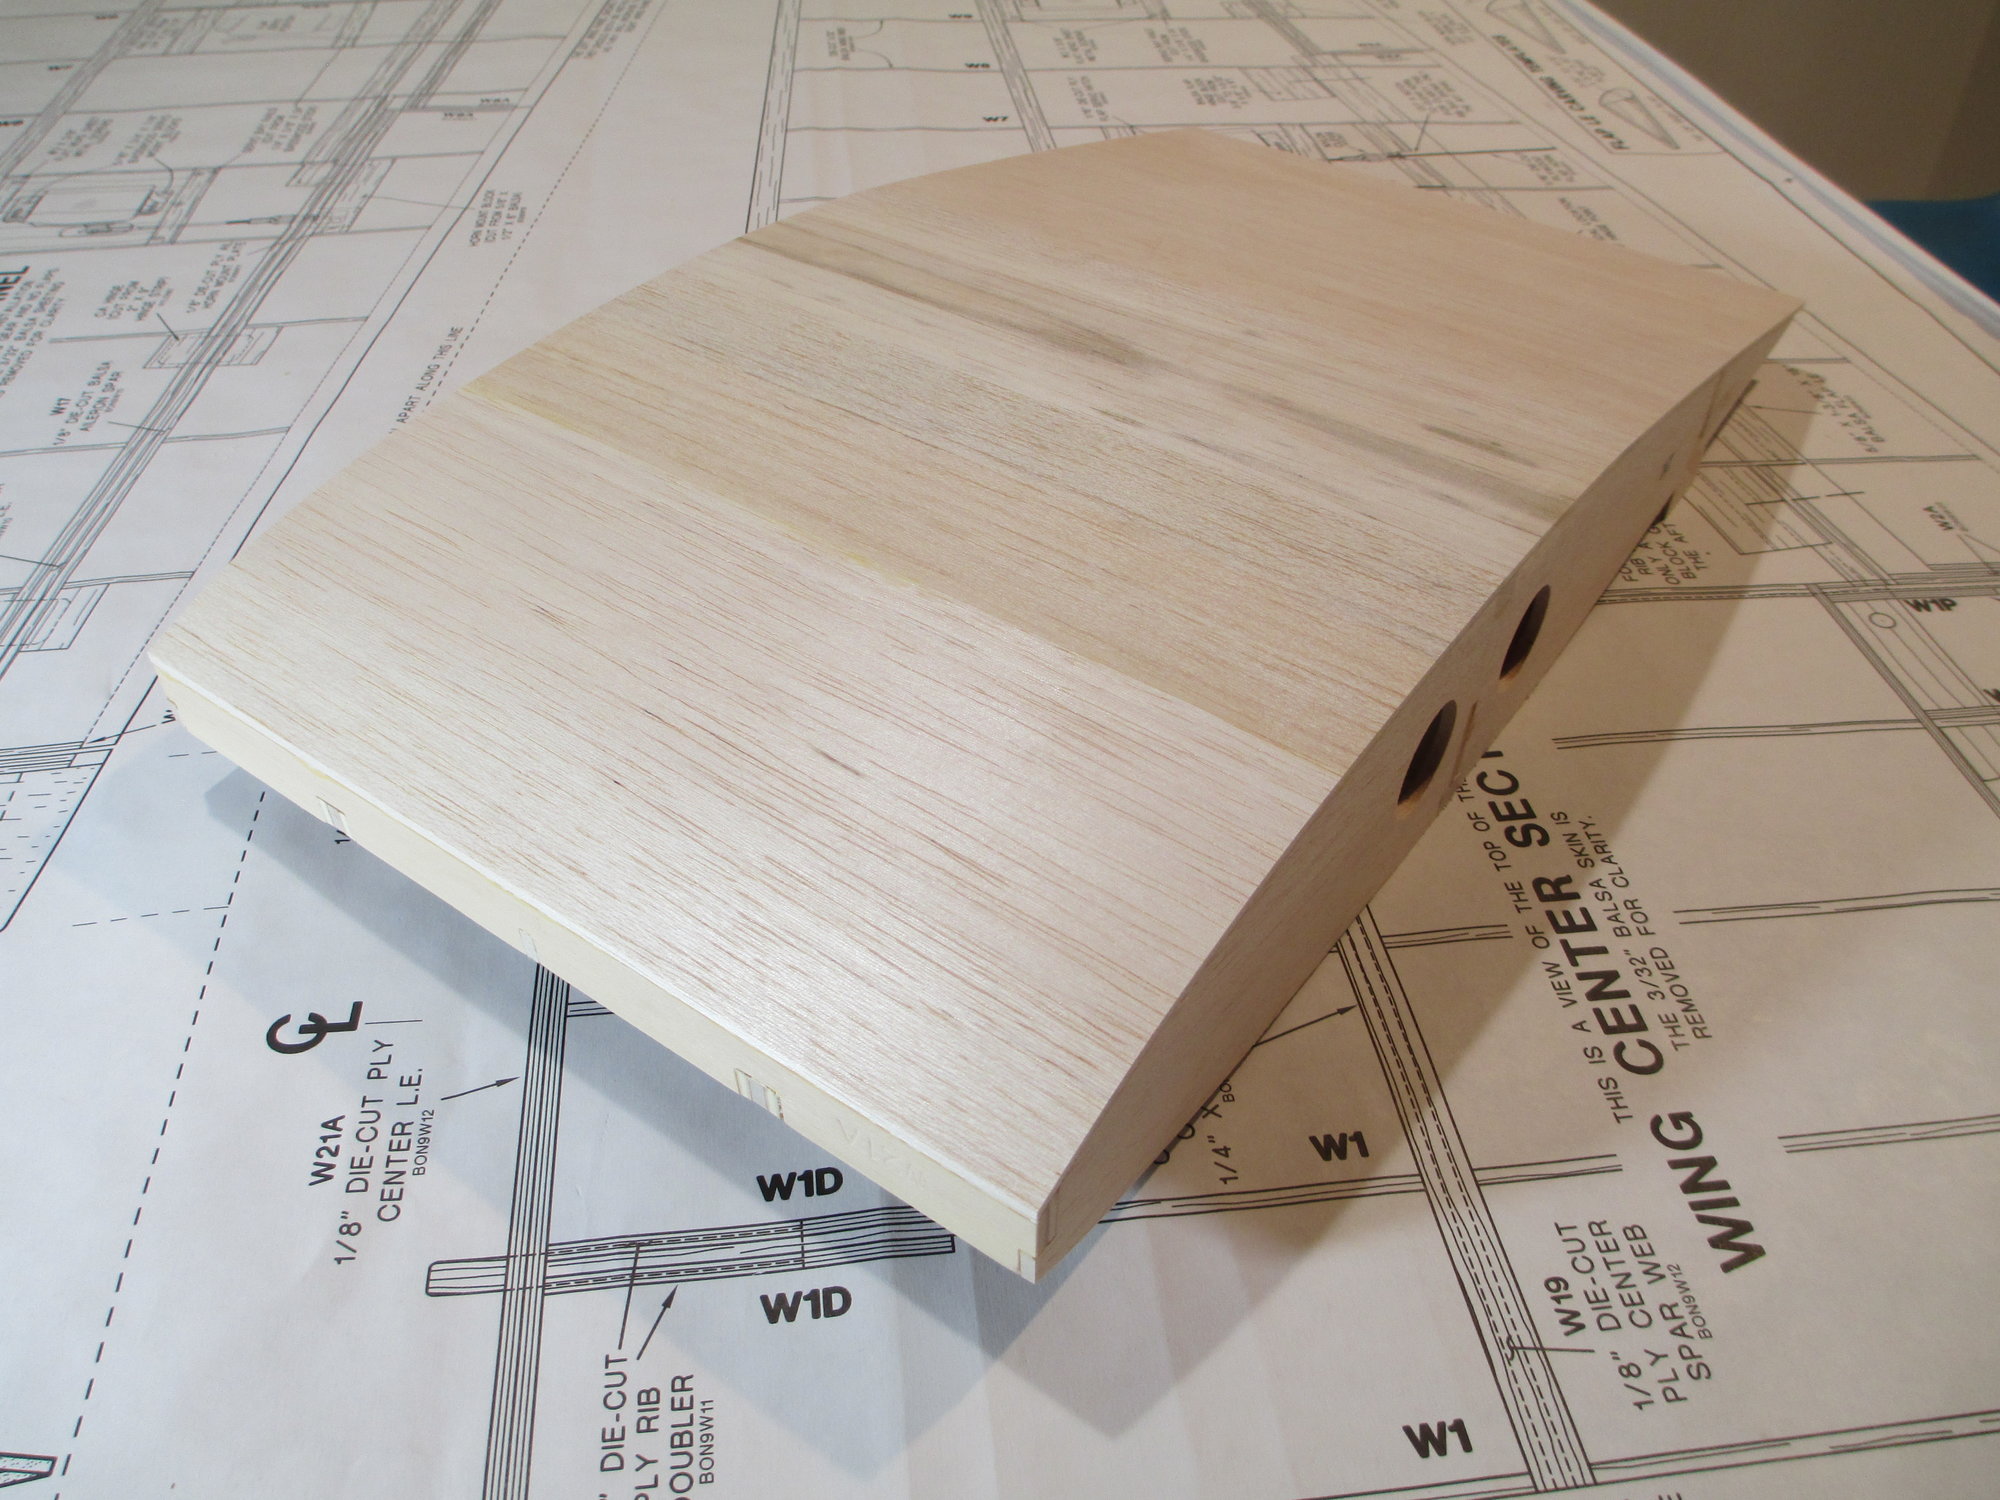
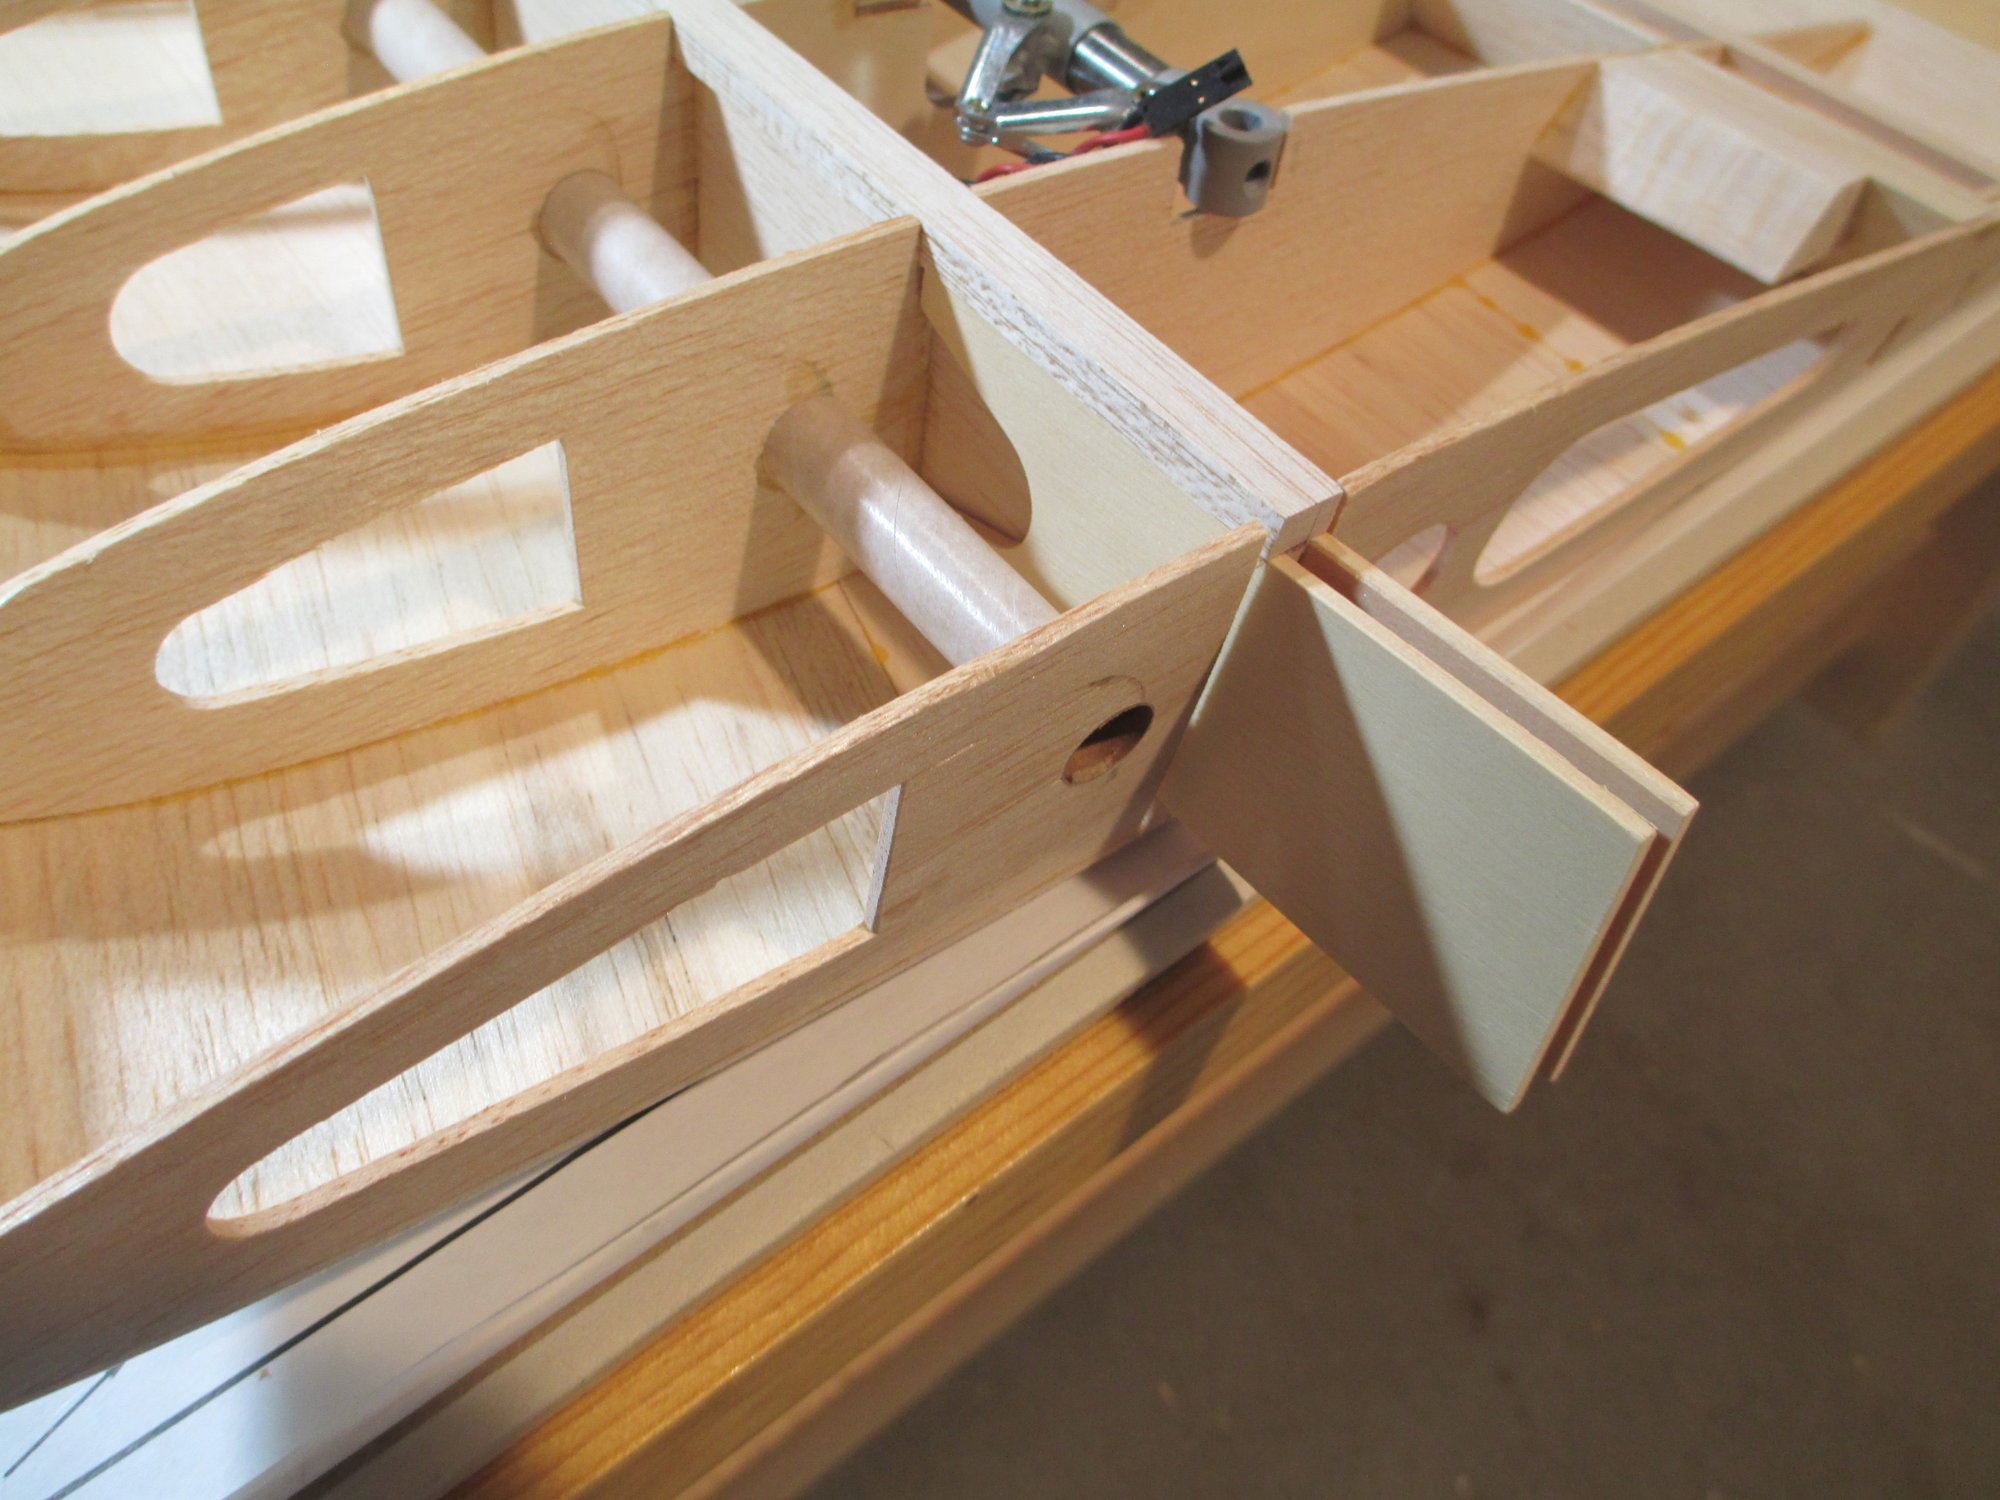
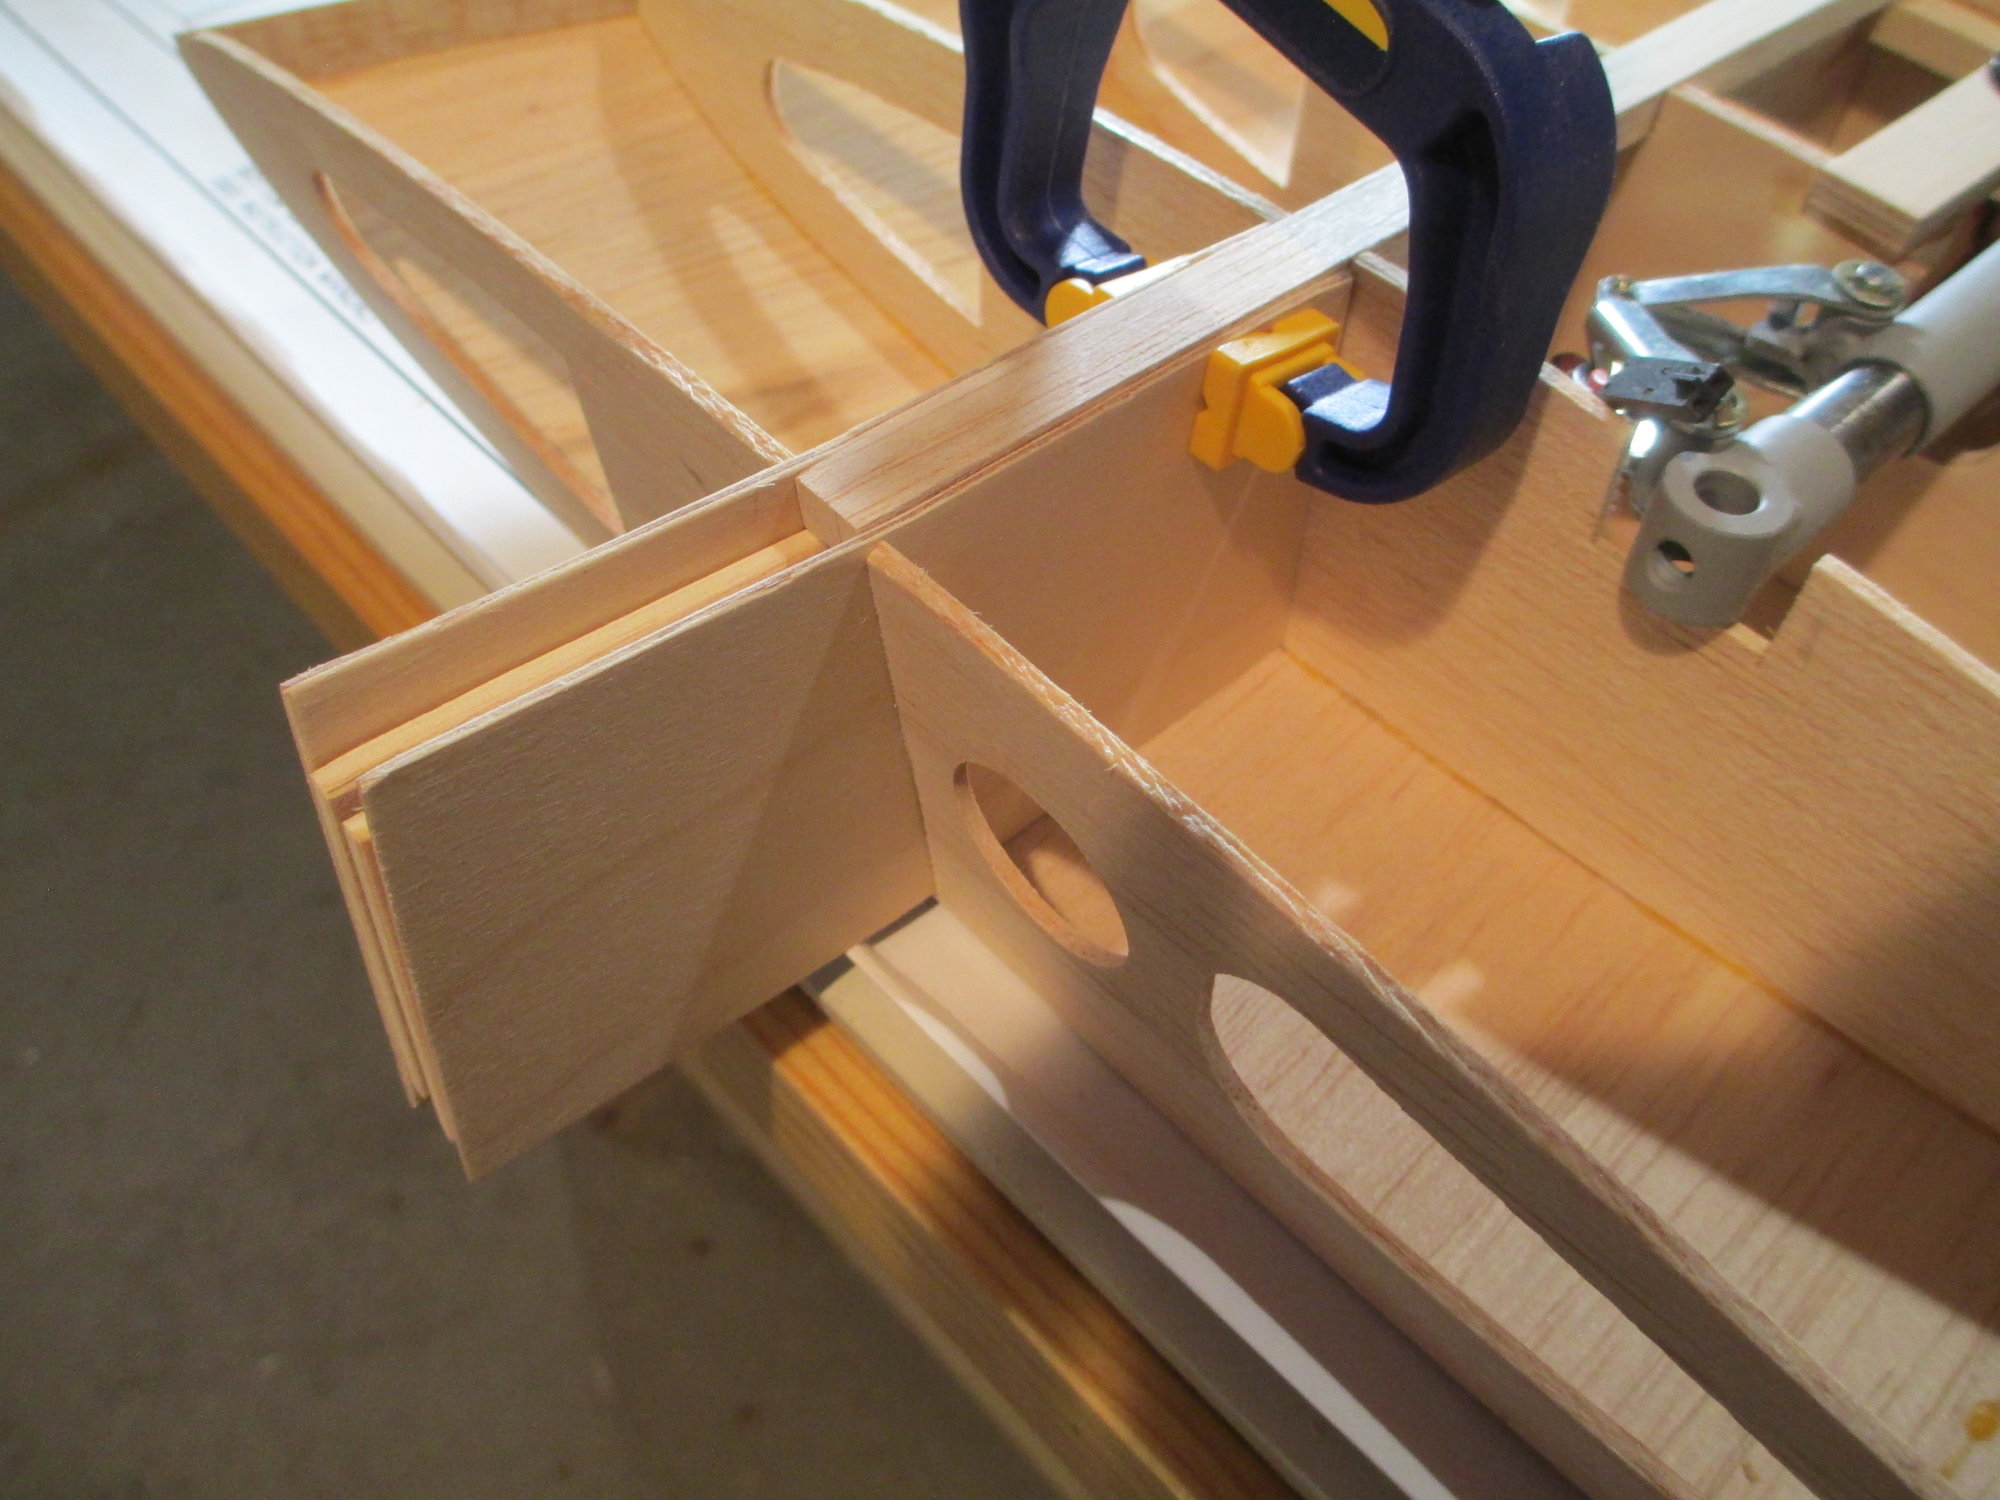
The two slots that you see in the front portion of the Center Section ribs are for the two wing dowels. This is the reason these two ribs are sandwiched with plywood...
Measurements were taken to ensure that the 1/4" hole I'm about to drill will line up with those slots.

I used a 1/4" brad point bit to make the hole. After drilling, I test fit a 1/4" dowel to see if my measurements were correct (and they were).
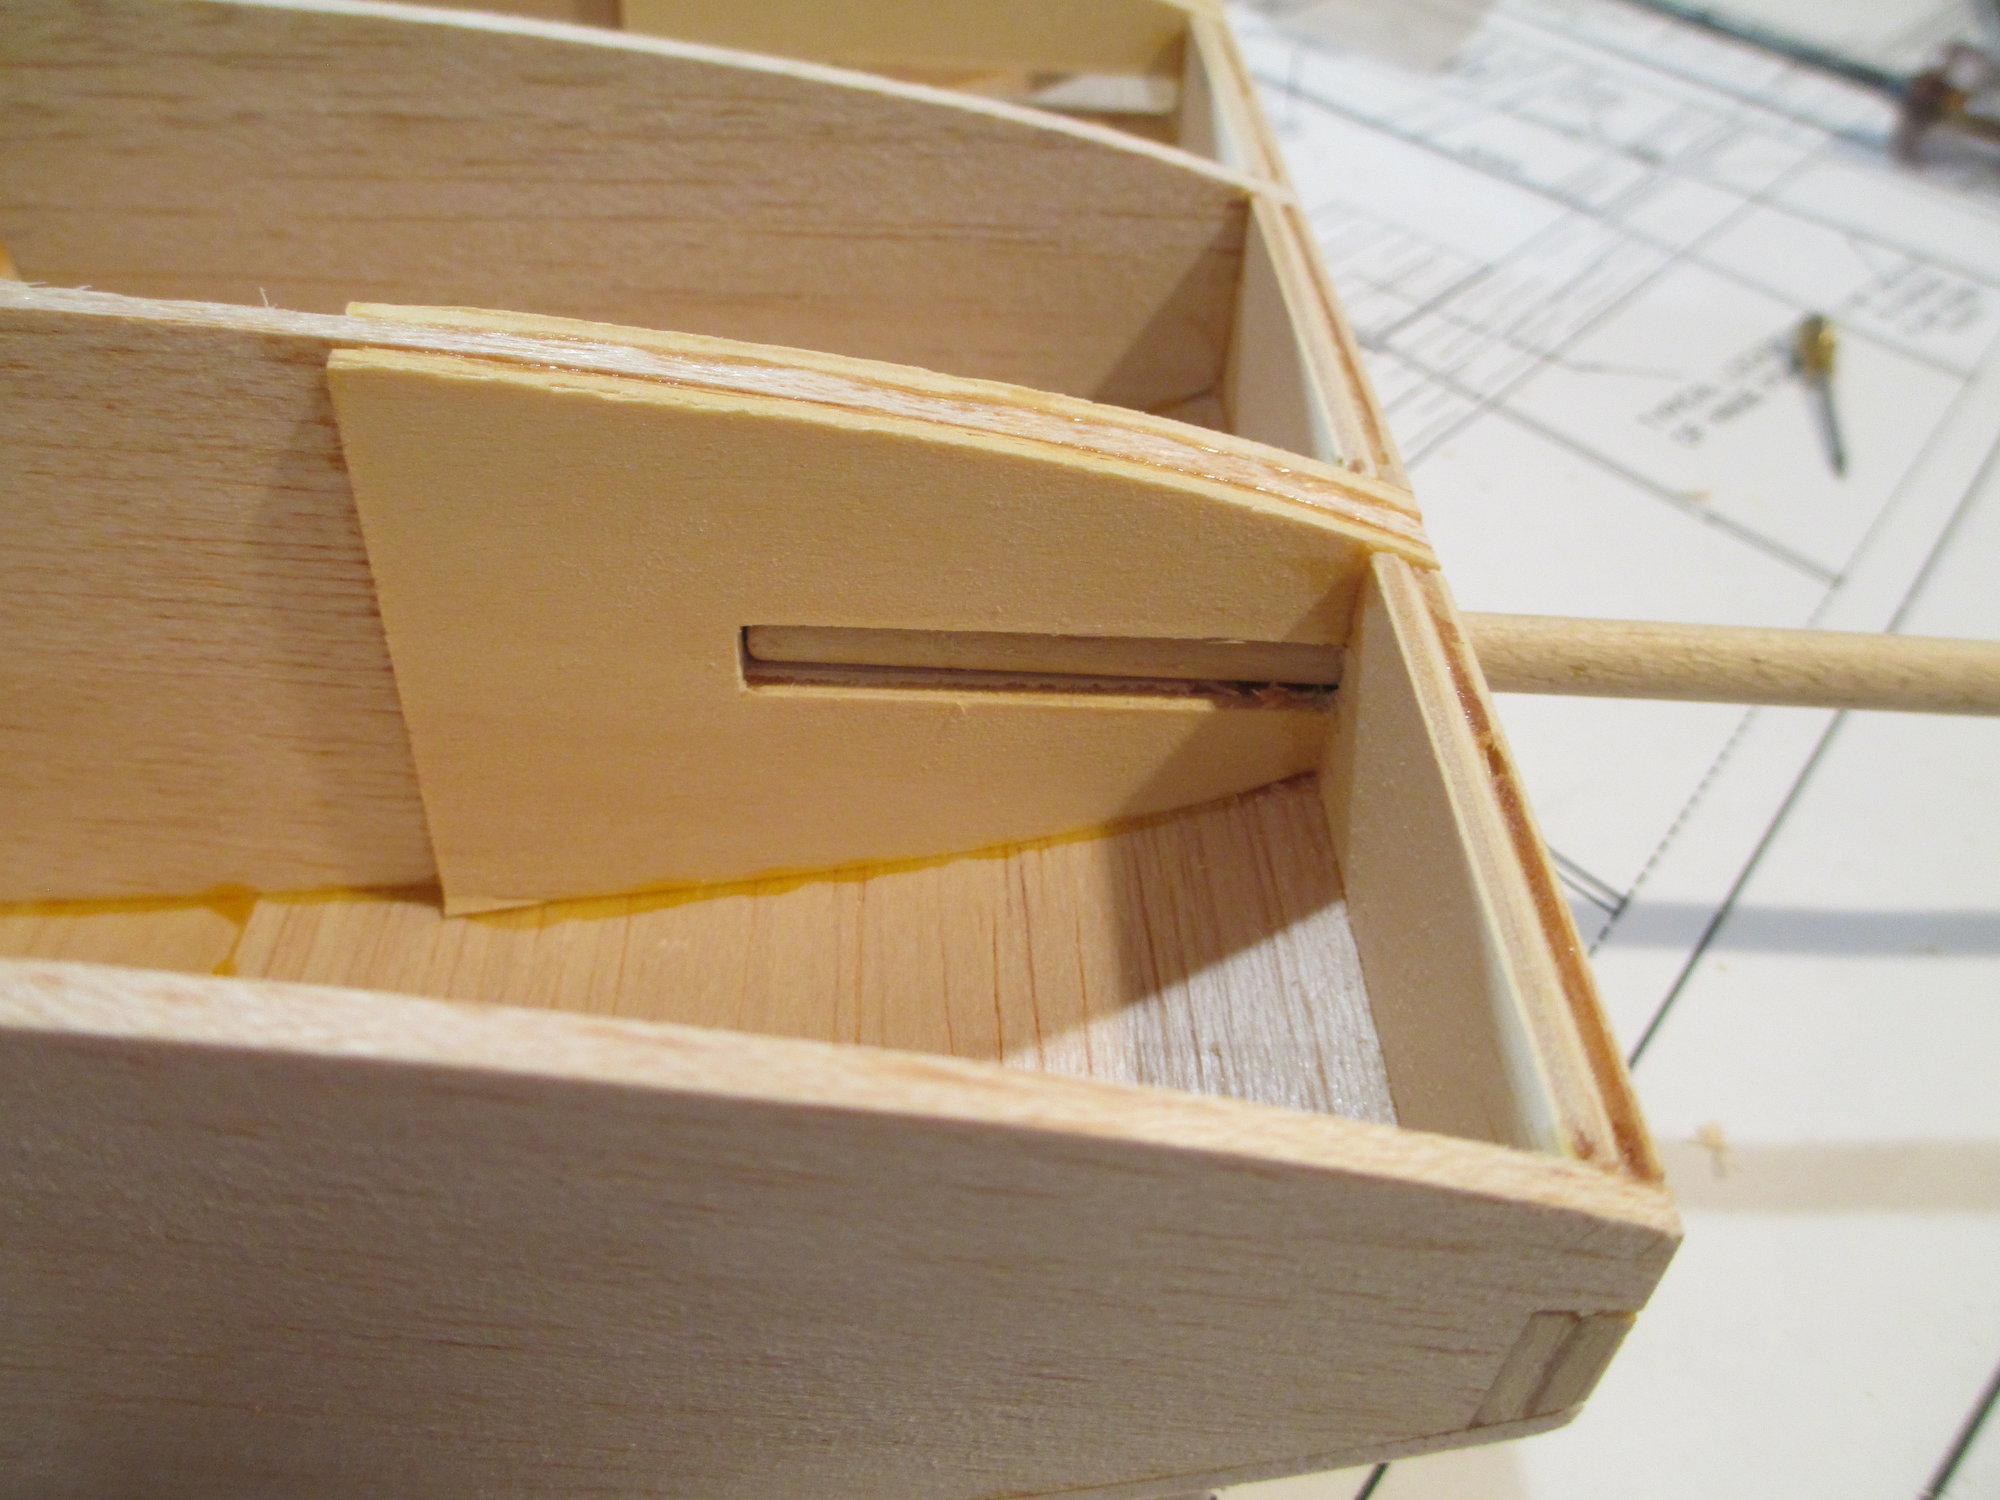
This photos shows how the dowel is held in alignment with the slots. Don't be tempted at this point to epoxy the dowels in now as they will only get in your way later when you are covering your model.
Sometimes it's the little things that make your model "better". The things that most people wouldn't even know is there, they're unseen but they make your build a little better, a little stronger.
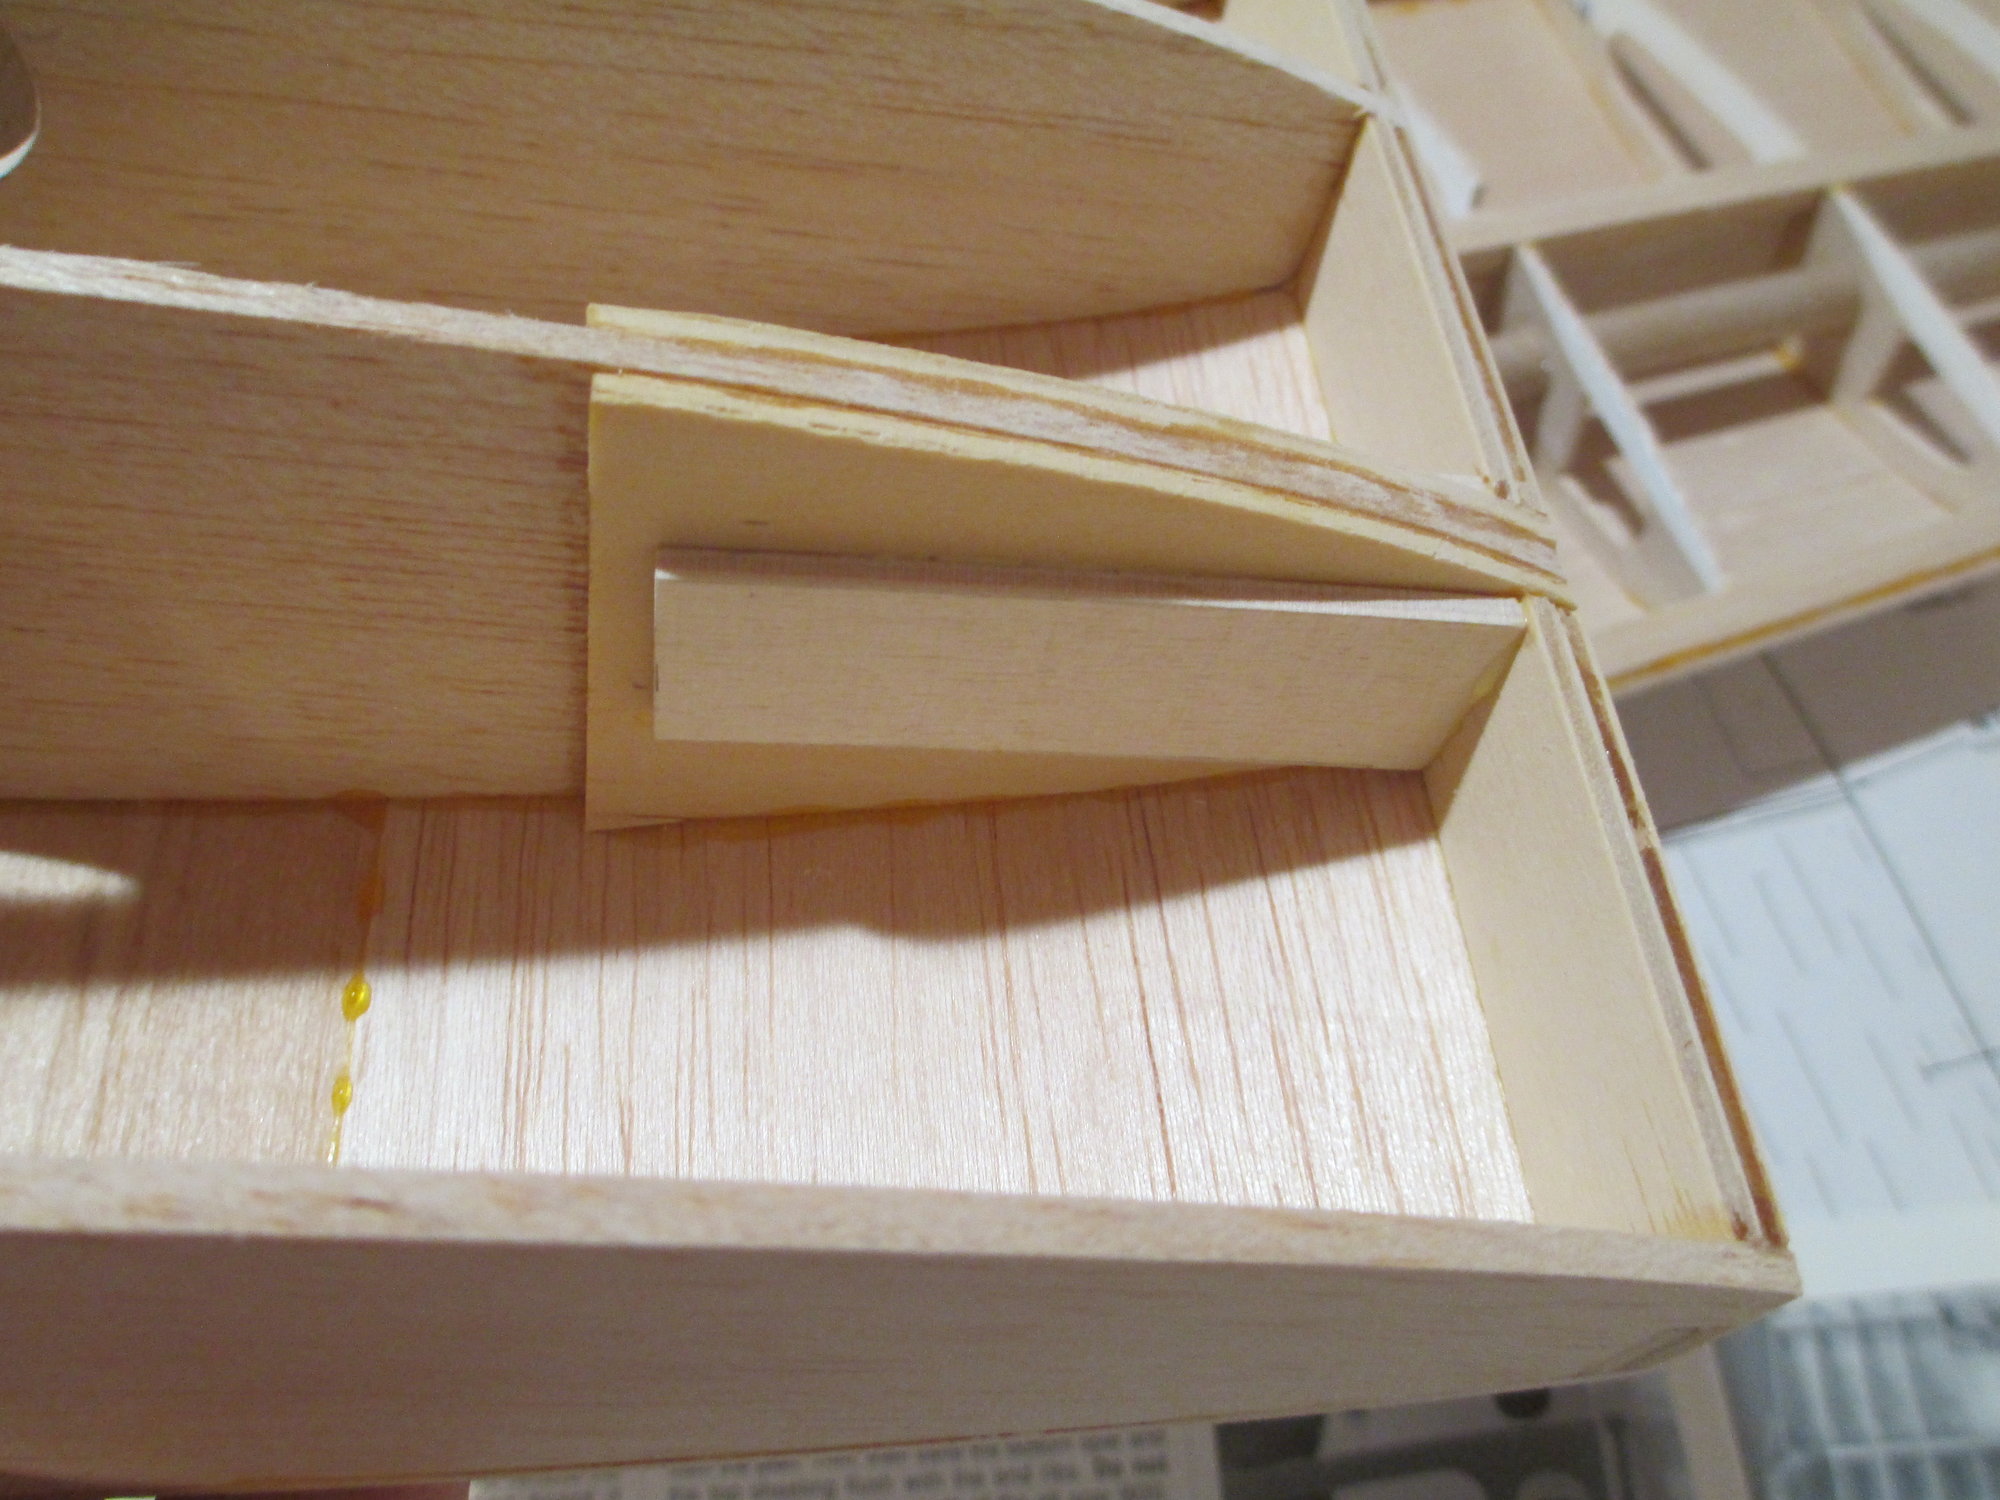
Since I will be epoxying these dowels after the wing is glassed, I want to be certain that the epoxy will surround the dowel securing it into position. That's why I cut two pieces of scrap lite plywood to box in the dowel slot.
A couple of spring clamps and you're good to go...
Last edited by VincentJ; 08-23-2019 at 03:03 AM.
08-23-2019, 05:31 AM
#207


This wing dowel step is interesting and precise. Gotta wait to see how the dowels will mate up to the former or plate that they insert into.
BTW. You do inspiring work that I will incorporate into future builds. Those will never be as complex as this F33A. Uh-uh.
BTW. You do inspiring work that I will incorporate into future builds. Those will never be as complex as this F33A. Uh-uh.
 08-23-2019, 10:17 AM
#209
Thread Starter
Thank you Lupe, I'm glad that you find some of my work inspiring. I try to share what I know with others so they can be aware of the process and duplicate it into their own builds...
08-24-2019, 02:17 AM
#210
Thread Starter
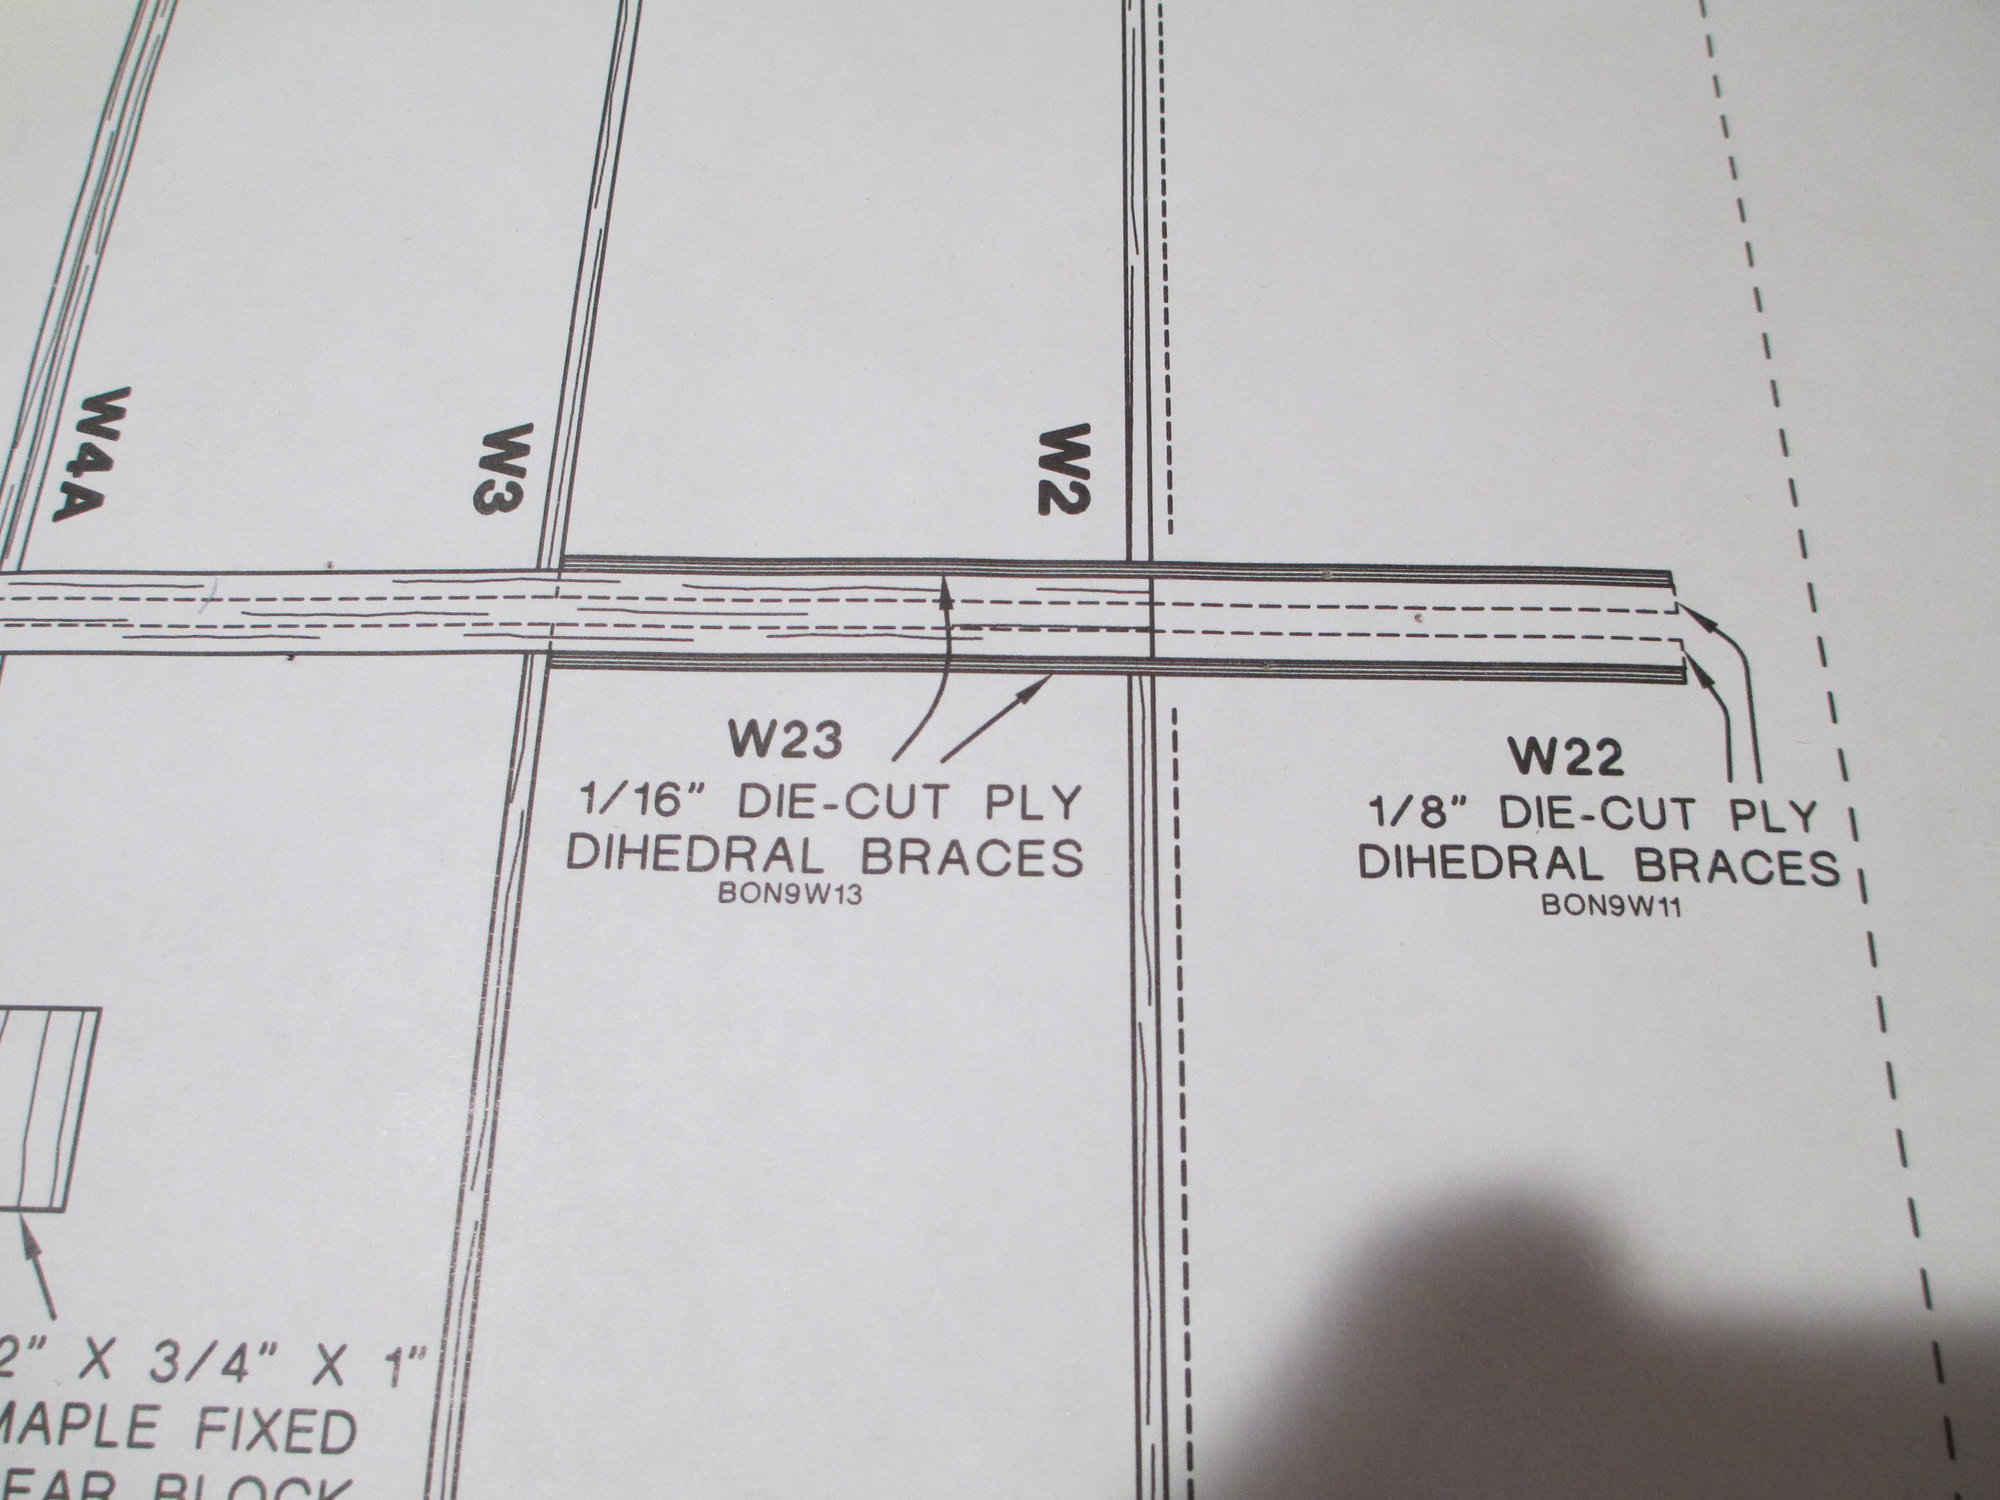
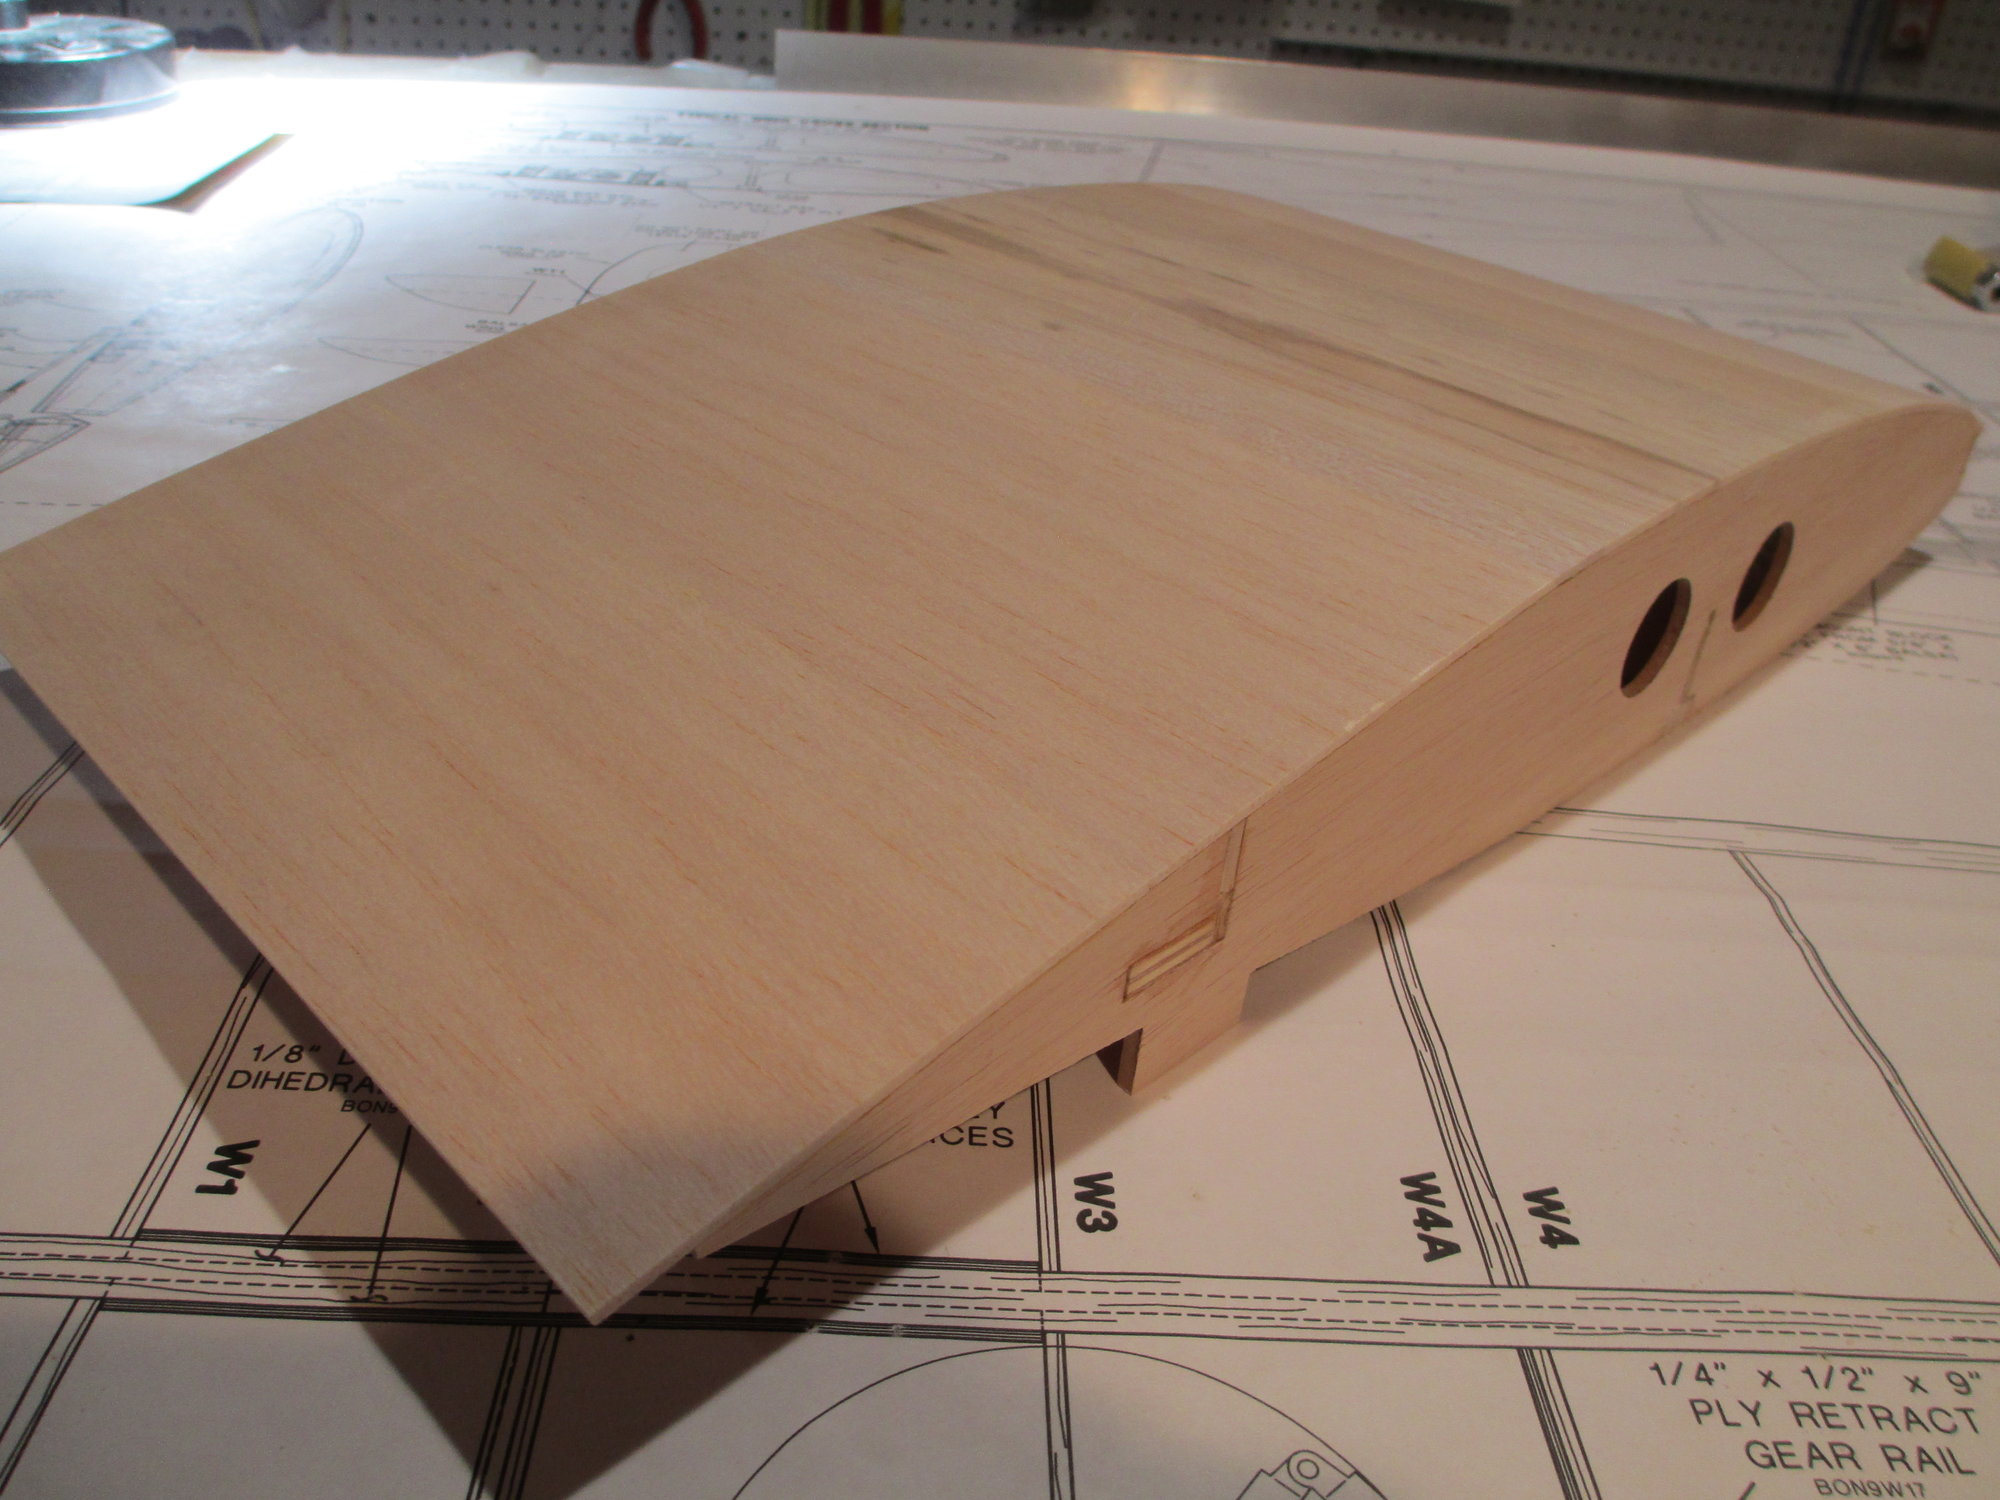
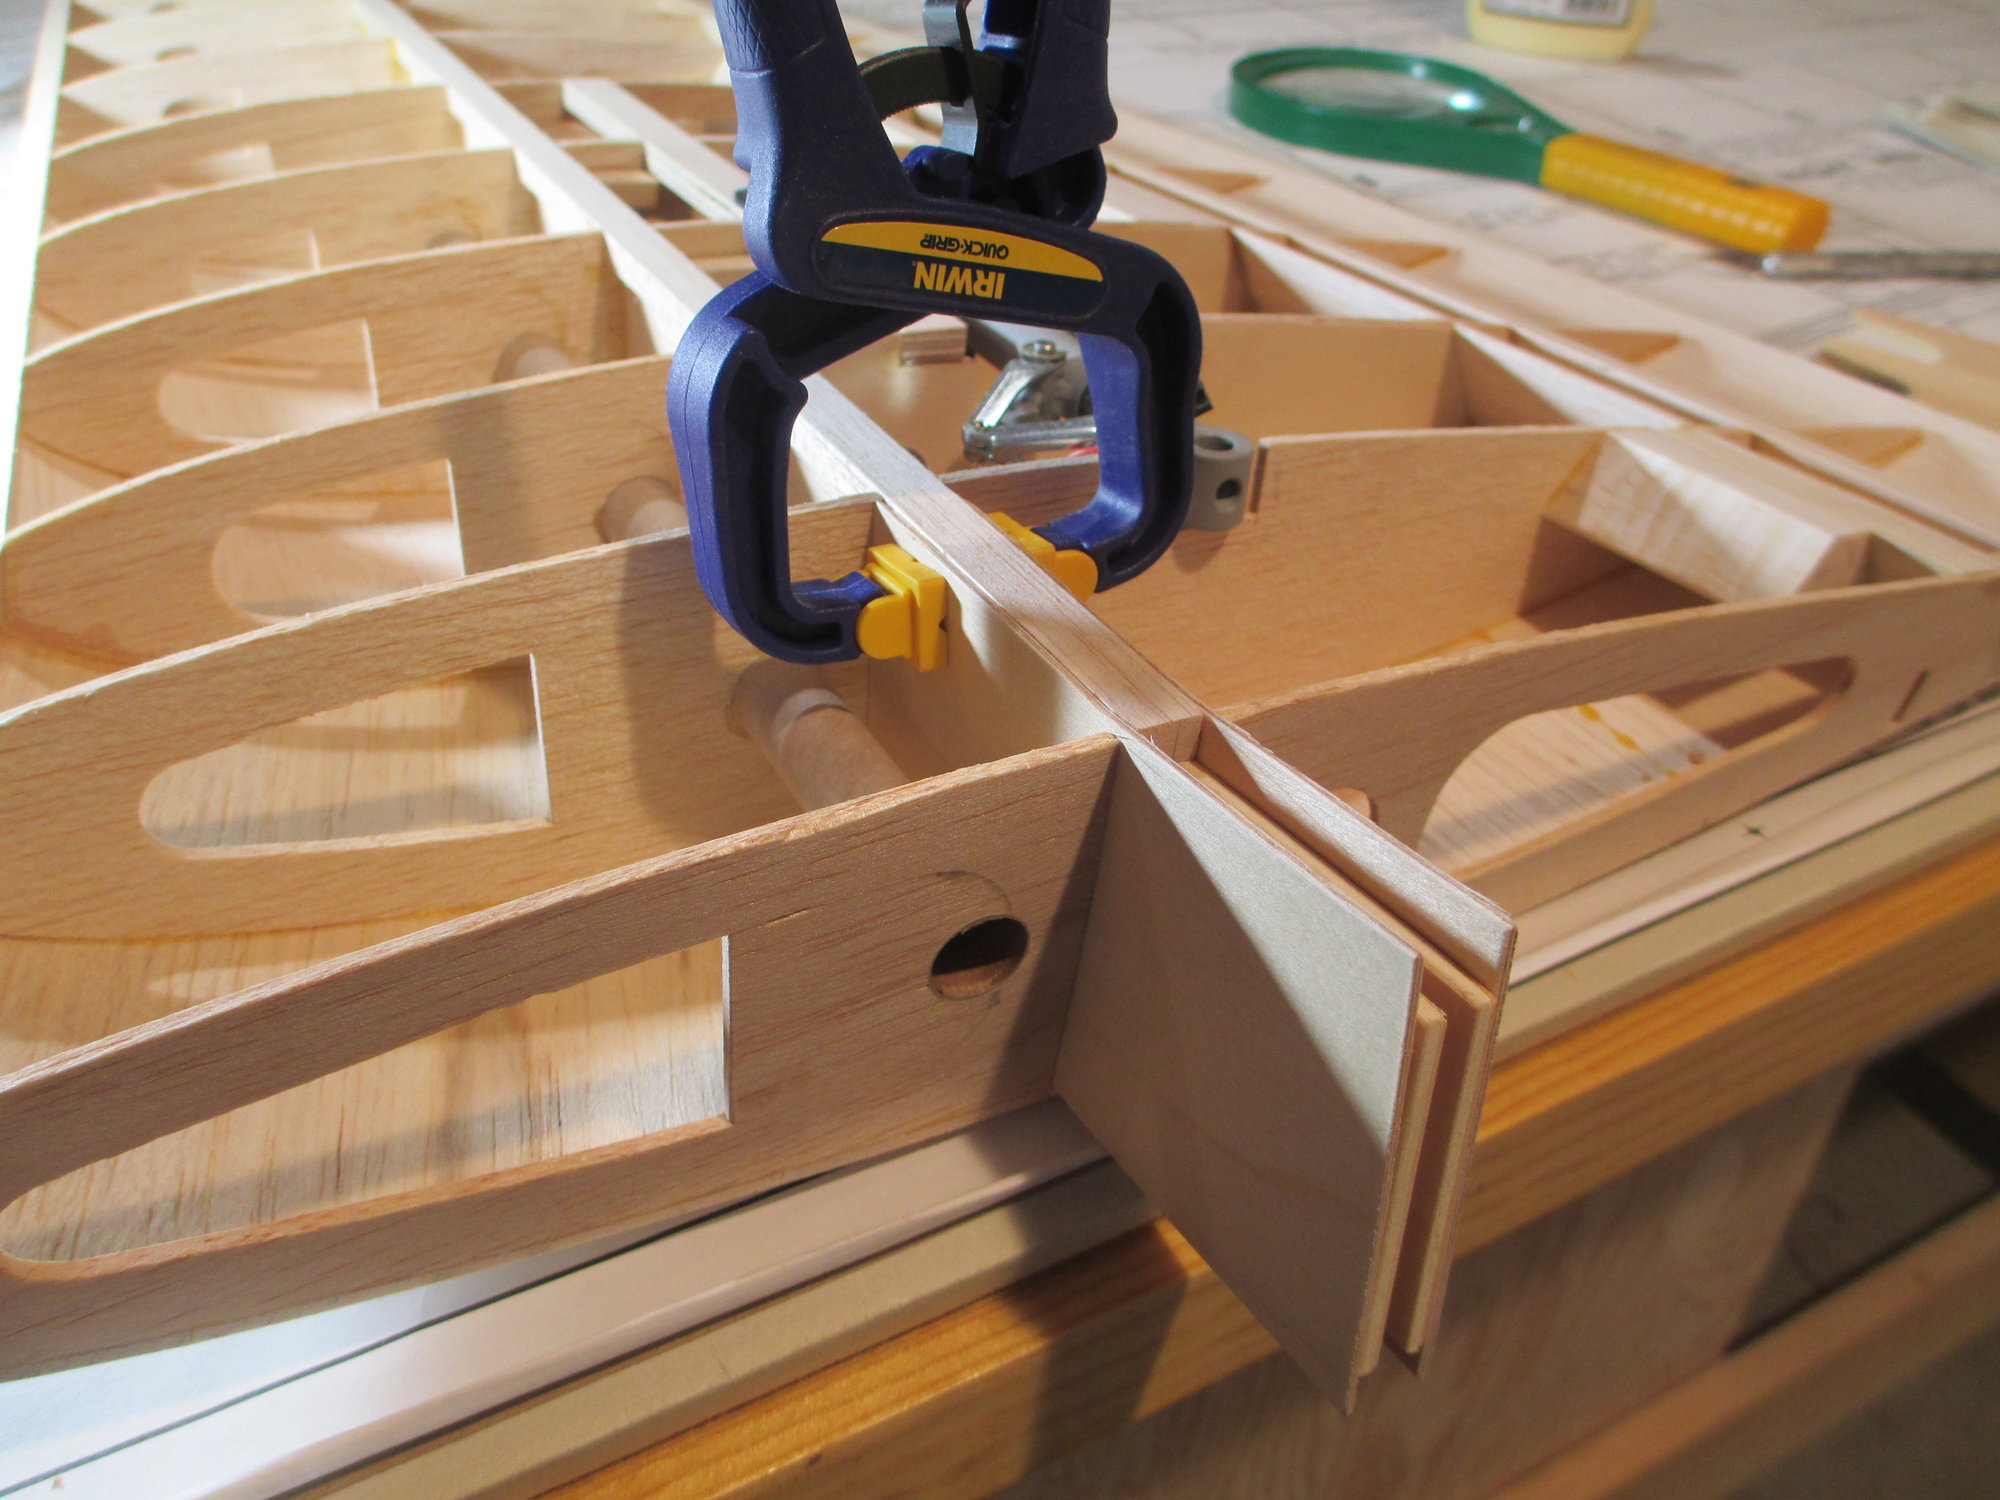
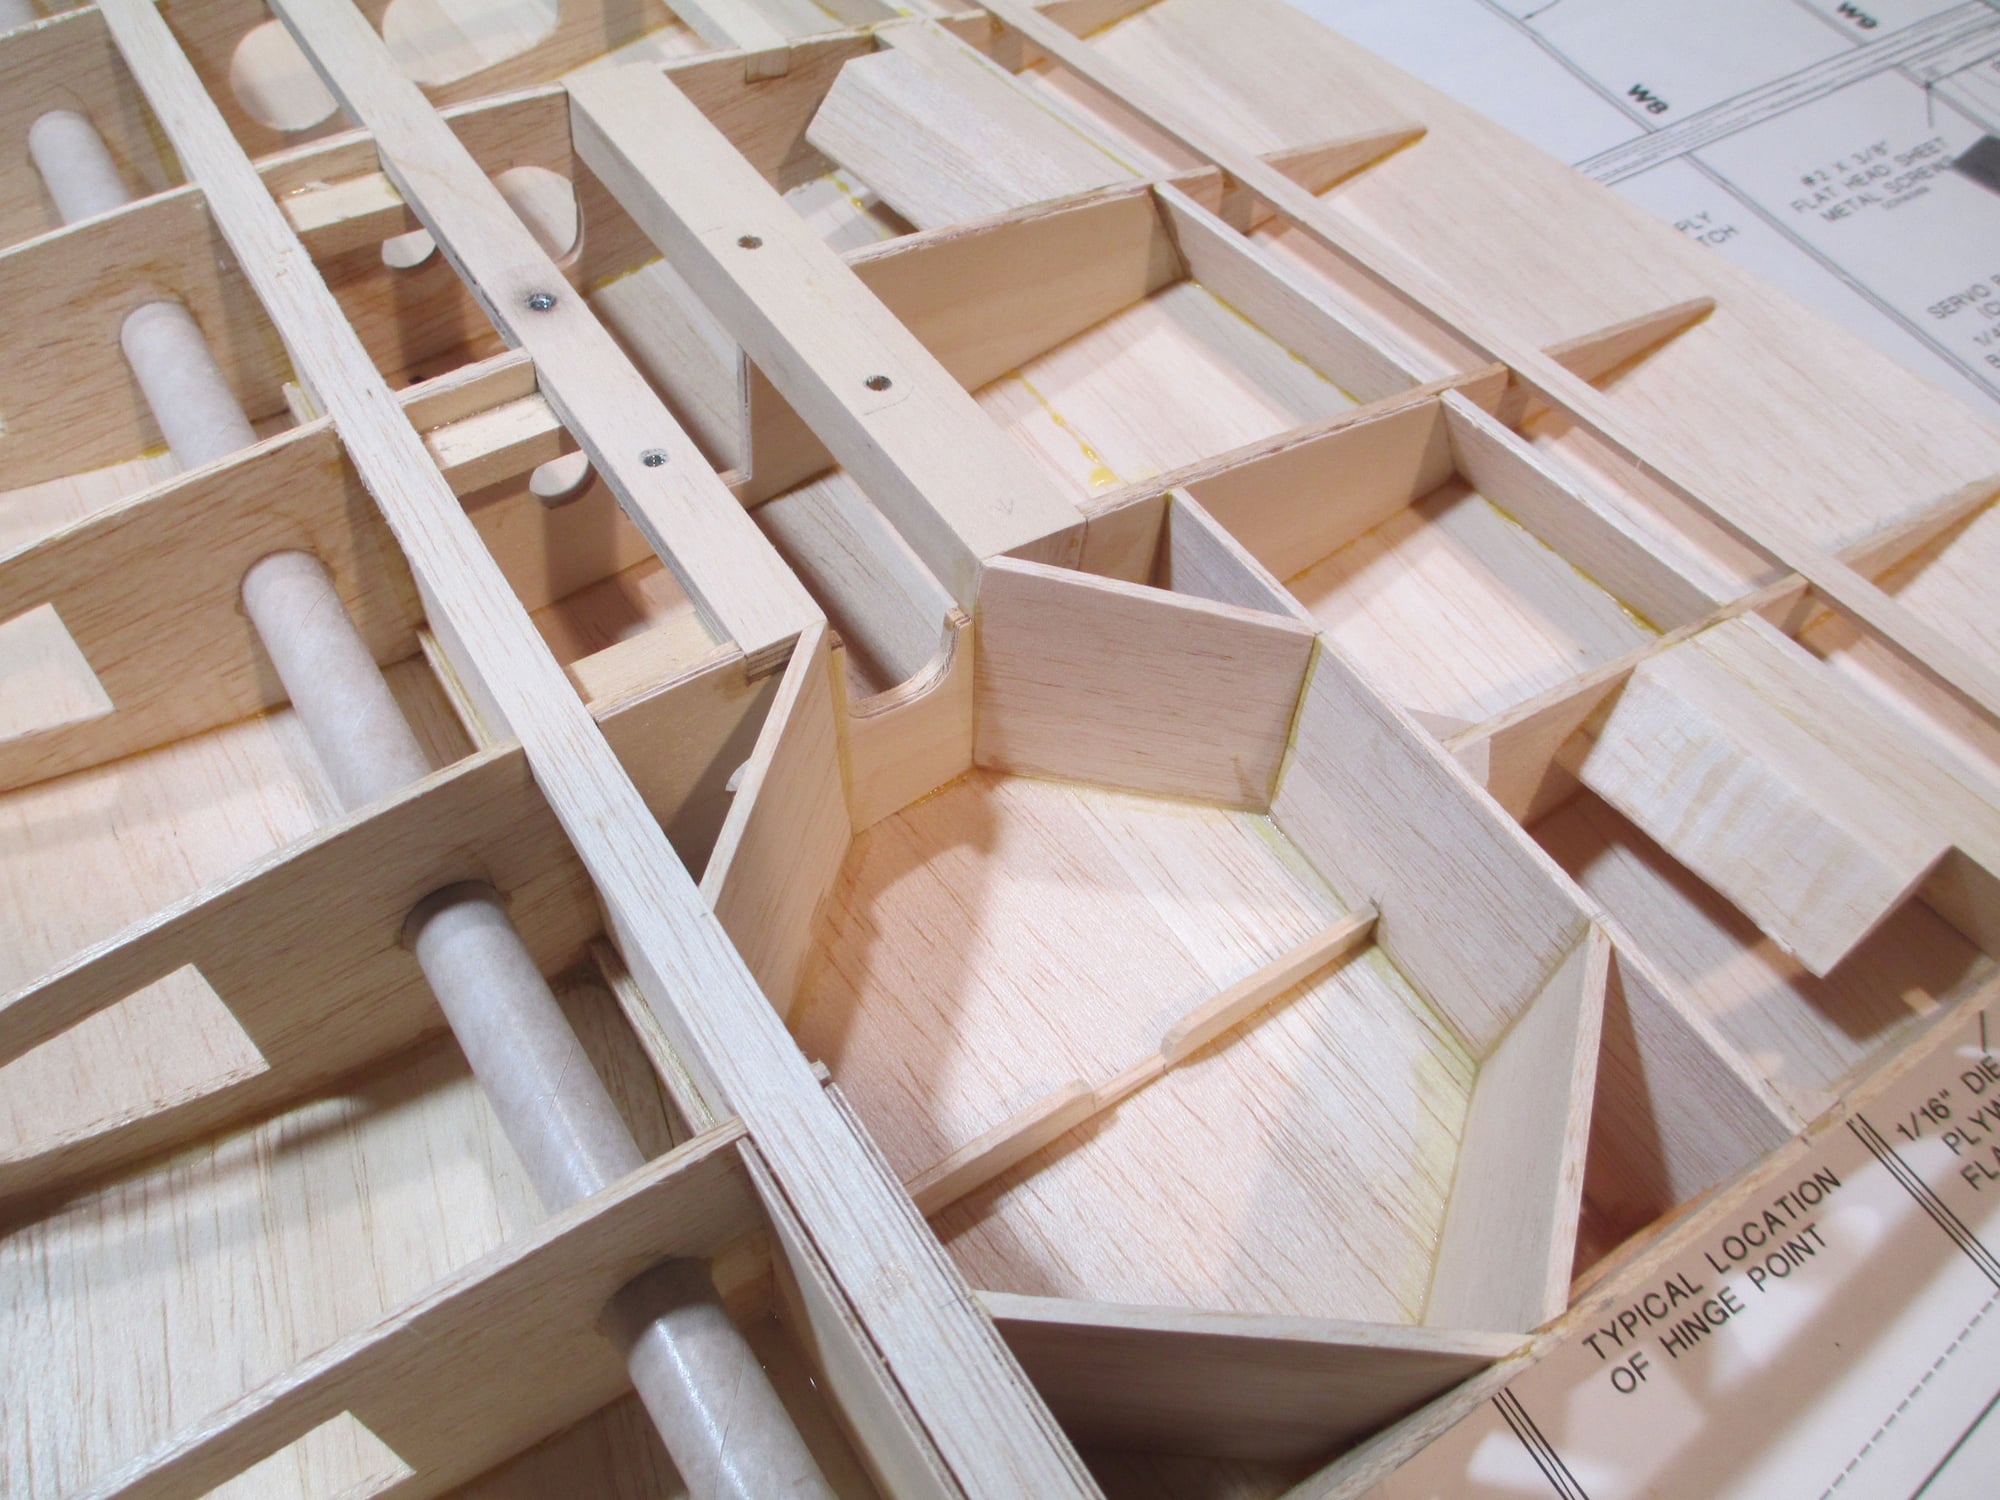
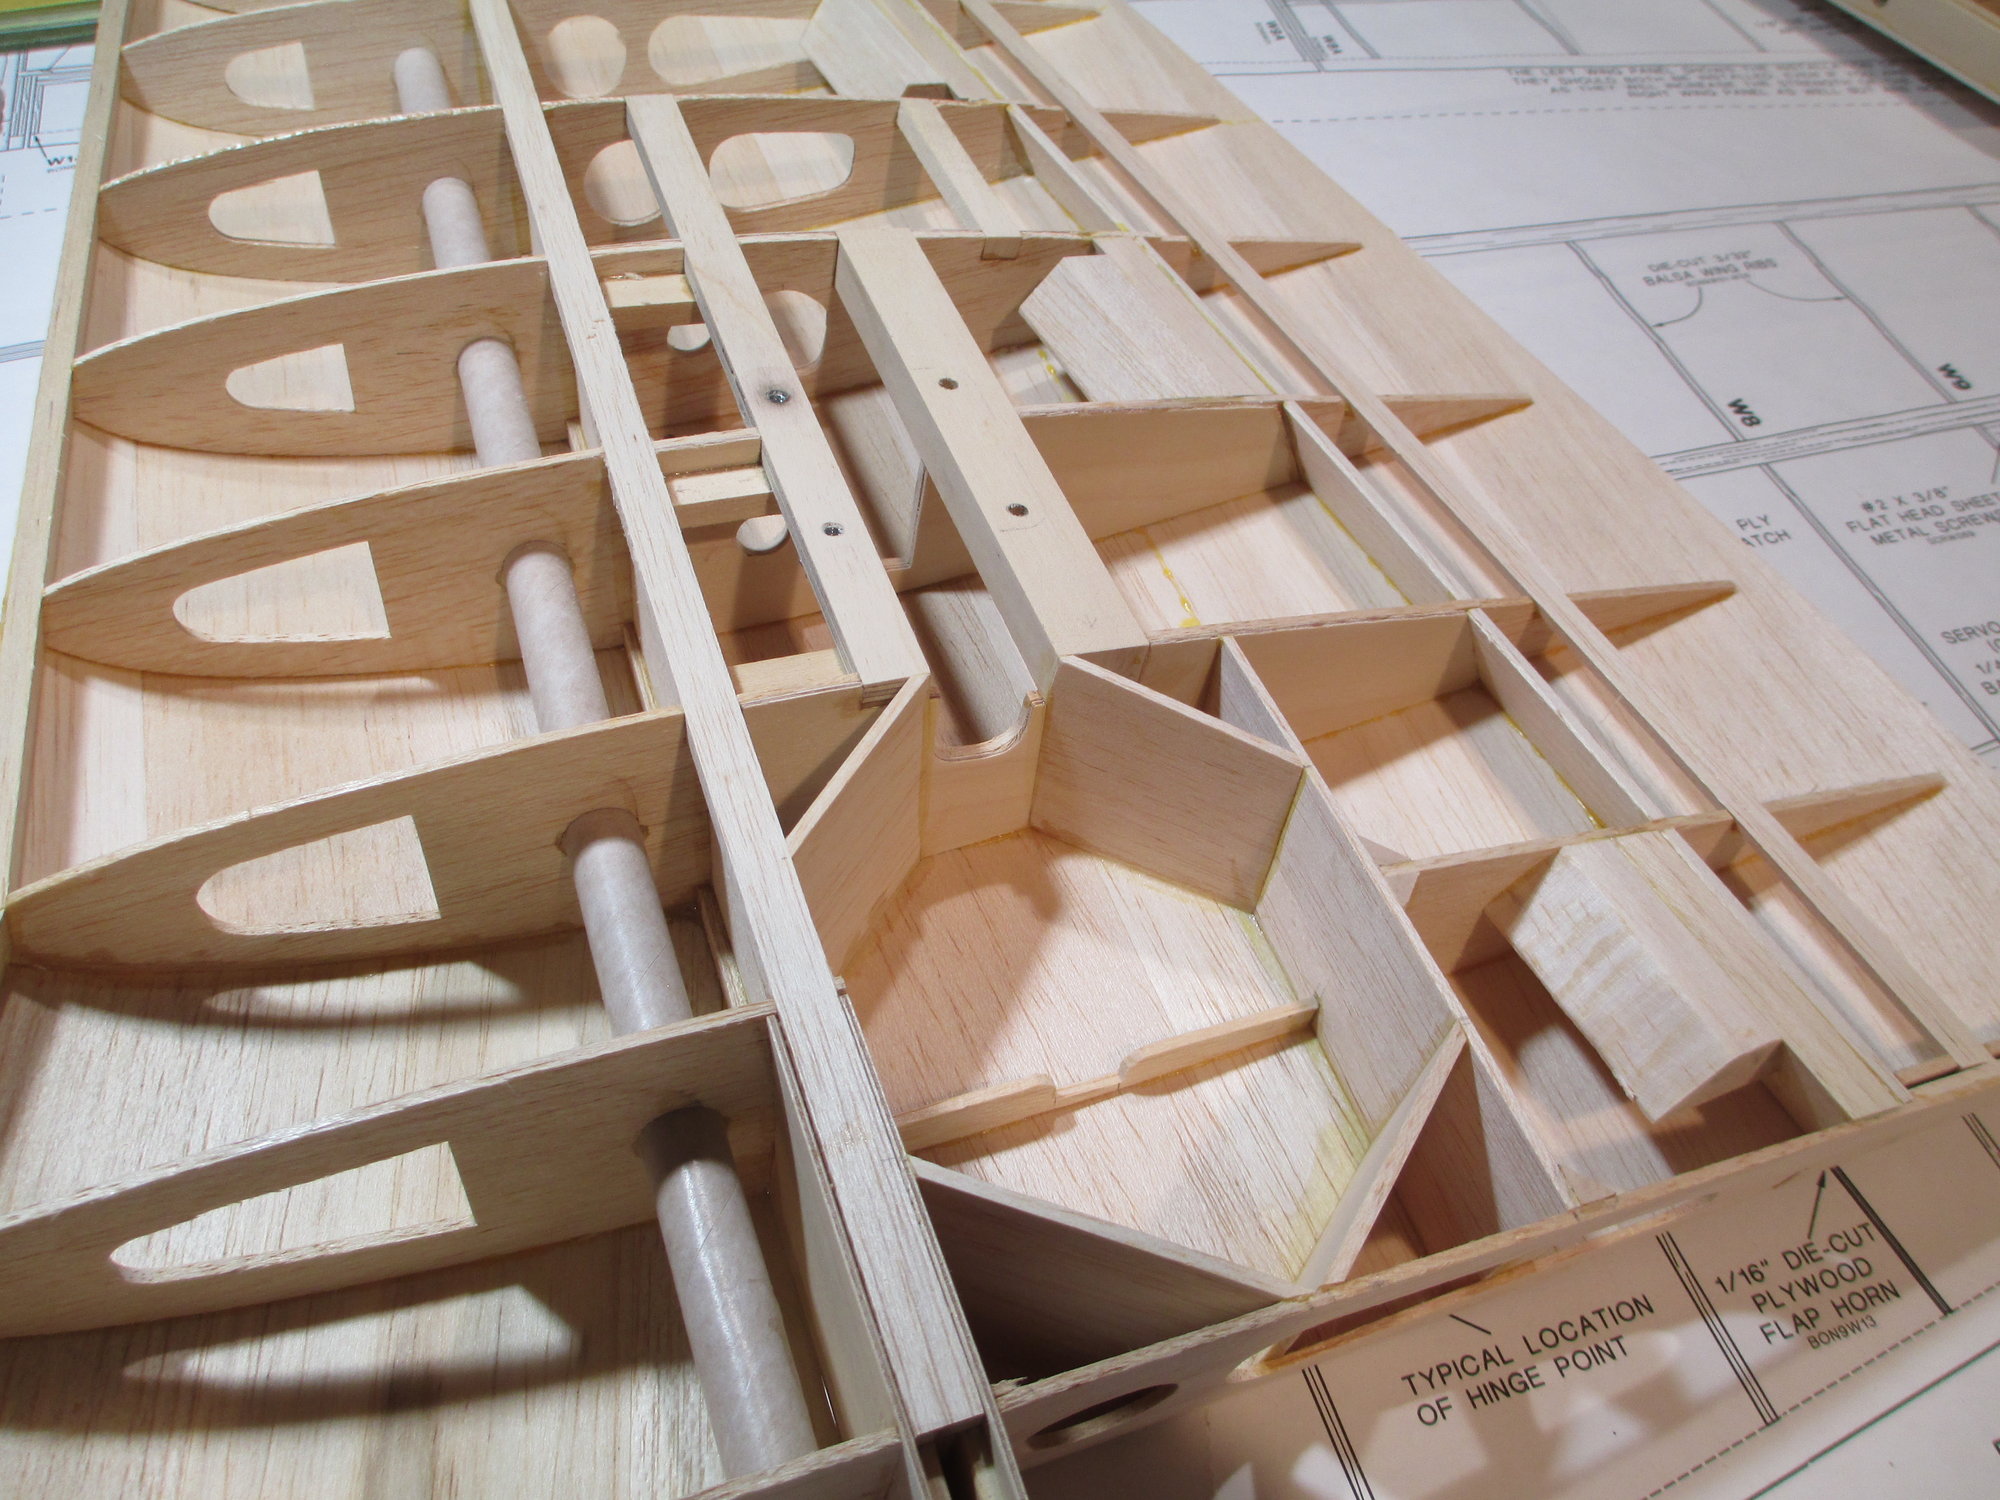
Plan details showing how wing panels are joined.
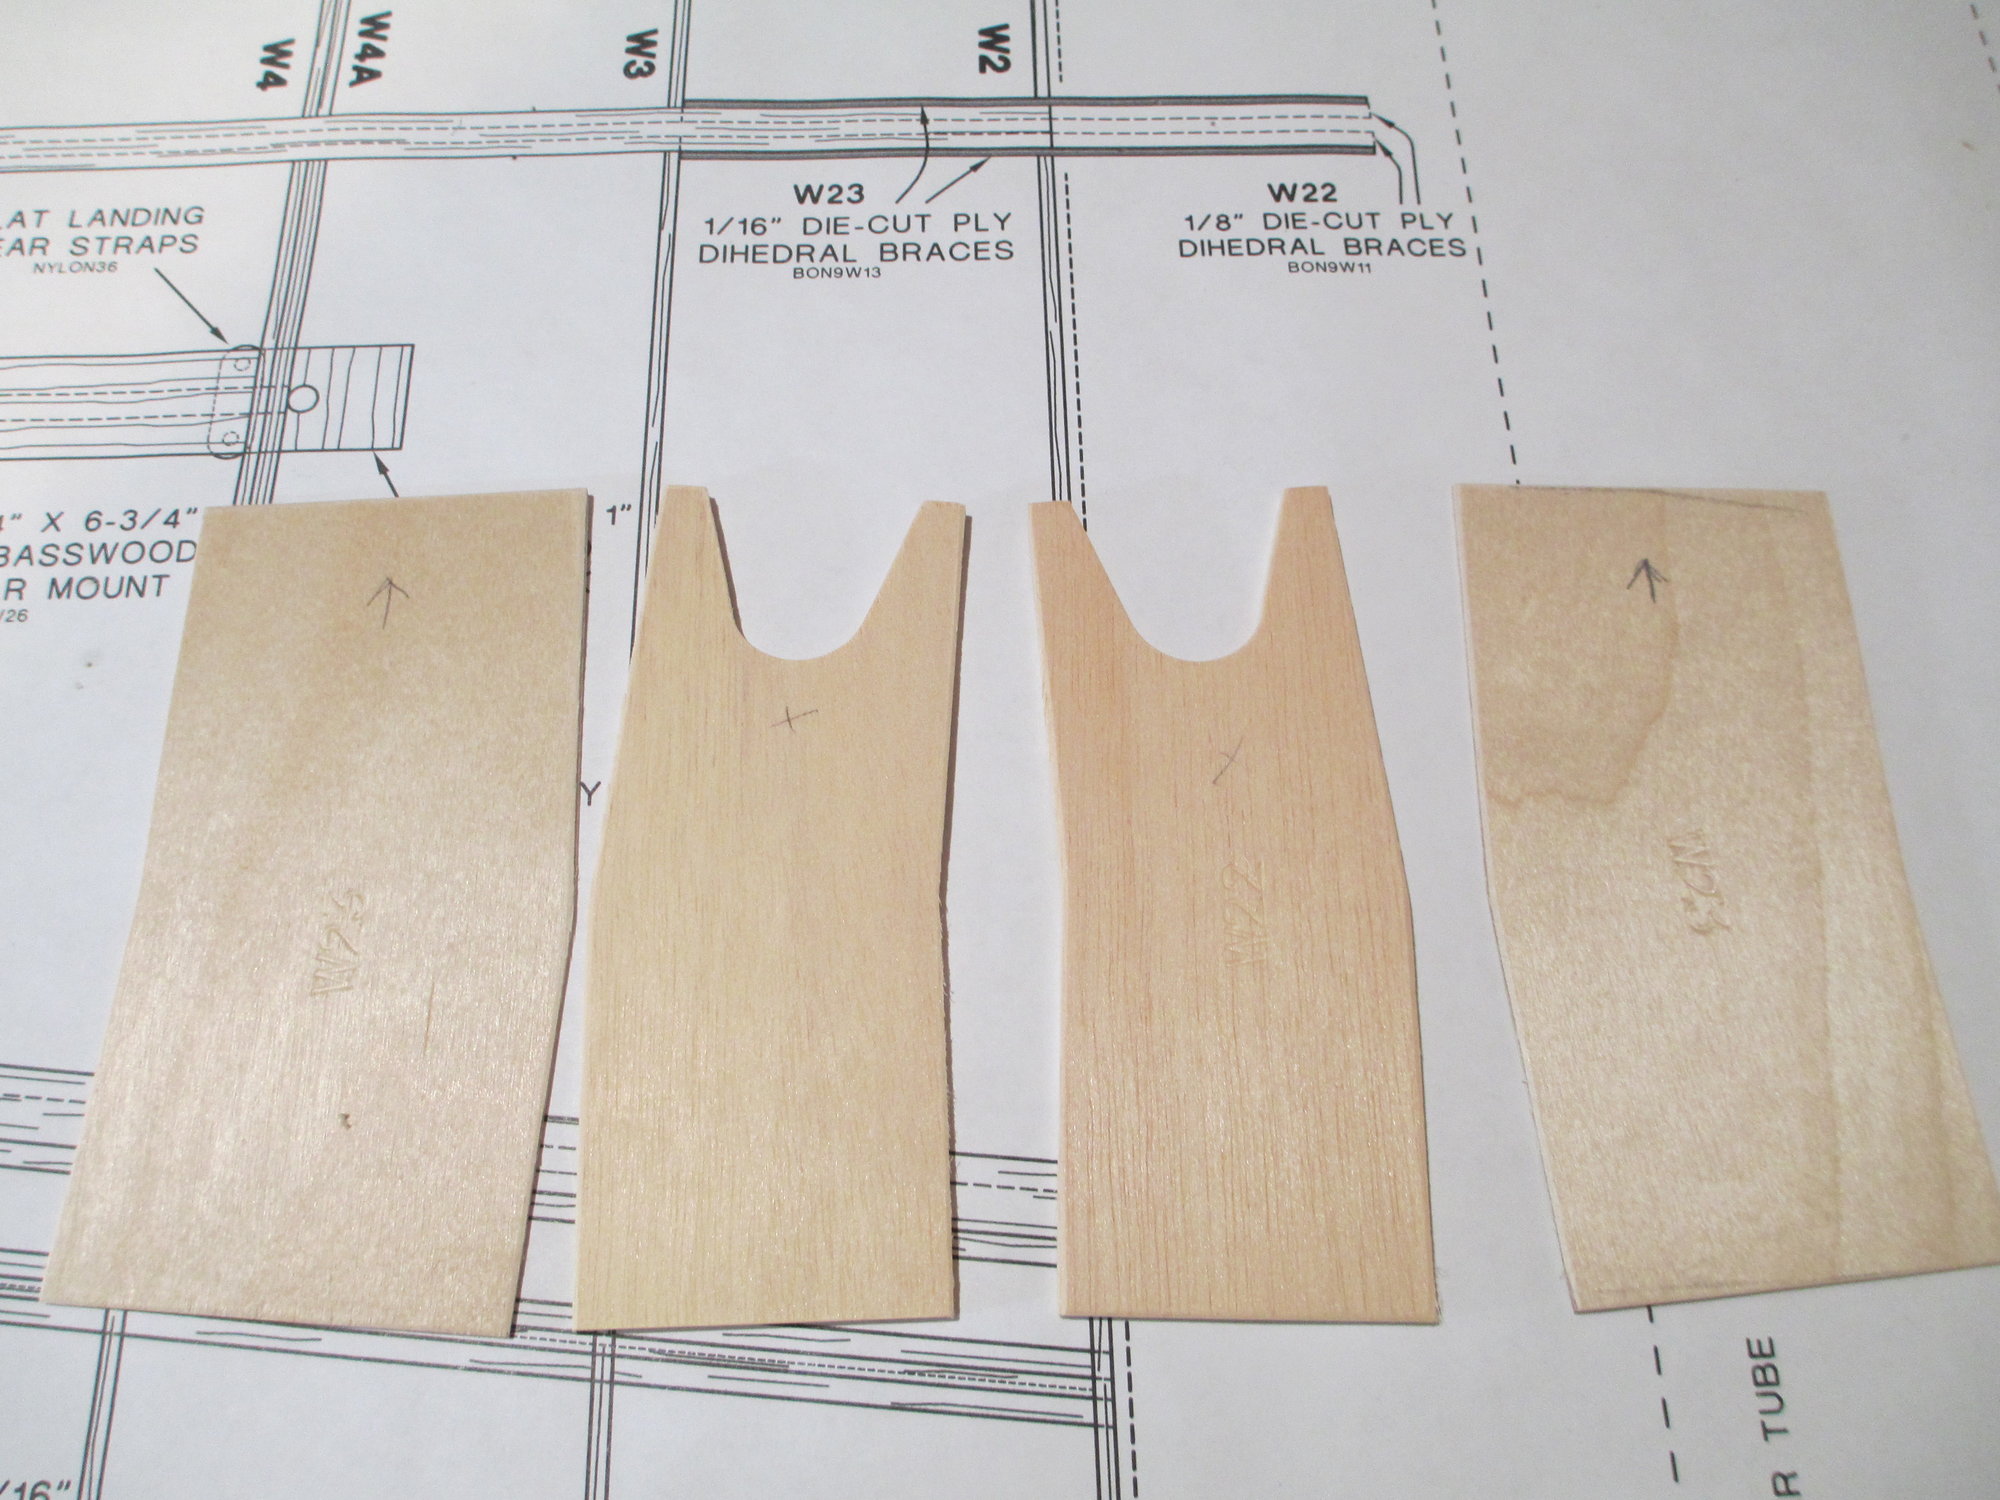
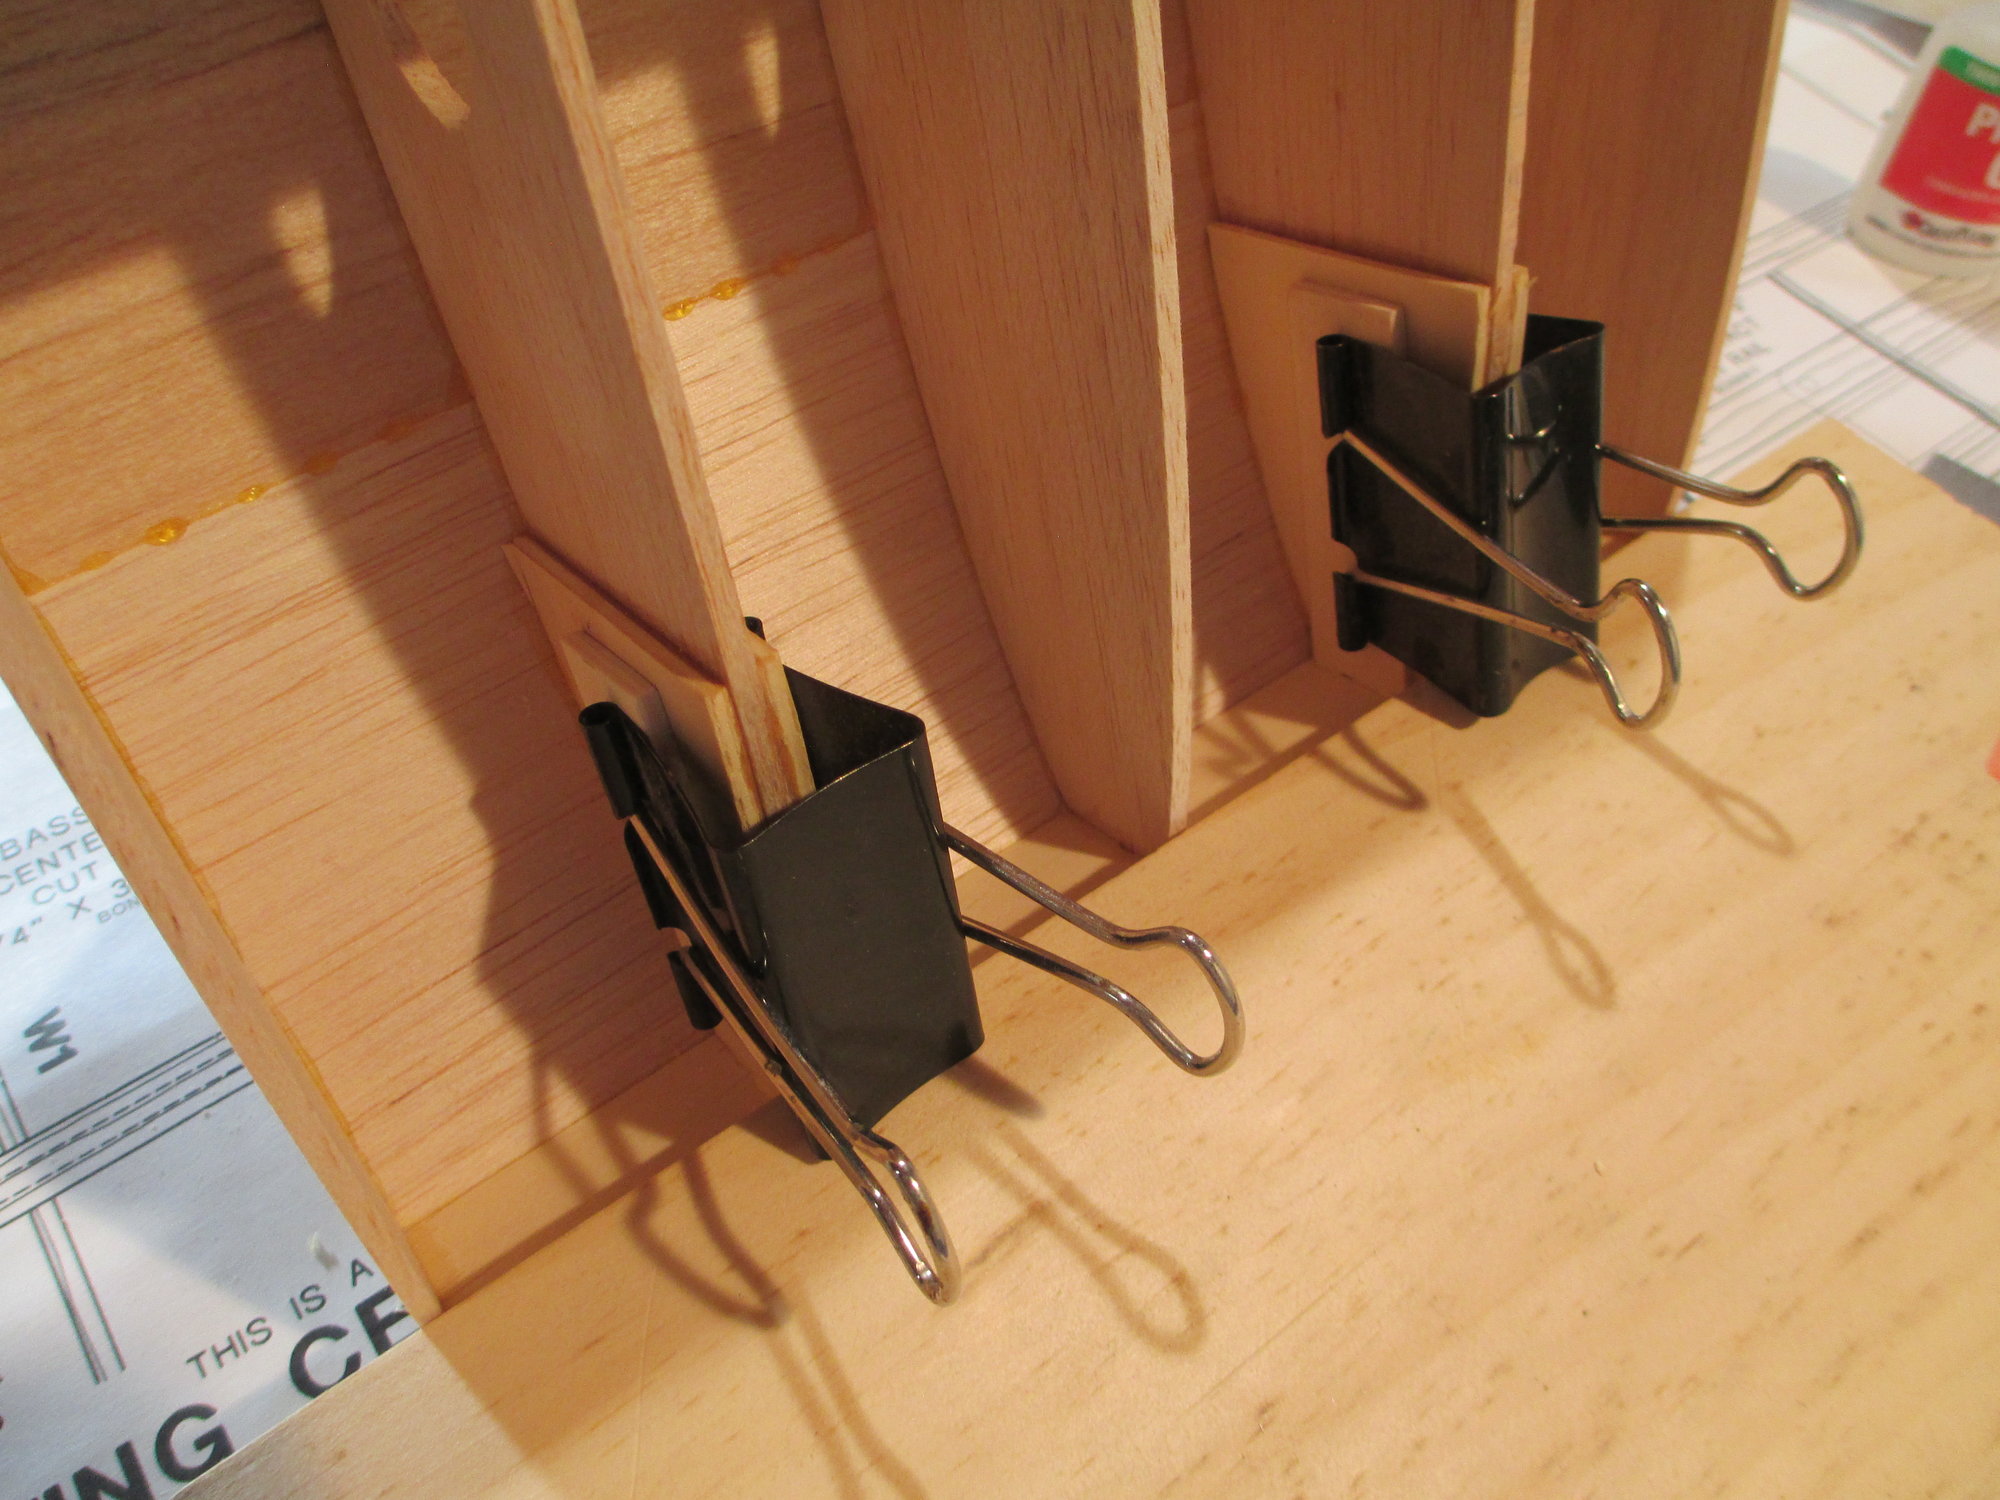
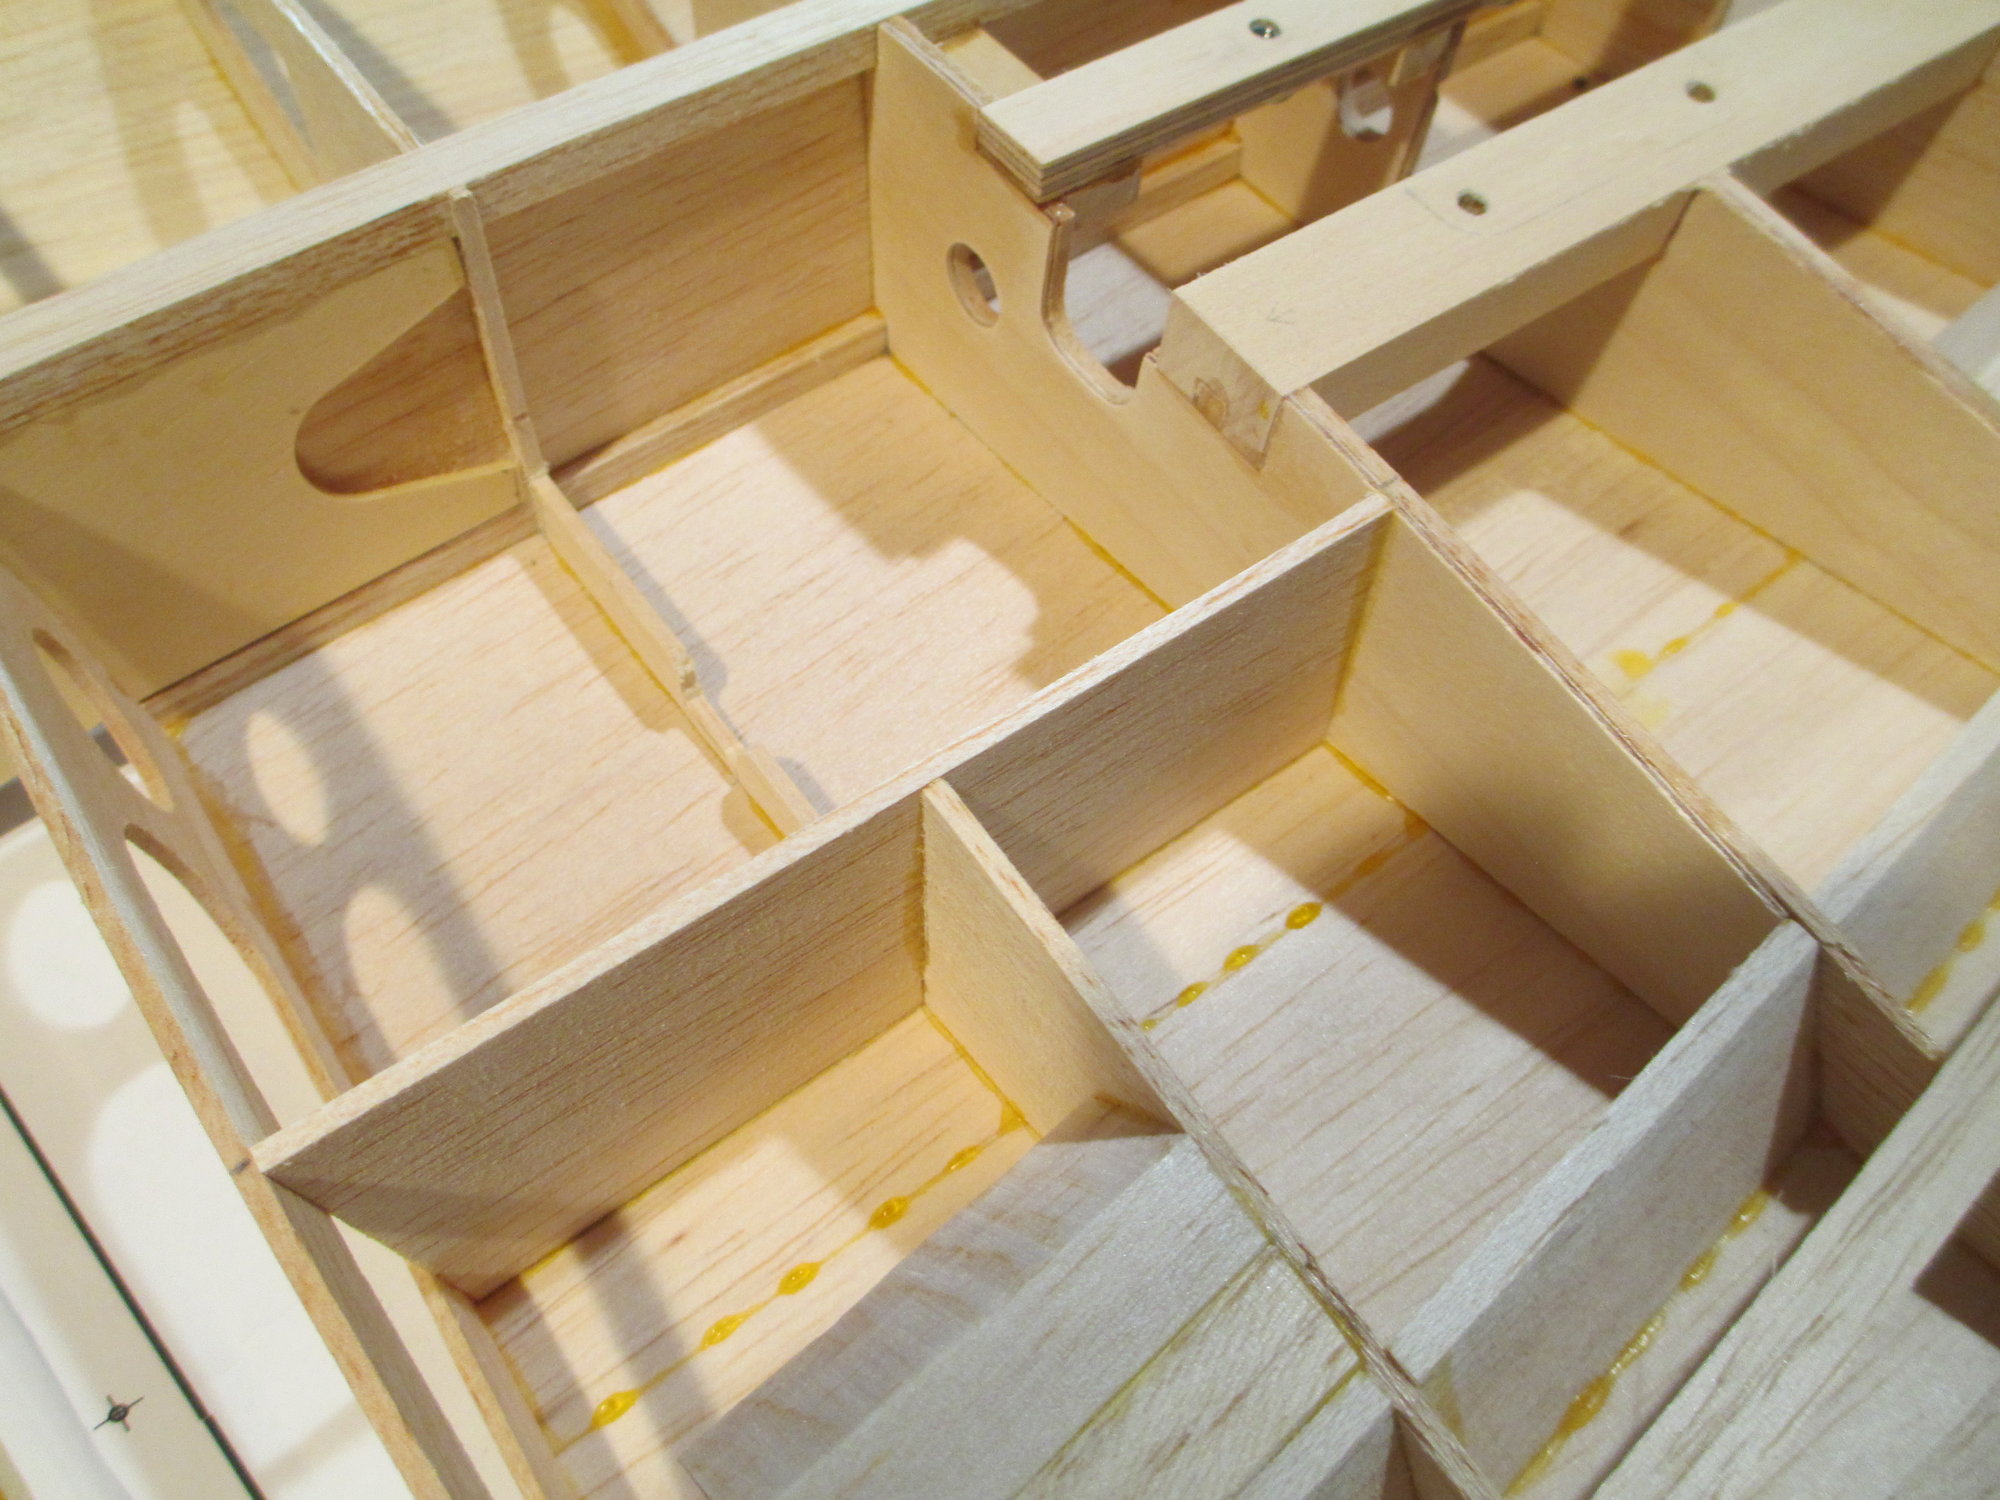
These are the plywood dihedral braces shown in the plan. The outer dihedral brace is 1/16" thick while the inner brace is 1/8".
In order for the wing panels to be joined together, measure, mark and carefully cut slots into the outer wing rib allowing the braces to slide in. I want to be sure to take my time while this fitting process. A tighter fitting joint will be stronger than a loose fitting one thus relying on the epoxy for strength.
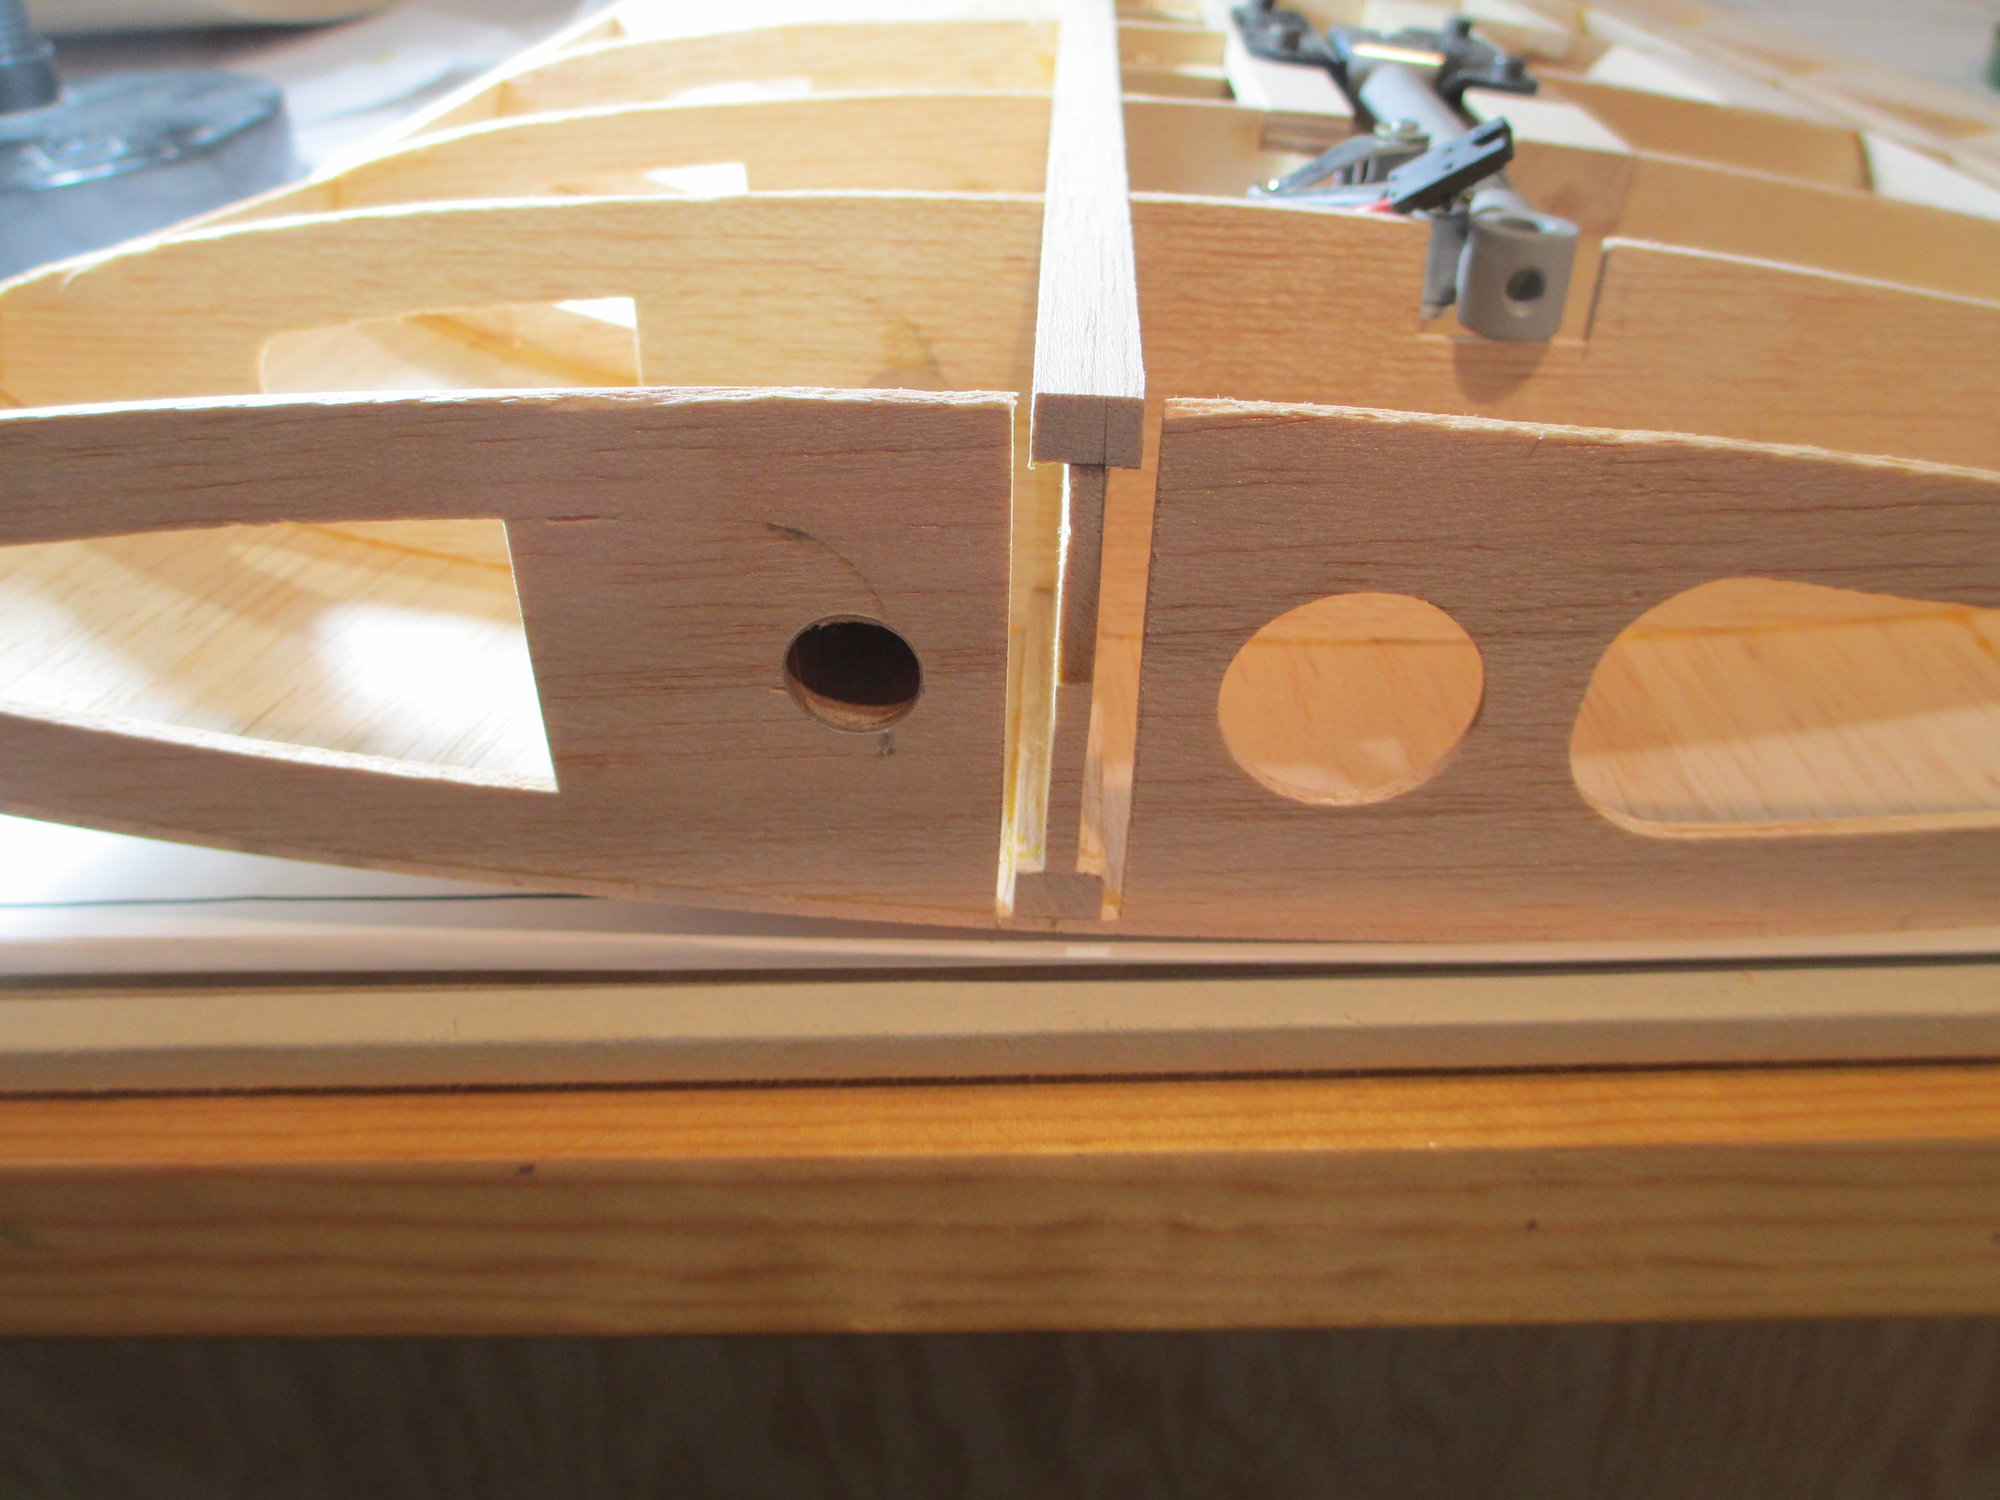
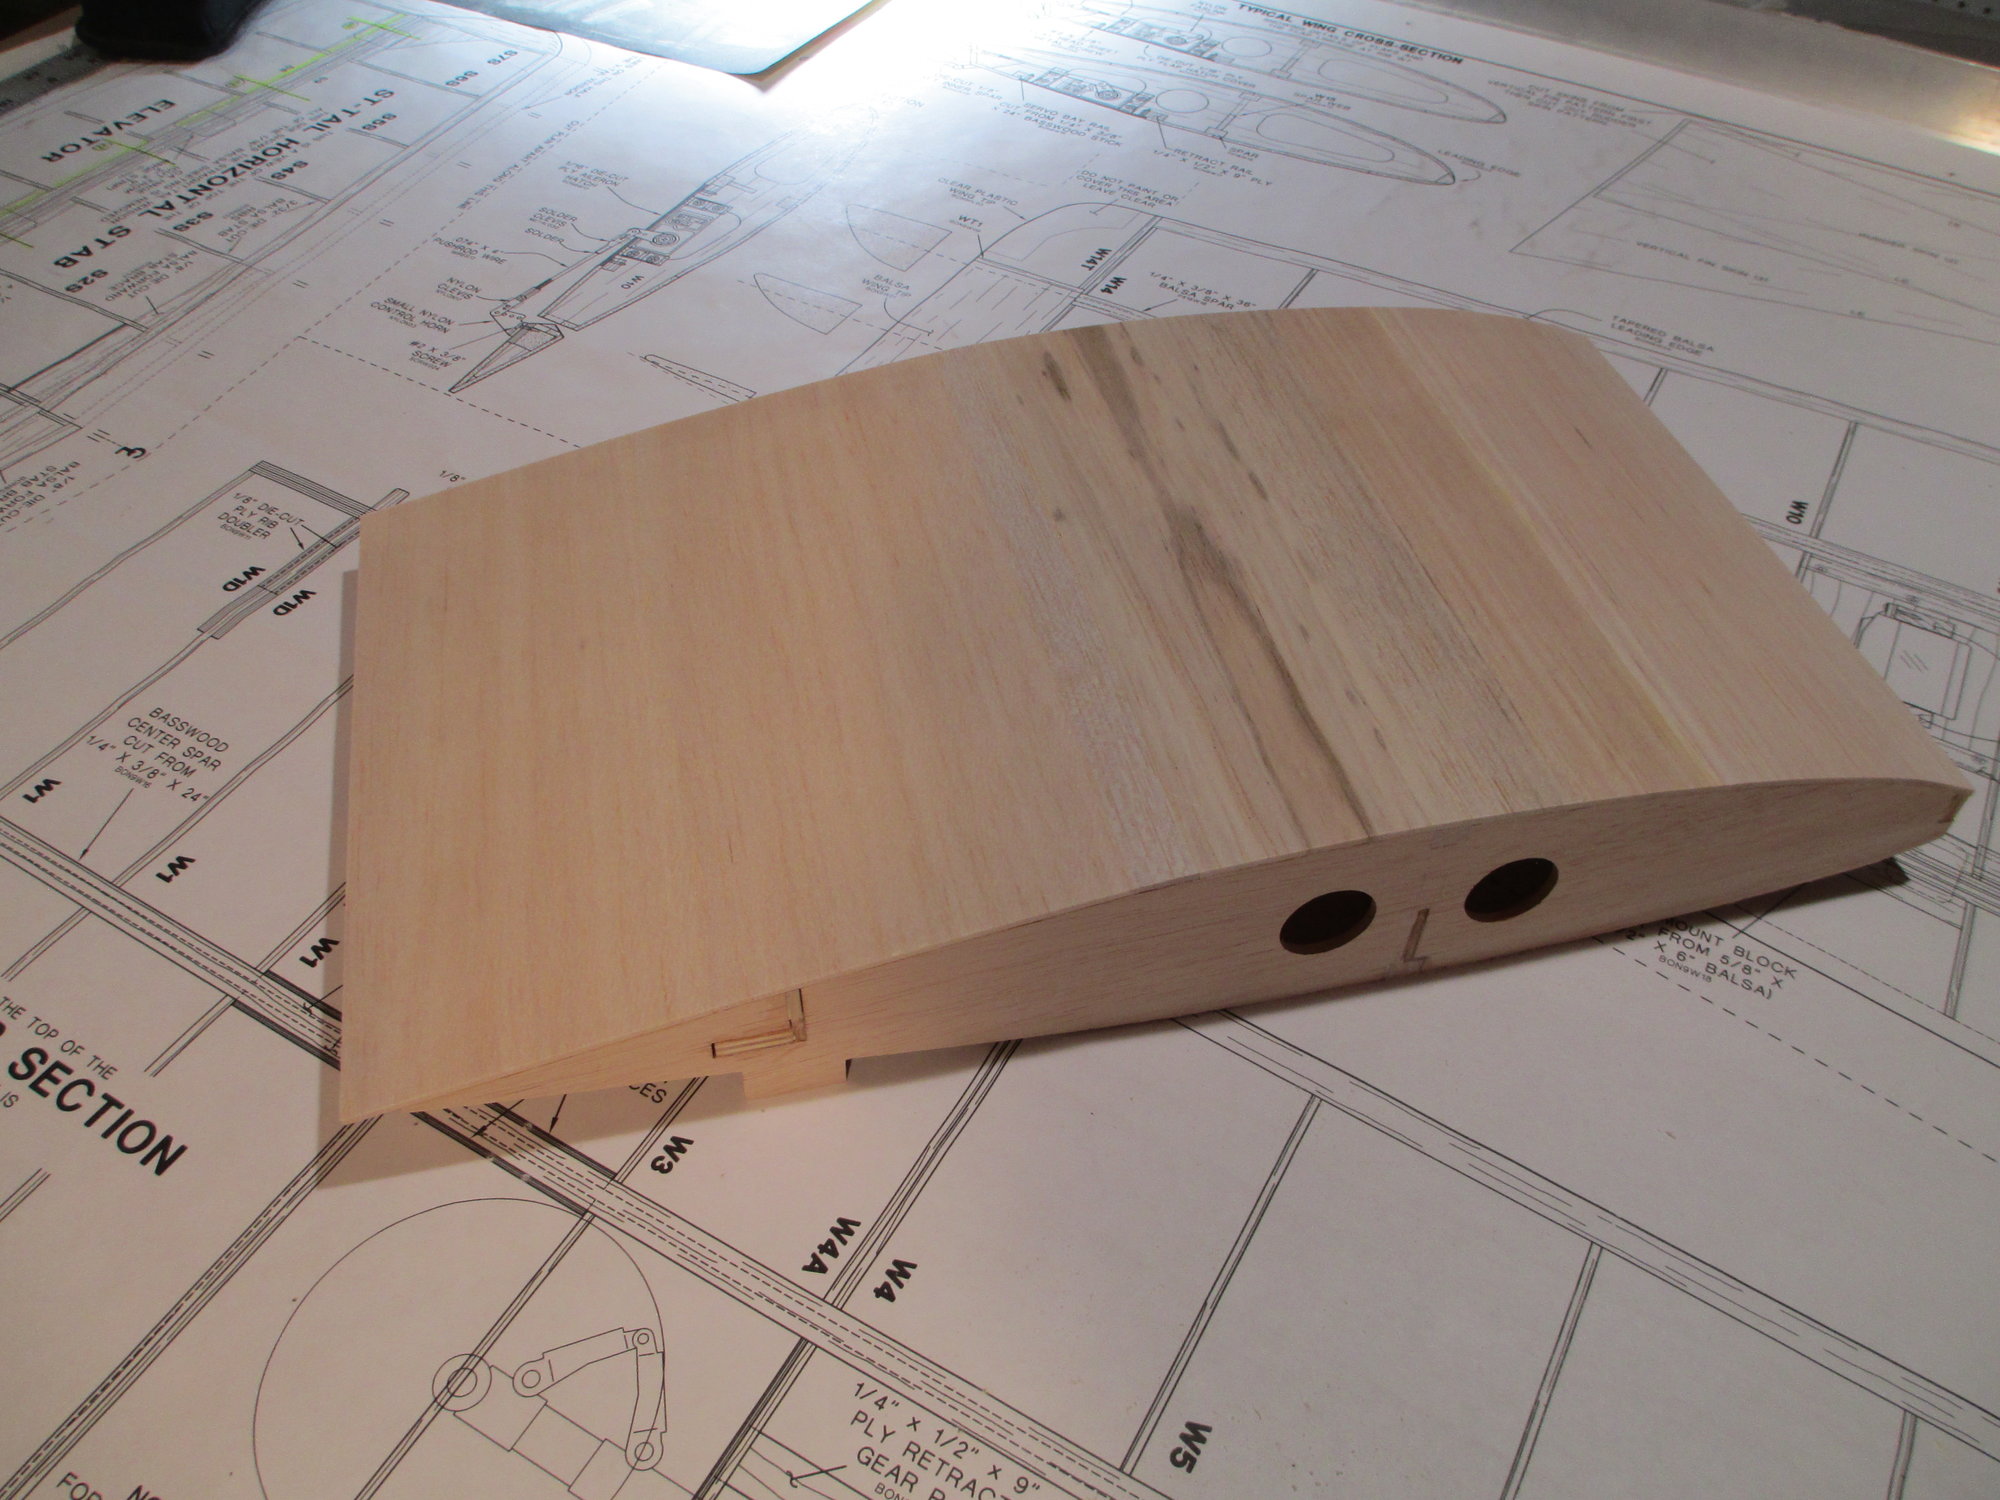
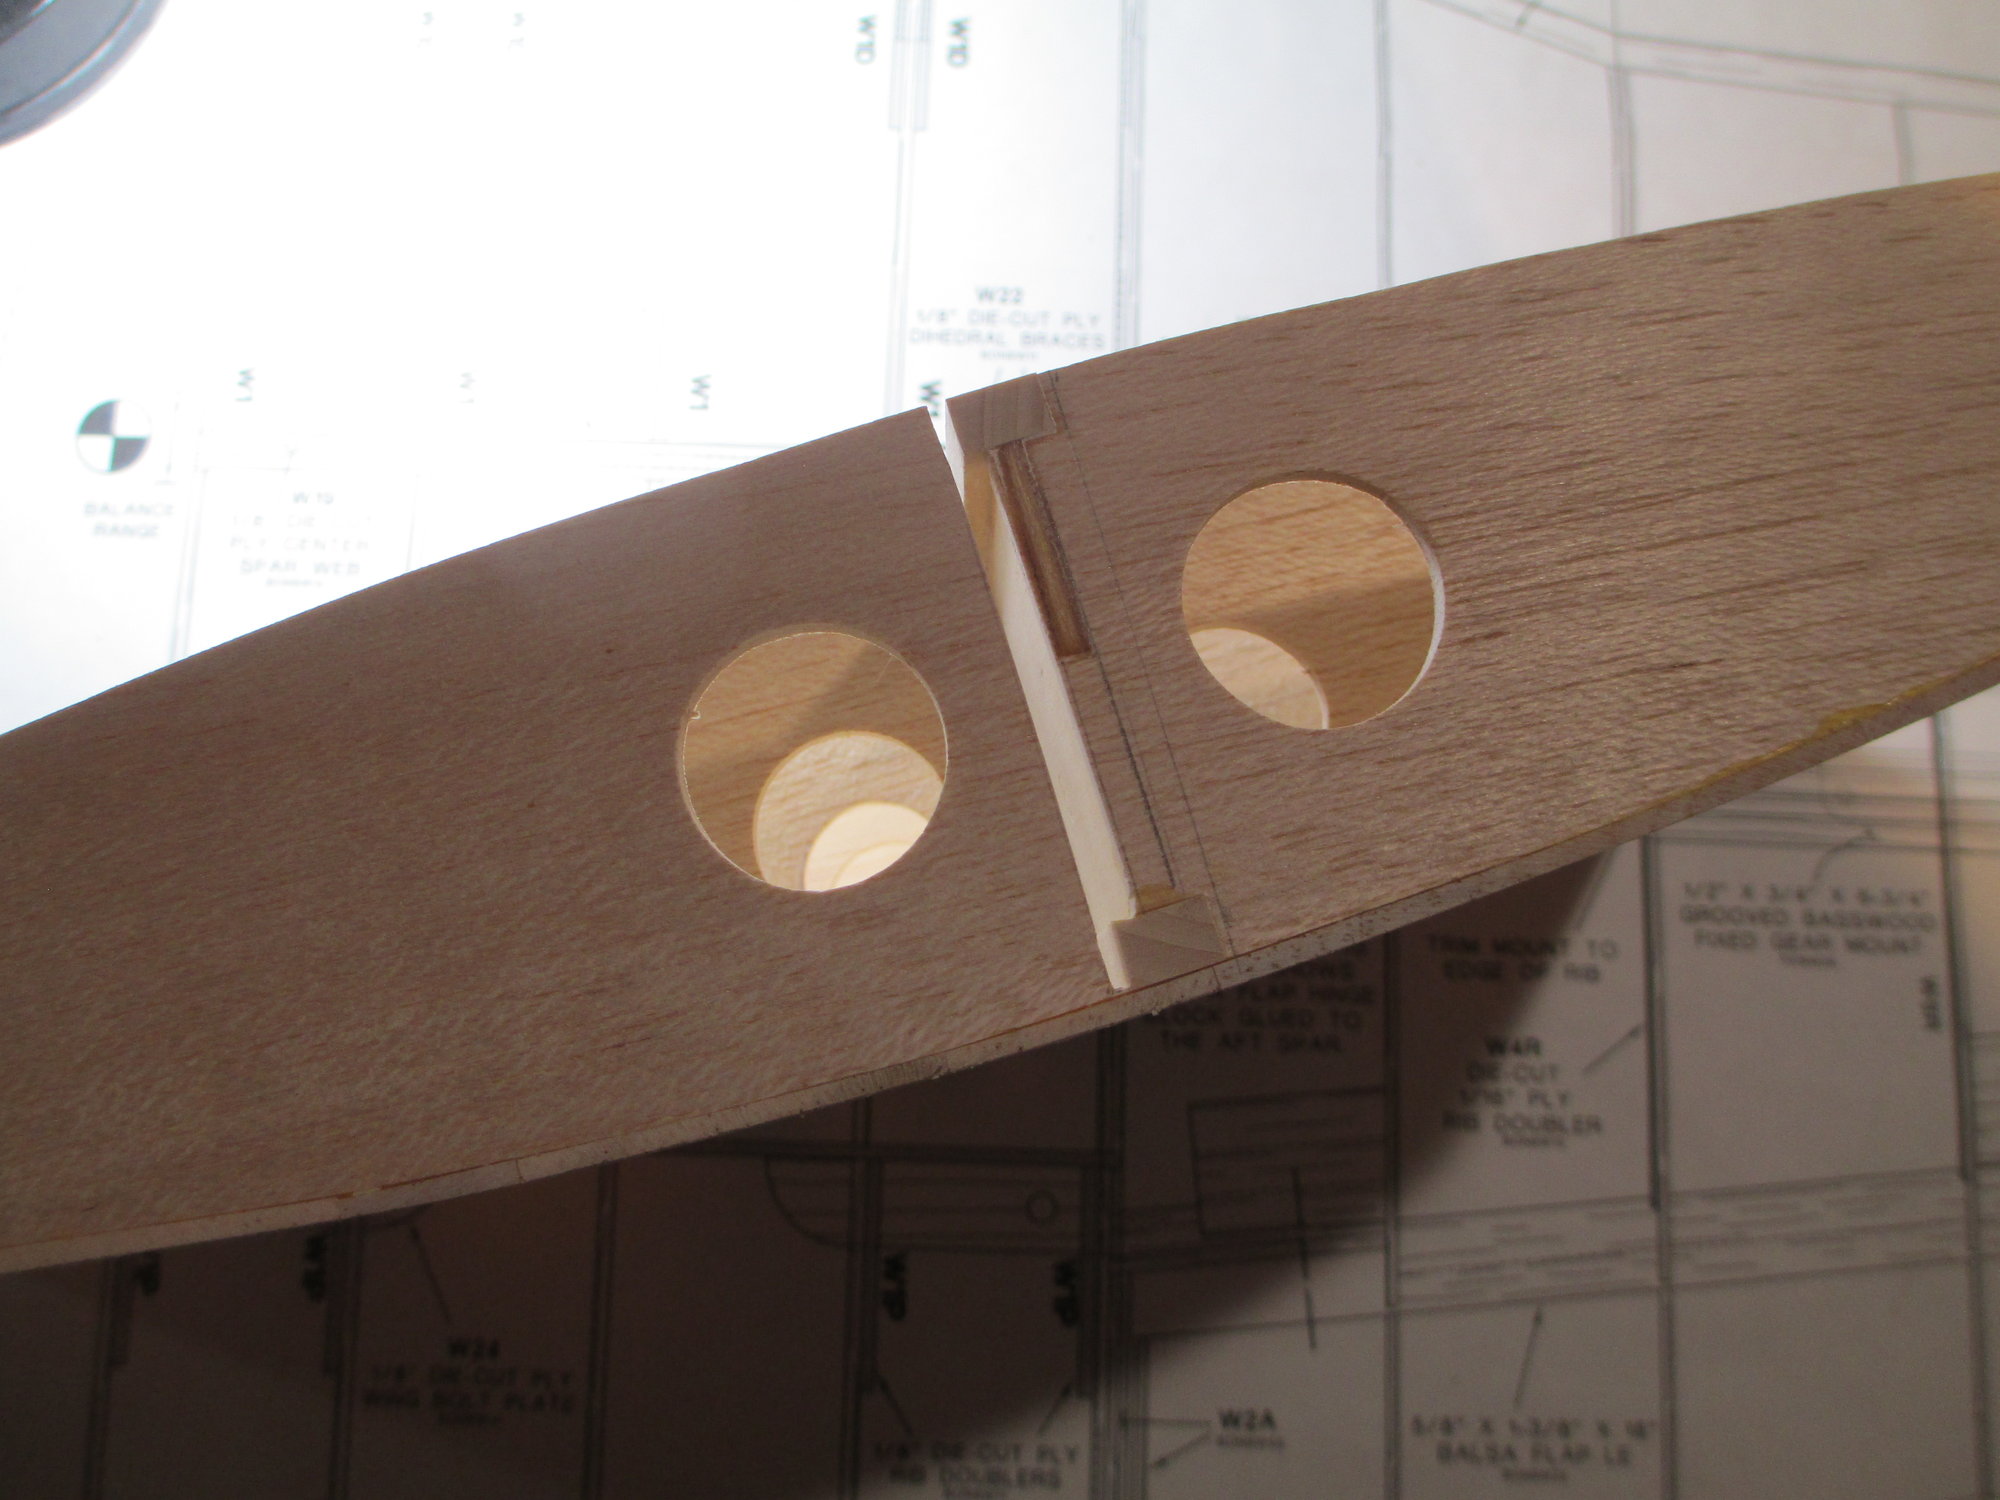
Outer wing panel is slotted along with the corresponding Center Section panel.

View from the opposite direction.
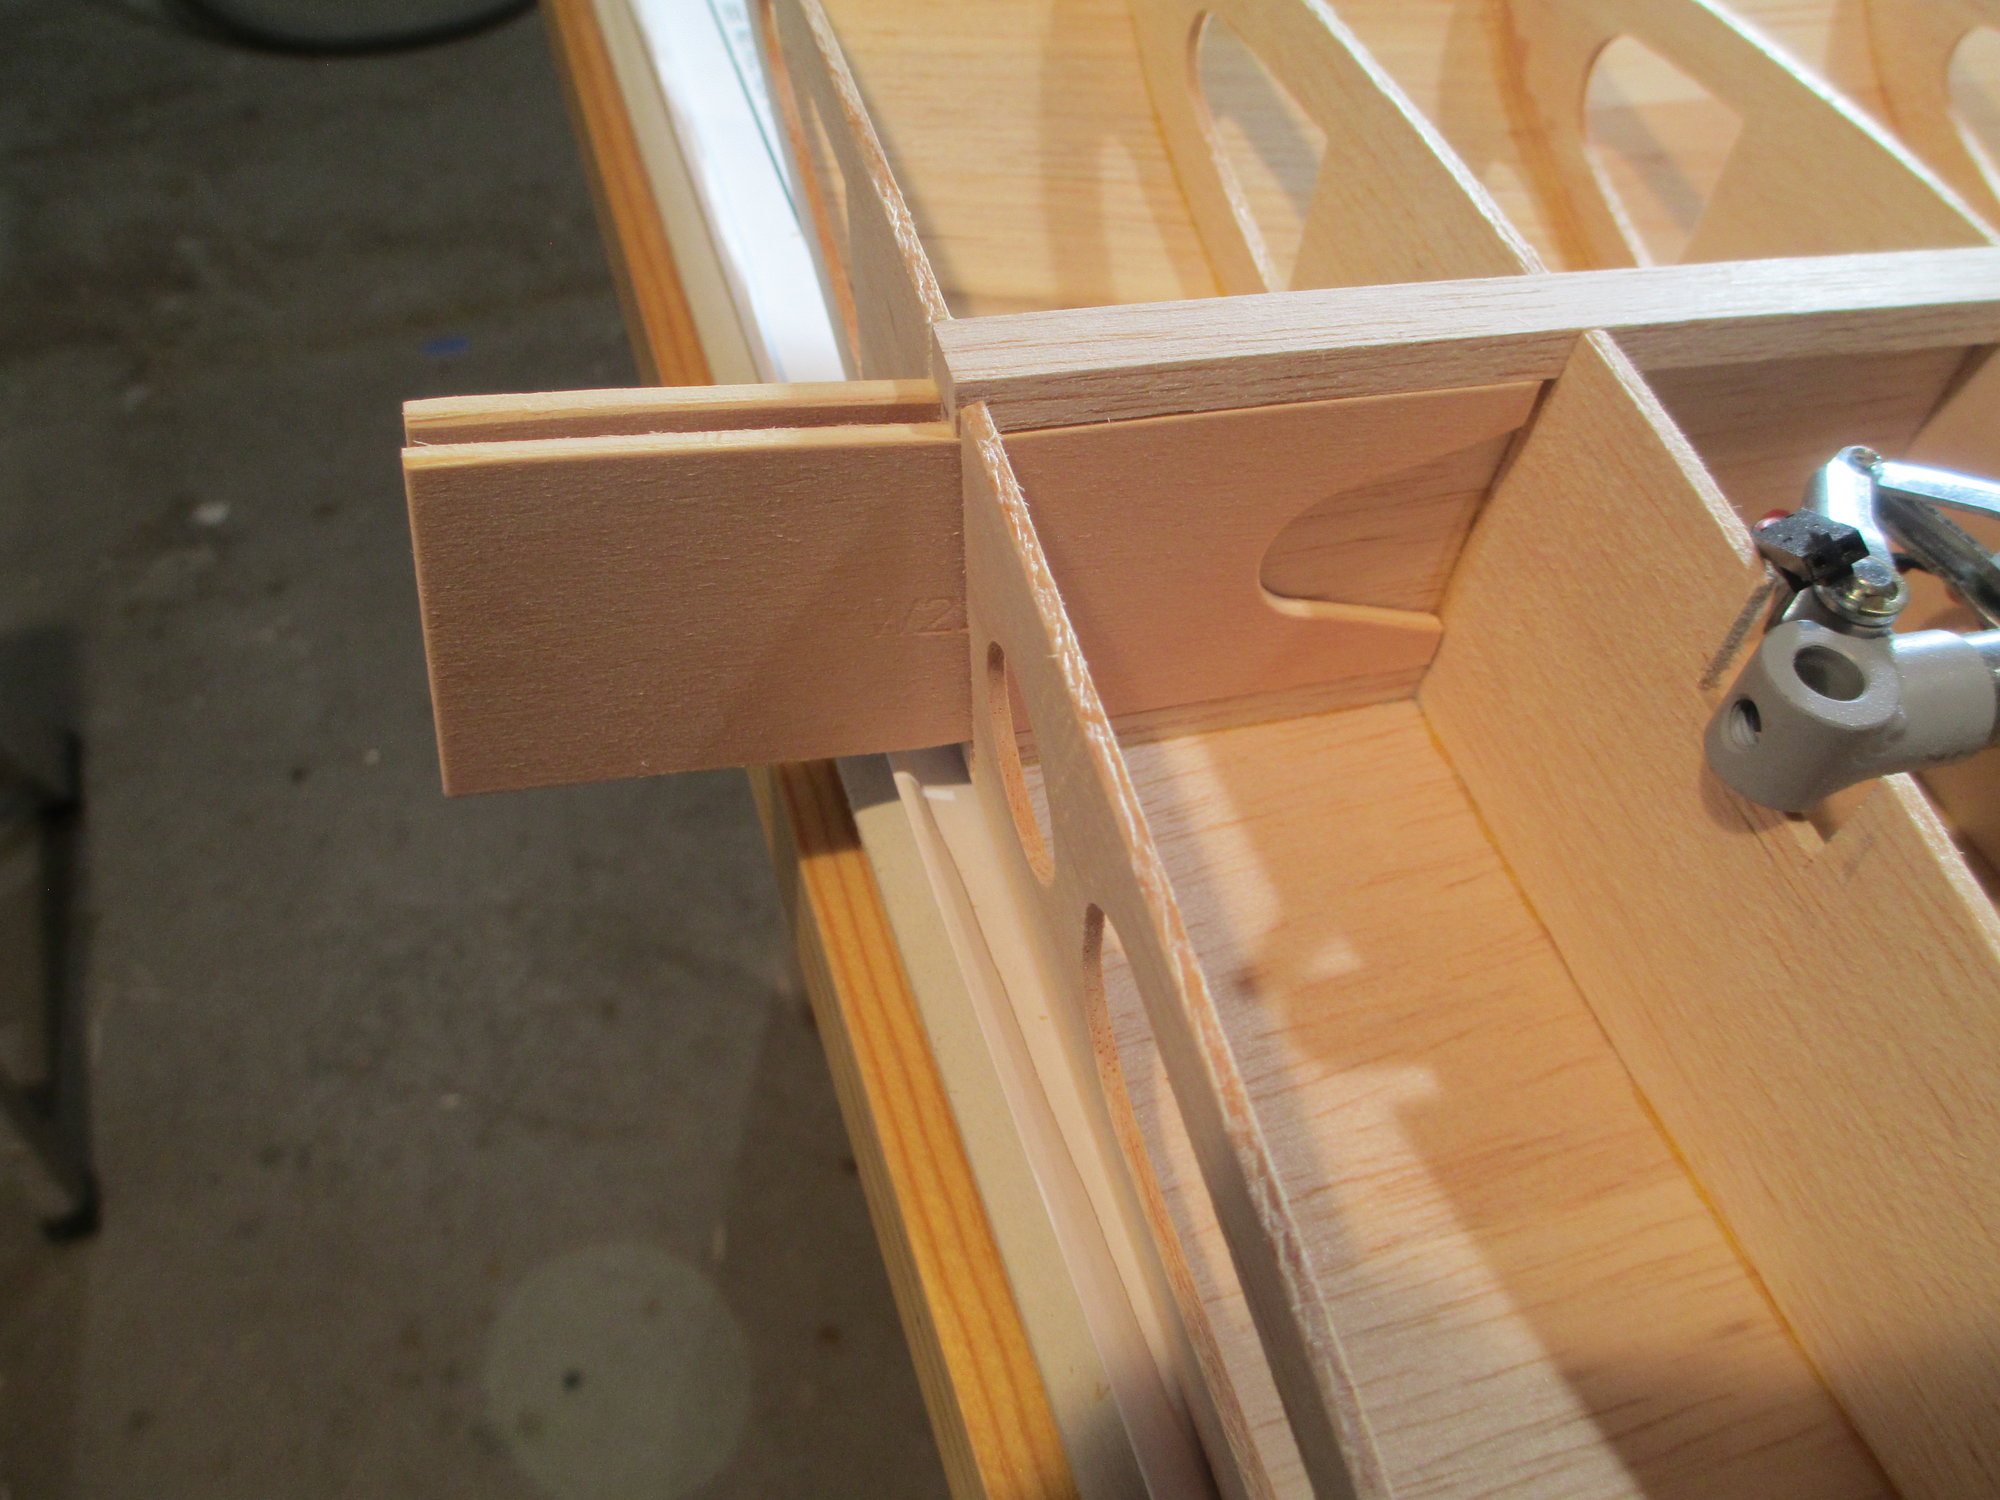
The 1/8" braces are slid into place. Note how they fit between the upper and lower spar. Make sure that you have the dihedral brace in the right direction!
The 1/16" dihedral braces are inserted. They flank each side of the upper and lower spar, sandwiching the whole assembly together once epoxied.
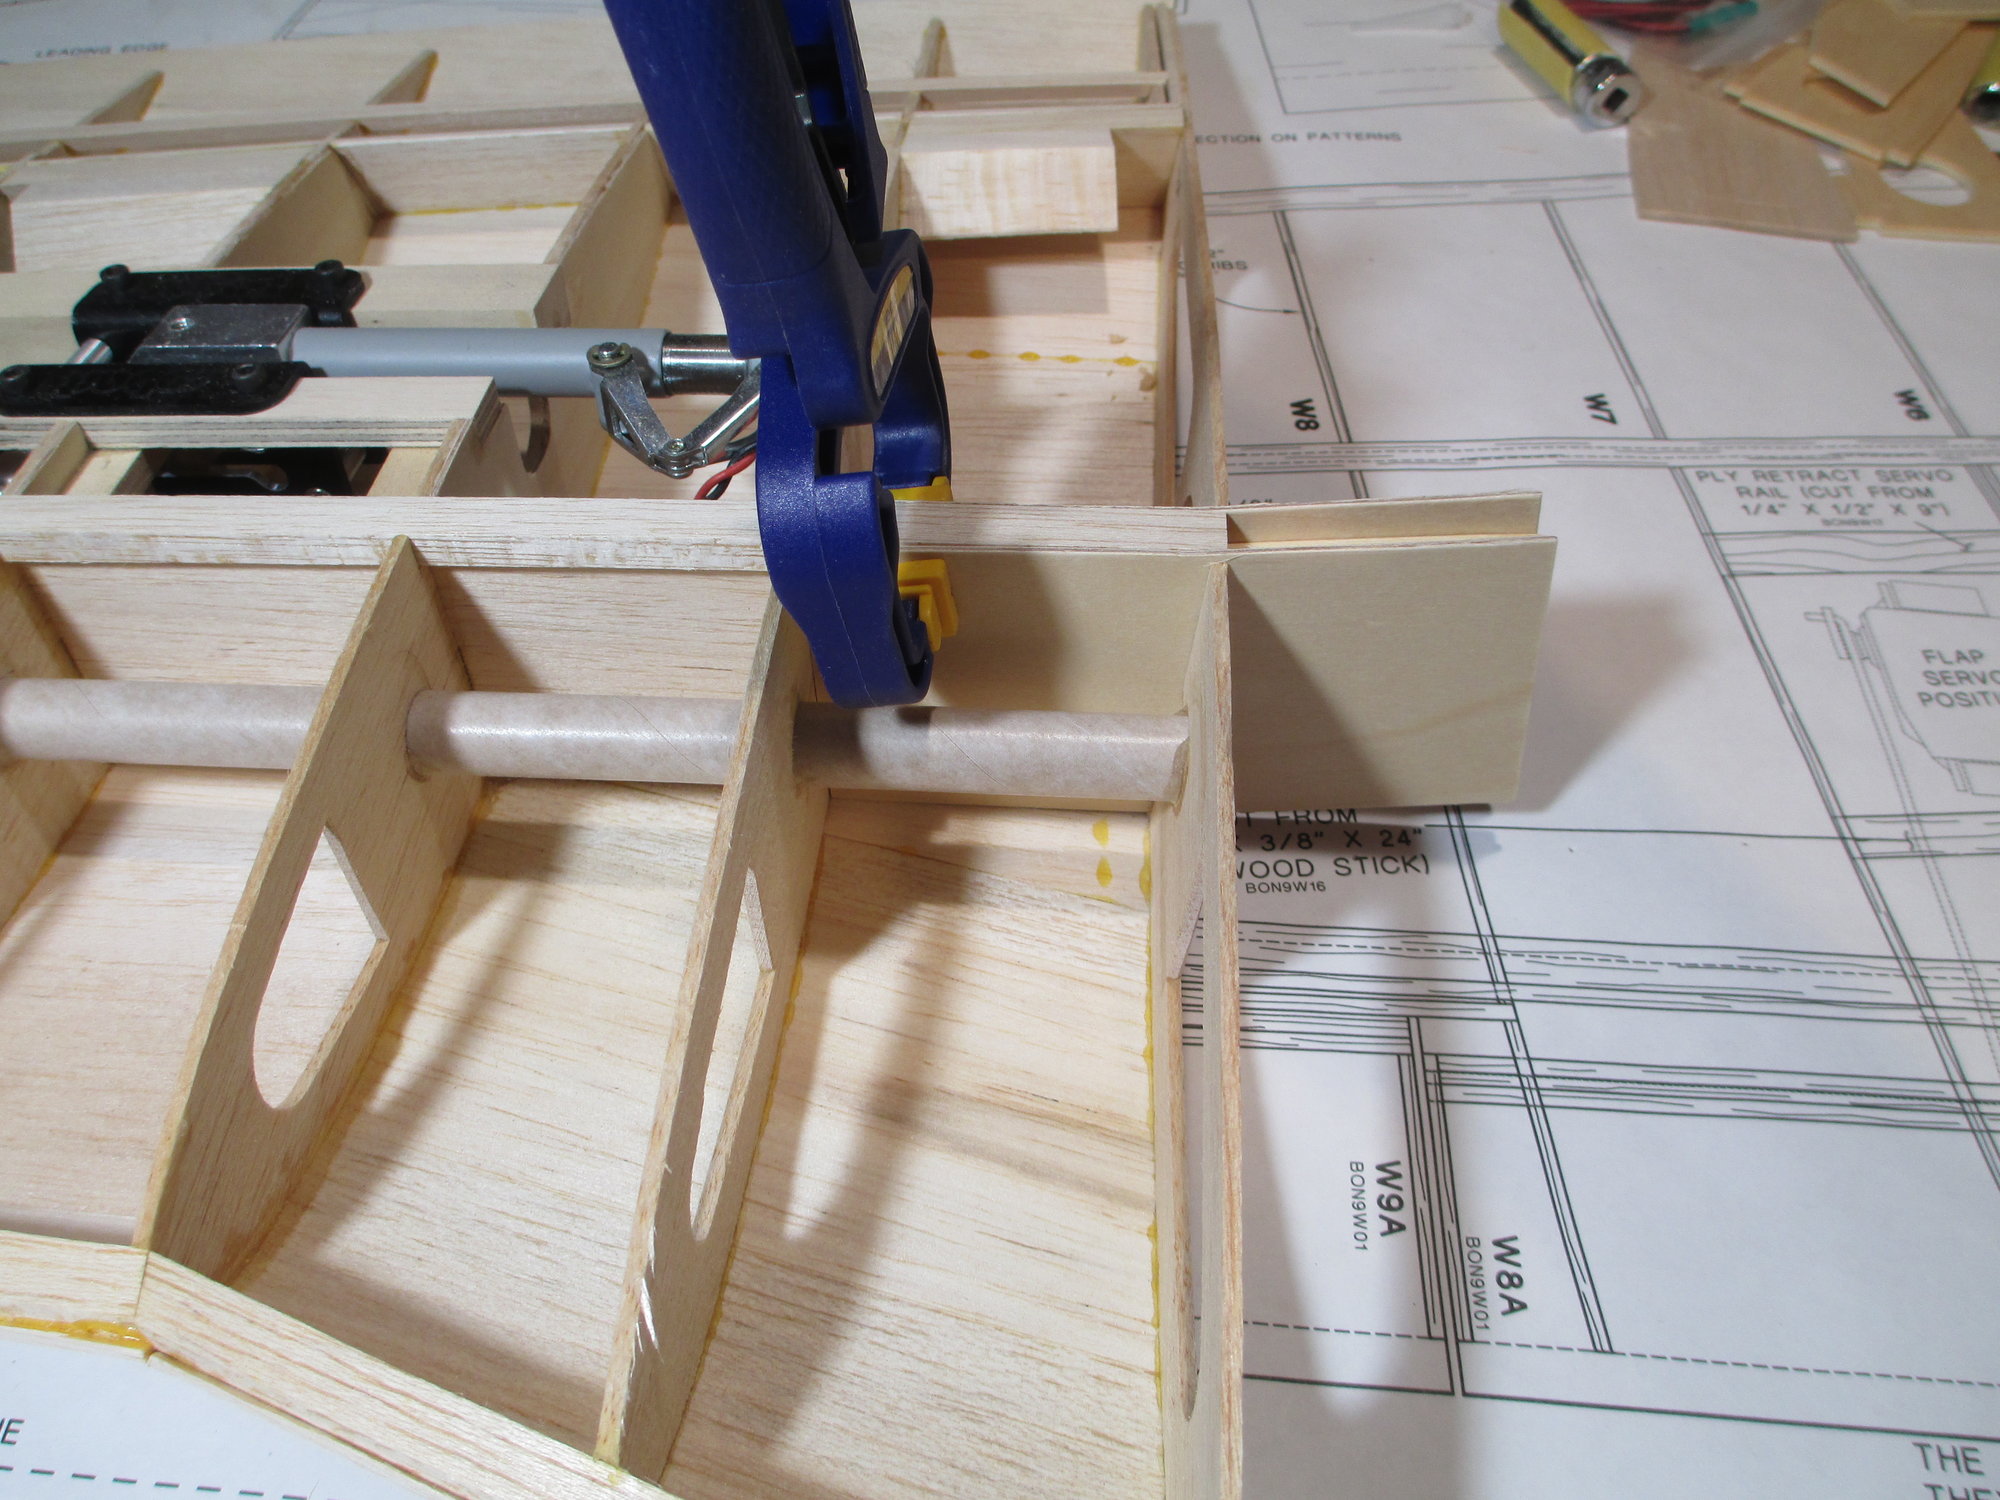
Time to slide the Center Section on as see how it fits...
 08-24-2019, 06:48 AM
#211

Vin, I assume this is designed as a one piece wing? At first I was thinking it was a good set up to remove the outer wing panels for transport, but that brace design might not be best for repeated assembly. 81" is a lot of wing to move around...
08-24-2019, 07:49 AM
#212
Thread Starter
Tim unfortunately this is a one piece wing. Large enough to be a surf board...
08-24-2019, 04:00 PM
#213
Thread Starter
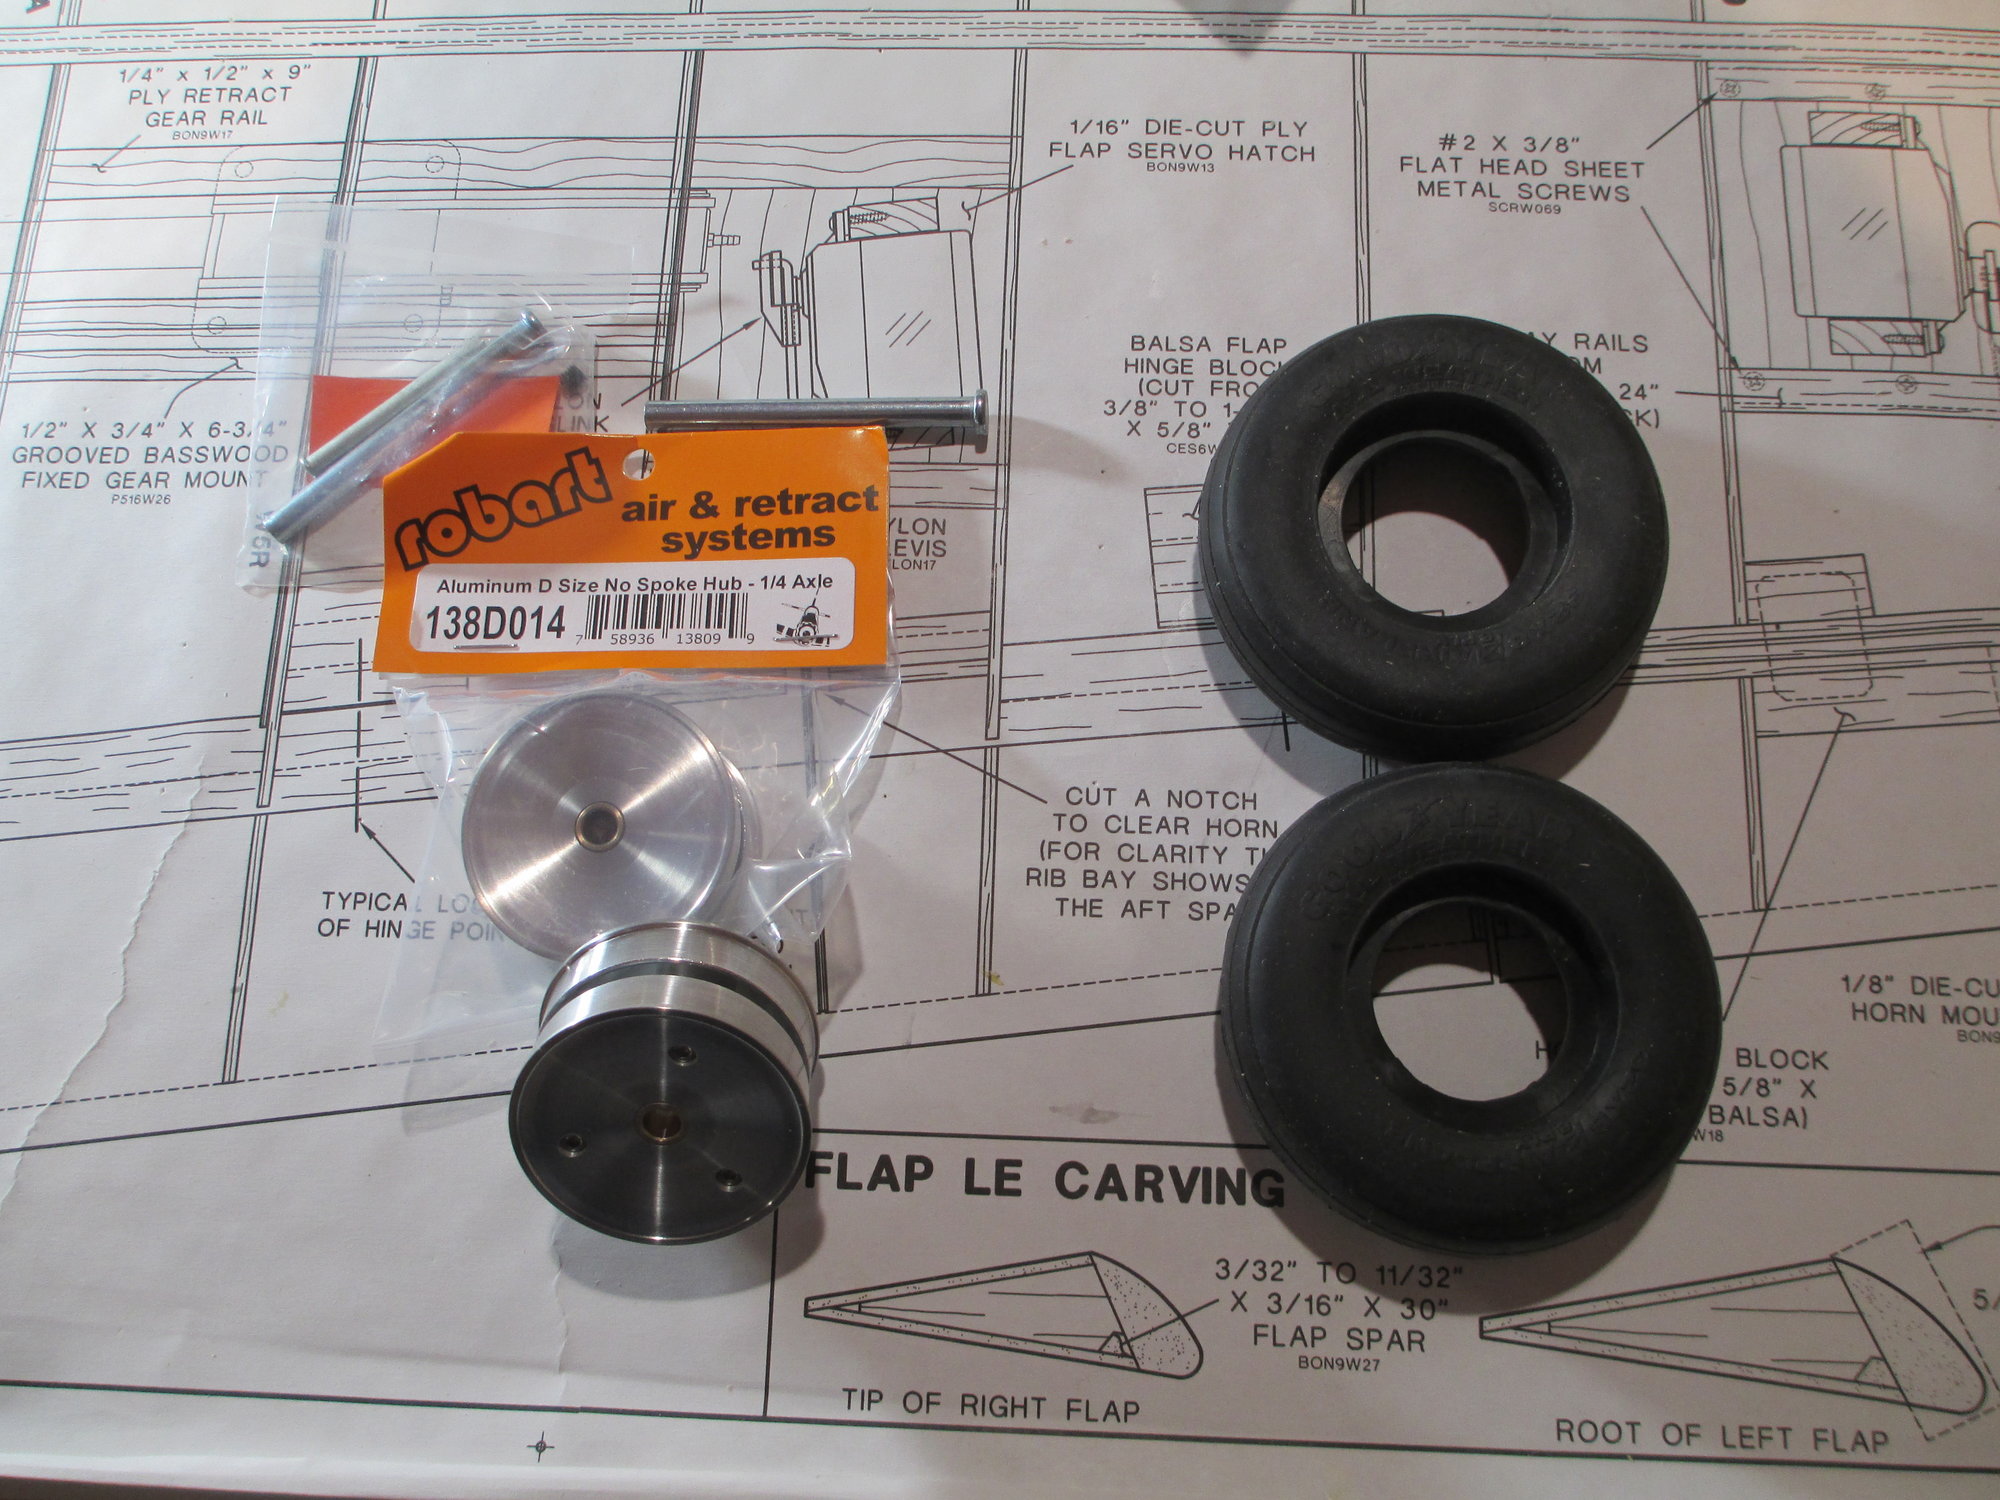
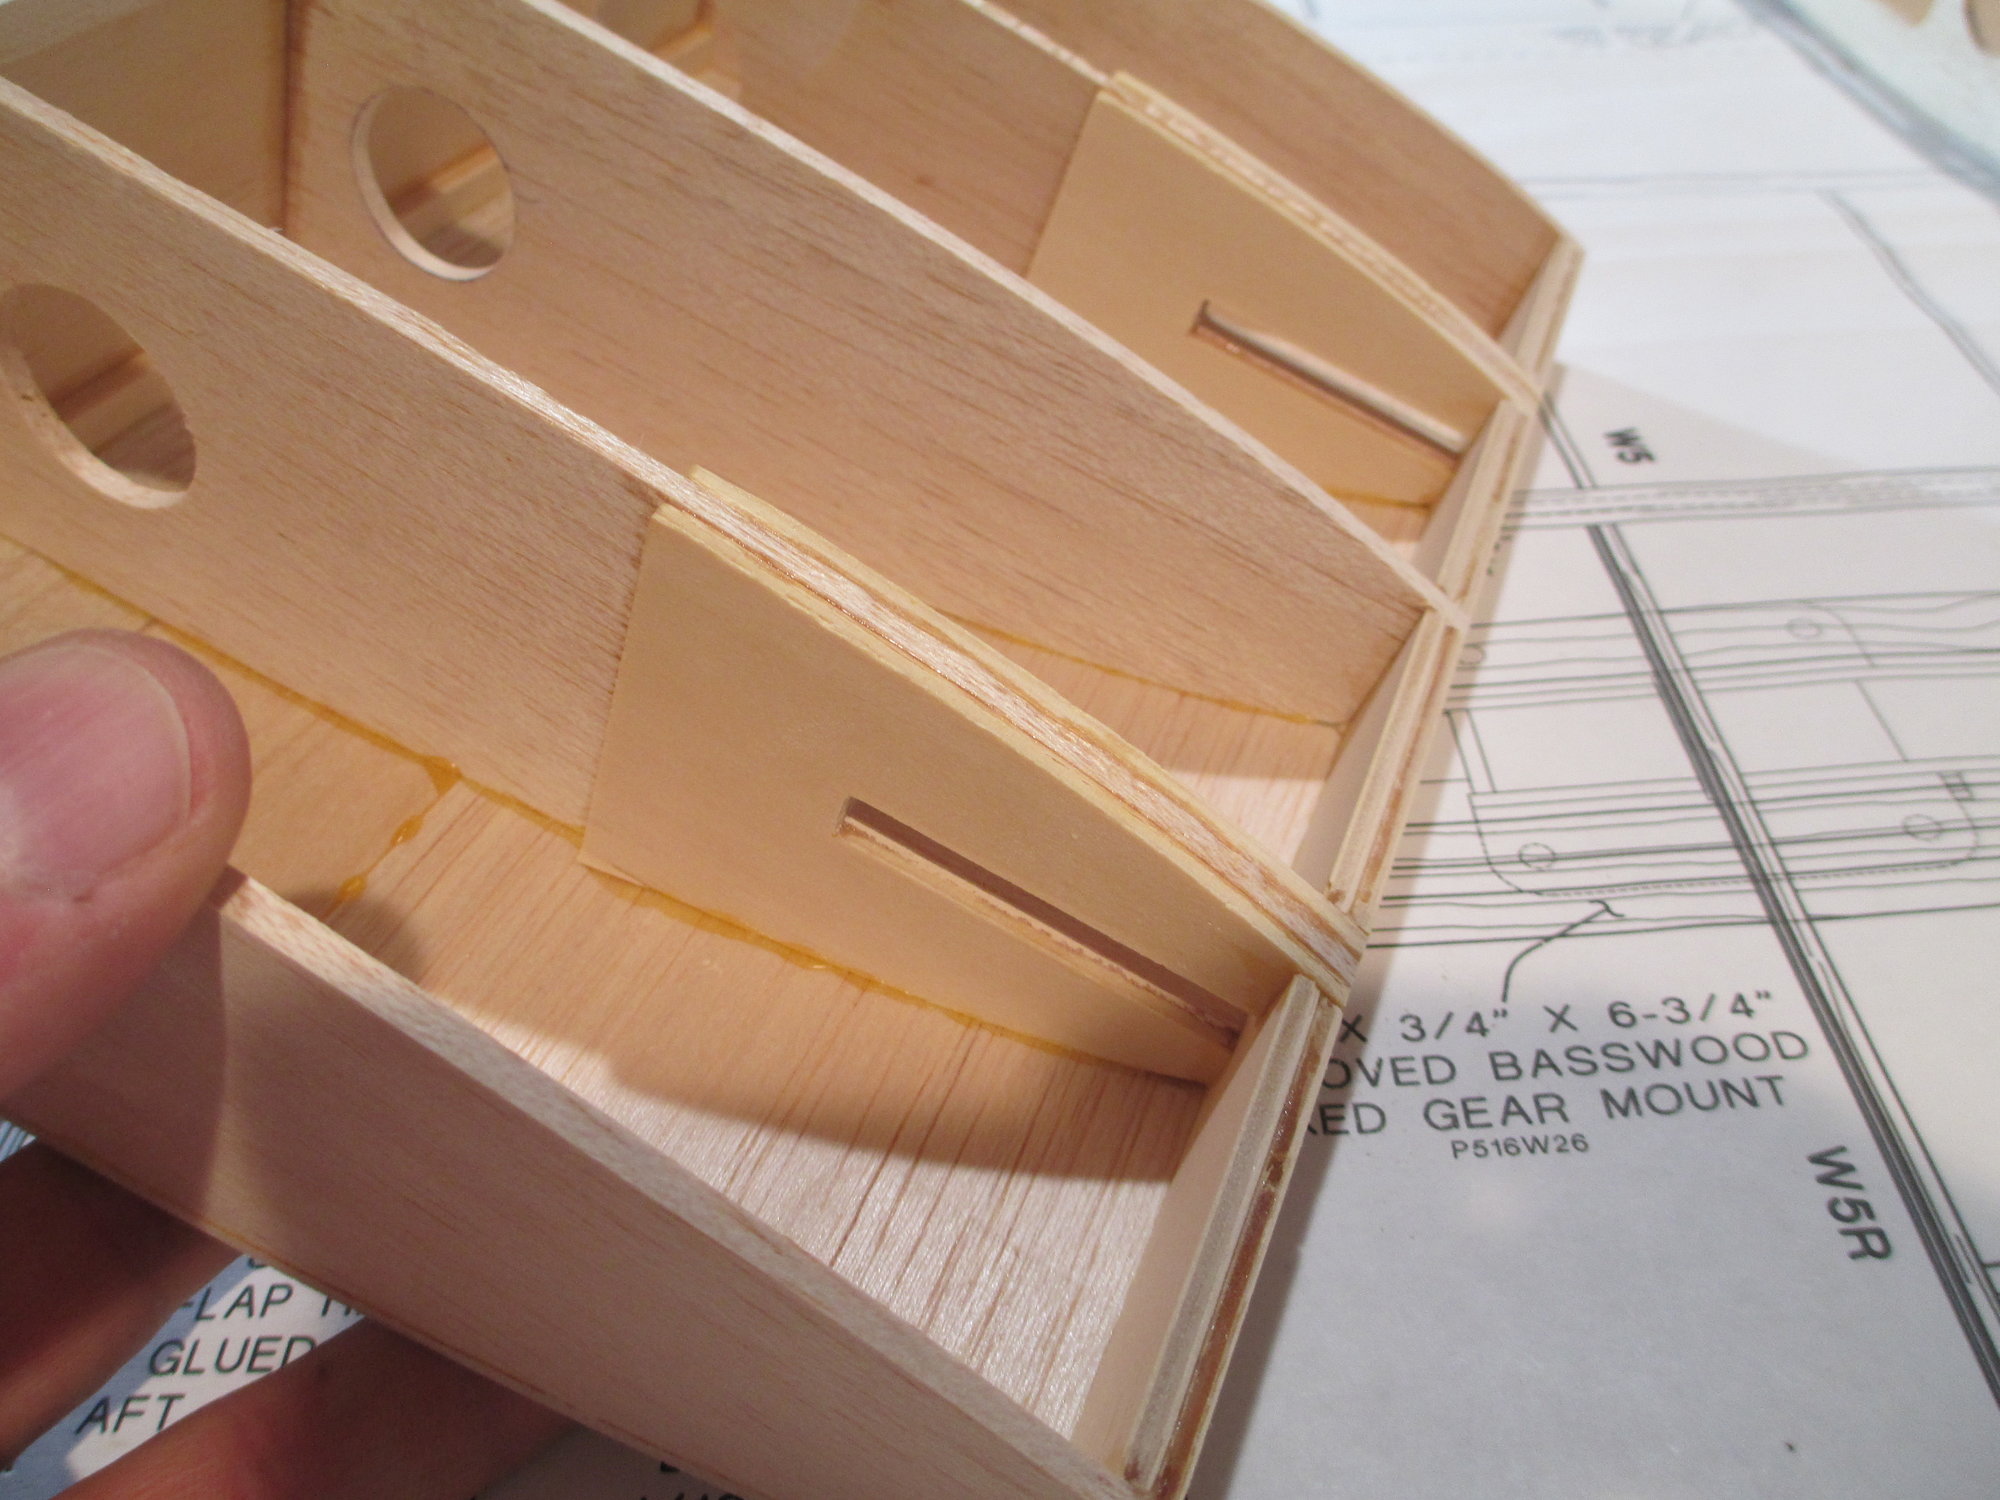
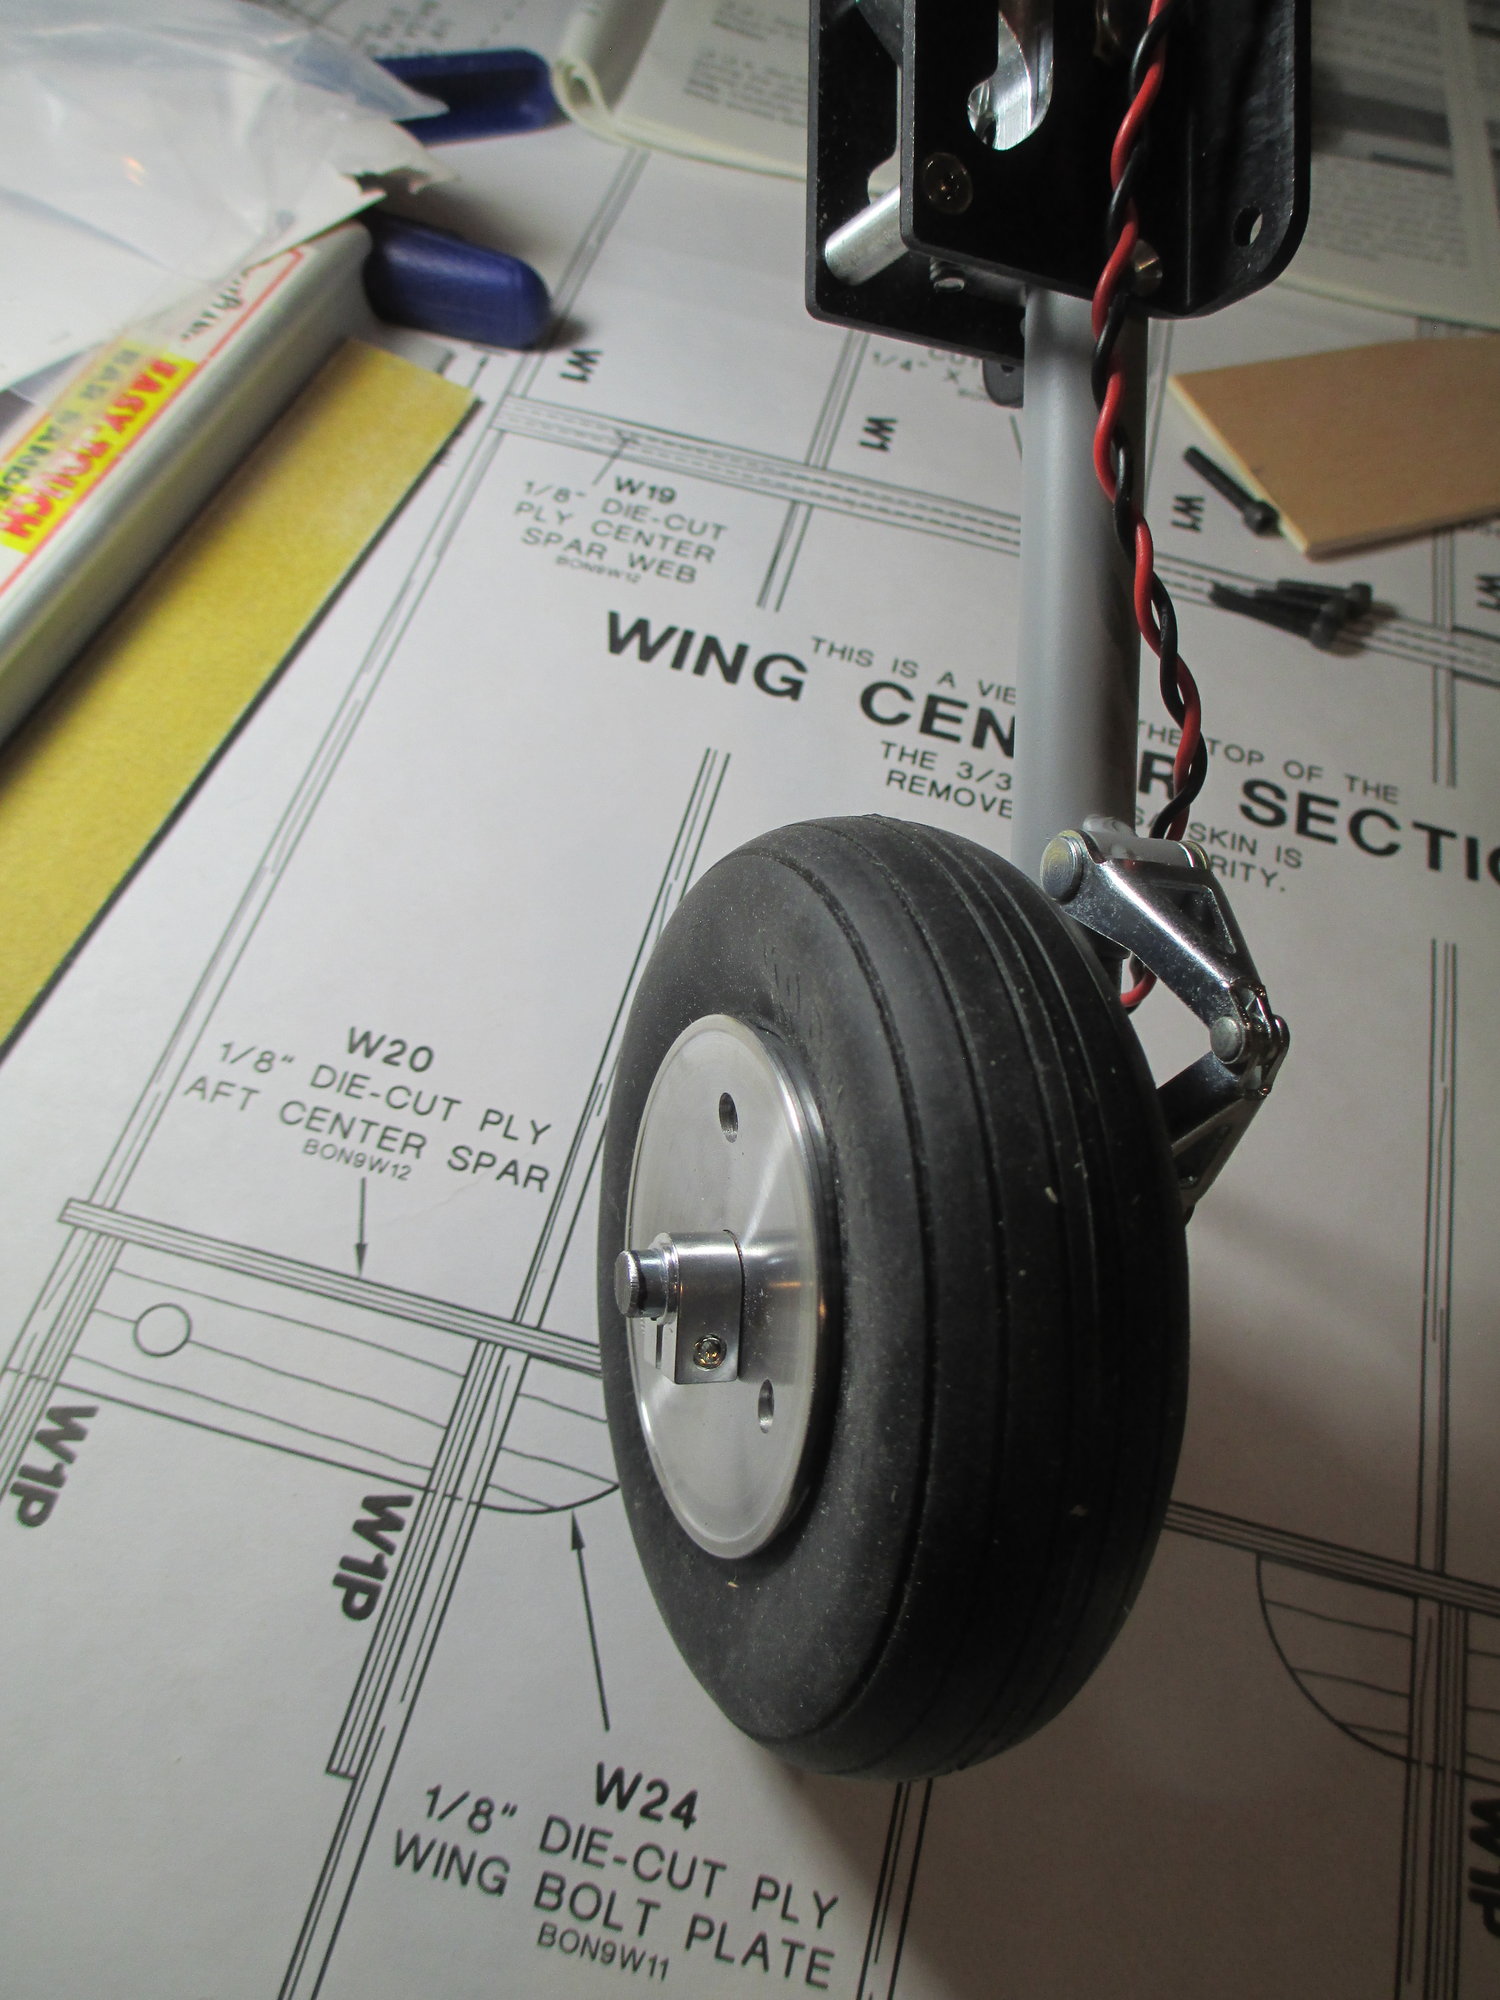
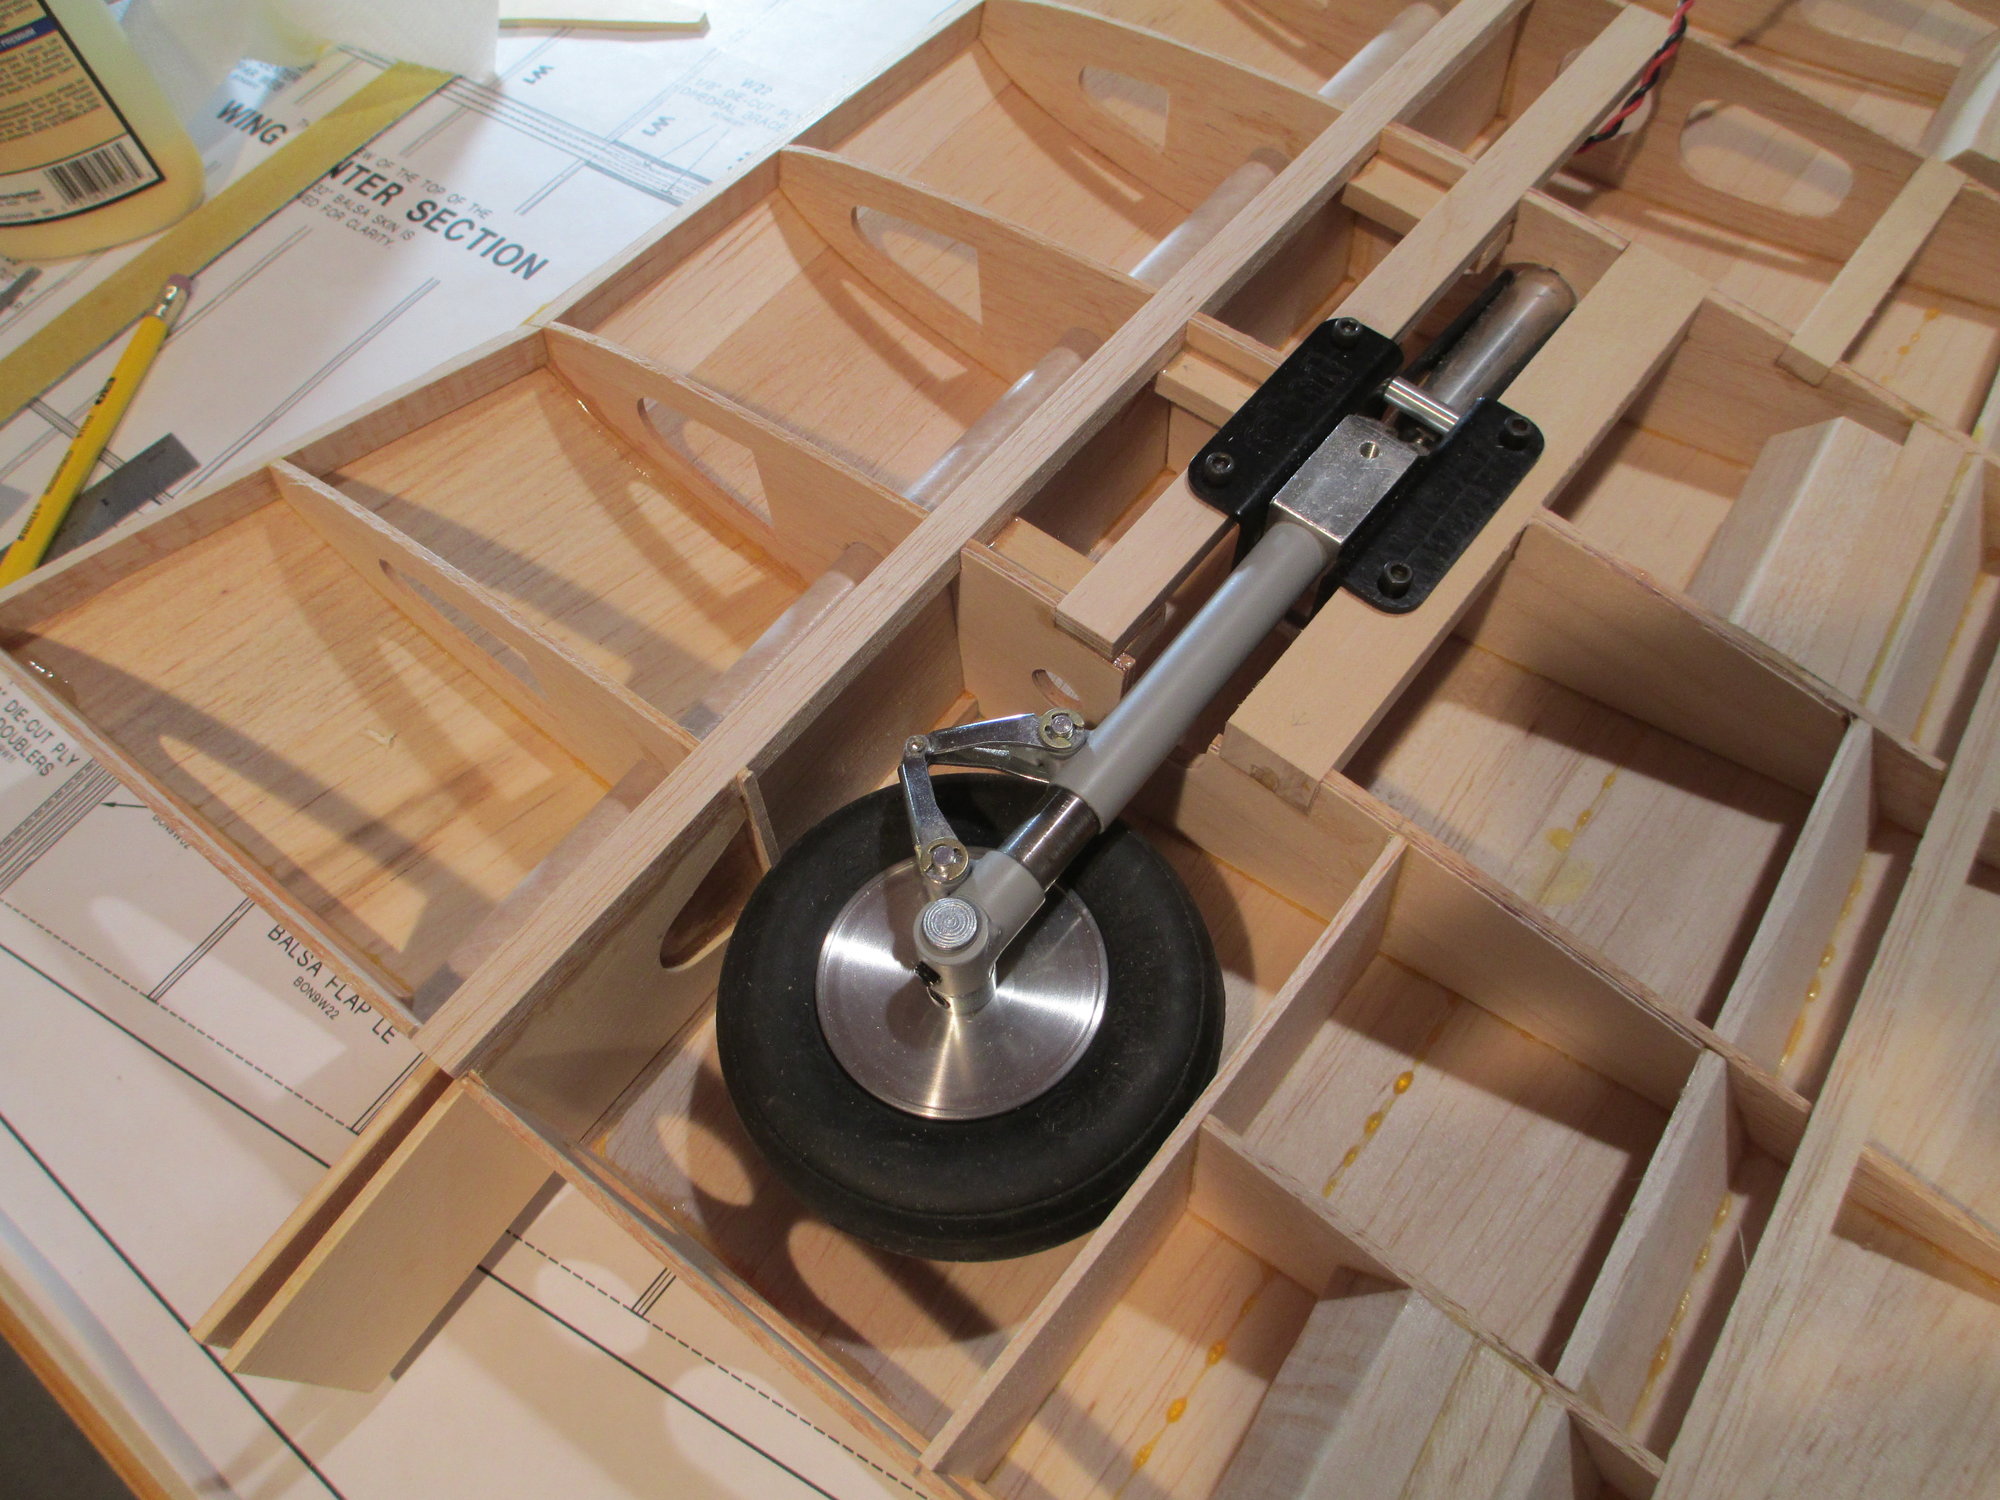
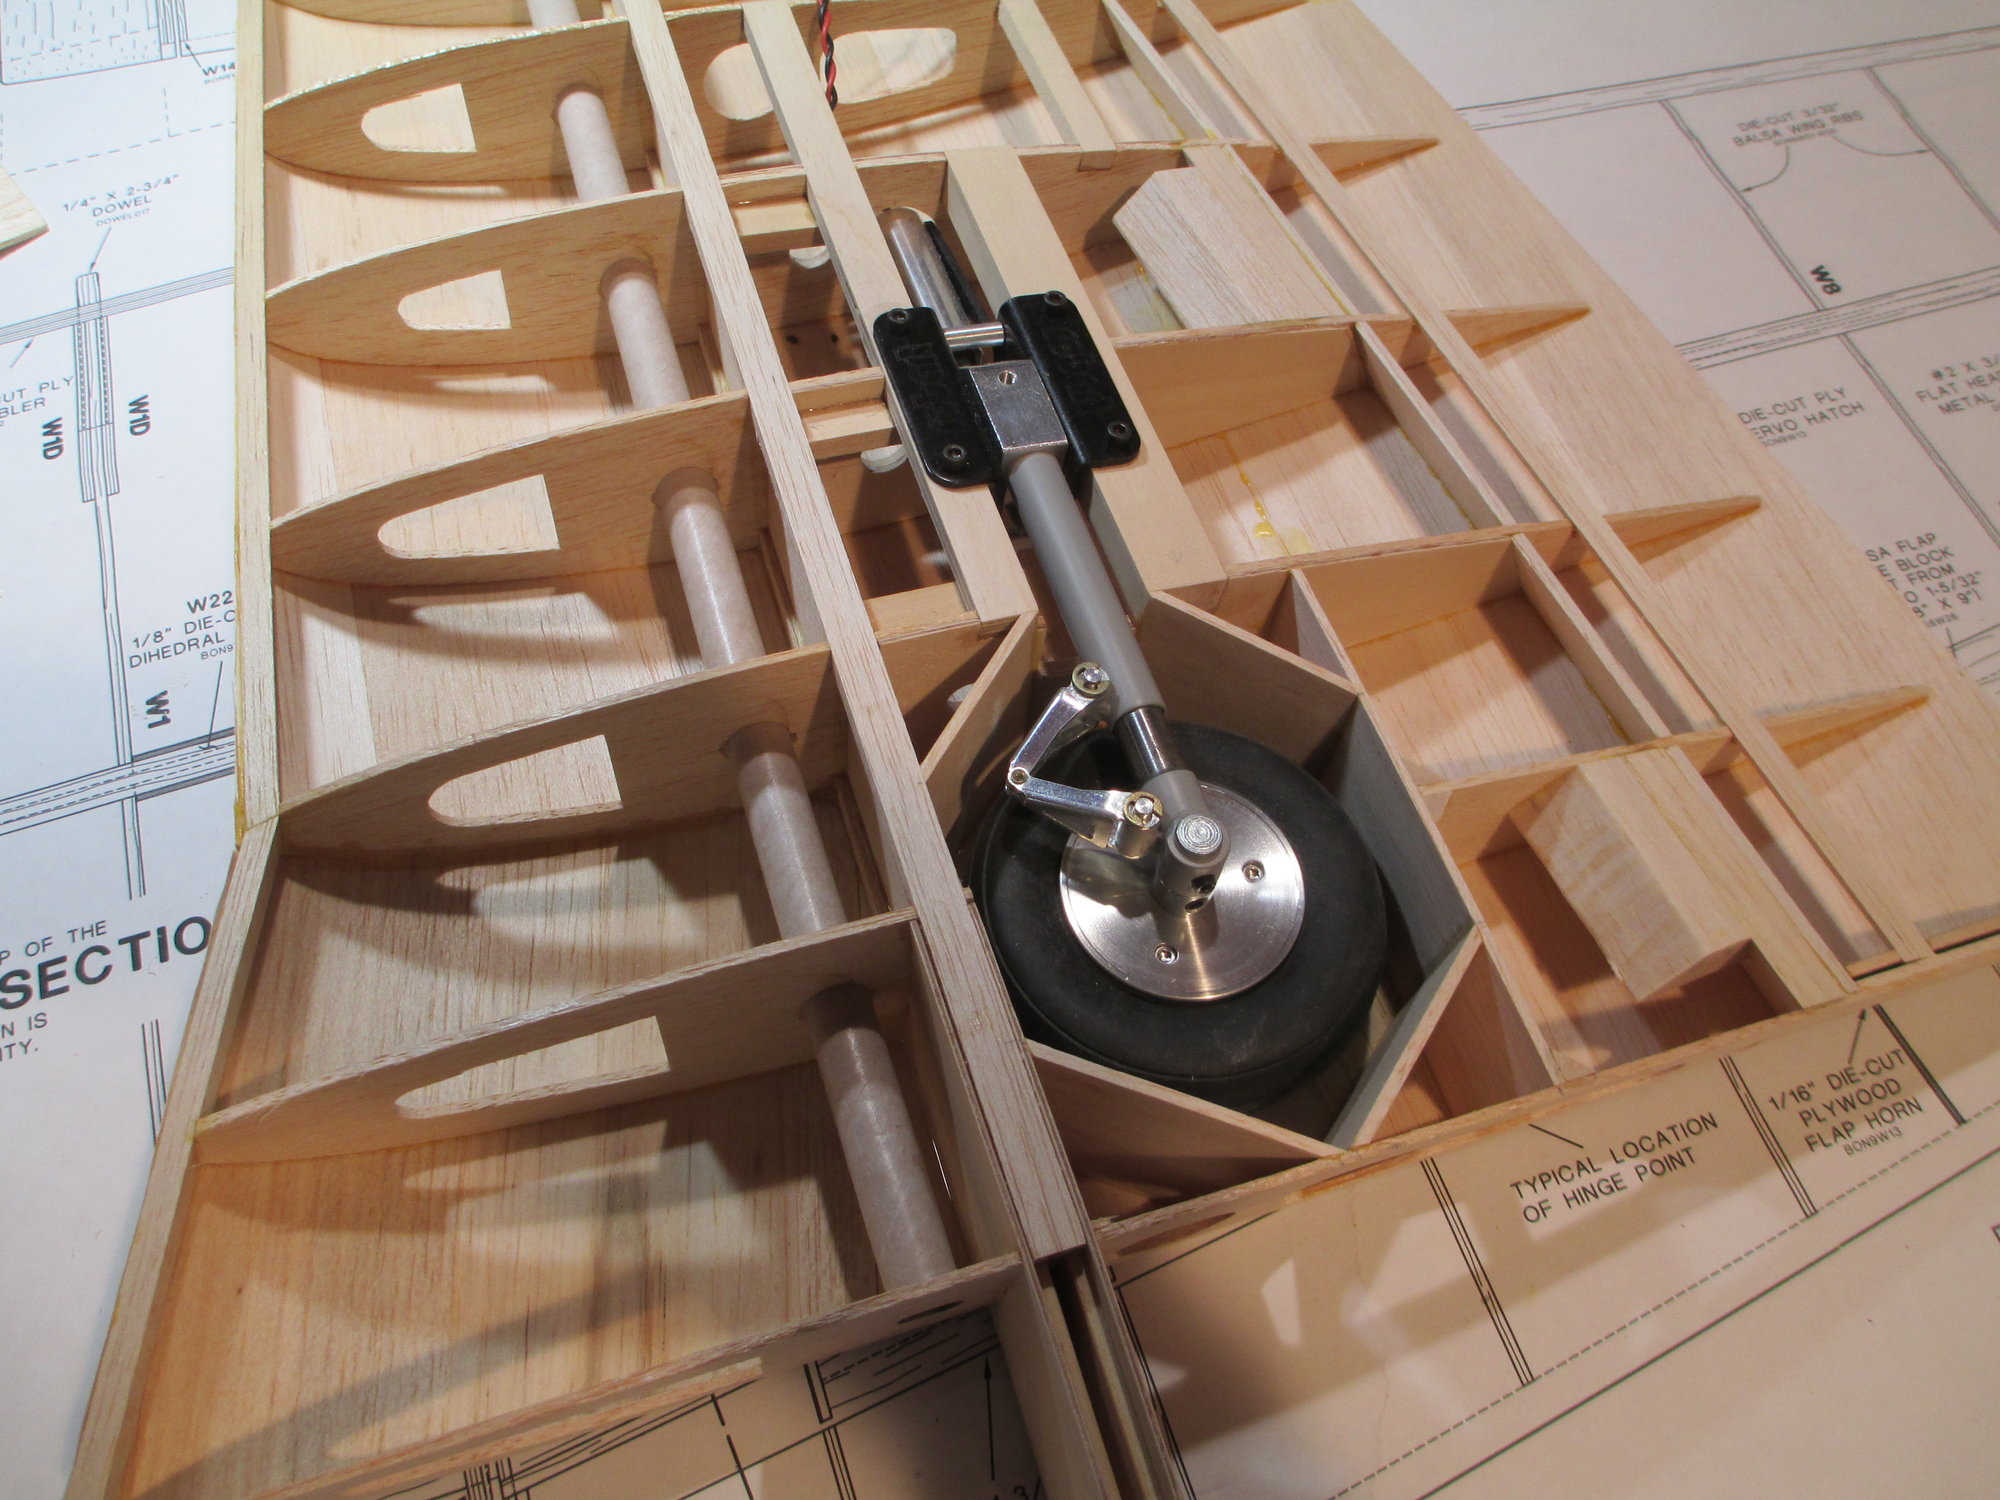
Received my wheels today. I had to send the others back because of the wrong axle size. (I was sent wheels that had a 3/16" axle)
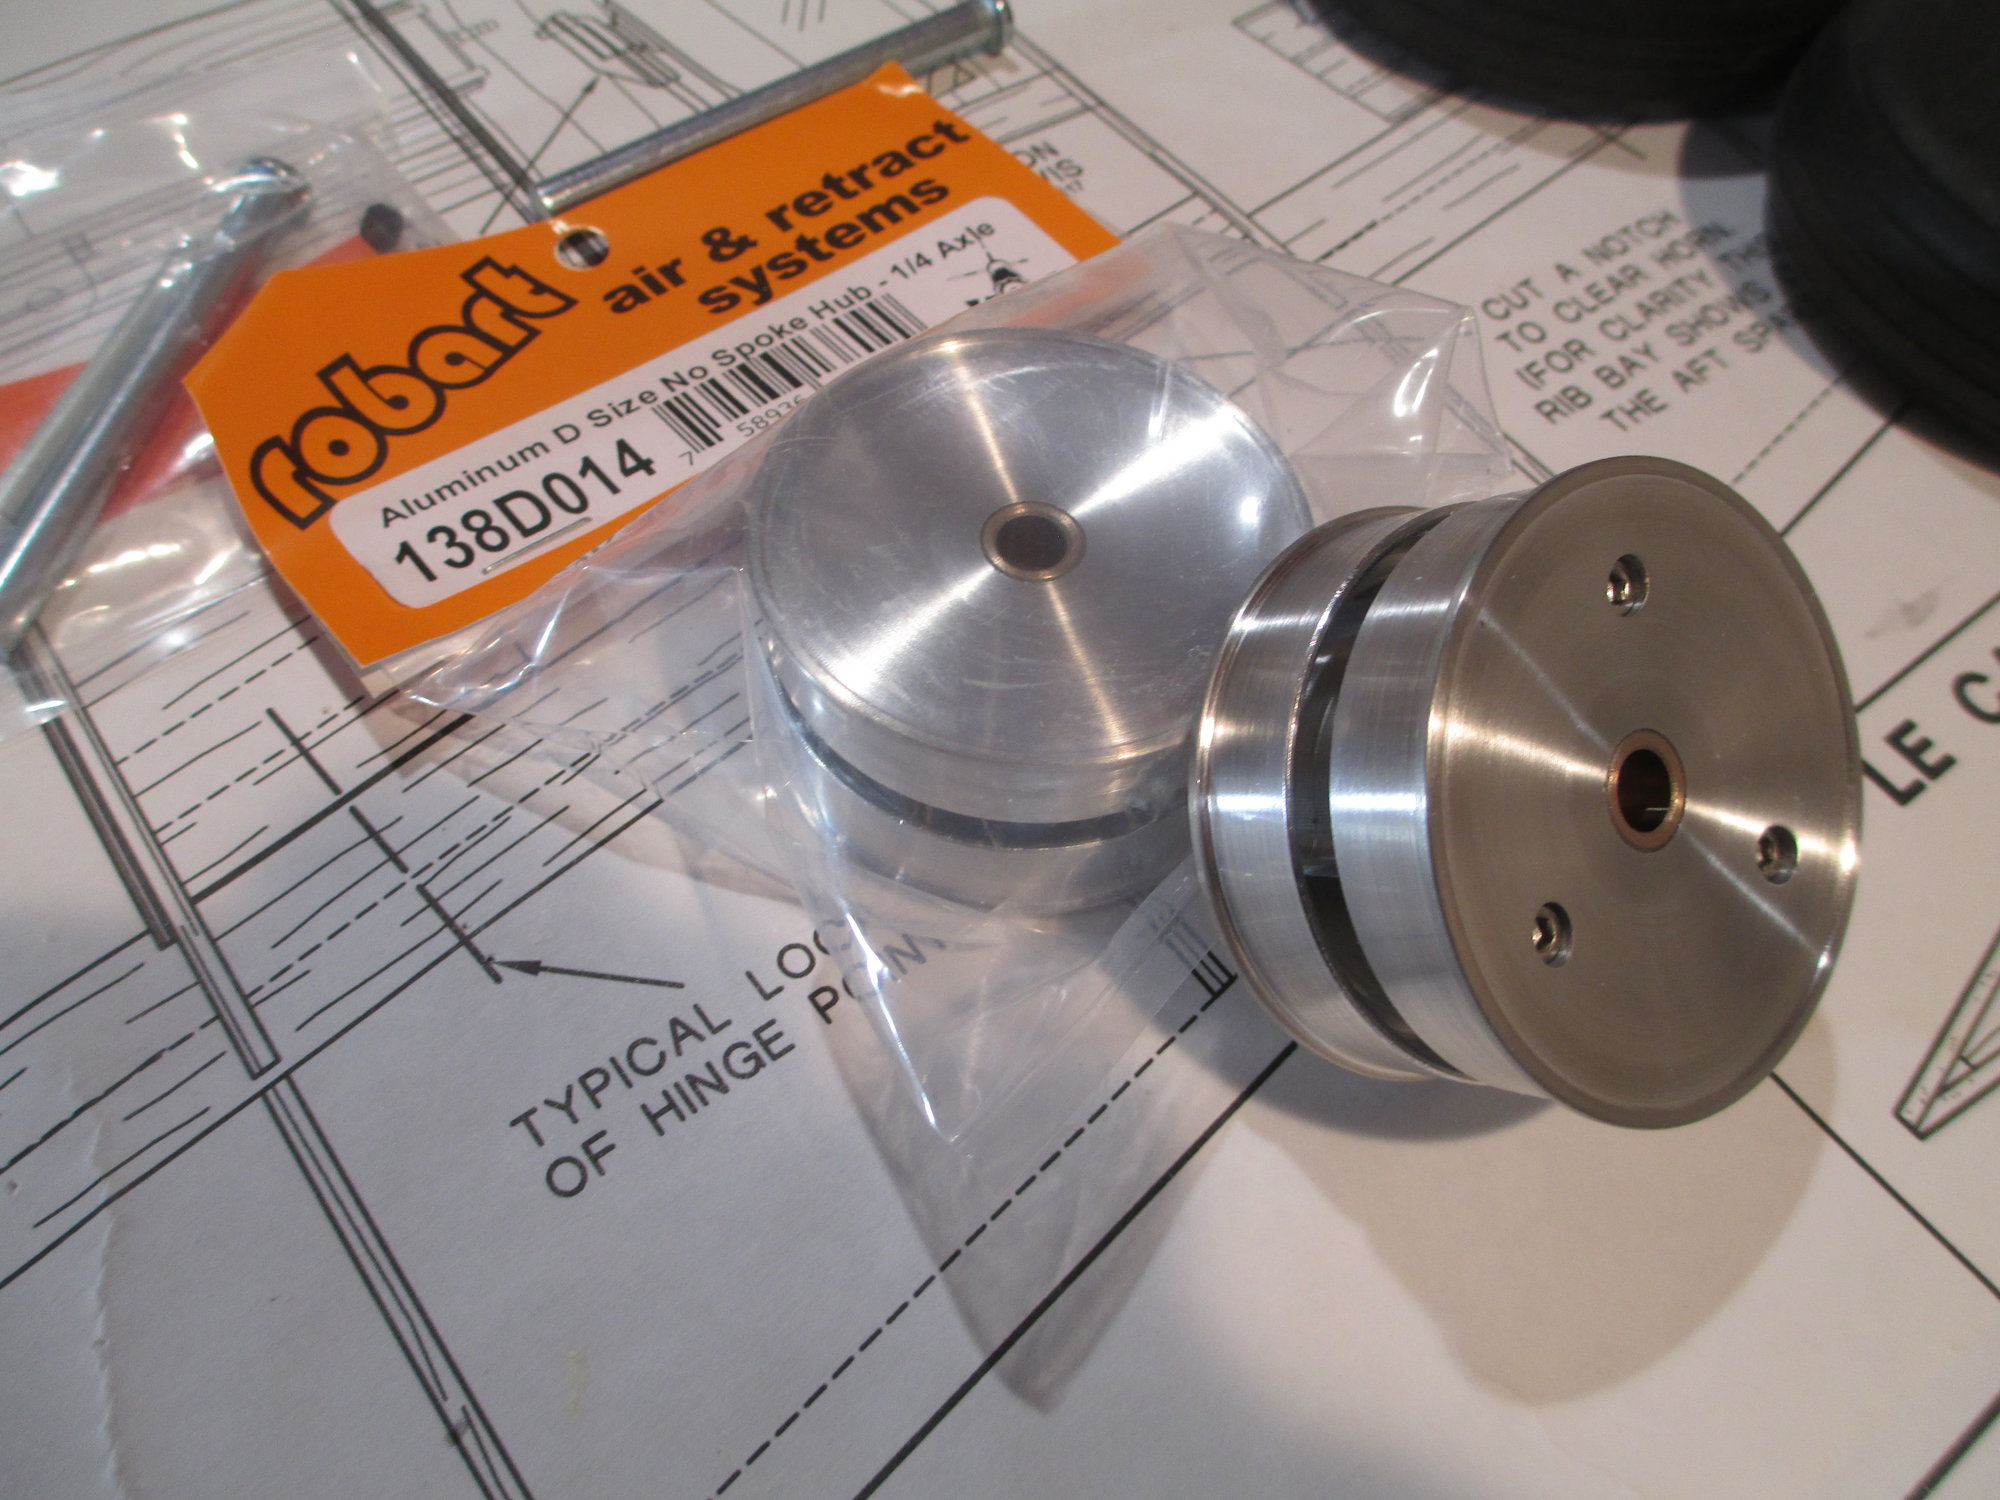
These are high quality 3-1/2" wheels by Robart. The hubs split by removing the three cap head screws visible so the tire can be mounted.
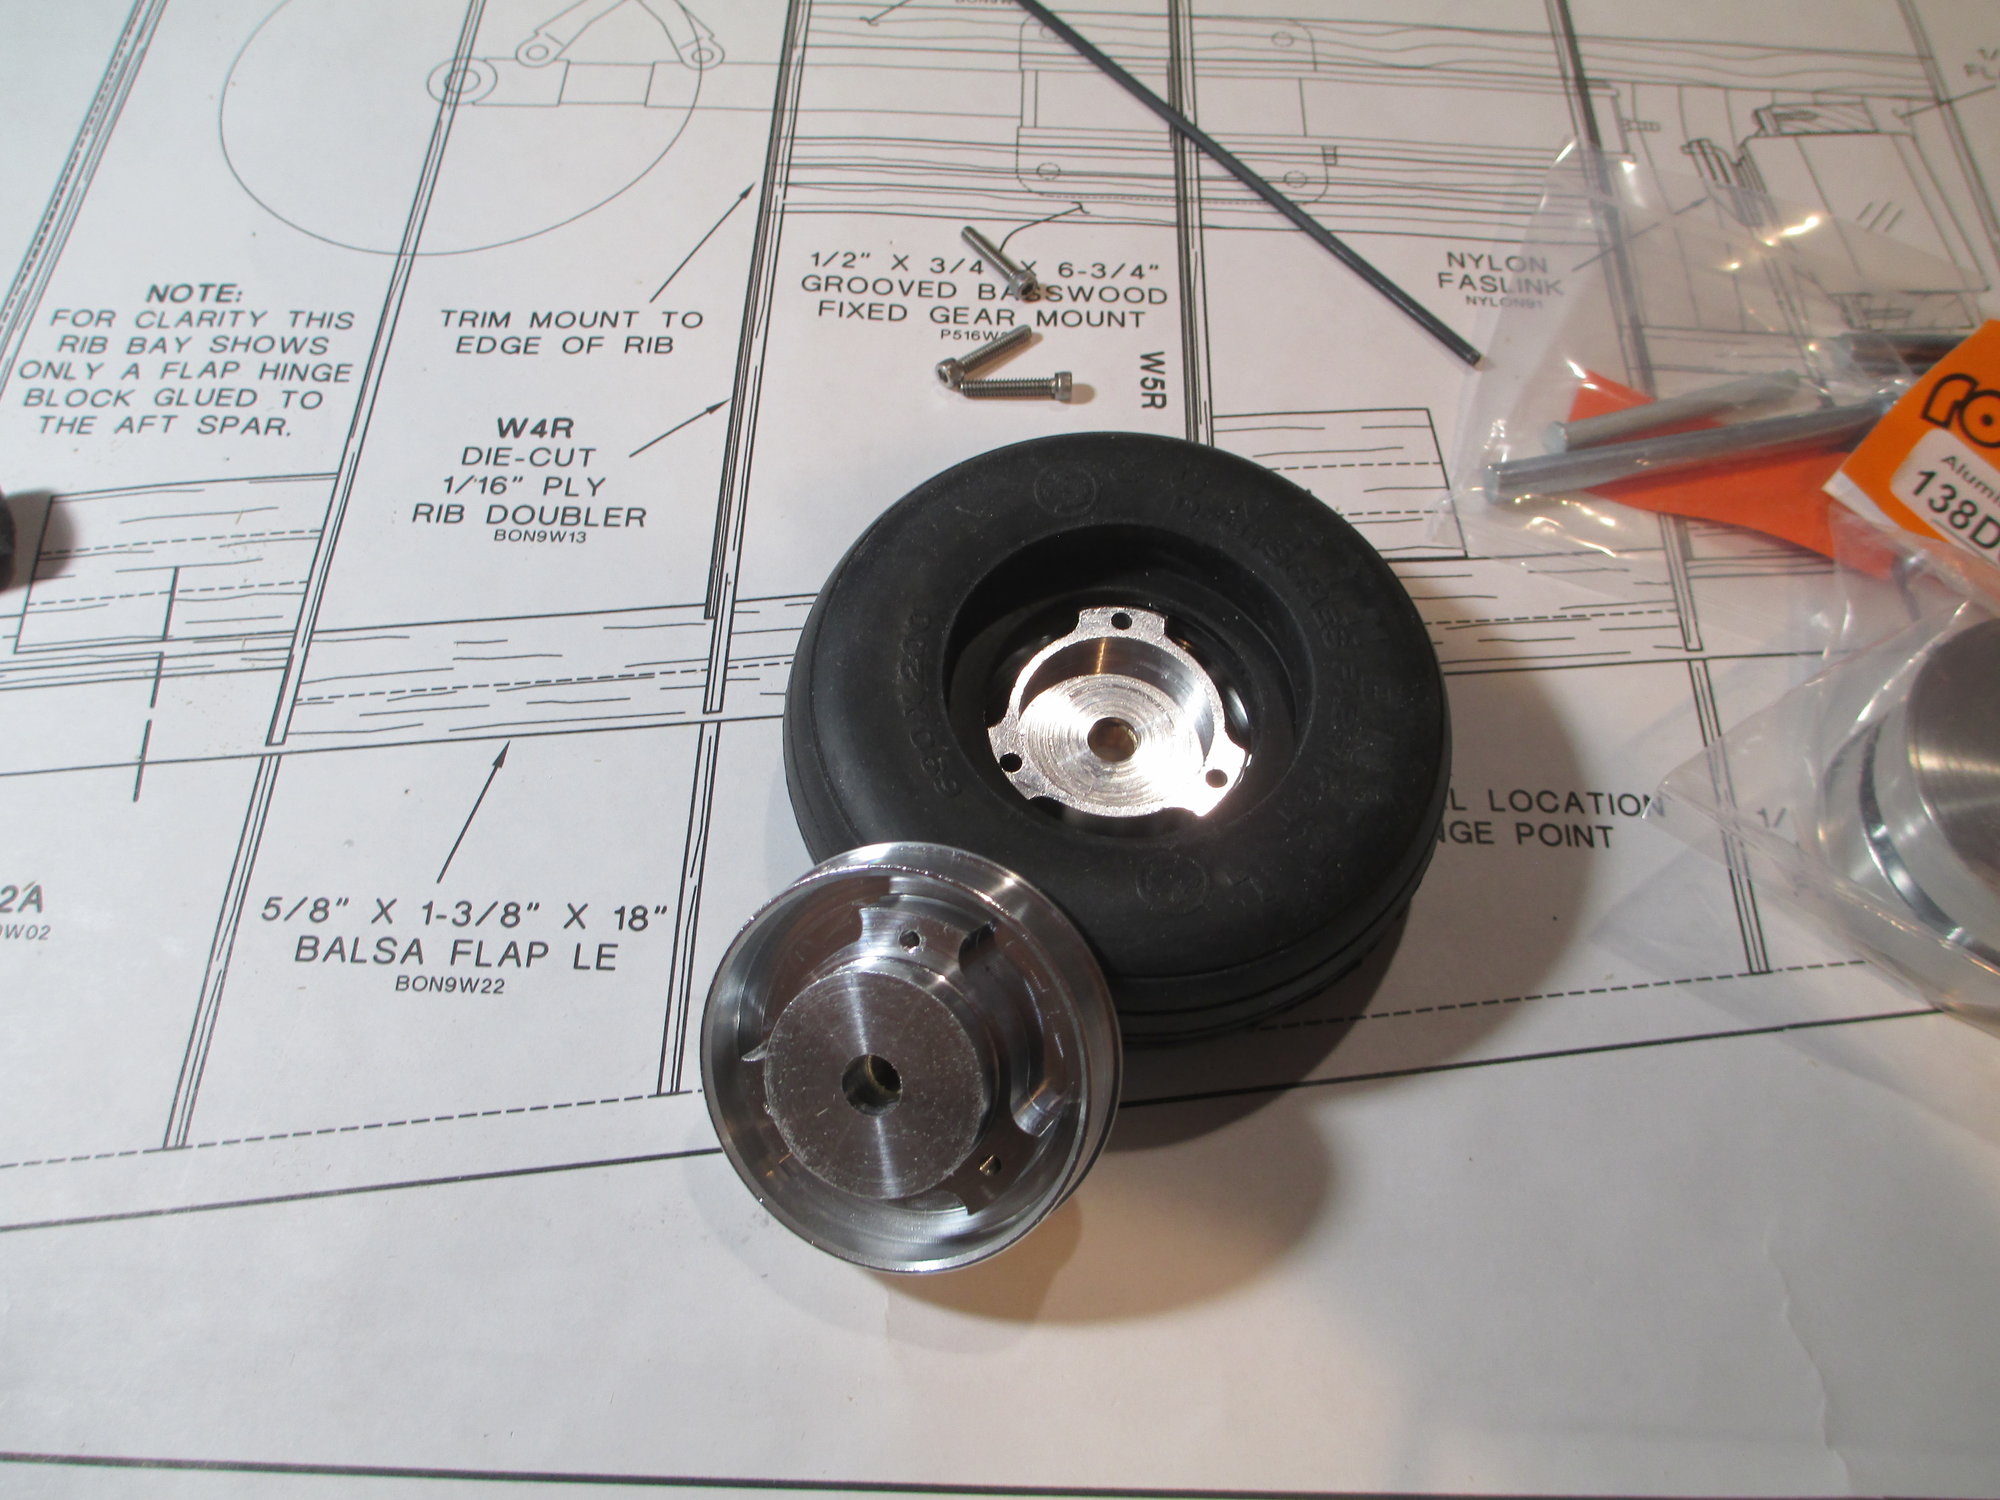
When I mounted the tires for the first time, I wasn't happy with how soft the tires were. I needed to make them stiffer, especially with a potentially 20 pound plane. The solution was pretty easy.
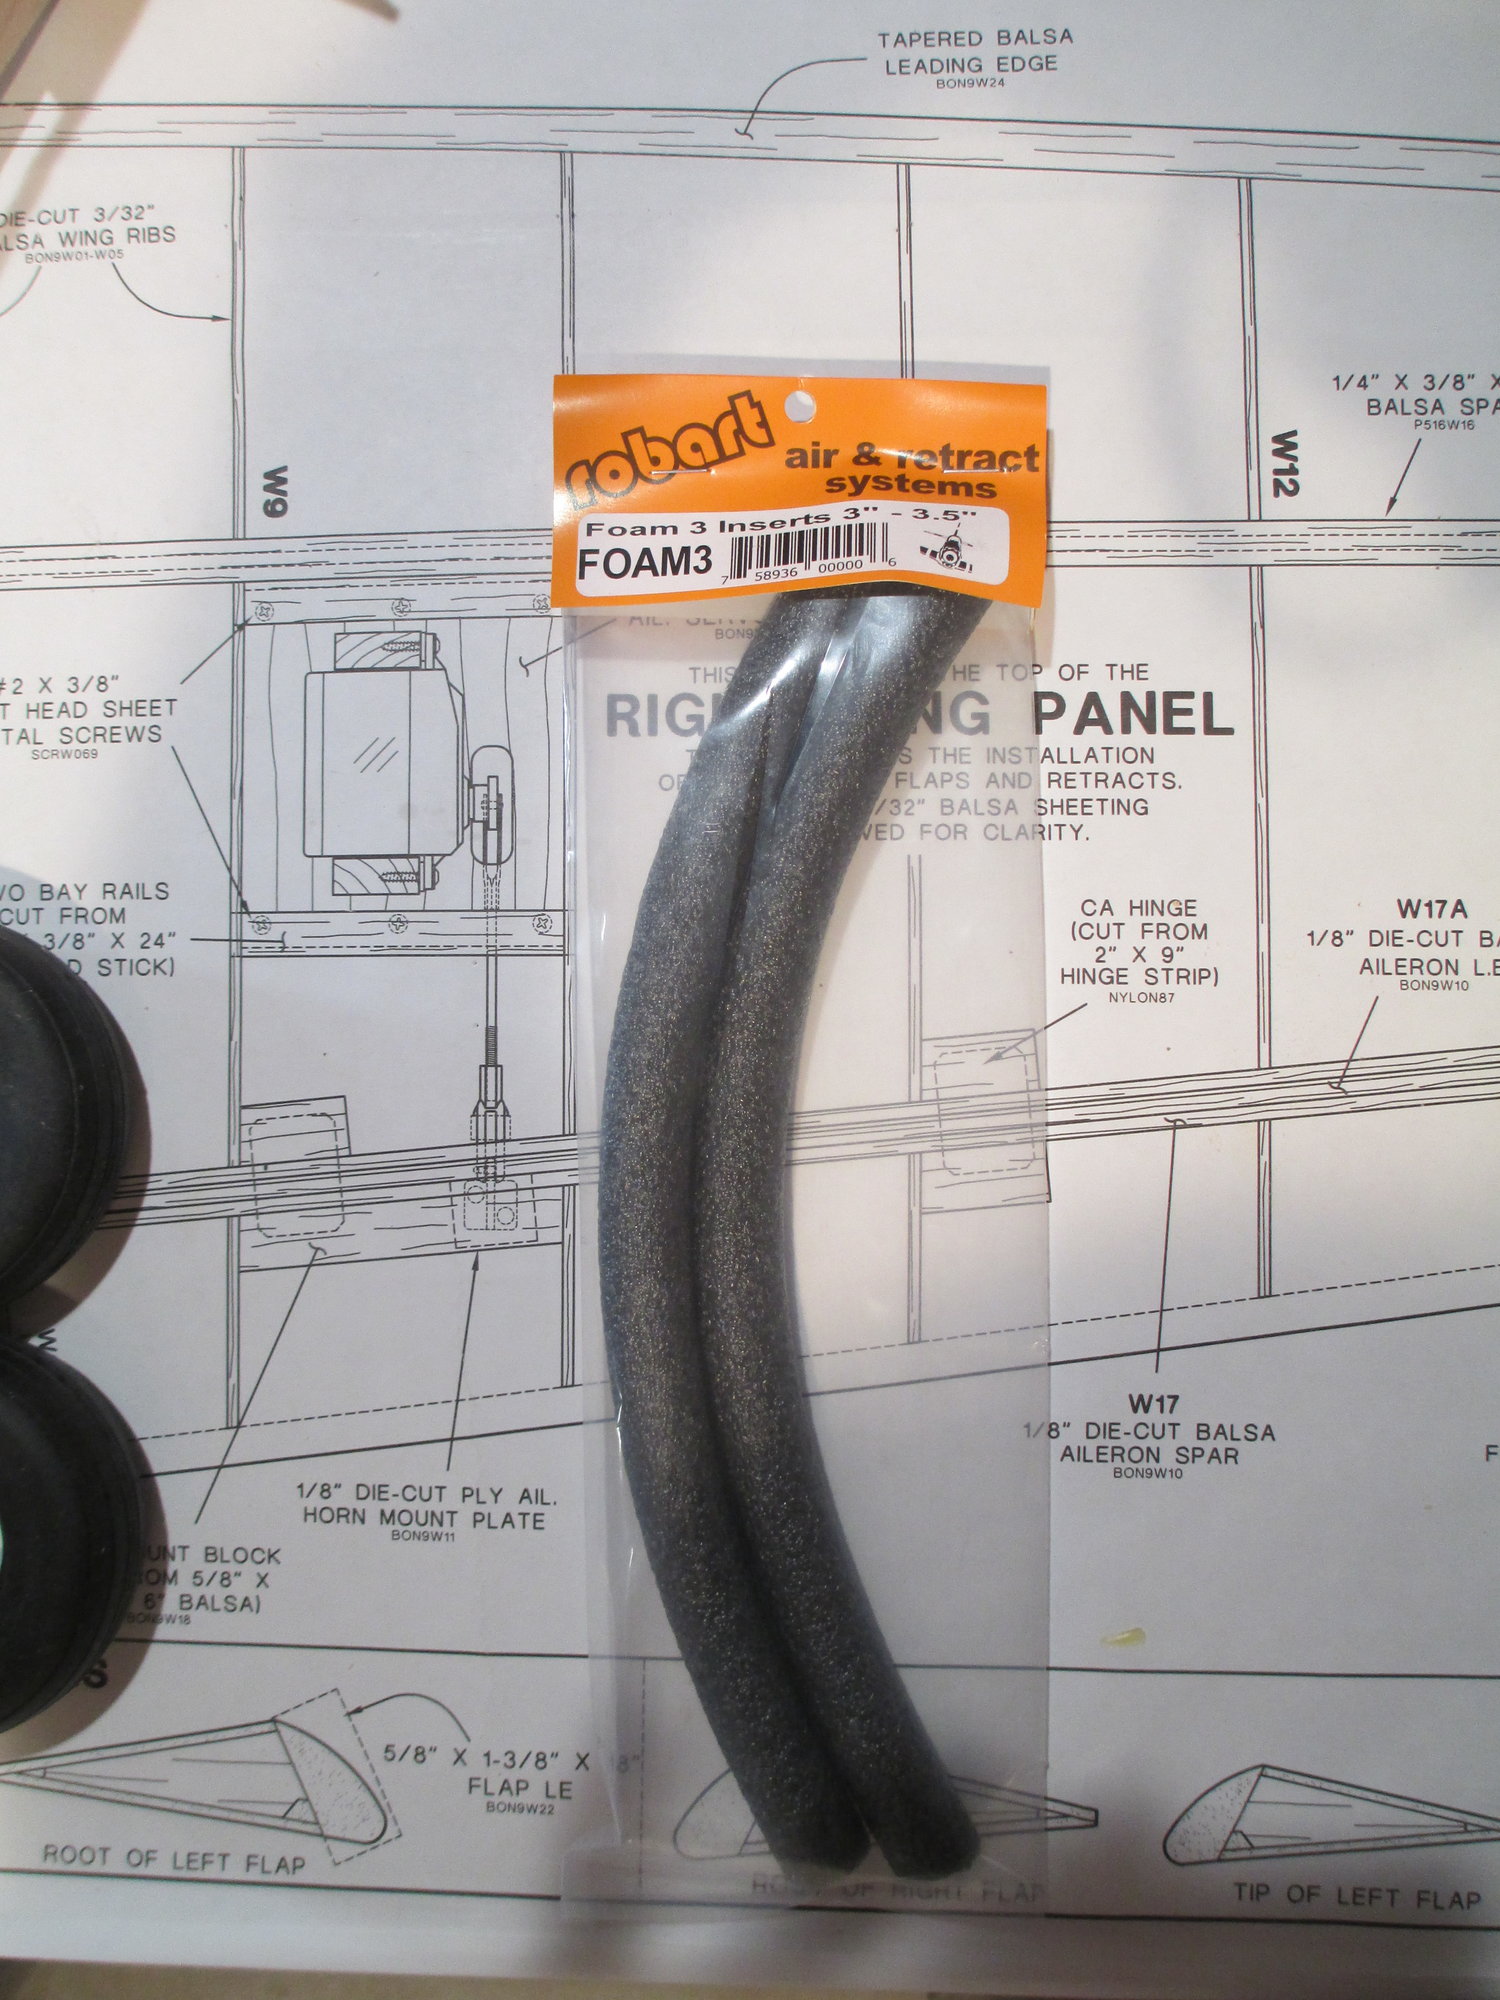
Apparently others before me had the same concern, so Robart came up with this solution. Simply insert inside of the tire with this foam rod.
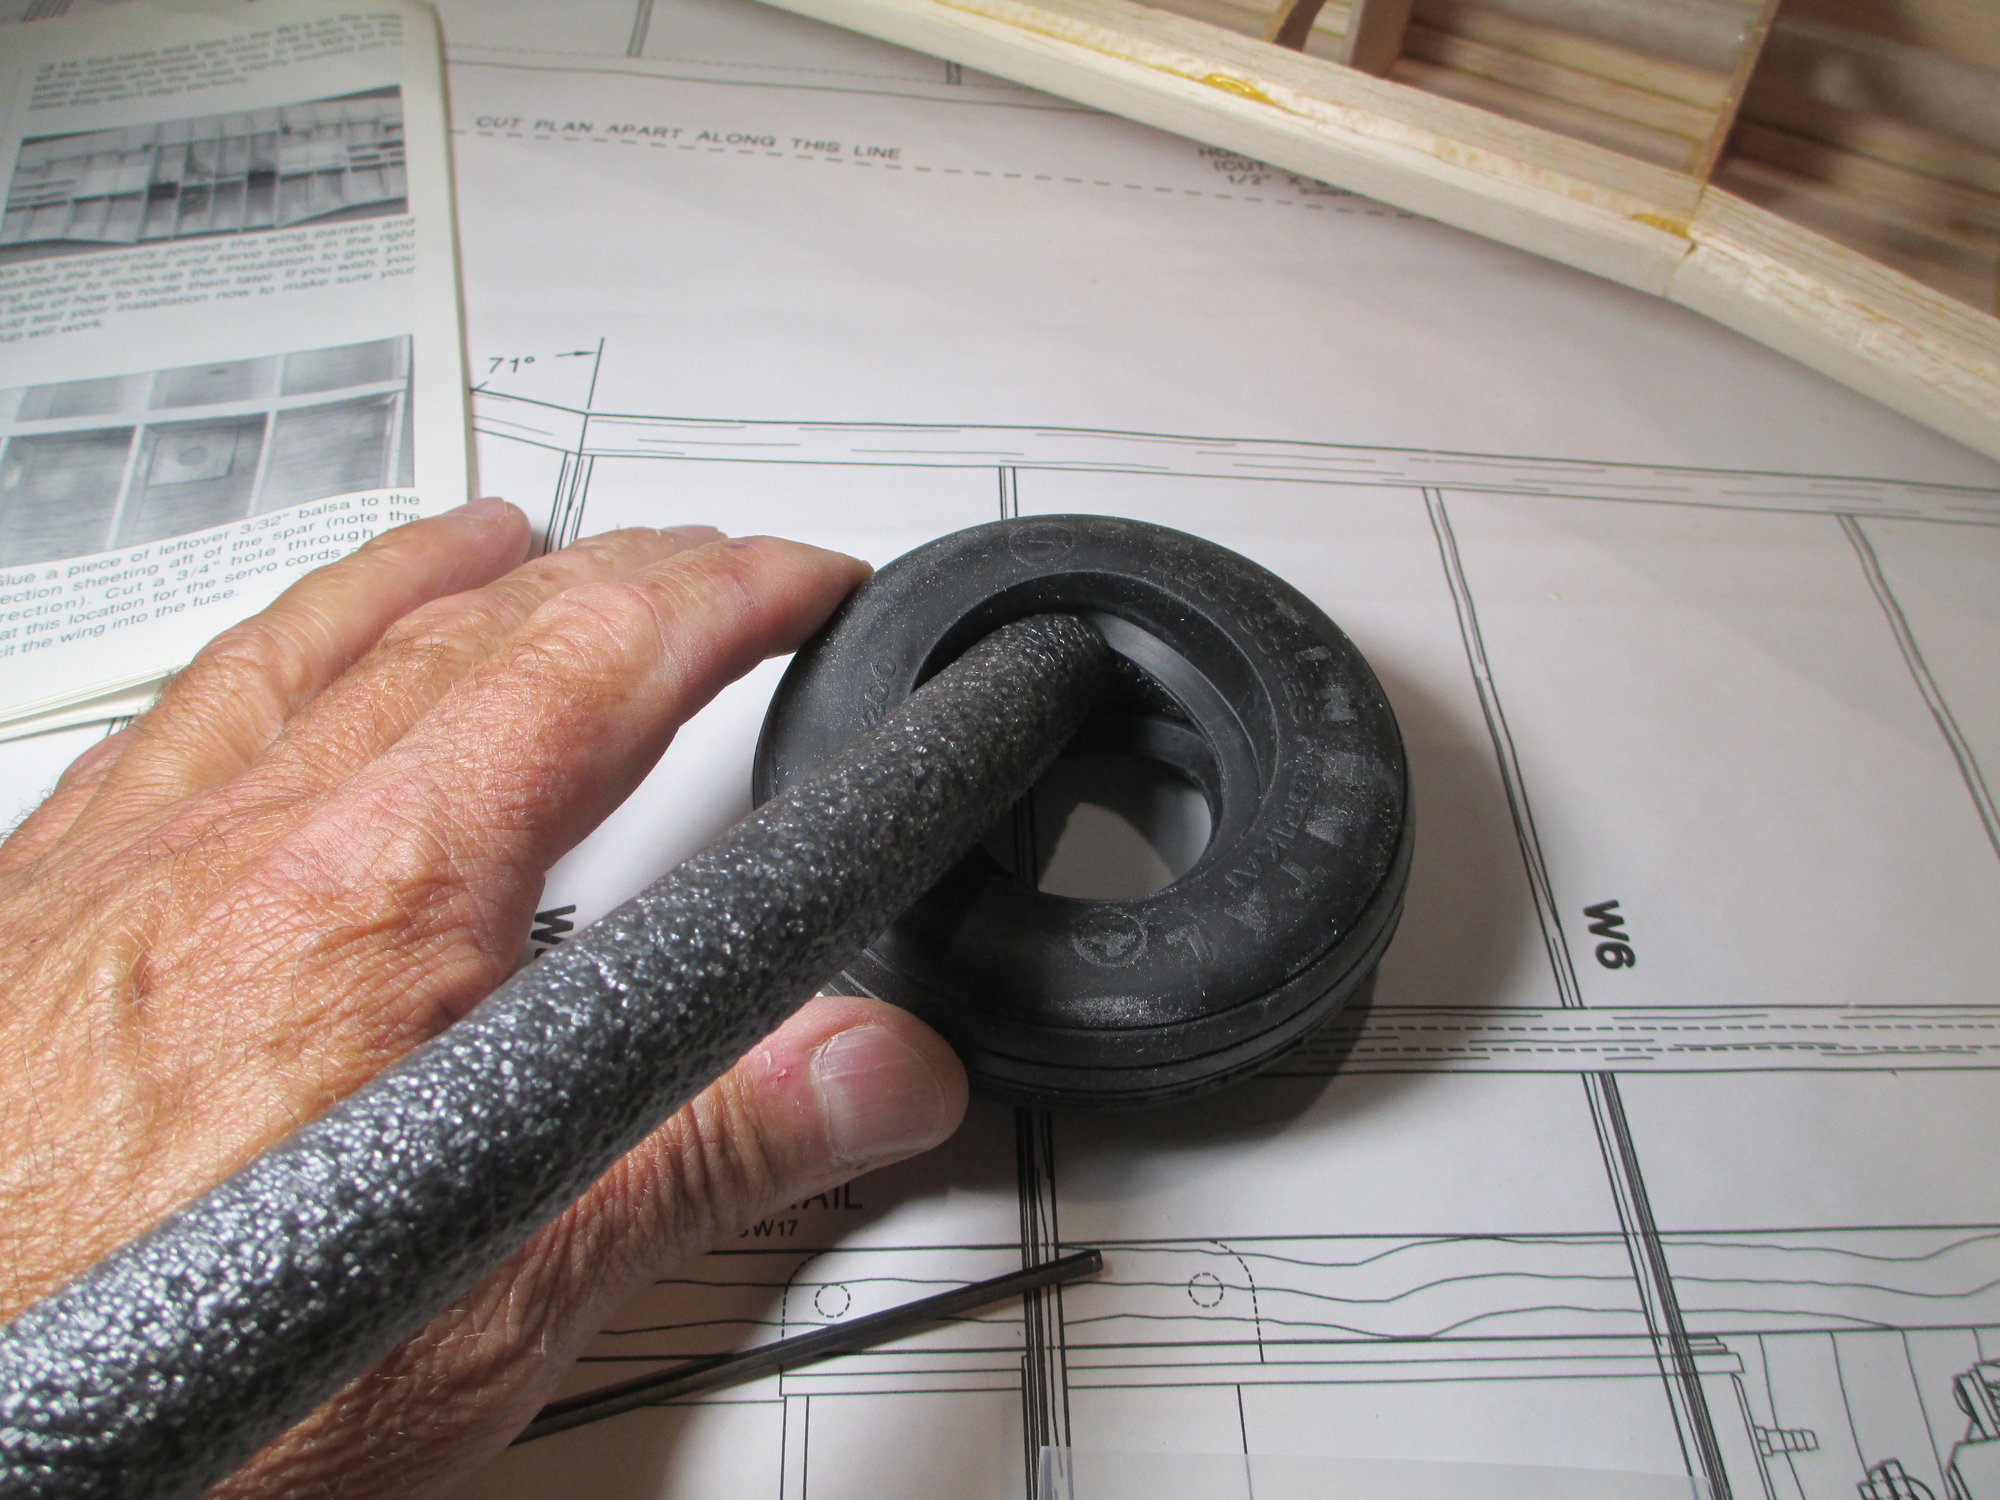
The foam filler rod was very easy to install.
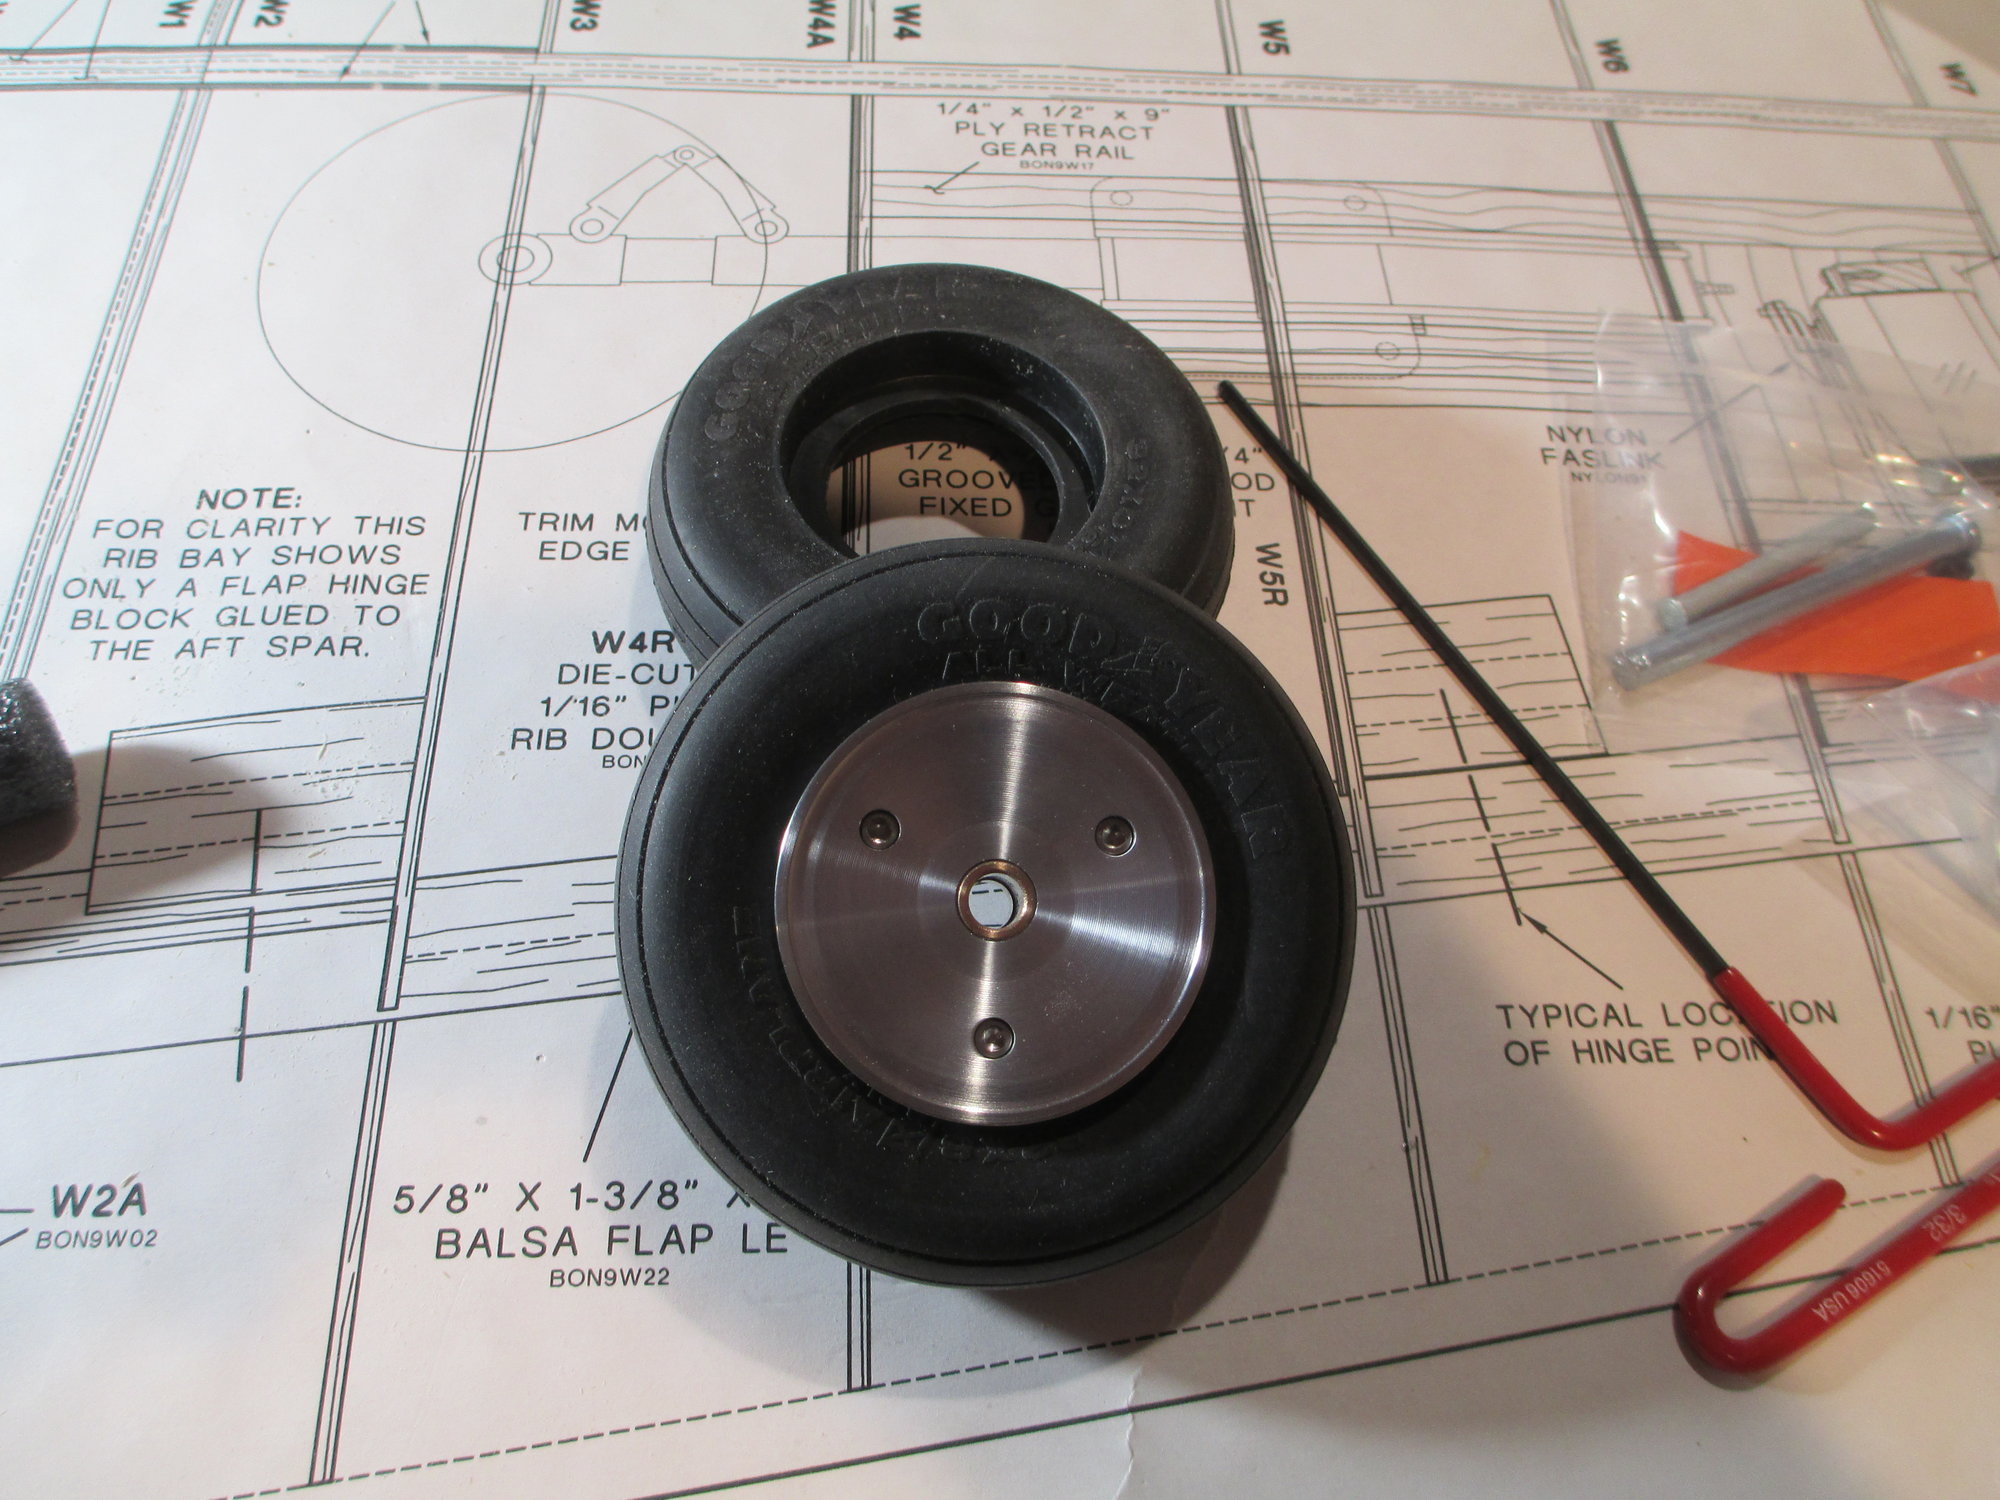
Once mounted, I was pleased with how much firmer these tires were.
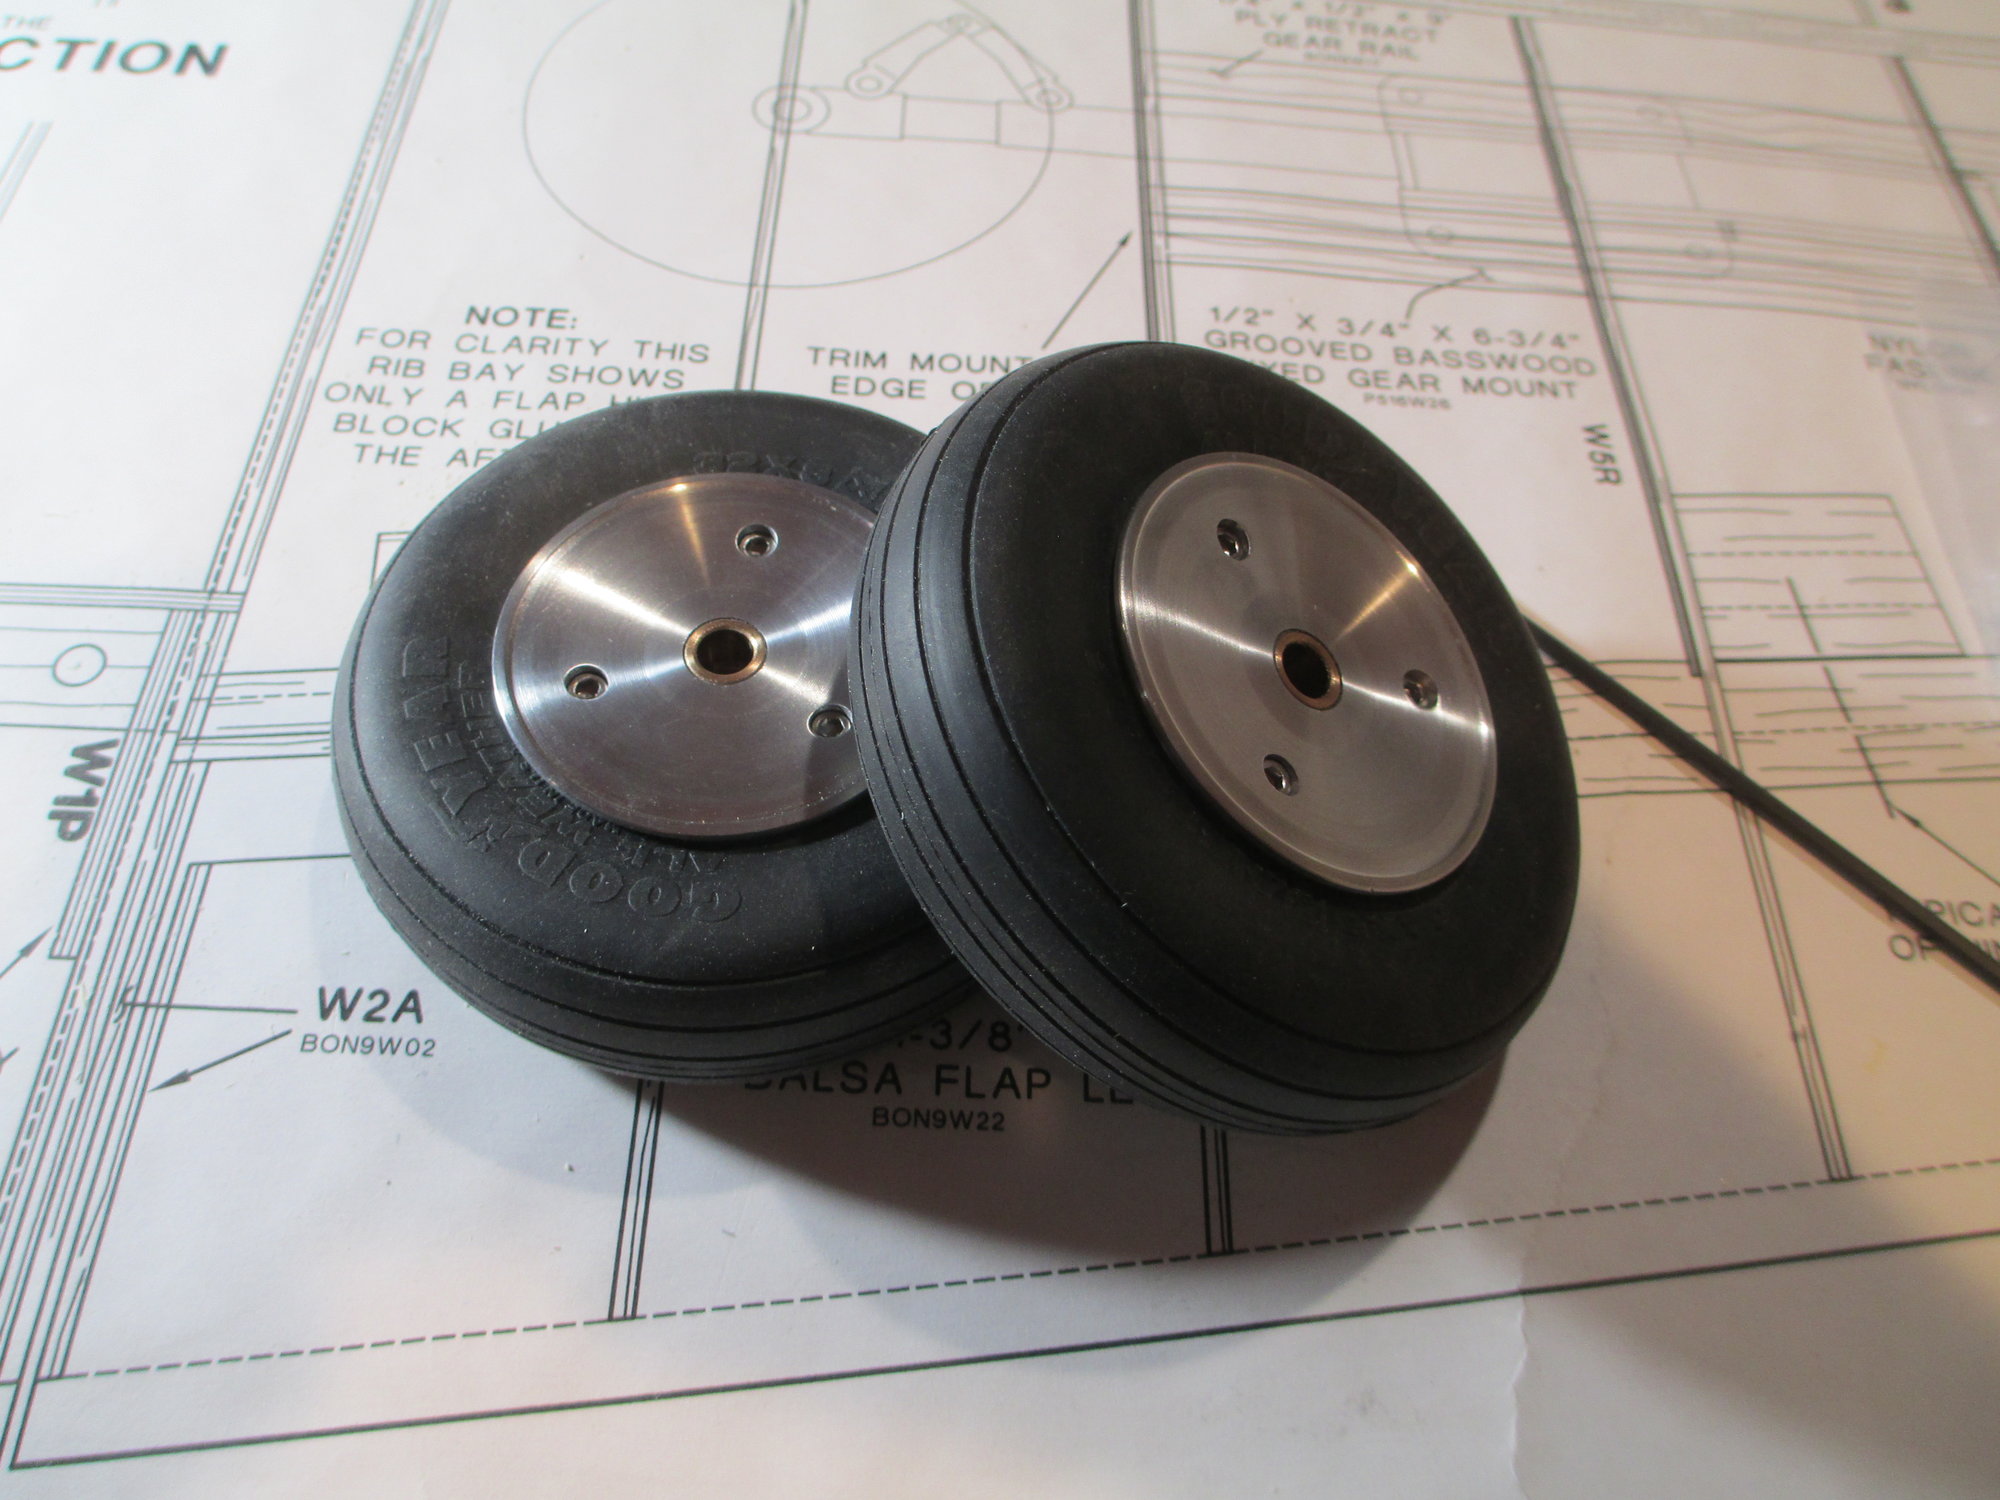
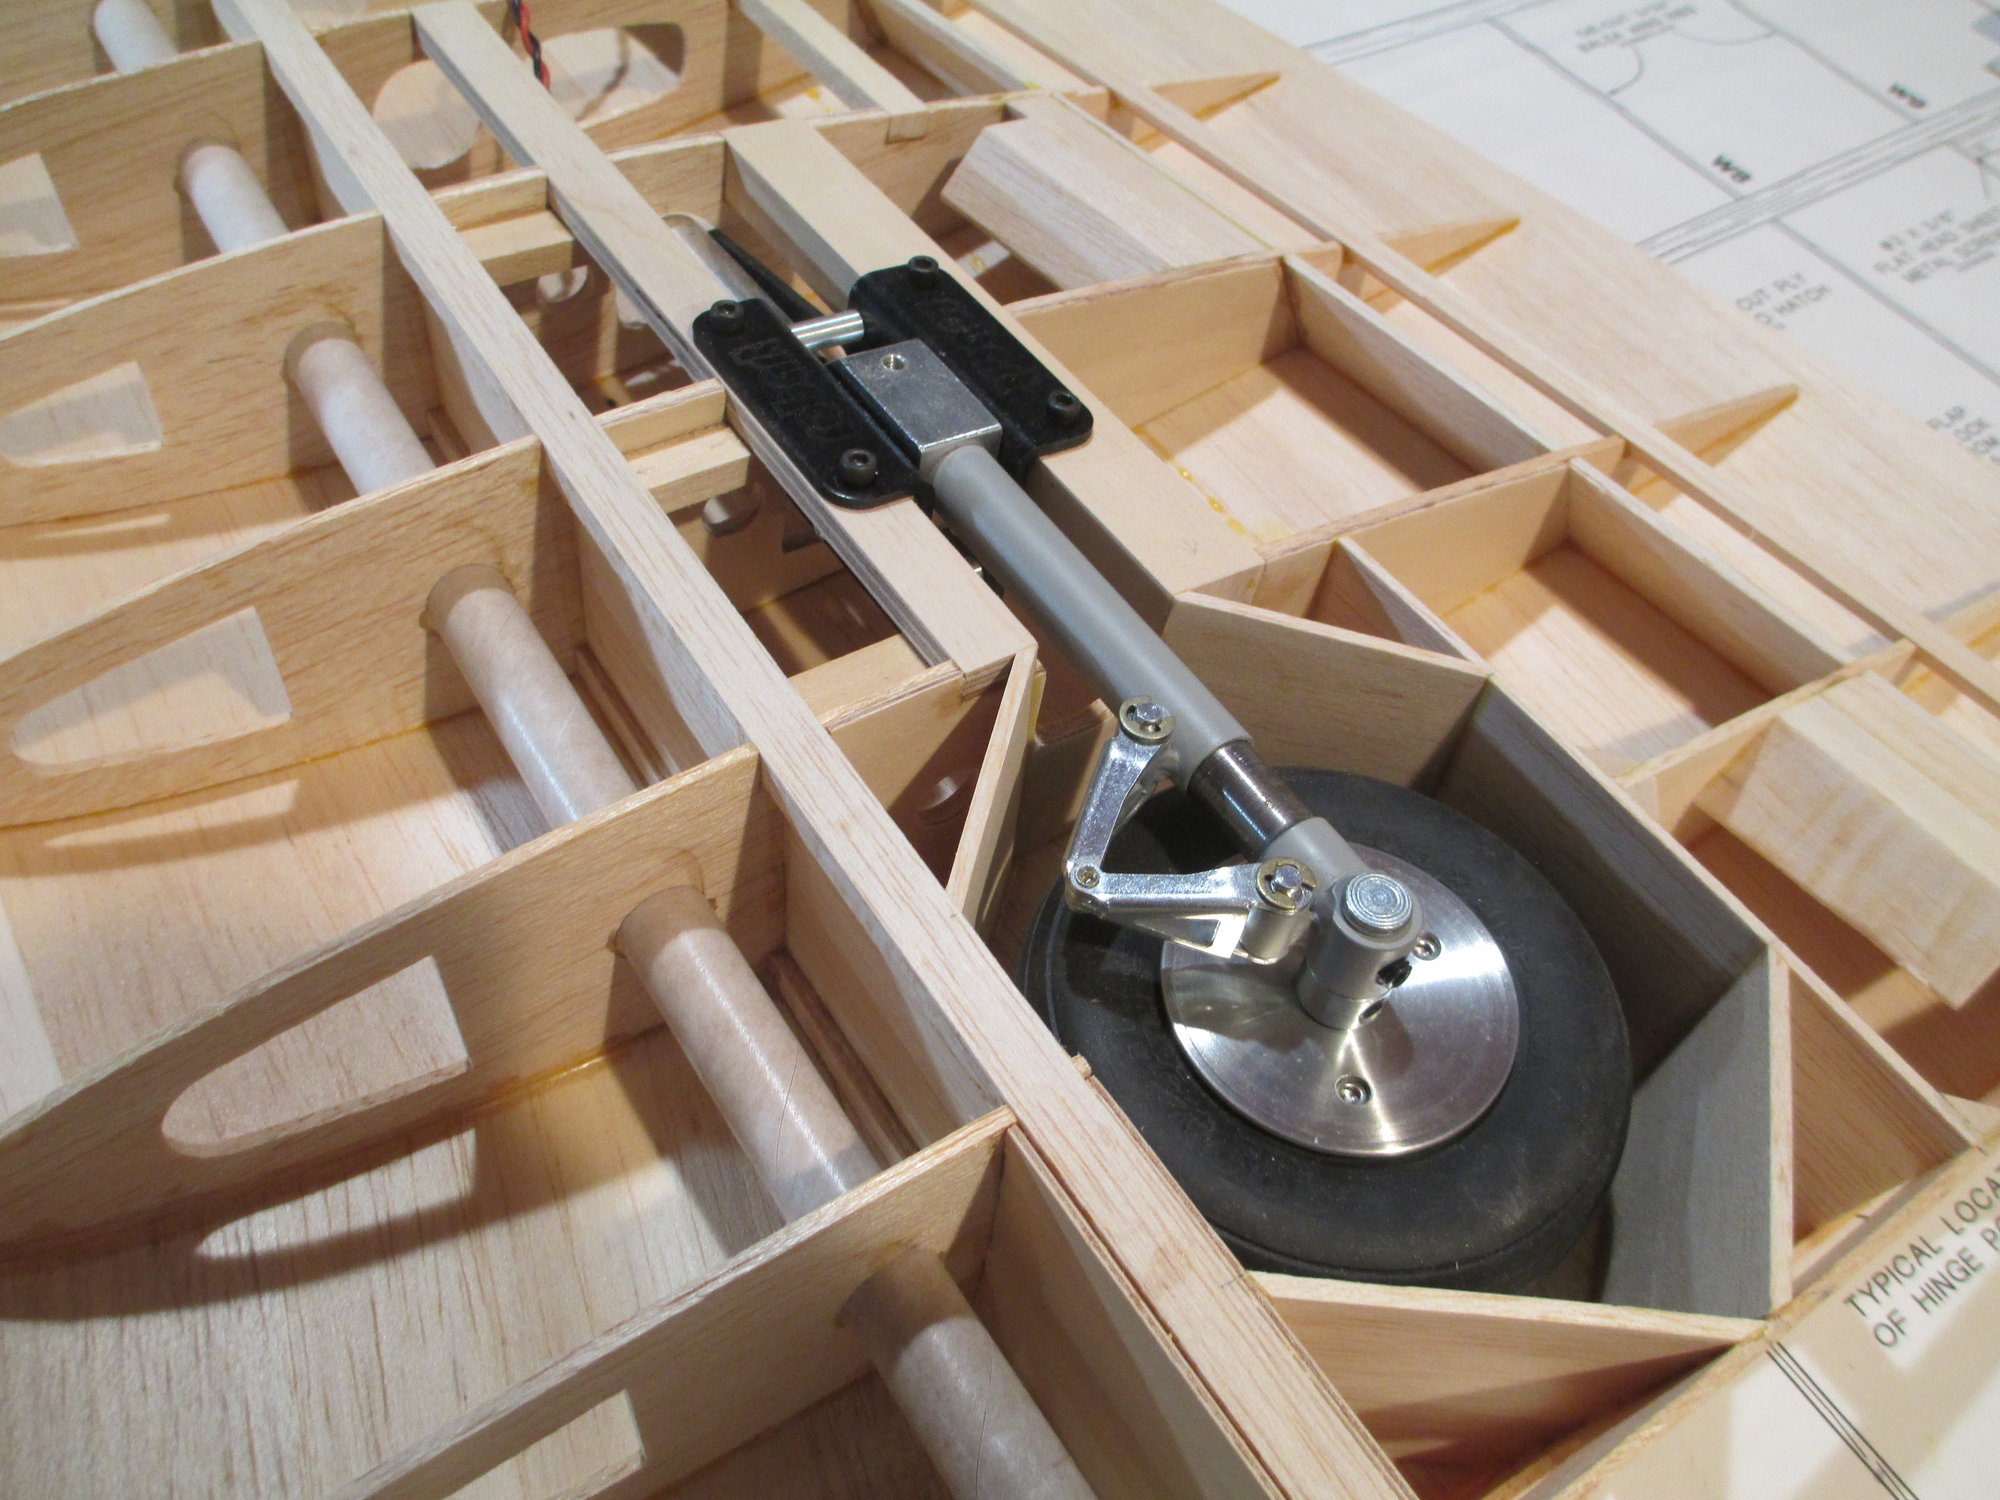
Ready to install on the retracts.

The axle for these wheels are pretty robust at 1/4". I had to install a collar on the inside to give clearance for the knee shock.
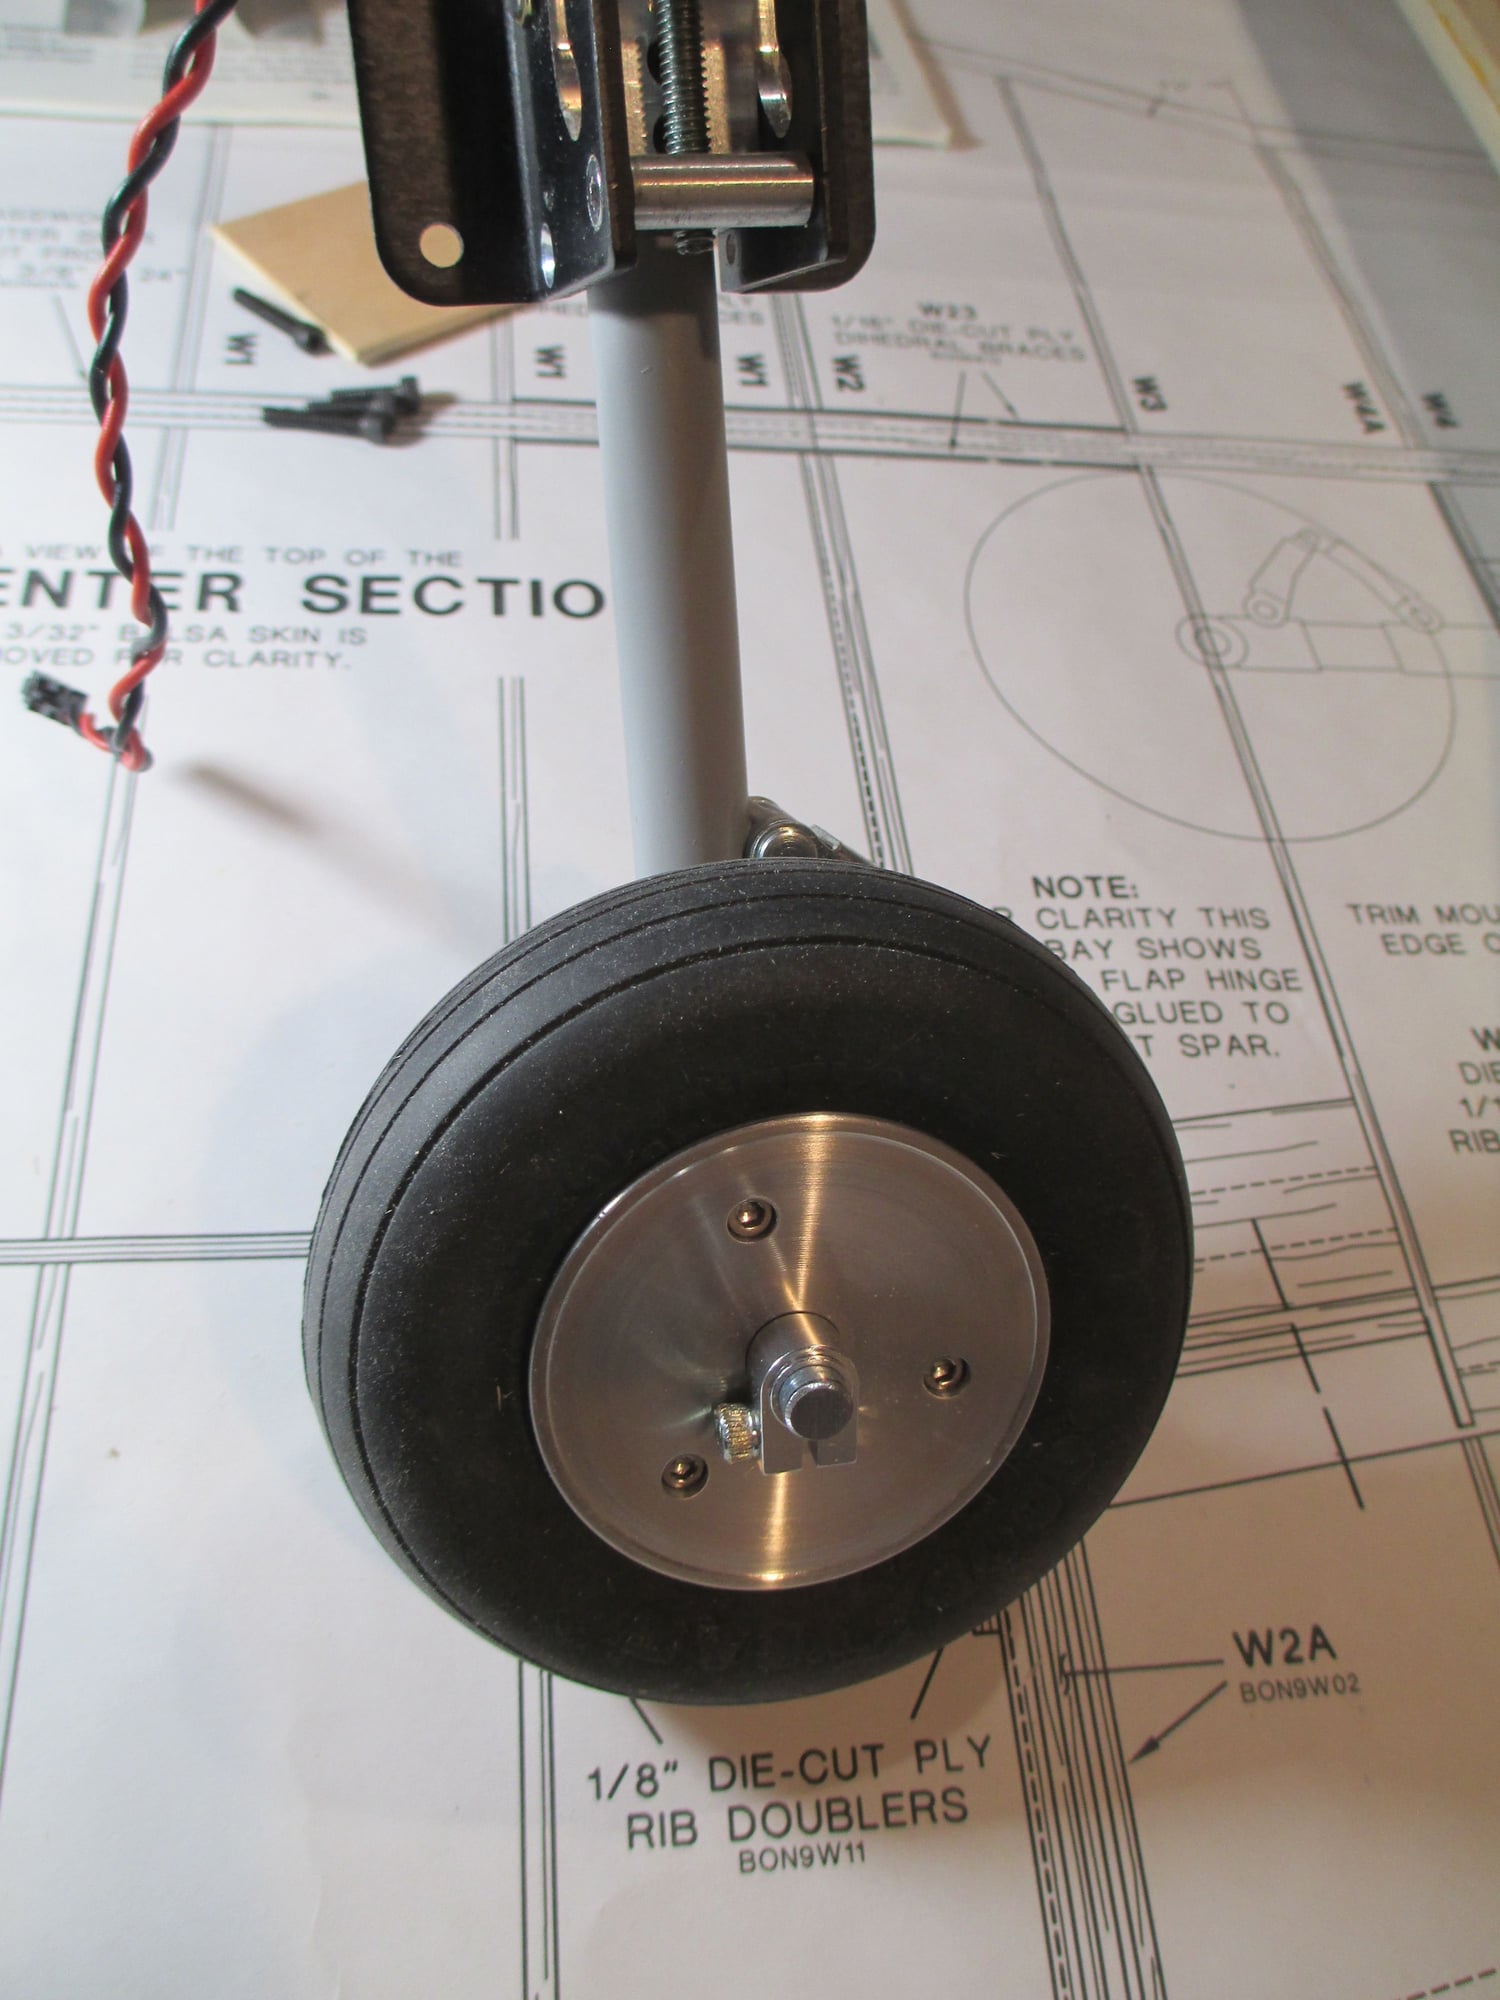
I'm trying this new type of split collar. I think it will hold better and it's lighter than the steel collars since they are machined from aluminum.
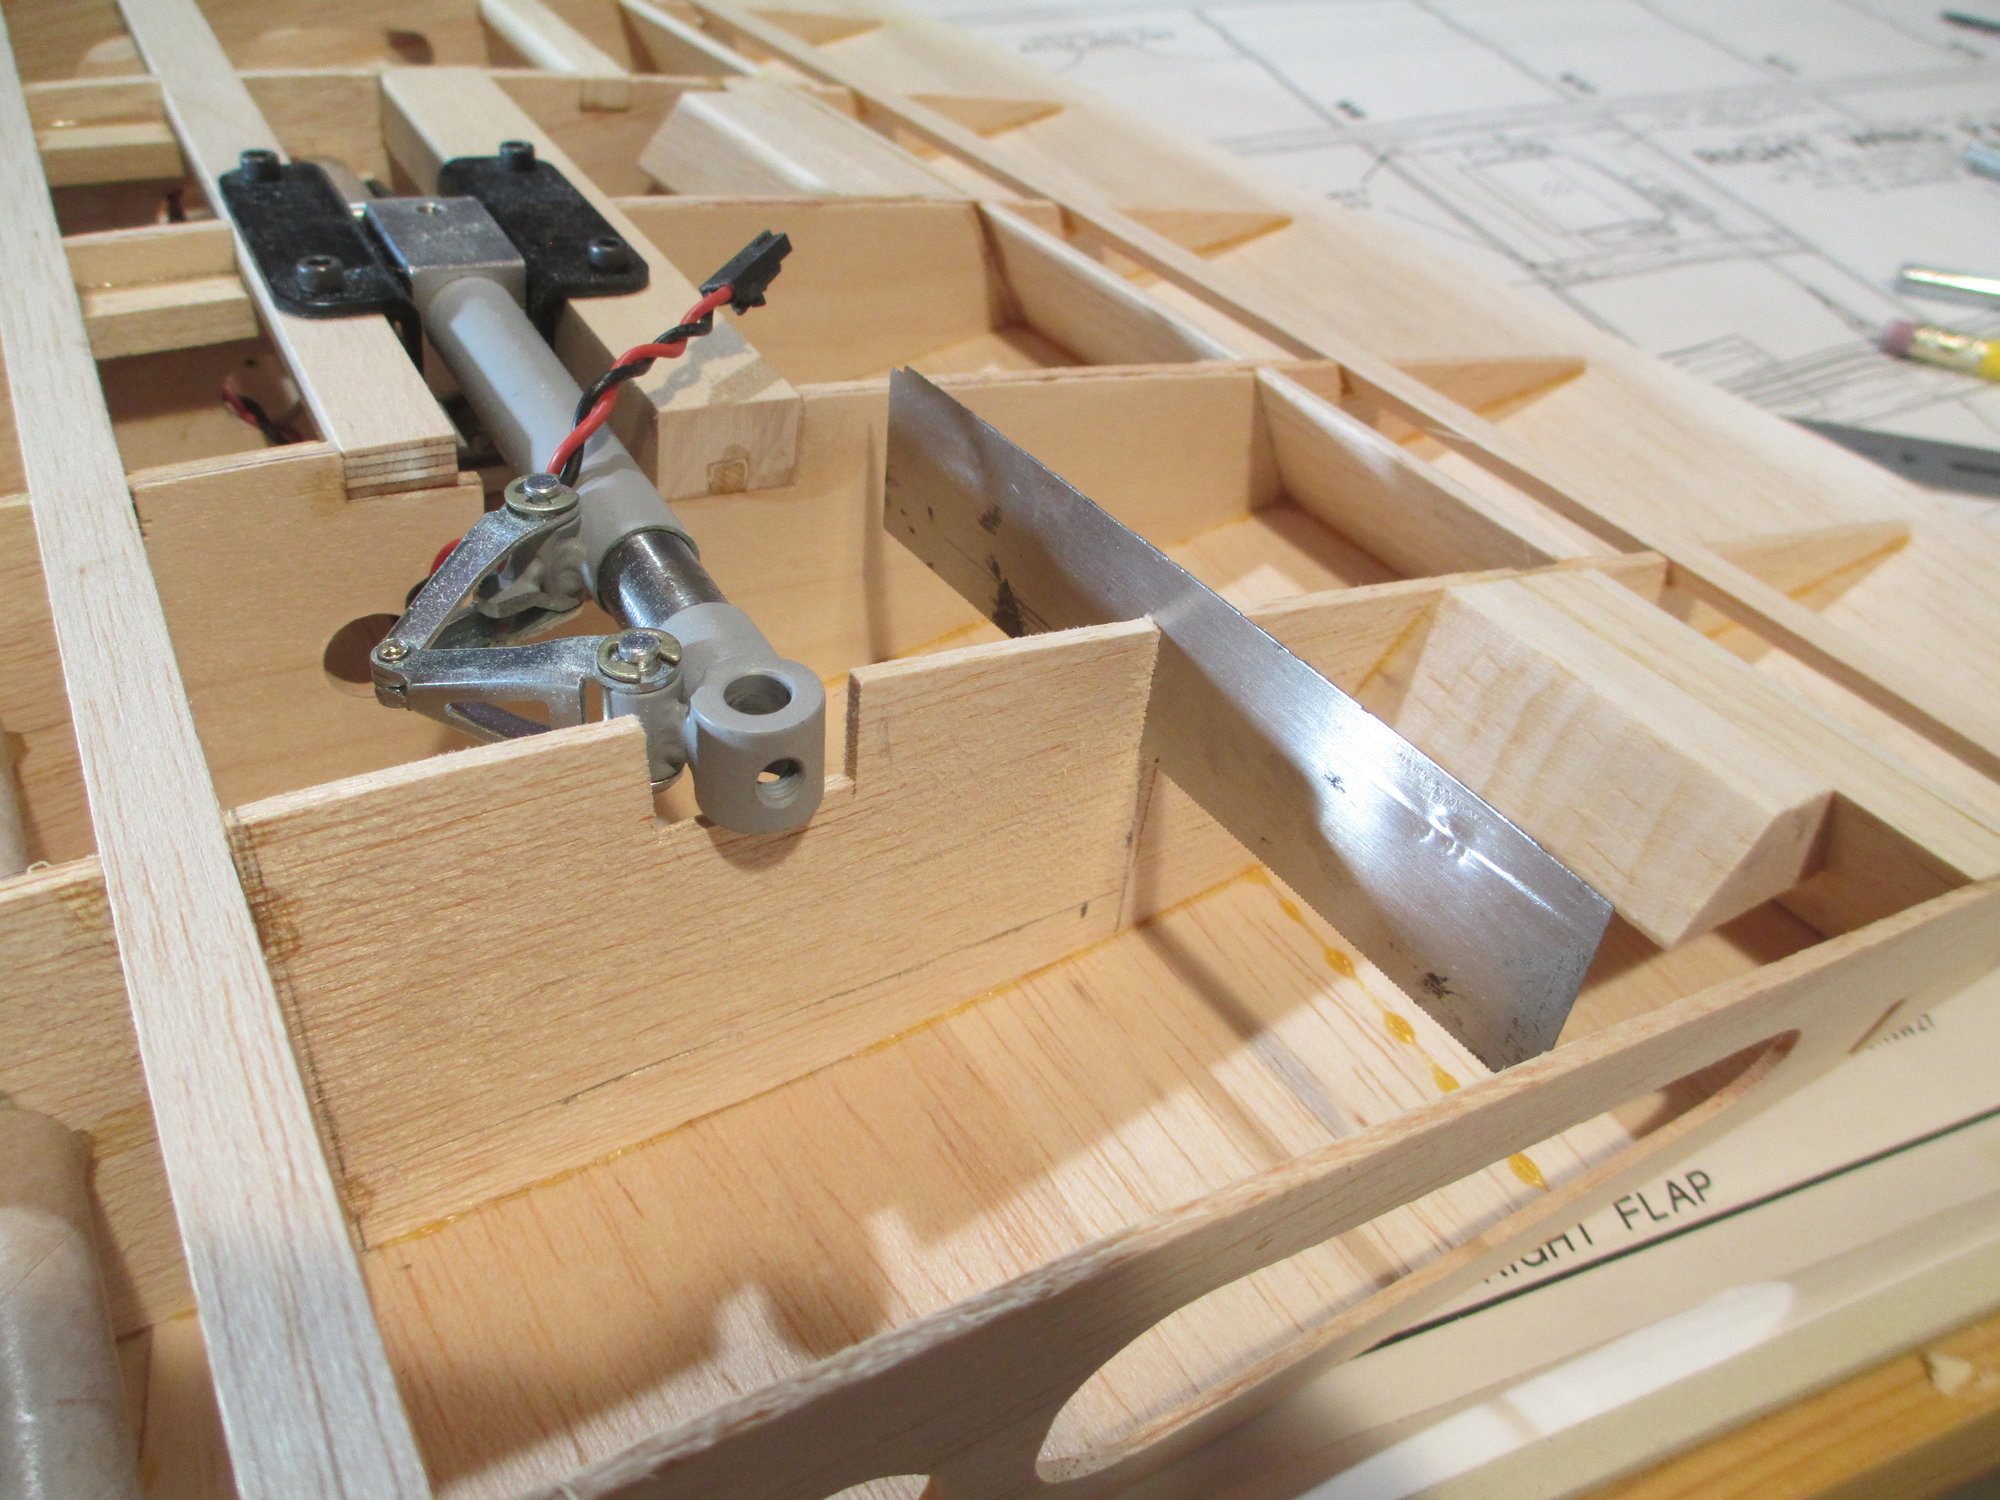
With the wheels mounted, I can see how much material I need to remove from the rib for wheel clearance. I'm using a blade that I removed from a retired Zona saw. Works great!
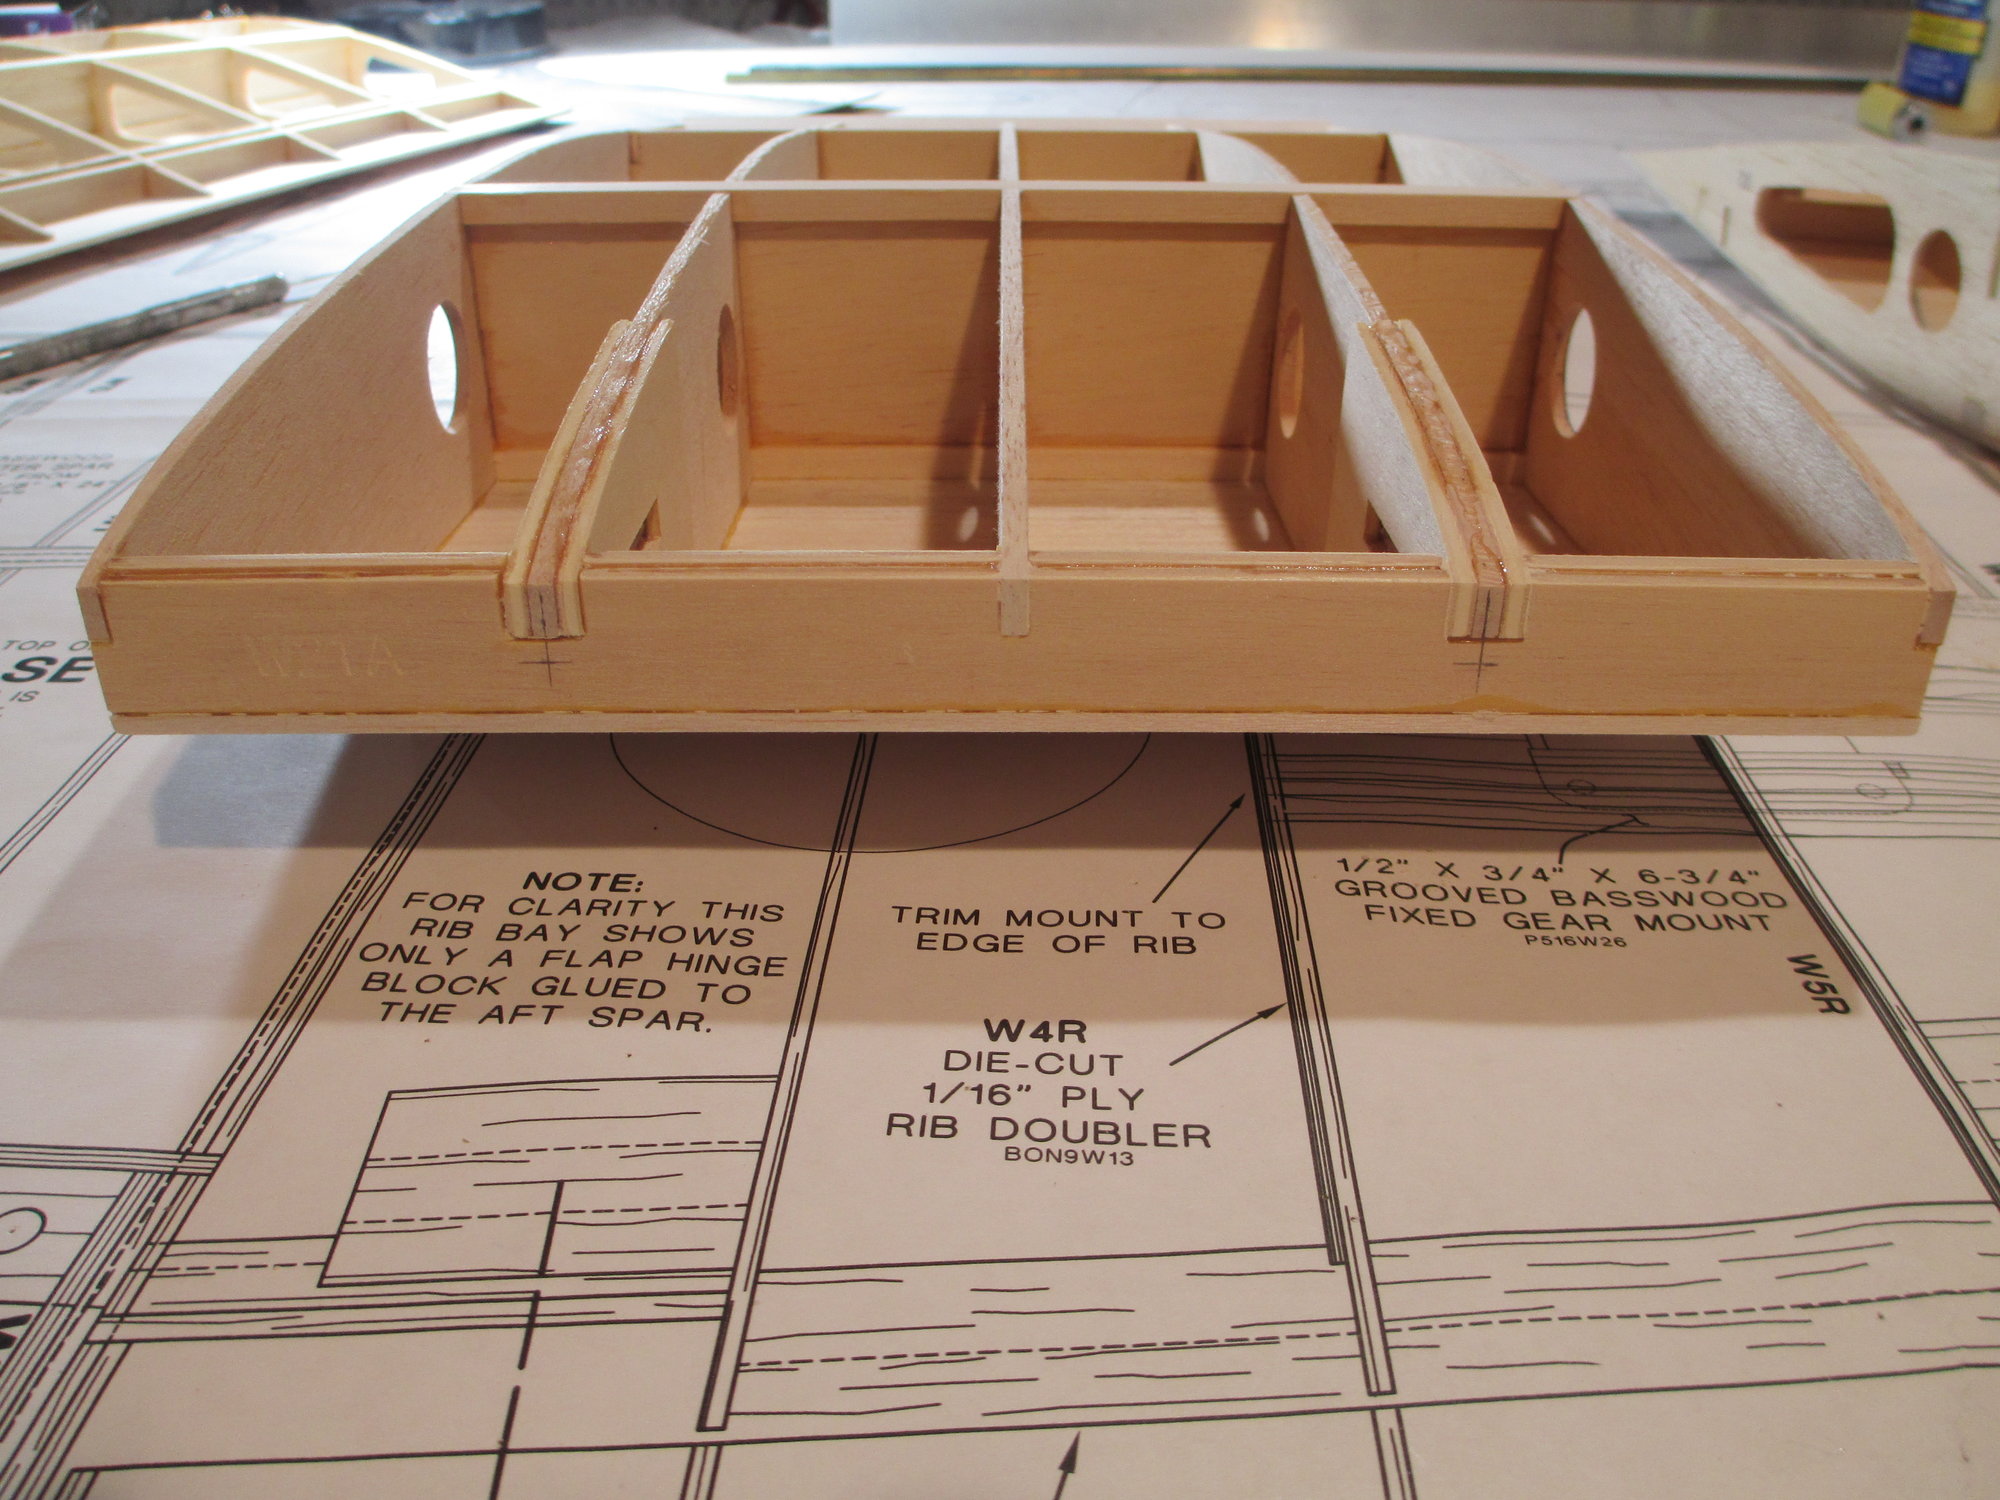
With the material removed, I boxed in the cut out area using 3/32" stock.
Last edited by VincentJ; 08-24-2019 at 04:06 PM.
08-25-2019, 12:25 PM
#215
Thread Starter
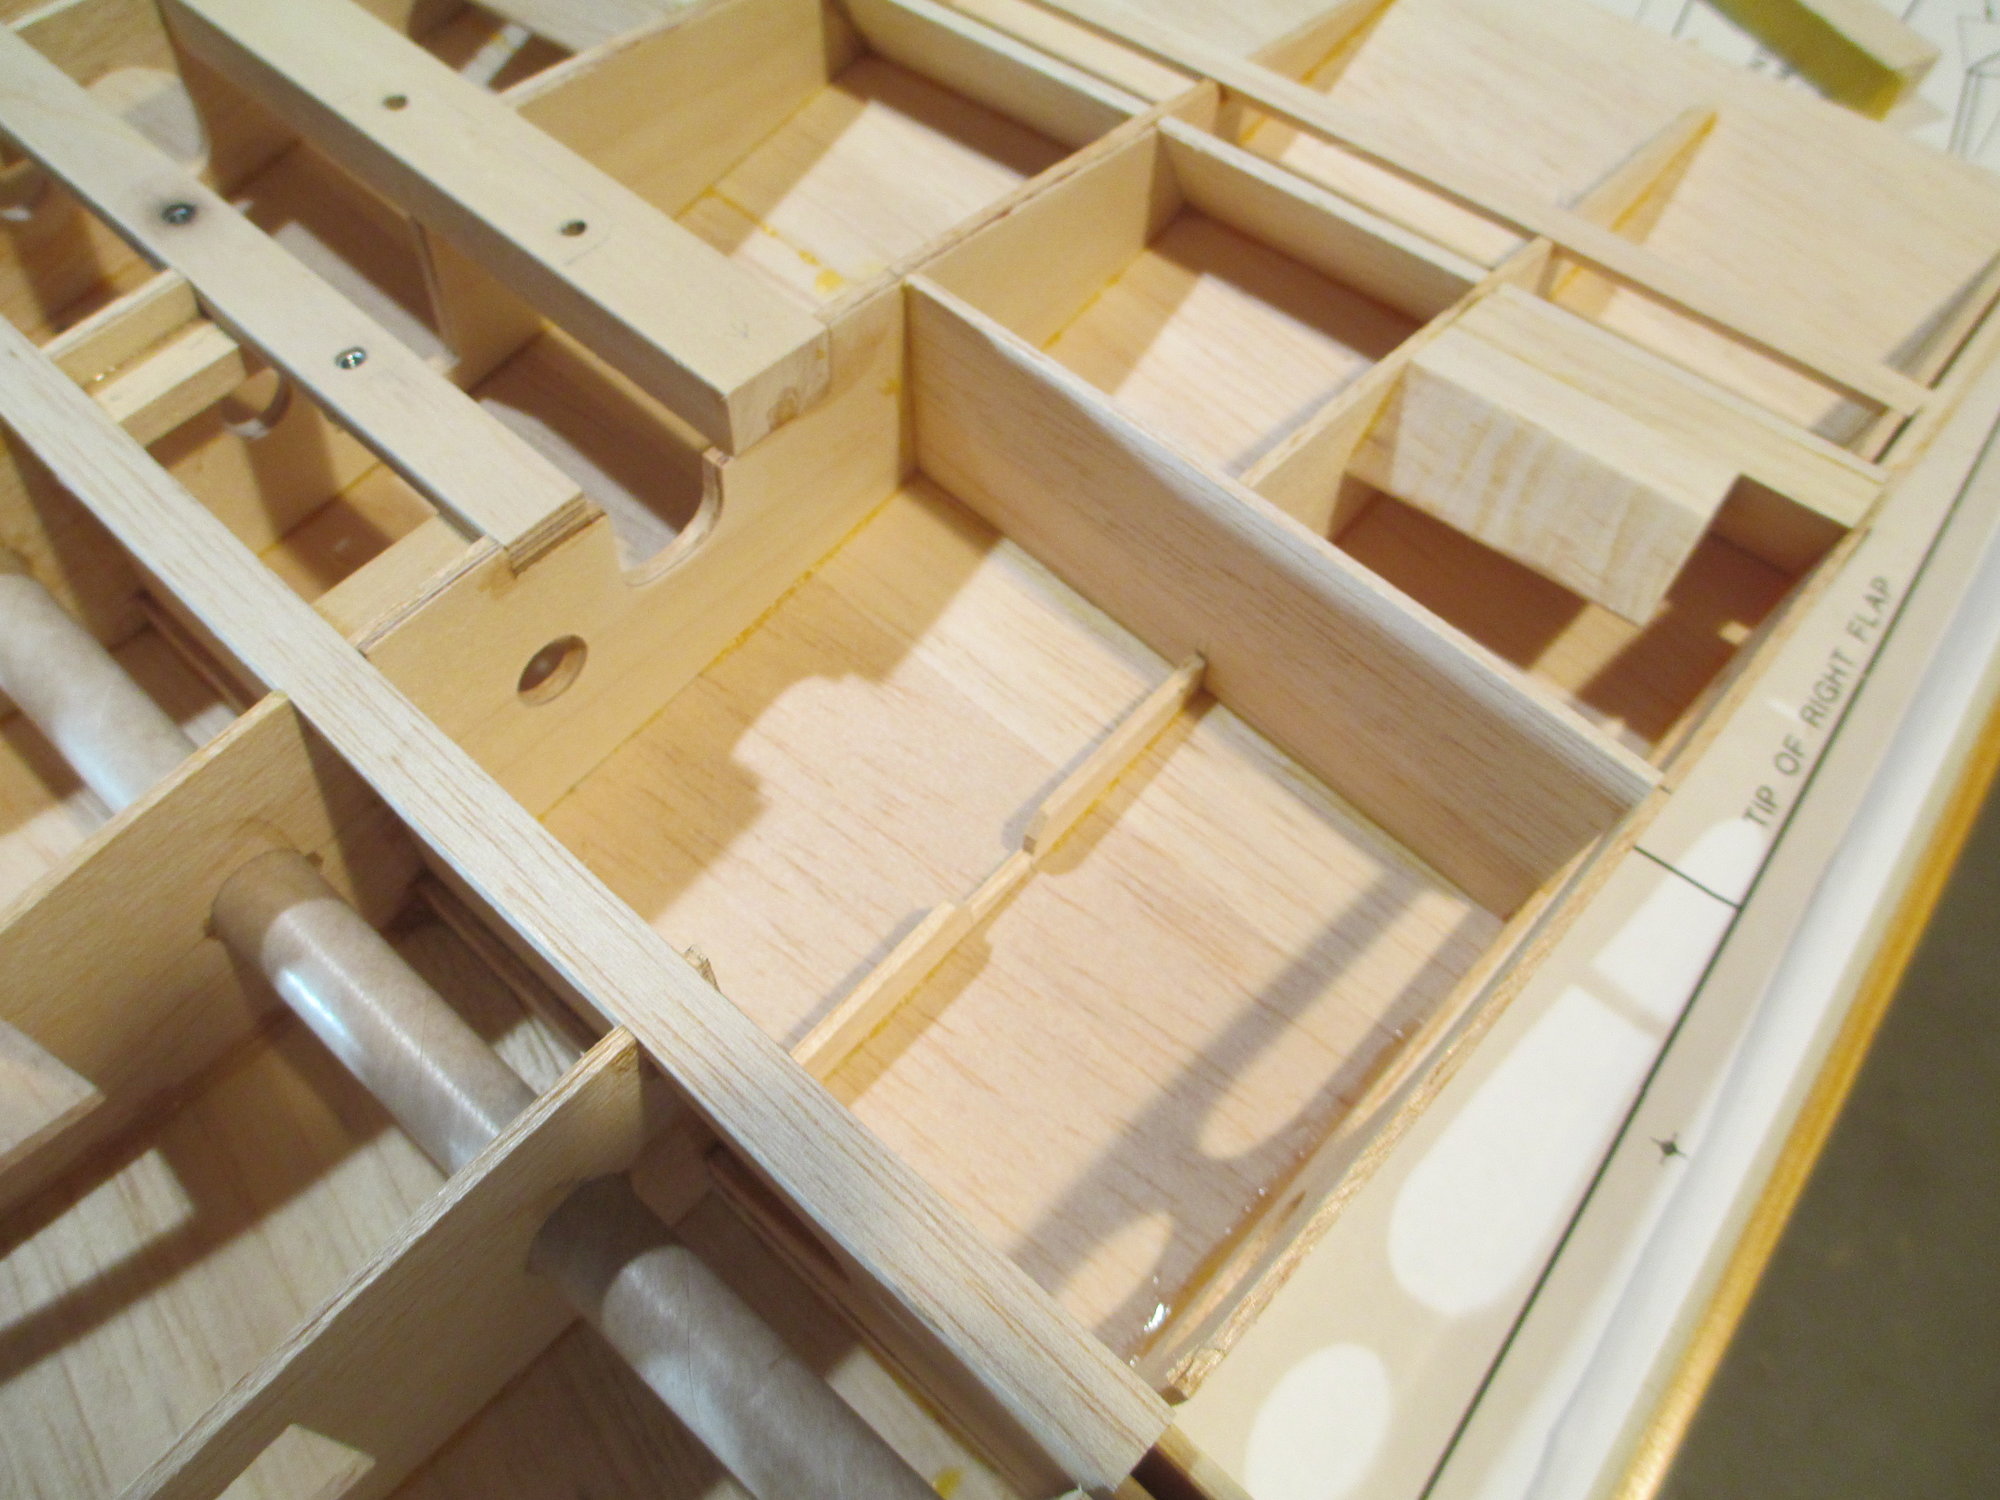
I decided to box in the wheel well for a couple of reasons...
Reason #1- better support for the overlaying sheeting. #2-Wheel wells tend to collect dirt and debris with use. Easier clean-up down the road.
 08-26-2019, 12:01 AM
#216

Just out of curiosity, did you consider using wing tubes and splitting the center section to make the wings easier to handle while traveling and for storage? I see why it wouldn't work to do so where the dihedral braces are installed, so I was curious.
08-26-2019, 12:49 AM
#217
Thread Starter
No I never considered that as an option Hydro, but I like it, I think your idea has merit. Maybe if I ever build a second one!
Last edited by VincentJ; 08-26-2019 at 12:52 AM.
08-26-2019, 02:09 AM
#218
You could always scratch build a second wing center and integrate that into it before you epoxy the outer panels to the center section. If I were to do that, I'd extend wing tubes out to at least the wing joint, if not through it, for strength. The only real change, other than the wing tubes, would be to double up the center rib, one for each half. I know that's like taking the proverbial two steps back but..........................
Last edited by Hydro Junkie; 08-26-2019 at 02:14 AM.
 08-26-2019, 06:38 AM
#221
Member

Perfect work as usual Vince. Okay time for another builders question. I see others fillet all joints with wood glue. I don't see you do that. Is it overkill if the joint was glued properly? Ribs to spars mainly.
08-26-2019, 07:43 AM
#222
Thread Starter
If you have good contact between two pieces of wood, in other words no gaps, then fillets are NOT necessary. All they will do is add unnecessary weight to your model. The bond between the two surfaces will be strong enough. Don't believe me, then edge glue two 1/16" balsa sheets together and let dry. Now bend the sheets trying to break the glue bond. Yes, the wood will break, but not on the glue joint.
If when gluing up let's say a rib to a spar that is loose fitting, then it may be beneficial to have a fillet of glue to regain the strength lost from the lack of contact.
Whenever possible, after I glue two parts together I always scrape off any remaining glue that squeezes out. Glue that you see that isn't scraped off in any of my photographs means that I didn't have the access to do so. It not only saves weight, but it looks better too!
Hope this answers your question Steve.
Last edited by VincentJ; 08-26-2019 at 08:00 AM.
08-26-2019, 11:02 AM
#223
Member
Excellent question Steve. Of course this is my opinion and others may disagree but...
If you have good contact between two pieces of wood, in other words no gaps, then fillets are NOT necessary. All they will do is add unnecessary weight to your model. The bond between the two surfaces will be strong enough. Don't believe me, then edge glue two 1/16" balsa sheets together and let dry. Now bend the sheets trying to break the glue bond. Yes, the wood will break, but not on the glue joint.
If when gluing up let's say a rib to a spar that is loose fitting, then it may be beneficial to have a fillet of glue to regain the strength lost from the lack of contact.
Whenever possible, after I glue two parts together I always scrape off any remaining glue that squeezes out. Glue that you see that isn't scraped off in any of my photographs means that I didn't have the access to do so. It not only saves weight, but it looks better too!
Hope this answers your question Steve.
I'm going to try the edge glue experiment. I believe you but I am a visual learner so I want to see it in action!
08-26-2019, 12:03 PM
#224
And, while I agree with Vincent, there is another reason to leave a fillet of glue. If you have a structure that will be taking serious shock loads, such as landing gear blocks or, for that matter, floats on a float plane or flying boat hull, fillets may be a good idea. IF you can land smoothly every time and have a known smooth runway, fillets would be needless overkill. On the other hand, I wouldn't build anything that is going to be in the water without fillets and a sealing coat of something, at least on the lower half. Those joints, even when covered with film or FG, have to be water tight and able to take more of an impact than the plane that always lands smoothly on a smooth runway. Cracking a seam or a skin piece could result in a lost or water soaked plane if the joints aren't water tight, just like the Titanic
08-30-2019, 05:44 AM
#225
Thread Starter
Work or should I say progress on this project has slowed down because summer for me is over. That means back to work!
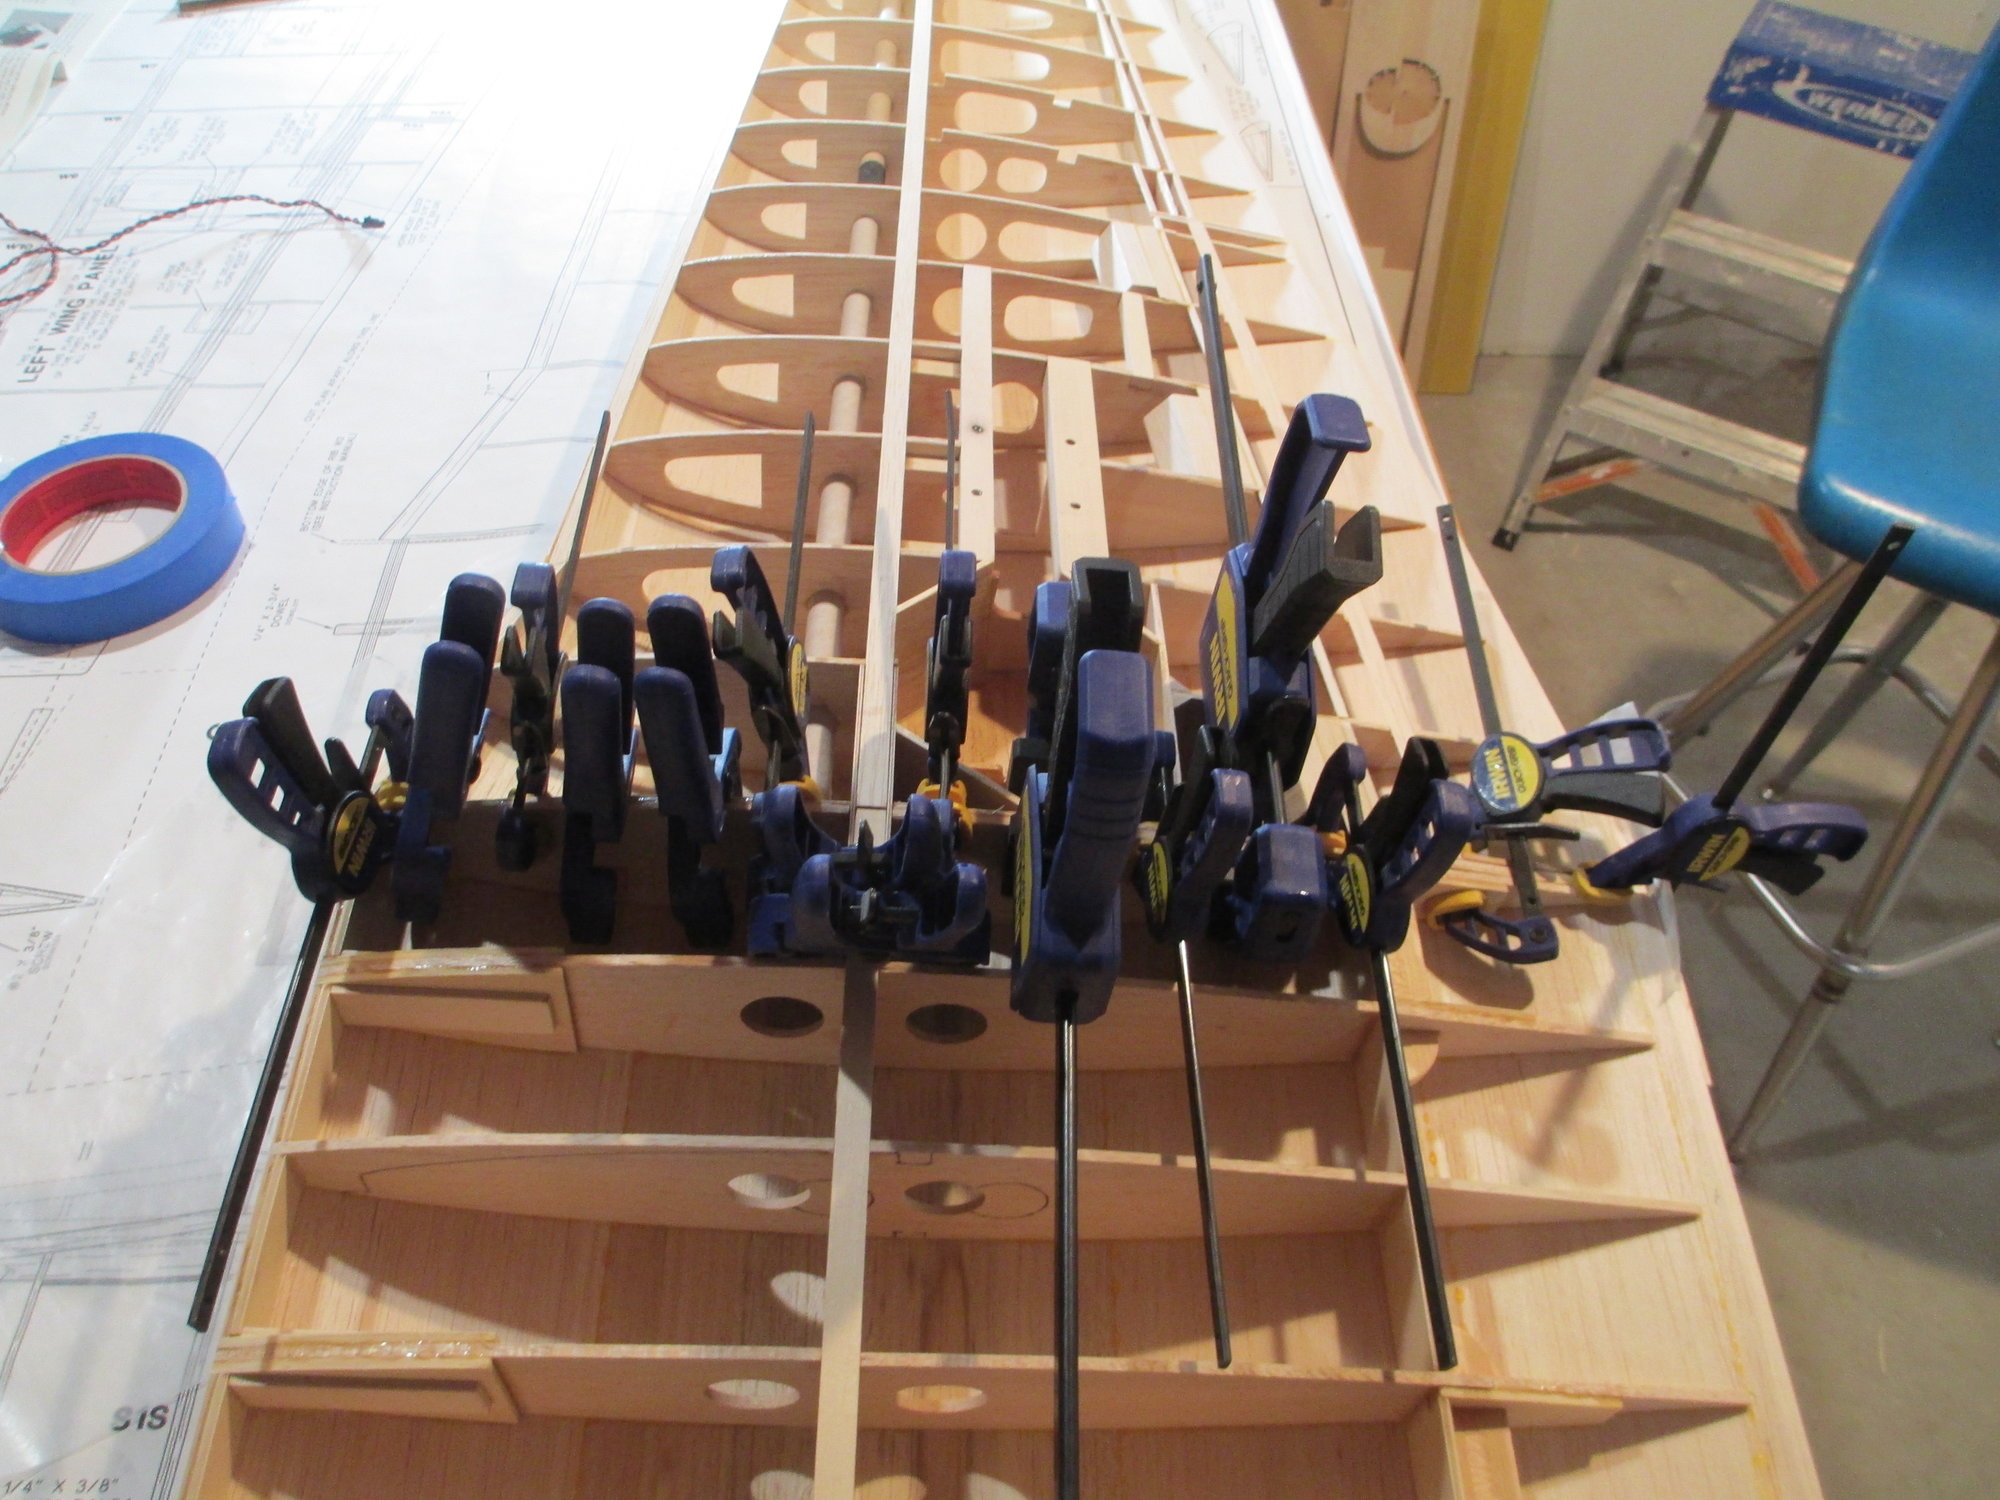
Big turning point in this build...I'm using 30 minute epoxy to join the three sections of the wing together. I prefer to join the wing prior to sheeting the bottom. I can clamp the halves together and see the epoxy squeeze out being assured that I have a strong joint that won't fail.
Big turning point in this build...I'm using 30 minute epoxy to join the three sections of the wing together. I prefer to join the wing prior to sheeting the bottom. I can clamp the halves together and see the epoxy squeeze out being assured that I have a strong joint that won't fail.
Last edited by VincentJ; 08-30-2019 at 08:47 AM.