


Finishing sets for scale models
 06-27-2012 | 03:54 AM
#1
Thread Starter

For scale details on model modelers use many different techniques. This I want to introduce here is simple, trouble free, and give perfect results...
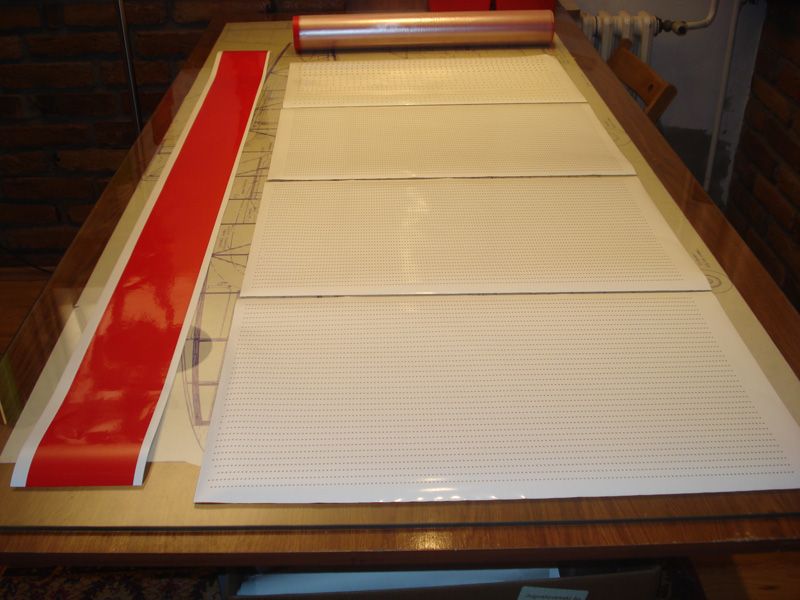
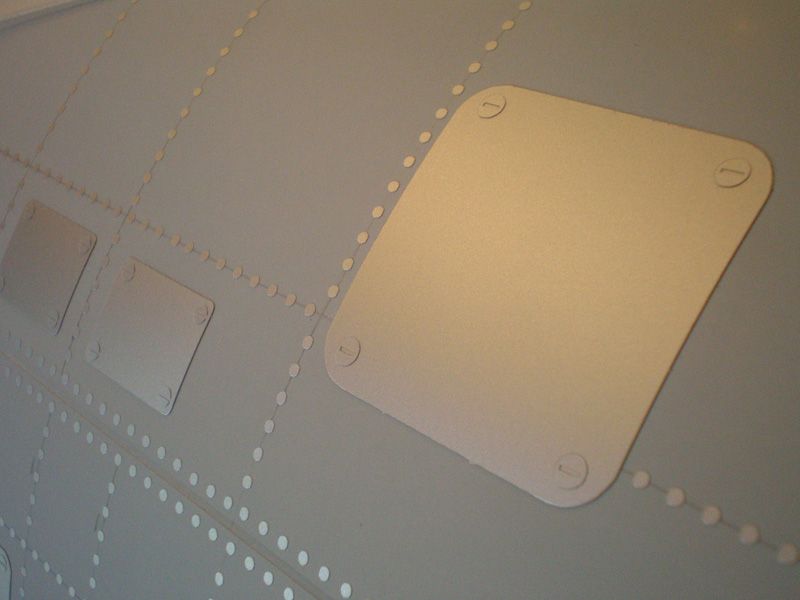
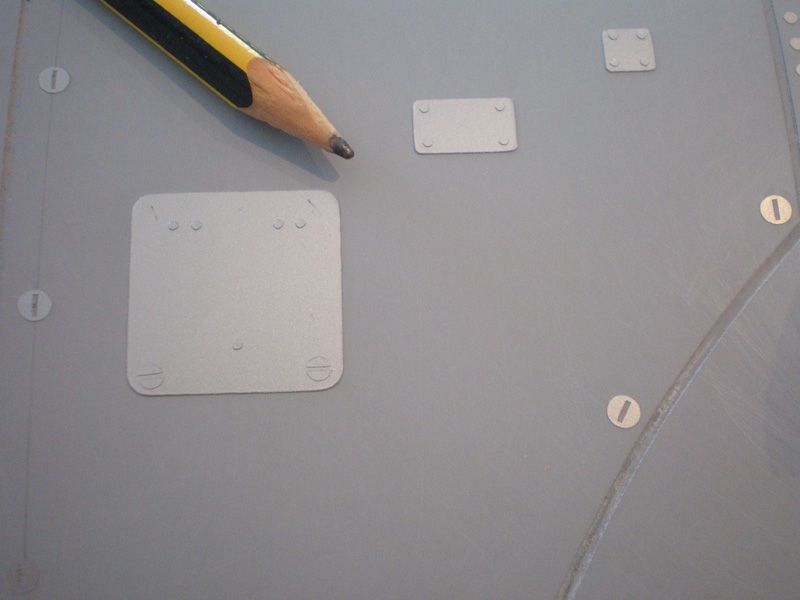
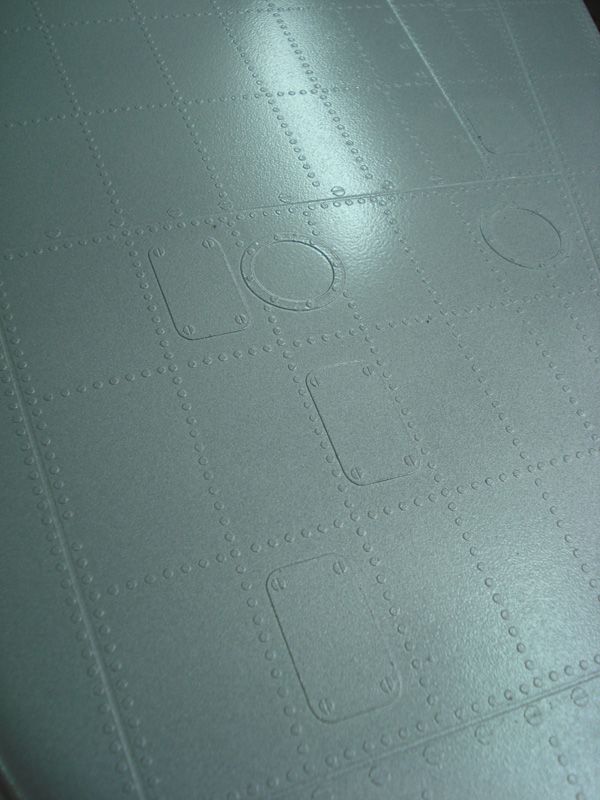
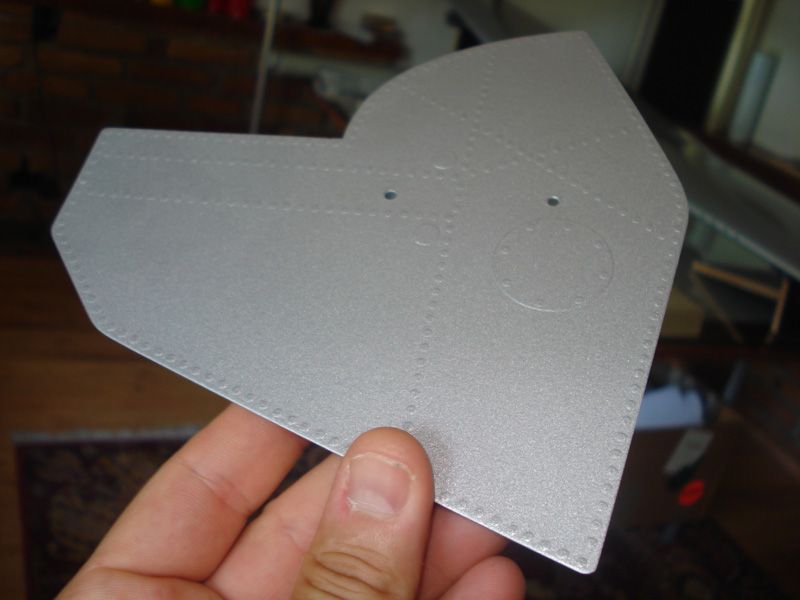
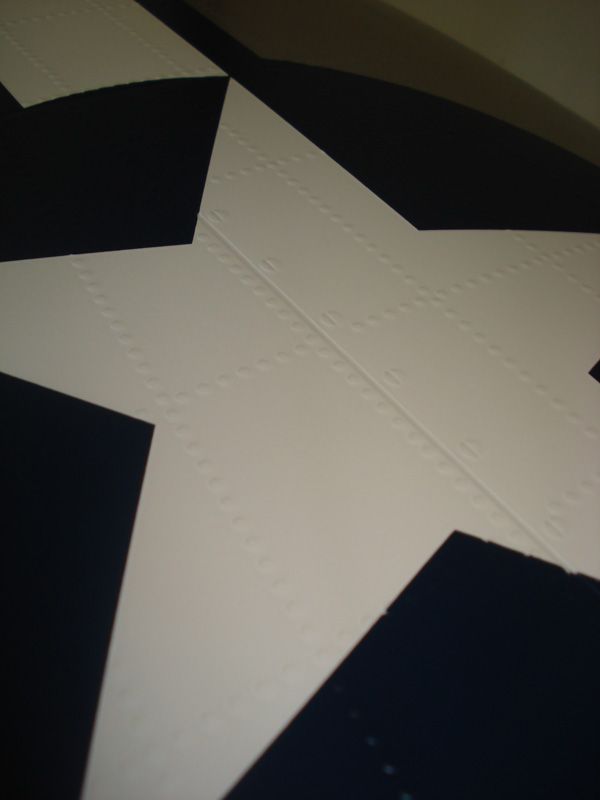
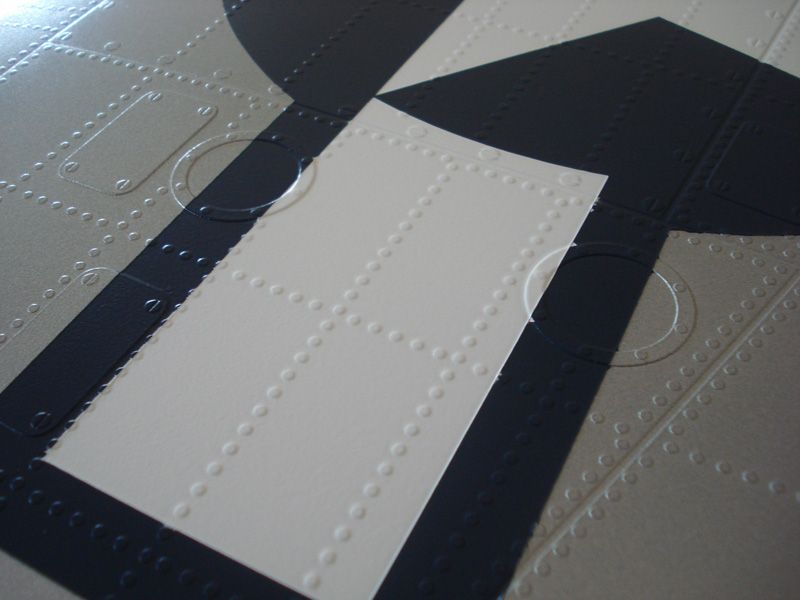
Create scale detail never been easier... With Mirce Finish Set, you can made panel lines, rivets, dummy screws...
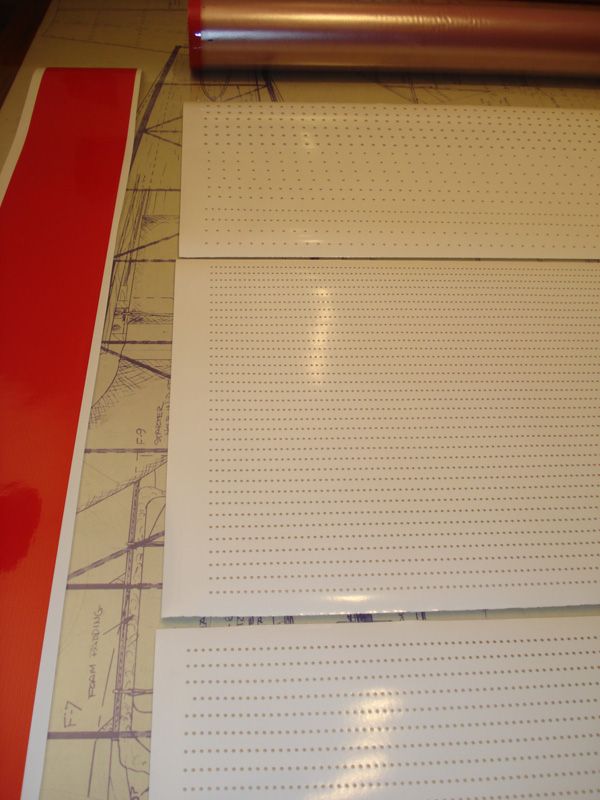
Mirce Finish Set is made of Oracal silver self adhesive film, and contains:
- 100 meters - 1,4 mm wide
- 15000 - 2 mm diameter circles - rivets
- 250 dummy screws 2,5 mm diameter
- 250 dummy screws 3 mm diameter
- 250 dummy screws 4 mm diameter
- 2 meter transfer film for applying


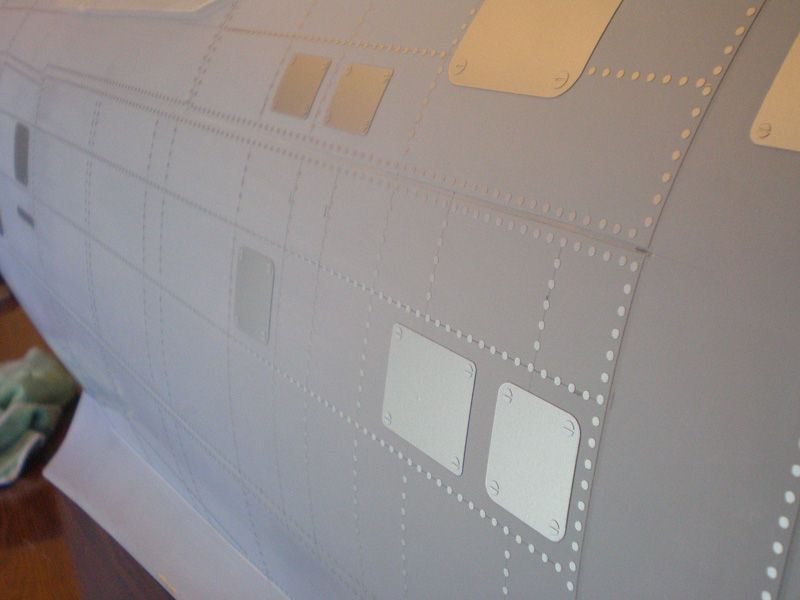
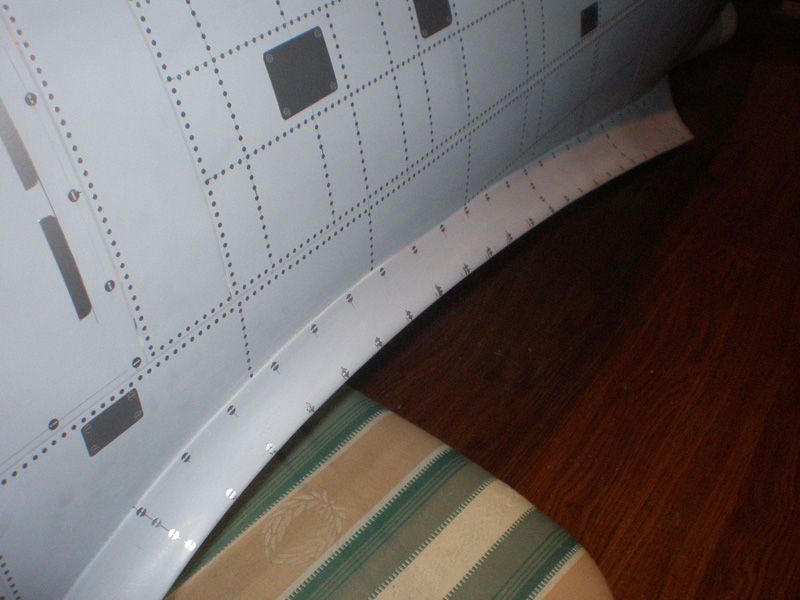
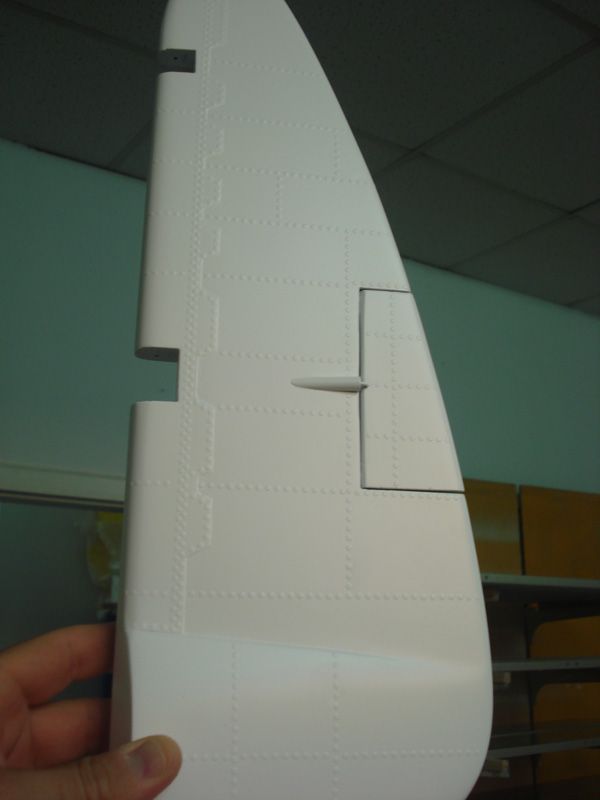
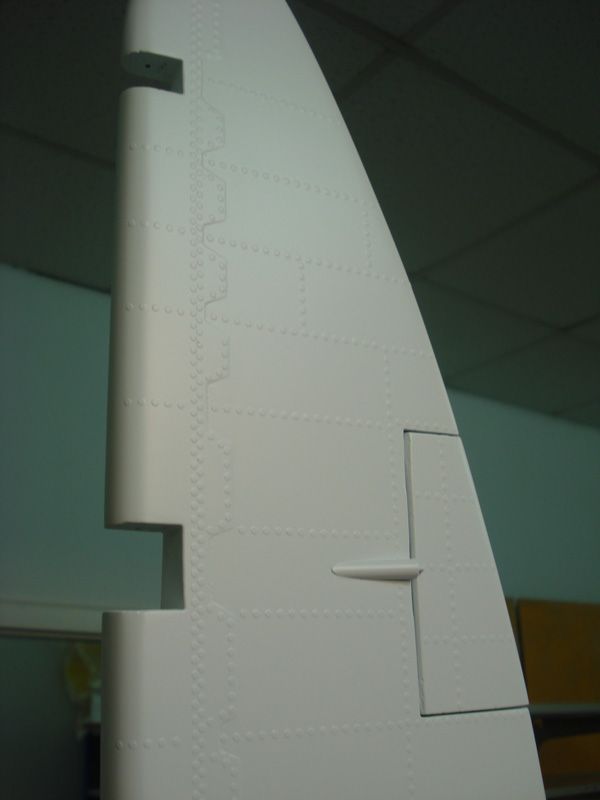
Panel lines placed on the prepared surface... After glassing, adding filler and sanding surface is ready for setting panel lines...
Surface must be clear, and before setting you must wipe it with alcohol.

For my P 47, I used scale draw for measure where every line must be placed...

Every line is now on place...

Same procedure is on the wing...


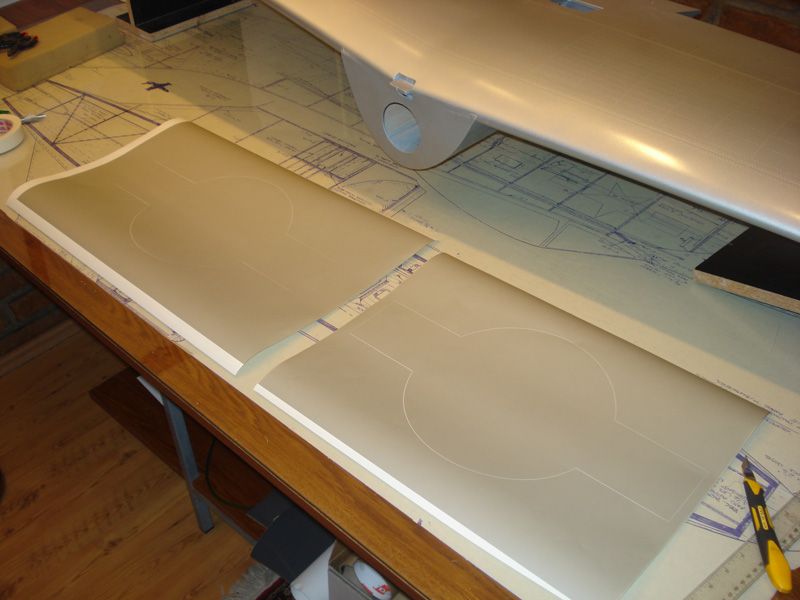
After this stage, my friend put few layers of acrylic filler. You need 4 - 5 layers to get good thickness...


When filler was dry, surface look like this... Next step is taking lines out from filler...


Next step was sanding, first with 240 grade sand paper...


...and then with 800 water sand paper...


Surface is now nice and smooth.
Rivets...
First step is to wipe surface with alcohol and draw guide lines with pen...


With transfer foil pick up one line of rivets and apply it on surface...


Than gentle push a transfer film with rivets, and take it down...
Transfer foil you can use multiple times...

Finally, surface look like this...


For some models I will have sets with details. Those sets are available for Ziroli's F6F Hellcat, Ziroli's F9F Panther, 100" P 47 Thunderbolt...
Just few picture how it looks...


Right now I'm in process of painting my P 47, so I will continue this topic after that.
To see how look finish model with Mirce Finish Set, check:
- F9F Panther build: http://www.nsmodelers.rs/jet/f9f-pan...-novembar-2010
- F6F Hellcat build: http://www.nsmodelers.rs/warbirds/he...jekat/jun-2011 and here http://www.nsmodelers.rs/warbirds/he...2011/juli-2011
I hope you see how this method is easy and simple. You just need patience to be all done properly..
More about this products you can see on www.nsmodelers.rs and more informations can get on e-mail: [email protected]
Regards
Mirce
Create scale detail never been easier... With Mirce Finish Set, you can made panel lines, rivets, dummy screws...
Mirce Finish Set is made of Oracal silver self adhesive film, and contains:
- 100 meters - 1,4 mm wide
- 15000 - 2 mm diameter circles - rivets
- 250 dummy screws 2,5 mm diameter
- 250 dummy screws 3 mm diameter
- 250 dummy screws 4 mm diameter
- 2 meter transfer film for applying
Panel lines placed on the prepared surface... After glassing, adding filler and sanding surface is ready for setting panel lines...
Surface must be clear, and before setting you must wipe it with alcohol.
For my P 47, I used scale draw for measure where every line must be placed...
Every line is now on place...
Same procedure is on the wing...
After this stage, my friend put few layers of acrylic filler. You need 4 - 5 layers to get good thickness...
When filler was dry, surface look like this... Next step is taking lines out from filler...
Next step was sanding, first with 240 grade sand paper...
...and then with 800 water sand paper...
Surface is now nice and smooth.
Rivets...
First step is to wipe surface with alcohol and draw guide lines with pen...
With transfer foil pick up one line of rivets and apply it on surface...
Than gentle push a transfer film with rivets, and take it down...
Transfer foil you can use multiple times...
Finally, surface look like this...
For some models I will have sets with details. Those sets are available for Ziroli's F6F Hellcat, Ziroli's F9F Panther, 100" P 47 Thunderbolt...
Just few picture how it looks...
Right now I'm in process of painting my P 47, so I will continue this topic after that.
To see how look finish model with Mirce Finish Set, check:
- F9F Panther build: http://www.nsmodelers.rs/jet/f9f-pan...-novembar-2010
- F6F Hellcat build: http://www.nsmodelers.rs/warbirds/he...jekat/jun-2011 and here http://www.nsmodelers.rs/warbirds/he...2011/juli-2011
I hope you see how this method is easy and simple. You just need patience to be all done properly..
More about this products you can see on www.nsmodelers.rs and more informations can get on e-mail: [email protected]
Regards
Mirce
 06-28-2012 | 12:23 PM
#3
Thread Starter
Joe, thank you for order...
Everything is ready for sending.
That's my first job tomorrow morning...
Regards from Serbia
Mirce
Everything is ready for sending.
That's my first job tomorrow morning...
Regards from Serbia
Mirce
08-06-2012 | 06:14 AM
#6
Thread Starter
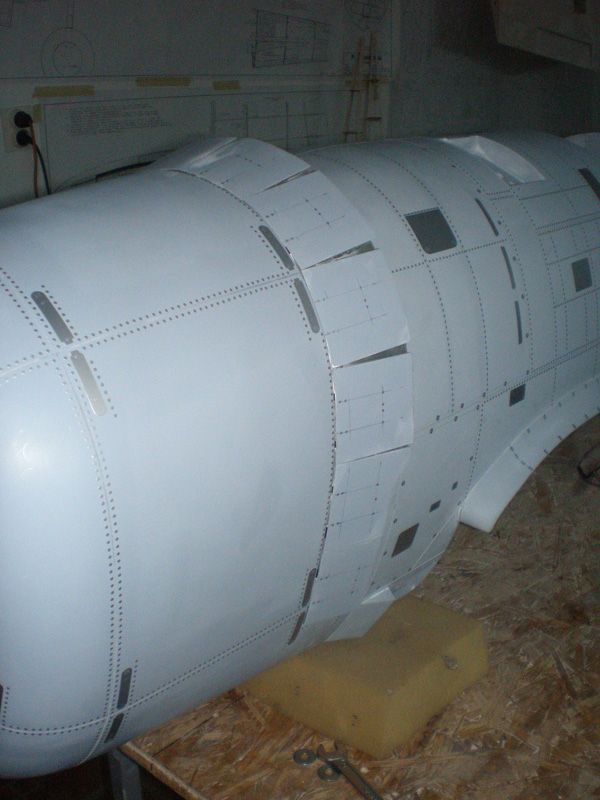
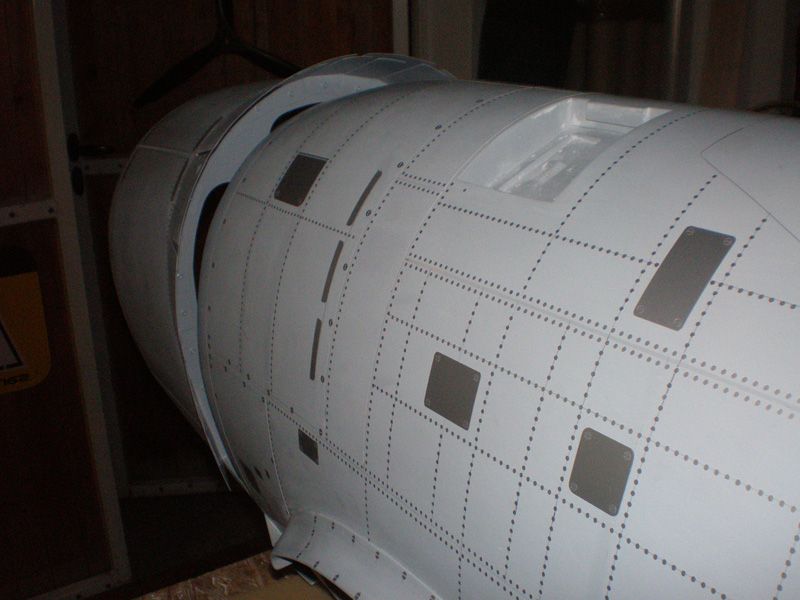
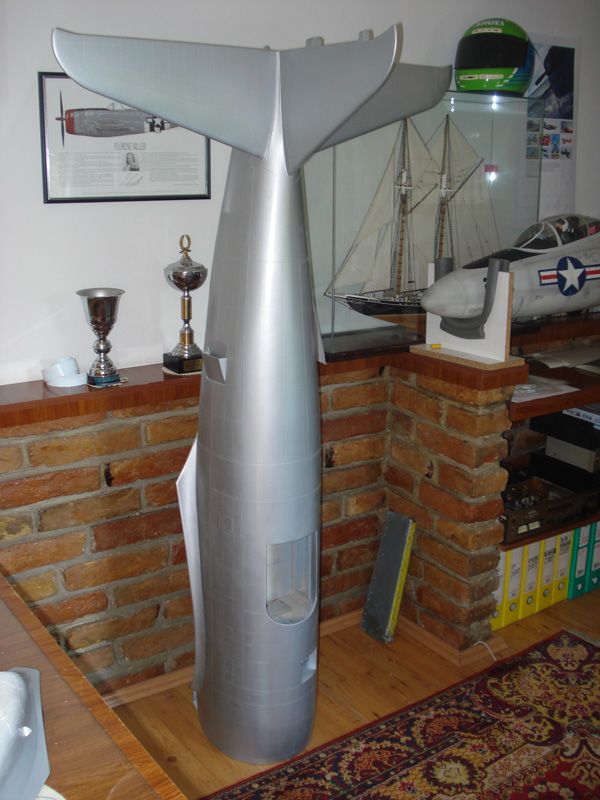
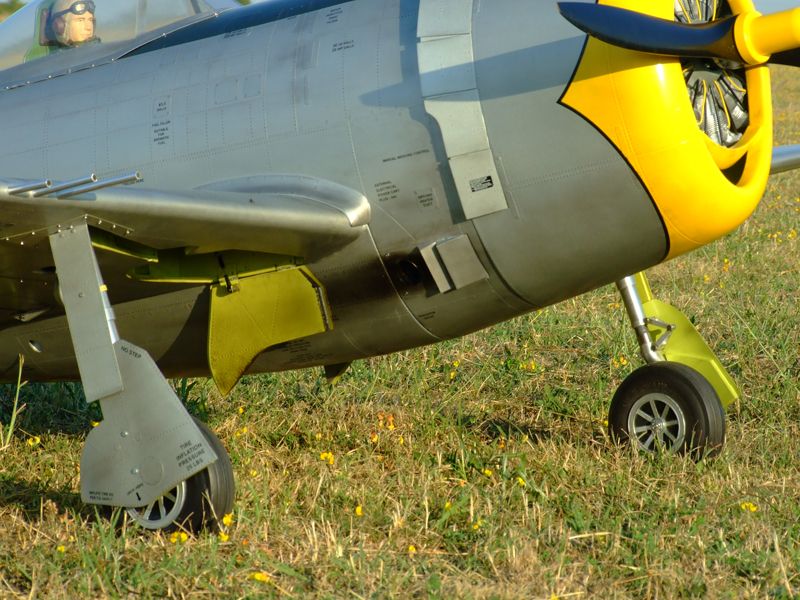
In meantime I finished P 47, and this is continuing of how Mirce Finish Set look...
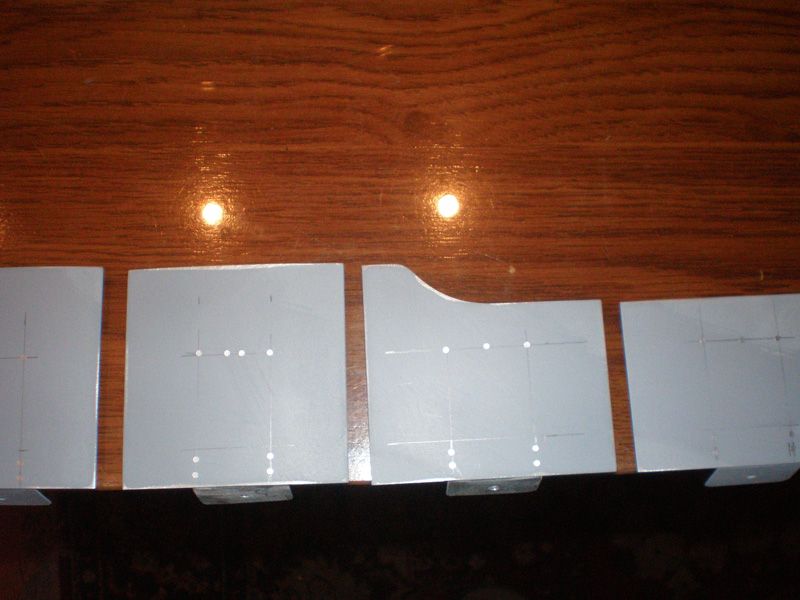
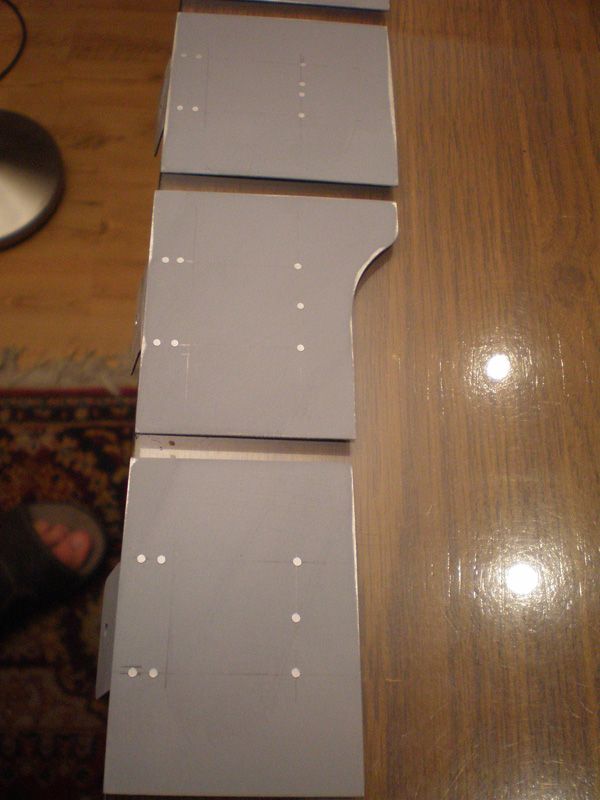
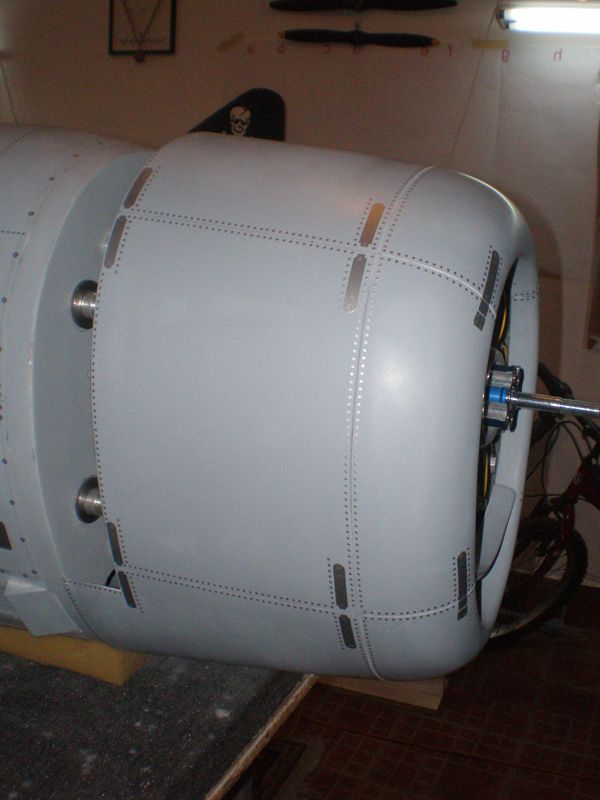
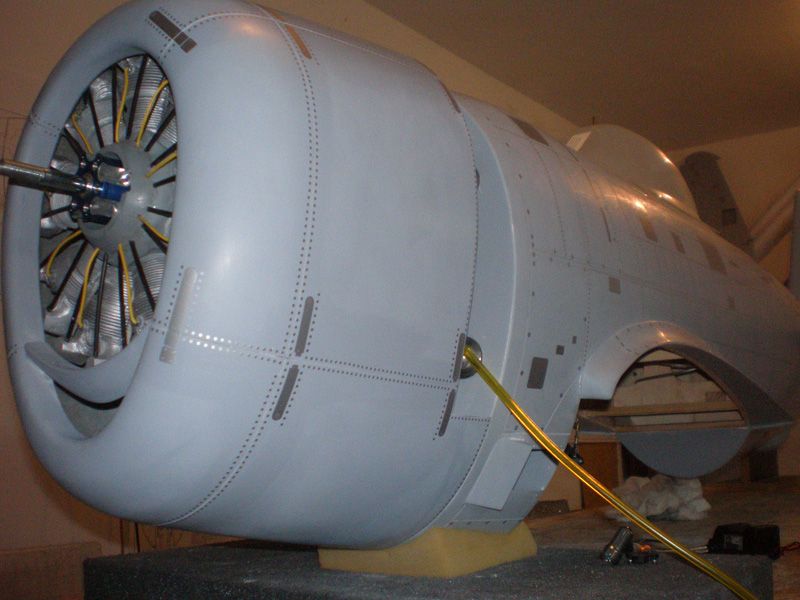
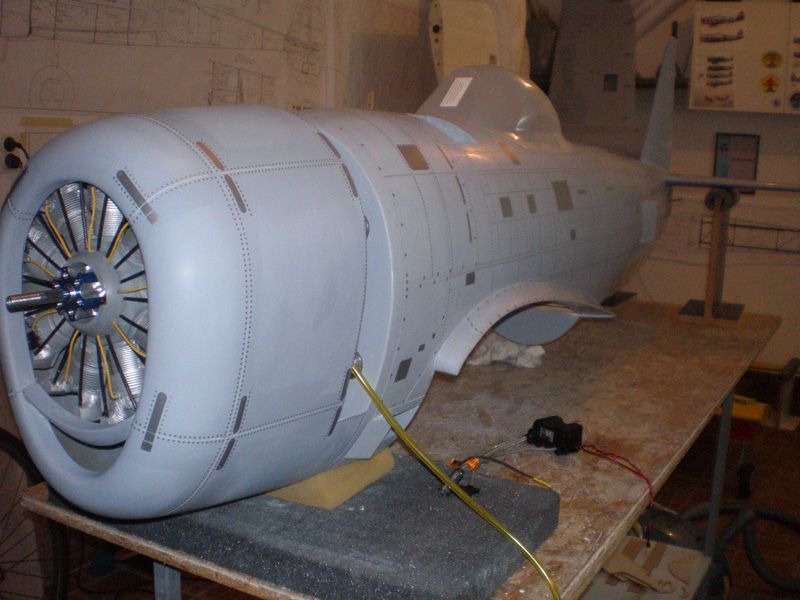
For 100" P-47 I can offer Detail Set with complete details for wing and fuselage surfaces. Some pictures you can see here before, but here are few more...

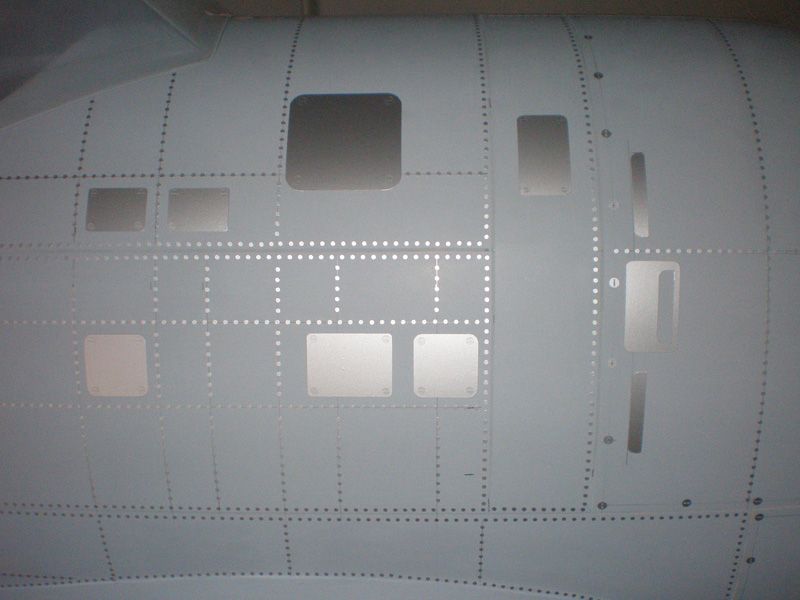


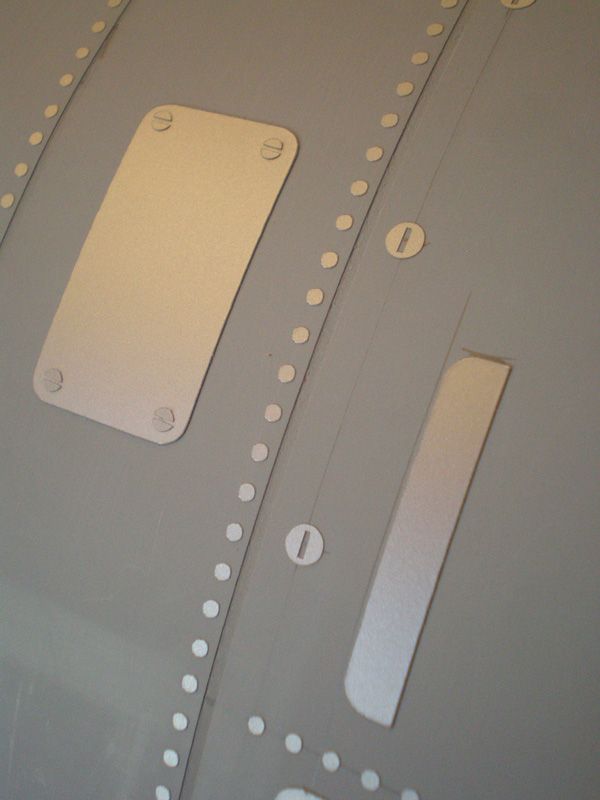

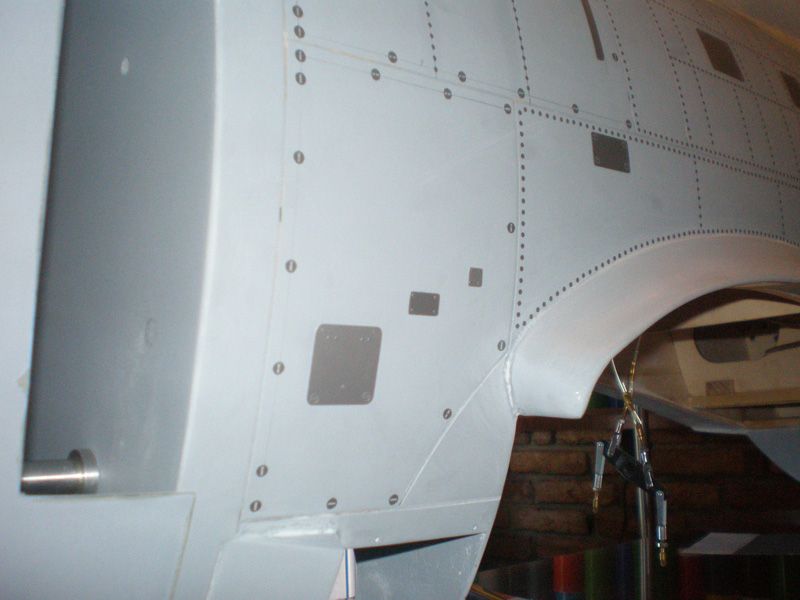
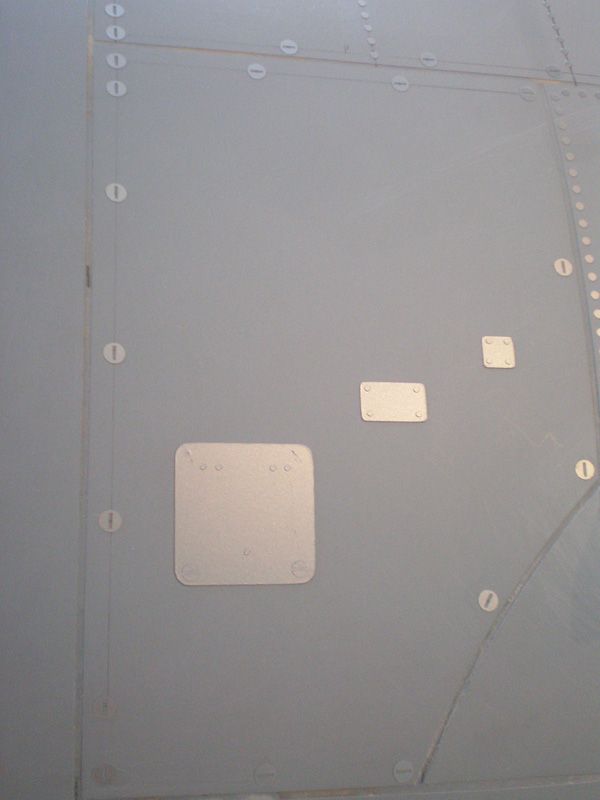
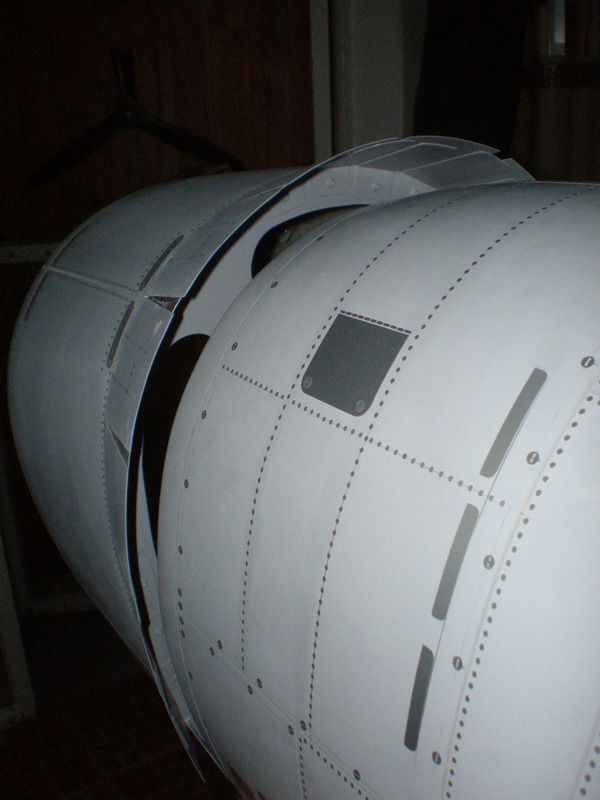
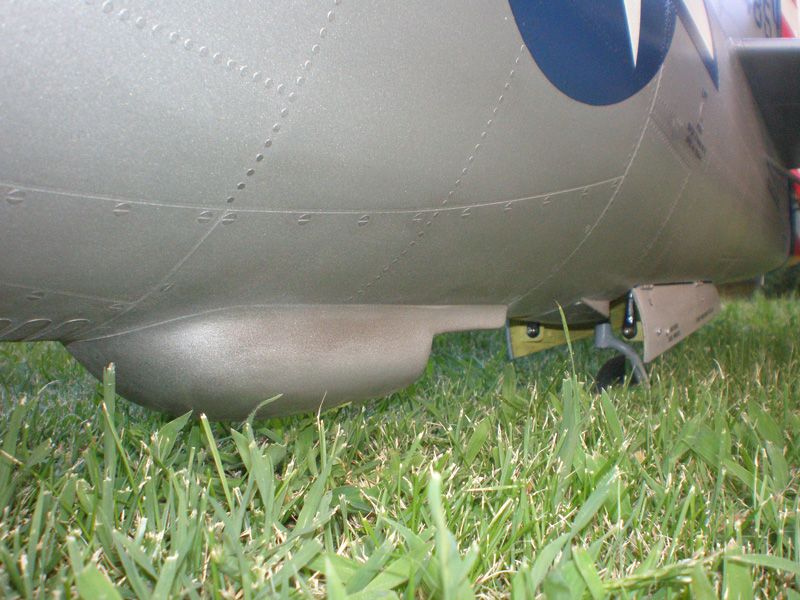
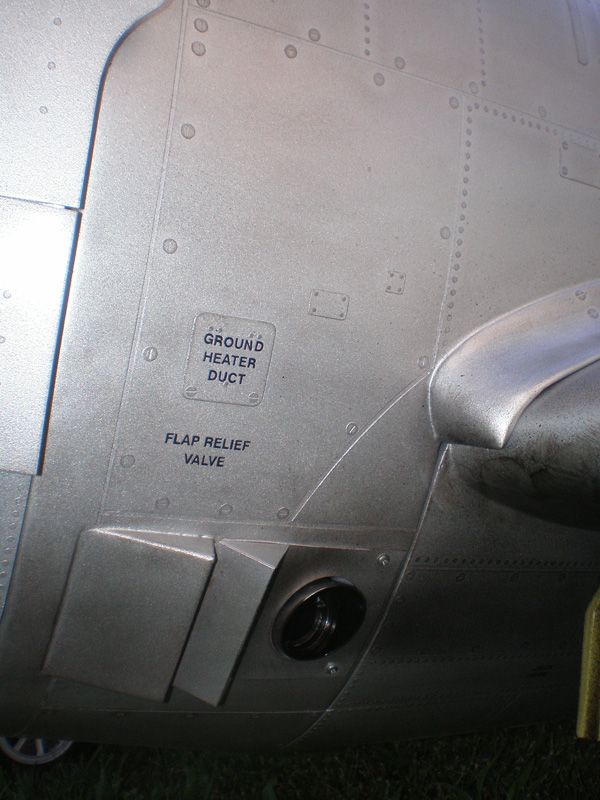
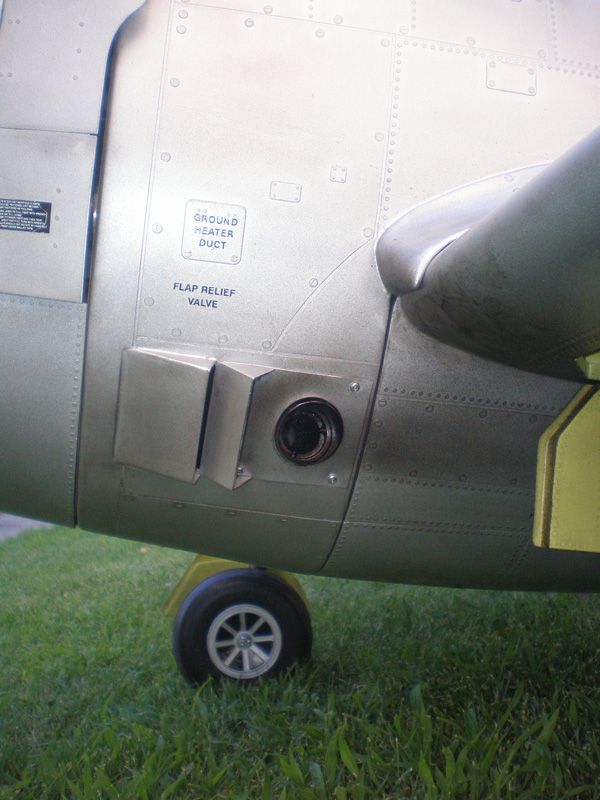
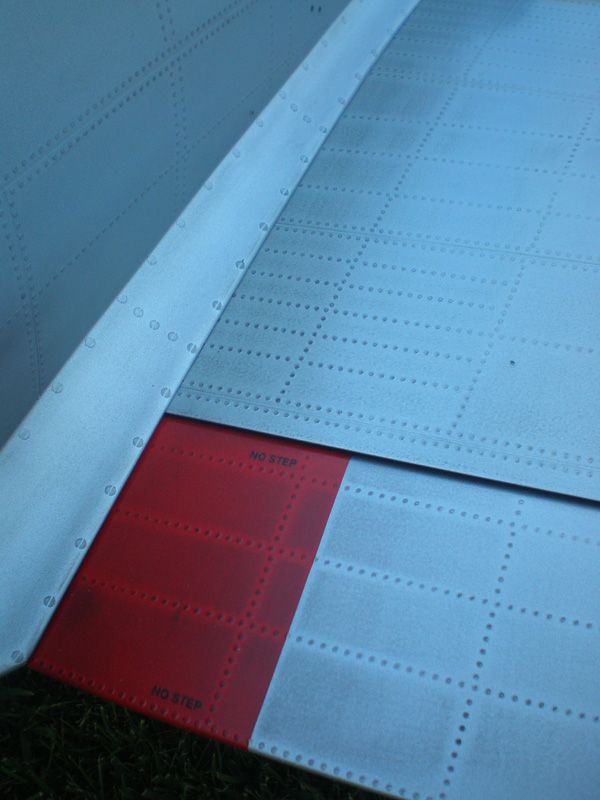
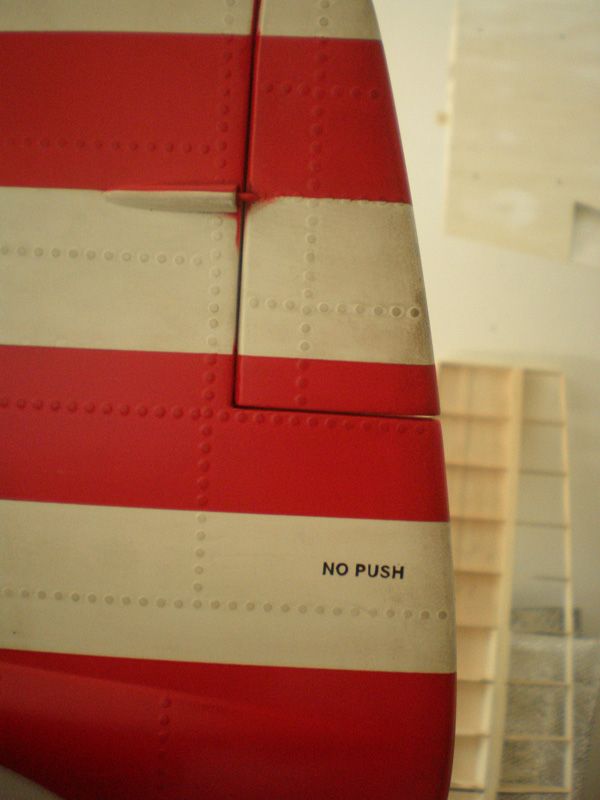
Mirce Finish Set has dummy screws in few dimensions. Some I use on lower part of the fuselage and the wing...

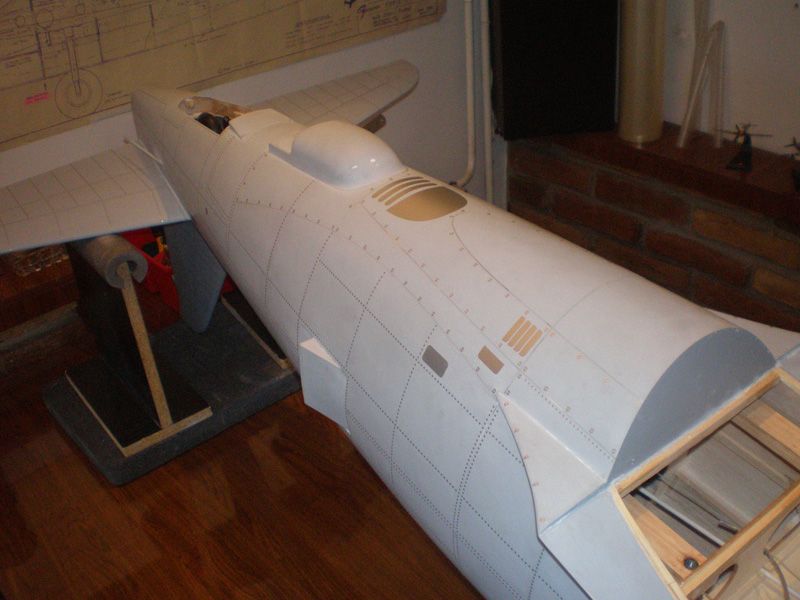
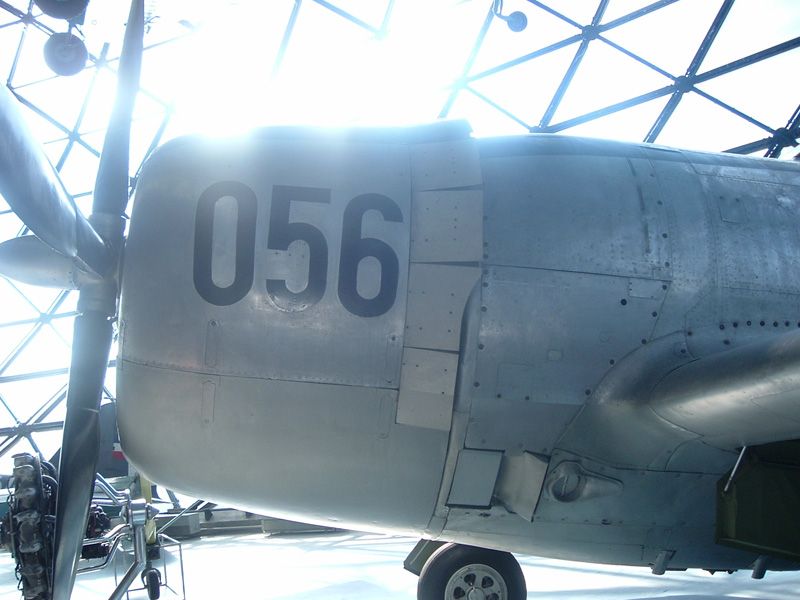
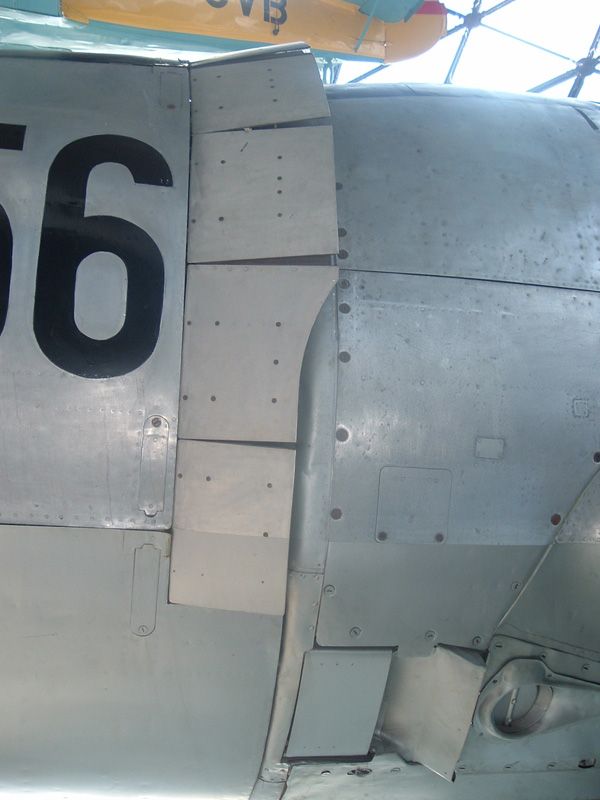
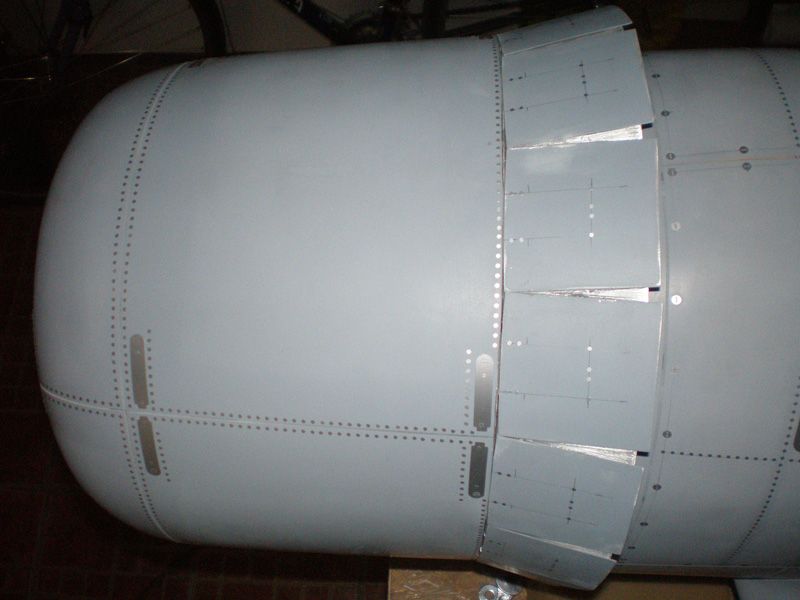
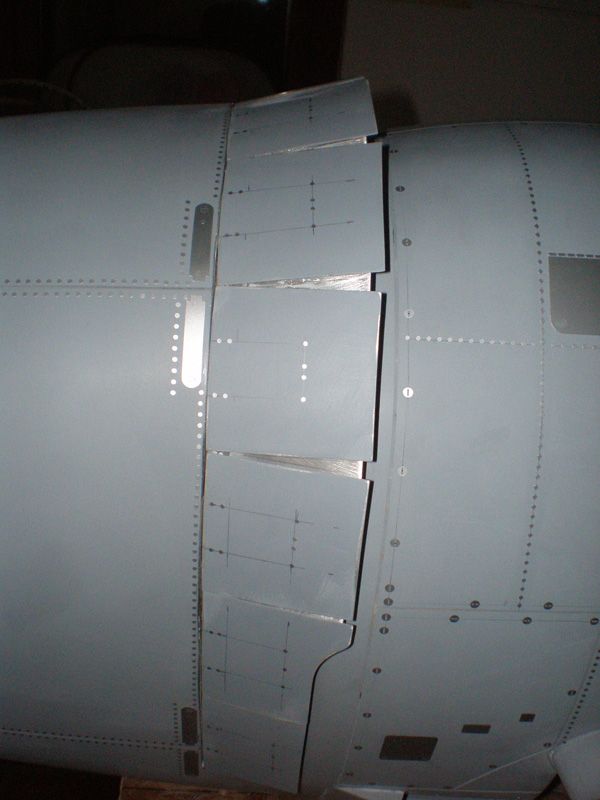
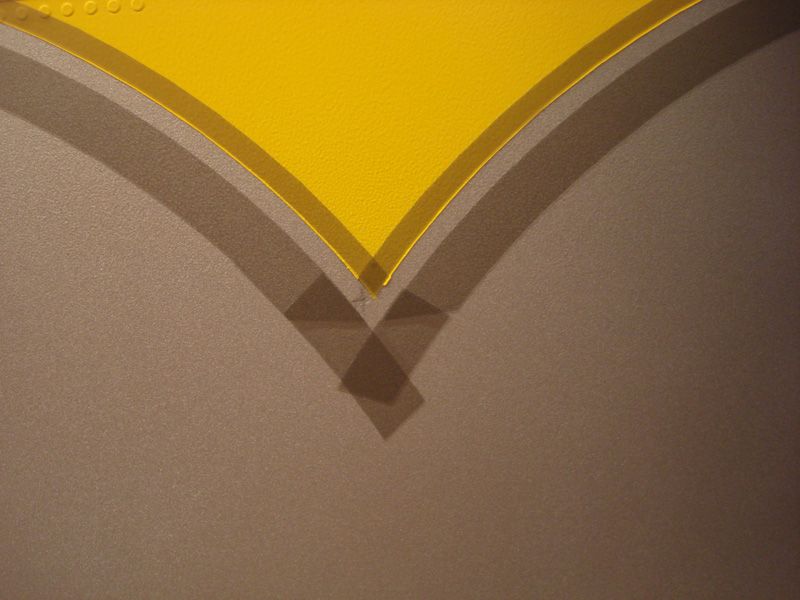
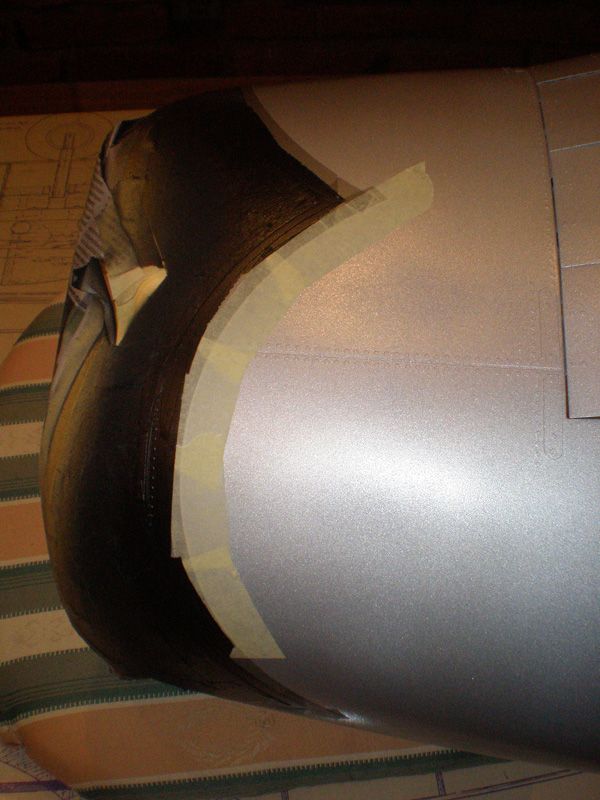
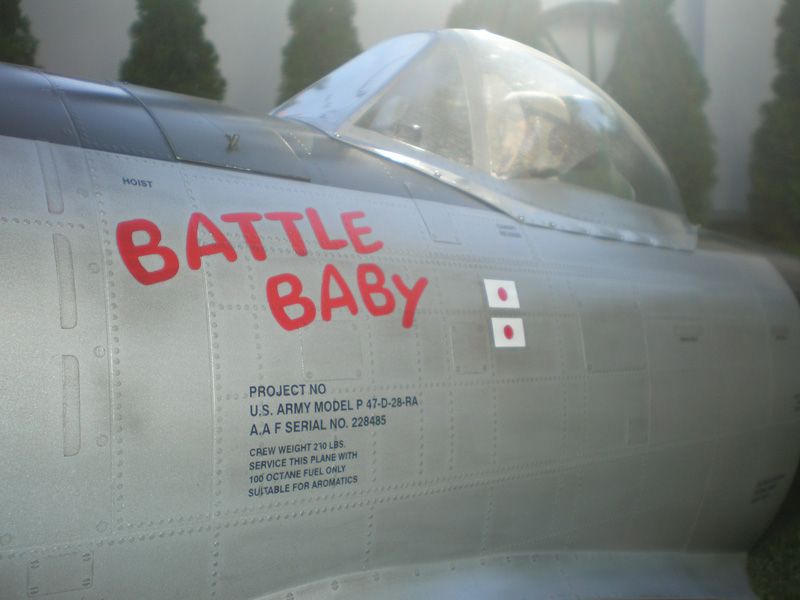
For cowl I used pictures from Thunderbolt which is in Belgrade Air Museum...
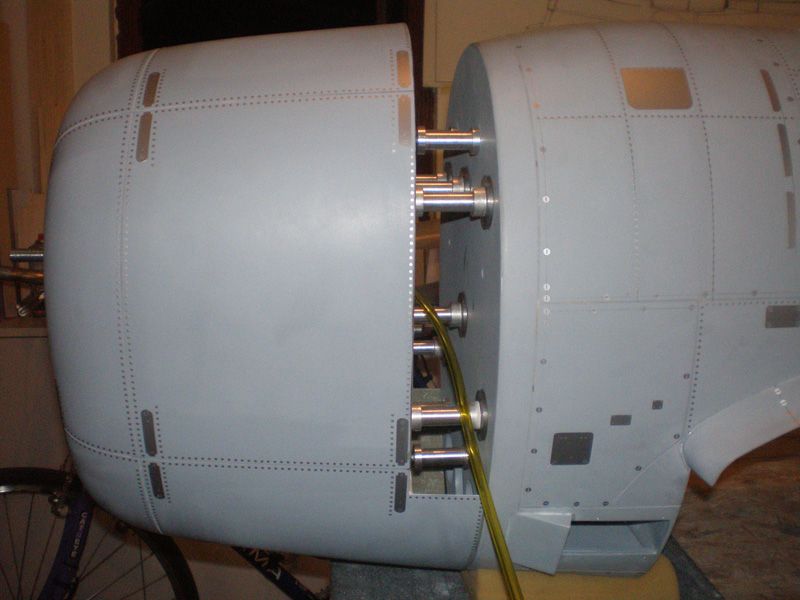

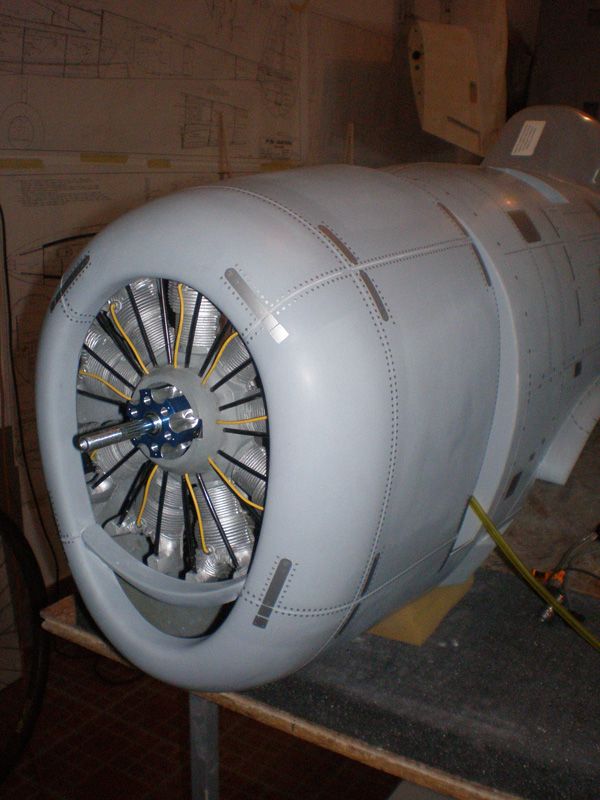
When I put flaps on cowl, it look like this...
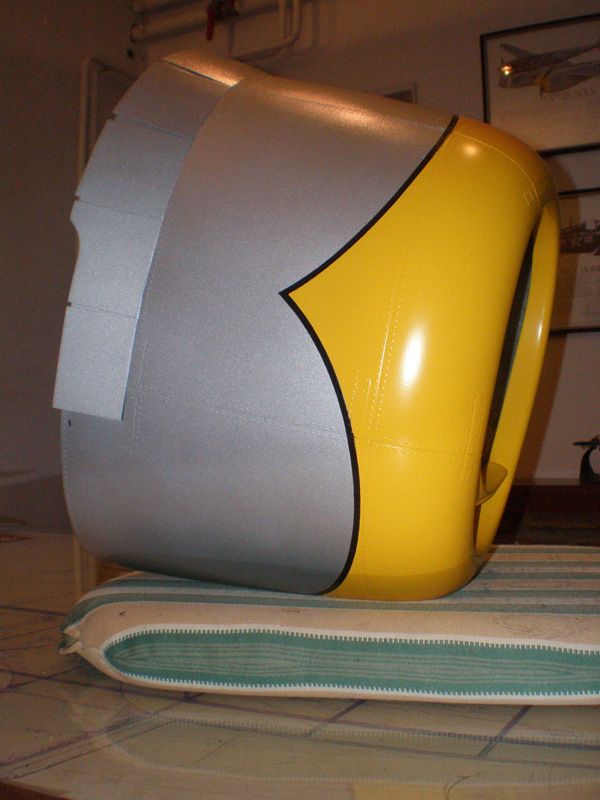
After adding all rivets and other details, parts was ready for painting. Silver color is all caught up...


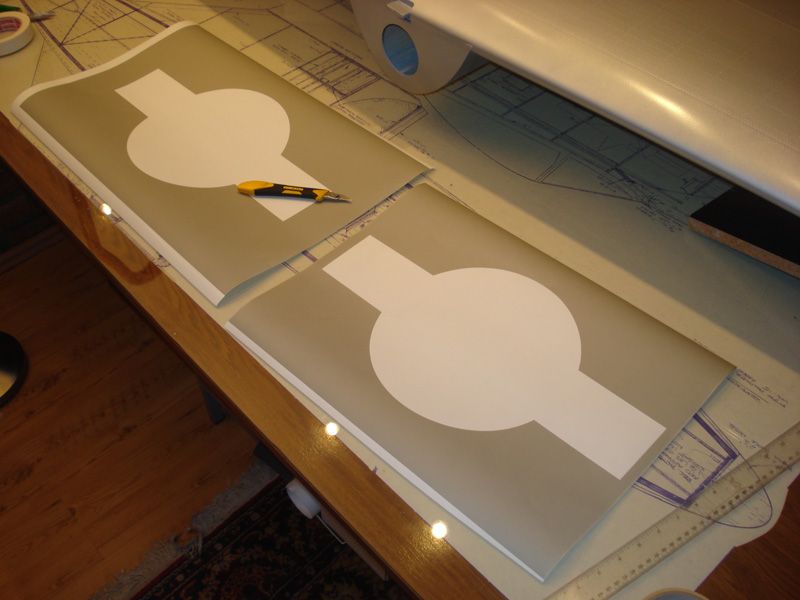
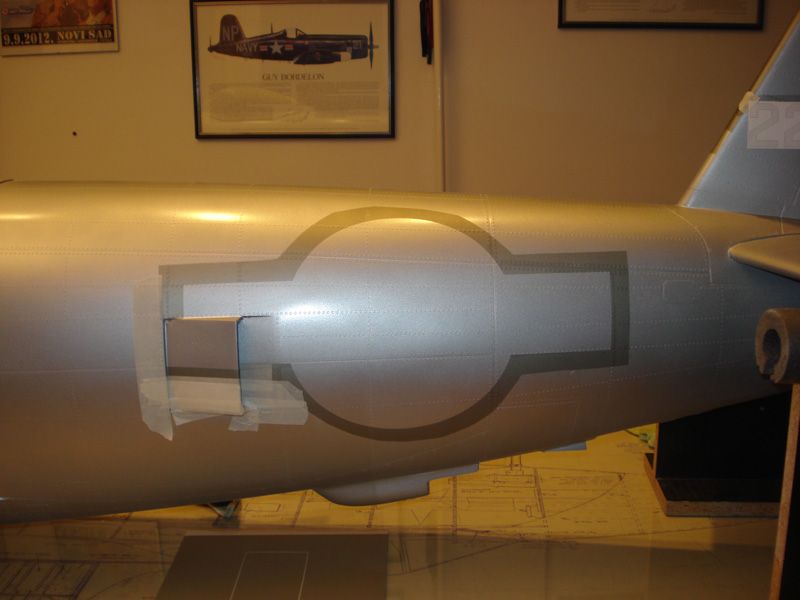
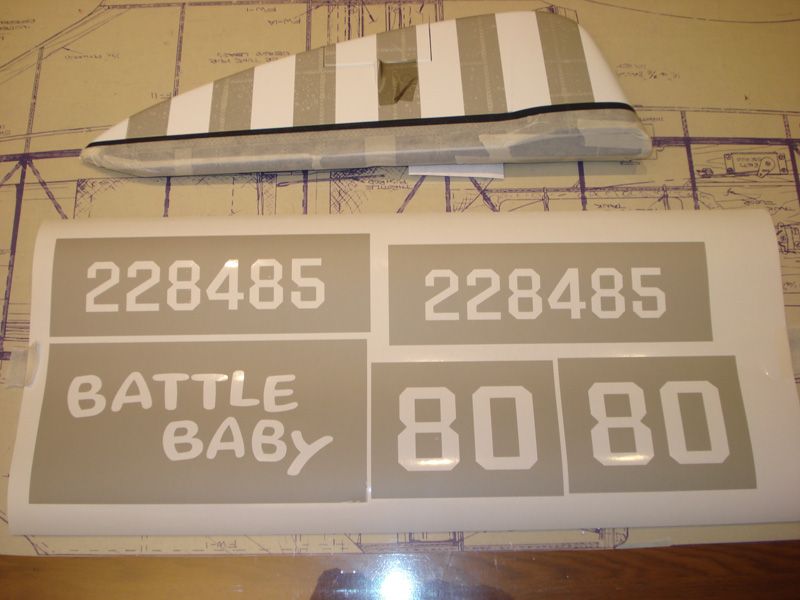
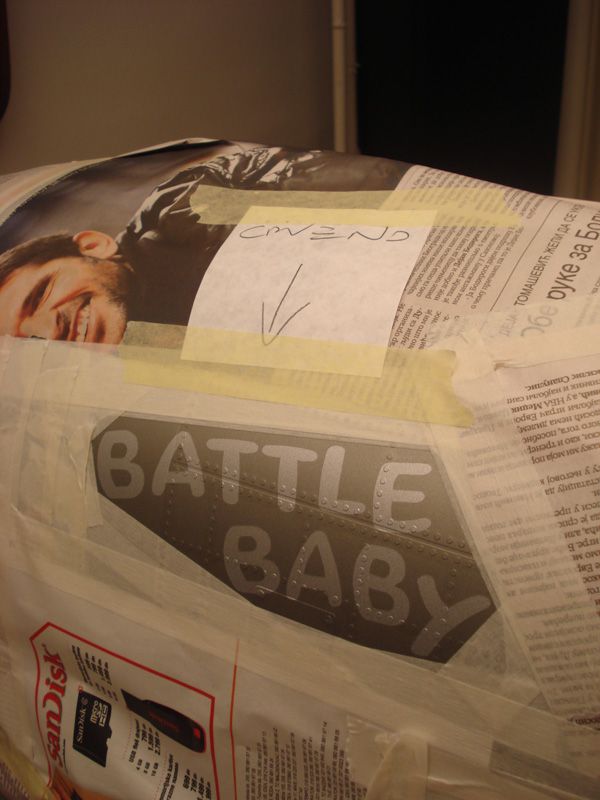
Before other colors I must made paint masc. For stars and bars I made it from Oracal's Oramasc foil, which is designed for this propose.
Paint masc are also available for this P-47, but for some other models also...
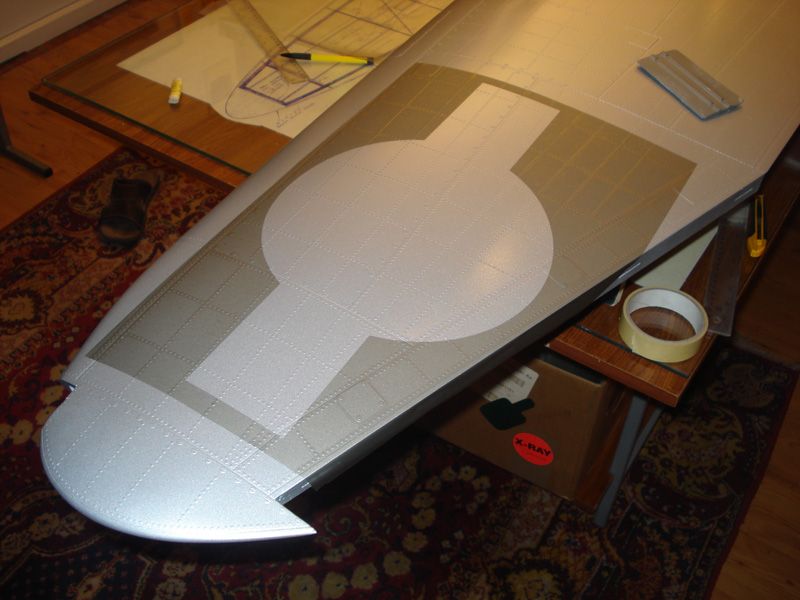
Same procedure is for under side and fuselage...
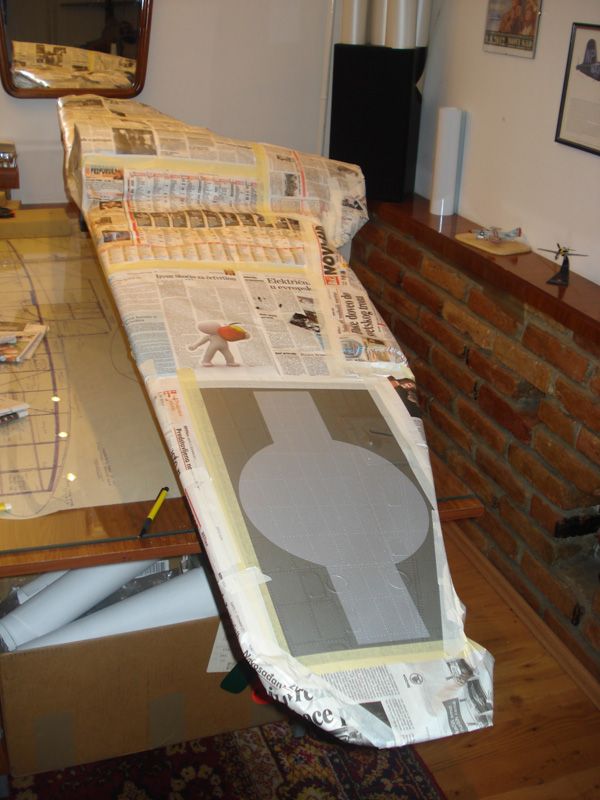
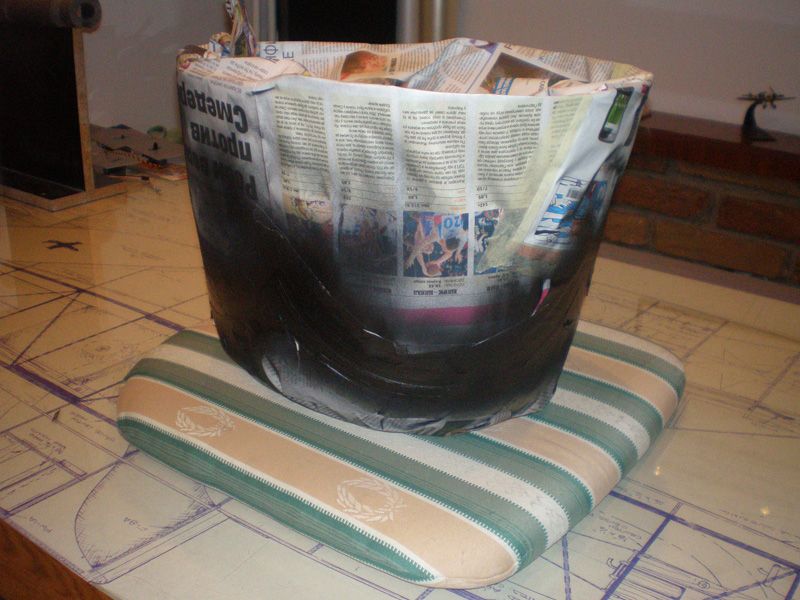
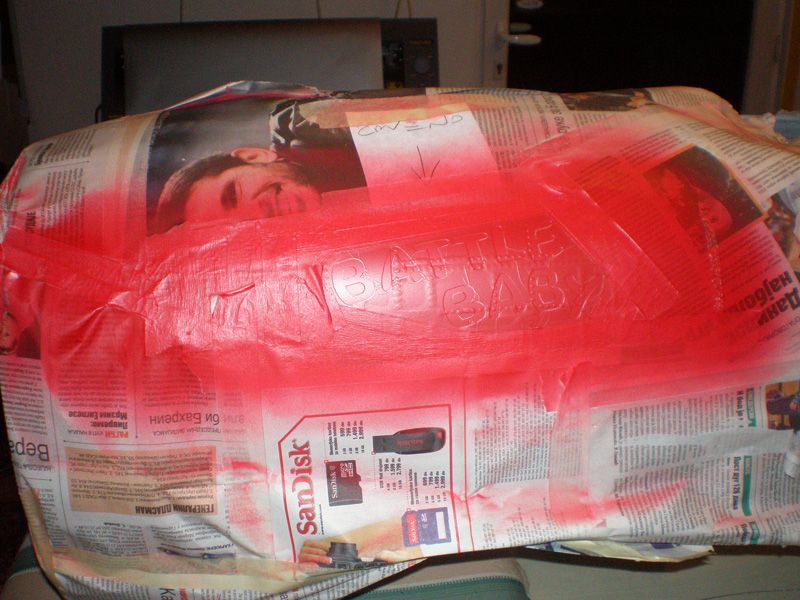
Than everything was wrapped in paper and prepare for next color...
To be continued...
Regards
Mirce
For 100" P-47 I can offer Detail Set with complete details for wing and fuselage surfaces. Some pictures you can see here before, but here are few more...
Mirce Finish Set has dummy screws in few dimensions. Some I use on lower part of the fuselage and the wing...
For cowl I used pictures from Thunderbolt which is in Belgrade Air Museum...
When I put flaps on cowl, it look like this...
After adding all rivets and other details, parts was ready for painting. Silver color is all caught up...
Before other colors I must made paint masc. For stars and bars I made it from Oracal's Oramasc foil, which is designed for this propose.
Paint masc are also available for this P-47, but for some other models also...
Same procedure is for under side and fuselage...
Than everything was wrapped in paper and prepare for next color...
To be continued...
Regards
Mirce

 08-22-2012 | 02:01 PM
#10
Thread Starter
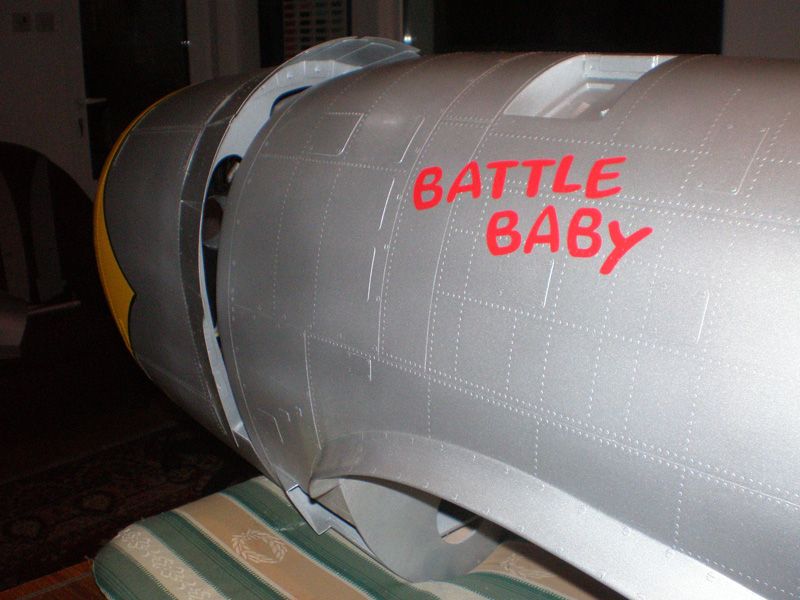
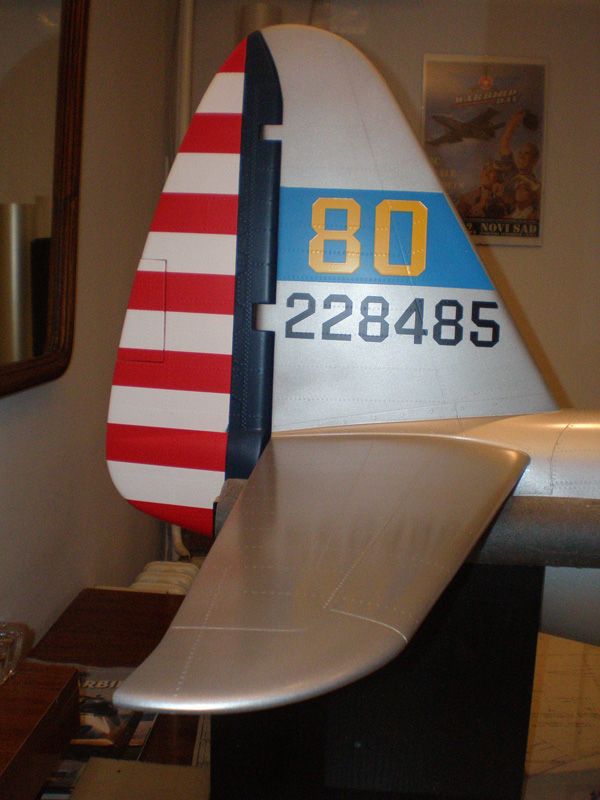
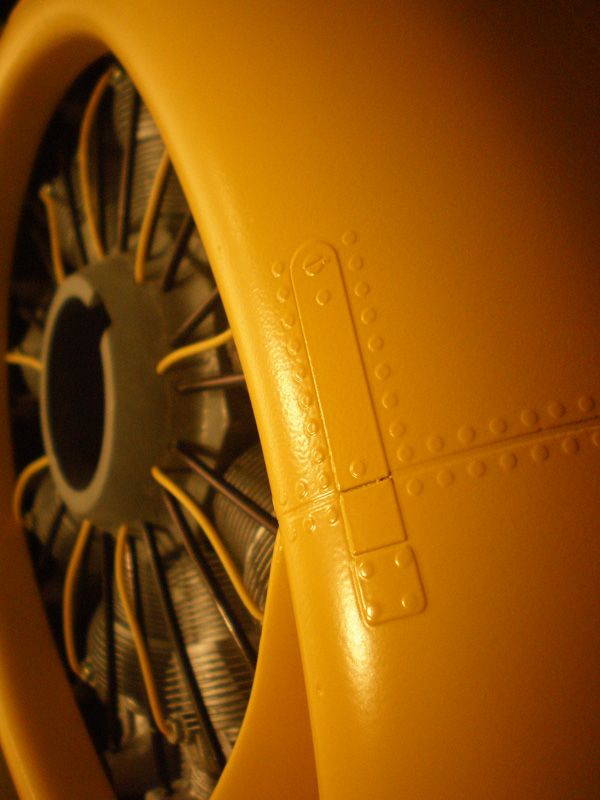
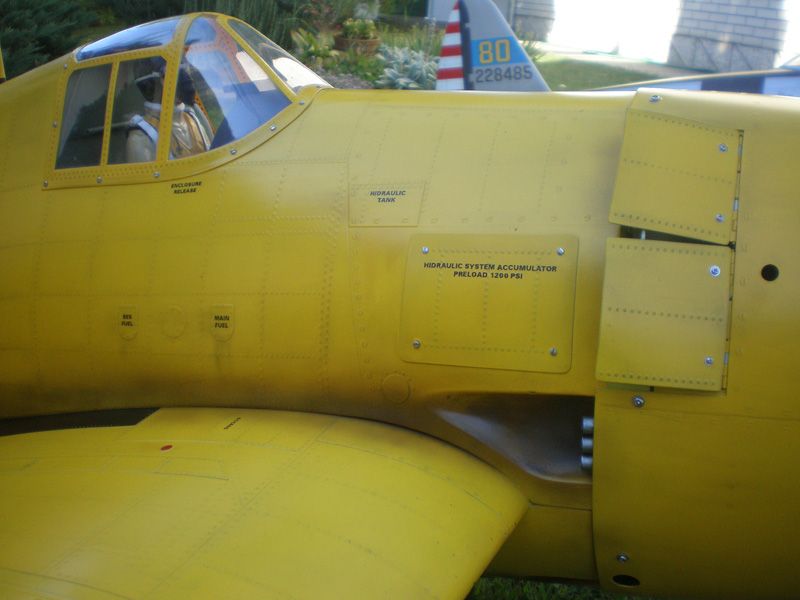
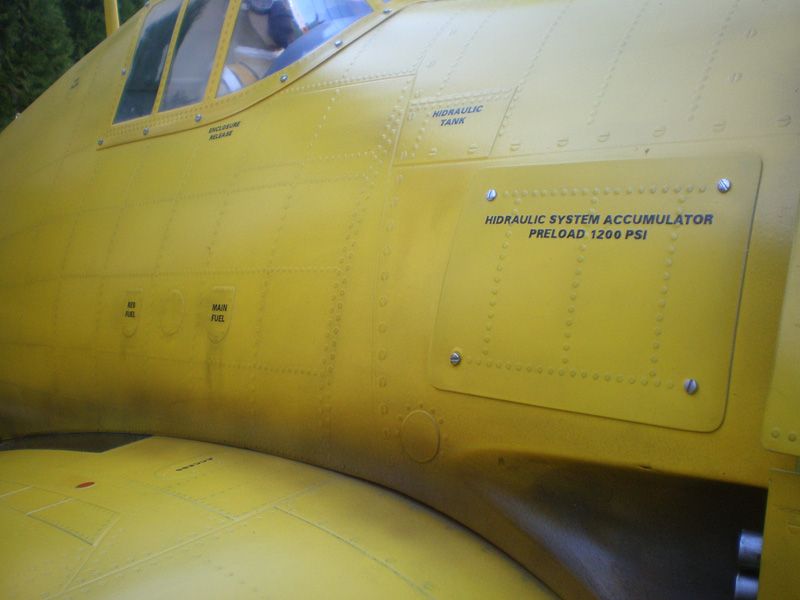
After painting insignia on fuselage and wing look like this...
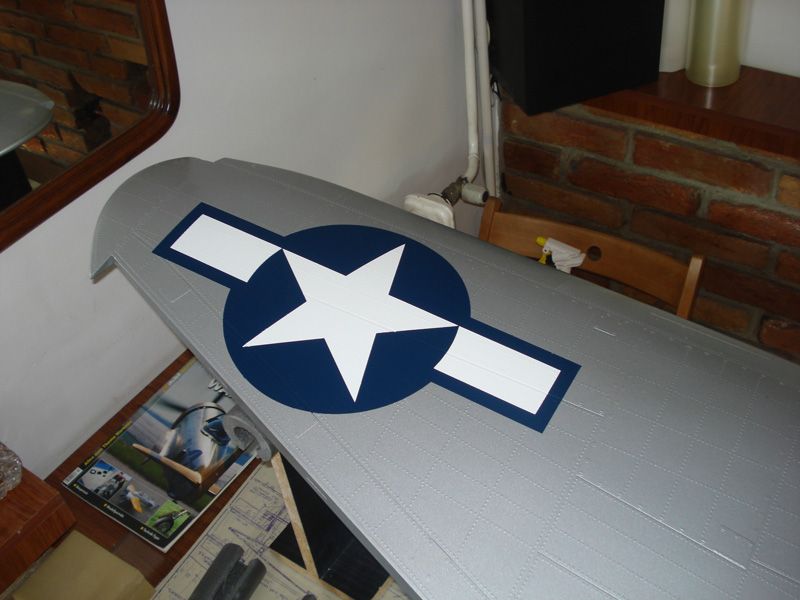
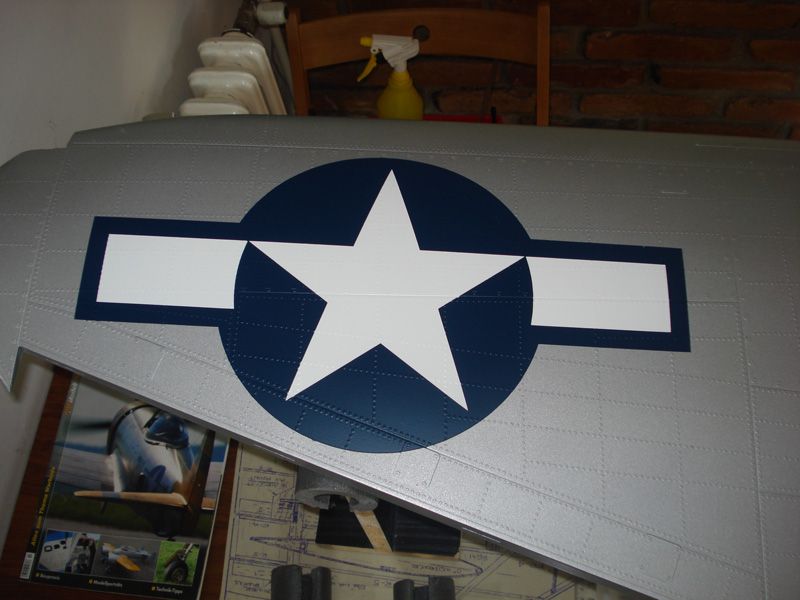
As I told earlier, for paint masc was used special Oramasc foil, which is made for that propose. This foil is little gummy and it can apply on every surface. Edges are sharp, and because it is made for painting, stripping foil is easy without any glue left on surface...
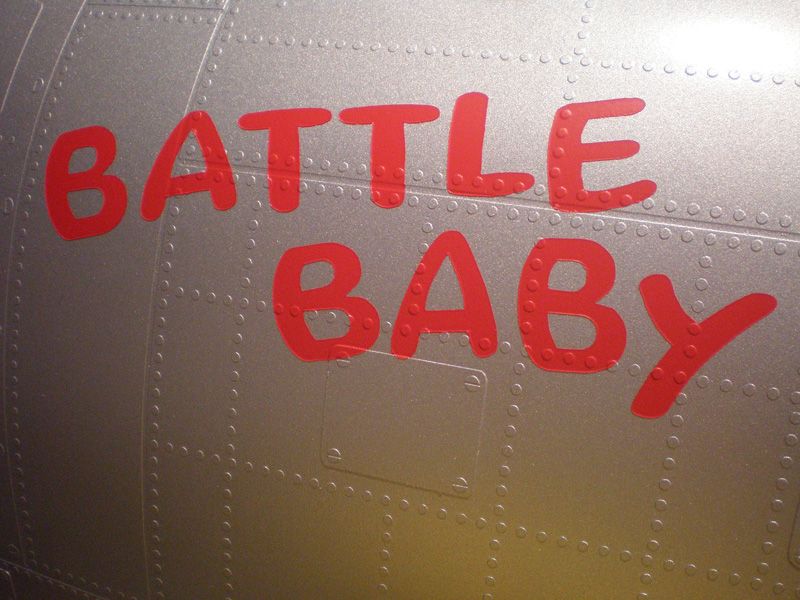
Same paint masc I used for all letters on model...

...and for line on fuselage...
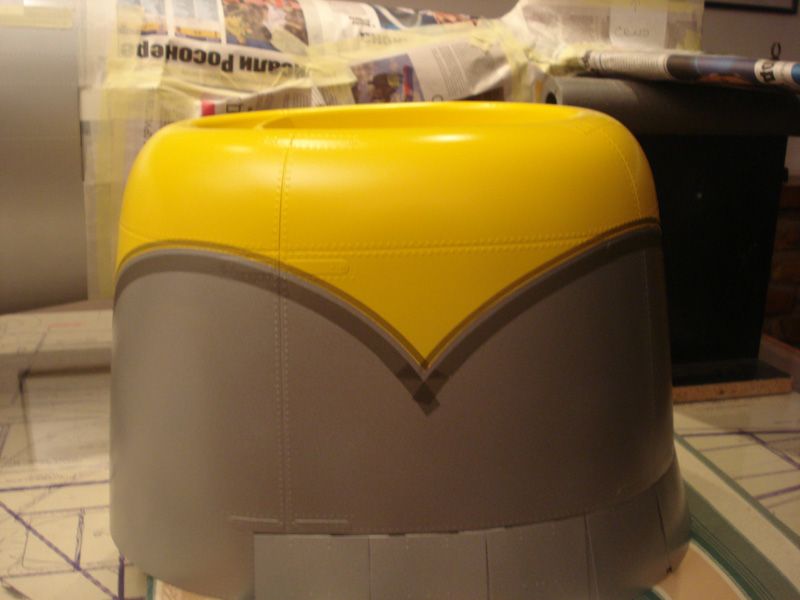
After painting...

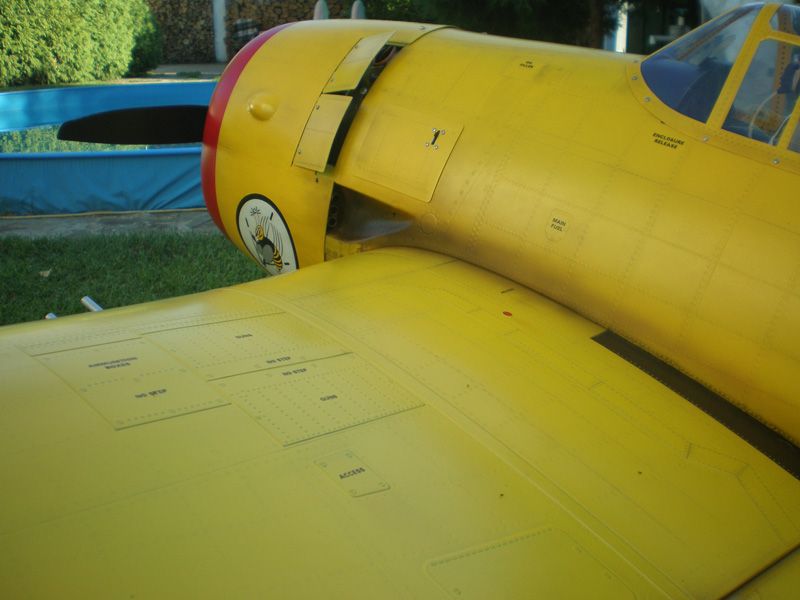
When all colors was painted I made weathering. OK, this is not something what I can offer like some set, but it take model on next level...
On P-47 I used pastel colors for this process. Most important is to after all colors you add on model in this last step, if made some mistake, it can fix without any problem. Pastel color is easy to take off...
I use tree tone of pastel: black and two brown tone...
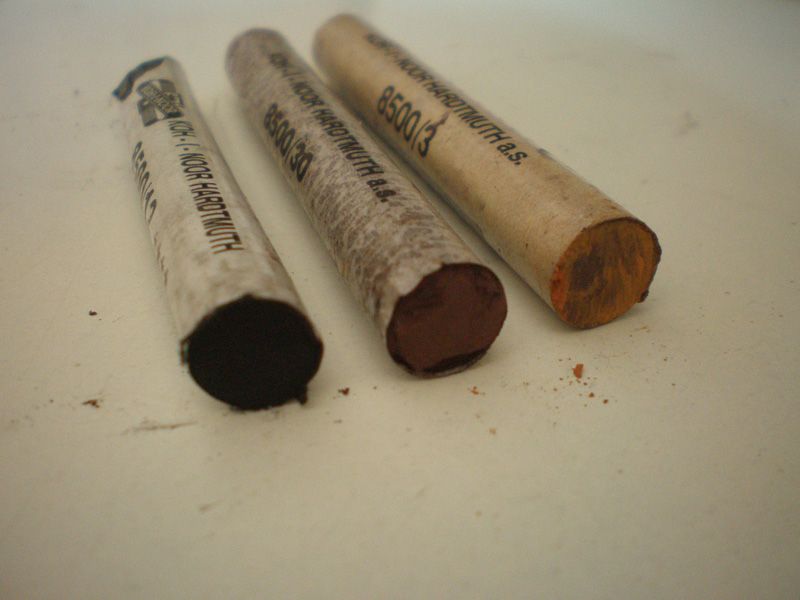
Pastels are soft ant it is easy to sand it...
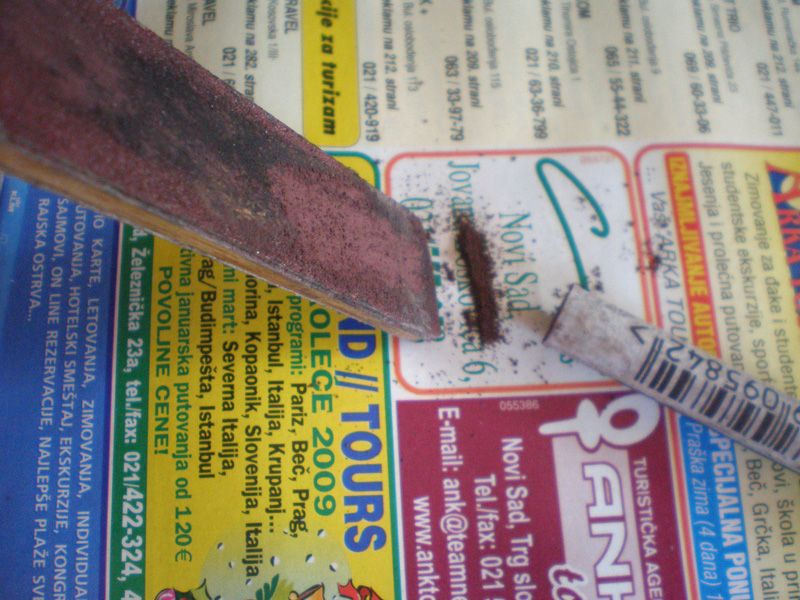
...than use cloth and apply it on model surface...
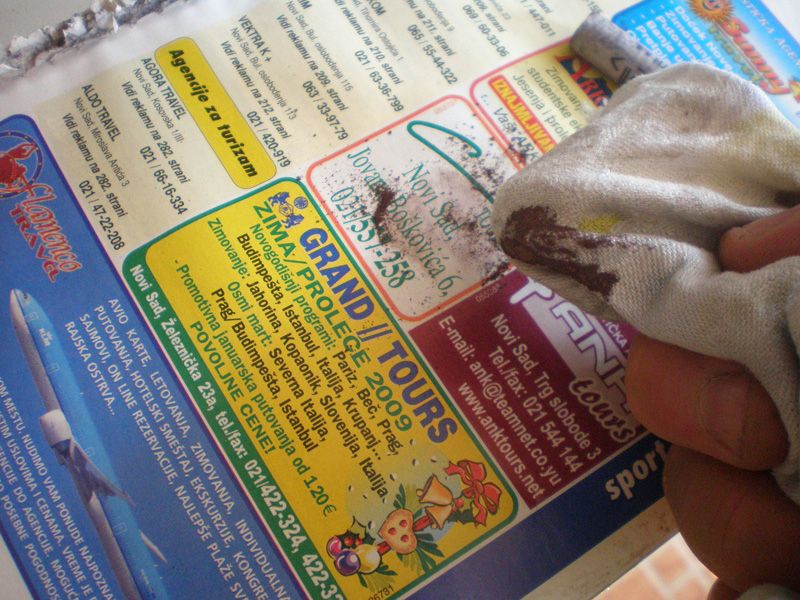
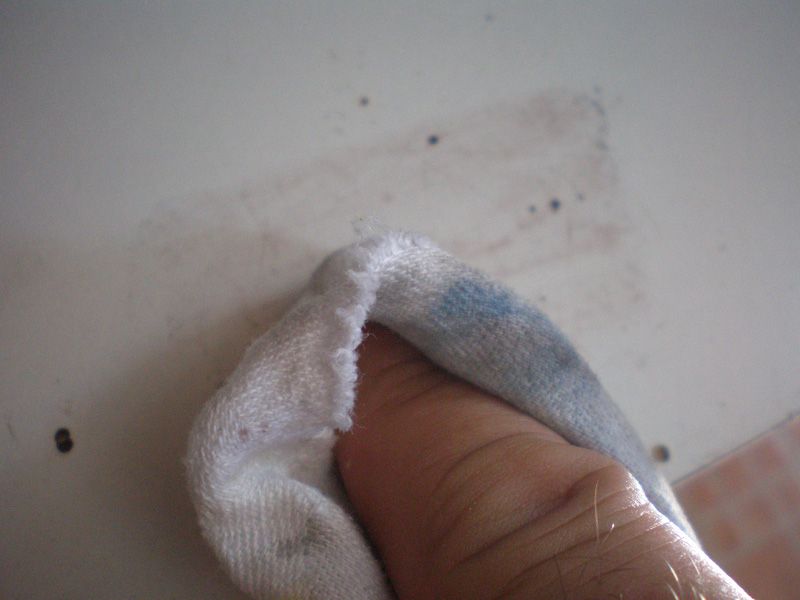
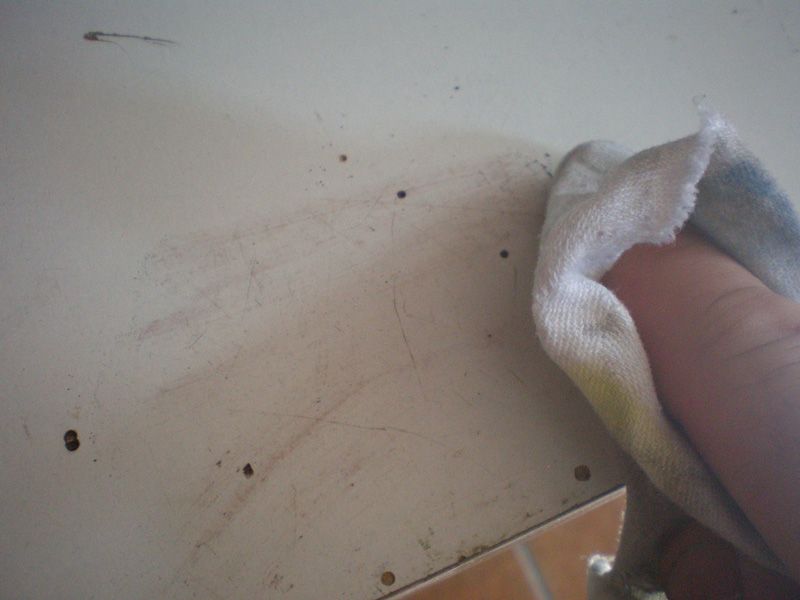
In model this size must be done part by part. But at the end result are great.
Finally, last step was painting clear cote...


Same procedure was made on my Ziroli F6F Hellcat. On yellow paint result are maybe even better...


Mirce Finish Set can be used not just for Thunderbolt or Hellcat, but for any bigger model.
I can made bigger and smaller rivets, depends of model size.
Detail Set I have now for 100" Thunderbolt ( 1/5 scale - Meister Scale )
I offer Detail Set for Top Flite P-47 ( 1/6 scale ) too...
I have same set for Ziroli F6F Hellcat and F9F Panther.
Same like Mirce Finish Set I can made Paint masc for stars and bars for many models in different size.
Check my web sit for more information: www.nsmodelers.rs
Best regards
Mirce
As I told earlier, for paint masc was used special Oramasc foil, which is made for that propose. This foil is little gummy and it can apply on every surface. Edges are sharp, and because it is made for painting, stripping foil is easy without any glue left on surface...
Same paint masc I used for all letters on model...
...and for line on fuselage...
After painting...
When all colors was painted I made weathering. OK, this is not something what I can offer like some set, but it take model on next level...
On P-47 I used pastel colors for this process. Most important is to after all colors you add on model in this last step, if made some mistake, it can fix without any problem. Pastel color is easy to take off...
I use tree tone of pastel: black and two brown tone...
Pastels are soft ant it is easy to sand it...
...than use cloth and apply it on model surface...
In model this size must be done part by part. But at the end result are great.
Finally, last step was painting clear cote...
Same procedure was made on my Ziroli F6F Hellcat. On yellow paint result are maybe even better...
Mirce Finish Set can be used not just for Thunderbolt or Hellcat, but for any bigger model.
I can made bigger and smaller rivets, depends of model size.
Detail Set I have now for 100" Thunderbolt ( 1/5 scale - Meister Scale )
I offer Detail Set for Top Flite P-47 ( 1/6 scale ) too...
I have same set for Ziroli F6F Hellcat and F9F Panther.
Same like Mirce Finish Set I can made Paint masc for stars and bars for many models in different size.
Check my web sit for more information: www.nsmodelers.rs
Best regards
Mirce
08-24-2012 | 01:53 PM
#11
Mirce, I am working on a Don Smith Hellcat and would like to use your product for panel and rivet details. The model is 1/6 scale with an 86" wingspan. Which of your sets would you suggest I buy?
Thanks, P51Tom
Thanks, P51Tom
08-24-2012 | 02:02 PM
#12
Thread Starter
Hello Tom,
I can offer you Mirce Finish Set for 1/6 scale, which have 1,2 mm wide panel lines, 1,6 mm diameter rivets, and 2,5; 3 and 3,5 mm diameter dummy screws.
Size of Detail set for Hellcat can be reduced on 1/6 scale too...
Also Paint masc for stars and bars can be made for your model.
Prices are same like on my web site, and if you want to buy all sets I will give you 10% discount. Postage to USA is 10,00$
For more information check my web site: www.nsmodelers.rs
Thank you in advance...
All the best
Mirce
 08-25-2012 | 06:30 AM
#14
Thread Starter
For Me 109 or FW I can offer Mirce Finish Set and Paint Masc.
I wasn't made none of these models, so I haven't Detail Sets for them...
Regards
Mirce
I wasn't made none of these models, so I haven't Detail Sets for them...
Regards
Mirce
08-25-2012 | 07:00 PM
#15
Senior Member
Joined: Feb 2011
Posts: 162
Likes: 0
Received 0 Likes
on
0 Posts
From: Comox,
BC, CANADA
Can a mask only be used once? So if a P47 had the two stars and bars on the wing and two on the fuse, you would send four mask sets? Sorry if it's a dumb queston, I have never used this kind of mask before.
Thanks Tom
Thanks Tom
08-26-2012 | 01:03 AM
#16
Thread Starter
Hello Tom,
yes, masc can be used just once. In Paint mask set contains 4 paint masc, two bigger for wing and two smaller for fuselage. Every paint masc was made from two parts, one for blue color, and next for white part of the insignia...
More information on: www.nsmodelers.rs
Best regards
Mirce
yes, masc can be used just once. In Paint mask set contains 4 paint masc, two bigger for wing and two smaller for fuselage. Every paint masc was made from two parts, one for blue color, and next for white part of the insignia...
More information on: www.nsmodelers.rs
Best regards
Mirce
12-05-2012 | 11:11 AM
#17
Thread Starter
From December 05. until New Year I offer 10% discount on my Sets prices...
For more information, check my web site...
Regards
Mirce
For more information, check my web site...
Regards
Mirce
12-18-2012 | 04:44 PM
#18
Thread Starter
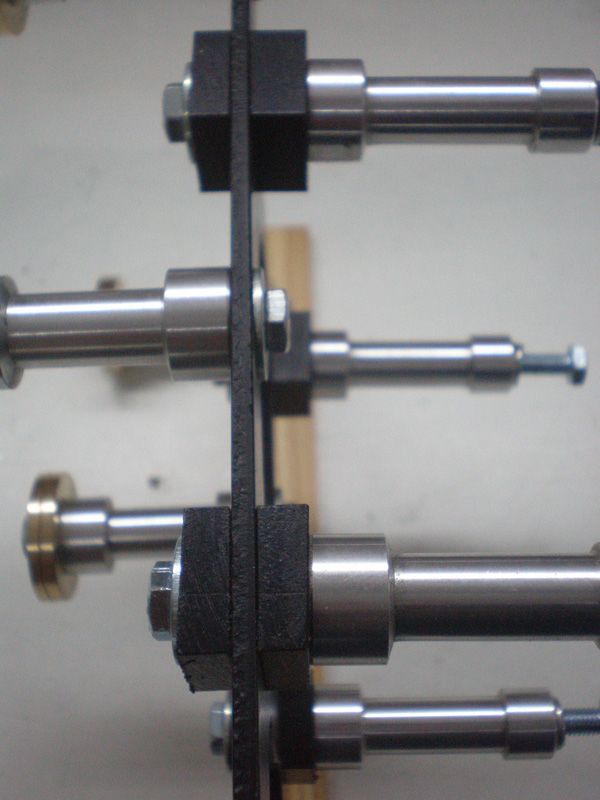
This special made engine plate was made for Meister Scale P-47 and for Evolution 80 GX engine. In Europe that engine have name MVVS 80 GX
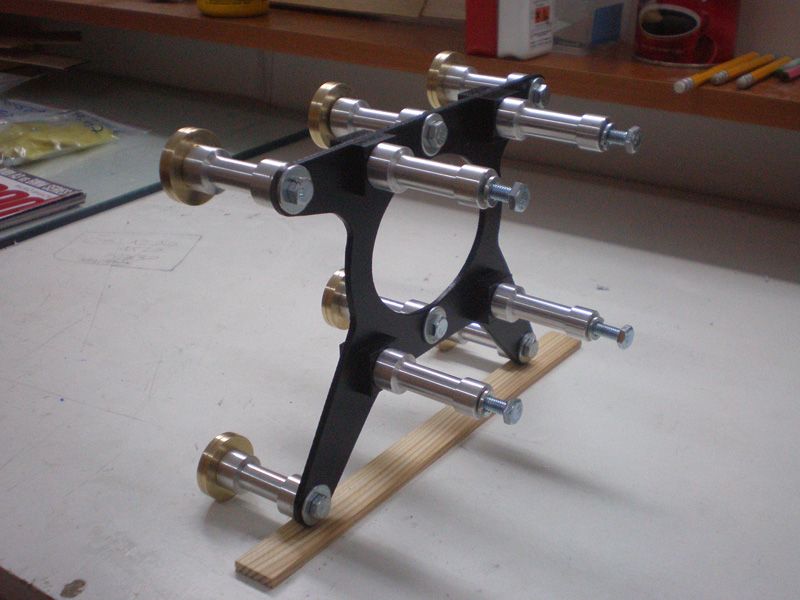
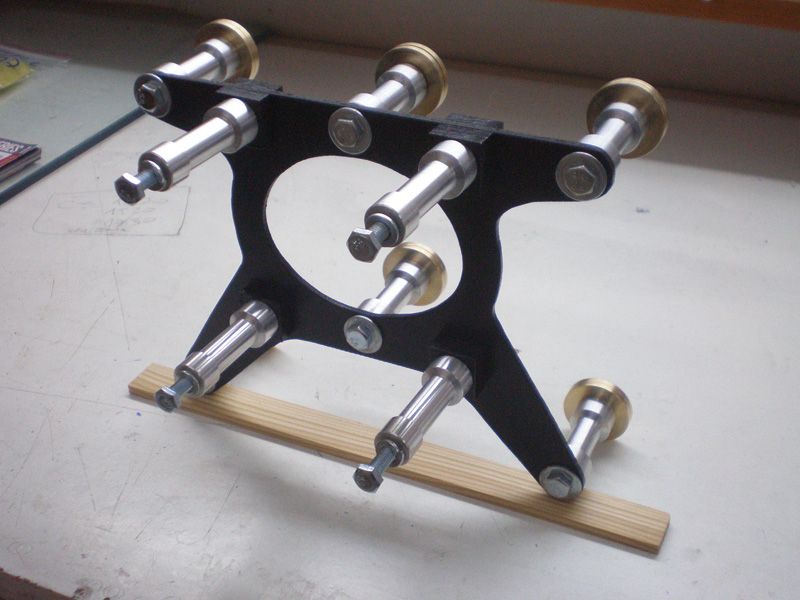
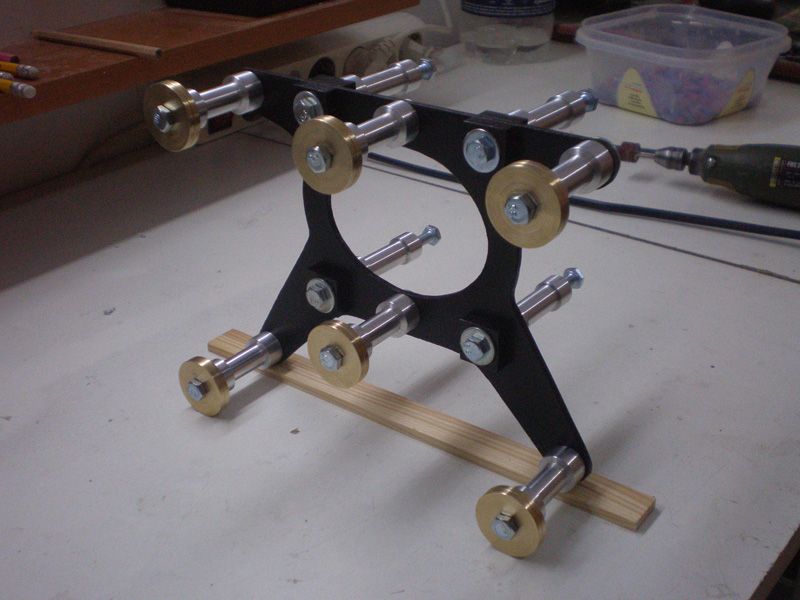
Plate was made from steel and all spacers are from aluminum.
In set are three spacers sets:
- 6 pieces aluminum spacers for back plate side and on this spacers we made big washers for larger contact surface on the fire wall
- 4 pieces aluminum spacers which come between engine plate and engine.
- 4 pieces aluminum sparers for cowl.
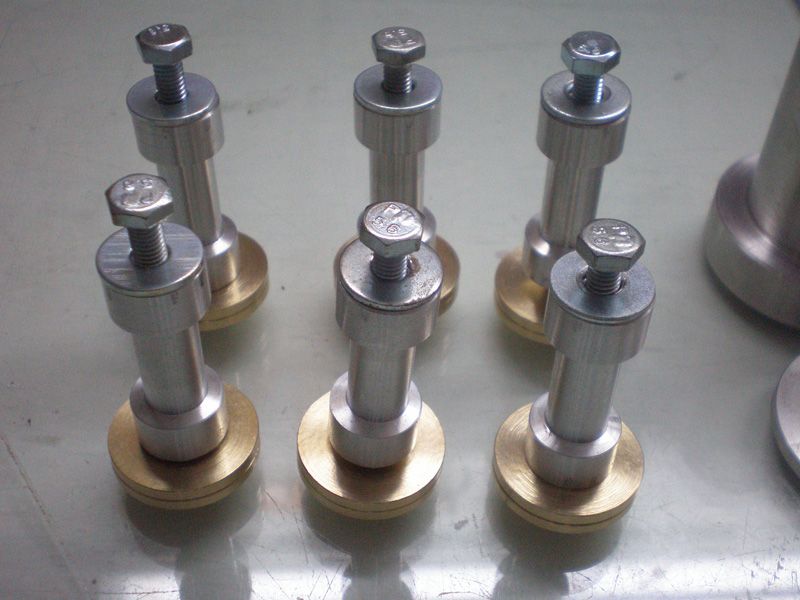
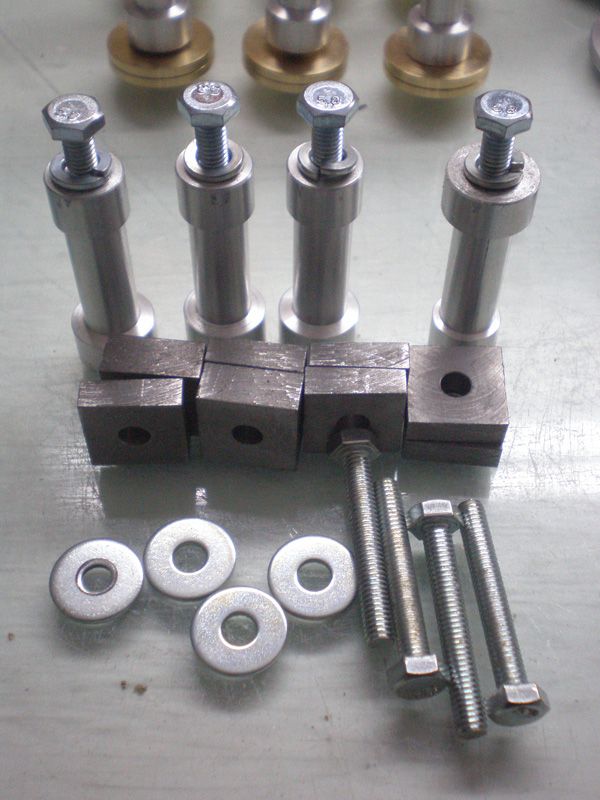
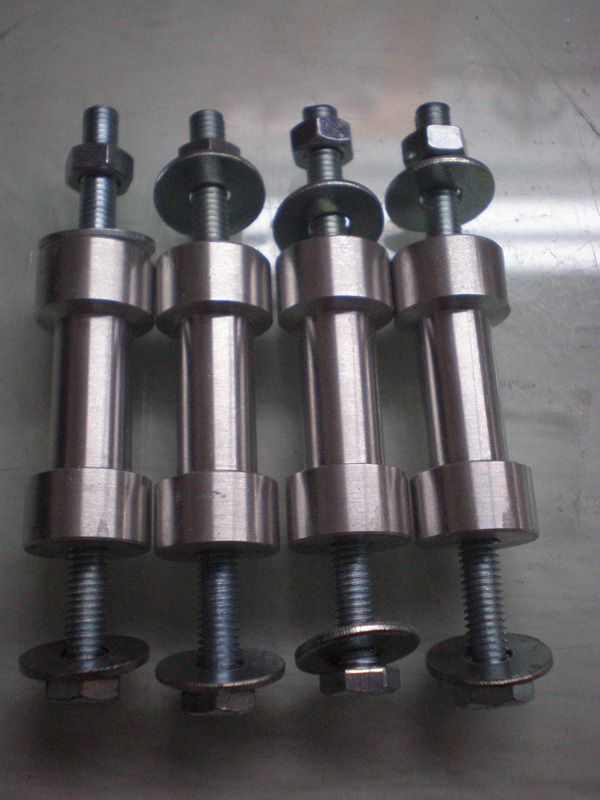
Between engine plate and spacers to the engine, we made 4 steel two piece parts for 2 degree angle on the right side. That angle eliminate engine and propeller torque to the left...

More information and pictures about installation this engine mount on the model you will find in "Meister Scale P 47 - step by step" topic here on RC Universe...
Here is a link to the page where is describe this setting: http://www.rcuniverse.com/forum/m_10...18/key_/tm.htm For details check topic 446 on the link...
Regards
Mirce
Plate was made from steel and all spacers are from aluminum.
In set are three spacers sets:
- 6 pieces aluminum spacers for back plate side and on this spacers we made big washers for larger contact surface on the fire wall
- 4 pieces aluminum spacers which come between engine plate and engine.
- 4 pieces aluminum sparers for cowl.
Between engine plate and spacers to the engine, we made 4 steel two piece parts for 2 degree angle on the right side. That angle eliminate engine and propeller torque to the left...
More information and pictures about installation this engine mount on the model you will find in "Meister Scale P 47 - step by step" topic here on RC Universe...
Here is a link to the page where is describe this setting: http://www.rcuniverse.com/forum/m_10...18/key_/tm.htm For details check topic 446 on the link...
Regards
Mirce
12-19-2012 | 03:50 AM
#19
Senior Member
Joined: Aug 2009
Posts: 420
Likes: 0
Received 0 Likes
on
0 Posts
From: Gunton, MB, CANADA
Good morning mirce. The panel lines and rivets look great. Truly a dedicated craftsman. How many hours do you think it took you, to apply all the lines and rivets on the P-47? Also, did you make the engine mount yourself?
Have a wonderful day!
Have a wonderful day!
12-19-2012 | 10:42 AM
#20
Thread Starter
Hello Kevin,
to be honest I invest a lot of time to rivets. I add between 45000 - 50000 rivets on Meister P 47. I try to made every row, like on real Thunderbolt.
Panel lines was made much faster. I checked now my topic, so I start adding panel lines at April 07.
That part of topic is here: http://www.rcuniverse.com/forum/m_10...15/key_/tm.htm from post 367 - 455
Now I looking dates on my topic, from panel lines to first color it need two and a half months.
OK, I'm not working just that, I was on Top Gun in mean time, but you need for sure few weeks, to work few hours a day, to apply all rivets, screws and all other detail. A lot of time was spent on measuring...
Regards
Mirce
12-19-2012 | 08:28 PM
#21


My Feedback: (73)
Joined: Mar 2002
Posts: 300
Likes: 0
Received 0 Likes
on
0 Posts
From: Inverness Fl
Hi Mirce, its John from Top Gun. How are you? Still have my set but the plane is not ready yet. Are you planning to attend TG next year?
12-20-2012 | 09:51 AM
#22
Thread Starter
Hello my friend, glad to hear you.
I'm nor sure about coming on Top Gun 2013, probably no.
As you know, right now I'm working on my new jet model Galeb G2 in 1/5 scale, but next will be same model in 1/4 scale. That bigger will be great model for Top Gun, maybe at 2014...
We will see, only if we survive the next day ...
...
Finish set, you have, will be good when come time to use it on model you work on. Vinyl can stay in same condition for a long time...
All the best from Serbia
Mirce
I'm nor sure about coming on Top Gun 2013, probably no.
As you know, right now I'm working on my new jet model Galeb G2 in 1/5 scale, but next will be same model in 1/4 scale. That bigger will be great model for Top Gun, maybe at 2014...
We will see, only if we survive the next day
...Finish set, you have, will be good when come time to use it on model you work on. Vinyl can stay in same condition for a long time...
All the best from Serbia
Mirce
12-20-2012 | 10:13 AM
#23
My Feedback: (10)
Mirce,<div>
</div><div>I just acquired a plane that is painted in Warbird Colors, mostly blue but some white, but with no panel lines or rivets :-( </div><div>
</div><div>Any ideas on adding panel lines and rivets to the plane without repainting? I've thought about in black or a similar blue and then a clear coat? Maybe with some weathering first.</div><div>
</div><div>Whit</div><div>
</div><div>PS really like your sets!! </div>
12-20-2012 | 11:33 AM
#24
Thread Starter
Hello Whit, yes I have idea...
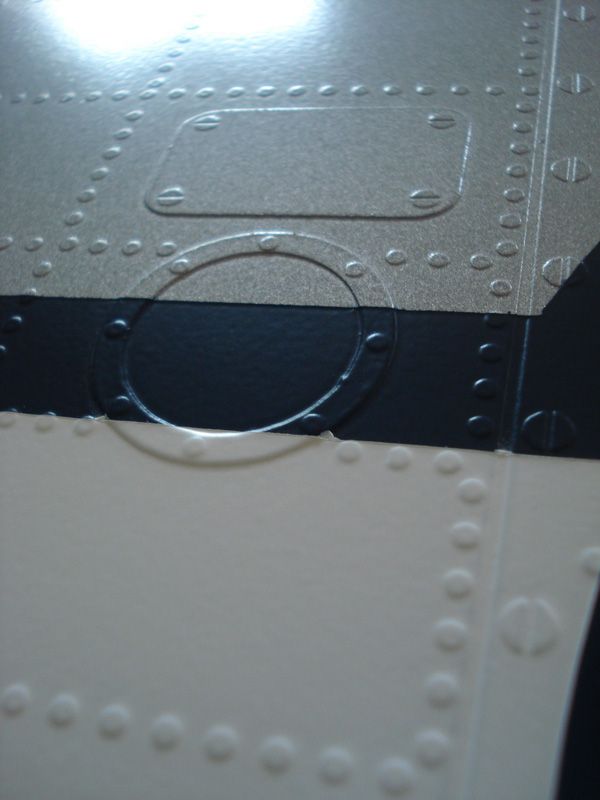
I can buy vinyl foils which is transparent, like glass, and of these foil I can made you all details. Because it's transparent, color from your surface will come trough rivets, lines and dummy screws...
When you make weathering dirt will stay around all details.
But, when you made panel lines first (before painting), you put panel lines on the surface apply filler and than take panel lines out from filler. In that case you get little channels - panel lines.
If you add vinyl lines after painting process, your panel lines will be above of the surface.
Vinyl lines and rivets are small, so I will proposed to put one layer of clear cote after you add details on model. That clear cote will add protective layer around these small details...
Regards
Mirce

