


Rebel Hot by Comp Arf
 10-04-2020, 10:59 AM
#651

My Feedback: (1)
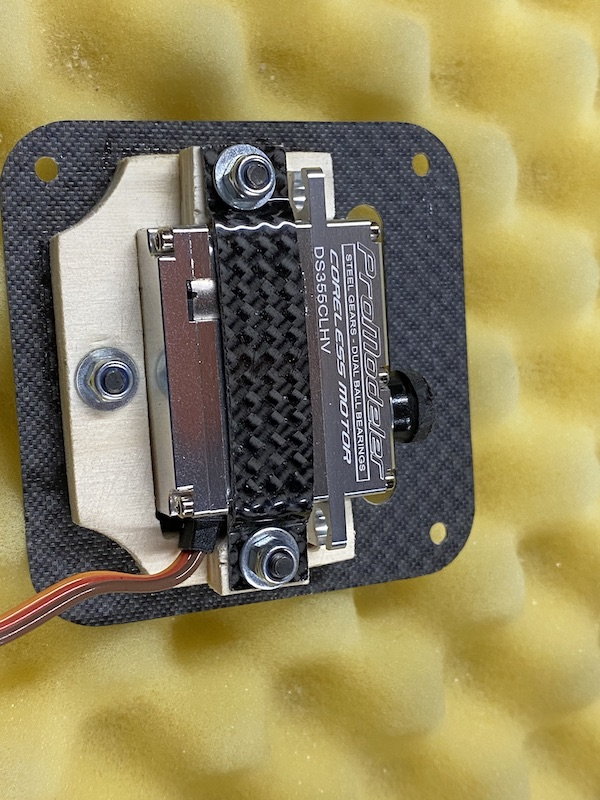
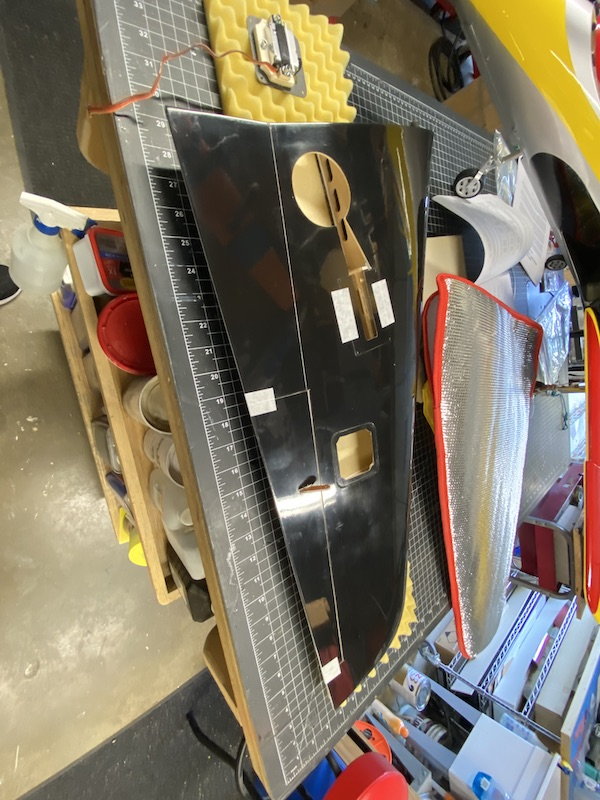
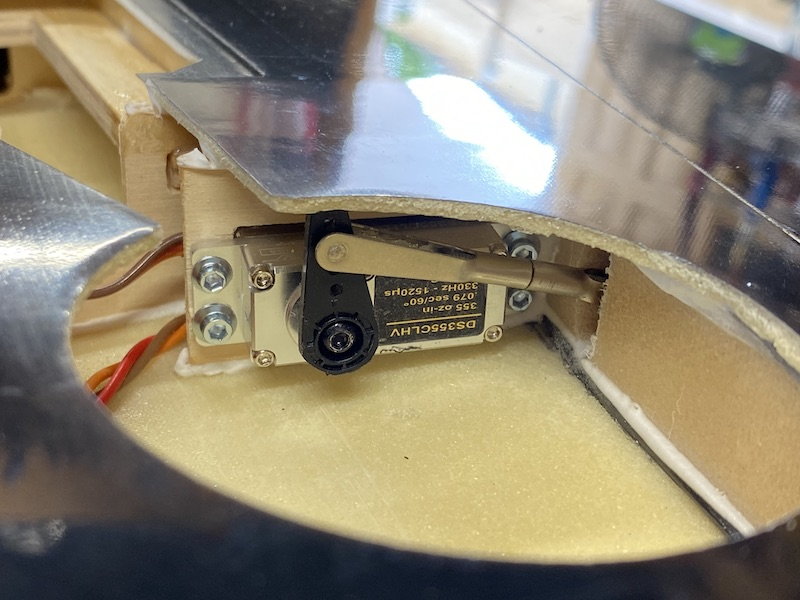
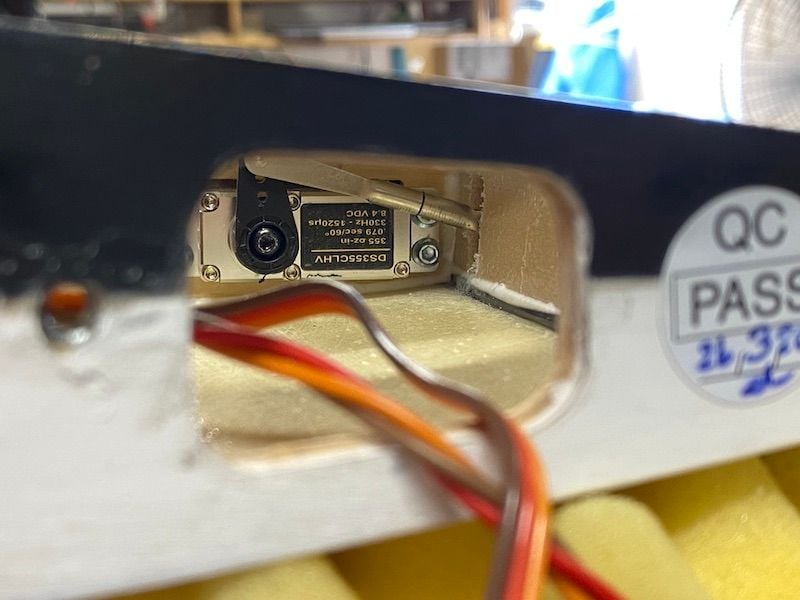
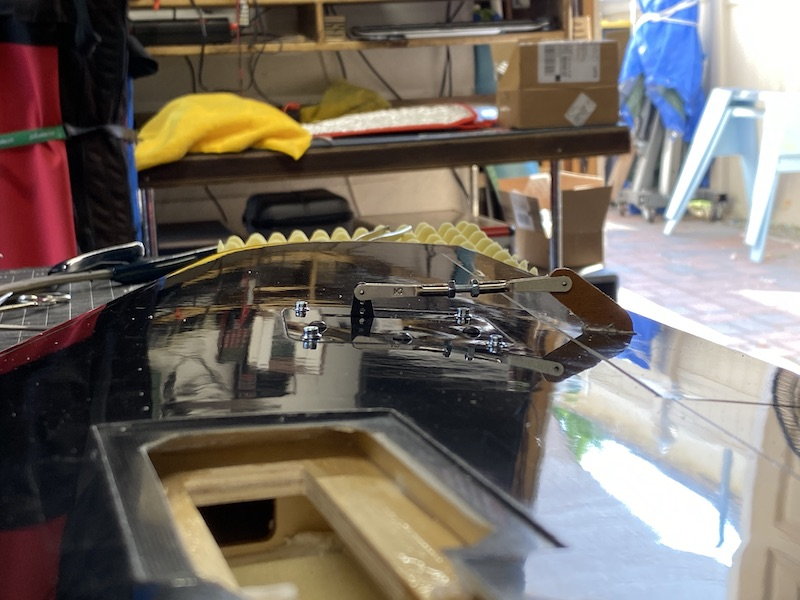
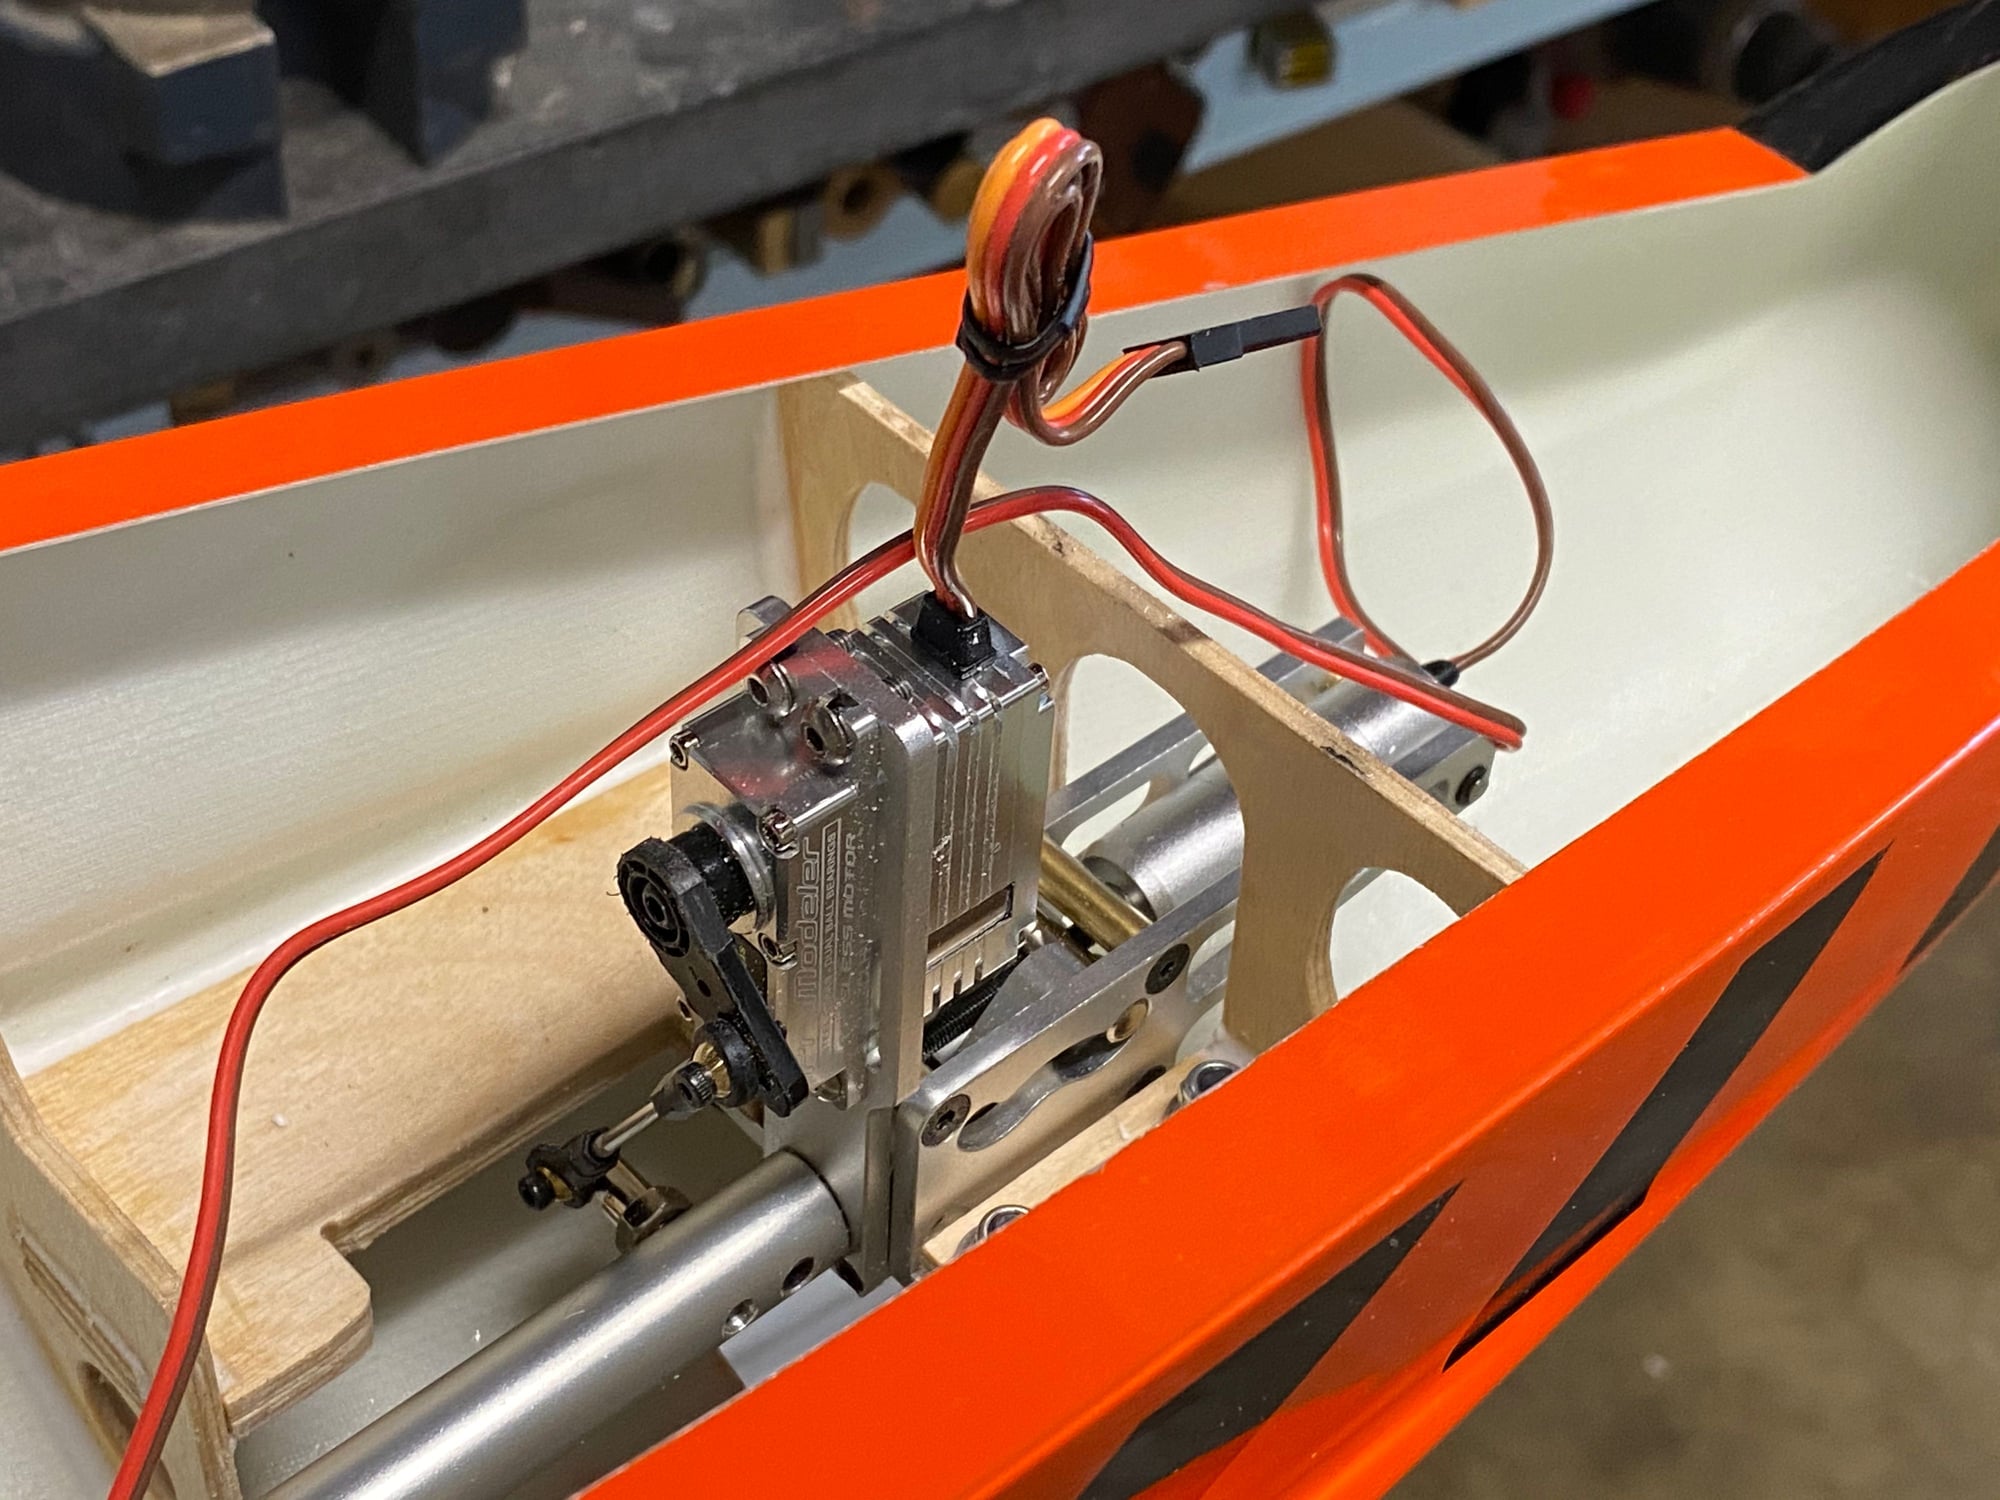
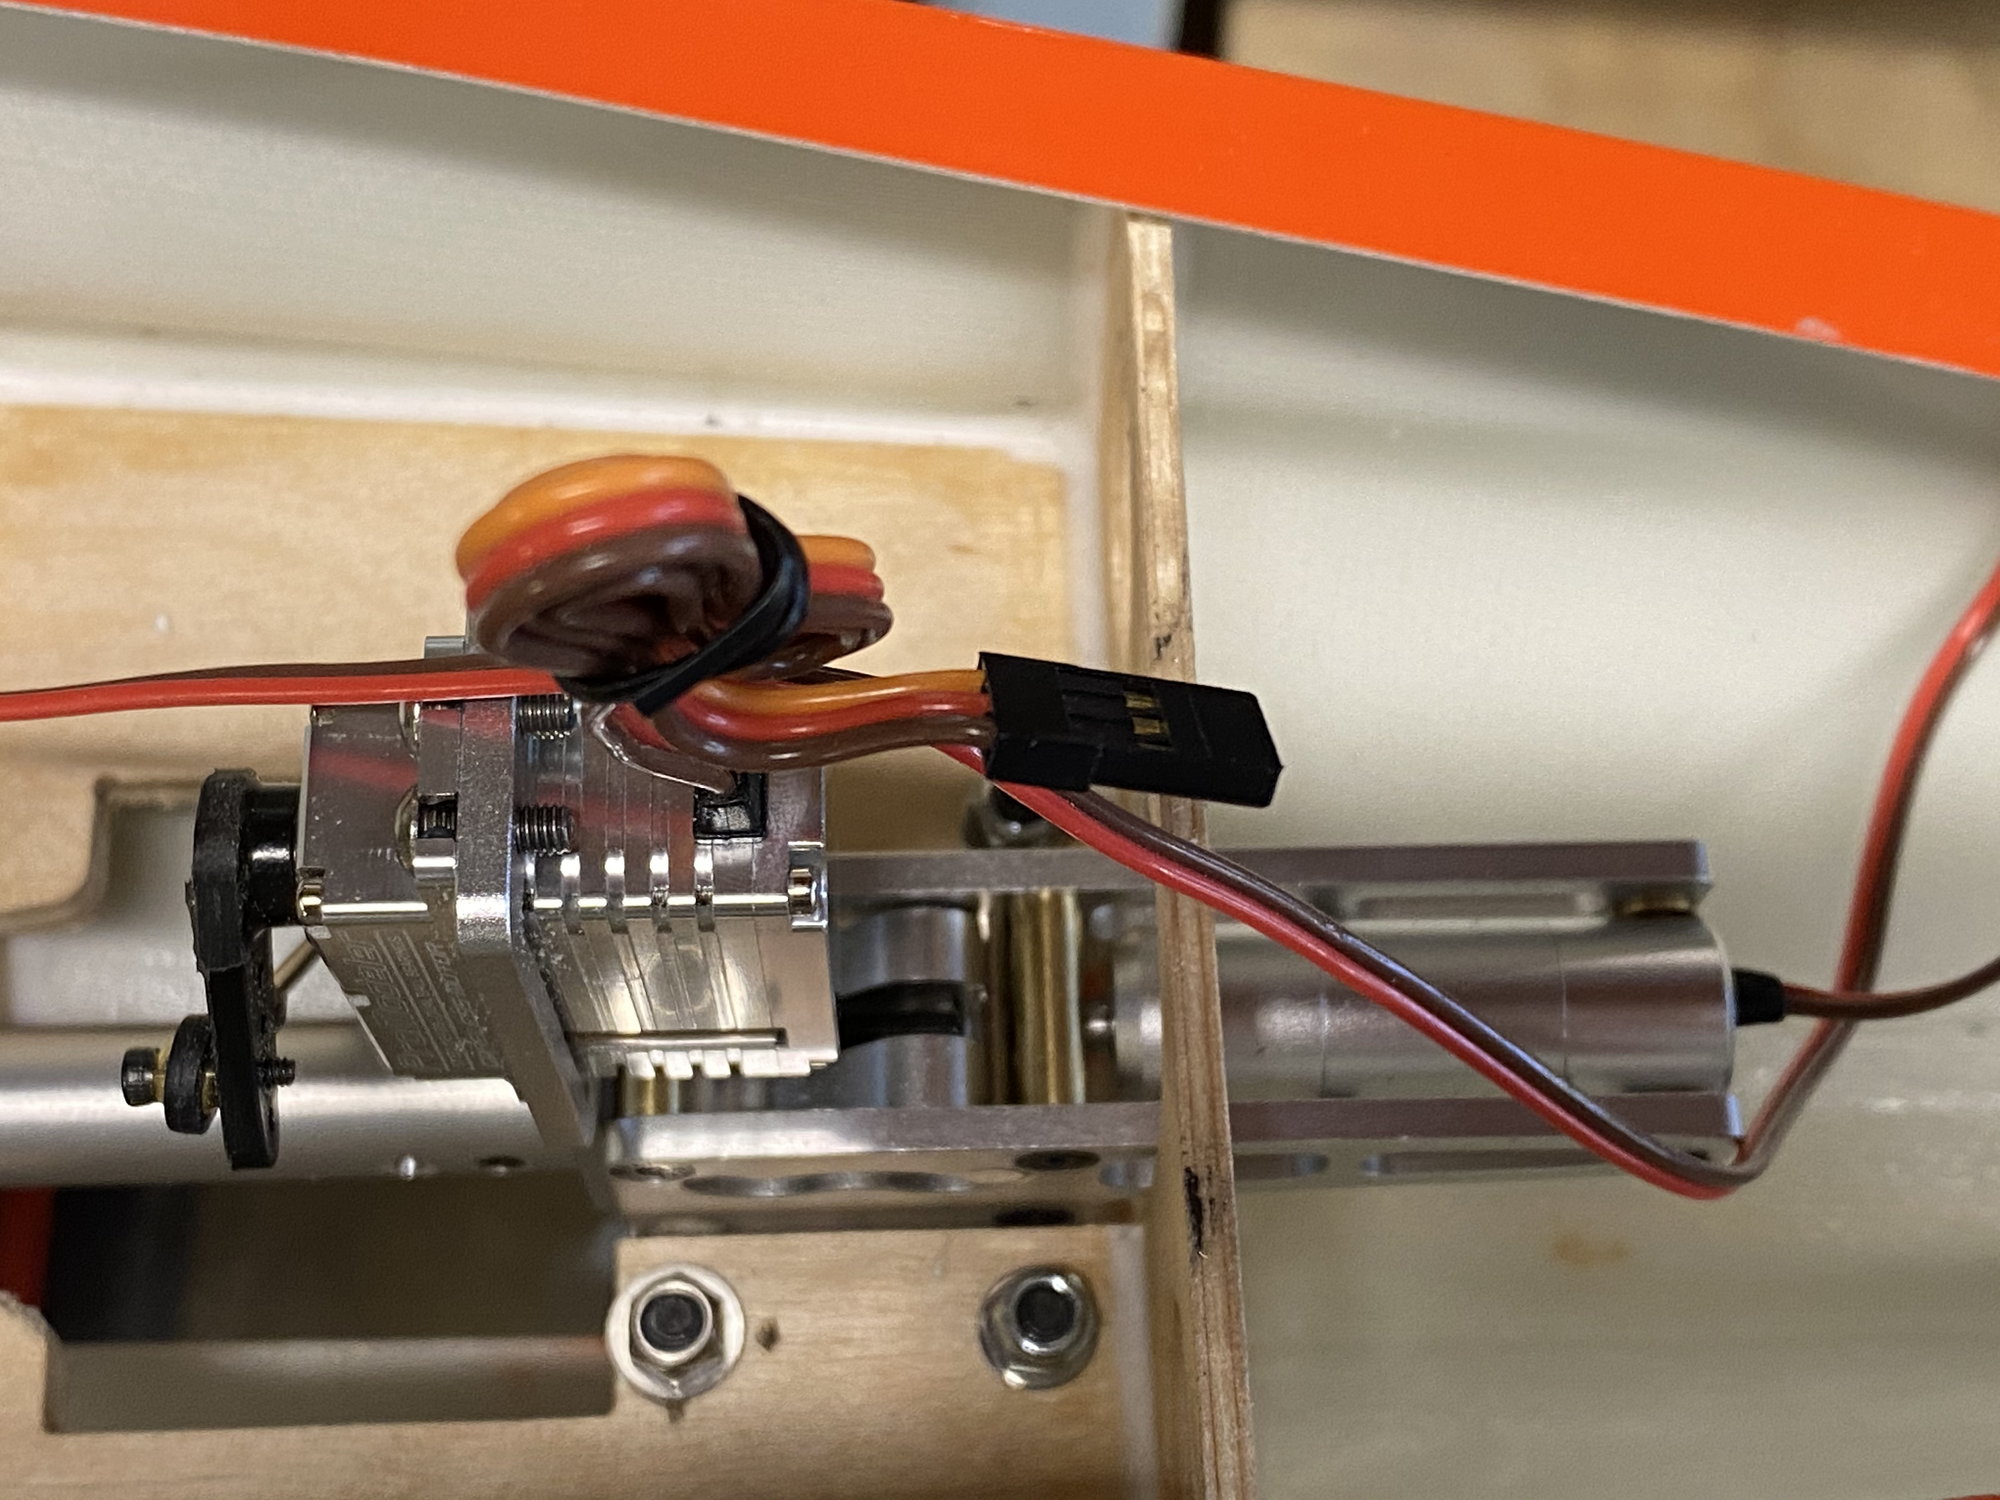
Making some progress on my wings. The aileron plate gets a little distorted from the screws.
The flap servo is a pain to install. You can see the clevis had to be back to back to get the correct length. In this months RJ Jets magazine the reviewer mention a 17mm arm and 60mm long push rod. I used about a 15mm arm and 55mm push rod.
What are folks using to hold the gear in? Instruction call for wood screws, but I'm thinking blind nuts and 3mm flat head screws.
I am using ProModeler servos all around, model 355.
 10-06-2020, 07:15 AM
#653
My Feedback: (1)
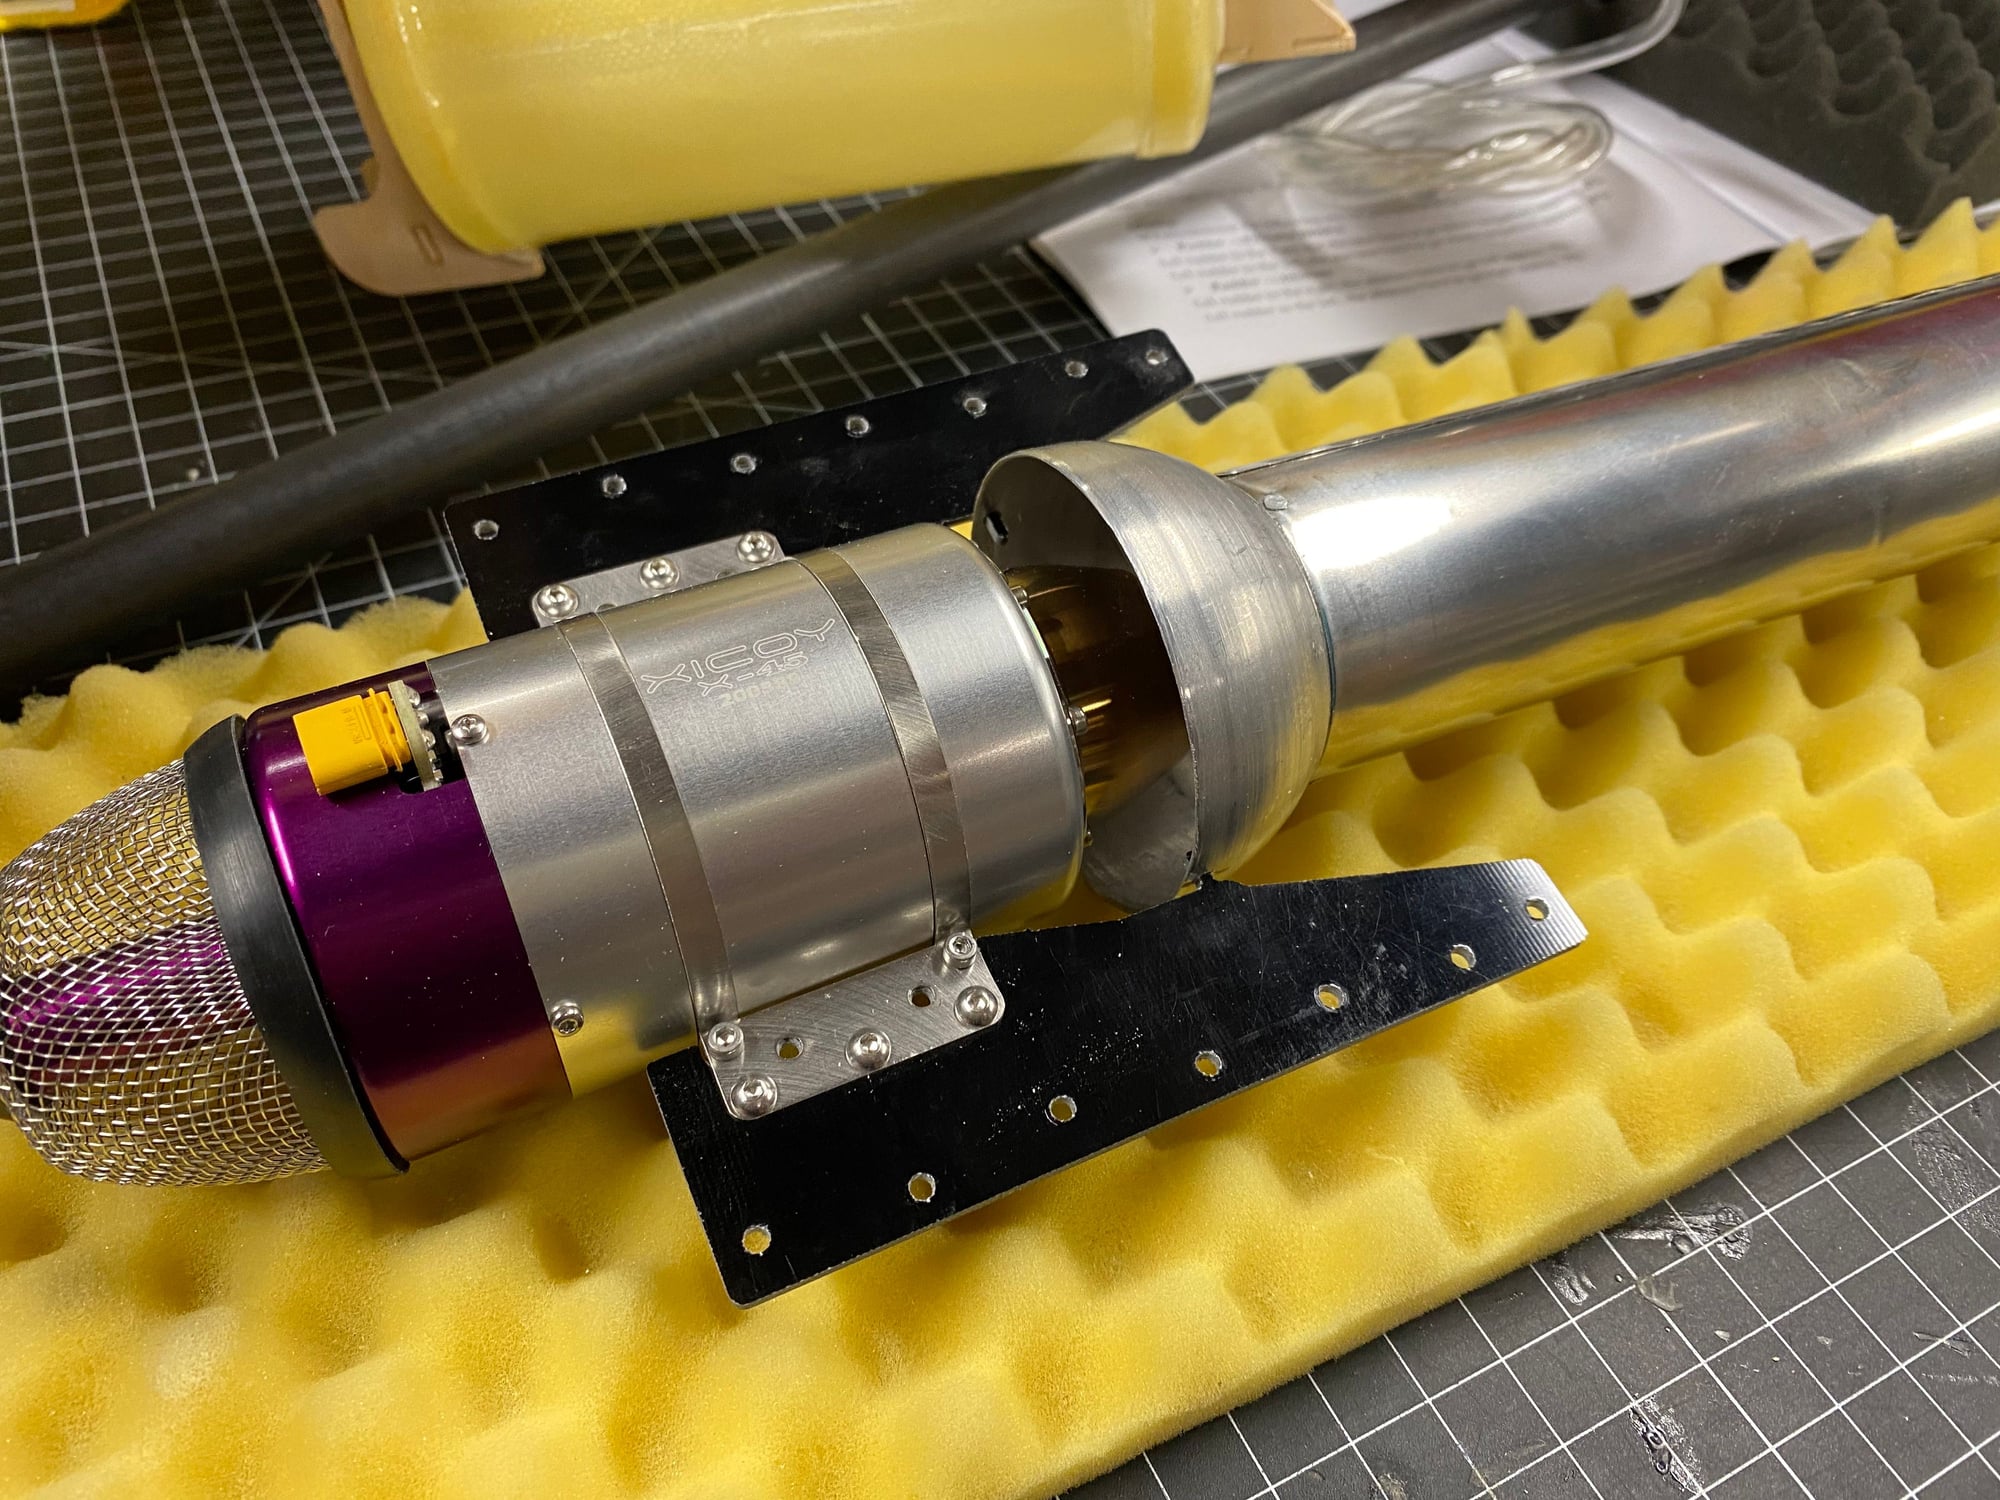
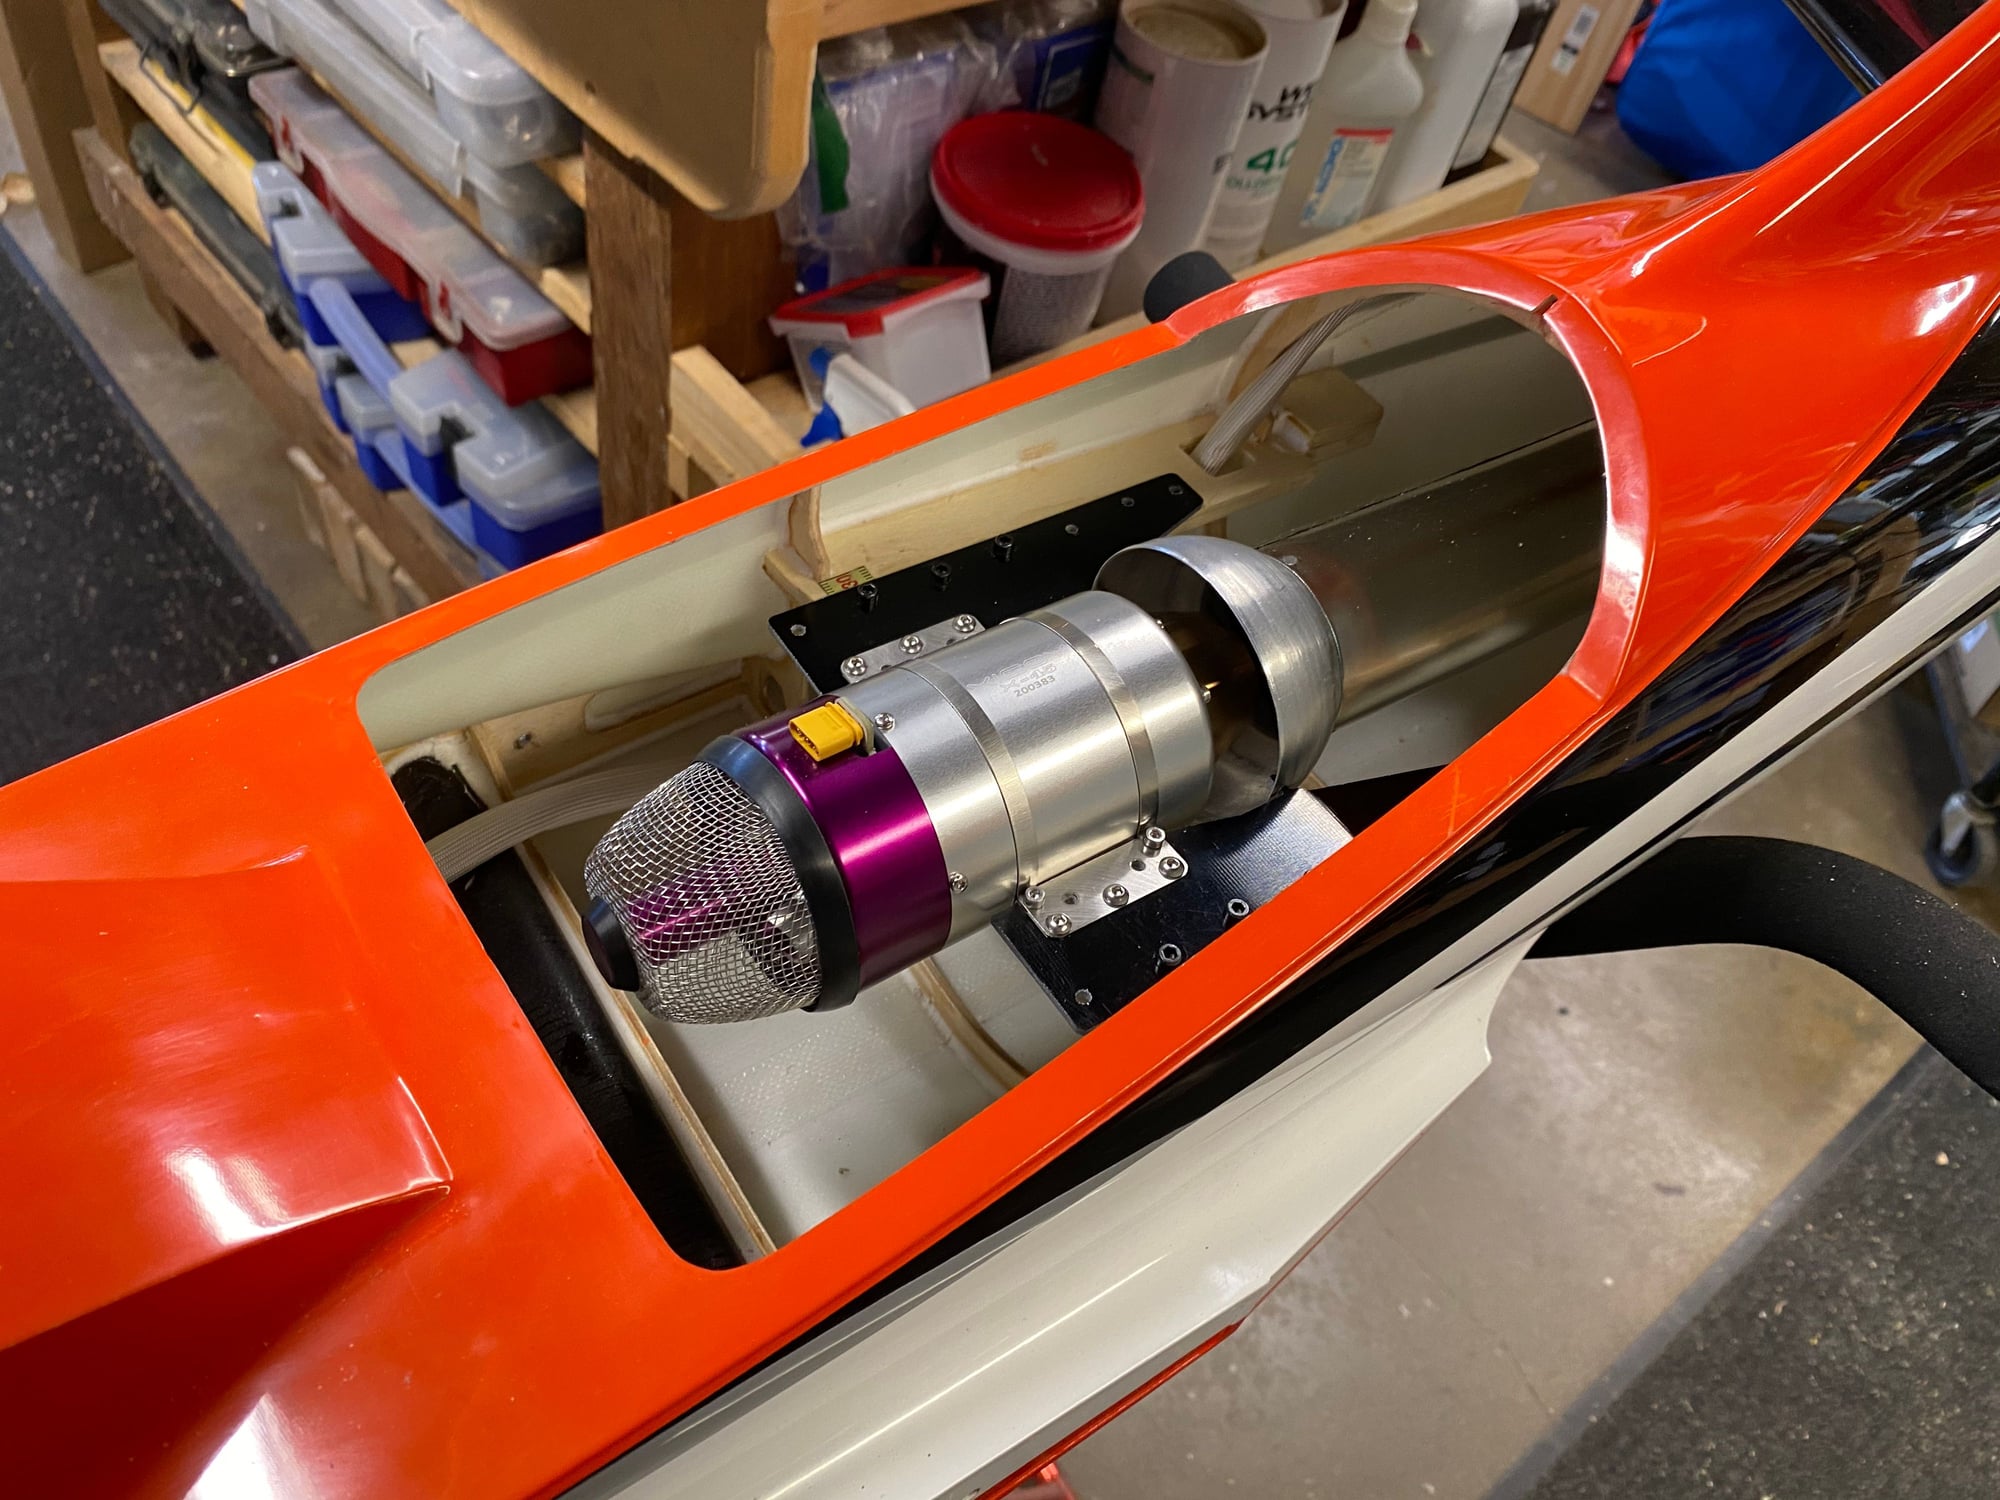
I noticed the HAB pipe is longer than the stock CARF pipe. I think it is this way so the X45 can be mounted forward. The HAB pipe is 1/2 the weight of the CARF pipe.
Are there any issues with using a single wall pipe? Will it melt the fuselage? Or is enough air pulled over it for cooling?
Here are three pipes, the HAB is the longest and lightest at 90g. The Grumania is 200g, has a bigger inside diameter than the HAB and a little shorter. The CARF pipe is massive compared to the others but is a little lighter than the Grumania.
Thanks
Last edited by jvaliensi; 10-06-2020 at 07:25 AM. Reason: add photos
The following users liked this post:
jcpl (06-16-2021)
10-17-2020, 04:48 PM
#658
My Feedback: (3)
Just received confirmation that my color swap Hot has arrived at the US port warehouse
Just sent payment to CARF and an email to Hab.se about X45 install kit stock status and shipping.
Need to wait for X45 to be in stock again and order tank/retracts and servos.
But I'm waiting until I receive the plane and make sure everything is ok first
Just sent payment to CARF and an email to Hab.se about X45 install kit stock status and shipping.
Need to wait for X45 to be in stock again and order tank/retracts and servos.
But I'm waiting until I receive the plane and make sure everything is ok first
10-18-2020, 07:21 AM
#659
My Feedback: (1)
Hi,
I noticed most folks mount the UAT on top of the slanted section of fuselage directly in front of the turbine. I was thinking to mount mine on the underside near the side of the fuselage. I have a small Inairco trap and it will fit there.
Is there a reason to not do this?
I noticed most folks mount the UAT on top of the slanted section of fuselage directly in front of the turbine. I was thinking to mount mine on the underside near the side of the fuselage. I have a small Inairco trap and it will fit there.
Is there a reason to not do this?
10-18-2020, 09:29 AM
#660
My Feedback: (1)
Progress photos-
I find it helpful to see how others are putting their together.
I just ball clevis and a Hitech servo arm for the rudder.
I needed to round off the corners of the front gear mount to get the steering to clear.
I used 4mm bolt and nuts instead of wood screws to hold the front gear in.
CM light weight tank 1.2l
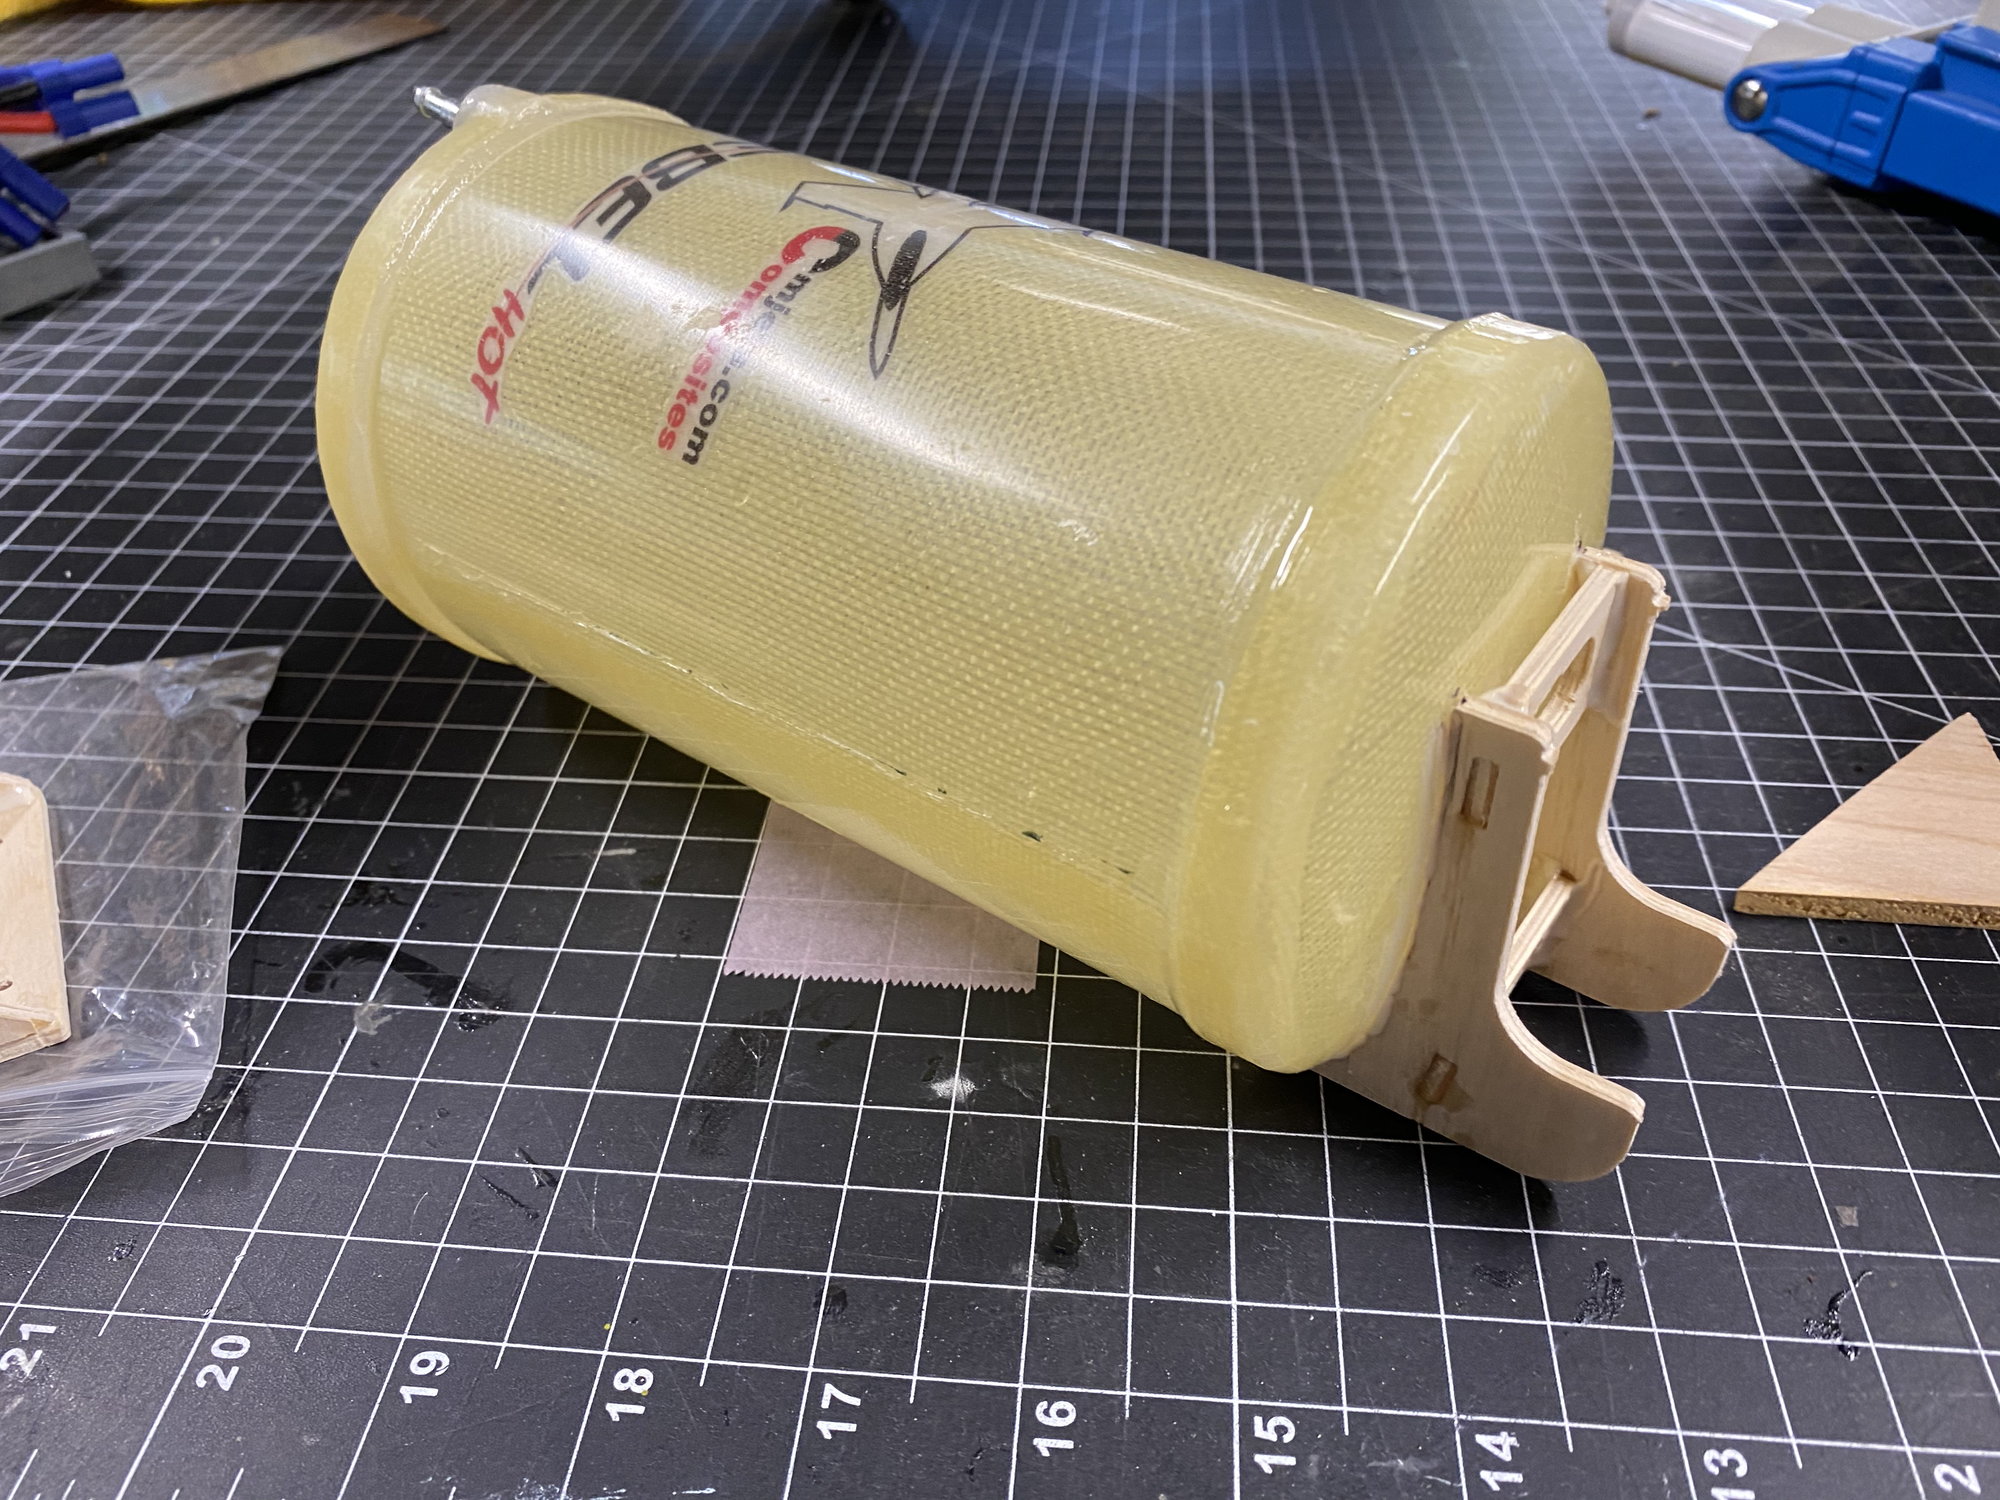
The front mound had to be re-profiled to match the tank
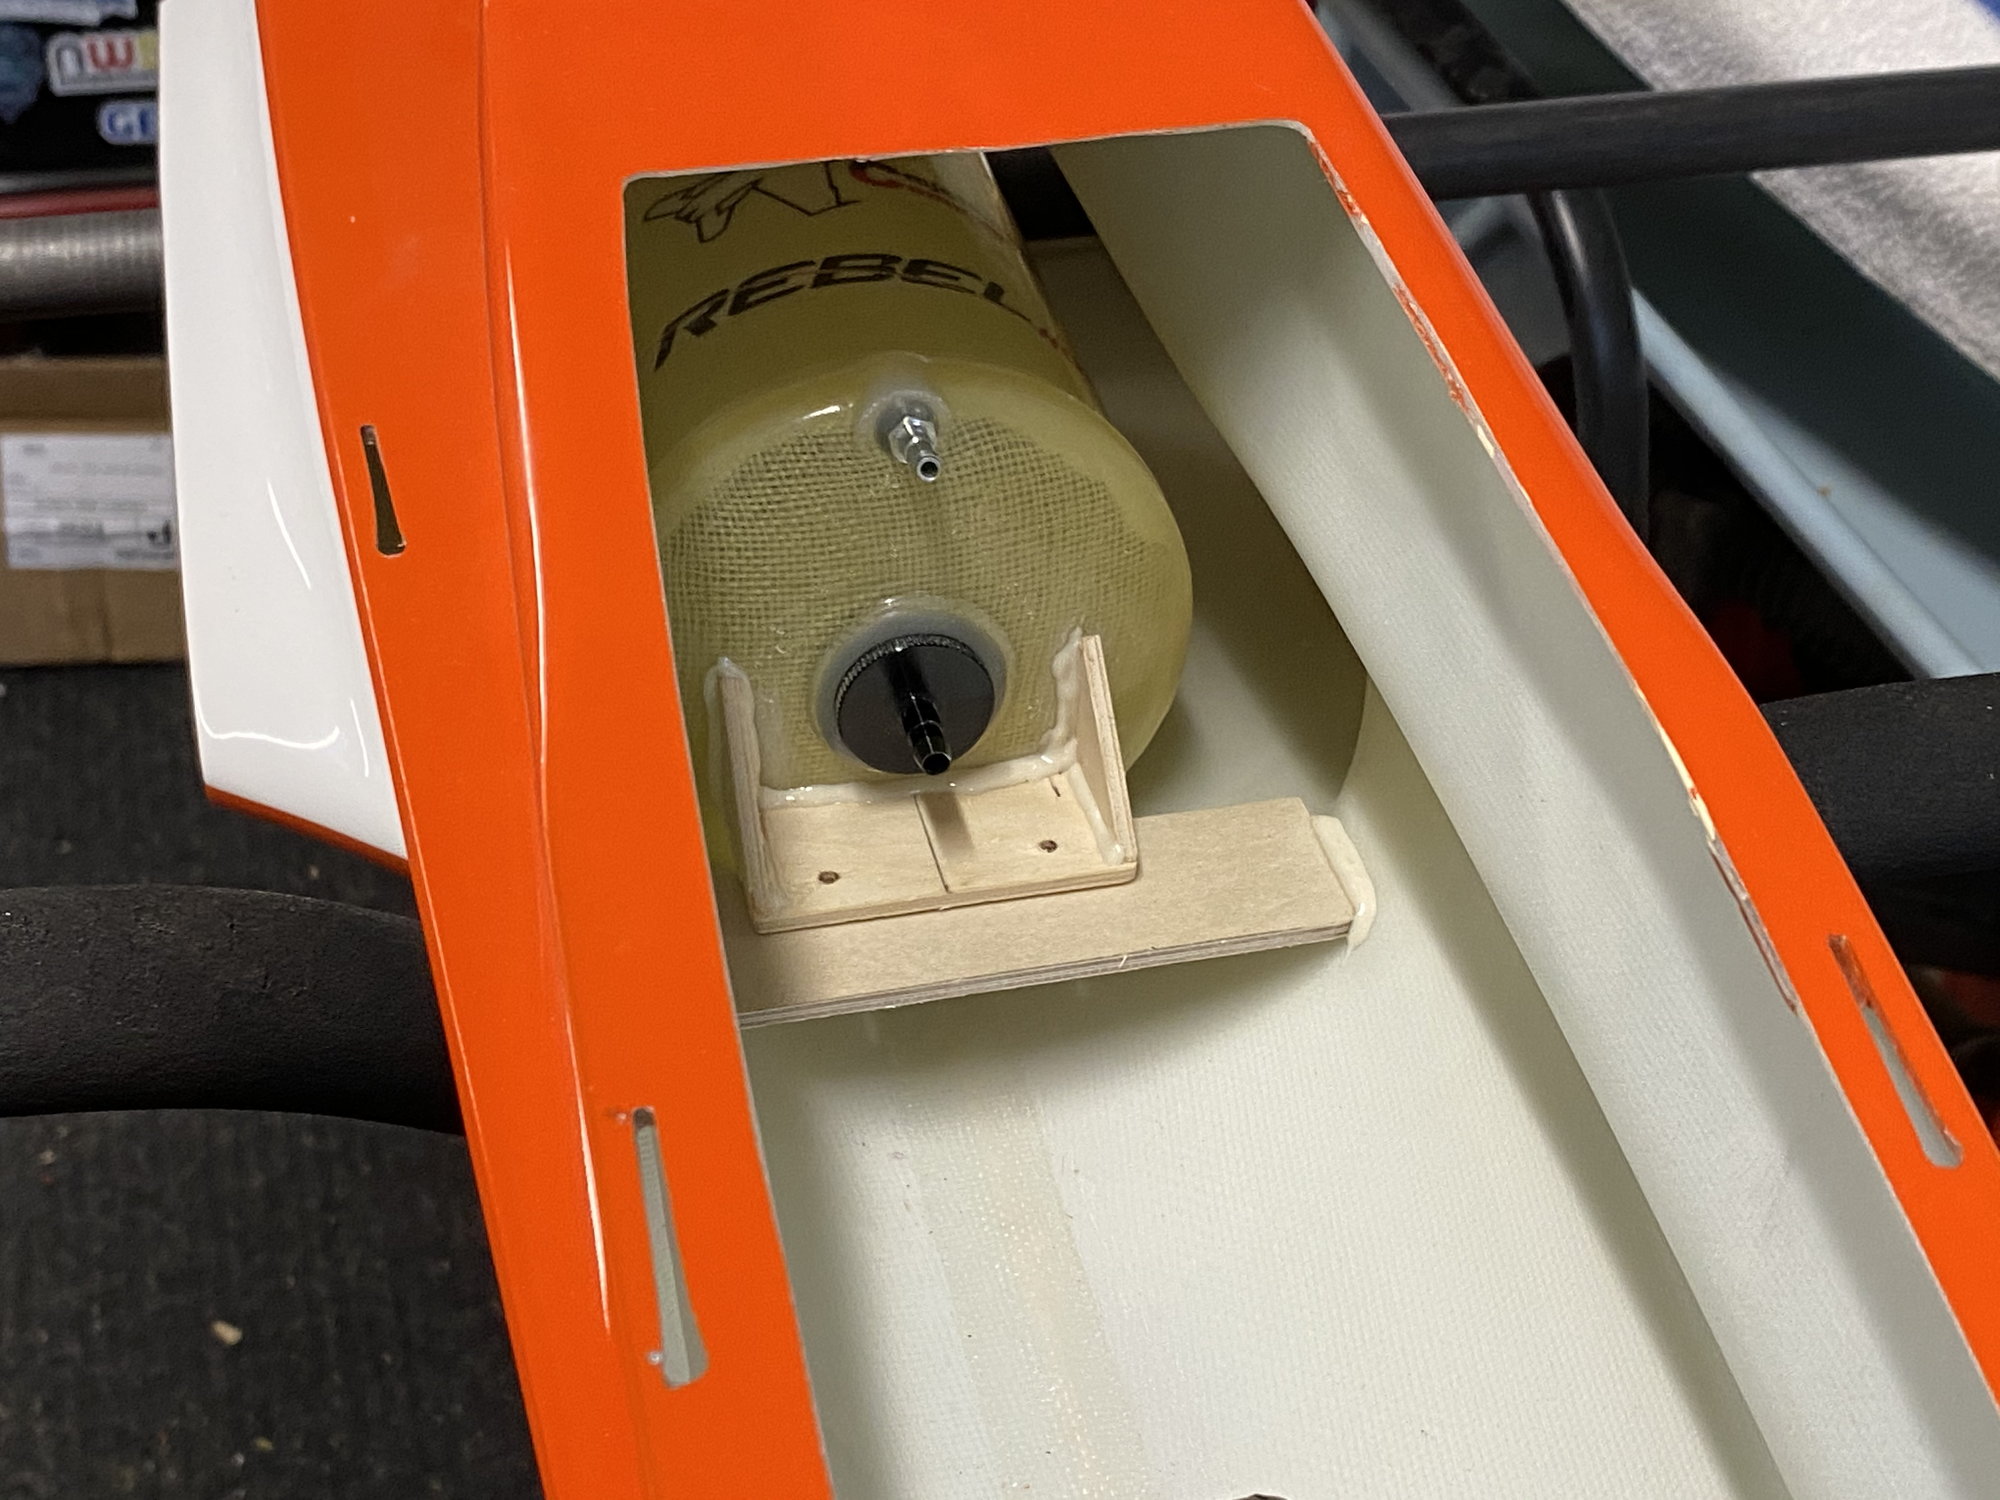
I needed to make a wider plate because the CM tank is much shorter than the stock tank.
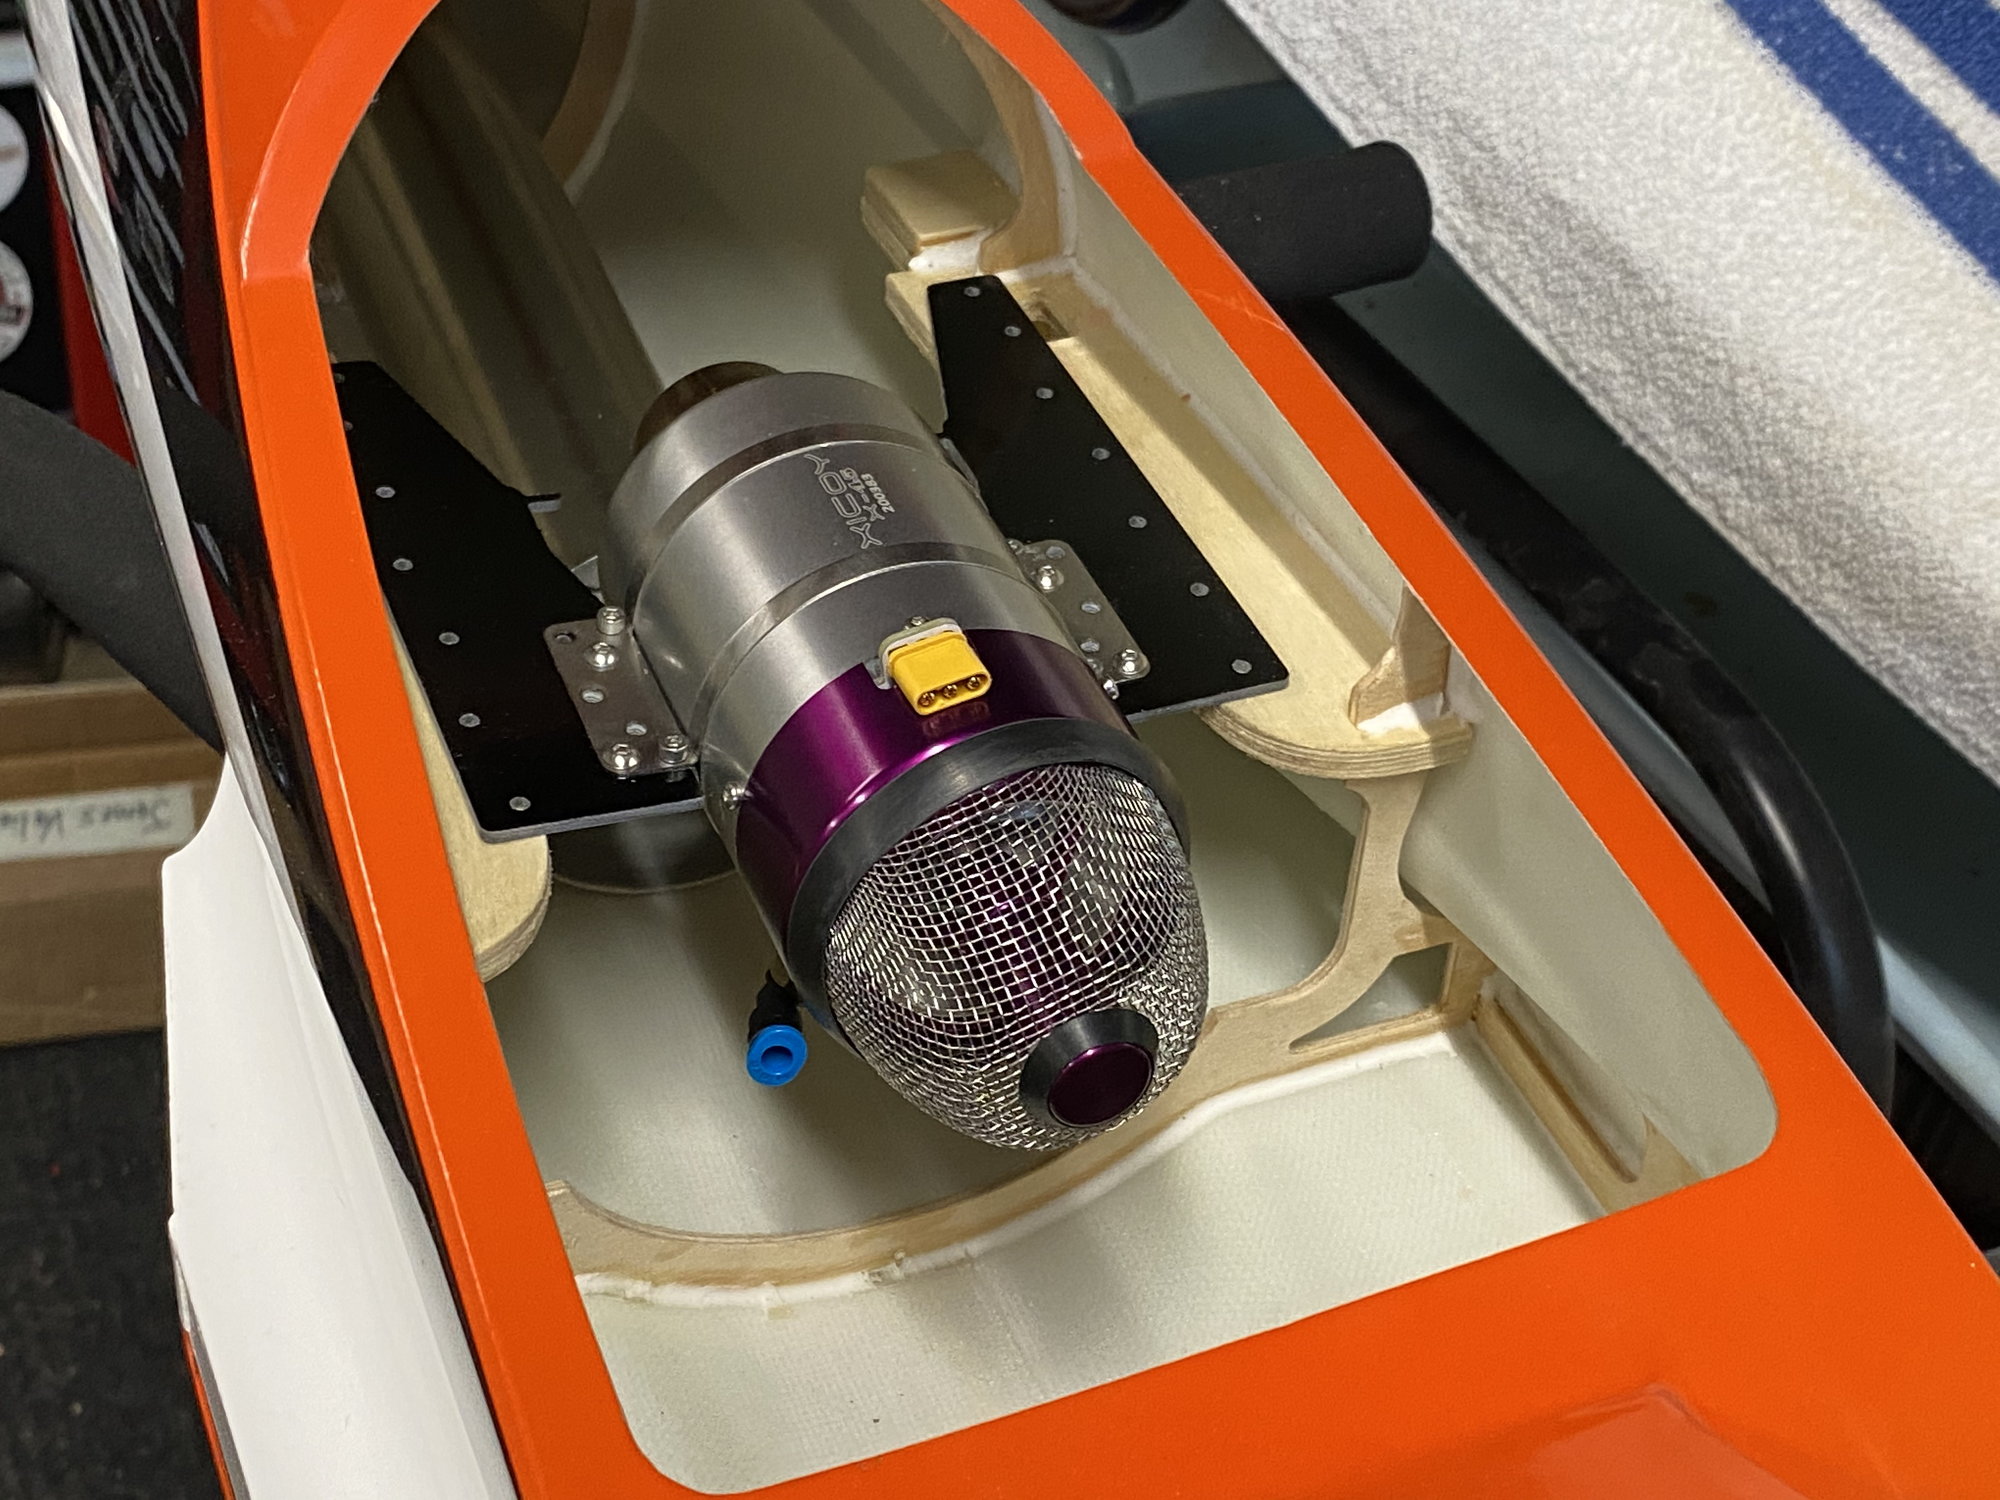
HAB kit for X45
I find it helpful to see how others are putting their together.
I just ball clevis and a Hitech servo arm for the rudder.
I needed to round off the corners of the front gear mount to get the steering to clear.
I used 4mm bolt and nuts instead of wood screws to hold the front gear in.
CM light weight tank 1.2l
The front mound had to be re-profiled to match the tank
I needed to make a wider plate because the CM tank is much shorter than the stock tank.
HAB kit for X45
10-19-2020, 10:55 AM
#661
My Feedback: (1)
Here is a tip for builders.
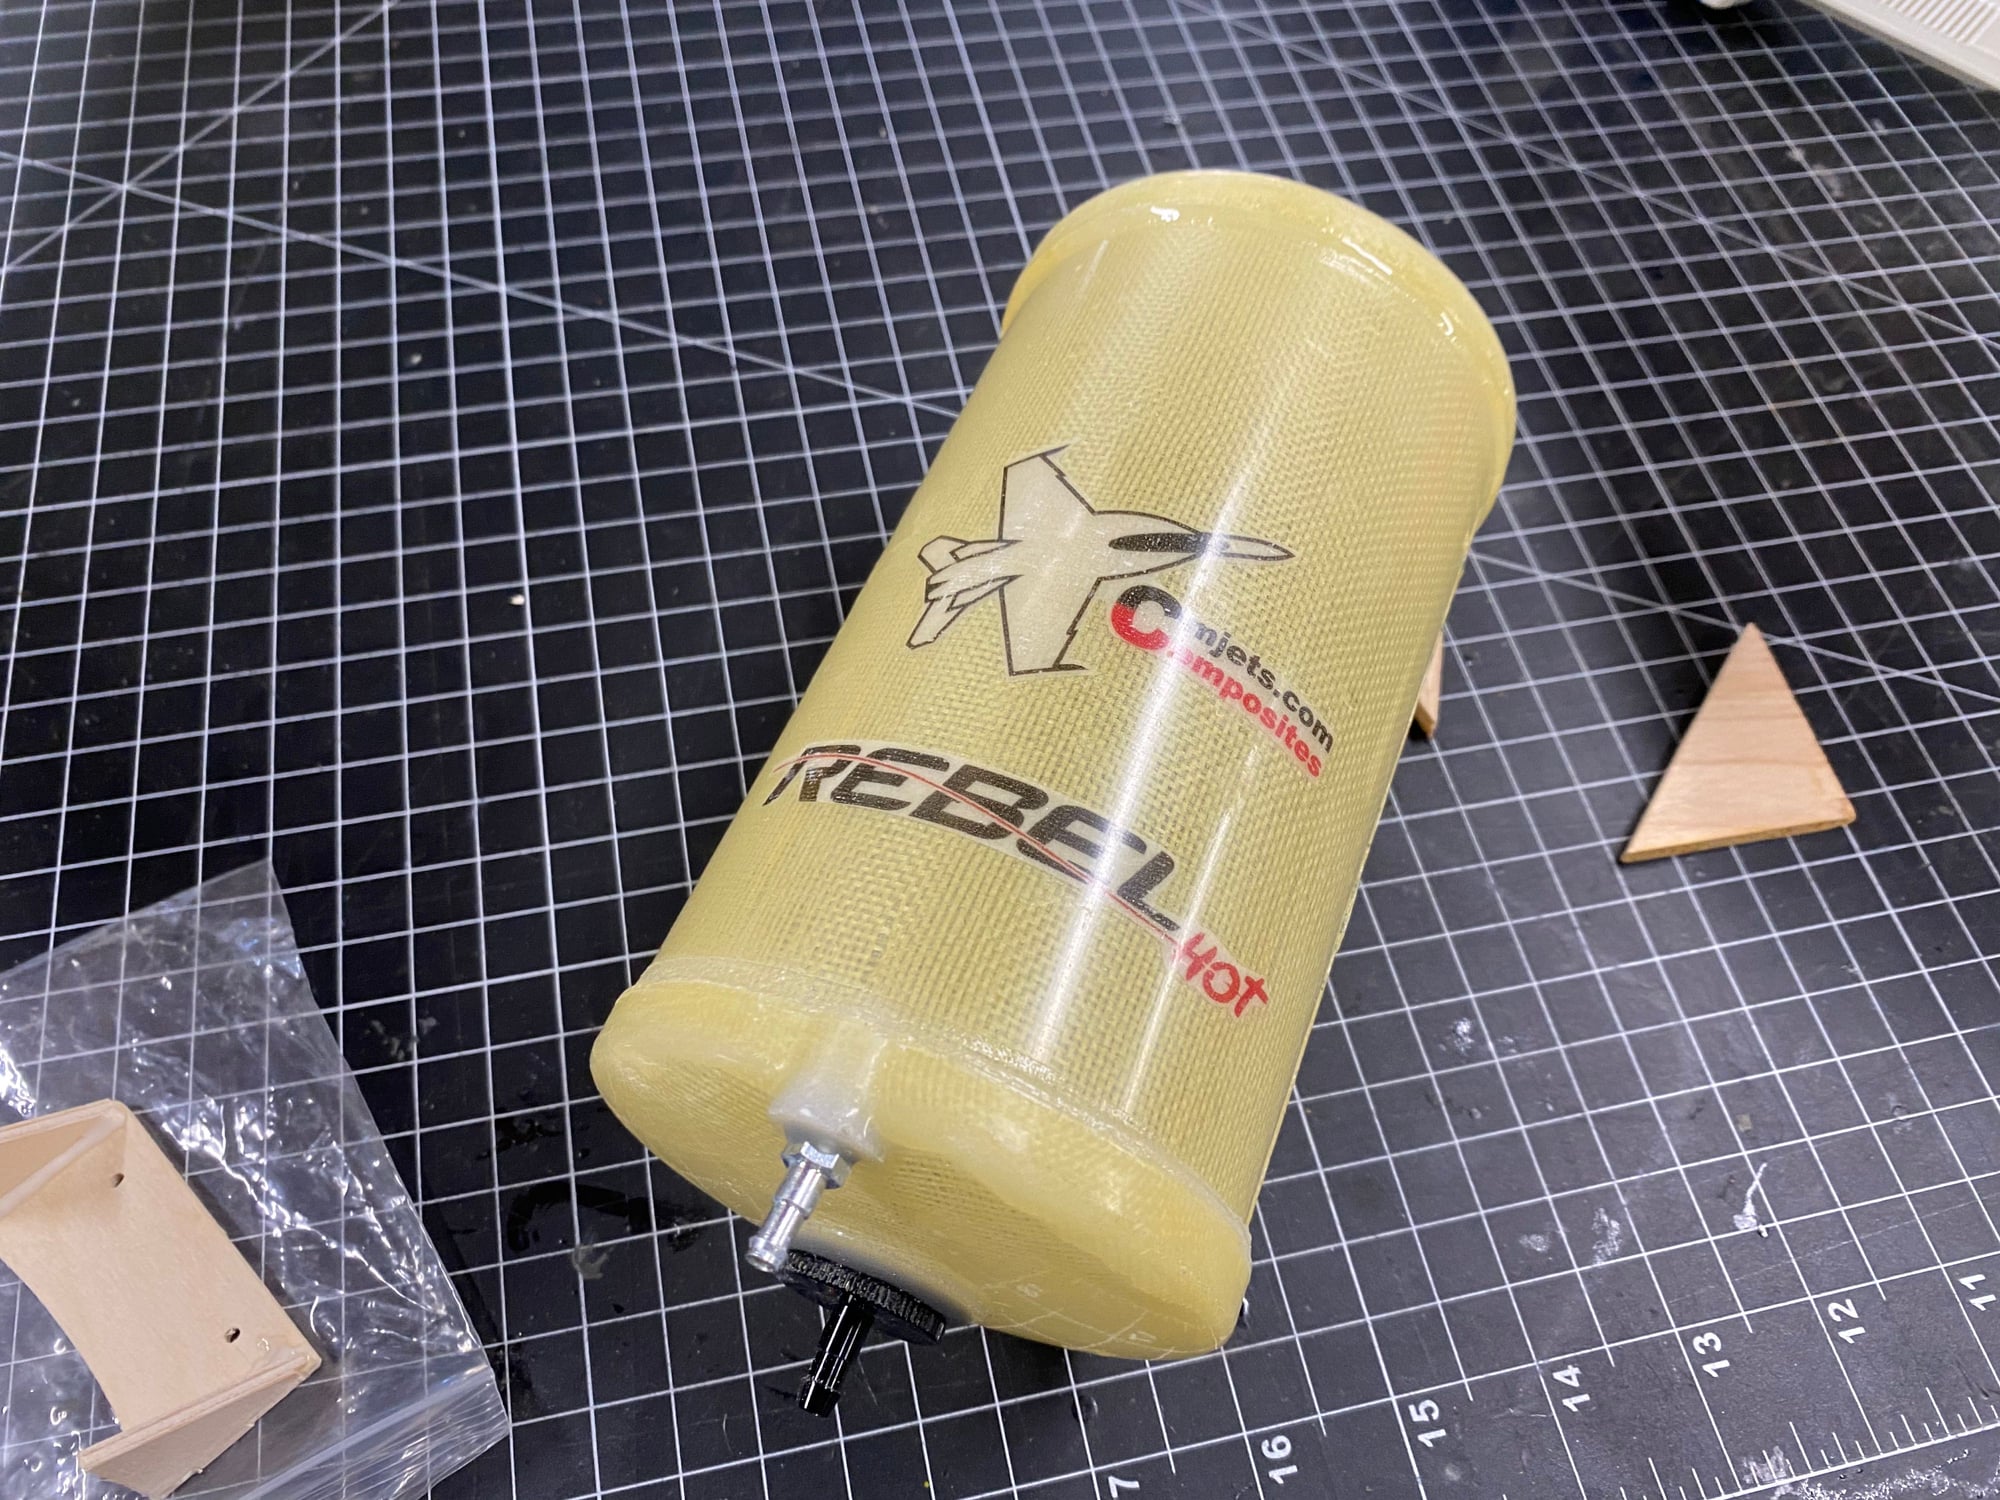
I got a beautify tank from Carlos at CM Jets.
I decided to put a felt clunk in it. When I pulled the clunk assembly out I discovered there was moisture inside the tank. Apparently, Carlos didn't use stainless-steel wire for the tubing clamps, because the wires were all corroded. I think the moisture got in the the tank as condensation somewhere along the line, it has been very dry here in California - I don't know about Spain or the shipping route.
So, I added my felt clunk and re-did all the safety wire with stainless-steel.
Check everything (twice).
 10-19-2020, 01:49 PM
#663
My Feedback: (1)
I did a smell test and there was no odor. I assume it was water. I thought, too that it may have been a rinse to clean the tank.
The corroded wire was a surprise. I bought, what surely will be a life time supply from Chief Aircraft for $12. It is made in USA and okay for use on certified aircraft (full size). I think if one went to another supplier, they may find that the stuff advertised as stainless steel, is not SS and will rust. Carlos's work looks impeccable, I wouldn't doubt he's the victim here.
The corroded wire was a surprise. I bought, what surely will be a life time supply from Chief Aircraft for $12. It is made in USA and okay for use on certified aircraft (full size). I think if one went to another supplier, they may find that the stuff advertised as stainless steel, is not SS and will rust. Carlos's work looks impeccable, I wouldn't doubt he's the victim here.
10-19-2020, 08:41 PM
#665


Progress photos-
I find it helpful to see how others are putting their together.
I just ball clevis and a Hitech servo arm for the rudder.
I needed to round off the corners of the front gear mount to get the steering to clear.
I used 4mm bolt and nuts instead of wood screws to hold the front gear in.
CM light weight tank 1.2l
The front mound had to be re-profiled to match the tank
I needed to make a wider plate because the CM tank is much shorter than the stock tank.
HAB kit for X45
10-20-2020, 06:12 AM
#666
My Feedback: (1)
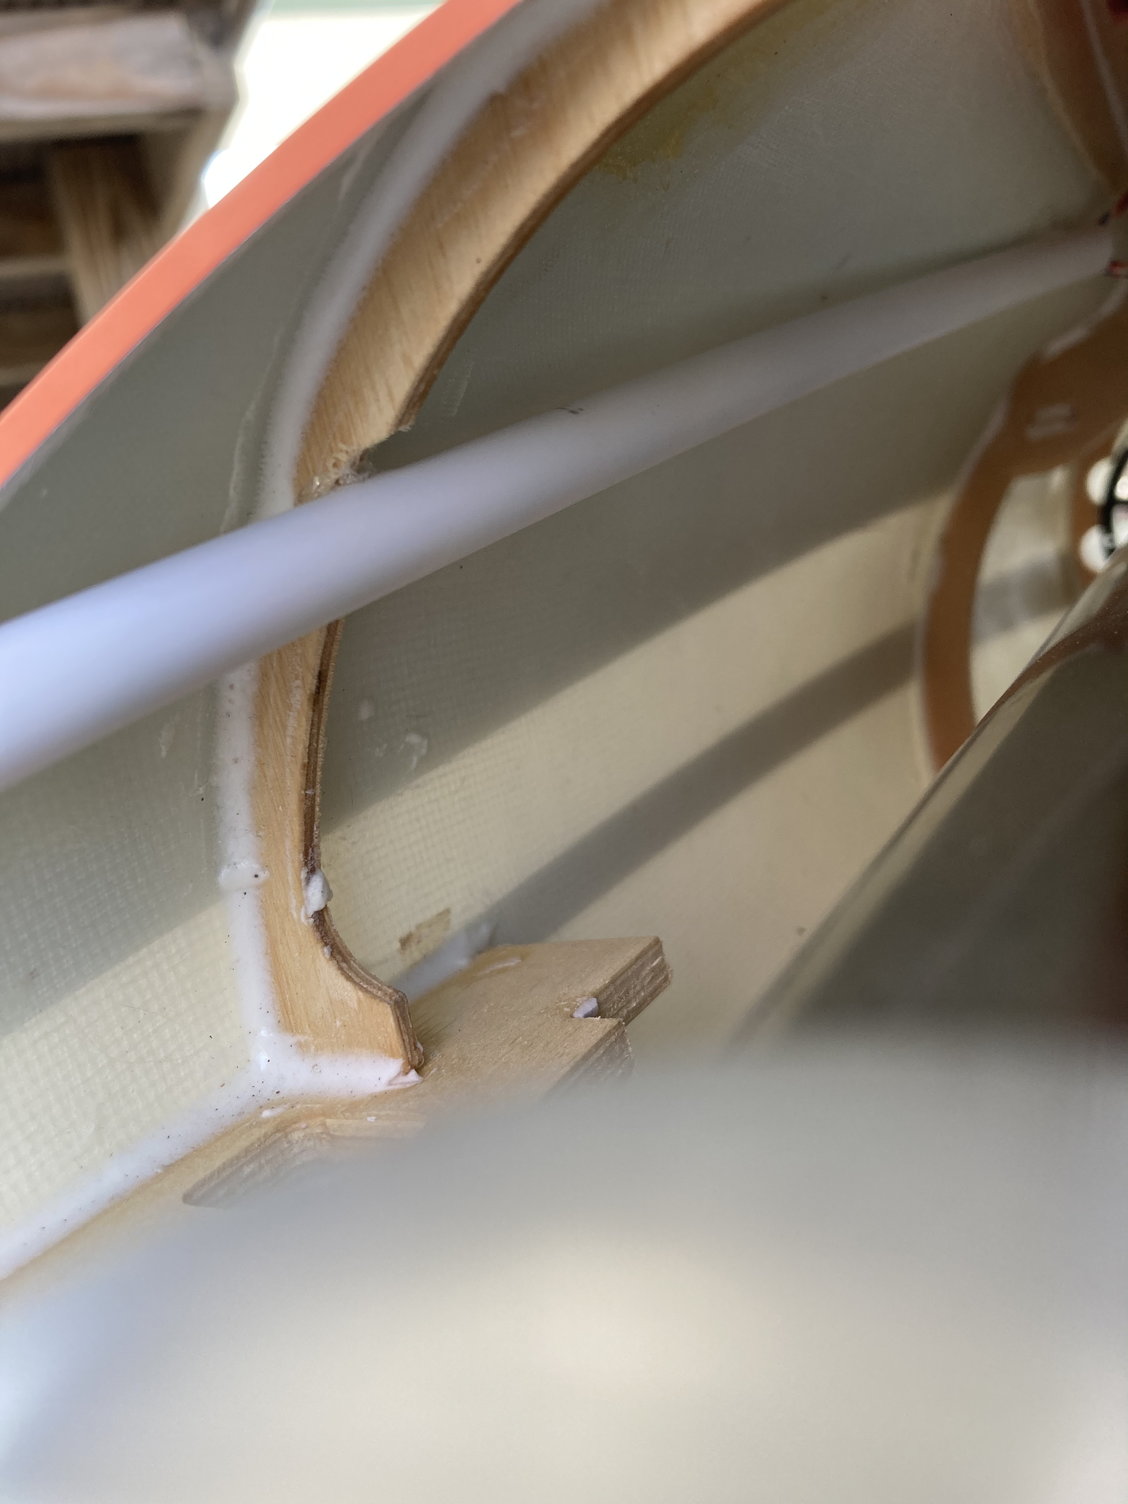
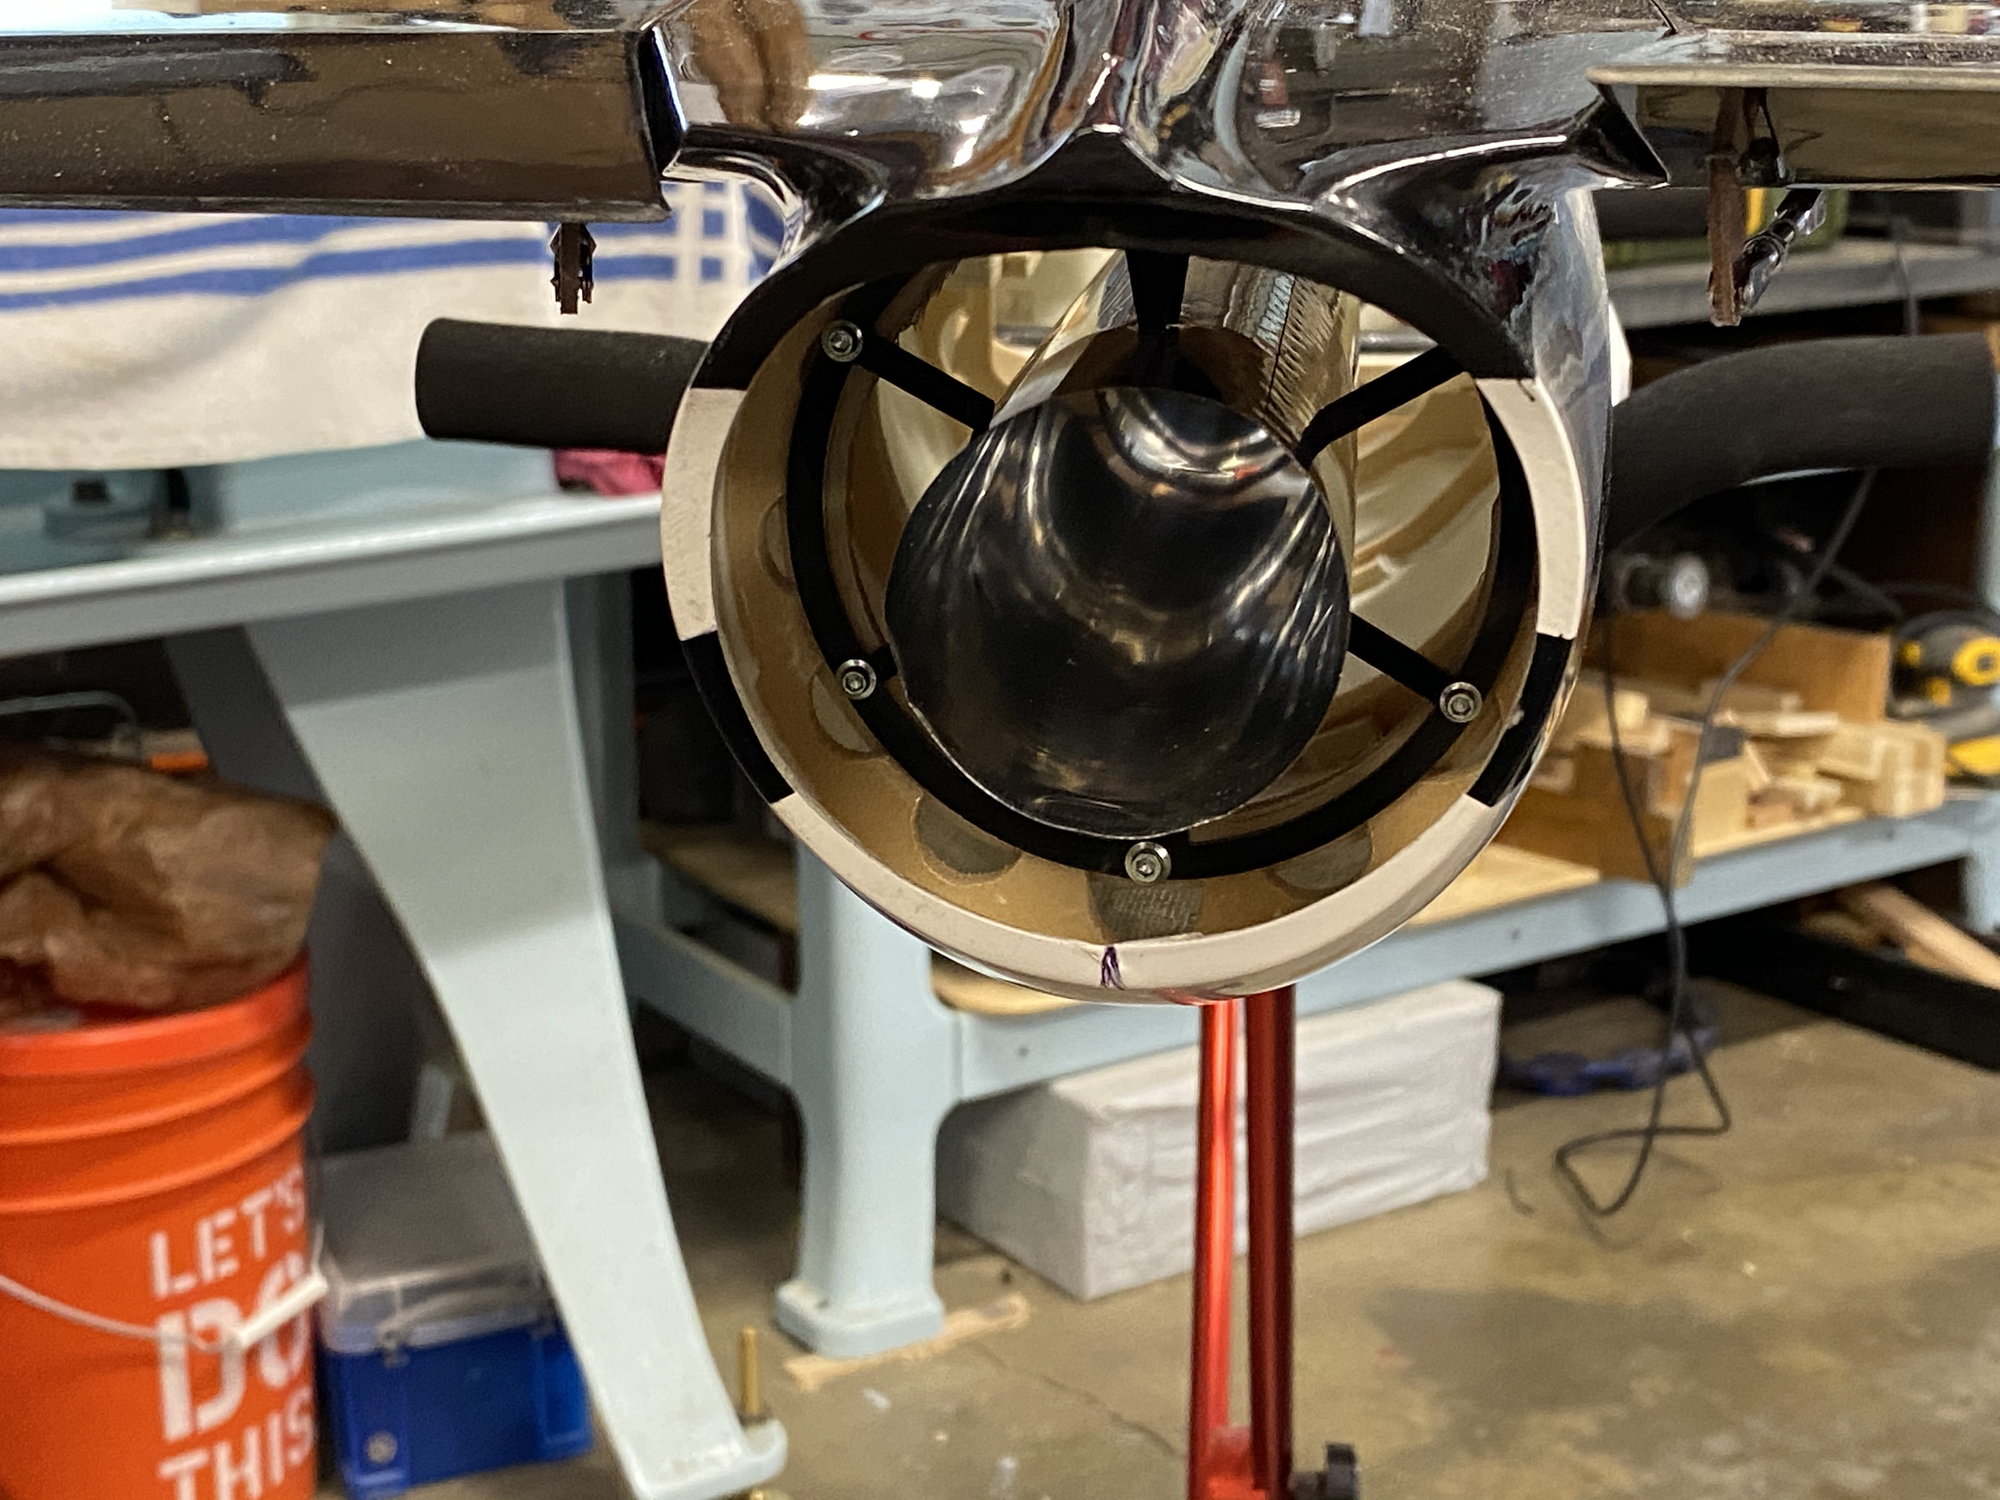
Putting the turbine is much more frustrating than it appears. I carefully aligned it and sighted down the fuselage with a string. Then screwed it down. Then I looked at the tail pipe and found it was pushed to one side. That means I drilled 8 holes in the exactly wrong spot.
Plus, how in the heck are you supposed to mount the HAB centering ring? It is a horrible design.
Plus, how in the heck are you supposed to mount the HAB centering ring? It is a horrible design.
10-20-2020, 06:25 AM
#667
Putting the turbine is much more frustrating than it appears. I carefully aligned it and sighted down the fuselage with a string. Then screwed it down. Then I looked at the tail pipe and found it was pushed to one side. That means I drilled 8 holes in the exactly wrong spot.
Plus, how in the heck are you supposed to mount the HAB centering ring? It is a horrible design.
Plus, how in the heck are you supposed to mount the HAB centering ring? It is a horrible design.
Also - keep in mind factory issues. I have found incorrectly installed formers and mounting plates before. That is sometimes the most frustrating because as you are trying to make things perfect, the last thing you want to see is the jet throw an imperfect curve ball. It is a bummer. I am actually dealing with this now on a new jet, the nose gear is not perfectly at 90 degrees. The mounting plate was not installed properly at the factory, so I am going to need to shim the retract. It is very frustrating.
Last edited by skunkwurk; 10-20-2020 at 06:48 AM.
10-20-2020, 07:04 AM
#668
My Feedback: (1)
HAB has sorted out the position of the pipe in relation to the turbine. Bob B post 591 show's the same set up. There is a 1/2" or so between the end of the turbine nozzle and end of pipe. It is less than I thought was needed but I believe Bob has had good success with it as it is.
I figured the formers in the fuselage are less than perfect and symmetrical.
10-20-2020, 10:35 AM
#671
Bob, I see you opted to install the seam of the pipe downward. I believe common guidance has been to install the seam upwards, in case there is some type of leak. I think the logic being if fuel, residual not-burned turbine oil or smoke oil gets in there, it cannot leak into the fuse. I used to own a JetCat P-100 that would leak oil all the time. Not a criticism, just an observation.
10-20-2020, 02:23 PM
#672
My Feedback: (1)
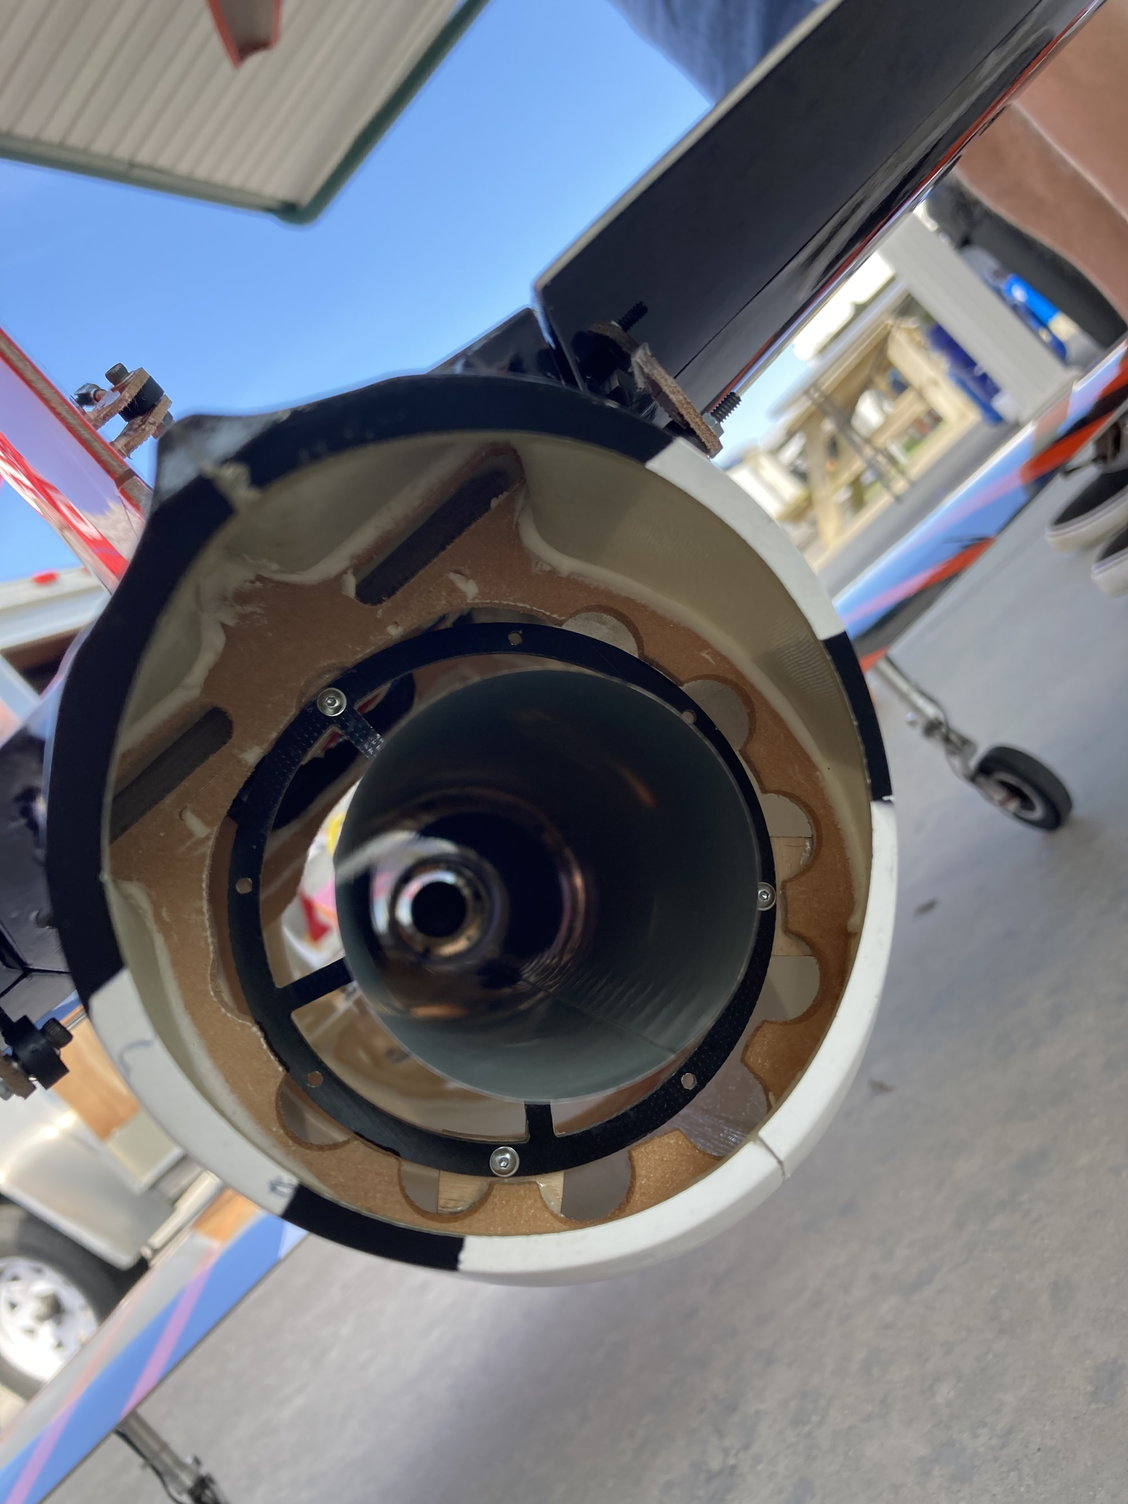
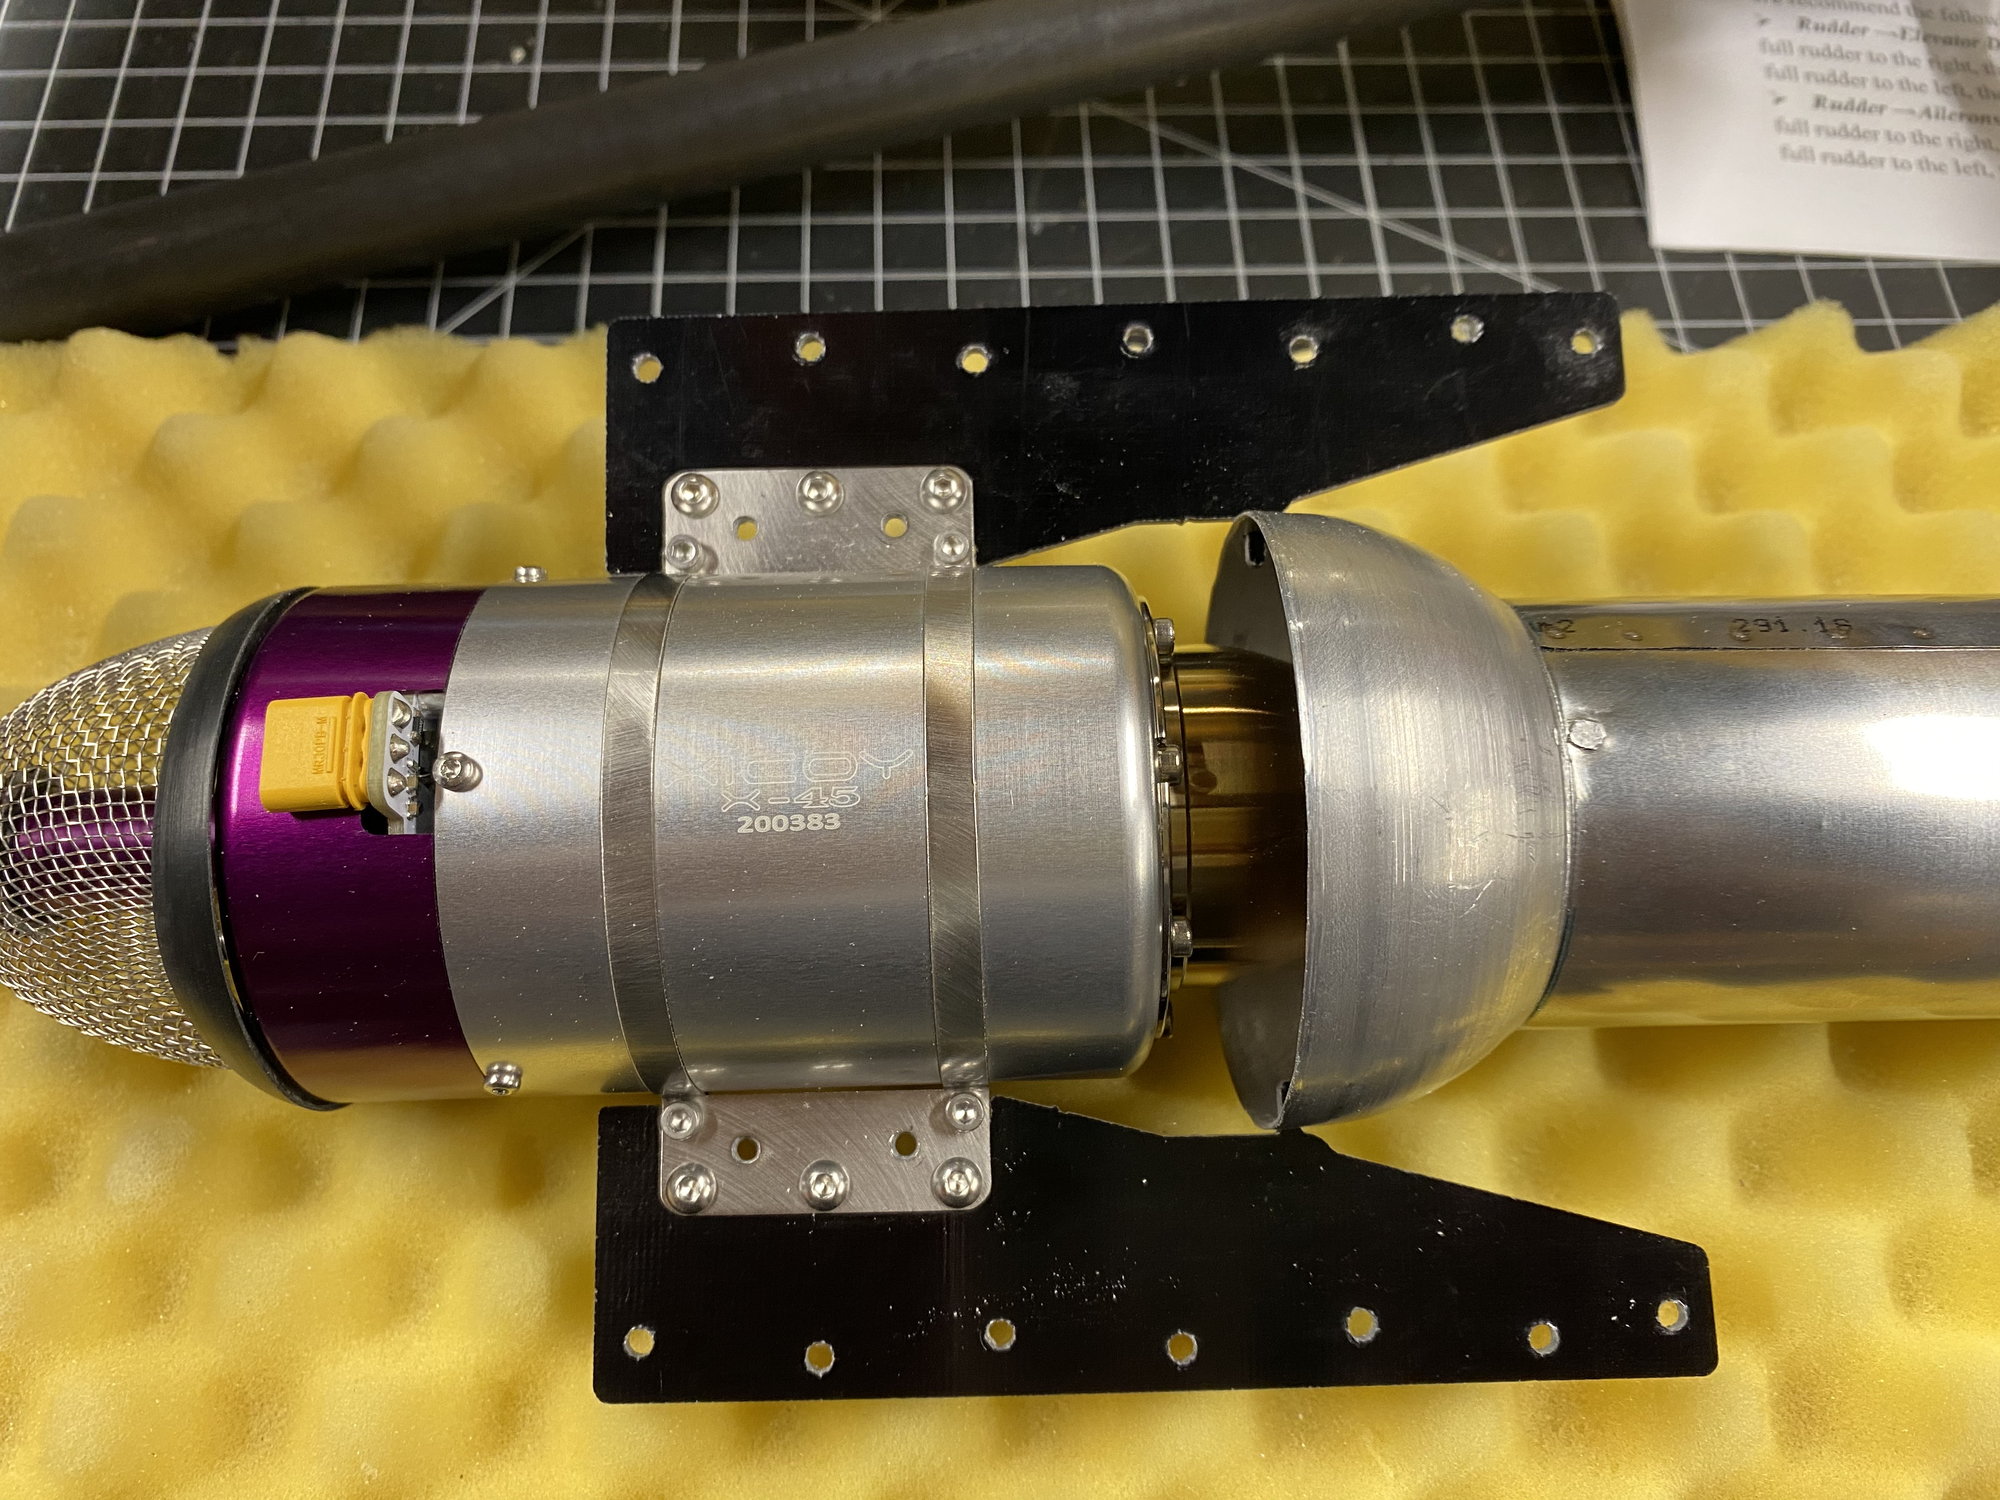
I've made progress. The tail pipe support piece I got from HAB is different than the one Bob B has. My was two pieces and too big in diameter to fit thru the back of the fuselage. Bob's sits inside the stock support ring opening, whilst mine fits on the outside.
I made an inner ring from plywood and sandwiched the assemble together.
HAB tail pipe support was sent in two pieces
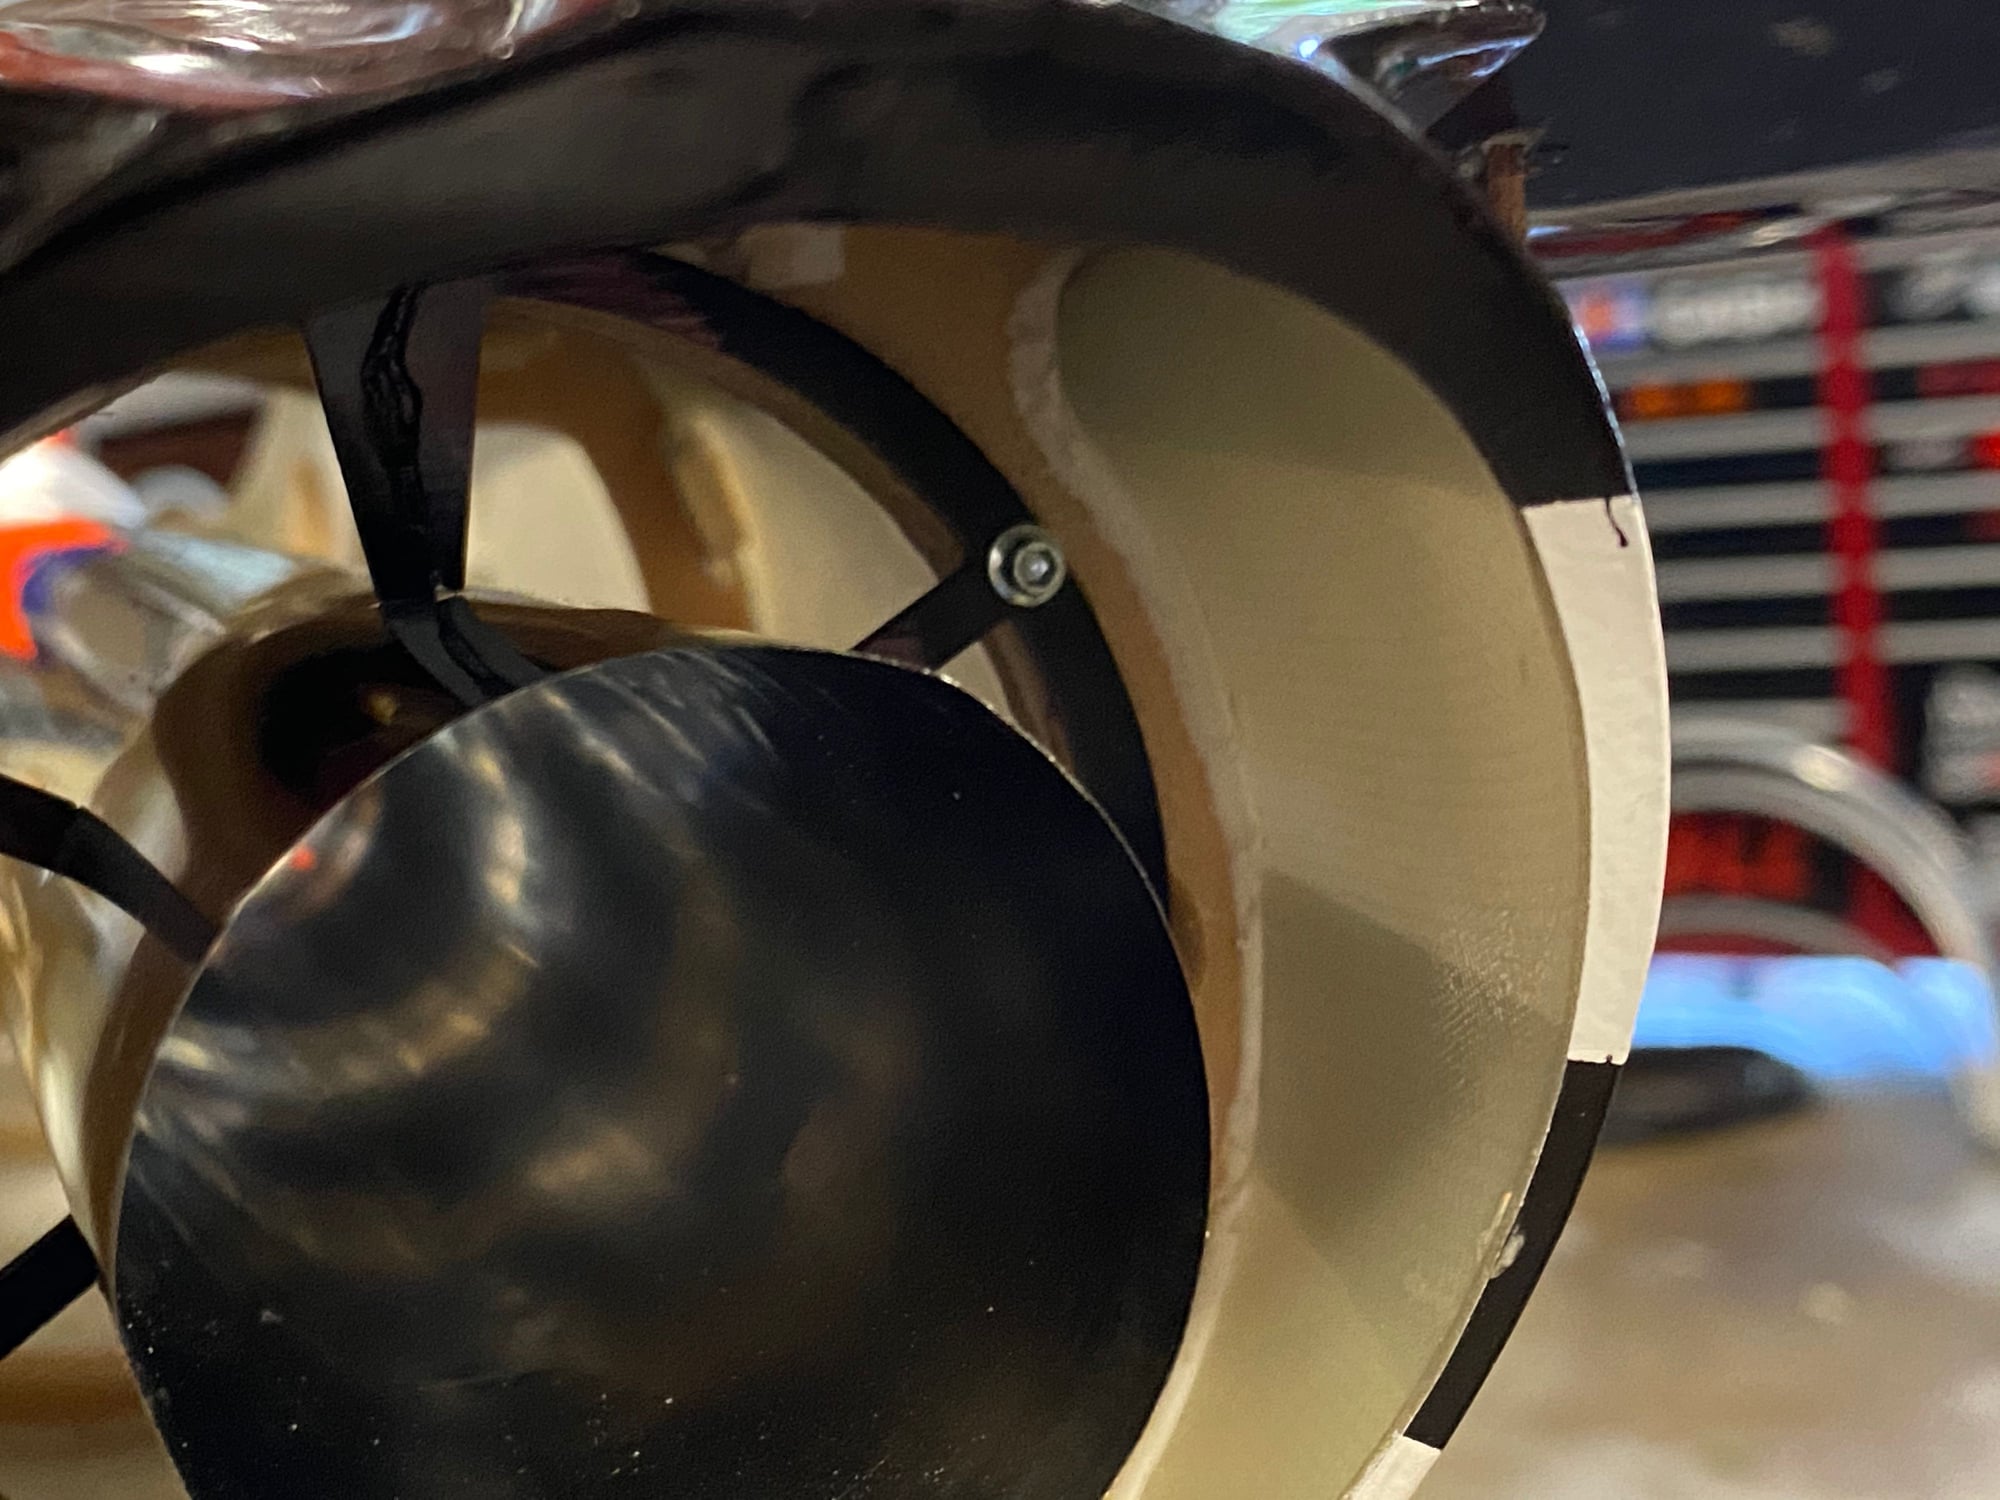
There is a second inner ring made from 3mm ply on the other side of the last former. The screws sandwich it together.

The HAB mounts align the tail pipe to the motor and connect the motor to the fuselage mounts. This is a clever design.
I made an inner ring from plywood and sandwiched the assemble together.
HAB tail pipe support was sent in two pieces
There is a second inner ring made from 3mm ply on the other side of the last former. The screws sandwich it together.
The HAB mounts align the tail pipe to the motor and connect the motor to the fuselage mounts. This is a clever design.
10-20-2020, 05:28 PM
#673
Bob, I see you opted to install the seam of the pipe downward. I believe common guidance has been to install the seam upwards, in case there is some type of leak. I think the logic being if fuel, residual not-burned turbine oil or smoke oil gets in there, it cannot leak into the fuse. I used to own a JetCat P-100 that would leak oil all the time. Not a criticism, just an observation.
None taken. I installed that way as It looks clean. It would be easy to rotate it.
Thanks for pointing that out.
10-22-2020, 10:26 PM
#674

Interested in possibly purchasing one of these and I have a complete set of JP Retracts and controller from another plane and I'd like to check and see if they would drop in to this airframe. Need some help from you guys to let me know what the size of the JP retracts are that came with your kit. Here's a link to what I think will fit in this jet, includes dimensions on the web page... JP Hobby Alloy Electric Retracts Set (3 retracts) with Brake wheel For 7-8KG turbo jet Plane for rc models wholesale from Hobby China Shop. Can someone do a quick check to see if these dimensions match what you have?
Also, the main photo on CARFs website is a little misleading because they show bigger diameter tires than what they offer for spares. My set has 65mm diameter wheels for the mains and a 50mm for the nose. Is that consistent with what you guys received?
Thanks for your help!
Also, the main photo on CARFs website is a little misleading because they show bigger diameter tires than what they offer for spares. My set has 65mm diameter wheels for the mains and a 50mm for the nose. Is that consistent with what you guys received?
Thanks for your help!
10-23-2020, 06:30 AM
#675
My Feedback: (1)
Hi,
The front wheel is 50mm and the rear wheels are 65mm. The retract mechanism you have appears to be the same as CARF sells for the Rebel Hot.
The front wheel is 50mm and the rear wheels are 65mm. The retract mechanism you have appears to be the same as CARF sells for the Rebel Hot.
Interested in possibly purchasing one of these and I have a complete set of JP Retracts and controller from another plane and I'd like to check and see if they would drop in to this airframe. Need some help from you guys to let me know what the size of the JP retracts are that came with your kit. Here's a link to what I think will fit in this jet, includes dimensions on the web page... JP Hobby Alloy Electric Retracts Set (3 retracts) with Brake wheel For 7-8KG turbo jet Plane for rc models wholesale from Hobby China Shop. Can someone do a quick check to see if these dimensions match what you have?
Also, the main photo on CARFs website is a little misleading because they show bigger diameter tires than what they offer for spares. My set has 65mm diameter wheels for the mains and a 50mm for the nose. Is that consistent with what you guys received?
Thanks for your help!
Also, the main photo on CARFs website is a little misleading because they show bigger diameter tires than what they offer for spares. My set has 65mm diameter wheels for the mains and a 50mm for the nose. Is that consistent with what you guys received?
Thanks for your help!