


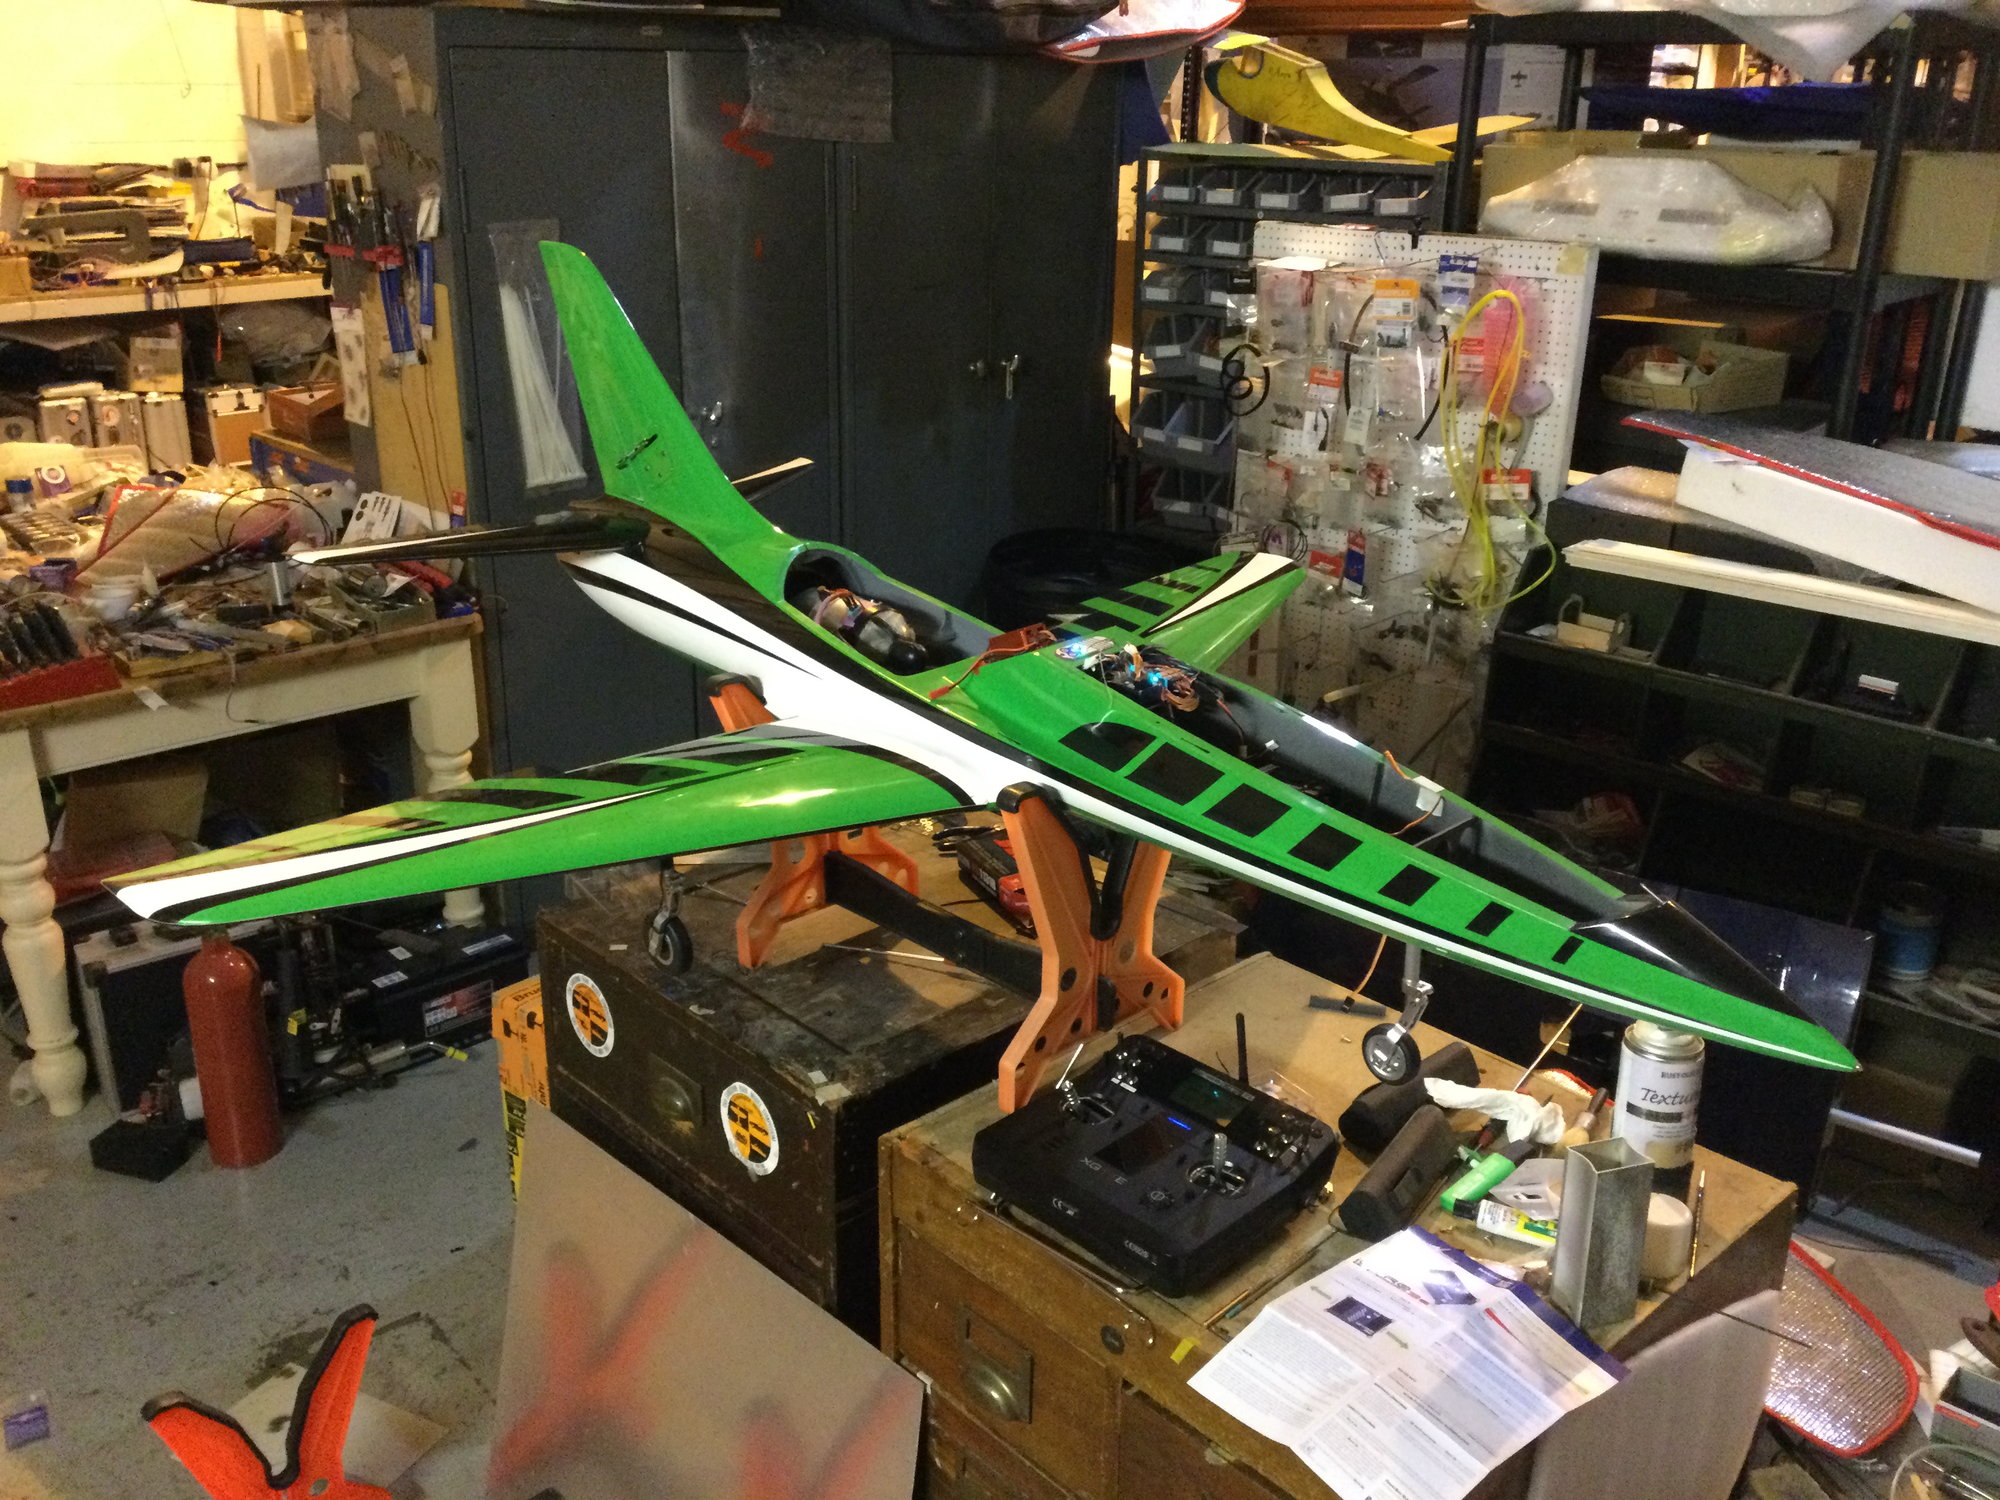
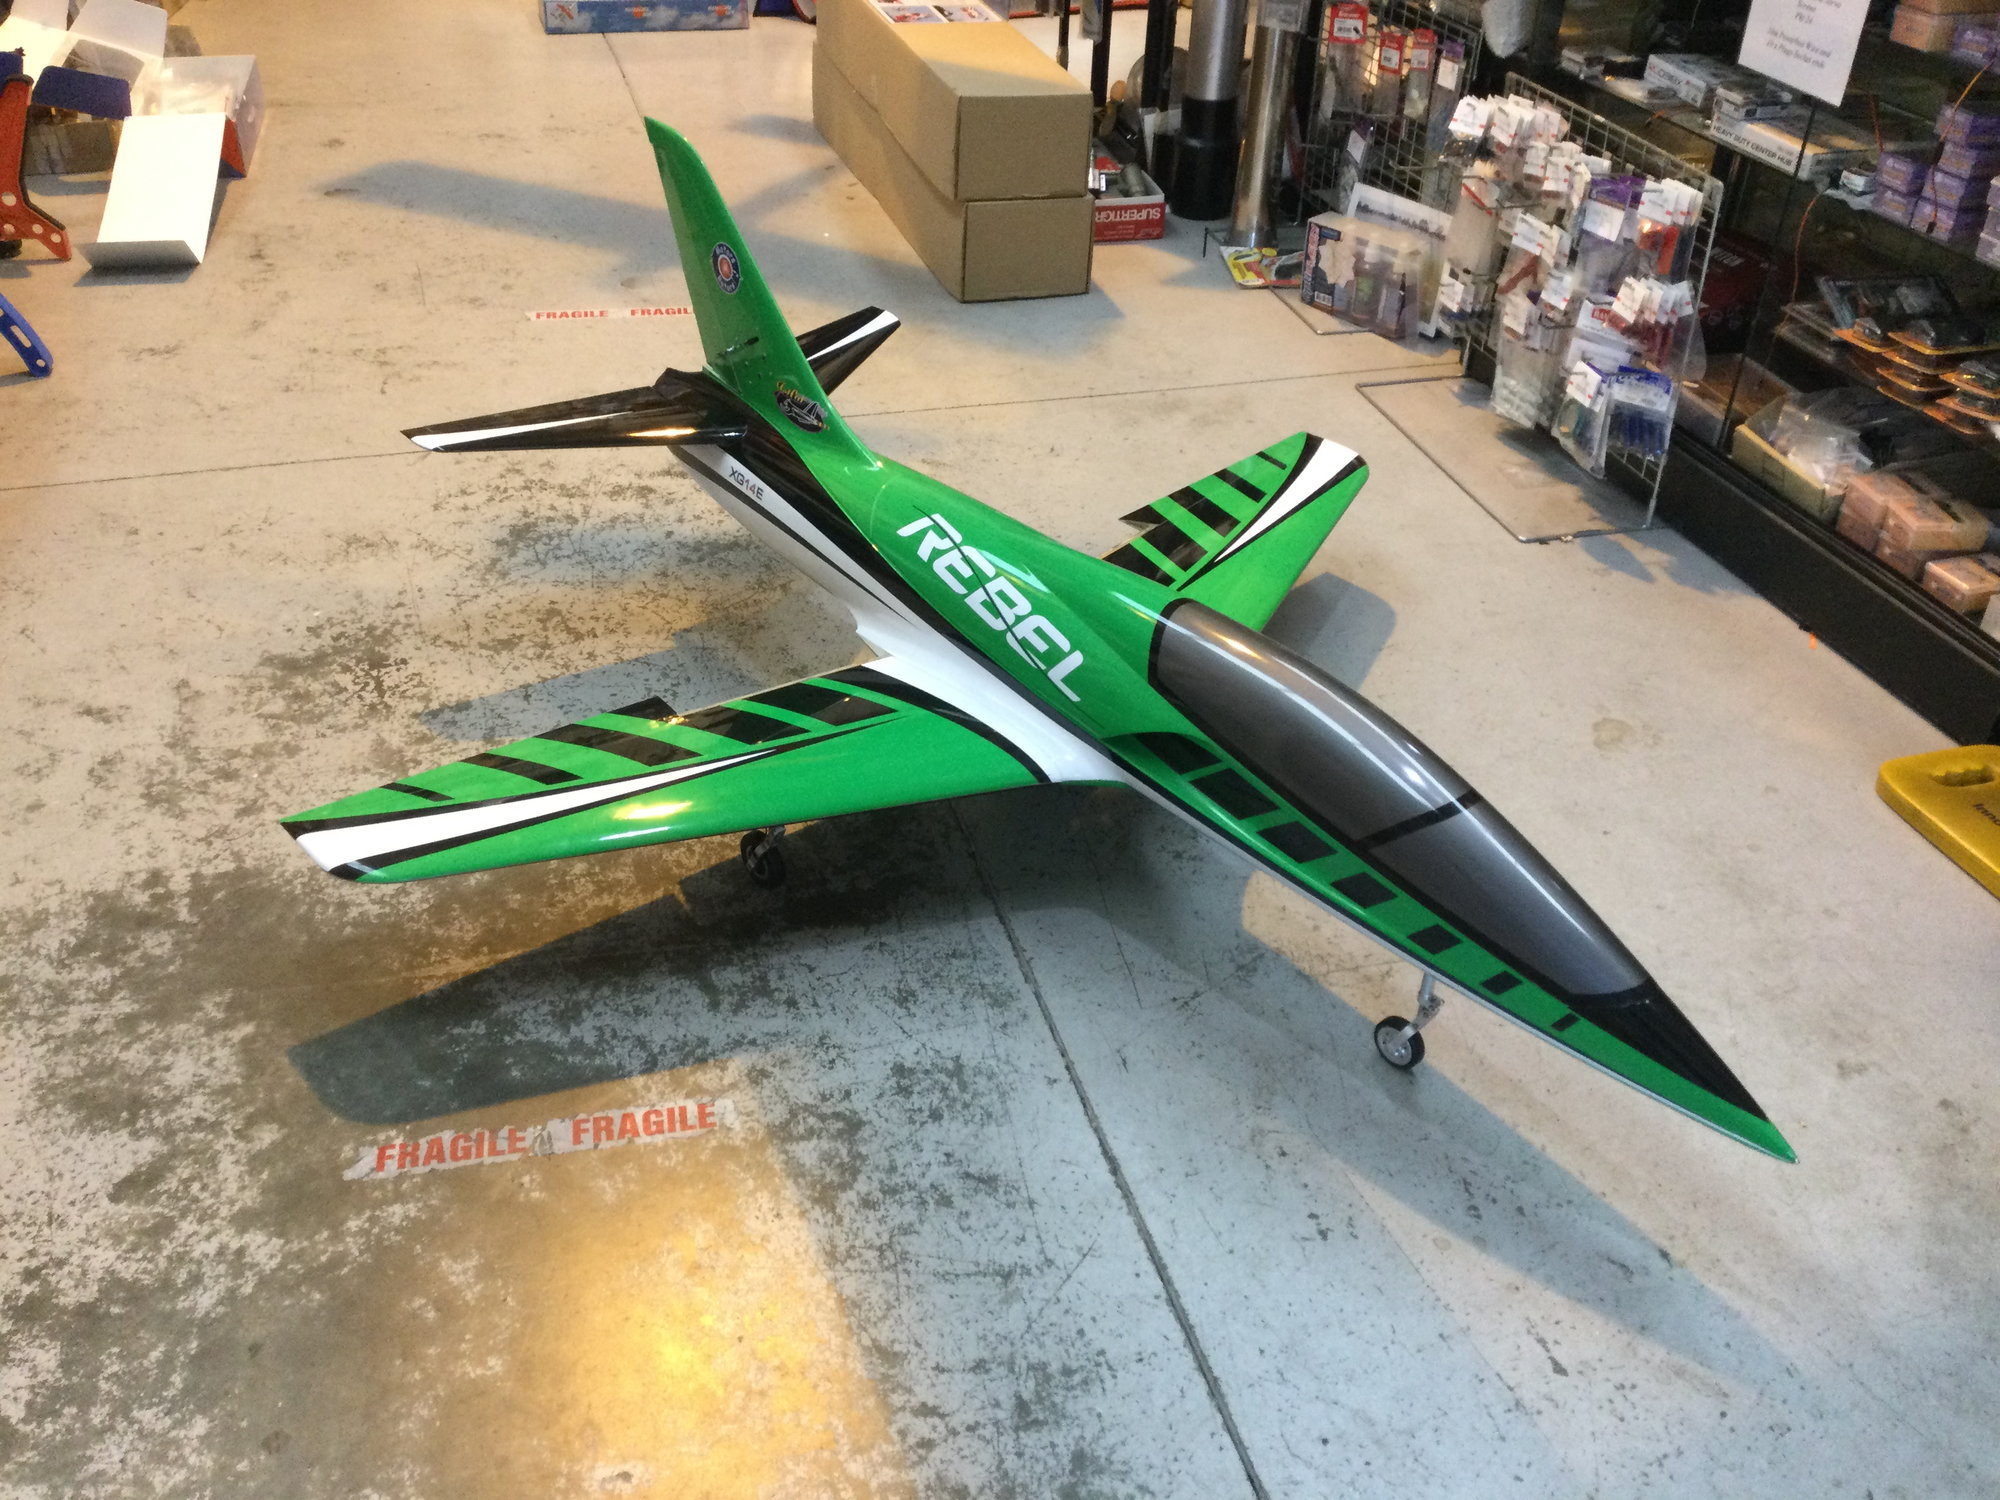
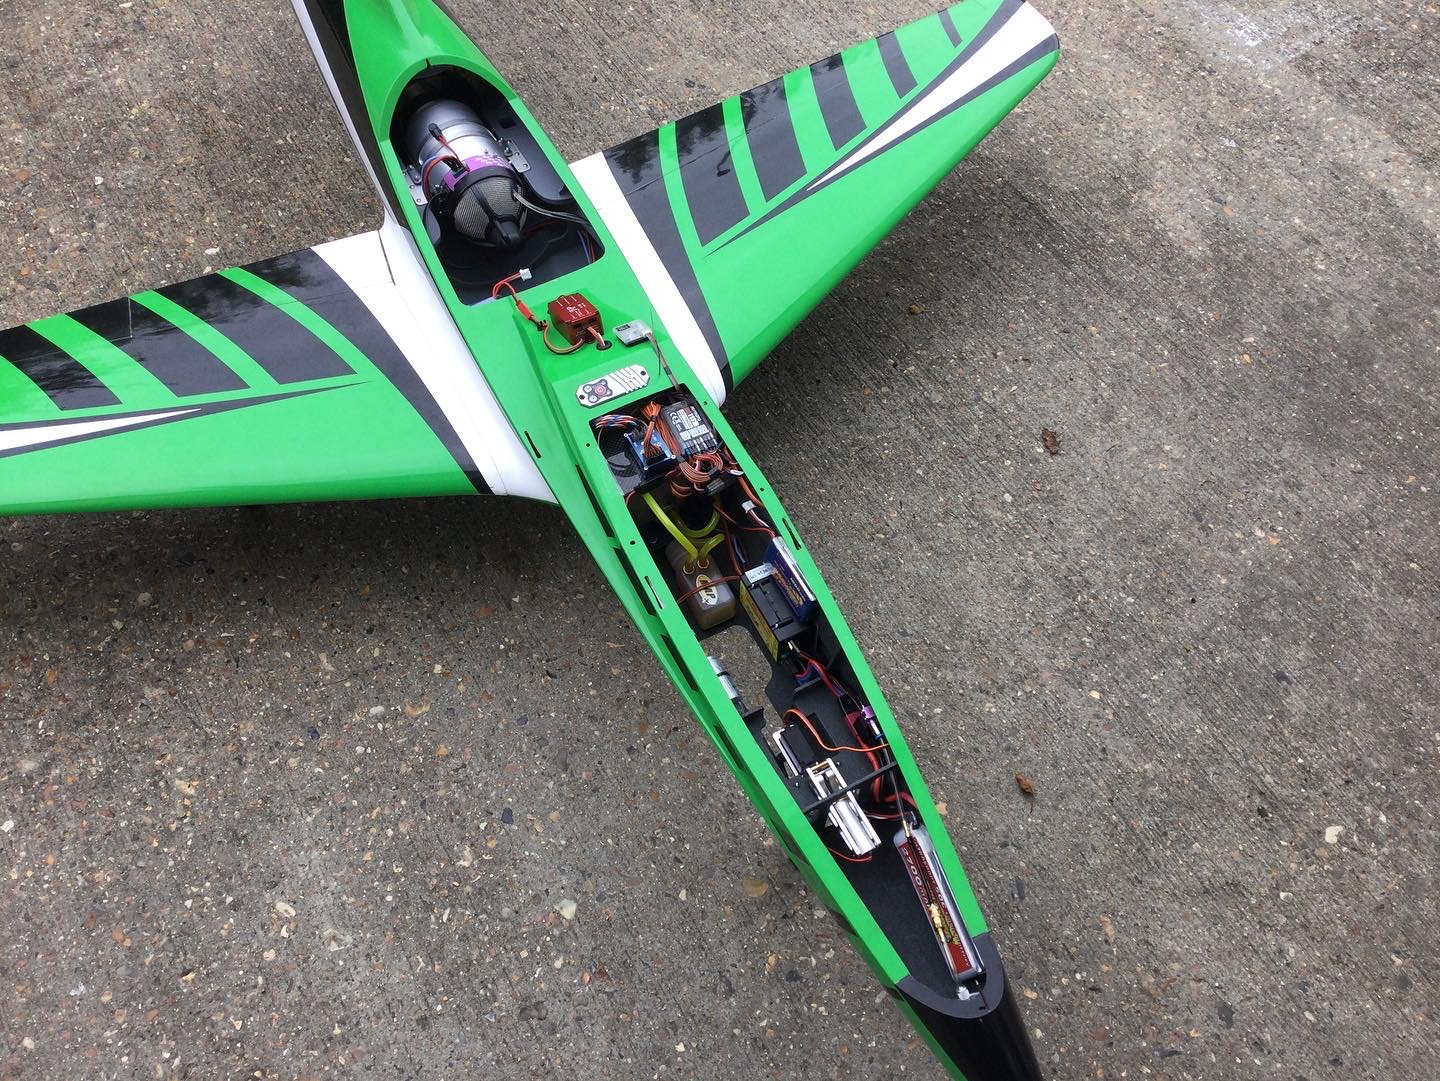
Rebel Hot by Comp Arf


 10-07-2022, 04:28 AM
#1153
Member
Today i installed my landing gear and i get a surprise.
I bought the jp retracts from carf as i tough they will be drop-in... but no, i will try to explain.
The length of the retract motor structure of jp retract is longer that the space between the begin support of the retract rail and the end support, so i needed to remove the part that links the right side with the left side to be able to fit the mechanic in..... that was a surprise for me and another was that this was not exactly the same in the other wing....
In the instructions retract fits... so maybe the person that glue mine did not have a good day, i attached a photo to tell what piece of wood i removed.
Someone has to do that on their planeżż Im worried that now i have a structural problem
Honestly i didn't expect this on that kind of plane
10-07-2022, 06:20 AM
#1154

My Feedback: (1)
I have a 1/16" plywood spacer between the retracts and wing. That made it fit better. I do remember sanding a bit to get the wires to clear.
CARF is consistent and you can get parts to maintain your airplane (in reasonable time).
The quality is okay - if you ever had a molded sailplane, such as a Shinto, you be horrified at the mold quality. Also, CARF models don't fall apart because they didn't do proper joining the pieces together. I find them to be very strong models that can take the abuse I dish out.
Once you fly your Rebel, you will be happy.
10-07-2022, 06:48 AM
#1155
Member
Thanks, my concern is that as i did that, if this will be a structural problem.
Sure i can get spares, that was one of the points to make my decision when i get it, that's cool part.
But kit is new and accessories are the recommended ones, i don't find reasonable to buy a pair of wings to see if those fit better.... I didn't own a shinto but i build some baudis gliders and expected quality to be on pair.
Problem was that to have wheel fit on hole i needed to remove that part, if not is not possible to have mechanics in, i cant solve the space shimming, metallic frame of chassis will not fit in length (other wing was better).
I like the molding quality, finish, wood structure, joints reforced with microbaloon and resin.... that's all ok, and im sure plane is a keeper.
Bit i cant understand why they recommend and sell a retract set that don't fit standard, and forced me to remove that piece of wood or to redo the holes in the wing to have wheels fit, i can understand this to happen if you choose another retract set.
10-07-2022, 07:26 AM
#1156
My Feedback: (1)
See my post about my Ultra Flash wing fit issue.
It's typical to do a bit of sanding to the wing to fit the wheels in.
Hopefully they are not using microbaloons to thicken the epoxy.
I've had formers partial come loose from the shell, I Zap them back together.
It's typical to do a bit of sanding to the wing to fit the wheels in.
Hopefully they are not using microbaloons to thicken the epoxy.
I've had formers partial come loose from the shell, I Zap them back together.
10-07-2022, 07:58 AM
#1157
Member
Sure a bit of trim to fit something is allowed, of course!!! Its a toy, don't need to be perfect, but that was not the case, if not i will just trimmed a bit the hole... and done!
Dont need to be perfect, in my kit i had one aileron horn not fully inserted when glued, so hole is not aligned in same position as the other wing, no problem is just a small detail. Also retract don't fit the same on both wings, ok also not a problem. I didn't begin with fuse or elevators so don't know on those.
But i insist that IMO if i bought what manufacturer told me to buy, i didn't expect to be need to do this to fit the retract, sure people will have their opinion and consider this normal or not... For me is not normal.
I'm only posting to see if someone has also to do that, because it worries me, maybe i just had bad luck with my unit.
10-07-2022, 12:02 PM
#1159
Member
Seems i didn’t explain myself correctly, in my unit to have wheels inside the skin holes, i have to put the gear in a position, in that position the gear structure dont fit in length so i needed to remove that wood area so gear wil fit.
Is not that the black plastic area in the motor wires hit the wood and you can sand a little or shims the retracts, is that those wont fit as are longer than available space so i need to remove that to let mechanic in. And cutouts in skin where not in same position in both wings
Dave in carf website they say cutouts are made for jp…
https://carf-models.com/en/products/...jp/parent/4177
JP is known for extremely reliable, strong and still very economically priced E-Retracts. For the Rebel HOT we opted for a JP based landing gear, perfectly fitted for our Rebel HOT. This gear includes precise wheels with E-brakes and a controller for both gear and brake operation. This gear is a drop in fit in our Rebel HOT's wood construction. Cutouts in wing and fuselage are all precisely pre-cut for that gear, no need to fiddle with templates or cut in the skin of composite parts, if you opt for this matching piece of equipment
maybe i understand this wrong
10-07-2022, 05:51 PM
#1160
My Feedback: (1)
Maybe all you need to do is increase the length of the opening of the plywood mounting plate. This will allow the gear slide towards the wing tip. Then maybe the gear cutout will work and the end of the gear motor will clear the framing. Form the one photo you sent it seems a 1/16 to 1/8" will do it.
I've built two Rebel Hots. One with JP and the other with Electron. Both required cutting, sanding and fitting the gear in. It was not Legos
One of my friends built one, using an older set of Electron gear he had., He did considerable more sanding and fitting and the results were good.
1, CARF's quality and QC is not perfect and I doubt that I could afford perfect QC anyways.
2. Seems like folks here are trying to help you resolve the issue so you can have fun with your jet, but sadly we cannot make you happy.
3. I've had similar issues with CARF and other models and I just work through it. Plus it is kinda fun to fix it and make it my own.
Good Luck!
10-07-2022, 08:39 PM
#1161
Member
I see where problem is, i didn't explain correctly, my mistake.
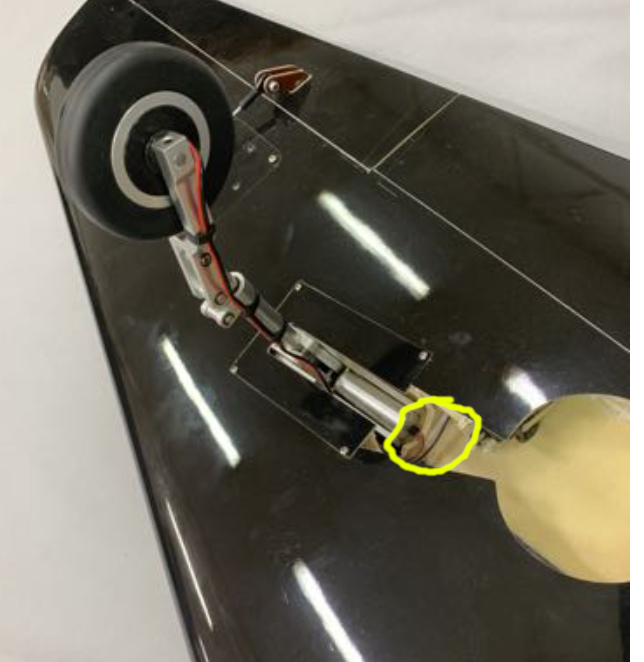
That photo is from instructions pdf.... is not my plane, that photo fits perfectˇˇˇ! i will be very happy with that one!!!
I used that photo to show the piece of wood i needed to remove the one in the yellow area as i don't know how to name it, so in my unit where the yellow point is there is no wood at all.
I don't want to make the impression that i don't appreciate the advices, sorry, i post here just to know what can be done and i appreciate it all the advices.
Fit is done, removing that piece of wood that connect both areas... i think that maybe i have a structural problem, so if someone has an idea on how to fix it, it will be welcome.
 10-08-2022, 01:50 PM
#1163
Member
Thanks Dave!!!
I did not measure distance from rib to rib, cant tell if is the same in both wings on mine, sure must be as look as structure must be cnc cutted.
I will try to explain, if i put my gear on that position, wheel will not fit in "skin circle hole" and i'm not talking about the wheel scratching the border so a bit of sanding will make it fit, nope it will not fit by 4mm or similar so circle will need to be offset at least that distance, or use a longer strut...
I think that whatever is used as a template to make the holes on the skin, it moved or whatever so in my unit holes where not where they expected to be, that's the only explain i found.
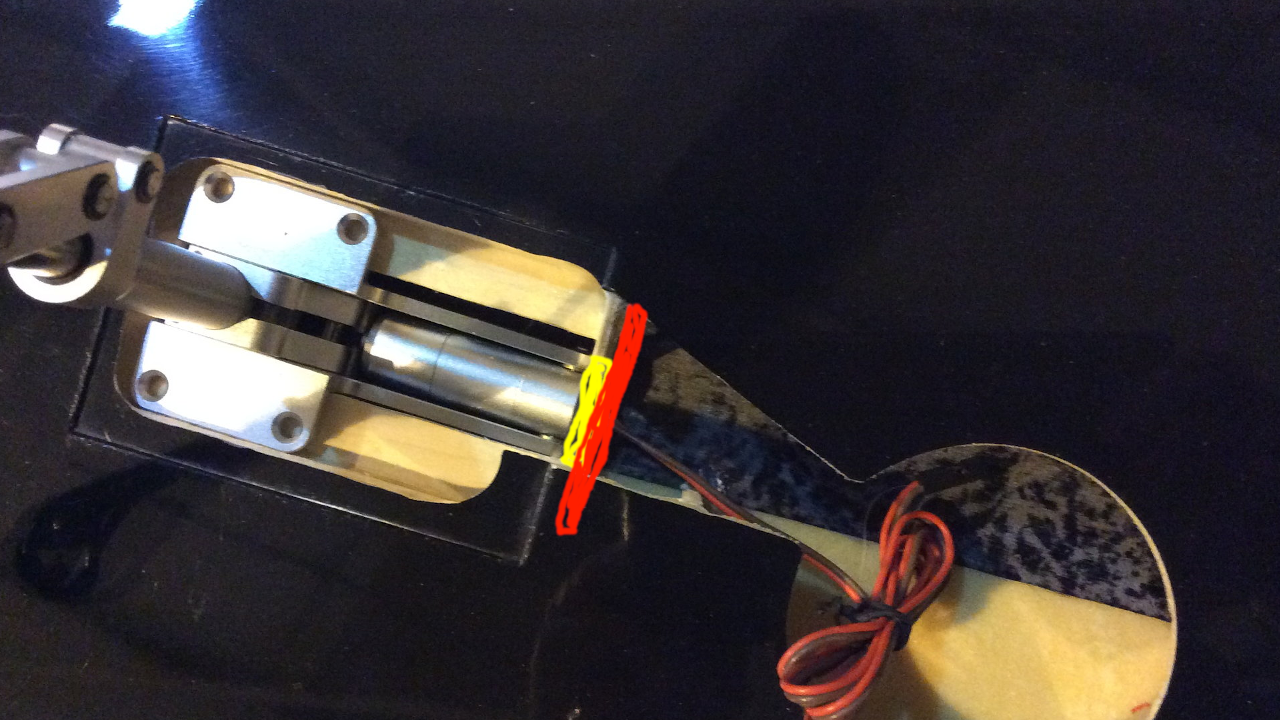
Taking over your photo, what i needed to do was to remove the wood i marked on yellow so i can move mechanics to the right (all the wood) and then it fits, plan now is to put a U of plywood as i marked on red so both sides connect. In one wing fit is better than the other.....
Do you think that putting a U shaped in "good aeronautic" plywood will be ok to reforce this again?
Maybe was expected to redo the wing skin cut or to use other strut... don't know, i opted to remove that wood as i found very ugly to have a oval as wheel hole and hard to fill all the hole, paint and cut again, or find another strut a few mm longer.
I will post of mine on Monday as plane is in a friend workshop, so people can see.
If this is correct, or expected or acceptable.... is a personal opinion, as a customer i don't find this normal but of course imo.
I did not measure distance from rib to rib, cant tell if is the same in both wings on mine, sure must be as look as structure must be cnc cutted.
I will try to explain, if i put my gear on that position, wheel will not fit in "skin circle hole" and i'm not talking about the wheel scratching the border so a bit of sanding will make it fit, nope it will not fit by 4mm or similar so circle will need to be offset at least that distance, or use a longer strut...
I think that whatever is used as a template to make the holes on the skin, it moved or whatever so in my unit holes where not where they expected to be, that's the only explain i found.
Taking over your photo, what i needed to do was to remove the wood i marked on yellow so i can move mechanics to the right (all the wood) and then it fits, plan now is to put a U of plywood as i marked on red so both sides connect. In one wing fit is better than the other.....
Do you think that putting a U shaped in "good aeronautic" plywood will be ok to reforce this again?
Maybe was expected to redo the wing skin cut or to use other strut... don't know, i opted to remove that wood as i found very ugly to have a oval as wheel hole and hard to fill all the hole, paint and cut again, or find another strut a few mm longer.
I will post of mine on Monday as plane is in a friend workshop, so people can see.
If this is correct, or expected or acceptable.... is a personal opinion, as a customer i don't find this normal but of course imo.

 10-08-2022, 02:21 PM
#1165
Member
Thanks Flaz
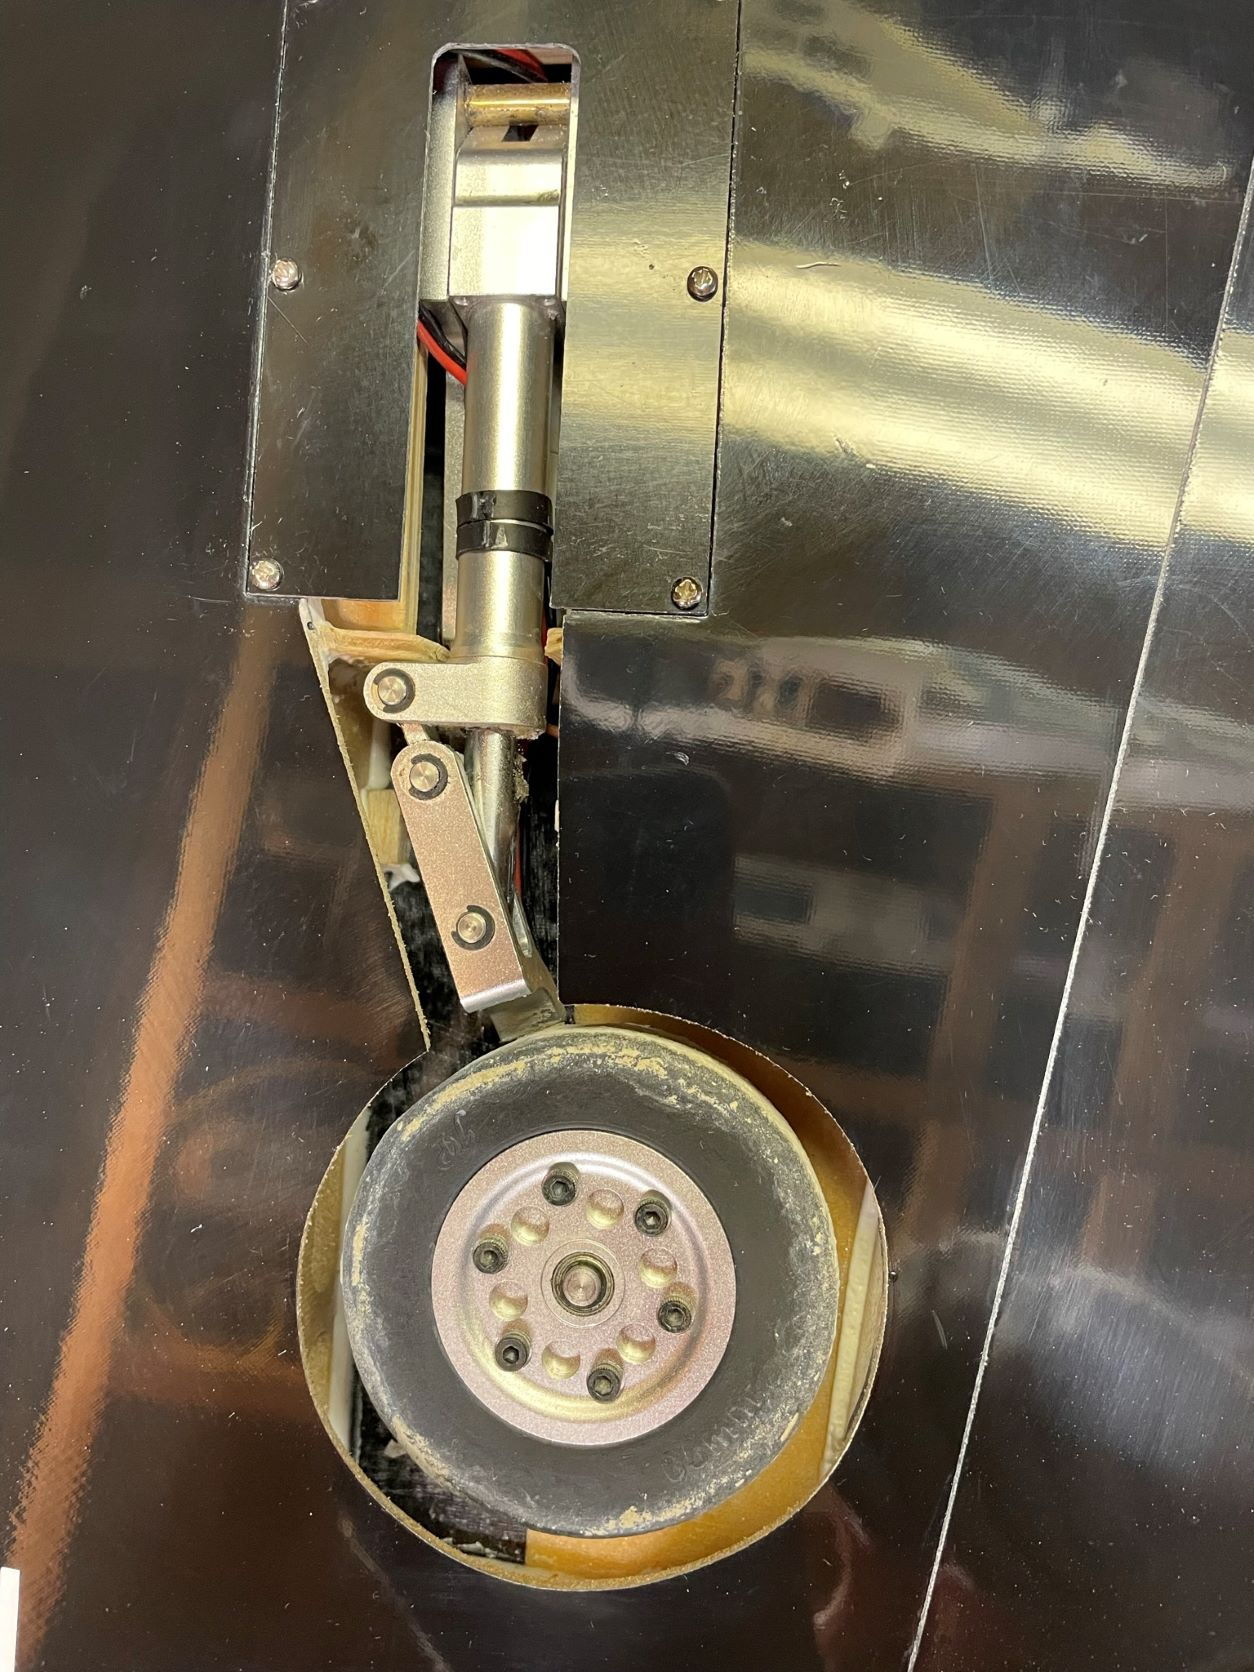
In my opinion, that's a good fit!!! it fits inside the skin hole and is able to take in and out without hitting the skin.
Sadly in my unit i needed to do what explained to be able to achieve that.
In my opinion, that's a good fit!!! it fits inside the skin hole and is able to take in and out without hitting the skin.
Sadly in my unit i needed to do what explained to be able to achieve that.
10-12-2022, 03:30 PM
#1166
Member
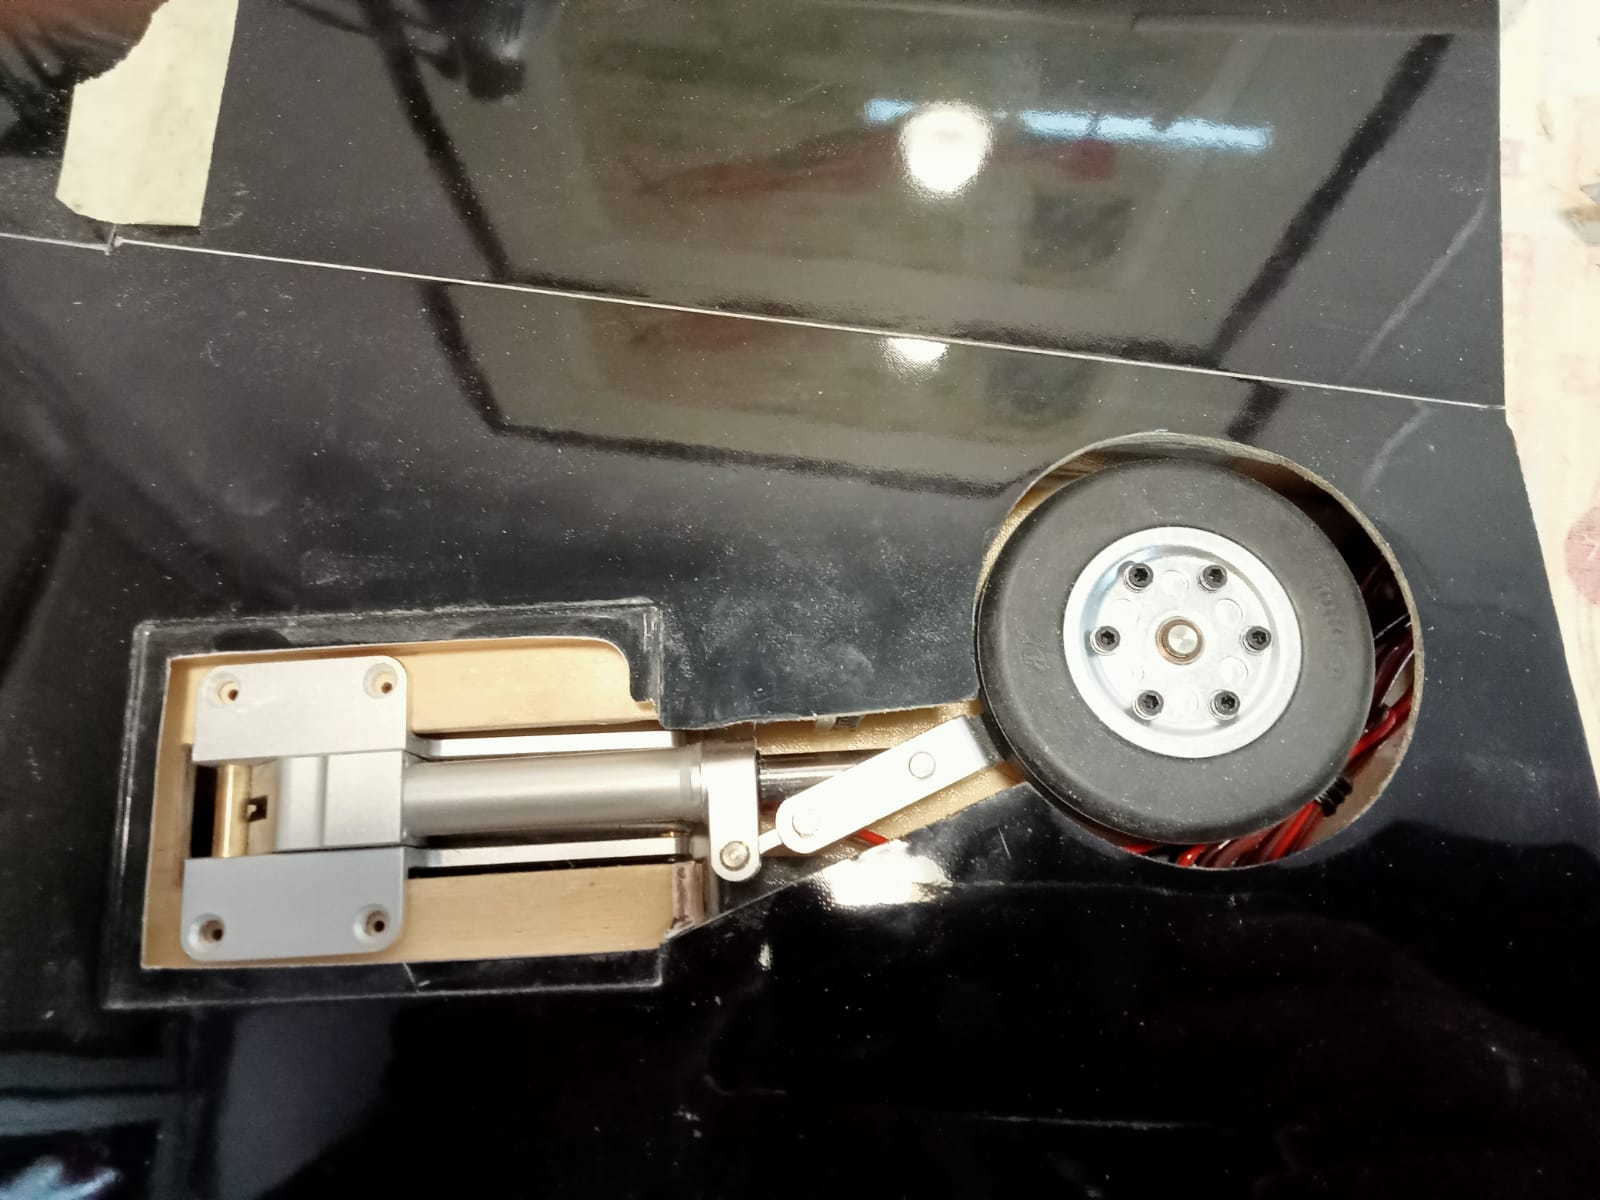
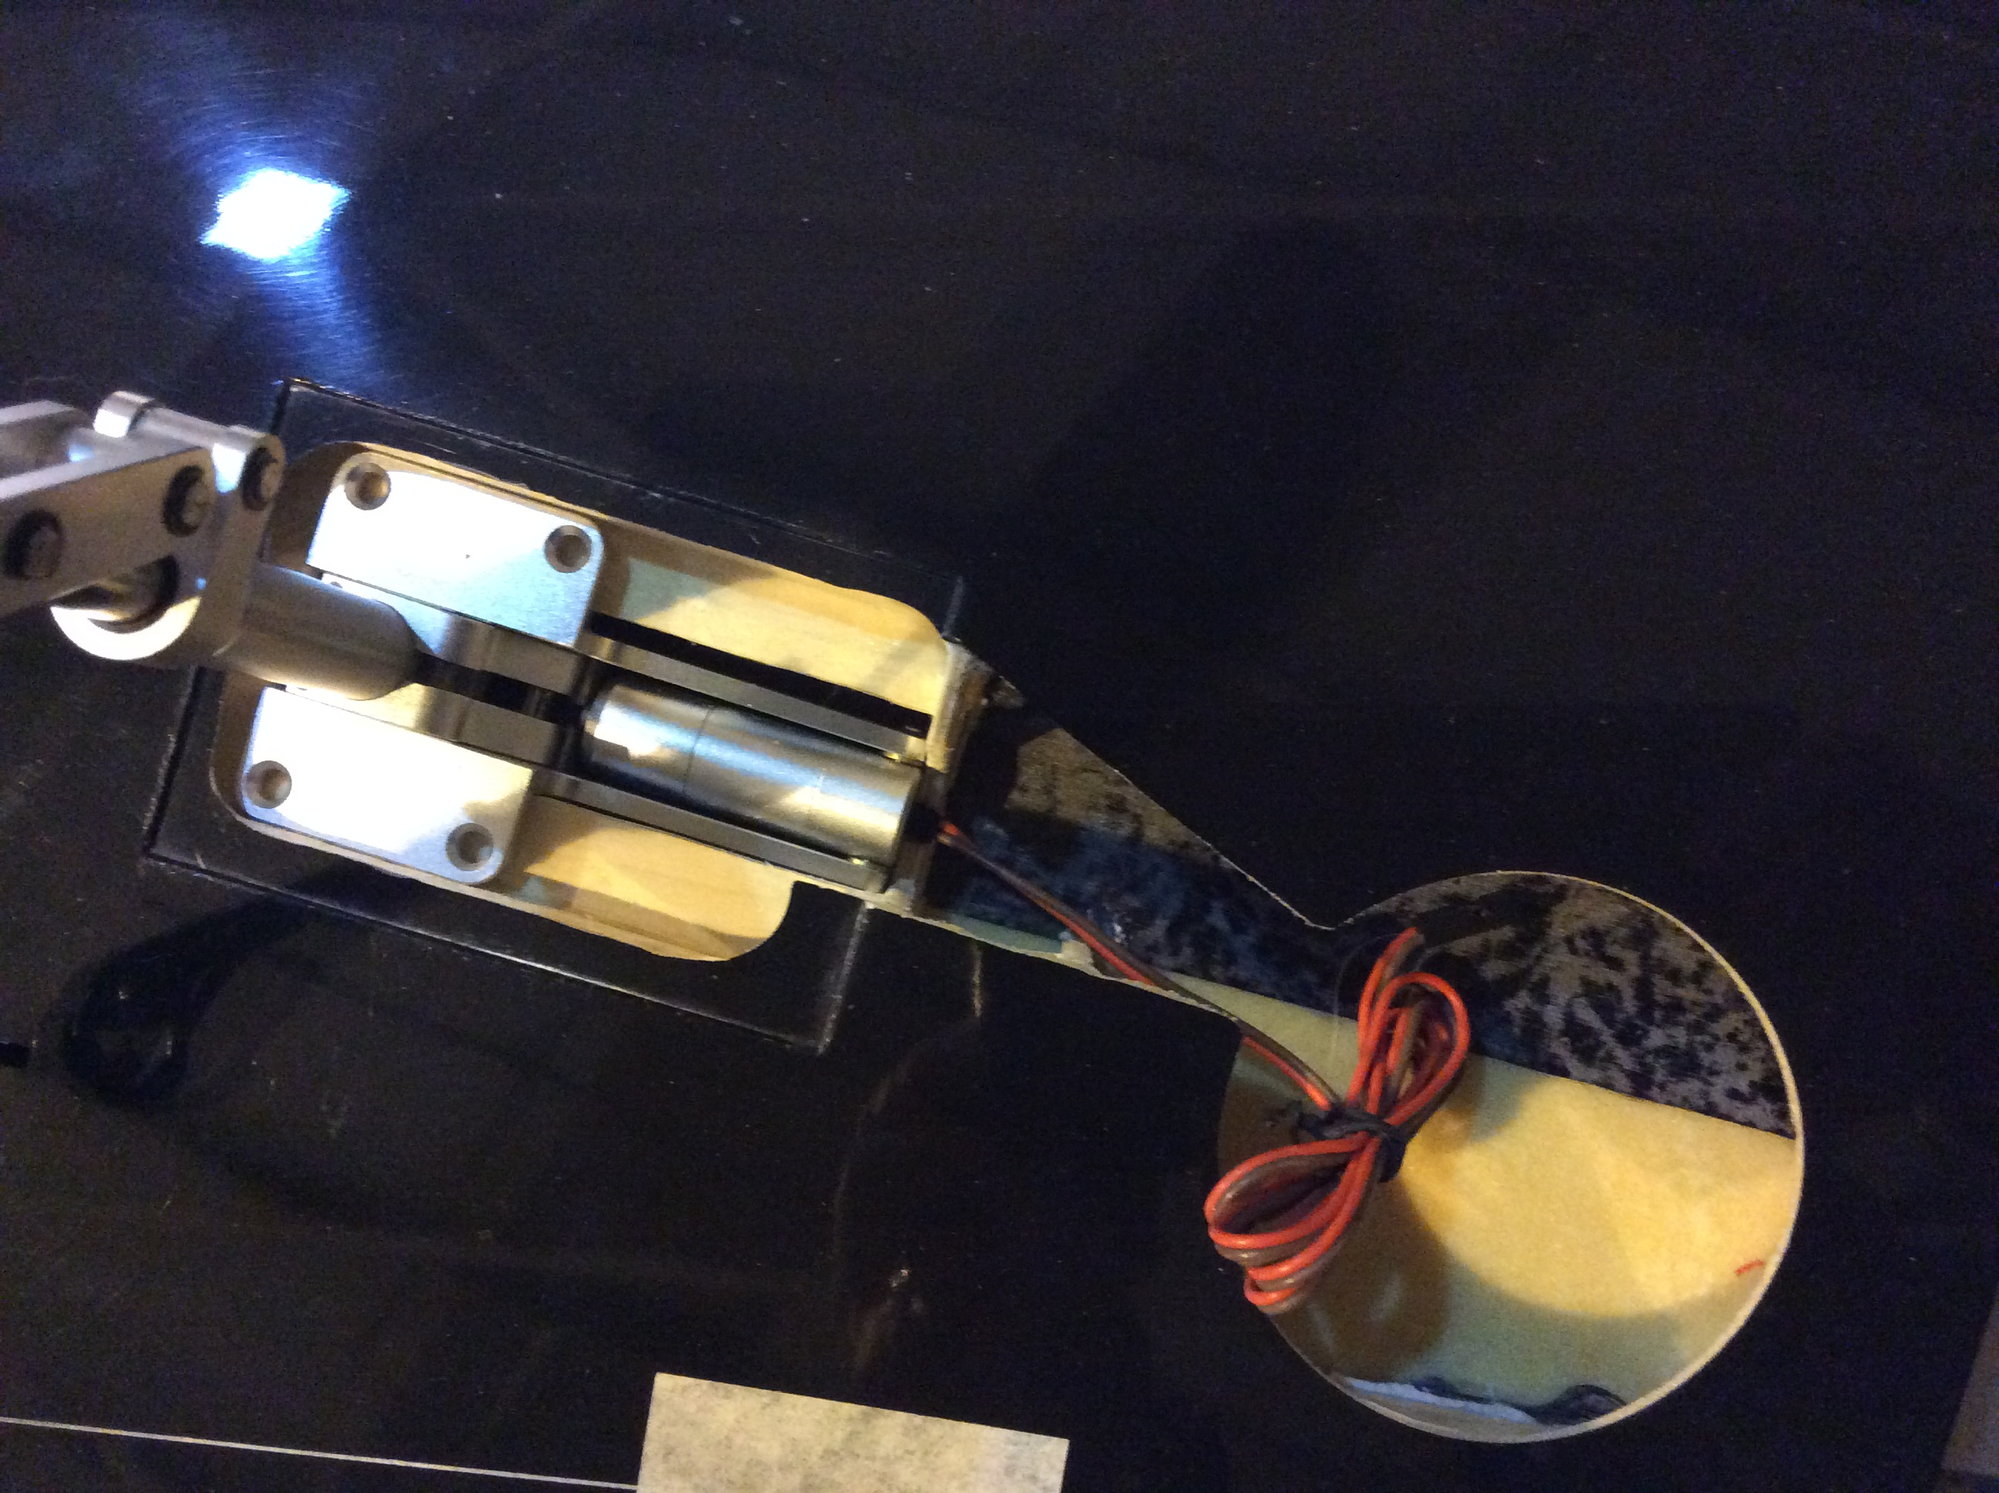
Here is one photo of my unit, i had to do what i was trying to explain to get wheels inside hole. If i moved retract to left to avoid removing the wood, then wheel will not fit in hole, so I need to move it to right removing that wood support to get wheel inside the accurate skin wheel cut. Posting for future owners curiosity
i hope with a photo is more easy to see than a description, i will try to fix it as described with the plywood refoircement.
the other one fits better….
thanks
The following users liked this post:
paulhat (10-14-2022)
The following users liked this post:
paulhat (10-15-2022)
10-15-2022, 03:27 AM
#1171
My Feedback: (1)
I would avoid painting the insides with dark paint, because it makes it hard to see inside it. A painted interior looks great However, clear epoxy over the wood and leaving the rest as plain fiberglass can be more practical, because repairs and mod's are easier and the model will be lighter.
Last edited by jvaliensi; 10-15-2022 at 05:58 PM.
10-15-2022, 09:51 AM
#1172
10-15-2022, 09:54 AM
#1173
You will need to seal the wood with something before painting it to make it look decent. Sanding sealer, clear polyurethane, polyester resin and epoxy resin all work.
I would avoid painting the insides with dark paint, because it makes it hard to see inside it. A painted interior looks ****. However, clear epoxy over the wood and leaving the rest as plain fiberglass can be more practical, because repairs and mod's are easier and the model will be lighter.
I would avoid painting the insides with dark paint, because it makes it hard to see inside it. A painted interior looks ****. However, clear epoxy over the wood and leaving the rest as plain fiberglass can be more practical, because repairs and mod's are easier and the model will be lighter.
The point about repairs is valid…if you might need to do some.
 10-24-2022, 08:12 PM
#1175
Balancing at the rear of the wingtube still seems nose heavy, (quite a bit of elevator required inverted). Those that have been flying this one for awhile where have you ended up?