CARF Bolt! Build thread
 08-23-2020 | 09:12 PM
#26
Thread Starter

It was a friend Andrew Bird some years ago who watched me fit a glass without, where I used tape pulls etc and said he used magnets! It allows you to check the fit without any glue, you can fit the frame and check for distortion before adding any glue.
You need more than you think, I have around 80 magnets for the big Aerobatic type canopy glasses.
You need more than you think, I have around 80 magnets for the big Aerobatic type canopy glasses.

The following users liked this post:
bodywerks (08-24-2020)
 08-24-2020 | 06:27 AM
#28
08-24-2020 | 06:27 AM
#29

My Feedback: (4)
You can update the van with a little fiberglass package too!
https://www.thedrive.com/news/35856/...-custom-colors
https://www.thedrive.com/news/35856/...-custom-colors
08-24-2020 | 08:31 AM
#30
My Feedback: (11)
[QUOTE=LimitDwn;12626797]Bob,
Where did you get the inlet ducts from for your Joker?
Robert[/QUOTE
https://www.schuebeler-jets.de
Danny at Aeropanda may have an extra set in stock.
Bob
Where did you get the inlet ducts from for your Joker?
Robert[/QUOTE
https://www.schuebeler-jets.de
Danny at Aeropanda may have an extra set in stock.
Bob
08-24-2020 | 02:00 PM
#31
Thread Starter
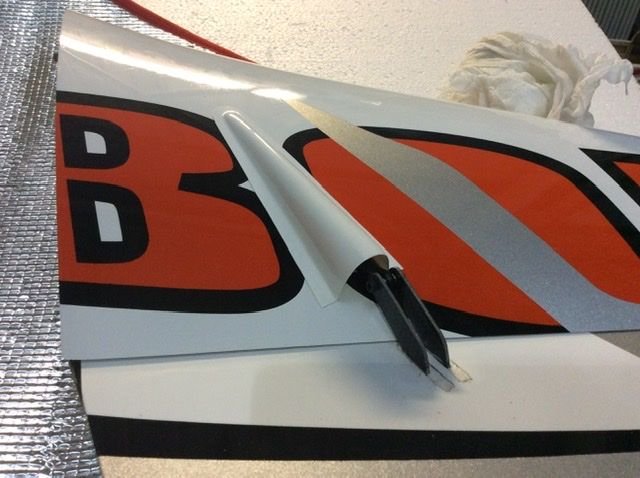
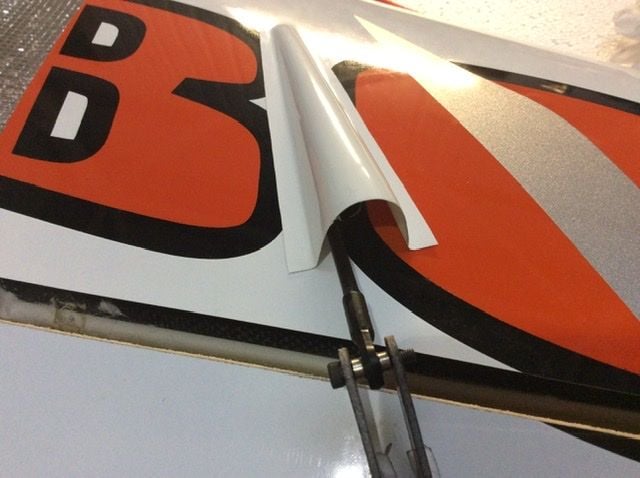
Work got in the way the last two days, so slow progress. On the full production kits the surface control rod slots will be cut 2mm wide to allow you to open to suit the arm offset you use. Mine was already opened to 5mm so I have ended up with a wider slot than I wanted. I may put fairings over the front section anyway to clean them up.
MacGregor 6928 Brushless servos on the stabs the same as the two prototype Bolt! Airframes.
Note the kit comes with carbon sleeves for the pushrods. I’ve just not set the length yet.
MacGregor 6928 Brushless servos on the stabs the same as the two prototype Bolt! Airframes.
Note the kit comes with carbon sleeves for the pushrods. I’ve just not set the length yet.
The following users liked this post:
bodywerks (08-25-2020)
08-24-2020 | 04:27 PM
#32
[QUOTE=Bob_B;12626831]
Thanks, Bob will give hi a call in the AM.
Sorry to hijack you thread Dave, but you never know where you can get good info from.
Bob,
Where did you get the inlet ducts from for your Joker?
Robert[/QUOTE
https://www.schuebeler-jets.de
Danny at Aeropanda may have an extra set in stock.
Bob
Where did you get the inlet ducts from for your Joker?
Robert[/QUOTE
https://www.schuebeler-jets.de
Danny at Aeropanda may have an extra set in stock.
Bob
Sorry to hijack you thread Dave, but you never know where you can get good info from.
08-24-2020 | 11:27 PM
#33

 08-25-2020 | 10:21 AM
#34

The following 2 users liked this post by Dave Wilshere:
AEROSHELDON (08-27-2020),
bodywerks (08-27-2020)
The following users liked this post:
bodywerks (08-27-2020)
08-27-2020 | 01:54 PM
#39
Thread Starter
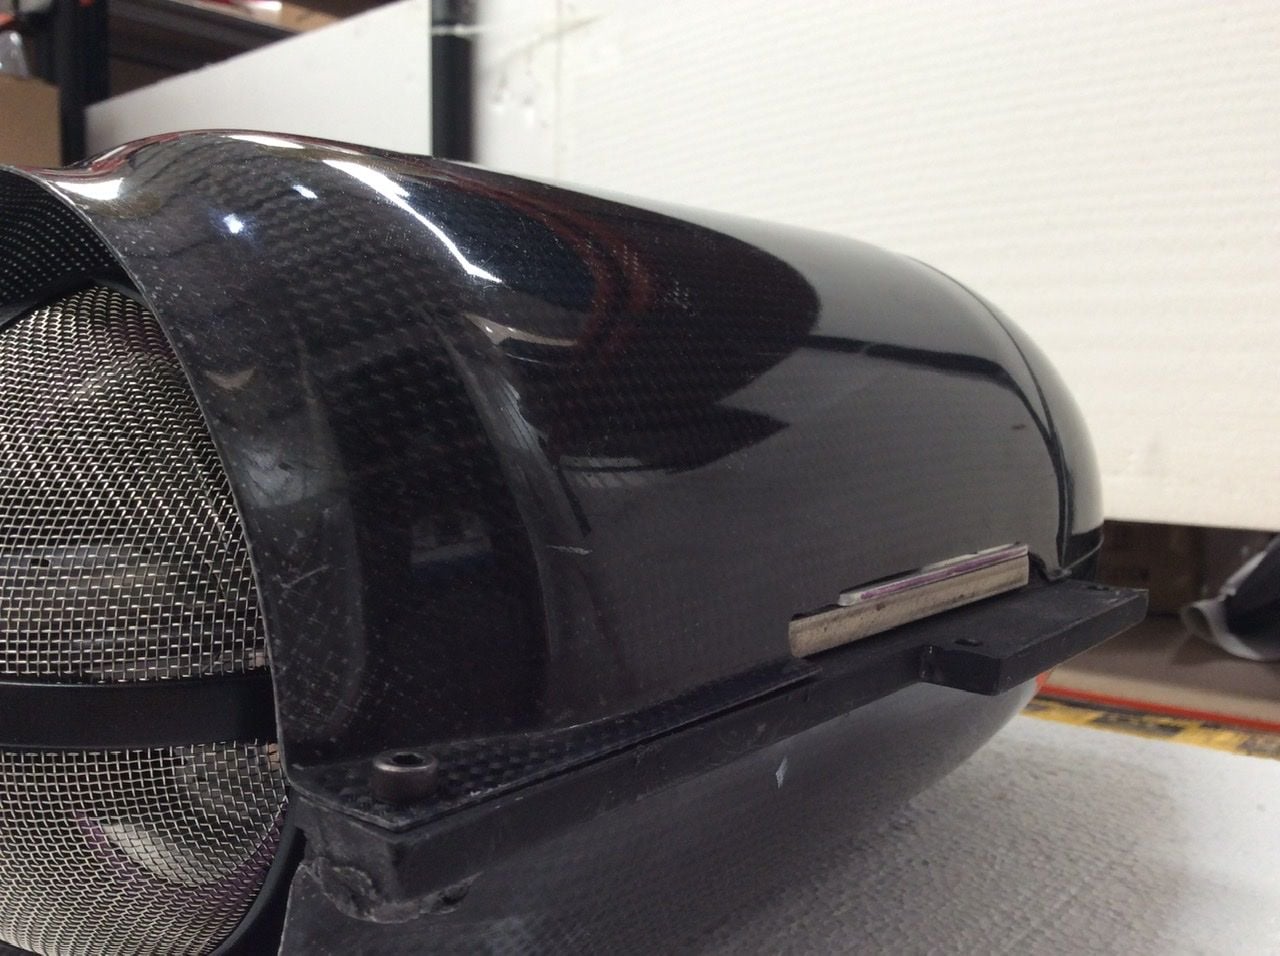
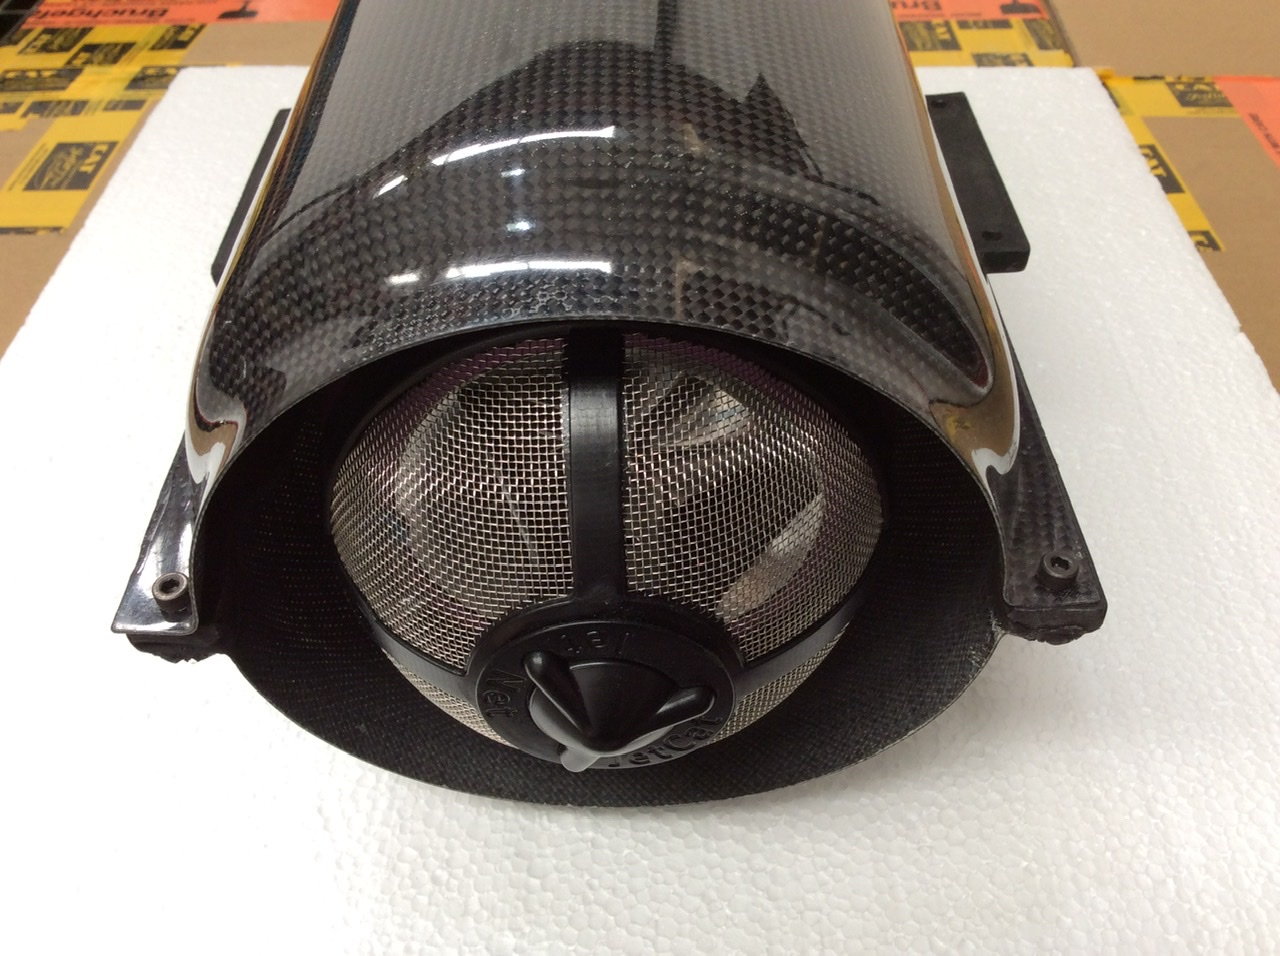
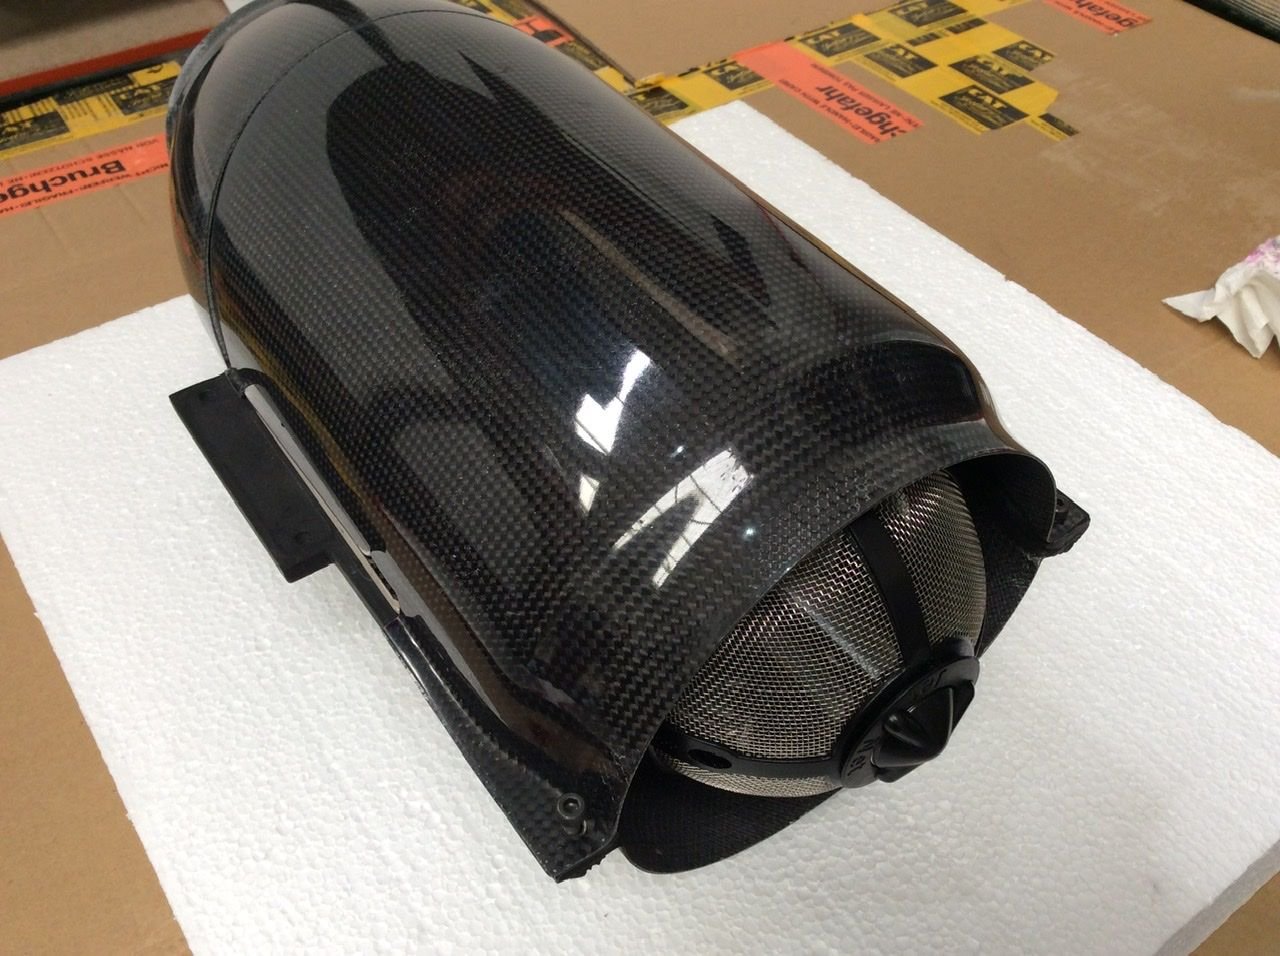
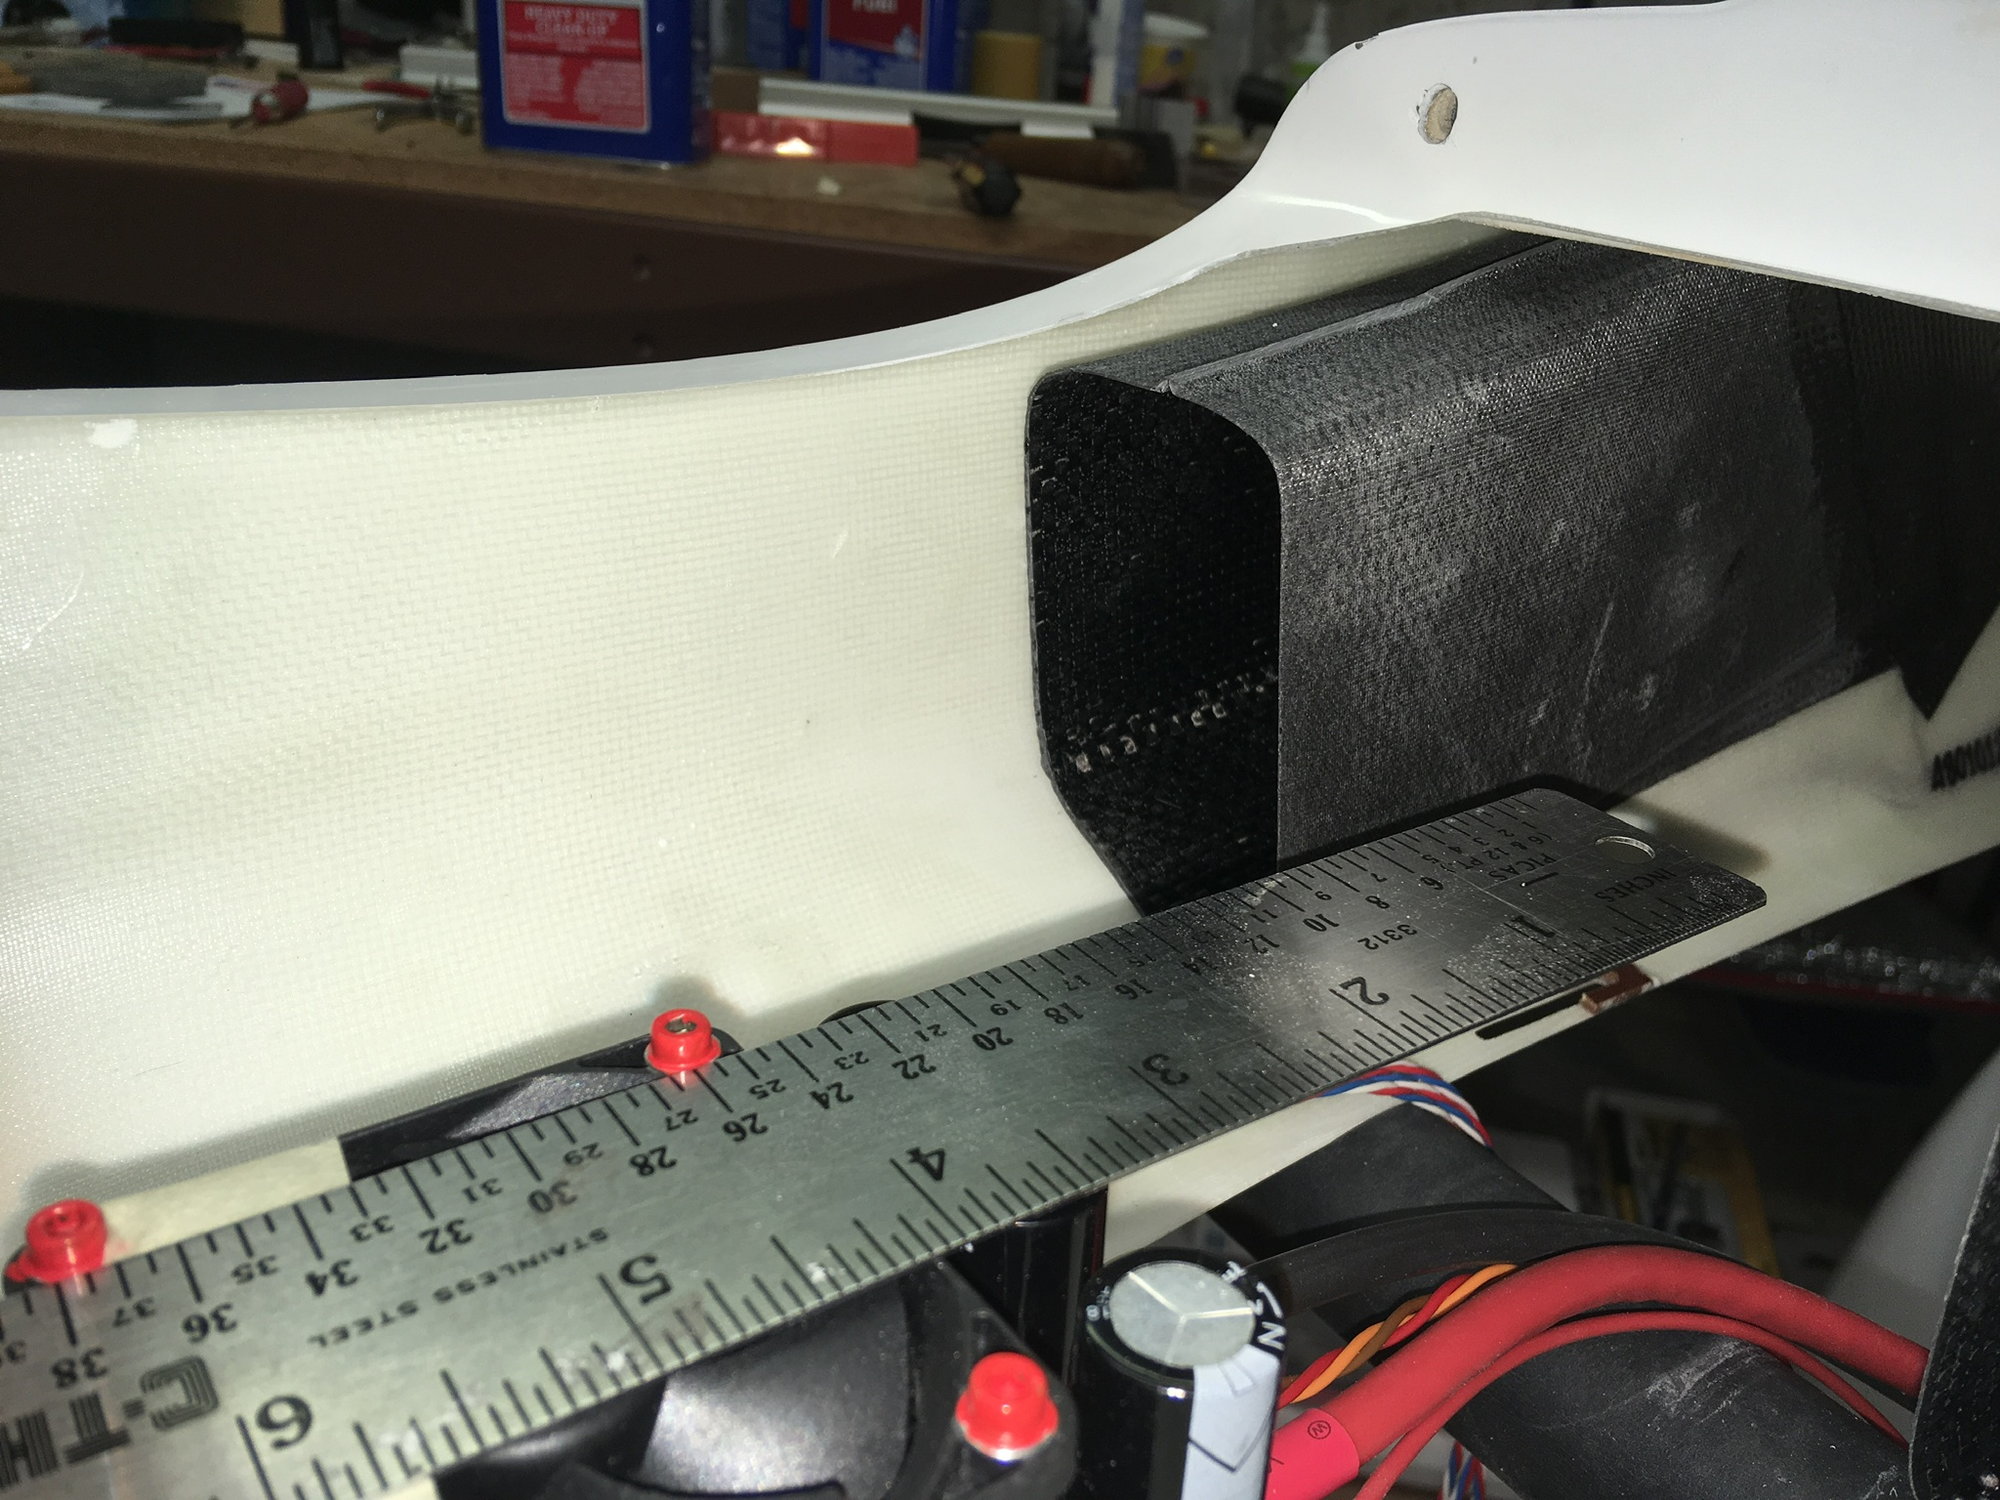
Spent a little time tonight looking at various parts. The bypass should take all 200-260 turbines with little effort. The JetCat P-220Rxi I�m using just needed the lugs taking off the cover and a notch cutting to clear the strap and 6mm packers.
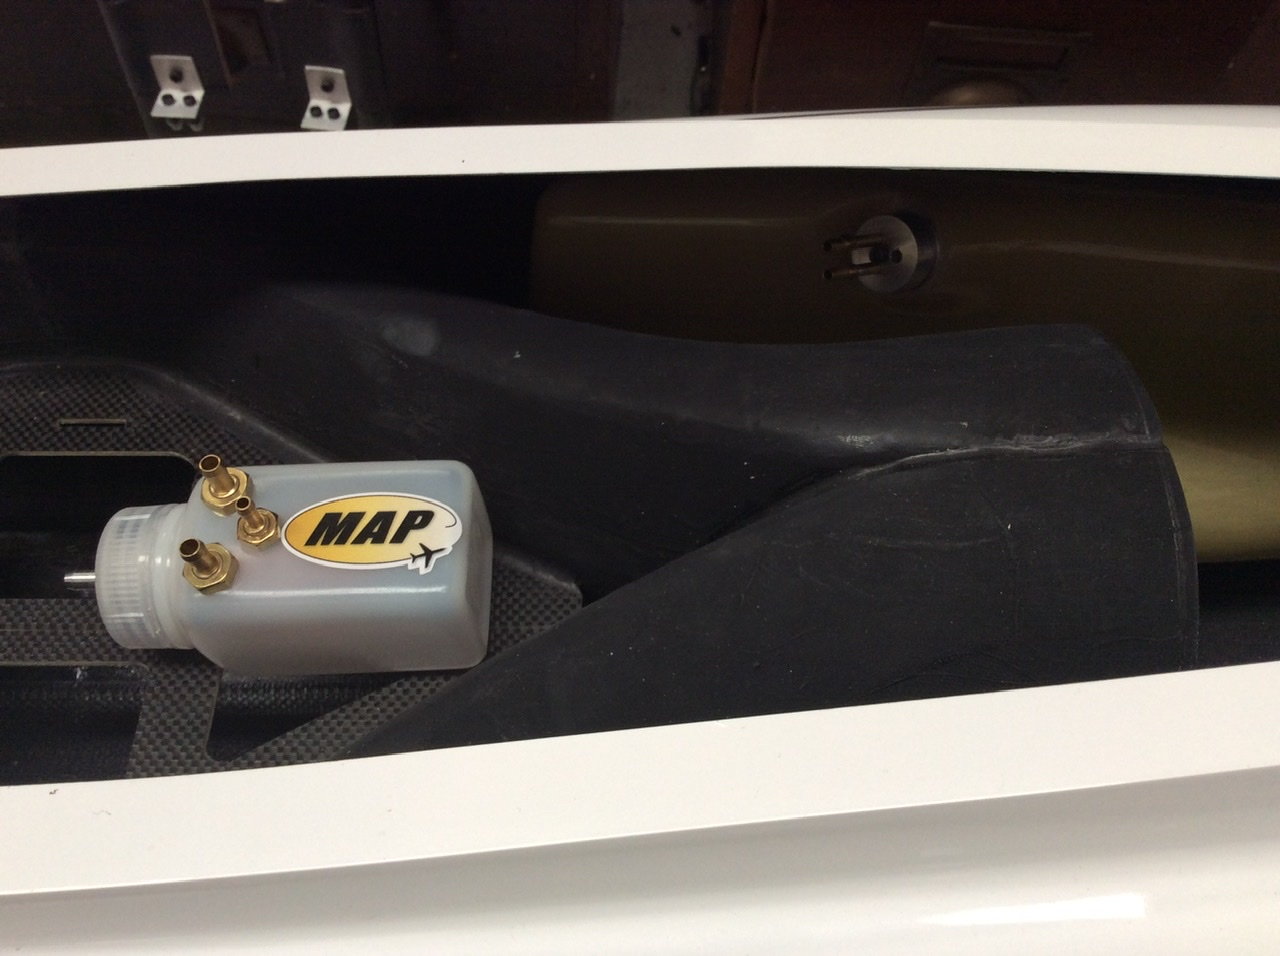
Trying to decide where to mount things. The two prototype models had the bubble trap mounted right at the front, but I think I�ll go for the shortest fuel line runs into a 6oz Map twin input tank
The following users liked this post:
bodywerks (08-27-2020)
08-28-2020 | 09:27 AM
#41
Thread Starter
Tailplane is the first part finished, the linkage screws are not final fix as I�ll wait for the programming stage for that. One of the nice things about the Bolt! and anyone who has built an Ultra Lightning or Mephisto wing will know you need the right tool to fit the servo mounting screws...so CARF have supplied Allen head screws and an extra long Allen driver for the job...makes it really easy 🙂
 08-28-2020 | 11:25 AM
#43
Thread Starter
Yep, makes it a breeze.
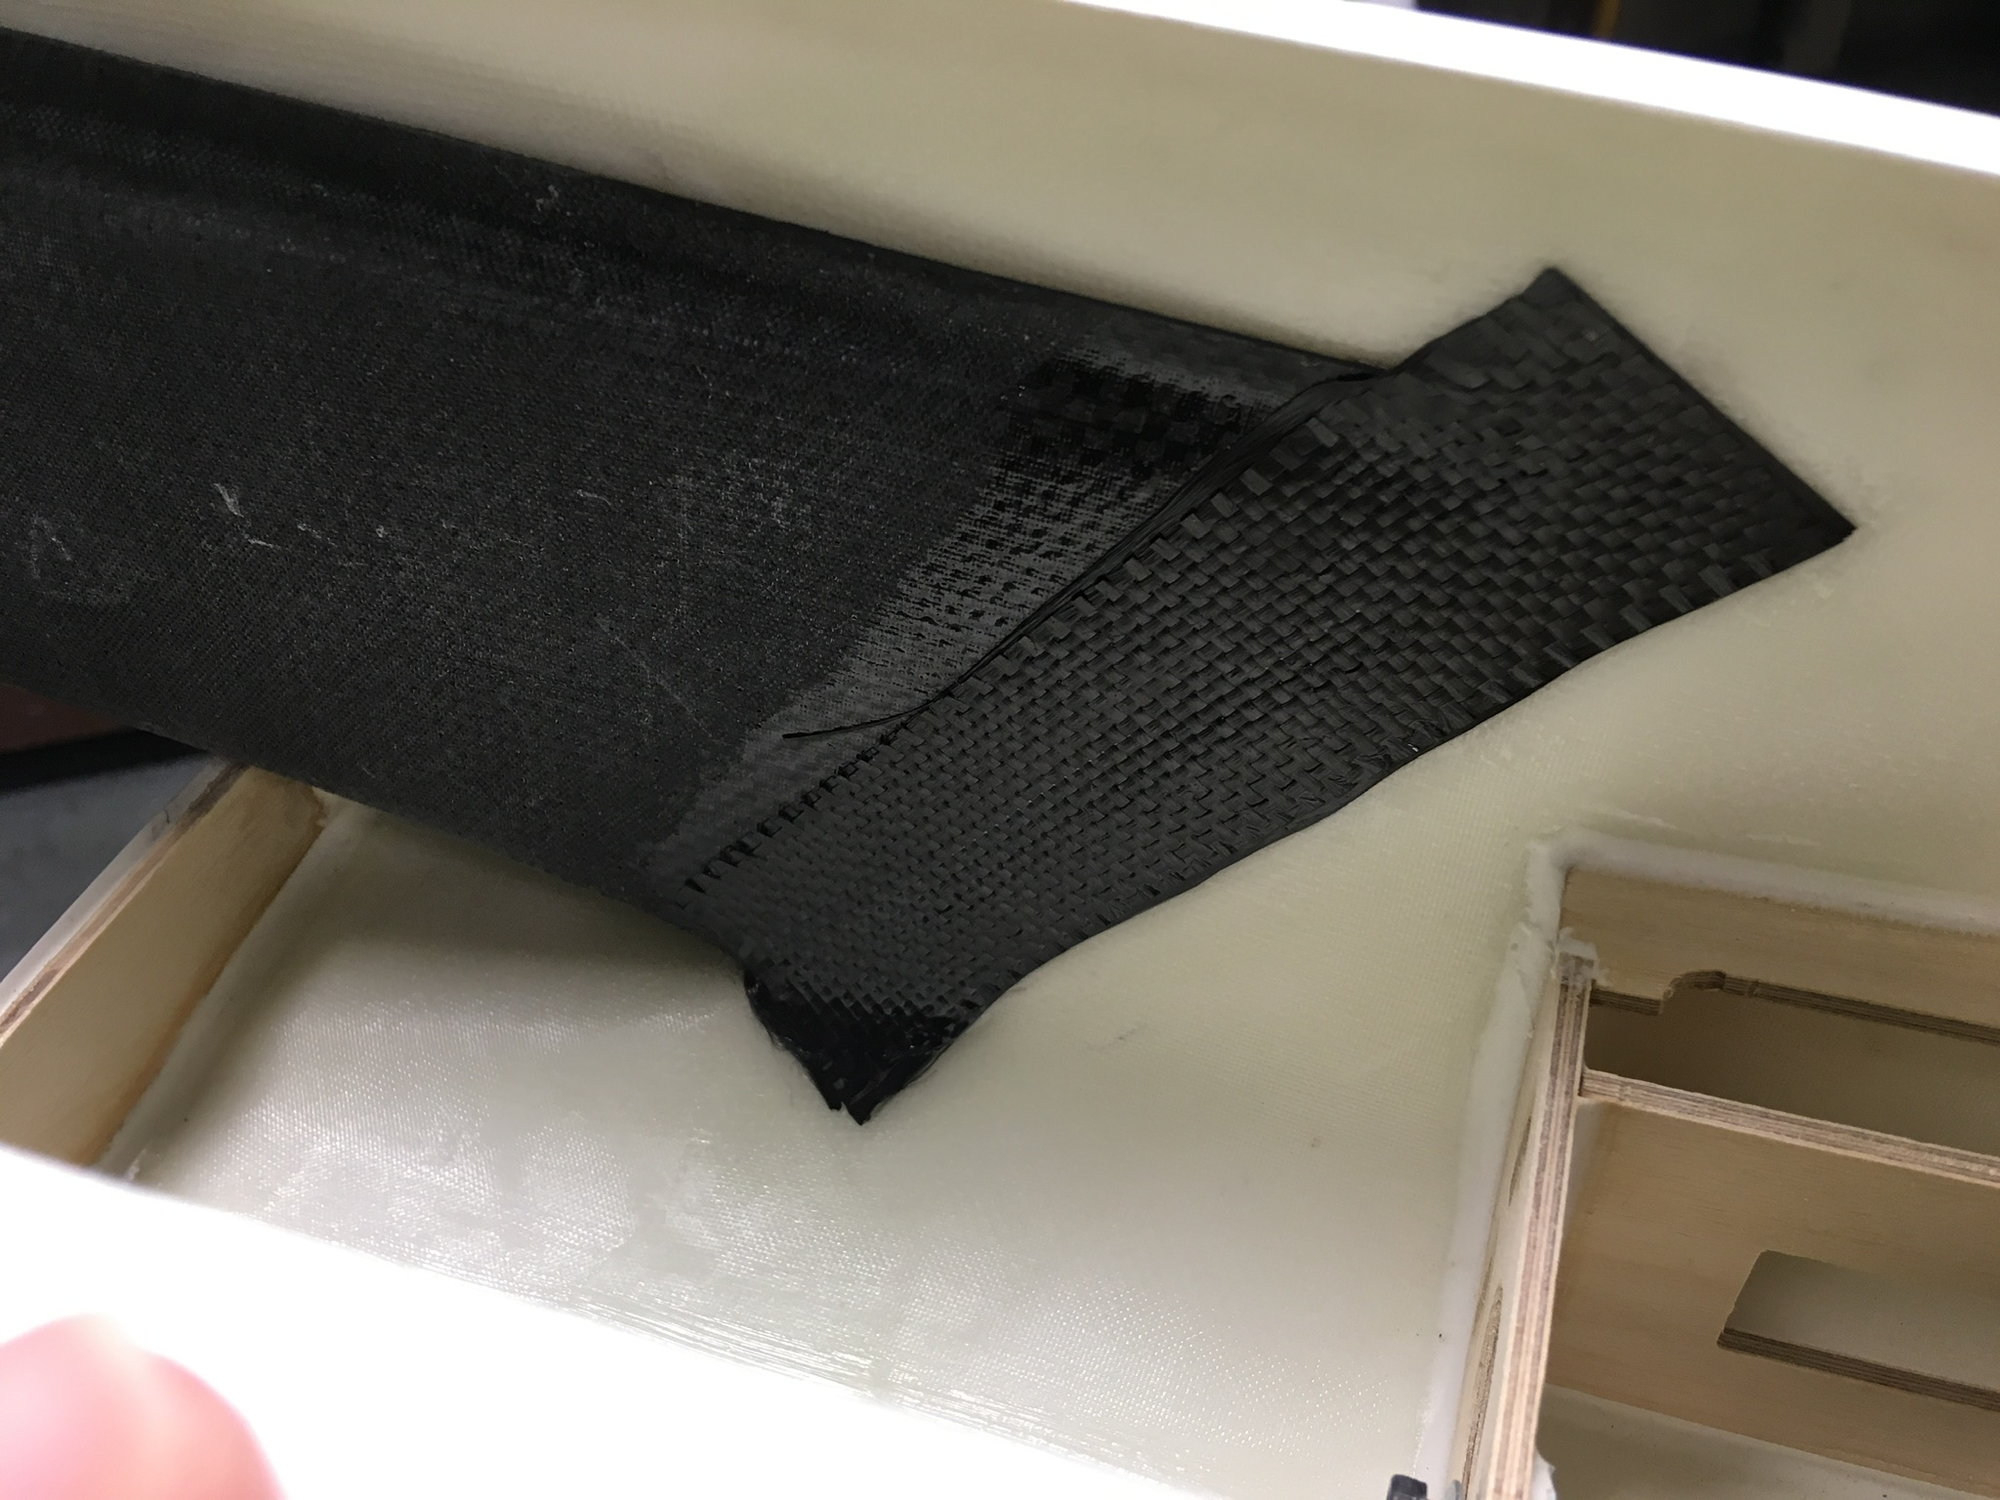
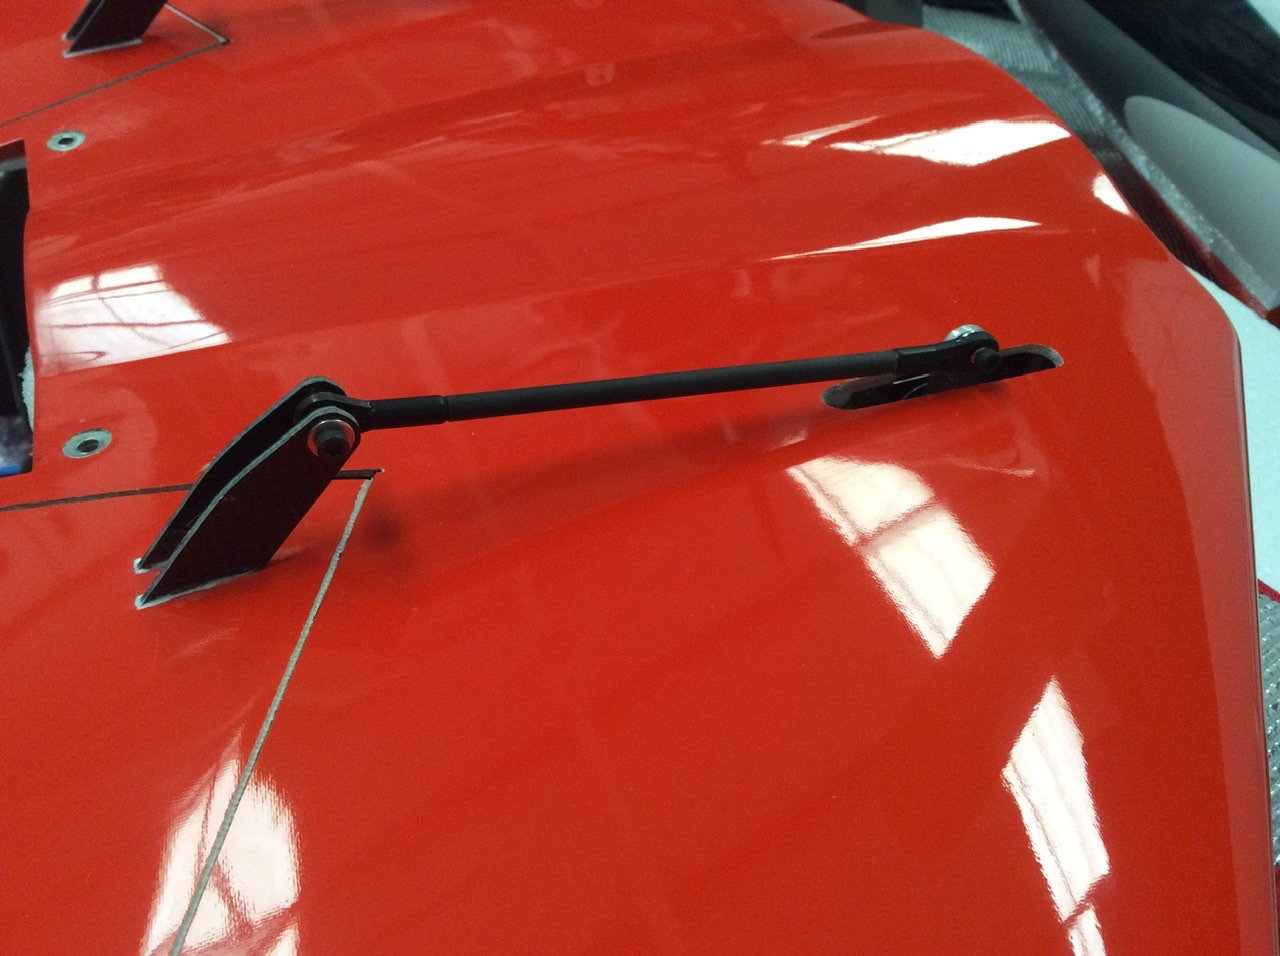
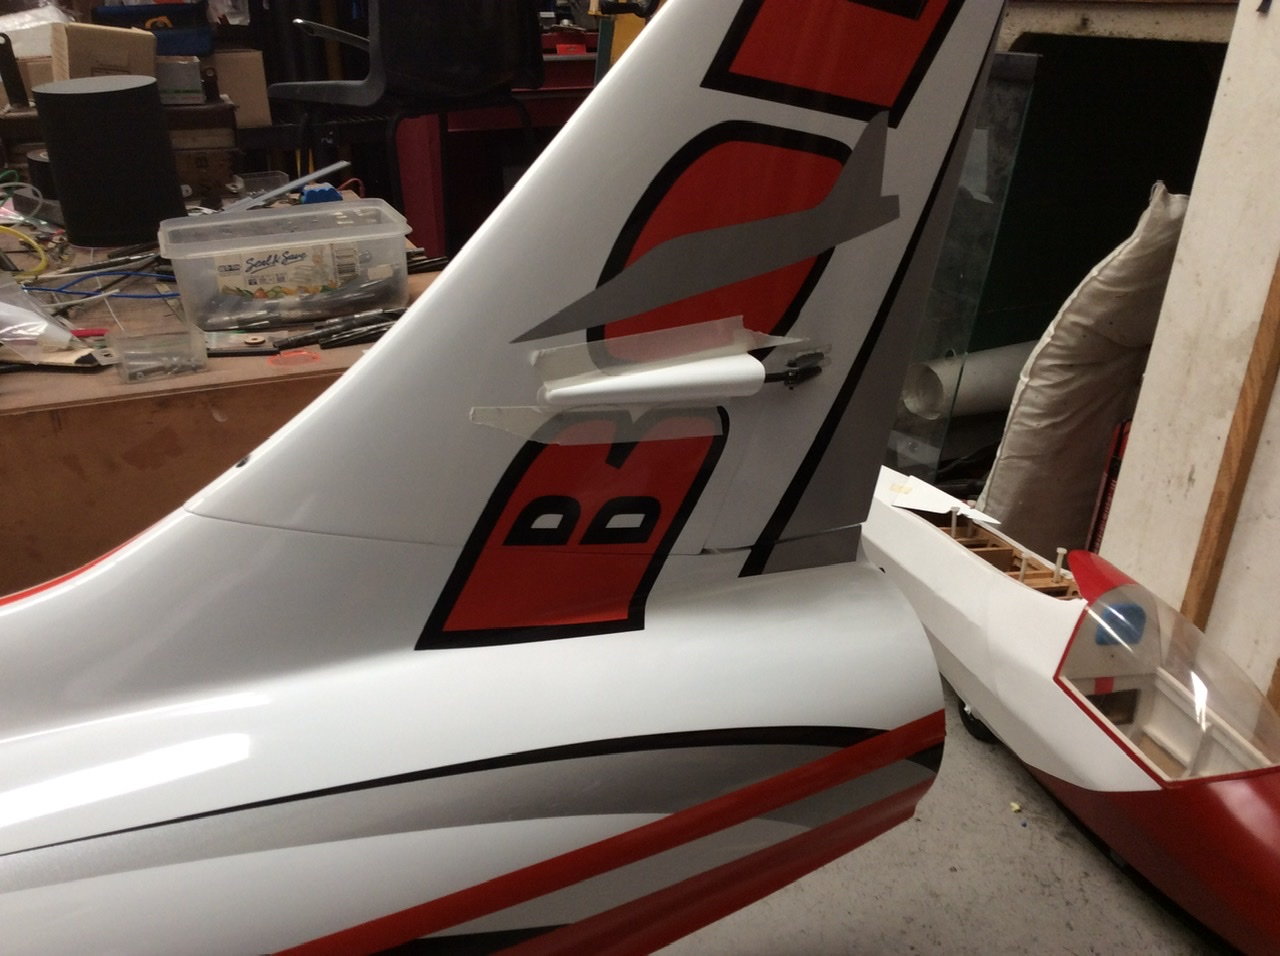
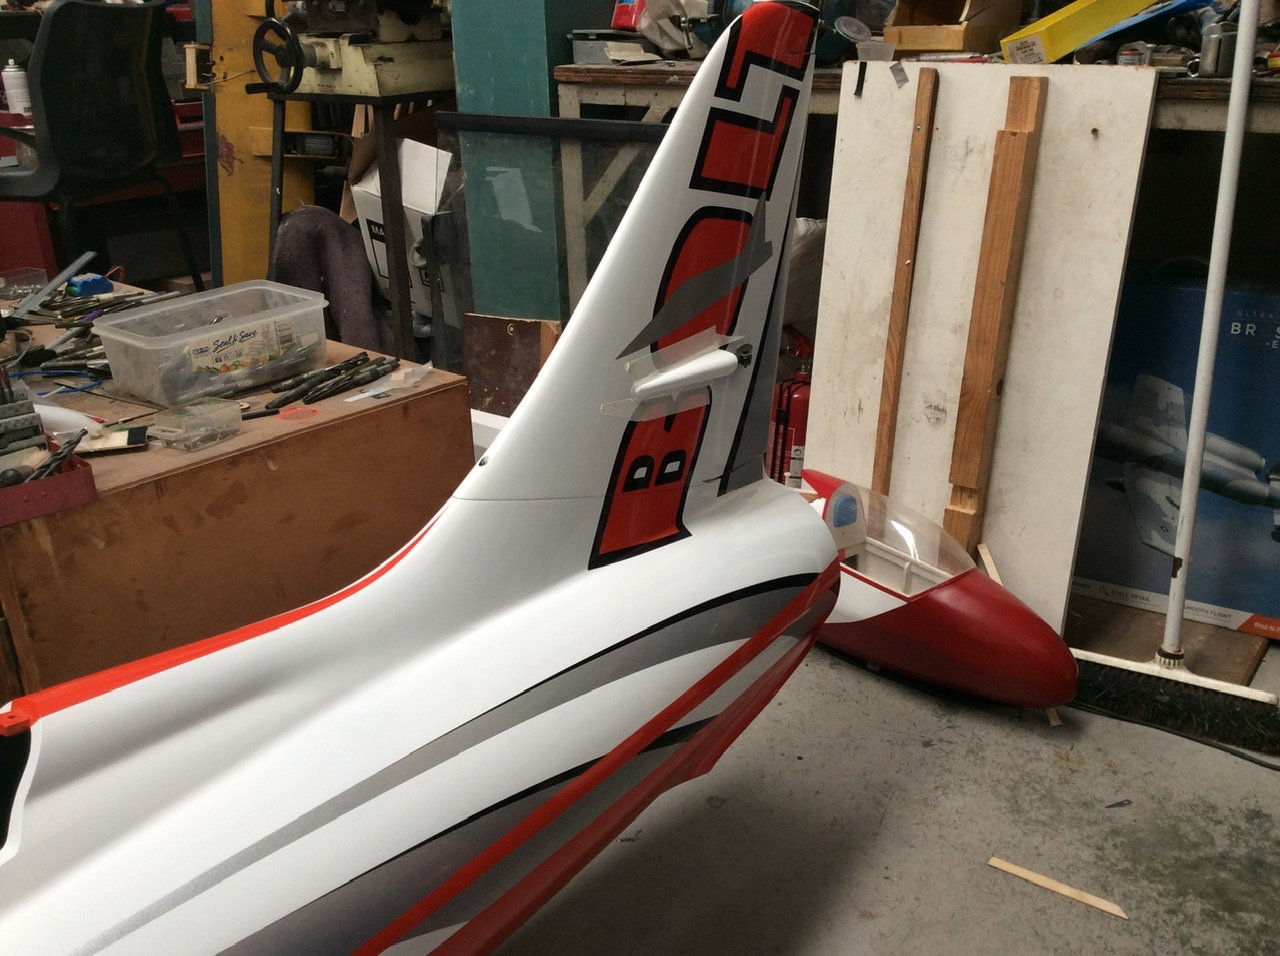
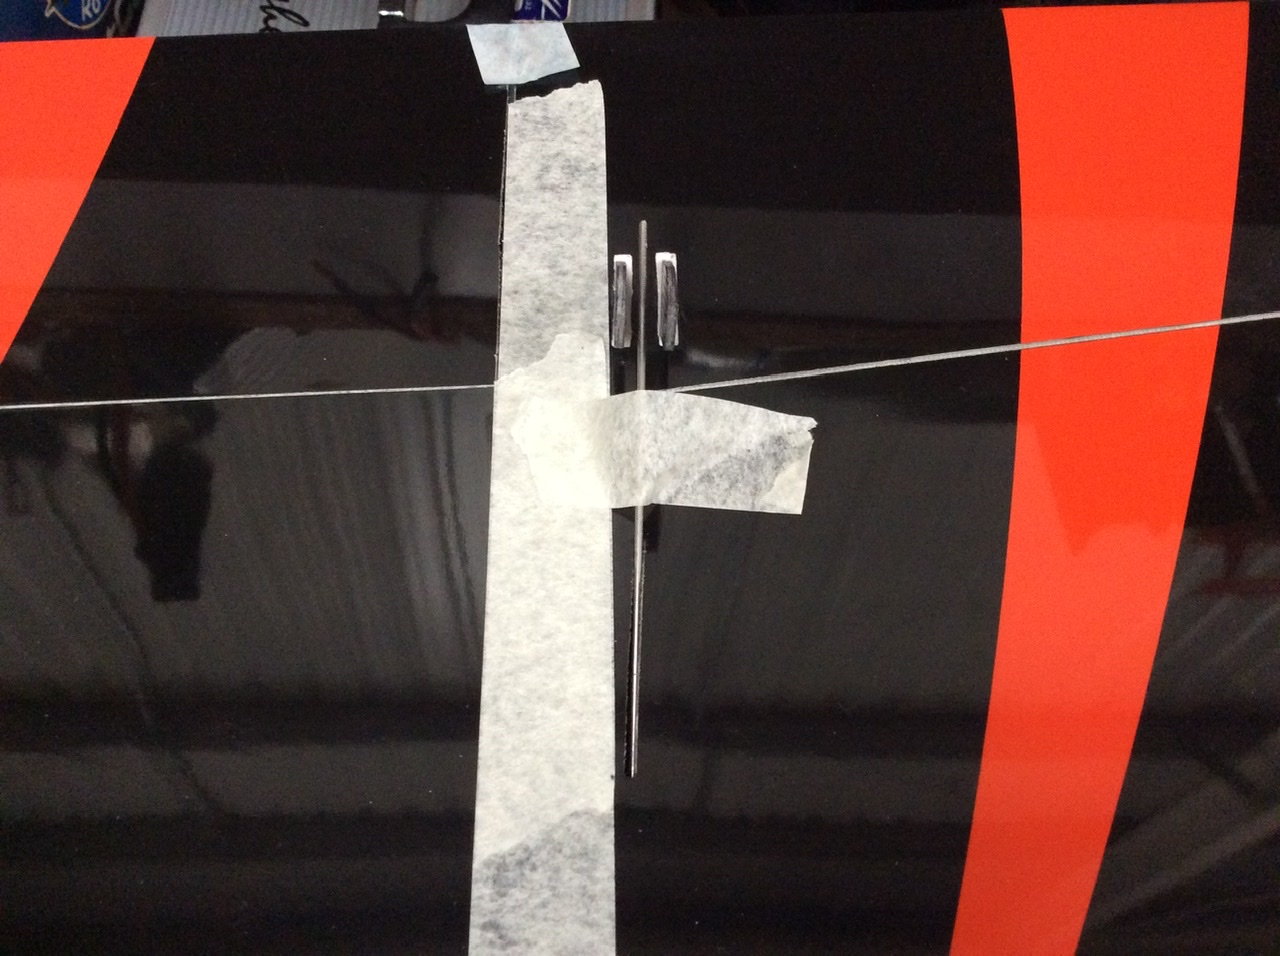
Fin next. The hinge line dictates a ball joint at each end, it was tried with a 90 degree pushrod but it worked out better like this. The slot has to allow for the pushrod indexing...so CARF moulded a cover. Not just a flat base flex and fix down- no it�s moulded to match perfectly just sitting there like I show. It�s glass fibre not plastic.I�ve started to trim the flange and will finalise tomorrow, eldest daughter is just home from a week in Scotland so I�m required for some daddy time,.,even though she�s 23!
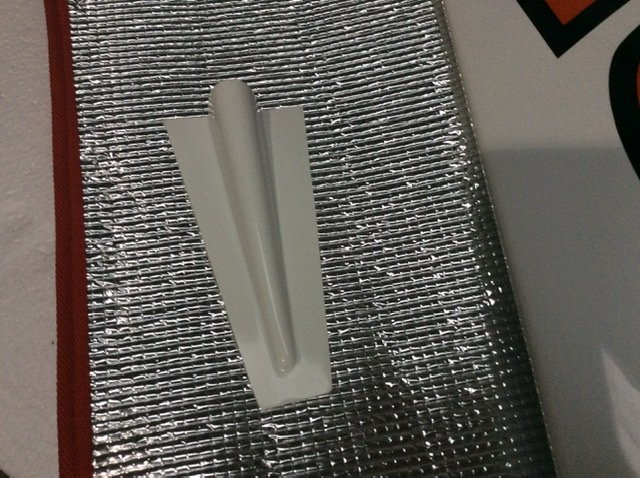

Fin next. The hinge line dictates a ball joint at each end, it was tried with a 90 degree pushrod but it worked out better like this. The slot has to allow for the pushrod indexing...so CARF moulded a cover. Not just a flat base flex and fix down- no it�s moulded to match perfectly just sitting there like I show. It�s glass fibre not plastic.I�ve started to trim the flange and will finalise tomorrow, eldest daughter is just home from a week in Scotland so I�m required for some daddy time,.,even though she�s 23!
Last edited by Dave Wilshere; 08-28-2020 at 11:27 AM.
08-29-2020 | 07:26 AM
#44
Thread Starter
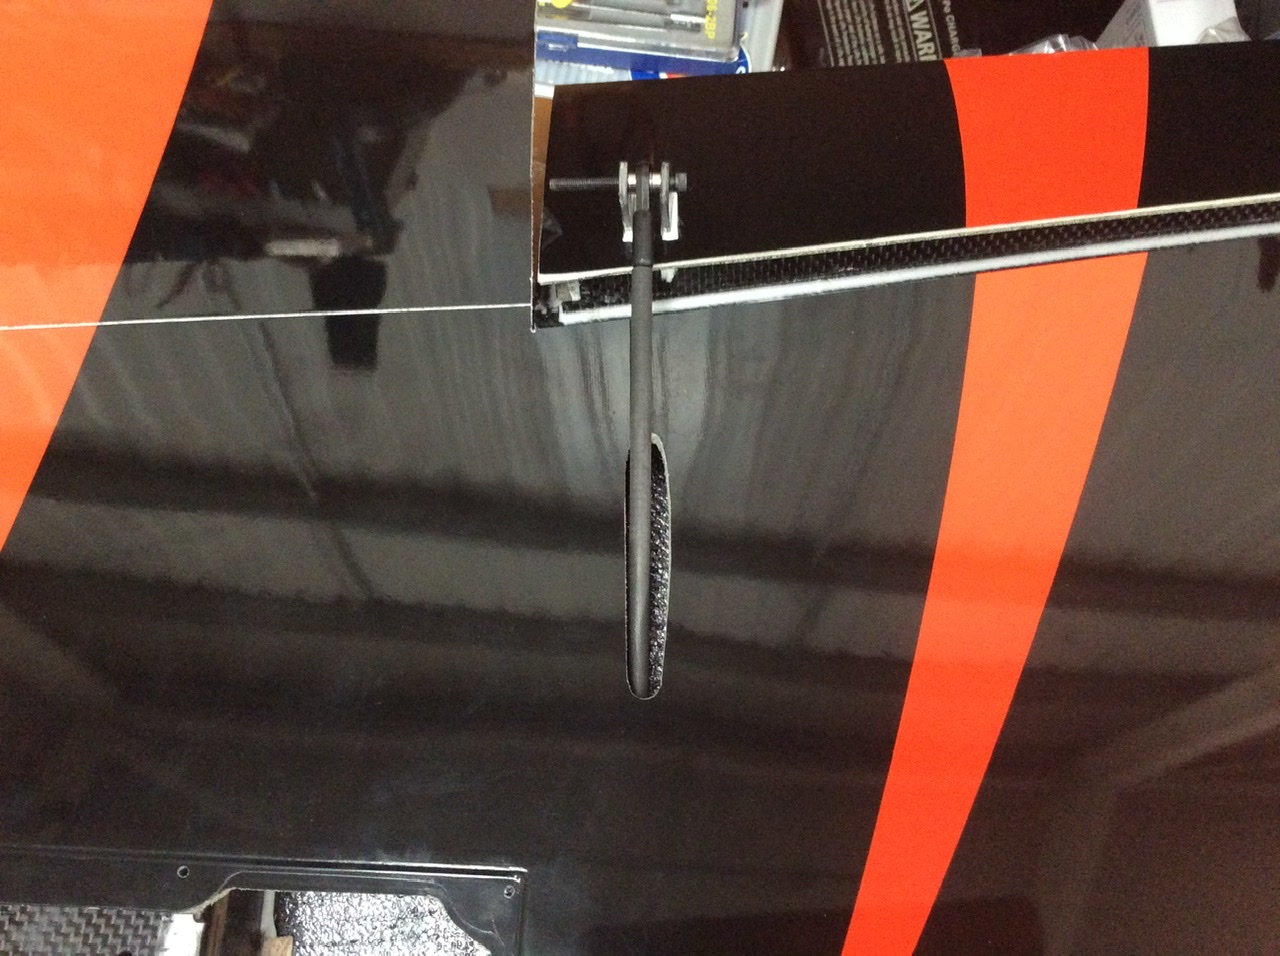
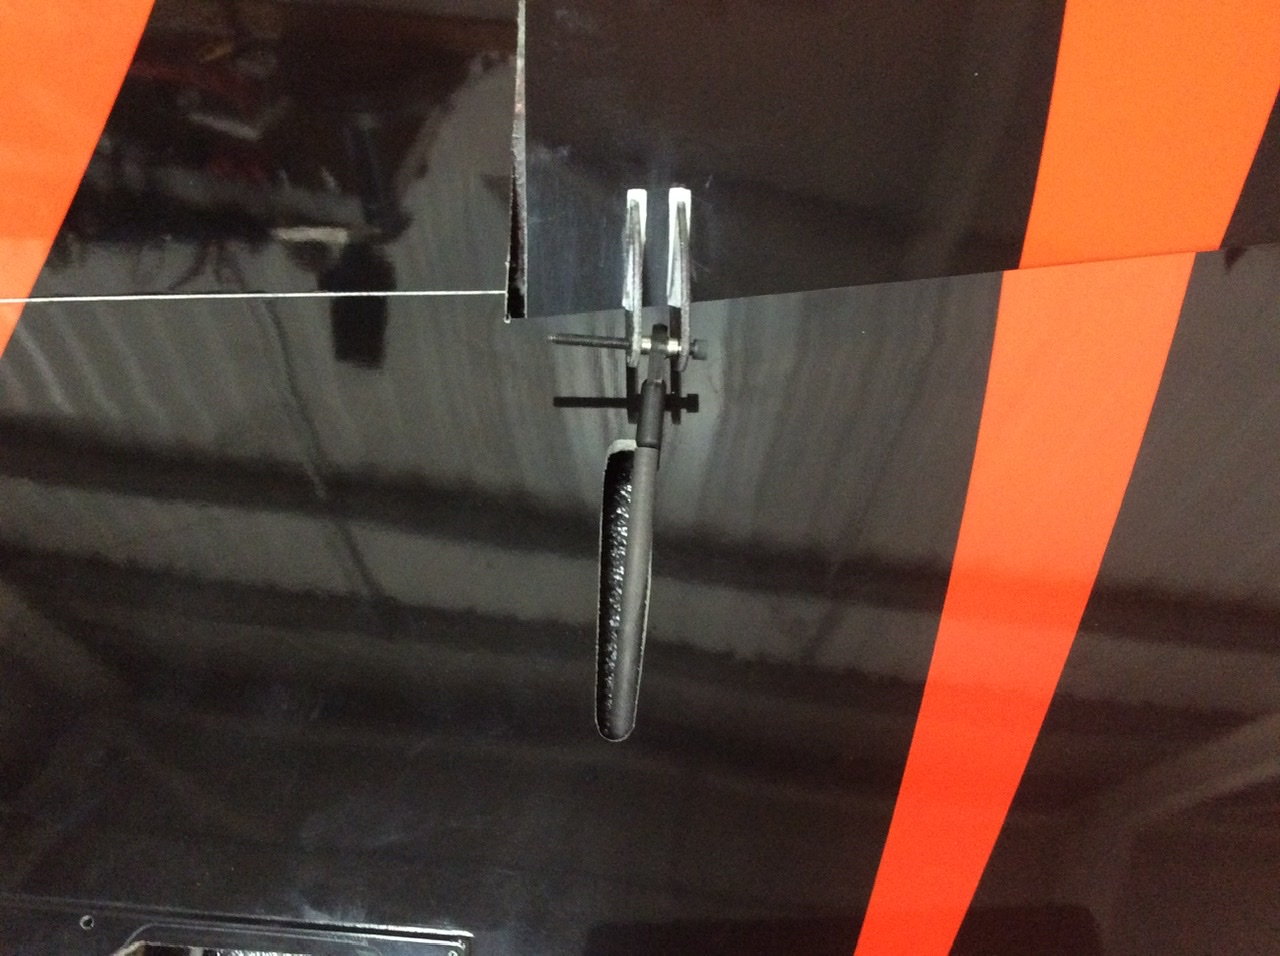
Here is the fin in position so people can understand the fairing is level when installed because of the angled mating surface. I have not decided whether to silicon or screw the fairing on. I don�t need to remove the fairing to take the pushrod out or the servo so it might even be Hysol time 🙂
08-30-2020 | 11:12 AM
#45
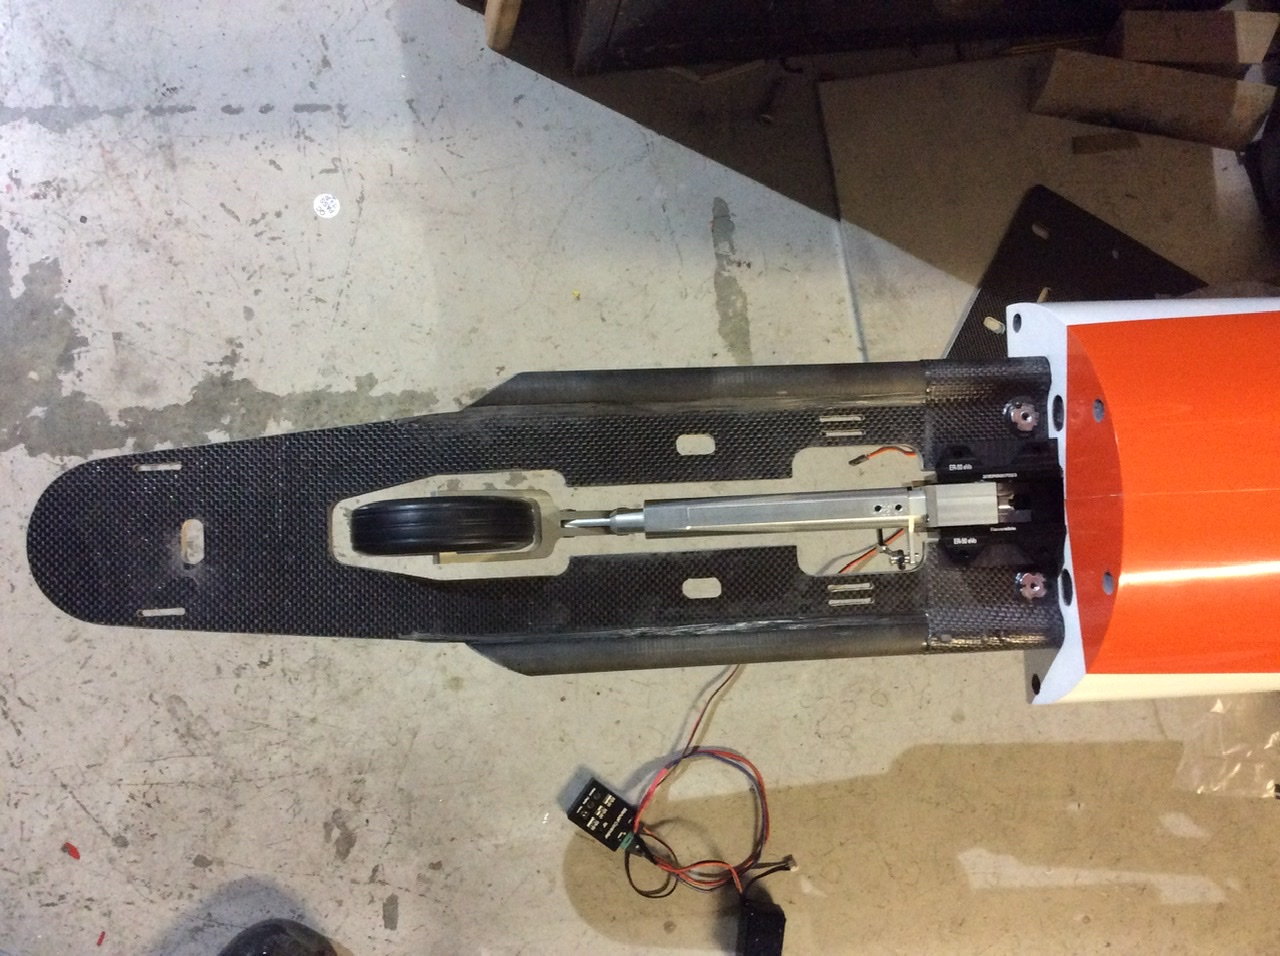
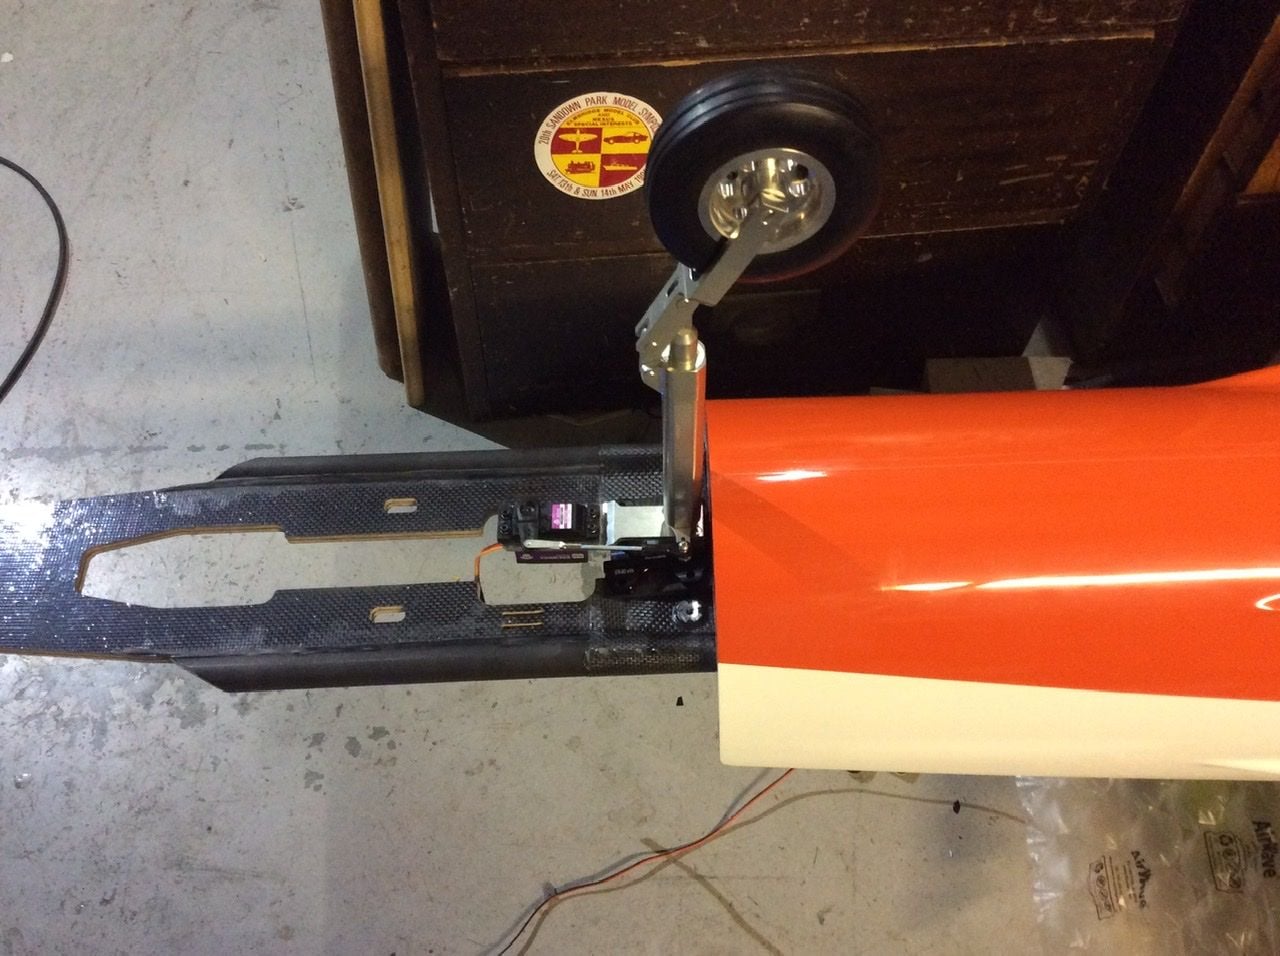
Thread Starter
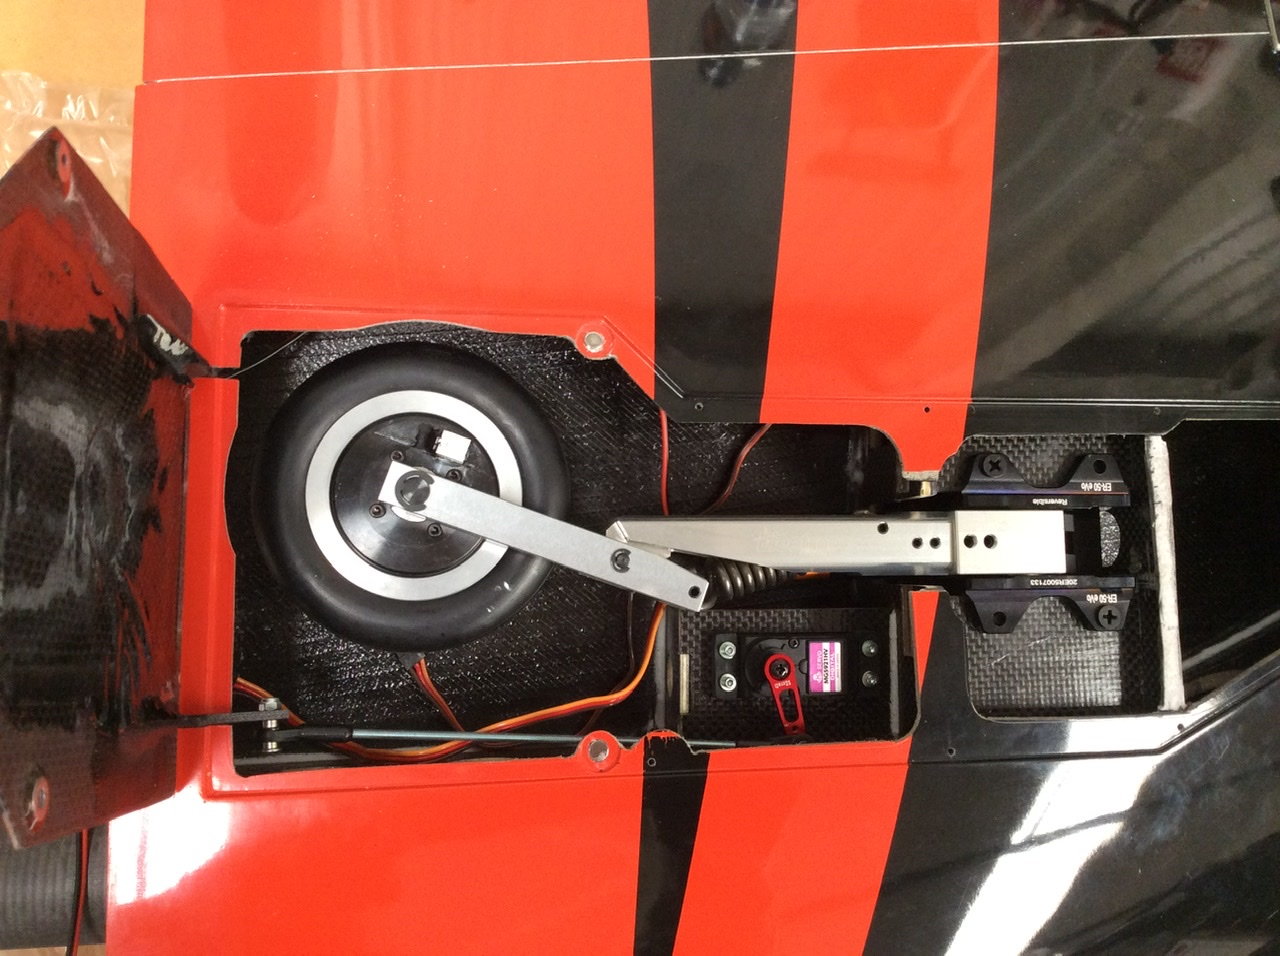
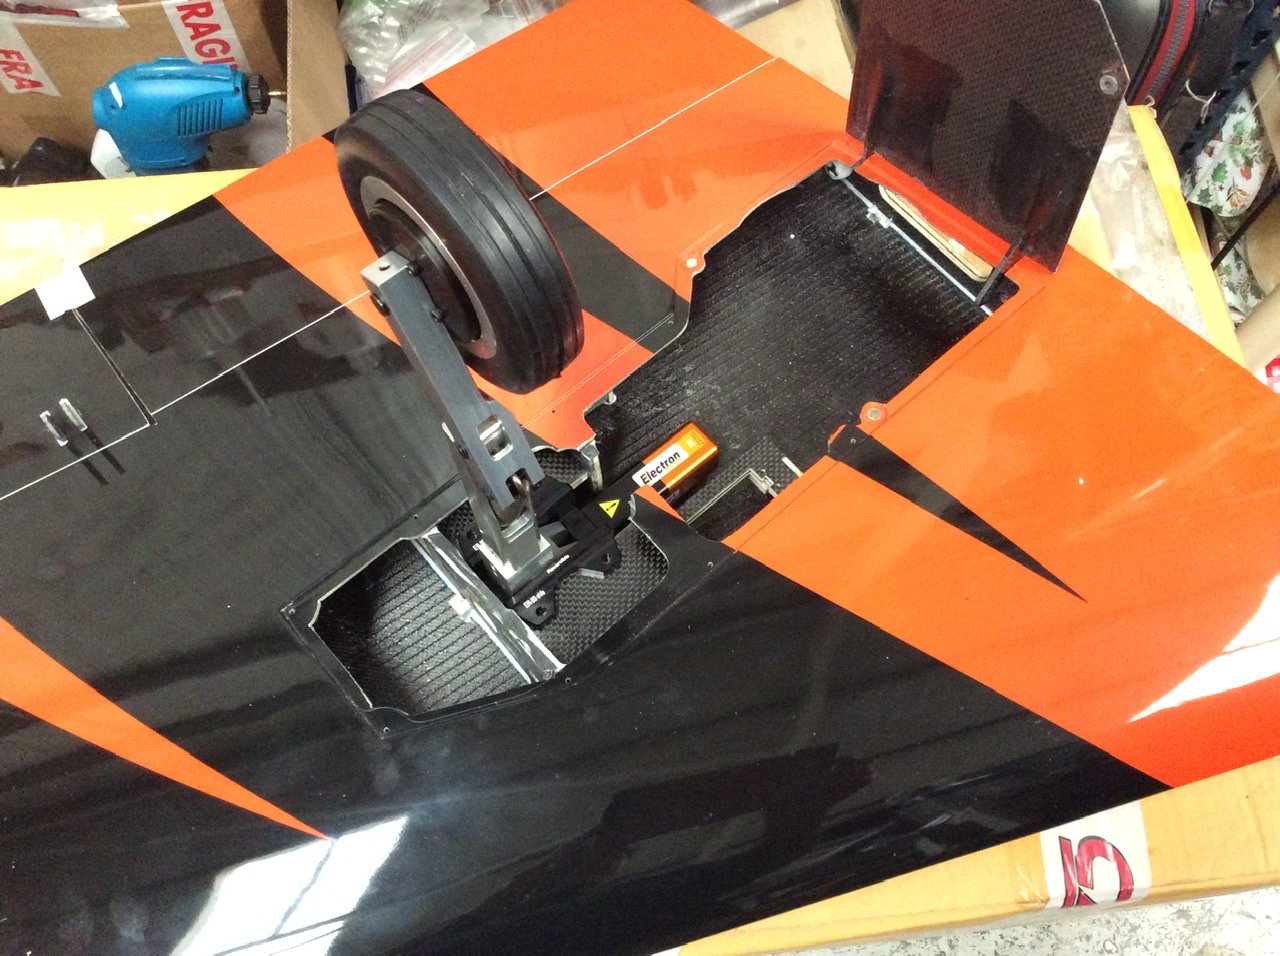
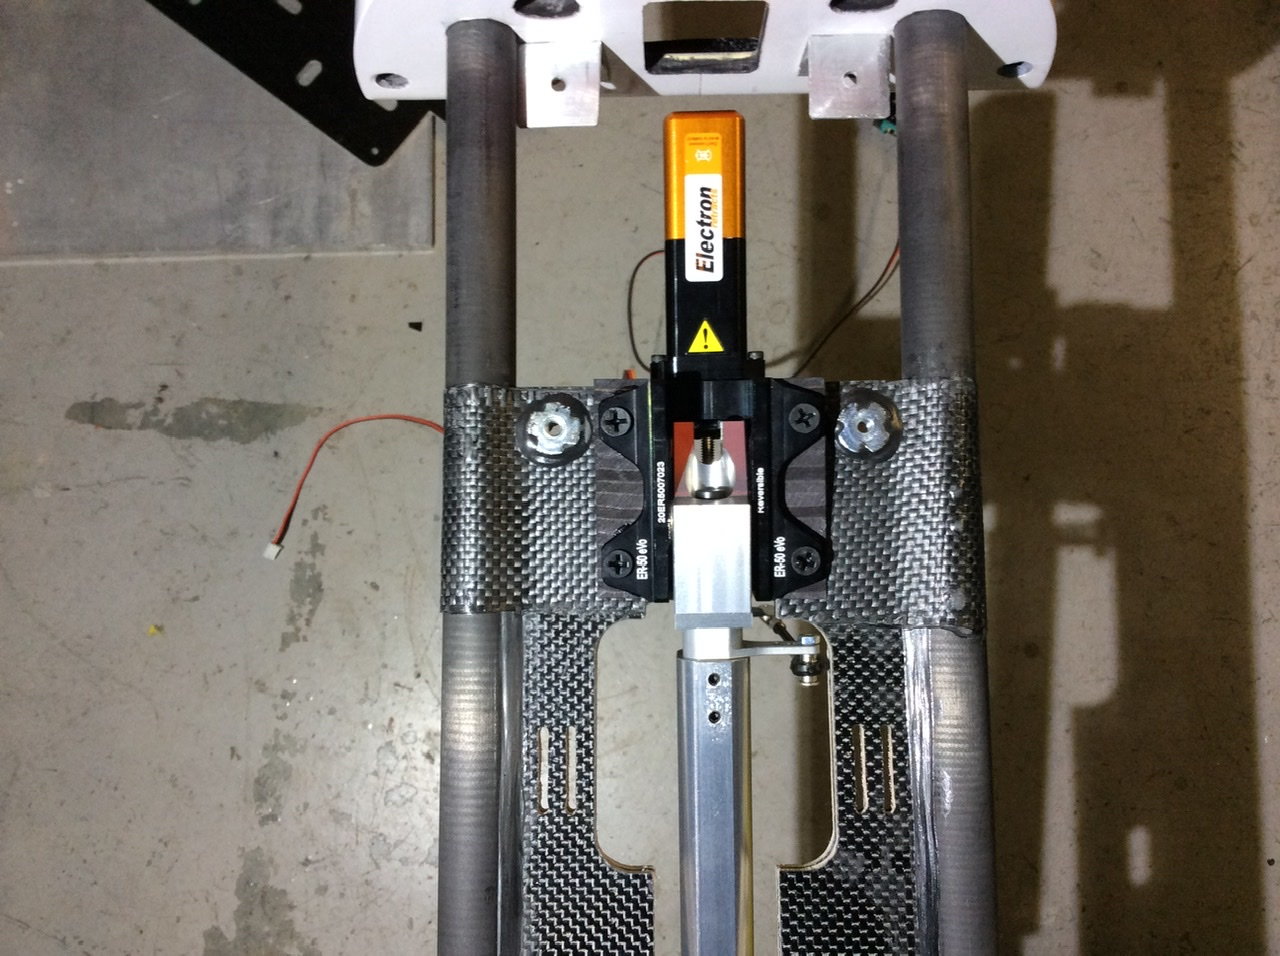
Not much time today as I was out flying with customers. Started to install gear. Just checking wheel alignment based on square leg to square Electron yoke. I like a tiny bit of toe in.
CARF supply CSK wood screws to hold the gear which is quick and simple if you go that route.
CARF supply CSK wood screws to hold the gear which is quick and simple if you go that route.
The following users liked this post:
Tom ling (08-30-2020)
09-01-2020 | 01:19 PM
#46
Thread Starter
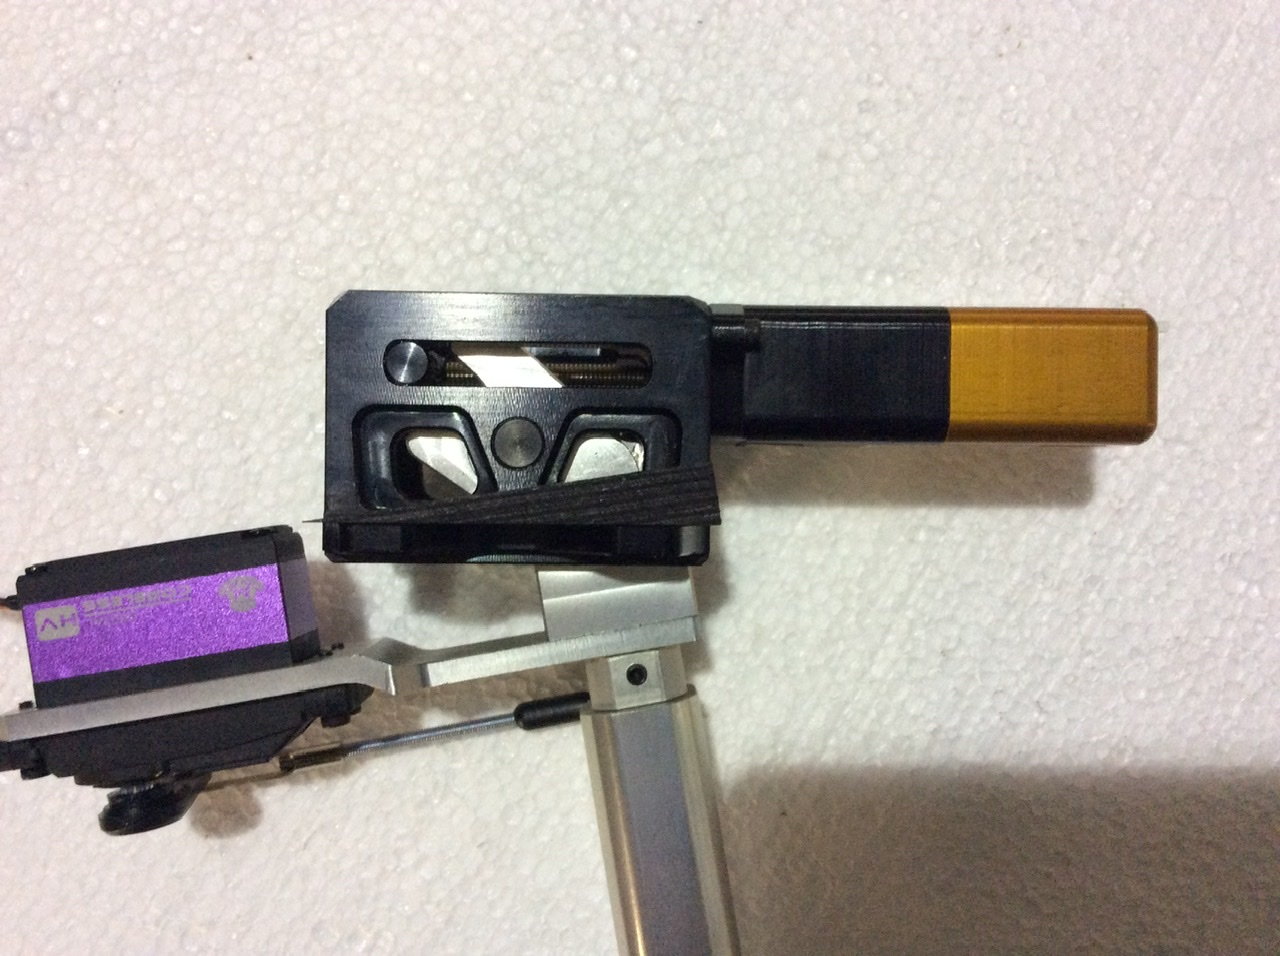
Started looking at the nose gear assembly tonight, flats on the nose pin are a must for me. The kit includes ball links for both ends of the steering linkage but I like a nylon horn on the steering servo to reduce the pounding they get. I used a Clevis and still got a perfect alignment. the clean nose needs a wedge to get the 105 degree nose leg vertical, the parts provided by CARF required no trimming and were identical.
I was mighty impressed the whole nose assembly went in without any notching or trimming around the leg, wheel or linkage!
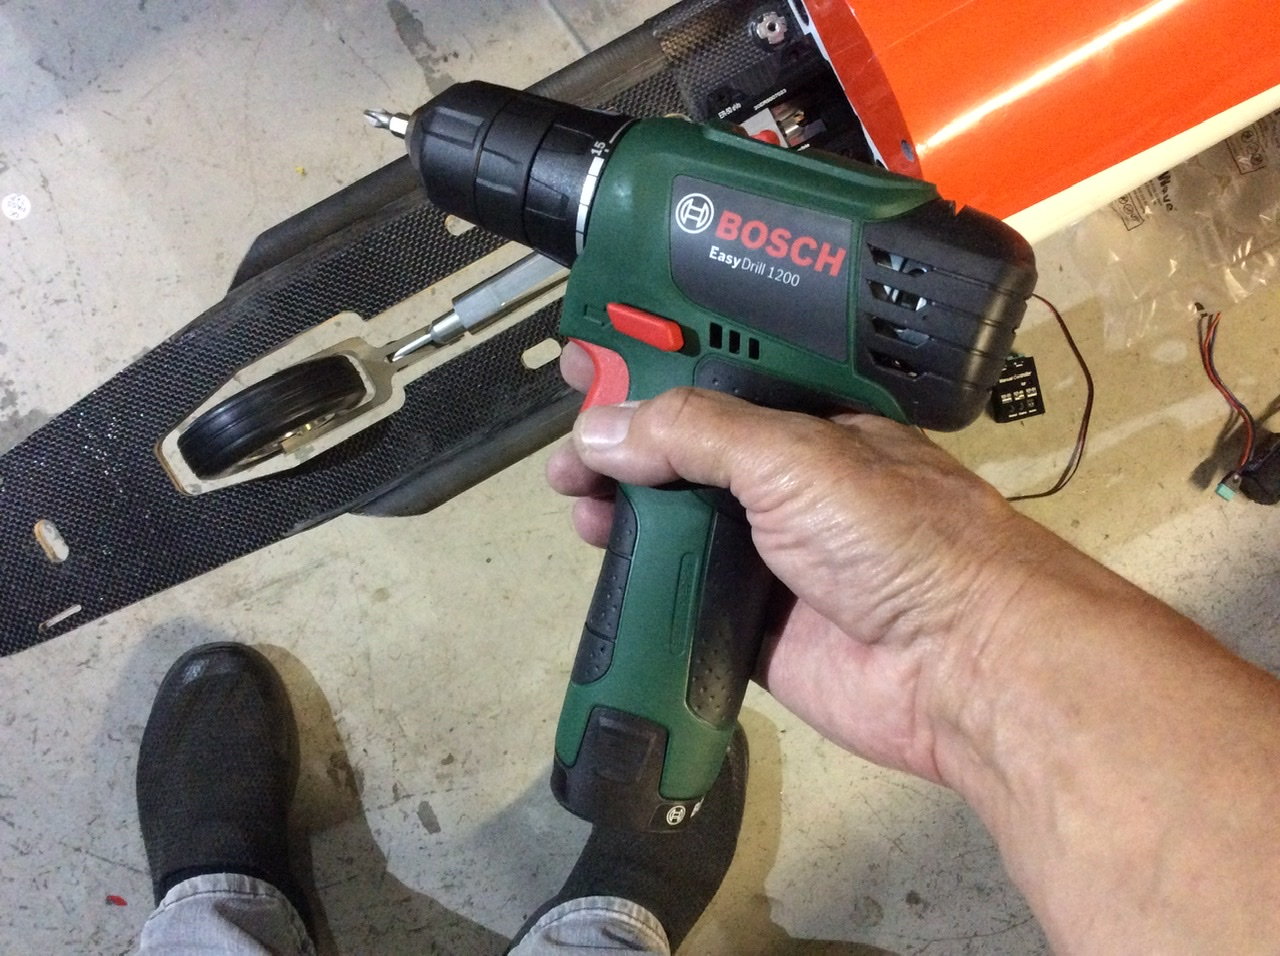
i treated myself to a new drill today, came in time to fix the nose unit in place 🙂
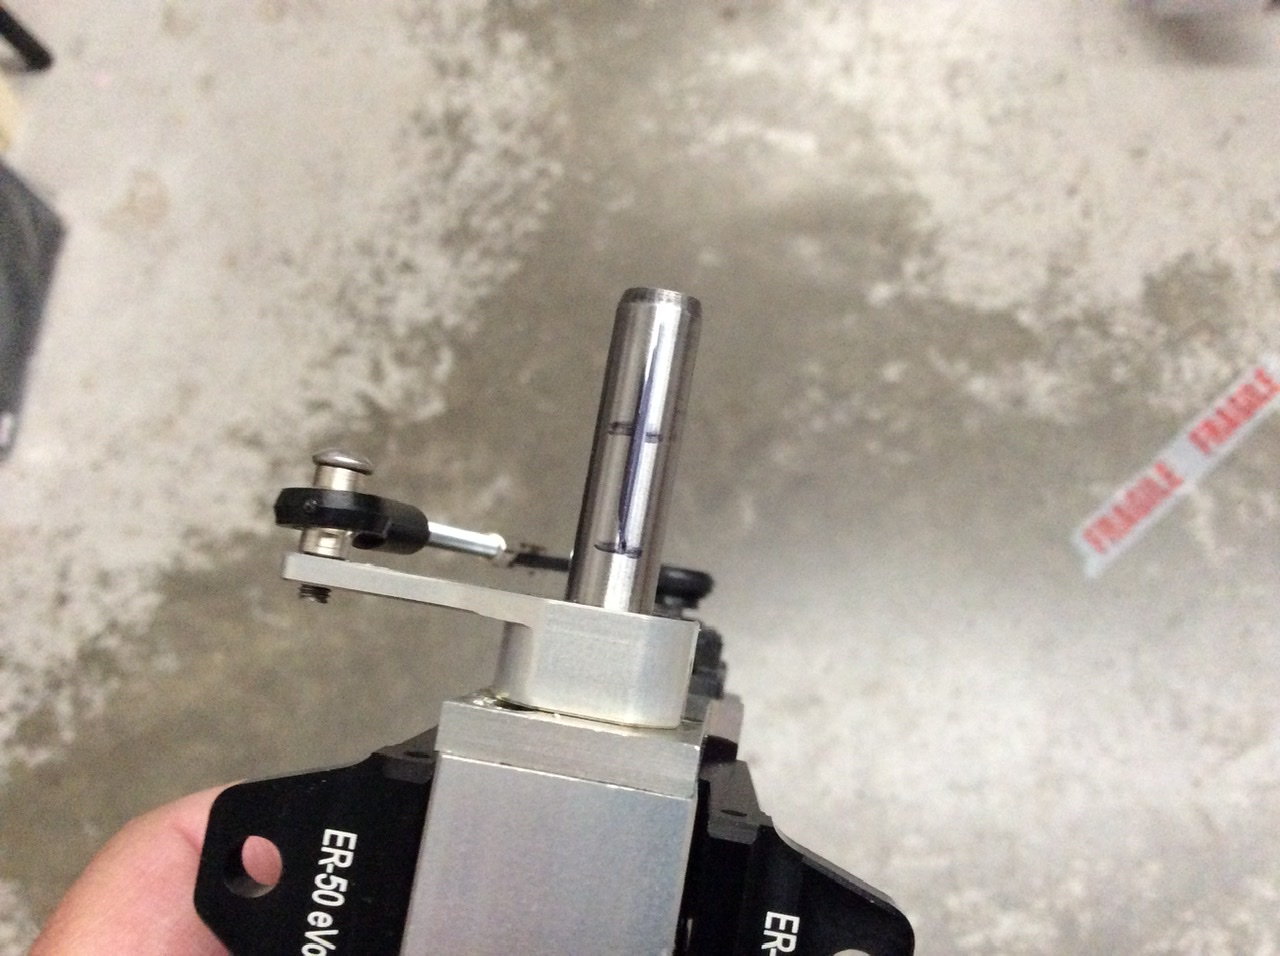

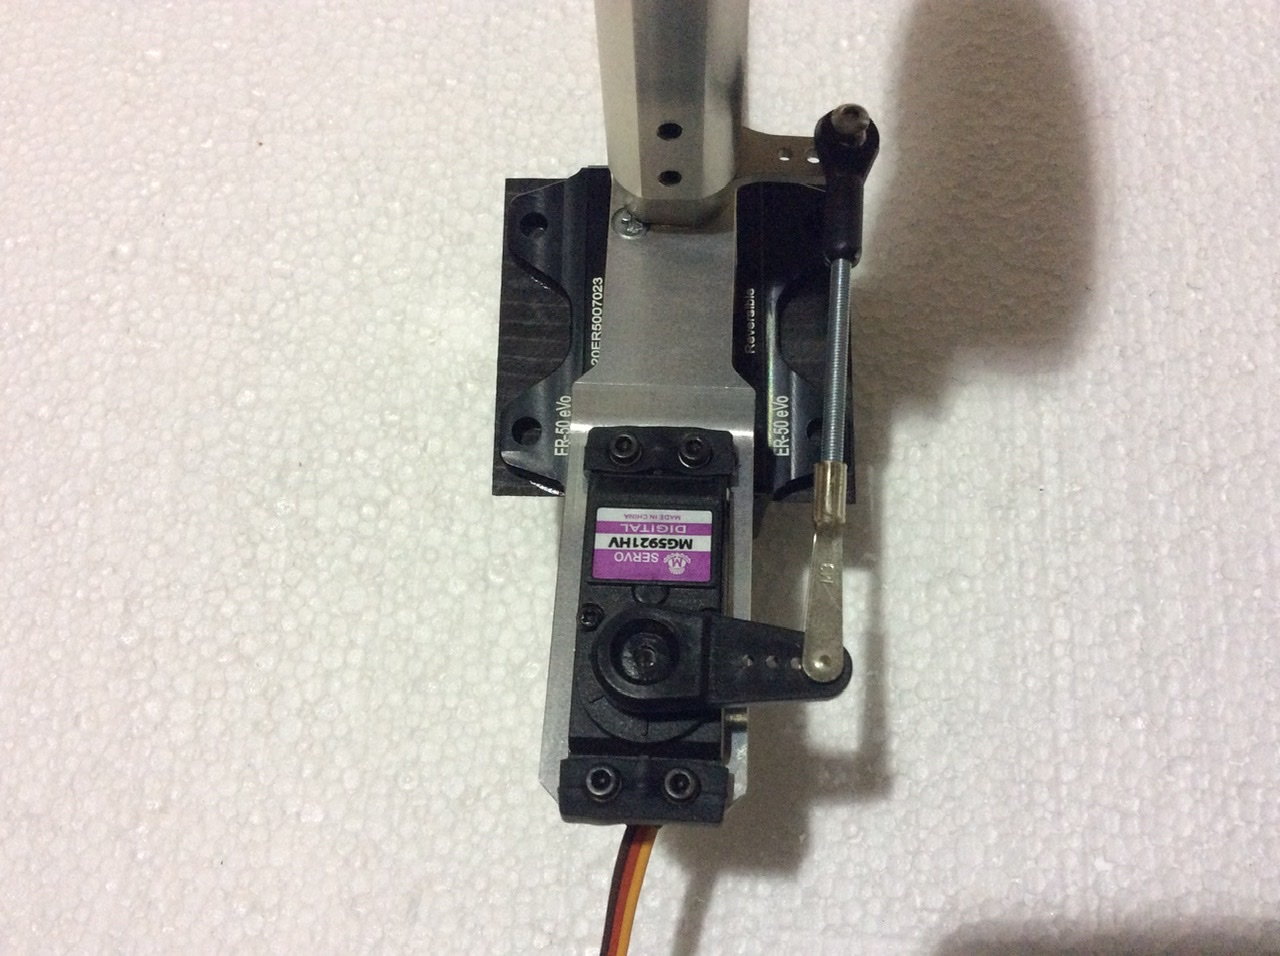
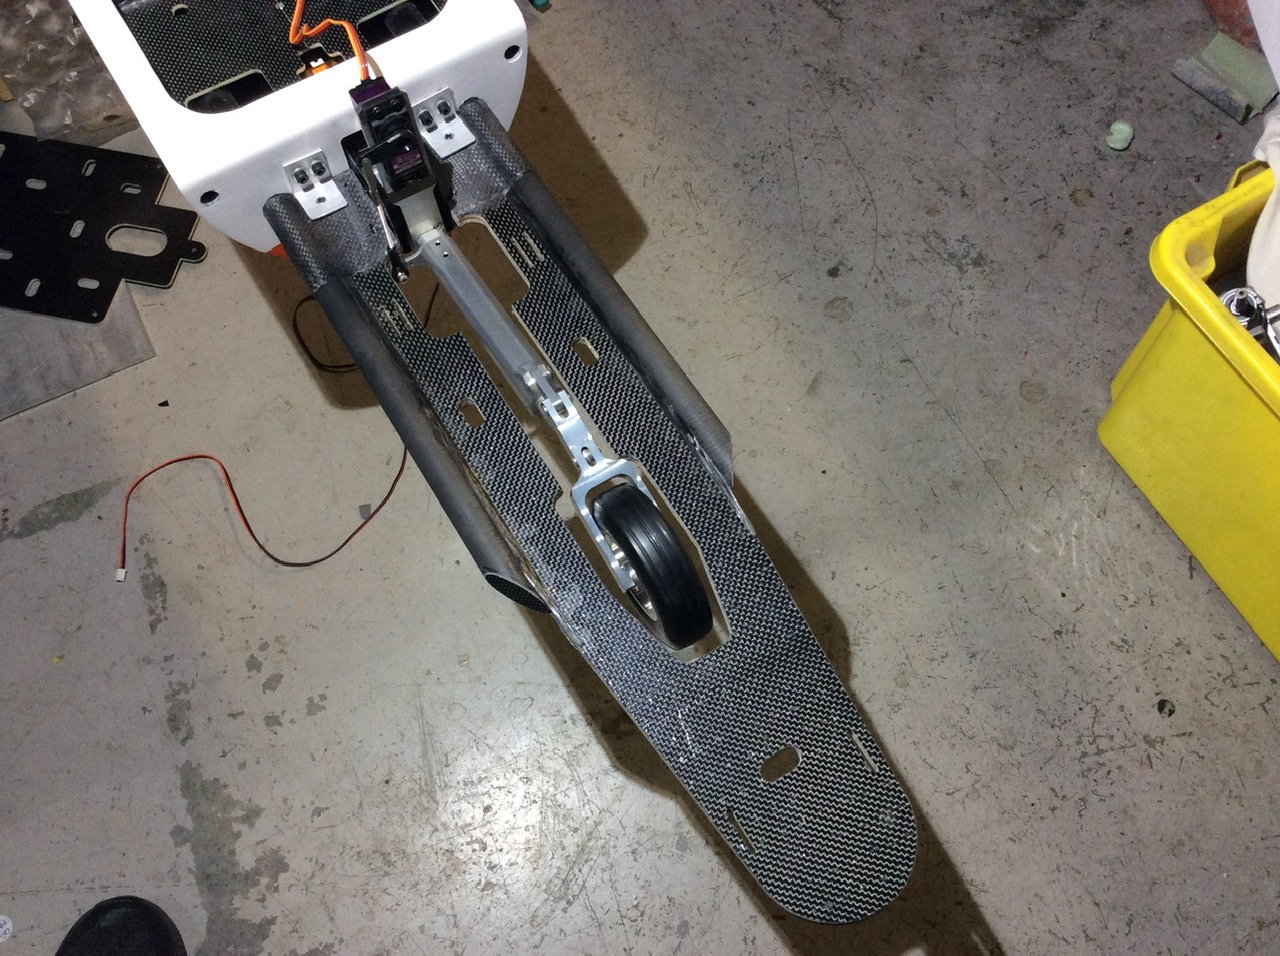
I was mighty impressed the whole nose assembly went in without any notching or trimming around the leg, wheel or linkage!
i treated myself to a new drill today, came in time to fix the nose unit in place 🙂
The following users liked this post:
bodywerks (09-01-2020)
09-01-2020 | 10:29 PM
#47
Thread Starter
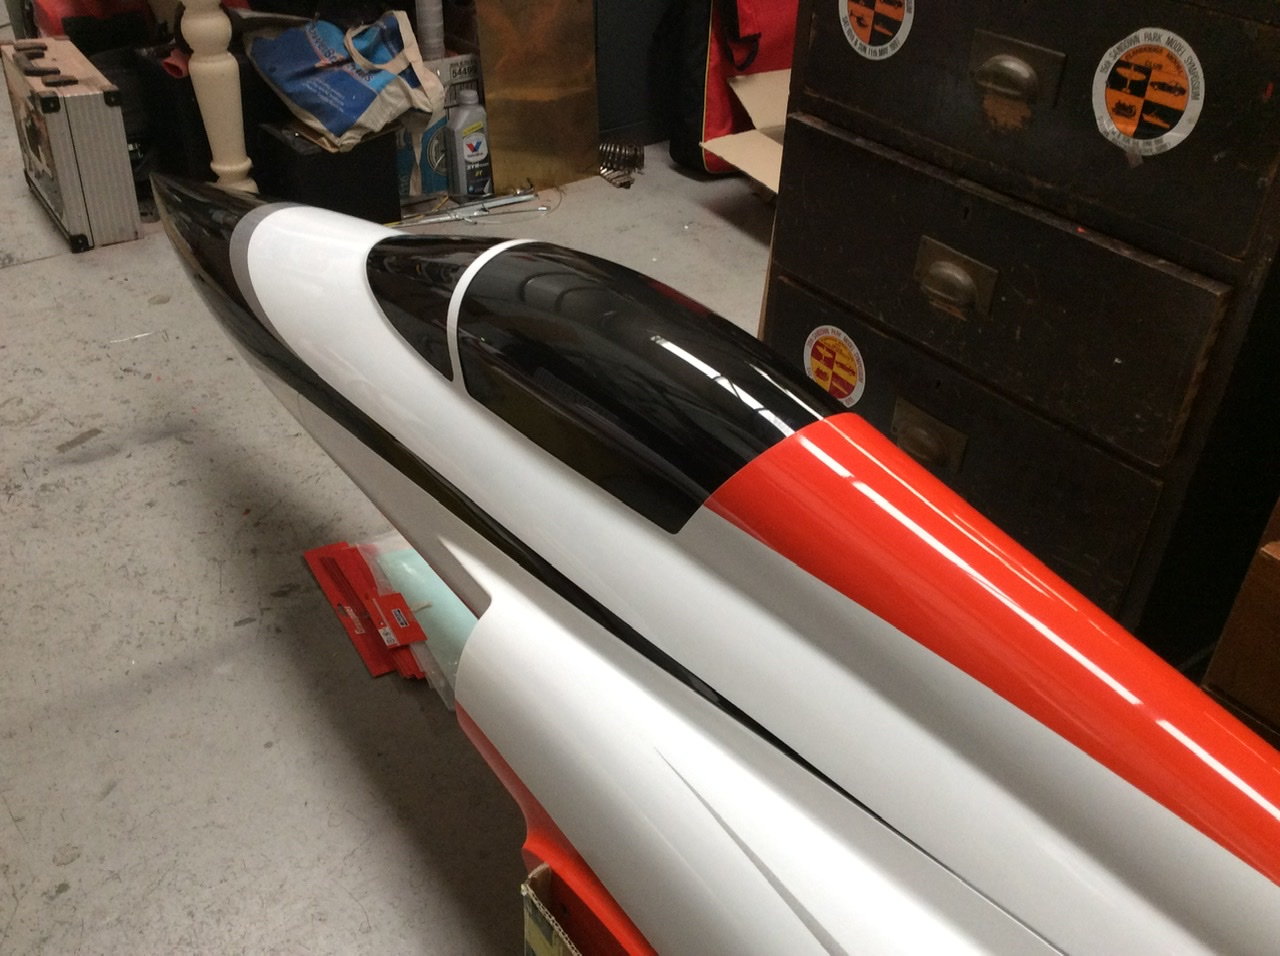

I couldn�t decide on the cockpit set up, so ordered a pilot figure to see how that worked and it was too small...so I went with the original idea of tinting it.
Won�t know if it worked until I get the whole thing together and stand back!
The following users liked this post:
bodywerks (09-02-2020)
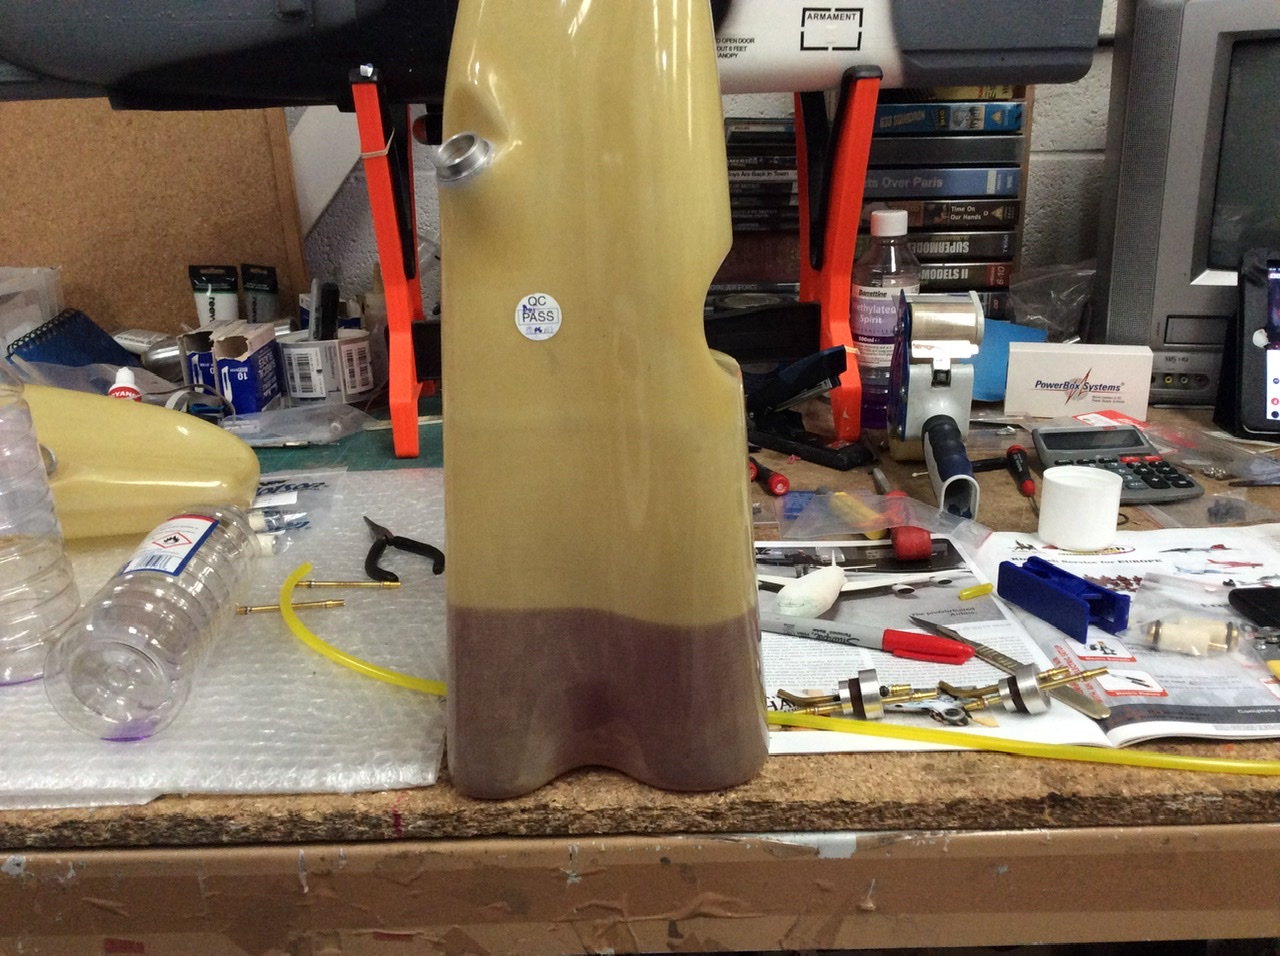
09-03-2020 | 01:04 PM
#48
Thread Starter
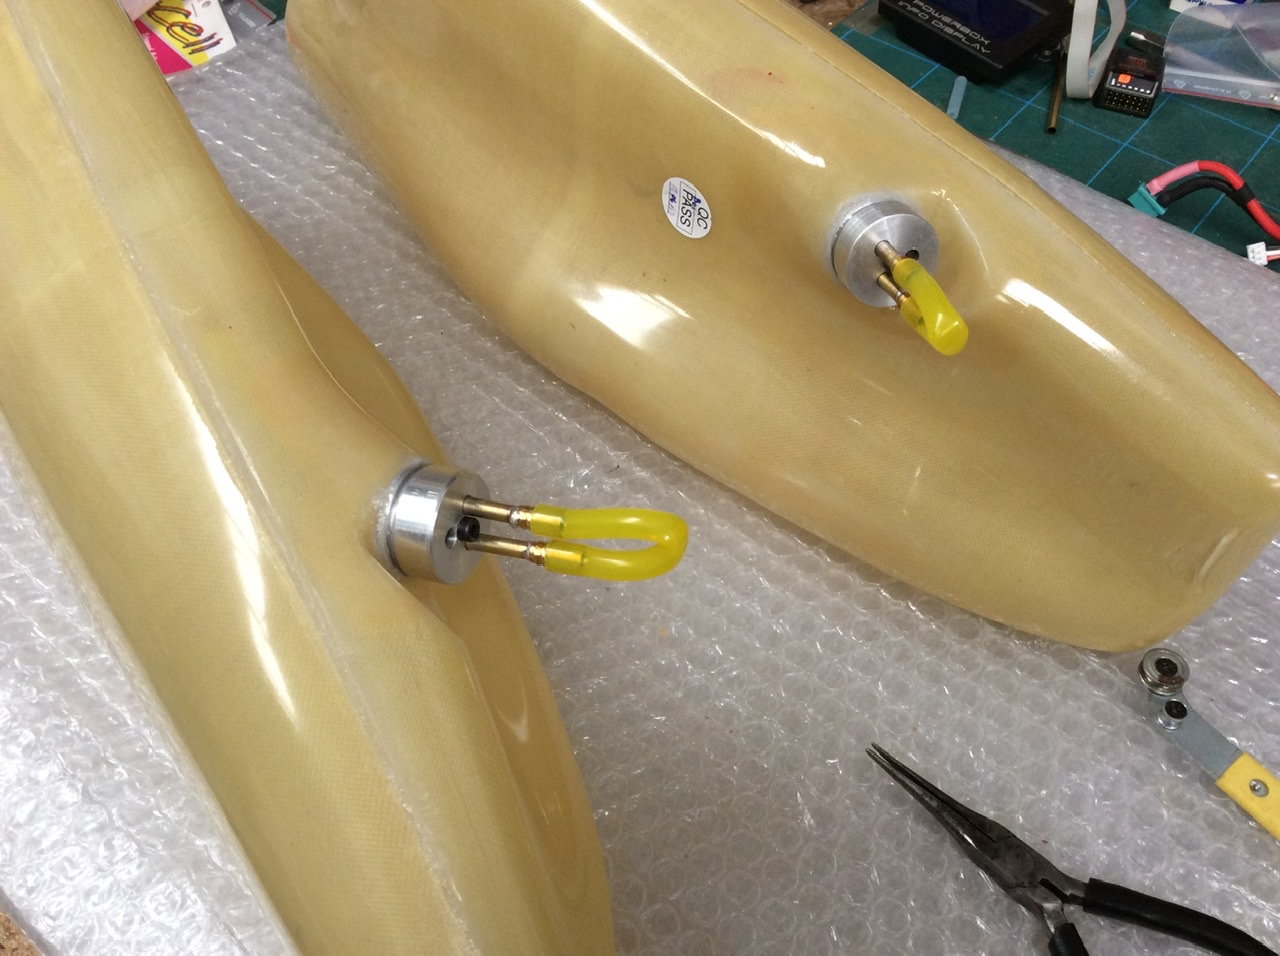
Decided to get the fuel tanks assembled tonight, I like them to sit pressurised for a few days before installing. I de pressure and re-pressure each day so the tank is �exercised� like filling, this will show up any weakness before filling with fuel 🙂
I must say these are the cleanest tanks I have ever had. I used 1 ltr of alcohol per tank with a really good soak and shake, I struggled to see anything in the clear bottle it drained into. Each tank is just over 3ltrs each which allows for some to sit in each tank and still give near 3ltrs useable from each.
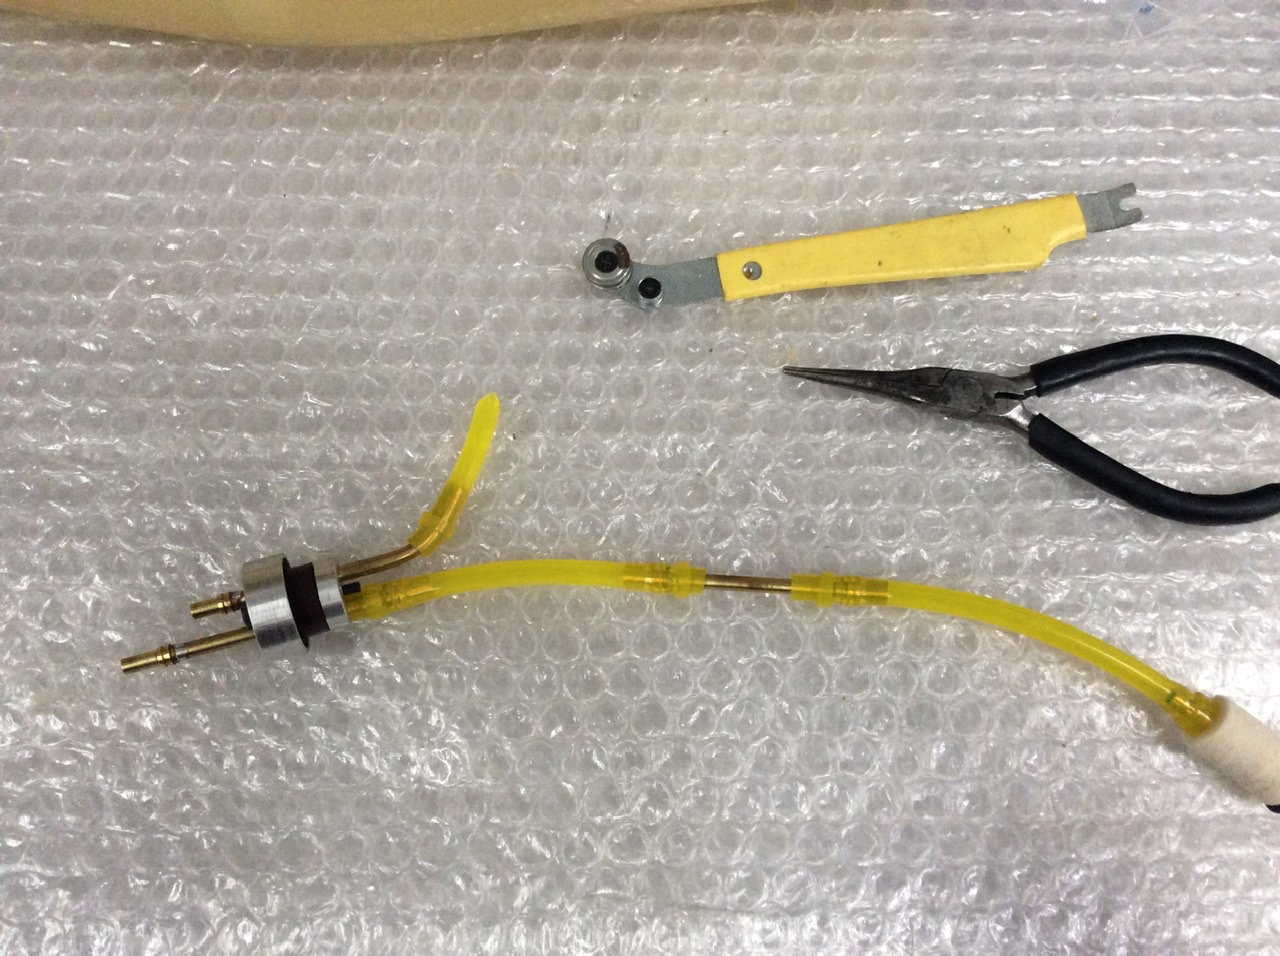
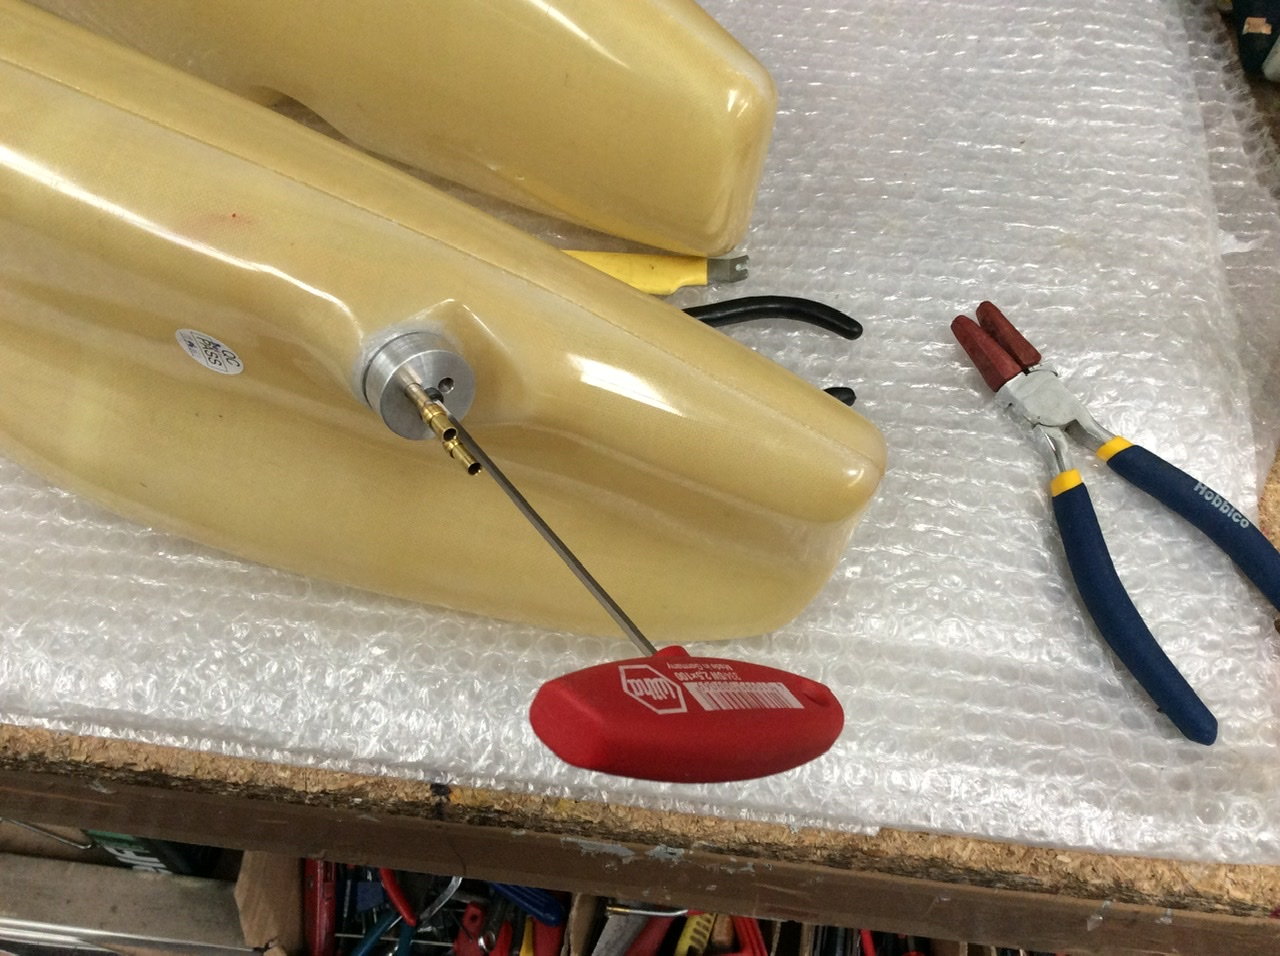
CARF supply barbs, but I used the Dubro machined version. The parallel set up allows 5/32 tube to be used. I�ll use a large bore overflow set up. Tightening the bung a T handle Allen Key is a must to get it really tight.
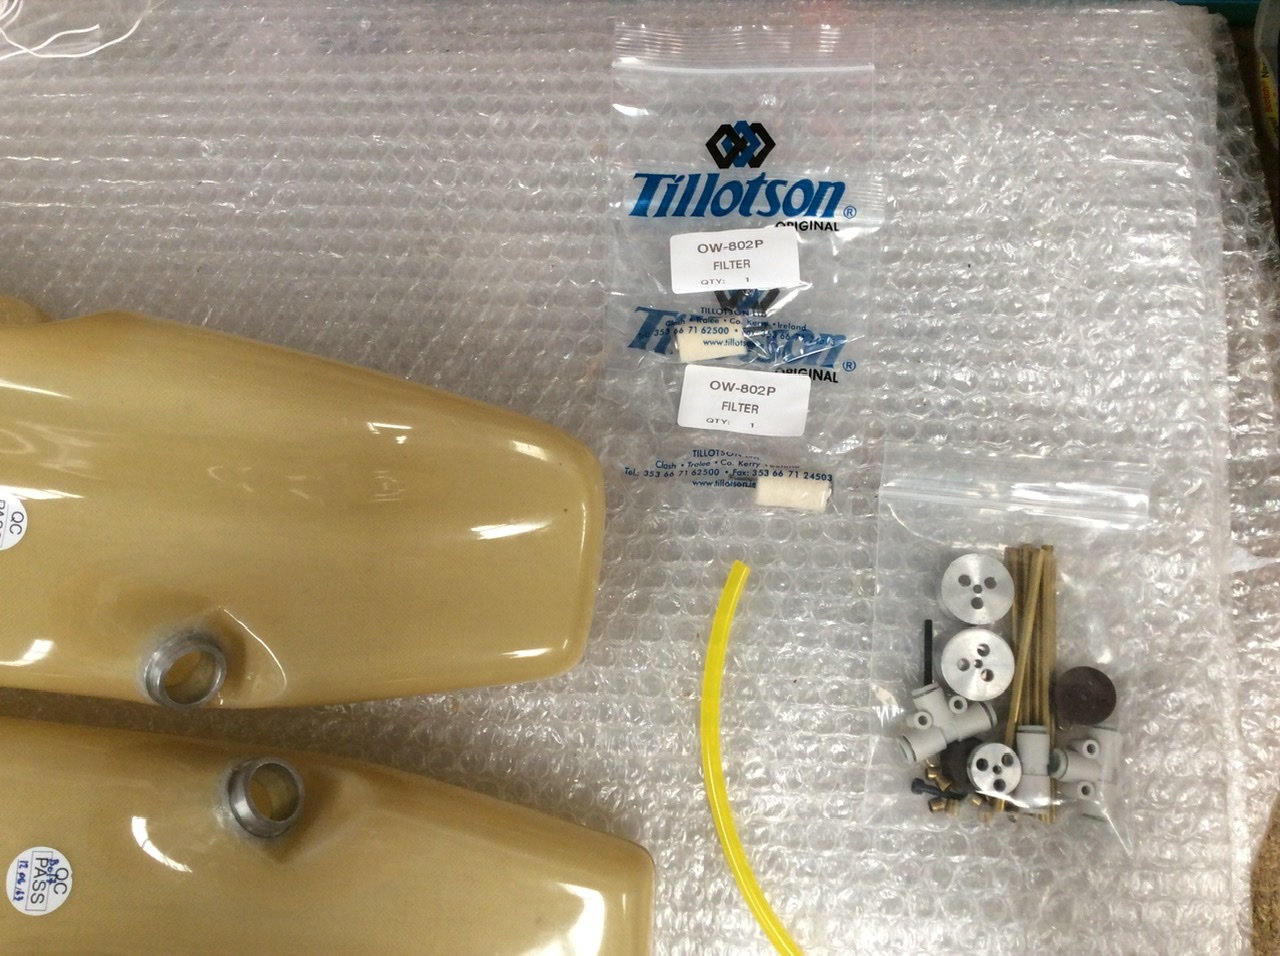
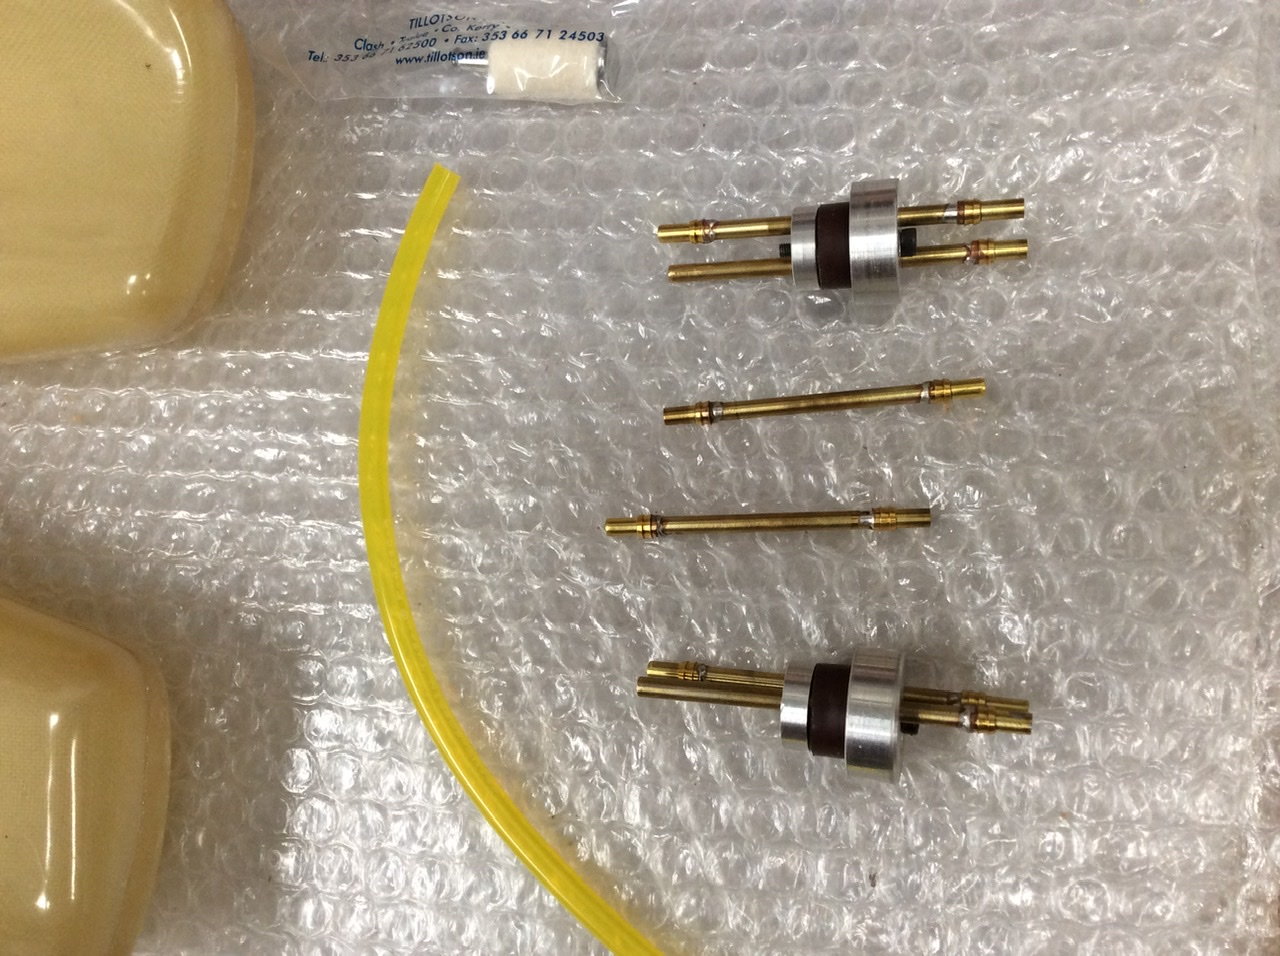
I must say these are the cleanest tanks I have ever had. I used 1 ltr of alcohol per tank with a really good soak and shake, I struggled to see anything in the clear bottle it drained into. Each tank is just over 3ltrs each which allows for some to sit in each tank and still give near 3ltrs useable from each.
CARF supply barbs, but I used the Dubro machined version. The parallel set up allows 5/32 tube to be used. I�ll use a large bore overflow set up. Tightening the bung a T handle Allen Key is a must to get it really tight.
09-05-2020 | 09:15 AM
#49
Thread Starter
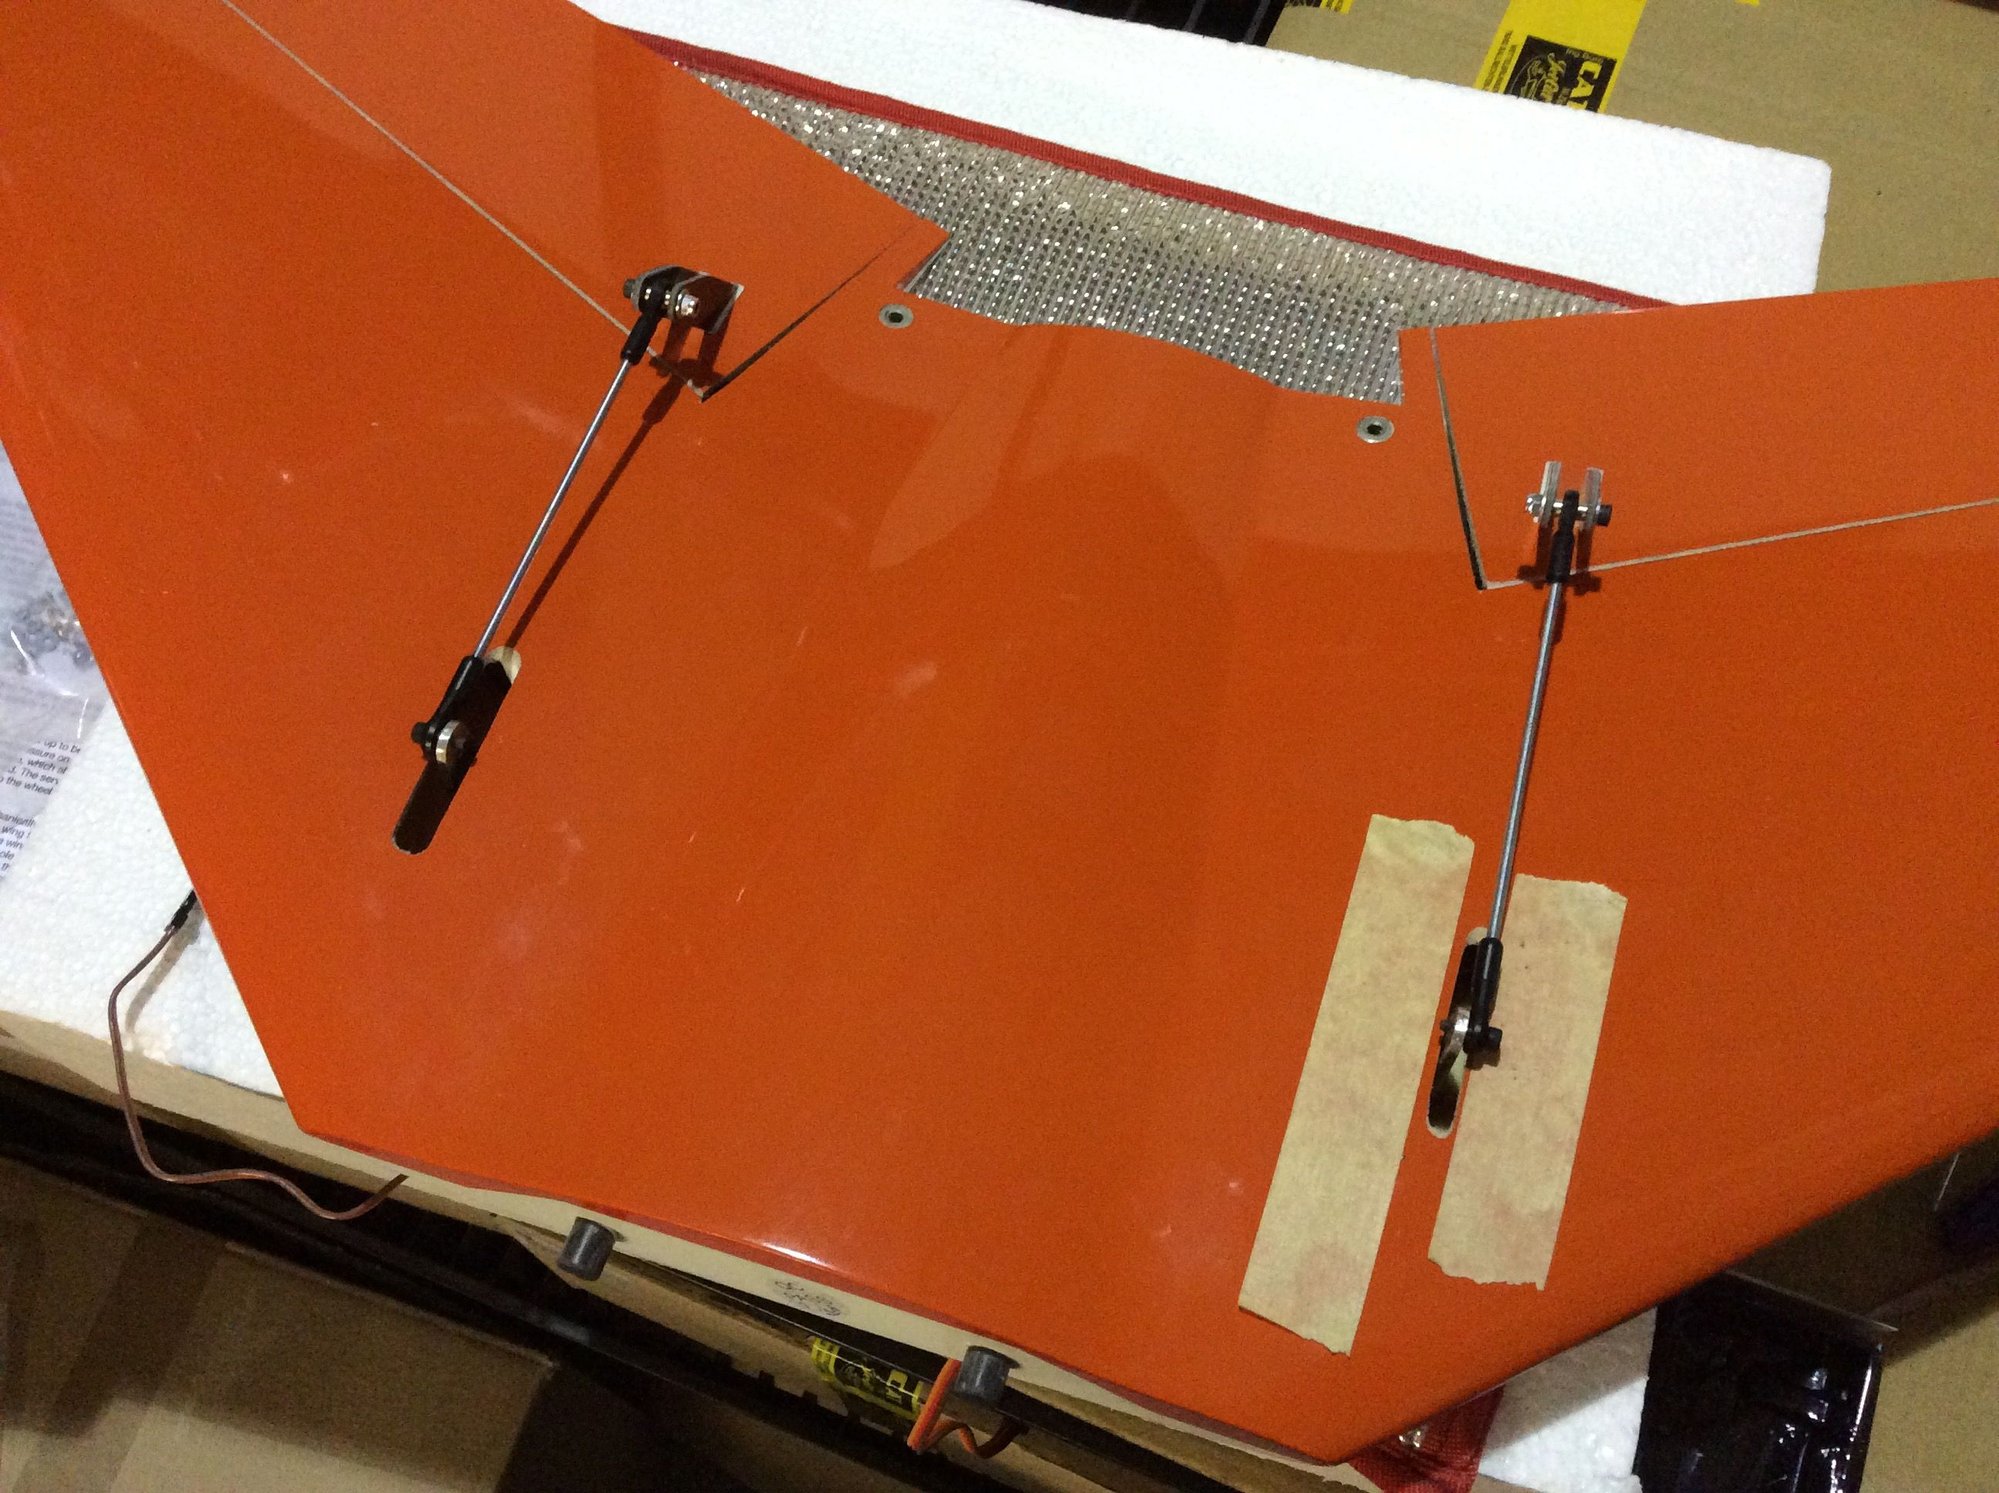
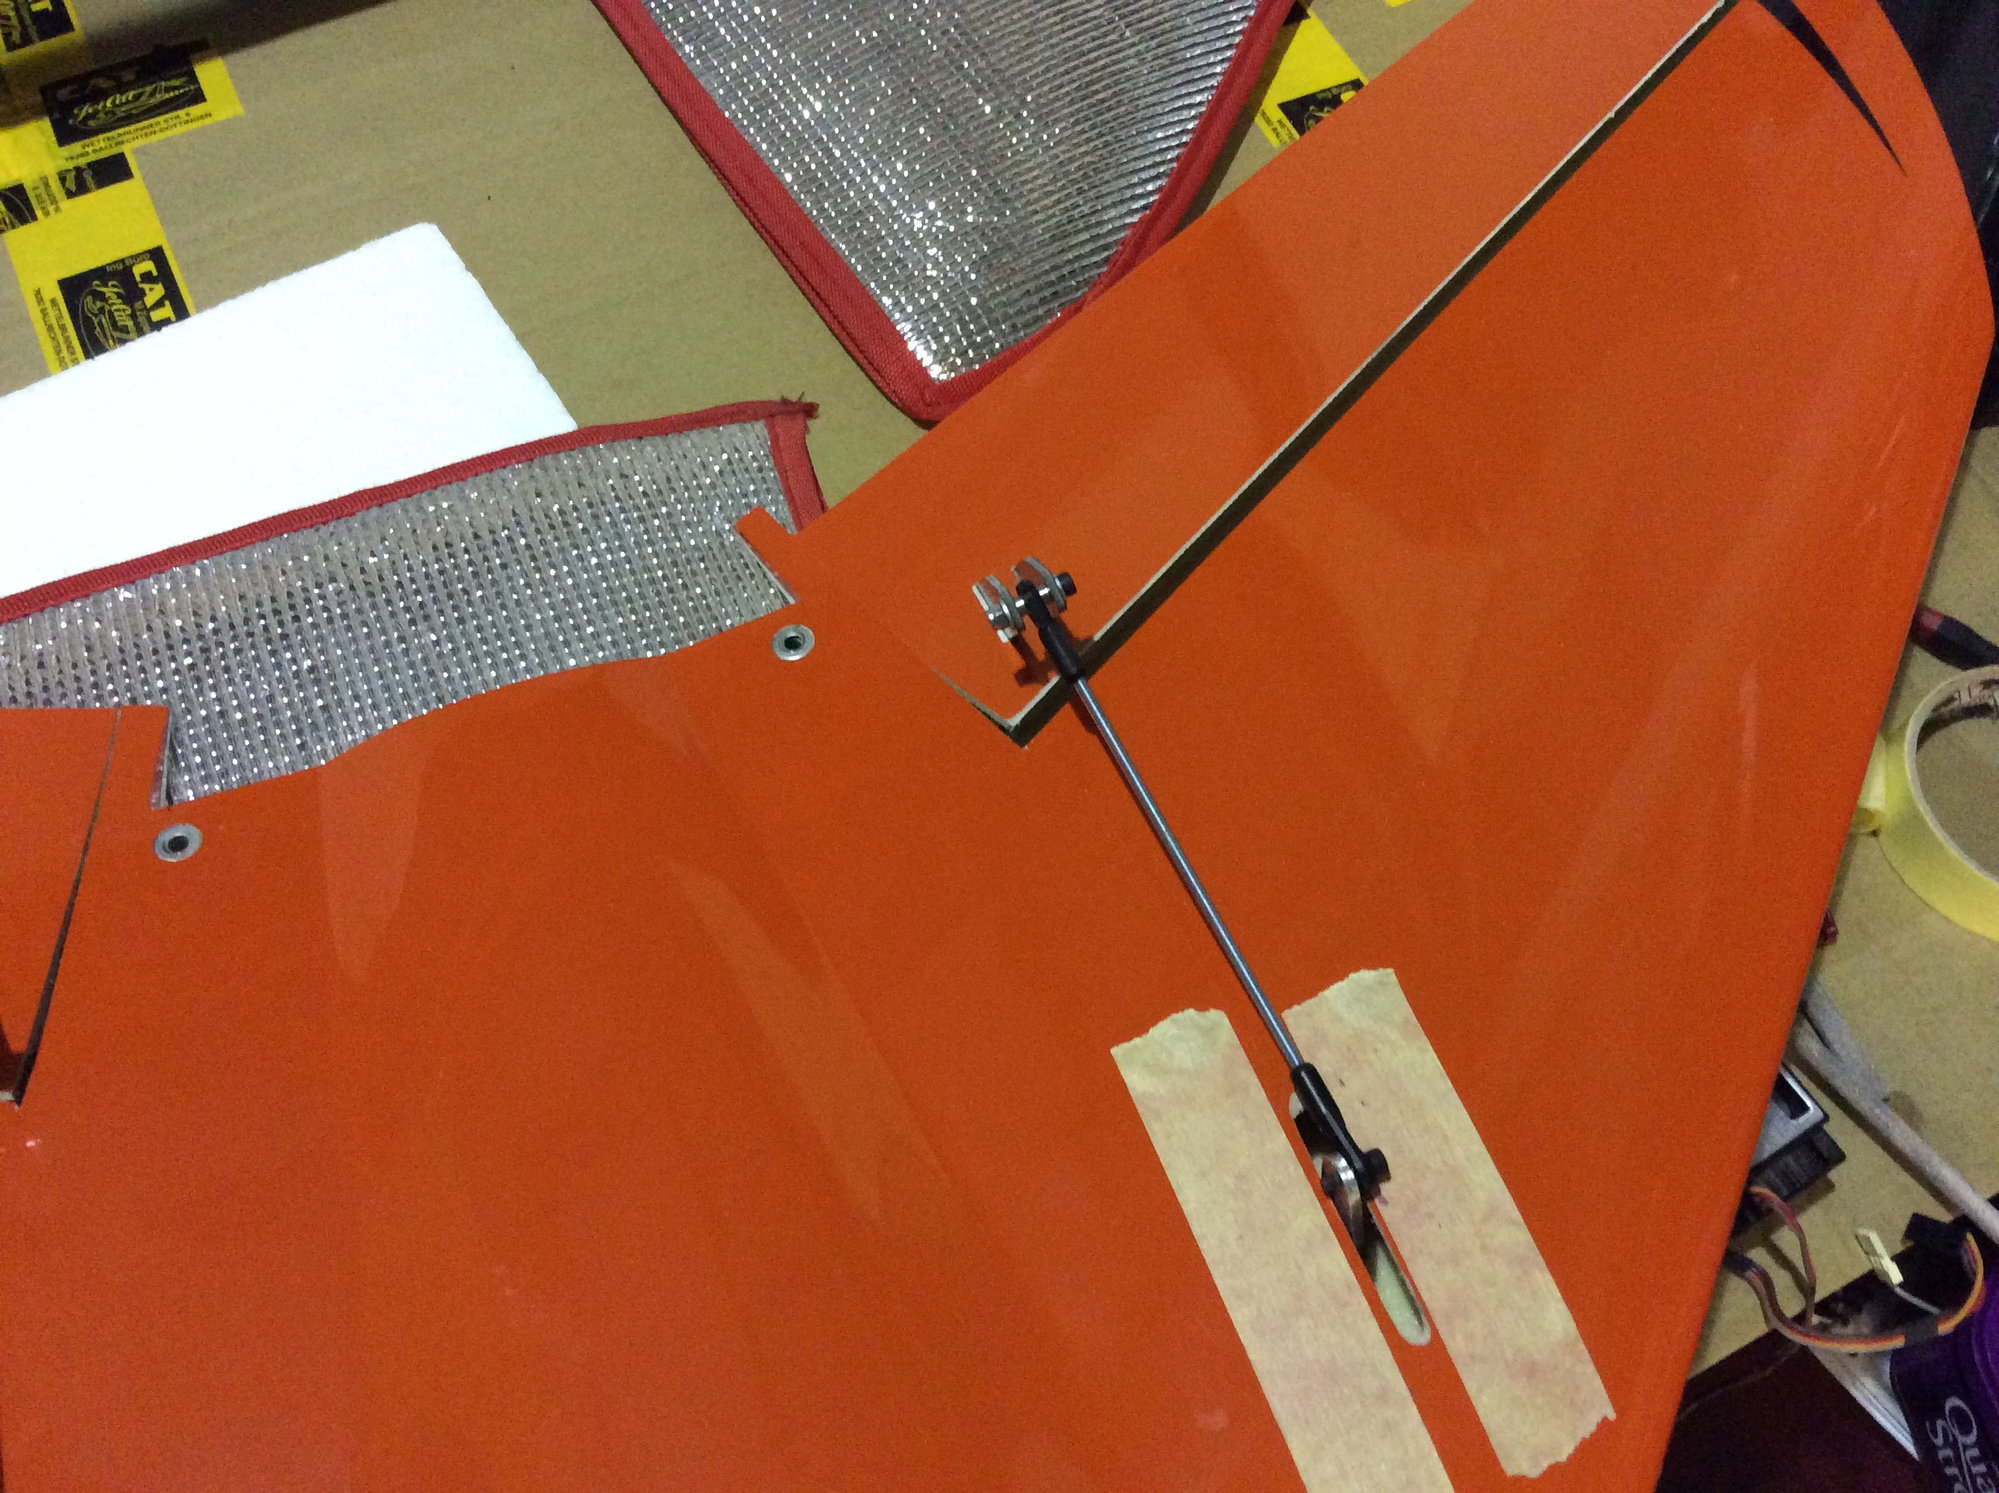
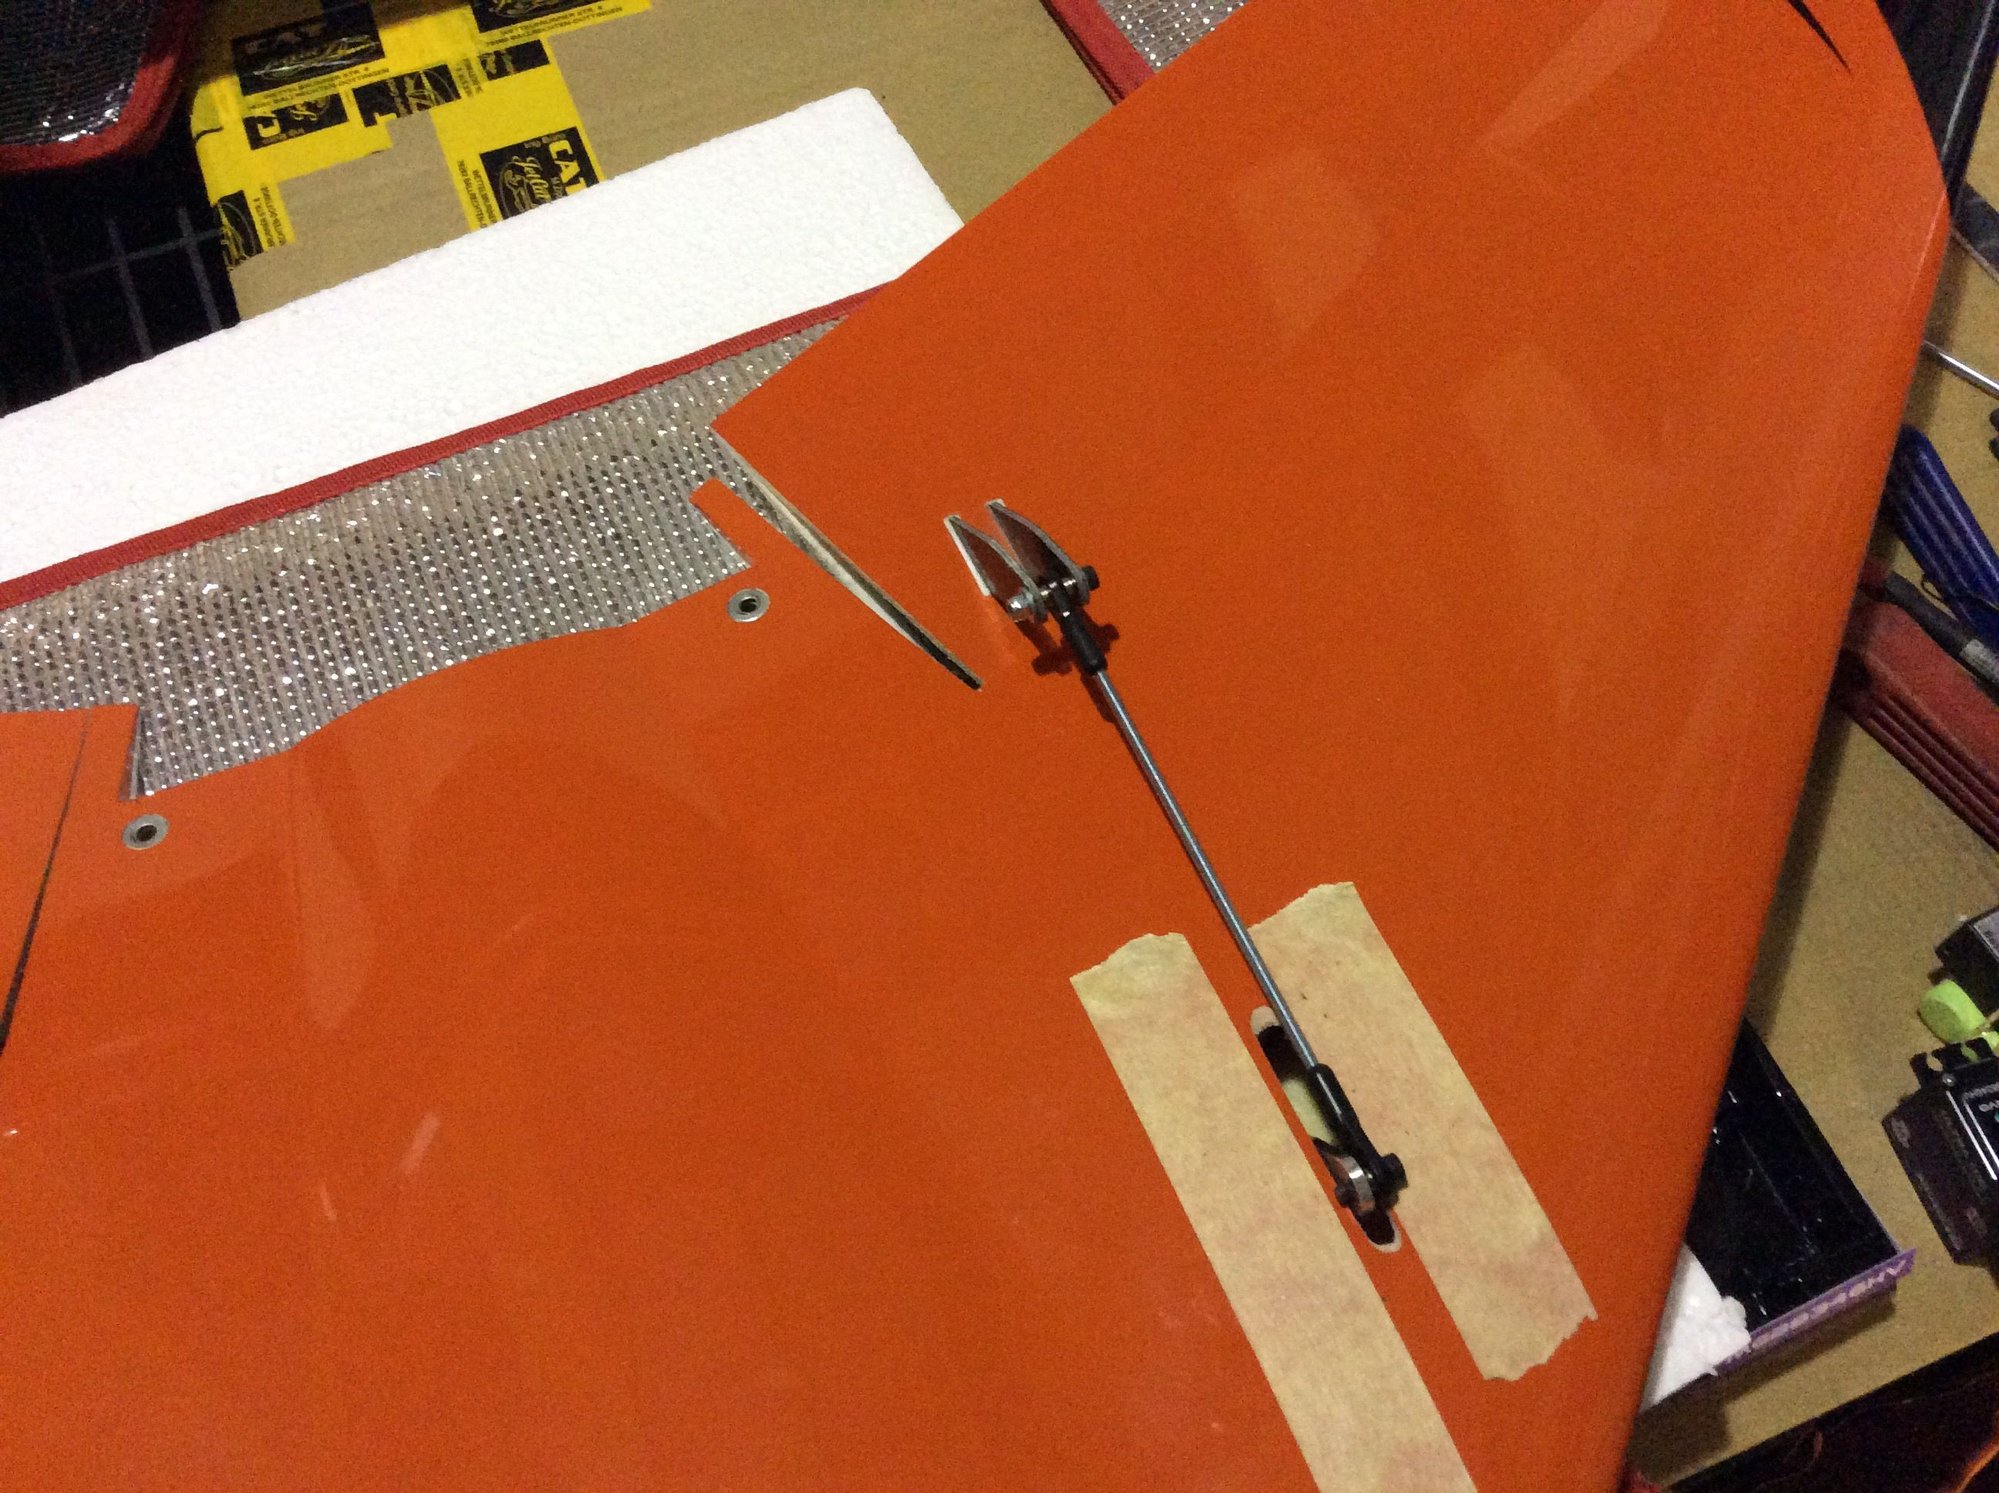
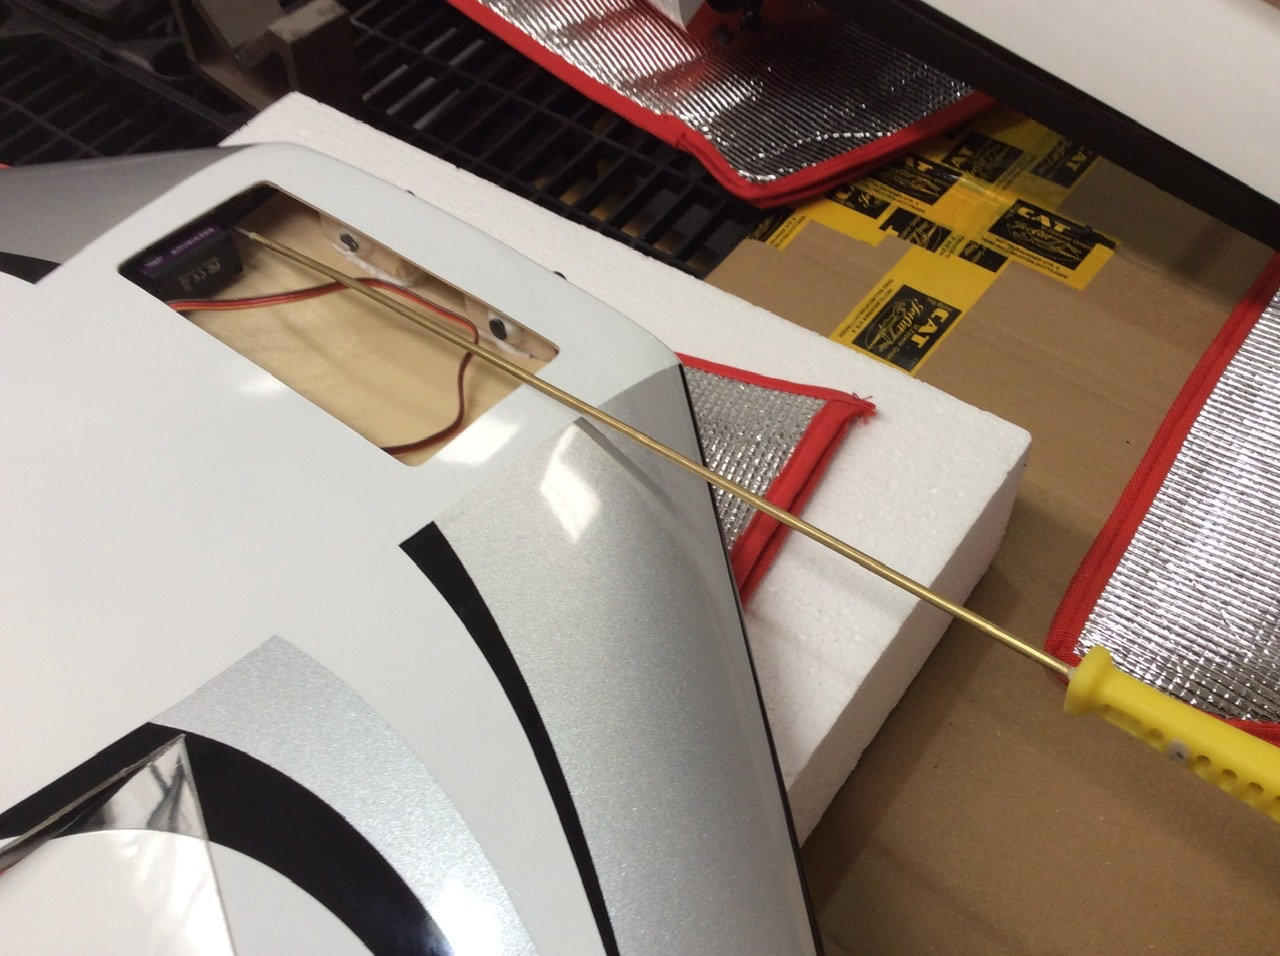
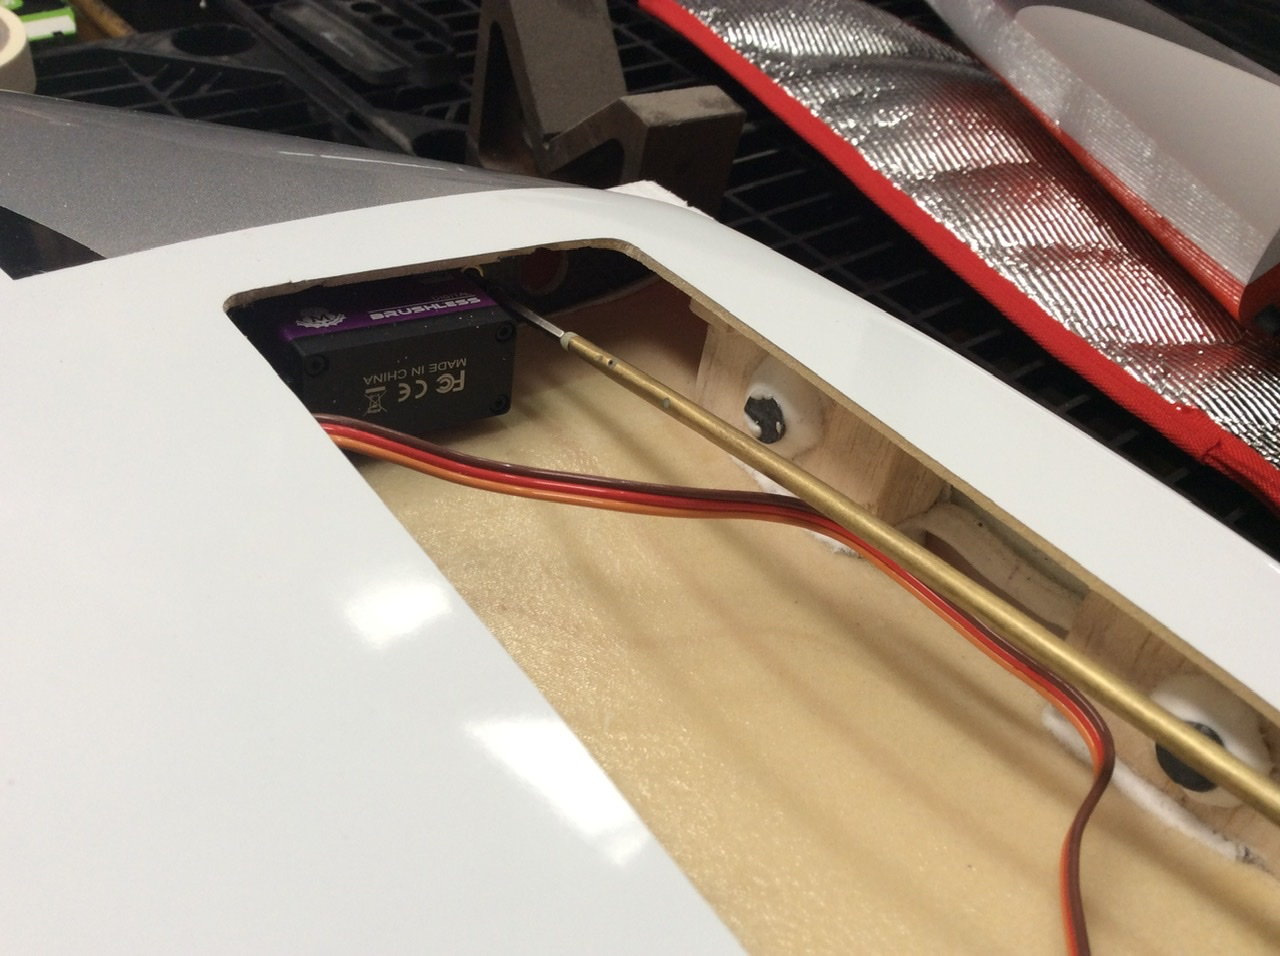
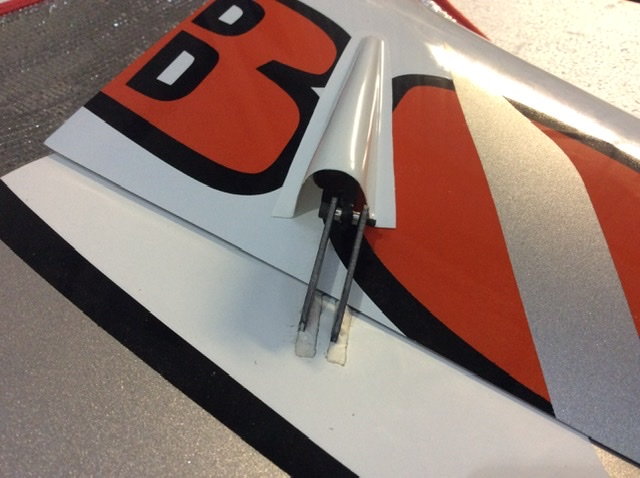
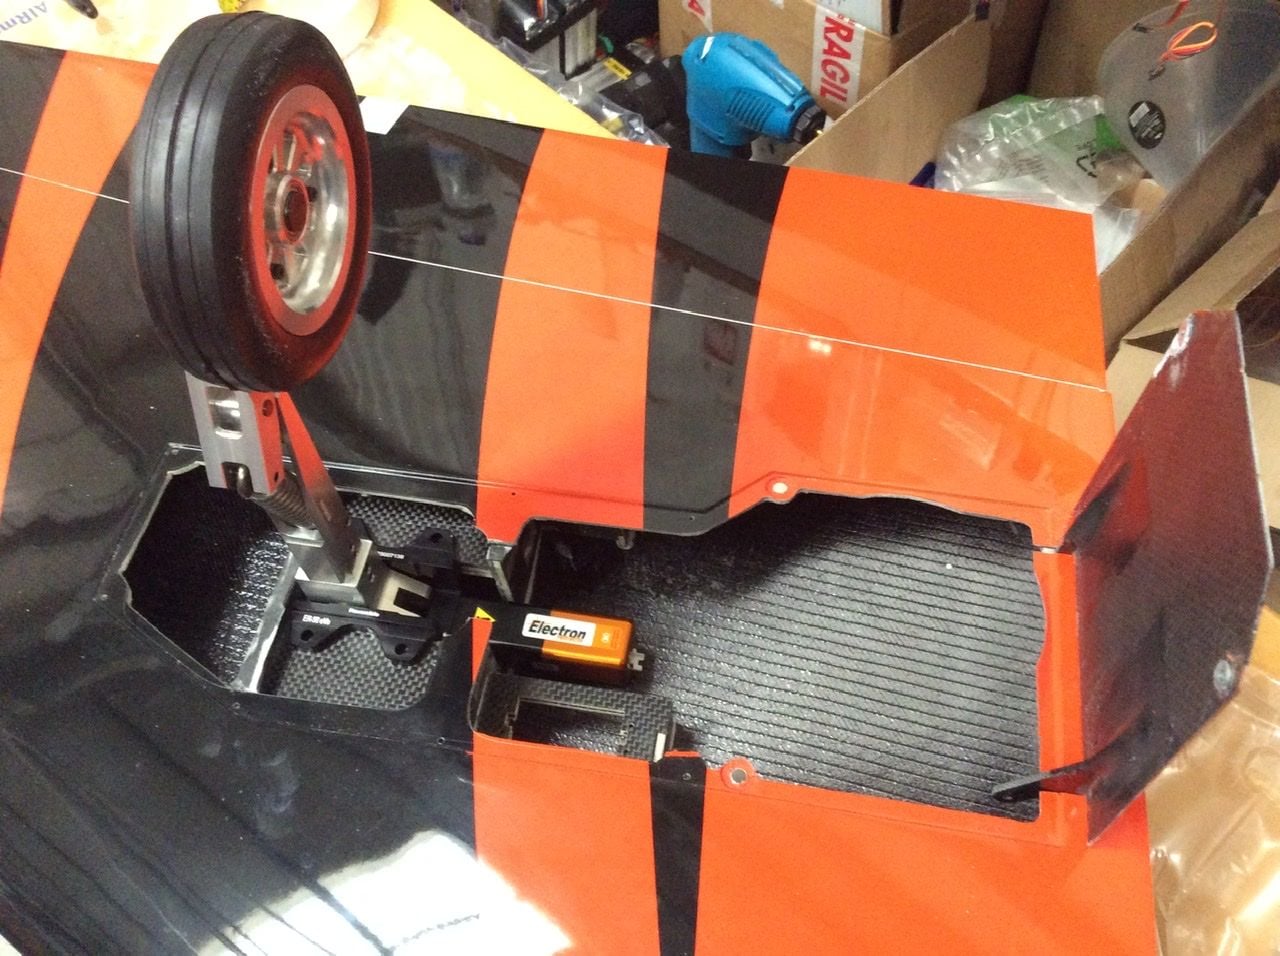
Looking at the wing today. Quick check on the slot position with my MacGregor servos and Secraft arms using thin wire. The rod indexes on full movement so this is the slot shape I ended up with.

09-08-2020 | 06:37 AM
#50
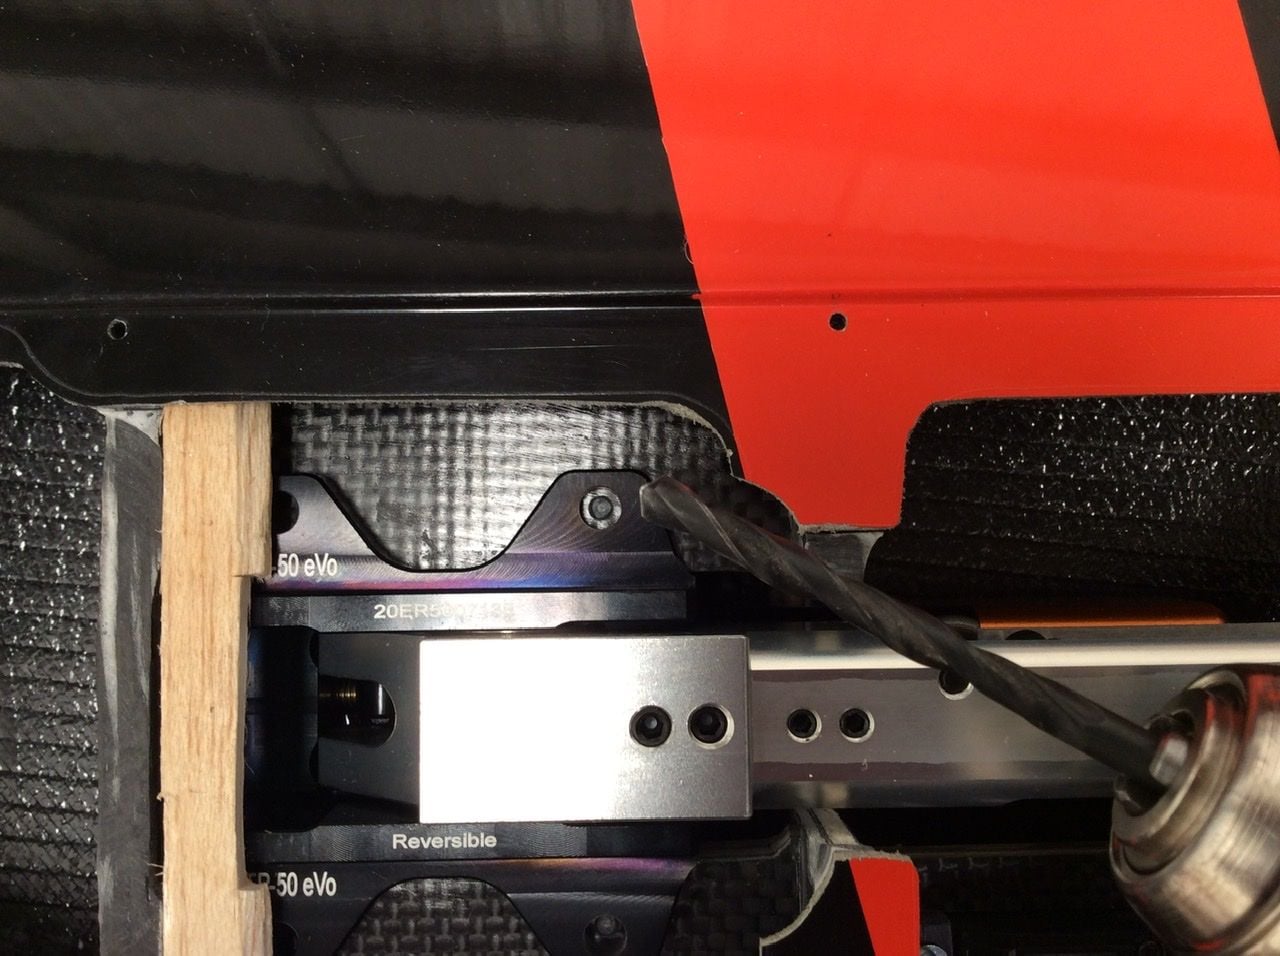
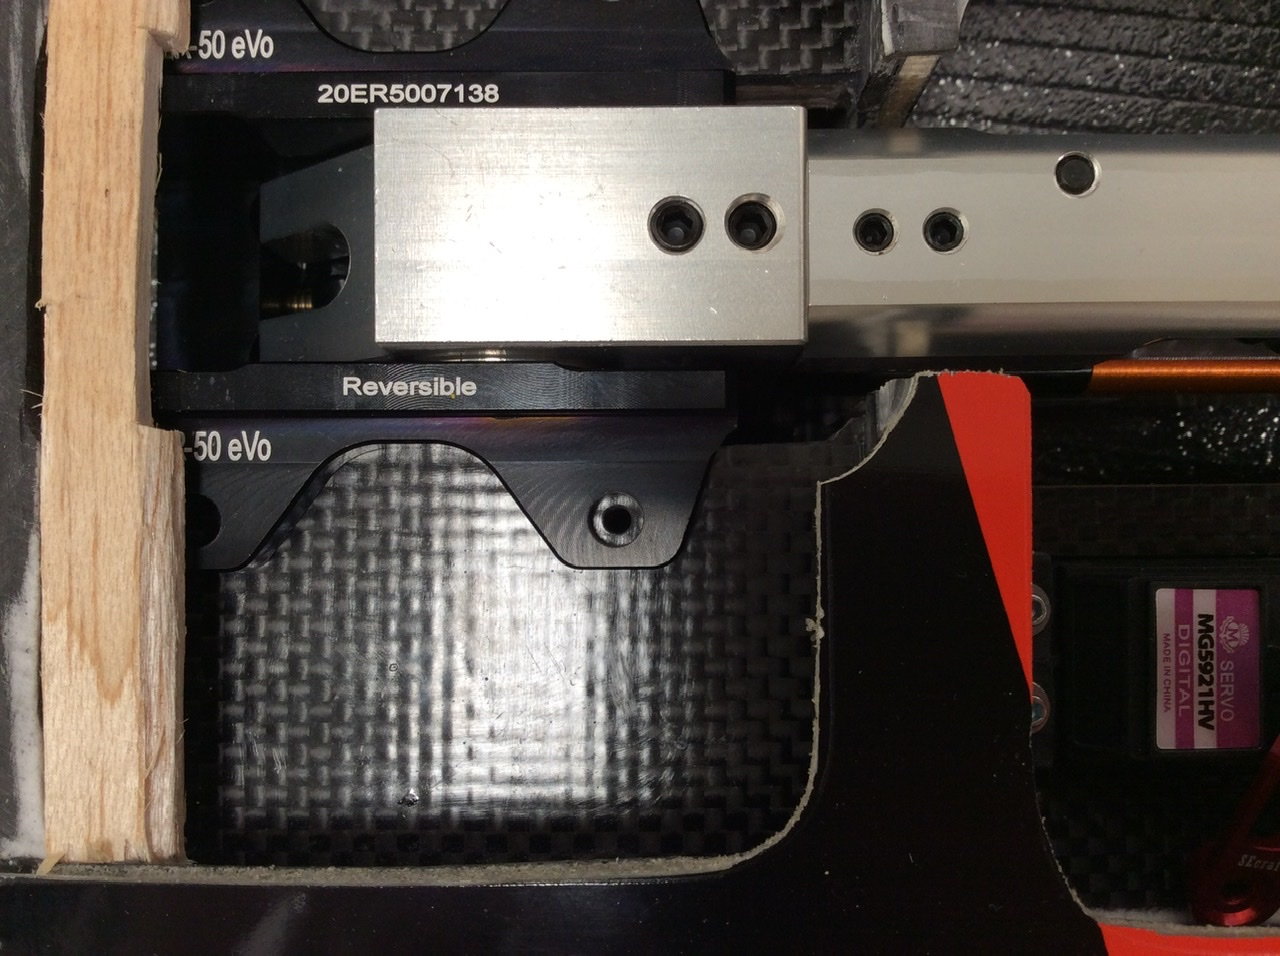
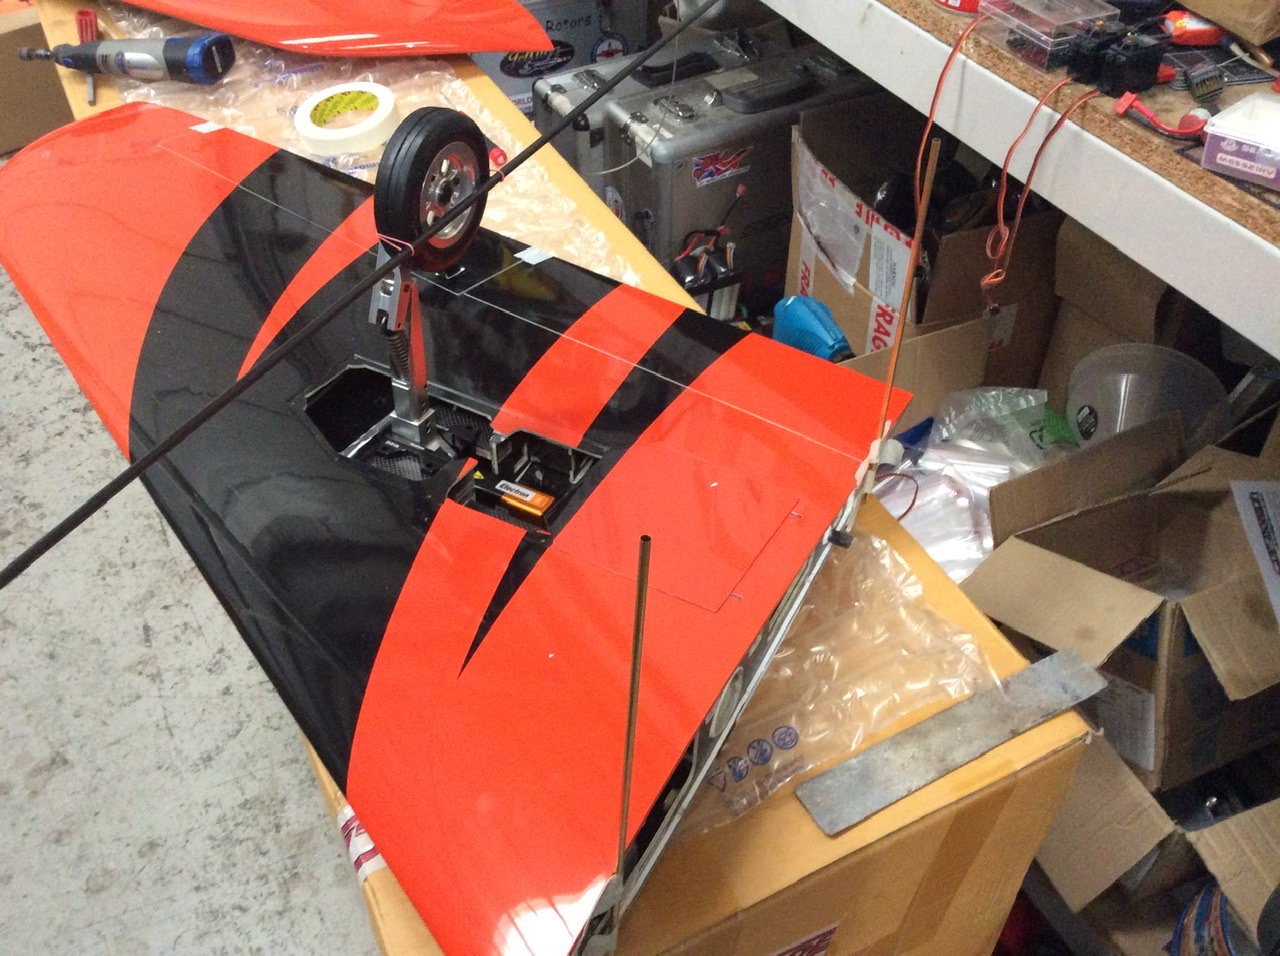
Thread Starter
Working on the wings again. The gear door system is genius and really easy to set up. Being ready to screw down the gear I used my usual trick of a drill the size of the hole in the unit to �spot� the centre and then drill through to suit the screws. The piece of balsa jamms the unit level and stops movement while I spot the holes.