


CARF Bolt! Build thread

 09-30-2020 | 06:24 AM
#77
Thread Starter

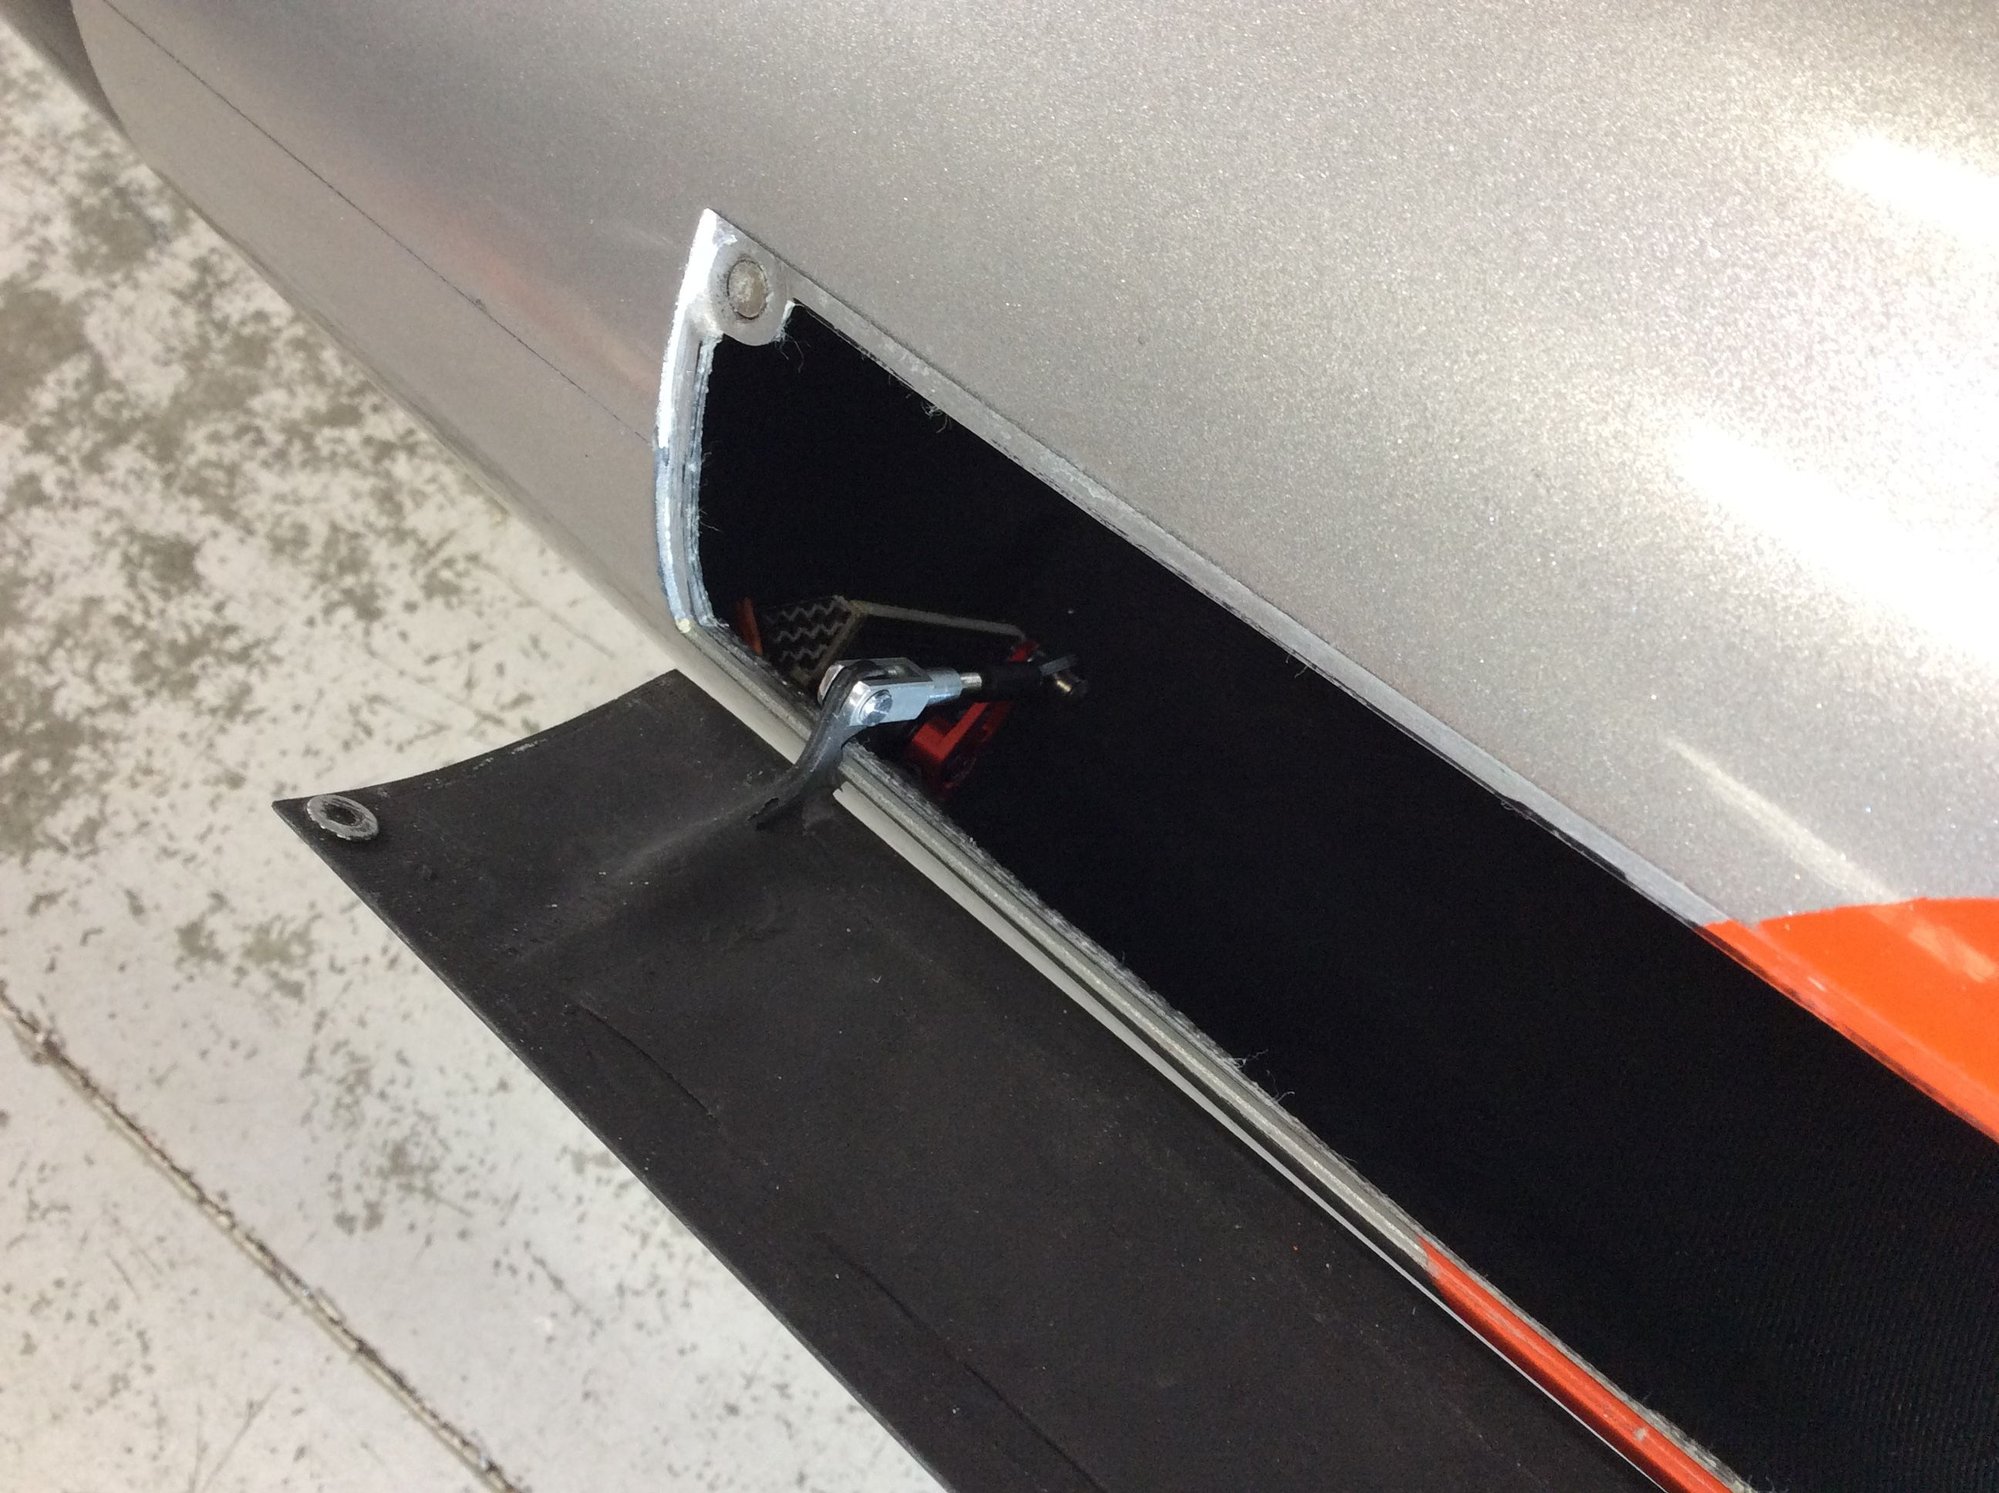
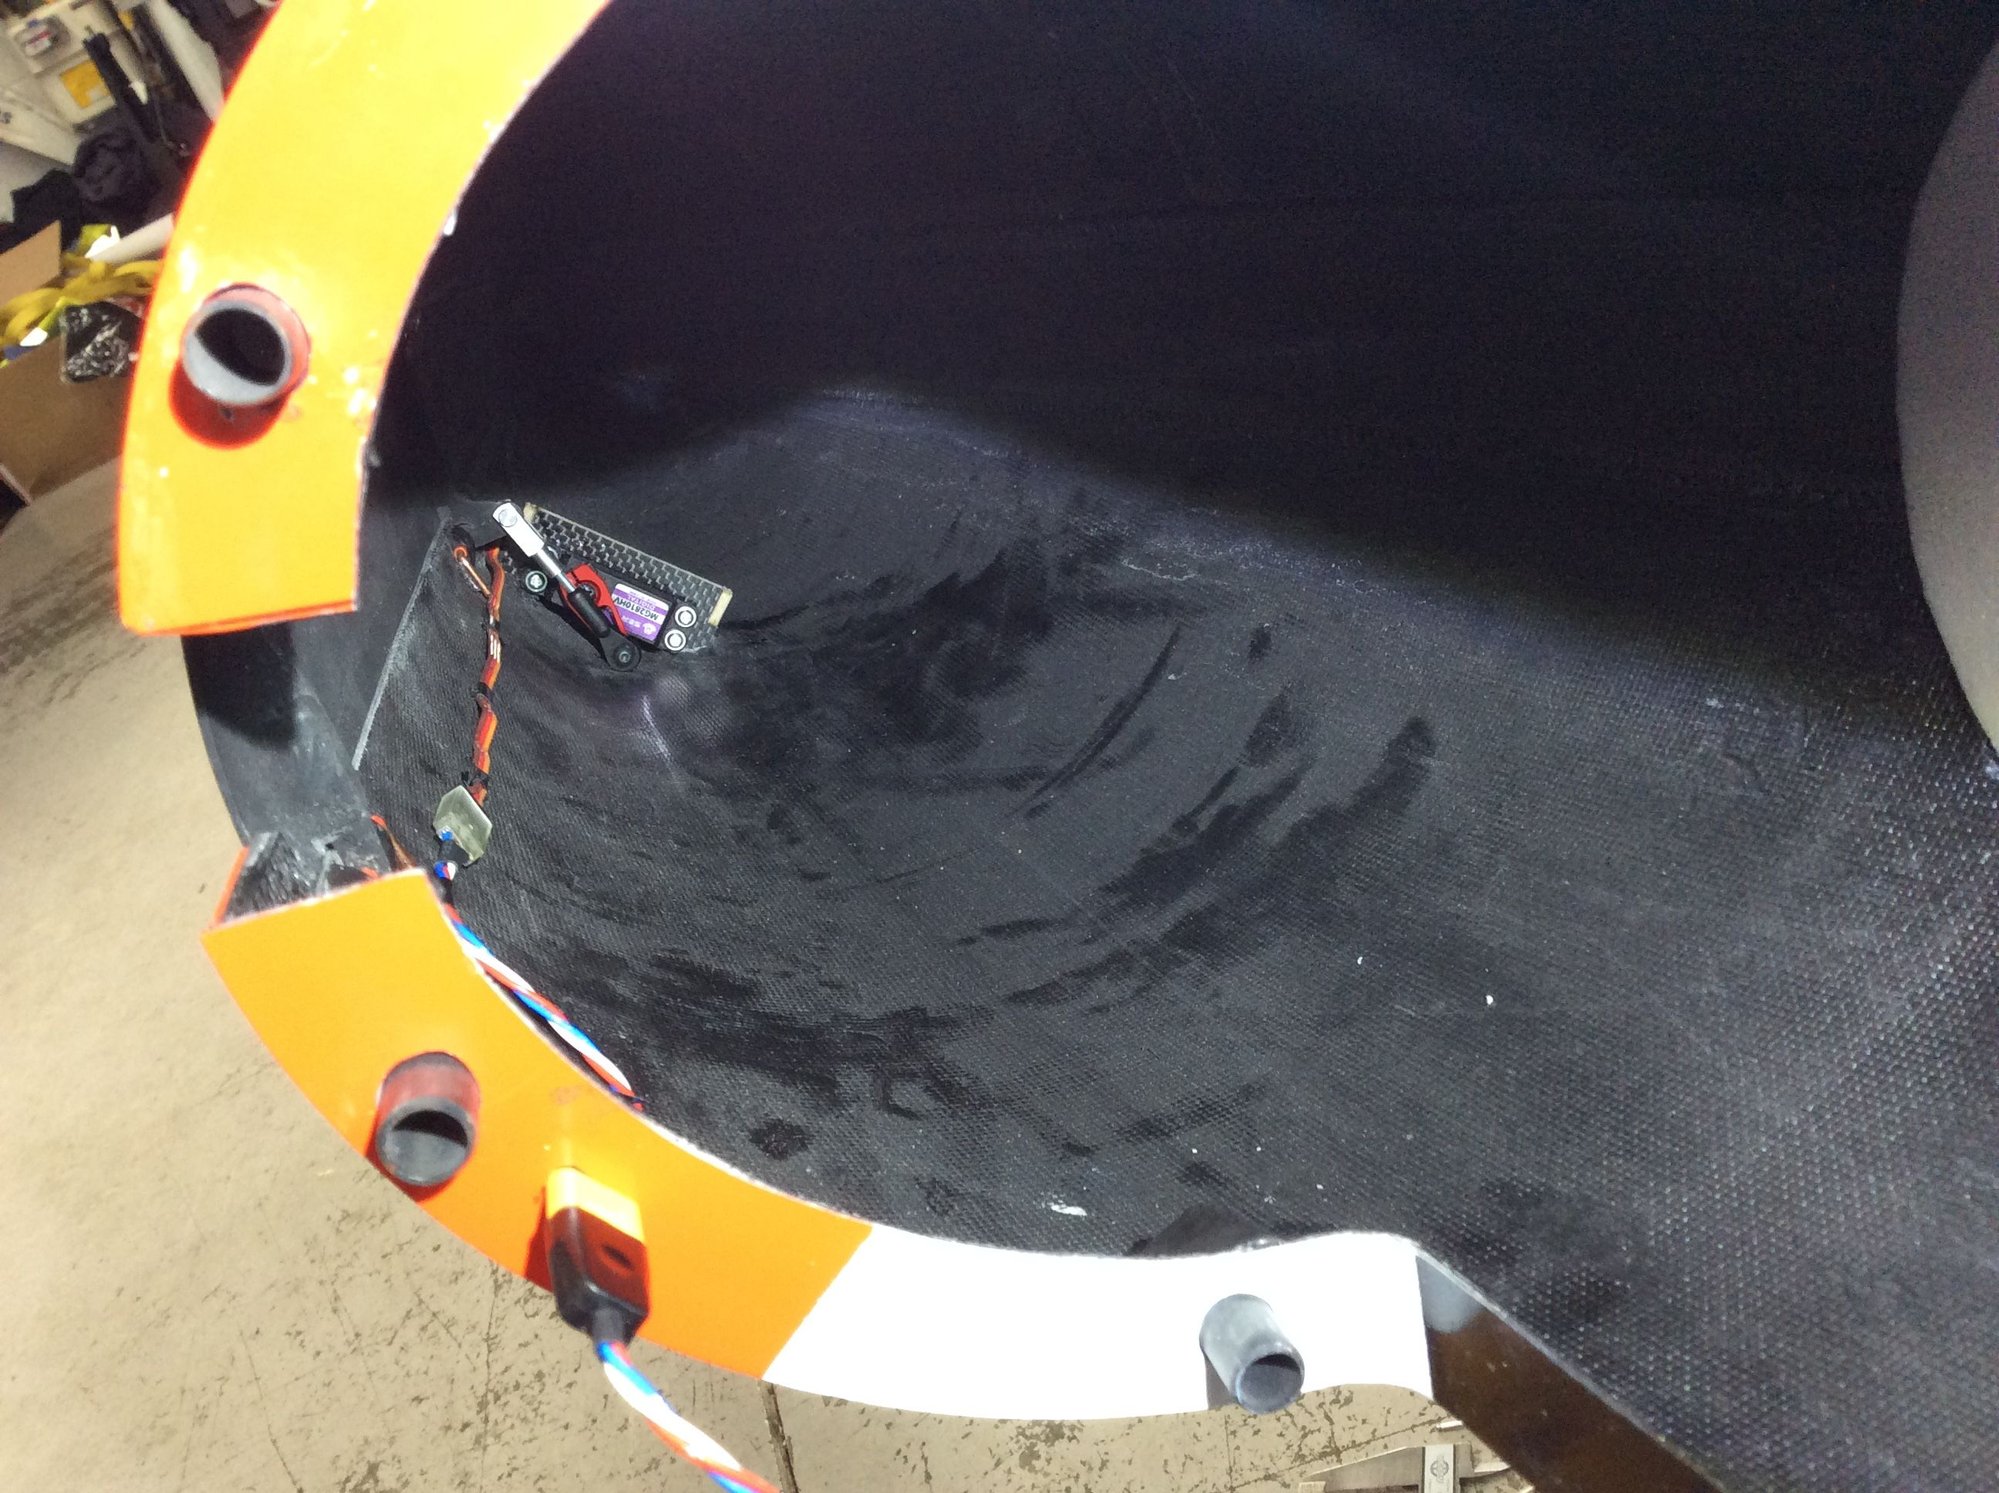
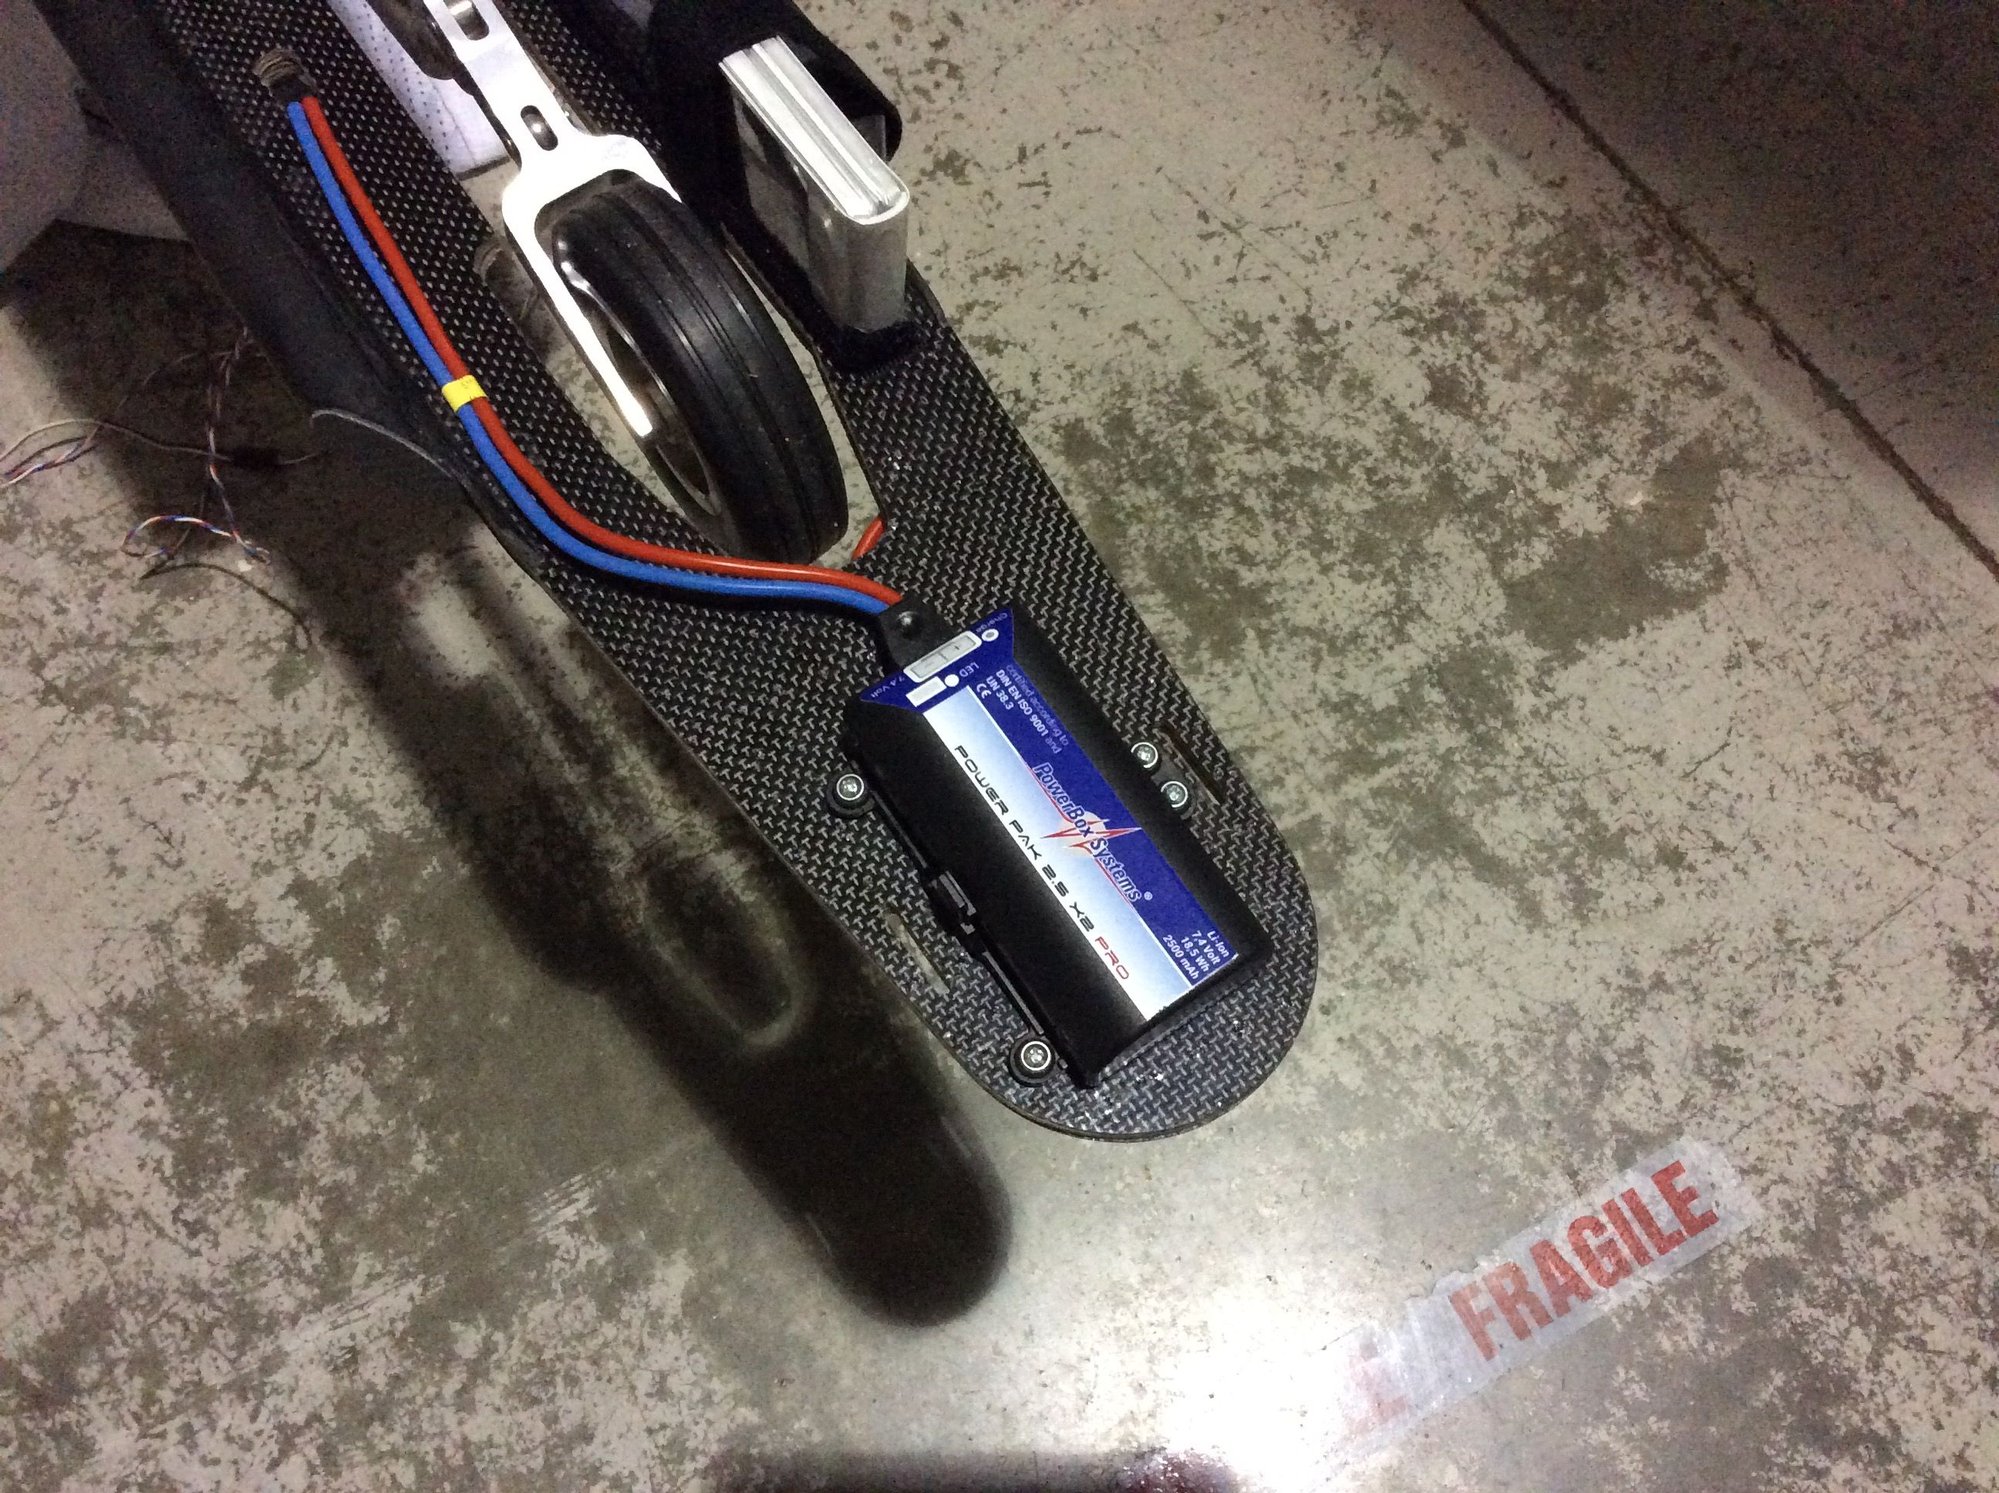
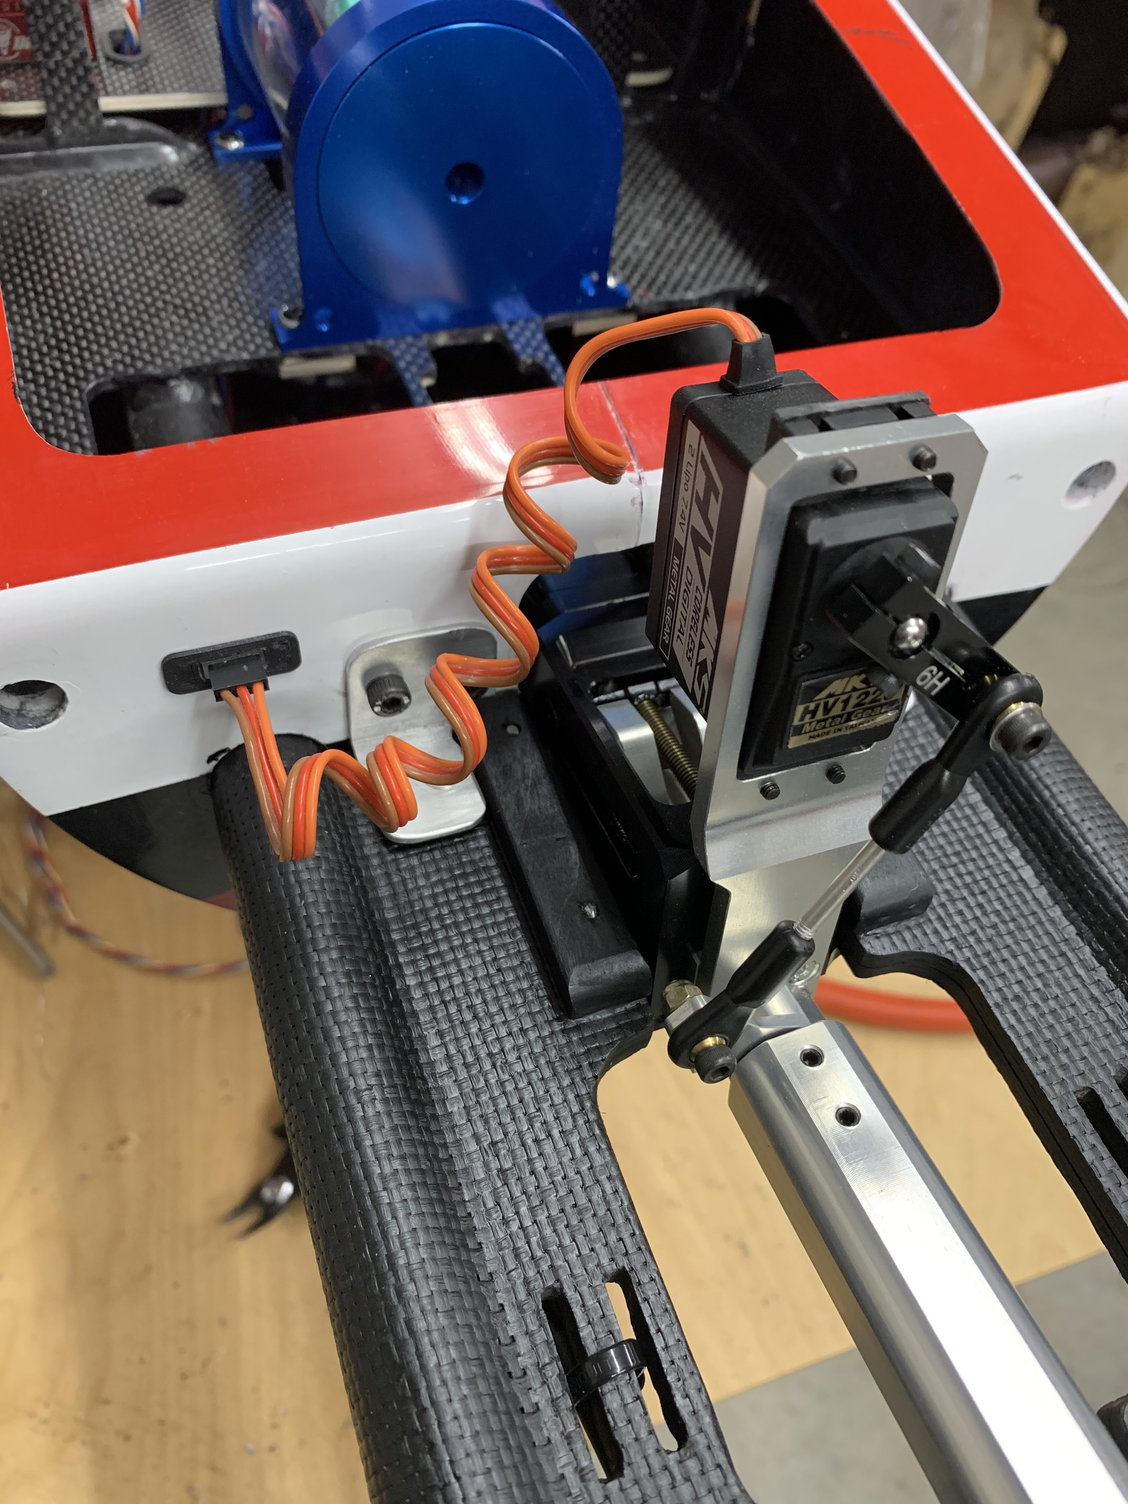
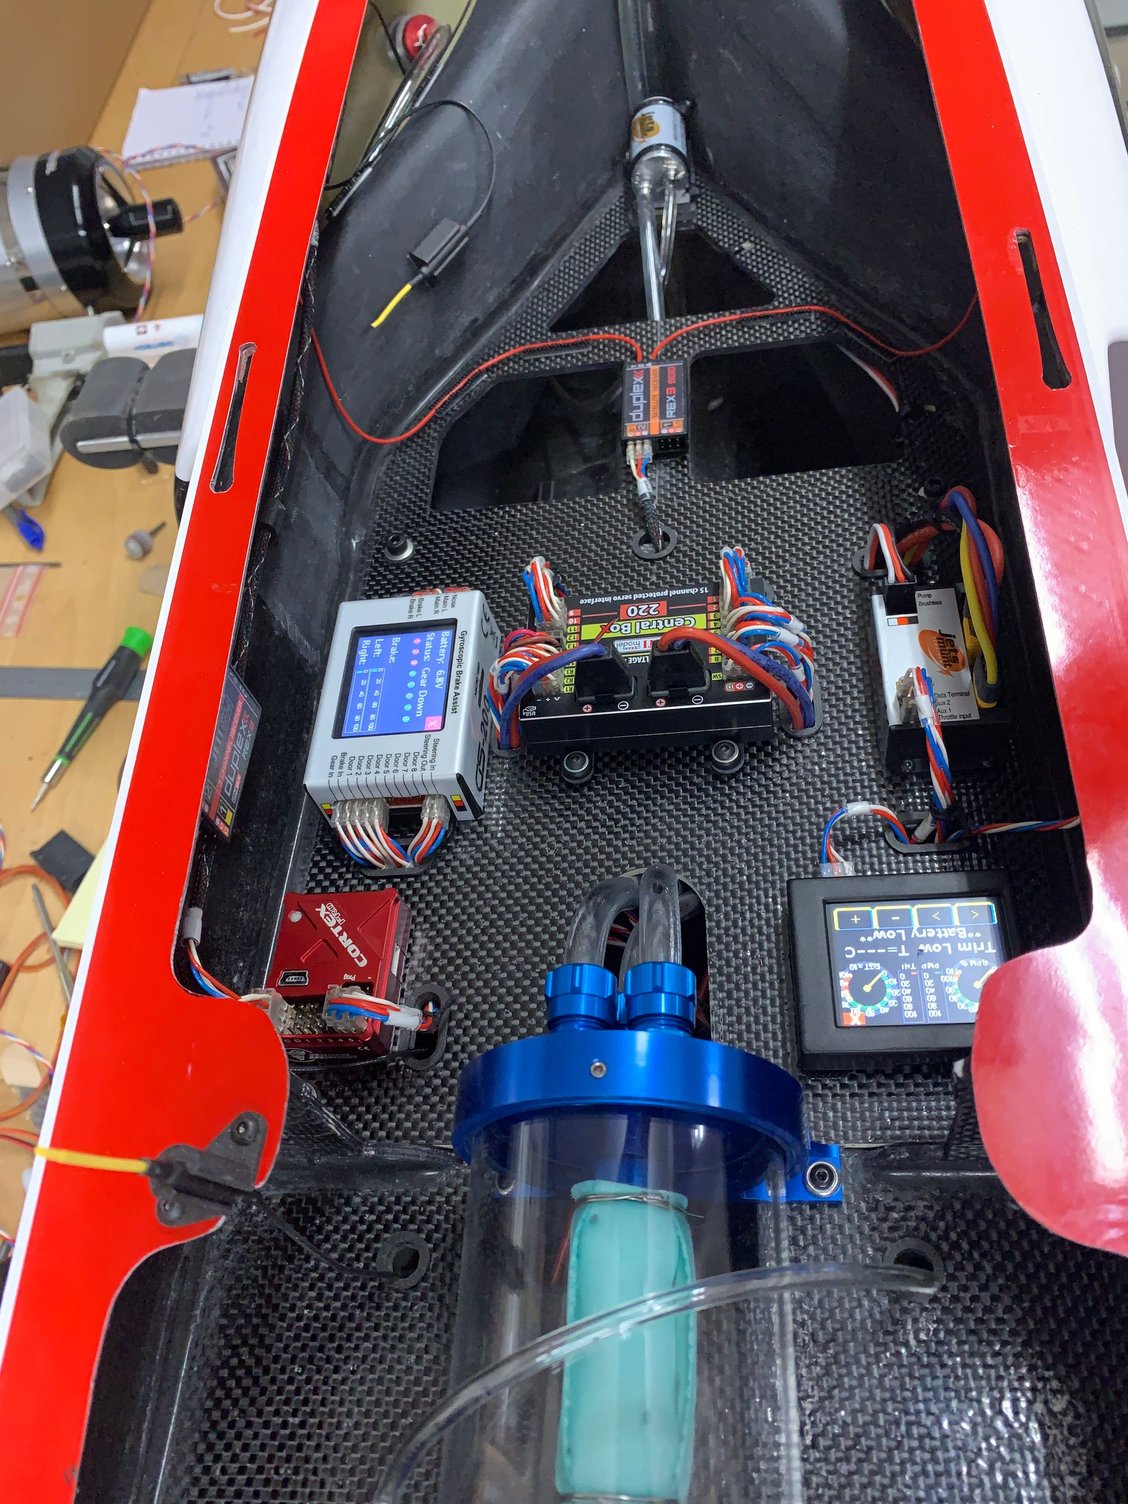
The only adjustment from Sunday�s test flight was to the nose gear servo to ensure the door stays locked. I changed the arm to allow the linkage to over centre. Current goes to almost nothing and the door is locked solid.
 10-04-2020 | 12:23 PM
#79
Thread Starter
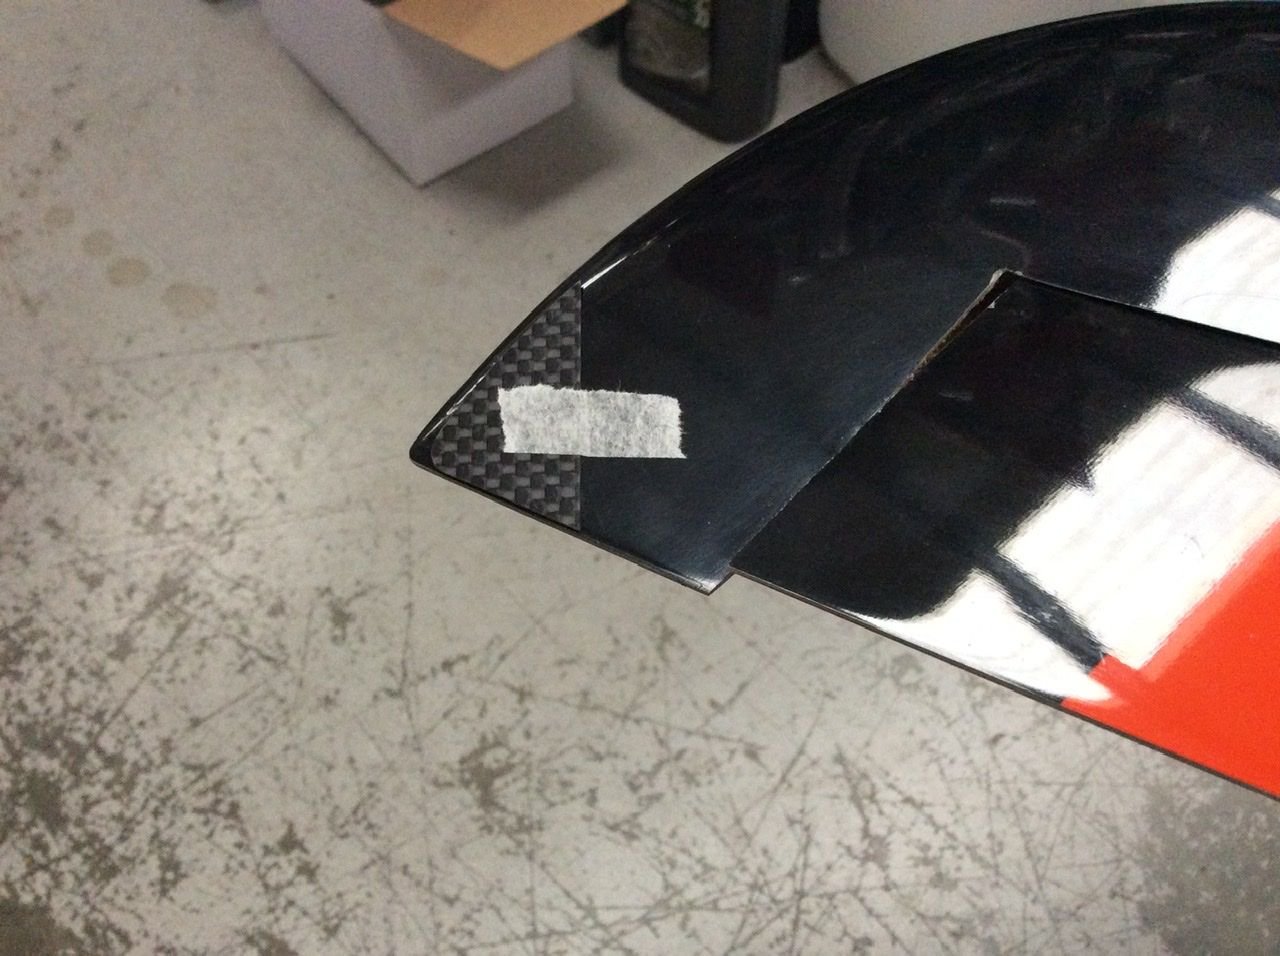
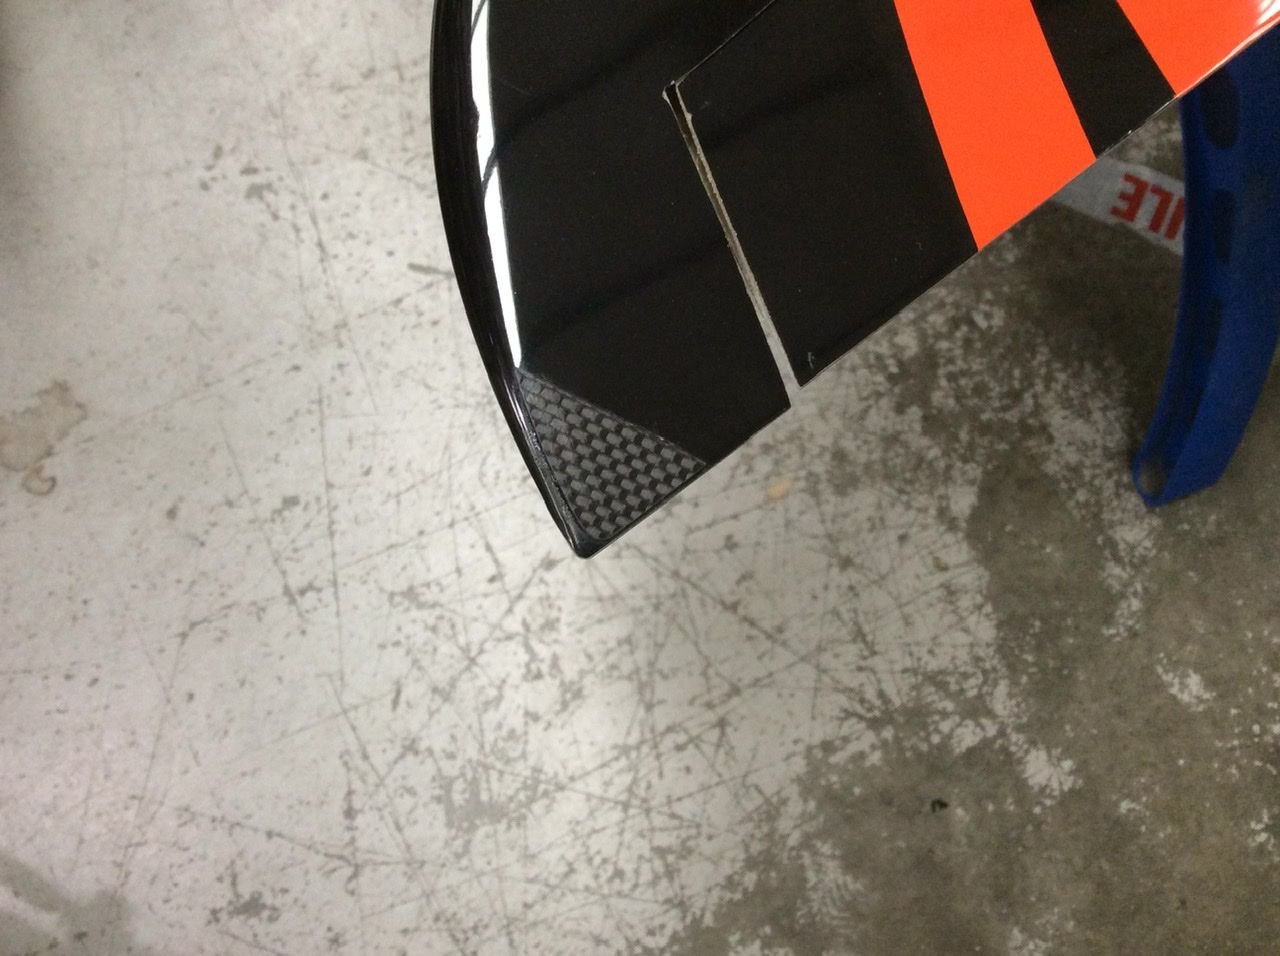
One of the things I noticed with the anhedral tail is the tips of the tail could get close to the ground ( even though the Bolt! lands pretty flat ) and the model tends to tip back on mine with the hatch off. I had some carbon parts hanging around ( actually KingKat boom braces BV sent out and I never used) so I have made some scuff plates and fitted before this coming weekends hoped for Jet meeting.
The following users liked this post:
paulhat (10-05-2020)
10-08-2020 | 05:26 AM
#80
Thread Starter
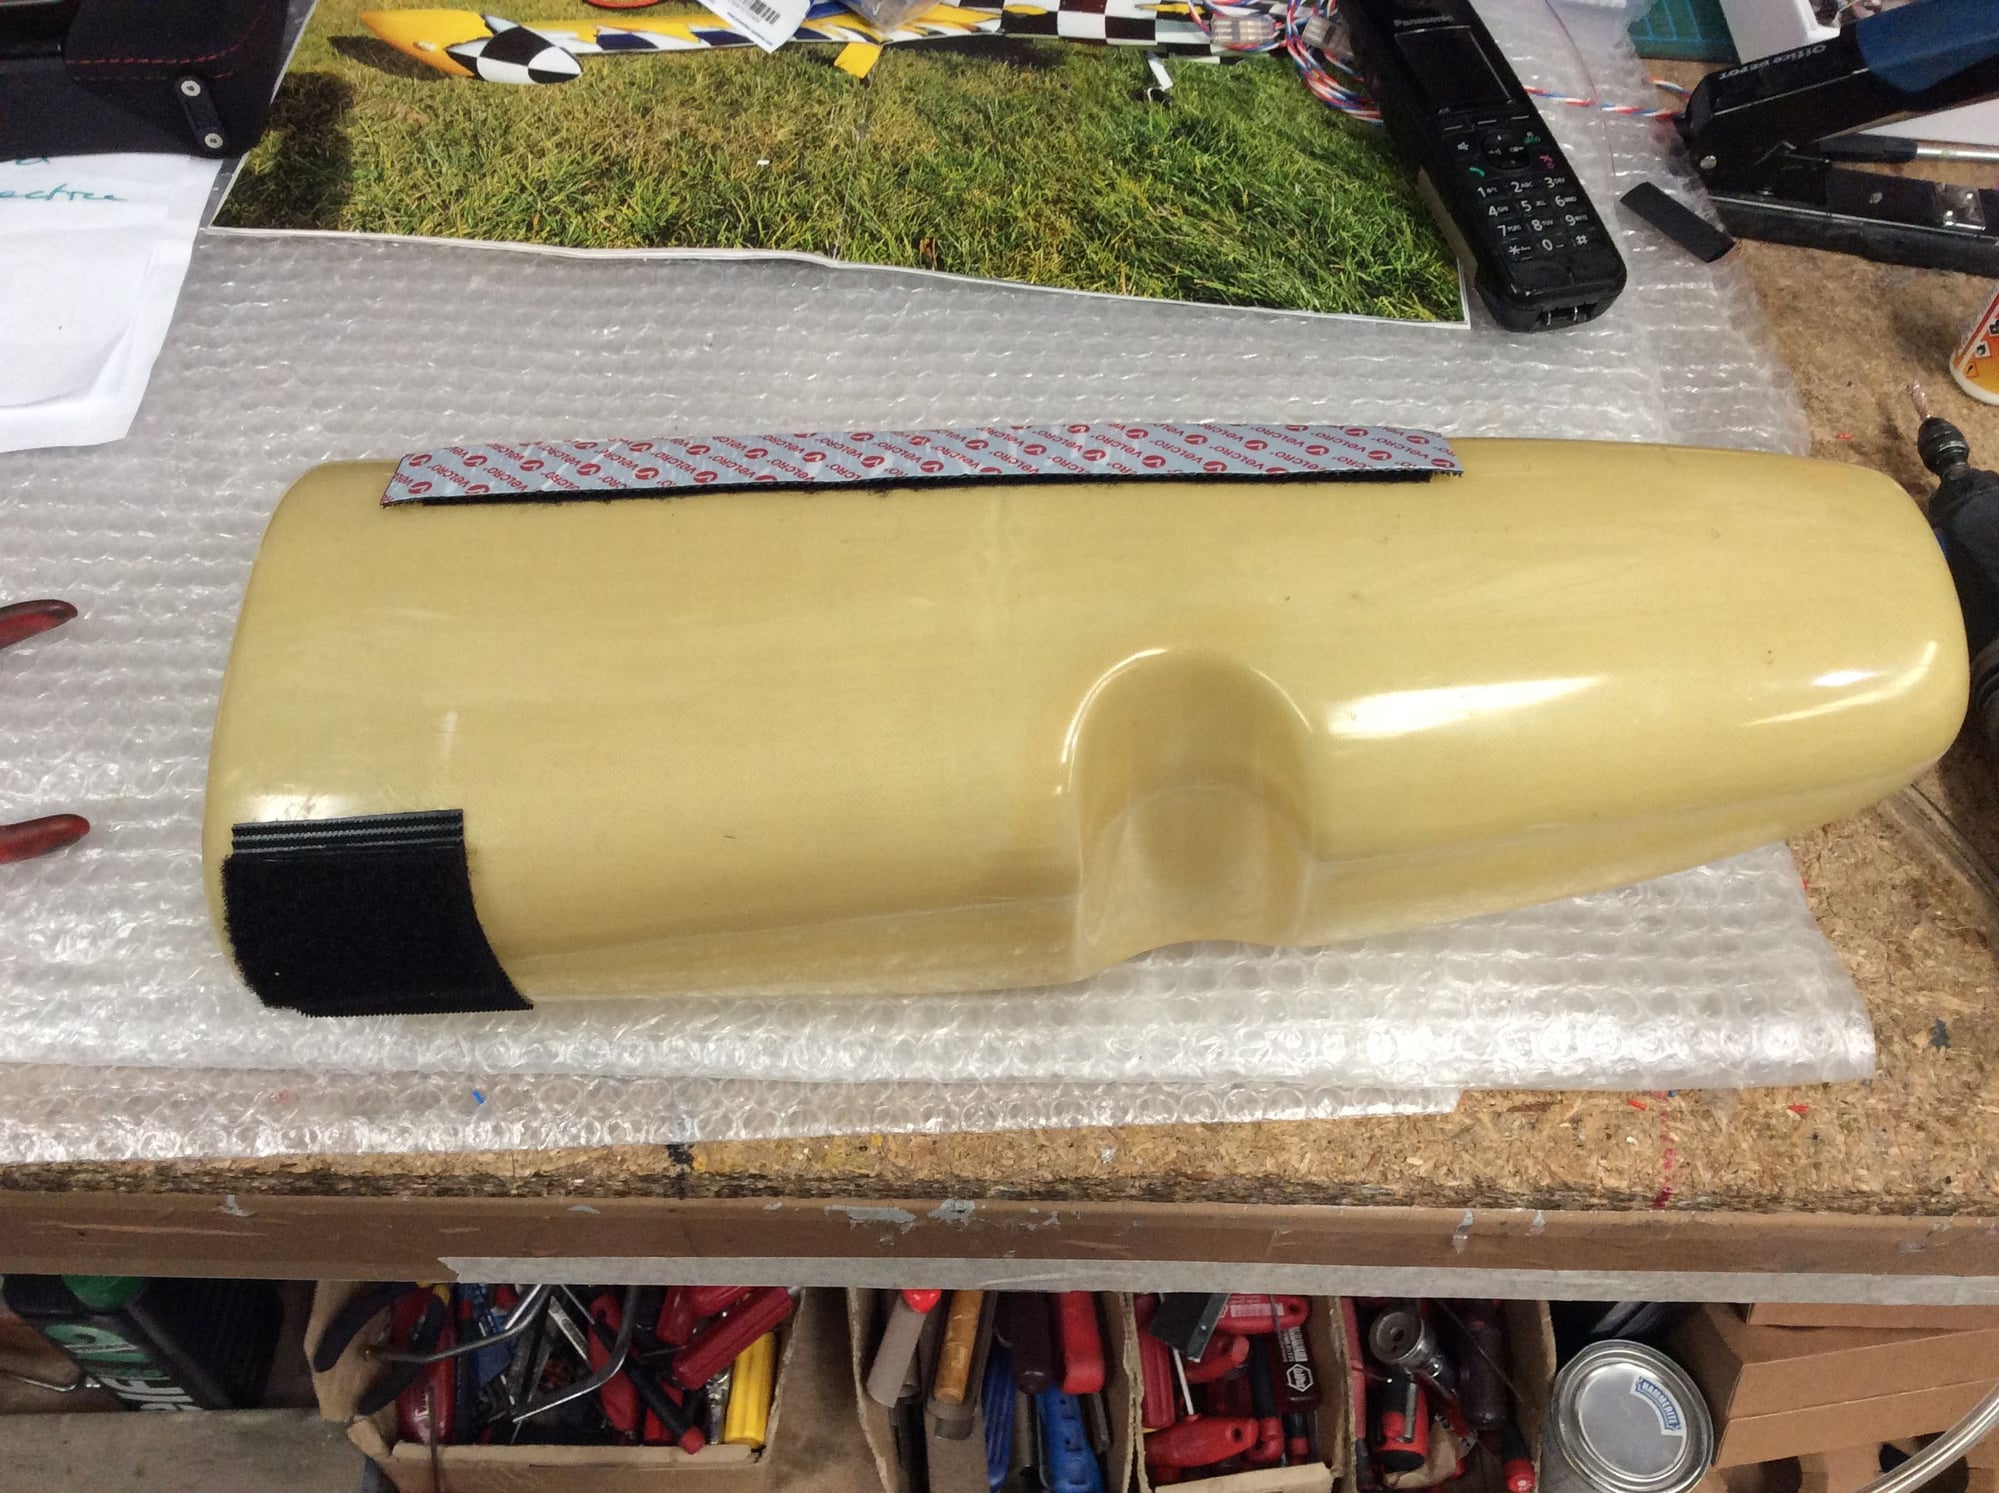
One of the considerations I had was once the nose was removed having it retained if no one was around to hold it. I looked at various options but realised I always have my painted box with me in the start box with glasses and Fire extinguisher in it.
So I came up with this idea, the proof will happen this weekend.
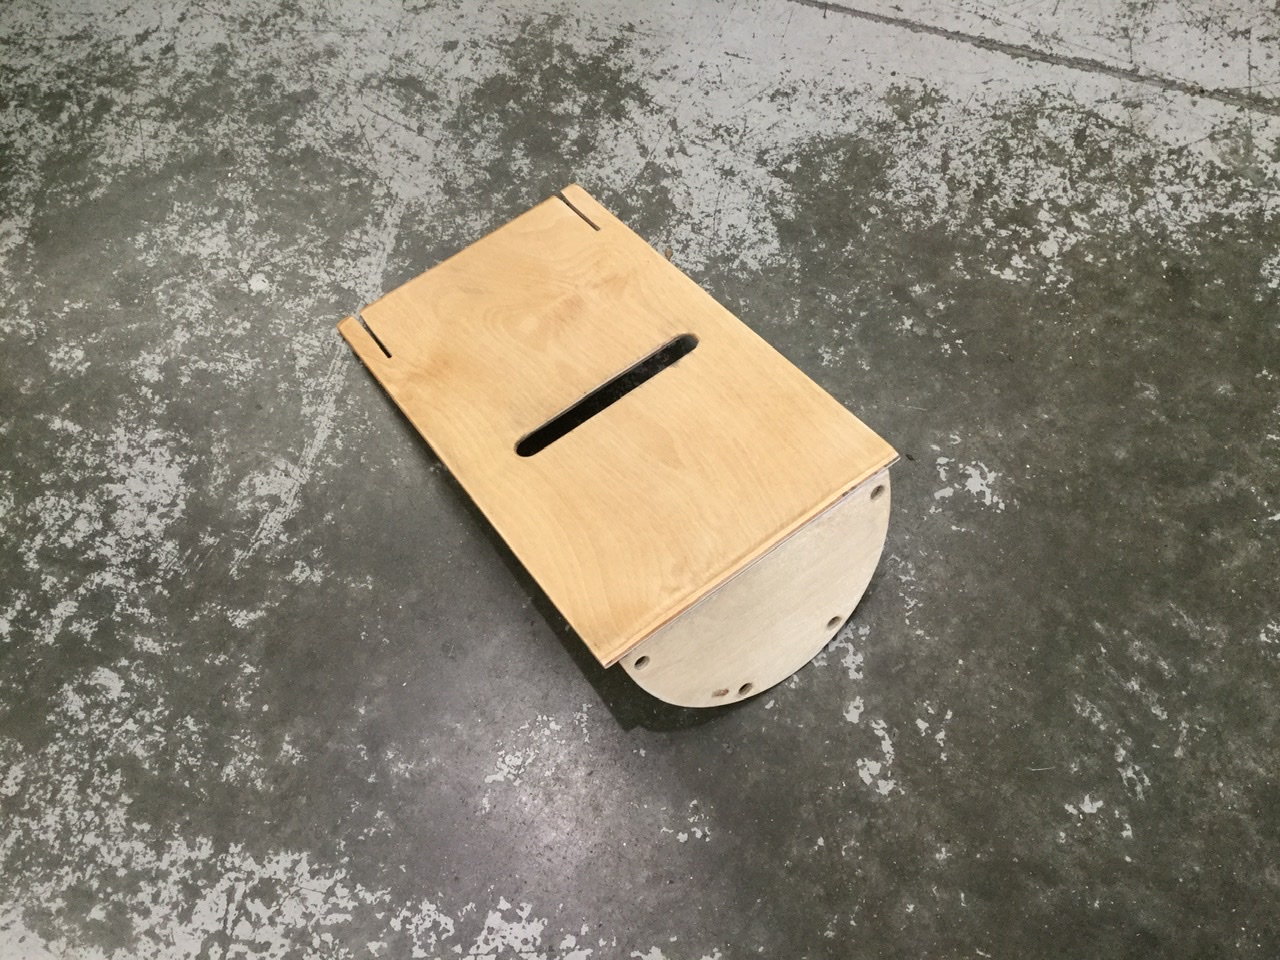
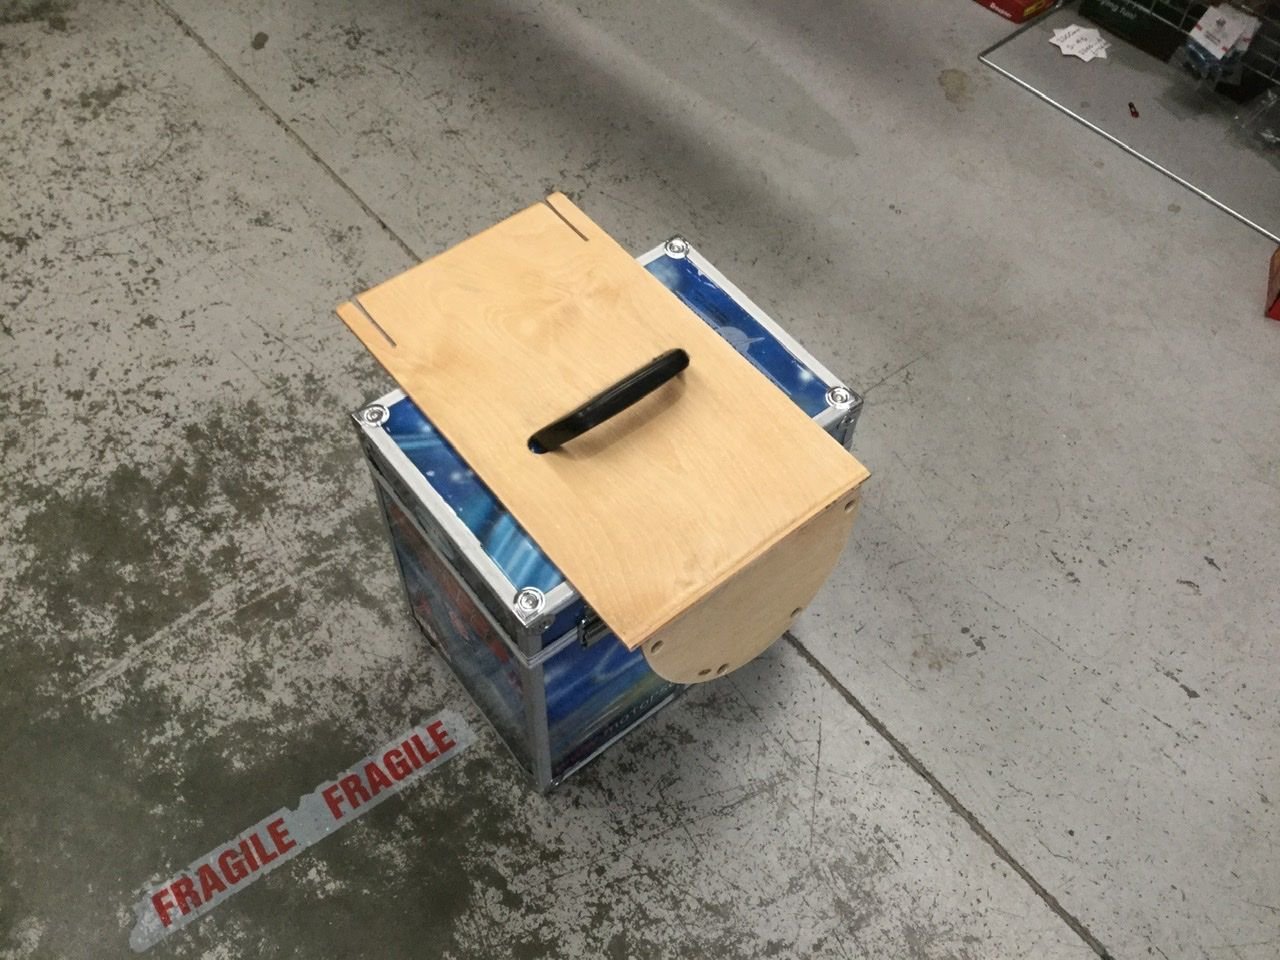


So I came up with this idea, the proof will happen this weekend.

The following users liked this post:
Canadian Man (01-19-2021)
10-11-2020 | 10:32 AM
#85
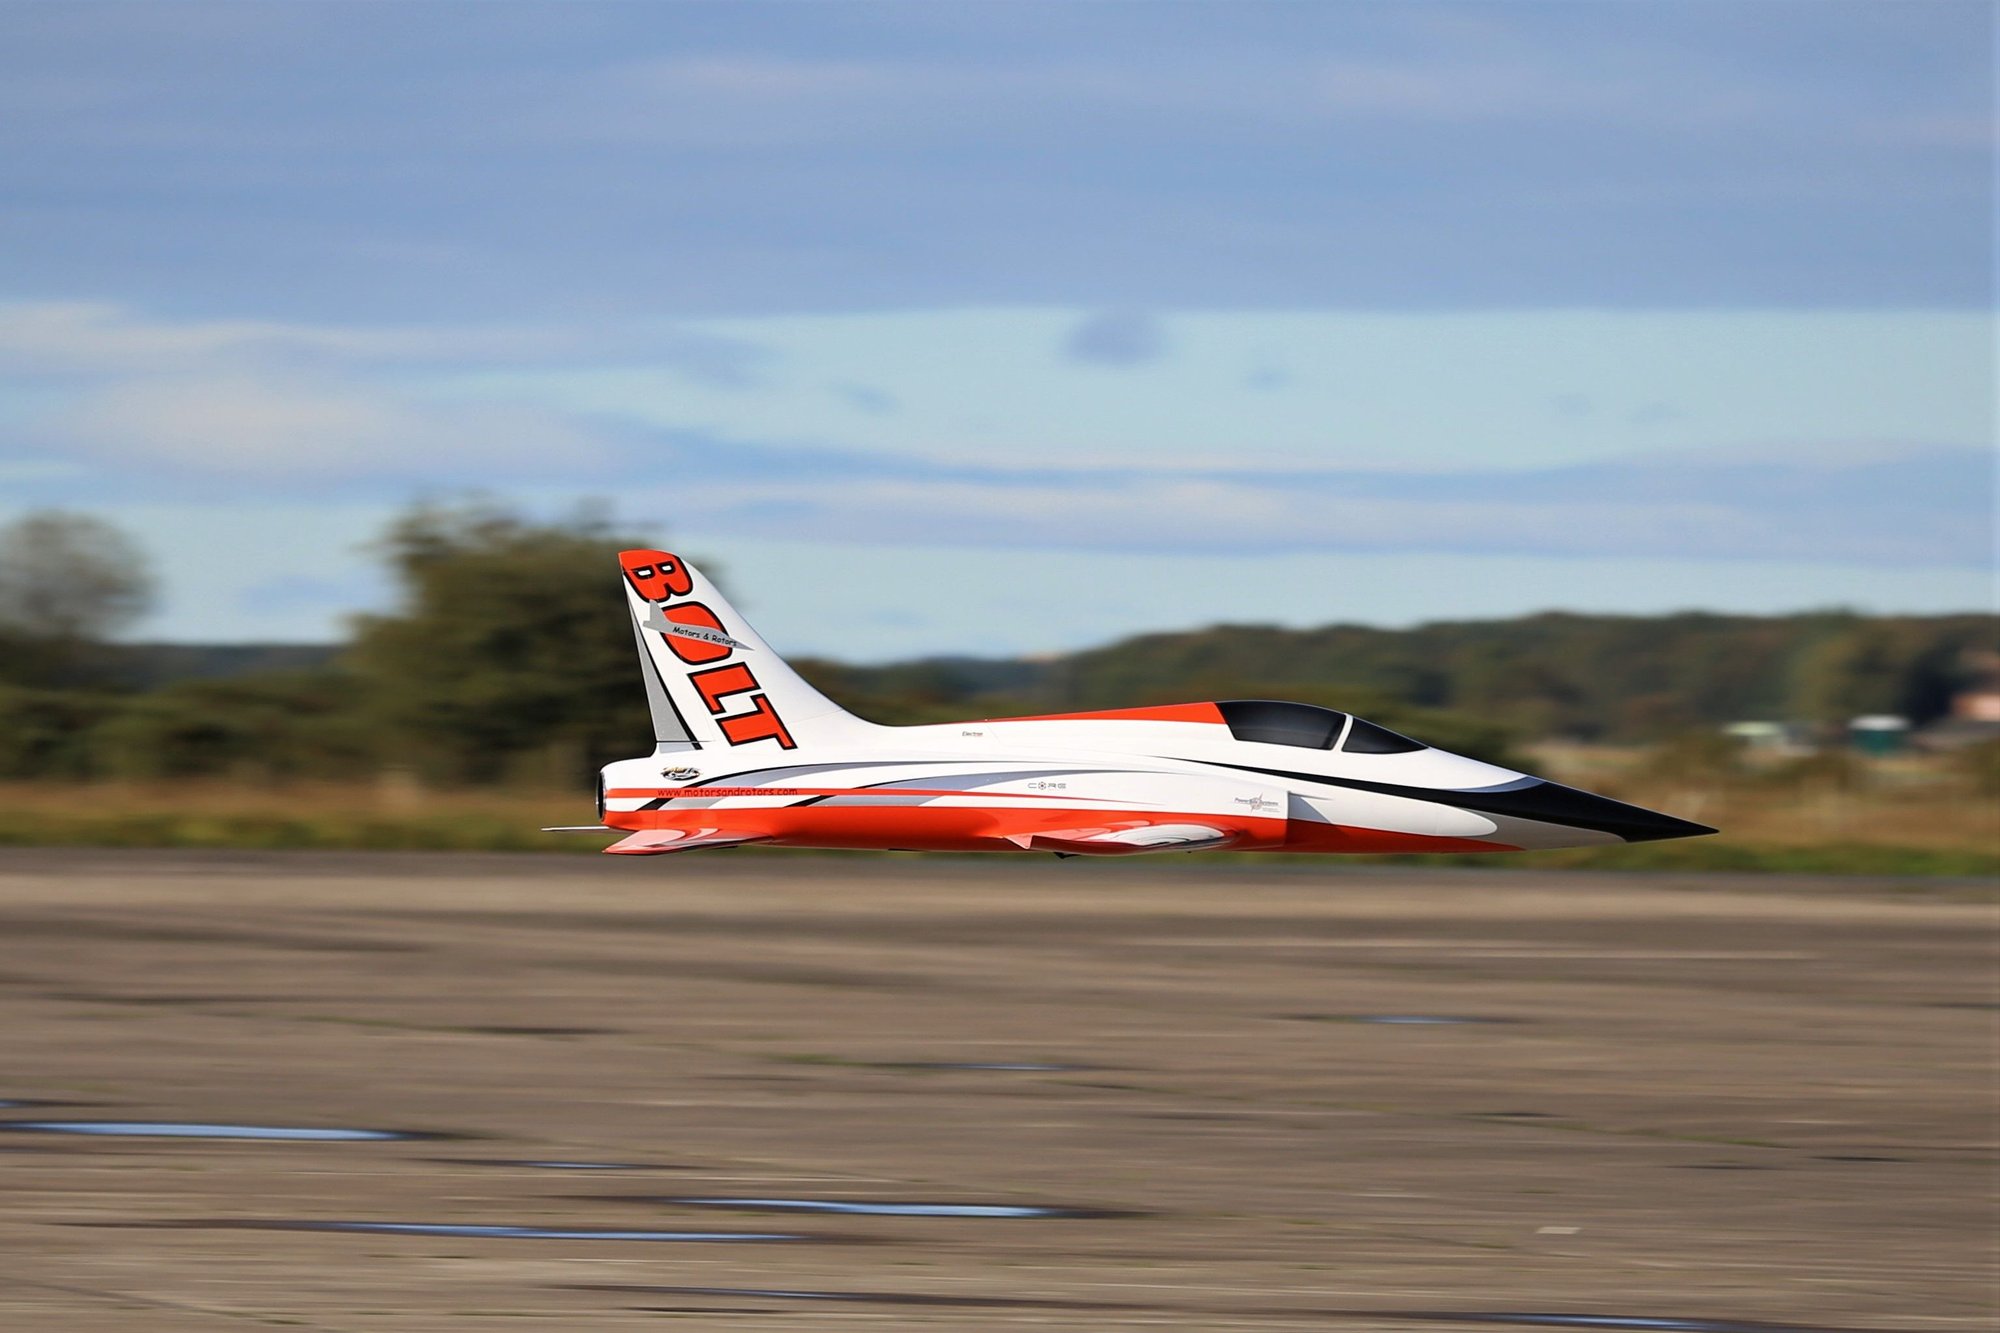
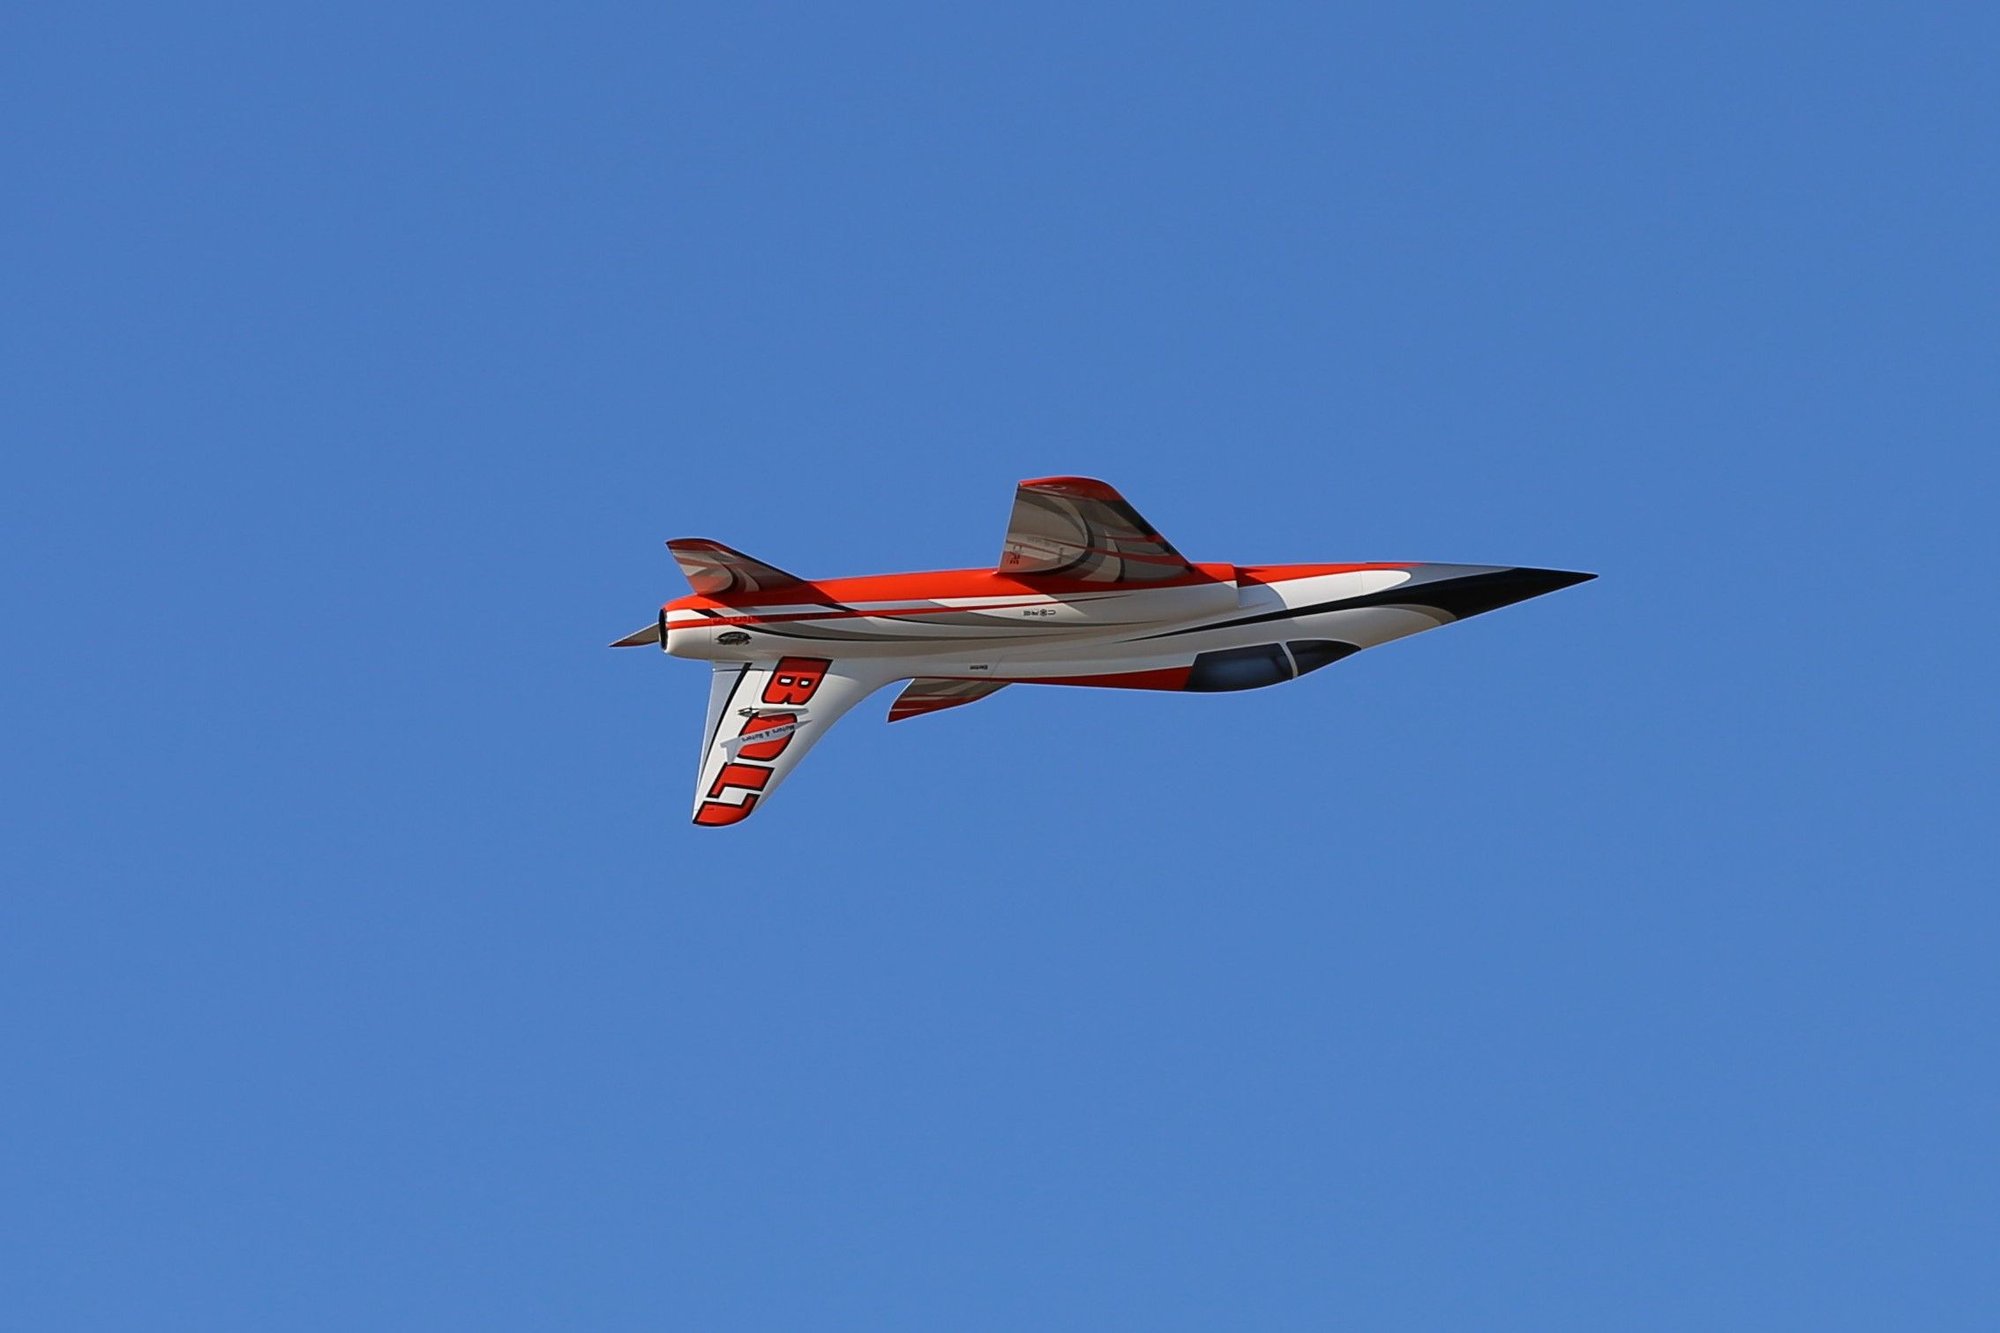
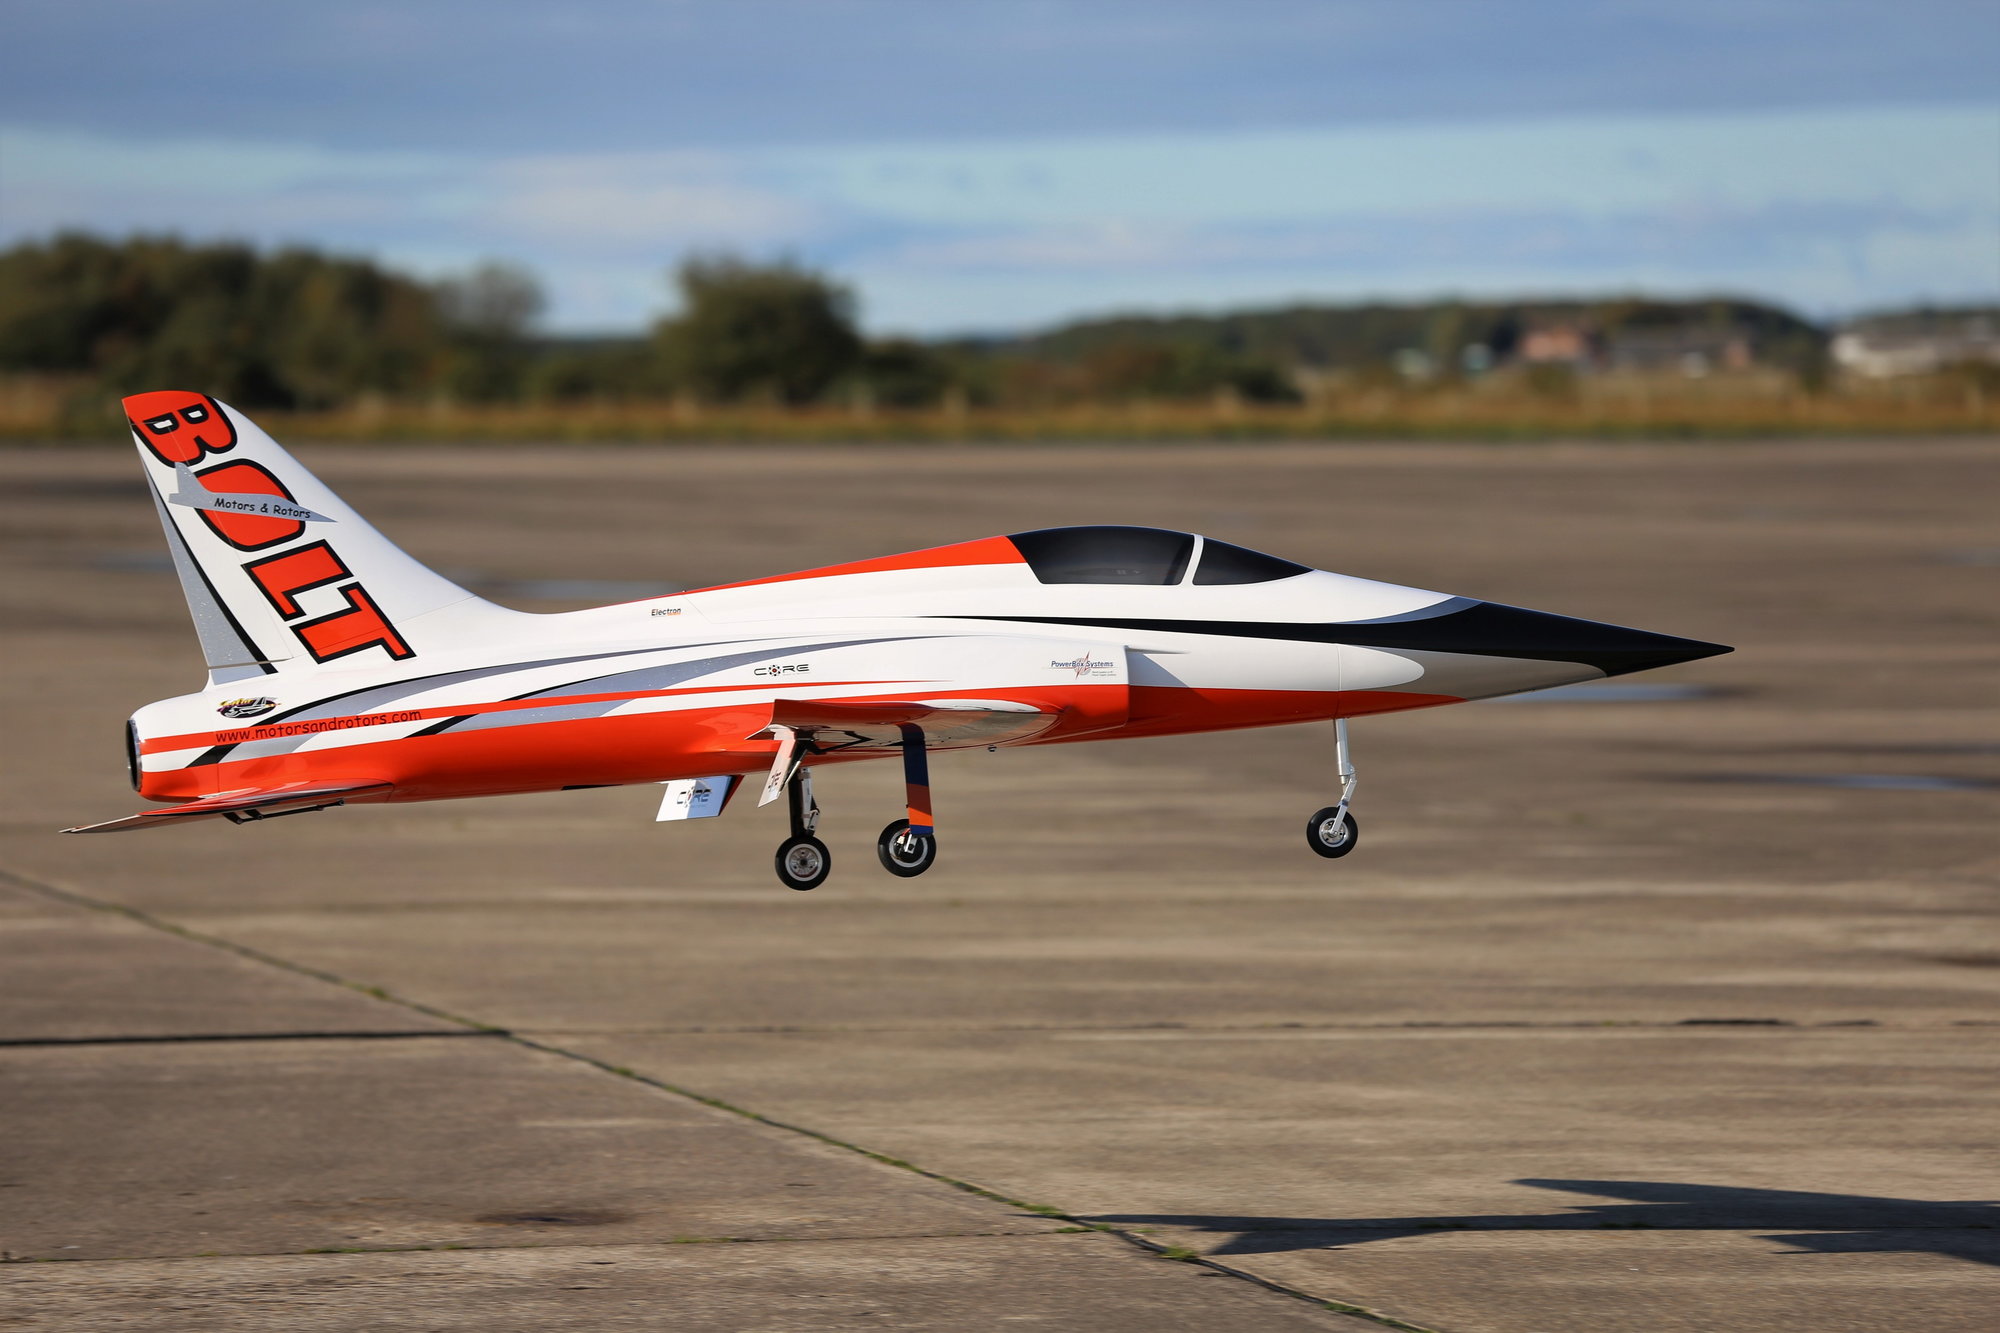
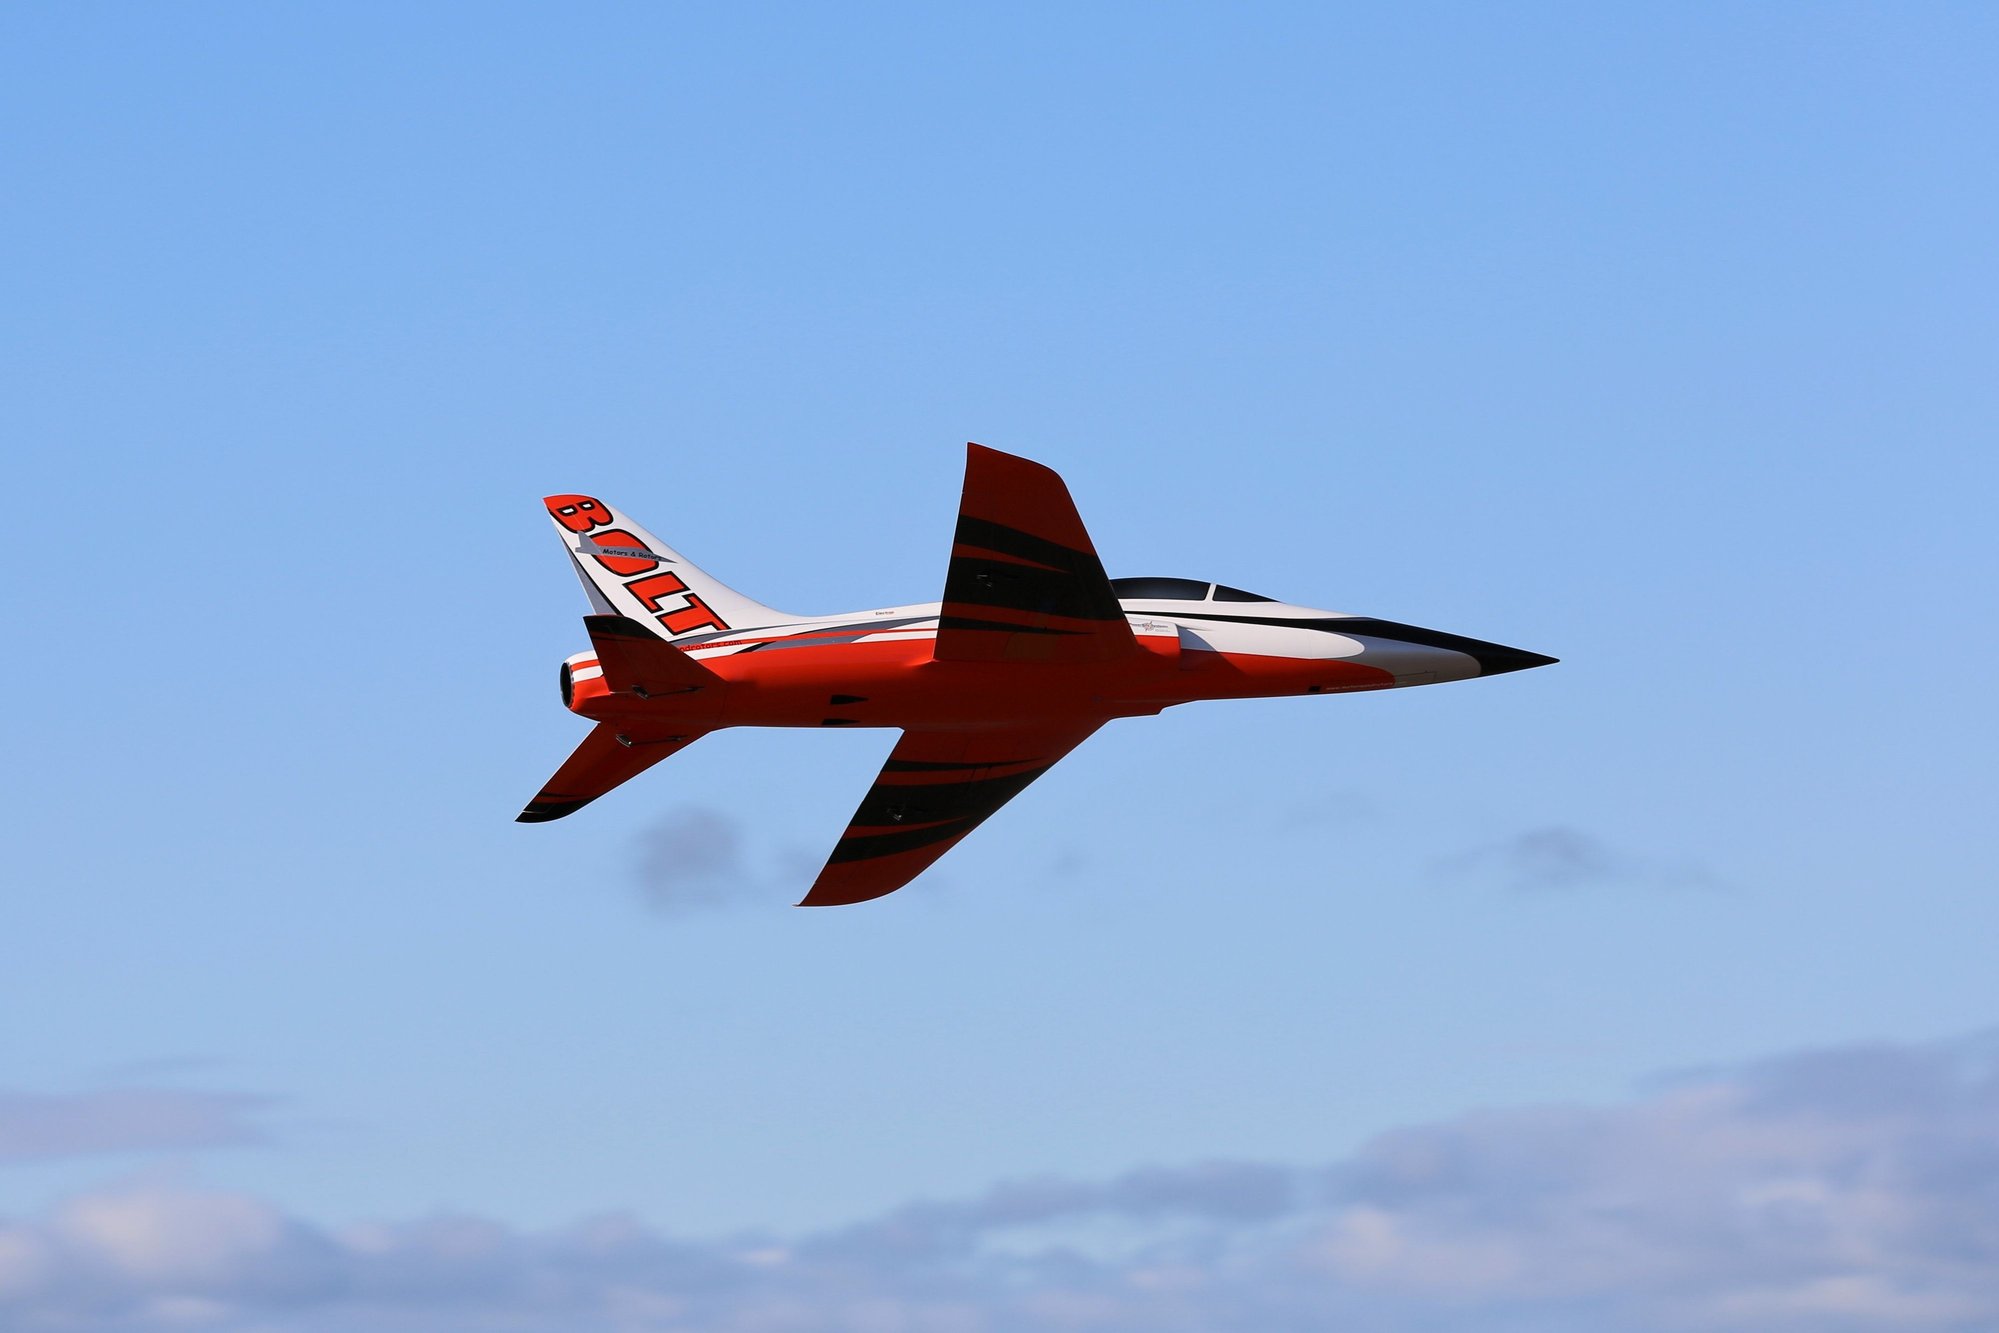
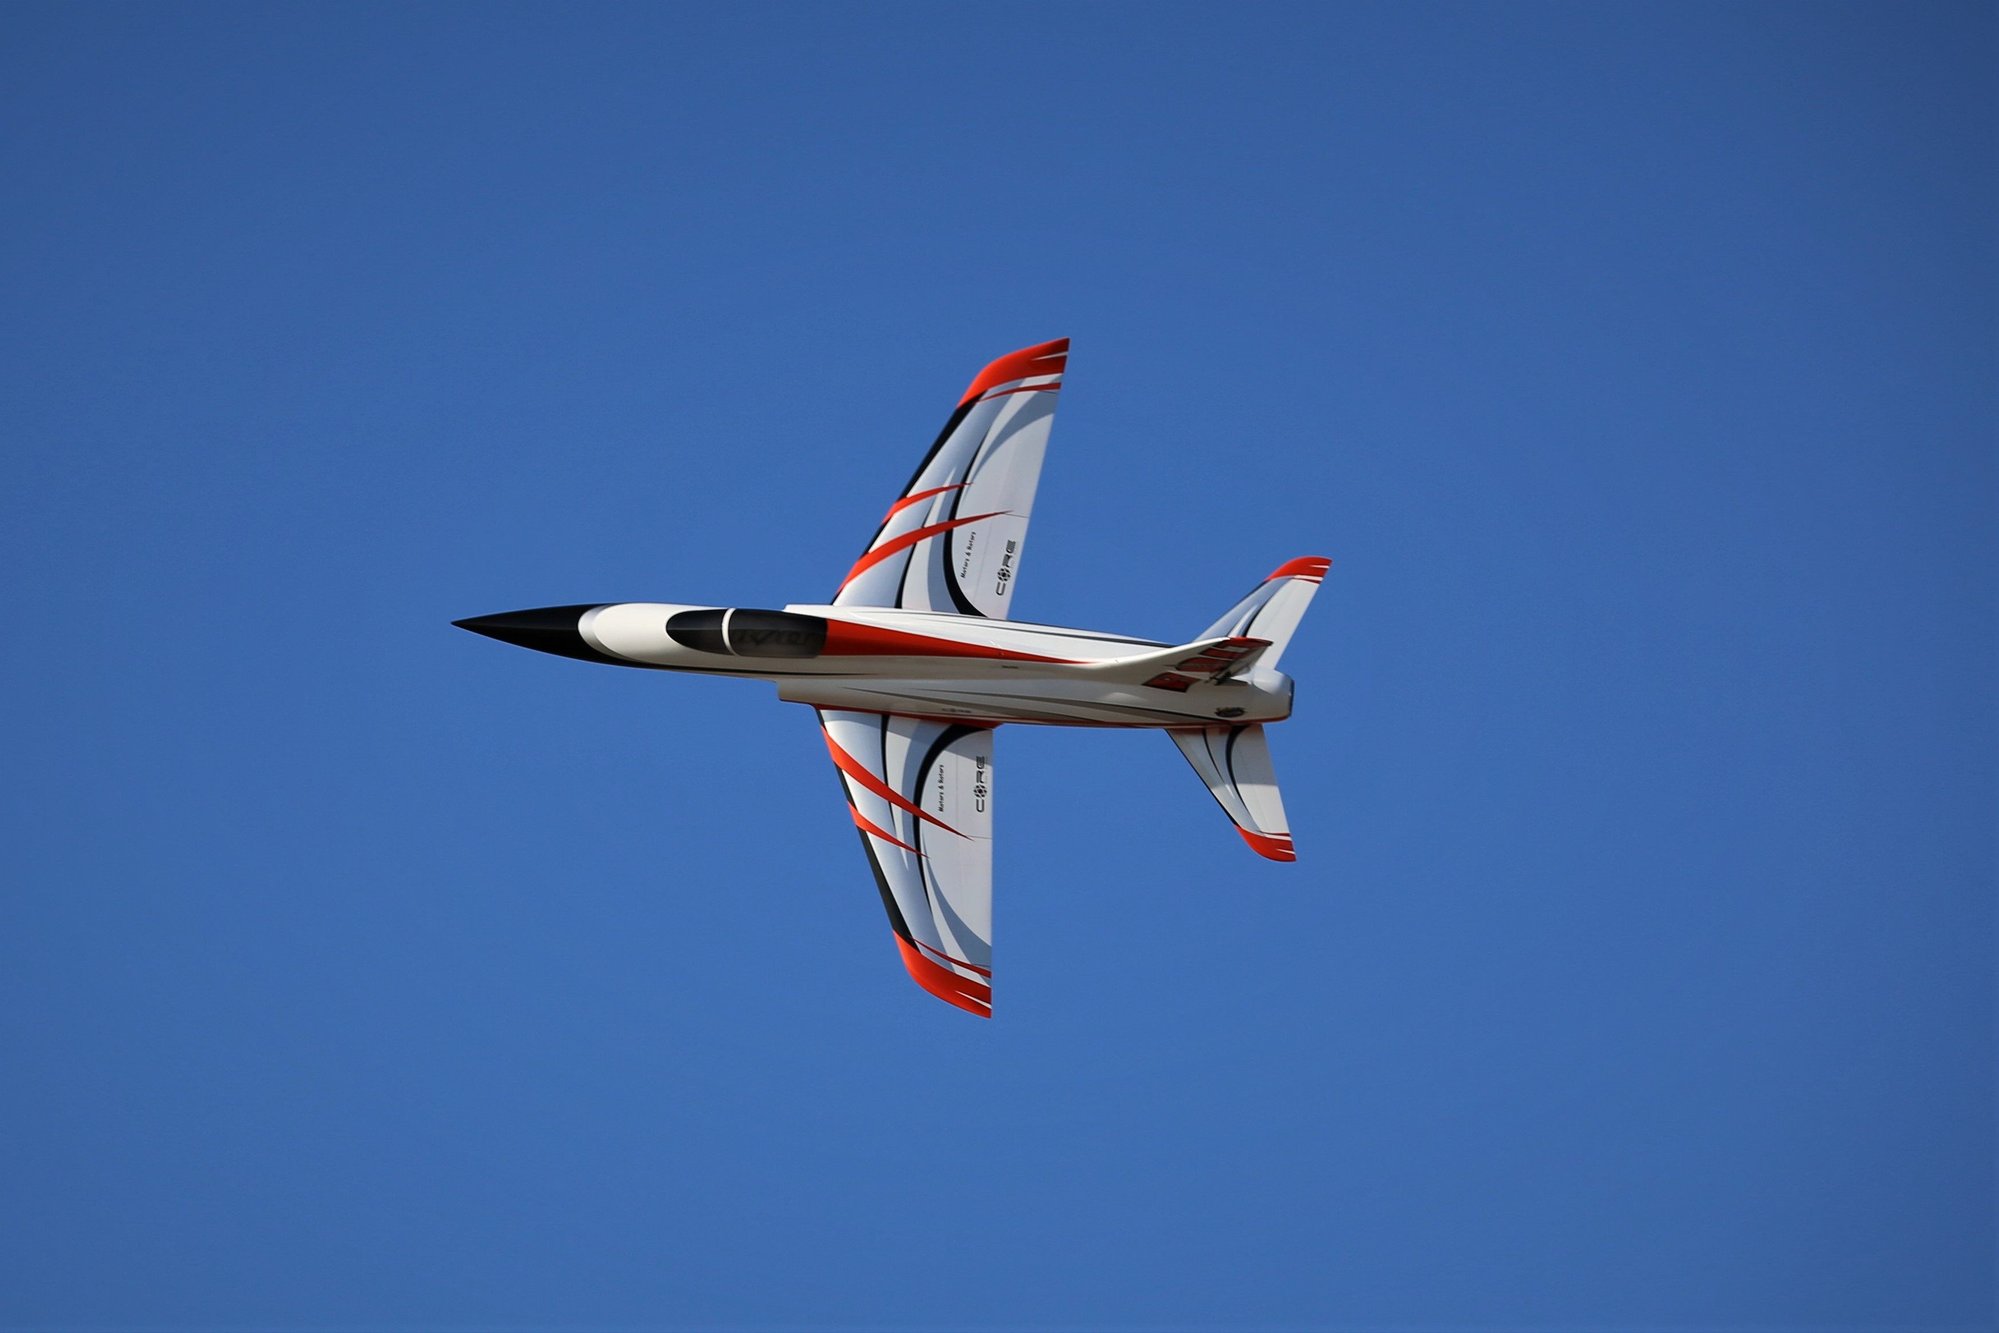
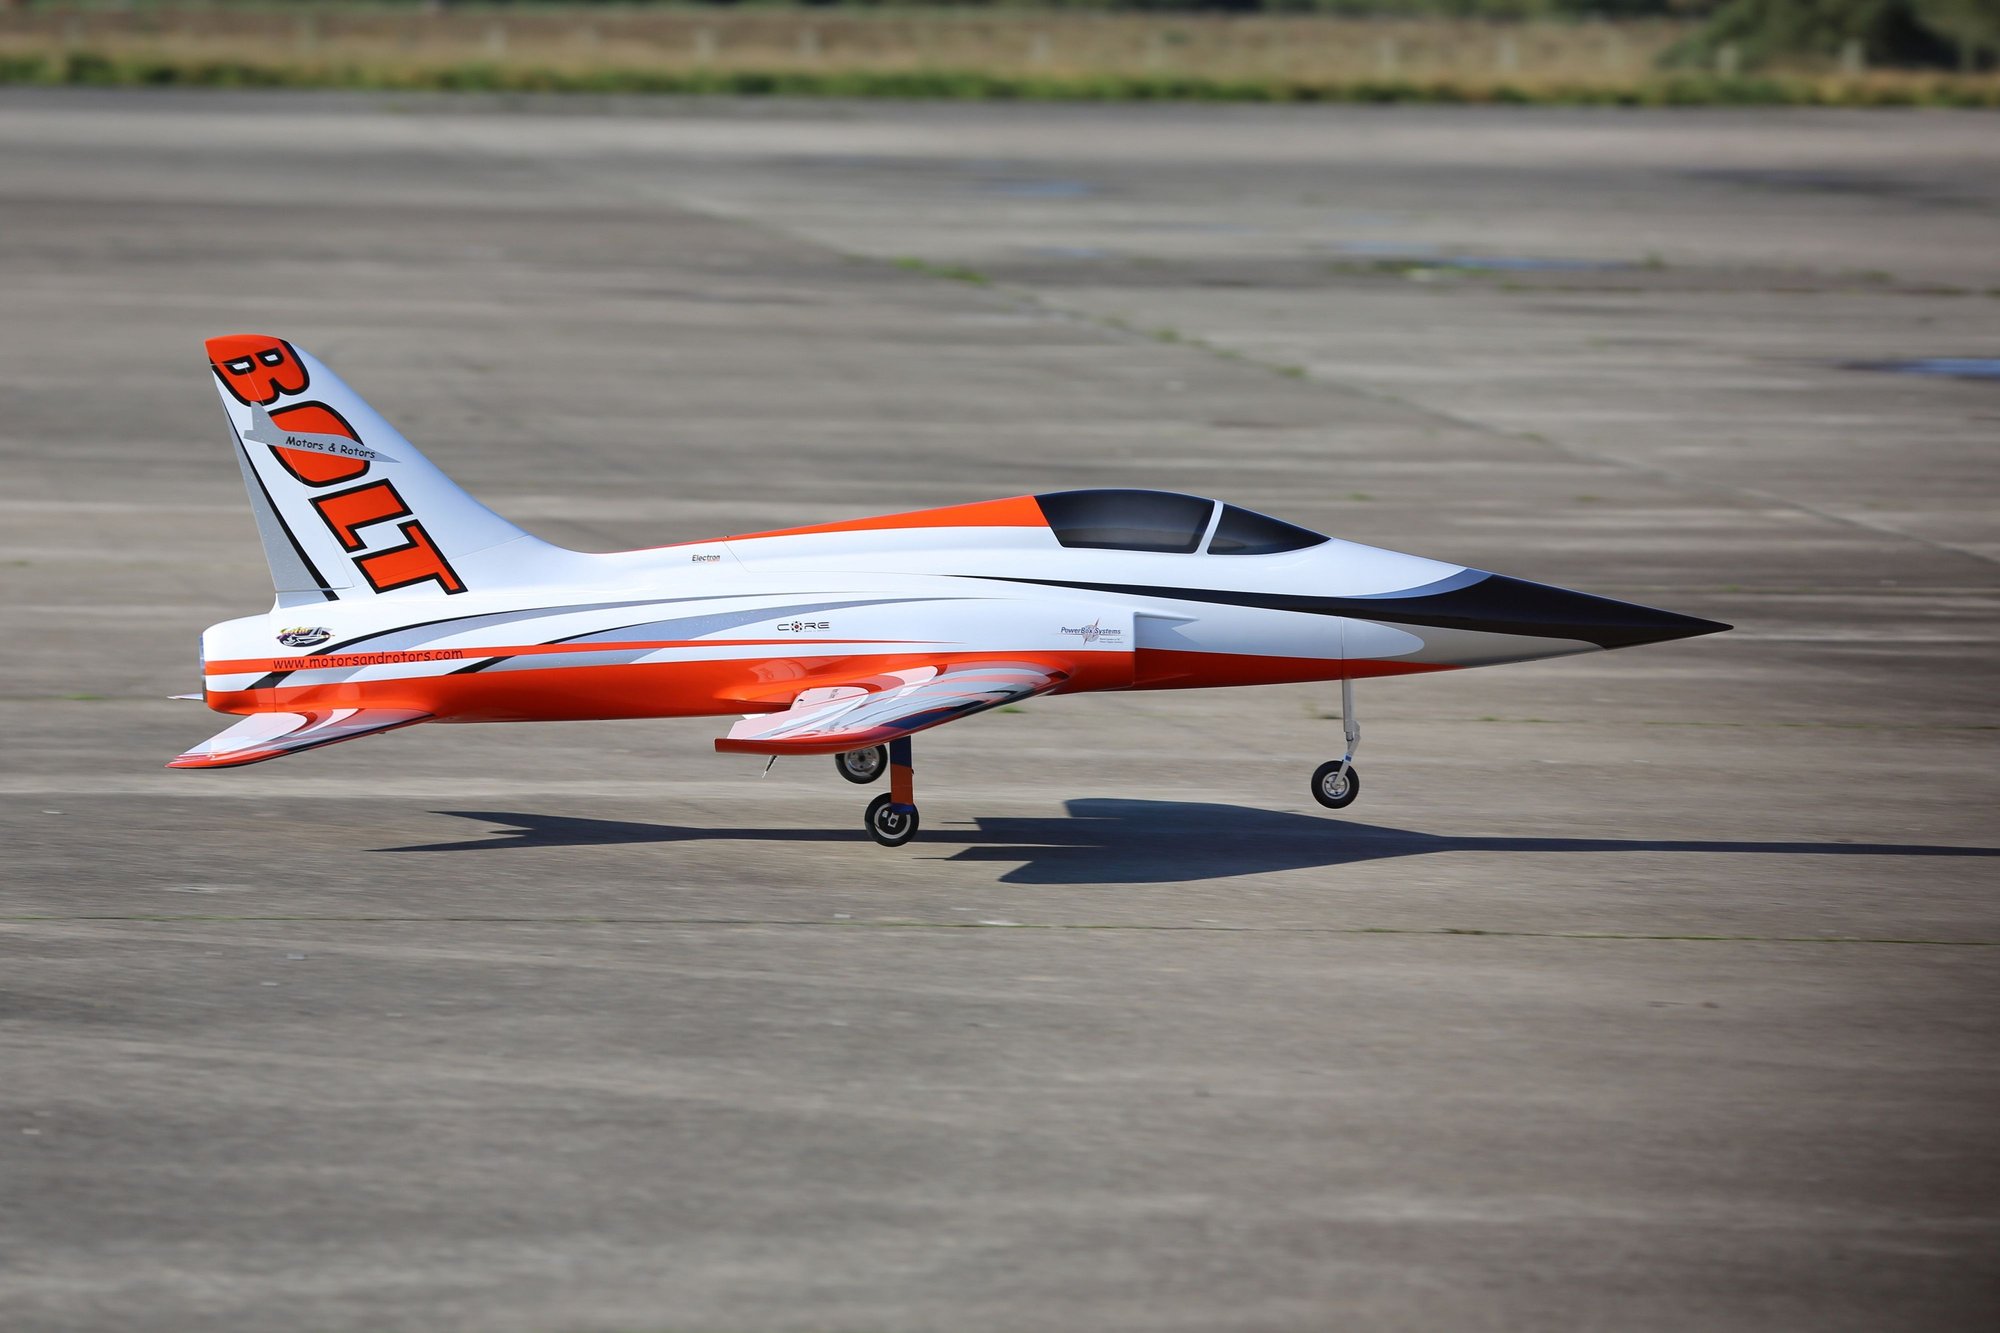
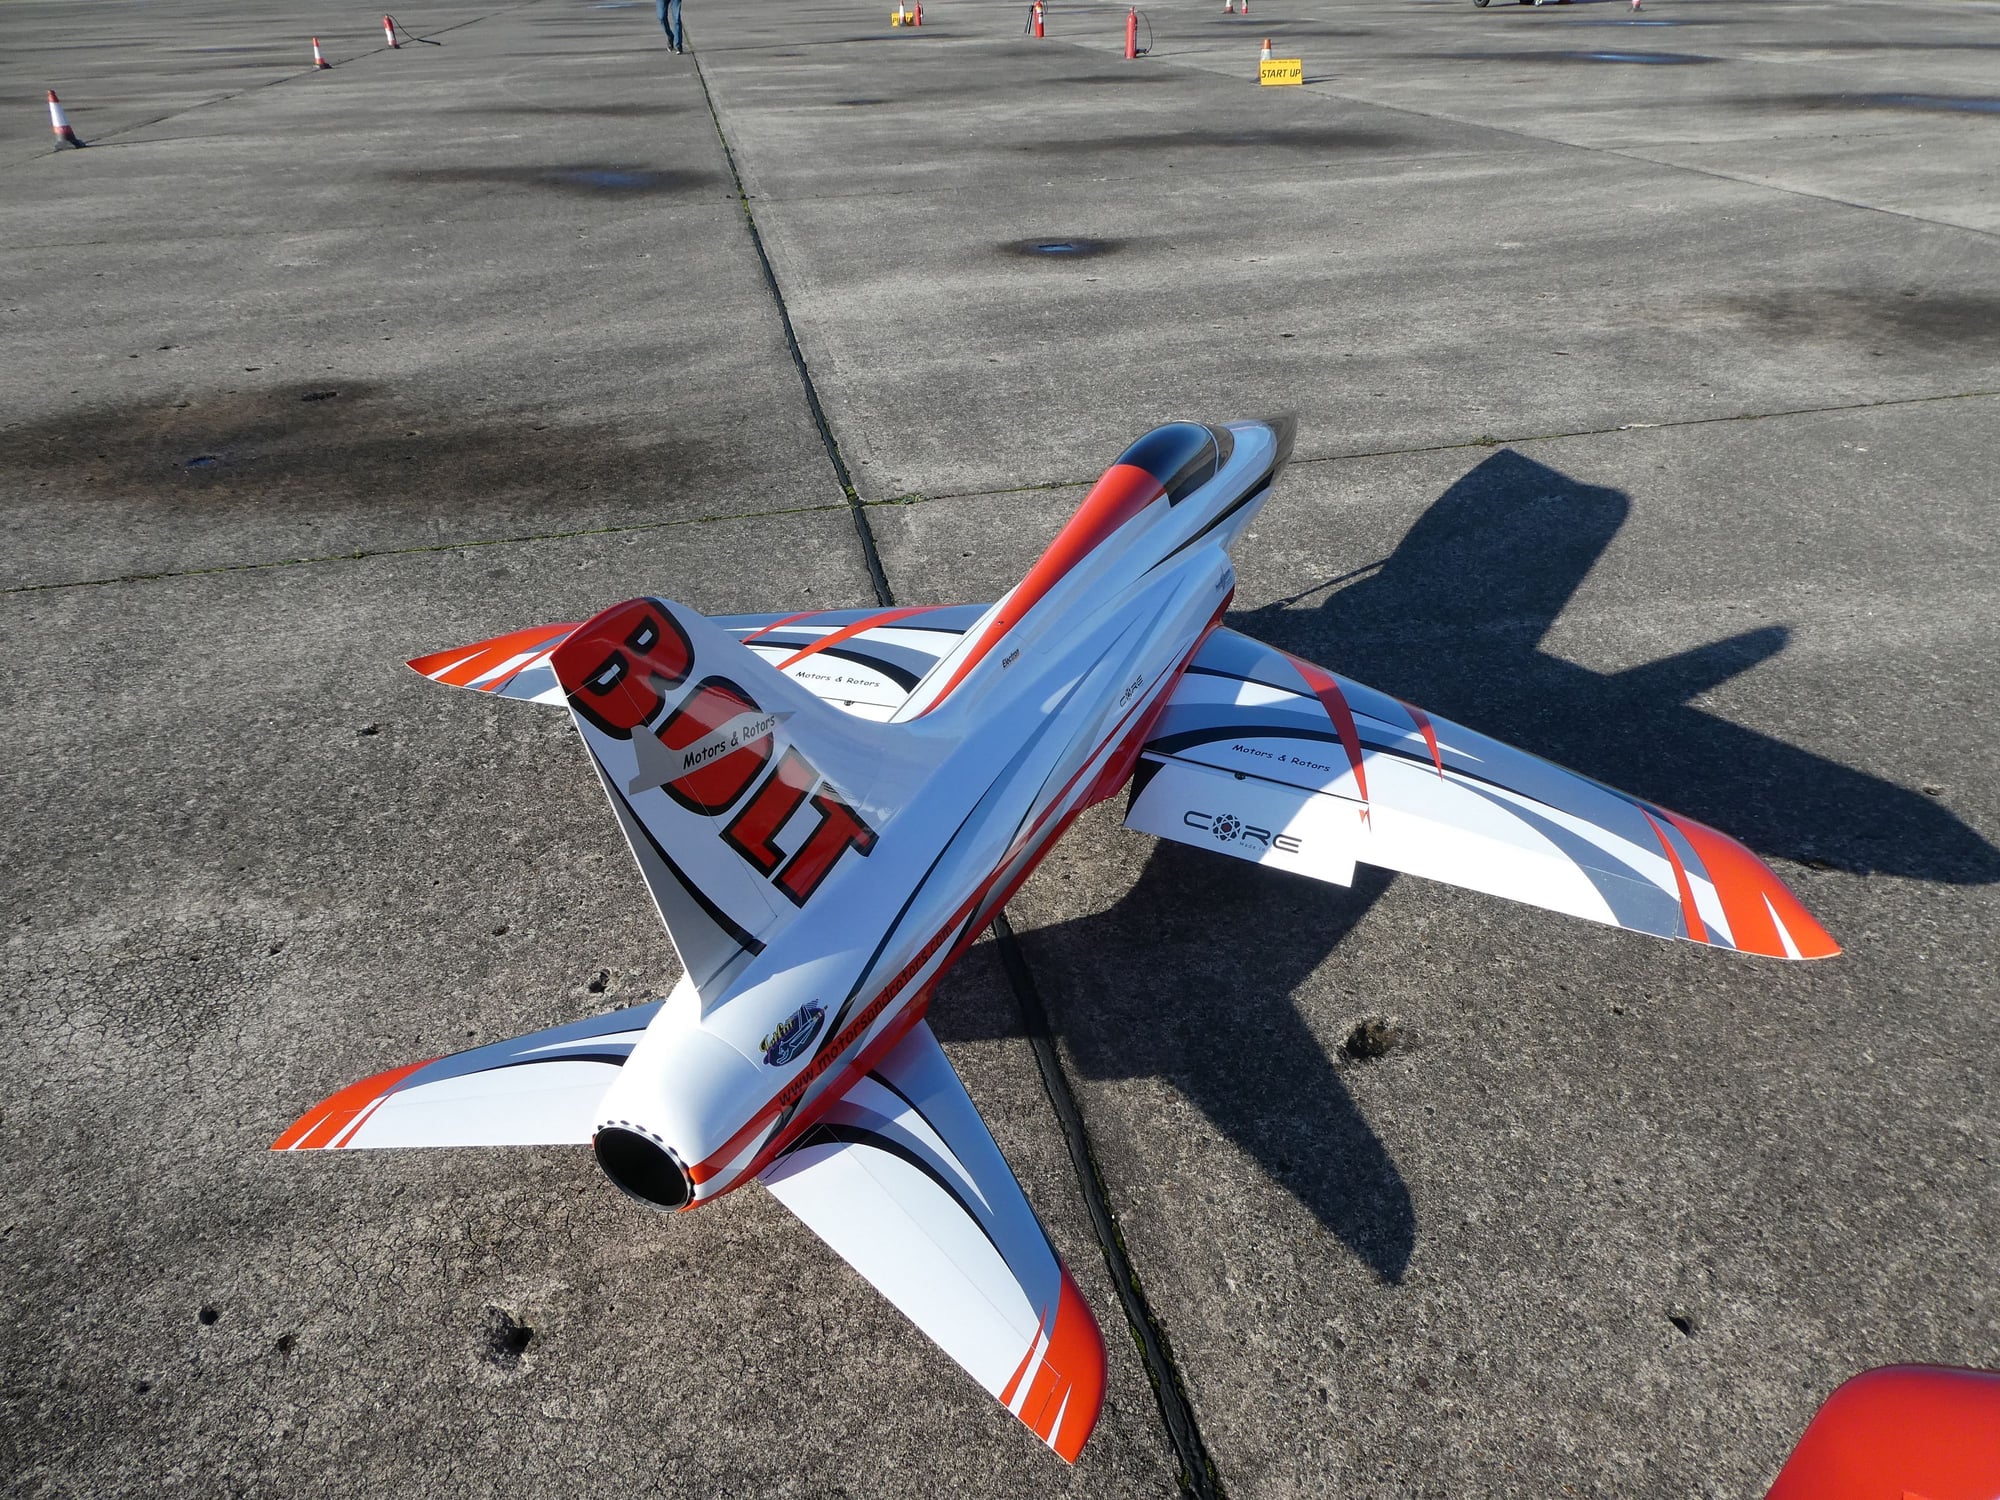
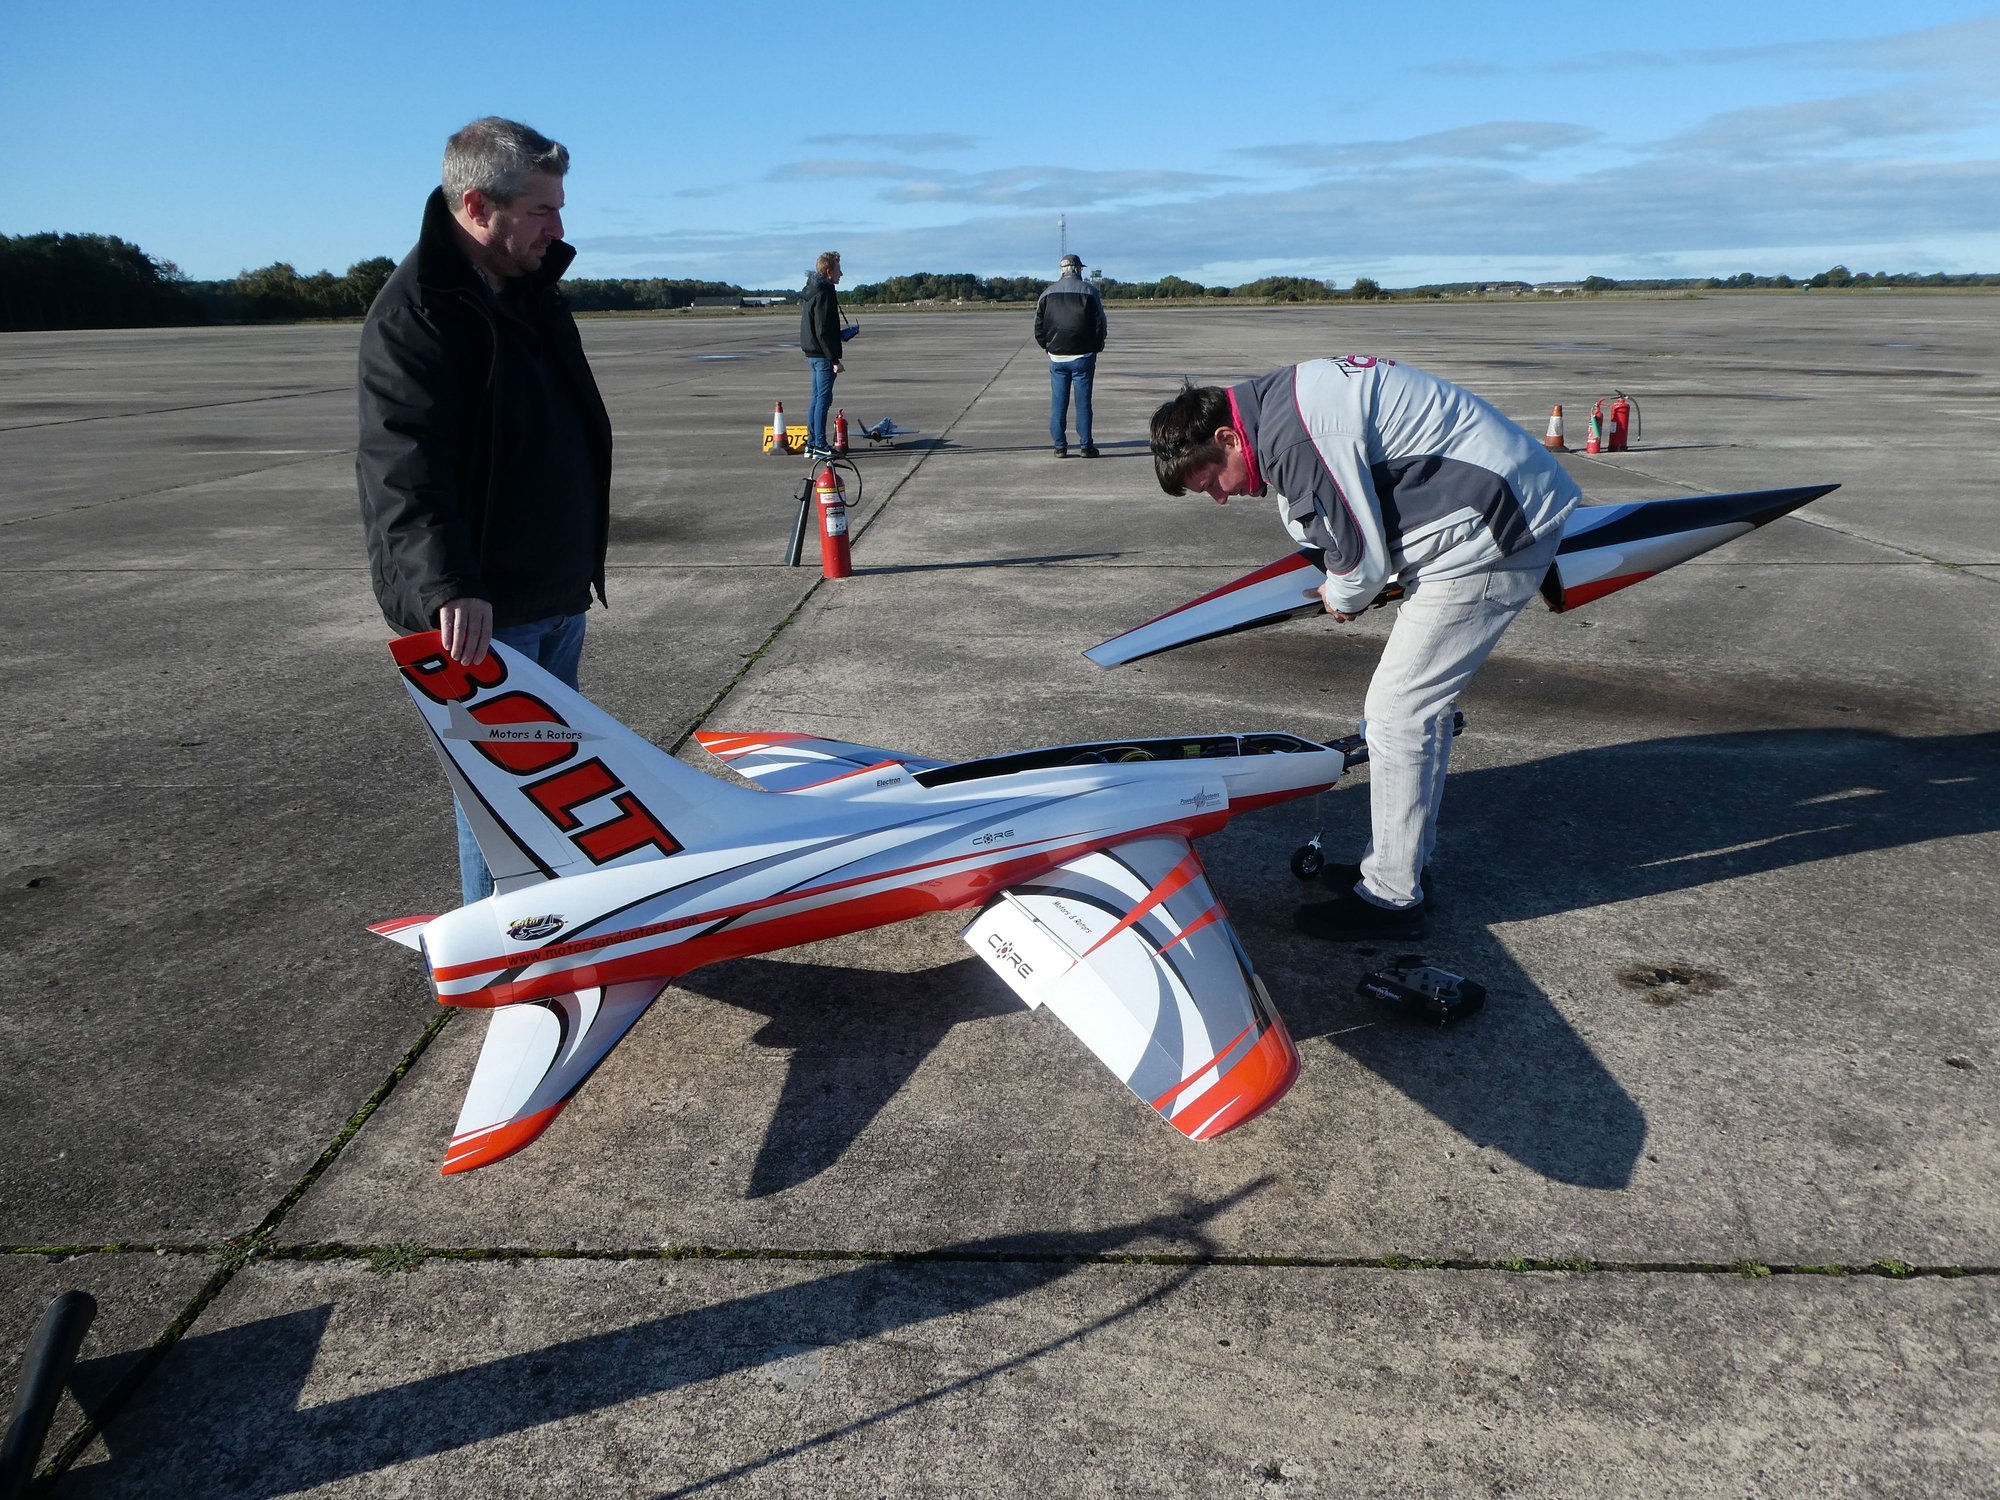
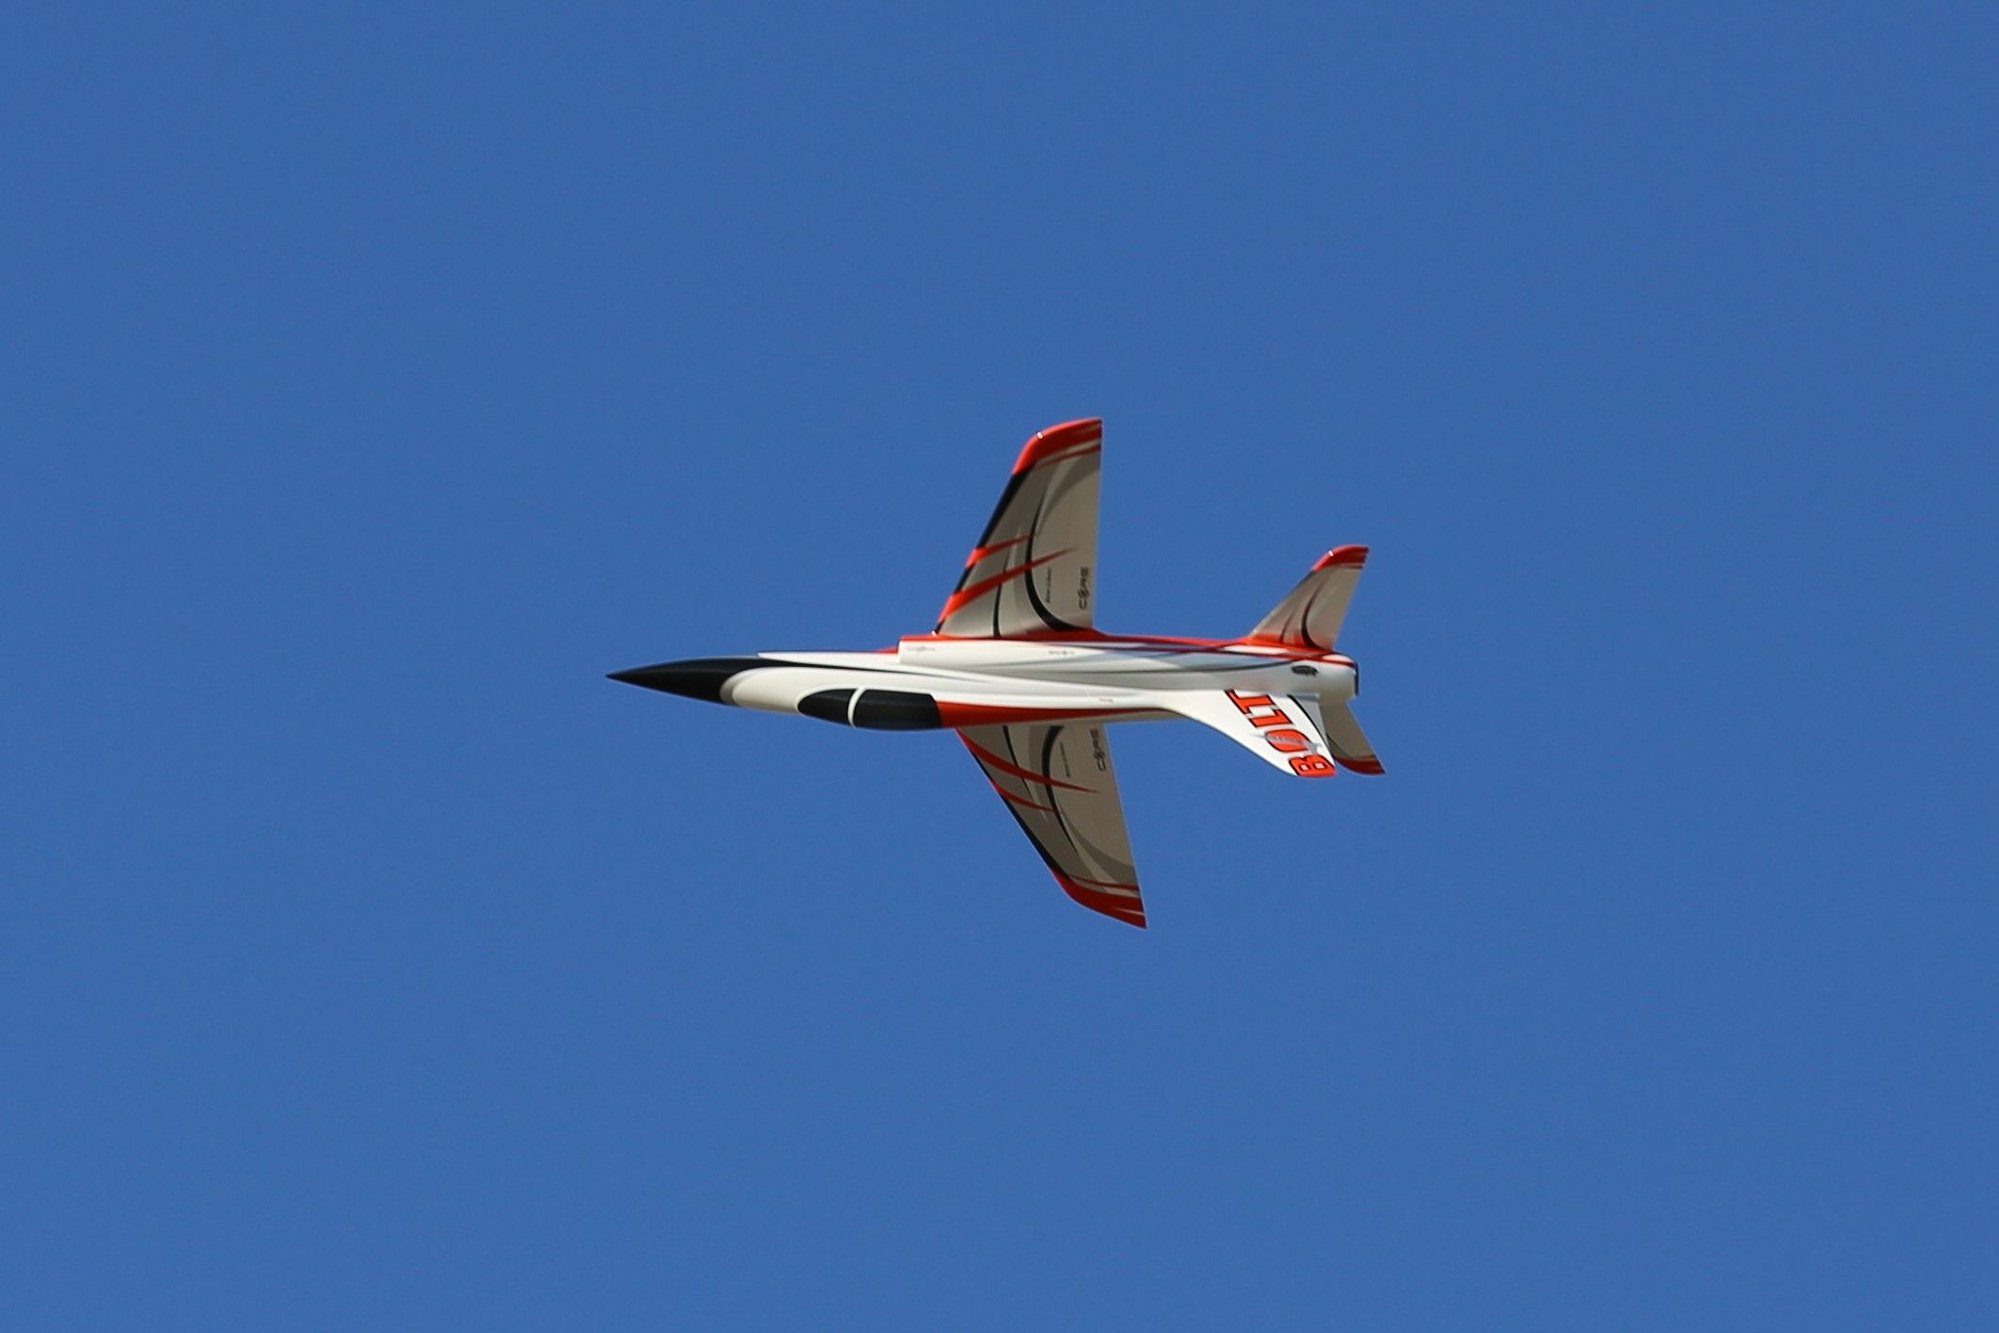
D.W. burnt a good few litres of kero in his CARF Bolt at Elvington this weekend,it flies very smooth, and can be quite quick when required :-)
Here are a few photographs.
Alistair Powers
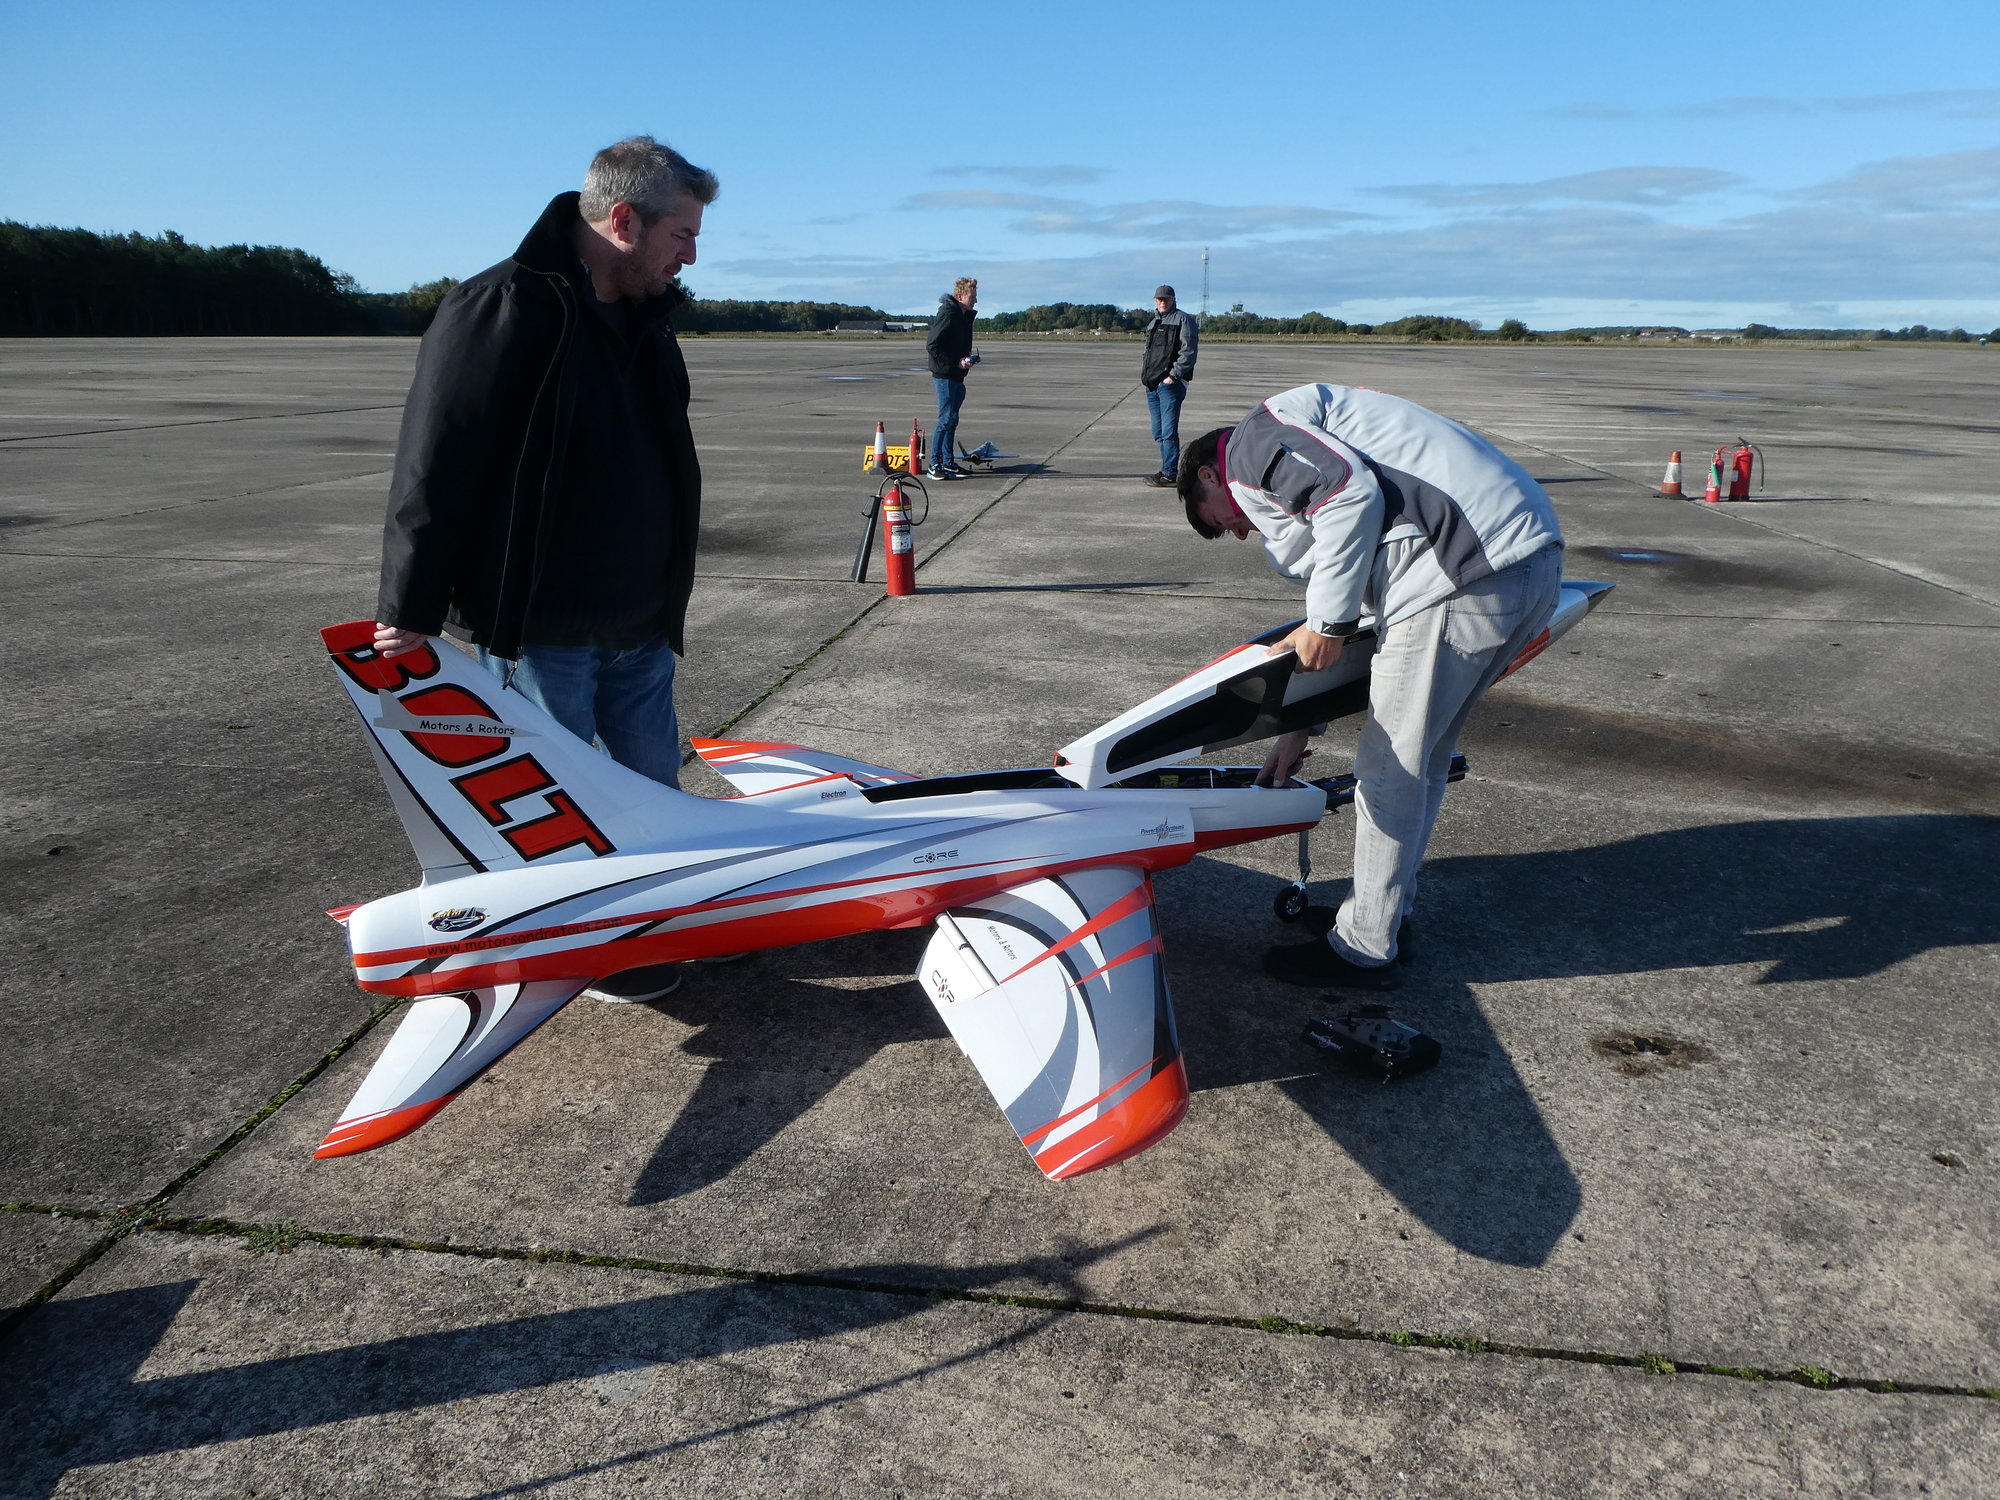


Here are a few photographs.
Alistair Powers
10-11-2020 | 01:14 PM
#86
Thread Starter
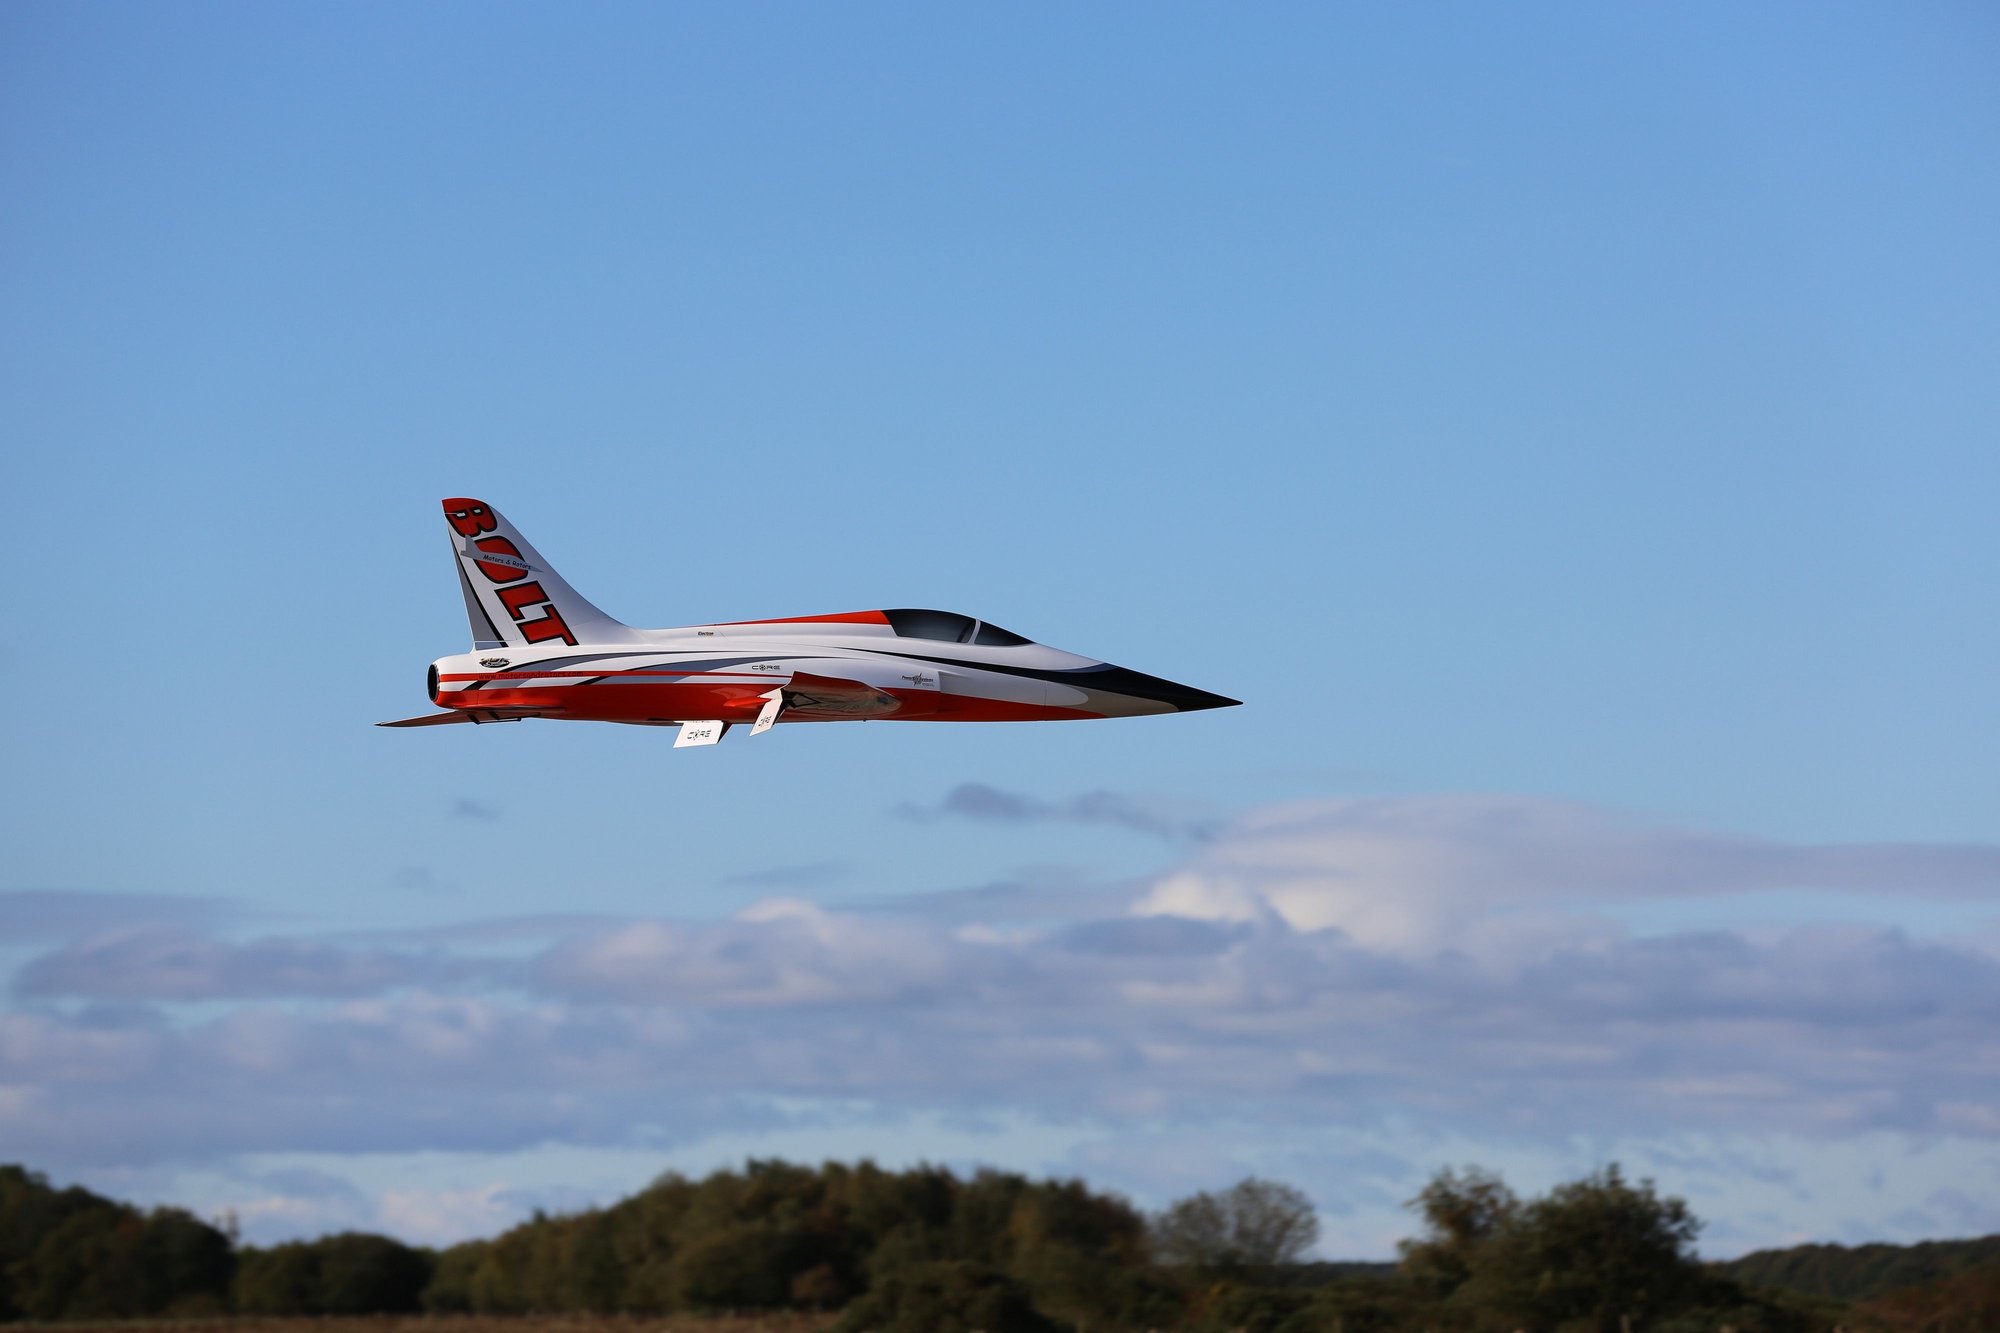
Eight more flights over this weekend, the Bolt is everything I expected and a little more. As my usual process I have been flying it with very little gyro dialled in so I could balance all the controls with movement and expo. Once this process is complete adding gyro generally just makes a model even better. A bit like my UF the Bolt flys really well without a gyro, after six flights I started adding gyro percentage to the 15% I had set for the test flight and as expected it’s just getting more and more locked in. I didn’t end up with any mixes before adding the gyro with my balance position just behind the wing fixing screw, gear down, landing fuel in the tanks. Timer is at 7 minutes with the JetCat P-220 and I’m landing with safe fuel when using full power-people commented today it accelerates going vertical from a slow pass.
One of the things that amused me is the surprise people showed at how slowly it lands, I guess the thought is it’s a high speed machine, but the speed range is massive.
I hope to get someone to video it soon.
One of the things that amused me is the surprise people showed at how slowly it lands, I guess the thought is it’s a high speed machine, but the speed range is massive.
I hope to get someone to video it soon.
The following 5 users liked this post by Dave Wilshere:
camss69 (10-11-2020),
Canadian Man (10-26-2020),
Mark Vandervelden (01-04-2021),
Milan V (10-12-2020),
paulhat (10-12-2020)


The following 2 users liked this post by Dave Wilshere:
Canadian Man (10-26-2020),
Milan V (10-12-2020)
The following users liked this post:
Milan V (10-25-2020)
10-25-2020 | 12:43 PM
#89
I�ve finally started work on David�s Bolt. First I have to say that this is one of the nicest finished CARF sport jets I�ve worked on. They have really stepped it up a notch. Working on the wings, the
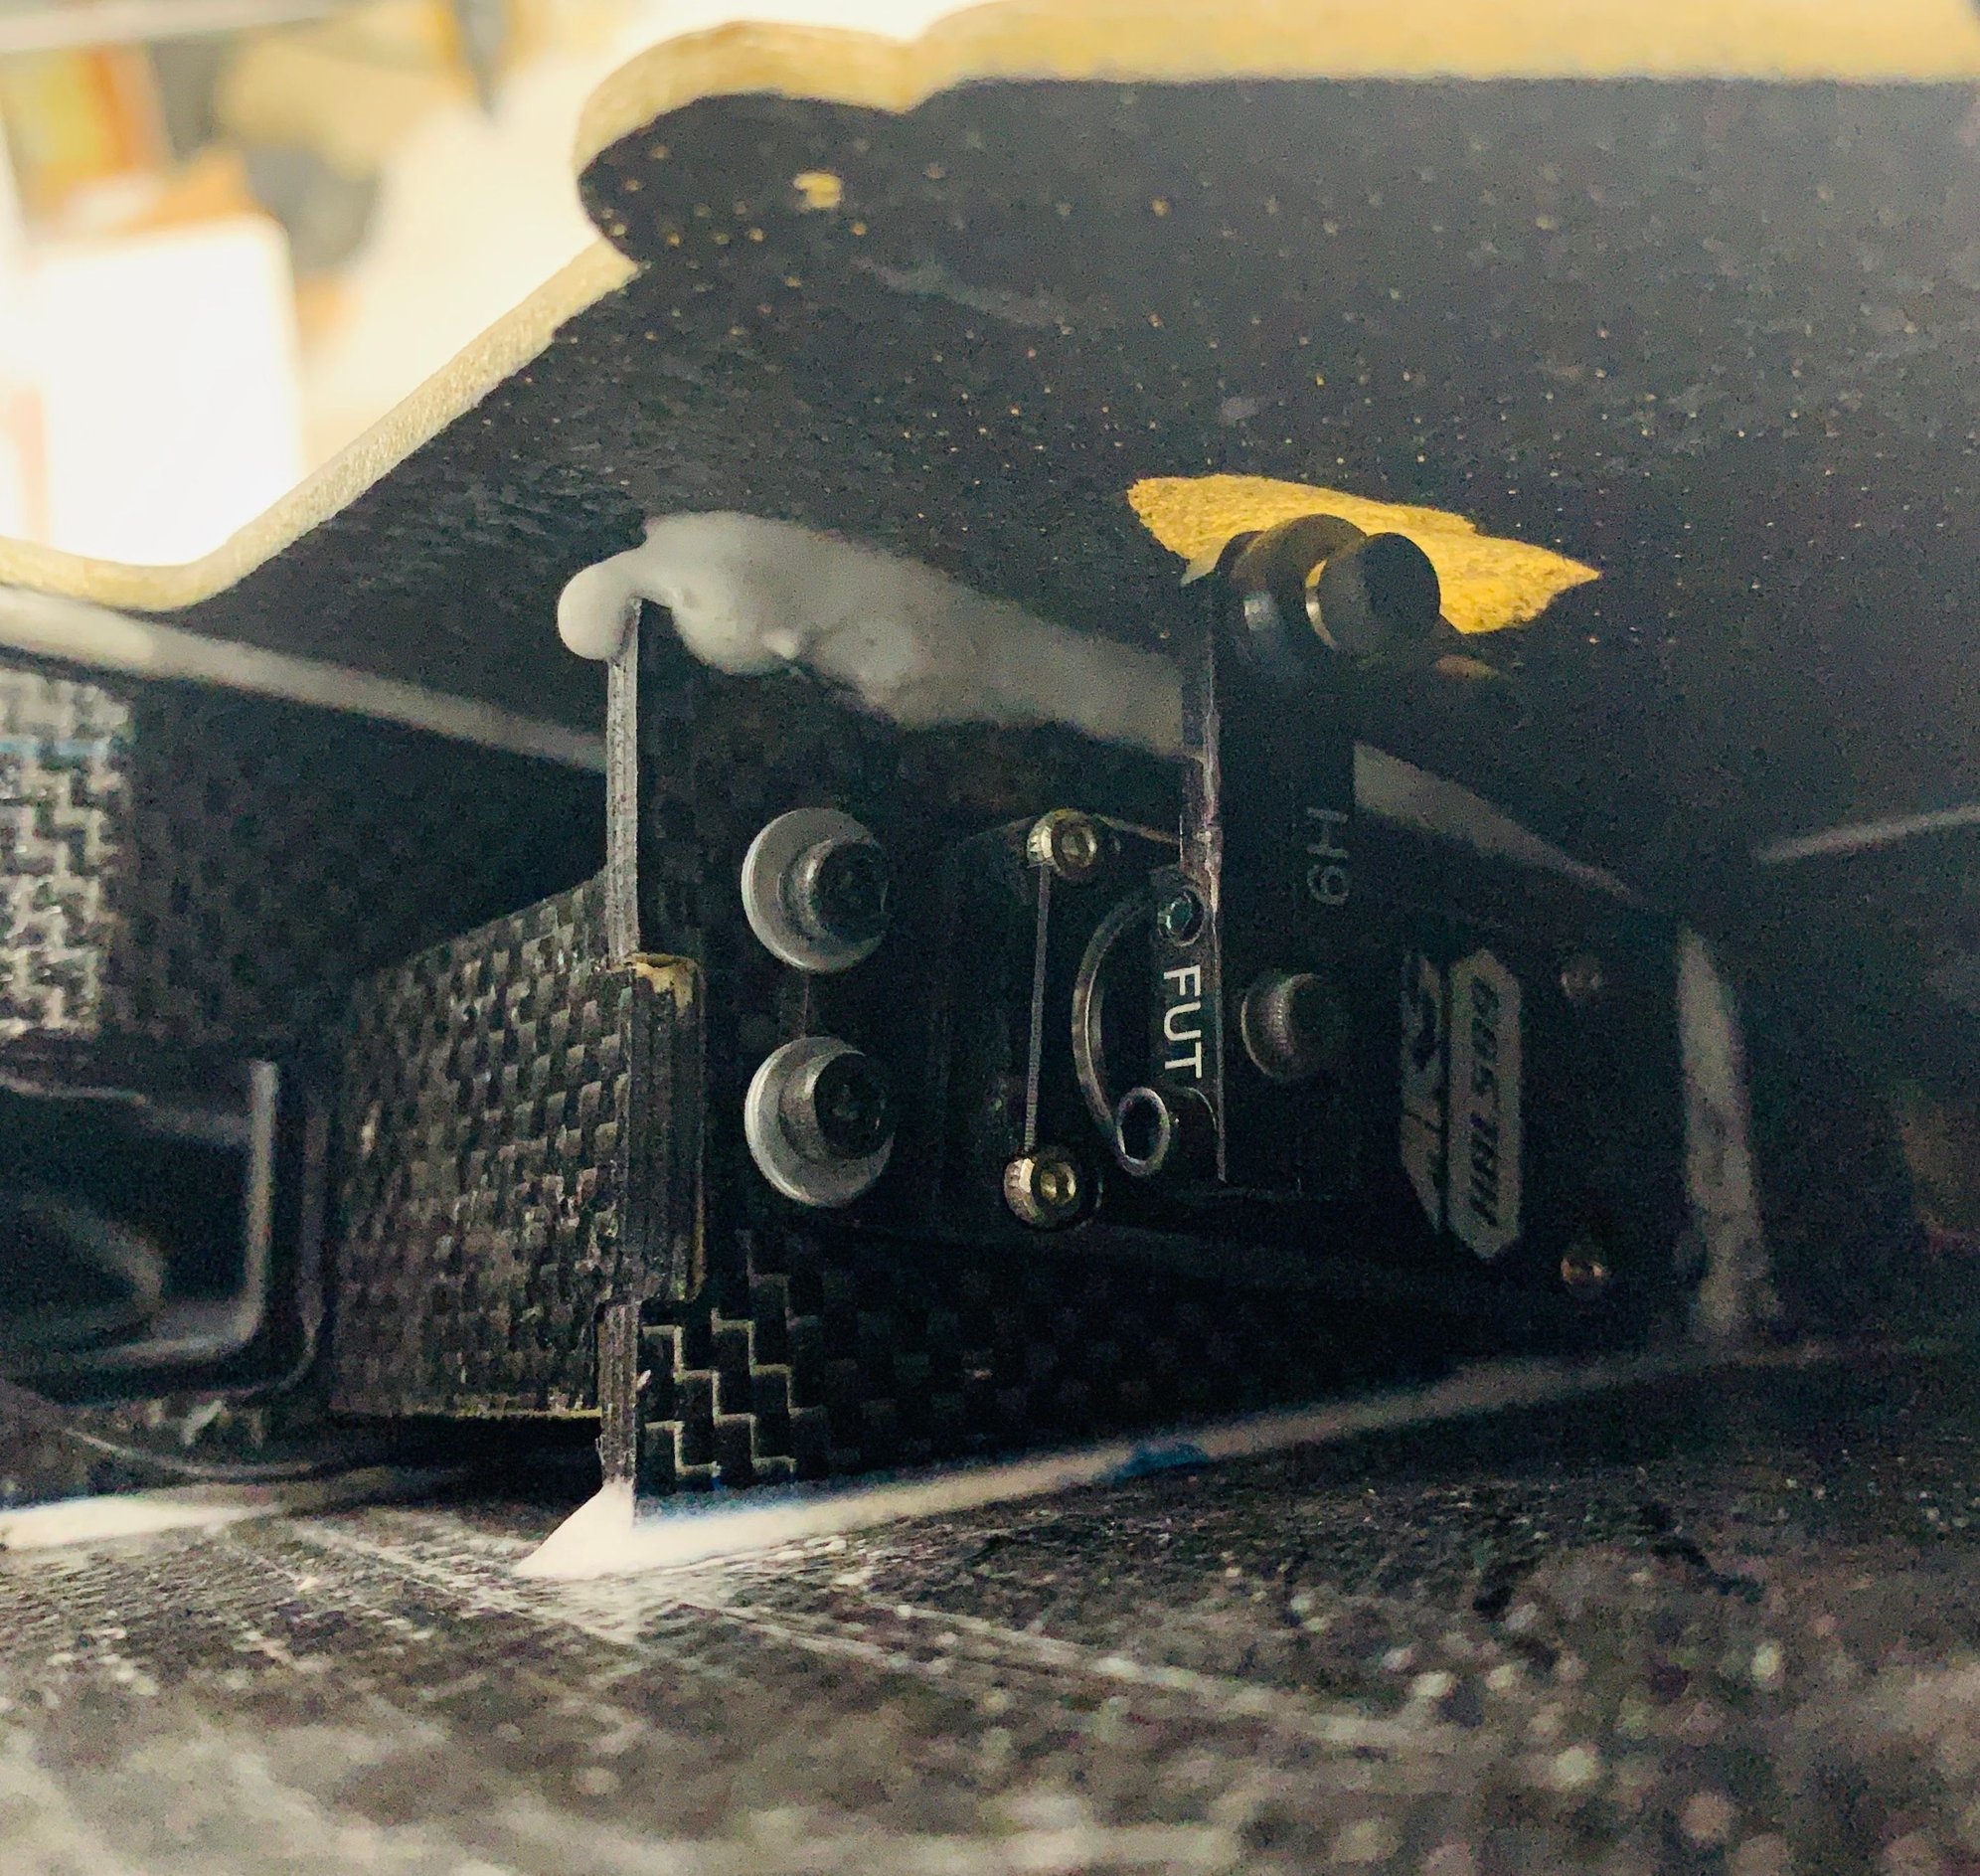
manual calls out for 1� arms for both the aileron and the flap. 1� would work for the aileron but I found that 3/4� gave a better angle on the pushrod which results in a shorter exit slot. There�s still plenty of travel with the shorter arm. I went with 3/4� for the flaps as well and found even this to be a little long. 17mm is probably ideal. I stayed with 3/4� since this is what I have and removed a small amount of the inner skin for clearance. I also opened up a small hole in the aft wing root to get a straighter shot at the rear flap servo screws.
manual calls out for 1� arms for both the aileron and the flap. 1� would work for the aileron but I found that 3/4� gave a better angle on the pushrod which results in a shorter exit slot. There�s still plenty of travel with the shorter arm. I went with 3/4� for the flaps as well and found even this to be a little long. 17mm is probably ideal. I stayed with 3/4� since this is what I have and removed a small amount of the inner skin for clearance. I also opened up a small hole in the aft wing root to get a straighter shot at the rear flap servo screws.
Last edited by F1 Rocket; 10-25-2020 at 12:51 PM.
10-25-2020 | 01:01 PM
#91
10-25-2020 | 01:08 PM
#92
Thread Starter
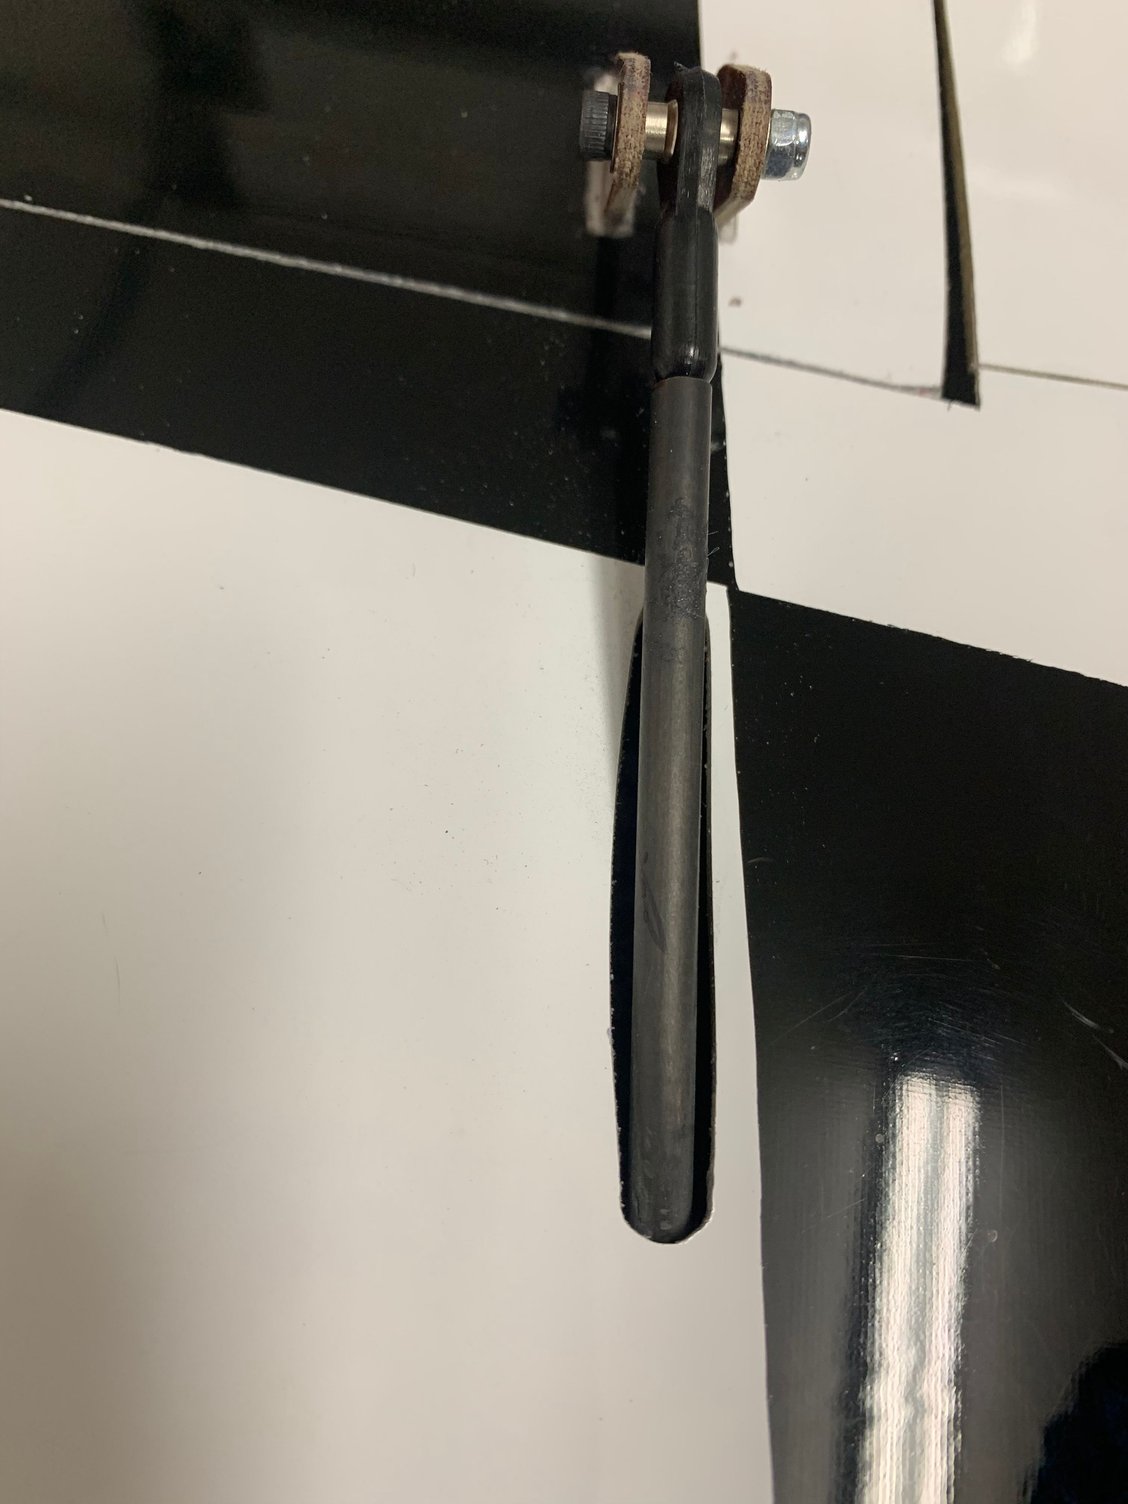
Yes, I used around 3/4” (19mm) modified Secraft arms
Dave
Also later production wings have a square hole where you drilled...
Dave
Also later production wings have a square hole where you drilled...
Last edited by Dave Wilshere; 10-25-2020 at 01:13 PM.
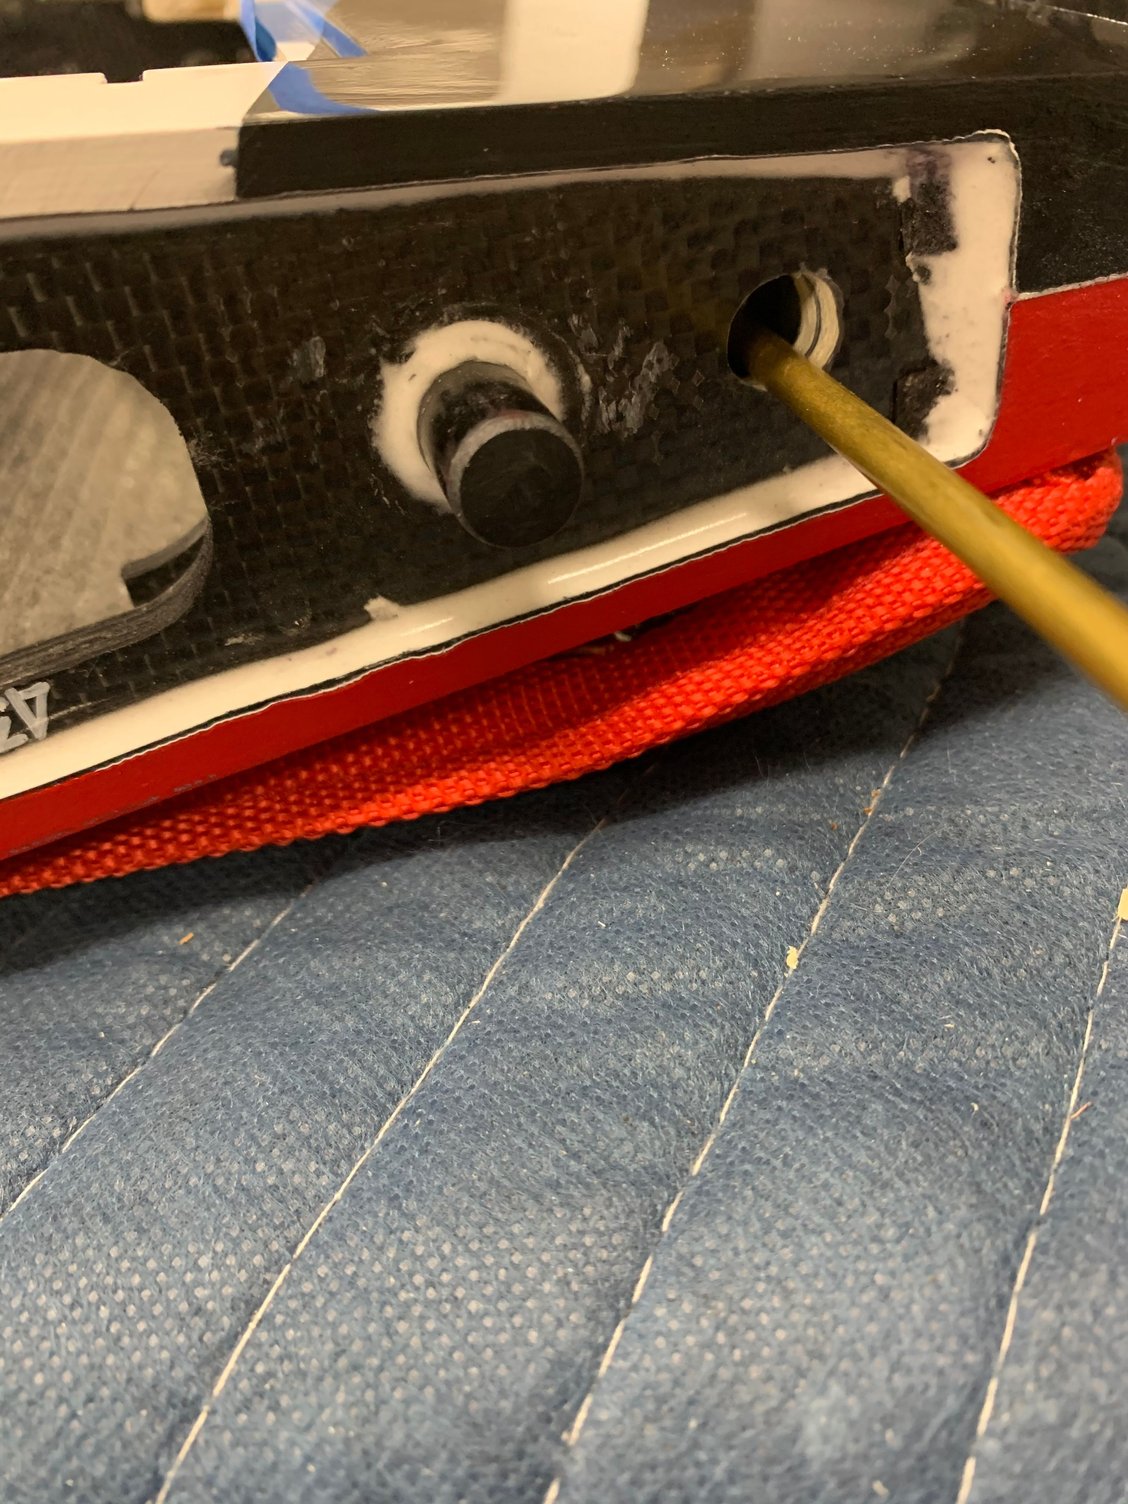
12-20-2020 | 09:44 AM
#94
Thread Starter
Danny
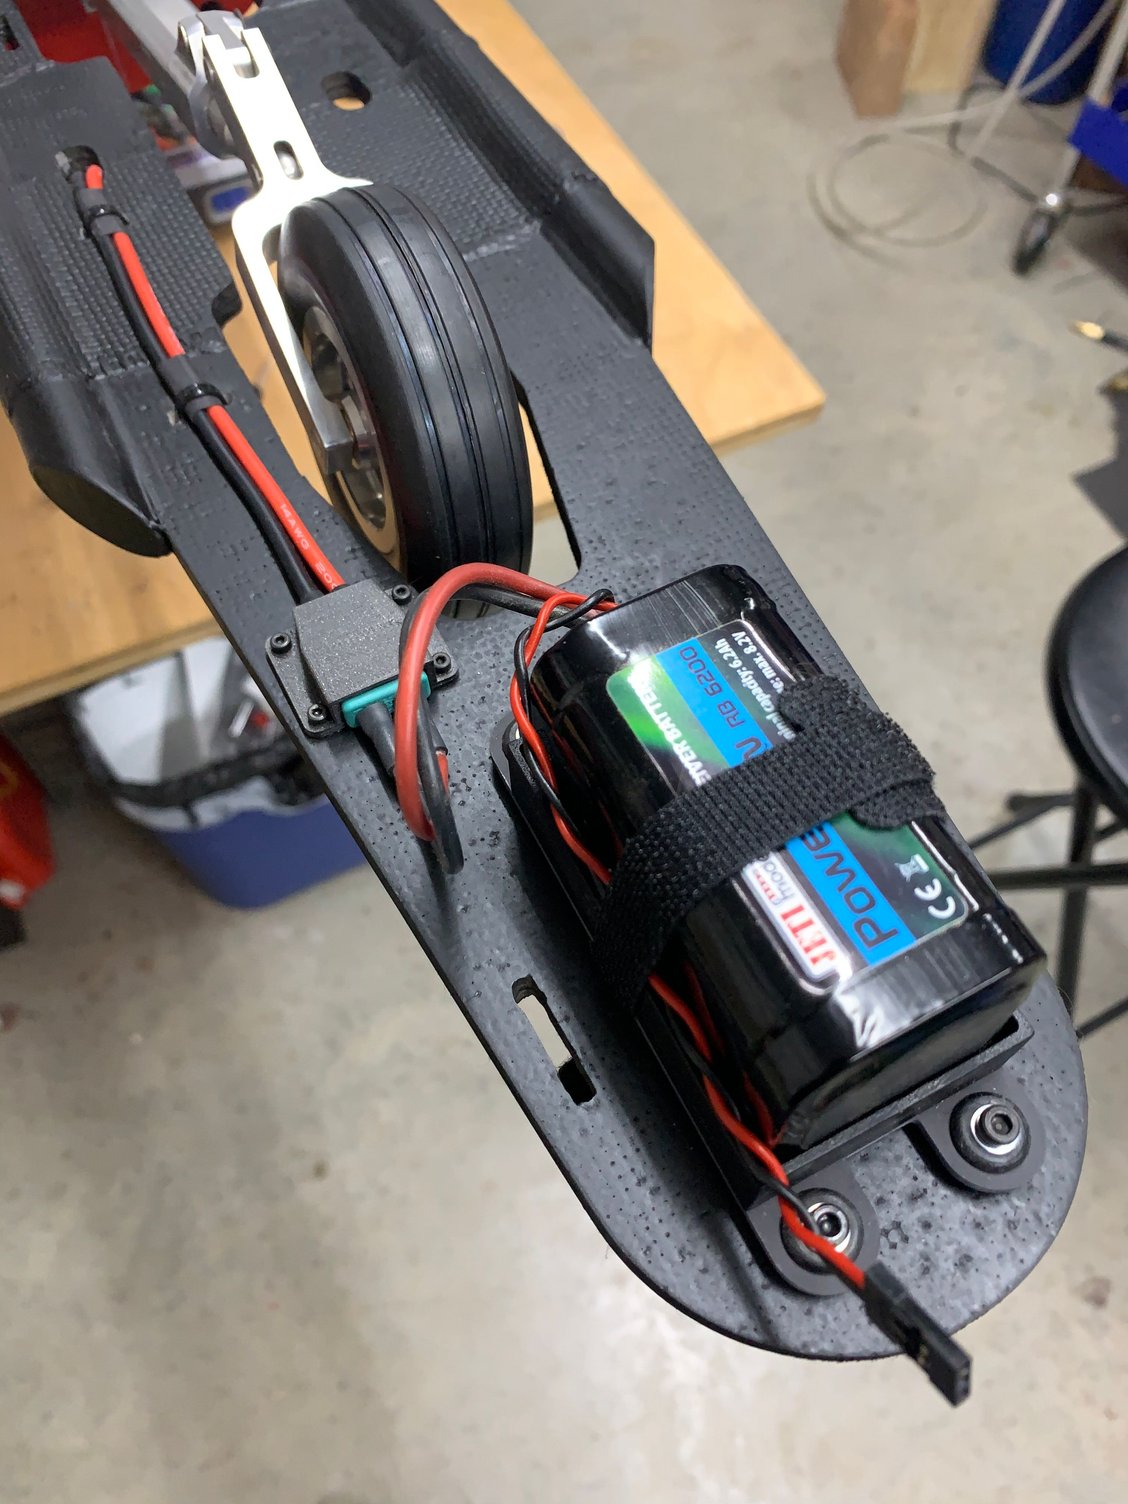
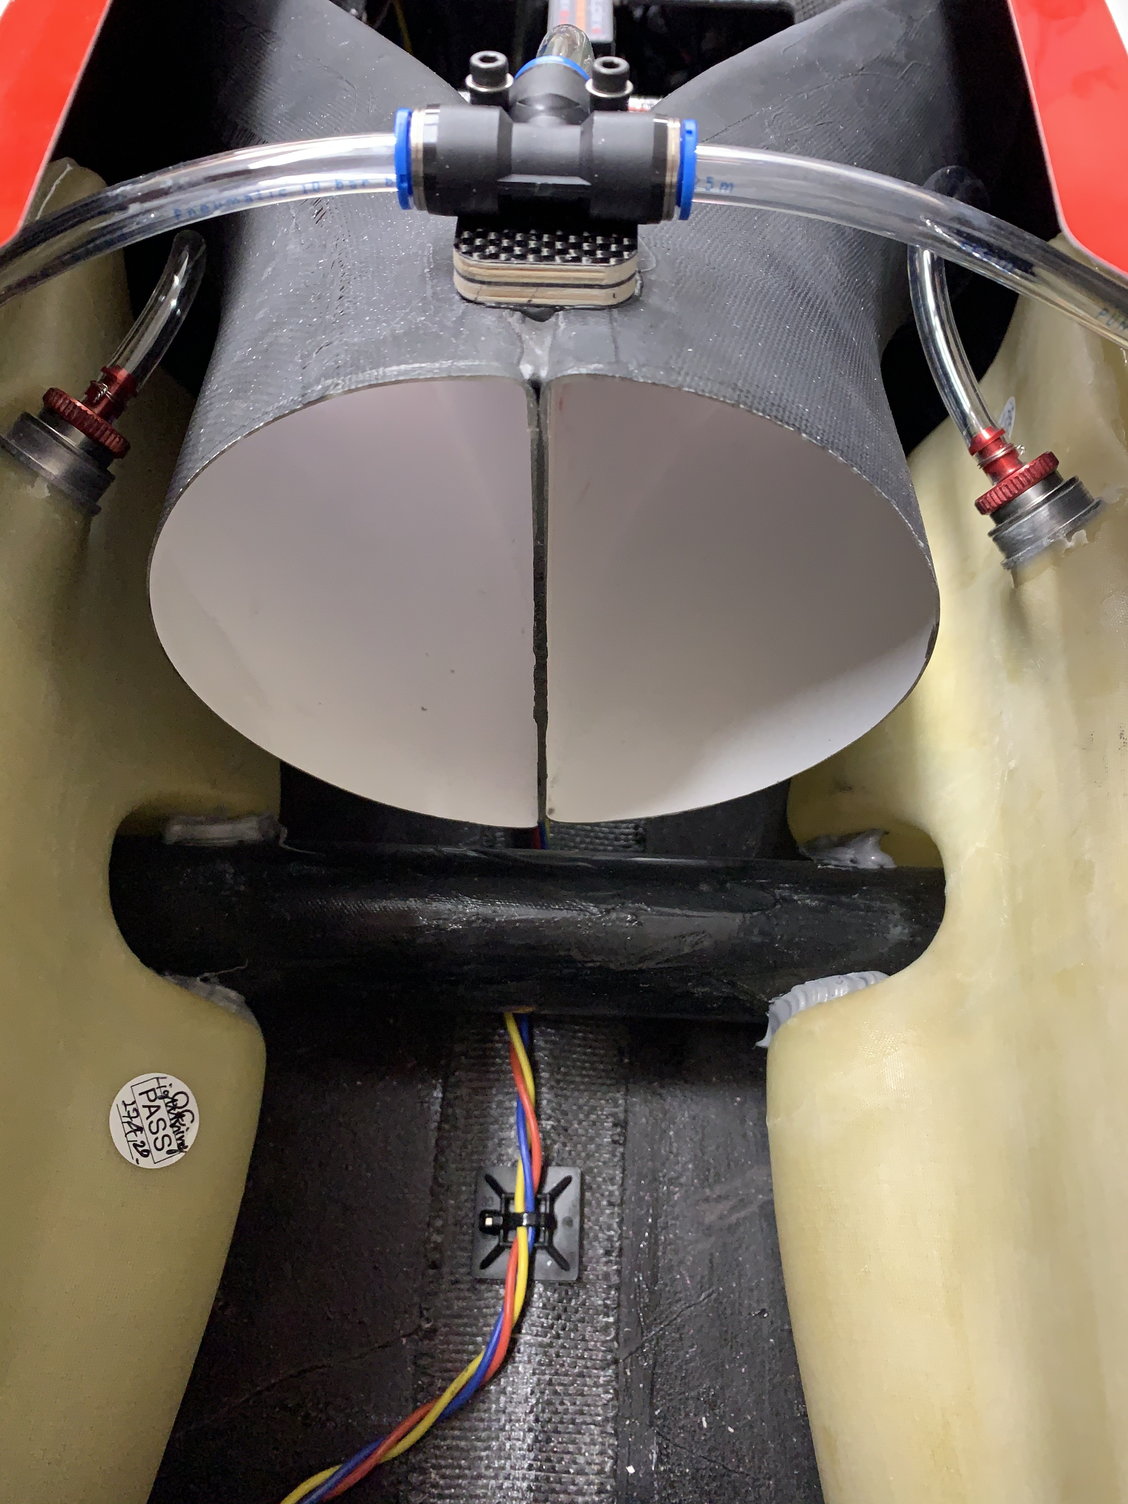
The later kits come with some wood locators. I used a strip of Velcro 3/4� wide about 12� long parallel with the top face of the tank where it touches the fuselage side. The spar notch stops the tank moving forward/backwards, I did add a spot of silicon to remove any chafing in the tank arch. The Velcro stops the tank moving up, I�ve tried some fairly hard negative snaps and nothing moves.
The CARF wood parts are designed to go on the top section under the canopy split line lip.
Dave
01-03-2021 | 01:01 PM
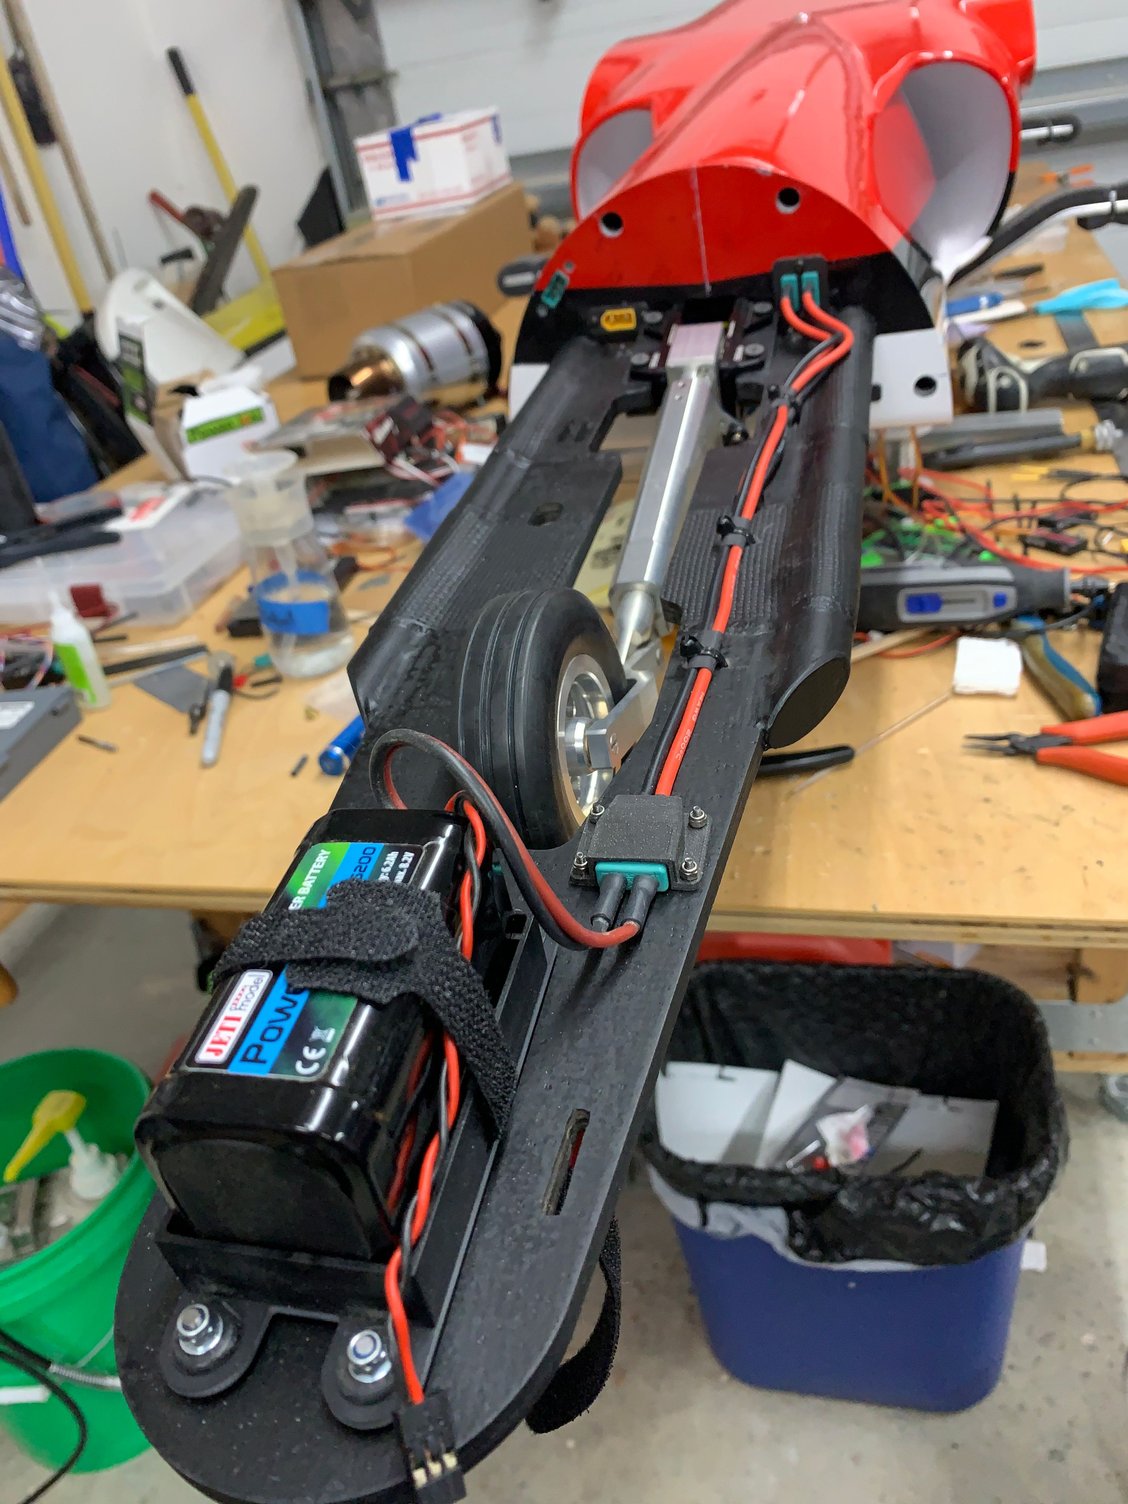
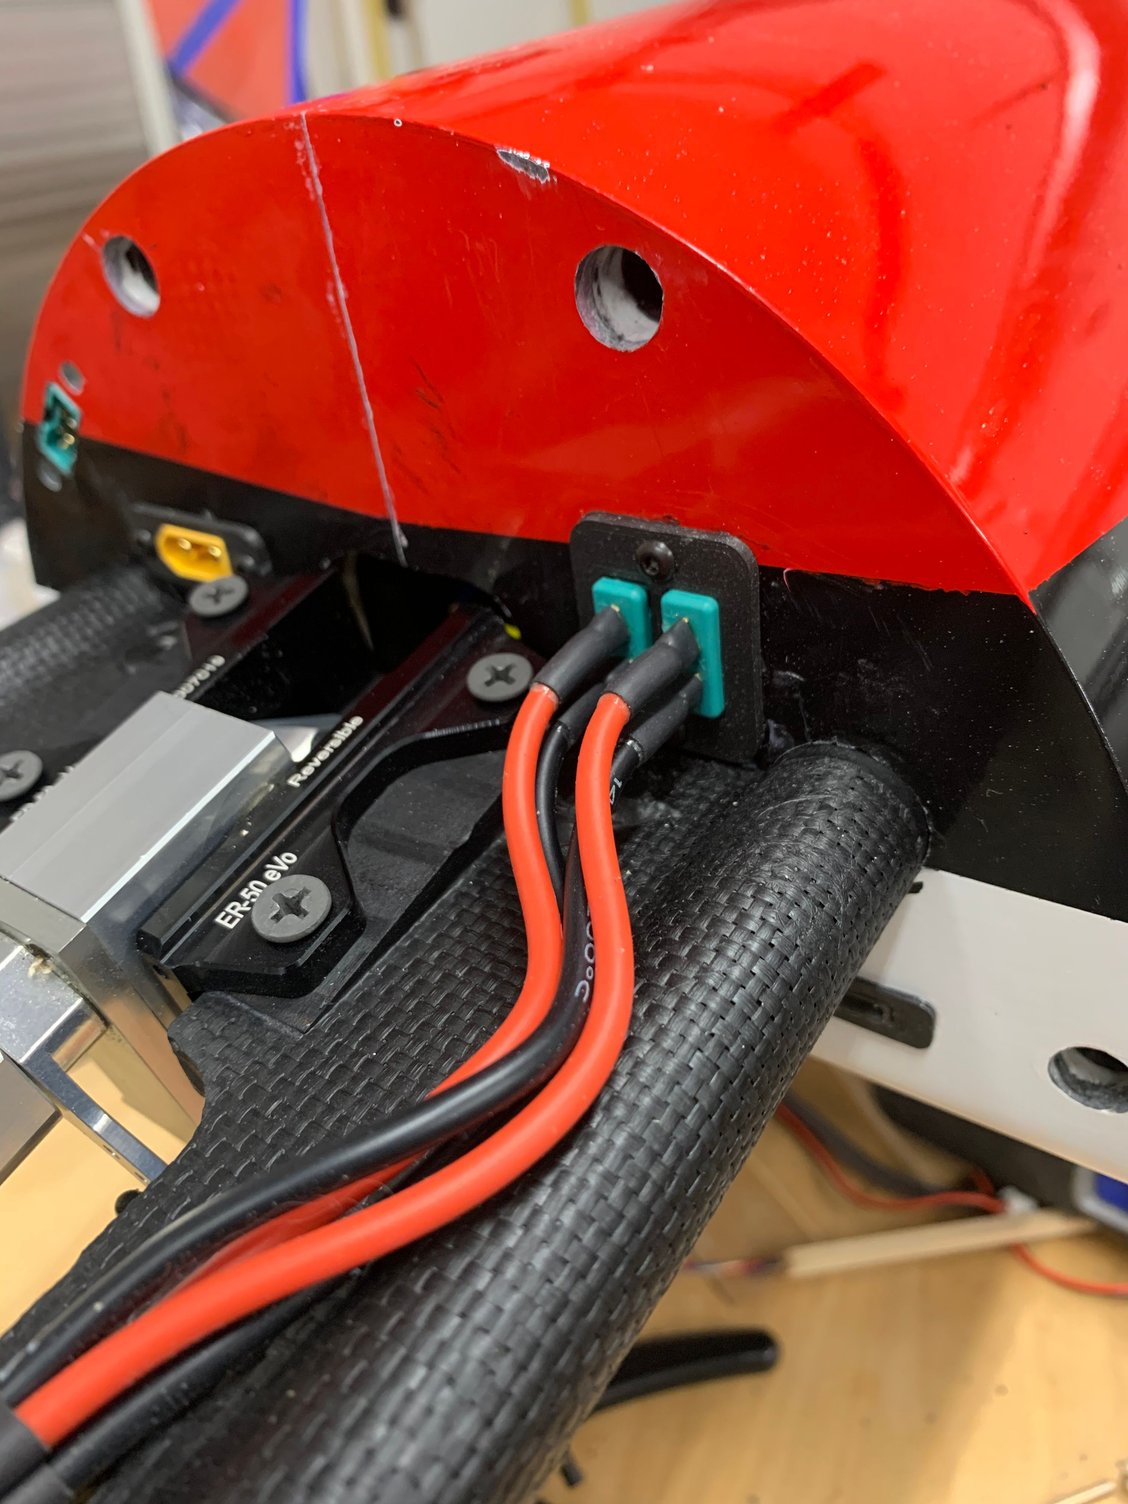
#95
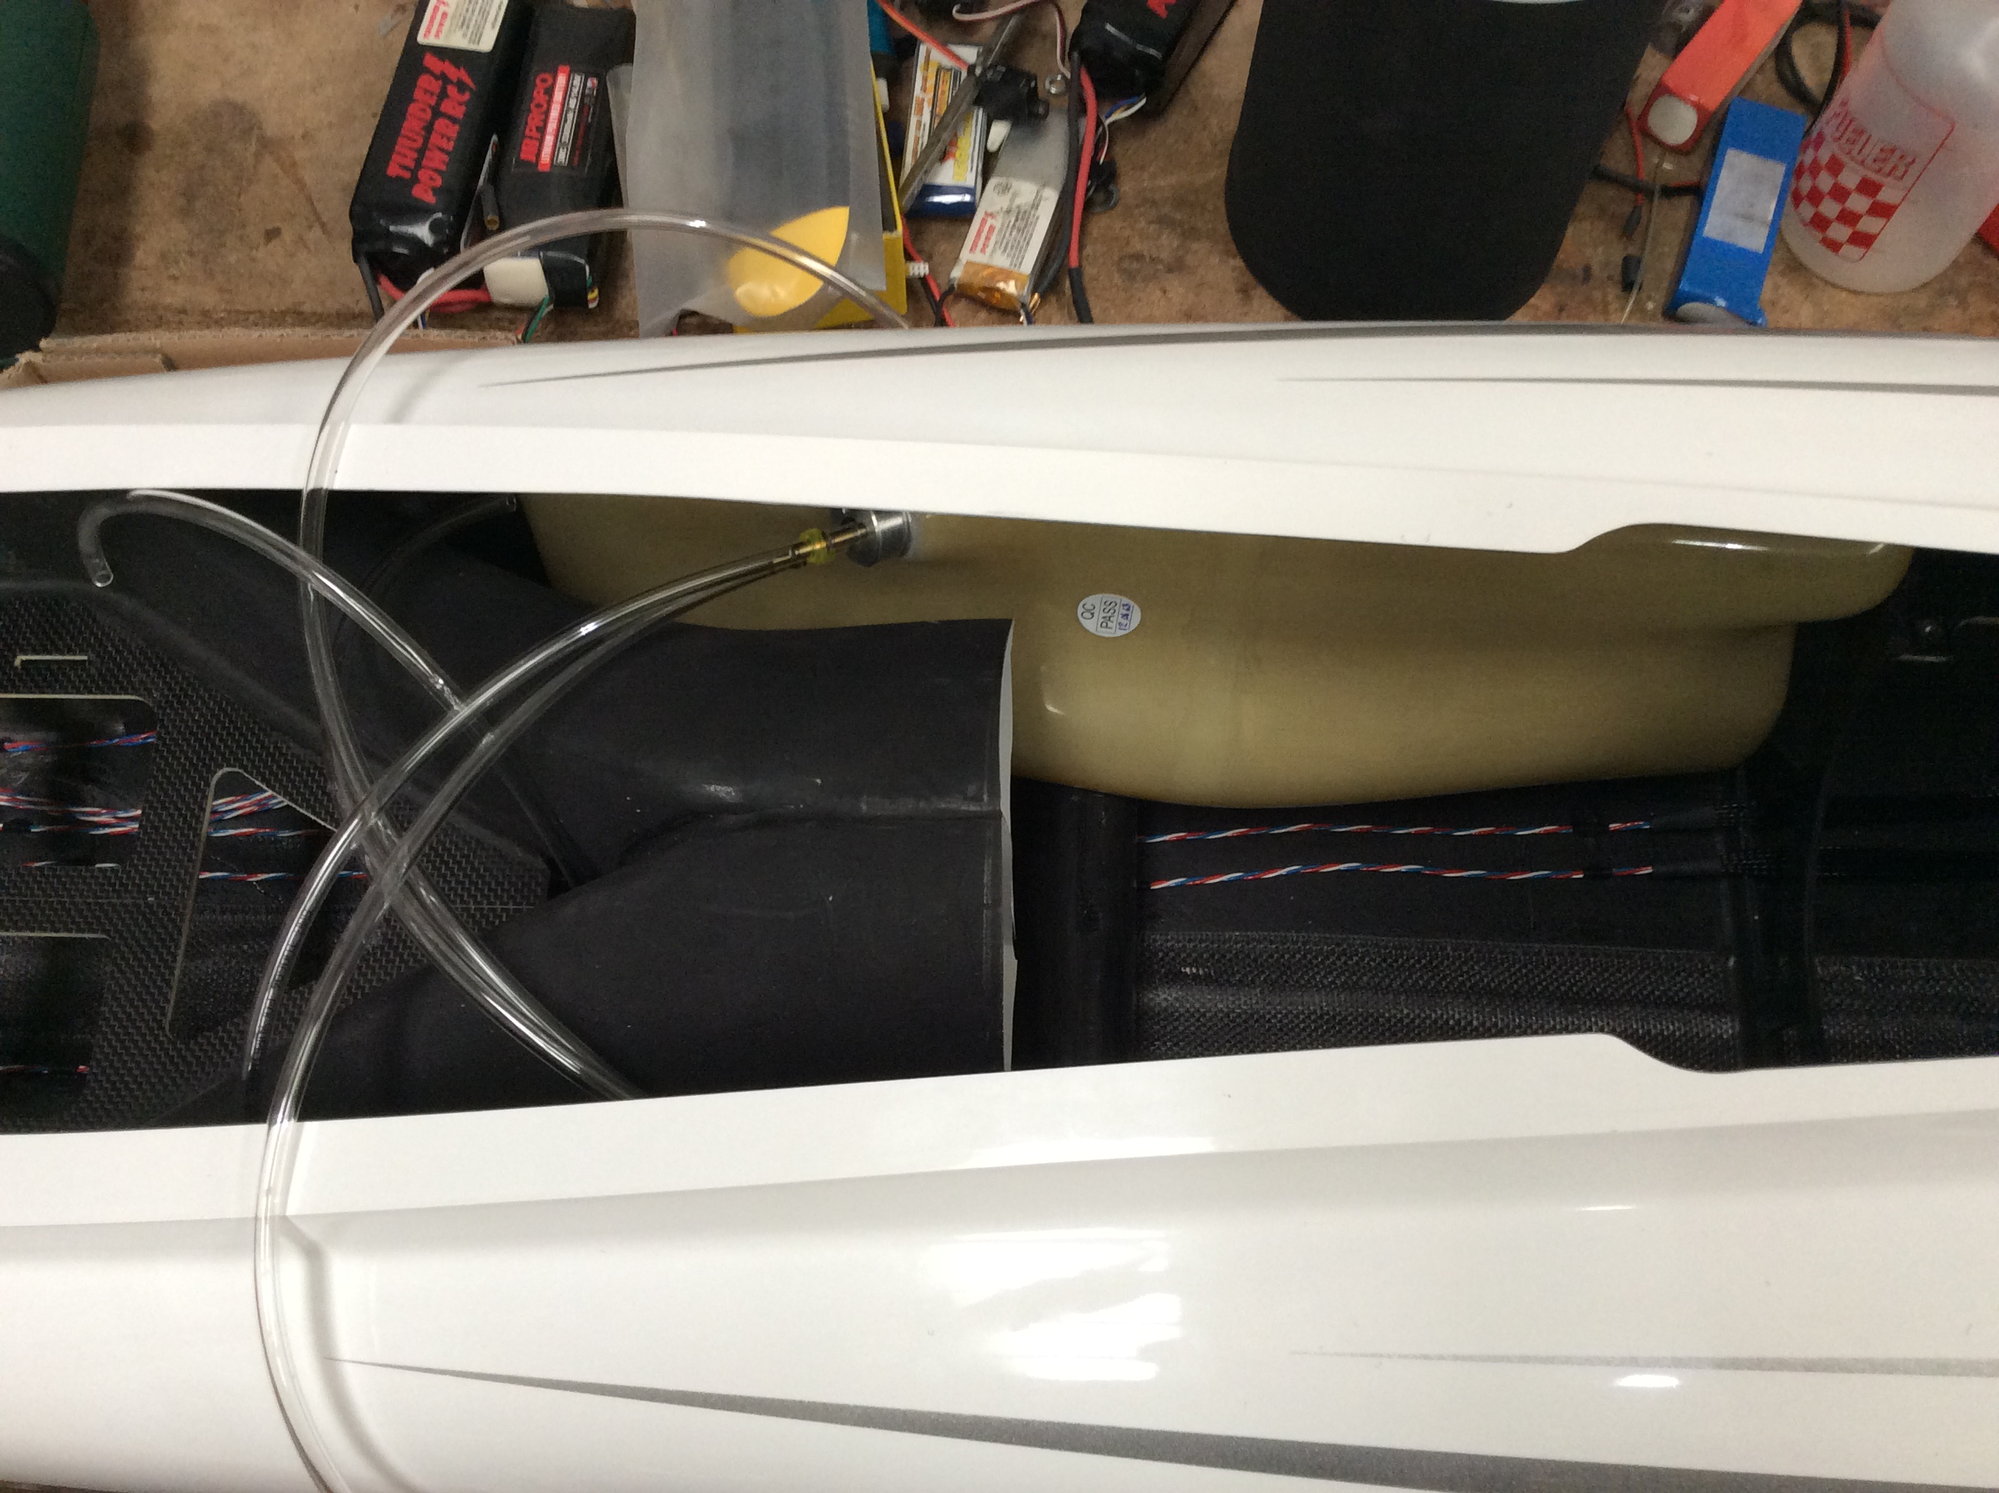
Working to get this jet done and out of my shop. The nose gear requires a 10 deg wedge be installed which is supplied with the kit. Don�t forget this or you will hate yourself later 
The forward mount assembly is a bit flexible so it�s best to drill the holes with the mount installed on the fus. I already had the airframe upright so I flipped the mount upside down, stuck it in the fuselage holes, and clamped the gear in place. This made it easy to align the gear and drill the holes. Once the gear was screwed in place I flipped the mount over and everything lined up perfectly.
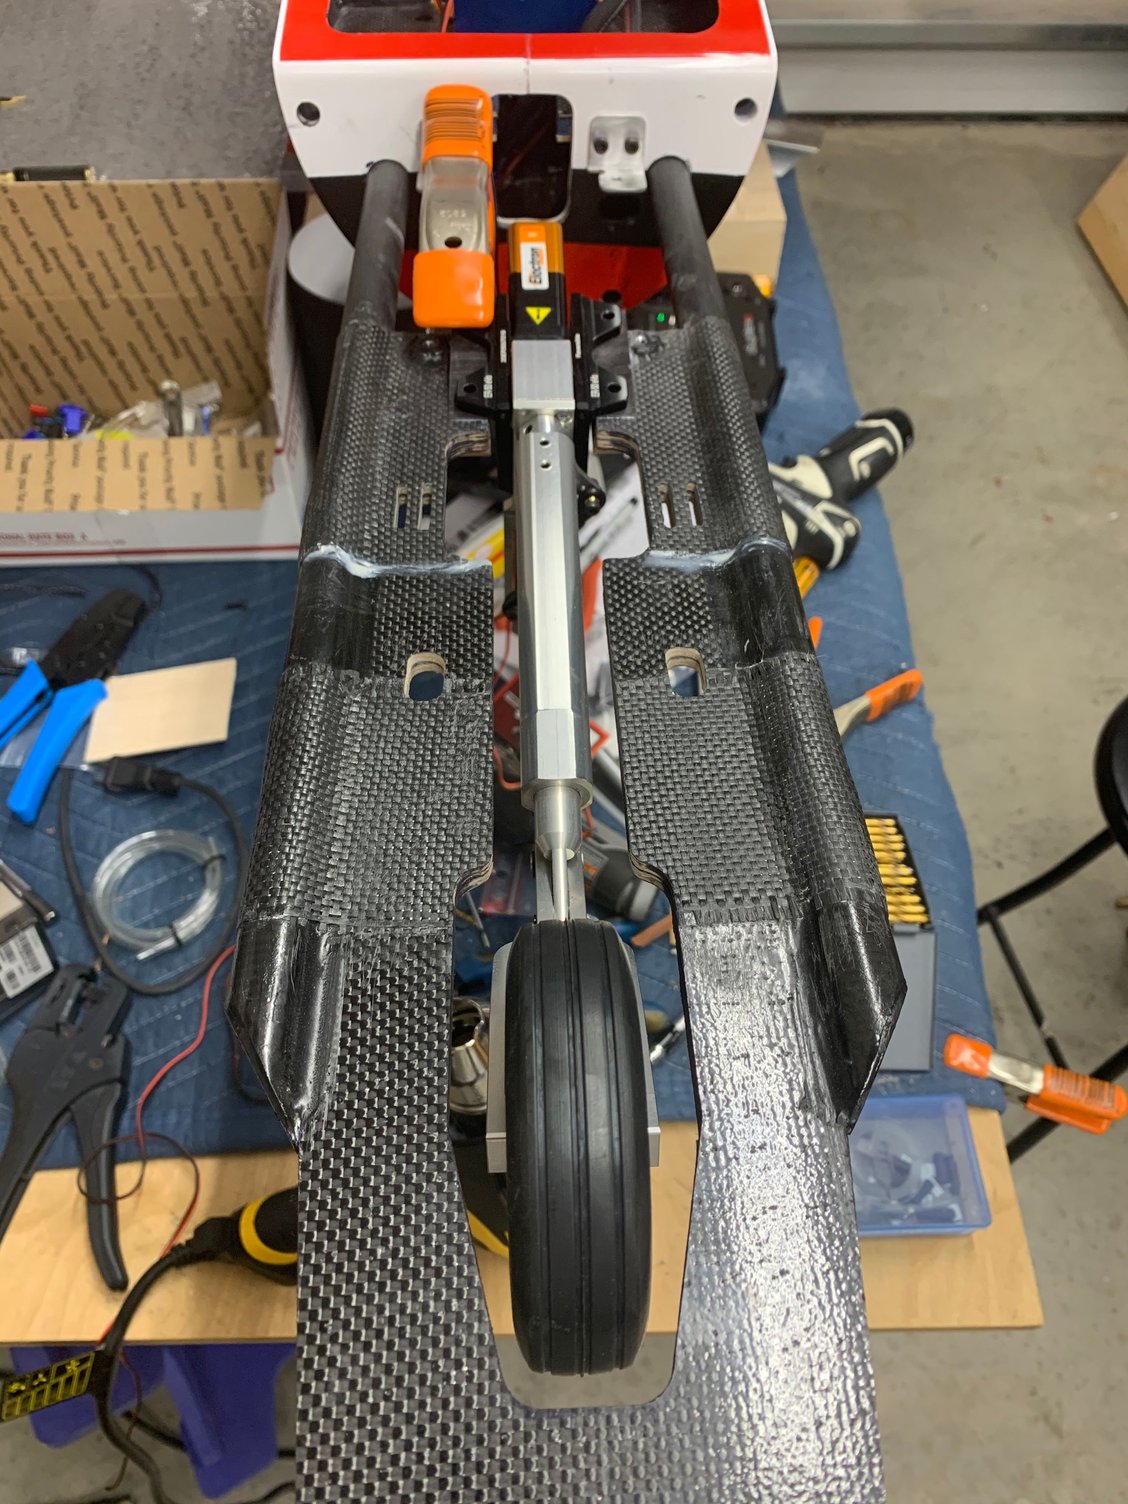
The forward mount assembly is a bit flexible so it�s best to drill the holes with the mount installed on the fus. I already had the airframe upright so I flipped the mount upside down, stuck it in the fuselage holes, and clamped the gear in place. This made it easy to align the gear and drill the holes. Once the gear was screwed in place I flipped the mount over and everything lined up perfectly.


The following 3 users liked this post by F1 Rocket:


The following users liked this post:
Canadian Man (01-19-2021)

 01-24-2021 | 12:07 AM
#99
Thread Starter
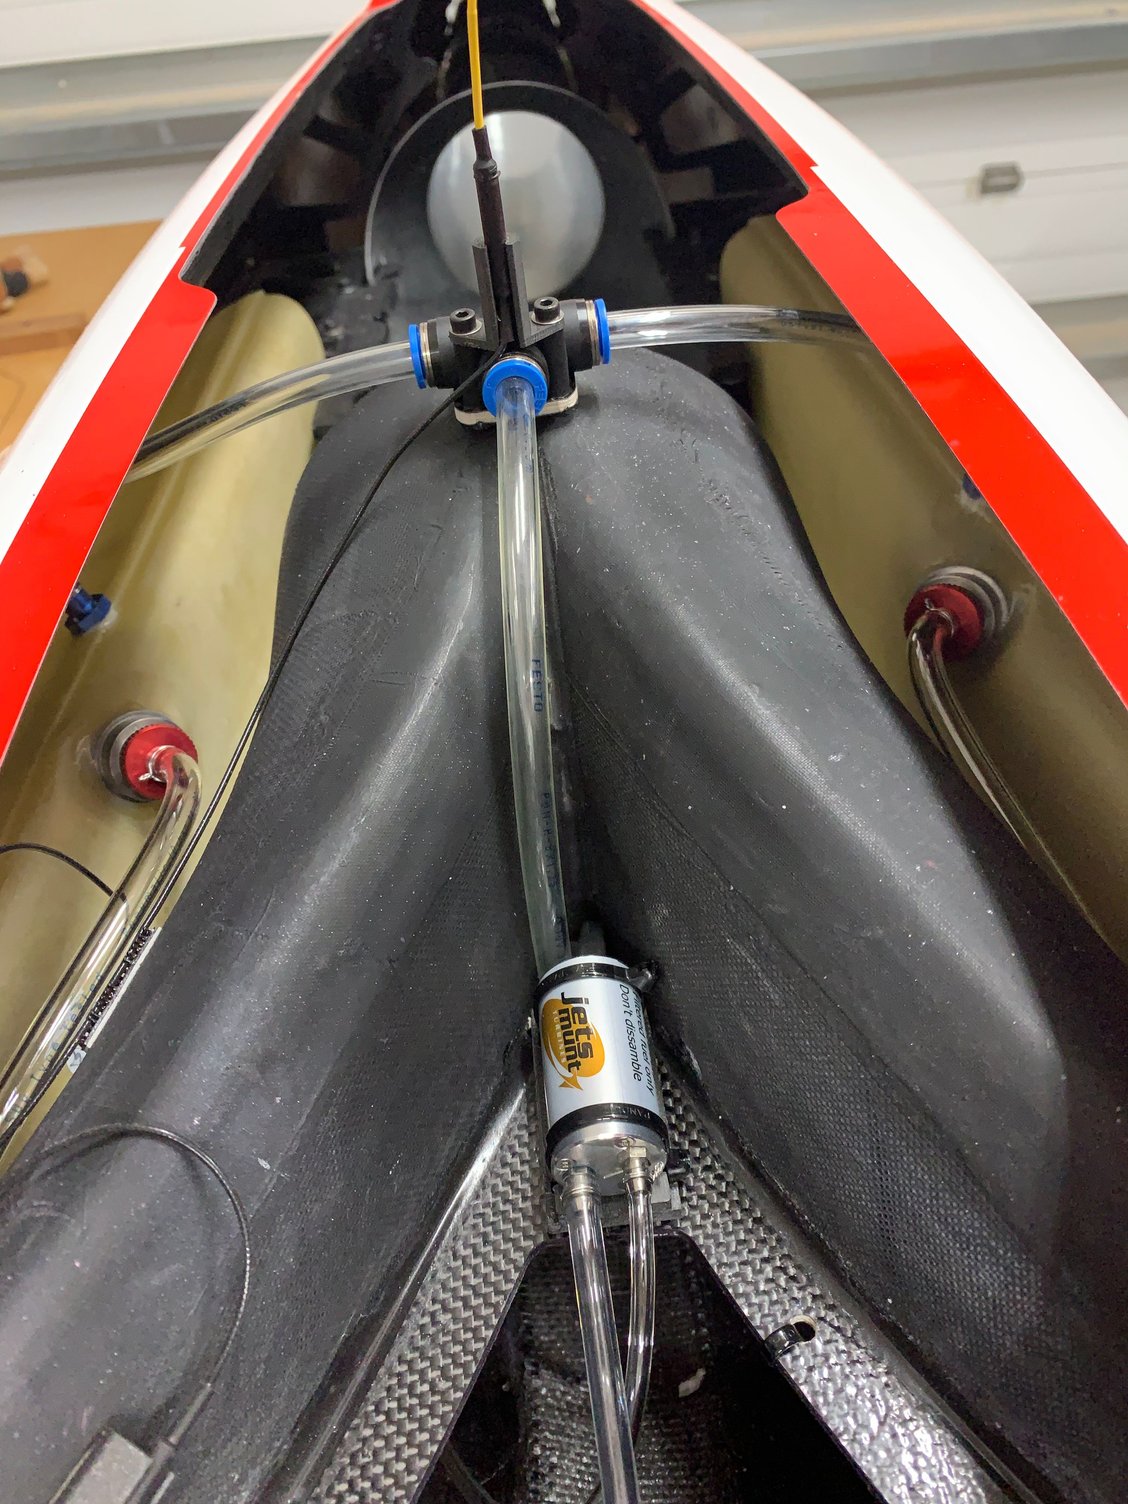
Be interesting to see the pump figures with the pipe runs on the suction side you have. I would monitor them over time once the fuel system settles in.
Dave
Dave
01-24-2021 | 05:10 AM
#100
Can you tell me how much fuel you had in your tanks when you weighed yours?

