


CARF Ultra Flash Evo build thread +


 11-04-2024 | 07:38 AM
#831
 11-05-2024 | 08:13 AM
#833
11-05-2024 | 11:38 AM
#834

My Feedback: (4)
Joined: Jan 2002
Posts: 4,159
Likes: 0
Received 0 Likes
on
0 Posts
From: Montreal, CANADA
I'm awaiting the delivery of the CARF Joker, do you know if it would have the same design ? They are very similar.
BTW, the reason I ordered the Joker is I saw the Ultra Flash flying at our Club last summer. I was amazed how it was flying like it was on rails. Very impressive !
11-05-2024 | 11:47 AM
#835
OK then, but it seems strange.
I'm awaiting the delivery of the CARF Joker, do you know if it would have the same design ? They are very similar.
BTW, the reason I ordered the Joker is I saw the Ultra Flash flying at our Club last summer. I was amazed how it was flying like it was on rails. Very impressive !
I'm awaiting the delivery of the CARF Joker, do you know if it would have the same design ? They are very similar.
BTW, the reason I ordered the Joker is I saw the Ultra Flash flying at our Club last summer. I was amazed how it was flying like it was on rails. Very impressive !
the joker is very diferent build.its not ment fot huge overpower engines and is not capable of high G maneuvers.i think ther is just 1 central tank for the joker
11-05-2024 | 02:40 PM
#836
OK then, but it seems strange.
I'm awaiting the delivery of the CARF Joker, do you know if it would have the same design ? They are very similar.
BTW, the reason I ordered the Joker is I saw the Ultra Flash flying at our Club last summer. I was amazed how it was flying like it was on rails. Very impressive !
I'm awaiting the delivery of the CARF Joker, do you know if it would have the same design ? They are very similar.
BTW, the reason I ordered the Joker is I saw the Ultra Flash flying at our Club last summer. I was amazed how it was flying like it was on rails. Very impressive !
11-07-2024 | 01:44 AM
#838

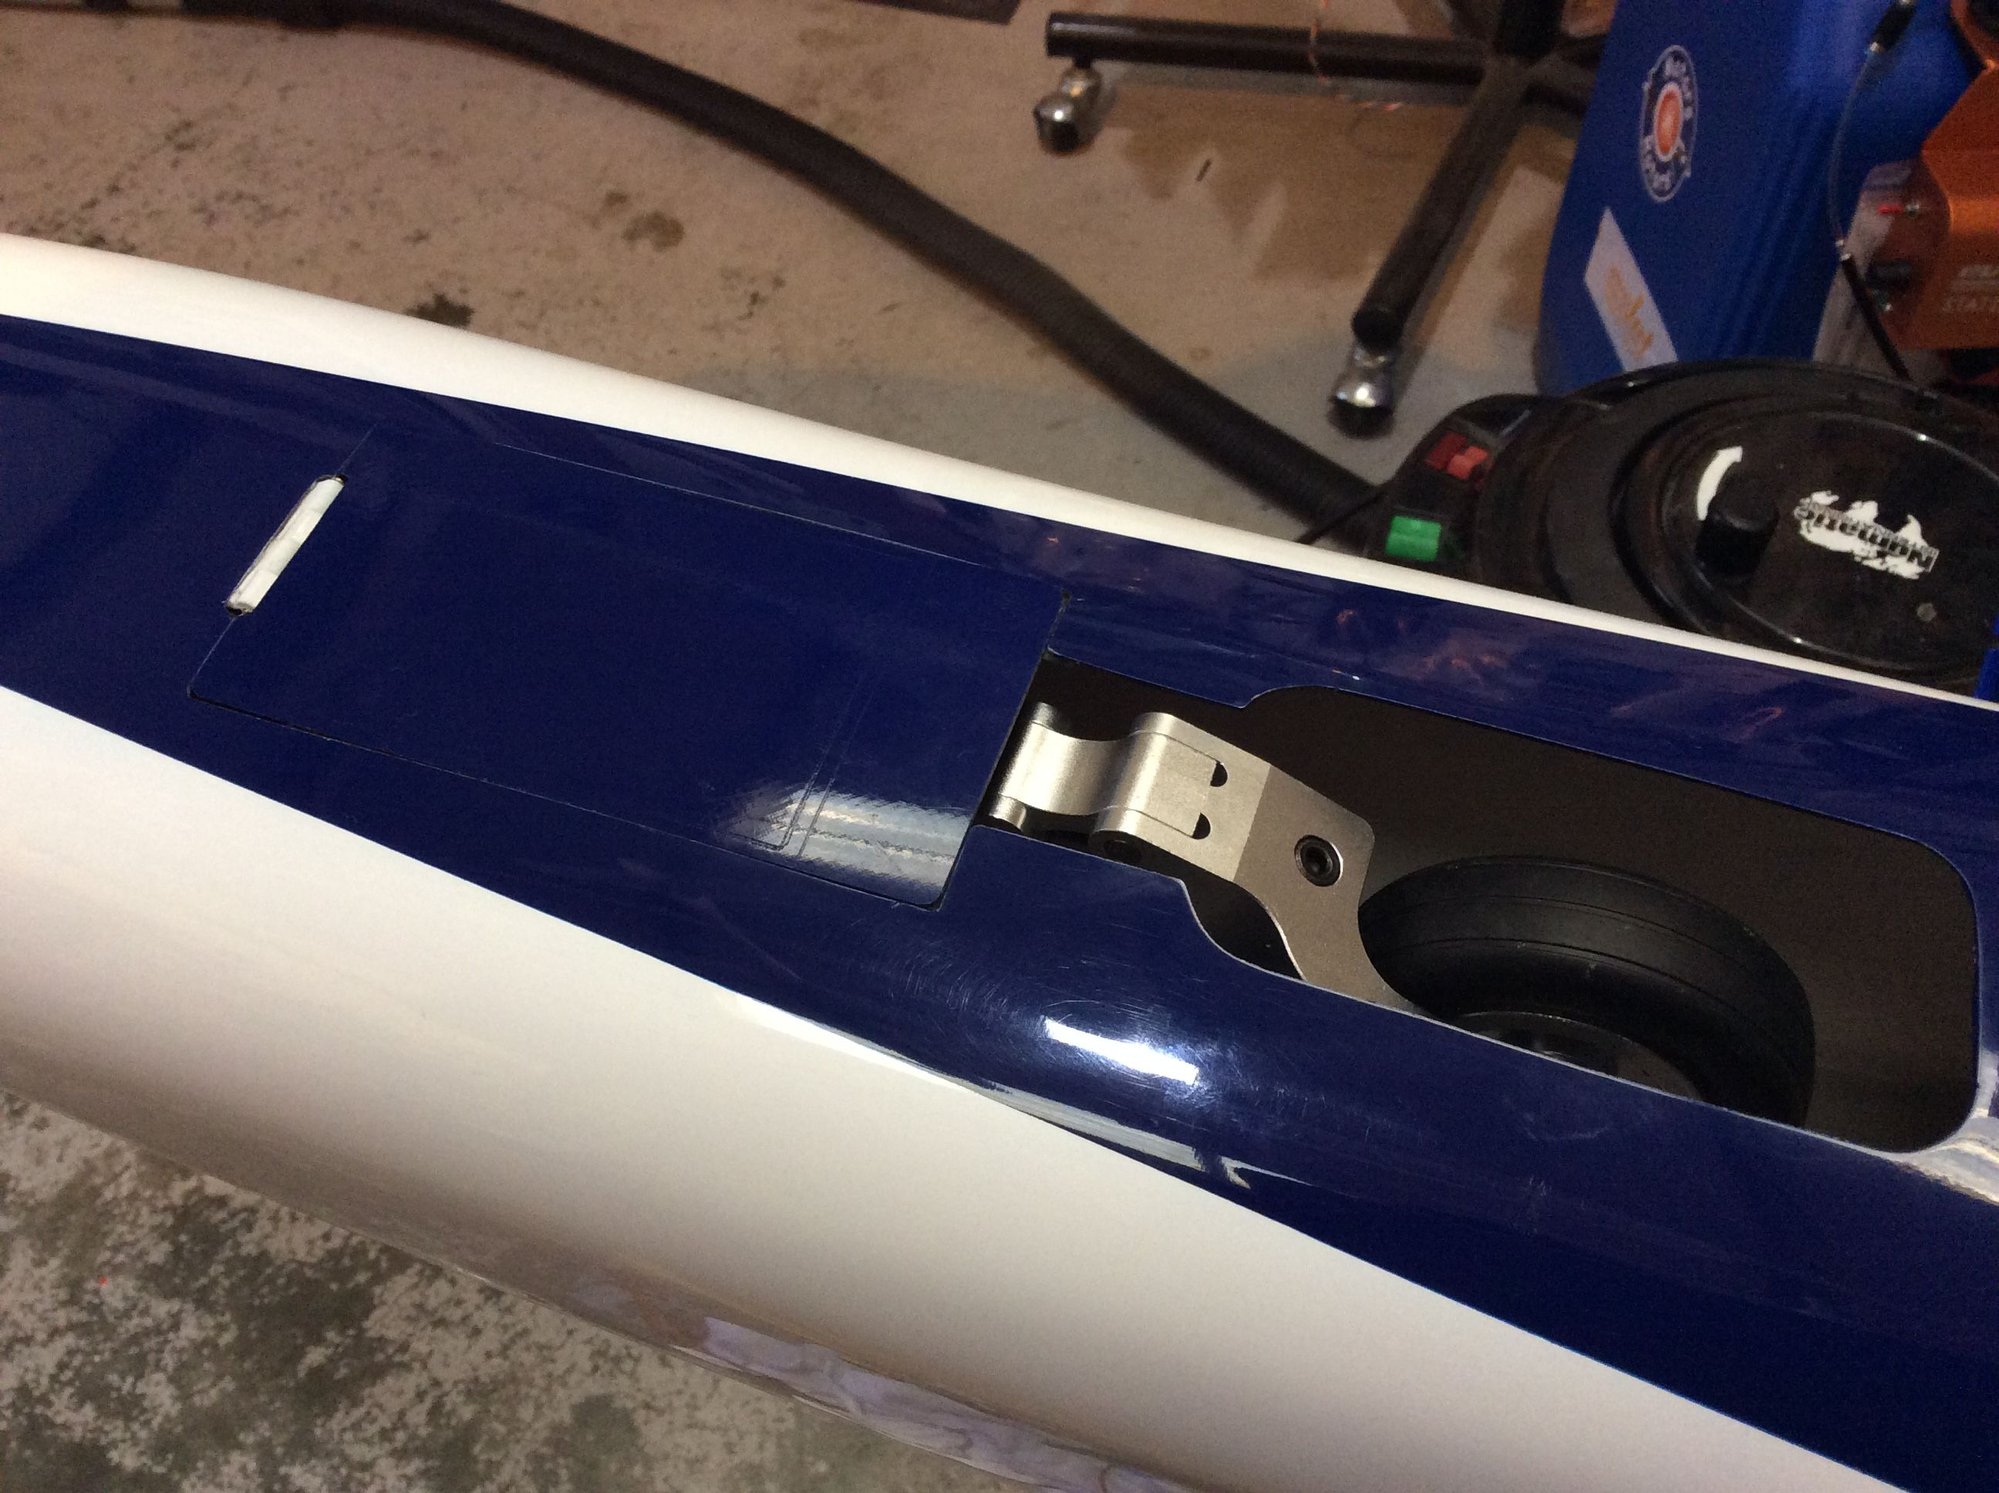
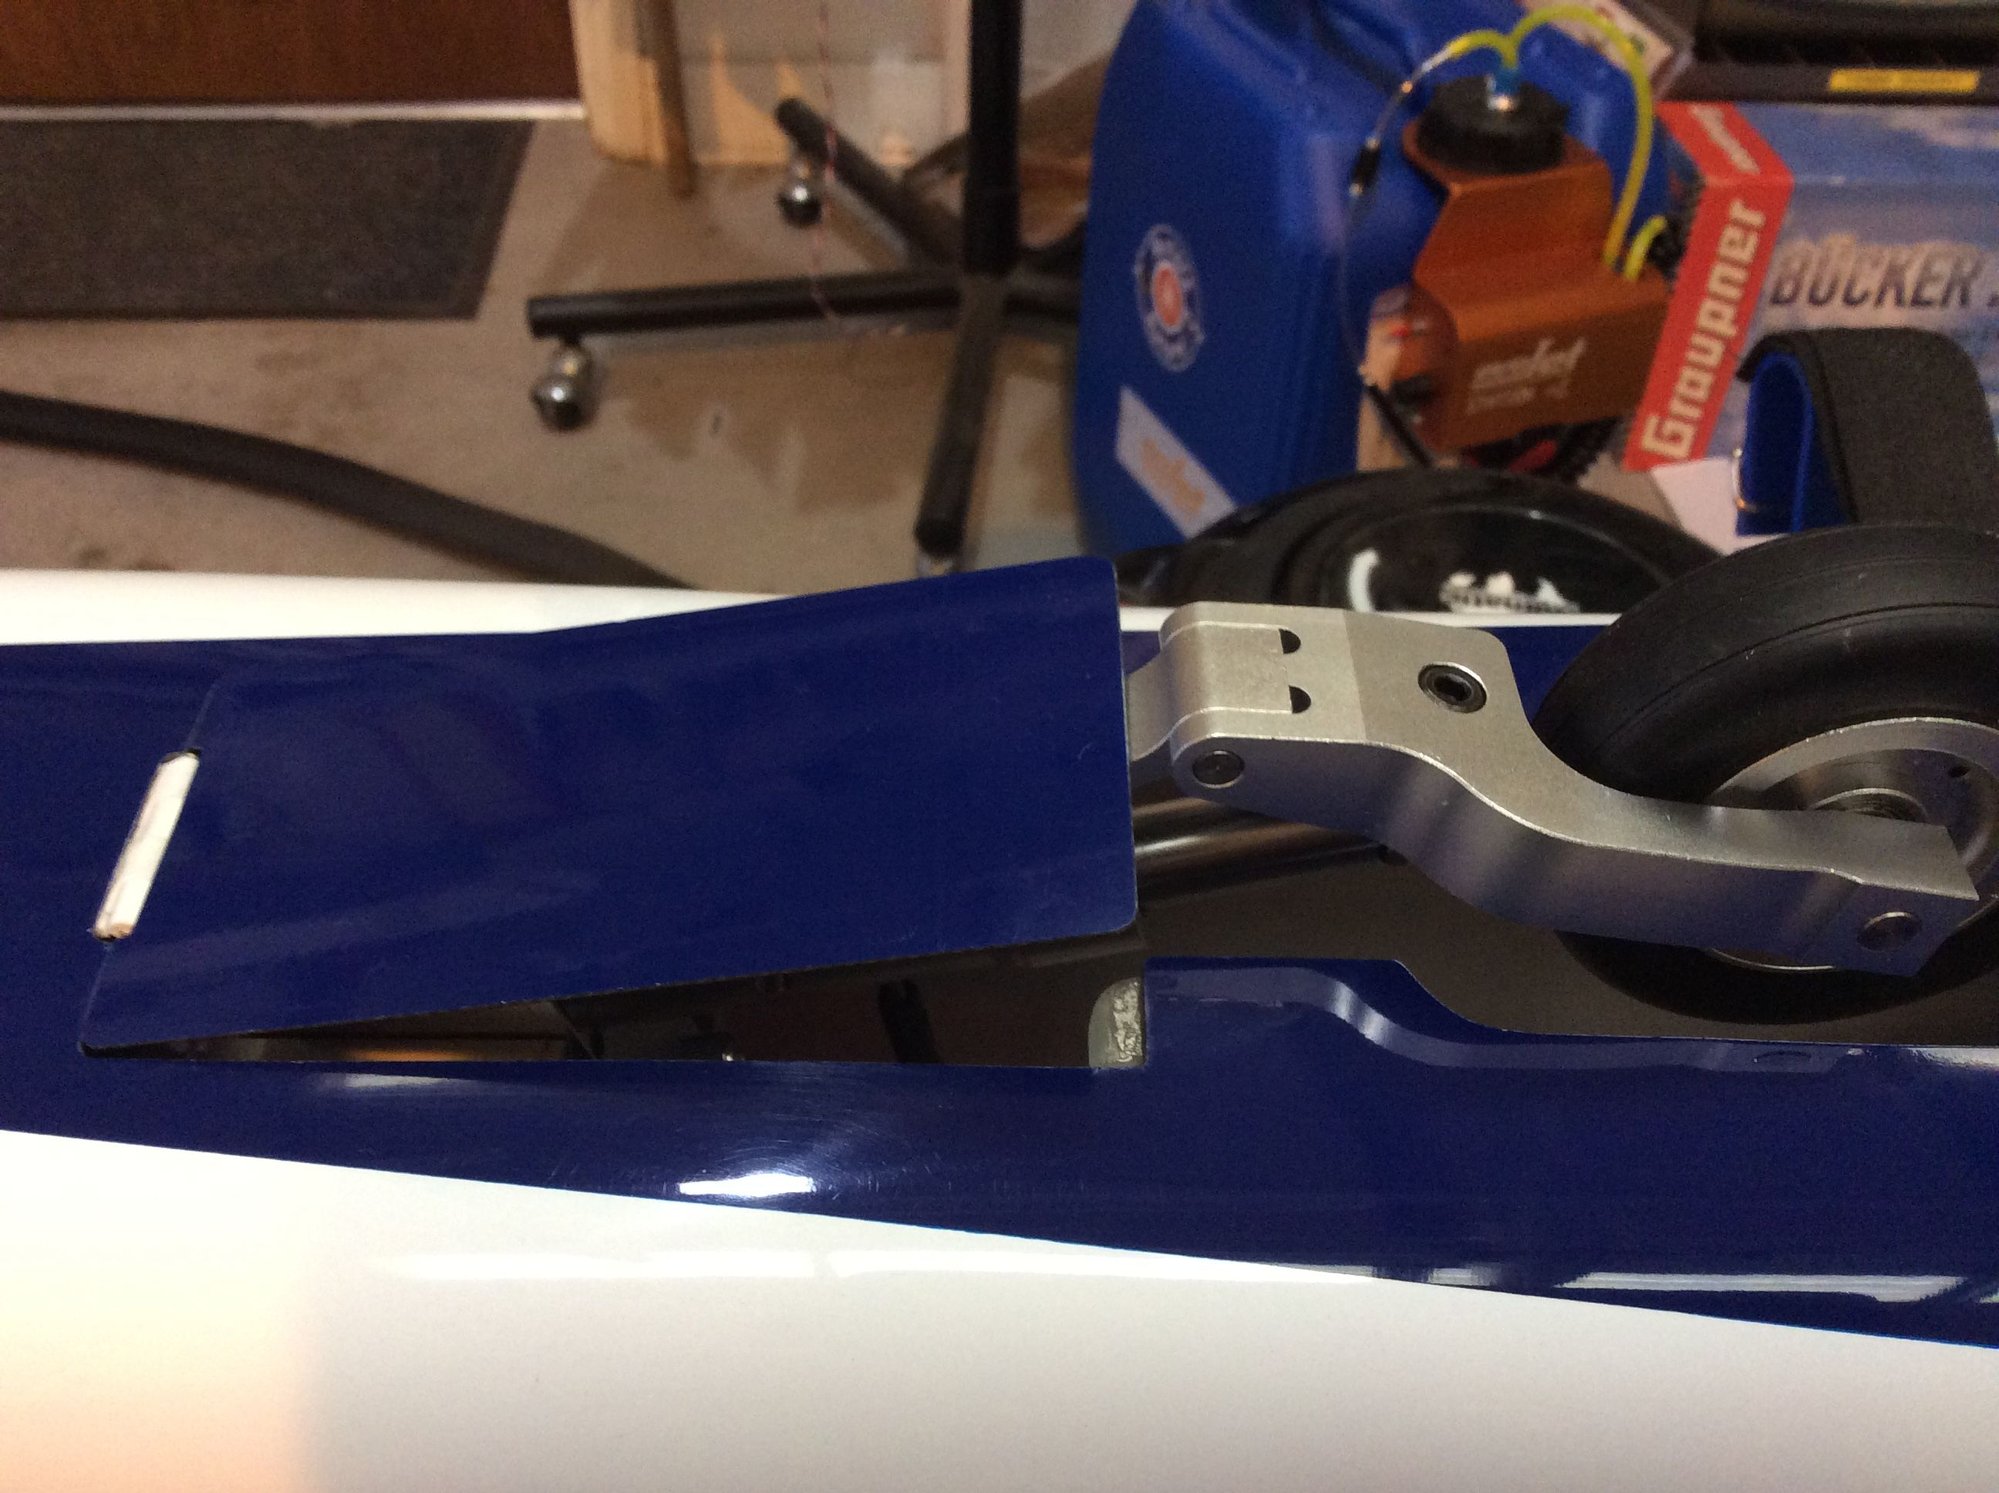
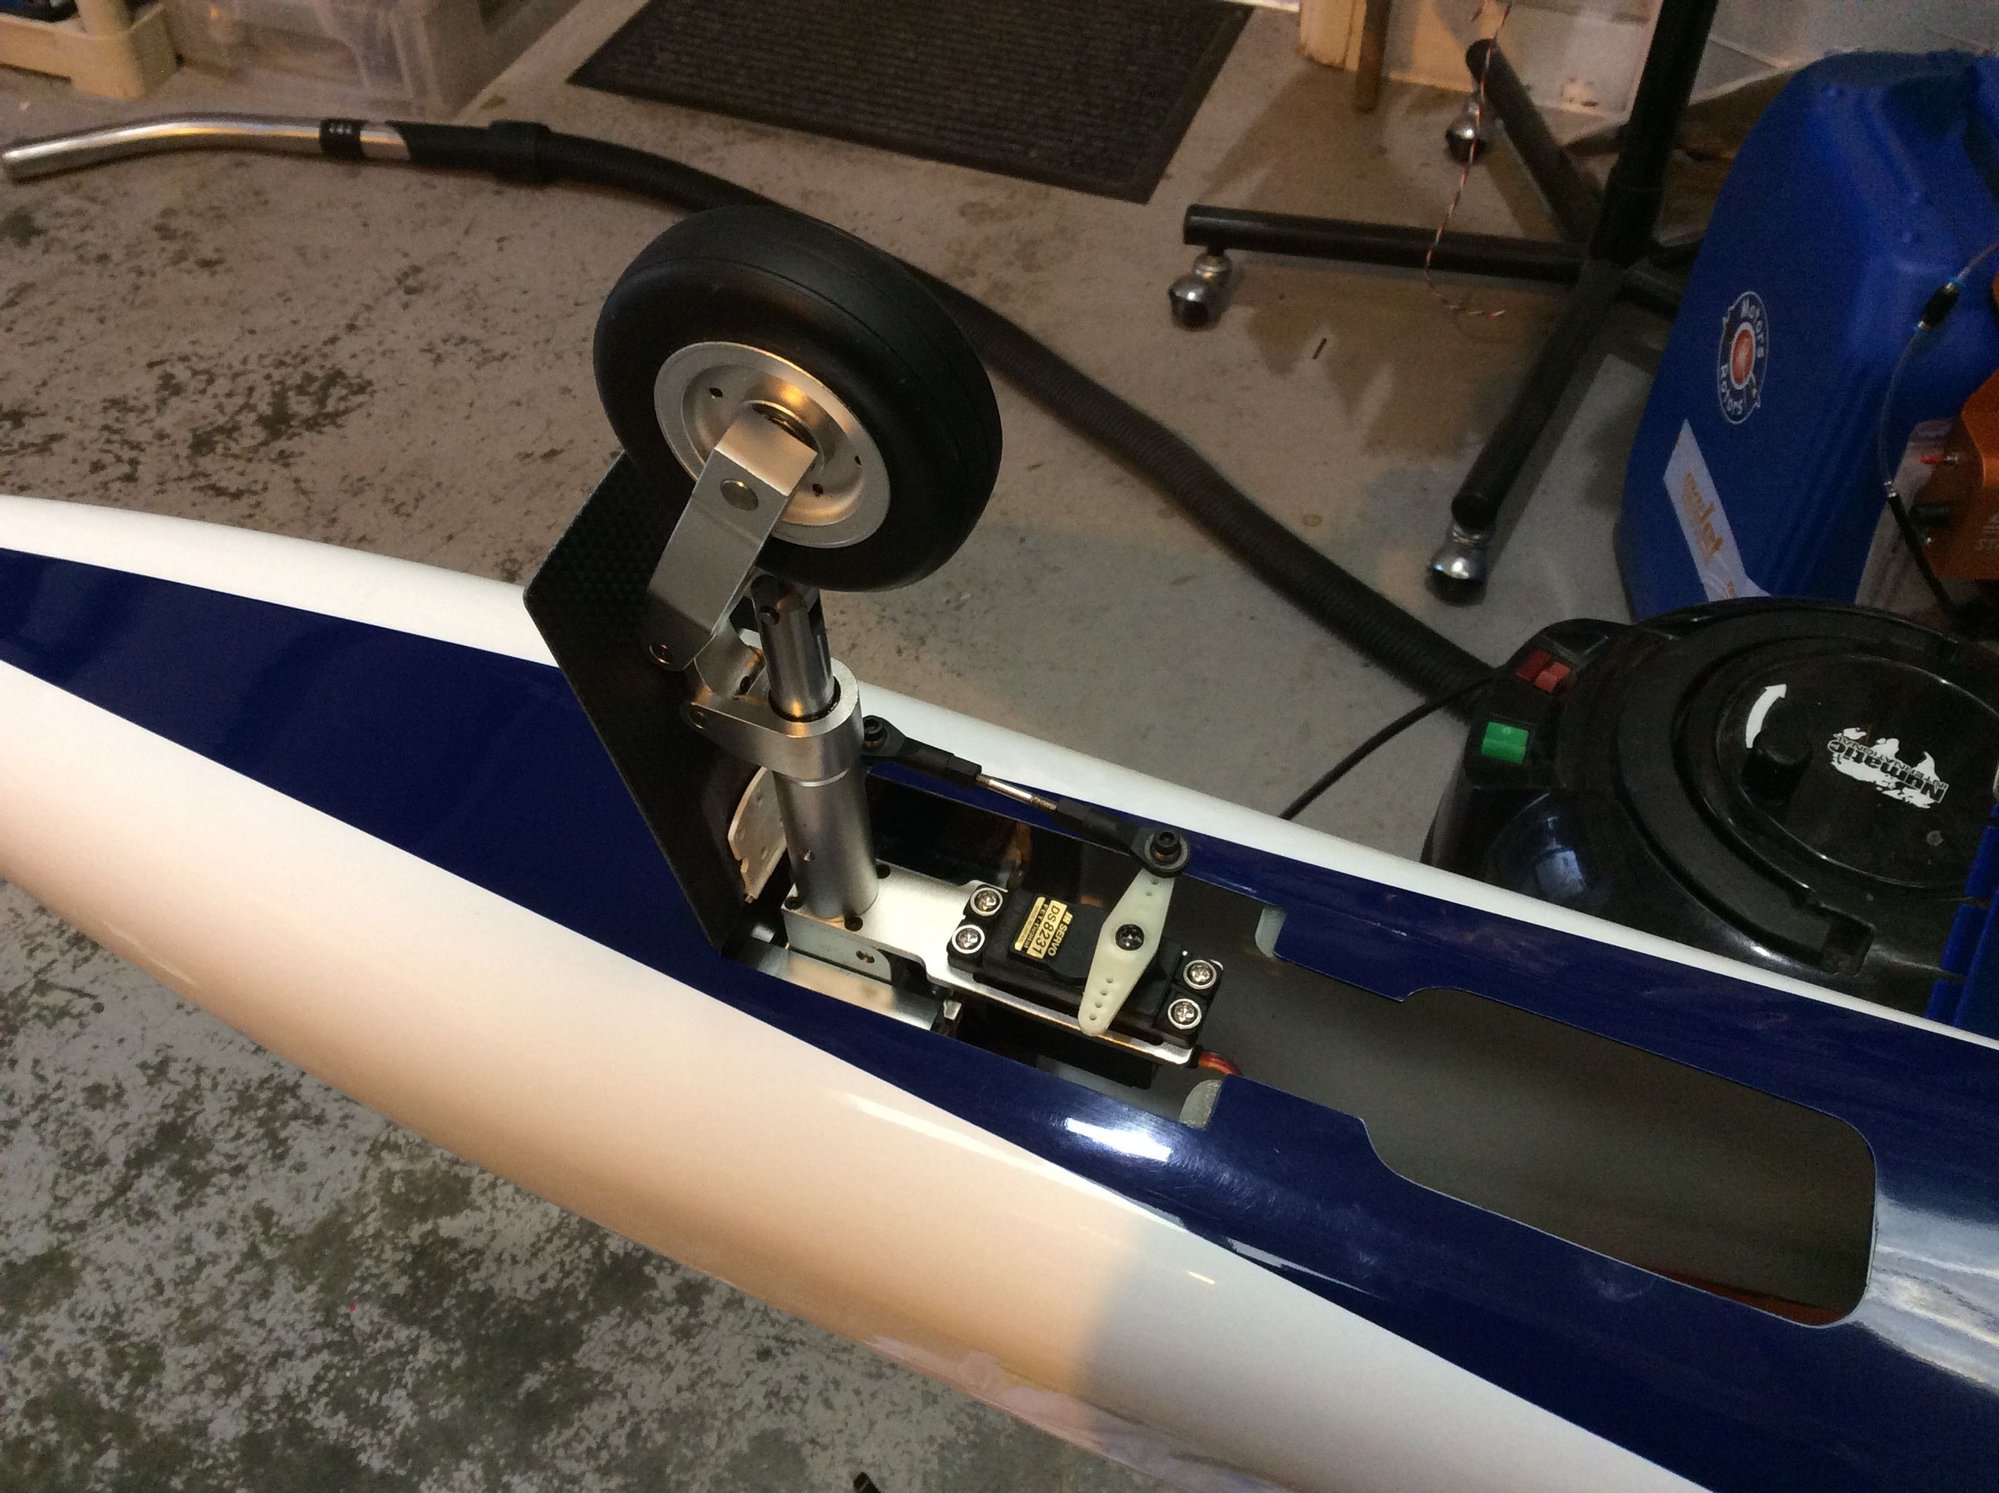
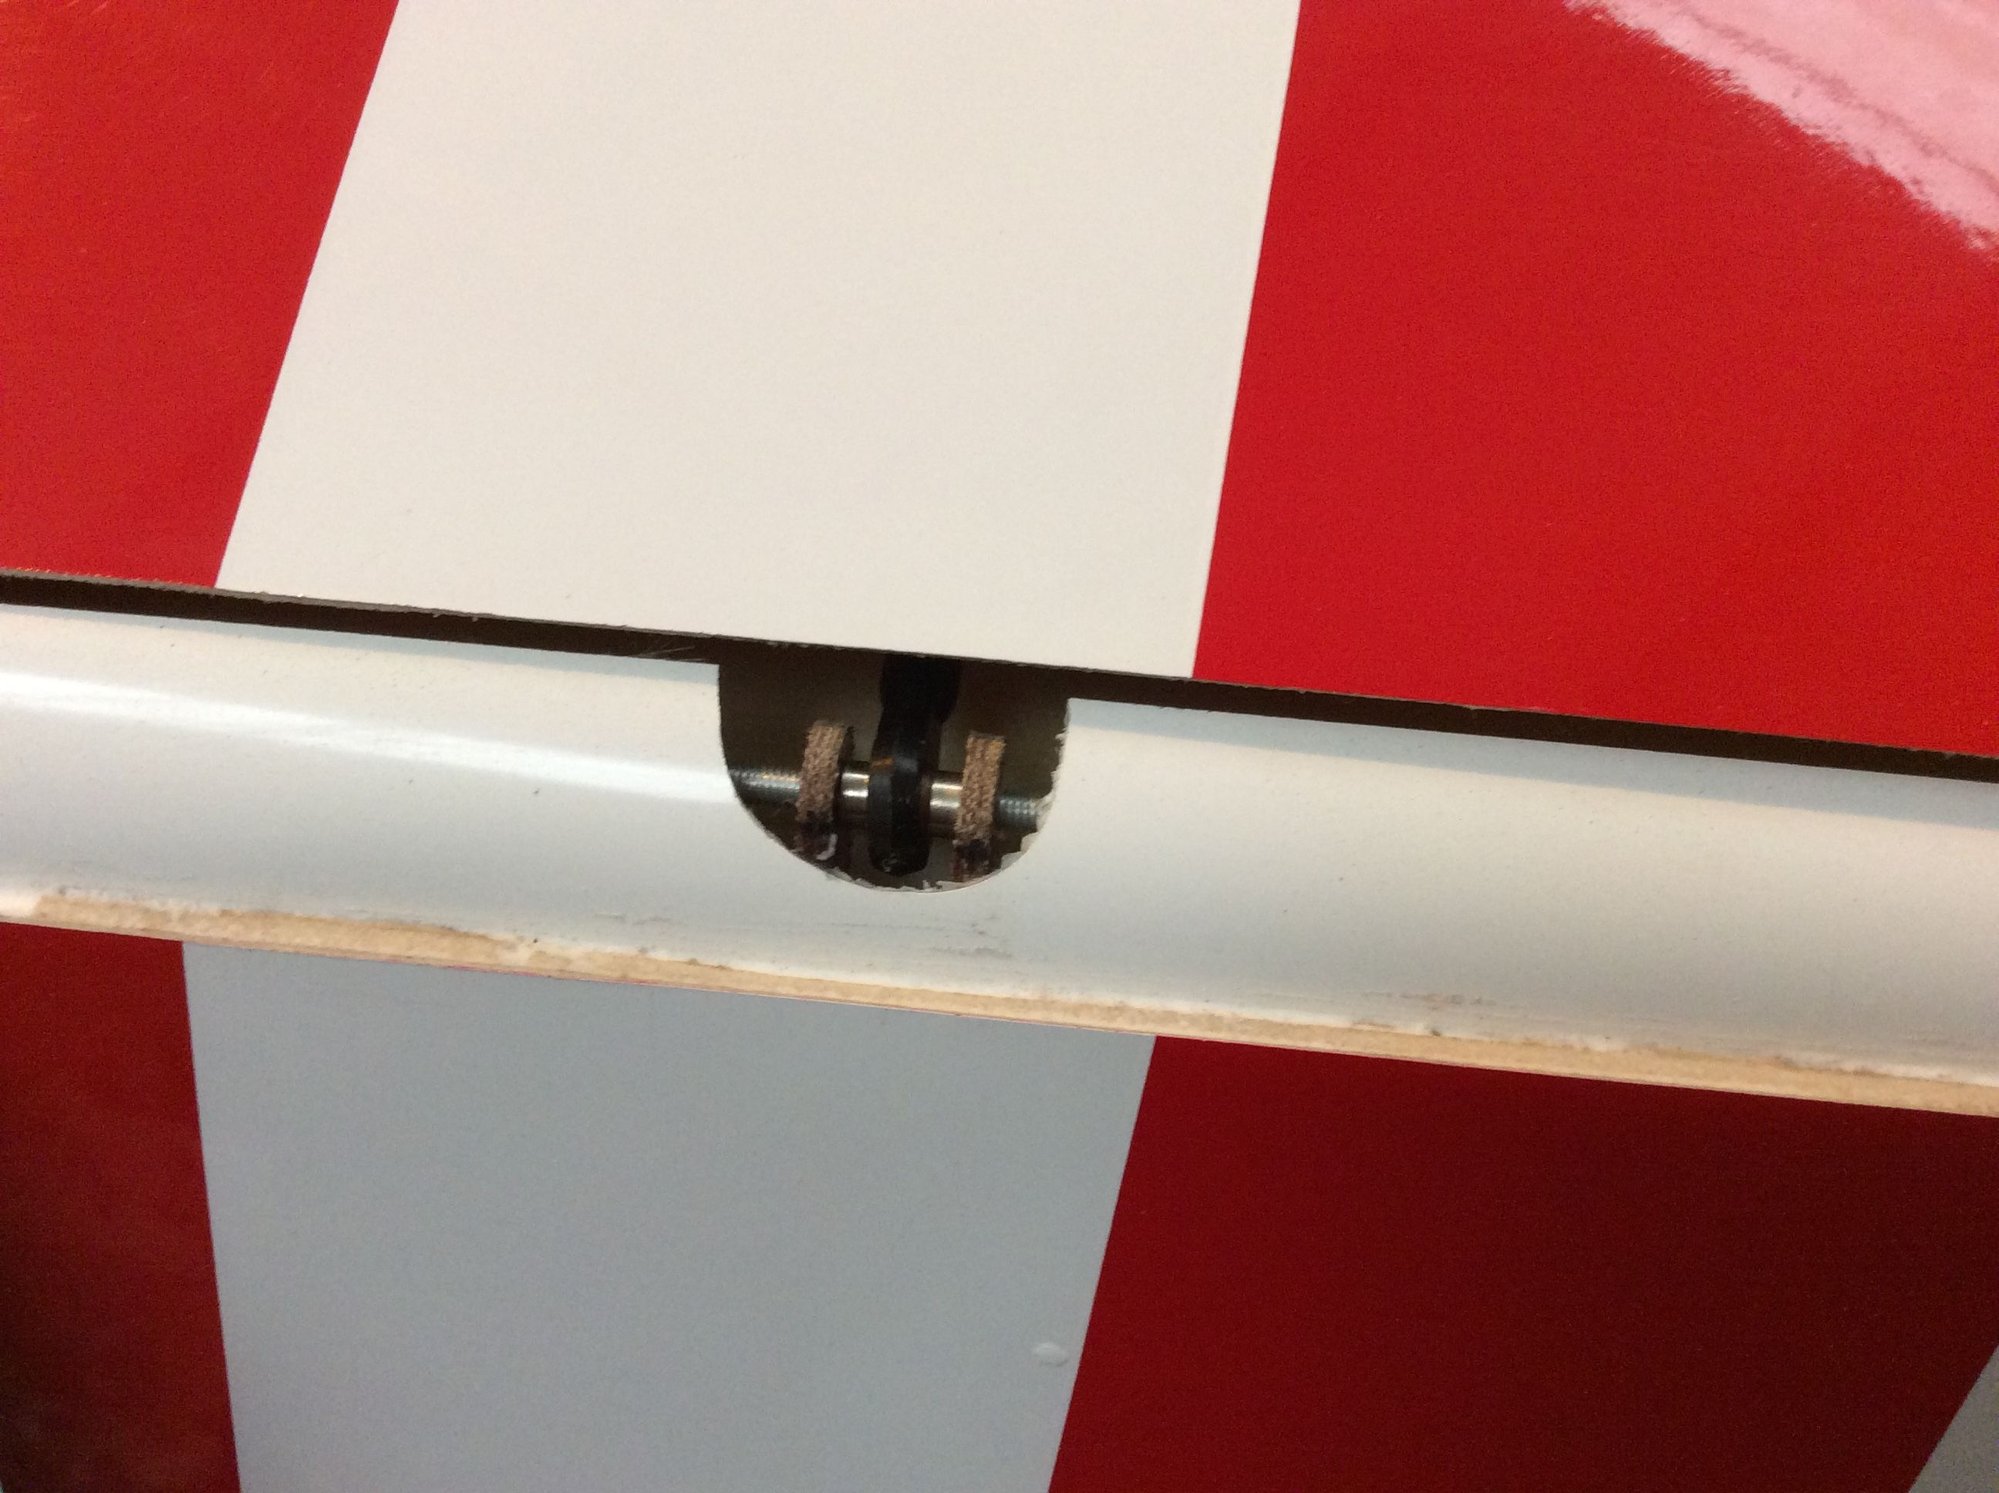
Can someone measure the electron strut length for me? Does this look a bit oversized? You can see the retract black mount with screwing holes is pushed all the way back on the nose gear tray/former. I can open up the nose wheel opening slightly but the wheel kinda overshoots the instrument tray wheel hole as well.. Does this look ok?

 11-09-2024 | 02:44 PM
#842
Thread Starter
Can someone measure the electron strut length for me? Does this look a bit oversized? You can see the retract black mount with screwing holes is pushed all the way back on the nose gear tray/former. I can open up the nose wheel opening slightly but the wheel kinda overshoots the instrument tray wheel hole as well.. Does this look ok?
it was designed for the JP gear.
 11-13-2024 | 09:15 AM
#843
Hey Dave,
So does mine look a lot longer?
I've had a word with Electron and they have confirmed the length to be in line with Carf's instructions.
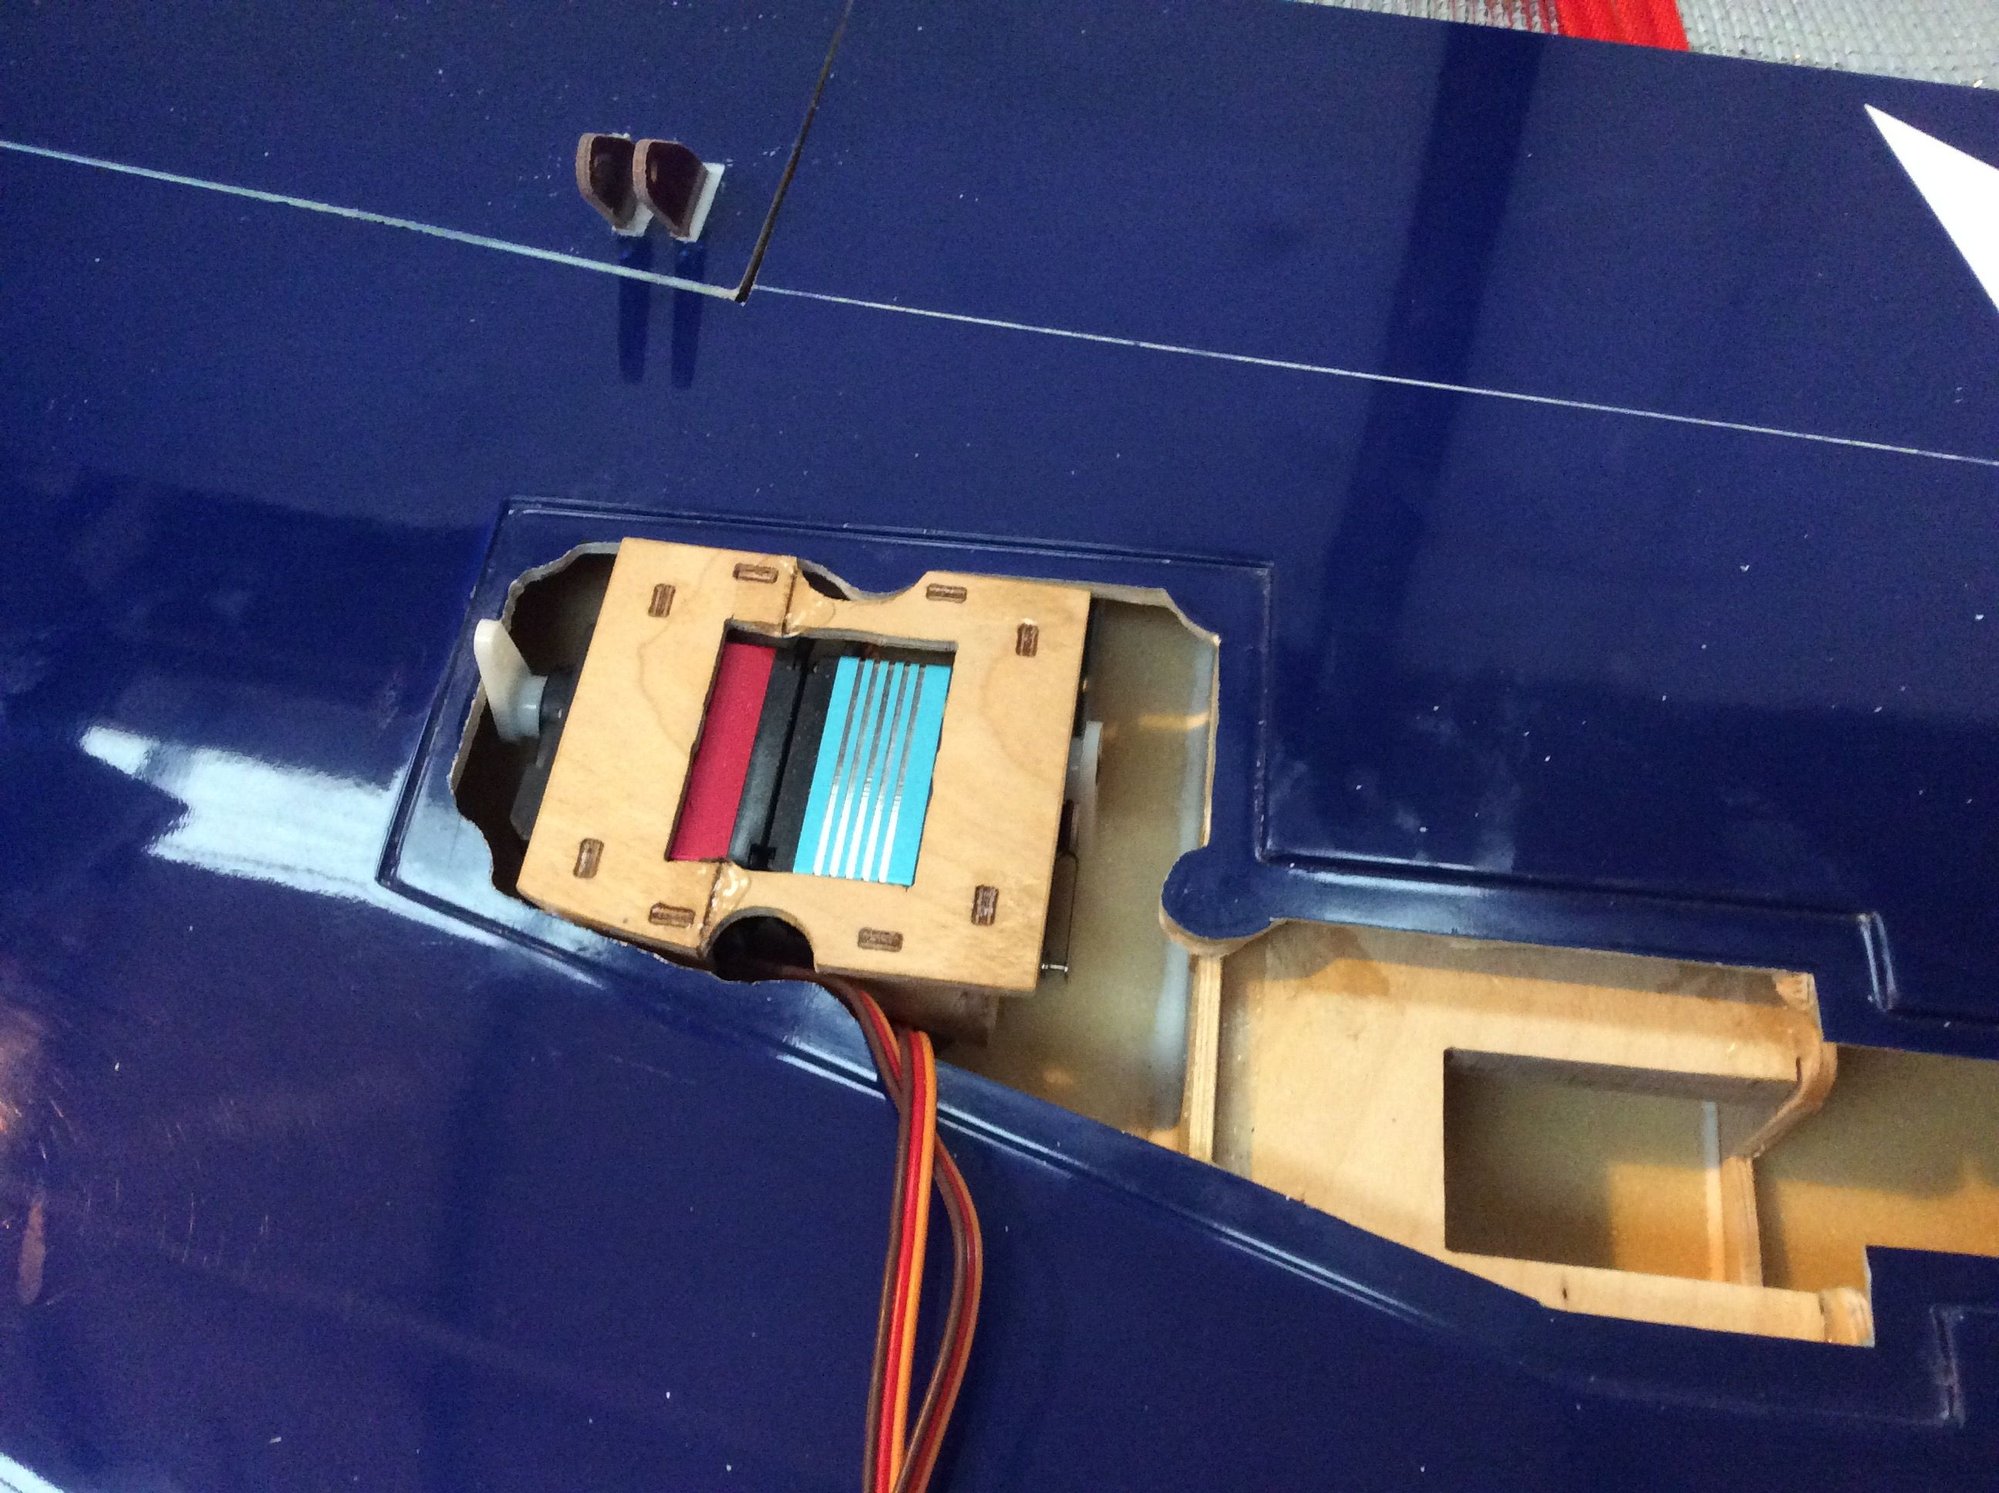
Flap question.
How do i start? As the servo trays are already glued to the cover, do i first connect the metal clevis on servo side and then
slide the ball link side out of the hole towards horn on the flaps? Or the other way around, quite a sketchy task.
thanks
So does mine look a lot longer?
I've had a word with Electron and they have confirmed the length to be in line with Carf's instructions.
Flap question.
How do i start? As the servo trays are already glued to the cover, do i first connect the metal clevis on servo side and then
slide the ball link side out of the hole towards horn on the flaps? Or the other way around, quite a sketchy task.
thanks
11-13-2024 | 02:15 PM
#844
Thread Starter
It does look long. Leg length is only part of it. The trunnion length and pivot point on the frame will vary the final axle position.
main gear is likely to be fixed length, so put the gear down, wing on. Stand it on bench and see what angle it sits with the nose leg length you have.
Flap is easy. Work out where the servo spline is on the cover hatch. Mark that through onto the top wing skin. Put a 15-16mm arm on flap servo. Set it with your radio, you want the servo arm angled back at full flap, it will swing forward to flaps clean. Put the servo arm in the landing position, mark the hole distance back from servo arm centre on the wing skin. Put a pushrod on the flap with ball link. Put flap at angle you want, lay the pushrod over the mark and mark the pushrod with a pen where the servo arm hole is. Put the flap clean and mark the skin with the pushrod travel. That is the servo travel you need to set in your radio flap travel.
Cut the pushrod and add the clevis/ball link you will use.
It�s normally easier to attach the servo end first, feed the pushrod through to the flap and add fixing screw once the cover plate is in position.
Easier to do than read!
11-14-2024 | 05:19 AM
#846
My Feedback: (4)
Joined: Jan 2002
Posts: 4,159
Likes: 0
Received 0 Likes
on
0 Posts
From: Montreal, CANADA
Do you have any pictures ? I am a bit dyslectic and have trouble following the text. Would really want to learn this procedure. THANKS !
It does look long. Leg length is only part of it. The trunnion length and pivot point on the frame will vary the final axle position.
main gear is likely to be fixed length, so put the gear down, wing on. Stand it on bench and see what angle it sits with the nose leg length you have.
Flap is easy. Work out where the servo spline is on the cover hatch. Mark that through onto the top wing skin. Put a 15-16mm arm on flap servo. Set it with your radio, you want the servo arm angled back at full flap, it will swing forward to flaps clean. Put the servo arm in the landing position, mark the hole distance back from servo arm centre on the wing skin. Put a pushrod on the flap with ball link. Put flap at angle you want, lay the pushrod over the mark and mark the pushrod with a pen where the servo arm hole is. Put the flap clean and mark the skin with the pushrod travel. That is the servo travel you need to set in your radio flap travel.
Cut the pushrod and add the clevis/ball link you will use.
It�s normally easier to attach the servo end first, feed the pushrod through to the flap and add fixing screw once the cover plate is in position.
Easier to do than read!
main gear is likely to be fixed length, so put the gear down, wing on. Stand it on bench and see what angle it sits with the nose leg length you have.
Flap is easy. Work out where the servo spline is on the cover hatch. Mark that through onto the top wing skin. Put a 15-16mm arm on flap servo. Set it with your radio, you want the servo arm angled back at full flap, it will swing forward to flaps clean. Put the servo arm in the landing position, mark the hole distance back from servo arm centre on the wing skin. Put a pushrod on the flap with ball link. Put flap at angle you want, lay the pushrod over the mark and mark the pushrod with a pen where the servo arm hole is. Put the flap clean and mark the skin with the pushrod travel. That is the servo travel you need to set in your radio flap travel.
Cut the pushrod and add the clevis/ball link you will use.
It�s normally easier to attach the servo end first, feed the pushrod through to the flap and add fixing screw once the cover plate is in position.
Easier to do than read!
11-14-2024 | 02:45 PM
#847
Thread Starter
Don’t have many as I tend to clear out my iPad after a while. I guess there are shots at the beginning of this thread.

Distance between the marks is the servo arm throw you need.
Threaded rod rather than fight to get a screw in each time during set up
Doing this you can operate the flap servo and set up the linkage
Distance between the marks is the servo arm throw you need.
Threaded rod rather than fight to get a screw in each time during set up
Doing this you can operate the flap servo and set up the linkage


