


Painted wing, stabs and advanced graphics
 12-16-2015 | 07:48 PM
#26
Now the work begins. I level the whole surface with 220 dry. The reason for the gloss Min Wax is to create a "guide coat", A guide coat tells us if we have low spots. If you still see gloss, you need to sand more because it's not level yet.
After leveling I use a flashlight held low to the surface to find pours and grain that still needs to be filled. You won't find all of them so just go for the big ones at this stage. I fill them with auto Glazing Putty, The stuff is heavy, but you will sand almost all of it off so weight gain is insignificant, This is the best material I have found for this purpose.
After leveling I use a flashlight held low to the surface to find pours and grain that still needs to be filled. You won't find all of them so just go for the big ones at this stage. I fill them with auto Glazing Putty, The stuff is heavy, but you will sand almost all of it off so weight gain is insignificant, This is the best material I have found for this purpose.
 12-19-2015 | 01:06 PM
#31
A bit about primers. I like Klass Kote high build epoxy primer. Not only does it sand like silk, being epoxy, it starts to build a bit of a hard (harder) surface, There is a lot of misinformation about primers. As I said, the biggest issue you have to deal with in a silkspan job is filling the balsa grain and pours under the silkspan covering. What some guys will do is shoot on a coat of primer, sand it off and shoot on another with the belief if they just keep laying on primer it will fill the grain. That is true to a point, but I can assure you with this method there will still be some extremely small (and sometimes large) grain that will not get filled.
This is why. Take a bowl of water and shoot your airgun straight into the bowl. What will happen is the water will blow back into your face and the bowl will be empty of water. The same thing happens when we try to fill grain by laying on more primer. When we shoot the primer on the surface, the air from our gun blows the primer back out of the hole and builds up around the edges like a volcano. So when we sand down the primer around the edges, the hole remains. We can lay on massive amounts of primer and some of the grain (holes) will never be filled.
I like to let the Klass Kote primer cure for 24 hours. I wet sand it with 400 back to where I start to see the grain of the wood underneath. It's important to not go too far and cut through (which we all do a little). At this point I want the primer cut back a long way, but I still want a fairly opaque, white surface. The reason I don't cut it too far, is it's easier to find unfilled grain. Once any remaining grain has been filled I can cut it back further.
Here is the Klass Kote primer:
http://www.klasskote.com/product/KKA100
12-19-2015 | 01:18 PM
#33
OK, now back on the hunt with the flashlight. I will tell you this is an extremely important stage and will take your work to the next level (glass smooth finishes). The initial grain filling with the spakling will get about 90 percent of them. The first round of glazing putty will get another 4 percent, but that 1 percent left is the difference between an average and a "show car" finish. Be ultra picky and look over the surface multiple times from different directions. This step is actually very fast and can be done in just a few minutes, so DON'T skip it.
12-19-2015 | 01:22 PM
#34
Here you can see one off to the edge of the light. It looks large in the picture, but was actually very small. If I see anything that remotely looks like an unfilled grain or microscopic pour I fill it with glazing putty. The glazing putty sands so fast, my opinion is "why not fill it". If it took some putty, fine, if not, no time wasted.
Last edited by Portlandflyer; 12-19-2015 at 01:40 PM.
12-19-2015 | 01:37 PM
#37
If there are any areas the have a fairly large amount of glazing putty still showing on the surface after sanding, I shoot a bit more primer on them to block the putty from migrating into the top color coats. At this point I sand with 400 dry and take the primer back a bit more. I have now removed as much primer as I safely can without cutting through it. I could probably go a bit more, but the 2 or 3 grams isn't worth it. One last quick pass with 600 and I'm ready for paint.
Ready for paint. The surface is more transparent than seen in the picture. Grain is visible over most all of the surface. You could read newsprint under it.
Ready for paint. The surface is more transparent than seen in the picture. Grain is visible over most all of the surface. You could read newsprint under it.
12-19-2015 | 01:45 PM
#38
One last thing about sanding primer. I do not use a block to sand primer. If you do, it's assured you will cut through the primer. I sand all primer by hand with the sand paper folded into thirds. When you get the primer down to the point you start to see grain, you will just be sanding (focusing) on the small opaque areas and stay off the thin spots.
12-19-2015 | 03:28 PM
#39
Senior Member
I use and like Klass Kote primer too. It's a favorite paint underlayment because it sands so easily and feathers great. The only complaint is that it is heavy and I find myself sanding almost all of it off. Only primer left is in the brush marks and still the gain is about 15 grams per panel. I didn't use a block this time either and I think it worked better since I was in touch with the surface continuously.
Since yellow is the main color of my panels which covers poorly, silvering over the sanded primer is a must producing an even colored surface to shoot yellow over. I used rattle can silver from Home Depot. It dried within a few minutes and it covered great. In fact I used only 3 grams per panel of silver to cover almost 1000 squares of each panel. That's almost nothing and worth the weight investment. We'll see how much yellow will be needed to cover that.....
Since yellow is the main color of my panels which covers poorly, silvering over the sanded primer is a must producing an even colored surface to shoot yellow over. I used rattle can silver from Home Depot. It dried within a few minutes and it covered great. In fact I used only 3 grams per panel of silver to cover almost 1000 squares of each panel. That's almost nothing and worth the weight investment. We'll see how much yellow will be needed to cover that.....
12-19-2015 | 03:38 PM
#40
That's a good idea with the silver. I find Klass Kote to be heavy as well, but it's worth it. I tend to shoot a white base in most cases and it takes a lot as House of Kolor pigment is ground so thin. I like your idea of a base with the silver. It could keep the amount of white needed to a minimum. What brand was the silver form Depot?
12-19-2015 | 04:59 PM
#41
Senior Member
I think it's Color Choice Fast drying. It takes A very light touch of spray to cover. Almost like spraying the air and passing the work through. Dont know if Depot still carries the brand tho. I've had this can several years. I think most any fast drying silver paint will do. I'm letting fully setup for 24 hours before hitting it with yellow Klass Kote. Two lights coats should be enough and should avoid incompatibility possibilities. I also scuffed it after the cure so the epoxy bites well
12-20-2015 | 06:42 AM
#42
Senior Member
Hey Matt,
The B.J. wings are actually built up pretty well with regards to rib spacing, at least my older ones are. My sole interest in doing this would be to go to a YS-185 CDI for 2016s new plane. I think that would increase the longevity of the wings and stabs for a few seasons. I am pretty sure I will go that route, ehhh...60/40, lol. I constantly talk myself out of it, like a ping pong ball on the table.....
I have to start over with the electric stuff all my stuff is either bad or grew legs. I have everything I need for a YS version of the Invitation, a cost analysis will decide the finial outcome.
I will hit you up off line, because I have another home brew project I am working on and that will be fully sheet'd, glassed and painted in one form or another.
Thanks' for the insight.. Happy Holidays!
Bill
Silkspan builds in robustness no different than glass and epoxy, except much lighter but also less ding resistant. The thickness is less. Wings, stabs require more care to keep hanger rash at bay.
Portlandflyer I opened the photos earlier in the thread. I love the art of the overlays. Your work reminds me of Bryan Hebert's and Raiko Potter's. Just beautiful!
12-20-2015 | 08:21 AM
#43

Joined: Nov 2015
Posts: 20
Likes: 0
Received 0 Likes
on
0 Posts
Excellent post. I was just thinking of tossing all the monokote since it doesn't work as well as it used to and going to fiberglass. This looks like much better alternative.
Using CF is also very interesting since I like to build strong. However, I don't understand why a person would apply CF on the bottom only. Does it add that much weight or is it a finish issue?
Can't wait to learn more about your painting and graphics techniques. Thank you for taking the time to do this.
12-20-2015 | 09:46 AM
#44
The oldest set of wings still with me that I have silkspanned (now retired) were built in 2000. They have between 2400 and 2700 flights on them with at least 5 different powerplants (all IC) hauling the plane. That wing was foam cored and since it was protected in its husks and its own case, it is still like new.
Silkspan builds in robustness no different than glass and epoxy, except much lighter but also less ding resistant. The thickness is less. Wings, stabs require more care to keep hanger rash at bay.
Portlandflyer I opened the photos earlier in the thread. I love the art of the overlays. Your work reminds me of Bryan Hebert's and Raiko Potter's. Just beautiful!
12-20-2015 | 10:19 AM
#45
Excellent post. I was just thinking of tossing all the monokote since it doesn't work as well as it used to and going to fiberglass. This looks like much better alternative.
Using CF is also very interesting since I like to build strong. However, I don't understand why a person would apply CF on the bottom only. Does it add that much weight or is it a finish issue?
Can't wait to learn more about your painting and graphics techniques. Thank you for taking the time to do this.
Using CF is also very interesting since I like to build strong. However, I don't understand why a person would apply CF on the bottom only. Does it add that much weight or is it a finish issue?
Can't wait to learn more about your painting and graphics techniques. Thank you for taking the time to do this.
One of the main reasons I do silkspan finishes is to create a surface for my painting. To me the painting is the creative and fun part, but if you don't put in the time and effort up front, it will hurt in the end. If you haven't figured it out already I am ultra picky about this stuff.
Carbon tissue will give you extra stiffness, but at the expense of a bit more weight and a lot more work. The way Matt uses it is not as finish surface rather a structural component. He (and I) have used it on the surface, but are not using it for this purpose anymore. Matt is using it under the balsa sheeting and as he said under the silkspan. In this case the carbon adds strength and the silkspan produces a smooth surface for painting.
There is a learning curve doing what we do, but it's worth it. For one thing, you have the ability to go creative on the design side and are not restricted like you are with wrinkle (Mono) kote. Also utilizing computer graphics along with a cutting plotter (vinyl cutter), the lid is blown off what you can do paint and design wise. I can assure you no one will have anything like your stuff at the field.
That being said, if you want to go this route, you better do it for yourself, because very few people have a clue what goes into creating these type of finishes. I have had guys walk up and look at my stuff for ten seconds and just walk away. In their mind they are thinking big deal I saw something like that at Tower Hobbies.....em no you didn't but they are clueless. I used to take it personally, now I just brush it off as "it's an ARF mentality". When I was a kid ( a long time ago), if you wanted it, you built it and everyone had an appreciation for what you did...not anymore. I call it the thirty to one rule. For every 30 hours I put in, guys look at my stuff for 1 second! Don't laugh...it's true.
You can see how low the interest is in this stuff by the lack of response on this thread, but no big deal. I figure if I can give one or two guys in the world some incentive to do this stuff, I have accomplished something. Matt gave me the incentive, maybe I can pass the baton to the next guy.
12-20-2015 | 10:55 AM
#46
Joined: Nov 2015
Posts: 20
Likes: 0
Received 0 Likes
on
0 Posts
Thanks for the points on the CF. Placing it under the sheeting or silkspan makes good sense.
As for the ARF people, well, they are just seeking instant gratification and missing out on most of the fun. I trust the construction of my own builds more than an ARF and find it much more gratifying to fly a plane that I built. There are still a few builders left and threads like this keep building alive.
As for the ARF people, well, they are just seeking instant gratification and missing out on most of the fun. I trust the construction of my own builds more than an ARF and find it much more gratifying to fly a plane that I built. There are still a few builders left and threads like this keep building alive.
12-20-2015 | 04:26 PM
#47
My Feedback: (20)
I guys, I just saw this thread today and have read it all just now. I learned a lot and the timing for me is perfect. I just today finished fabrication and assembly of my scratch build jet project and will start finishing next week. I am a paint novice so I am looking to learn all I can.
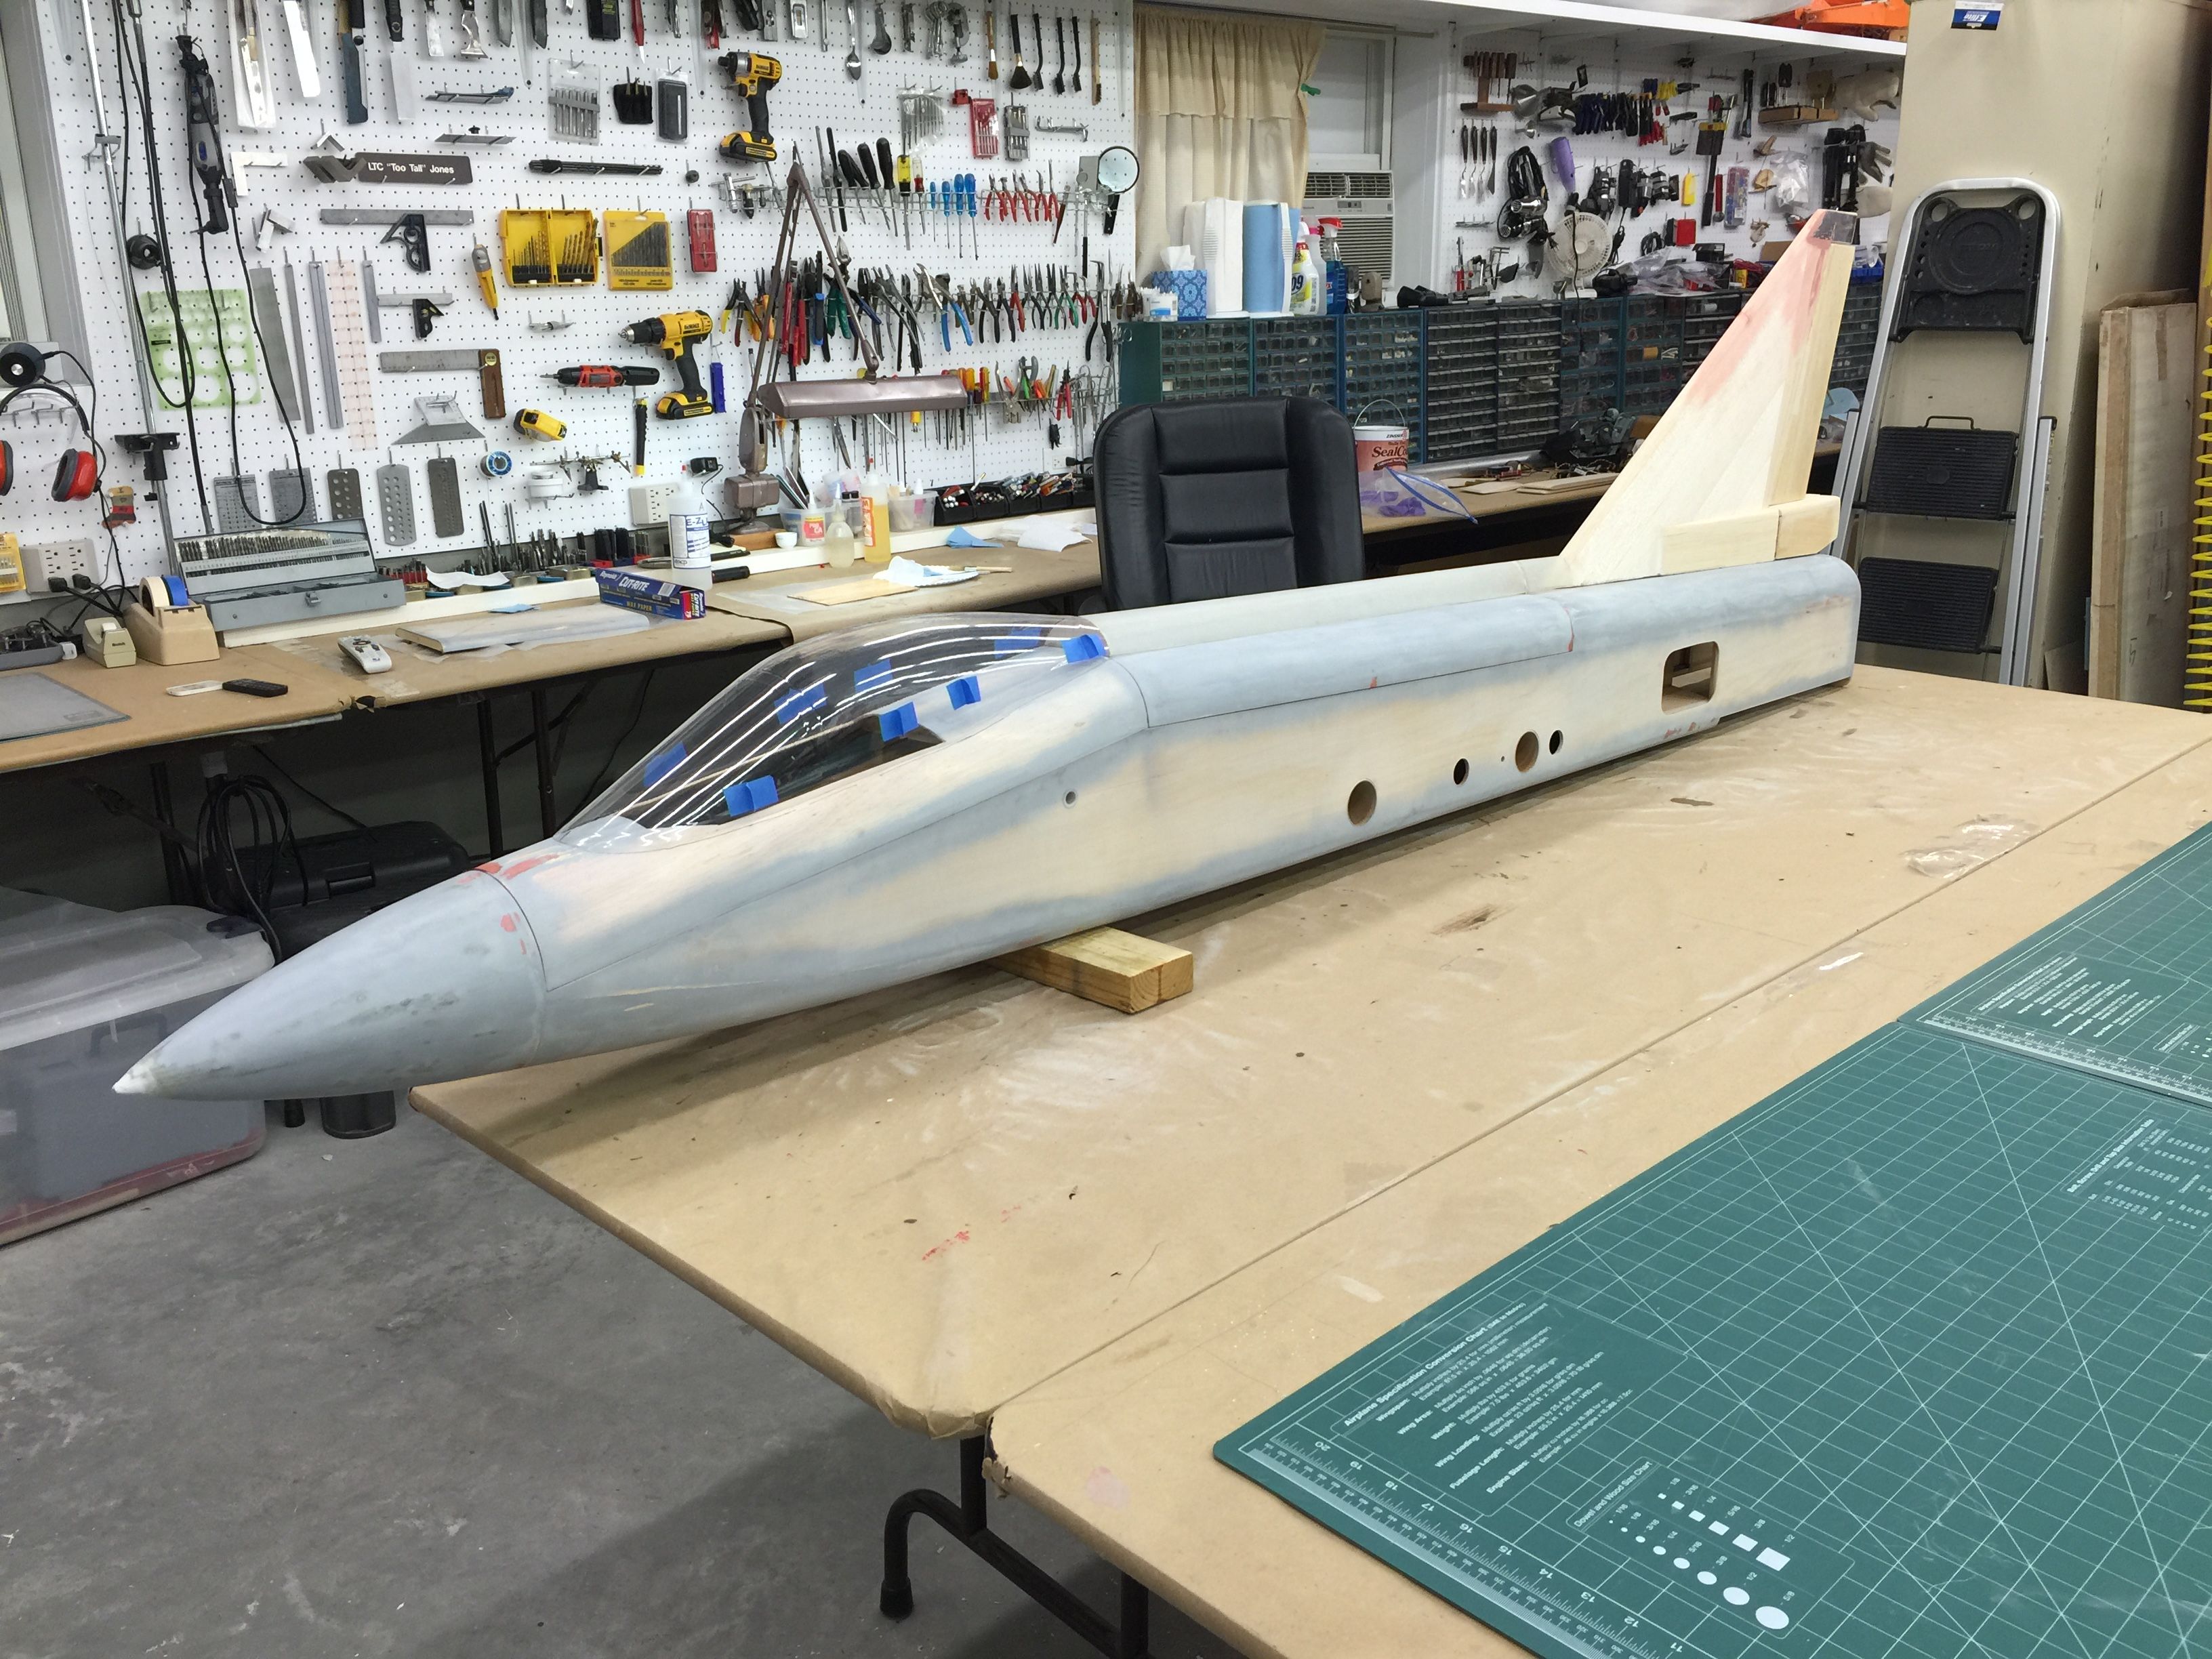
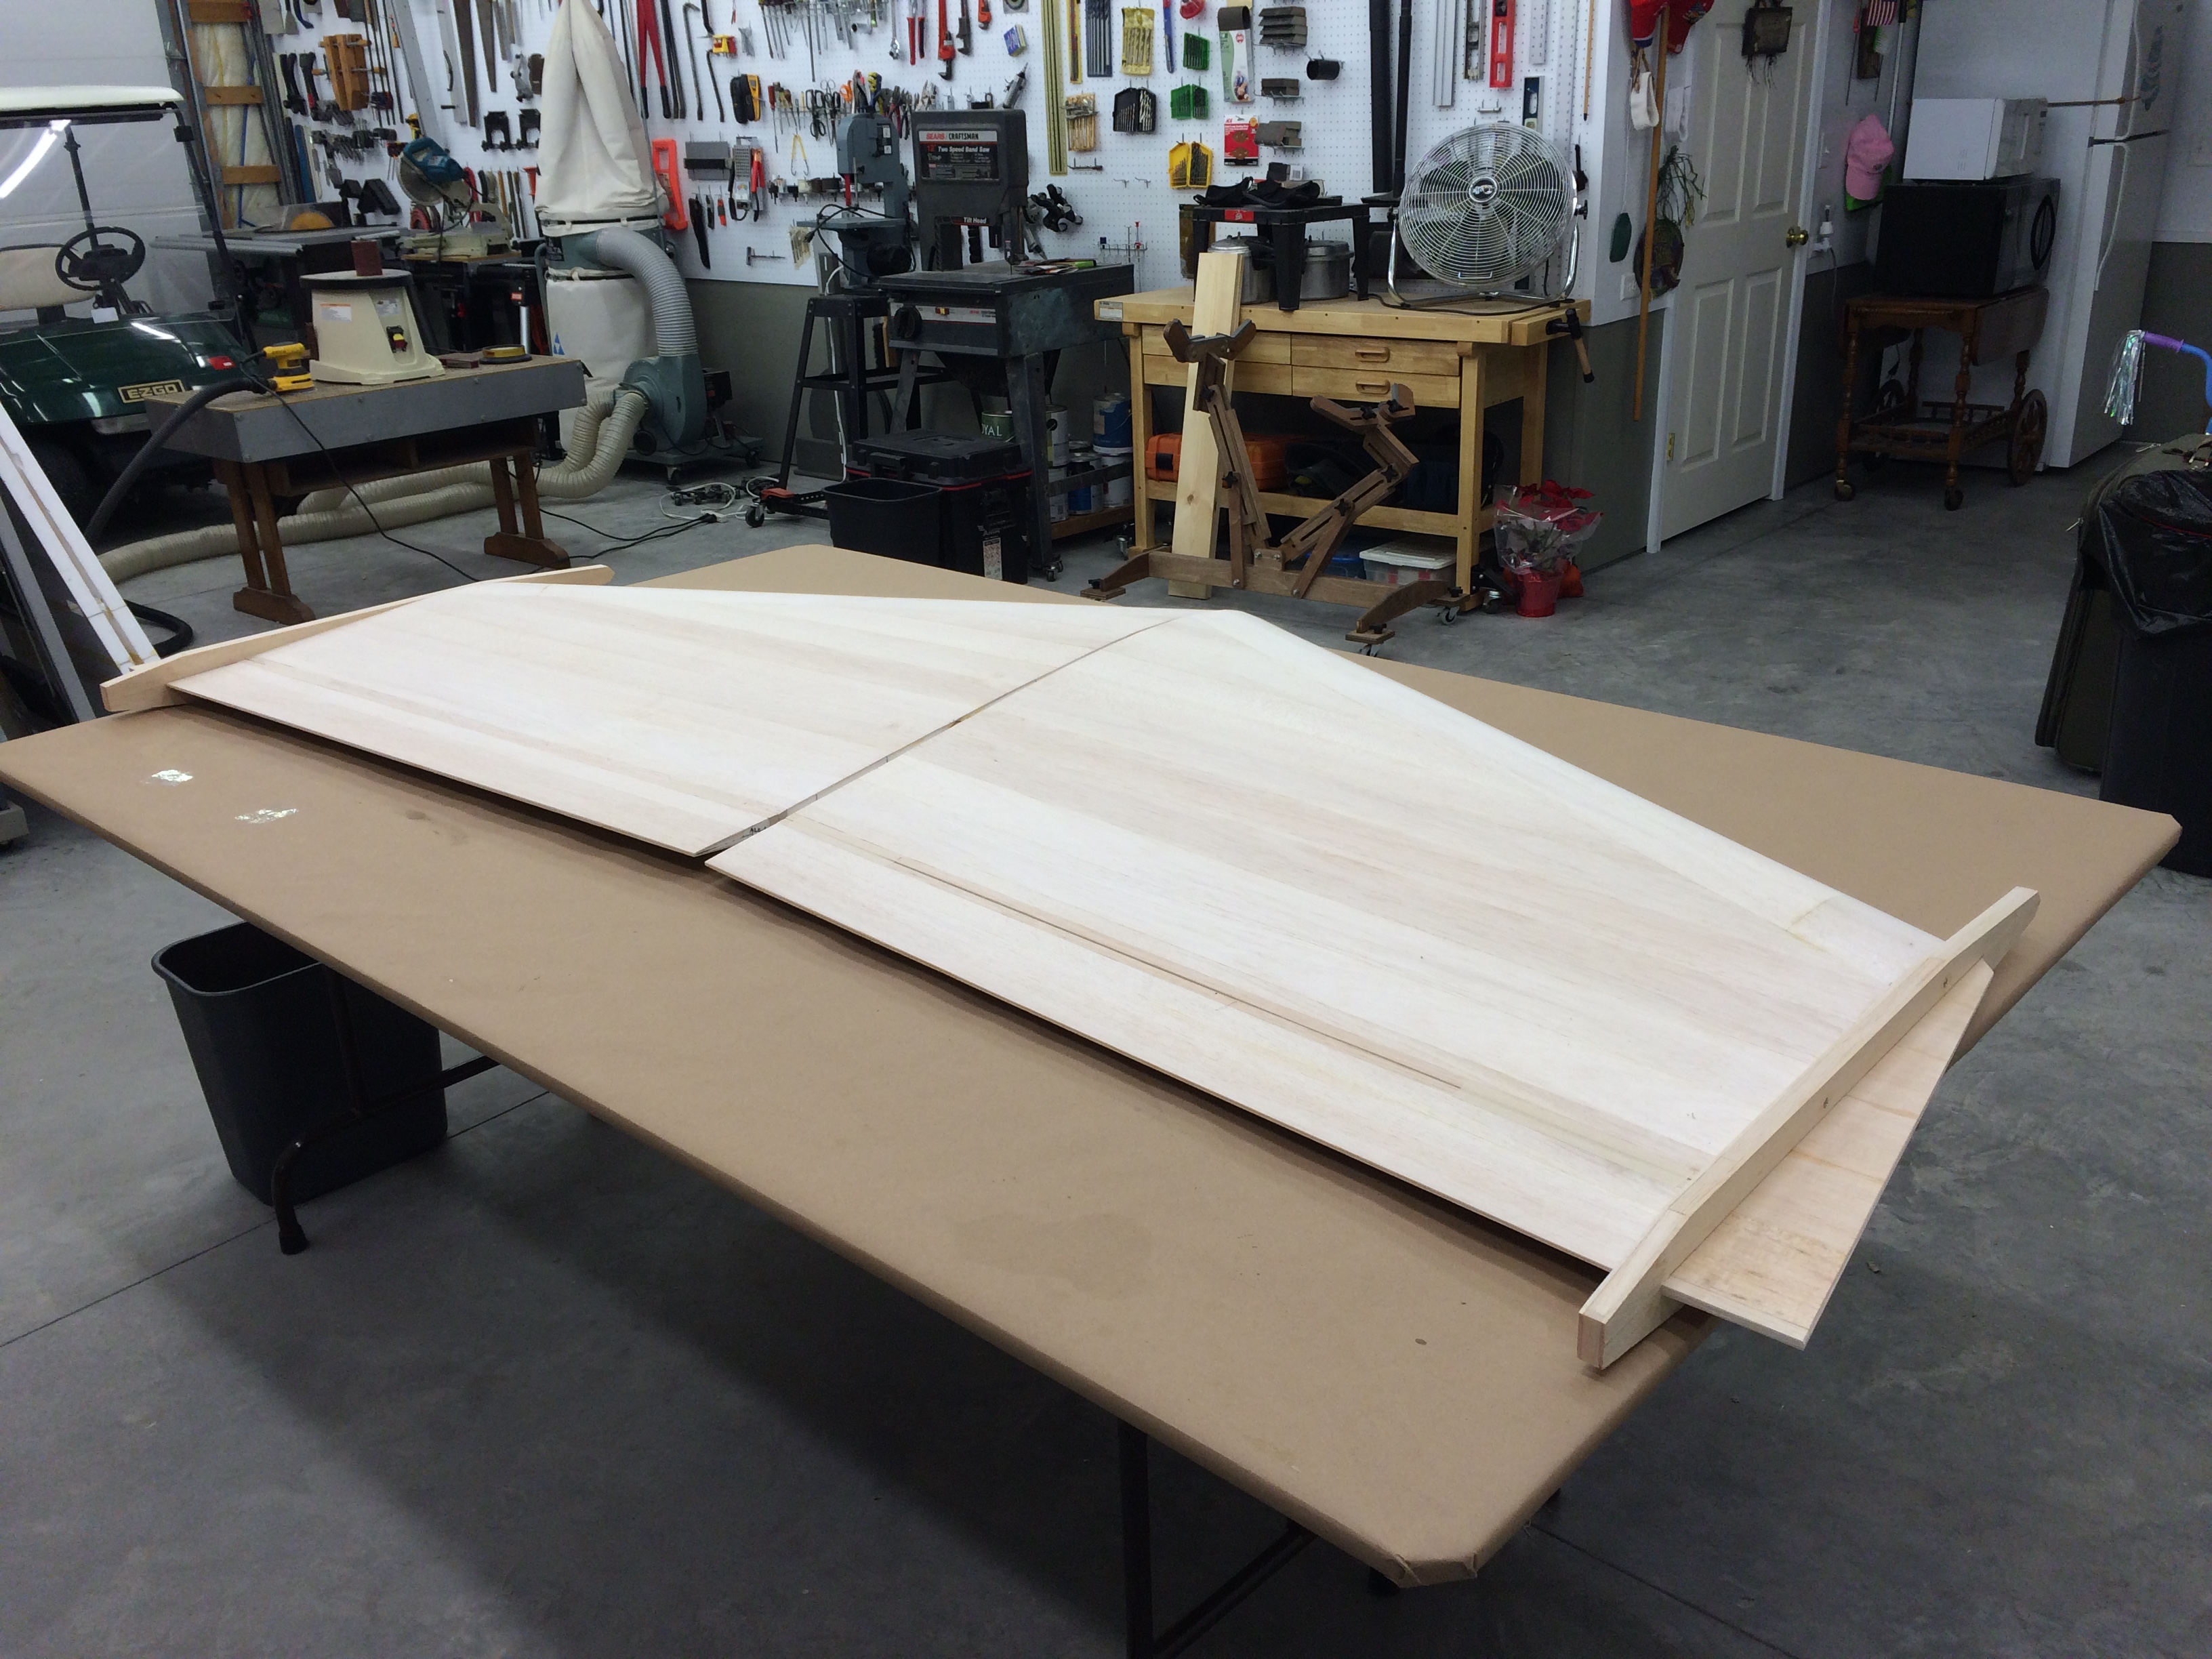
I have a balsa ply fuse and balsa covered foam core wings. Here is my finishing plan.
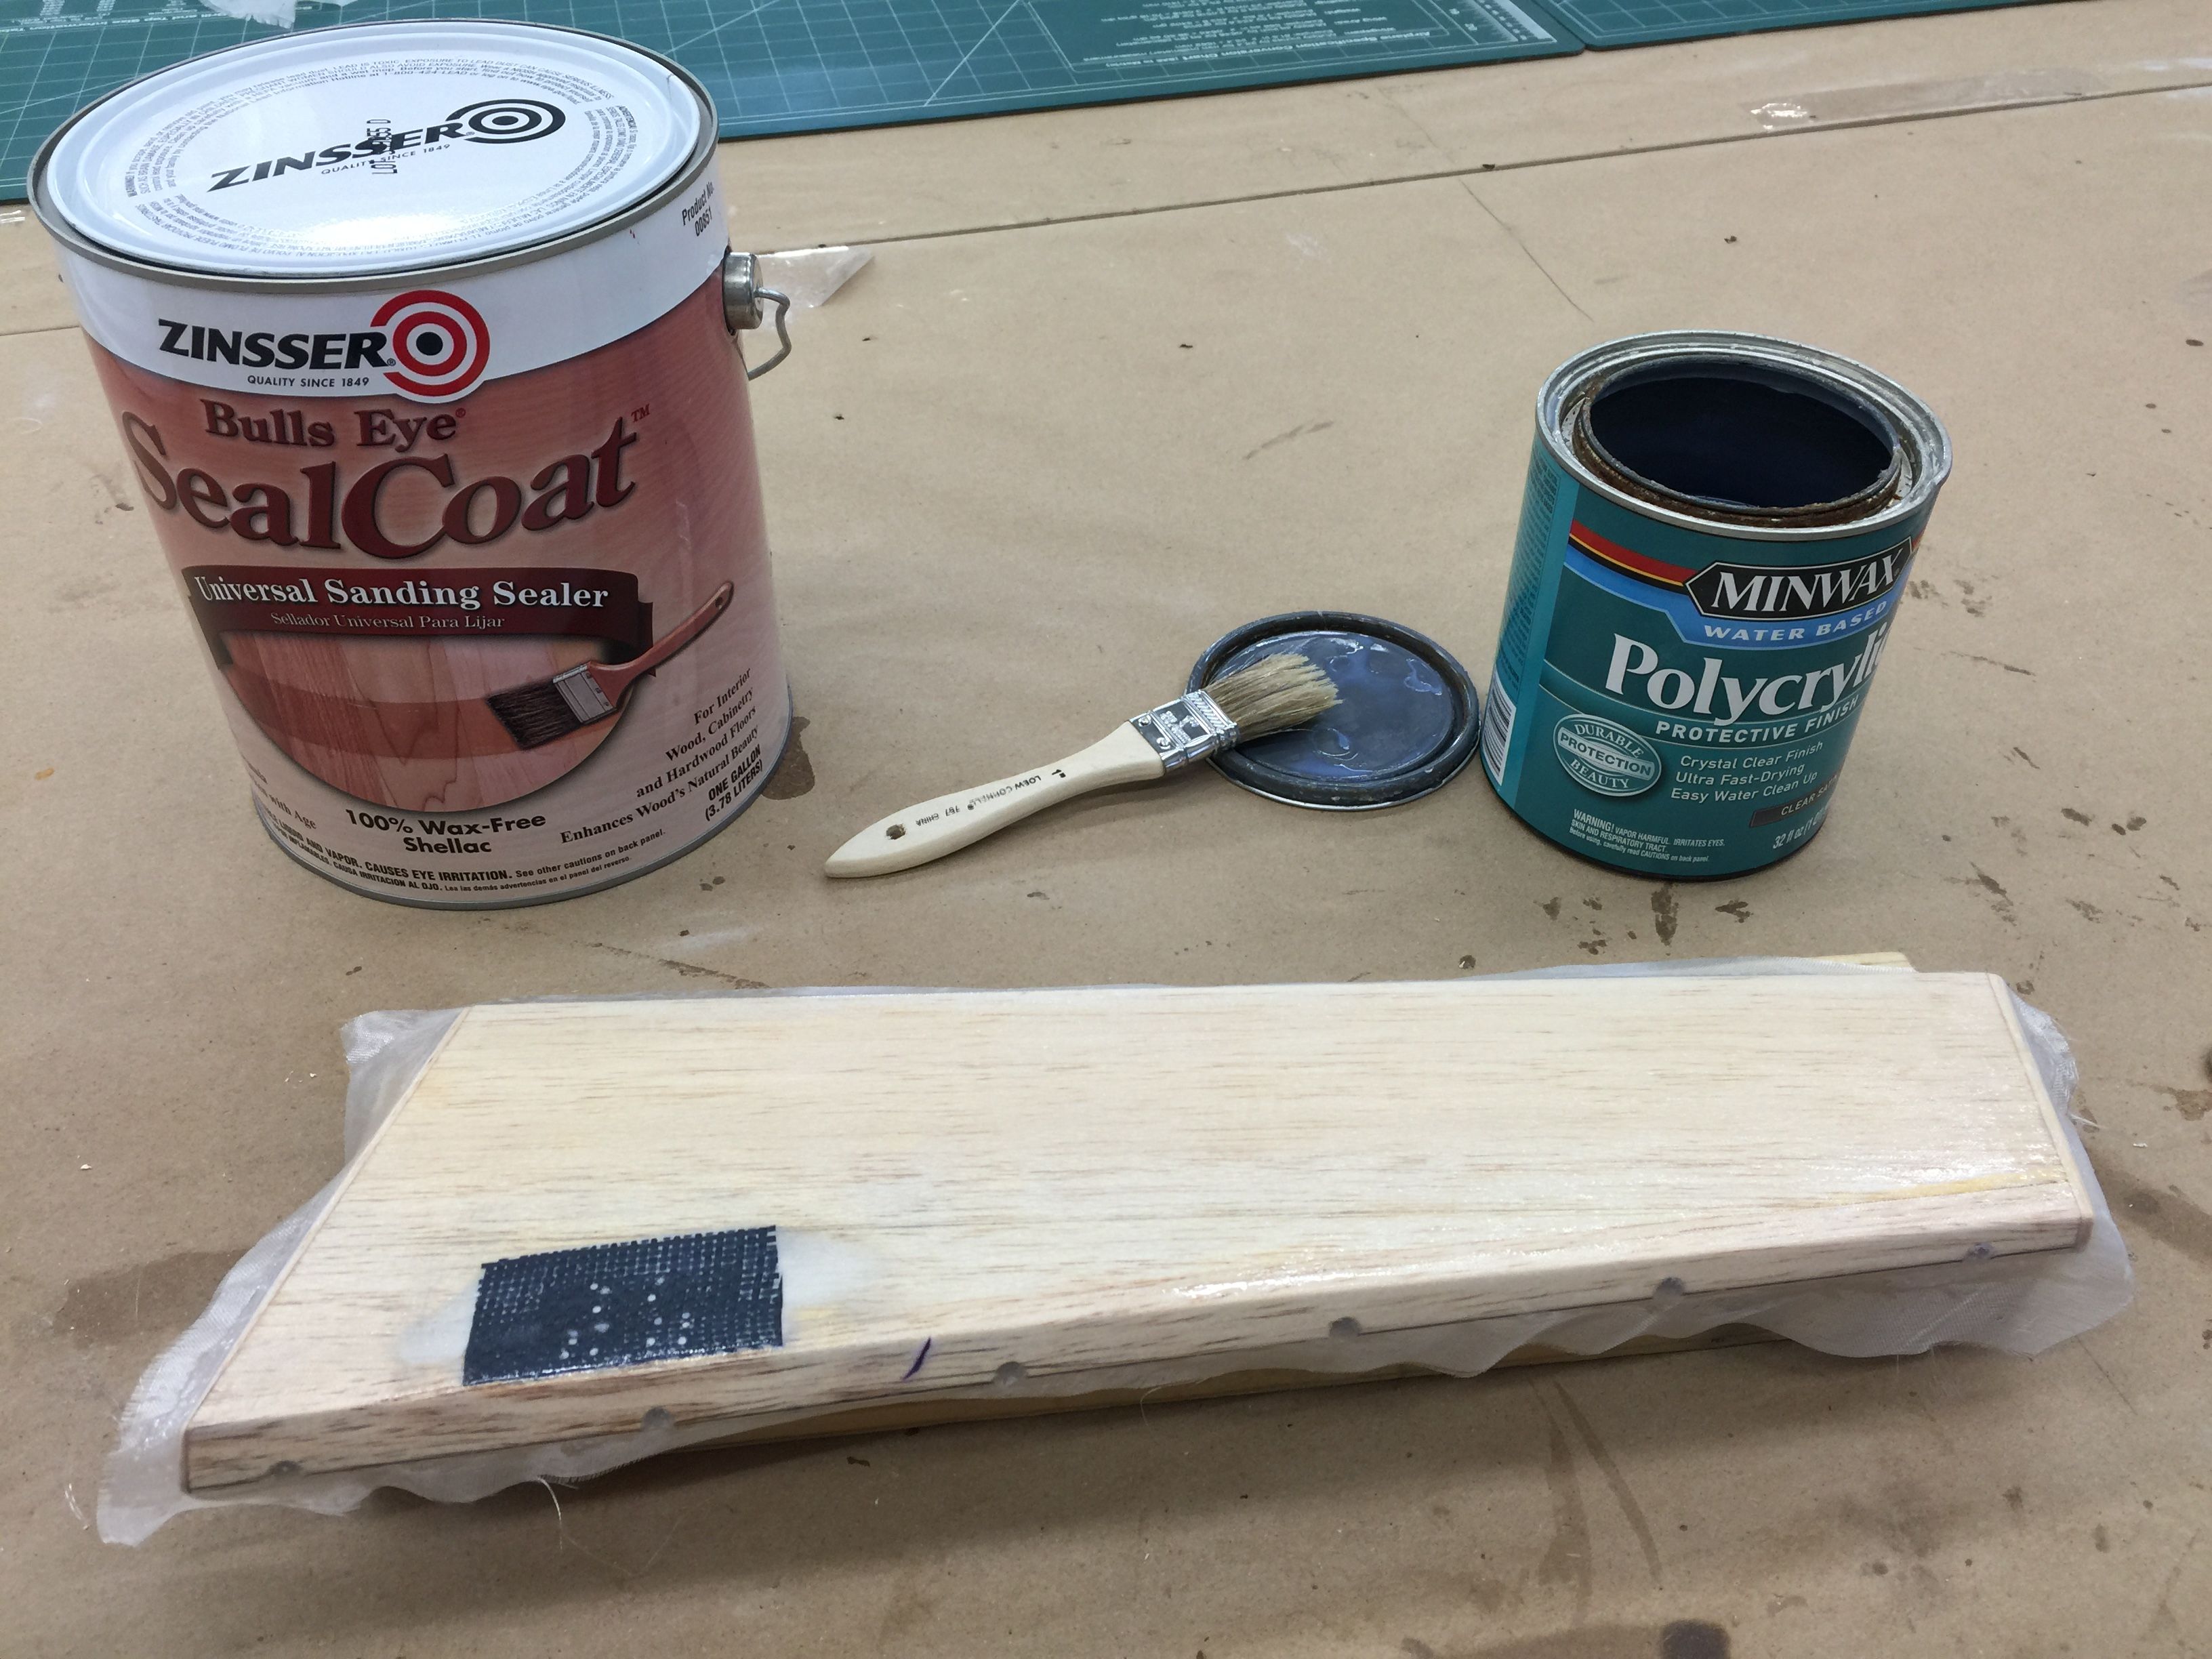
DAP light weight spackle and glazing putty to fill and sand holes and cracks.
One coat of Zinsser Seal Coat to seal the wood surface followed by light sanding to smooth the raised grain.
Cover with .73 oz glass cloth applied with Minwax Polycrylic.
2-3 coats of Polycrylic to fill the weave and light sanding with 220.
Prime with Rustoleum rattle can grey auto spray primer sanded with 220 and 400.
Paint with one coat of Klass Kote cub yellow on top surface and deep blue on bottom.
I glassed my rudder with the poly and it was so easy. I will never use epoxy again. I have not added any other coats of poly yet.
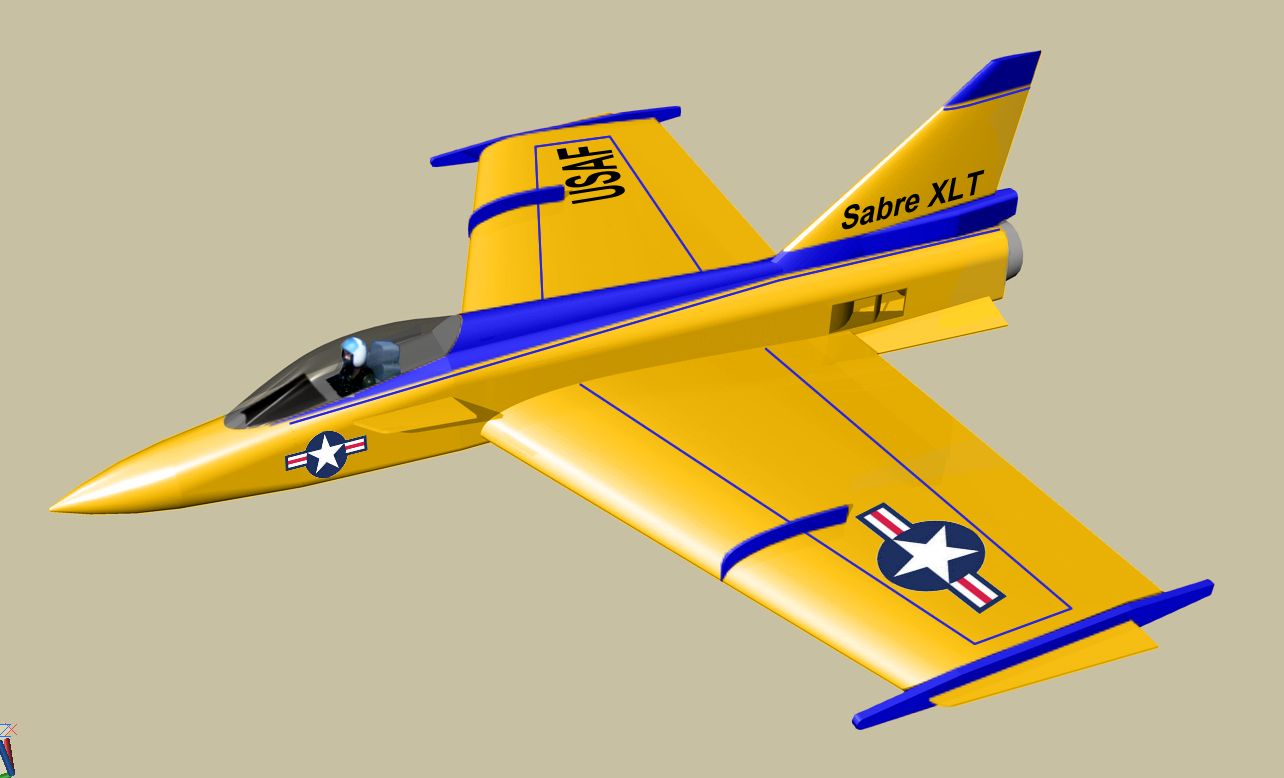
Proposed color scheme
Current status of fuse and wings
Build thread is here: http://www.rcuniverse.com/forum/rc-j...ort-jet-6.html
My question for you guys with paint experience is would I be better with a white primer, grey primer, or a silver base coat as mentioned above and why?
As you can see finishing is just starting. Any help or suggestions are appreciated.
Thanks
Gary
I have a balsa ply fuse and balsa covered foam core wings. Here is my finishing plan.
DAP light weight spackle and glazing putty to fill and sand holes and cracks.
One coat of Zinsser Seal Coat to seal the wood surface followed by light sanding to smooth the raised grain.
Cover with .73 oz glass cloth applied with Minwax Polycrylic.
2-3 coats of Polycrylic to fill the weave and light sanding with 220.
Prime with Rustoleum rattle can grey auto spray primer sanded with 220 and 400.
Paint with one coat of Klass Kote cub yellow on top surface and deep blue on bottom.
I glassed my rudder with the poly and it was so easy. I will never use epoxy again. I have not added any other coats of poly yet.
Proposed color scheme
Current status of fuse and wings
Build thread is here: http://www.rcuniverse.com/forum/rc-j...ort-jet-6.html
My question for you guys with paint experience is would I be better with a white primer, grey primer, or a silver base coat as mentioned above and why?
As you can see finishing is just starting. Any help or suggestions are appreciated.
Thanks
Gary
Last edited by Viper1GJ; 12-20-2015 at 04:34 PM.
12-20-2015 | 05:25 PM
#48
Gary,
You are on the right track. A few guys have seen the light and are using Min Wax for glass work. If you just put the DAP on heavy and let it set 24 hours before sanding you will be good to go and won't need the glazing putty at that stage. In fact I learned about the DAP from guys doing glass work. It will add almost zero weight and gives an exceptional bass for the glass. The Zinsser should work perfect. You should only have a little grain raise as the DAP will do most of that already. It's likely going to take about two to three coats to fill the weave as you are expecting.
The reason I use white primer is all my work starts with a white bass coat so it reduces the amount of paint by a bit. One important issue with sanding primer on glass is don't get heavy handed as it can fuzz on you. I am hearing really good things about using Min Wax for glassing and filling. The main reason I don't (and will not again) use glass is the telegraphing of the weave to the surface. One way to mitigate it from happening is to get a lot of heat on it after glassing to help shrink the Min Wax and primer before painting.
The only thing I would do different is use .5 oz cloth. .75 is a little more than you need and the weave is harder to fill, but you will be fine, just have more patience filling the weave.
12-20-2015 | 06:36 PM
#49
Senior Member
Gary,
I would say white primer such as Klass Kote is an excellent undercoat for light colors on top. But use grey if the colors are dark. Silver covers amazingly well and results in a very even color to shoot top coats over. It also can be used as a highlighter of any surface flaws. Repair prior to top coats is the simplest way to do it.
silver prior to yellow on my wing project resulted in about 15 - 20 gram weight gain per panel which is for yellow, is not bad. I don't think I'll do yellow base again


