


Vortex F3A build thread

 09-26-2019, 01:28 PM
#102

Really nice to see it in final shape. I didn't see that much sweep in the vertical from early depictions...looks very cool. You know, with that degree of perfection in the balsa skin work and knowing you're going to cover all surfaces, you really should consider various colors of transparent film. When she looks that good naked, why put clothes on her.
09-26-2019, 11:54 PM
#103
Thread Starter
Thanks a lot guys.
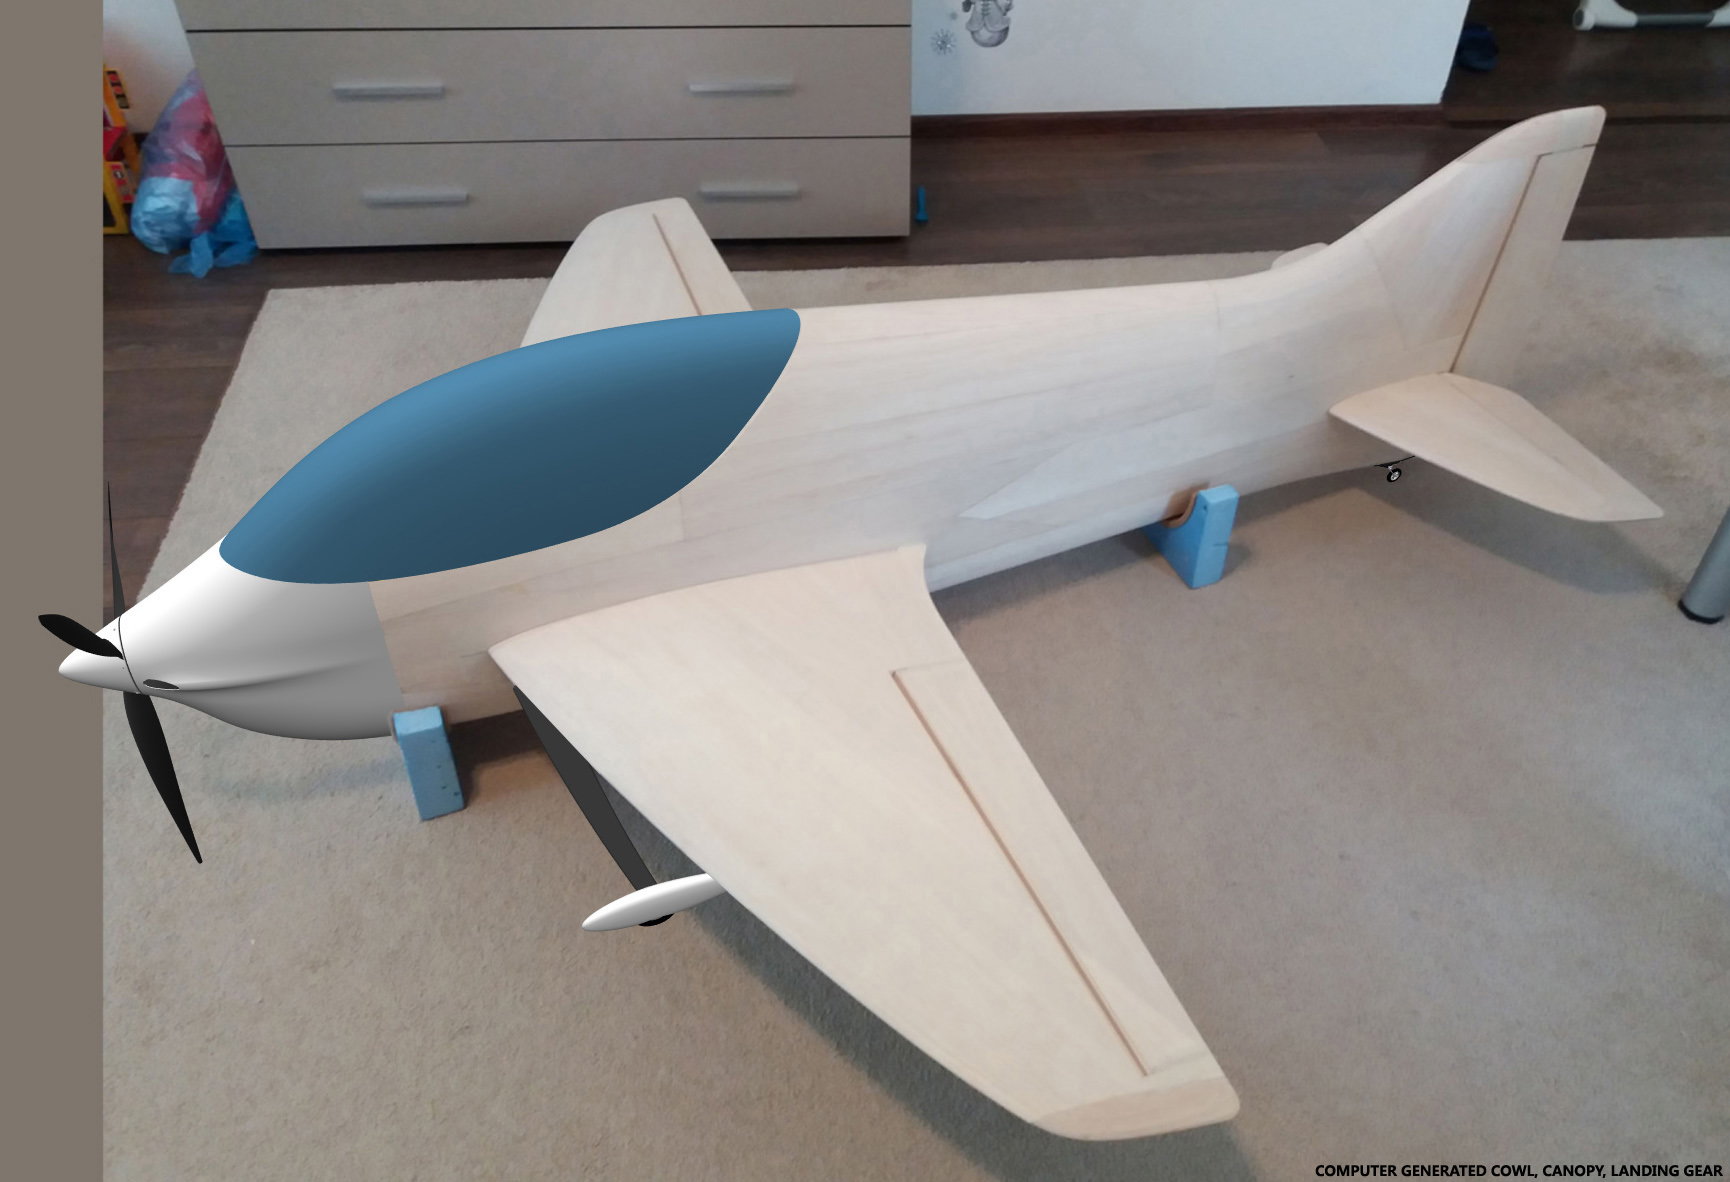
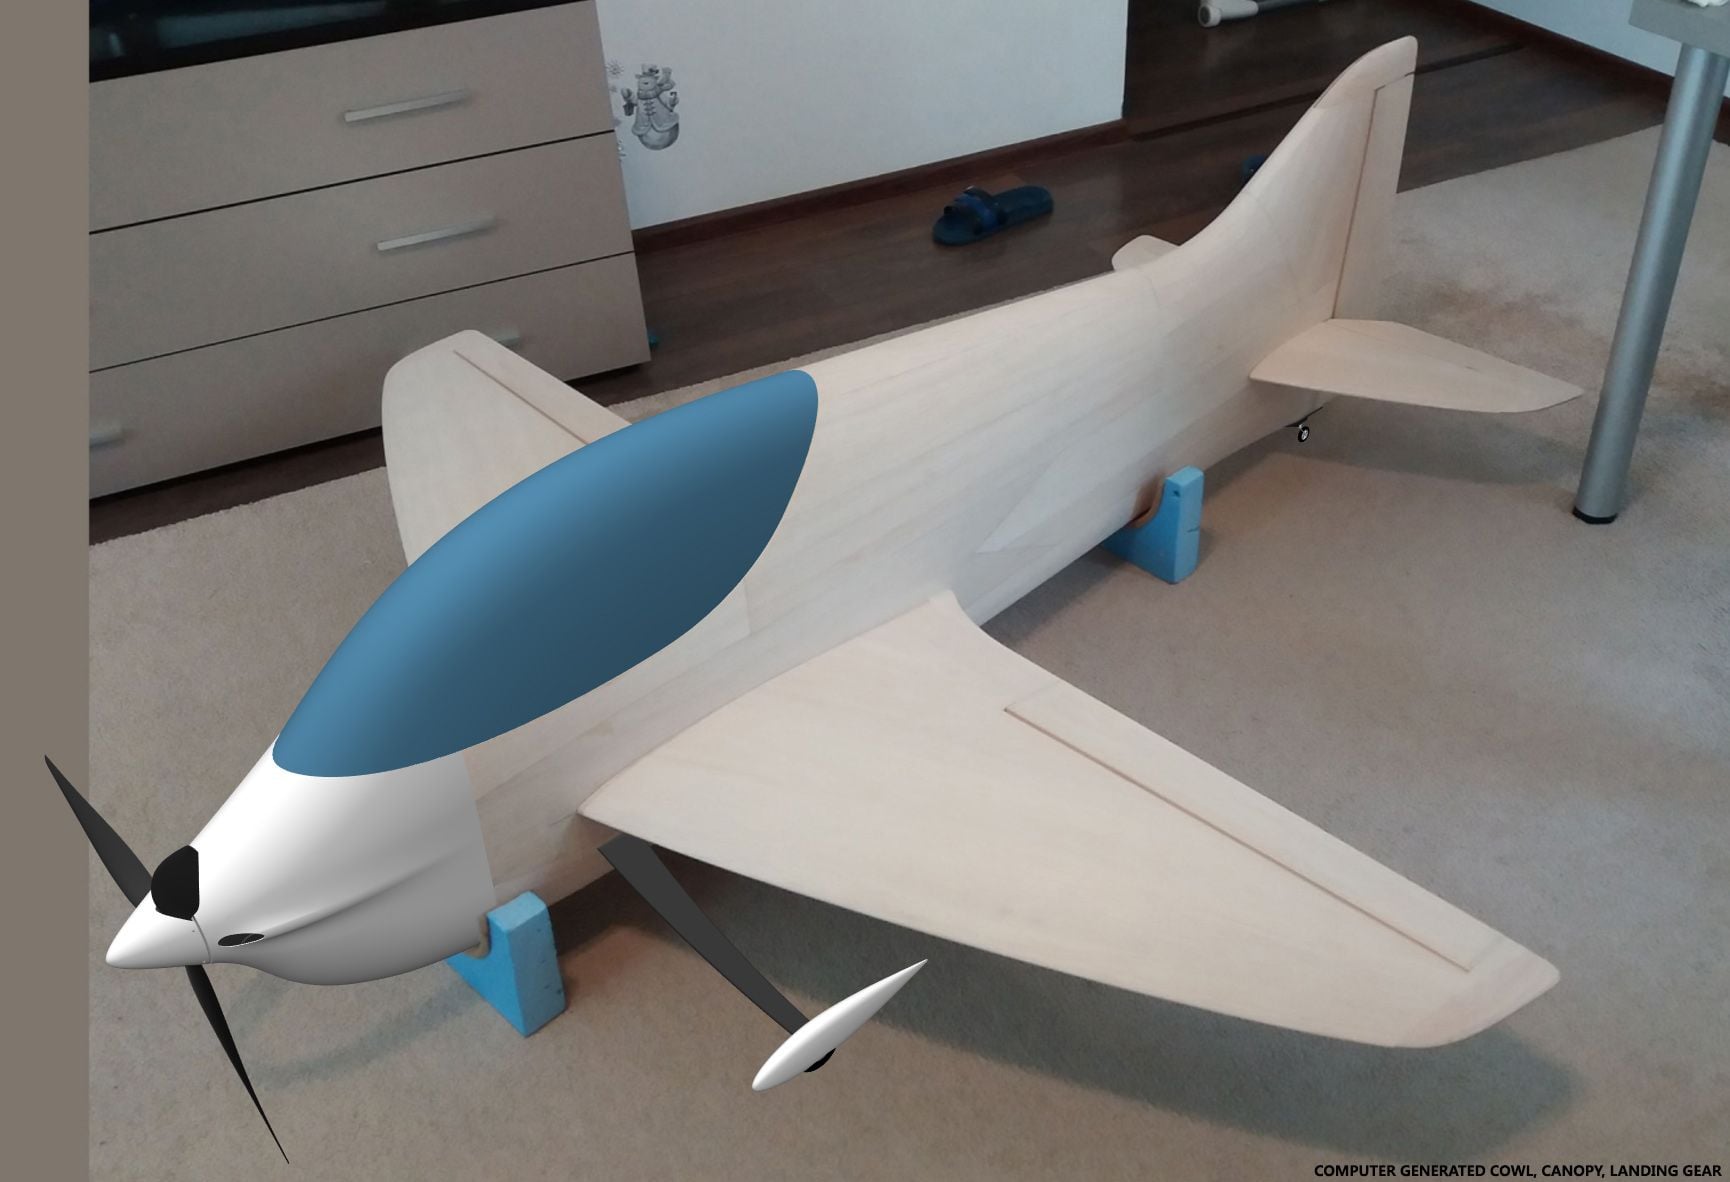
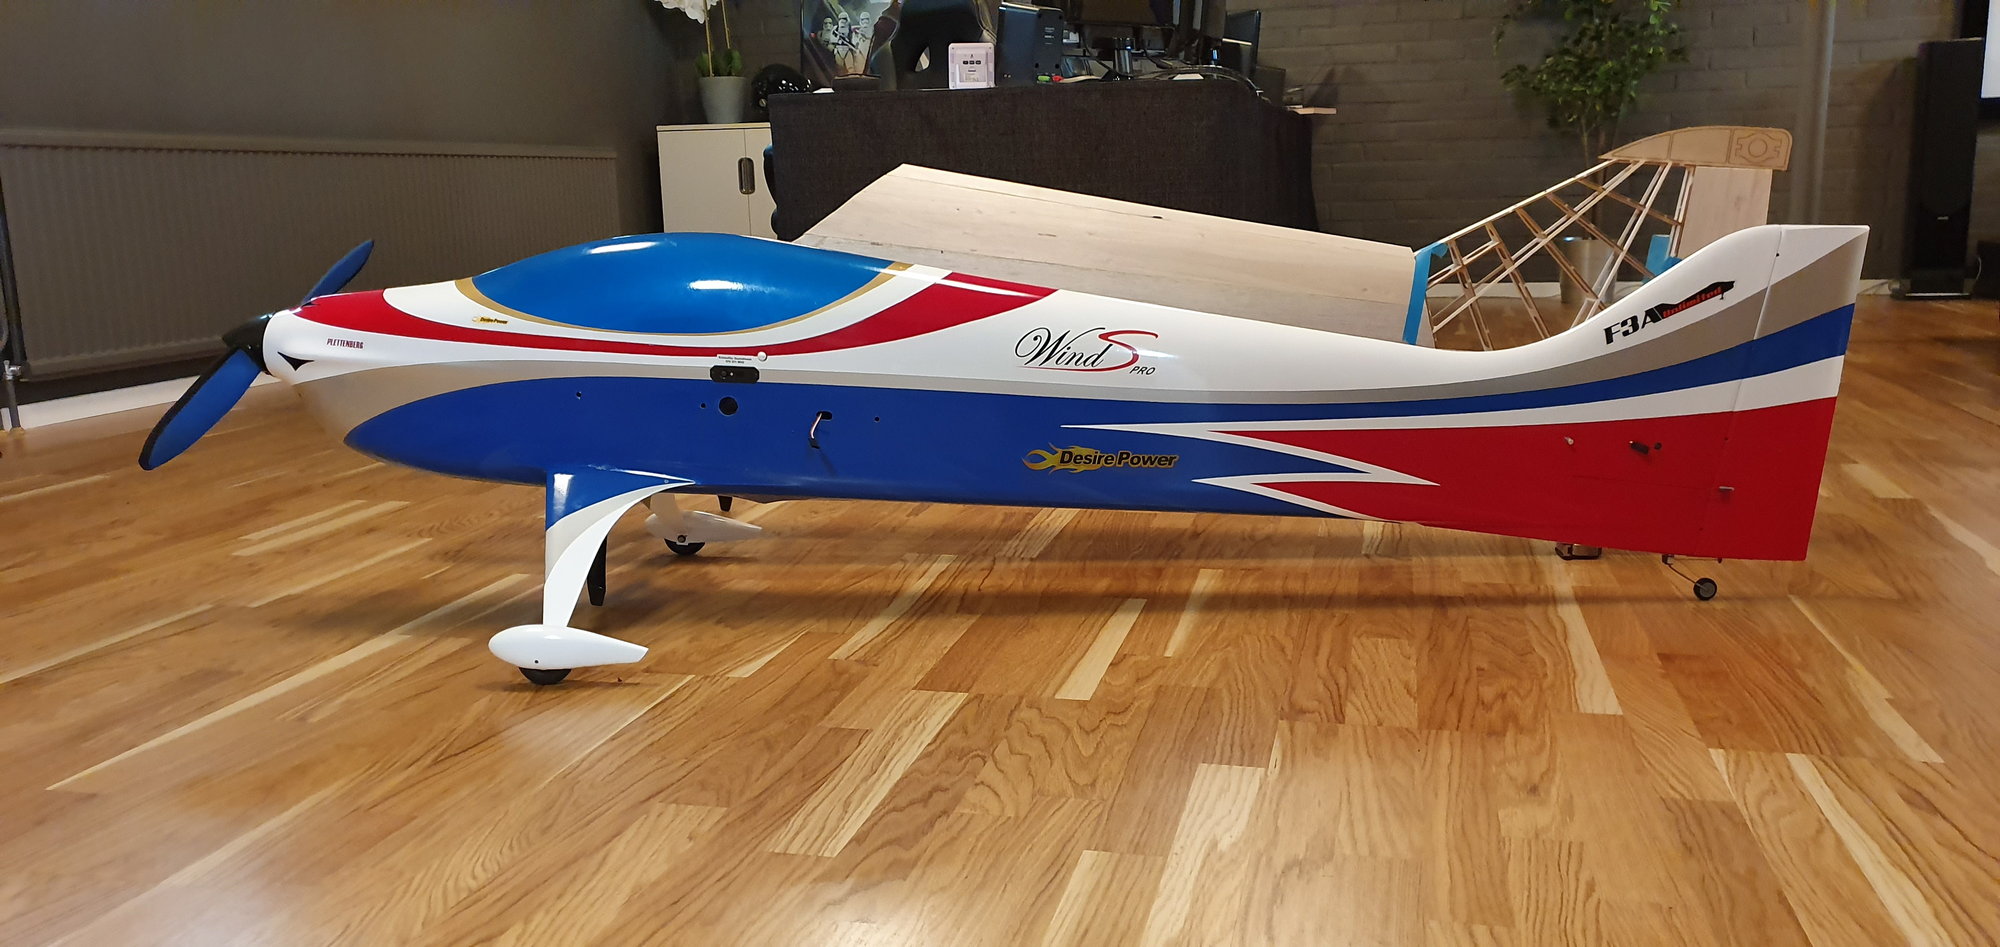
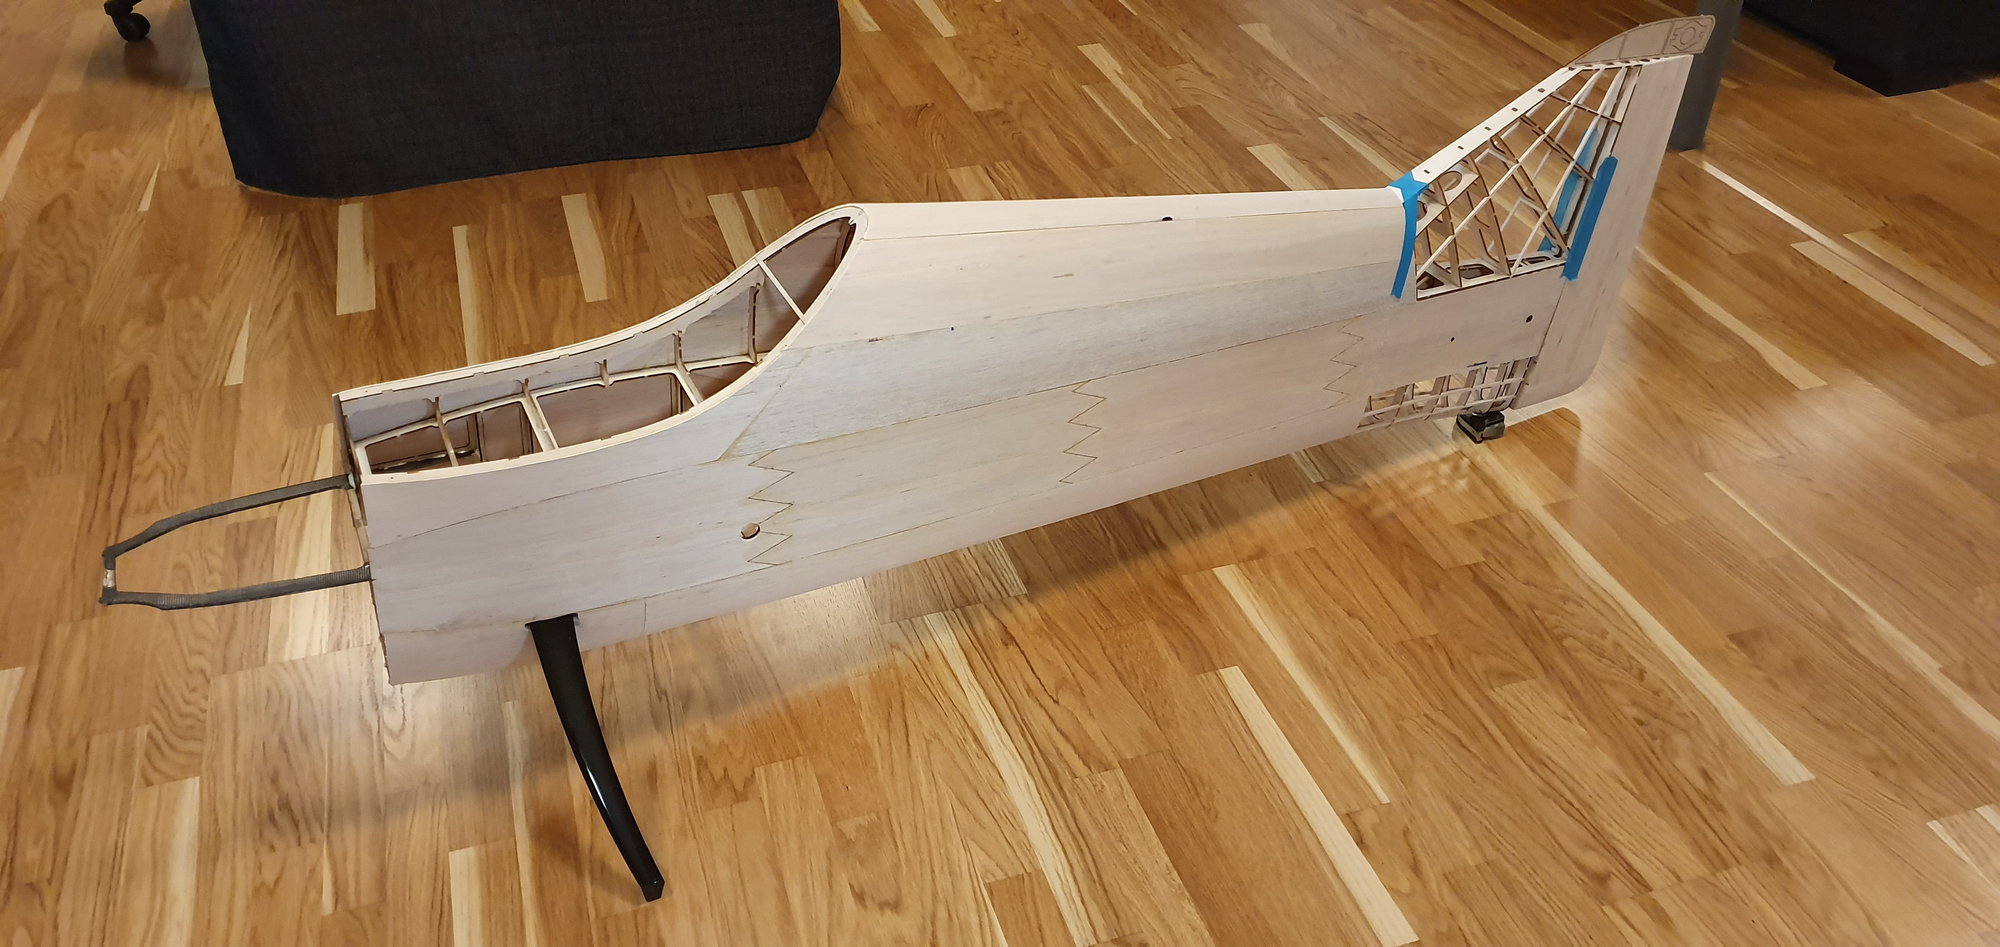
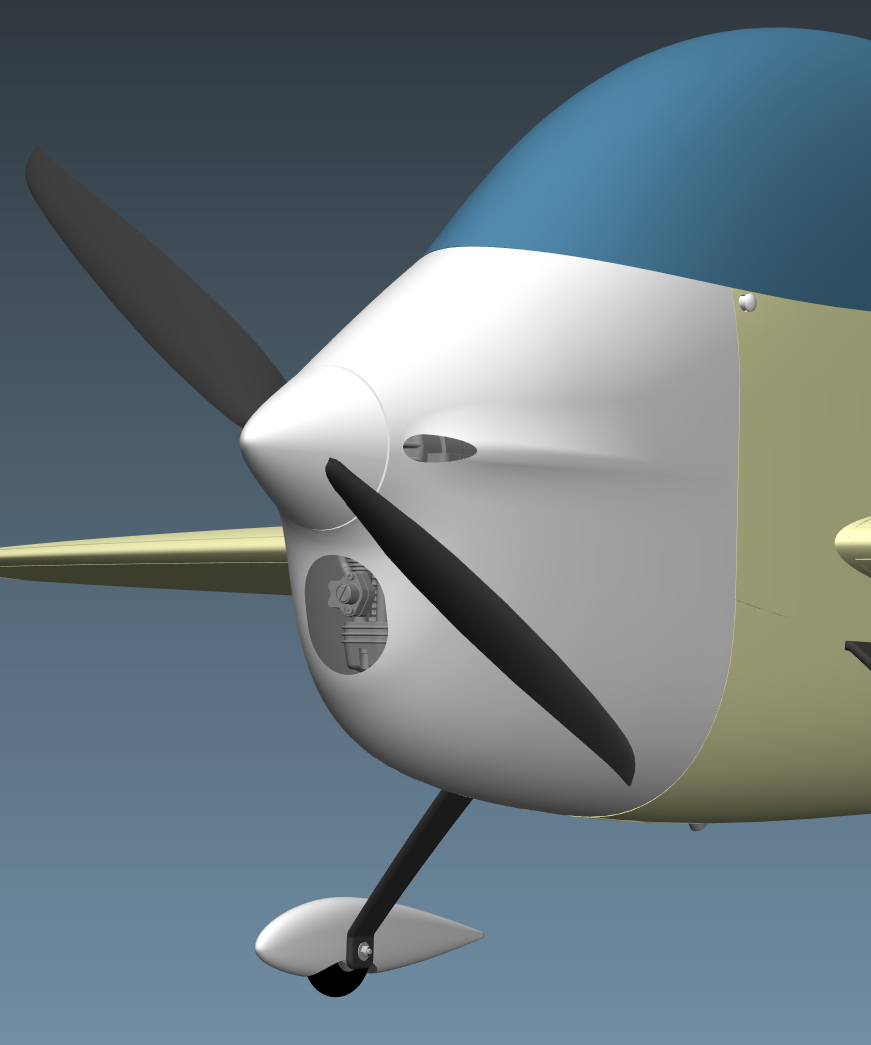
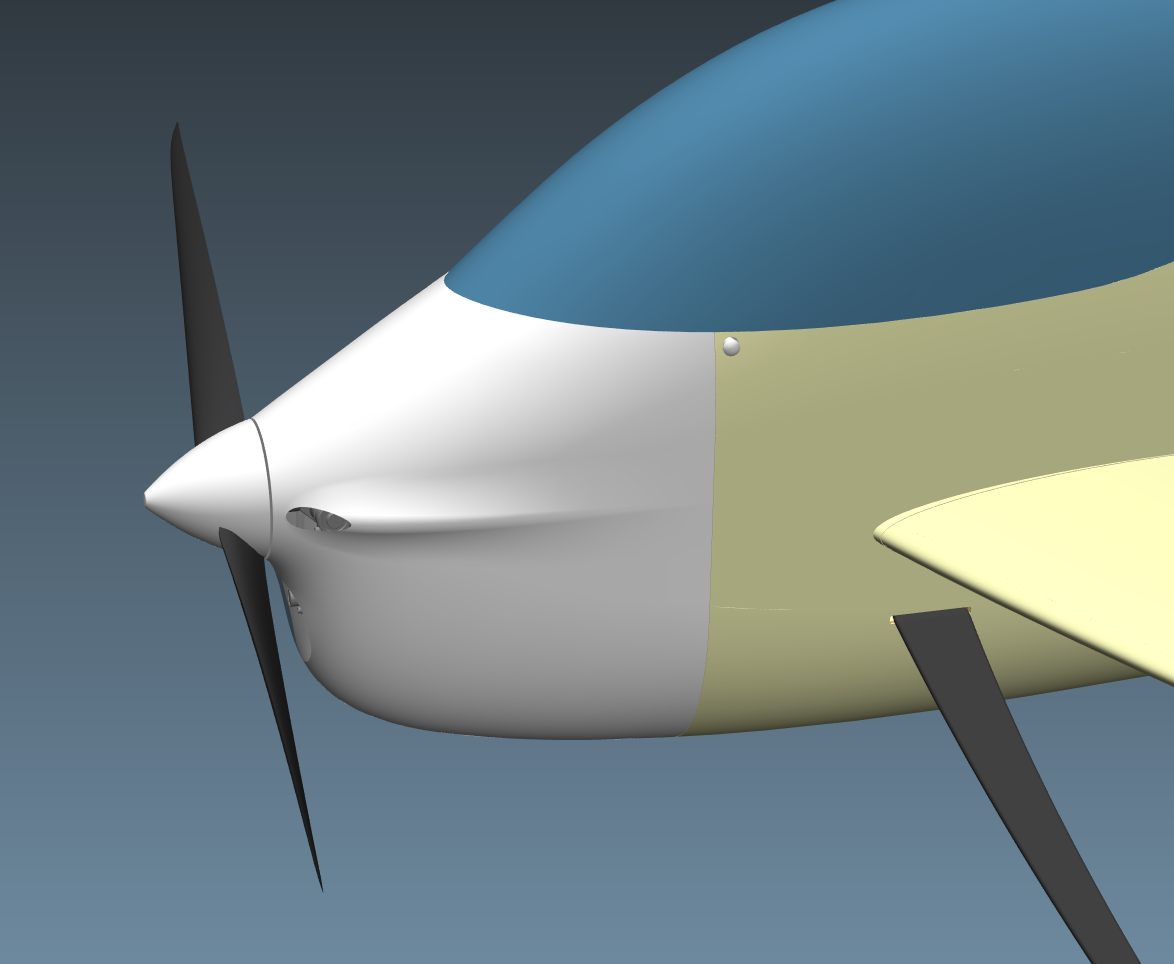
From the pictures it was difficult for me to imagine how it will look like in the end, so i used the images posted above as background in my CAD software and by carefully matching the camera angles and field of view, i managed to add the computer generated cowl, canopy and landing gear.
The camera lens distorts the proportions quite a bit so in real life the front end is not so large compared to the tail. The sweep in the vertical tail is also an effect of the camera lens perspective, in reality the trailing edge of the rudder is perfectly vertical. The CAD images from the first post in this thread should give a much better impression of the shapes and proportions because the camera lens has a much lower field of view (less perspective distortion).
Unfortunately this is as far as i could get with the Vortex project before moving, so it will take a while before i can get back to it but i will continue to post the rest of the building instructions using CAD images.
Last edited by Alex Voicu; 09-27-2019 at 12:09 AM.
09-27-2019, 05:30 PM
#105
My Feedback: (6)

Join Date: Feb 2003
Location: Grand Junction, Colorado
Posts: 1,484
Likes: 0
Received 4 Likes
on
4 Posts
The plugs are almost finished and the the molds should be done in about week. Most that have ordered want contest balsa and I'm just waiting for it to be delivered. I should have it all coming together in a week or so.
Last edited by frequent flyer; 09-27-2019 at 05:37 PM.
09-28-2019, 09:15 AM
#106
Hey Don. I've not seen good old red nitro glazing putty for twenty years, LOL. Brings back memories, surprised they still make the stuff. Not picking at you as it's perfectly fine for such an applications. I'm wondering, have you eliminated the cooling fairings, leaving these up to the individual modelers to fashion as they like? Also, is the final choice to go with zero thrust offset and leave any changes to that for the individual modelers as well? Thanks, Ted.
09-28-2019, 09:22 AM
#107
Hey Alex. We'll miss "The Alex's Vortex Show" till the new fall season debuts, same channel, same time. I would imagine the characters will remain and there will be outdoor filming scenes as well. It's been the most exciting forum for awhile, heh, heh. Good luck with your move, Ted.


The following users liked this post:
robin24 (04-26-2020)
10-01-2019, 02:34 PM
#112
My Feedback: (6)
Join Date: Feb 2003
Location: Grand Junction, Colorado
Posts: 1,484
Likes: 0
Received 4 Likes
on
4 Posts
I've made , bought and ordered everything for the kits. I have the landing gear, wing tubes tubes, stab tubes in stock. I ordered as much contest balsa as all my suppliers had and I'm waiting for it to arrive. I'm still working on the price there are a lot of sheets that go into cutting everything and I don't want to miss anything when I set the price.
10-01-2019, 10:55 PM
#114
Thread Starter
10-04-2019, 09:08 AM
#115
I've made , bought and ordered everything for the kits. I have the landing gear, wing tubes tubes, stab tubes in stock. I ordered as much contest balsa as all my suppliers had and I'm waiting for it to arrive. I'm still working on the price there are a lot of sheets that go into cutting everything and I don't want to miss anything when I set the price.
 10-11-2019, 12:29 PM
#116
Junior Member
Join Date: Oct 2019
Posts: 1
Likes: 0
Received 0 Likes
on
0 Posts
Hi Alex,
really great design you did. I'd like to build one, too.
I plan to make the parts on a CNC drilling machine.
Would you be willing to share the original dxf files, so that I can create the input files for the drilling machine?
Cheers,
Ro
really great design you did. I'd like to build one, too.
I plan to make the parts on a CNC drilling machine.
Would you be willing to share the original dxf files, so that I can create the input files for the drilling machine?
Cheers,
Ro
10-11-2019, 11:57 PM
#118
Thread Starter
You can find the drawings in the first post in this thread: http://www.rcuniverse.com/forum/12531336-post1.html
You can also find the 3D models for reference in post #4.
Anyway, please read carefully this part of the post:
"All the major structural parts are found inside the �Laser Cutting Files� folder - I do not recommend cutting these parts on a CNC router! To ensure proper interlocking between parts, I used a small offset to compensate for the width of the laser beam. This offset is quite small for soft balsa or liteply parts (0.15mm) but it can be double for tough materials like the 3mm hard plywood. If you use a CNC router, you will have to sand off this small offset to make the parts fit."
 10-23-2019, 10:43 PM
#125
Thread Starter
The trailing edge is 8mm thick at the wing root and 5mm at the tip. If you want to make it thicker, you can simply cut the trailing edge to get the desired thickness, sand it and apply a 2-2.5mm balsa strip.