


Panel lines
 12-08-2012 | 11:37 AM
#1

Thread Starter

Joined: Dec 2011
Posts: 405
Likes: 0
Received 0 Likes
on
0 Posts
From: burlingtonontario, CANADA
Hi guys,
Ok; I am no expert , this is not a tutorial and by no means is this the only way to do it, but I like it.
Peter.
<br type="_moz" />
Ok; I am no expert , this is not a tutorial and by no means is this the only way to do it, but I like it.
Peter.
<br type="_moz" />
 12-08-2012 | 10:18 PM
#3

Thats intresting, it's hard to see how it's going to turn out at this stage. I'll look foward to seeing the finished productand your right there are several ways to do that.
12-08-2012 | 11:01 PM
#4

My Feedback: (3)
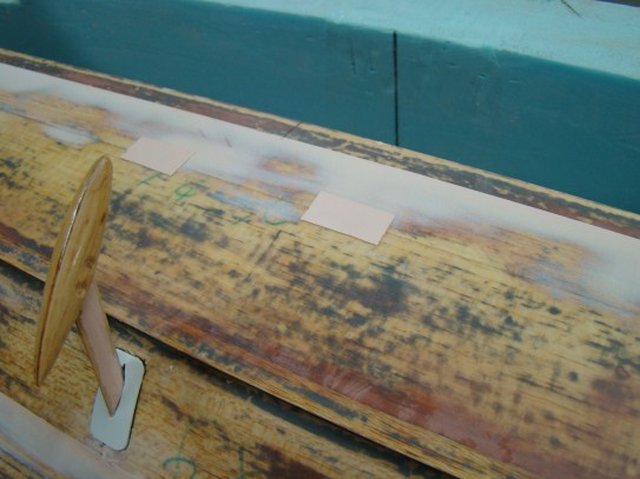
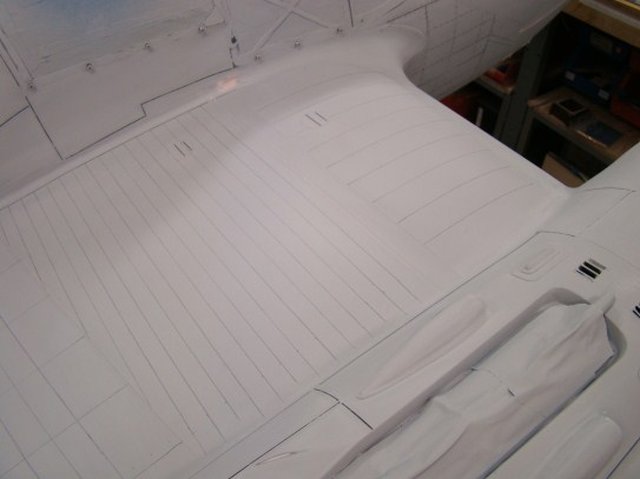
Yes this technique does work well when combined with panel lins and rivets. It should be employed on the right panels and parts of a plane to replicate raised panels. Typically panels assembled on wing ribs are even in height.
At this stage if you striped a panel line with anything from pinstripe tape to fishing line you can build up the other panel edge like youve done so far. This will result in depressed looking panels that span a structure underneath. Then add rivets and the job will be impressive.
Cool work so far! Ive done this before on older scale helicopter master models and the effect is realistic.
12-09-2012 | 03:42 AM
#5
Text about panel lines and rivets, with a lot of pictures, you can find here...
http://www.rcuniverse.com/forum/m_11133554/tm.htm
Regards
Mirce
http://www.rcuniverse.com/forum/m_11133554/tm.htm
Regards
Mirce
12-09-2012 | 05:01 AM
#6
Thread Starter
Joined: Dec 2011
Posts: 405
Likes: 0
Received 0 Likes
on
0 Posts
From: burlingtonontario, CANADA
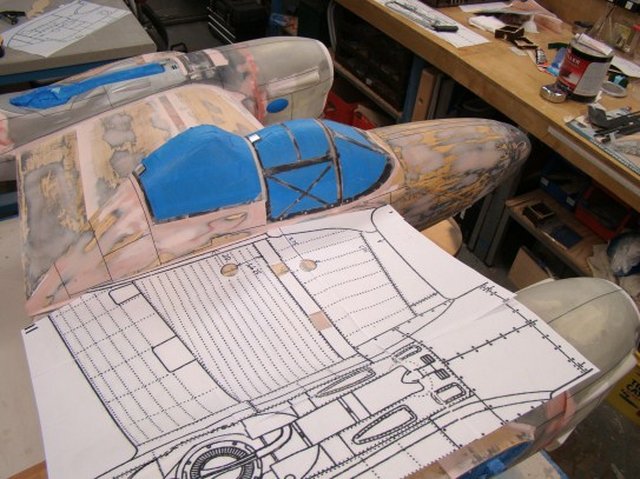
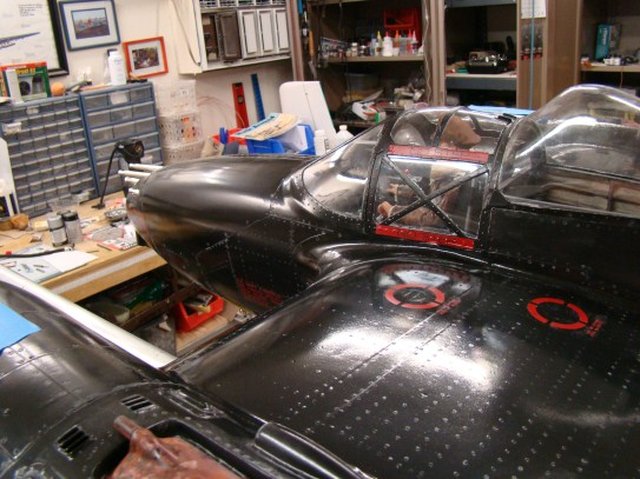
Fuselage in primer with rivets shows finished product.
Flush panel joints on front half of fuselage are done using same technique back to back leaving small .015" gap.
Joint is then pre-shaded using fine tip marker which will bleed through.
Peter<br type="_moz" />
Flush panel joints on front half of fuselage are done using same technique back to back leaving small .015" gap.
Joint is then pre-shaded using fine tip marker which will bleed through.
Peter<br type="_moz" />
12-09-2012 | 05:06 AM
#7
Thread Starter
Joined: Dec 2011
Posts: 405
Likes: 0
Received 0 Likes
on
0 Posts
From: burlingtonontario, CANADA
Hi Noah,<div>
</div><div>Long time, wacha working on? You all moved in or is it painting time?</div><div>
</div><div>Peter
<div>
</div></div>
</div><div>Long time, wacha working on? You all moved in or is it painting time?</div><div>
</div><div>Peter
<div>
</div></div>

 12-09-2012 | 10:32 AM
#10
My Feedback: (60)
I use the same method for overlapped panels and the results are worth the effort. I do use electrical tape instead of paper based masking tapes as the electrical tape will go around curves and does not disentegrate when wet sanding which I prefer to dry sanding. The hardest part of the process is often just figuring out in what order to proceed with application of the panels and then not accidentally building up on the wrong side!

 12-10-2012 | 03:26 AM
#12
Thread Starter
Joined: Dec 2011
Posts: 405
Likes: 0
Received 0 Likes
on
0 Posts
From: burlingtonontario, CANADA
Hey G-pete looking good.
Good Idea using filler for shaped non-functioning hatches.
For functioning doors and hatches I like to use aluminum (maintains it's shape).
For fixed (non operating hatches) I use .020" thick plastic.
Peter<br type="_moz" />
Good Idea using filler for shaped non-functioning hatches.
For functioning doors and hatches I like to use aluminum (maintains it's shape).
For fixed (non operating hatches) I use .020" thick plastic.
Peter<br type="_moz" />
12-10-2012 | 04:35 AM
#13
My Feedback: (15)
Looking so nice, Peter!
Nothing happening down here... just working hard, waiting for the house to be finished. Hopefully we'll move just after the first of the year. Nice big work space in the garage awaits my Avenger and Tigercat (and I picked up a 35% Yak this fall).
I have a Ziroli Mustang that I'll probably start working on once we're all moved in and settled.
Can't wait to see the rest of the Avenger come together!
Noah
12-10-2012 | 04:05 PM
#14
Thread Starter
Joined: Dec 2011
Posts: 405
Likes: 0
Received 0 Likes
on
0 Posts
From: burlingtonontario, CANADA
Thanks Noah.<div>
Hope you don't have to wait too long for the house, we had to wait two years (bought from a builder).
</div><div>I have seen some of your flights on you tube , you fly very well.</div><div>I will have to get you to come up here and teach me how to fly this beast ! </div><div></div><div>Peter</div><div></div><div></div>
Hope you don't have to wait too long for the house, we had to wait two years (bought from a builder).
</div><div>I have seen some of your flights on you tube , you fly very well.</div><div>I will have to get you to come up here and teach me how to fly this beast !
</div><div></div><div>Peter</div><div></div><div></div>
12-13-2012 | 06:04 AM
#15

Joined: Mar 2002
Posts: 1,013
Likes: 0
Received 0 Likes
on
0 Posts
From: Smithfield,, VA
ORIGINAL: peter w h
Hi guys,
Ok; I am no expert , this is not a tutorial and by no means is this the only way to do it, but I like it.
Peter.
<br type="_moz" />
Hi guys,
Ok; I am no expert , this is not a tutorial and by no means is this the only way to do it, but I like it.
Peter.
<br type="_moz" />
I'm interested in the BLAZEGLAZEyou used. Where did you find it? It may be under a different name here in the States.
Thanks,
Dash
12-13-2012 | 07:39 AM
#17
Joined: Mar 2002
Posts: 1,013
Likes: 0
Received 0 Likes
on
0 Posts
From: Smithfield,, VA
I looked all over their web site and could not find the Blaze Glaze.. The link you gave me took me to a two part epoxy filler in two small plaztic jars.
Is the Blaze Glaze a laquer based filler? I may already have something similar.
Thanks,
Joe
Is the Blaze Glaze a laquer based filler? I may already have something similar.
Thanks,
Joe
12-13-2012 | 08:03 AM
#18
Thread Starter
Joined: Dec 2011
Posts: 405
Likes: 0
Received 0 Likes
on
0 Posts
From: burlingtonontario, CANADA
<div>Most CARQUEST stores have it.
</div><div>Here it is, it is not laquer base it uses hardener like regular body filler.
Check under USC products, Blaze Glaze #26116</div><div></div><div></div>http://www.autobodytoolmart.com/usc-blaze-glaze-finishing-putty-p-19176.aspx<div></div><div>Peter
<div></div><div></div><div></div><div></div></div>
12-13-2012 | 09:45 AM
#20
Joined: Mar 2002
Posts: 1,013
Likes: 0
Received 0 Likes
on
0 Posts
From: Smithfield,, VA
That is it. Ididn't realize it was a two part product. And you say it sands very easily? I almost hesitate to use an epoxy or polyester product over balsa, as I ten d to sand down the surrounding balsa trying to sand down the filler. It should work well on a glassed surface.
Thanks,
Dash
Thanks,
Dash
 12-13-2012 | 06:59 PM
#24
Senior Member
My Feedback: (2)
Joined: Mar 2003
Posts: 129
Likes: 0
Received 0 Likes
on
0 Posts
From: Avilla , IN
I have had good results using Bondo brand professional finish glaze and also 3M Piranha Putty both are "2K"(2 part) products, used to build up raised panels both are easy sanding as long as mixed well with correct ratios
Question with the 1/64 tape method what is the correct type of tape i see CHARTPAK brand offer both a Crepe type or a Matte type with the matte stuff about +$2 USD difference in price. i guess I'm a cheap skate but if the cheap stuff will work, why not.
Question with the 1/64 tape method what is the correct type of tape i see CHARTPAK brand offer both a Crepe type or a Matte type with the matte stuff about +$2 USD difference in price. i guess I'm a cheap skate but if the cheap stuff will work, why not.
12-13-2012 | 07:33 PM
#25
Joined: Mar 2002
Posts: 1,013
Likes: 0
Received 0 Likes
on
0 Posts
From: Smithfield,, VA
I think I have always used the Crepe type. The problem with other products or types, is you have to remove the tape after you have sprayed your primer. Tape that is too thin or weak will break and could be difficult to get out of your primer.
Dash
Dash


