


G&L 1/5 DHC chipmunk - diary of a build.


 10-14-2014, 12:55 PM
#927


Although I may have some relief that might help out. When Jim Buzzeo and I cleaned out Minnflyer's (may he rest in peace) shop earlier this year Minnflyer had build a sanding block that you hook up to your shop vac and sand on. When I get to the point of sanding on my next build I'm going to try sanding on that and see how it does. If it keeps the dust I might be able to keep my projects on track in the future!!!!

Ken
 10-15-2014, 02:05 AM
#930

What stalls my builds is repetition. When I build something from scratch and design it, like custom hinges or control surfaces. I spend a lot of time building one wing panel then I have to repeat it for the other panel, I stall at that point. I now try to do both at the same time, seams to help the "stall"
I too am a buildahalic!
TB
I too am a buildahalic!
TB
Last edited by TonyBuilder; 10-15-2014 at 02:58 PM.
10-31-2014, 10:03 PM
#931


Join Date: Apr 2011
Location: Banjup . , AUSTRALIA
Posts: 9
Likes: 0
Received 0 Likes
on
0 Posts
Hello TonyBuilder or Gooday Mate !
I congratulate you on your excellent build of the Chipmunk , Nice job.
I have a black horse Chipmunk myself with a Moki 2.10 in it. Would I be eligible for the Chipmunk Brotherhood?
I have been reading your post number 250 dated 06-30-2014 on page 10 and it was nice to see that you mention of the agriculture conversion of the chipmunk that was done in Australia by Sasin - Aerostructures , the S A 29 Spraymaster.
I would like to let you know I was employed by Mike Sasin in my early days as an up coming aircraft engineer and did a lot of work on the chipmunk conversion, manufacturing, refurbishment and overhaul of the airframe. The whole airframe internal and top deck was removed, fiberglass hopper 55 gallon/200 liters made and installed where the front seat was, new swing swing rudder pedals with toe brakes made and installed, rear seat redesigned with crash absorbing foam seat/back rest to prevent severe back injury in a crash, was raised 11" for better visibility over the nose.
Rollover truss, windscreen installed, new redesigned instrument panel and rear sliding canopy made, battery box installed behind engine firewall, dorsal fin and anti spin strakes made and installed, a new bulkhead made to mount the leaf spring scott tail wheel assembly.
Goodyear wheels and disc brakes fitted plus a lot of other mods done. In total three SA-29 where built VH- SJD,VH-BCA,VH-GEB.


The first fuselage did not fly, was used as a tooling jig to make the components for the flying aircraft.
Mike Sasin did a lot of flight testing to satisfy the civil aviation Athority to get the aircraft approved and certified.
The colour schemes VH-SJD was red and white, VH-BCA, VH-GEB was blue and white.
This takes me back a lot of years as I am retired. I also keep in contact with old boss Mike Sasin.
The sad part about this was VH-SJD crashed beyond repair but the pilot survived some back injury he is ok, I keep in touch with him. ( run out of fuel on take off, tried to turn back to land ).
VH-BCA has been restored to a normal Chipmunk except for the tail wheel.
VH-GEB has been sold to USA and modified for aerobatics as N7DW.
Best regards,
Eddy P51


( image source 1 )
( image source 2 )
( image source 3 )
I congratulate you on your excellent build of the Chipmunk , Nice job.
I have a black horse Chipmunk myself with a Moki 2.10 in it. Would I be eligible for the Chipmunk Brotherhood?
I have been reading your post number 250 dated 06-30-2014 on page 10 and it was nice to see that you mention of the agriculture conversion of the chipmunk that was done in Australia by Sasin - Aerostructures , the S A 29 Spraymaster.
I would like to let you know I was employed by Mike Sasin in my early days as an up coming aircraft engineer and did a lot of work on the chipmunk conversion, manufacturing, refurbishment and overhaul of the airframe. The whole airframe internal and top deck was removed, fiberglass hopper 55 gallon/200 liters made and installed where the front seat was, new swing swing rudder pedals with toe brakes made and installed, rear seat redesigned with crash absorbing foam seat/back rest to prevent severe back injury in a crash, was raised 11" for better visibility over the nose.
Rollover truss, windscreen installed, new redesigned instrument panel and rear sliding canopy made, battery box installed behind engine firewall, dorsal fin and anti spin strakes made and installed, a new bulkhead made to mount the leaf spring scott tail wheel assembly.
Goodyear wheels and disc brakes fitted plus a lot of other mods done. In total three SA-29 where built VH- SJD,VH-BCA,VH-GEB.
The first fuselage did not fly, was used as a tooling jig to make the components for the flying aircraft.
Mike Sasin did a lot of flight testing to satisfy the civil aviation Athority to get the aircraft approved and certified.
The colour schemes VH-SJD was red and white, VH-BCA, VH-GEB was blue and white.
This takes me back a lot of years as I am retired. I also keep in contact with old boss Mike Sasin.
The sad part about this was VH-SJD crashed beyond repair but the pilot survived some back injury he is ok, I keep in touch with him. ( run out of fuel on take off, tried to turn back to land ).
VH-BCA has been restored to a normal Chipmunk except for the tail wheel.
VH-GEB has been sold to USA and modified for aerobatics as N7DW.
Best regards,
Eddy P51
( image source 1 )
( image source 2 )
( image source 3 )
11-13-2014, 07:25 AM
#932
TB, did you see this thread on the other board(Link below)? It made me think of your cowling.
Mike
http://www.rcgroups.com/forums/showthread.php?t=2277006
Mike
http://www.rcgroups.com/forums/showthread.php?t=2277006
11-14-2014, 08:36 PM
#940
I have found if you use a short section of 1/4" hose ( 8-10' is good ) called a whip and put your regulator between it and the feed hose which should be 5/16" and not longer than 25', if longer then the feed hose should be 3/8". This prevents the pressure drop (serge) at the gun. A small gun regulator will work also, I use both, the one at the gun is great for quick pressure changes if you change the spray fan while painting.
Leroy
Leroy
11-17-2014, 07:49 AM
#941
Everyone talks how good is the klass kote paint and I don't doubt it. I don't know what I am doing wrong, but his is the result that I am getting (this is primer, but also had the same thing with colors).. can you please tell me wants is the issue (look at the picture to see the "dots")?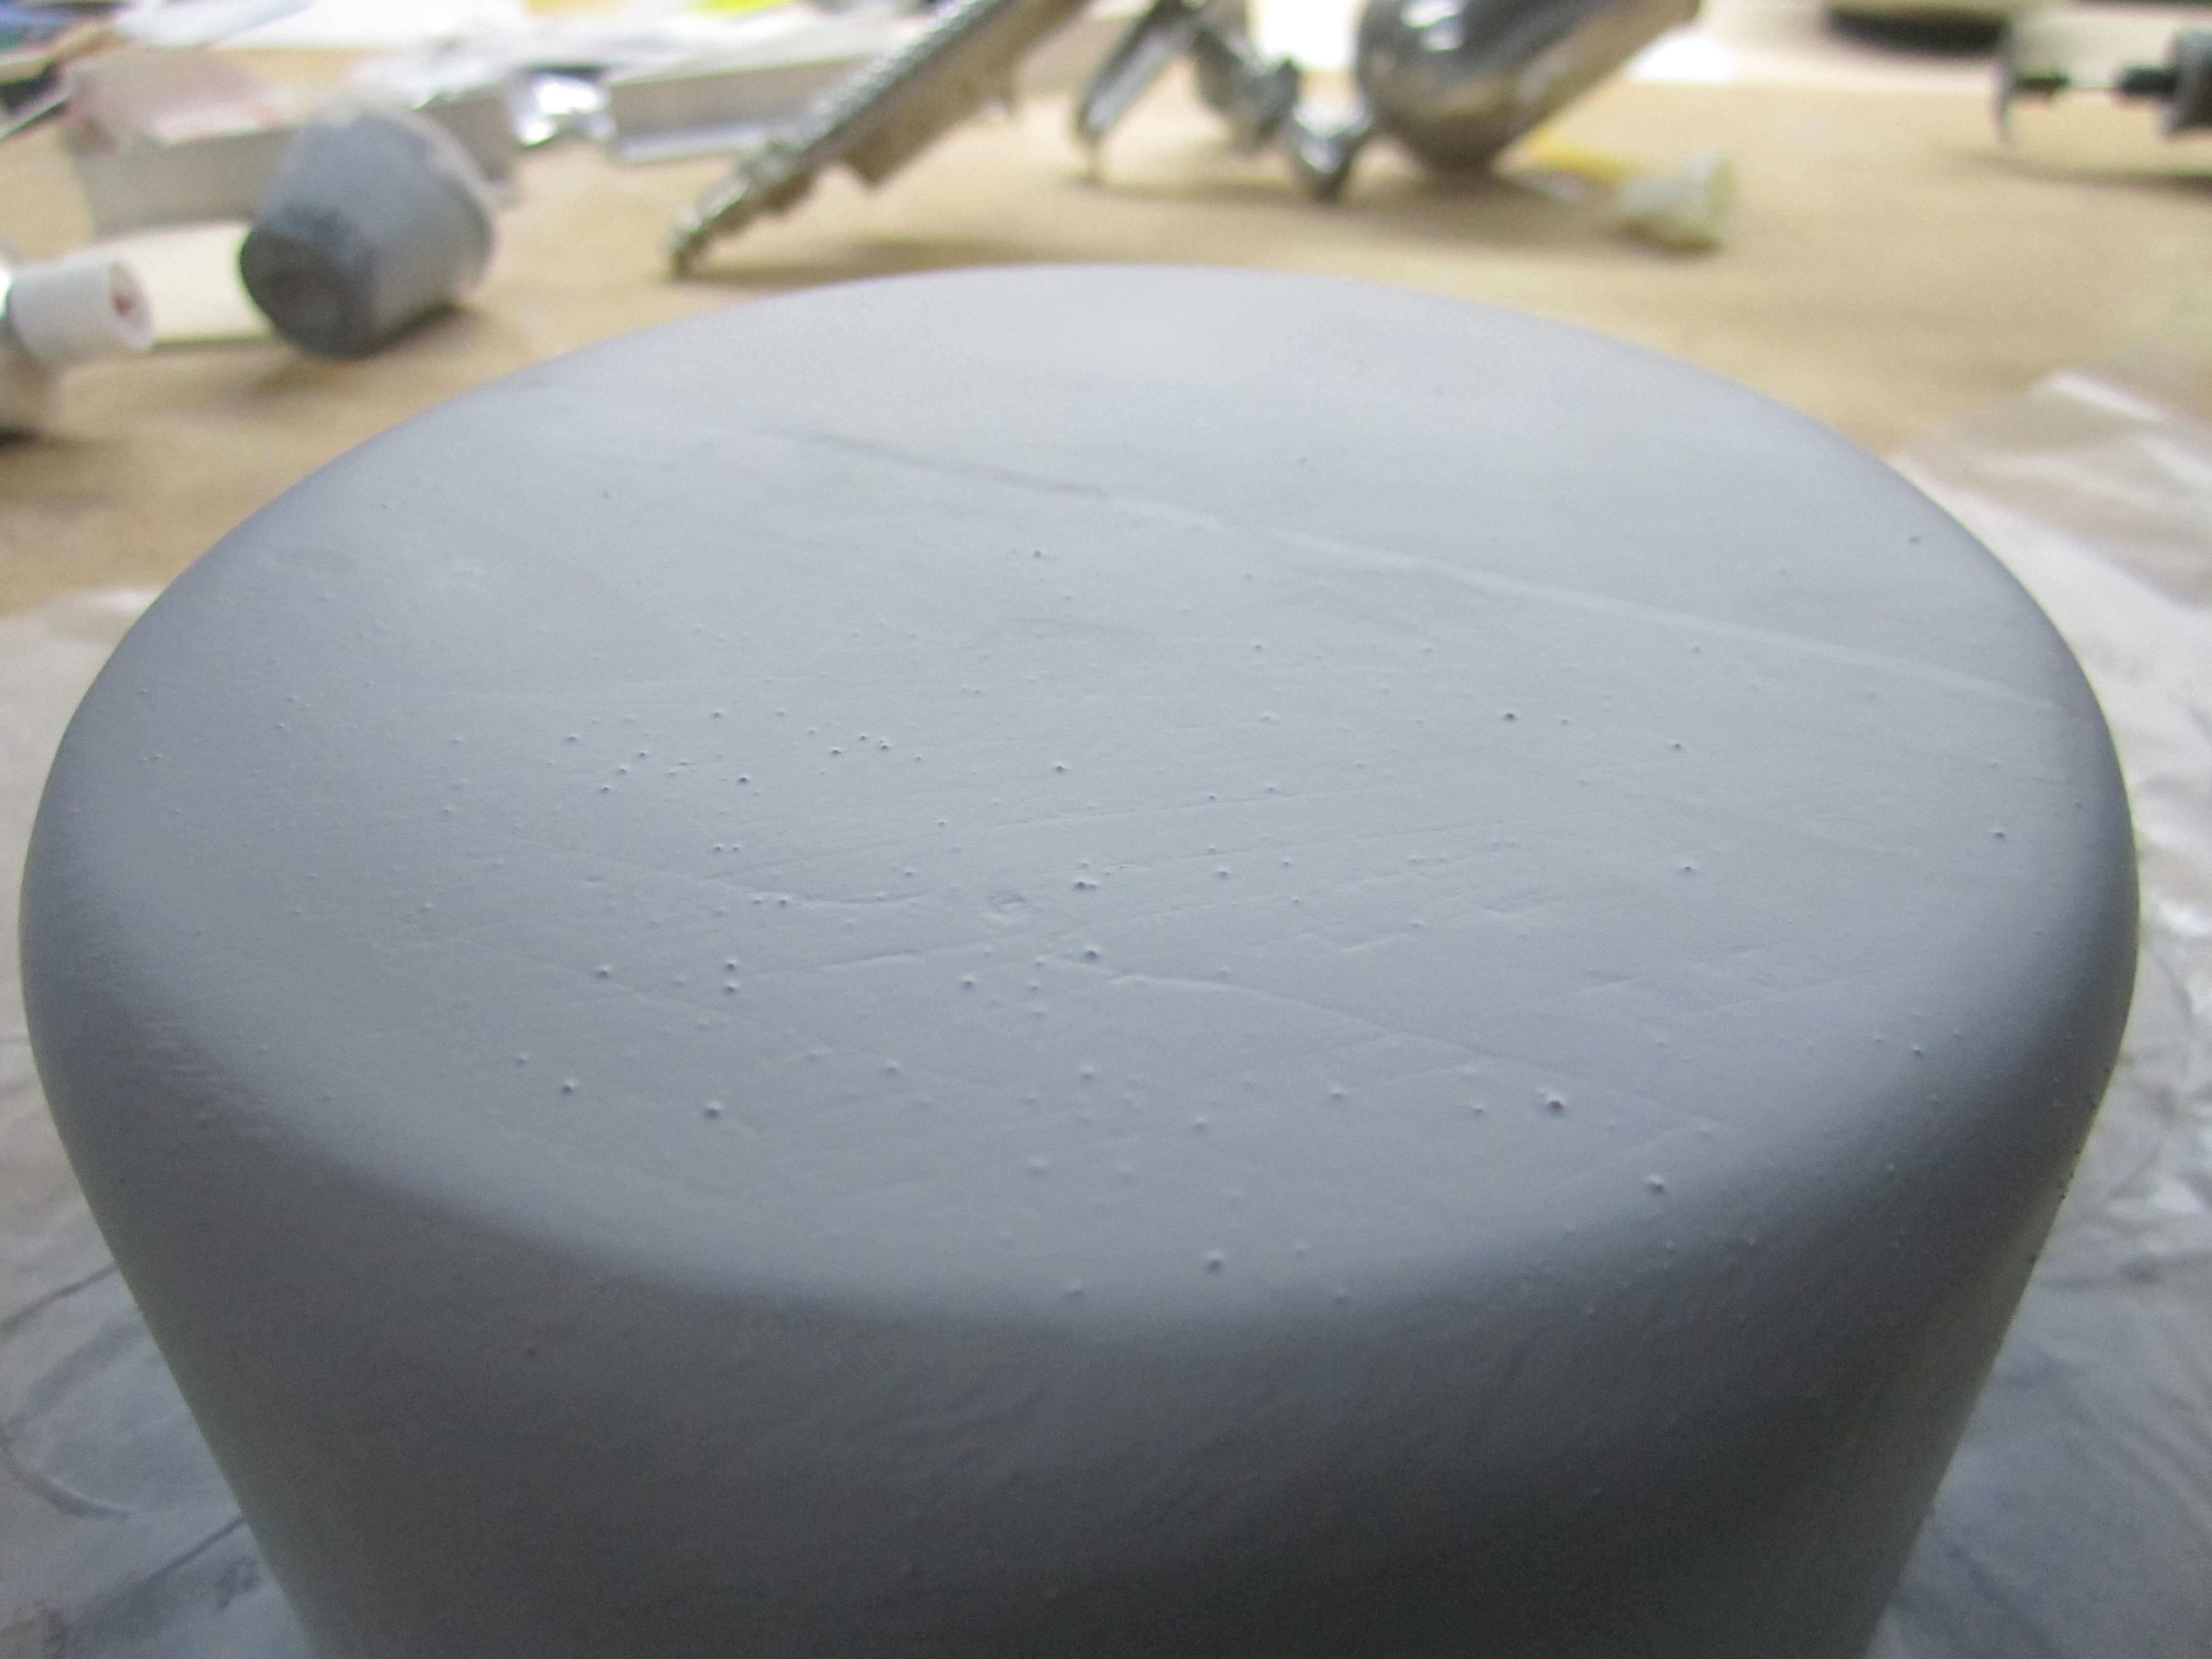
11-17-2014, 11:25 AM
#942
Banned
Everyone talks how good is the klass kote paint and I don't doubt it. I don't know what I am doing wrong, but his is the result that I am getting (this is primer, but also had the same thing with colors).. can you please tell me wants is the issue (look at the picture to see the "dots")?
What you see ( and we do ) is not likely to be due to the paint you use.
It appears to be drops of liquid paint dripping from the gun and is likely due to a lack of pressure at the gun nozzle; not enough atomization or the fluidity of the paint.
See if you can check and adjust the pressure or the dilution of the paint.
Is the surface vertical or horizontal when spraying ?
Zor
Last edited by Zor; 11-17-2014 at 11:29 AM.
11-17-2014, 12:06 PM
#944

Join Date: Sep 2006
Location: The Sunshine state, when it's not raining!
Posts: 8,131
Likes: 0
Received 2 Likes
on
2 Posts
Those look to be where particles were on the surface and the primer was sprayed to heavy, when both of those come together it creates what appears to be small air pockets that burst. Next go around make sure to tack rag it a second or two prior to spraying, use 30-35lbs pressure, and you may even need to thin the primer a tad.
11-17-2014, 12:50 PM
#945

Join Date: Jun 2012
Location: Bristol, CT
Posts: 4,002
Likes: 0
Received 0 Likes
on
0 Posts
Also, the biggest thing, that will save time and frustration, is practice. Preferably on a surface similar to what you want to spray. Experiment with different pressures and distances and find what works best. Good luck.
11-17-2014, 04:15 PM
#946
My primer went on smooth as silk. I do three or four thin coats. 15 psi is not enough pressure I would think. The primer/ paint dries fast so do a test piece and if it looks good go for it. The results should be present on your test piece immediately so just play with the pressure/ gun. Also you should be thinning the primer/ paint.
TB
TB
11-20-2014, 04:29 AM
#947

Everyone talks how good is the klass kote paint and I don't doubt it. I don't know what I am doing wrong, but his is the result that I am getting (this is primer, but also had the same thing with colors).. can you please tell me wants is the issue (look at the picture to see the "dots")?
Bob
