


Lets build a tank!!! The tamiya JS-2
 04-06-2015 | 06:06 AM
#126
what size pinion you thinking of moving to? And what size motor, 480? Stock tamiya pinion in a 9 tooth, if you go higher number of teeth you end speed will be higher and you'll also have to
window the motor mount screw holes since the larger pinion has now moved the motor further from the gear. I'm not sure what the IS-2 does out of the box but you can find a basic speed chart
on the BAT site which also gives the distance to run full throttle so you can do runs at home to check. Just look in the Intel section of the site.
http://www.bayareatankers.org/
 04-06-2015 | 06:39 AM
#127
Thread Starter
Senior Member
Joined: Feb 2015
Posts: 421
Likes: 0
Received 0 Likes
on
0 Posts
From: Quakertown PA
Well I'm not trying to get to a higher end speed. The 480's would be nice. basically I'm really just going to get the tank to high torque, to reduce the slowdown on hits, and keep the speed as close to scale as possible. I'll take a look at the site and get some times on speed down up to see where I am.
Raceeng18. I will post my findings for you to help with your decision on this matter as well. if nothing else it should give us some good info
Bill
Raceeng18. I will post my findings for you to help with your decision on this matter as well. if nothing else it should give us some good info
Bill
04-06-2015 | 08:46 AM
#128


Question Answers:
1. Suppressors are not required for the ETO Armor sourced motors that I used.
2. At the time of my various builds, the ETO Armor motors and Impact 8T pinion gear had been developed and recommended by ETO Armor for use at Danville and that is my understanding and still used today with no issues. I checked.
3. I have commissioned Daryl Turner to guide a Danville IR purposed rc tank "world class model" build, relying on his excellent recommendations, design, engineering and metal fabrication skills and that is my best research source for building IR legal AAF Museum fighters, plus a few other guys who also actually fight there.
3a. The gearboxes in my Danville JS-2 build are DT's "combat spec built gearboxes" which have been used by many guys and girls running at Danville for some time now.
4. Per James, the owner of my almost stock JS-2 Danville build (plus collecting some very high end Daryl Turner collaboration rc tank builds, including a KV-1, Tiger II and an Leopard 1A4, assembled and setup by me):
This is what he says about the JS-2, ETO Armor motors/8T Pinion Gear legal speed while running at Danville for almost 2 years now:
"Yes, no problems with that. It is not the fastest tank, but it is close to the real one in scale speed."
Look him up the next time you all are at Danville, he will happily show you his rc tanks and what makes them go and fight.
5. I live on the other coast and my rc tanks (for my use) are setup for charging across lawns and soft or drought hard dirt fields, like Kursk, during the Summer of 1943 (not Danville). So, the setup for my tanks includes ETO motors, Impact 8T Pinion Gears, a Daryl Turner gearbox mount brace (if available), removing and CA gluing the rotation and elevation units clutch gears and a metal elevation arm. Everything else in my rc tank build is OEM Tamiya out of the box including the tracks.
5. For comparison, below is a Tamiya legacy static kit converted to full option by Daryl Turner. It is a very fancy, high end, expensive Tiger II build setup purposed for AAF Museum, Danville IR fights using ETO black motors, Schumo gear reduction and Impact 8T pinion gears for scale speed and being able to maneuver after the 7th hit (LOL).
The Daryl Turner commissioned project is designed, engineered, fabricated hull and turret using all the bells and whistles, for sure: spring loaded return idlers, road wheel bearings, hull braces, gear box mount brace, Impact Metal Tracks & Early Drive Sprockets, ETO metal Porsche Turret Barrel, metal glacis plate braces and much more. I have found just asking the guys who participate at the AAF Museum Battles, when doing your build research for your Daniville rc tank, works pretty good. Anyway it is the t/c that wins battles, so I find they are pretty open about their IR tank build secrets.
Enjoy, John
Last edited by Pcomm1.v2; 04-06-2015 at 08:48 AM.
04-06-2015 | 11:41 AM
#129
Thread Starter
Senior Member
Joined: Feb 2015
Posts: 421
Likes: 0
Received 0 Likes
on
0 Posts
From: Quakertown PA
Thanks for the info Pcomm. No one had a brought their JS-2 at the last Danville meetup in March. Troy said he was going to bring his up so he could show me a thing or two with it. I'll probably get the motors from ETO, or Bob. Anyway I did my speed runs to figure out where the JS-2 sits as far as scalle speed. just for kicks I also did it with my Taigen M4A3 to see how close it was to scale speed out of the box as well.
On Brets (TheBennyB) advise i went to the following link which breaks it down very nicely to figure out scale speed.
http://www.bayareatankers.org/
Here are the results of the five speed runs
JS-2
10.93
10.65
11.48
11.21
10.98
With an average speed of 11.05. Now the motors have not been broken in yet. Also all runs were done on a 2s 2200 compact lipo.
Based on the calculation on the referenced site my stock JS-2 clocks in at roughly 24-25MPH scale speed with the actual speed of a JS-2 (according to wikipedia anyway) as 23MPH. This would put the tank within a 2MPH variance.
Now once the motors are broken in I expect to see a change in this number. Also since i was doing the time trial myself there is room for error on the times listed.
The Taigen Sherman ran on the following times.
12.70
12.46
12.33
12.20
12.08
Average time of 12.35. The actual speed (again from wikipedia) is 21MPH. With a 12.35 the Taigen Sherman has a scale speed of 21-22MPH.
So all in all the JS-2 runs a little fast for scale speed but it could just have been a number of variables that caused me to reach a speed of 24-25MPH.
If you think I messed up on this somehow please let m know.
Bill
04-13-2015 | 05:50 AM
#138
Wow, Tanker 10, you were on fire to finish this beast!!! Looks good!!! How long 4 or 5 days from start to finish?
04-13-2015 | 11:46 AM
#139


Joined: Oct 2014
Posts: 888
Likes: 0
Received 0 Likes
on
0 Posts
From: Roseville, CA
It was seven days. I'm retired, so there were a couple of 8 hour days devoted to the tank. Thanks for the compliment. Waiting for bearings from Hong Kong so I can get those installed. Going to see if Aber makes an antenna also.
04-13-2015 | 02:20 PM
#140
Thread Starter
Senior Member
Joined: Feb 2015
Posts: 421
Likes: 0
Received 0 Likes
on
0 Posts
From: Quakertown PA
Looks great. I hope to be able to post mine up as soon as I finish the paint. Currently testing a few different shades to figure out which one I want to go with. It's looking real good though. I;m surprised the bearing didn't get there already. Did you order from the same place I did?
Hey this thread is for all can't hijack a community thread
Bill
Hey this thread is for all can't hijack a community thread
Bill
04-13-2015 | 03:04 PM
#141
Joined: Oct 2014
Posts: 888
Likes: 0
Received 0 Likes
on
0 Posts
From: Roseville, CA
Looks great. I hope to be able to post mine up as soon as I finish the paint. Currently testing a few different shades to figure out which one I want to go with. It's looking real good though. I;m surprised the bearing didn't get there already. Did you order from the same place I did?
Hey this thread is for all can't hijack a community thread
Bill
Hey this thread is for all can't hijack a community thread
Bill
04-13-2015 | 03:22 PM
#142
Thread Starter
Senior Member
Joined: Feb 2015
Posts: 421
Likes: 0
Received 0 Likes
on
0 Posts
From: Quakertown PA
I just went with a little CA. I don't really expect to have to pull the wheels aprt a whole lot over the course of there use. Probably only one every couple of years. But i put just a few drops on to hold. For the sprocket covers I'm using some magnets to keep the covers in place. I can see taking off the sprockets more than taking the roadwheels apart. But a small and thin neodine magnet would work to hold the caps on. I also used them on the rear instead of the screws to hold the back of the upper hull on. I just put them together without the screw then used a little hot glue to attach. It works great.
Bill
Bill
04-13-2015 | 04:06 PM
#144
Thread Starter
Senior Member
Joined: Feb 2015
Posts: 421
Likes: 0
Received 0 Likes
on
0 Posts
From: Quakertown PA
By all mean i copied it from troy and a couple of the other guys. You can get the neodine magnets pretty cheap i think i got a pack of 100 for $5.00-$10.00 It wasn't enough for me to even note. just bum around ebay They come in all sizes Mine are to big for the roadwheels butwork for just about every else. I'll take some measurements for you and a pic or two for reference.
Bill
Bill
04-13-2015 | 04:27 PM
#145

Joined: Jan 2009
Posts: 1,567
Likes: 0
Received 0 Likes
on
0 Posts
From: King,
NC
I use the magnets to replace the screws holding the upper and lower hulls together. It makes it a whole lot easier to open. I drill out the screw posts with a 1/4" bit and glue a magnet into the upper hull posts. When that is dry, I put the two magnets together and then glue them into the lower hull posts. I fit the hulls together before the glue dries and perfect fitting top.
Herman
Herman
04-13-2015 | 05:00 PM
#146
Thread Starter
Senior Member
Joined: Feb 2015
Posts: 421
Likes: 0
Received 0 Likes
on
0 Posts
From: Quakertown PA
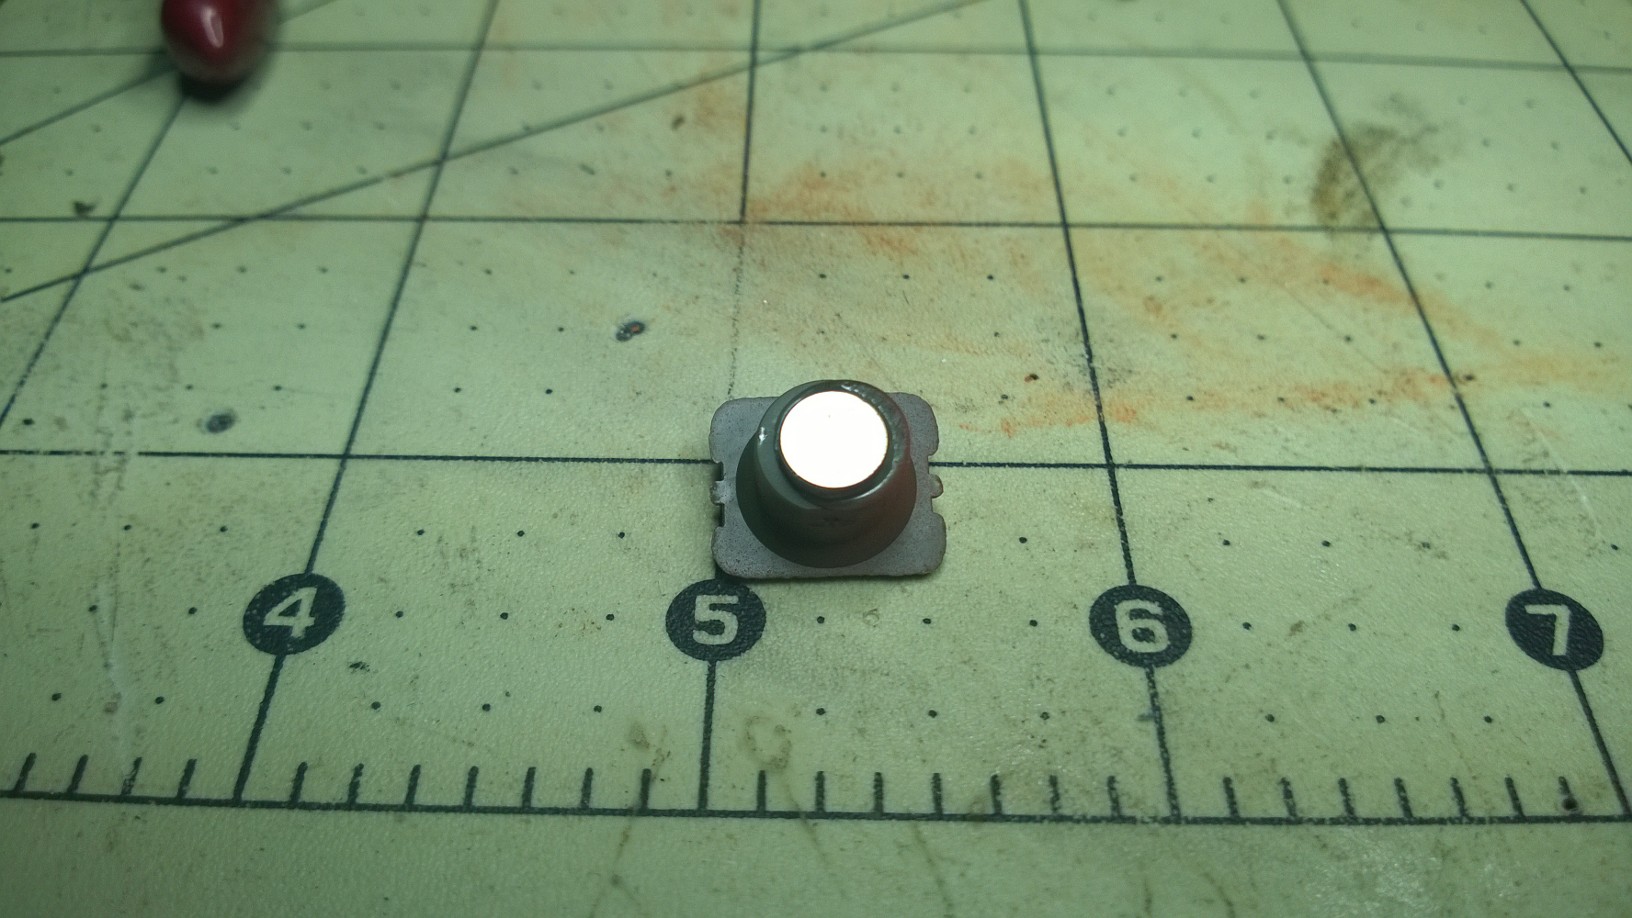
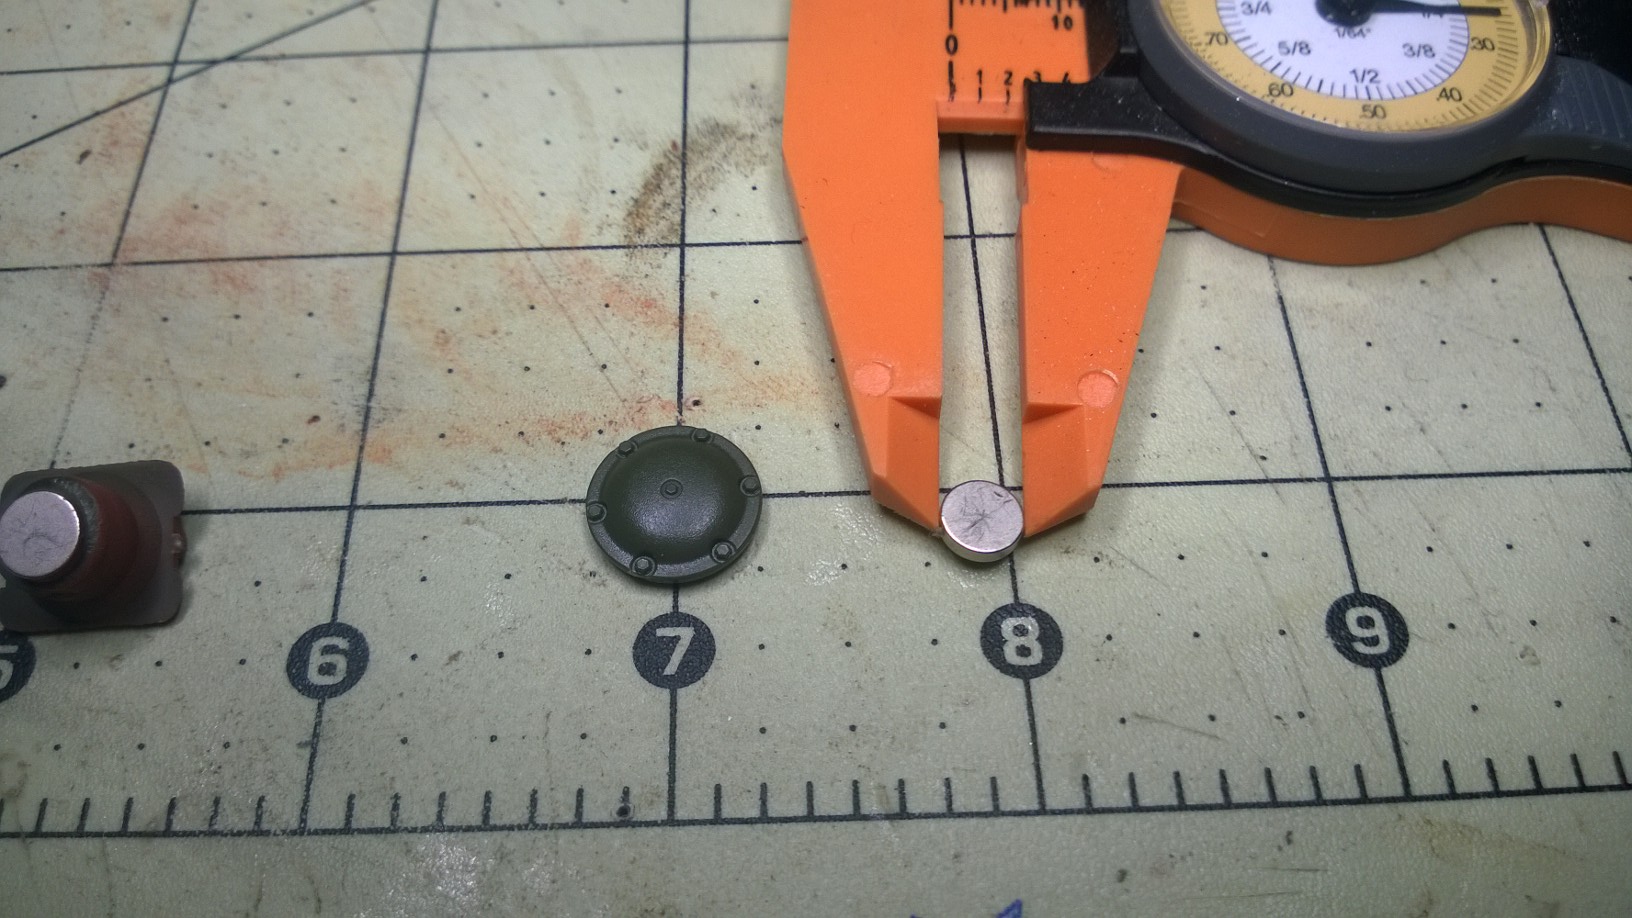
Here are a couple of pics of the the magnets that I have been using for various things. I bought them originally for keeping the upper and lower hull together.as a quick release.
The diameter is 6mm with a total height of 1.5mm maybe 1.6mm Also threw a couple of other pics on. One is of the magnet attached to the rear mounting false hinge of the JS-2 and the other is just one to kind of give you an idea of size just by looking at it. like i said though they come in all sizes. Hope this gives you an idea or two.

Bill
The diameter is 6mm with a total height of 1.5mm maybe 1.6mm Also threw a couple of other pics on. One is of the magnet attached to the rear mounting false hinge of the JS-2 and the other is just one to kind of give you an idea of size just by looking at it. like i said though they come in all sizes. Hope this gives you an idea or two.
Bill
04-13-2015 | 05:38 PM
#147
Joined: Oct 2014
Posts: 888
Likes: 0
Received 0 Likes
on
0 Posts
From: Roseville, CA
Here are a couple of pics of the the magnets that I have been using for various things. I bought them originally for keeping the upper and lower hull together.as a quick release.
The diameter is 6mm with a total height of 1.5mm maybe 1.6mm Also threw a couple of other pics on. One is of the magnet attached to the rear mounting false hinge of the JS-2 and the other is just one to kind of give you an idea of size just by looking at it. like i said though they come in all sizes. Hope this gives you an idea or two.
Bill
04-13-2015 | 05:40 PM
#148
Joined: Oct 2014
Posts: 888
Likes: 0
Received 0 Likes
on
0 Posts
From: Roseville, CA
I use the magnets to replace the screws holding the upper and lower hulls together. It makes it a whole lot easier to open. I drill out the screw posts with a 1/4" bit and glue a magnet into the upper hull posts. When that is dry, I put the two magnets together and then glue them into the lower hull posts. I fit the hulls together before the glue dries and perfect fitting top.
Herman
Herman
Joe
04-14-2015 | 04:59 AM
#149
Joined: Jan 2009
Posts: 1,567
Likes: 0
Received 0 Likes
on
0 Posts
From: King,
NC
All of them. The magnets I use are 1/4" X 1/4" and 1/4" square X 1/8" neodymium. If the posts are to skinny I build them up with plastic tube and if the room is not there I use the square flat magnets glued to the hull as in the front of my Hetzers.
Herman
Herman


