Mods.


 12-28-2015 | 06:22 AM
#27

I've not had much time to do anything lately due to an impending house move, but I did get around to wiring up my Asiatam Kubelwagen and get it drivable:


Also about done with my M16 - just need to figure out an appropriate bumper code (489th AAAW battalion pictures are almost non existent) and weather it:


And as this is a mod thread, quick pic of my other M16 conversions:

Also about done with my M16 - just need to figure out an appropriate bumper code (489th AAAW battalion pictures are almost non existent) and weather it:
And as this is a mod thread, quick pic of my other M16 conversions:

 12-29-2015 | 06:35 AM
#31
Looks good!!!
01-11-2016 | 04:32 PM
#32
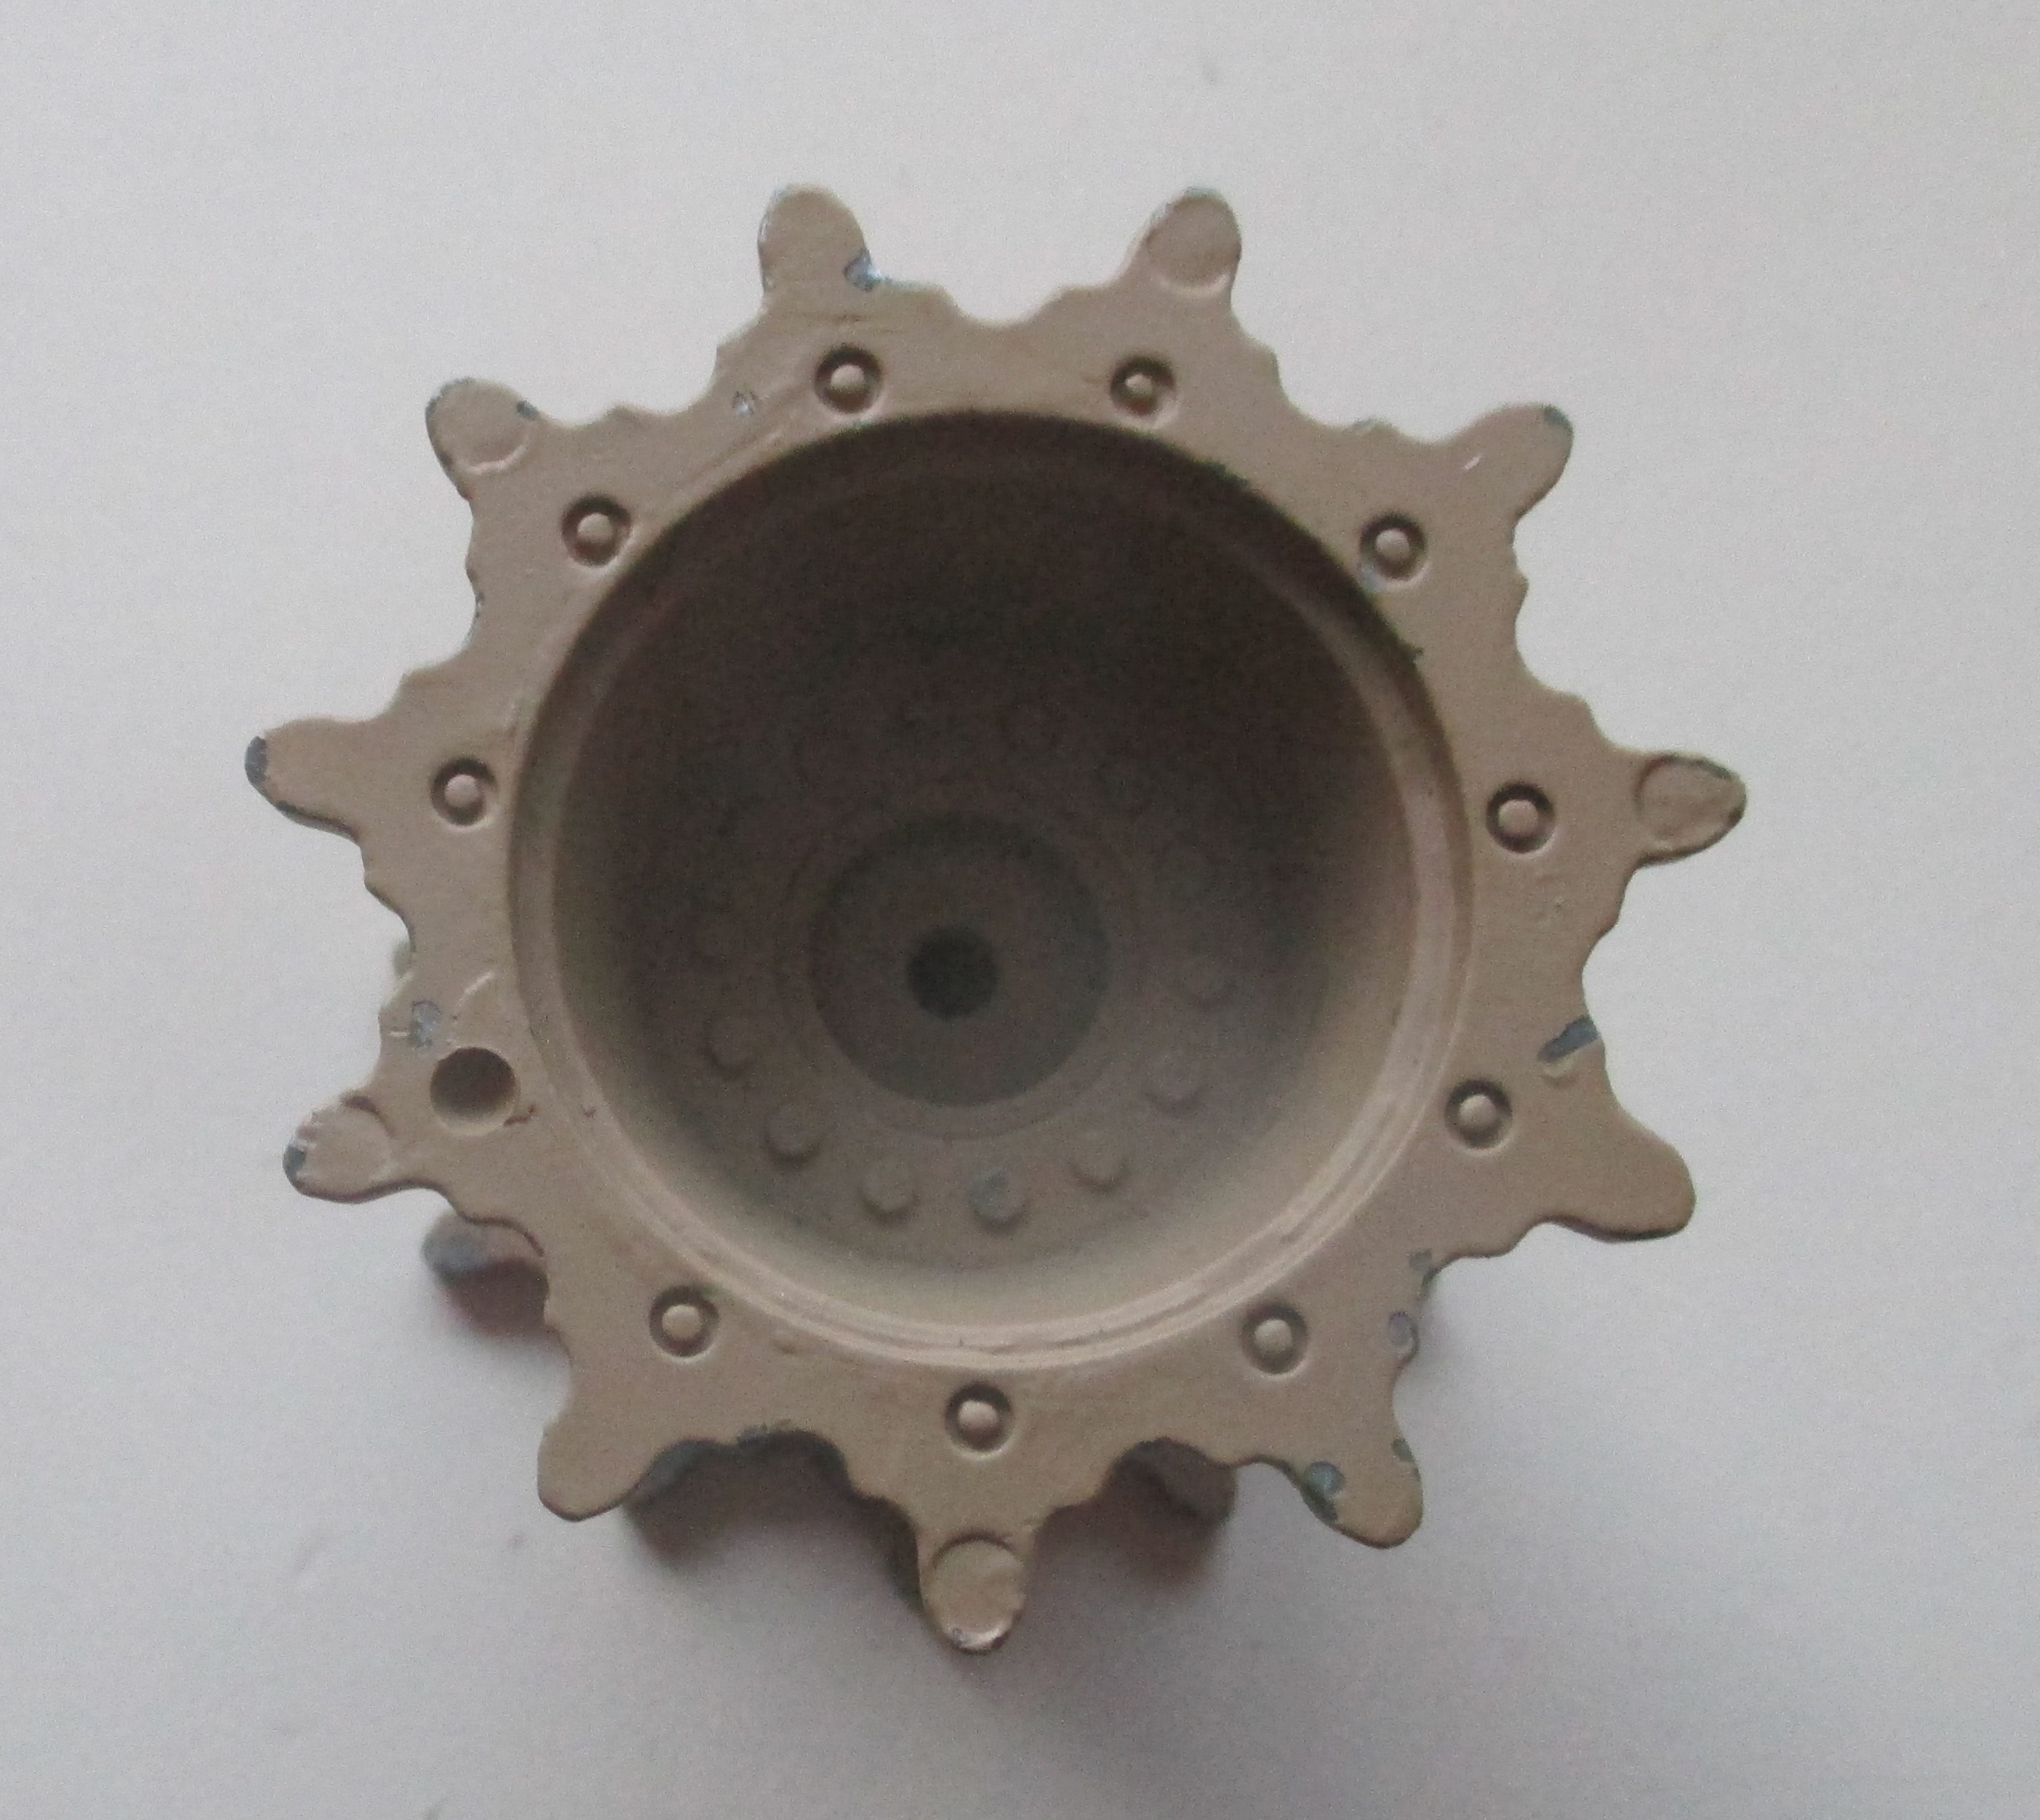
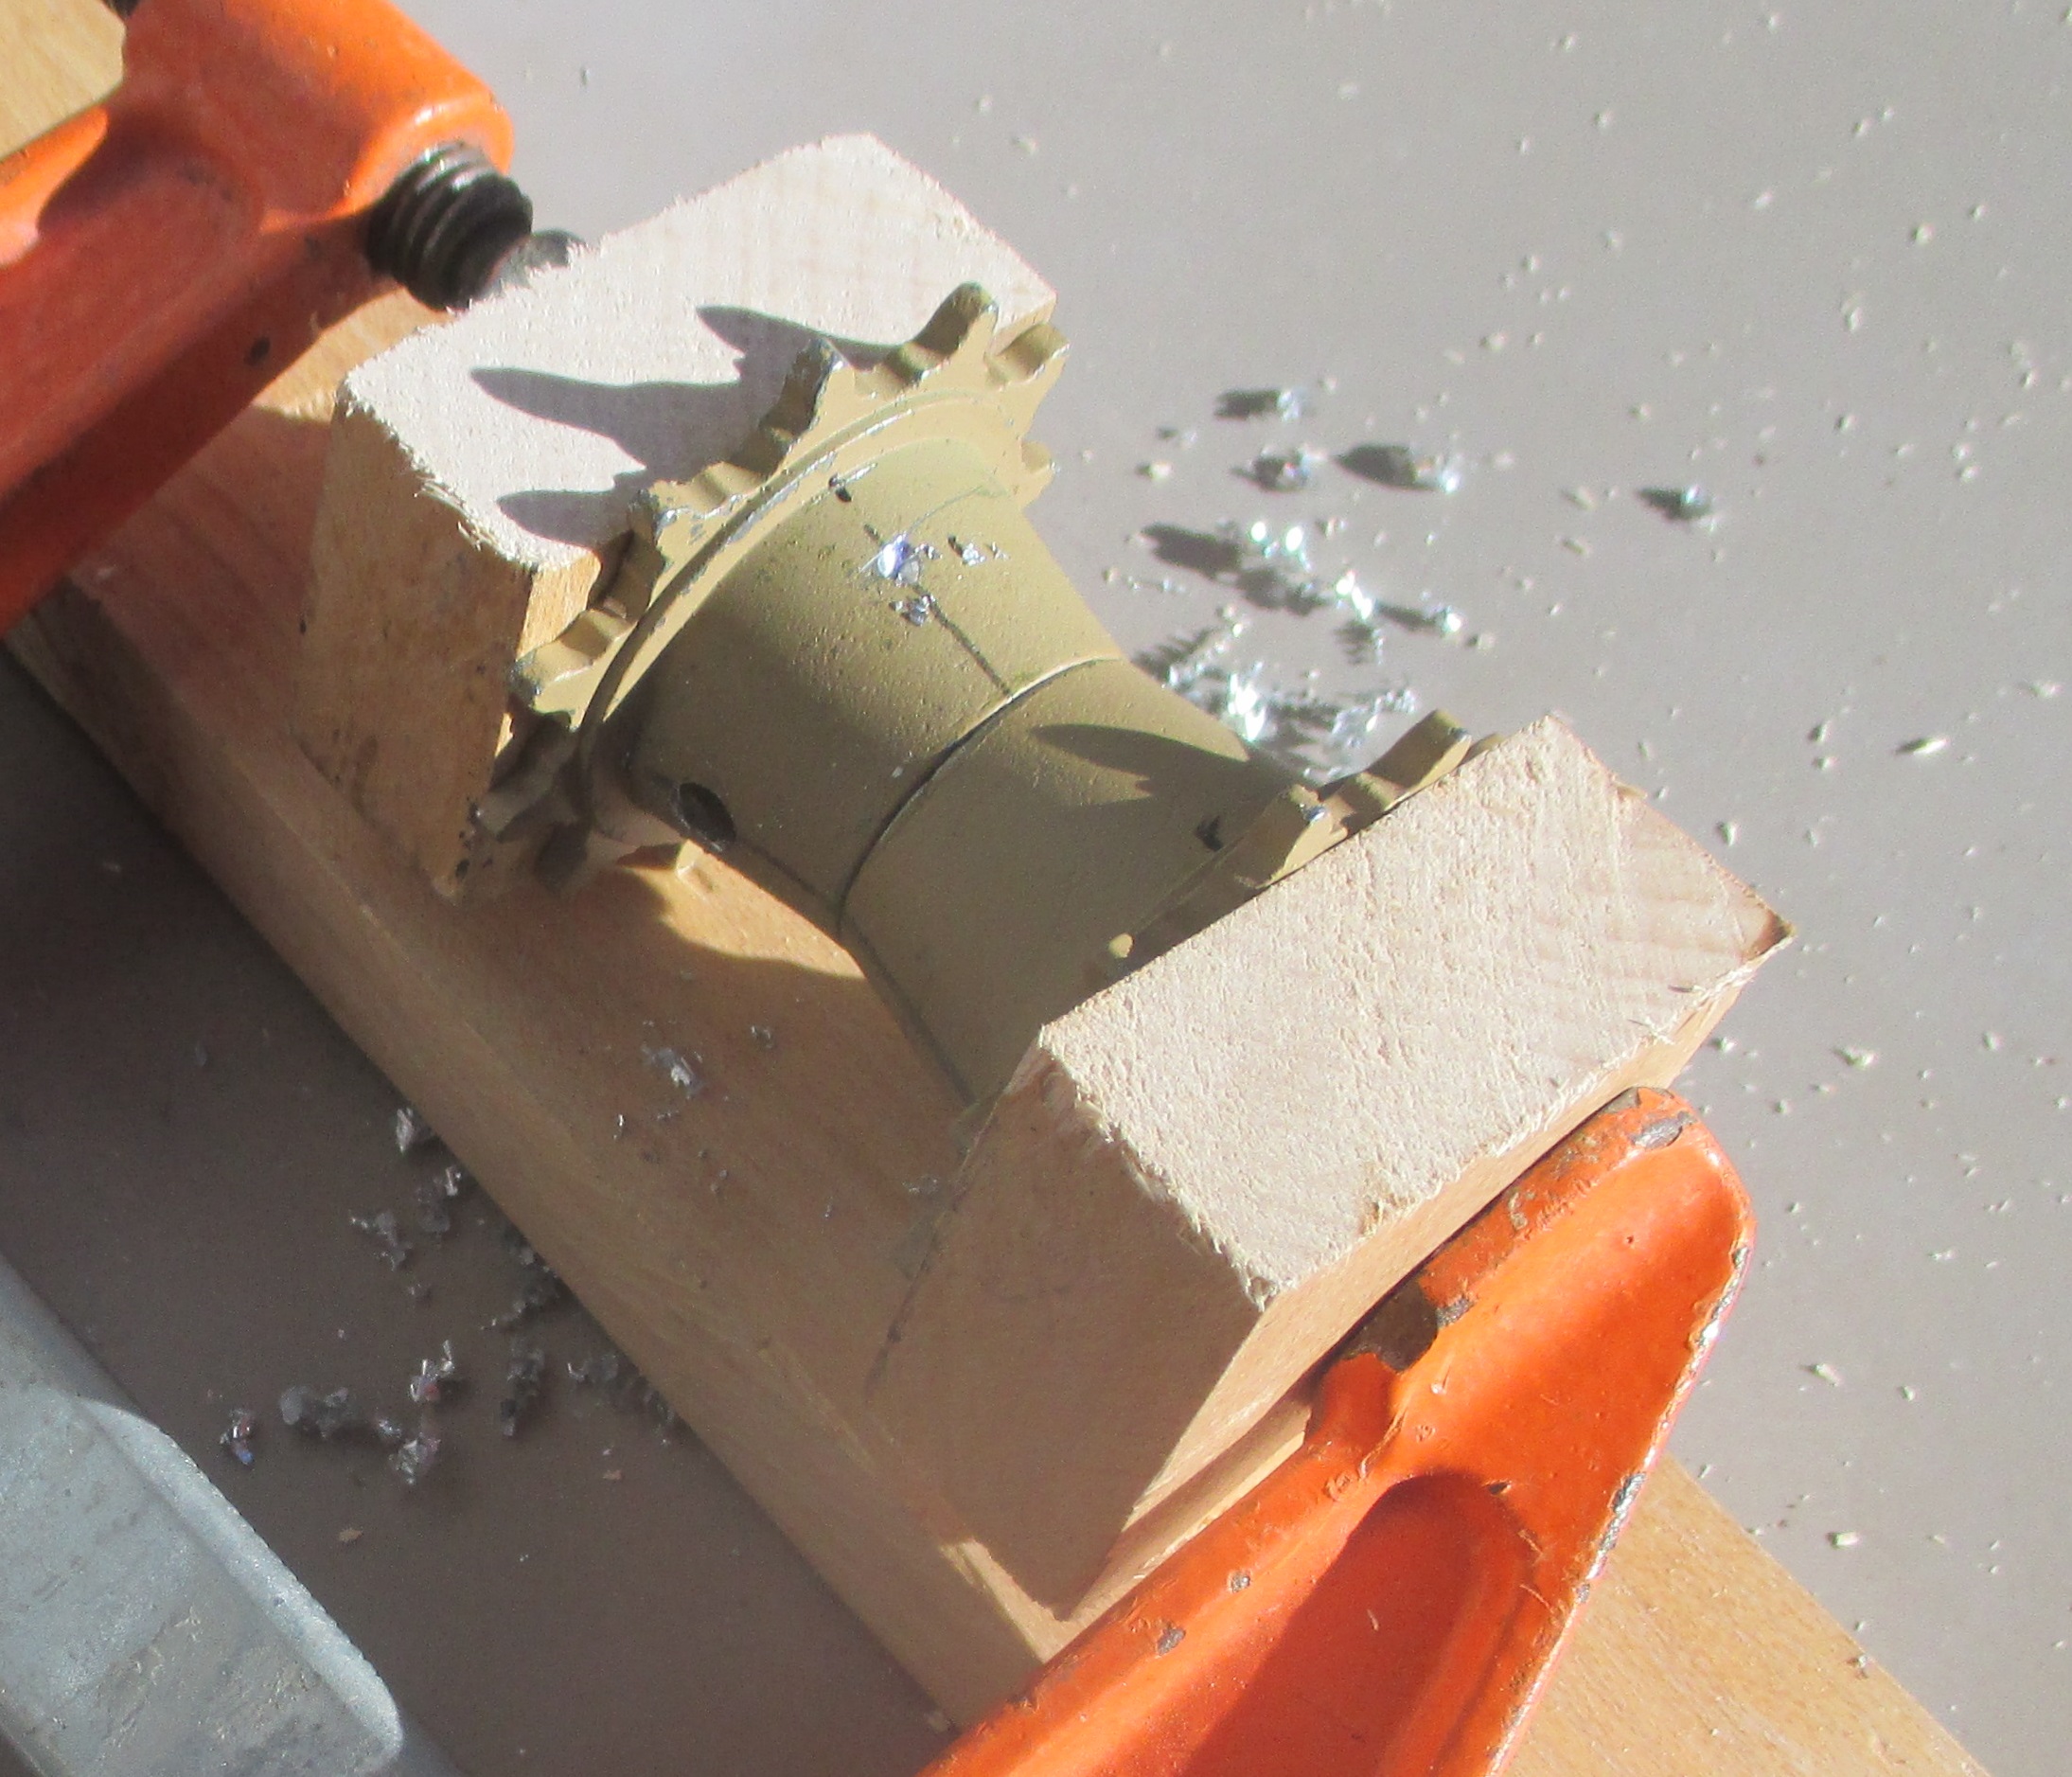
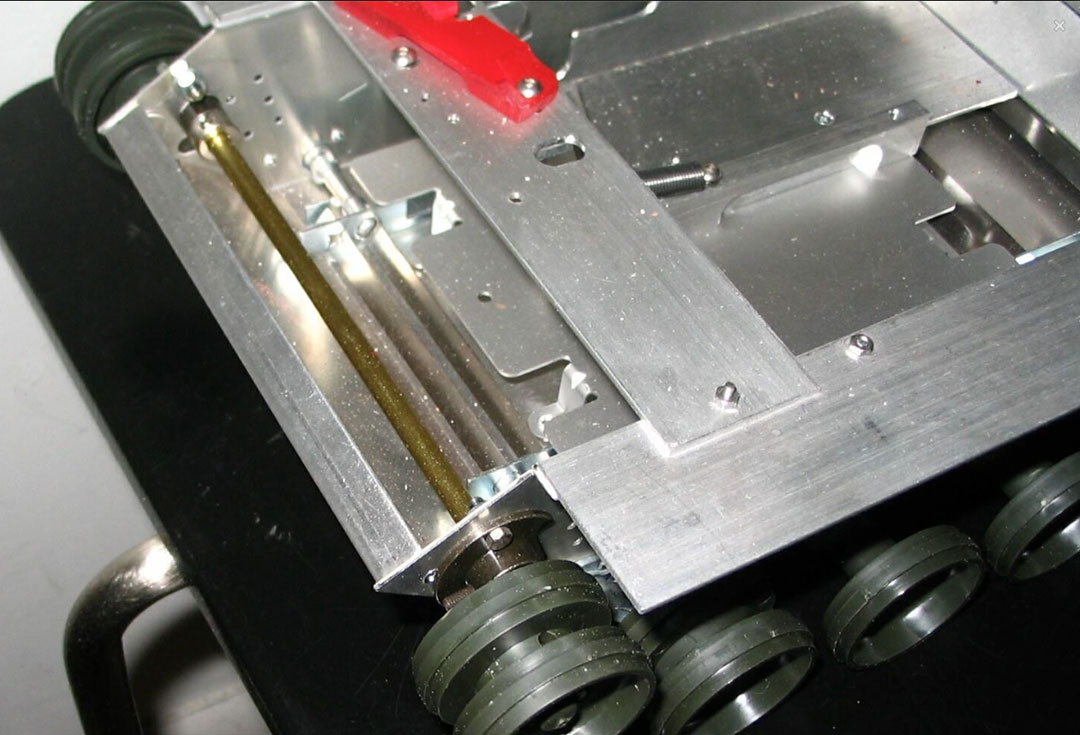
This last weekend I did a small Mod to my Abrams to fix an inaccuracy in the Heng Long drive sprocket molds. I actually did the fix on a set of Heng Long metal drive sprockets. The modification involved drilling the metal and filling some holes with epoxy, then sanding and filing the metal to cleanup the surface. The result is not perfect, I compromised on a couple things, but is closer to the real thing by a long shot than the stock Heng Long molds.
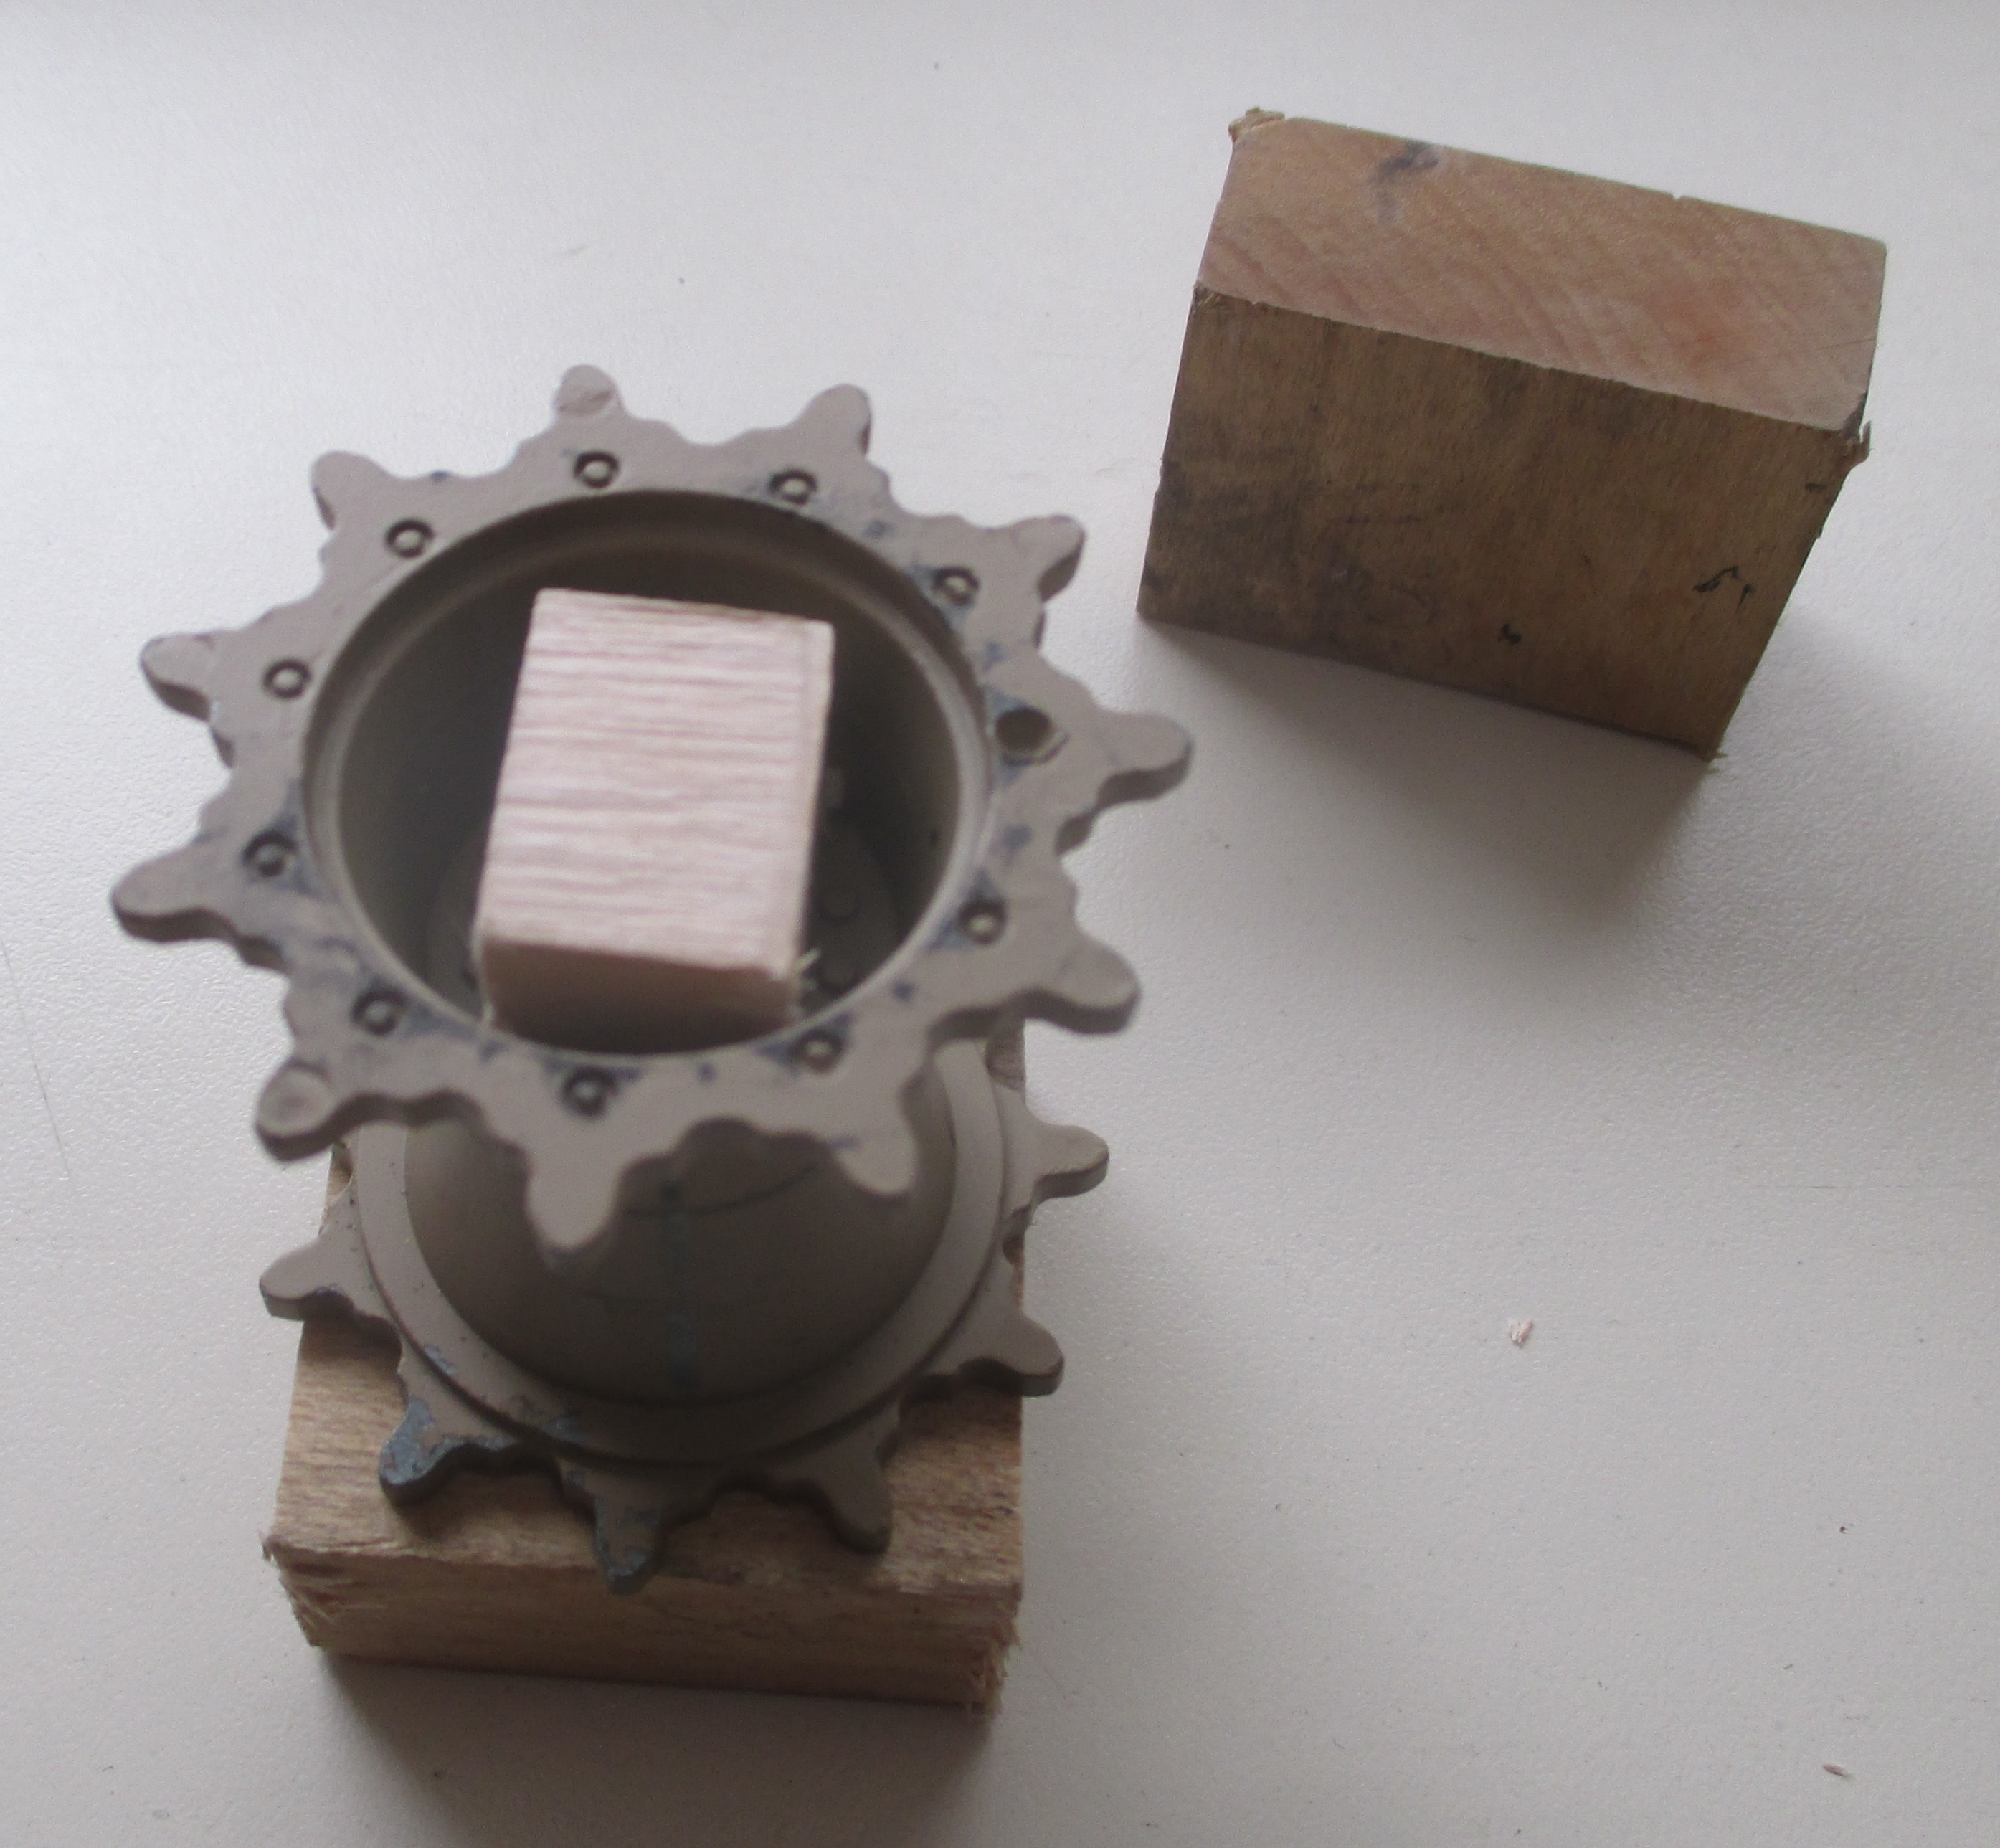
Step 1. I layout and drill four holes in the hub part. I step drilled them, starting with a 1/16 inch bit and finishing with a � inch bit. This was to ensure my drill bit did not drift off the mark when I started each hole. I also placed a small block of wood inside the hub while drilling to catch the bit when it broke through to prevent scaring the inside. I only drilled the outside half, the part that shows.
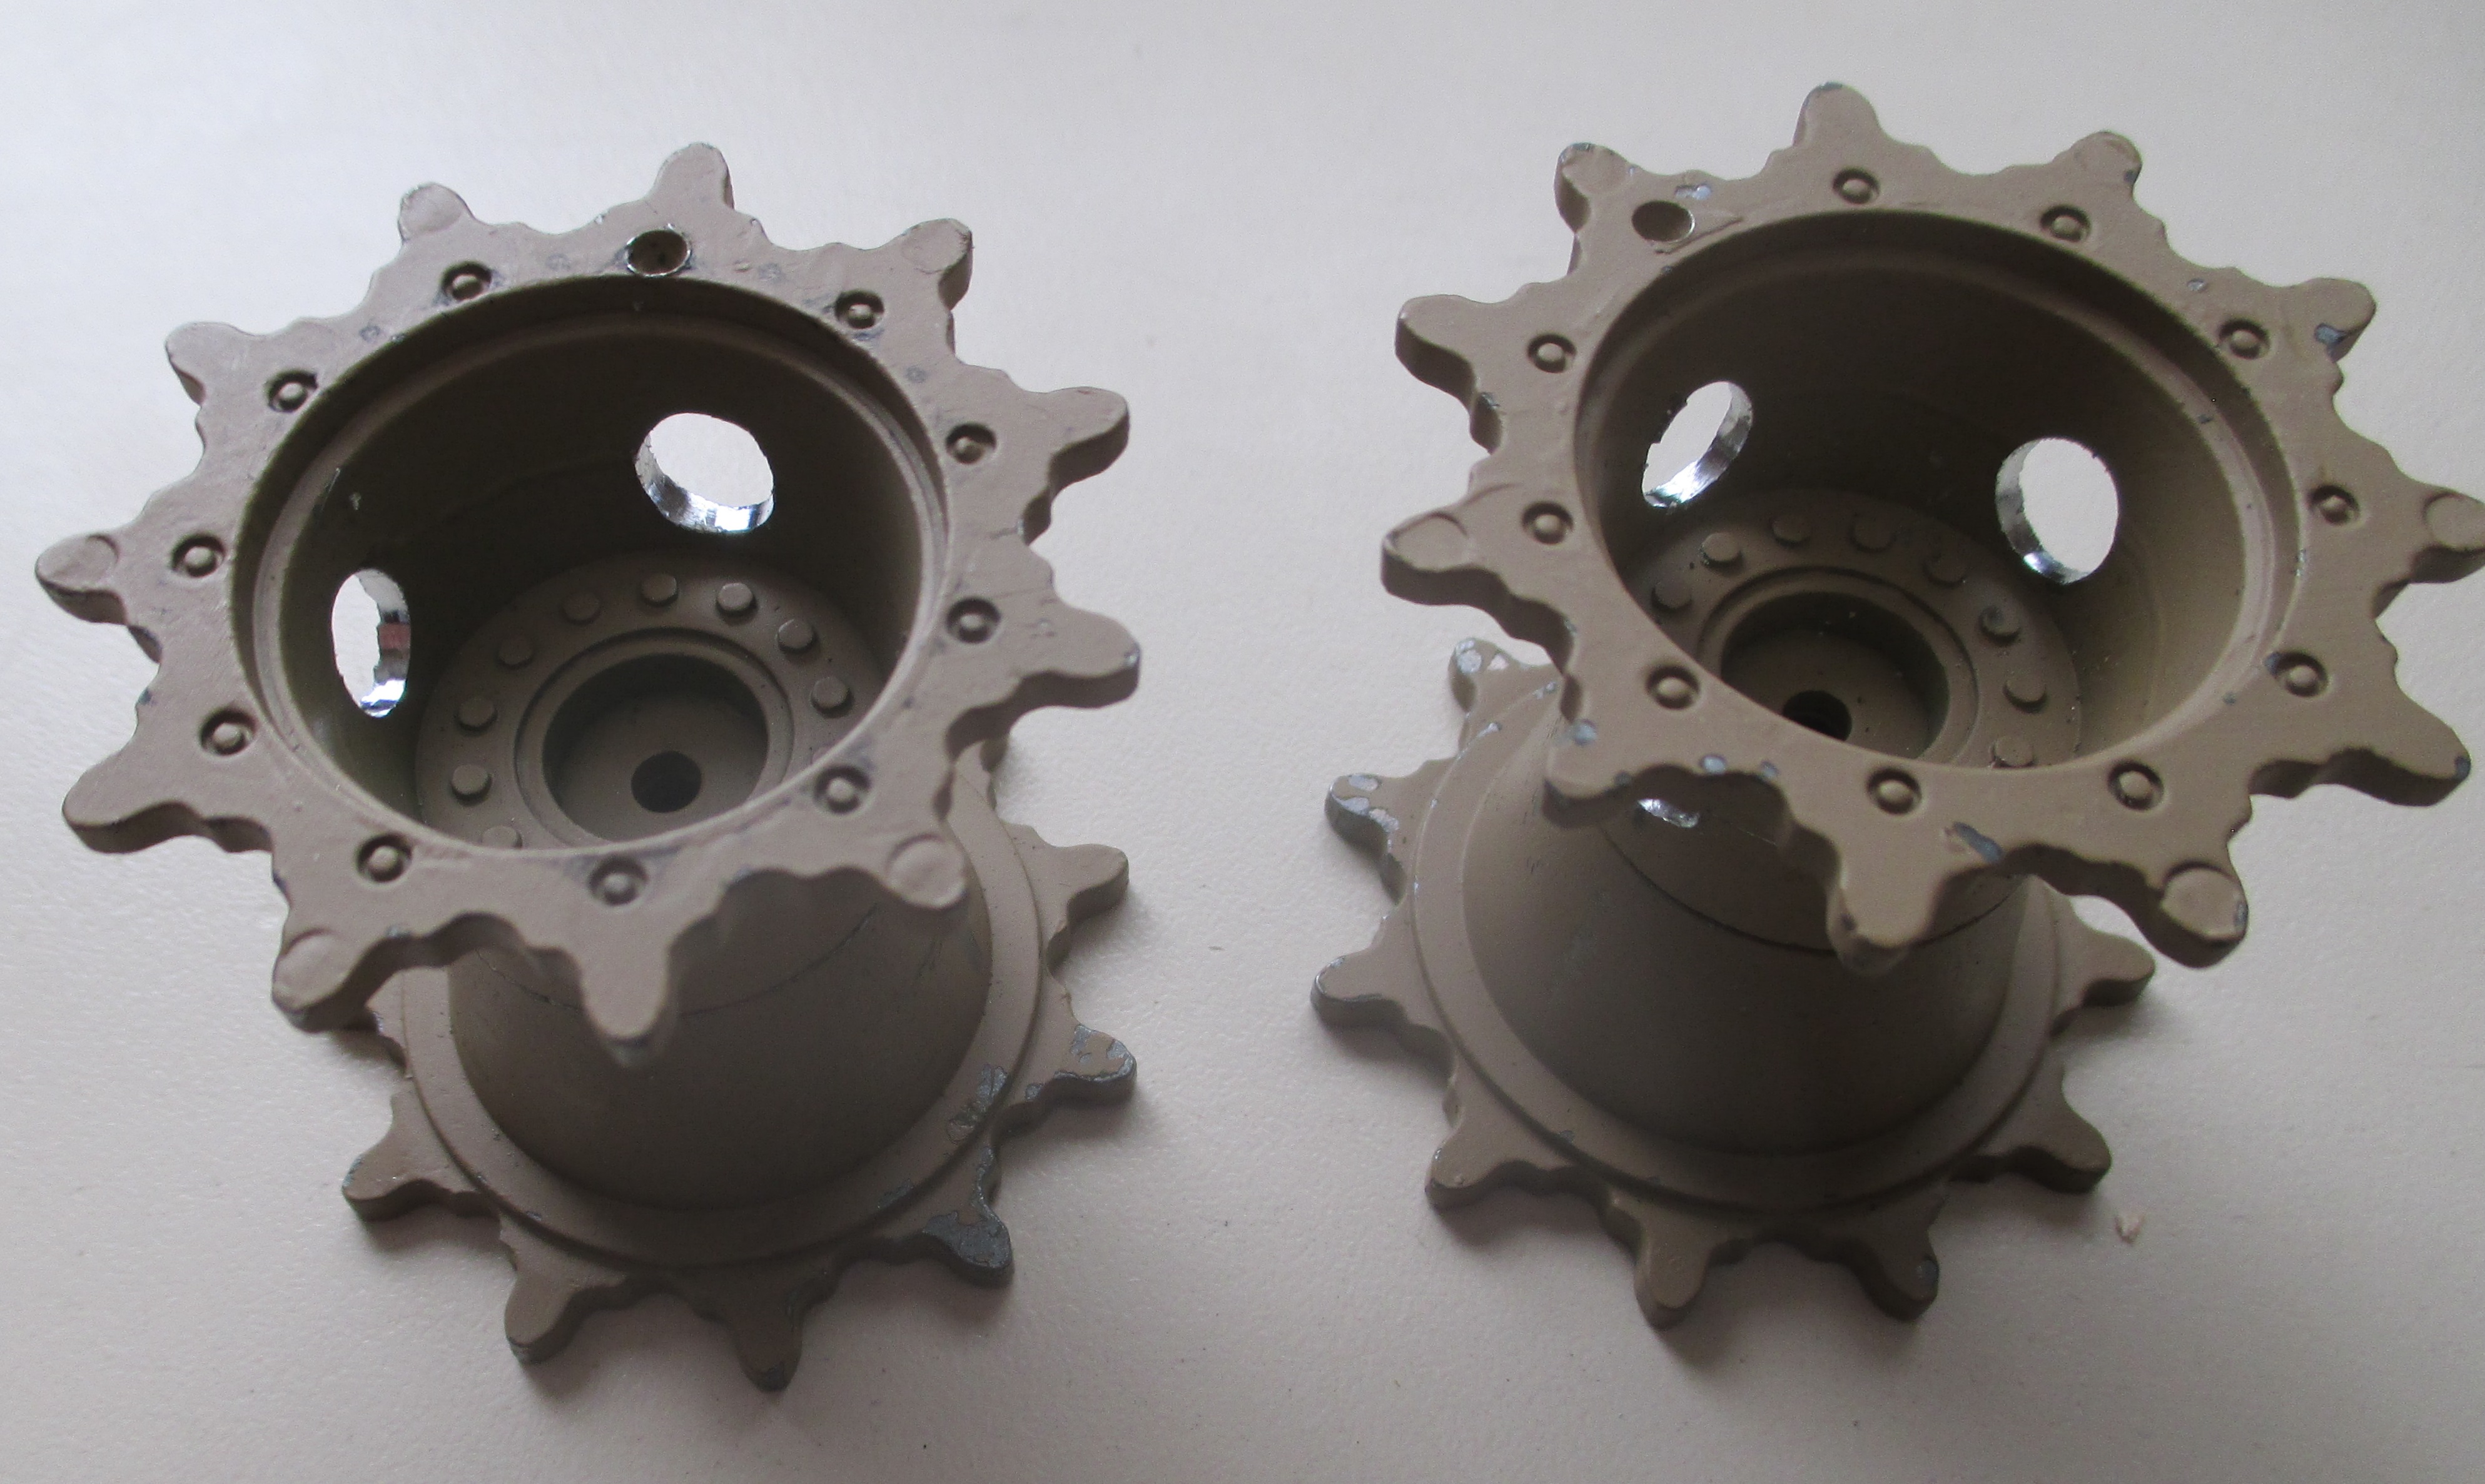
Step 2. I sanded the face of the sprocket enough to remove the paint. I also scratched the paint out of the incorrect recessed bolt holes with a hobby knife.
Step 3. I used 5 min. epoxy to fill the recessed bolt holes.
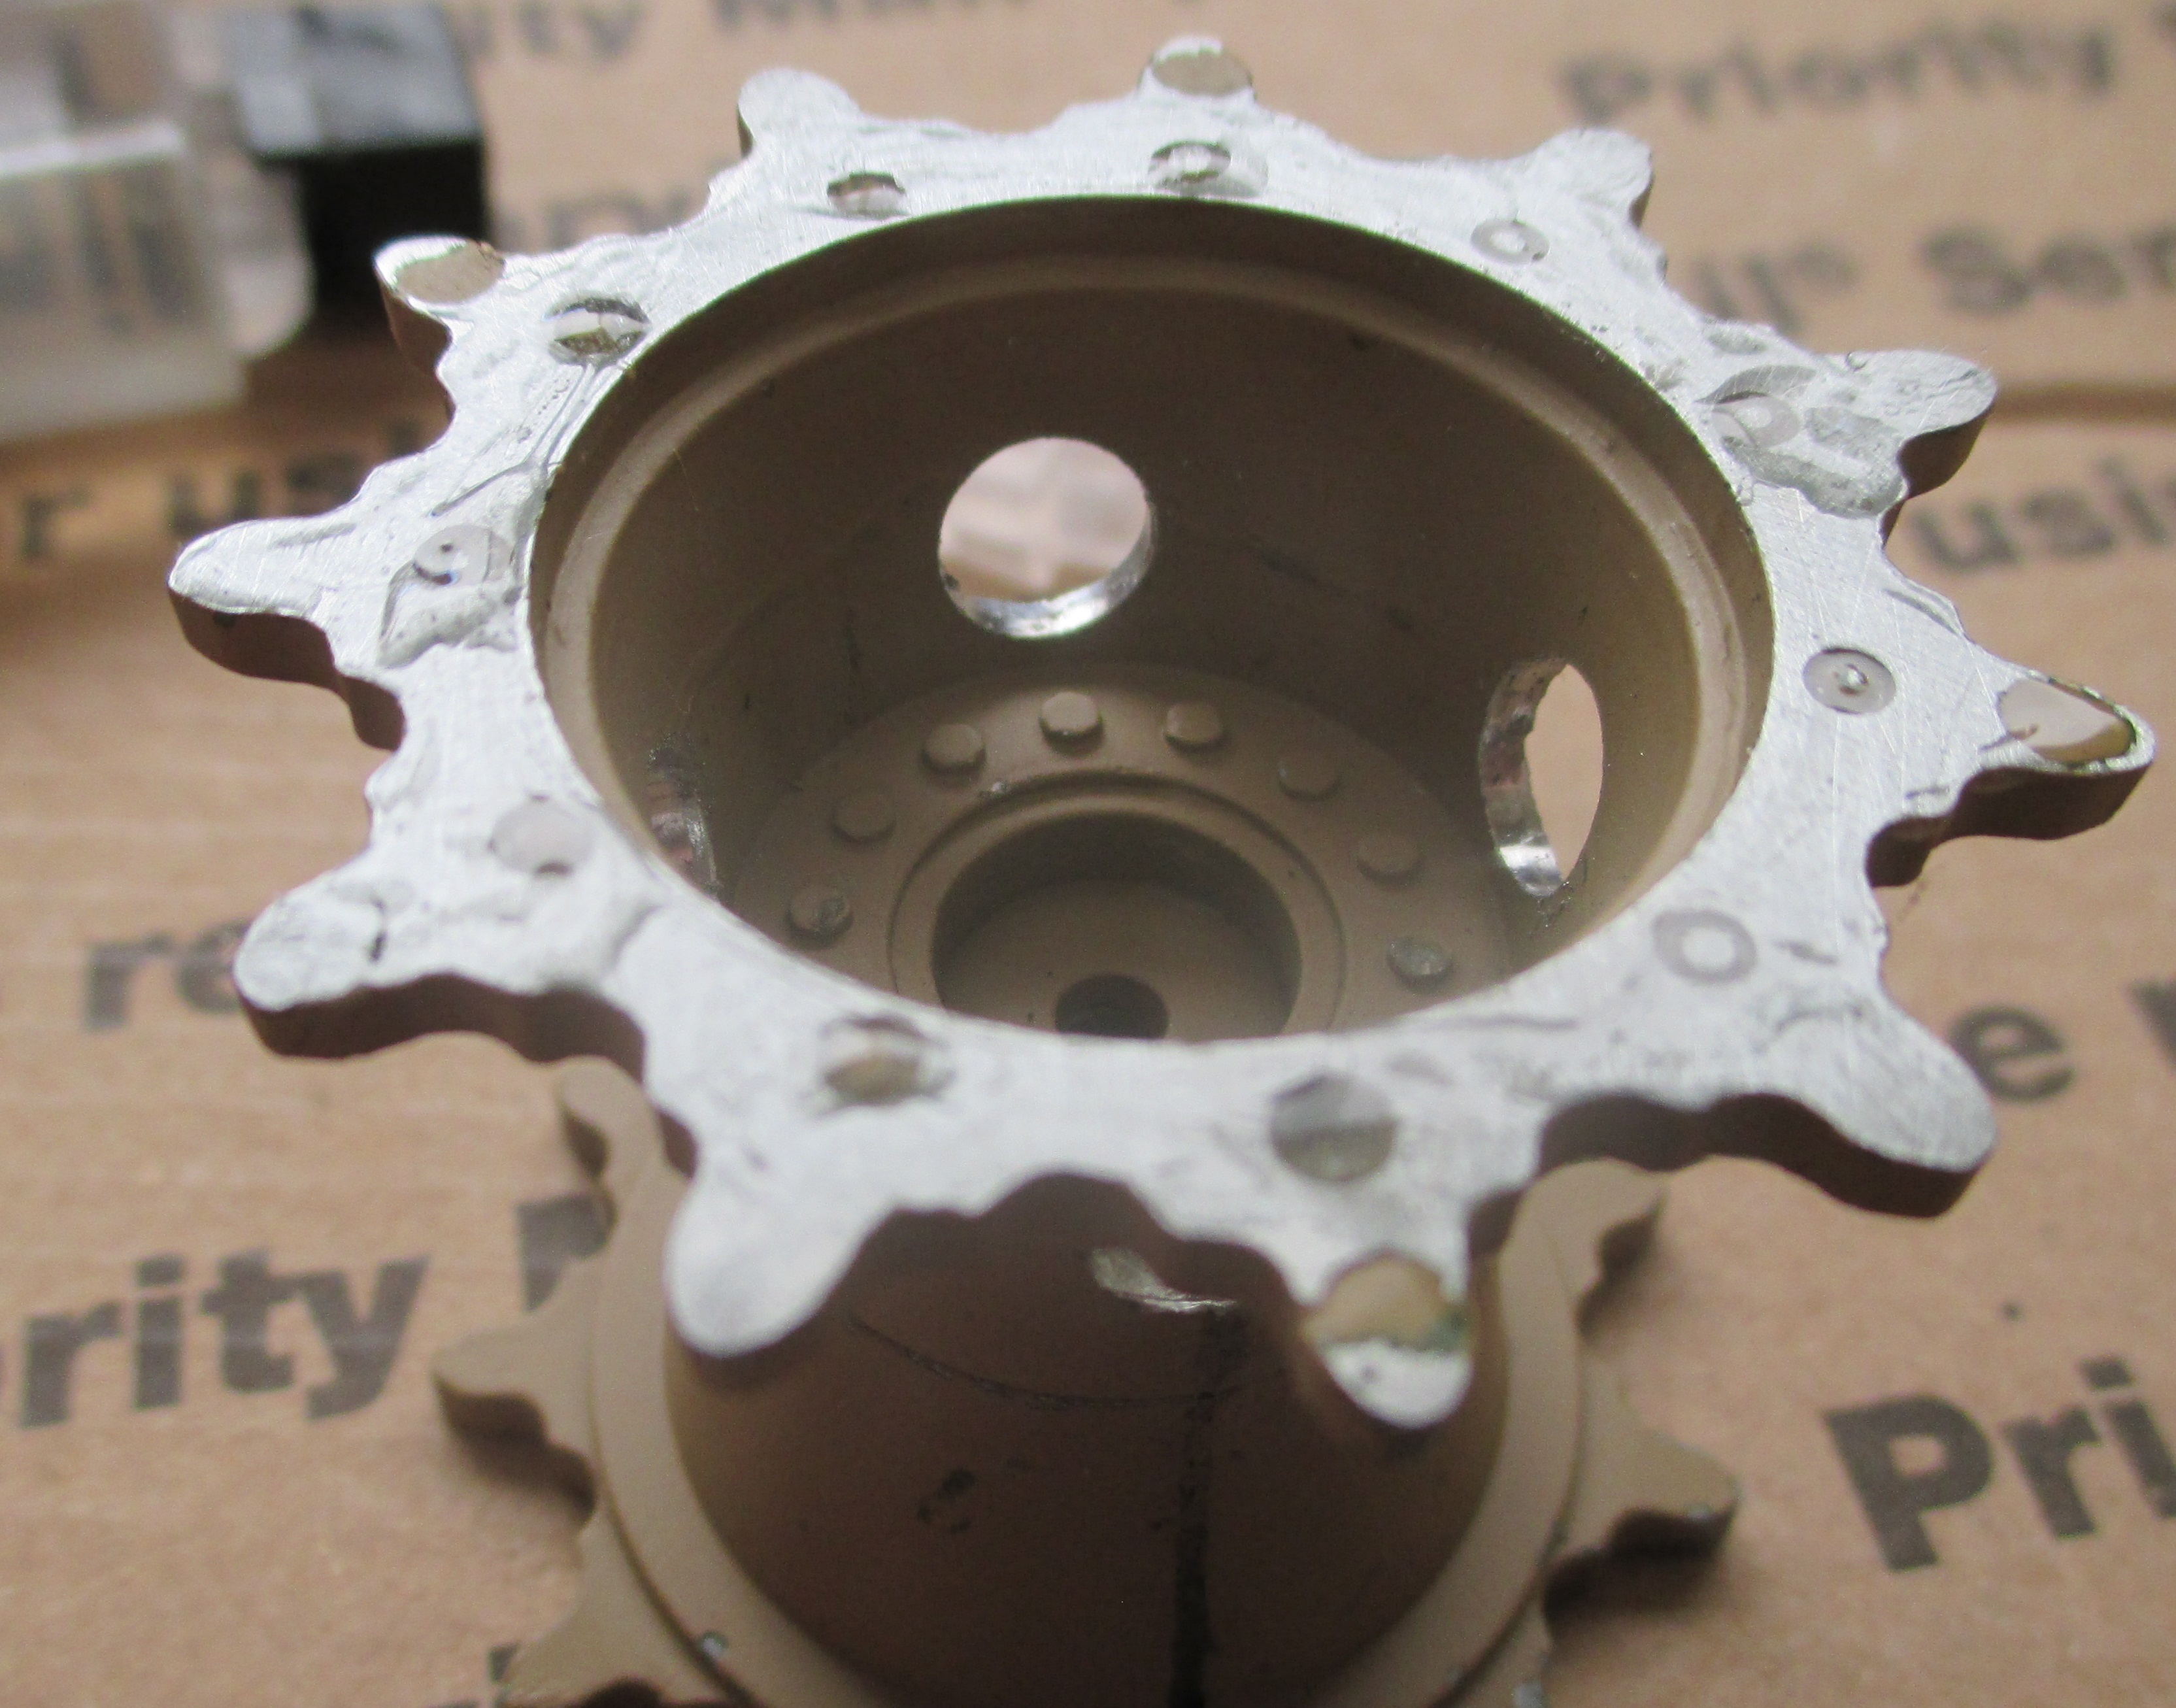
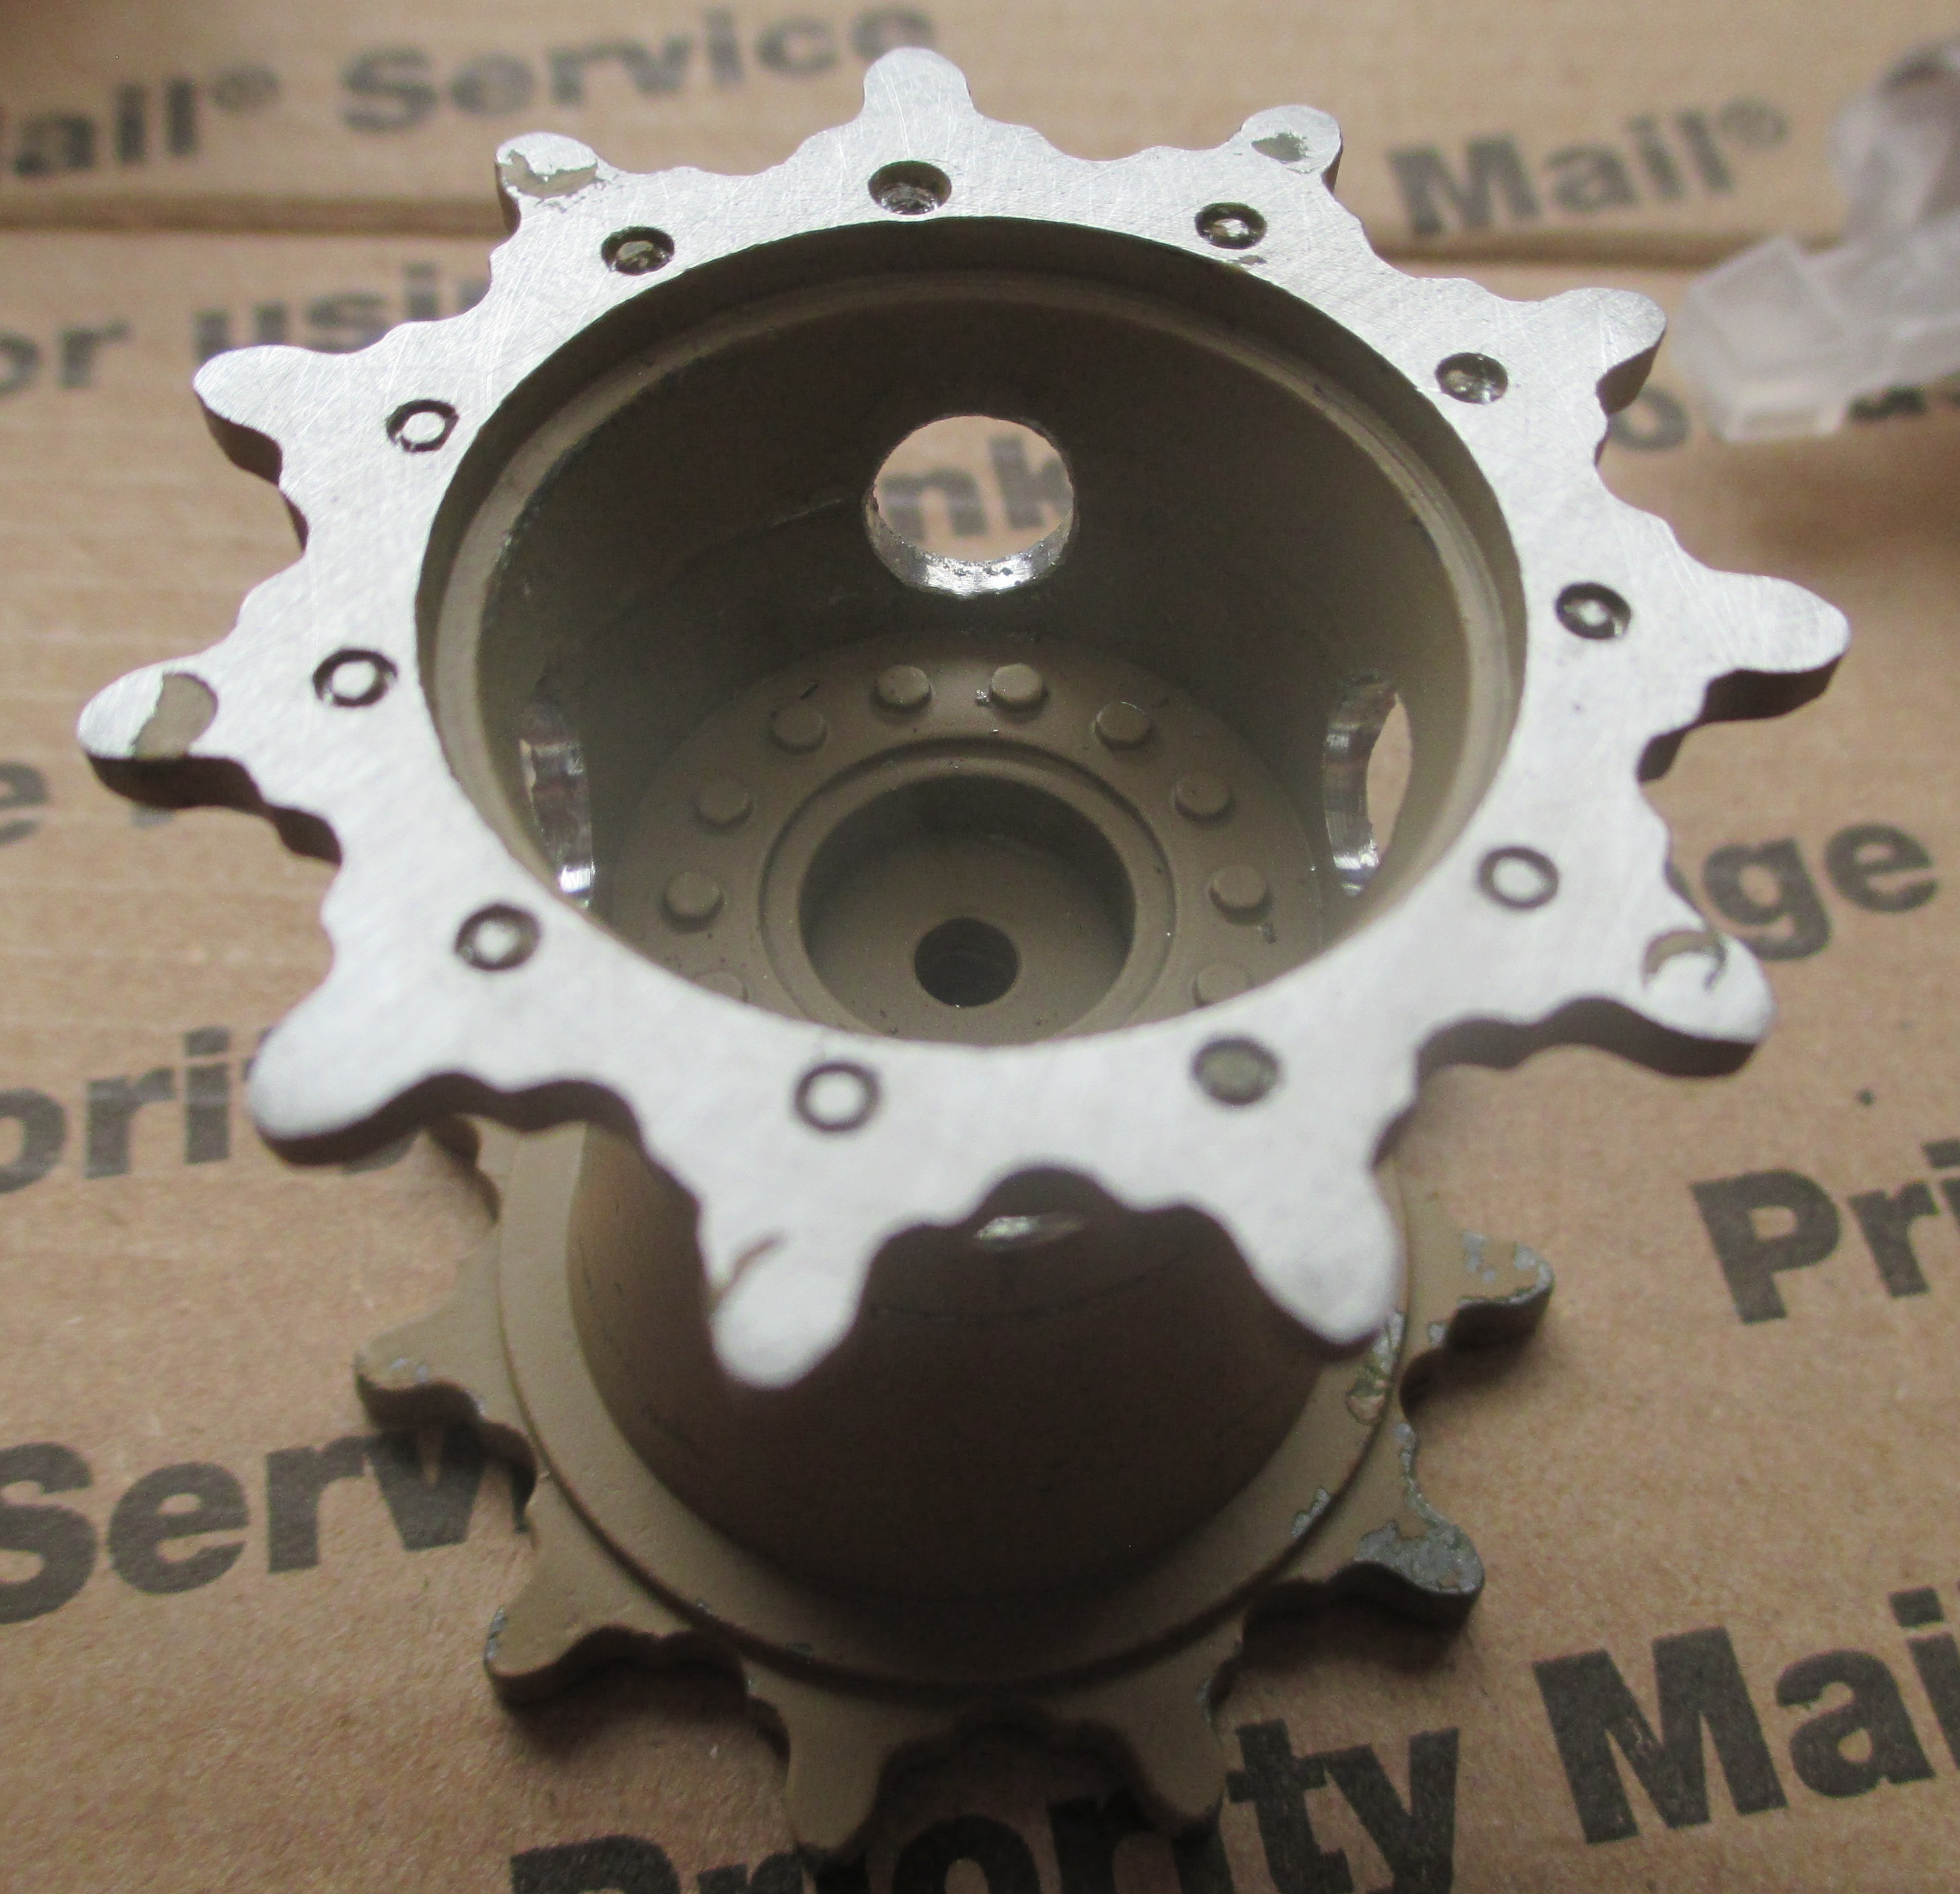
Step 4. I sanded the face flat to remove excess epoxy. I used a file to clean up the drilled holes in the hub, then painted them NATO Green.
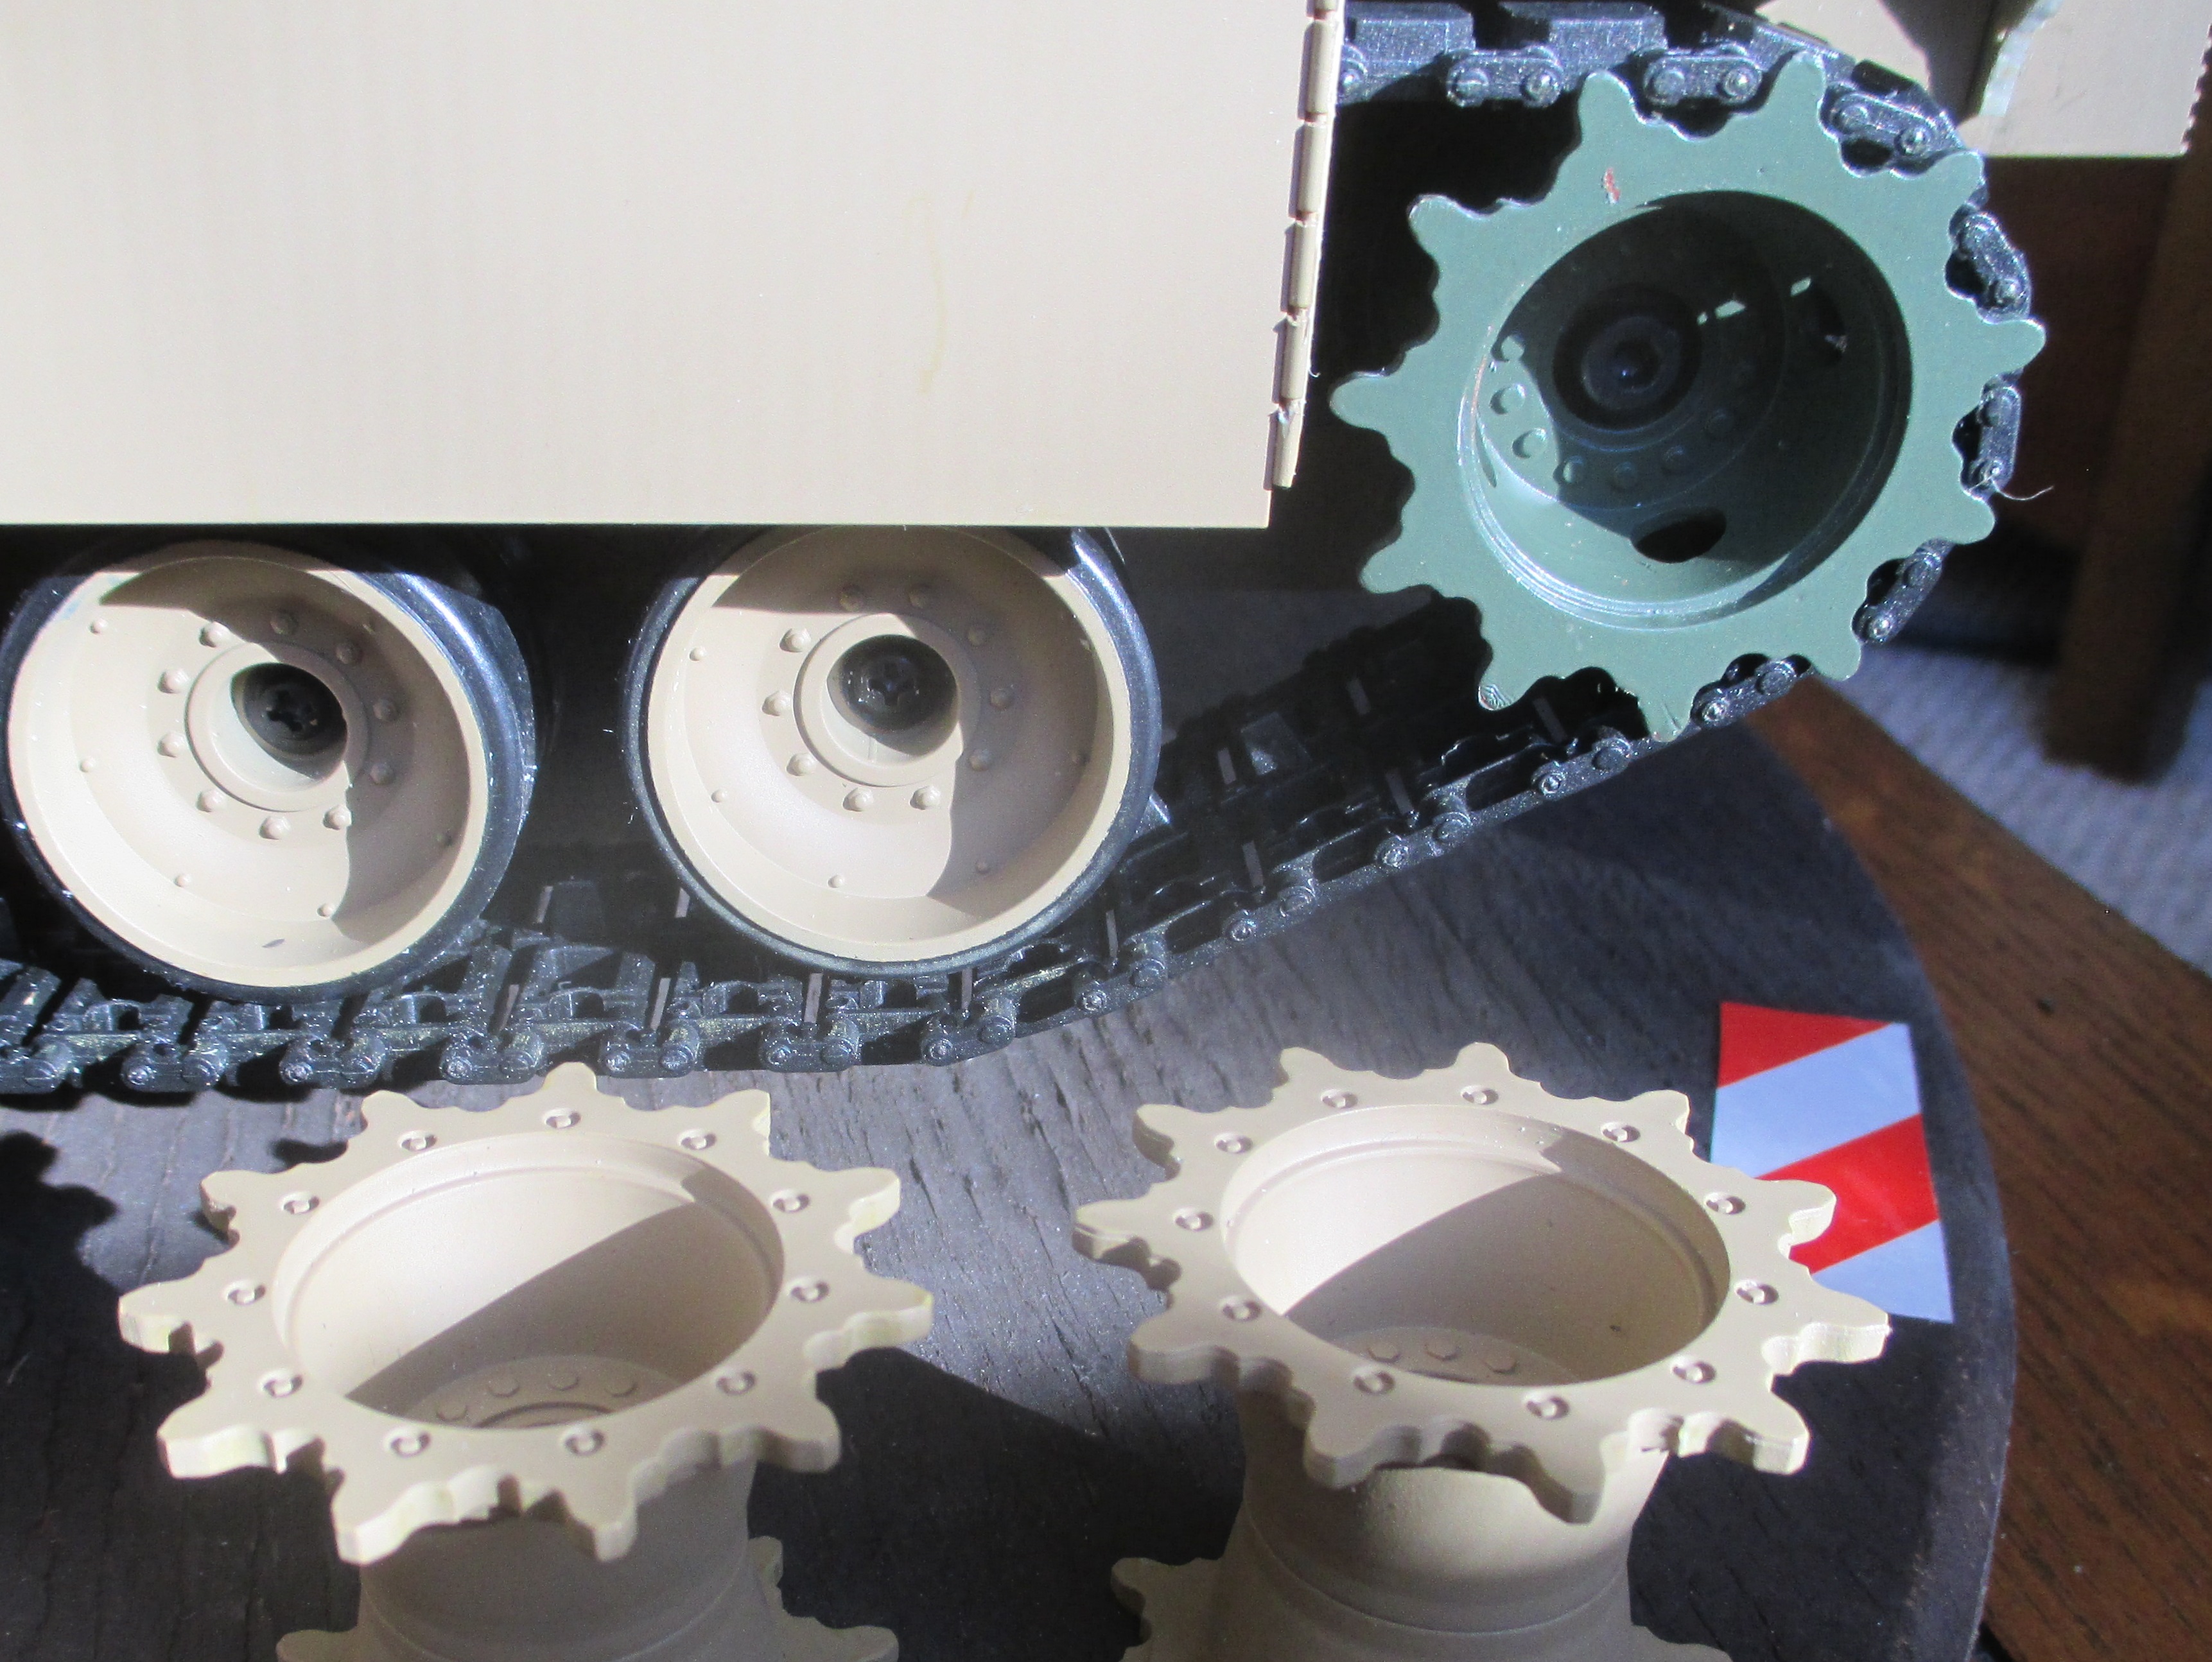
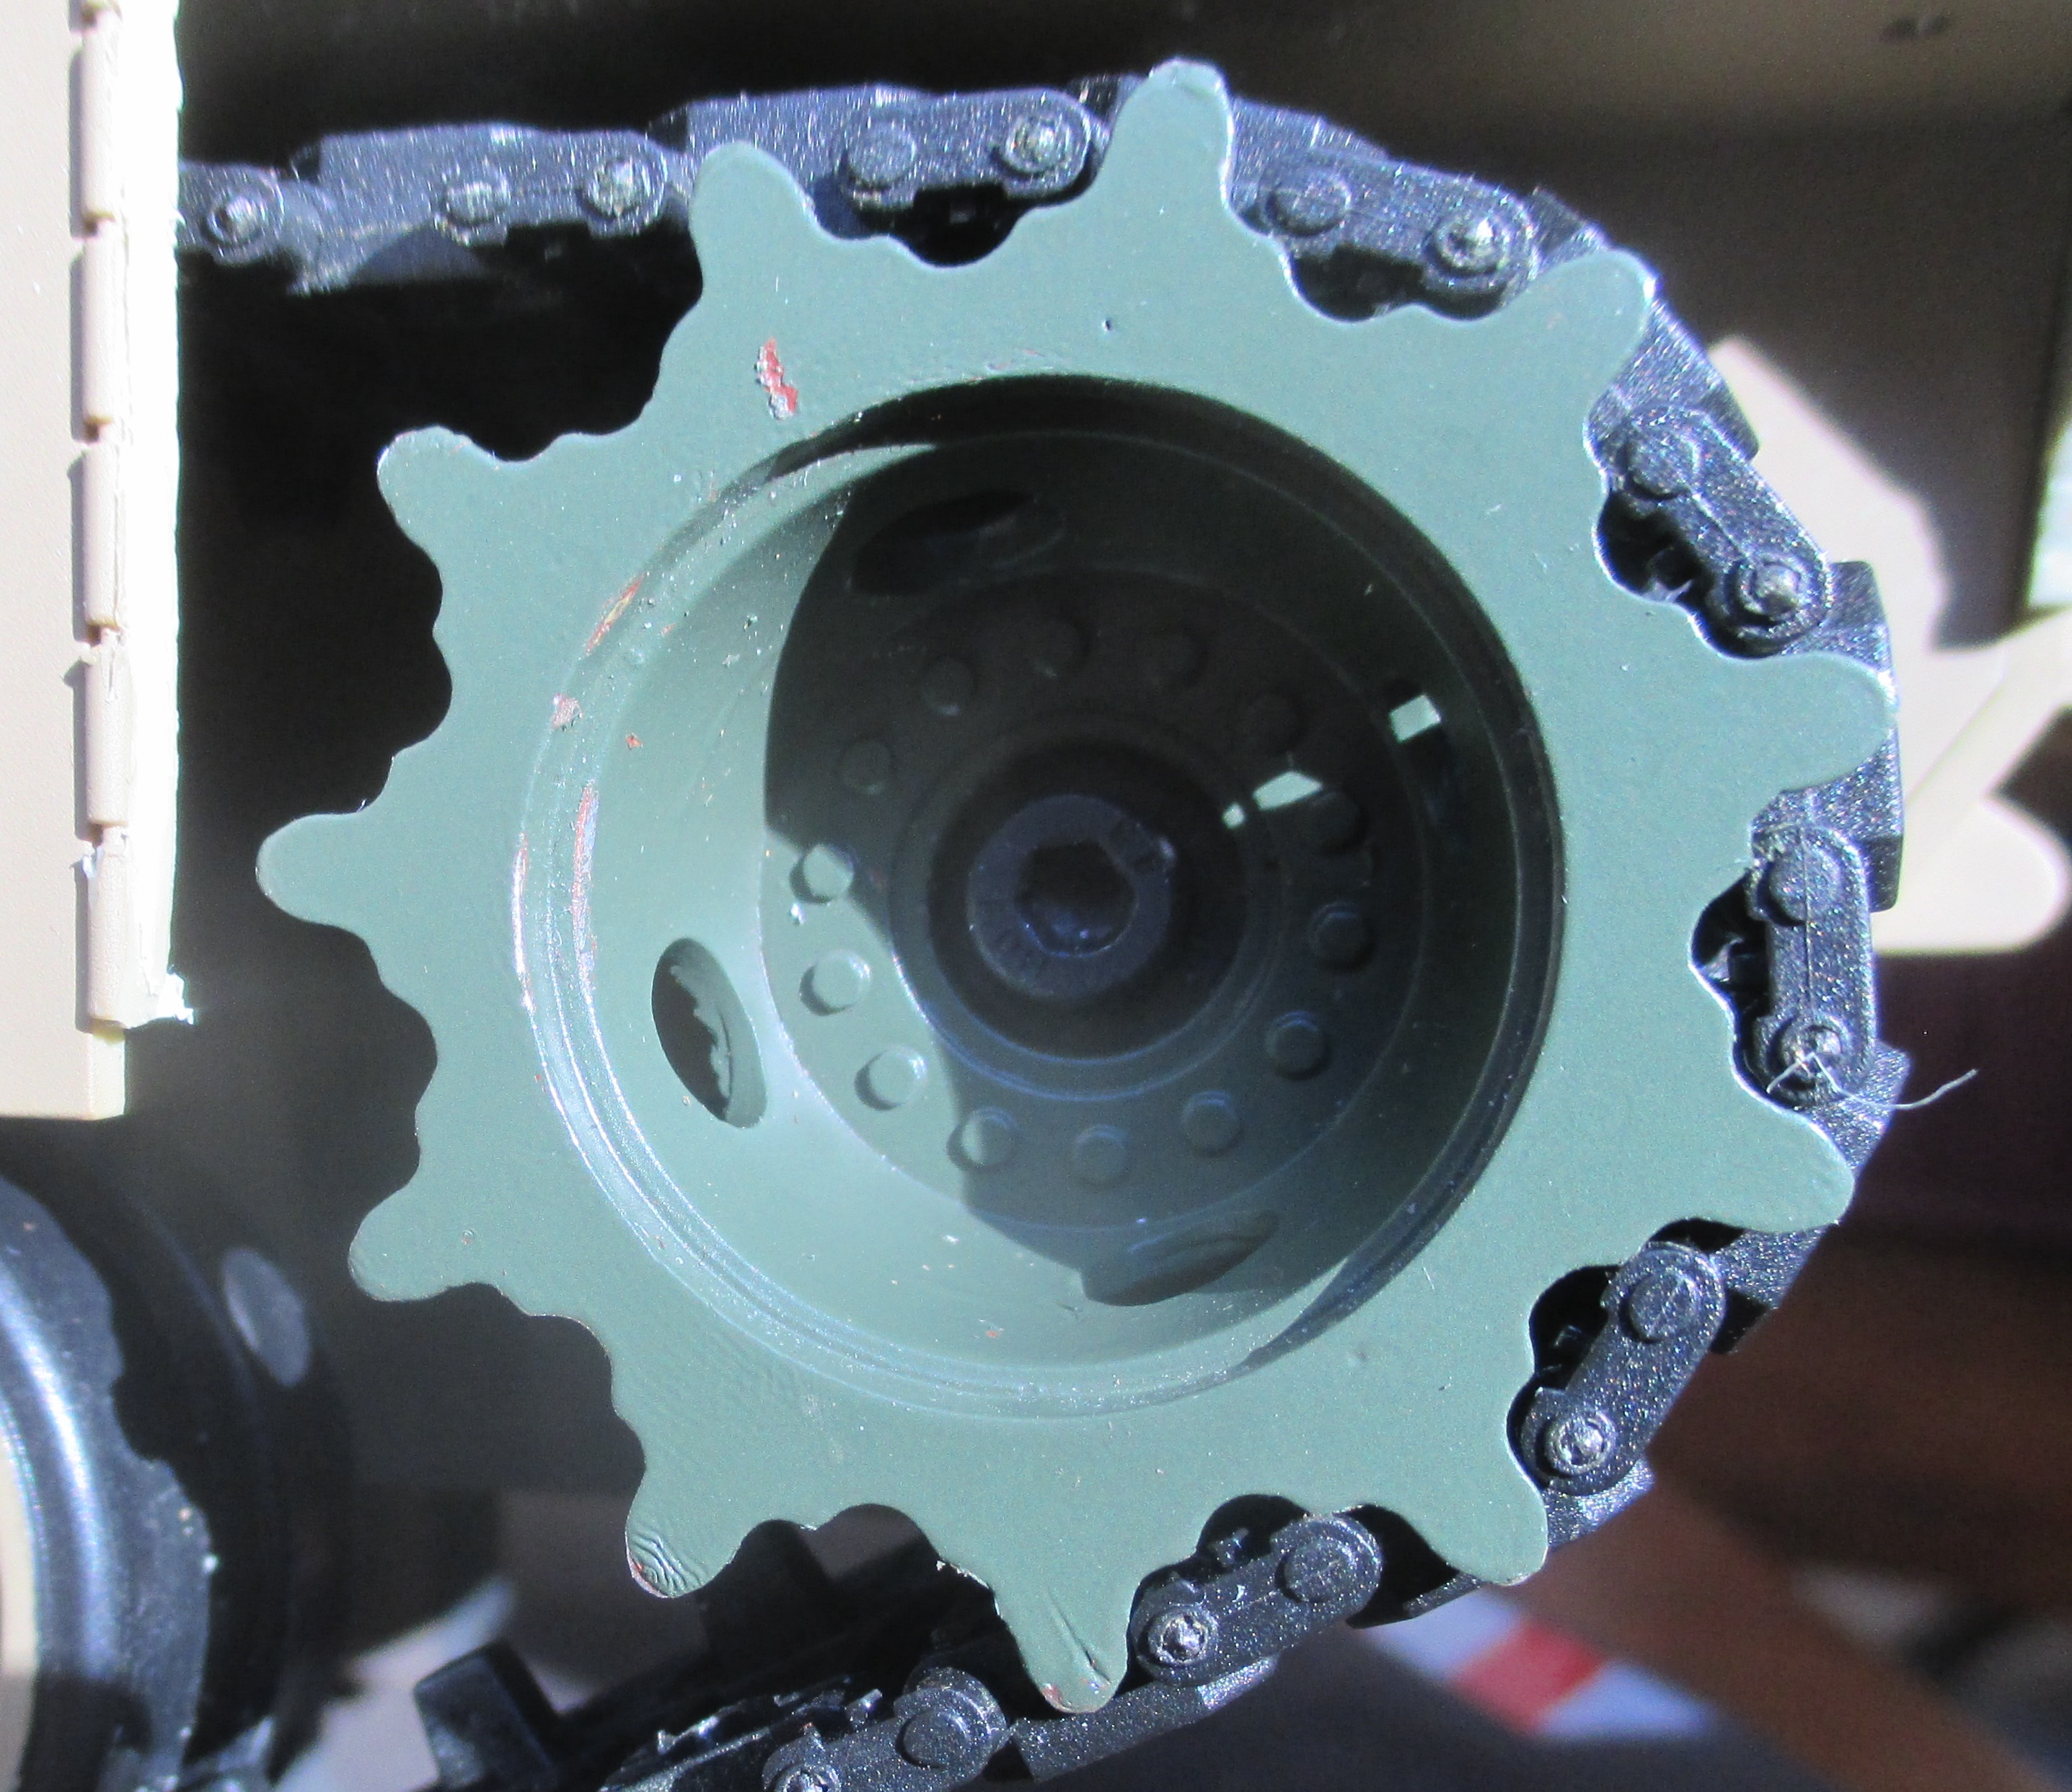
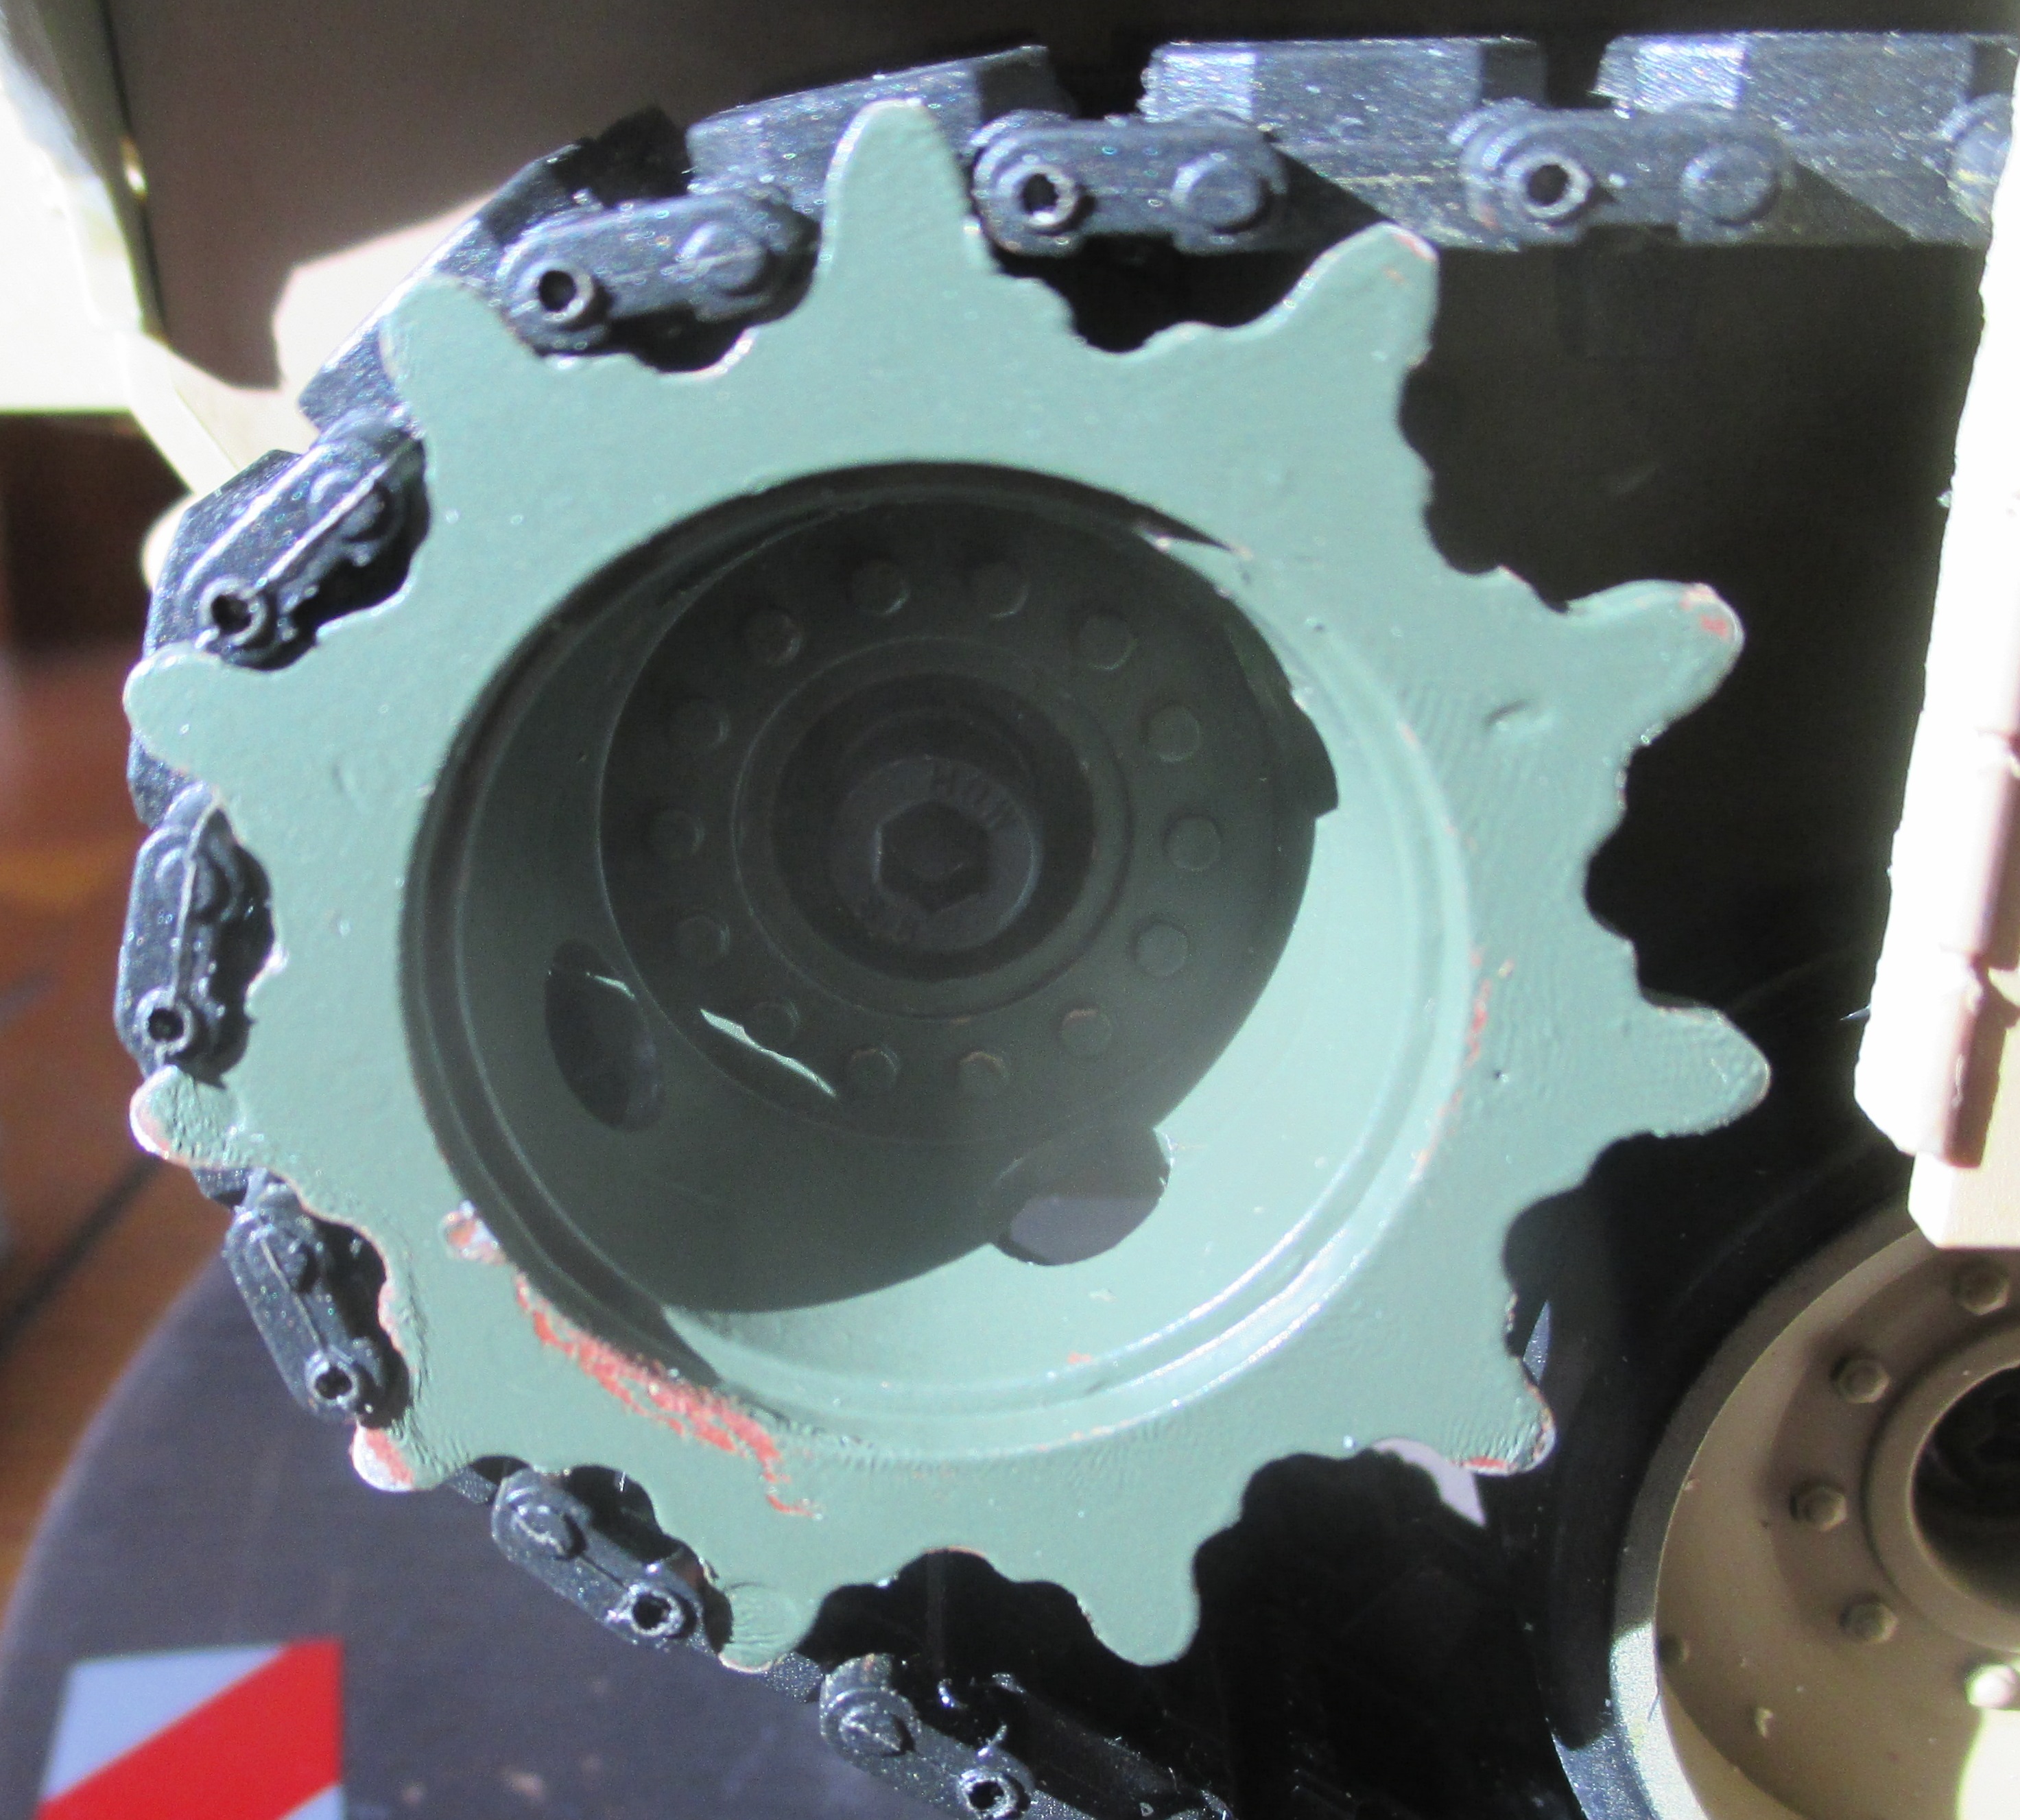
Step 5. Use a 1/16 inch drill bit to show the threaded holes in the sprocket like the real ones have. (I haven’t done this step yet)
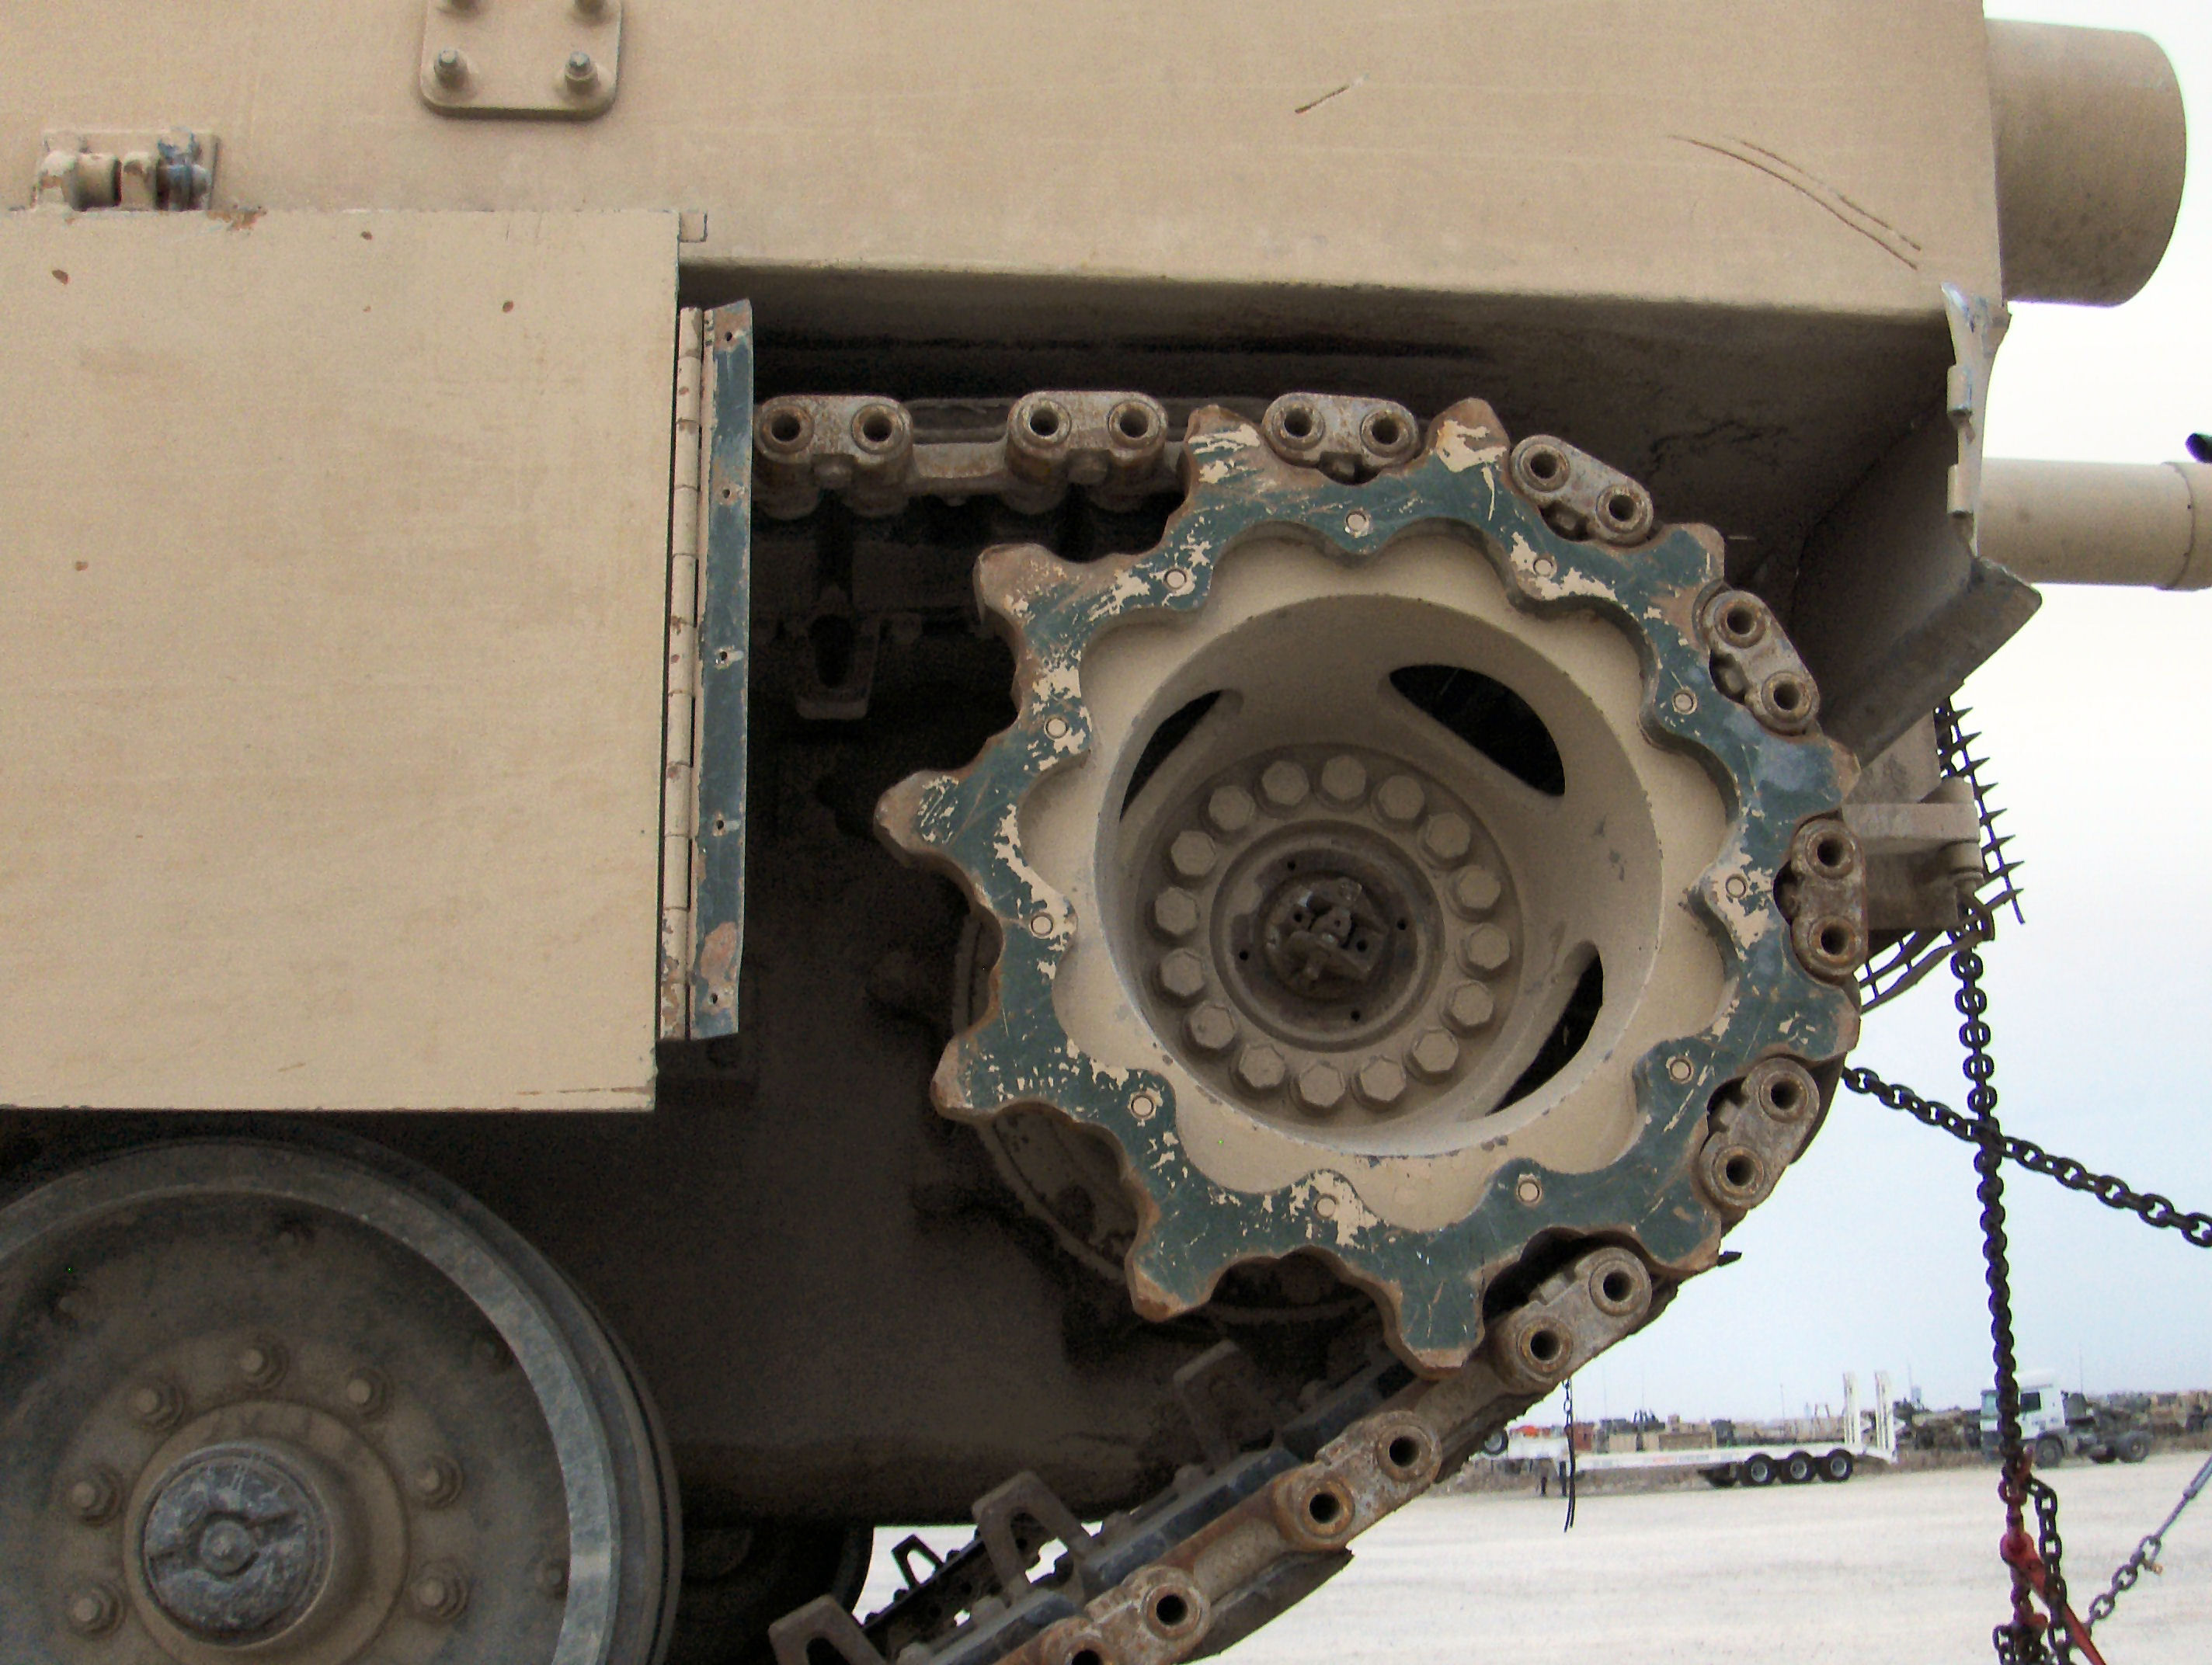
Note, Abrams tanks use two types of sprockets, I think both interchangeable, that are bolted from the inside of the sprocket, not the outside like Heng Long shows. One type is round on the inside, like Heng Long’s, and one type is wavy like the picture above.
Step 1. I layout and drill four holes in the hub part. I step drilled them, starting with a 1/16 inch bit and finishing with a � inch bit. This was to ensure my drill bit did not drift off the mark when I started each hole. I also placed a small block of wood inside the hub while drilling to catch the bit when it broke through to prevent scaring the inside. I only drilled the outside half, the part that shows.
Step 2. I sanded the face of the sprocket enough to remove the paint. I also scratched the paint out of the incorrect recessed bolt holes with a hobby knife.
Step 3. I used 5 min. epoxy to fill the recessed bolt holes.
Step 4. I sanded the face flat to remove excess epoxy. I used a file to clean up the drilled holes in the hub, then painted them NATO Green.
Step 5. Use a 1/16 inch drill bit to show the threaded holes in the sprocket like the real ones have. (I haven’t done this step yet)
Note, Abrams tanks use two types of sprockets, I think both interchangeable, that are bolted from the inside of the sprocket, not the outside like Heng Long shows. One type is round on the inside, like Heng Long’s, and one type is wavy like the picture above.
01-11-2016 | 10:06 PM
#34

Great work here! A lot of fun projects going on in this thread.
These are my winter projects and I might have them complete by summer or not.
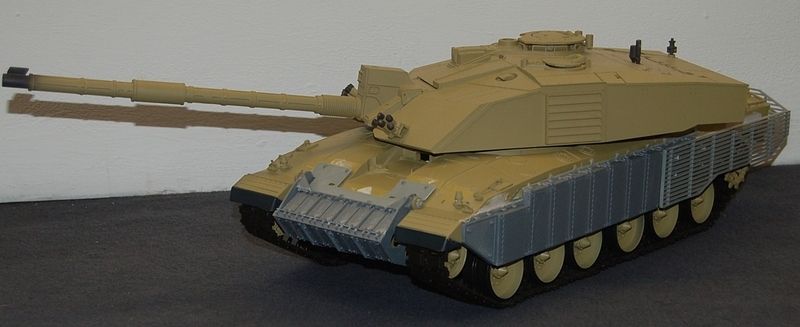
1. Tamiya Leopard 1A4 IR RC display kit conversion with custom one off metal parts by Daryl Turner and using a Henntec idler system from ETO Armor.
2. Tamiya Type 10 with Tamiya figures by Martin McDonald.
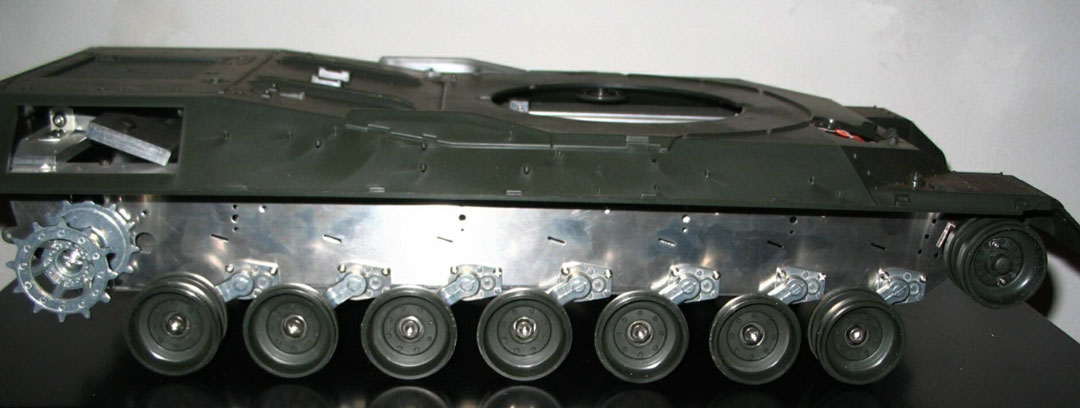
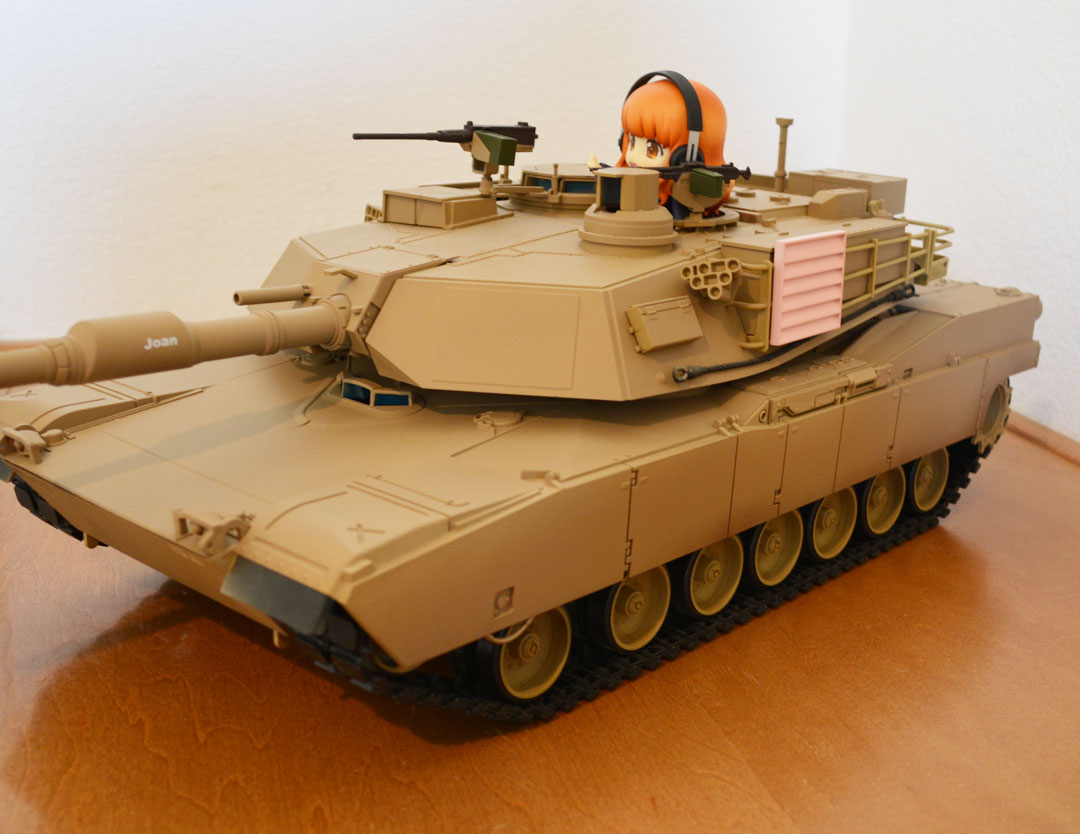
3. Girls und Abrams Panzer with the new 3 to 1 Taigen Steel ball bearing gearboxes.


John
These are my winter projects and I might have them complete by summer or not.
1. Tamiya Leopard 1A4 IR RC display kit conversion with custom one off metal parts by Daryl Turner and using a Henntec idler system from ETO Armor.
2. Tamiya Type 10 with Tamiya figures by Martin McDonald.
3. Girls und Abrams Panzer with the new 3 to 1 Taigen Steel ball bearing gearboxes.
John
01-26-2016 | 12:00 PM
#35

I forgot to add battle mods, the other thread about sensors reminded me.
Here's two cupolas with sensors and LEDs installed instead of an apple. Can't be used with a club because of low profile, but are cool otherwise.
The StuG is actually using the periscopes, the sensors are below facing up for full 45 degree defense.
https://www.youtube.com/watch?v=_2uR9KtTJZg https://www.youtube.com/watch?v=CQpSZzFiF6I

 01-27-2016 | 09:48 AM
#39
So speaking of mods... I want to try my hand at animating (adding motion) a 1/16 figure.
What IS the best route to start with as far as servo size/speed and is it best to use linkage or a cable through the body/torso?
I know the radio needs more than 4 channels... so what should I shoot for then?
8? 10 channels?
Jeff
What IS the best route to start with as far as servo size/speed and is it best to use linkage or a cable through the body/torso?
I know the radio needs more than 4 channels... so what should I shoot for then?
8? 10 channels?
Jeff
01-27-2016 | 11:04 AM
#40
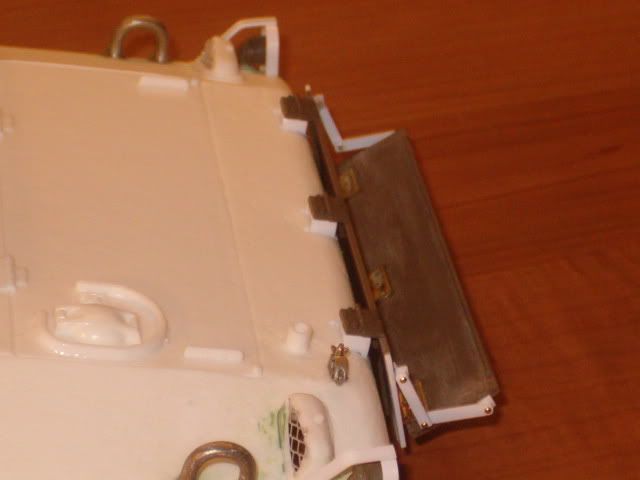
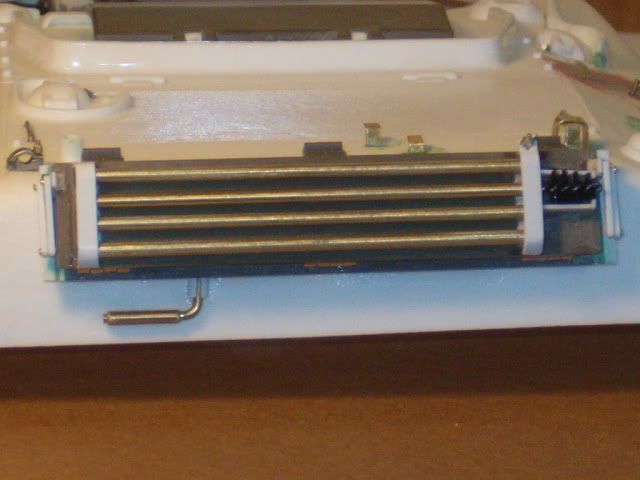
About the only modification I have done that warrants bragging on is the folding shelf on my A1.
http://www.rcuniverse.com/forum/rc-t...n-build-2.html
Jeff
01-27-2016 | 12:47 PM
#41
WOW, nice stuff going on here...
01-27-2016 | 01:43 PM
#42
So speaking of mods... I want to try my hand at animating (adding motion) a 1/16 figure.
What IS the best route to start with as far as servo size/speed and is it best to use linkage or a cable through the body/torso?
I know the radio needs more than 4 channels... so what should I shoot for then?
8? 10 channels?
Jeff
What IS the best route to start with as far as servo size/speed and is it best to use linkage or a cable through the body/torso?
I know the radio needs more than 4 channels... so what should I shoot for then?
8? 10 channels?
Jeff
A 5 gr micro servo would serve fine for turning a head, but if you go from underneath, any servo size will do.
In terms of channels, anything above 6 is too rich for my blood, or at least to warrant the price (I'm not up on the cheapies). But you only get switches above 6 anyway right? It's not like they have more sticks.
The easiest would be a head turn hook up to the rotation, you can go with like it'slooking ahead or against as if it's checking it's back. With Tamiya, you can get the servo to move before the rotation kicks in.
Here's Squidward (thrice decapitated in battle so far) piggy backed on rotation of a normal 4 channel Attack Tx.
https://www.youtube.com/watch?v=ONW9lqzBgGg
01-27-2016 | 02:28 PM
#43


So speaking of mods... I want to try my hand at animating (adding motion) a 1/16 figure.
What IS the best route to start with as far as servo size/speed and is it best to use linkage or a cable through the body/torso?
I know the radio needs more than 4 channels... so what should I shoot for then?
8? 10 channels?
Jeff
What IS the best route to start with as far as servo size/speed and is it best to use linkage or a cable through the body/torso?
I know the radio needs more than 4 channels... so what should I shoot for then?
8? 10 channels?
Jeff
 The programming is some of the easiest I've ever seen on a transmitter and has a help button for every screen. I think you would be fine with 10ch, but 16+ is even better. If you are looking for all out top of the line transmitter then I would say go with the Taranis. You can do ANYTHING with that transmitter, just be very prepared to study how the thing works lol. Programming is much harder on the Taranis than the i10 though just to warn you. I will no longer buy or even invest in a less than 6 or 7 channel transmitter anymore. The last 6 channel I got was just patched to be a 8ch actually. I find on my tanks I need at least 7ch and for my multicopters I need at least 8.
Edit: the Taranis would allow things like programmed movements accompanied with sound from the transmitter on one switch. This way you could press a switch (or trainer, no limits on OpenTX) and the model would say turn his head and wave and the TX would announce "waving" or whatever you wanted it to say.
Last edited by Imex-Erik; 01-27-2016 at 02:30 PM.
01-28-2016 | 06:22 AM
#45
Yea but I'm moving back to my Taranis now TBH. I love to tinker and it is hands down my favorite radio I've ever owned. From voice prompts to awesome telemetry you really cant beat it IMO. The only downside is trying to find one in stock at a LHS lol.
01-28-2016 | 10:50 AM
#46
First off decide what you want it to do. Simplest and most convincing is just a turning head. Second would be an arm lifting binocs or something similar, but that runs the risk of looking like a Santas Elf in a window type thing.
A 5 gr micro servo would serve fine for turning a head, but if you go from underneath, any servo size will do.
In terms of channels, anything above 6 is too rich for my blood, or at least to warrant the price (I'm not up on the cheapies). But you only get switches above 6 anyway right? It's not like they have more sticks.
The easiest would be a head turn hook up to the rotation, you can go with like it'slooking ahead or against as if it's checking it's back. With Tamiya, you can get the servo to move before the rotation kicks in.
Here's Squidward (thrice decapitated in battle so far) piggy backed on rotation of a normal 4 channel Attack Tx.
https://www.youtube.com/watch?v=ONW9lqzBgGg
I DO appreciate your help!
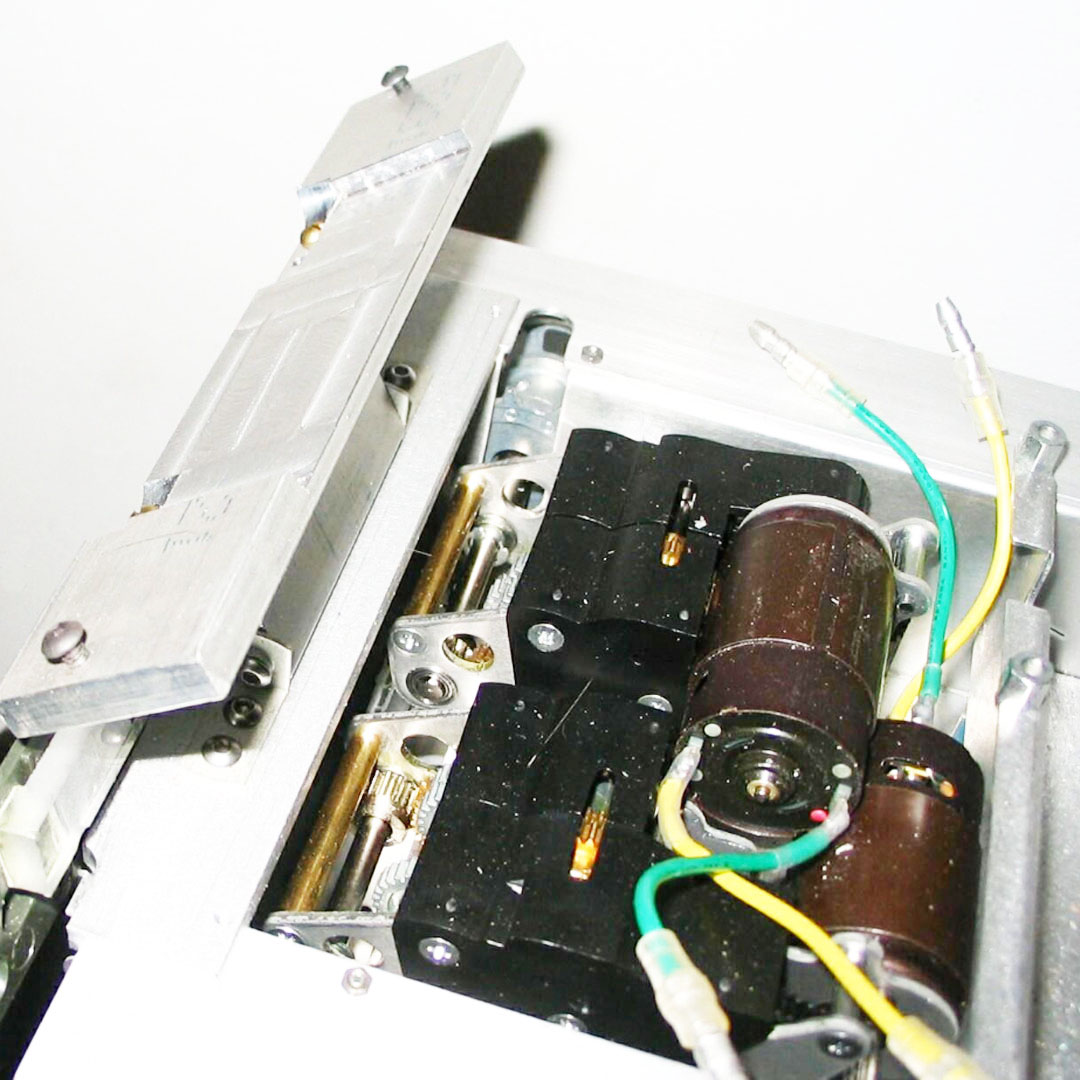
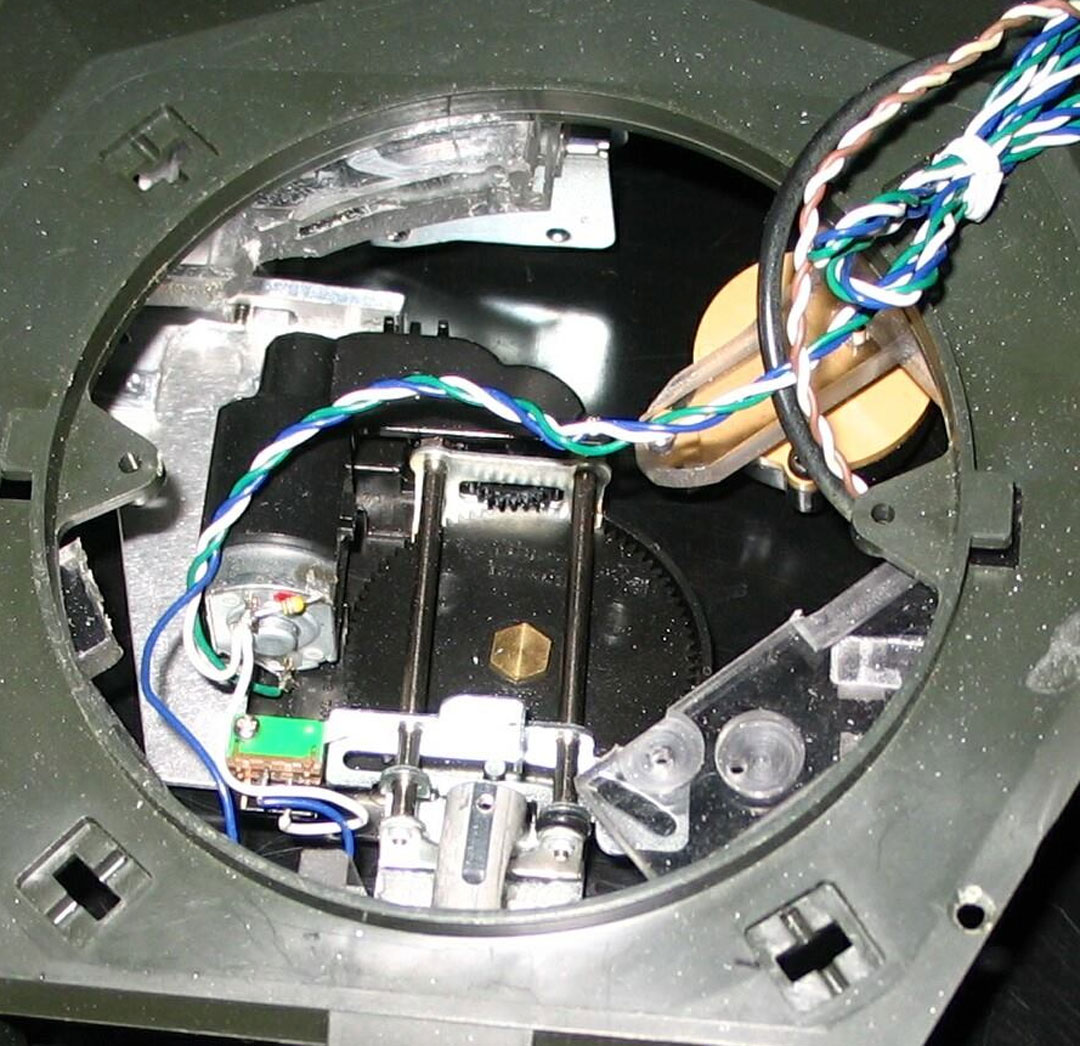
I would love to know how you managed to have tilt with the head rotation for your Tiger commander has.
I understand what's going on in the head... the hinge operation, but I am dumbfounded when it comes to the mechanics of what's going on down below.

Jeff
01-28-2016 | 11:59 AM
#47
I DO appreciate your help!
I would love to know how you managed to have tilt with the head rotation for your Tiger commander has.
I understand what's going on in the head... the hinge operation, but I am dumbfounded when it comes to the mechanics of what's going on down below.
Jeff
I would love to know how you managed to have tilt with the head rotation for your Tiger commander has.
I understand what's going on in the head... the hinge operation, but I am dumbfounded when it comes to the mechanics of what's going on down below.
Jeff
If you look closely at the video, you can see the pushrod that moves the head up/down, it's right where the trachea would be. I'm not sure a fleshed out head would look good, it'd be like Charlie McCarthy.
https://www.youtube.com/watch?v=ONS58Loi5QY
01-28-2016 | 12:32 PM
#48
Okay, I have seen the push rod earlier. So a linear servo is more like an actuator, right?
So you have a servo for rotation and 2 actuators for the vertical movement of the head and digits?
Jeff
So you have a servo for rotation and 2 actuators for the vertical movement of the head and digits?
Jeff
01-28-2016 | 05:03 PM
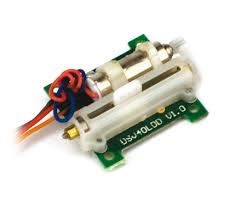
#49
It's this type, used on all the Horizon Hobby Ultra Micro planes. I ripped apart a bunch of wrecks and had a pile of servos and bricks that needed to go somewhere, I figured, why not in a figure...