


1/10th scale Hydro Build
 01-04-2021 | 06:26 PM
#51

I think I need to start looking at getting some hardware in, as I think I'll need to do some mods to fit batteries in etc. MH Boatworks does essentially the same boat in 1/10th and they recommend the following:
*Speedmaster or Accu-tech 20 rudder
*Speedmaster or Accu-tech 3/16" flat bottom hydroplane Strut (Modern Hulls may use the "Extended" style Strut)
*Speedmaster or Accu-tech 3/16" flex cable and prop shaft
*Virginia Craftsman ( [email protected] ) or Accu-Tech RC Hardware home page 1/10th Scale or Sport 20 or 40 Turn Fin
They don't give any recommendations on motors. Does anyone have any thoughts on any of it? I don't need top of the line gear, mid range is fine for now.
Cheers,
Mike
Last edited by Vilante; 01-04-2021 at 06:29 PM.
 01-04-2021 | 08:11 PM
#52

Since you're boat will be electric, you can get away with enamel. IF, however, you plan to use decals for the lettering, you will need to spray a clear over the top to protect the decals. I would recommend that you test your clear on a sample of the white to make sure there won't be any issues that could ruin your paint job. With my boats, most will get a coat of white primer, sand it smooth, add a second thinner coat, sand it slightly, add lettering or decals and spray a couple of coats or clear to finish it. The exception to that will be the new Elam hull I'm building. It will get a specific white paint over a tinted primer, neon orange as needed over that, followed by two or three coats of clear over the decals.
As for your hardware, I would install all of it PRIOR to installing the decks. Something else to look at is where the screws are used. Sheet metal and wood screws won't work as the wood isn't strong enough to handle the stress. I would recommend doing one of the following:
1) Install a plywood doubler inside the locations where the hardware will be mounted. For the sponson and rear fin/rudder brackets, you need to have at least 10mm in total thickness and have the doublers cover a larger area than where the brackets will be. Drill the locations for the mounting screws and then install either threaded inserts or blind nuts into the holes
2) Install an aluminum doubler at least 3mm thick inside the transoms where the brackets will be. Drill the holes for the screws and tap threads into the aluminum doublers.
01-05-2021 | 06:49 PM
#53
Thanks again Hydro.
Any ideas on what I should base my setup around? There are 3 classes under the local rules, 4S/6S/12S.
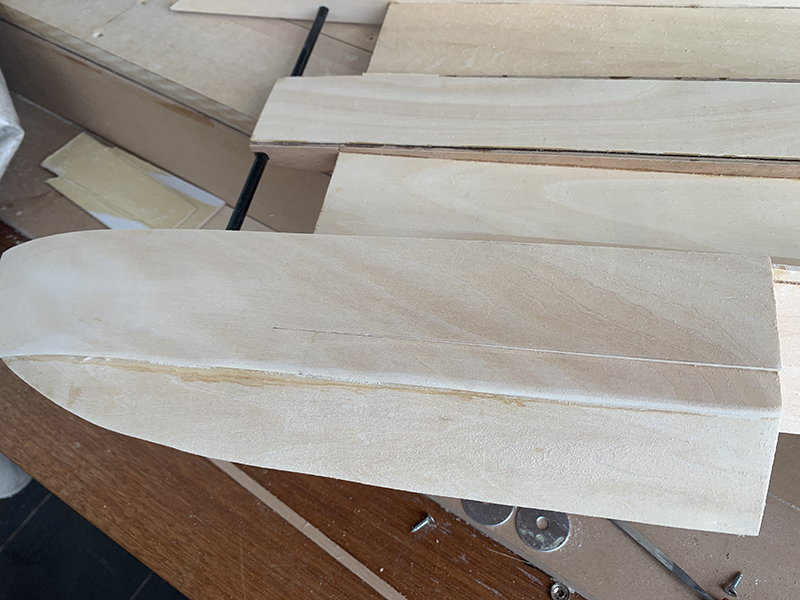
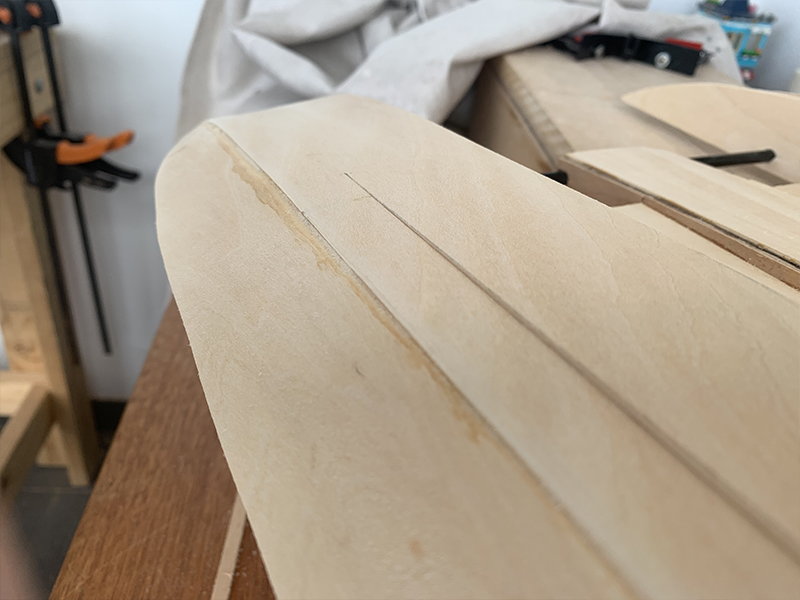
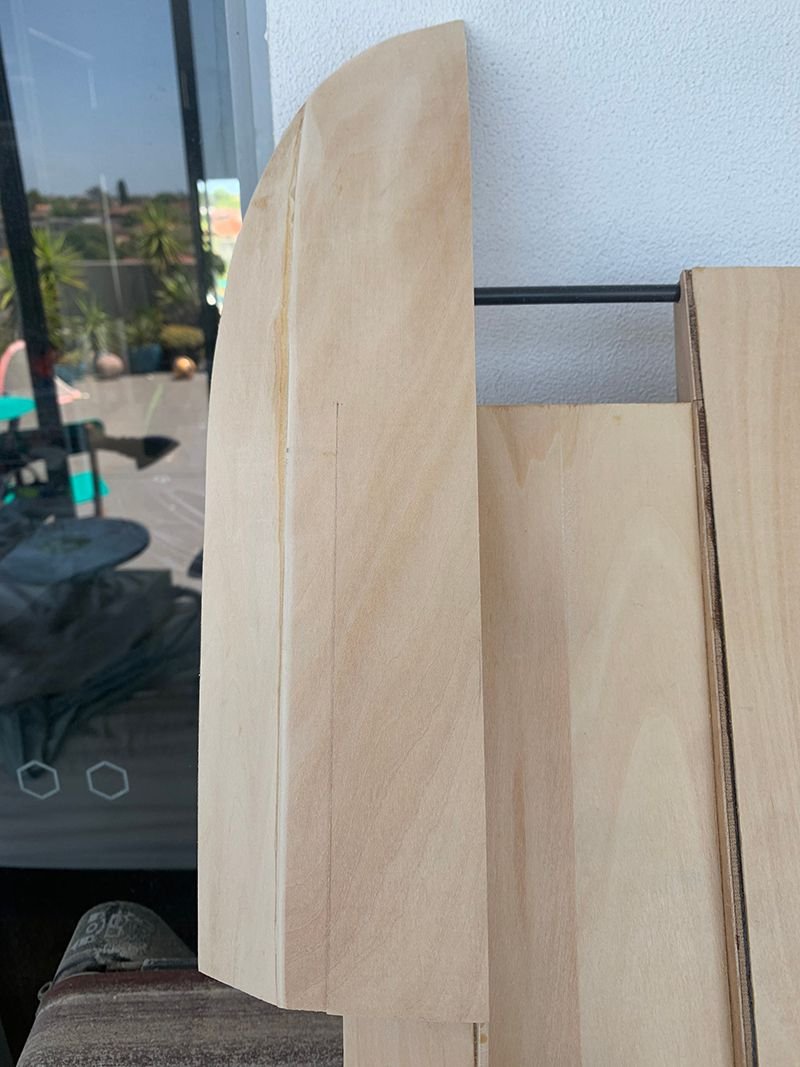
The sponson didn't go quiet as well as hoped, I needed to overlap it more. All learning. I'll have to do some filling.
Any ideas on what I should base my setup around? There are 3 classes under the local rules, 4S/6S/12S.
The sponson didn't go quiet as well as hoped, I needed to overlap it more. All learning. I'll have to do some filling.
01-05-2021 | 07:05 PM
#54
I would call that an "OOPS", or not too much of a big deal. Since you've already decided to fill those areas that didn't quite make it, there are two things you need to do:
- fill those areas with either straight epoxy or epoxy mixed with silica fibers, West Systems 406 is what I use in areas like what you showed in your picture
- sand the filled areas flush with the adjacent sides/bottom after it has several days to cure. BE SURE TO KEEP THE EDGES SHARP OR THE WATER WILL SUCK THE BOAT DOWN!!!!!!!!!!!!!!!!!!!!!!!
01-05-2021 | 07:32 PM
#56
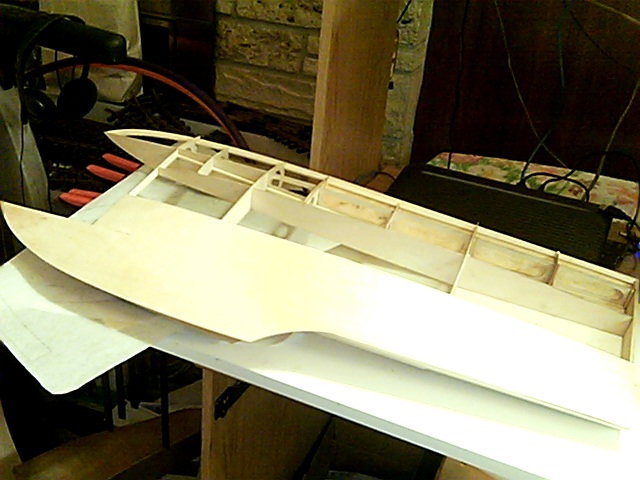
What did I do? I just told you what I have done on a few occasions to fix a shifted skin panel. That is the very reason I always oversize my parts by no less than 3mm on all sides. You can see that on the bottom picture on post 47. The deck extends around the sponson by roughly 3mm or so to make sure it didn't end up short. What I did do, however, is let the deck shift so that the deck didn't reach the edge aft of the sponson where it and the side panel didn't match. If you look closely at the deck edge by the rear of the boat, you can see a darker stripe that is the visible spruce glue strip inside the hull. Since this wasn't an area that would be hit by water or stressed, I used epoxy and microballoons, West Systems 410, to give the boat a sharp edge
Last edited by Hydro Junkie; 01-05-2021 at 09:38 PM.
01-06-2021 | 02:15 PM
#57
Just thanking you for the feedback mate. It's a bit hard to get these days, I guess more and more people are buying rather than building now.
Is there any other interesting resources around you know of, particularly in regard to FE power train?
Is there any other interesting resources around you know of, particularly in regard to FE power train?
01-14-2021 | 05:05 PM
#60
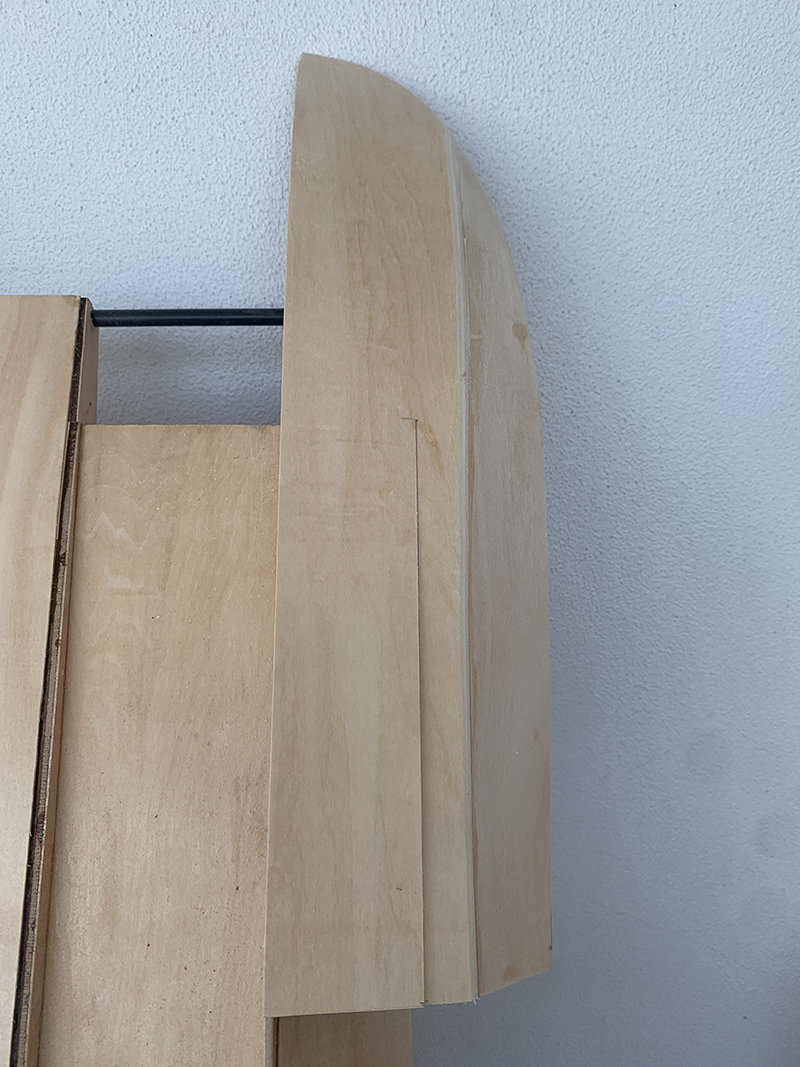
Skinning the second sponson seems to have come out better. I think I've got my driveline sorted, I've got some help from a local boat shop owner which has been great. I won't get that for a couple of weeks, so I think I might move on to the cowel.
Does anyone know of a good tutorial on fibreglassing? I wouldn't mind having a go at making a plug and molding it out of fiberglass.
Does anyone know of a good tutorial on fibreglassing? I wouldn't mind having a go at making a plug and molding it out of fiberglass.
01-16-2021 | 08:34 AM
#62


My Feedback: (29)
Here is a build thread here on RCU. It is an airplane project but does show some good information about plug and mold fabrication. A bit long with a fair amount of fluff but a good read none the less.
Pattern Biplane
Pattern Biplane
05-06-2021 | 08:39 PM
#64
OK I'm back!! I have been working on the plug here or there, but I've finally placed my order for all the running gear so I can get stuck back into the hull.
I have ordered:
3/16 -60mm deep strut
3/16 flex cable/stuffing tube/Teflon liner/thrust bearing/drive dog
115mm dual pick up rudder
SSS 4092 1650kV motor
Cooler
Mount (Carbon because cool)
Servo, mount and rod
I'll still need to get the ESC and a received along with a turn fin (couldn't figure out which size to get) but this is enough to get the hull built. Exciting times!!
05-06-2021 | 09:57 PM
#65
Welcome Back!!
Sounds like you've done a bit of researching, glad to hear that. Many just go out and buy without knowing what they are buying.
I am a bit envious, however. Between my job and Covid, I've been looking at parts and not able to do anything with them. Fortunately, two days ago I was able to get down to the Hydroplane & Raceboat Museum to get a bit more information off of my boat, the 1973 Pak. IF(and that's a big "IF" with the wife wanting to work in the yard all weekend, that is if it doesn't rain)I get to work on the boats, I'll be working on setting up the sponson framing and doing some final shaping on the engine bay sidewalls as the bottom of those was only roughly cut. I was able to get the information I needed on the runners and fairings while I was at the HARM so now I can start working on them again. Needless to say, I'm looking forward to playing with epoxy and actually making some progress
Last edited by Hydro Junkie; 05-06-2021 at 10:00 PM.
05-07-2021 | 05:40 PM
#66
Welcome Back!!
Sounds like you've done a bit of researching, glad to hear that. Many just go out and buy without knowing what they are buying.
I am a bit envious, however. Between my job and Covid, I've been looking at parts and not able to do anything with them. Fortunately, two days ago I was able to get down to the Hydroplane & Raceboat Museum to get a bit more information off of my boat, the 1973 Pak. IF(and that's a big "IF" with the wife wanting to work in the yard all weekend, that is if it doesn't rain)I get to work on the boats, I'll be working on setting up the sponson framing and doing some final shaping on the engine bay sidewalls as the bottom of those was only roughly cut. I was able to get the information I needed on the runners and fairings while I was at the HARM so now I can start working on them again. Needless to say, I'm looking forward to playing with epoxy and actually making some progress
Sounds like you've done a bit of researching, glad to hear that. Many just go out and buy without knowing what they are buying.
I am a bit envious, however. Between my job and Covid, I've been looking at parts and not able to do anything with them. Fortunately, two days ago I was able to get down to the Hydroplane & Raceboat Museum to get a bit more information off of my boat, the 1973 Pak. IF(and that's a big "IF" with the wife wanting to work in the yard all weekend, that is if it doesn't rain)I get to work on the boats, I'll be working on setting up the sponson framing and doing some final shaping on the engine bay sidewalls as the bottom of those was only roughly cut. I was able to get the information I needed on the runners and fairings while I was at the HARM so now I can start working on them again. Needless to say, I'm looking forward to playing with epoxy and actually making some progress
Do you have a build thread for that boat? You're so lucky you can visit the museum, super cool.
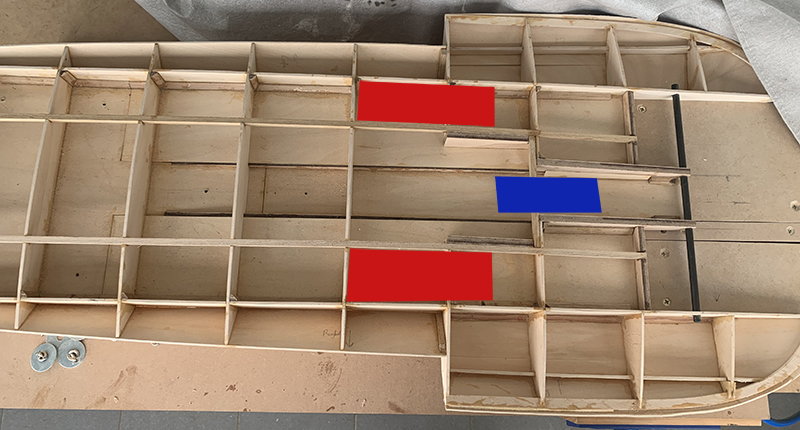
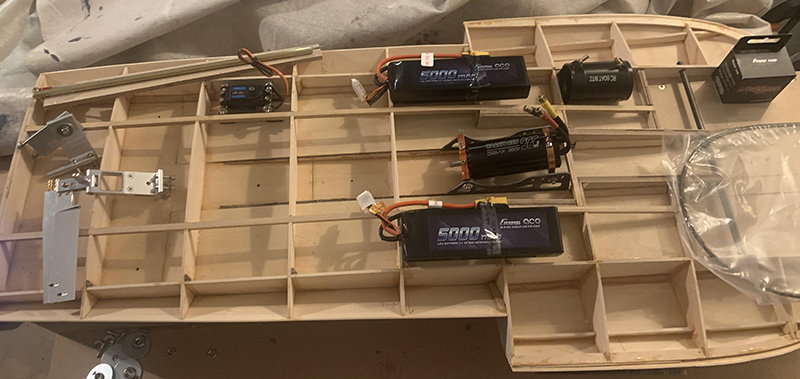
I had an 'Oh S...' moment when I realised how big a 5000mah 50C 3S battery is. If I get (expensive) shorty packs and lay them on their sides, this is as far forward as I can get them (and I have to cut back some bulkheads). Hoping it will be far enough as the deck gets shallow further forward. Thinking I'll have to mount the motor as far forward as possible.
What's the best way to try to find the COG, add some weight to represent the decks/cowl/wing etc and balance it now to get the position of the motor?
 05-07-2021 | 07:51 PM
#67
Your battery location should be fine. It's best to have them at the CG or around the rear of the sponsons, as you have shown with the red. If it's not shown on the plans, you want the CG to be between the rear of the sponson and the next frame back. You can balance the boat with the motor and radio gear to a large extent so I wouldn't worry quite yet. You have to remember, the only weight you're going to have at the rear is going to be the strut and prop shaft, rudder assembly and the tails/wing. I would get the tail mounts, rudder and deck installed AND THEN see where the boat balances at. If it falls in between the sponson transom and next frame back, you will probably be fine. If it's outside of that range, you will be a bit more limited on where to put everything. The strut and tail feathers won't weigh that much and should be offset by the prop's lift. You also have to remember, you still have a cowl to install though, like the tail feathers, it shouldn't weigh a lot either.
As for a thread on my Pak, not yet. I'll be starting one when I get a bit further along. Still debating on whether I should include pictures of the full sized boat or not, if for no other reason, for comparison sake
As for a thread on my Pak, not yet. I'll be starting one when I get a bit further along. Still debating on whether I should include pictures of the full sized boat or not, if for no other reason, for comparison sake
Last edited by Hydro Junkie; 05-07-2021 at 07:55 PM.
05-08-2021 | 08:13 PM
#68
The COG is currently in that line through the batteries so it's close. So I'll get the batteries and make sure they've got space (as it'll be hard after the decks on), then I'll finish the boat off and mount the motor once I know where it suits the COG.
05-08-2021 | 10:29 PM
#69
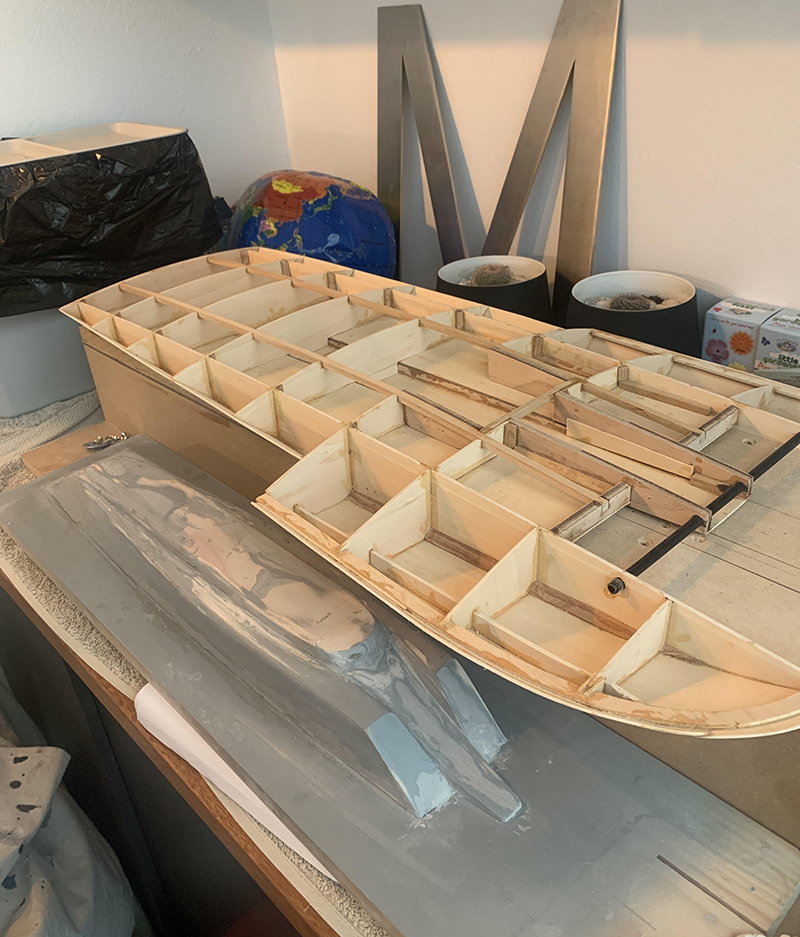
As I suspected, it was errand and yard work today. I did dry fit the frames(rough as they are) together for a picture.
Sorry about the messy background, had to clear room for the boat
IF(not as big of "IF" as today was) I get the chance, I'll be doing more work on the sponsons tomorrow
Sorry about the messy background, had to clear room for the boat
IF(not as big of "IF" as today was) I get the chance, I'll be doing more work on the sponsons tomorrow
05-09-2021 | 02:57 AM
#71
You sure about that? The boat frame I posted the picture of is 108.585cm long. A gas scale of the same boat is 130.3cm long, if you build it to exact scale length. You also have to figure out how to fit the engine without ruining the scale appearance, not exactly an easy task
05-09-2021 | 03:14 AM
#72
You sure about that? The boat frame I posted the picture of is 108.585cm long. A gas scale of the same boat is 130.3cm long, if you build it to exact scale length. You also have to figure out how to fit the engine without ruining the scale appearance, not exactly an easy task
 05-09-2021 | 09:09 PM
#73
You might want to build a 1/8 scale first, then move up to a gas scale. You also need to plan on spending more money as you will be needing birch plywood to build anything larger. The next question would be nitro or electric scale? My 1/8th scale is being built with 1.5, 3, 4.5 and 6mm birch plywoods, the thickness dictated by where the plywood is being used in the structure.
05-10-2021 | 04:16 AM
#74
If you really want to do a gas boat, here's a way to get one that not only has plans, it has "How To" videos on Youtube. I've known the guy for years and, while him and I do things differently, he does know his stuff. Anyway, here's the link to the video:
05-11-2021 | 02:23 AM
#75
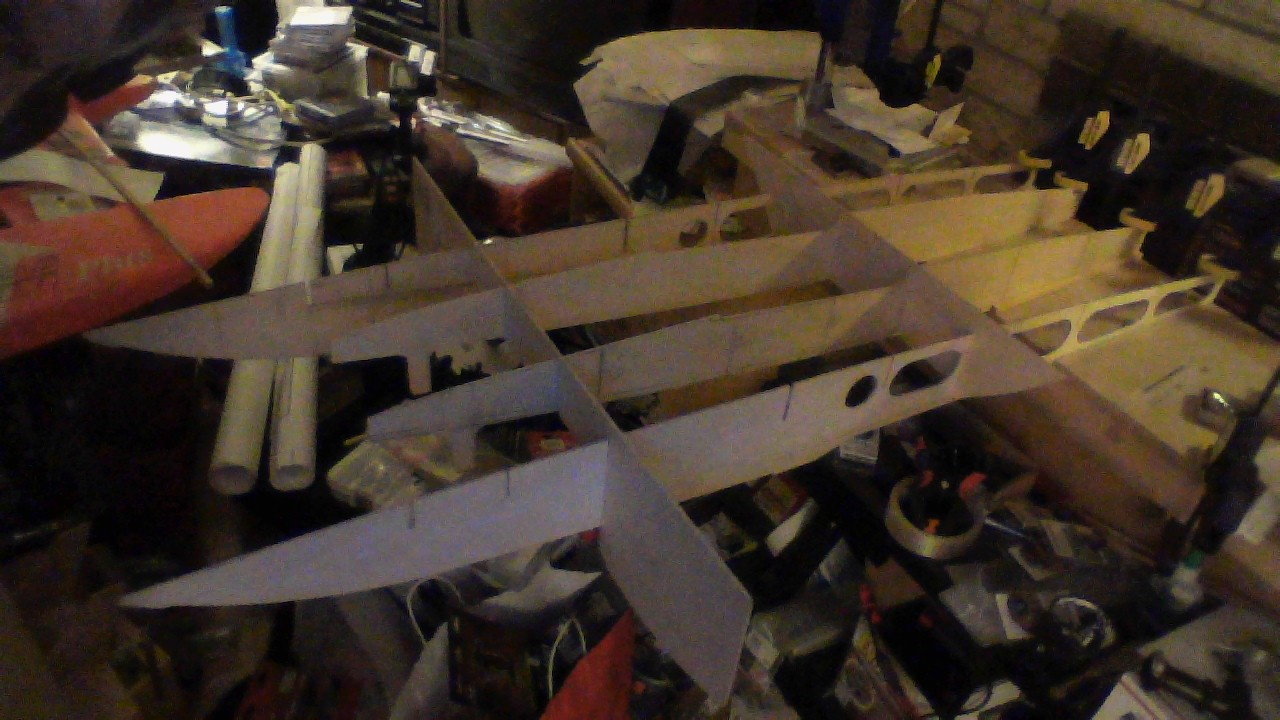
I got stuff!!
I don't think the stuffing tube etc is long enough but we'll cross that bridge later. I don't think the servo mount is going to work, it's too tall, so some thinking required there.
I may have to trim the rails to get the motor lower, but again that depends on where it needs to sit for COG.
Next I will cut out/strengthen bulkheads to fit the batteries, fix up some holes and joints in the current panelling and them sand everything in preparation for the decks. I have some expanding foam on the way too. Is there any reason you couldn't do the whole top in one sheet?

