


Comp ARF BAE Hawk build thread
 09-21-2013 | 06:04 PM
#1401


My Feedback: (3)
Thanks Alan. I will do the same. Could you post the dimensions of the pitot probe? I can find someone here to machine me one. I could make a small working drawing from dimensions. (Unless of course you are selling them then I would just buy one from you.)
 09-21-2013 | 08:35 PM
#1402

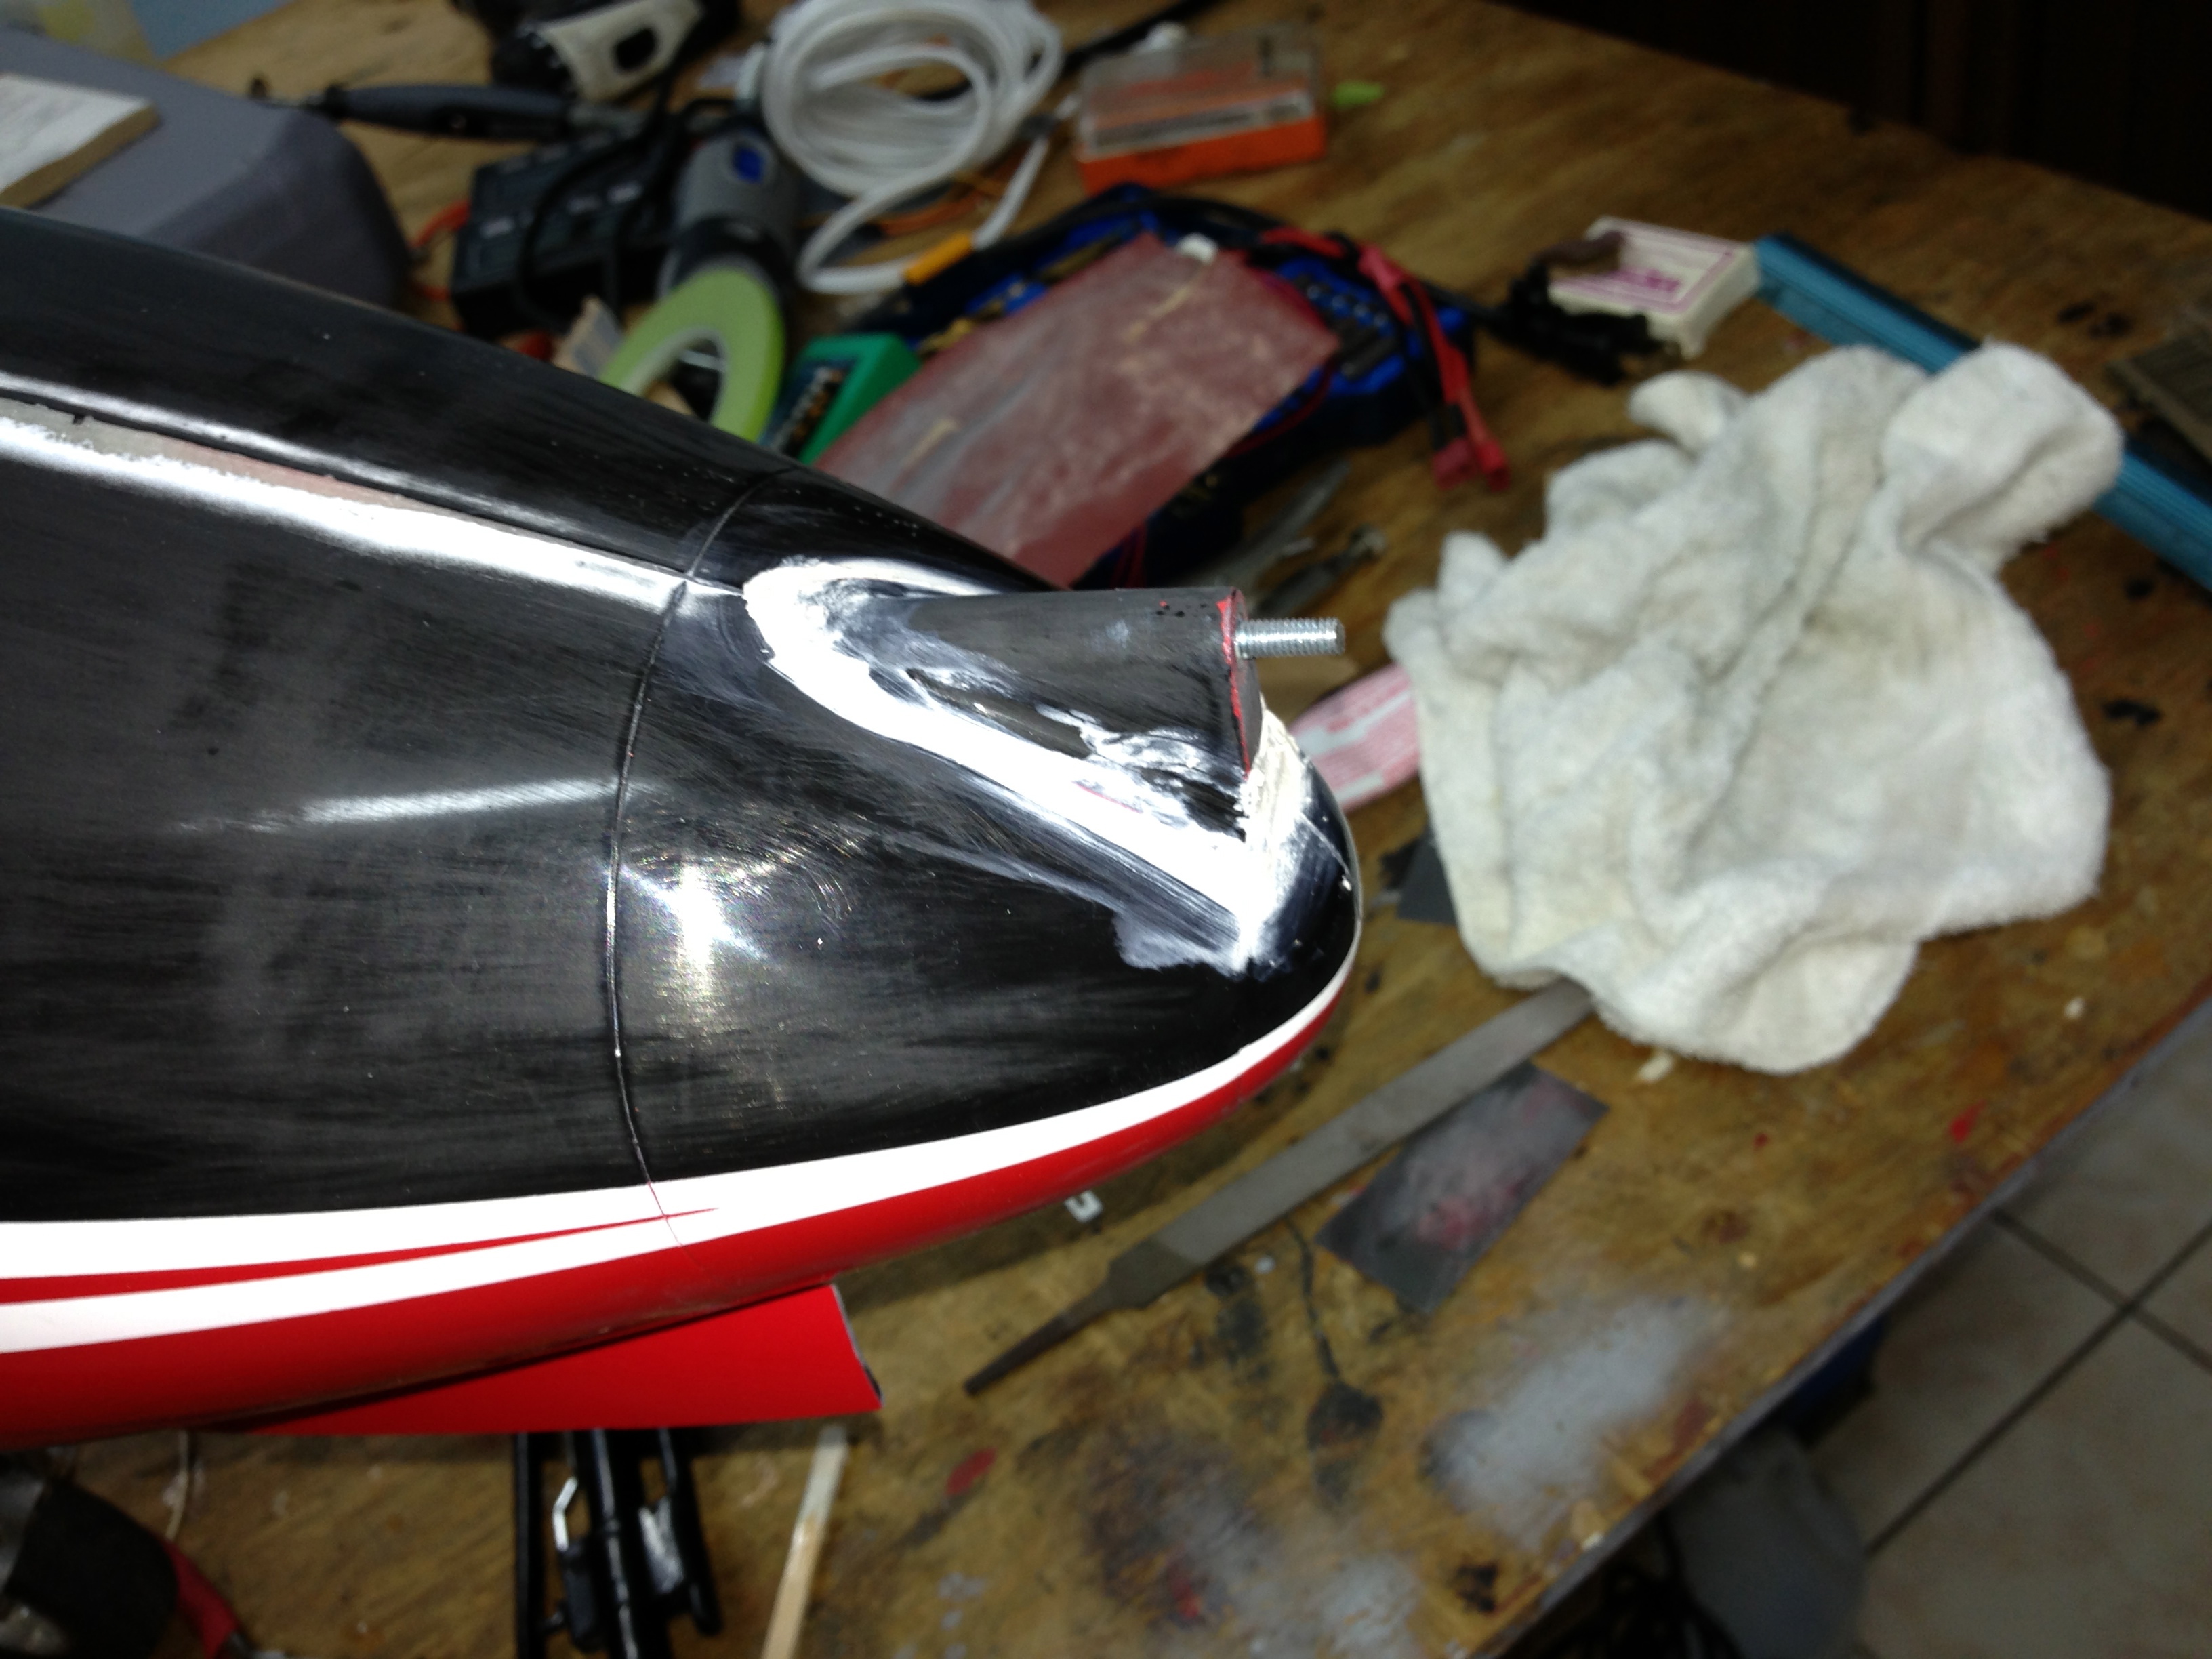
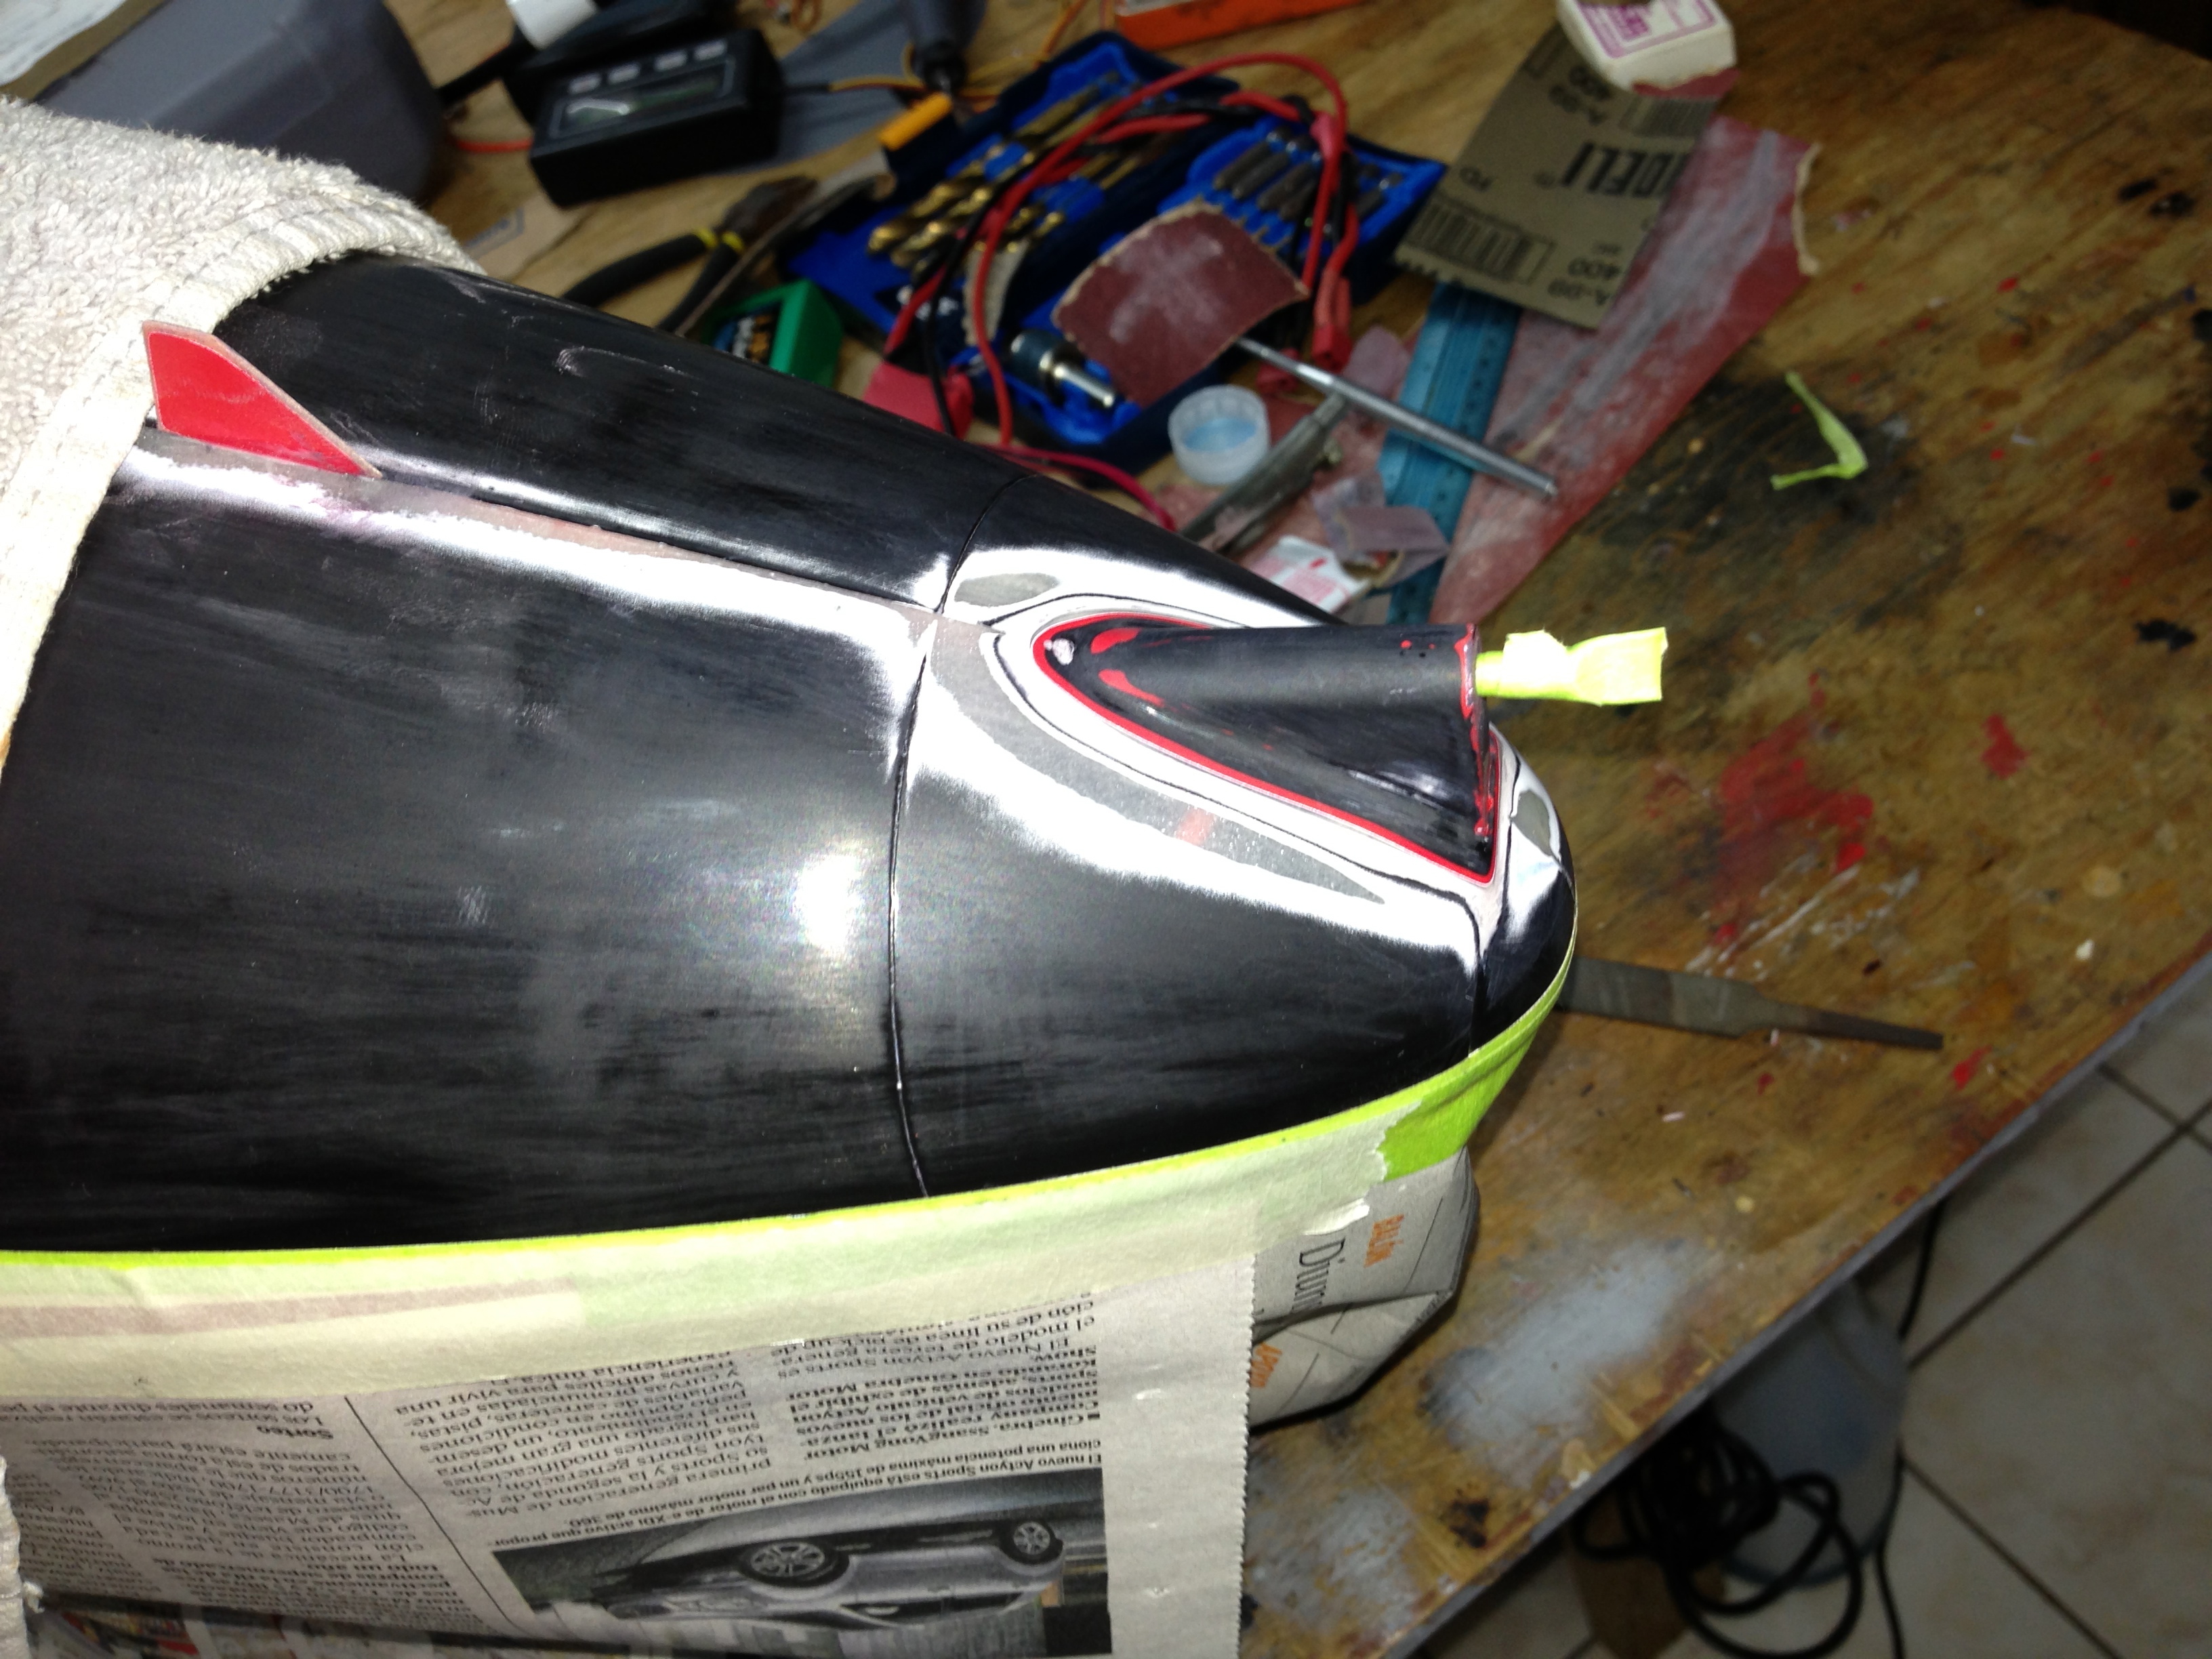
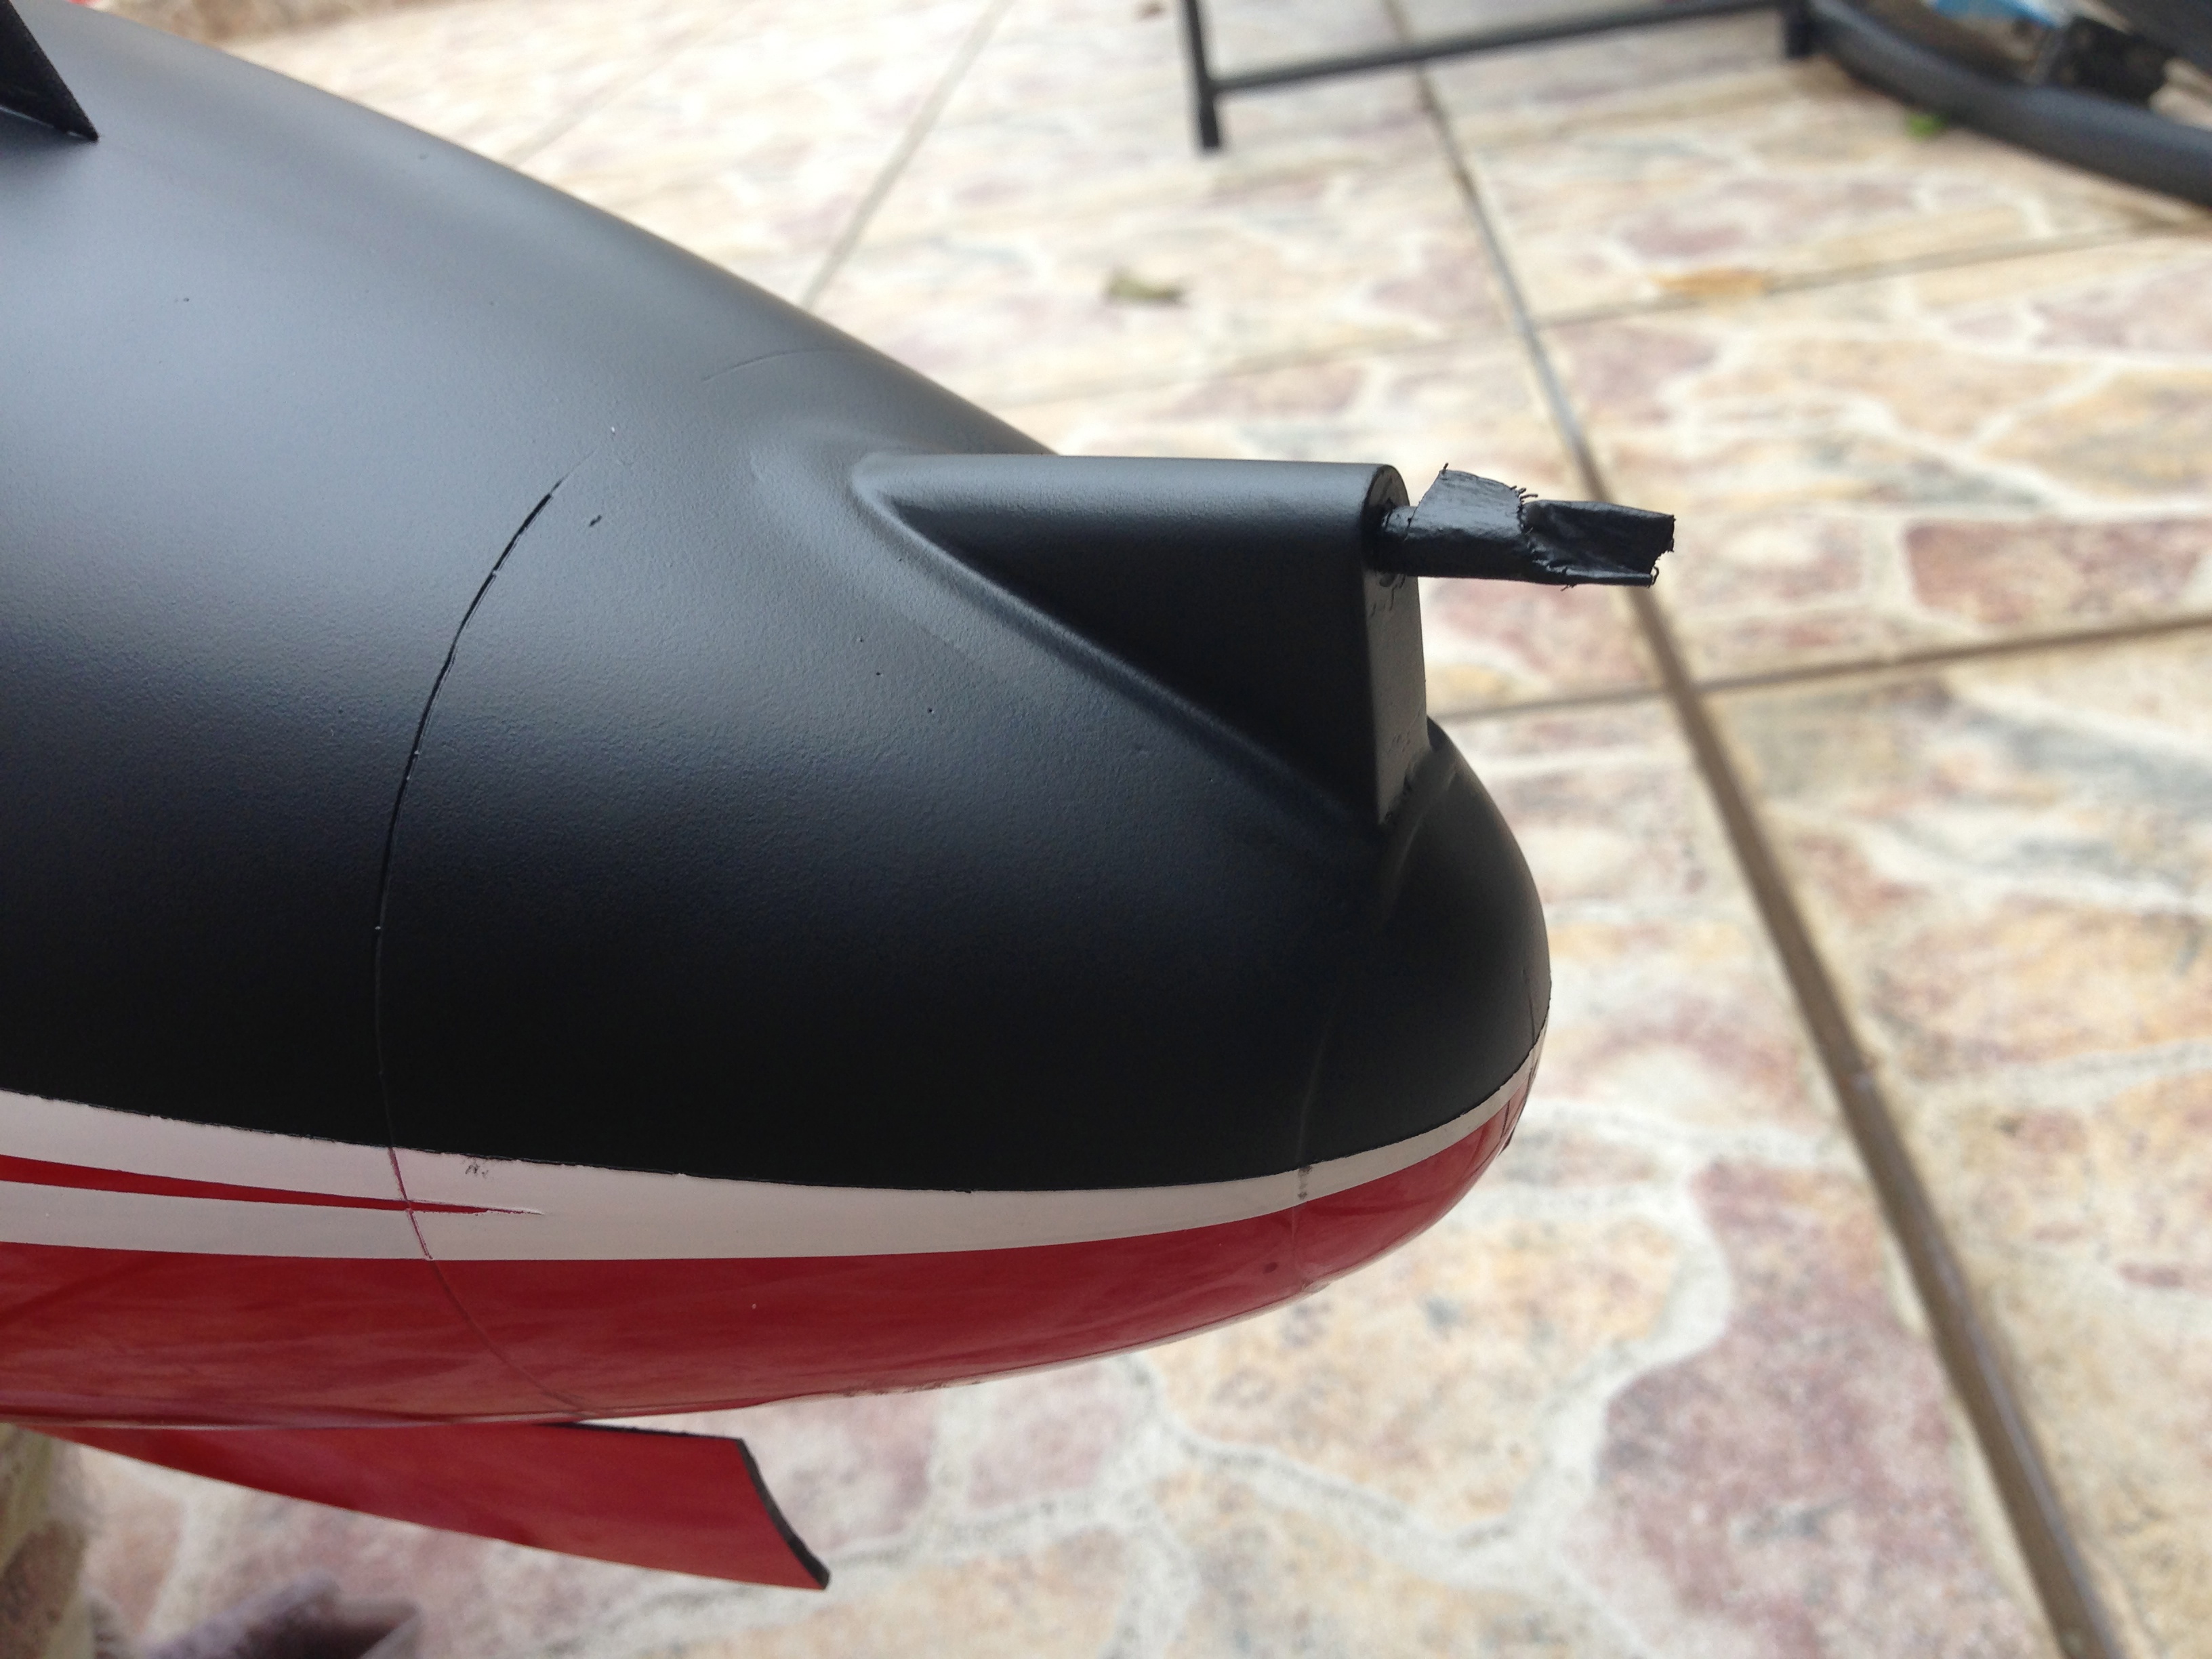
I did the same as Alan, just cut out the bump leaving an edge to glue on the fuse. some painting involved but turned out nice since i changed the shiny black for Flat Black or Matte black as some call it.
09-22-2013 | 01:33 AM
#1403
Thread Starter
Dw
09-22-2013 | 09:28 AM
#1404
Great weather here in the UK so got the spray gun out again... Just flatting down and just black to go..
Agree with DW the DerJet cock pit definitely the better option, if you look back in this thread I took some pics for other guys to show how I modified/cut the DerJet to fit but really finishes the Hawk off
Alan
Agree with DW the DerJet cock pit definitely the better option, if you look back in this thread I took some pics for other guys to show how I modified/cut the DerJet to fit but really finishes the Hawk off
Alan
Last edited by fireblade5437; 09-22-2013 at 09:32 AM.
09-22-2013 | 05:25 PM
#1406
My Feedback: (3)
Anyway we have a bunch of cocpit tub shots, DerJet cockpit and BVM pilot figure.
Then we have ashot of the front tub cutaway to clear the gear steering servo in the factory supplied nose gear. I still have to add a bit to the shroud to hide the fuselage interior.
Then a pic showing the cutaway aft tub, the fuel lines coming out of the UAT are in this area, they just barely touch the back of the seat molding.
Then there are pics of the equipment installation.
Then a pic showing the balsa strips below the fuselage side rails.
Then a tub showing the stick on foam strip (door strips) either side of the tubs. These compress to allow the tub railings to be popped into the space between the fuselage cockpit railings and the balsa strips. And then the foam centers the tub in the fuselage.
So there are a few shots showing how I instal the front tub and slide it forward until it hits the plywood either side of the nose gear air cylinder. Then I pop in the aft tub and slide it forward, it overlaps the front tub.
Then a shot of the canopy rear section showing the 1/64 ply hing the gap behind the aft tub.
Then a few shots with the canopy on.
BTW I had a hard time with the DET cord, I am not sure what the best way to stick it on is but suffice to say the canopy has complex curves and the decal does not... I may try to redo it as I ended up with it curving a bit across the centerline and it kind of grabs your attention (in a bad way) like that.
Remember, this is not intended to look really scalelike but rather improve the appearance of my sport jet with a small amount of effort. There are others here in the forum that have MUCH nicer instals, but mine does work!
Last edited by husafreak; 09-22-2013 at 05:48 PM.
 09-23-2013 | 08:47 PM
#1408
Bob
I do not know if you are receiving PM's but can you please recheck the measurement of the internal carbon tube that's in the pitot moulding as the 0.250" seems on the large size as most seem to be nearer to 0.231" ?
I don't want to make your insert too large!
Alan
I do not know if you are receiving PM's but can you please recheck the measurement of the internal carbon tube that's in the pitot moulding as the 0.250" seems on the large size as most seem to be nearer to 0.231" ?
I don't want to make your insert too large!
Alan
09-24-2013 | 04:40 AM
#1409

My Feedback: (21)
Alan,
You are correct. The measurement I gave you was too large. Originally, I put the dial calipers inside the tube and the ID varies so I gave an average. This time, I inserted a drill bit in the tube, and the one that fits nicely is .232"
Thanks,
Bob Neal
You are correct. The measurement I gave you was too large. Originally, I put the dial calipers inside the tube and the ID varies so I gave an average. This time, I inserted a drill bit in the tube, and the one that fits nicely is .232"
Thanks,
Bob Neal
09-24-2013 | 07:43 AM
#1411
My Feedback: (3)
Glad to have you aboard, Cowboy! This thread is now your best friend, tons of great stuff especially early on when a lot were building at the same time. I see a Flash in your avatar so you know whatever Dave says means something  I finally maidened mine a couple weeks ago. It flew great, couple clicks of trim and done. I was tilting my fuel jug to get the last drops for my 6th flight that day, LOL First day flying jets too, got my waiver and everything. The Display scheme looks great in the air and on the ground. But it is, ah, pretty black up there. Just don't take your eyes off it if the sun gets behind. I will try to post some build notes before you get yours. And I don't know who you got it from but the Carf Rep, Andy Kane, was super helpful to me . He always answered my questions within an hour or two if he didn't just pick up first ring. That was very comforting for my first go at jets.
I guess I should mention flight characteristics, outstanding knife edge, no roll coupling on mine just elevator, probably a bit nose heavy. It can be smooth or lively with the recommended throws and expos. It is very responsive. I saw no tendency to roll or snap but didn't push too hard. Lands great. I did a lot of inverted flying, slow rolls and point rolls. It doesn't need much in the way of corrections doing those, my tendency was to overcompensate so it should be really easy to fly accurately once I get more practice and dial it in a bit. It is not as fast as a Flash though! I have Cheetah power and mine is a bit heavy with cockpit/smoke. It doesn't fly heavy but I am glad to have 140 thrust when I go vertical. For a 100 or 120 keep it as light as possible. It is a winner for sure.
I finally maidened mine a couple weeks ago. It flew great, couple clicks of trim and done. I was tilting my fuel jug to get the last drops for my 6th flight that day, LOL First day flying jets too, got my waiver and everything. The Display scheme looks great in the air and on the ground. But it is, ah, pretty black up there. Just don't take your eyes off it if the sun gets behind. I will try to post some build notes before you get yours. And I don't know who you got it from but the Carf Rep, Andy Kane, was super helpful to me . He always answered my questions within an hour or two if he didn't just pick up first ring. That was very comforting for my first go at jets.I guess I should mention flight characteristics, outstanding knife edge, no roll coupling on mine just elevator, probably a bit nose heavy. It can be smooth or lively with the recommended throws and expos. It is very responsive. I saw no tendency to roll or snap but didn't push too hard. Lands great. I did a lot of inverted flying, slow rolls and point rolls. It doesn't need much in the way of corrections doing those, my tendency was to overcompensate so it should be really easy to fly accurately once I get more practice and dial it in a bit. It is not as fast as a Flash though! I have Cheetah power and mine is a bit heavy with cockpit/smoke. It doesn't fly heavy but I am glad to have 140 thrust when I go vertical. For a 100 or 120 keep it as light as possible. It is a winner for sure.
09-24-2013 | 08:33 AM
#1412
Bob
Probe and insert finished will get it posted ASAP
Alan
Edit: Bob probe has been posted today.... Thursday 26th
Last edited by fireblade5437; 09-26-2013 at 08:22 AM.
09-25-2013 | 09:36 PM
#1413

Senior Member
My Feedback: (29)
Joined: Jun 2002
Posts: 1,962
Likes: 0
Received 0 Likes
on
0 Posts
From: River Oaks,
TX
Thanks for the info. Yup, been reading and re-reading the thread quite a bit. Dave and Ali were the perfect mix on getting me close to 300 flights on the flash now, love it. Just now able to really do it some justice. I'll be a frequent on here once it gets here and get it all on the table. Can't wait!
09-27-2013 | 06:20 AM
#1416
My Feedback: (3)
Too cool, reminds me of metal shop in High School.
I checked the CG of my Hawk, looks like it was a few mm further fwd than I thought, about 189 for the maiden and first 6 flights. I added 40g/1.5oz. in the tail box to get it back to about 197mm which I will try Sunday. Once I finish the details and decide where I want the CG I can simply move a battery aft and get the lead out.
I bought another fuel jug too, only 6 flights per outing might not be enough :P
09-28-2013 | 04:34 PM
#1417

My Feedback: (29)
Joined: Jan 2002
Posts: 1,436
Likes: 0
Received 0 Likes
on
0 Posts
From: Hamilton,
ON, CANADA
I was out flying my Hawk again today with the CG at 198 and I must say it is excellent at 198. It has transformed this hawk from something that was a bugger to land to a ***** cat....and it flies like its on rails.
09-28-2013 | 05:06 PM
#1420
My Feedback: (3)
I have questions for anyone who has used the CARF paint. I have it and so I will use it. I will be putting the rabbit ears and dummy flap actuator covers on and painting them and the fences this week. Does anyone know how long I should let this dry before applying the Tailormade decals and waxing it? I think I read it is very slow drying but can't remember. What type of wax are people using? I read here somewhere to use black shoe polish to darken the white stuff in the panel lines. Is this a good idea? Wouldn't the wax then rub it out? Will it get on my hands every time I handle the plane? Lotta questions right? Thanks.
Last edited by husafreak; 09-28-2013 at 06:37 PM.
09-28-2013 | 05:53 PM
#1421
My Feedback: (18)
Joined: Jun 2002
Posts: 3,021
Likes: 0
Received 0 Likes
on
0 Posts
From: New City, NY
Thanks. I'll have to CG mine again. I started having some landing issues at Kentucky Jets when I started pulling some nose weight out of the plane as I thought it was nose heavy. I did CG it after I repaired the wing damage that occurred in Kentucky due to having one of the mains getting hung up and skidding off the runway into a light. Still isn't quite right.
09-28-2013 | 06:44 PM
#1422
My Feedback: (3)
I thought my Hawk flew very well at 189mm and landings were a breeze. But it did feel a bit nose heavy overall. I was using a LOT of up elevator just before touchdown even though the landing attitude was fairly level. Also it needed a fair amount of down elevator inverted and mixed in for knife edge. Also if I did the test where you climb at 45 degrees, roll inverted, and center the elevator it was pulling level (inverted) pretty aggressively. But I do not know if the airfoil is symmetrical or a lifting airfoil... hmmm.
I do think the manual is right to recommend 190mm to start. It was rock steady and very predictable at that CG once trimmed.
I do think the manual is right to recommend 190mm to start. It was rock steady and very predictable at that CG once trimmed.
09-28-2013 | 06:55 PM
#1423
My Feedback: (18)
Joined: Jun 2002
Posts: 3,021
Likes: 0
Received 0 Likes
on
0 Posts
From: New City, NY
I thought my Hawk flew very well at 189mm and landings were a breeze. But it did feel a bit nose heavy overall. I was using a LOT of up elevator just before touchdown even though the landing attitude was fairly level. Also it needed a fair amount of down elevator inverted and mixed in for knife edge. Also if I did the test where you climb at 45 degrees, roll inverted, and center the elevator it was pulling level (inverted) pretty aggressively. But I do not know if the airfoil is symmetrical or a lifting airfoil... hmmm.
I do think the manual is right to recommend 190mm to start. It was rock steady and very predictable at that CG once trimmed.
I do think the manual is right to recommend 190mm to start. It was rock steady and very predictable at that CG once trimmed.
09-28-2013 | 07:31 PM
#1424
My Feedback: (3)
I have exactly what the manual calls out and I know it has less down than up elevator. That is why I was wondering about the airfoil. A scale or "lifting " airfoil would naturally require more down elevator than up but you also wouldn't want to push too much down due to the danger of stalling it, and so the reduced throw.
I am so excited to be bringing my Hawk to BITW this year, it is only 3 1/2 hour drive for me. Maybe some day I will head east to see you guys and fly as well. I can fly for free I just have to build something to transport a jet in.
I am so excited to be bringing my Hawk to BITW this year, it is only 3 1/2 hour drive for me. Maybe some day I will head east to see you guys and fly as well. I can fly for free I just have to build something to transport a jet in.

